
|
|
|
 03-01-2016, 11:57 PM
|
#1 |
|
Registered User
Join Date: Jan 2013
Location: Leonardtown, MD
Posts: 1,640
|
Re: 55 Wagon Progress
Thanks for the comments guys.
Worked on some louvers tonight, wanted to get some practice pieces done to see how well our "theory" might fare. Kyle cutting an inside lip off the clamp before cutting it in half.. 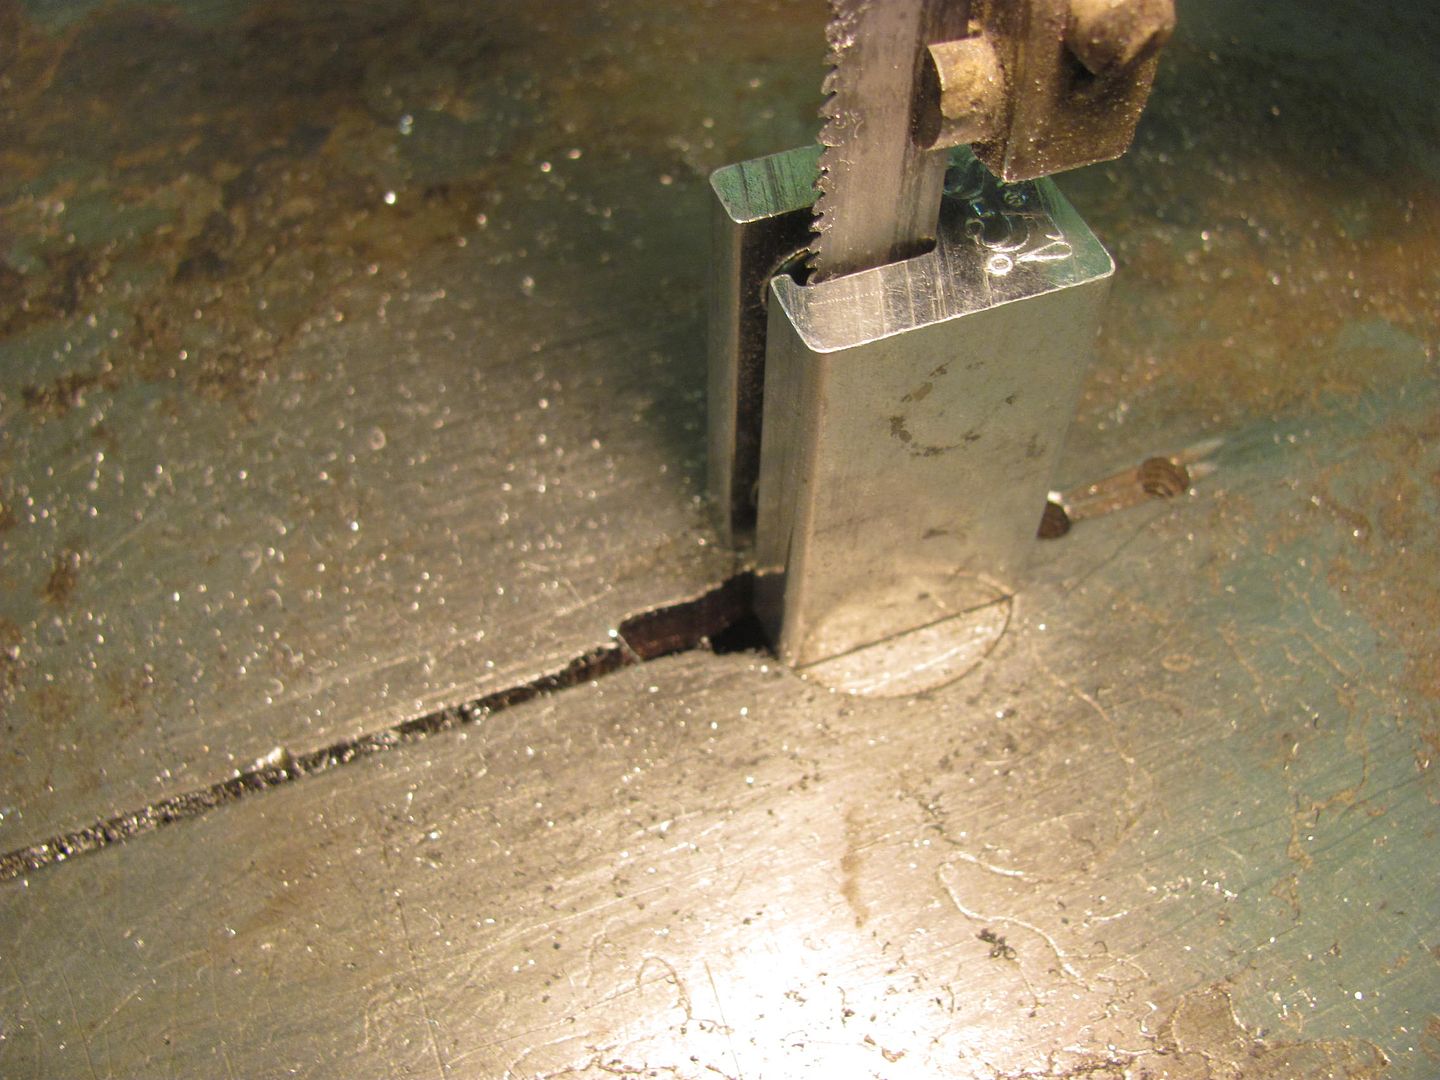 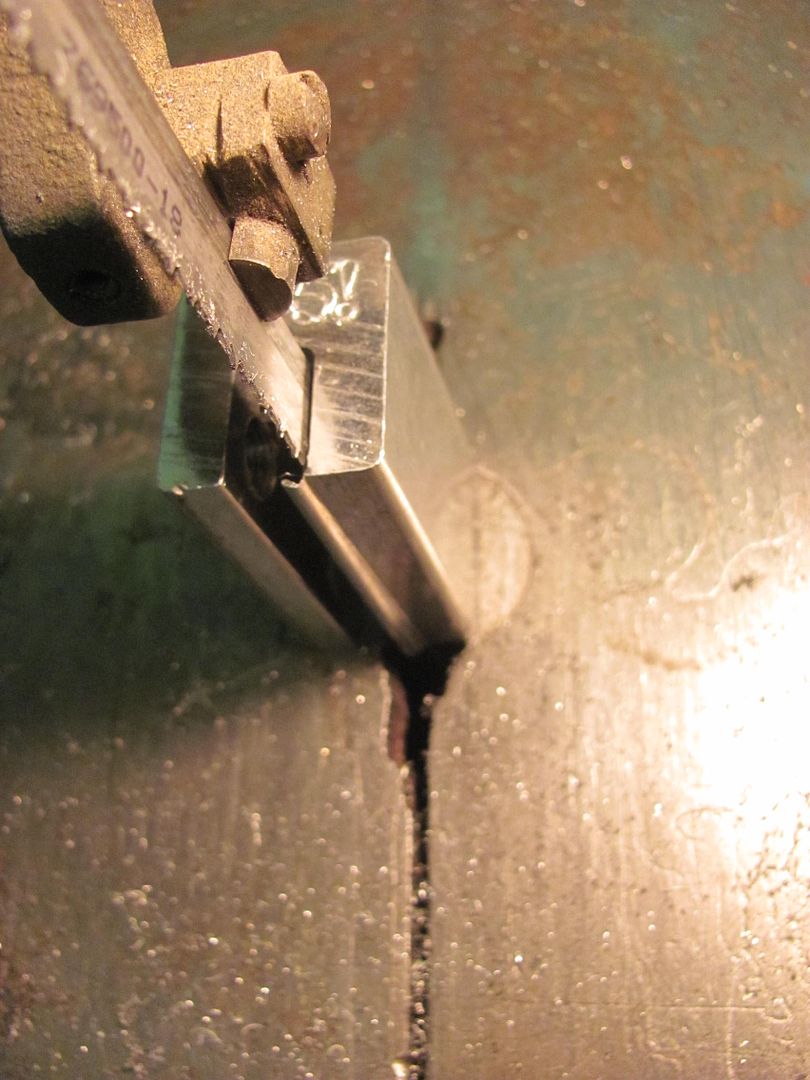 Meanwhile I got the holes (and some spares for height adjustment) drilled in the wheel hub flange... 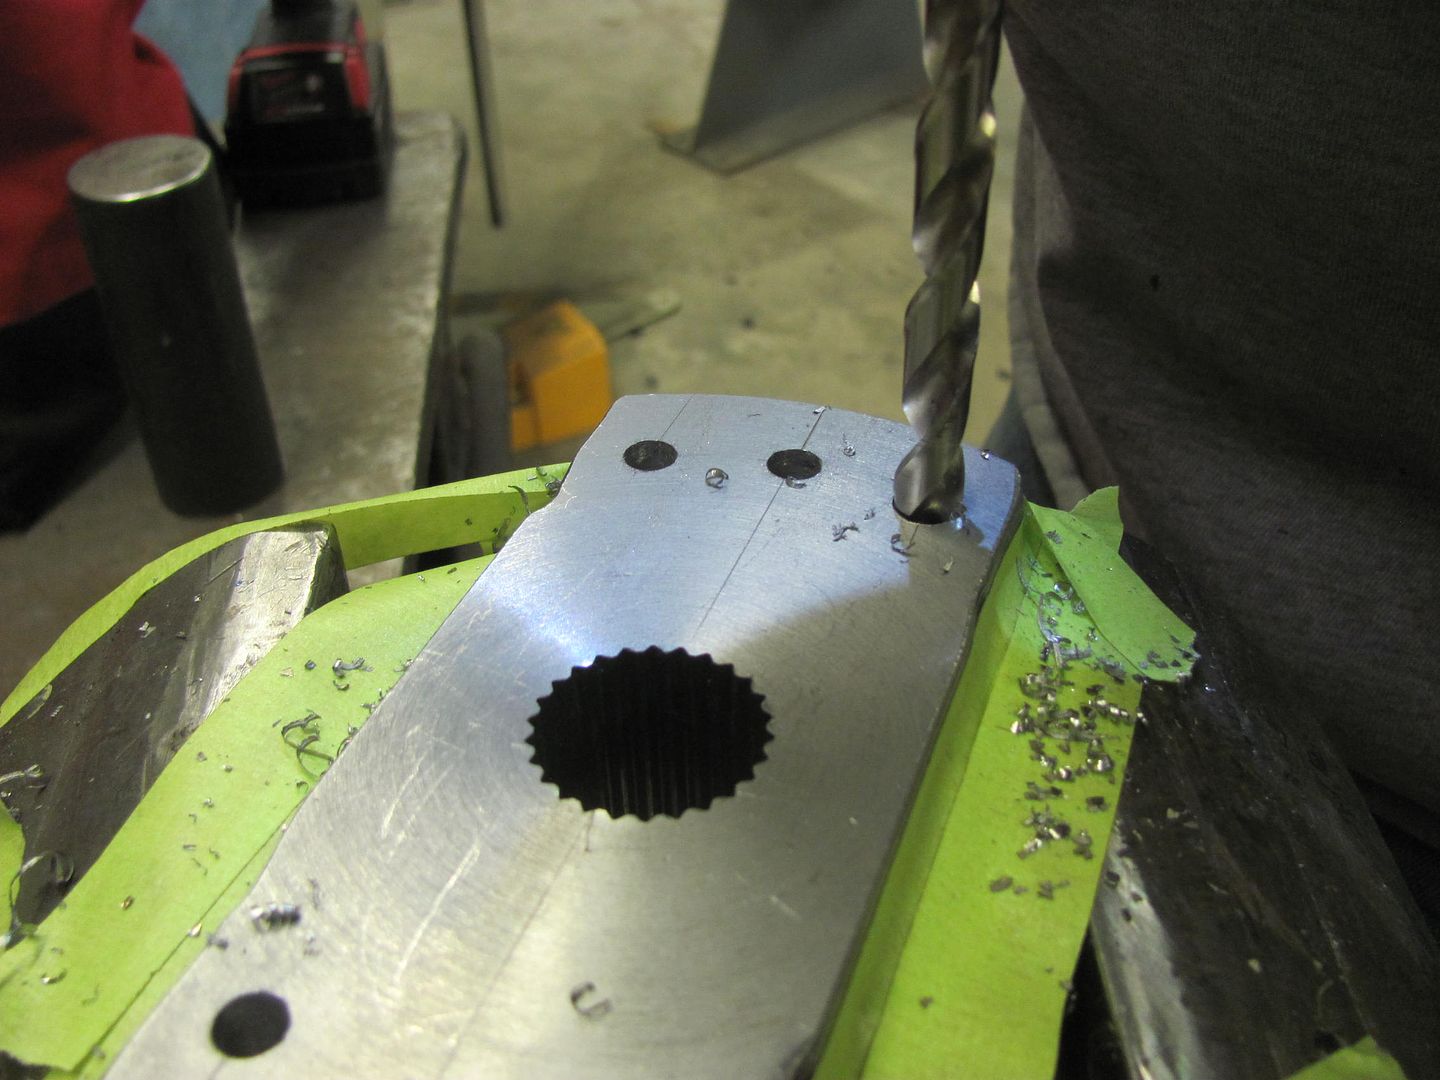 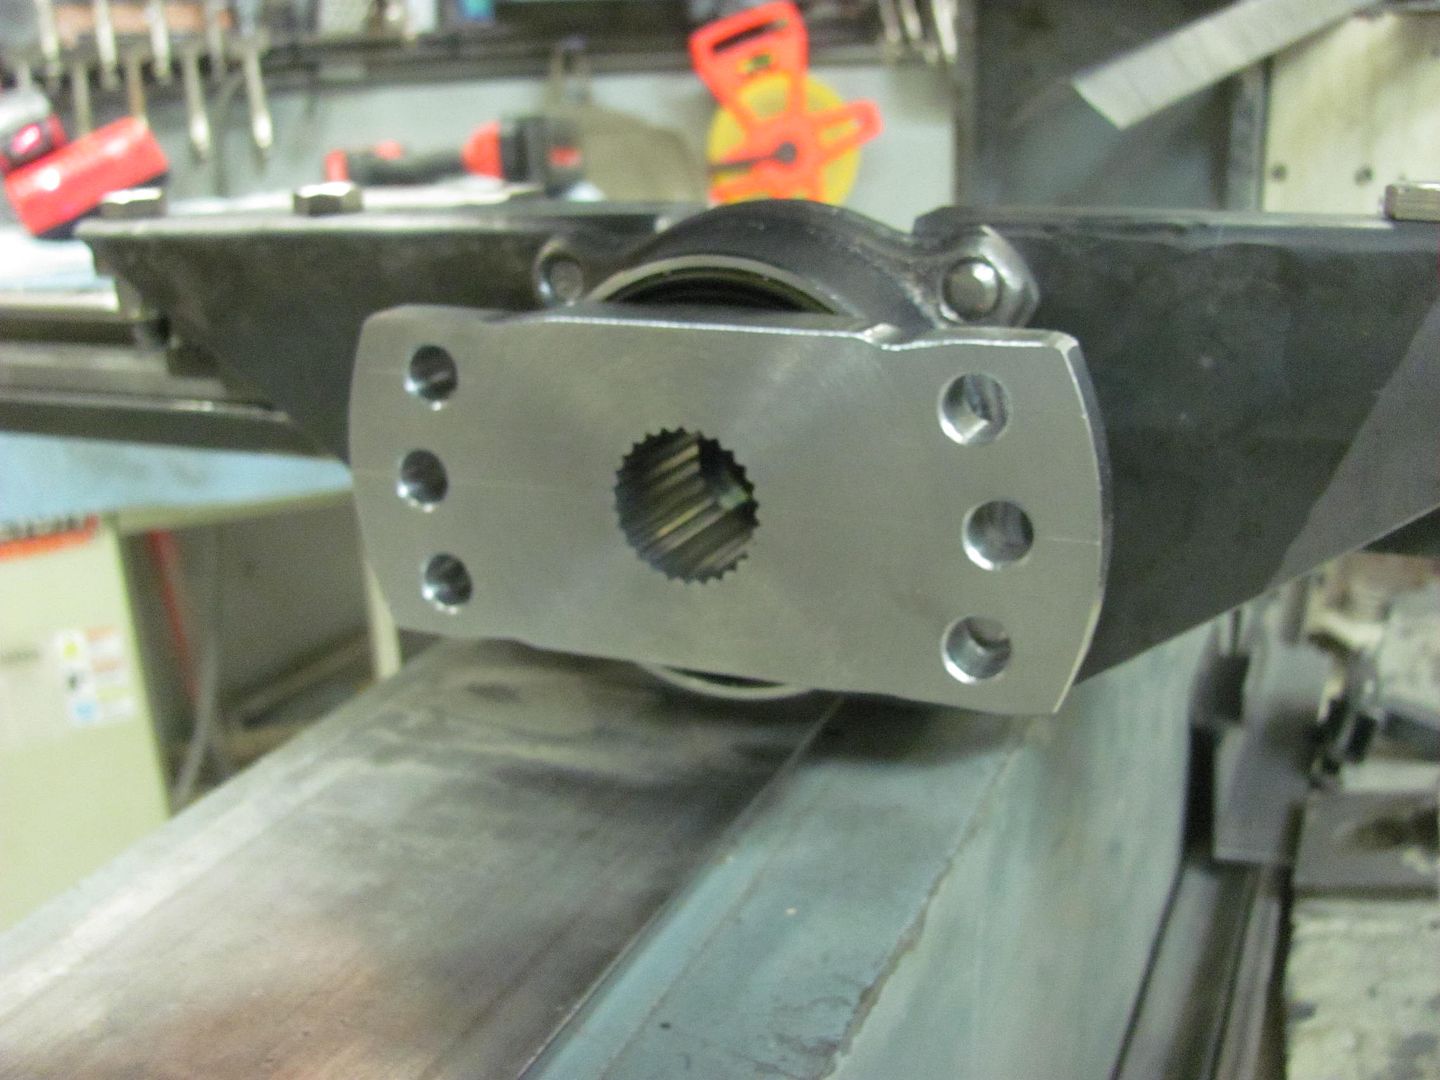 Clamps added... 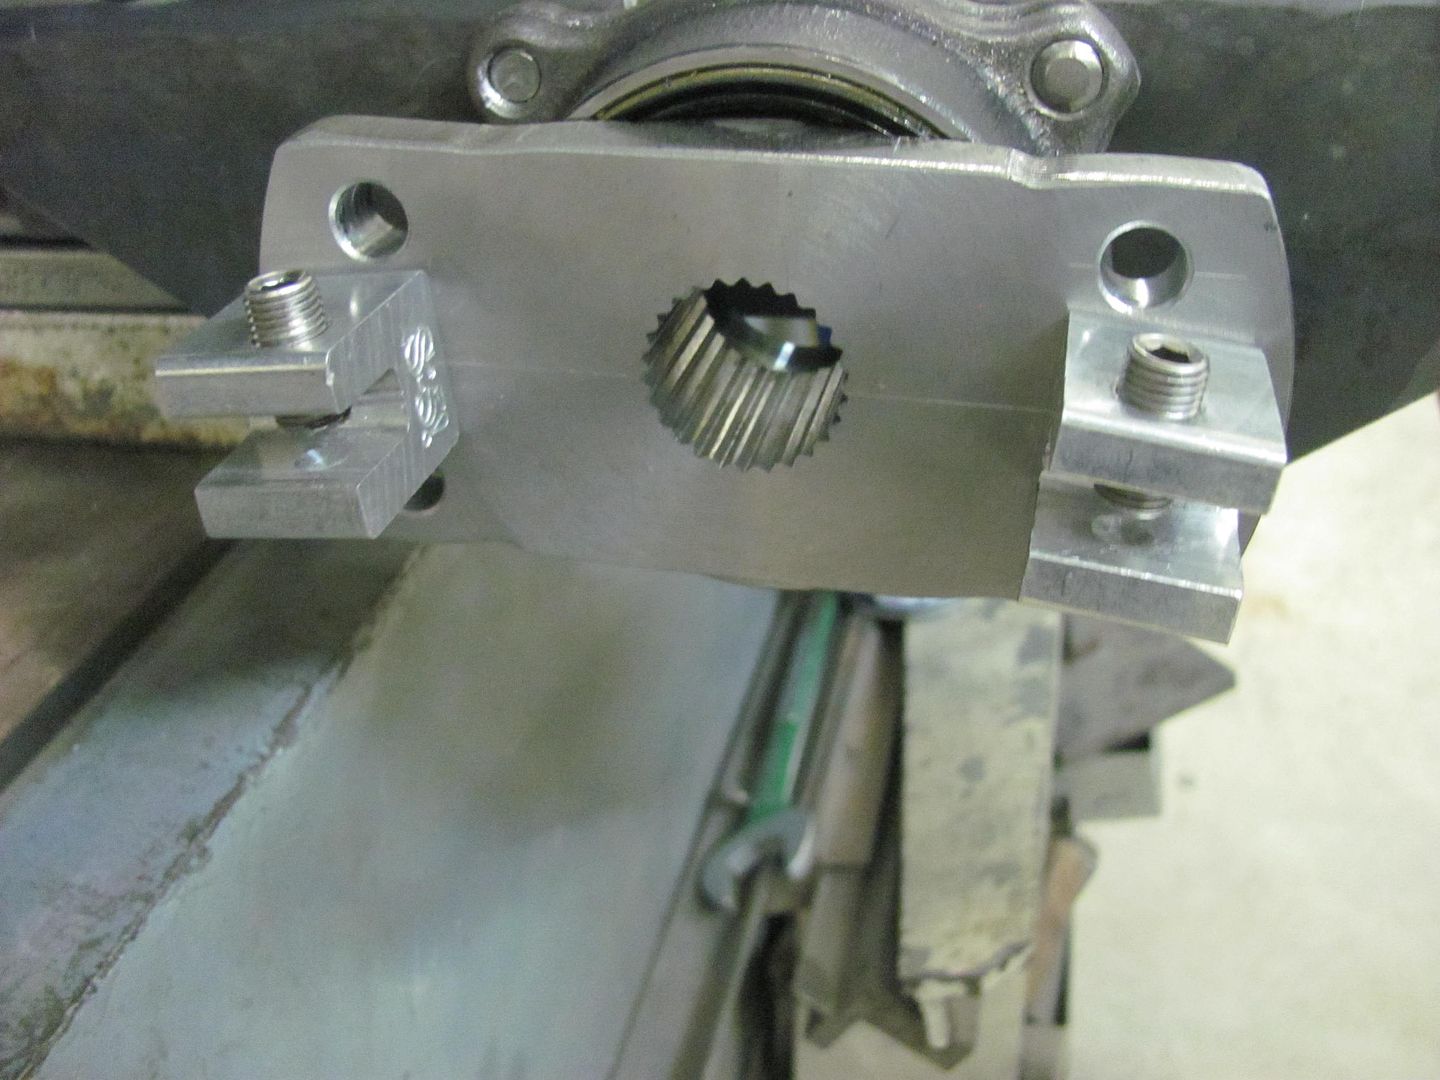 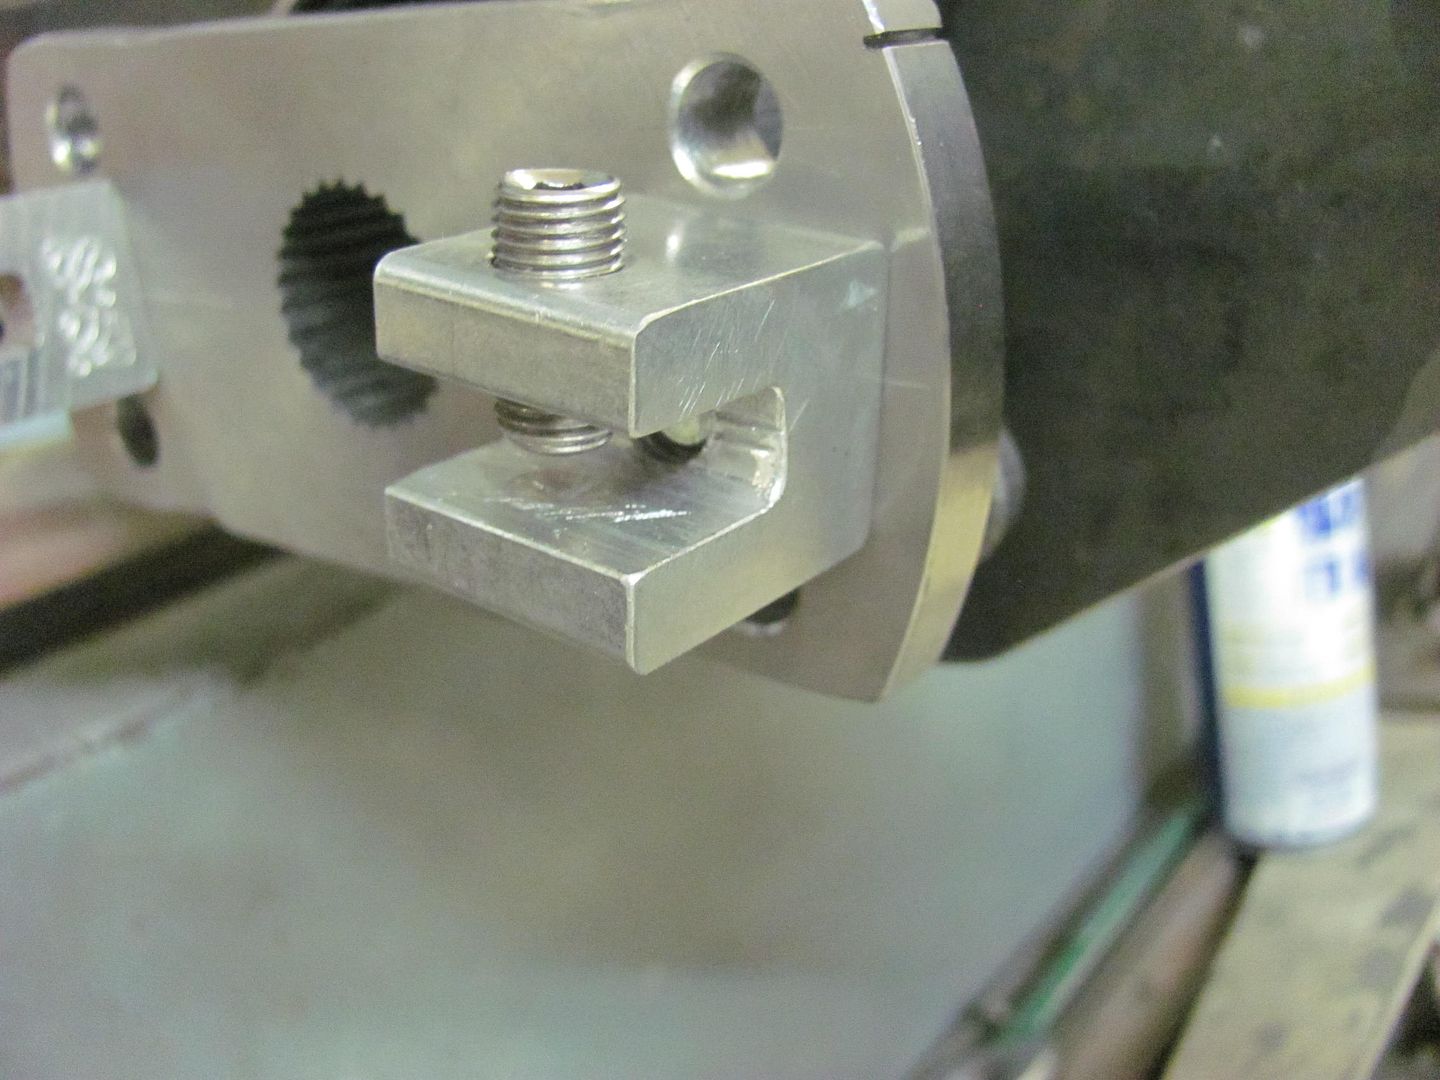 We used a "squaring plate" to align the panel for louver angle.. 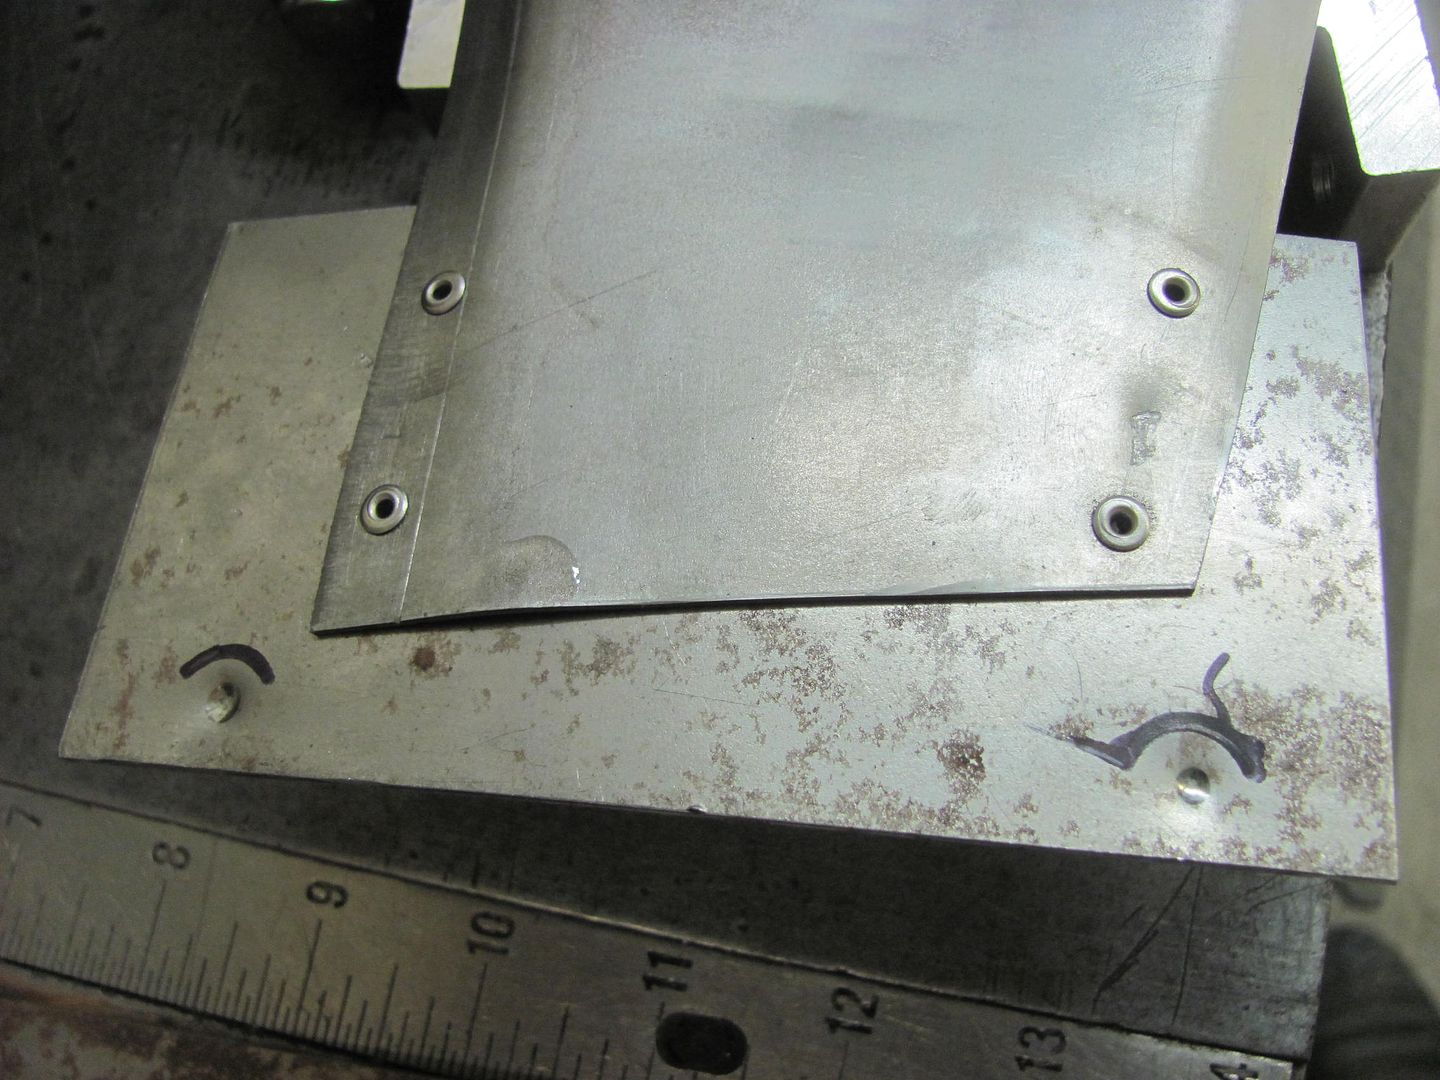 The punch needed some relieving to insure the corners didn't hit the inside radius of the panel... 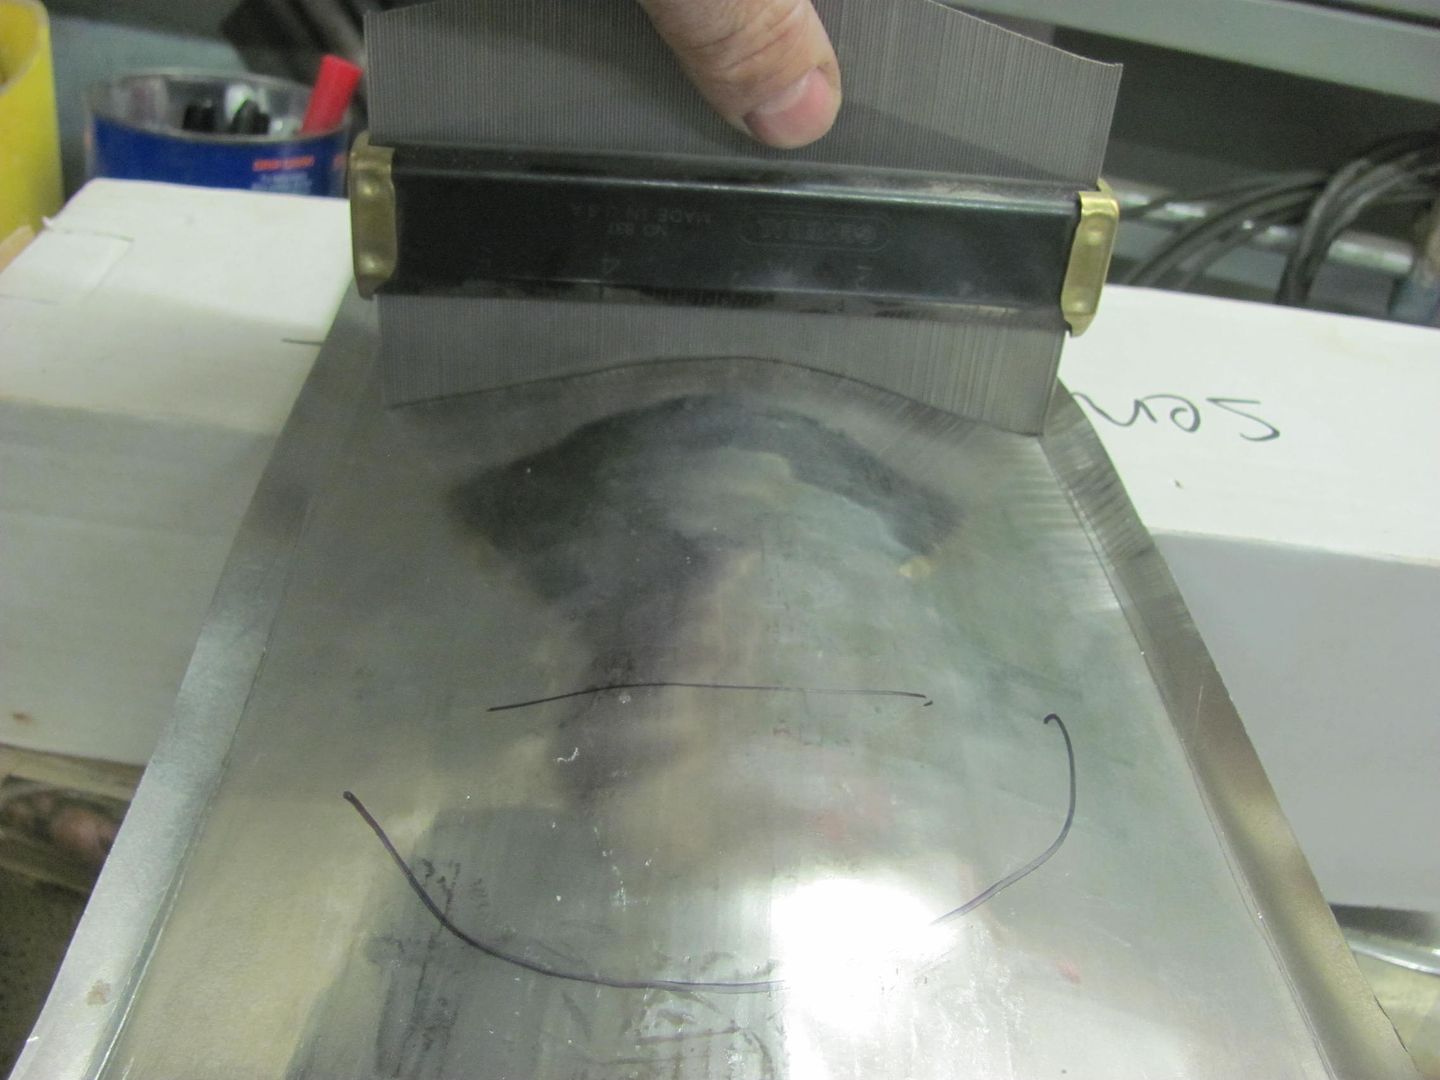 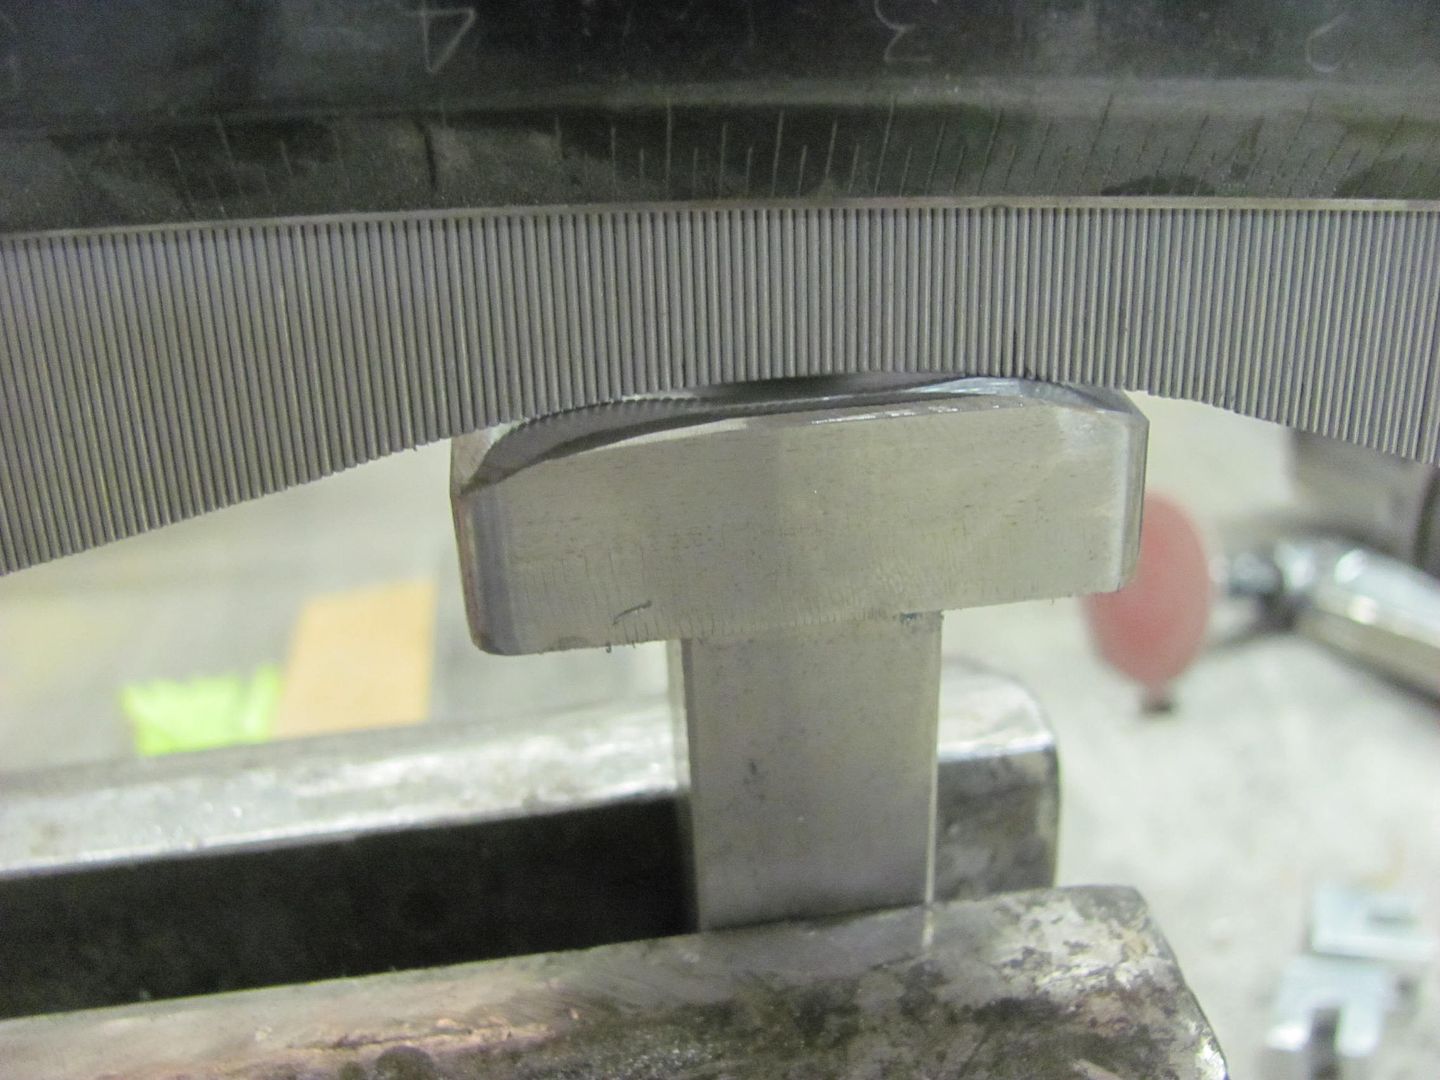 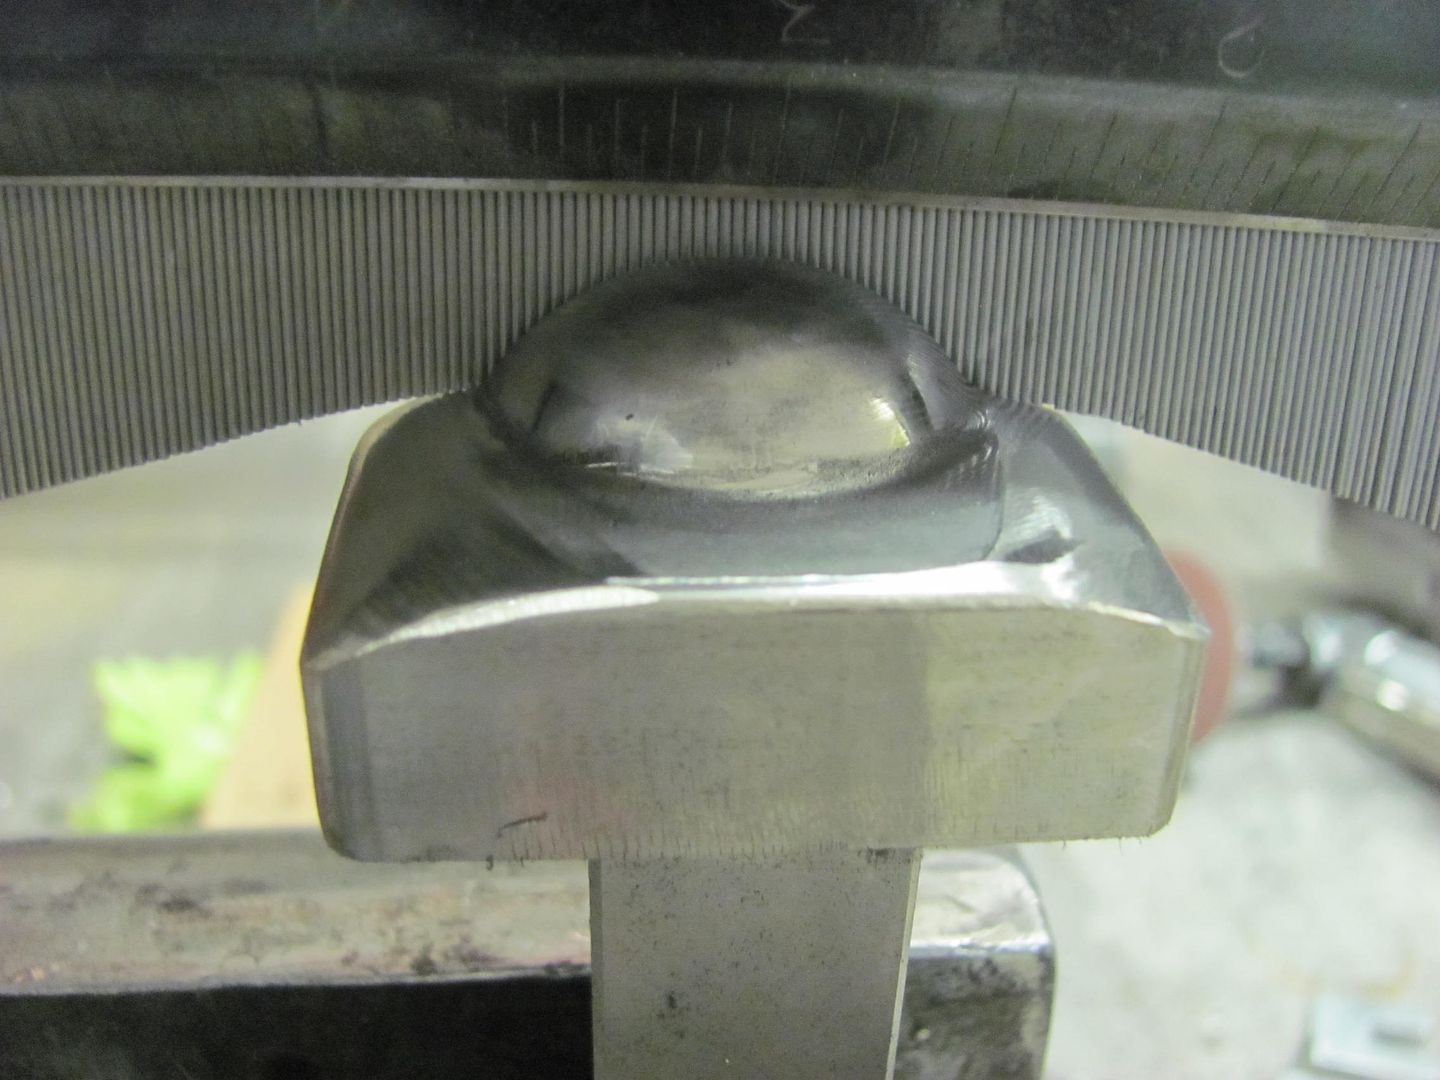 Cleaned up the grinder marks with a Scotchbrite pad.. 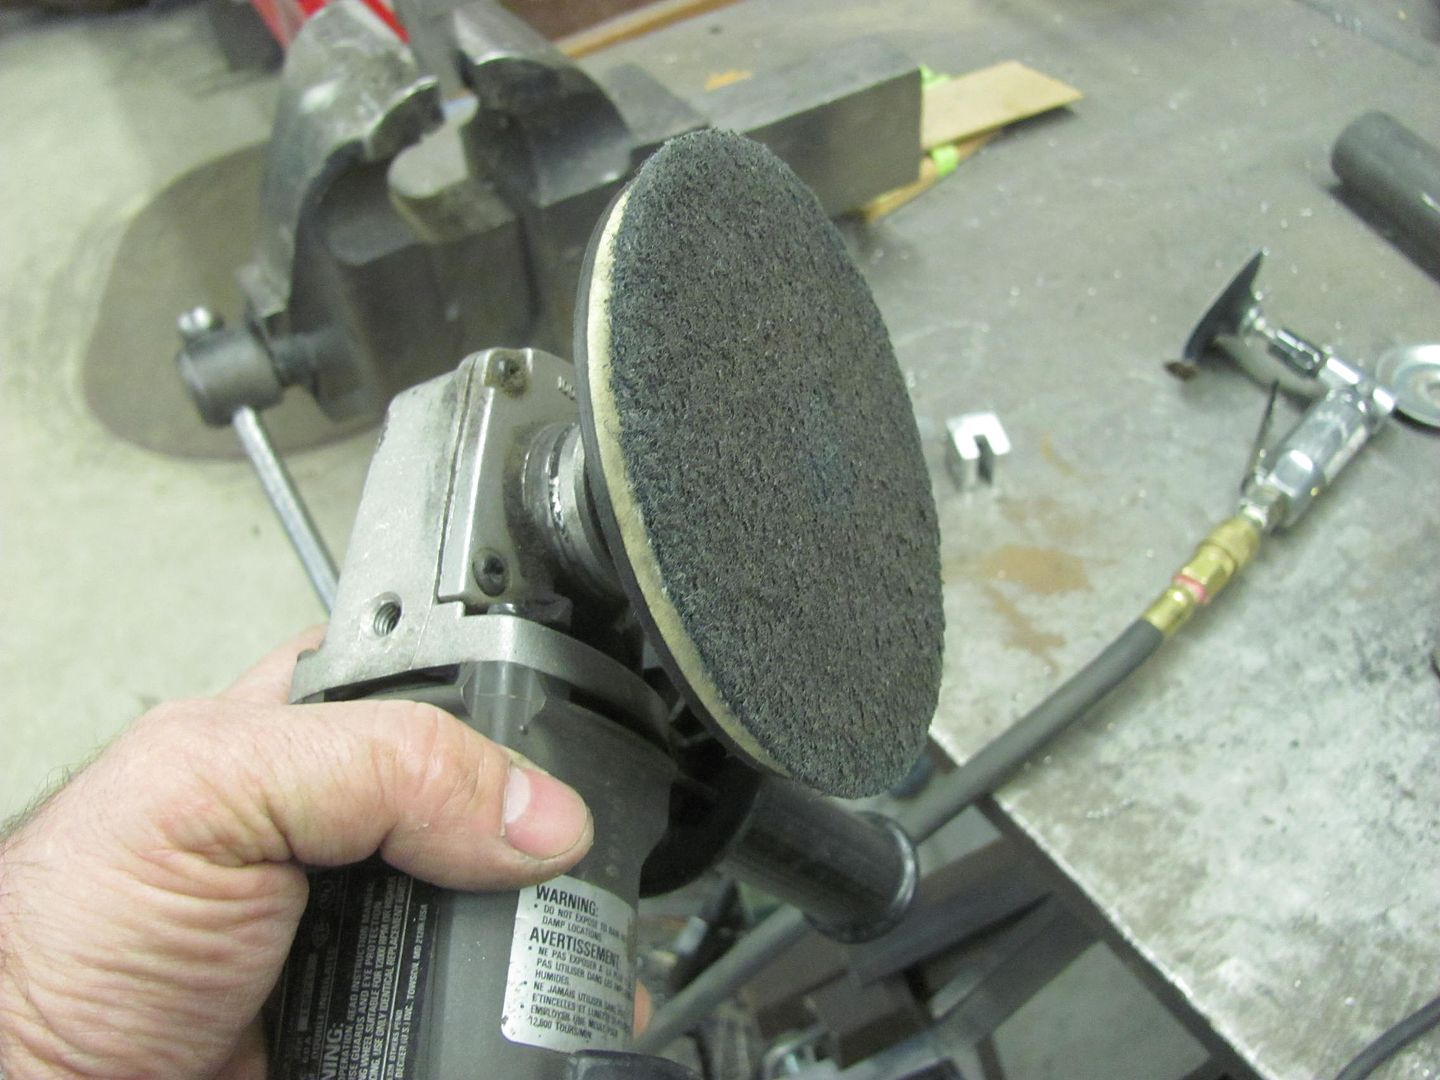 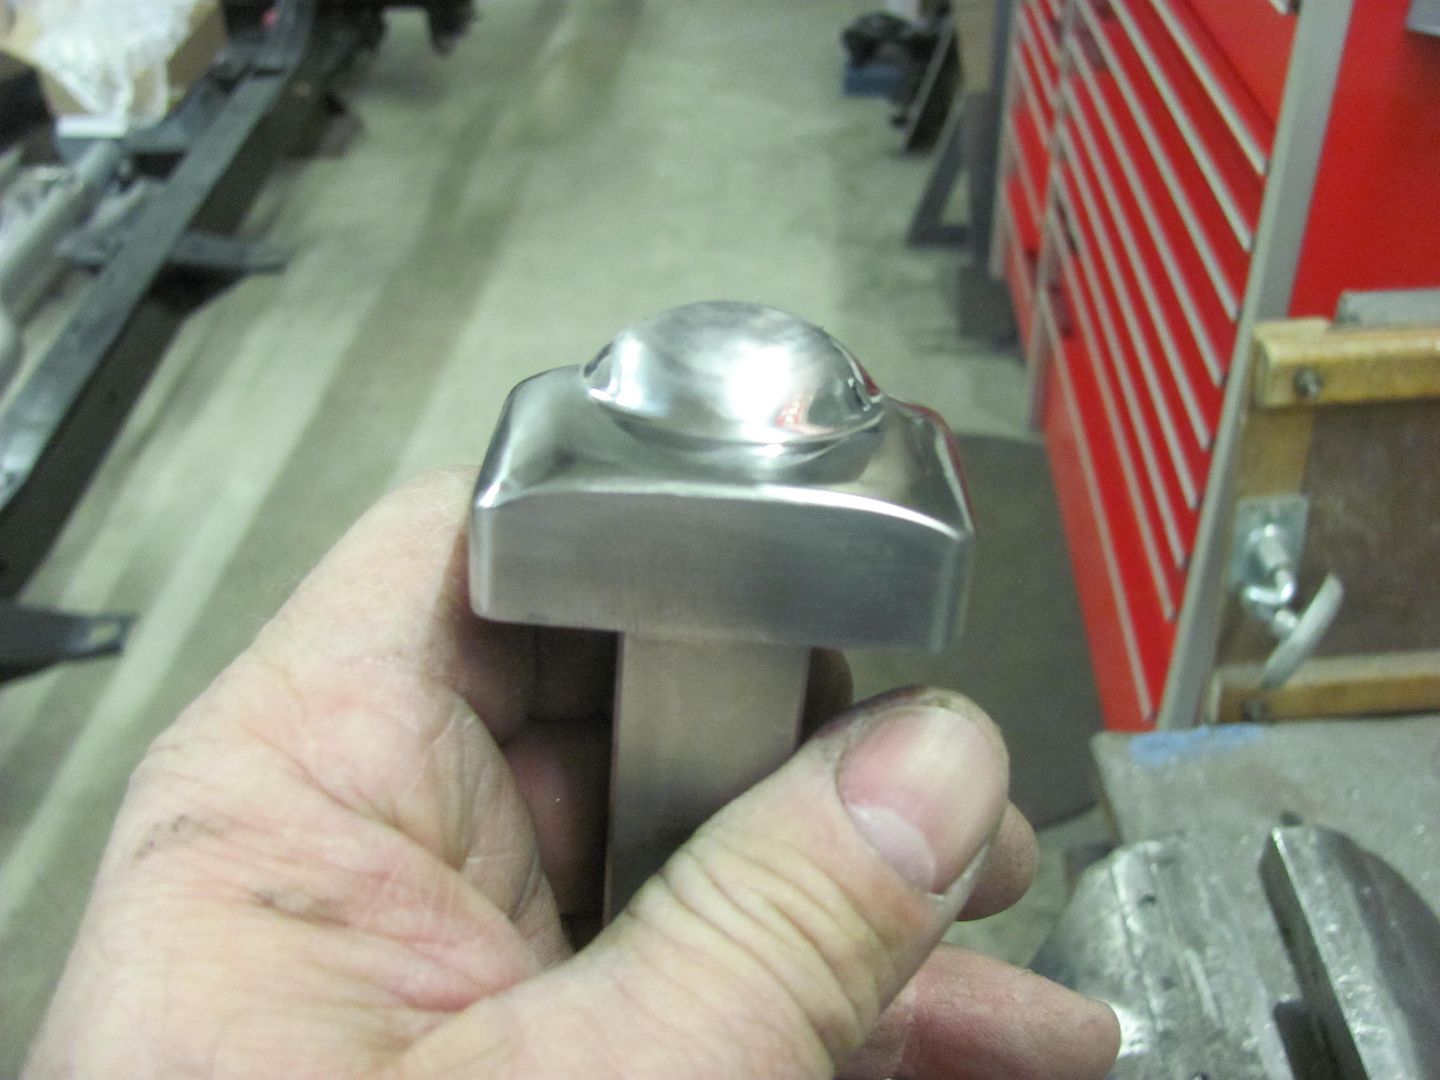 Looking at the louvers... Action shots: https://youtu.be/EEyI10qb4BI 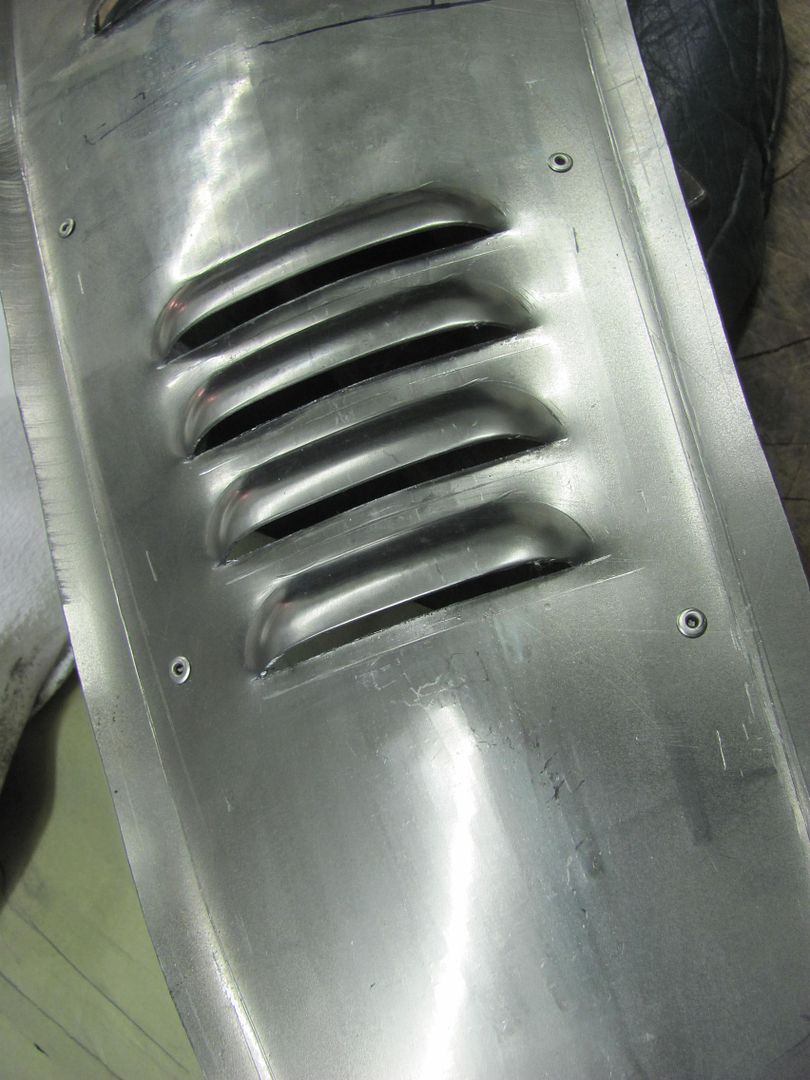  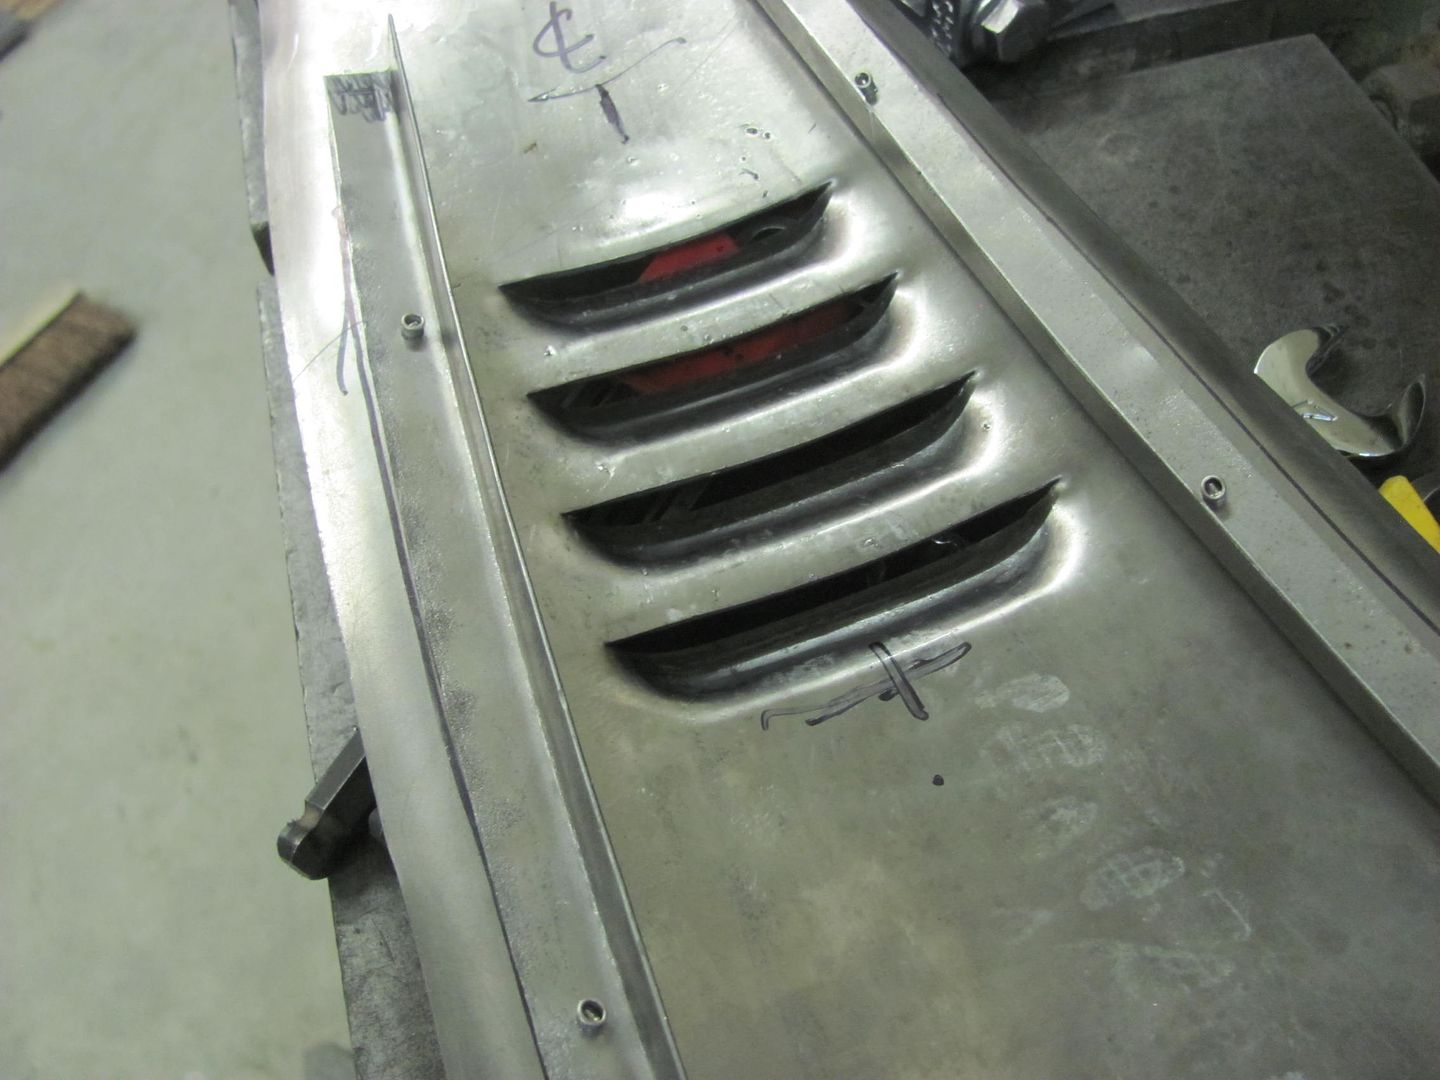 We have some more relieving to do on the tooling to eliminate some marking, then we'll do one more practice piece before breaking into the good stuff..
__________________
Robert |

|

|
|
03-02-2016, 01:55 AM
|
#2 |
|
Registered User
Join Date: Apr 2011
Location: .
Posts: 3,104
|
Re: 55 Wagon Progress
Incredible. Thanks for the how to.
|

|
|
|
03-03-2016, 11:49 PM
|
#3 |
|
Registered User
Join Date: Jan 2013
Location: Leonardtown, MD
Posts: 1,640
|
Re: 55 Wagon Progress
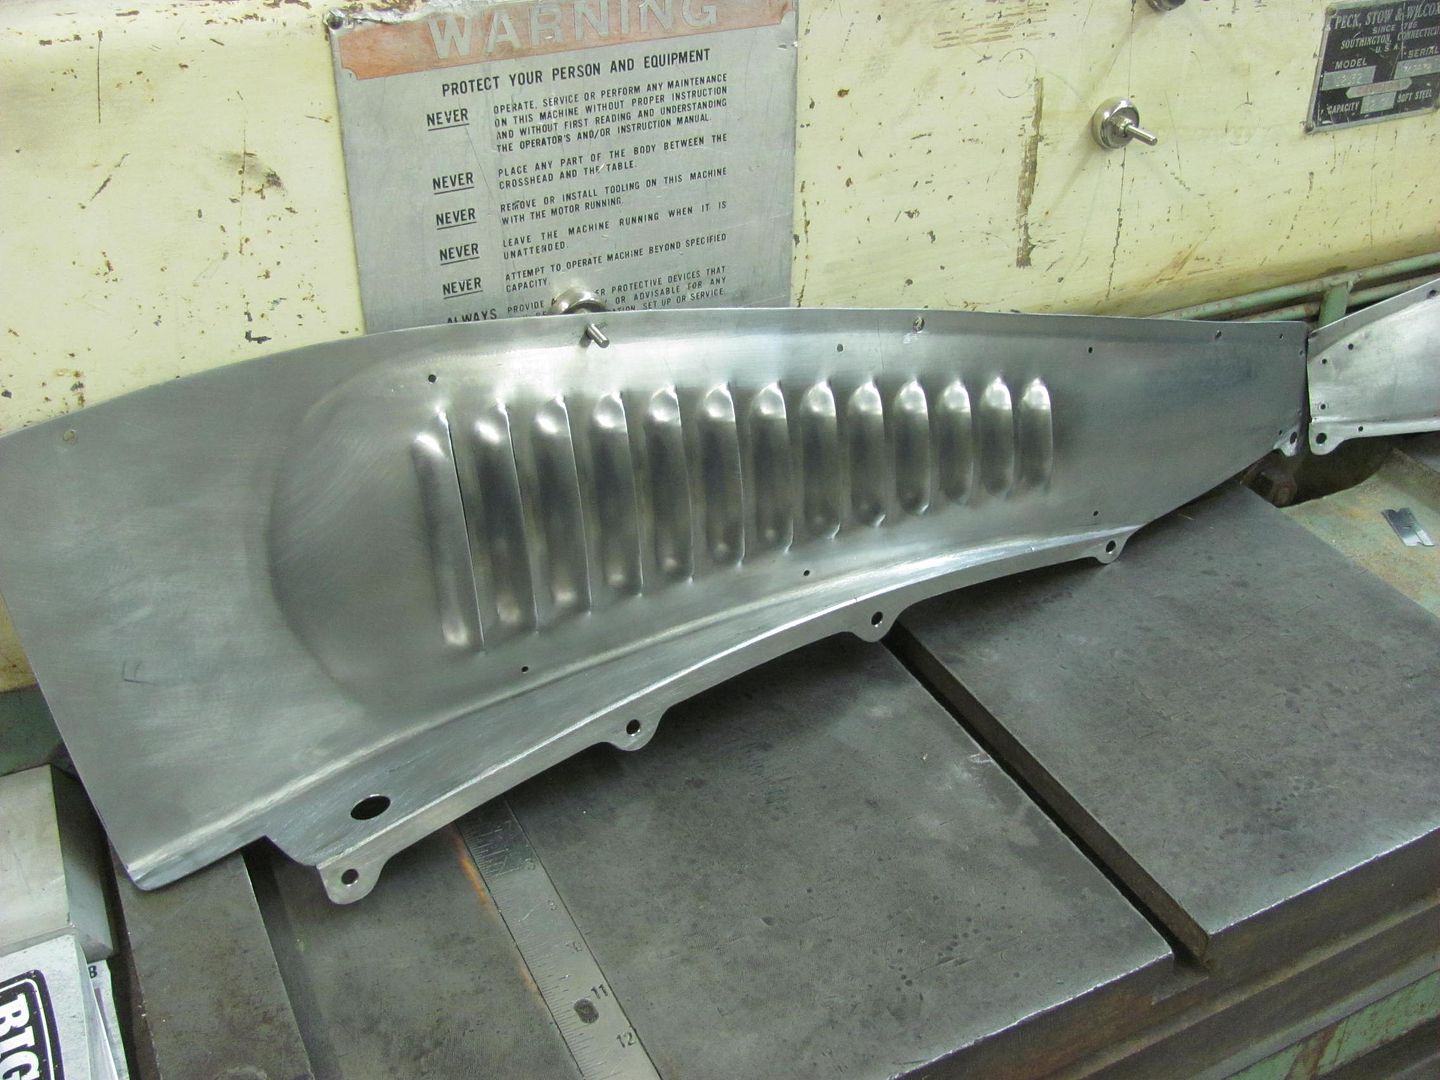
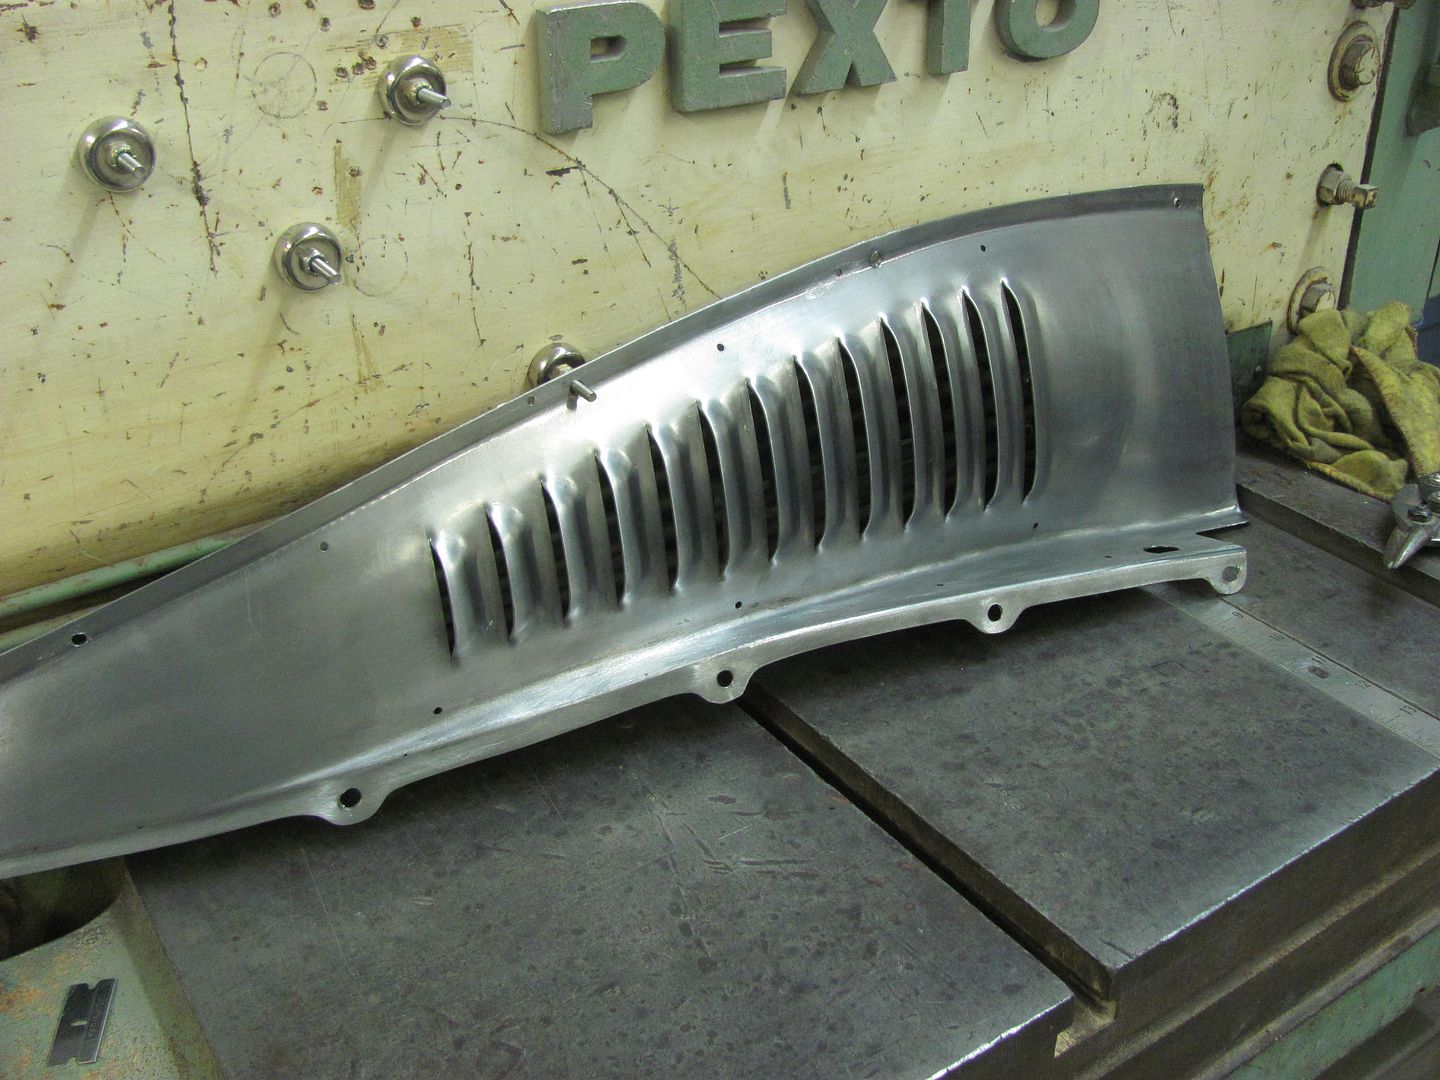
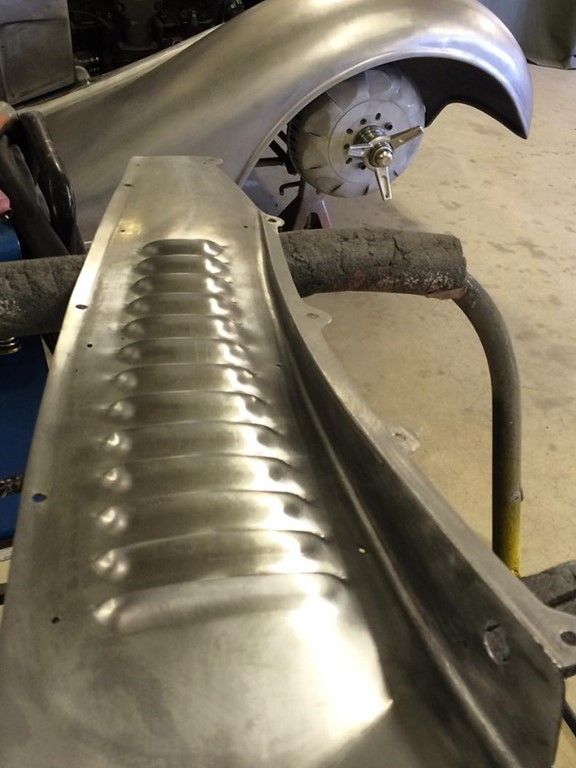
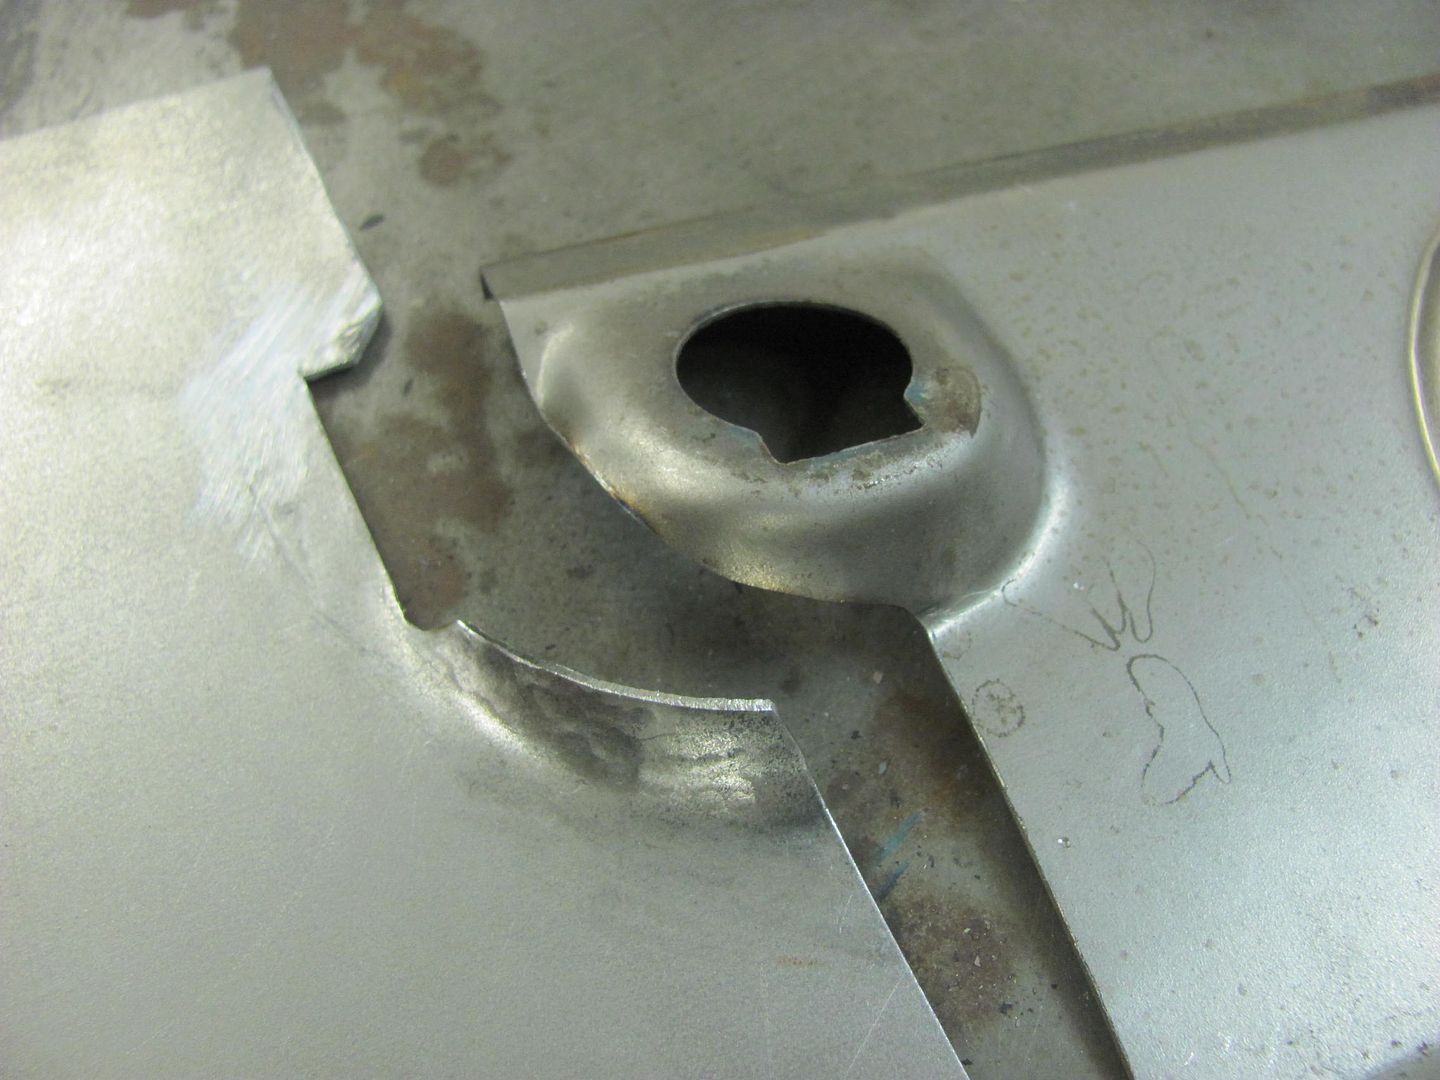
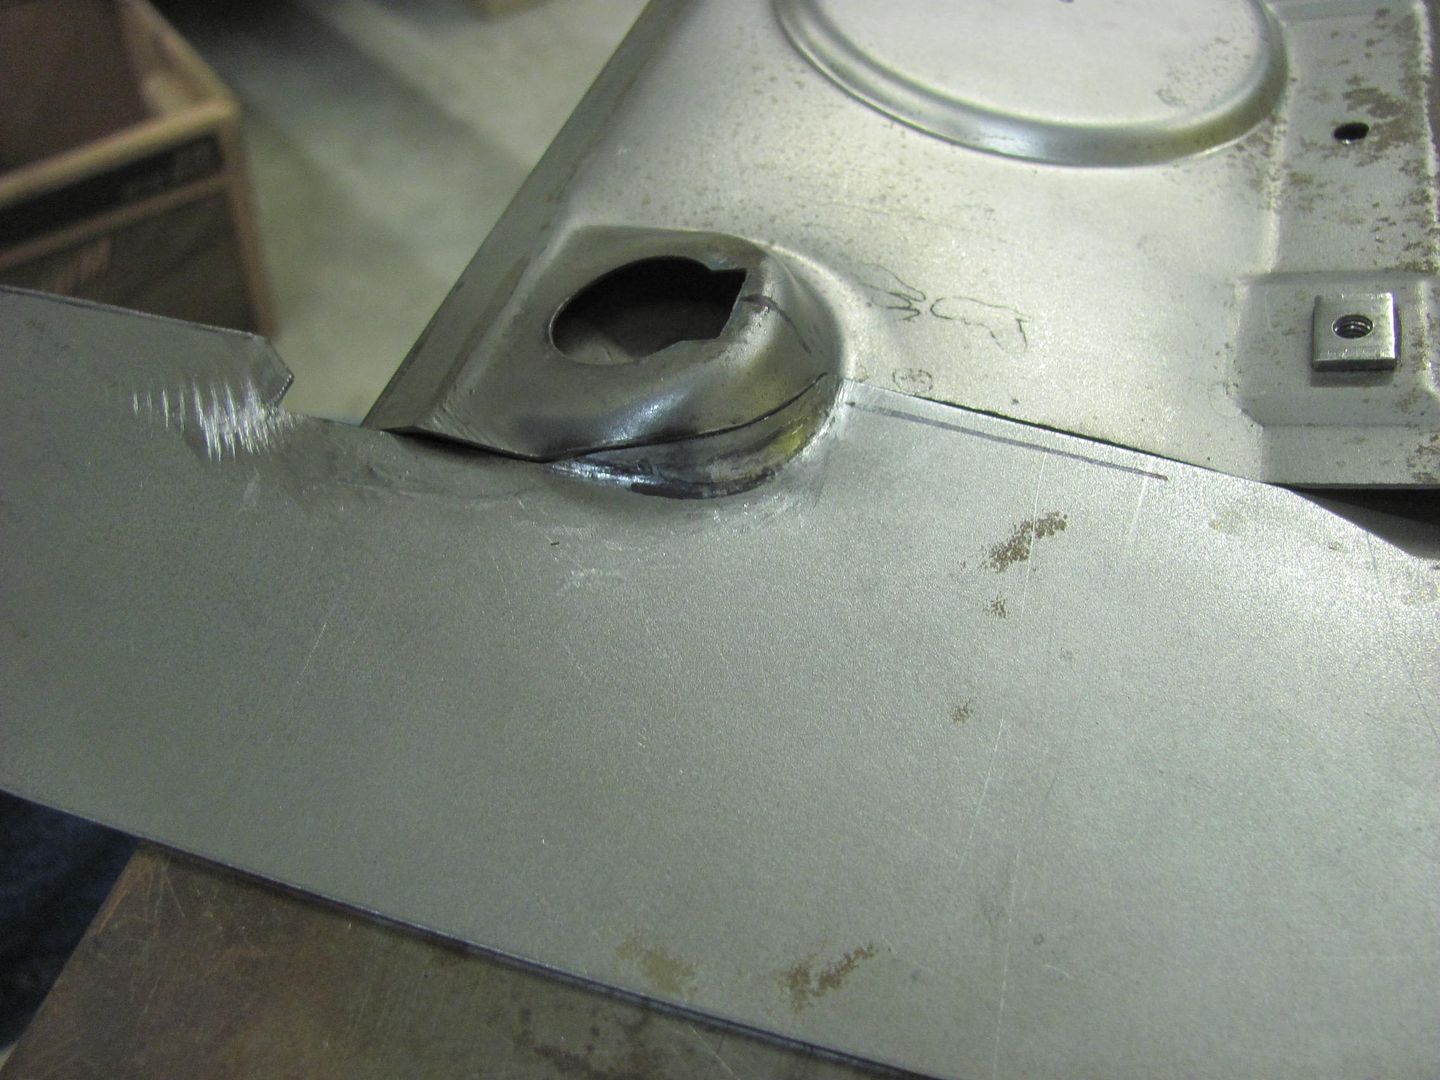
Here's the next practice panel as compared to Cody's inner fender panel..
 Punching the louvers in the practice panel.. https://youtu.be/n3NVTILslbE https://youtu.be/sHr2P60cqt8 Here's the moment of truth, the inner fender ready for punching... 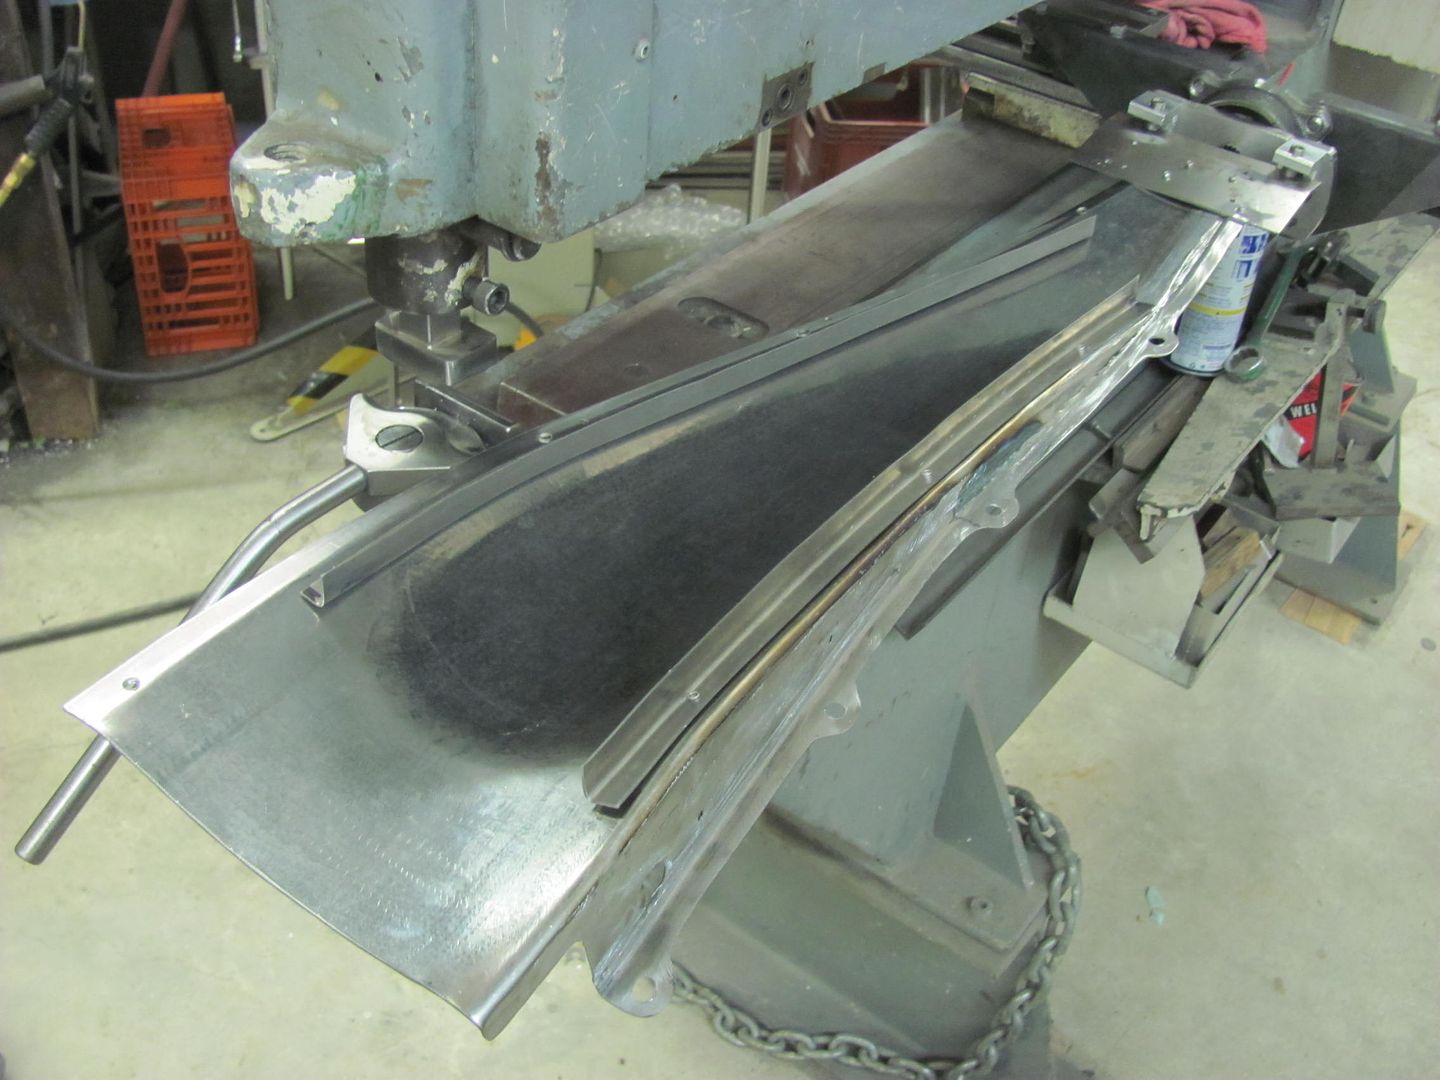 Looks like our crown still exists! 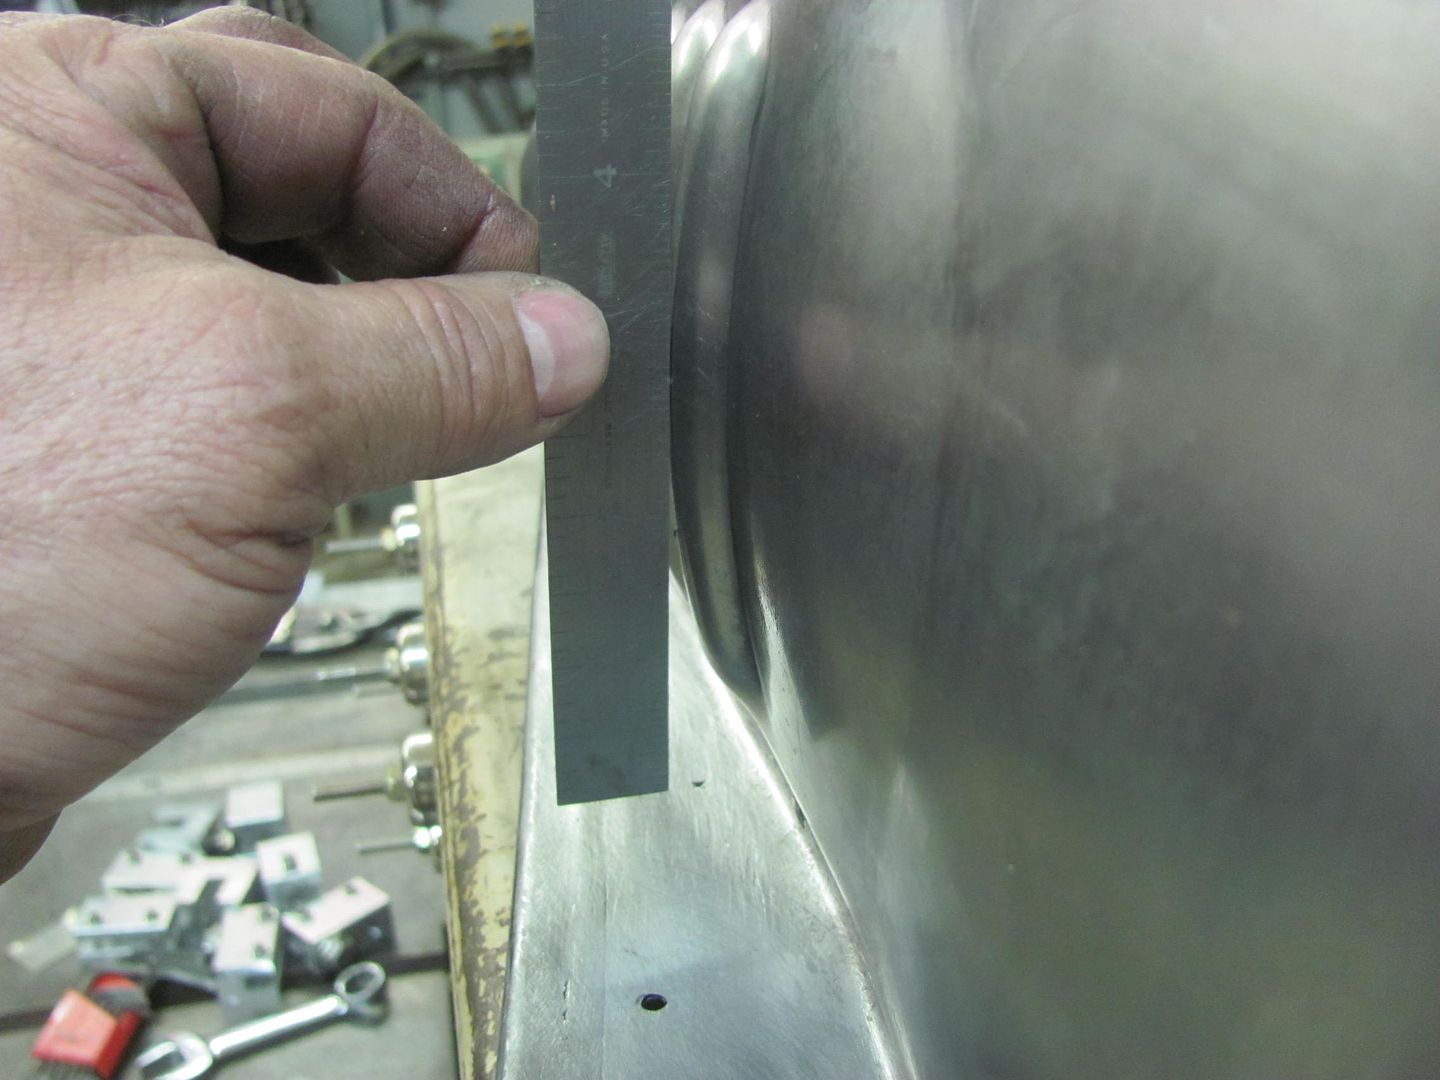  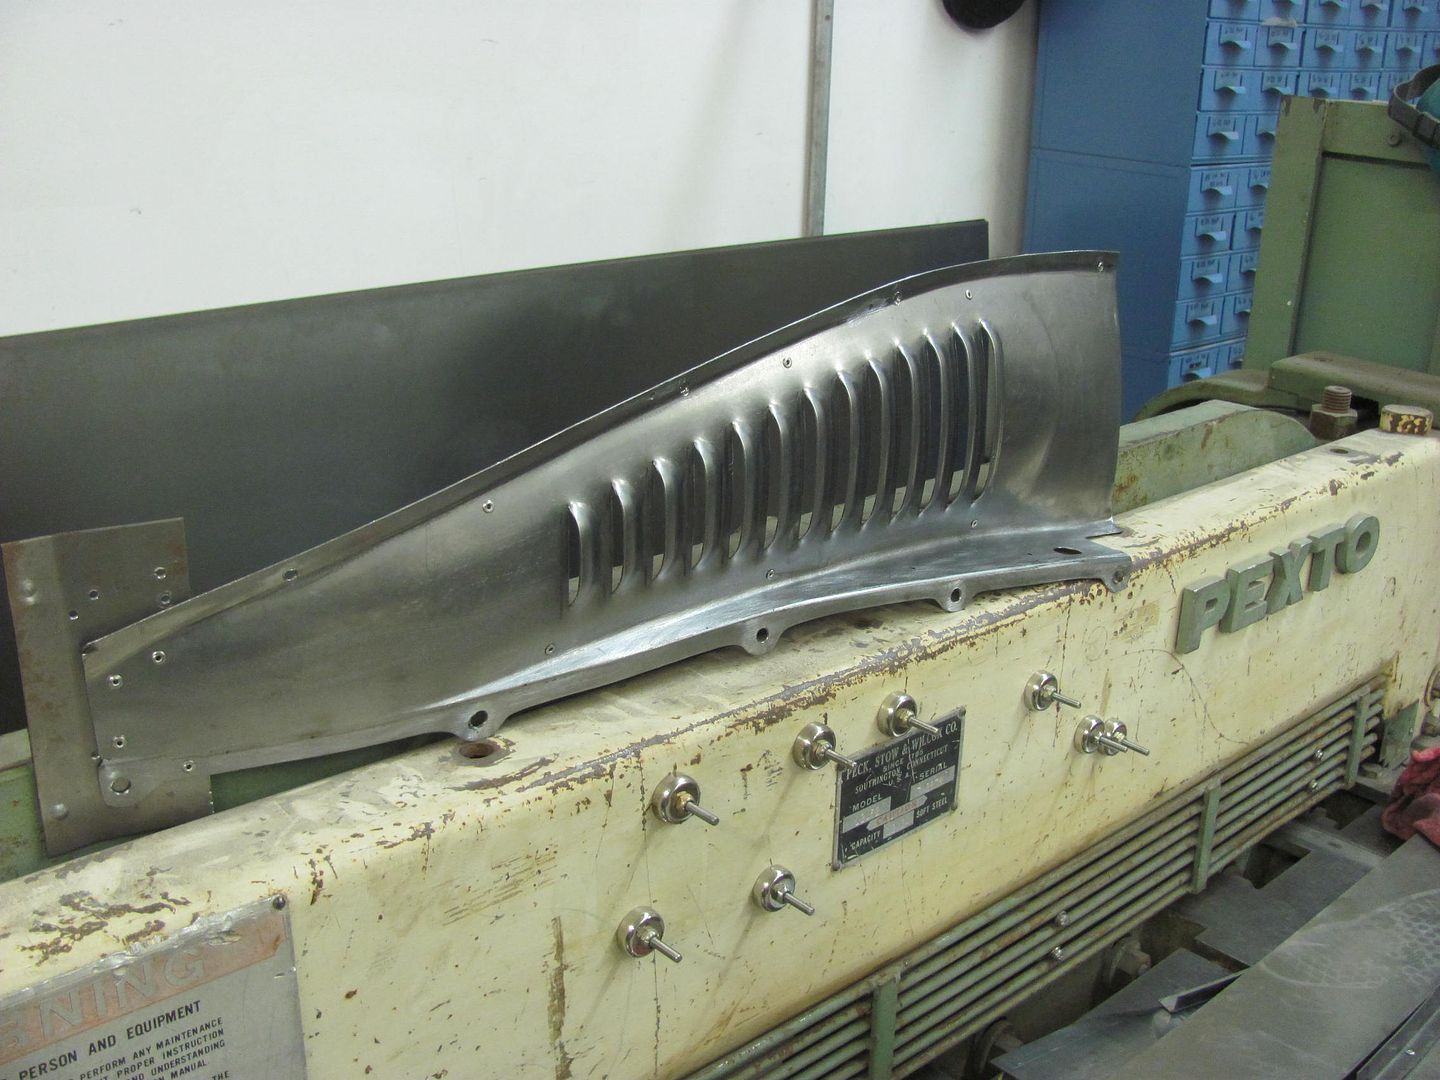 another view.... https://youtu.be/7tcYNZ29WTg One down, one to go..
__________________
Robert |
|
|
|
|
03-05-2016, 08:34 PM
|
#4 |
|
Registered User
Join Date: Jan 2013
Location: Leonardtown, MD
Posts: 1,640
|
Re: 55 Wagon Progress
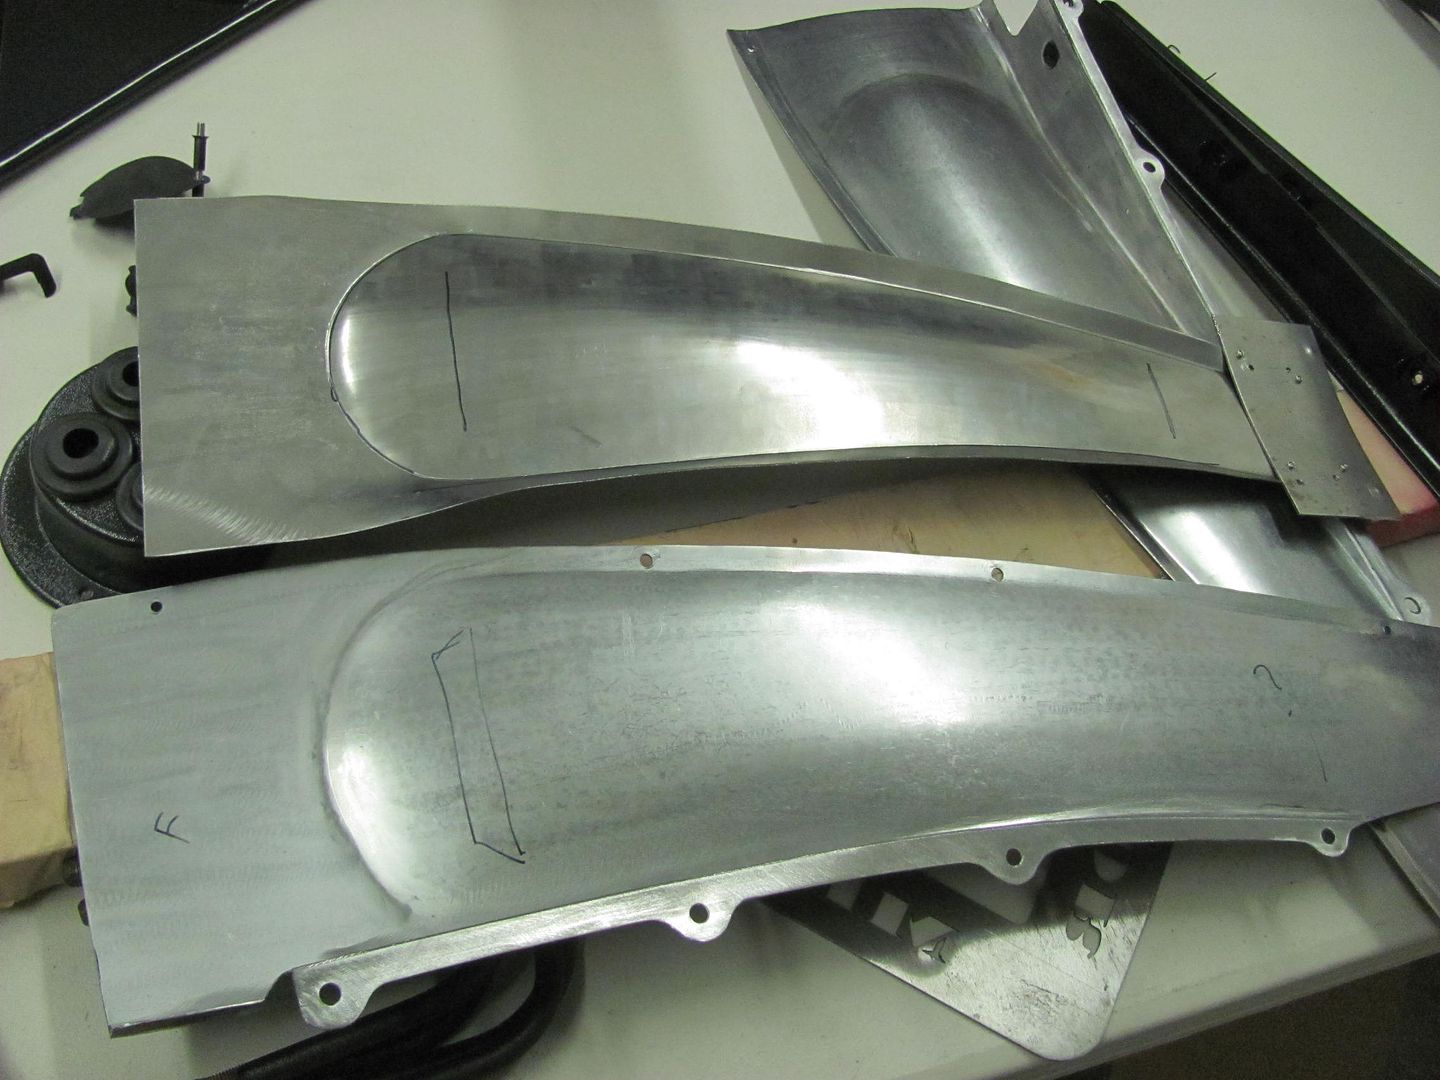
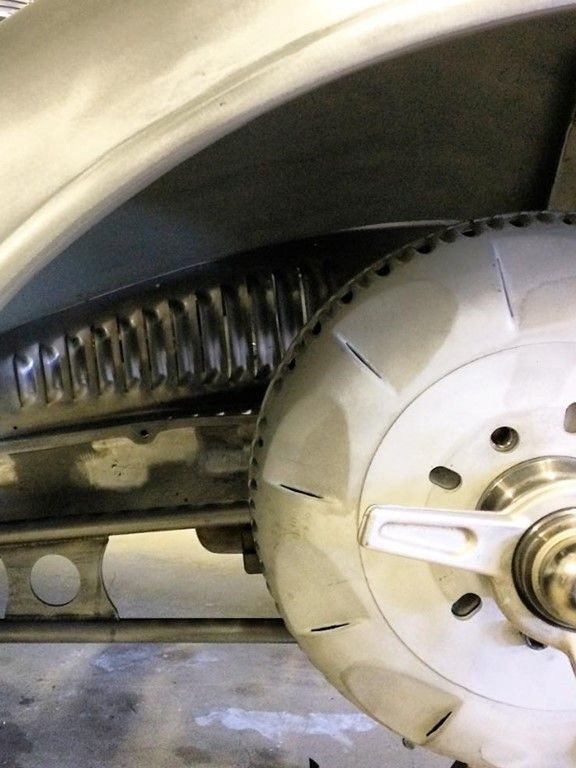
Finished the driver's side inner fender this morning..
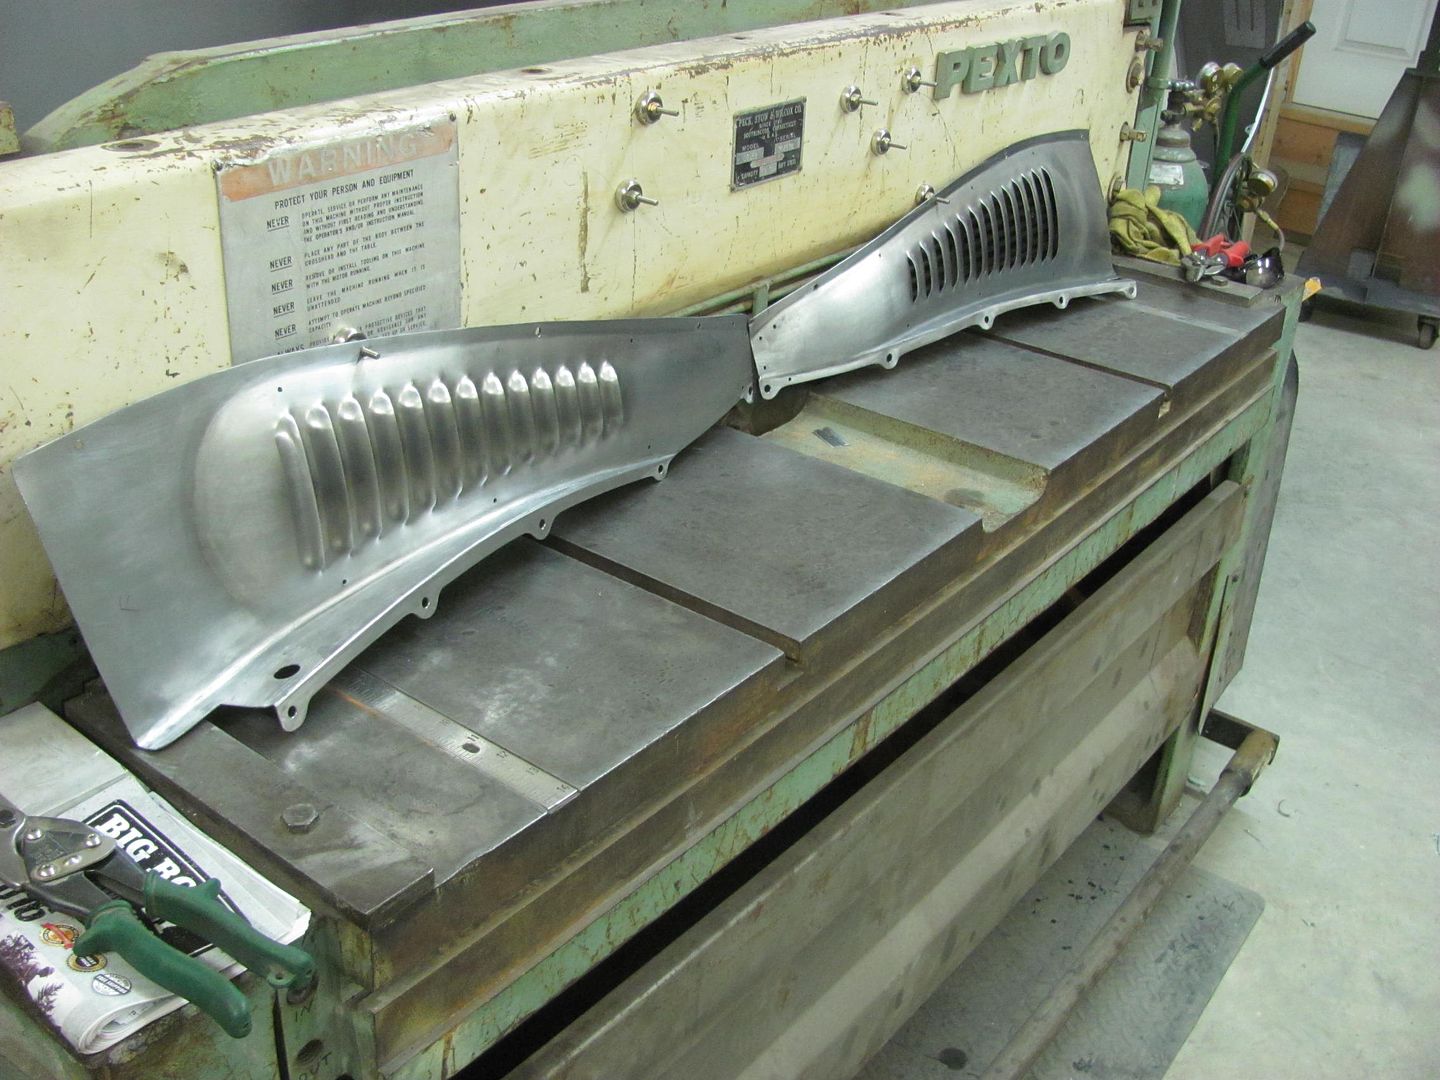   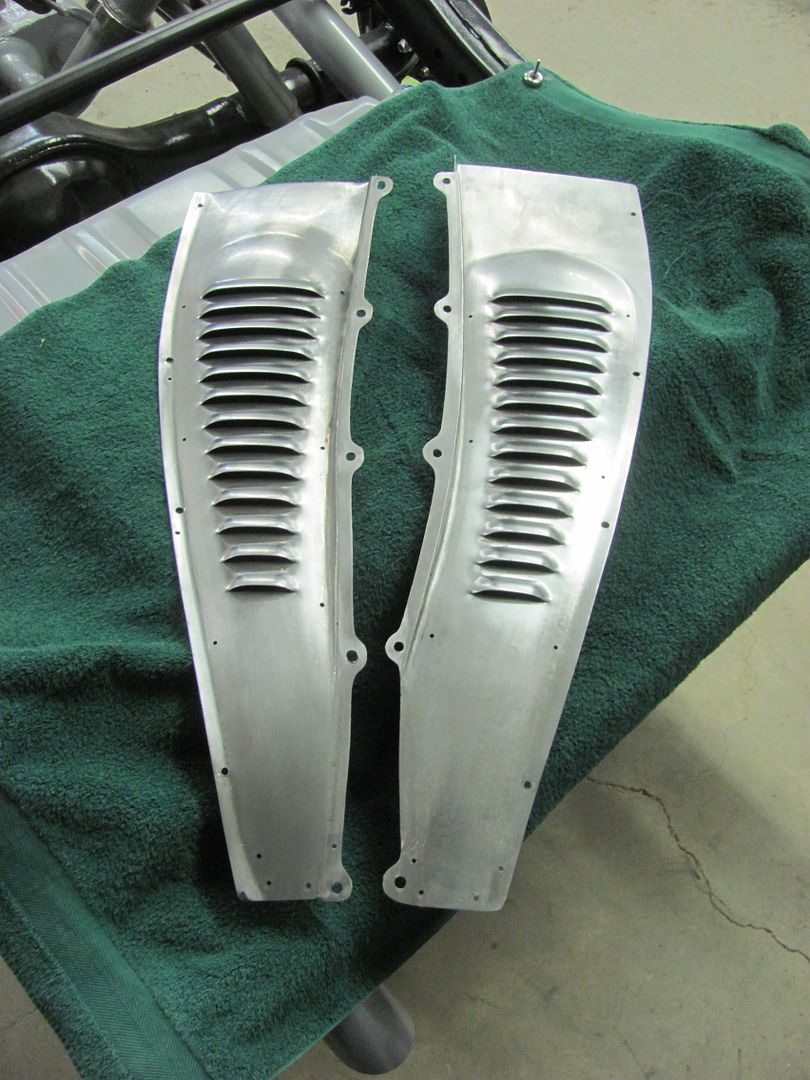 Now to get them back to Cody so he can do some more re-assembly.. After finishing the louvers this morning, we turned our attention back to the wagon. We started installing the brake lines and found the "kit" the owner had purchased was far from a direct fit. here's the booster and master cylinder we're using...  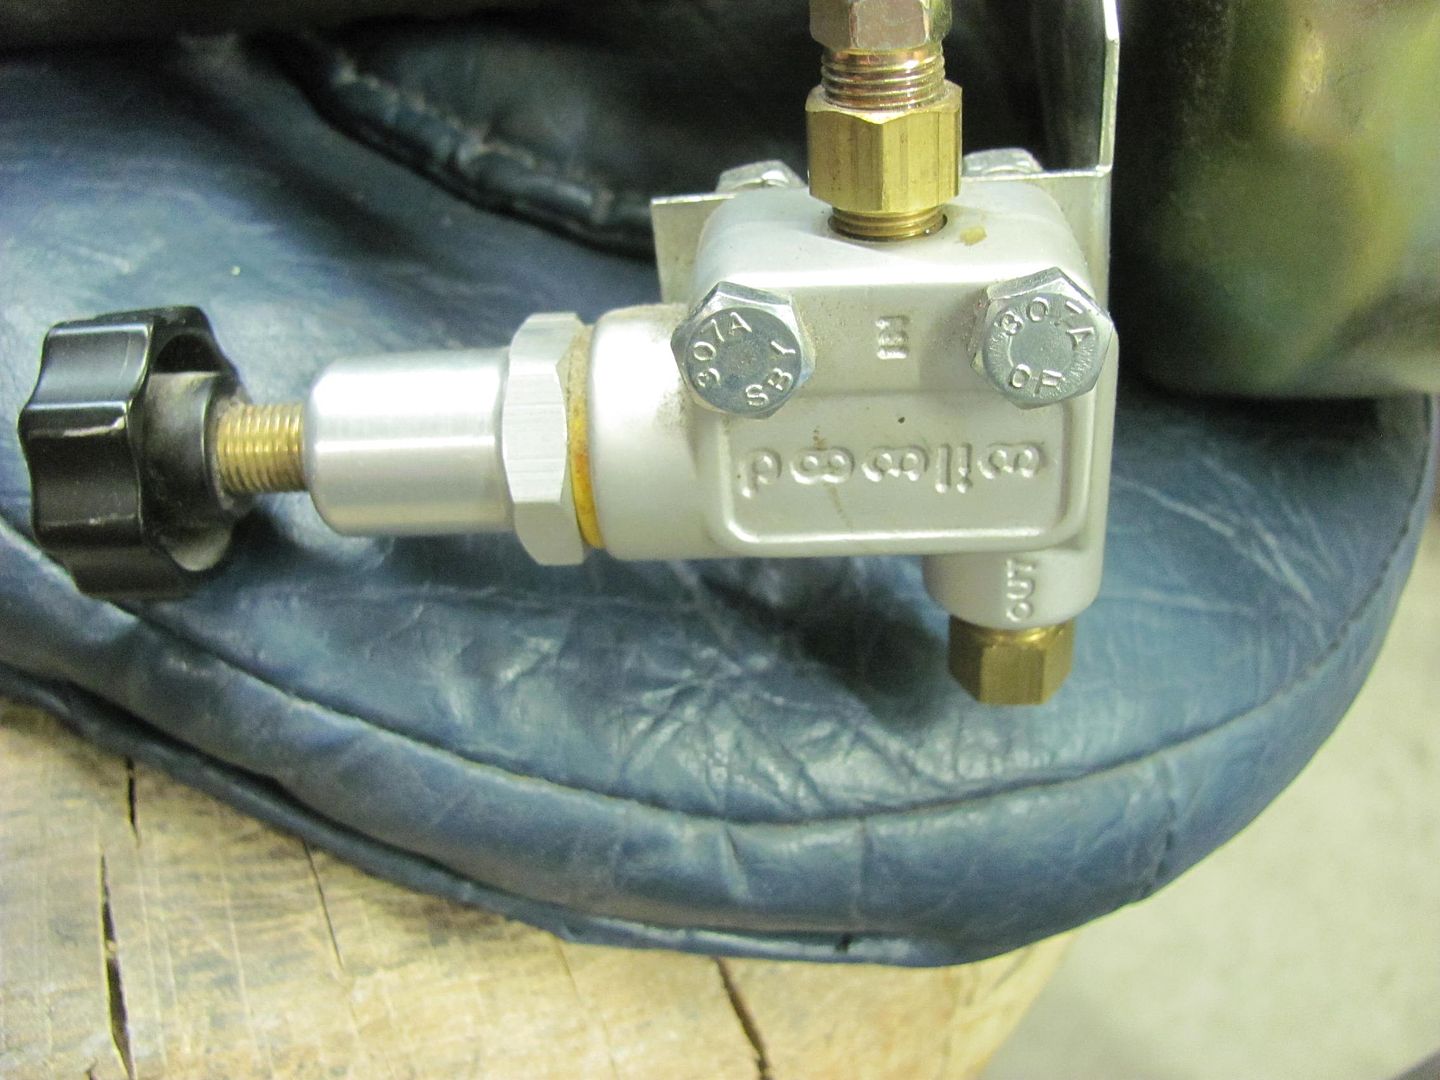 As the kit had no lines to fit a 9" rear, we used a stick of stainless tubing that was left over from the Fairlane job and bent our own. 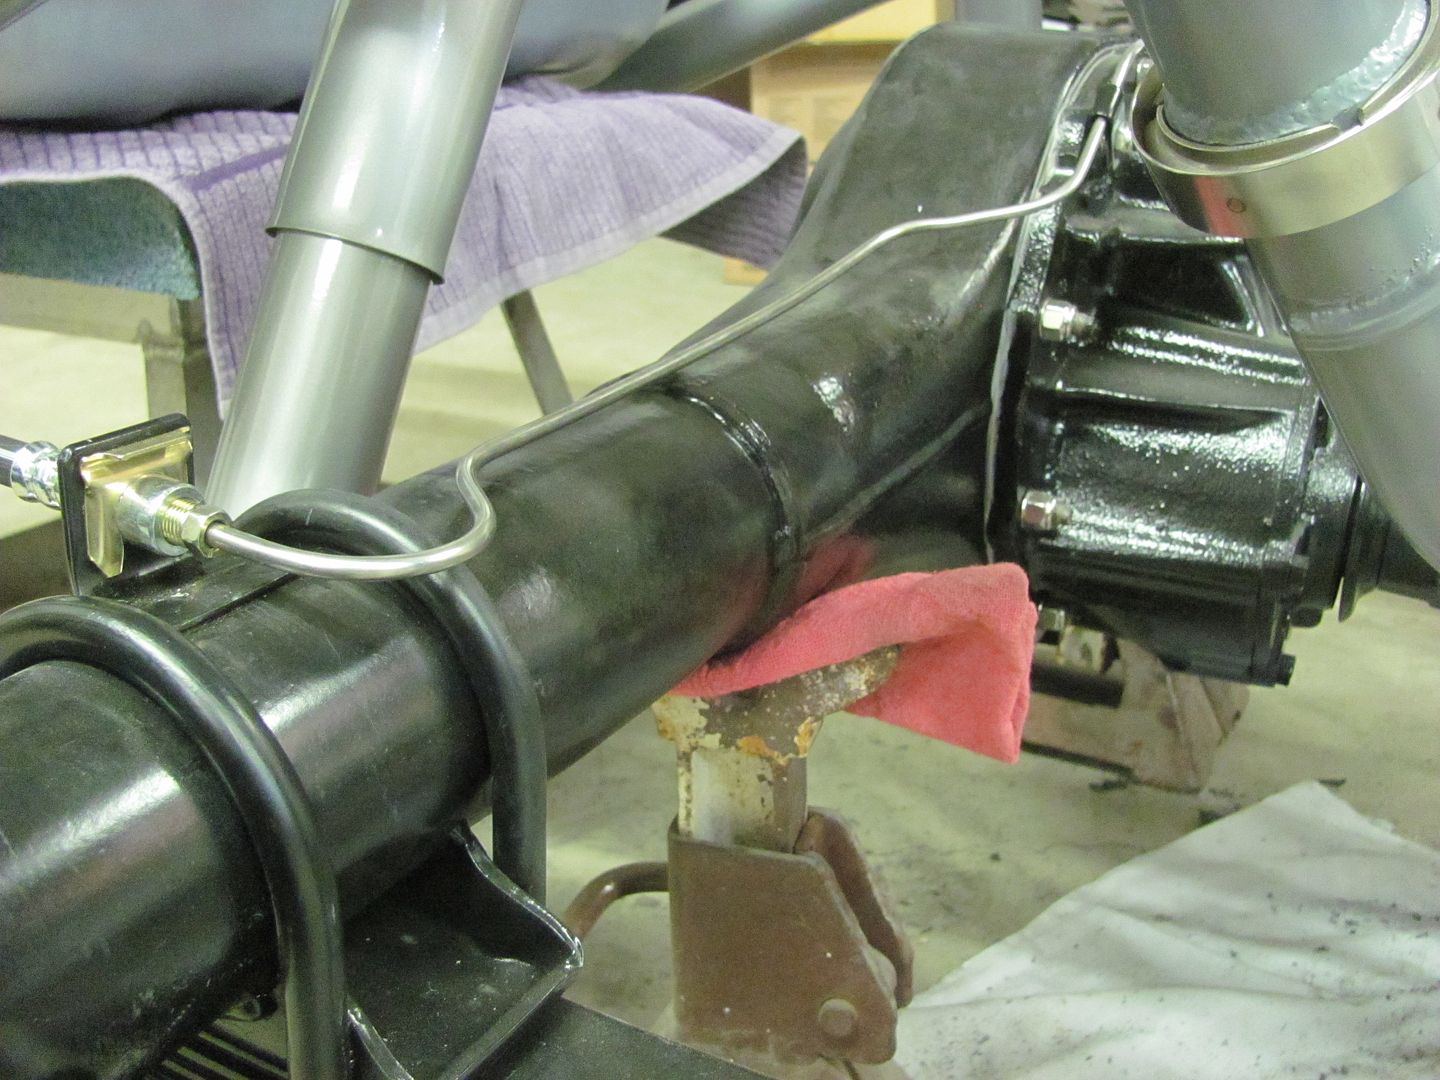 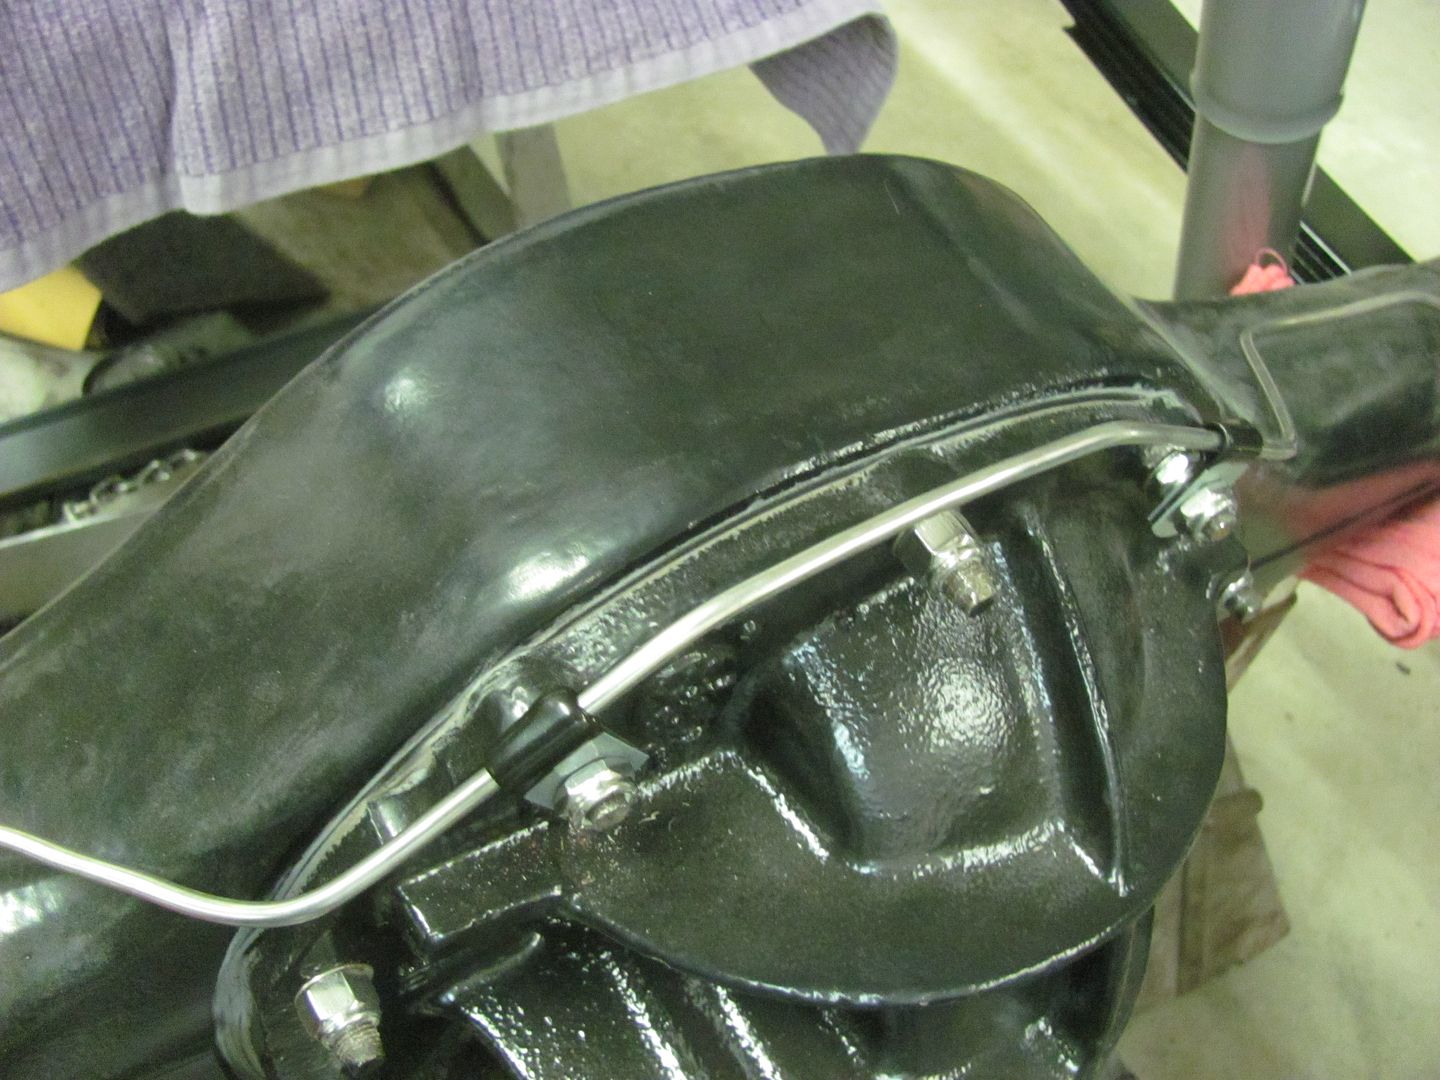 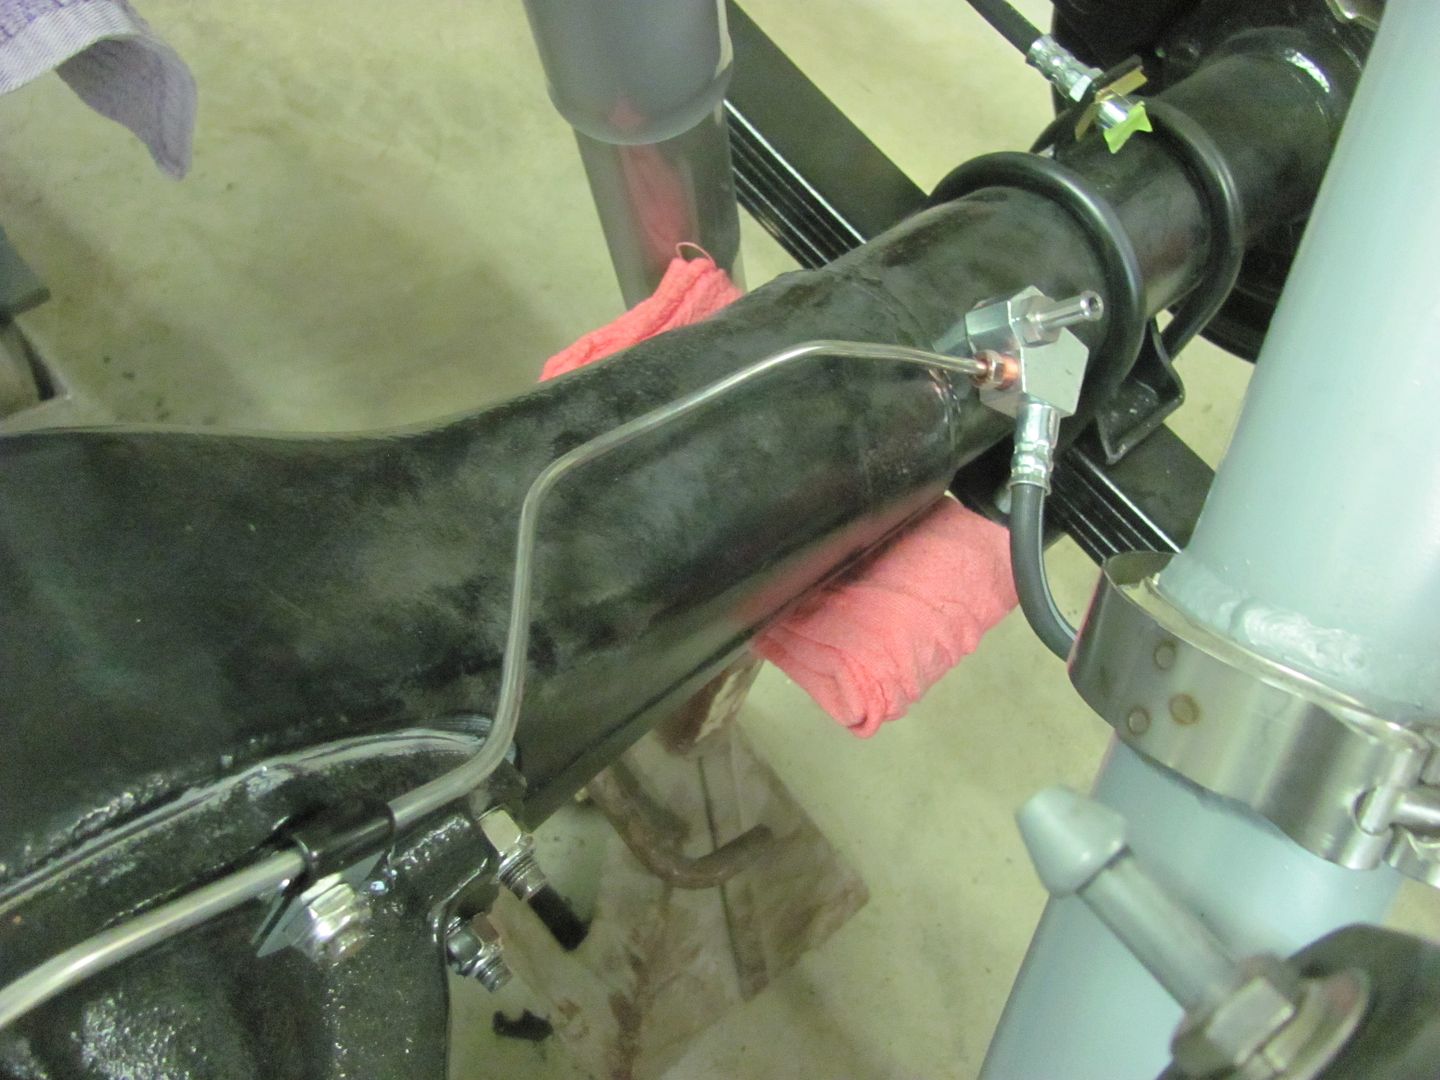
__________________
Robert Last edited by MP&C; 03-05-2016 at 08:54 PM. |
|
|
|
|
03-06-2016, 11:54 AM
|
#5 |
|
Registered User
Join Date: Apr 2003
Location: Indep, MO
Posts: 5,893
|
Re: 55 Wagon Progress
Nice tight work! Love the louvering, great stuff!
__________________
Boppa's Old Yeller Truck Build, Old Yeller's New Heart! Project Buzz Bomb Flyin' Low! |
|
|
|
|
03-06-2016, 08:37 PM
|
#6 |
|
Registered User
 Join Date: May 2007
Location: Deale Md
Posts: 4,663
|
Re: 55 Wagon Progress
What degree did you flare the stainless brake line ?
__________________
James 63 GMC V6 4speed carryall 65 chevy swb bbw V8 auto 68 K20 327/4 speed, buddy buckets 2002 GMC CC Dually Duramax 64 GMC lwb 3/4 V6 4speed SOLD 66 GMC swb bbw buddy buckets SOLD IG duallyjams The only thing that stays the same is constant change! |
|
|
|
|
03-06-2016, 10:53 PM
|
#7 |
|
Registered User
Join Date: Jan 2013
Location: Leonardtown, MD
Posts: 1,640
|
Re: 55 Wagon Progress
I used my hydraulic tool to perform the double flare, not sure on the angle, think it a 45* ???
__________________
Robert |
|
|
|
|
03-07-2016, 01:42 PM
|
#8 |
|
Registered User
Join Date: Jan 2013
Location: Leonardtown, MD
Posts: 1,640
|
Re: 55 Wagon Progress
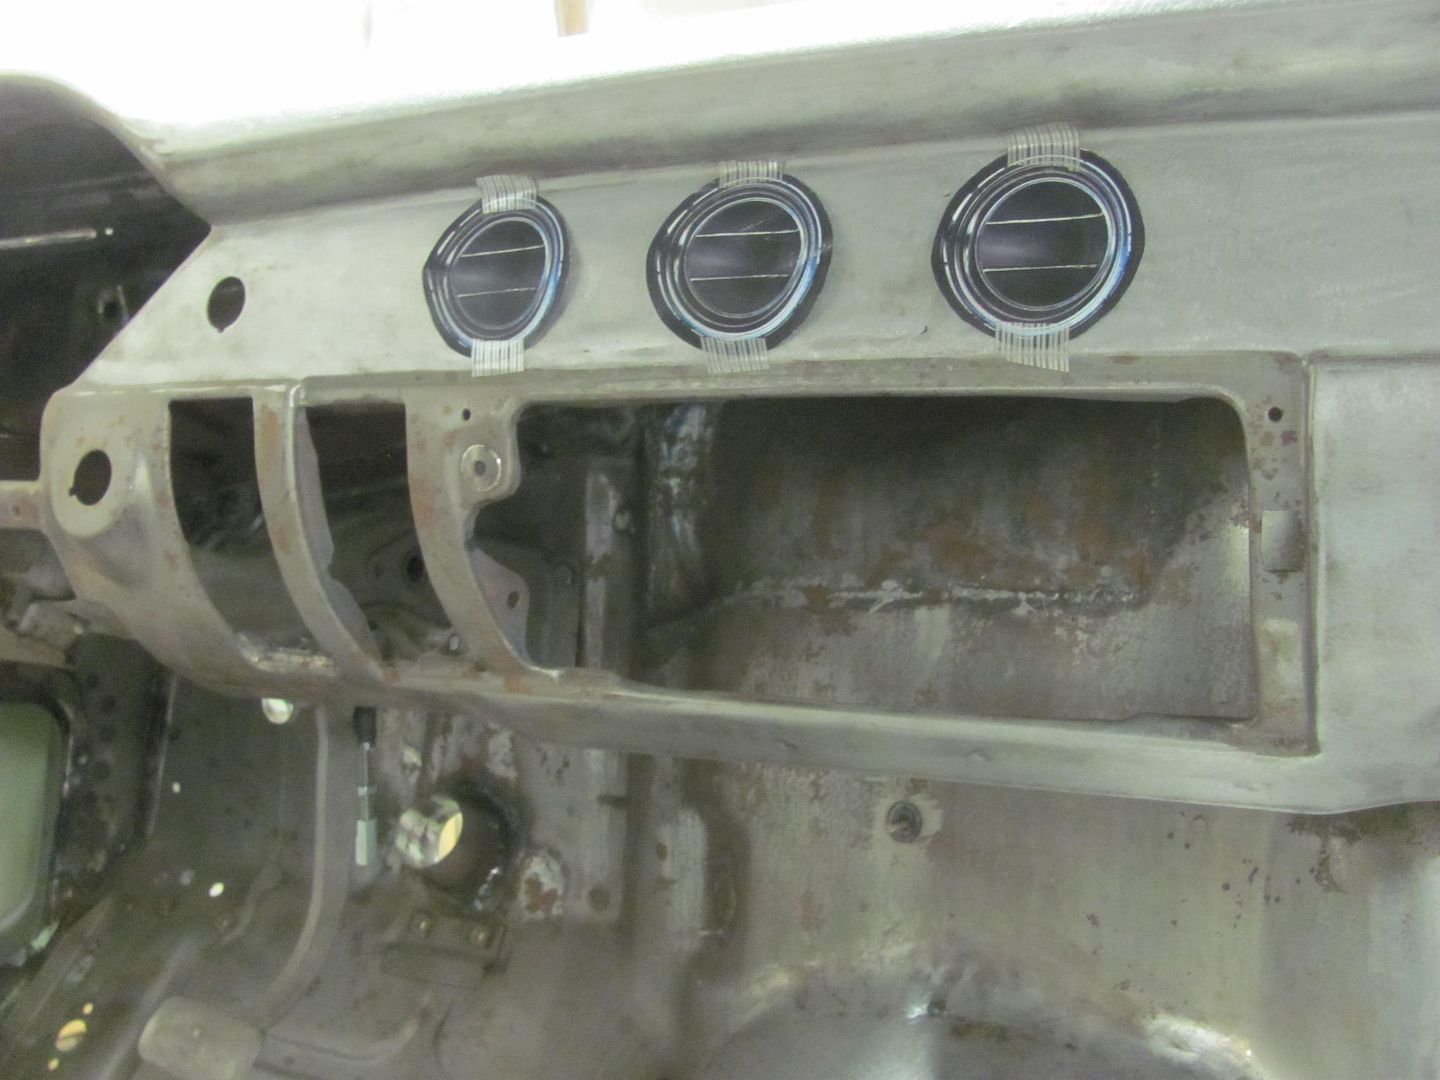
Well most small jobs I do like this you never see the part installed (like the Studebaker dash parts) so I was happy to see Cody post up some pictures this morning. Here's a shot of the passenger side installed.. It was nice to take on a challenge like this and see it actually work..
   I think Kyle enjoyed the break from blocking epoxy primer.. Now back to the old grind..
__________________
Robert |
|
|
|
|
03-07-2016, 02:09 PM
|
#9 |
|
Registered User
Join Date: Jun 2008
Location: Moss Point,Ms.
Posts: 1,439
|
Re: 55 Wagon Progress
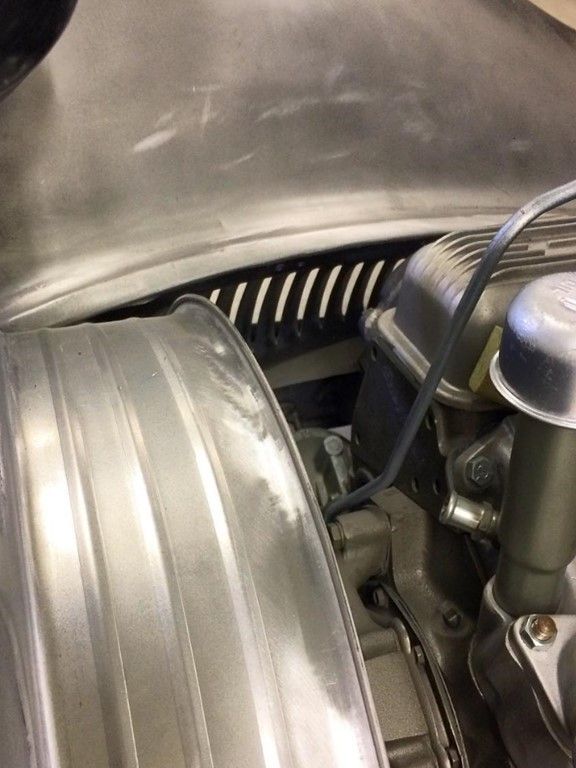
They should help a lot with the engine cooling being right at the exhaust ports!
Nice work as always Robert. Mike. 
|
|
|
|
|
03-07-2016, 02:43 PM
|
#10 |
|
Registered User
Join Date: Jan 2013
Location: Leonardtown, MD
Posts: 1,640
|
Re: 55 Wagon Progress
Thanks Mike! Yeah, I think it will need all the help in cooling that it can get. No Heat, no AC, no PS, no frills. Drive and go.
__________________
Robert |
|
|
|
|
03-08-2016, 10:45 PM
|
#11 |
|
Registered User
Join Date: Jan 2013
Location: Leonardtown, MD
Posts: 1,640
|
Re: 55 Wagon Progress
Adding the rear axle vent hose, we needed a spot to anchor the second vent fitting to keep the hose from flopping around...
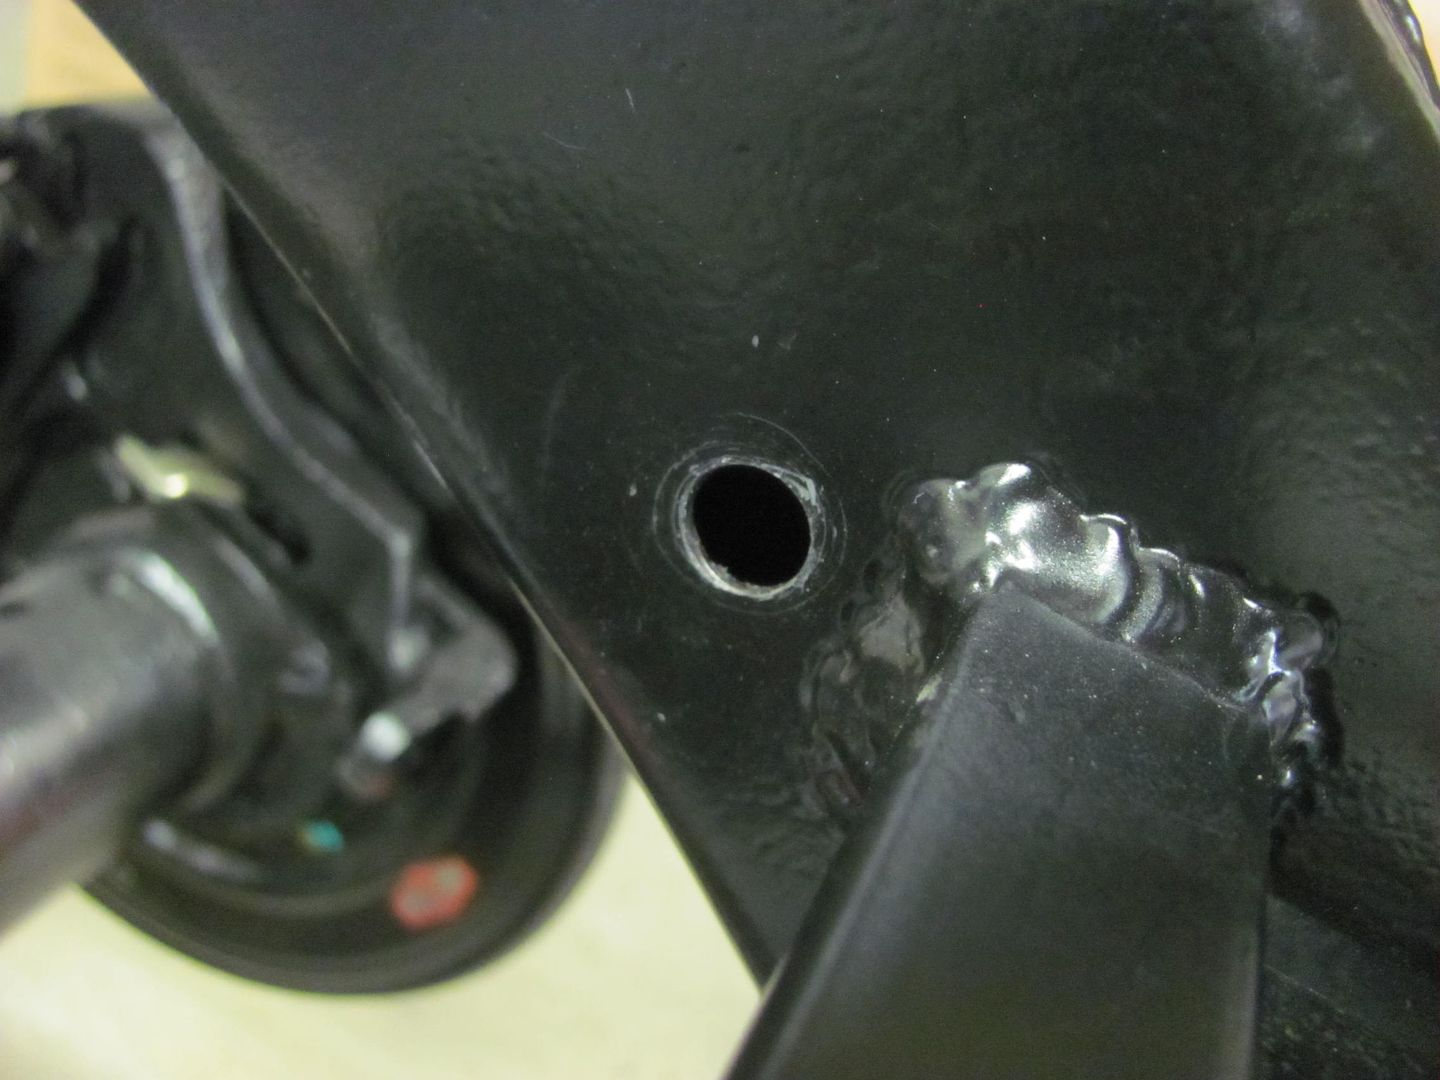 Which is threaded with a 7/16-20 thread  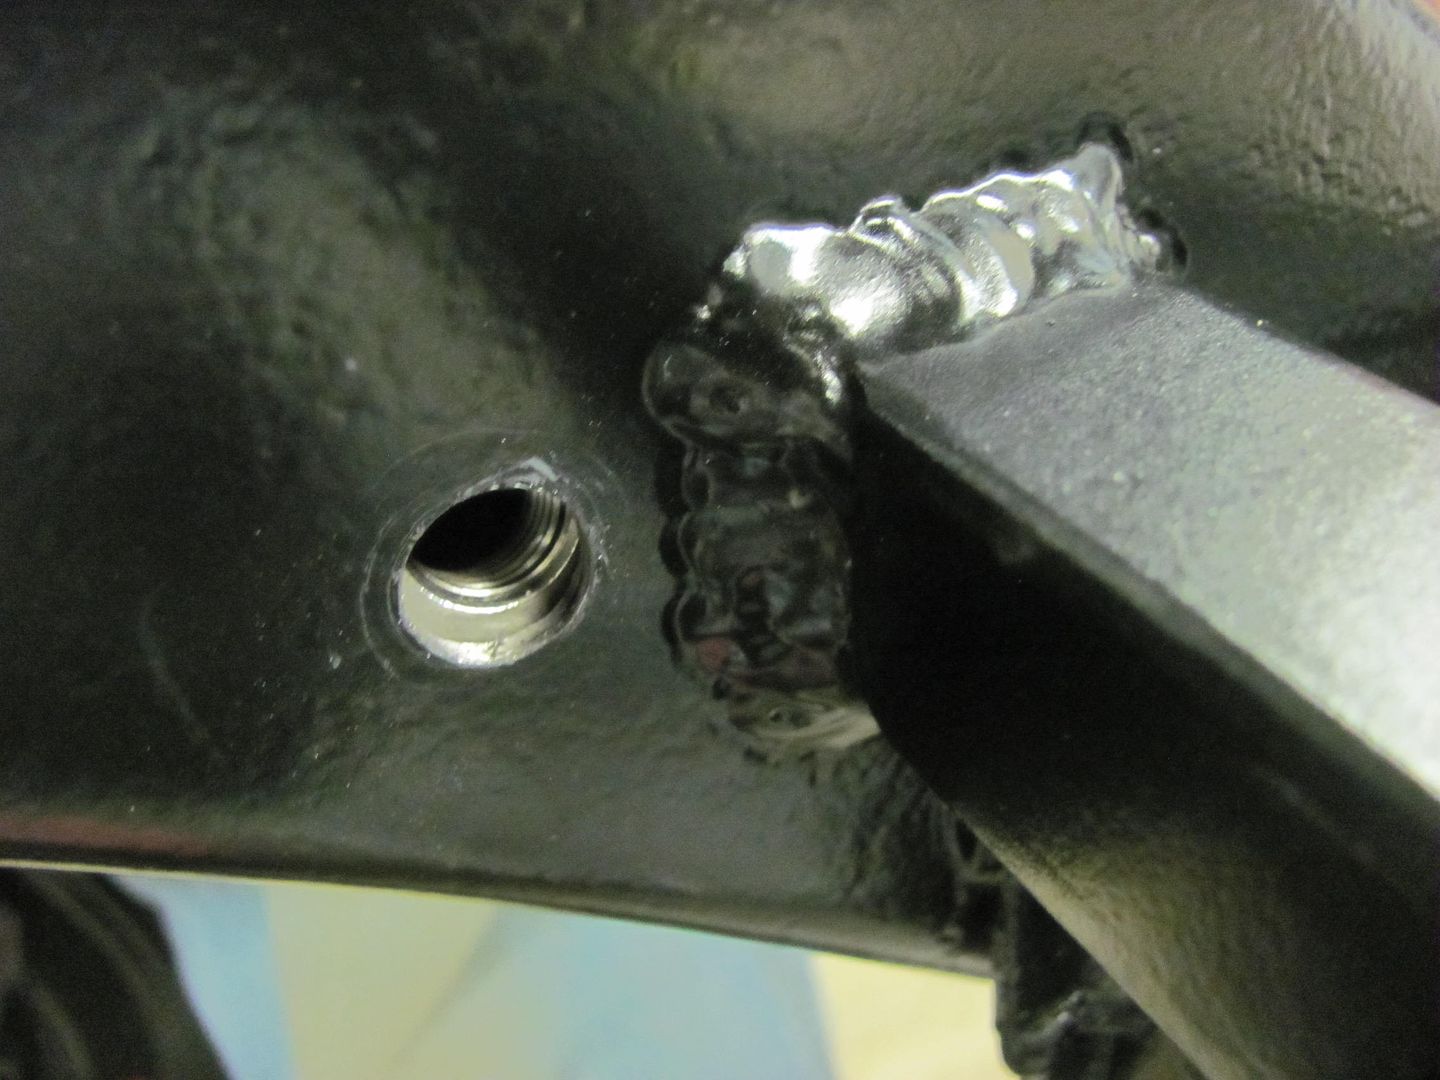 With Loctite added to the threads... 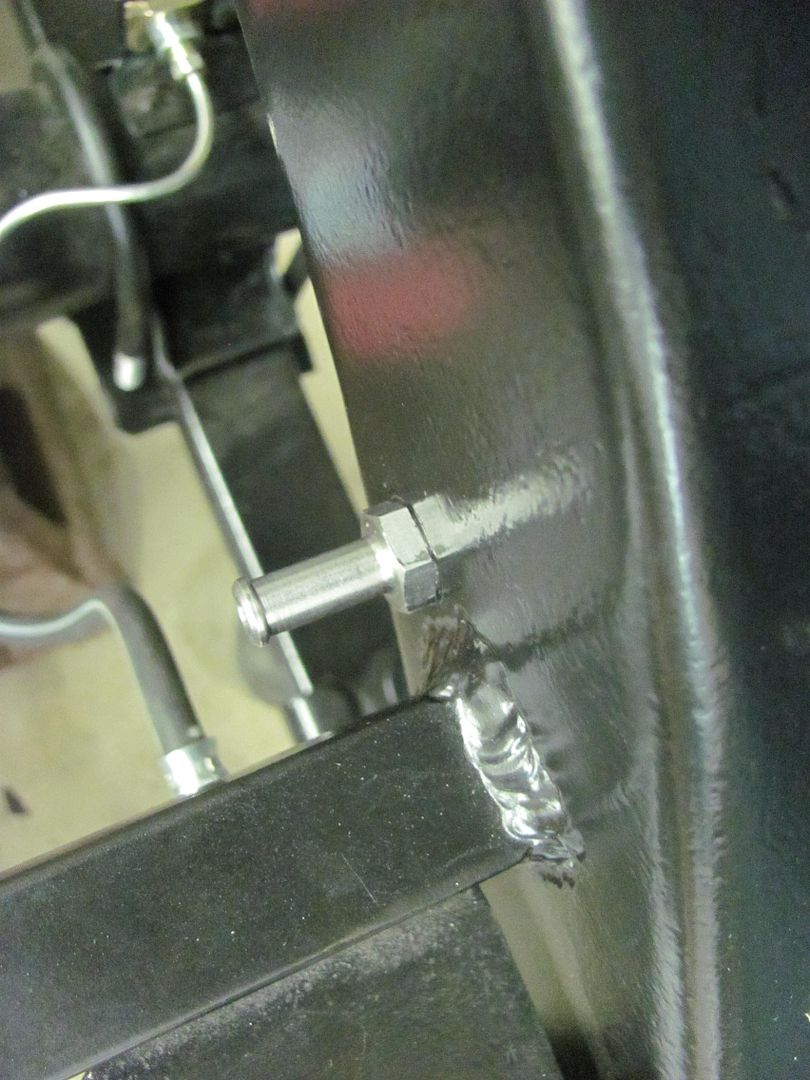 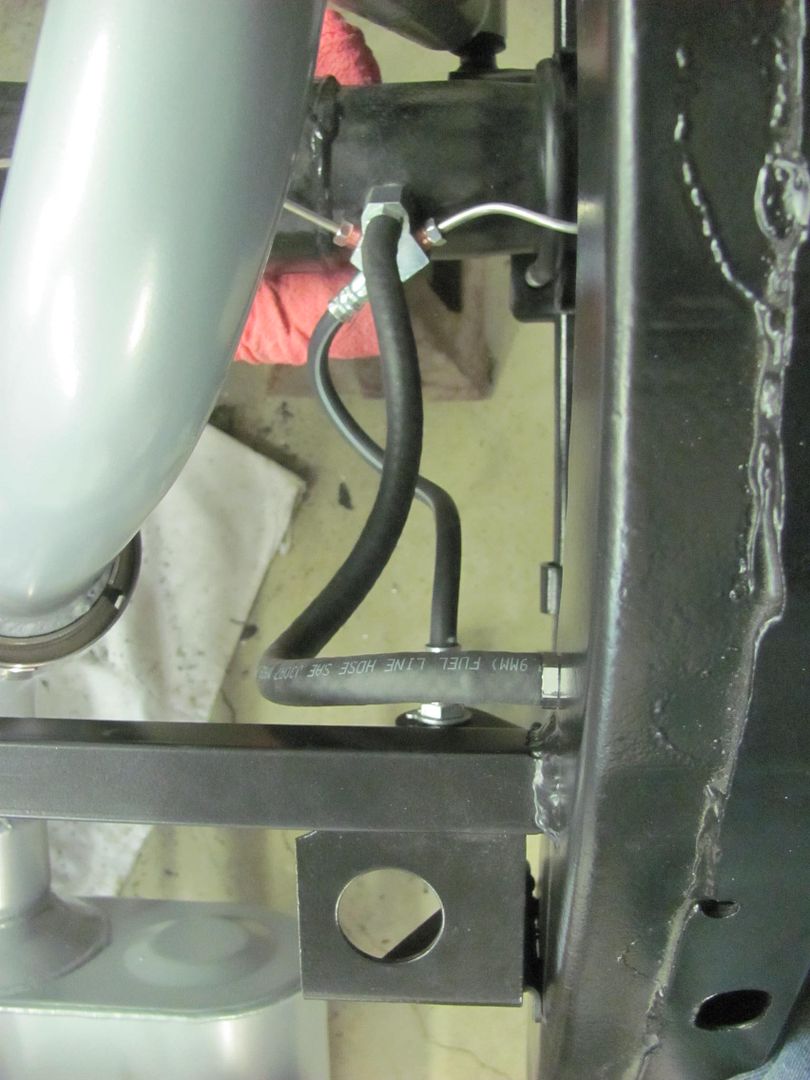 More SS brake lines... 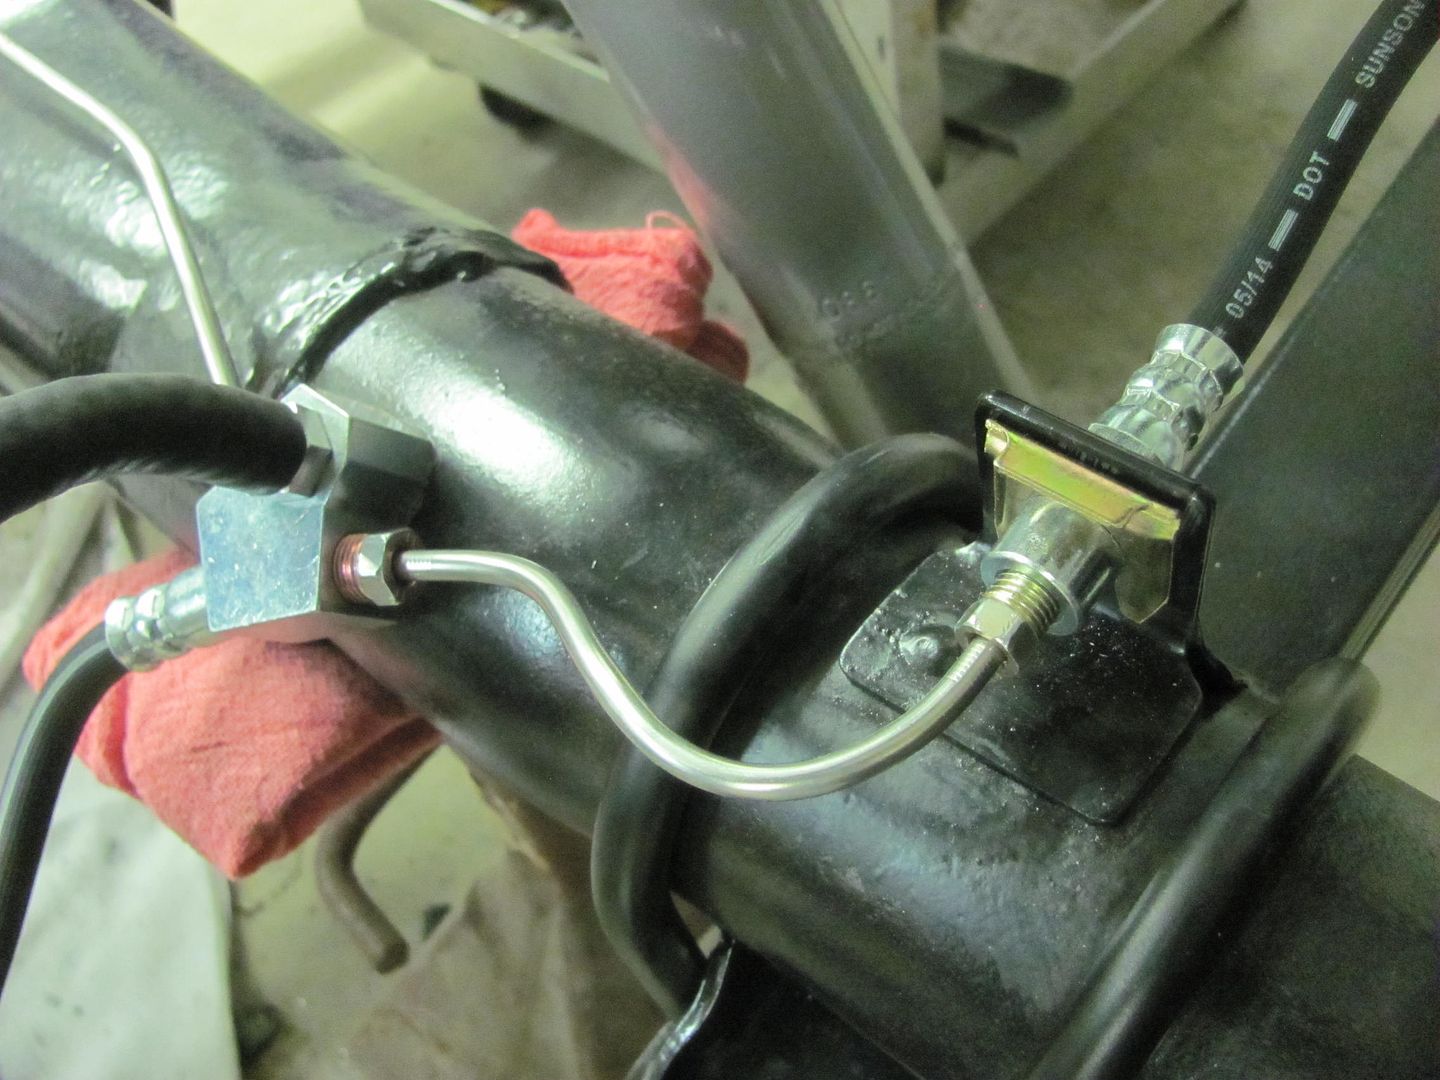  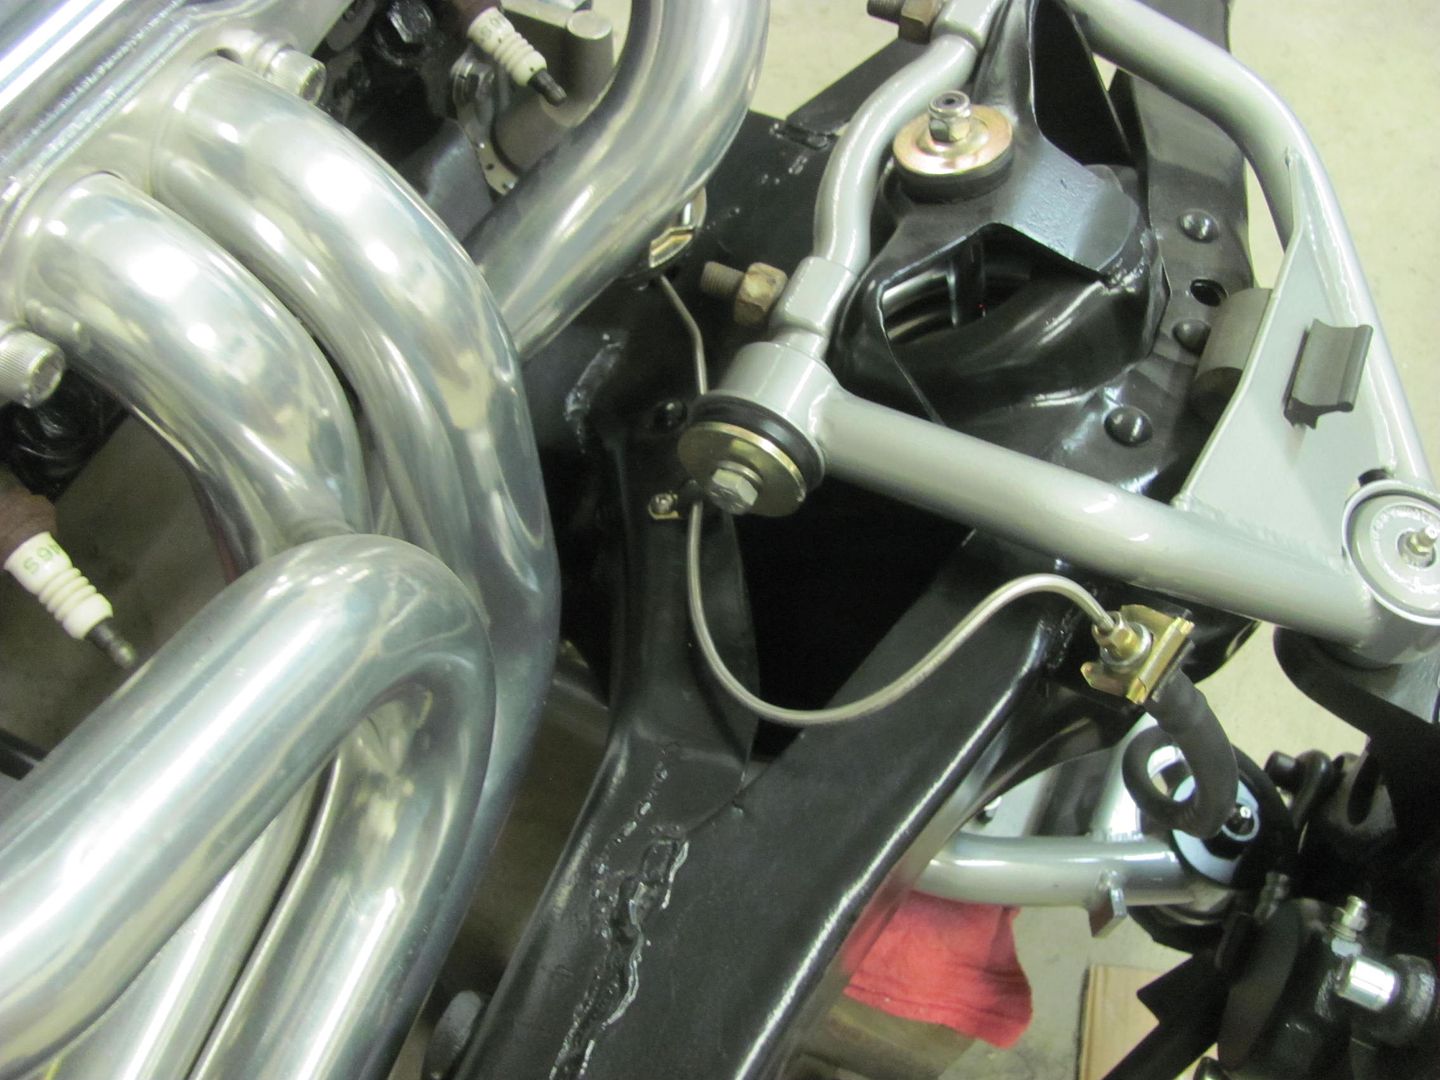 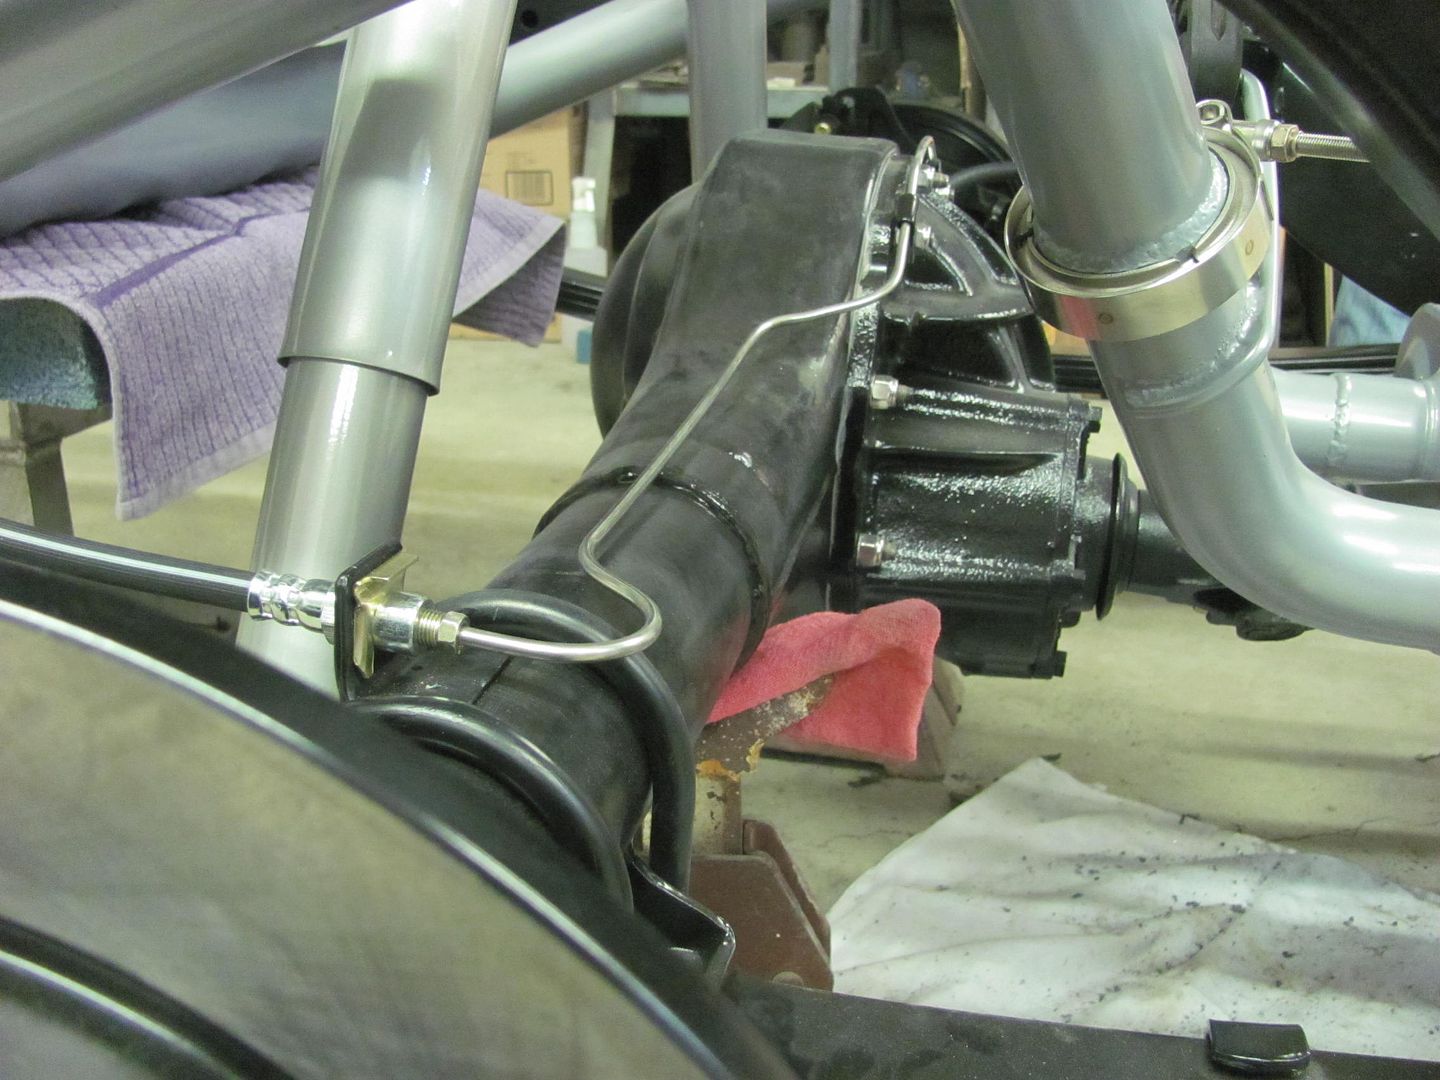 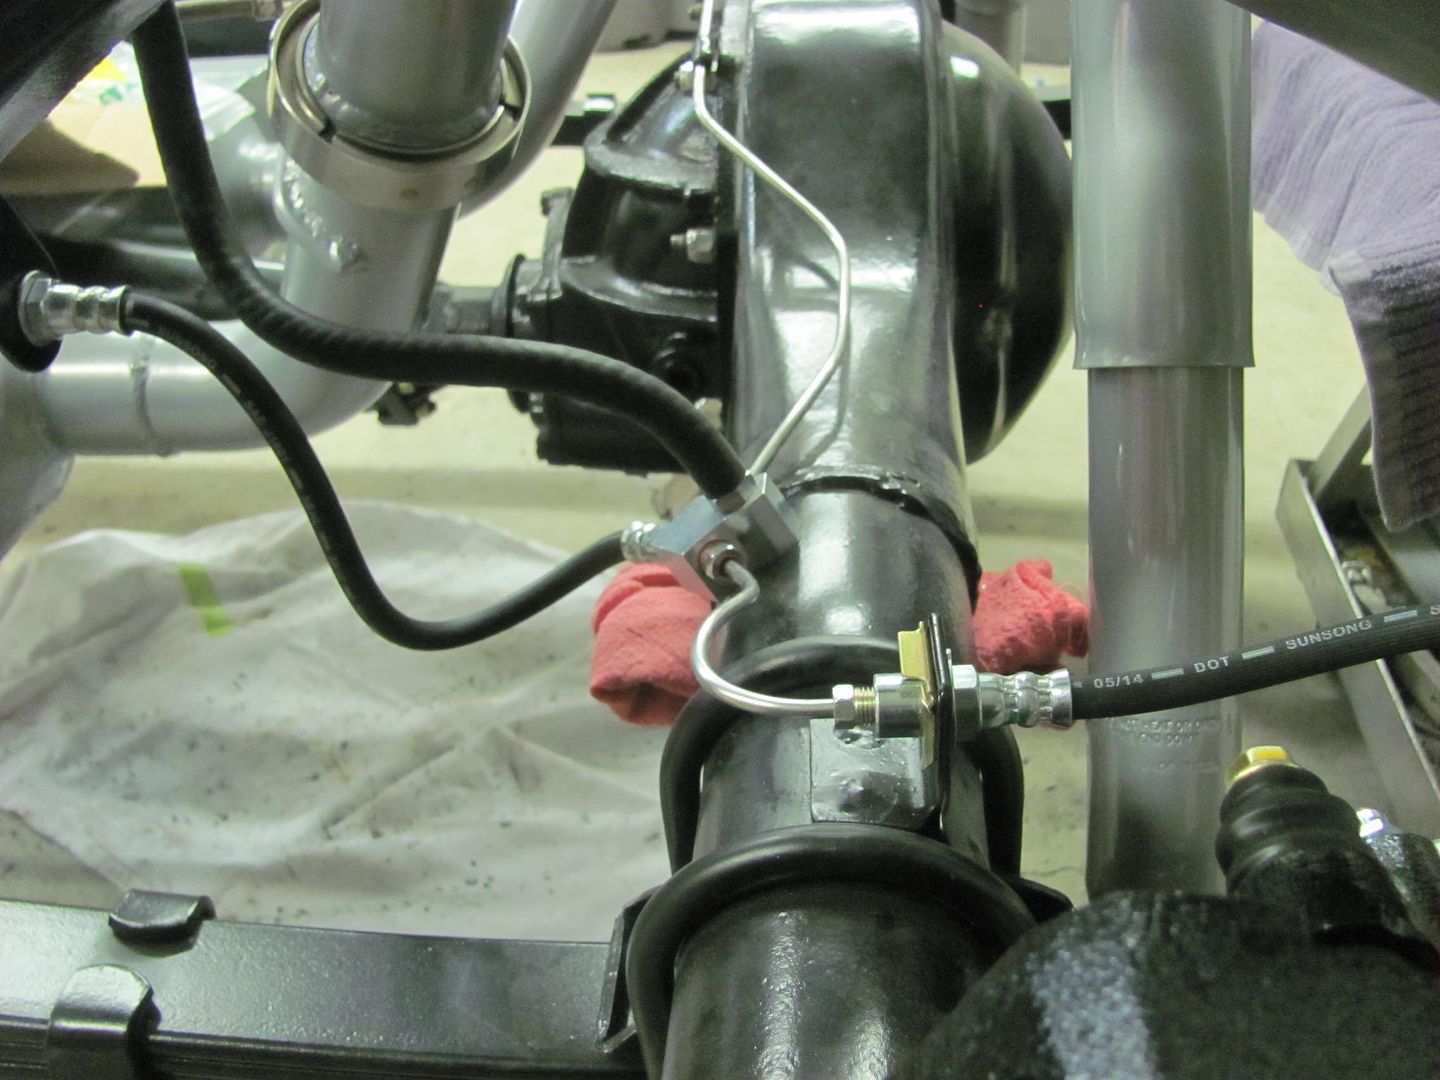 With the rear brake lines complete, the rear wheels were bolted back up.. 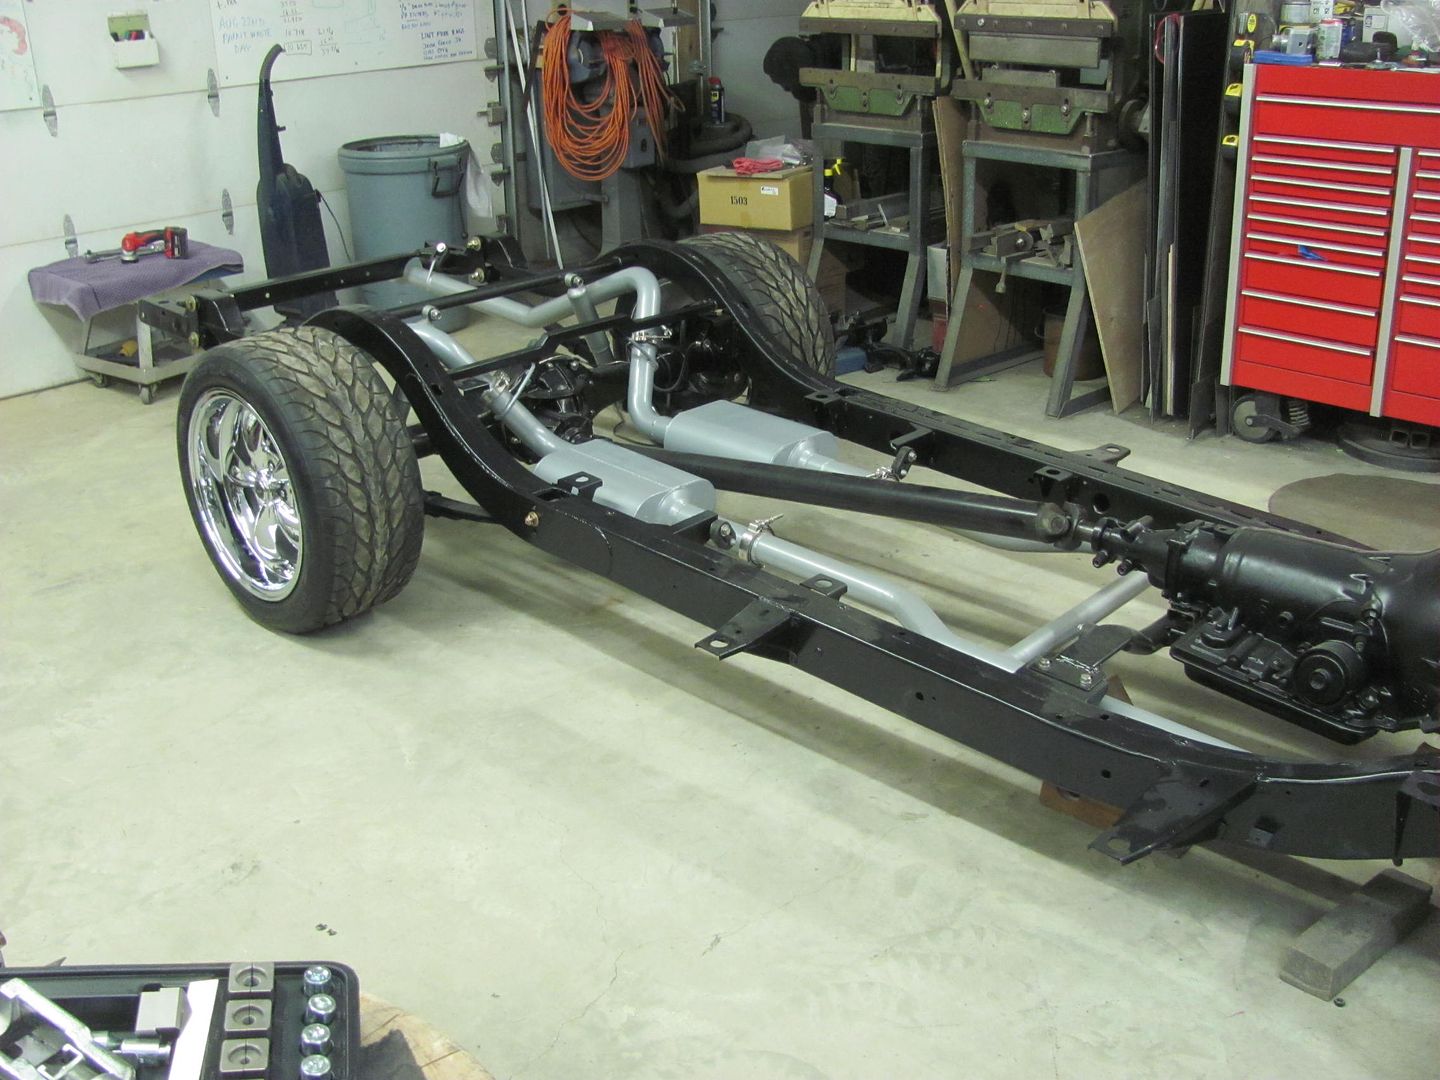 And for our lessons learned, this is what happens when you cut 12 gauge steel with a square on the other end of the shear. Dan, the blades are still sharp! 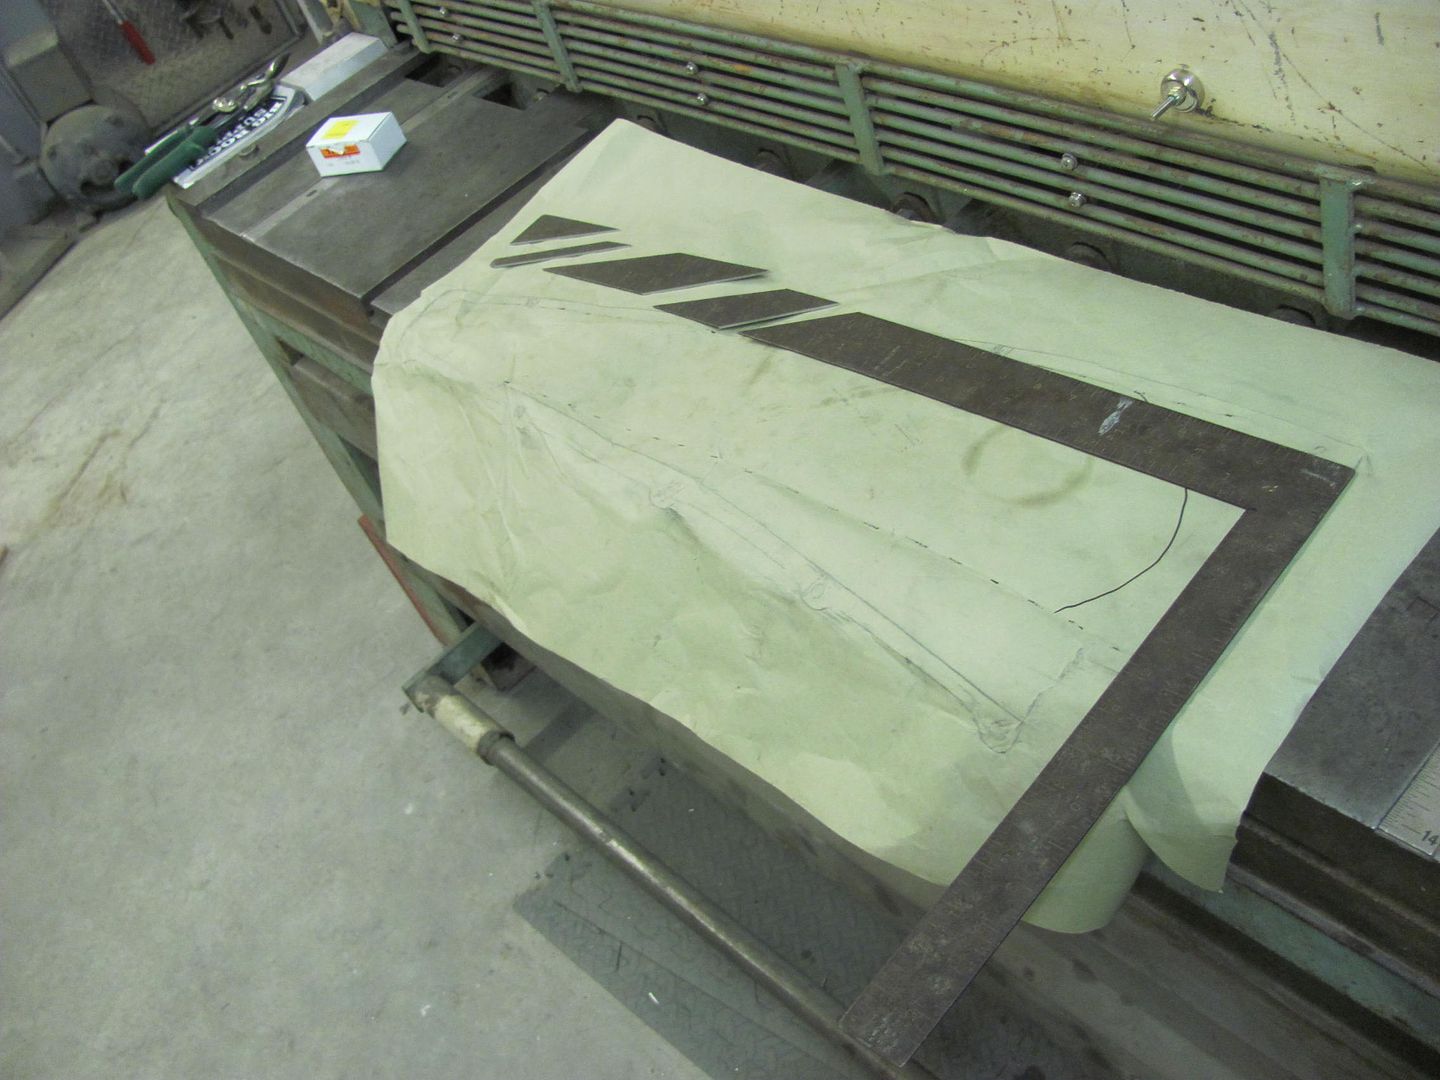 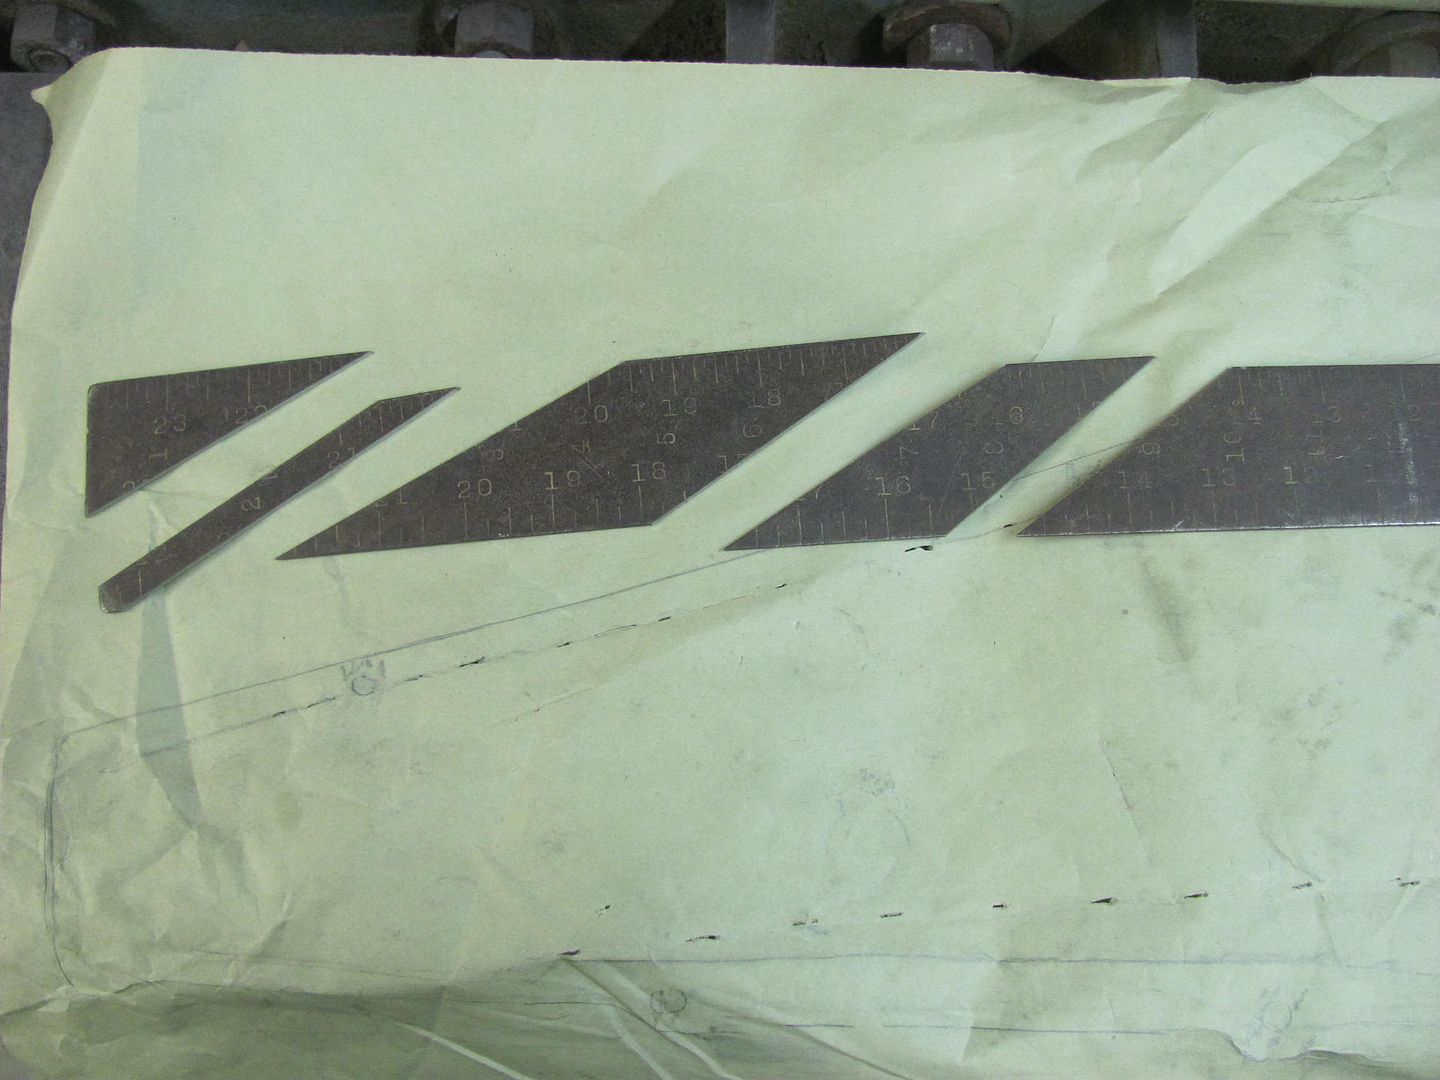
__________________
Robert |
|
|
|
|
03-09-2016, 12:01 AM
|
#12 |
|
Registered User
Join Date: Apr 2011
Location: .
Posts: 3,104
|
Re: 55 Wagon Progress
Thanks for posting. I swear every time I tune in I learn something.
|
|
|
|
|
03-10-2016, 02:26 AM
|
#13 |
|
Registered User
Join Date: Oct 2007
Location: Spanaway
Posts: 8,451
|
Re: 55 Wagon Progress
I have a couple nice shear modified scales myself, got a 2.1 and a 3.0..... now...

__________________
Mike. Swamp Rat build thread : http://67-72chevytrucks.com/vboard/s...d.php?t=595019 72 3/4T 4X4 4" BDS Lift 33" BFG's |
|
|
|
|
03-12-2016, 10:44 PM
|
#14 |
|
Registered User
Join Date: Jan 2013
Location: Leonardtown, MD
Posts: 1,640
|
Re: 55 Wagon Progress
We started on an ashtray delete mod for the wagon, starting with this...
  a bit wider opening... 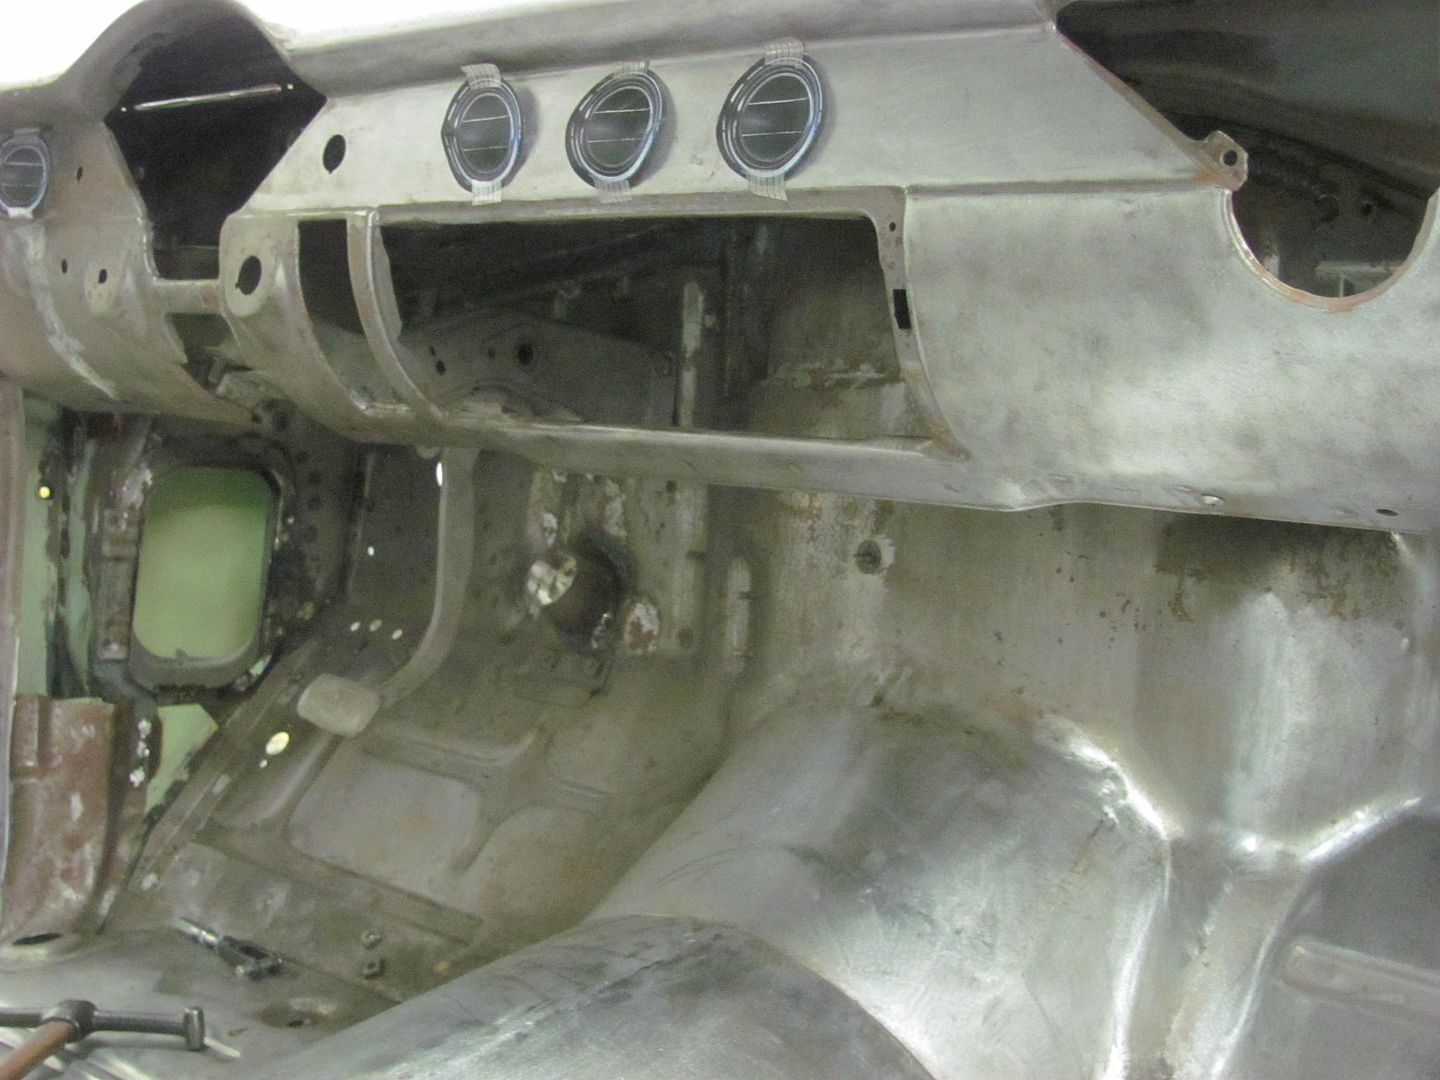 Now to remove the glove compartment door "skin"...... 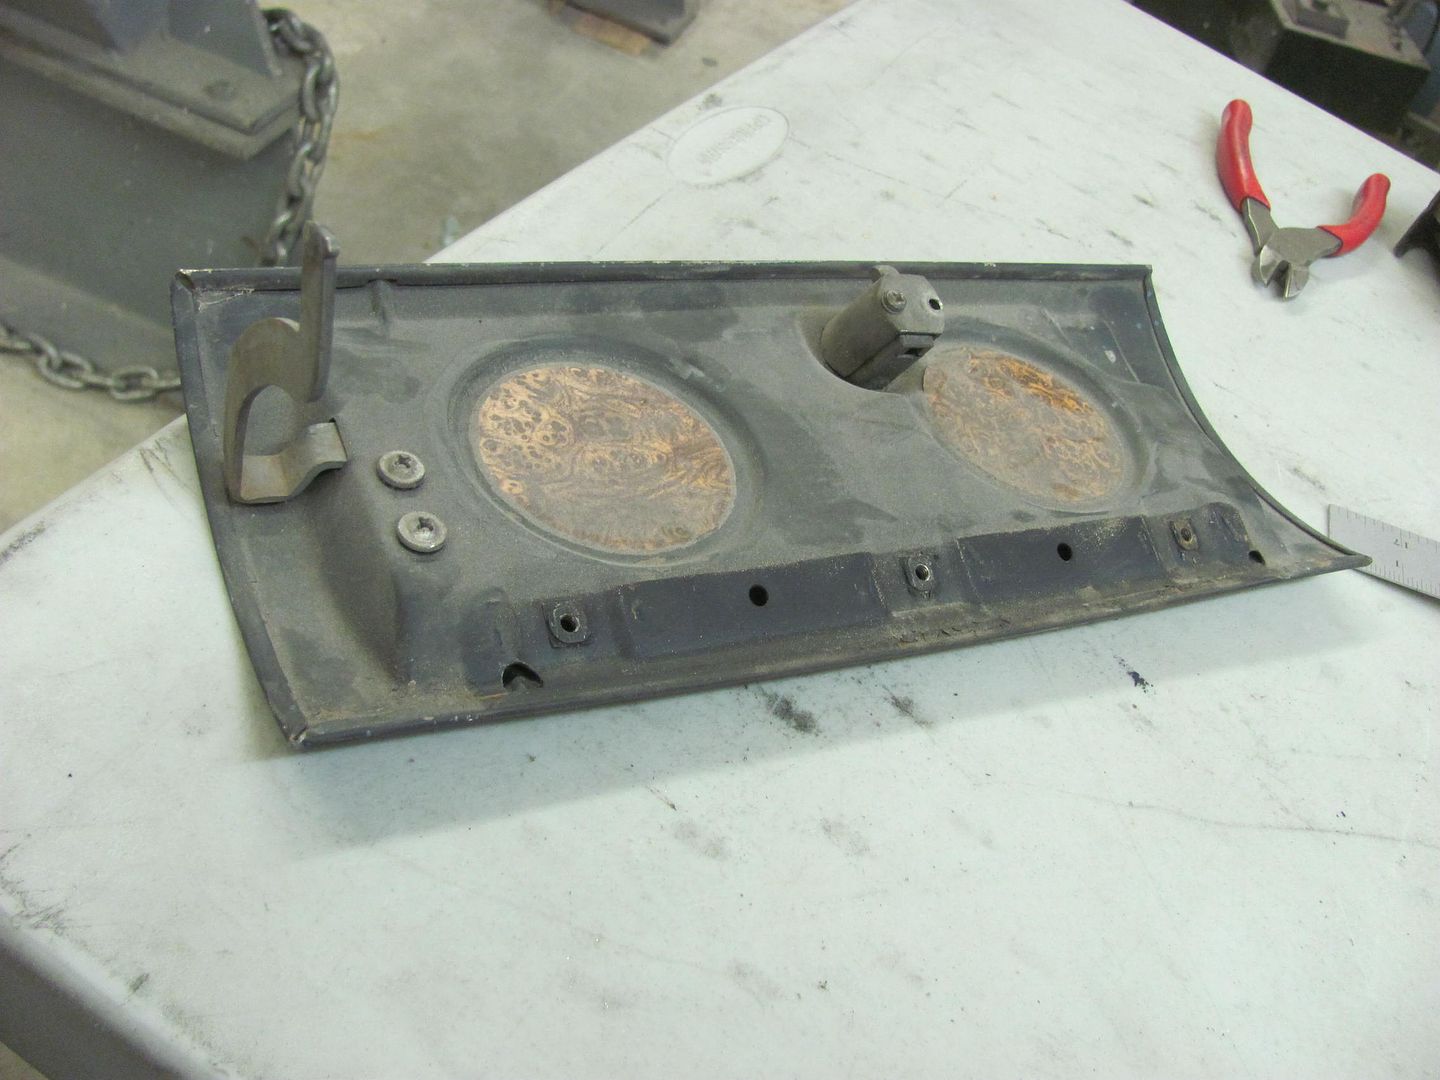 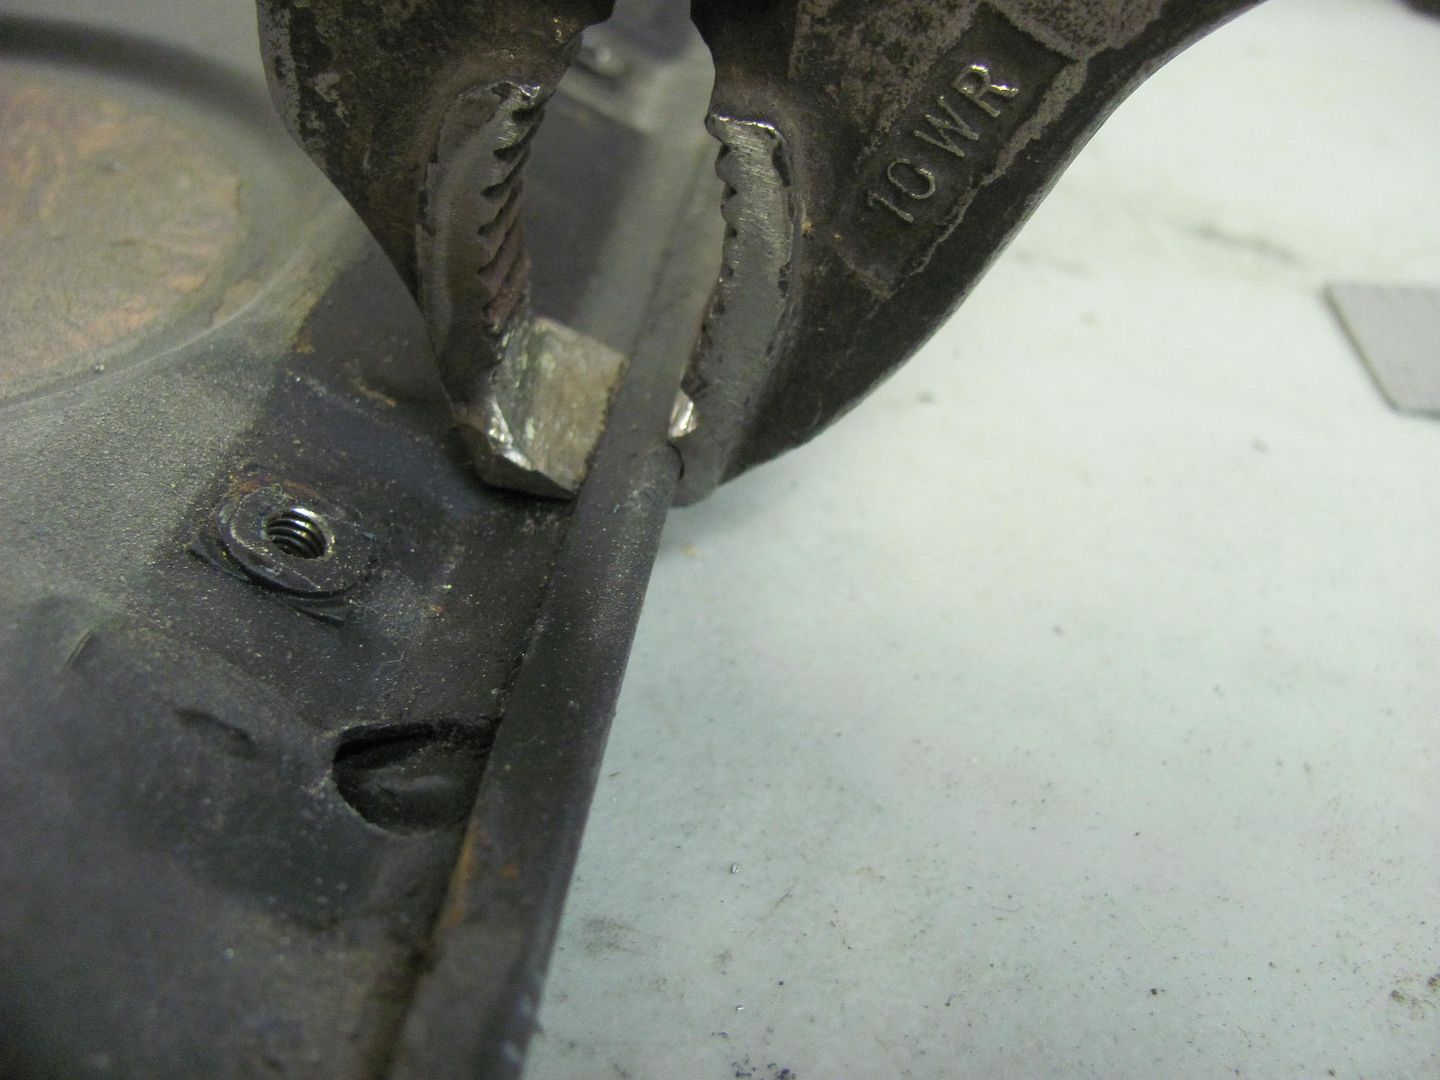 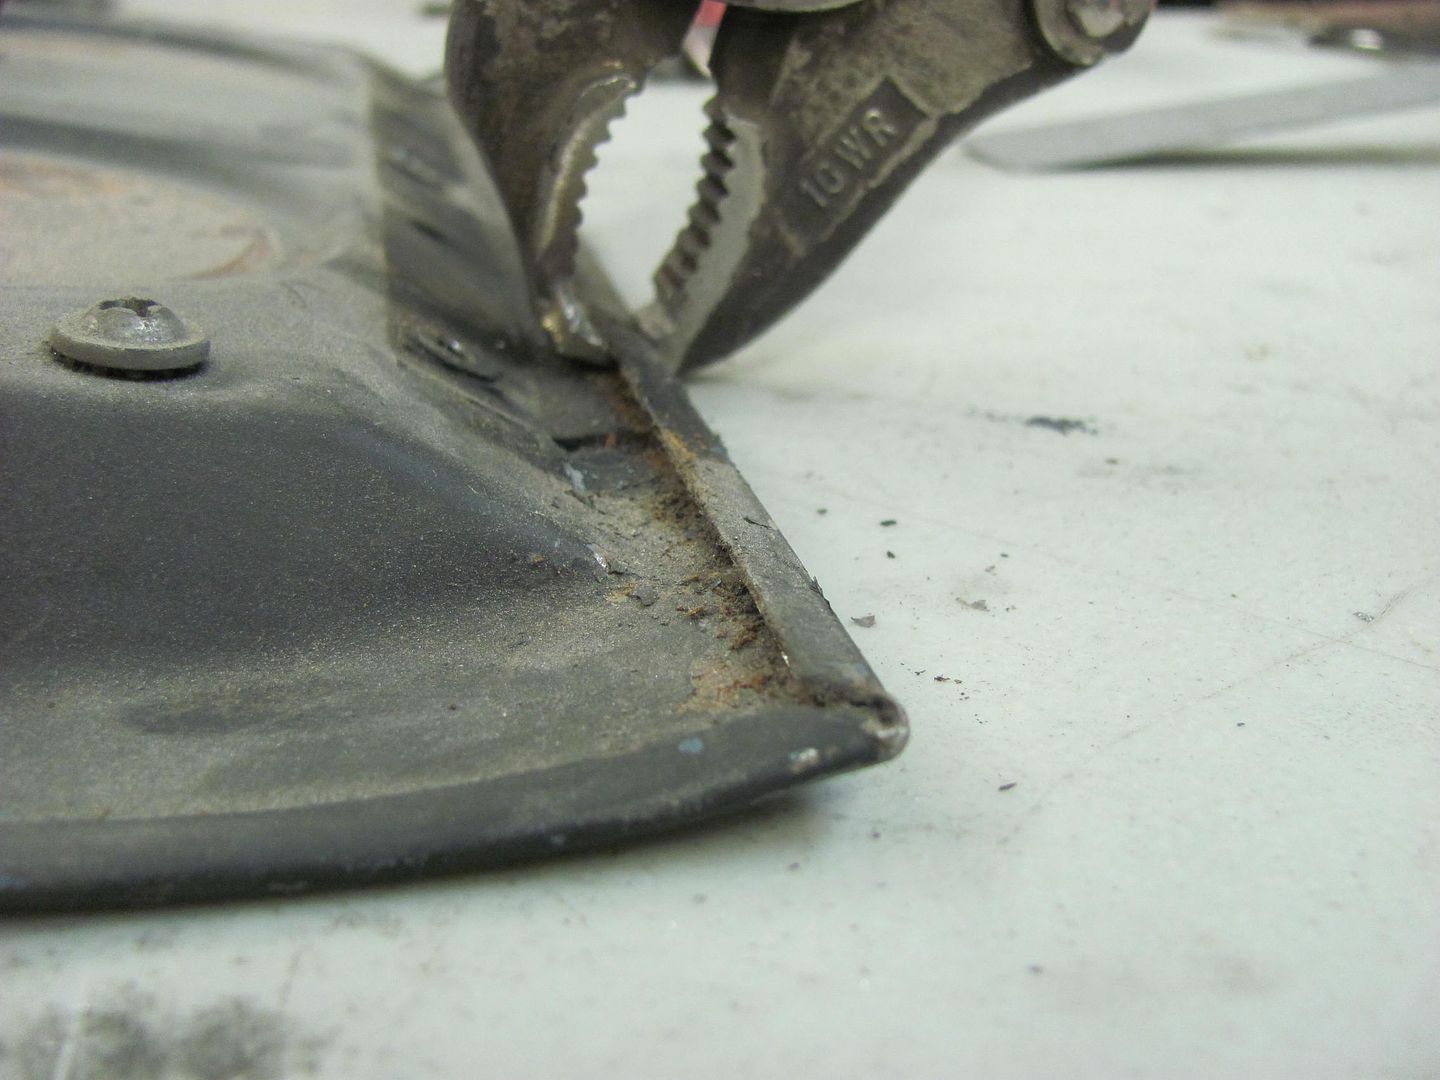 Then used these to flatten out the flanges... 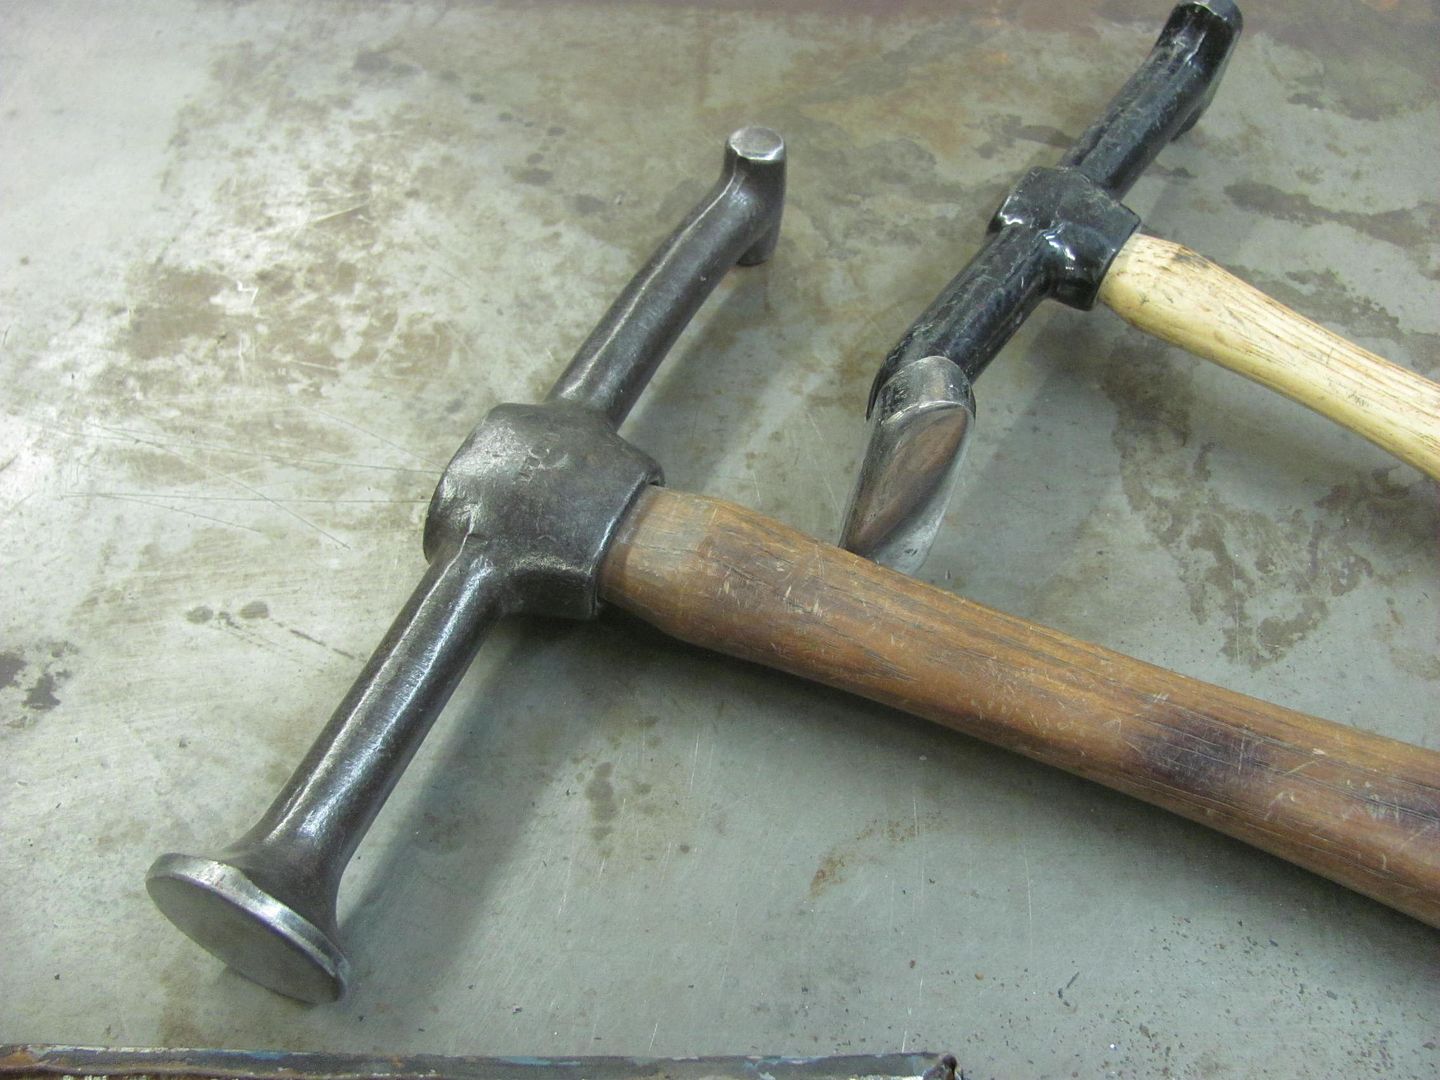 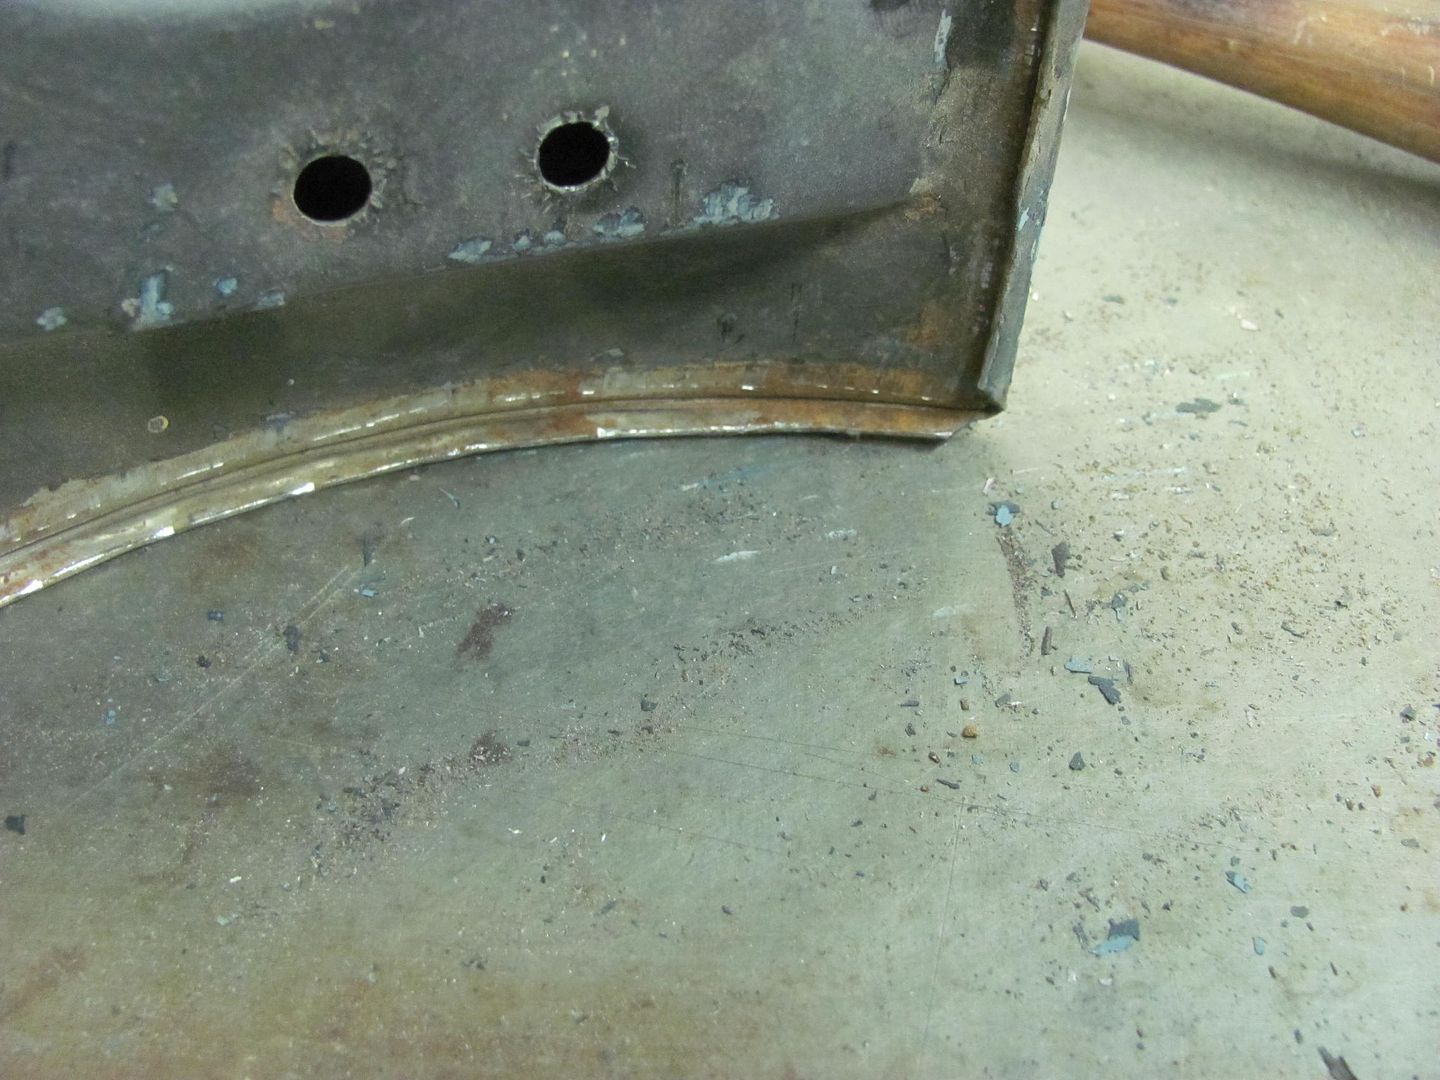 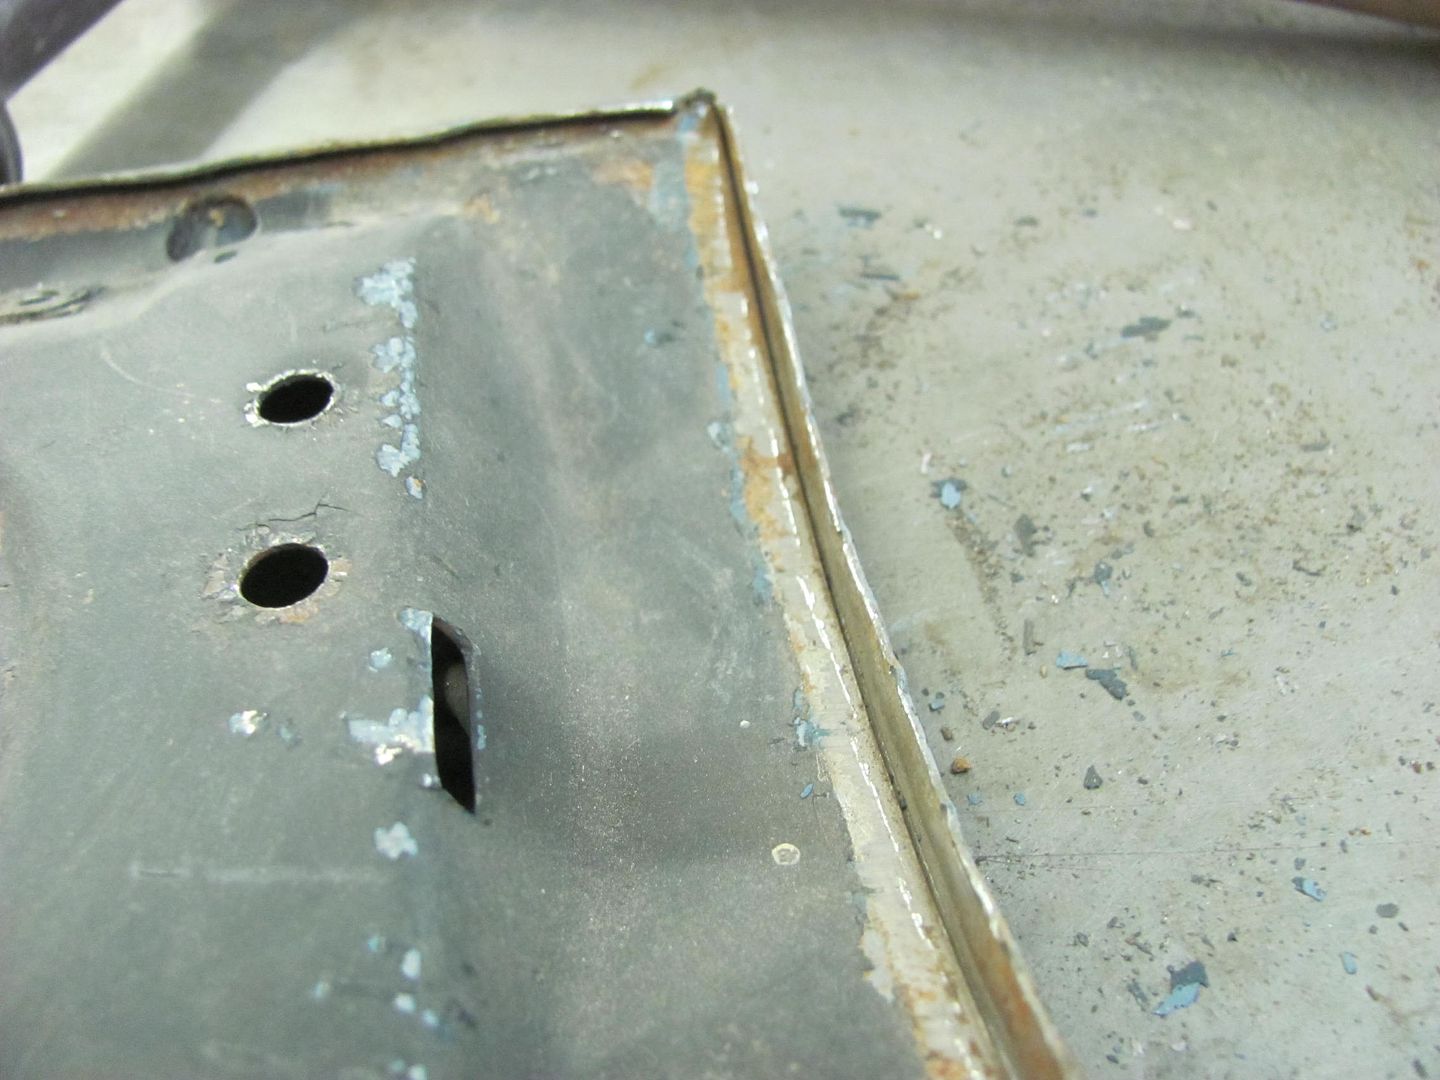 Looks like someone may have kneed the glove box at some point... 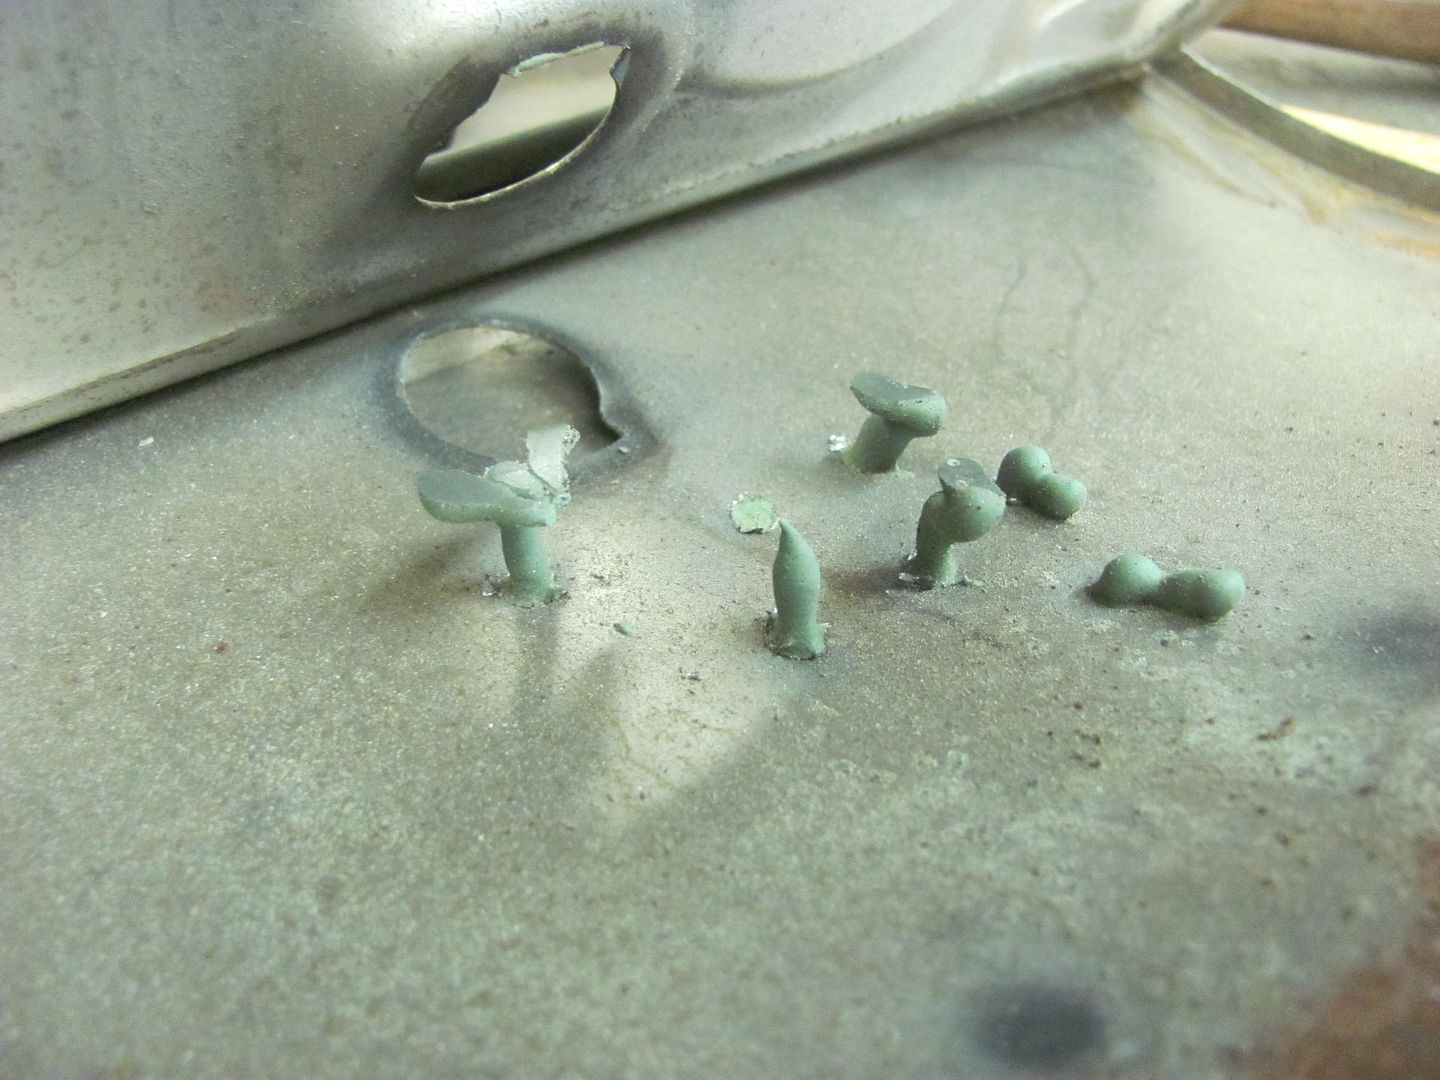 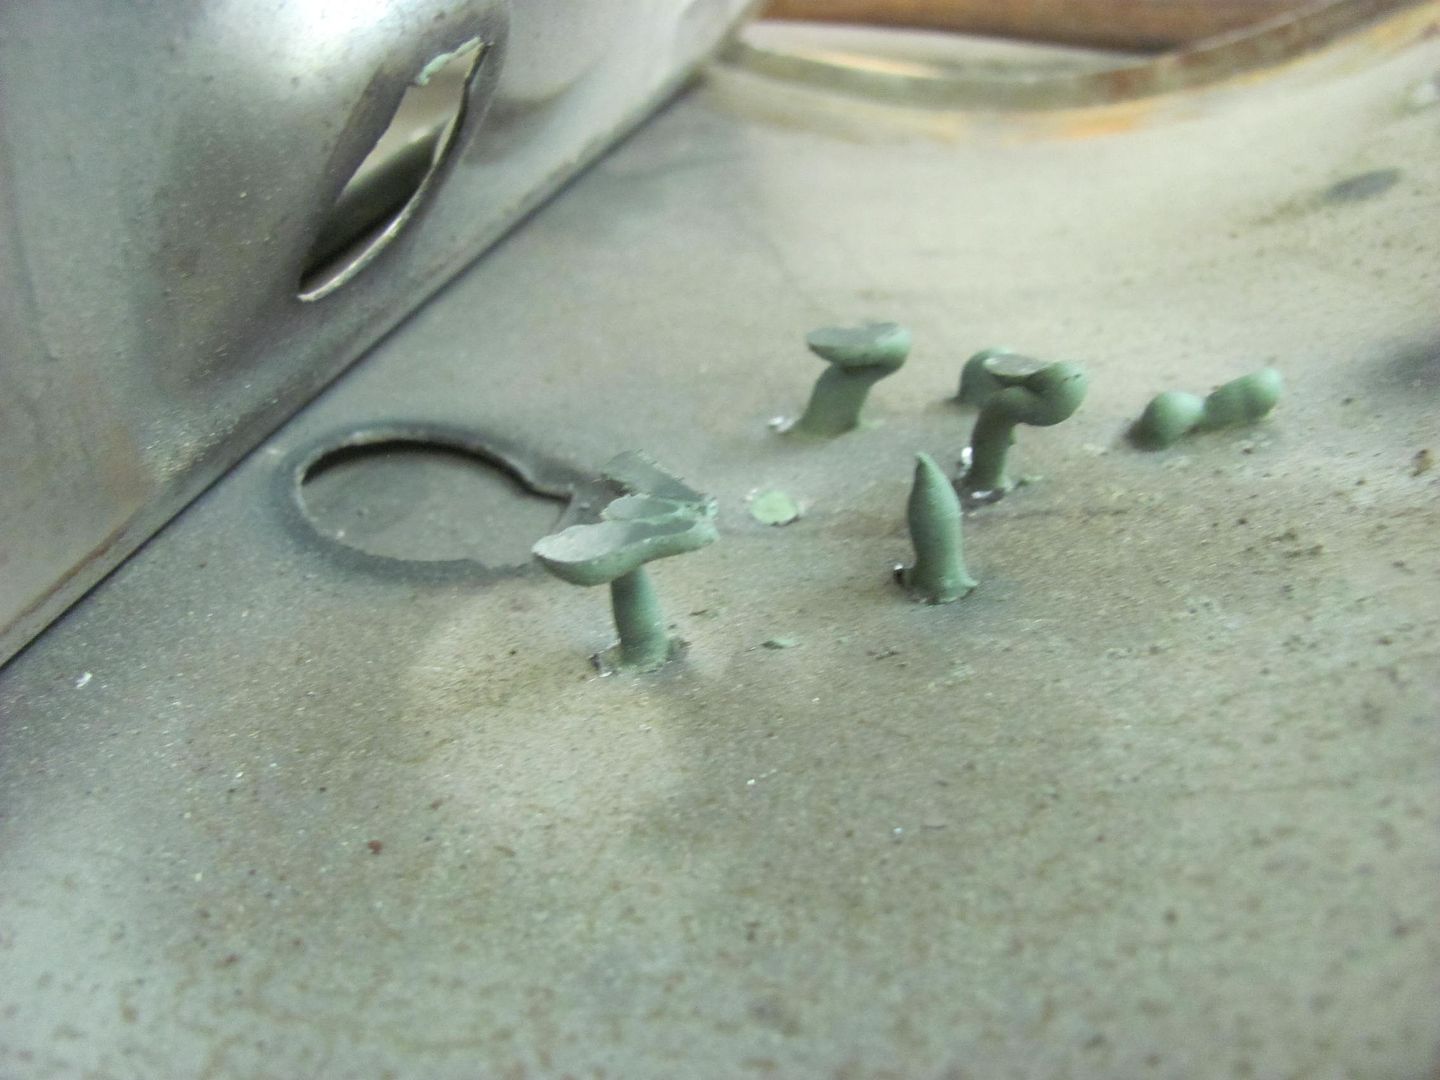 The inside looks real nice for 61 year old metal, still shining! 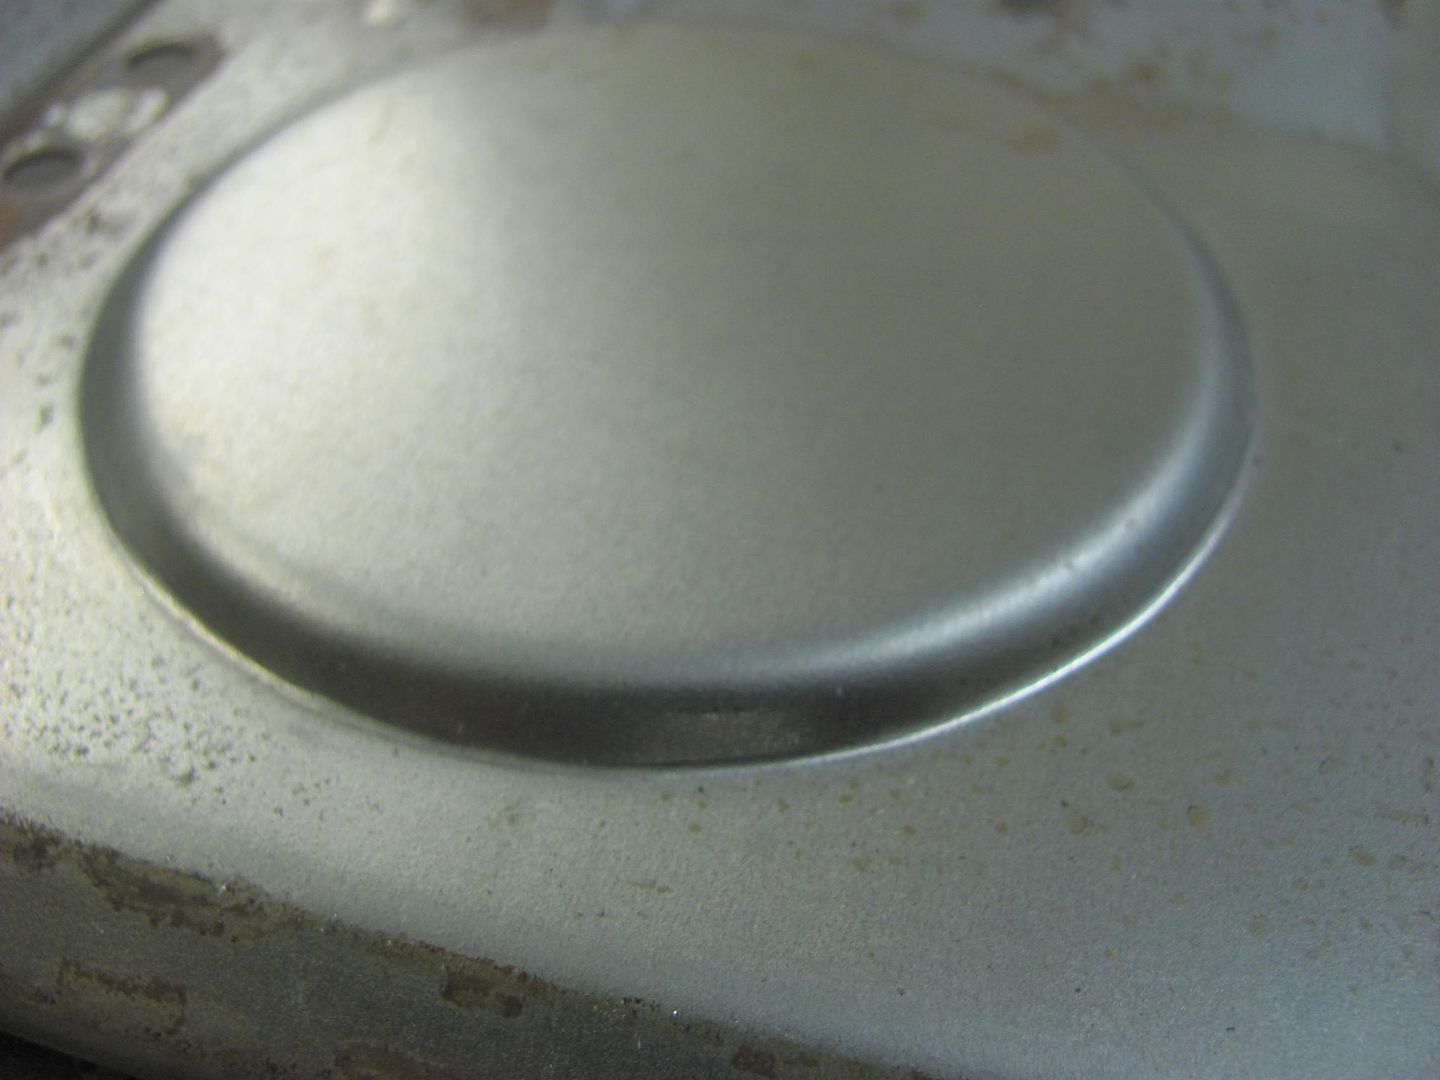 Now time for the post anvil... 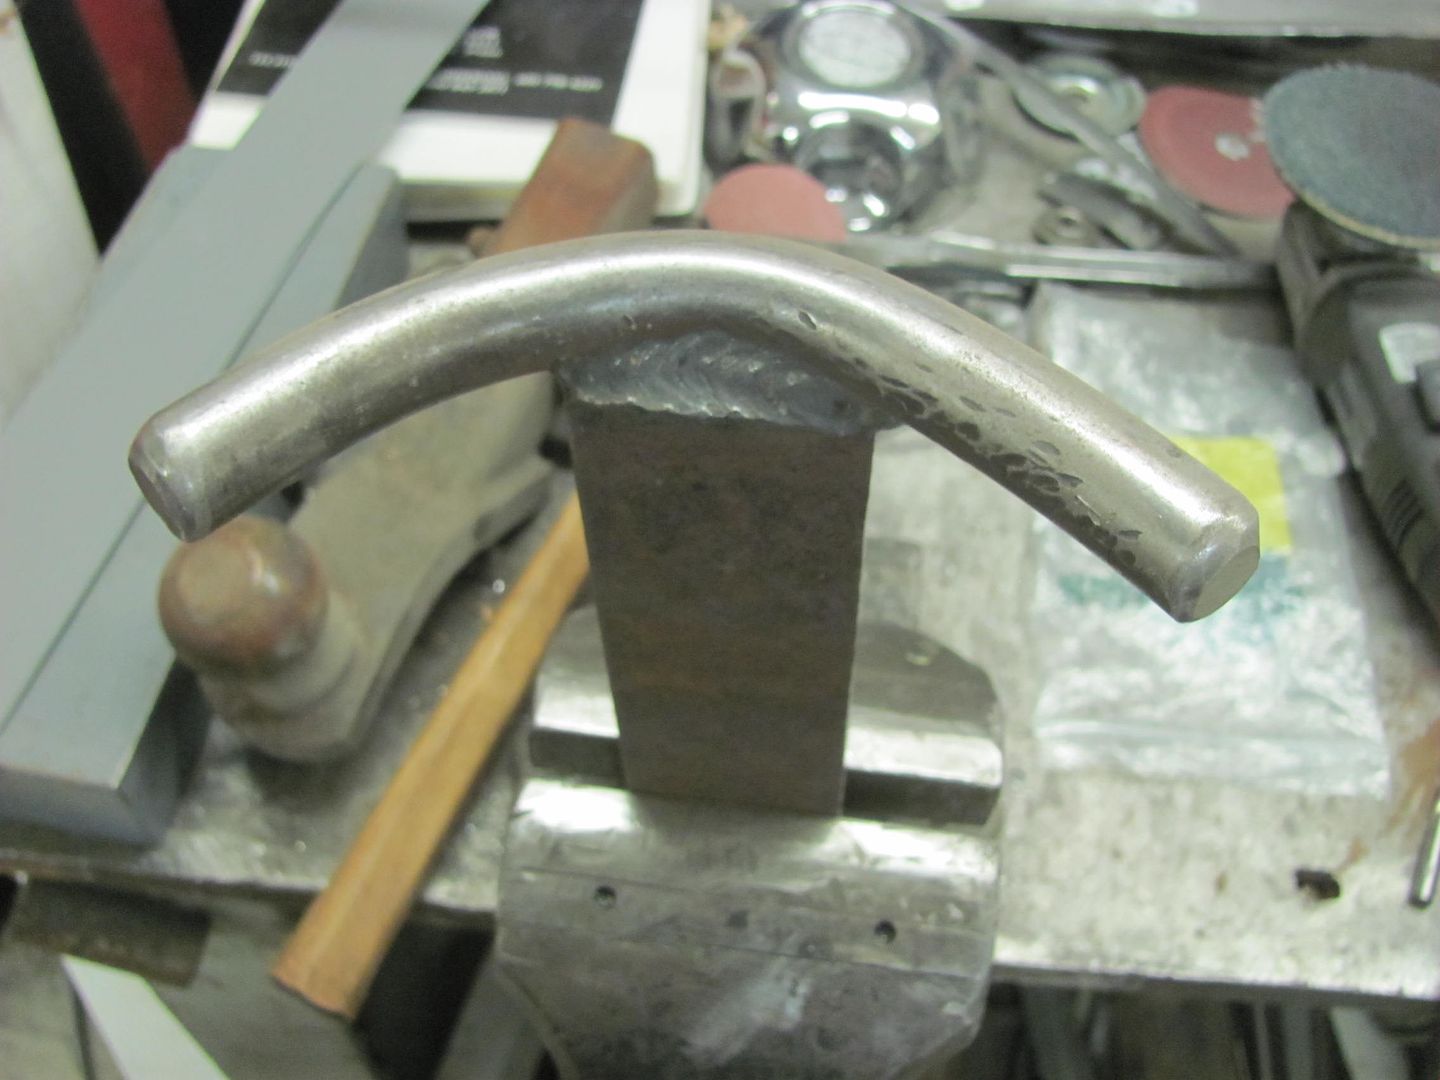 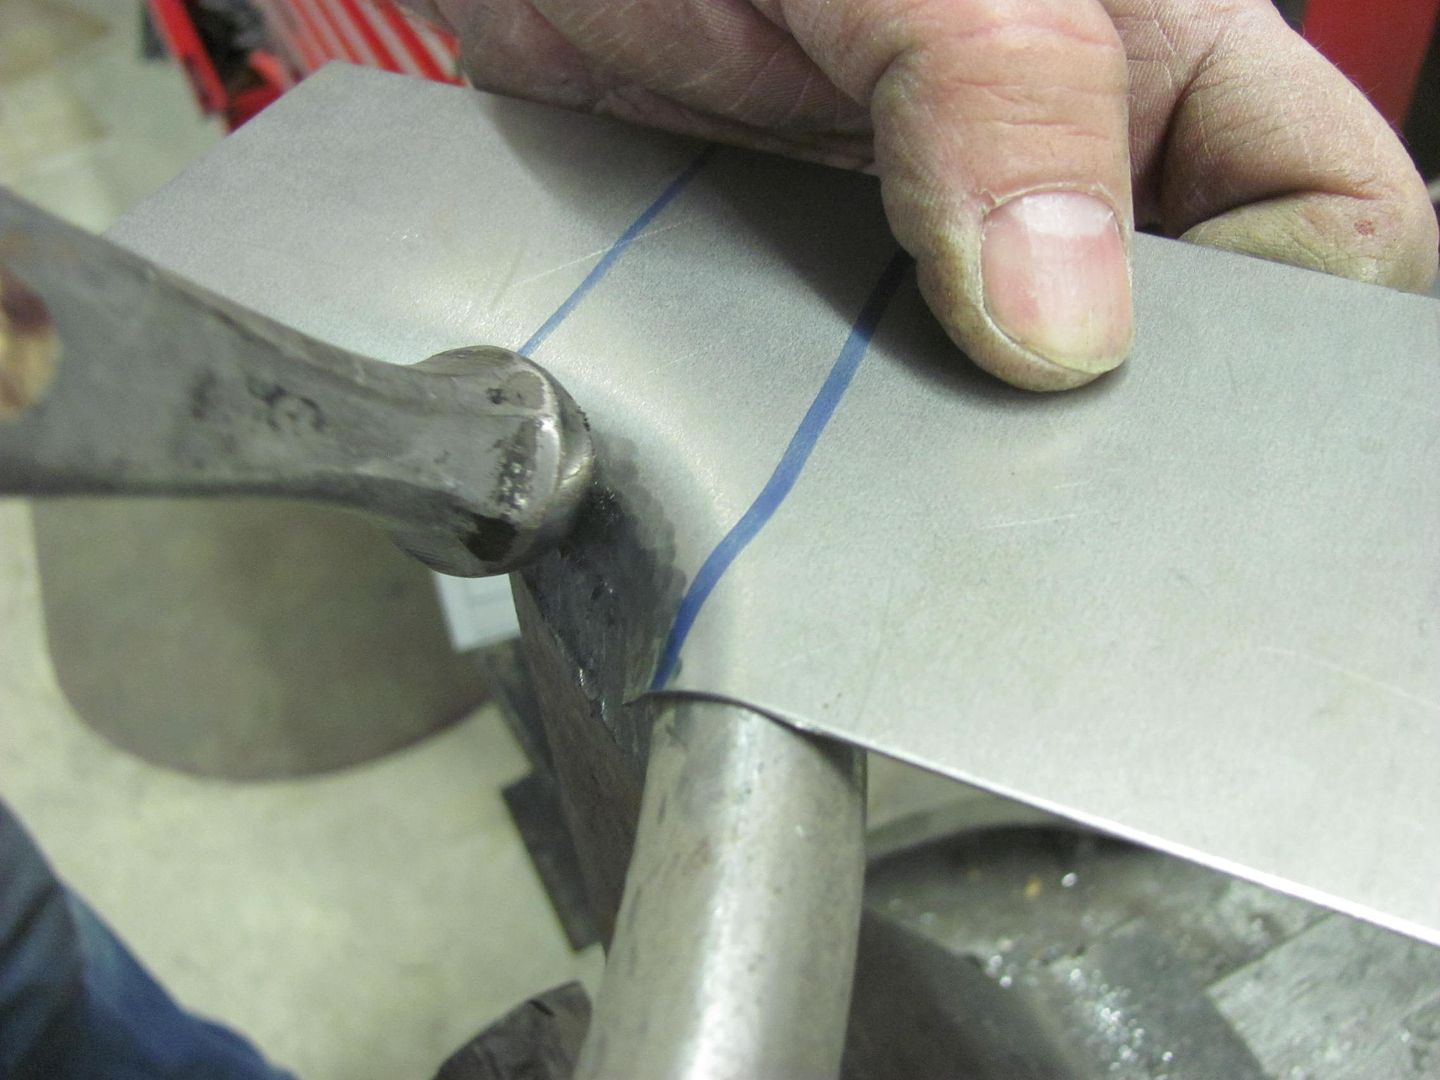 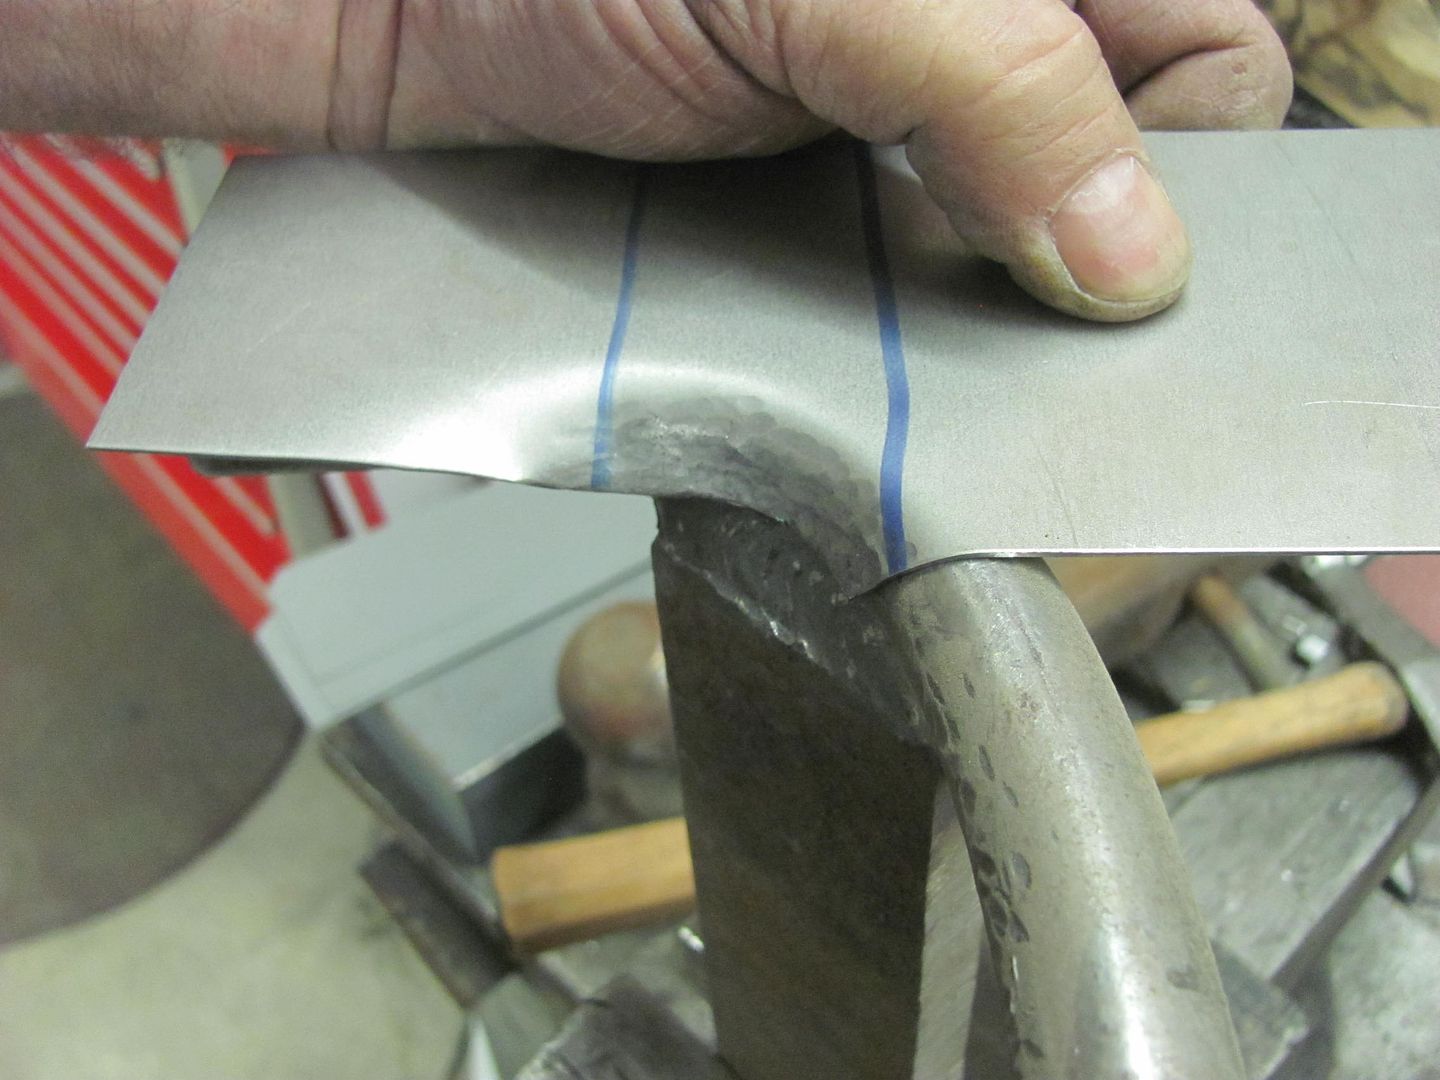 Here's our widening method for the inner door and the outside will get a new skin made up.. 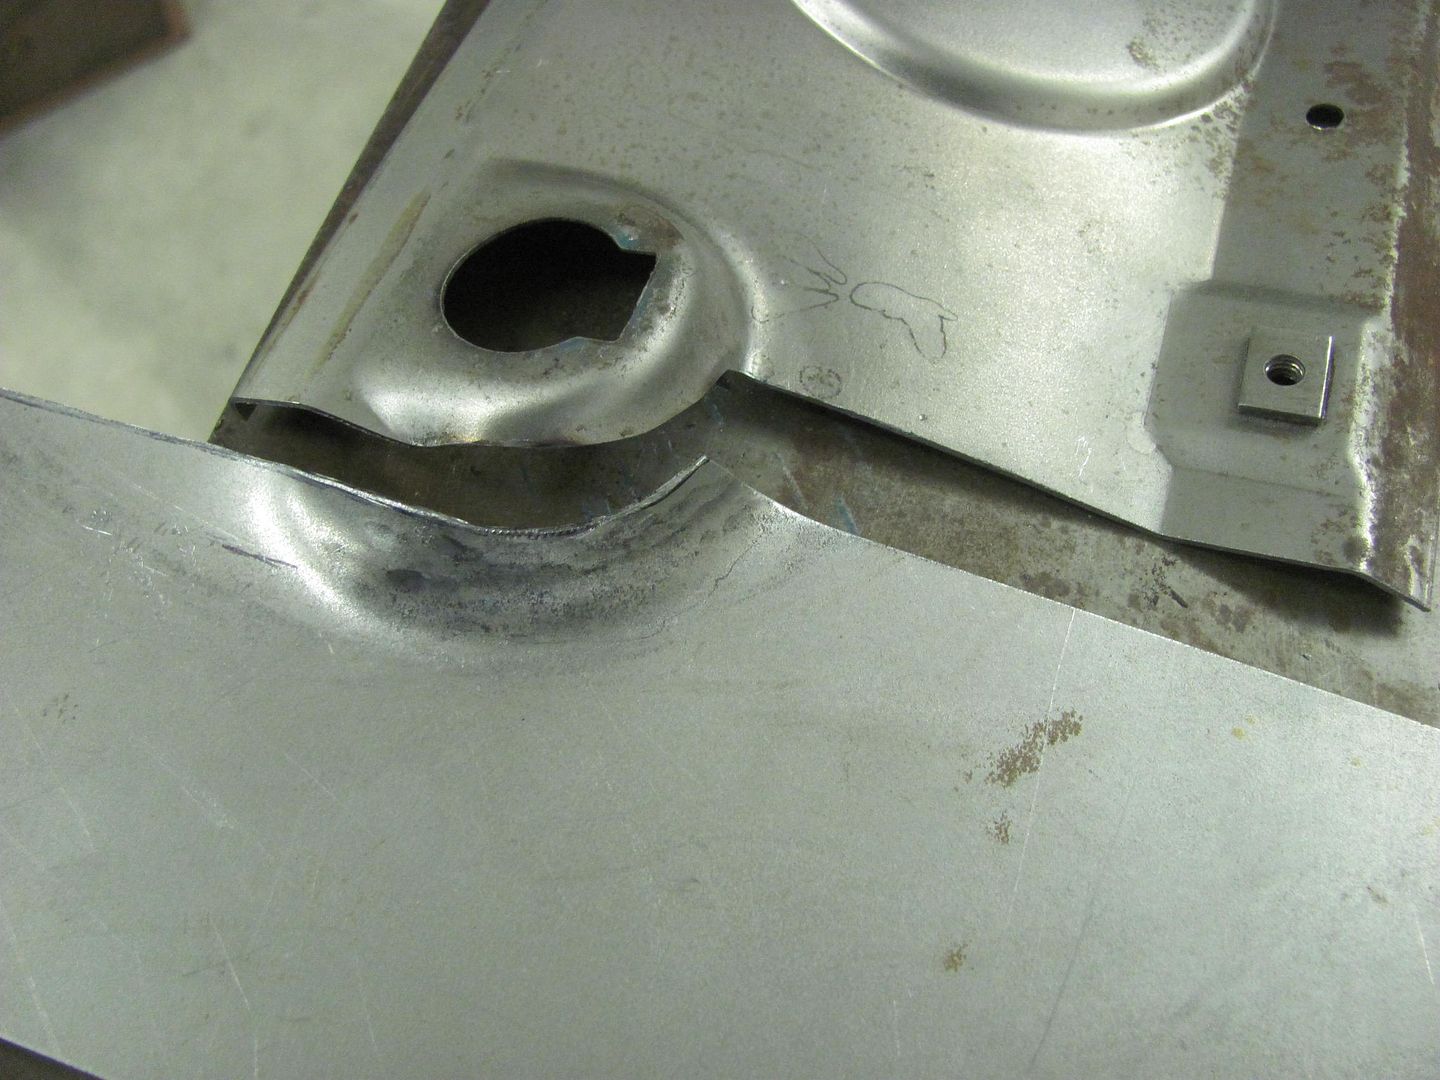 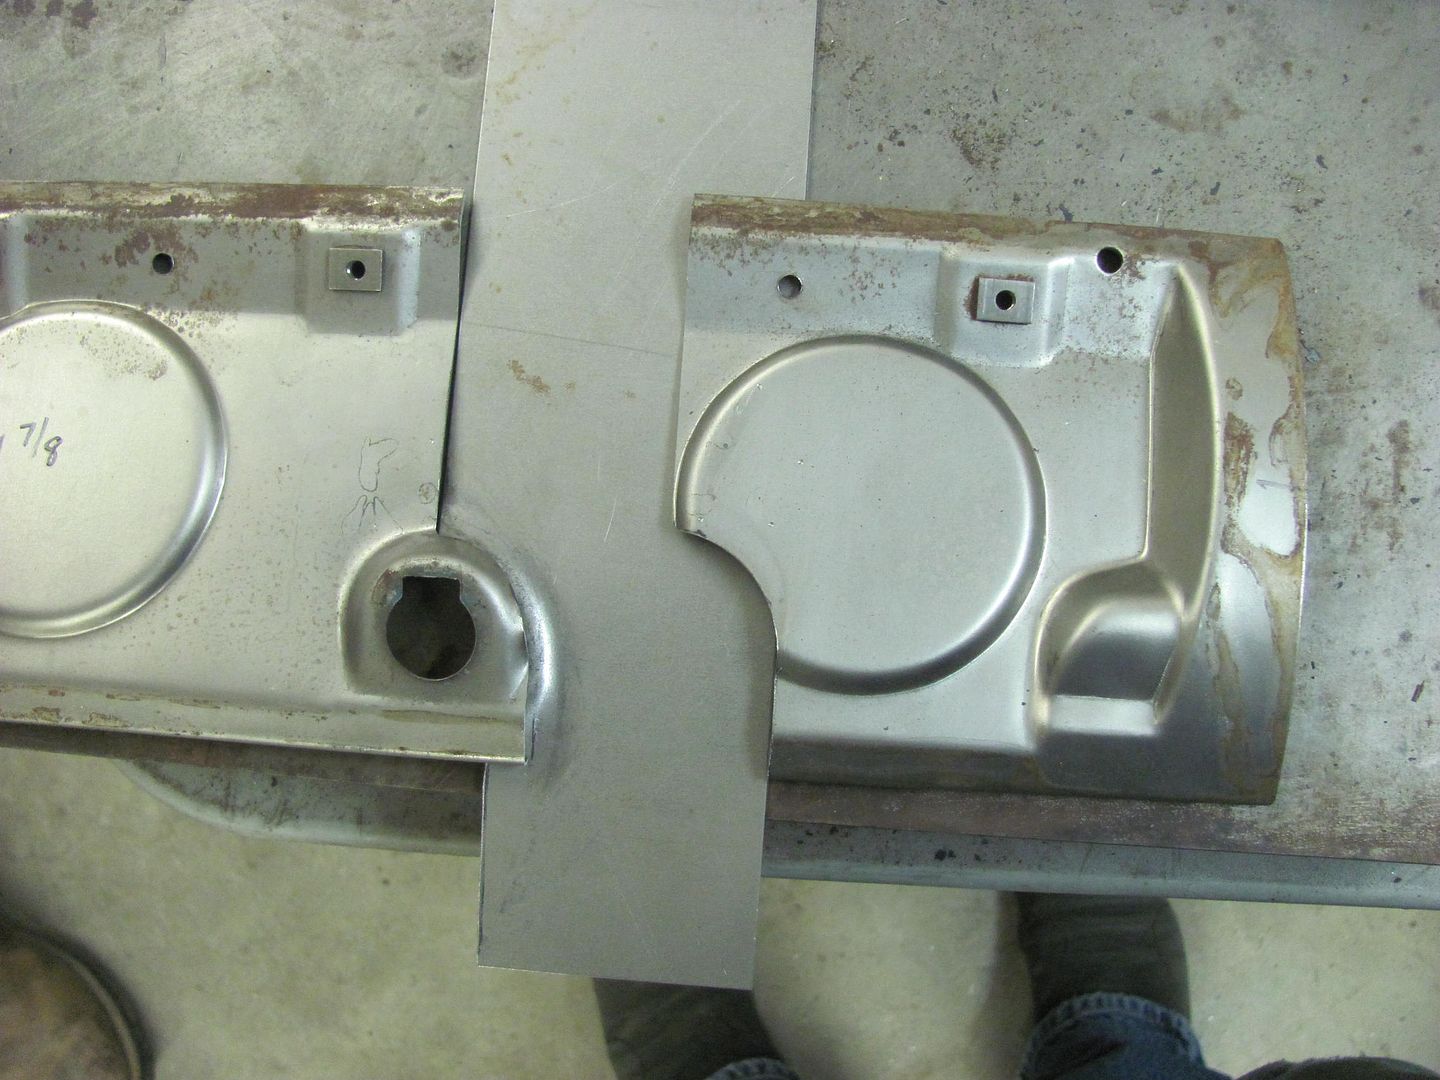
__________________
Robert |
|
|
|
|
03-13-2016, 01:13 AM
|
#15 |
|
Registered User
Join Date: Apr 2011
Location: .
Posts: 3,104
|
Re: 55 Wagon Progress
Sheet metal modification.
Note pad... Check pencil........Check |
|
|
|
|
03-15-2016, 09:57 PM
|
#16 |
|
Registered User
Join Date: Jan 2013
Location: Leonardtown, MD
Posts: 1,640
|
Re: 55 Wagon Progress
Kyle continued on reshaping the opening for the glove box, and I got started in trimming the filler panel for the inner glove box door....
   To try and keep our shape around the lock cylinder symmetrical, we cut out a profile template... 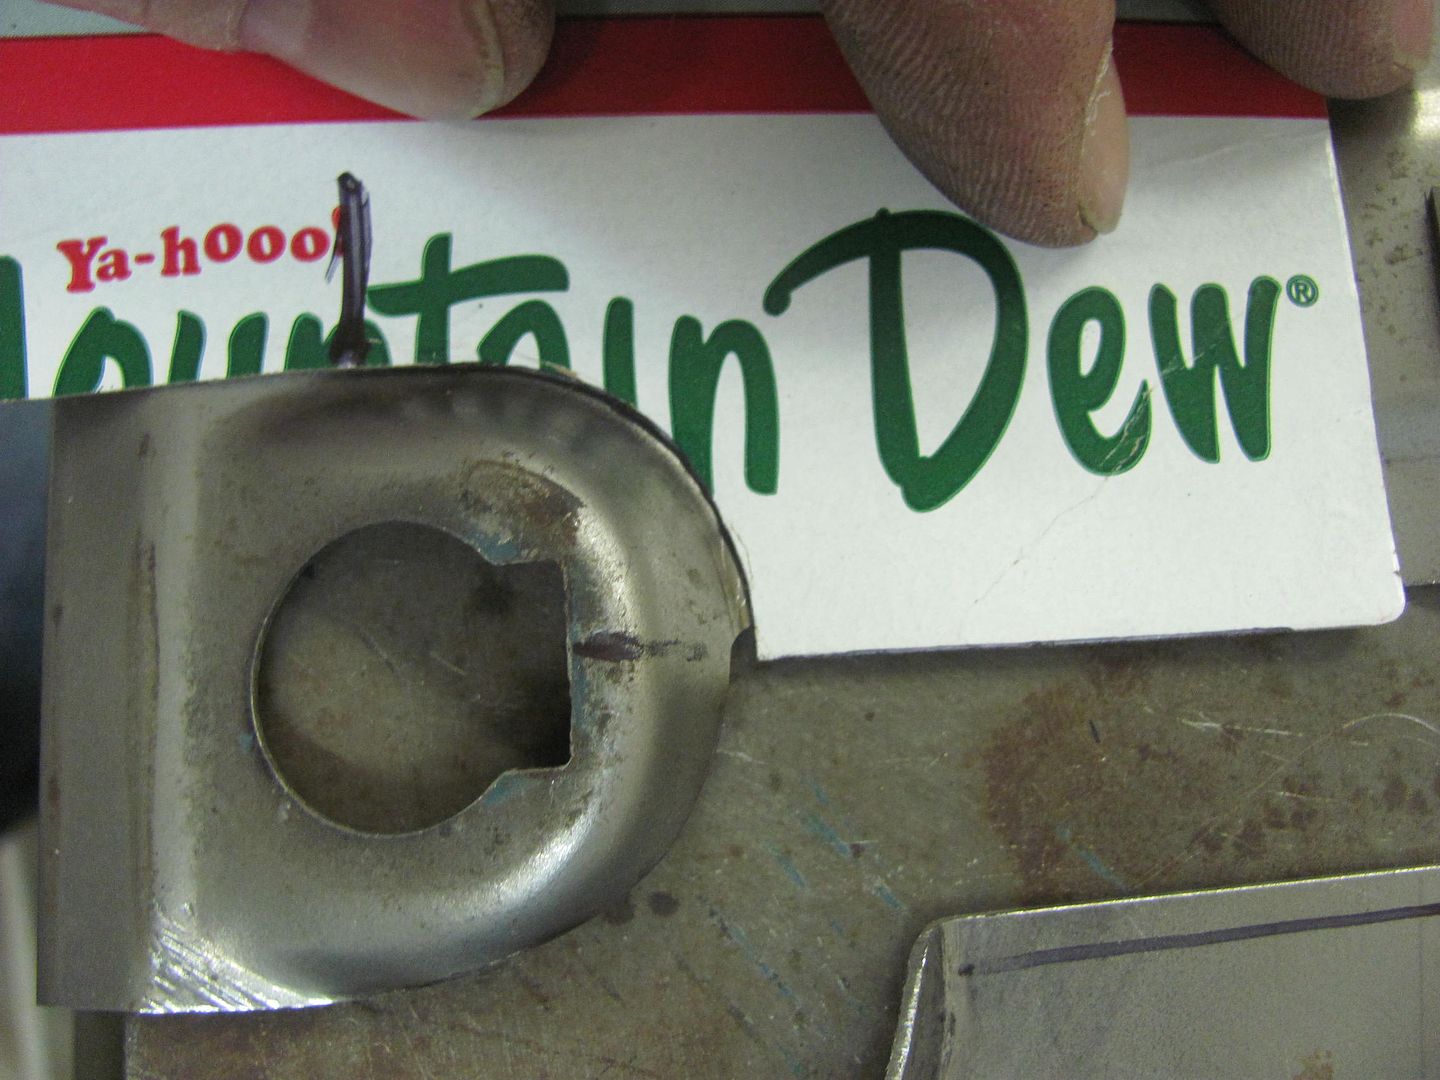 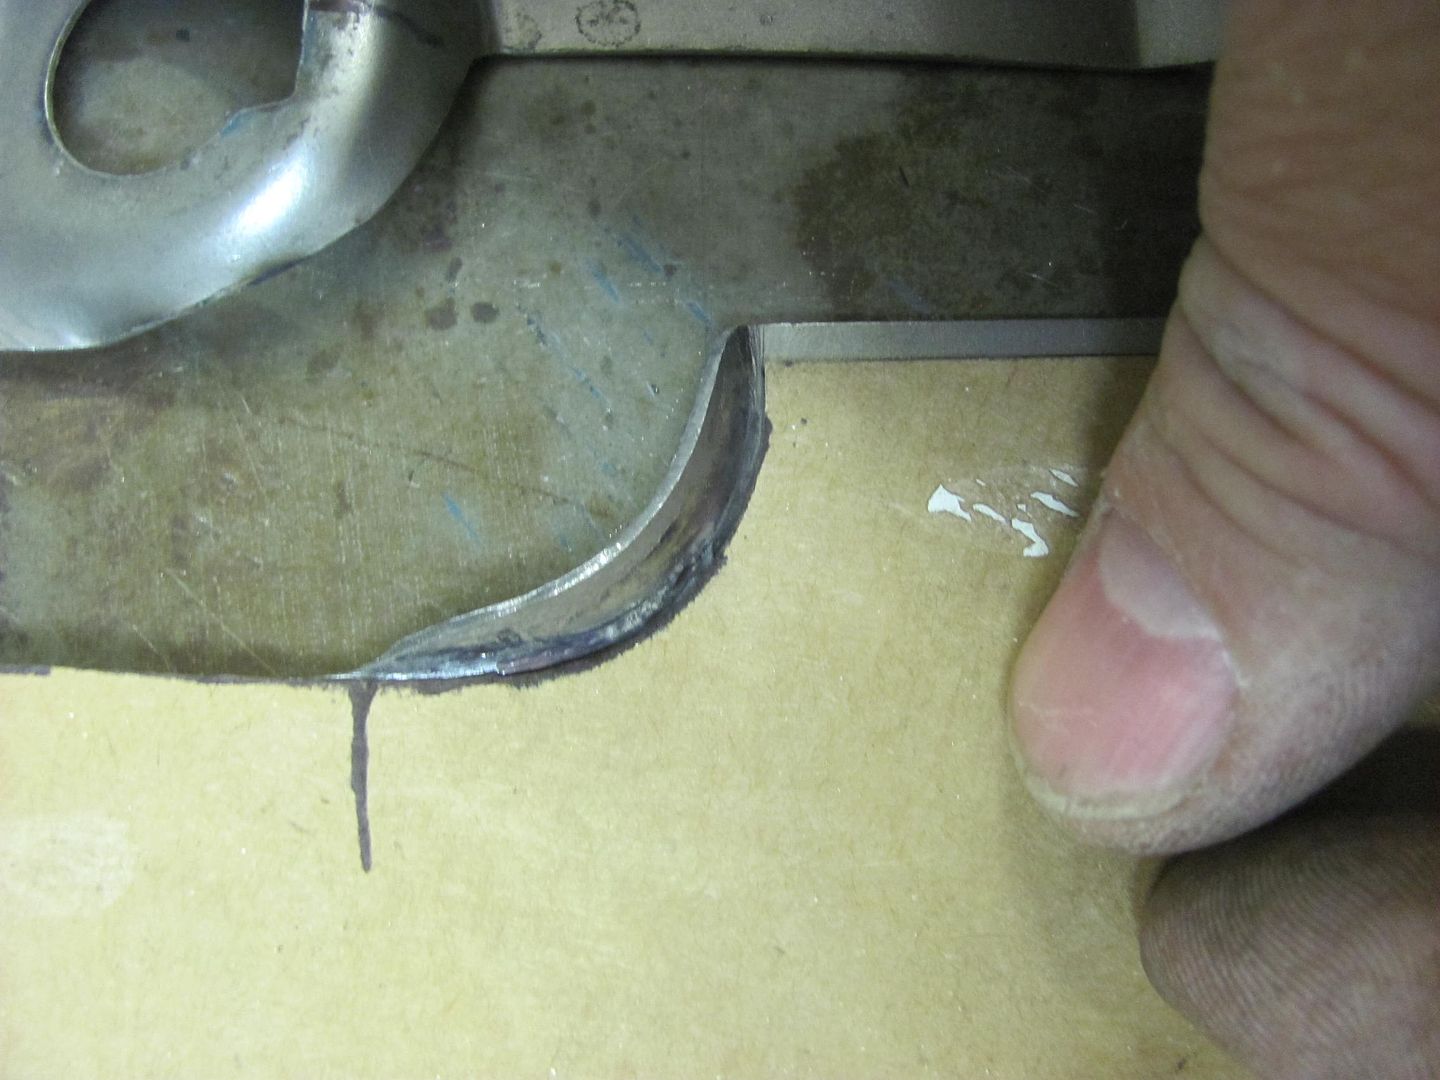 Adding the bends.... 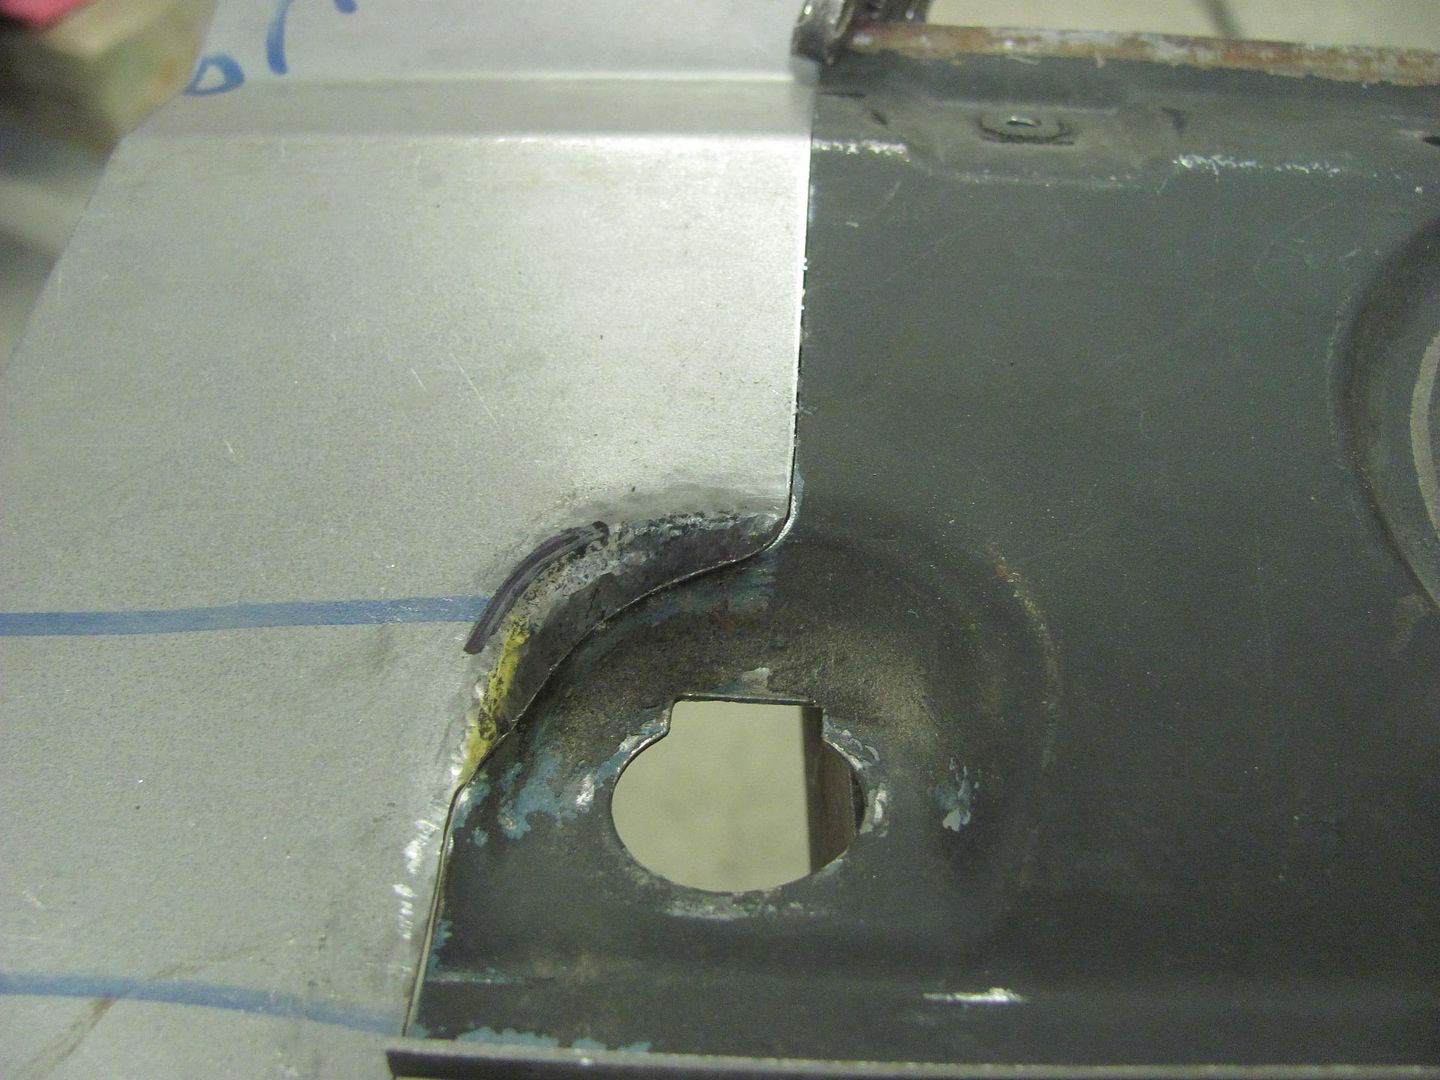 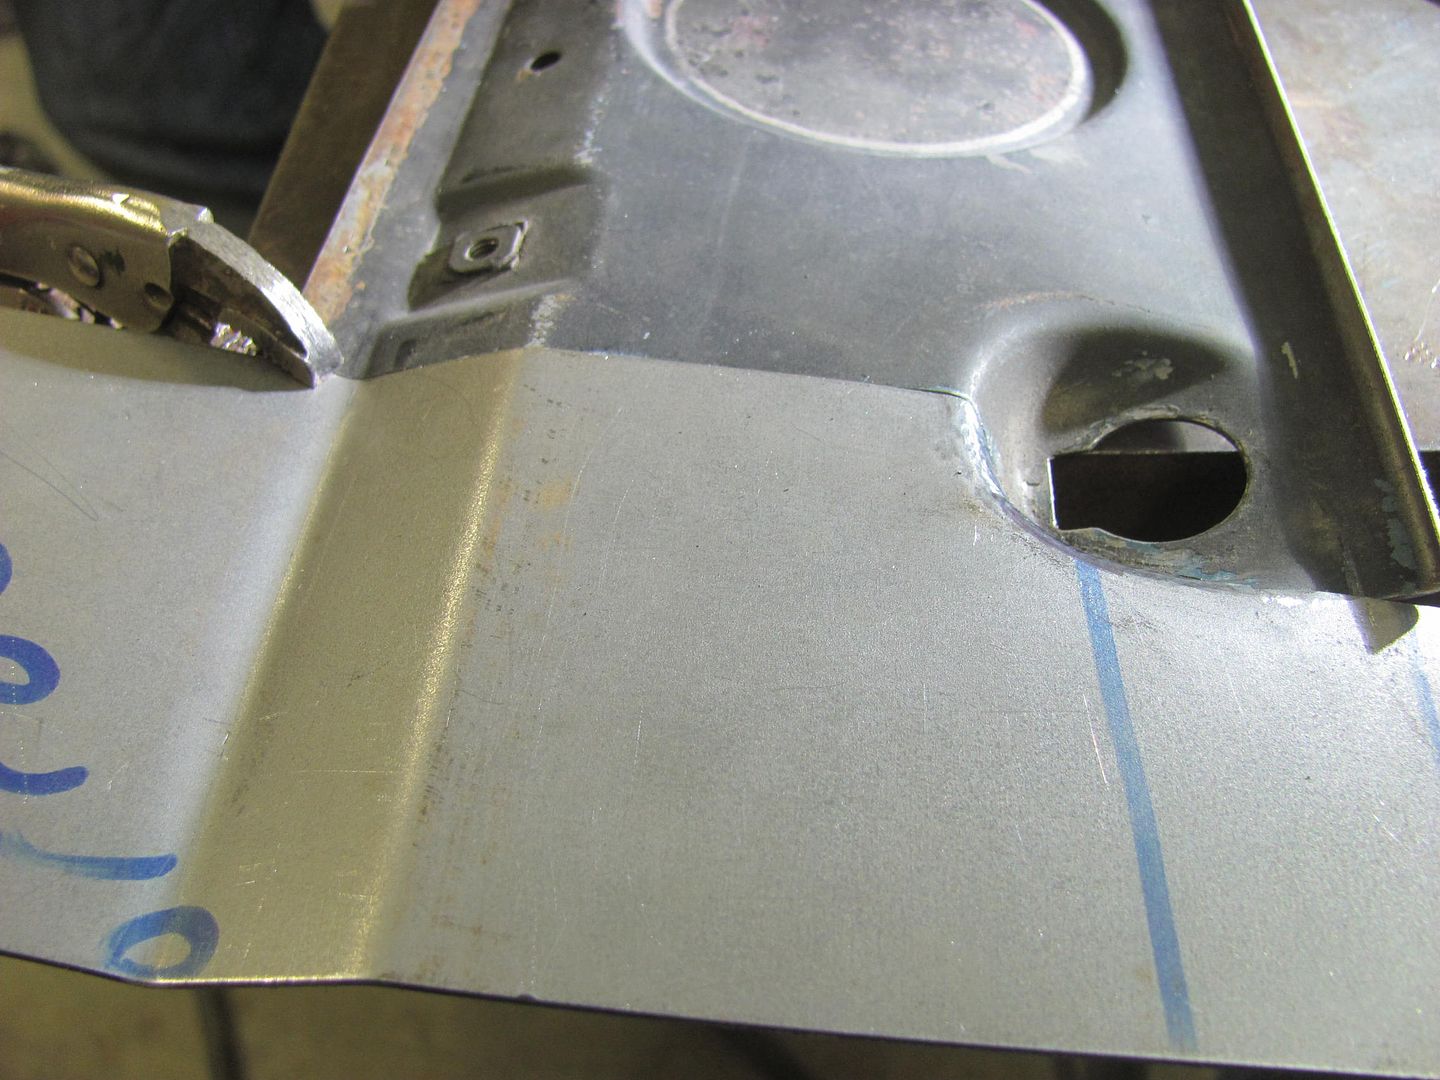 Looking for a proper sized circle pattern, Mickey Thompson comes through... 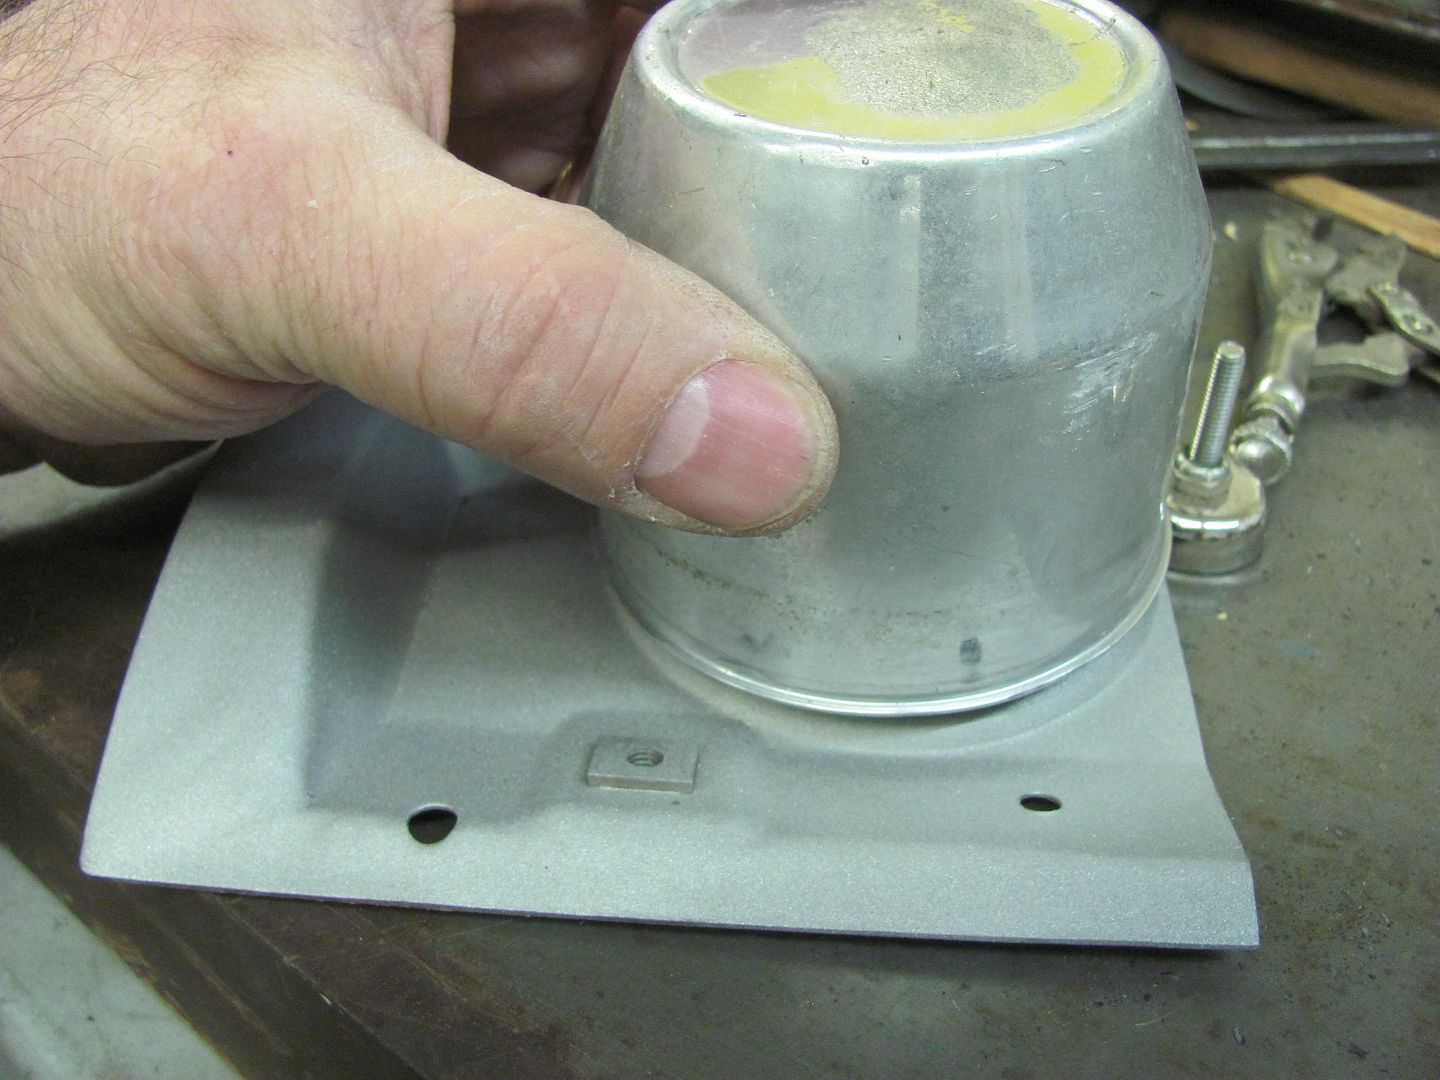 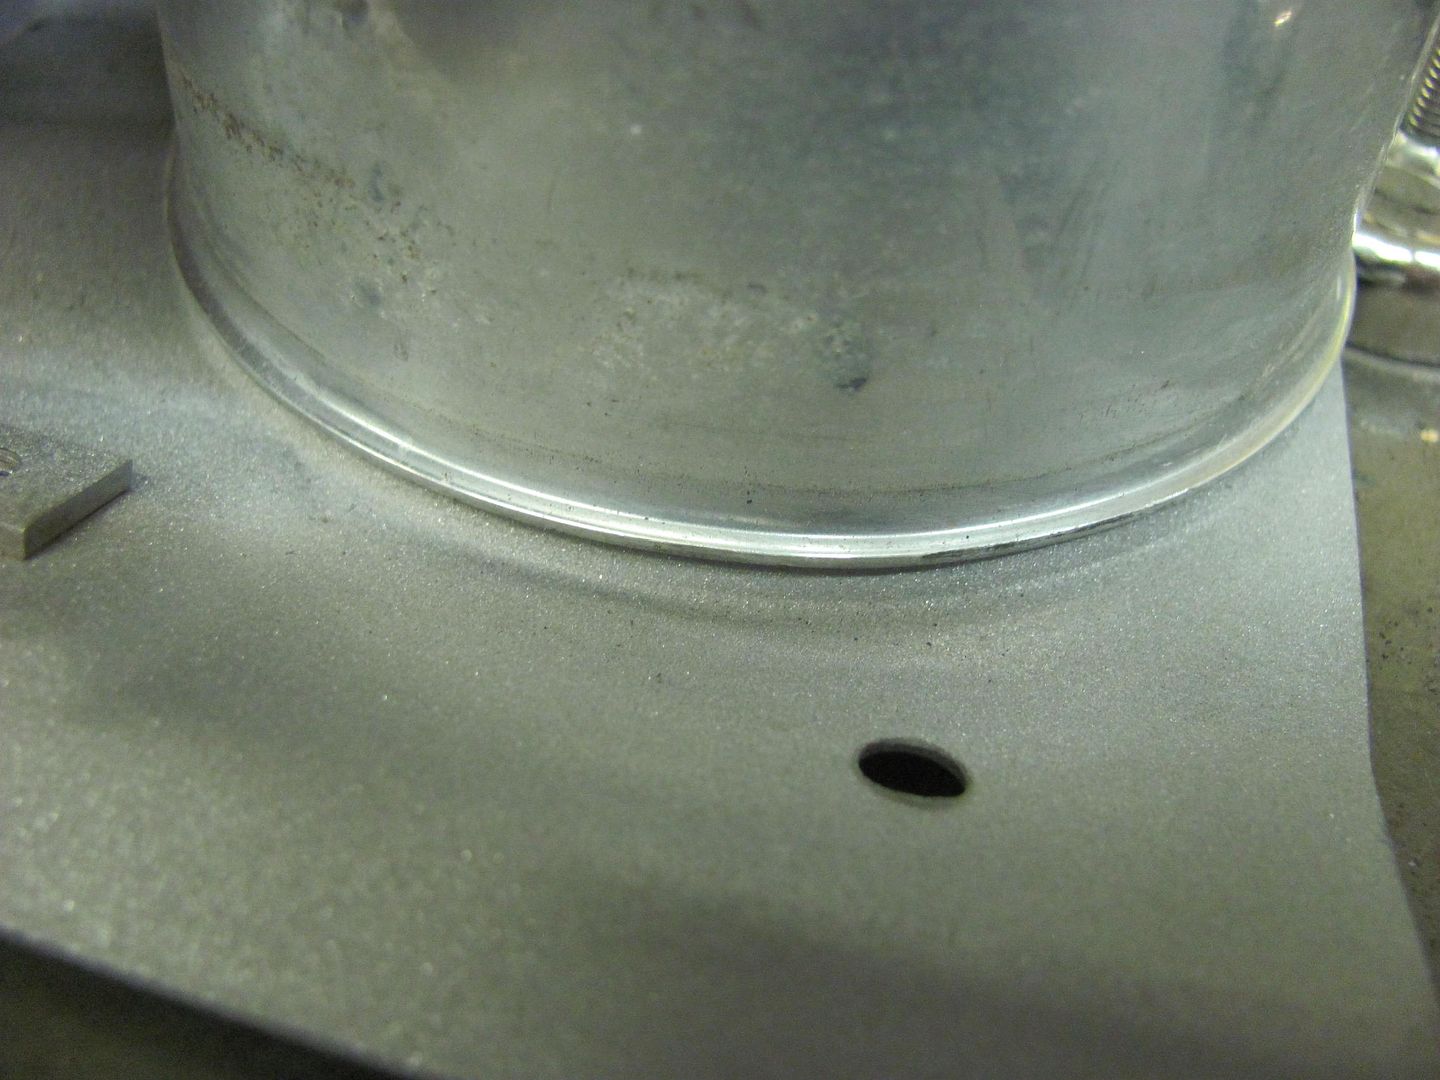 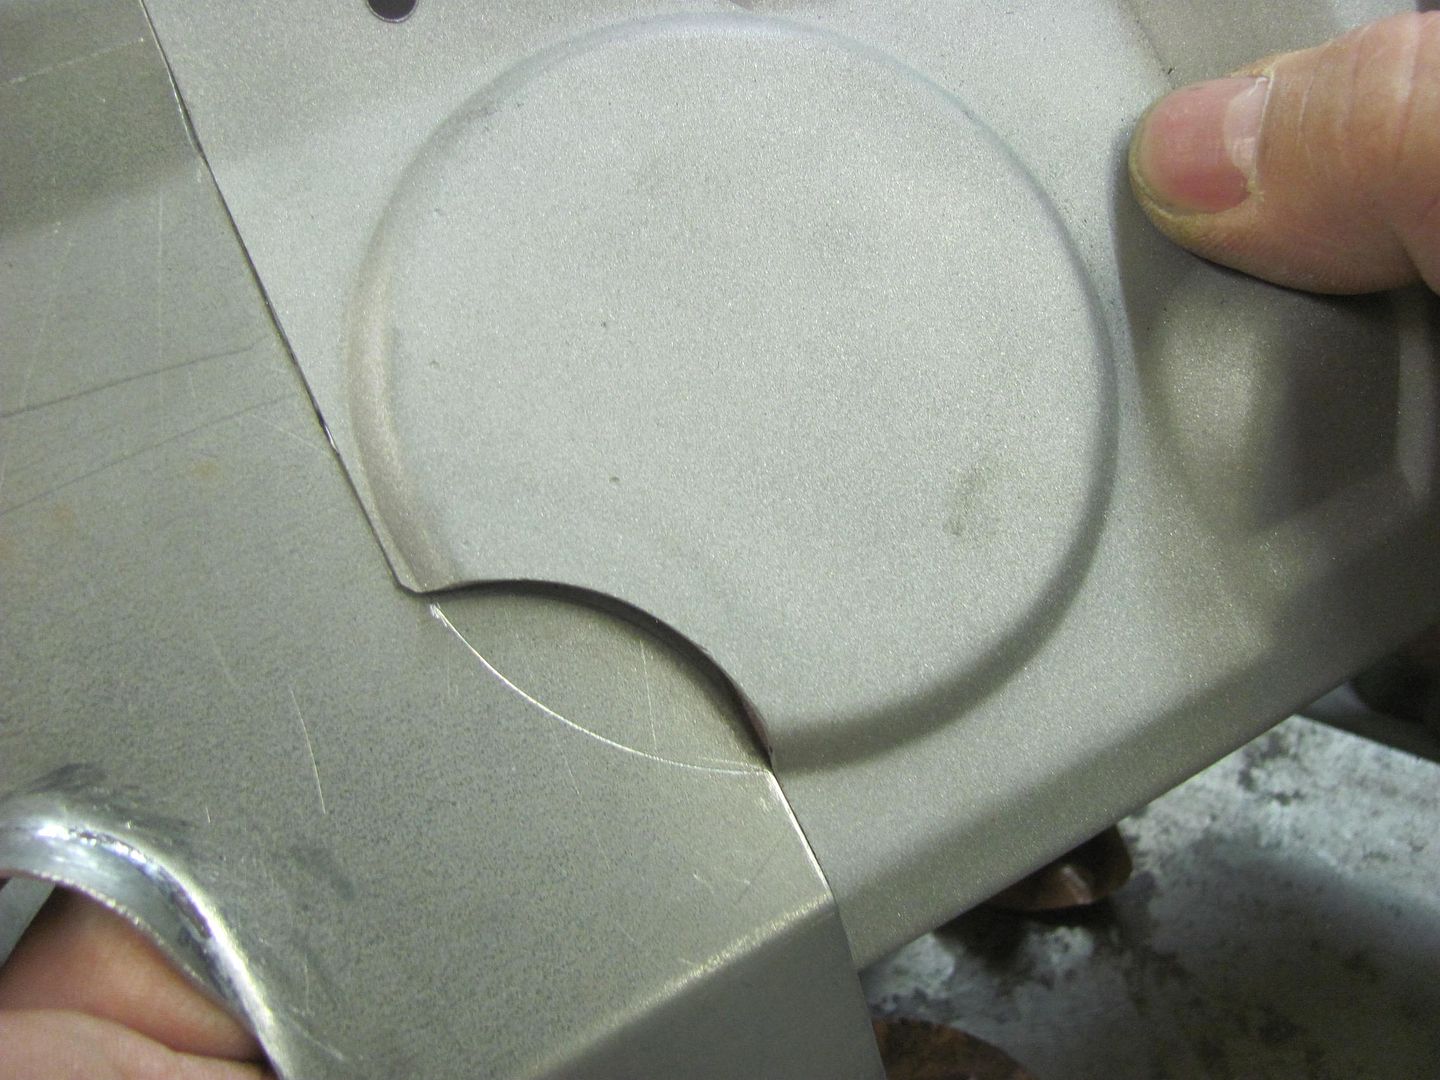 Some bead roller action... 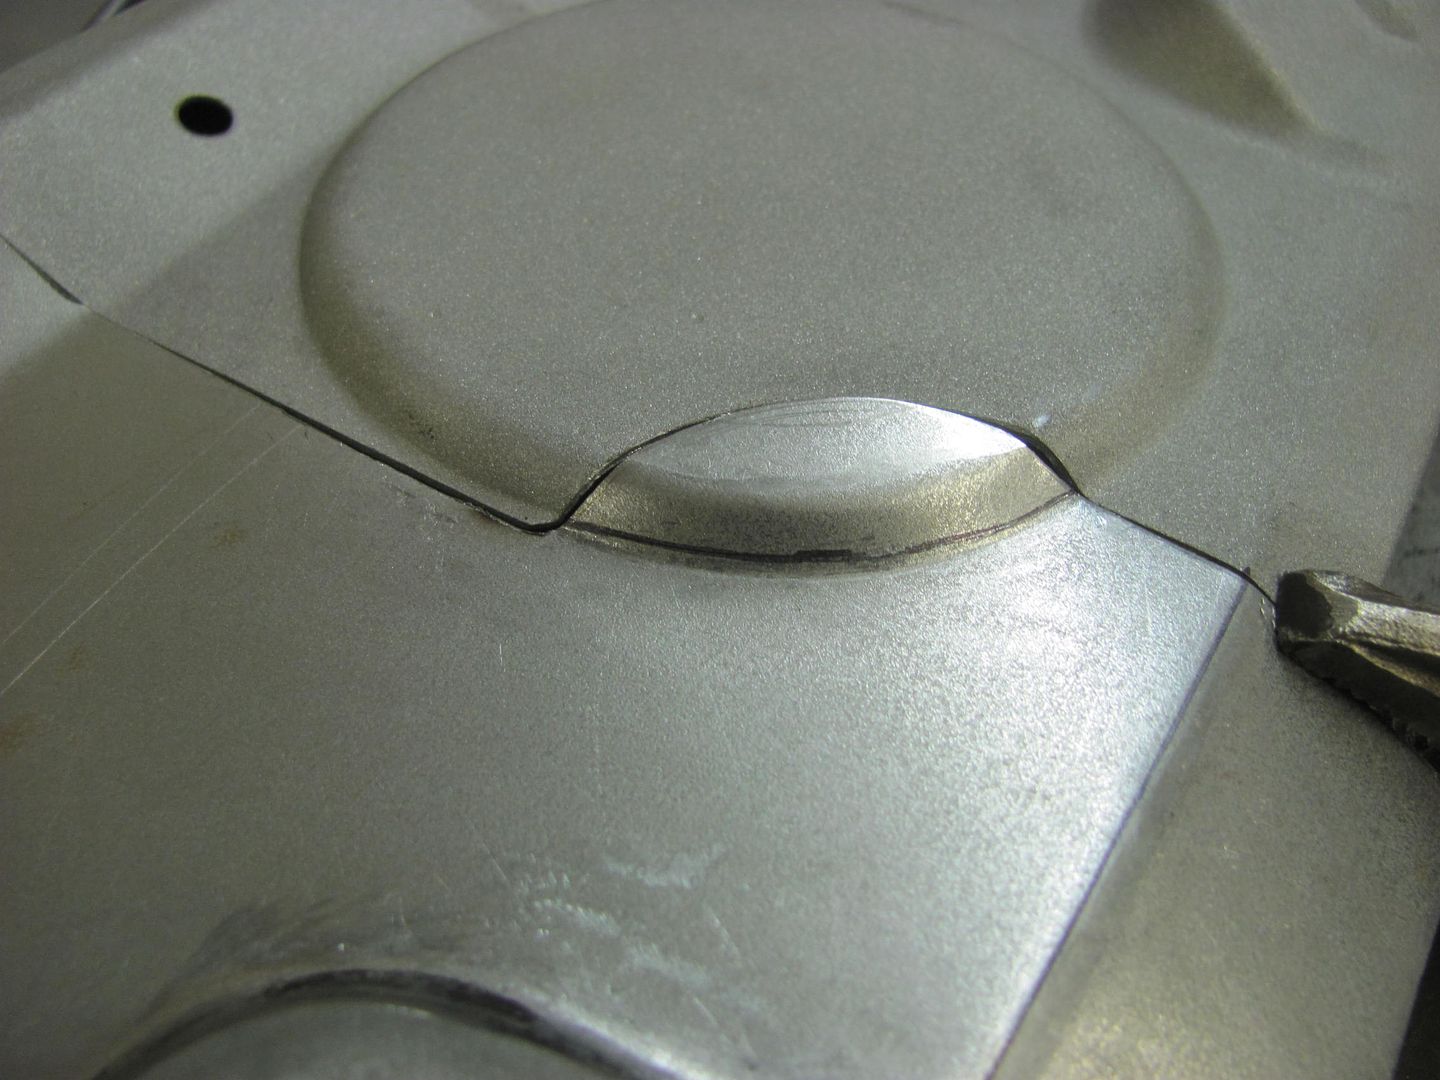 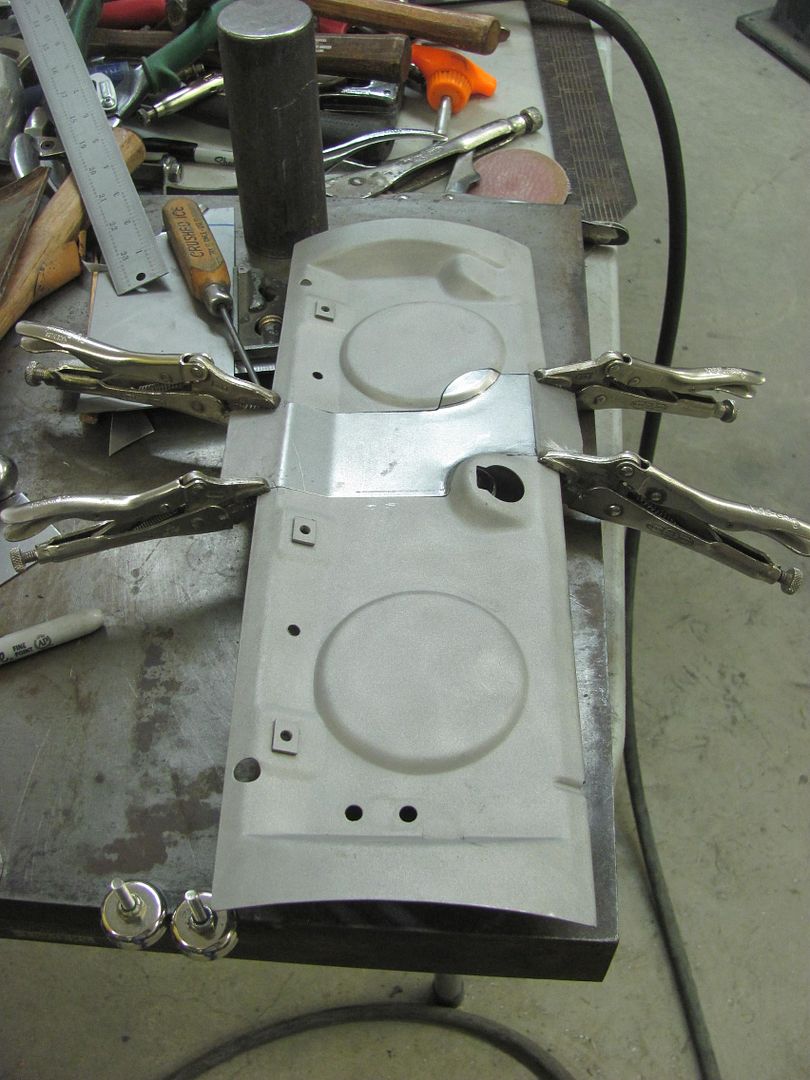 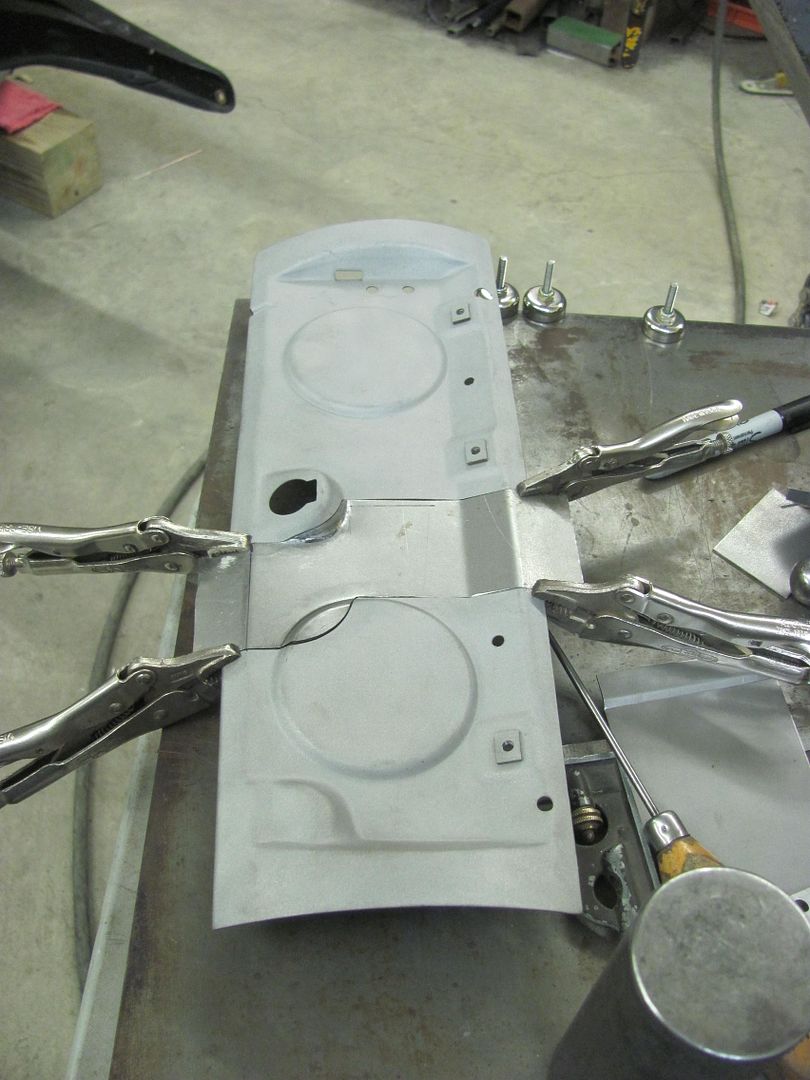 Some TIG welding, we'll finish this up next time.. 
__________________
Robert Last edited by MP&C; 03-15-2016 at 10:03 PM. |
|
|
|
|
03-16-2016, 08:50 PM
|
#17 |
|
Senior Member
Join Date: Jul 2012
Location: Oblong, Illinois
Posts: 7,028
|
Re: 55 Wagon Progress
Impressive attention to detail.
|
|
|
|
|
03-16-2016, 10:52 PM
|
#18 |
|
Registered User
Join Date: Jan 2013
Location: Leonardtown, MD
Posts: 1,640
|
Re: 55 Wagon Progress
Thanks Doug!
Spent some time in the shop tonight finishing the other weld but I was on a roll and forgot the in process pics.. Have to get a new photographer, this one just isn't working out.. 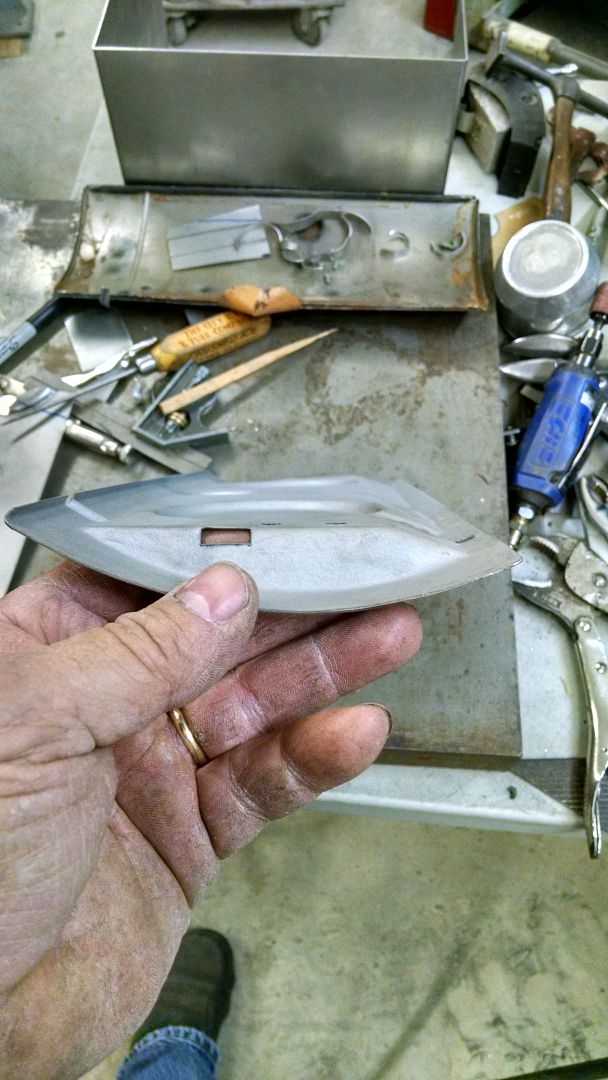 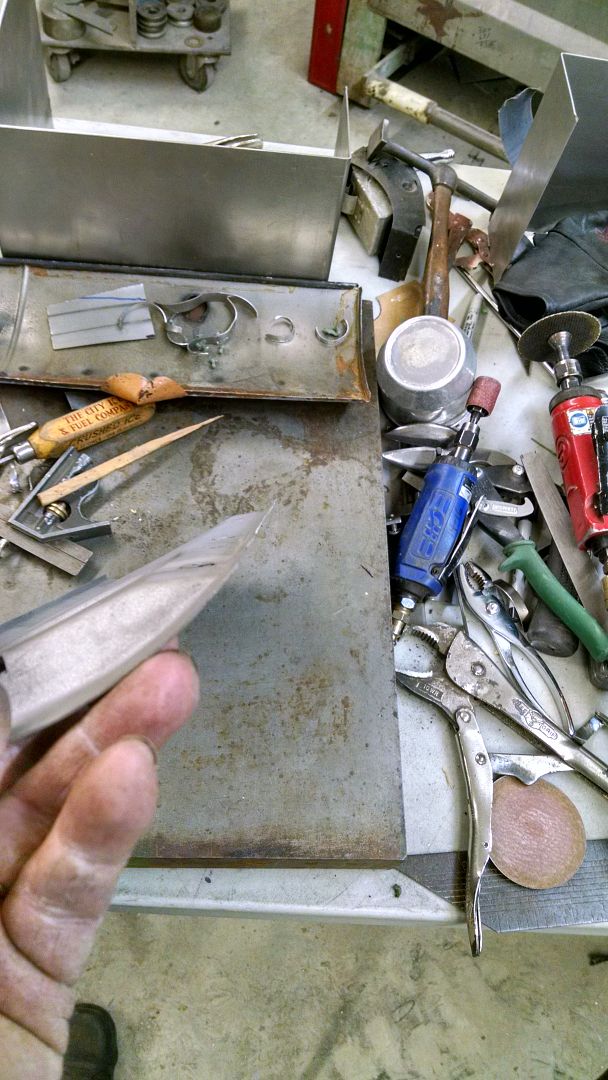 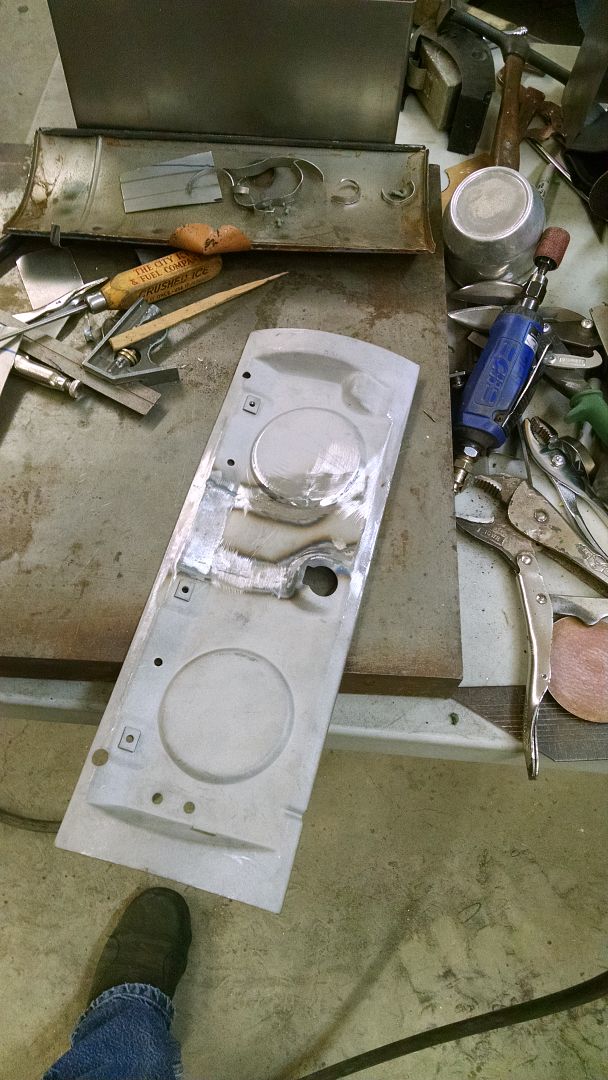 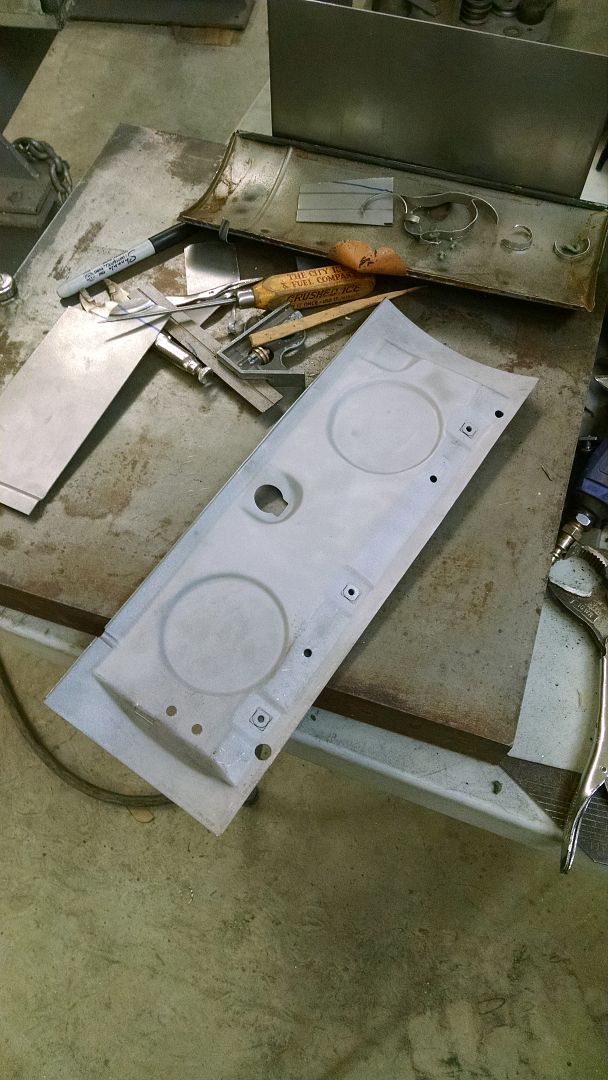 Or the motion picture... https://youtu.be/SD4j6tJwh7w The new Tommasini Wheeling machine is on it's way north from Rock Hill SC, we'll be picking it up this weekend. Once it's set up we can whip out the new glove box door skin.. 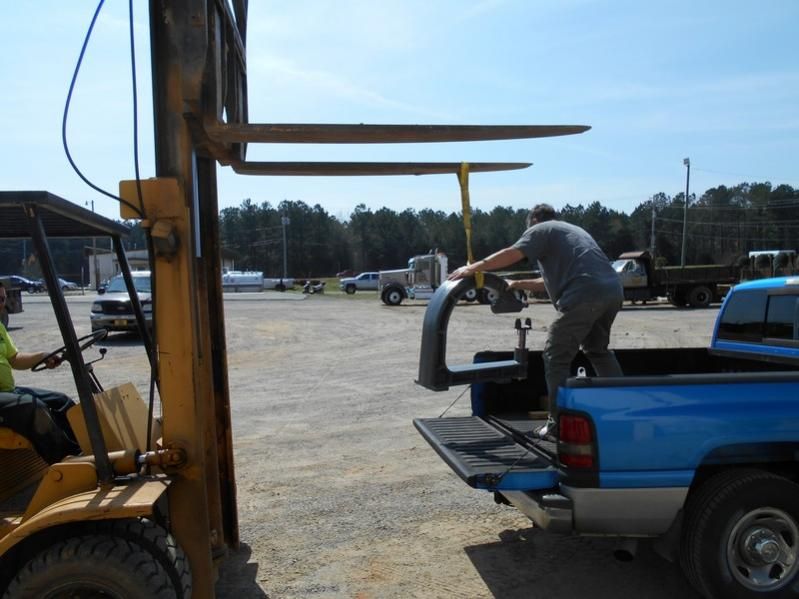
__________________
Robert |
|
|
|
|
03-17-2016, 10:19 PM
|
#19 |
|
Registered User
Join Date: Jan 2013
Location: Leonardtown, MD
Posts: 1,640
|
Re: 55 Wagon Progress
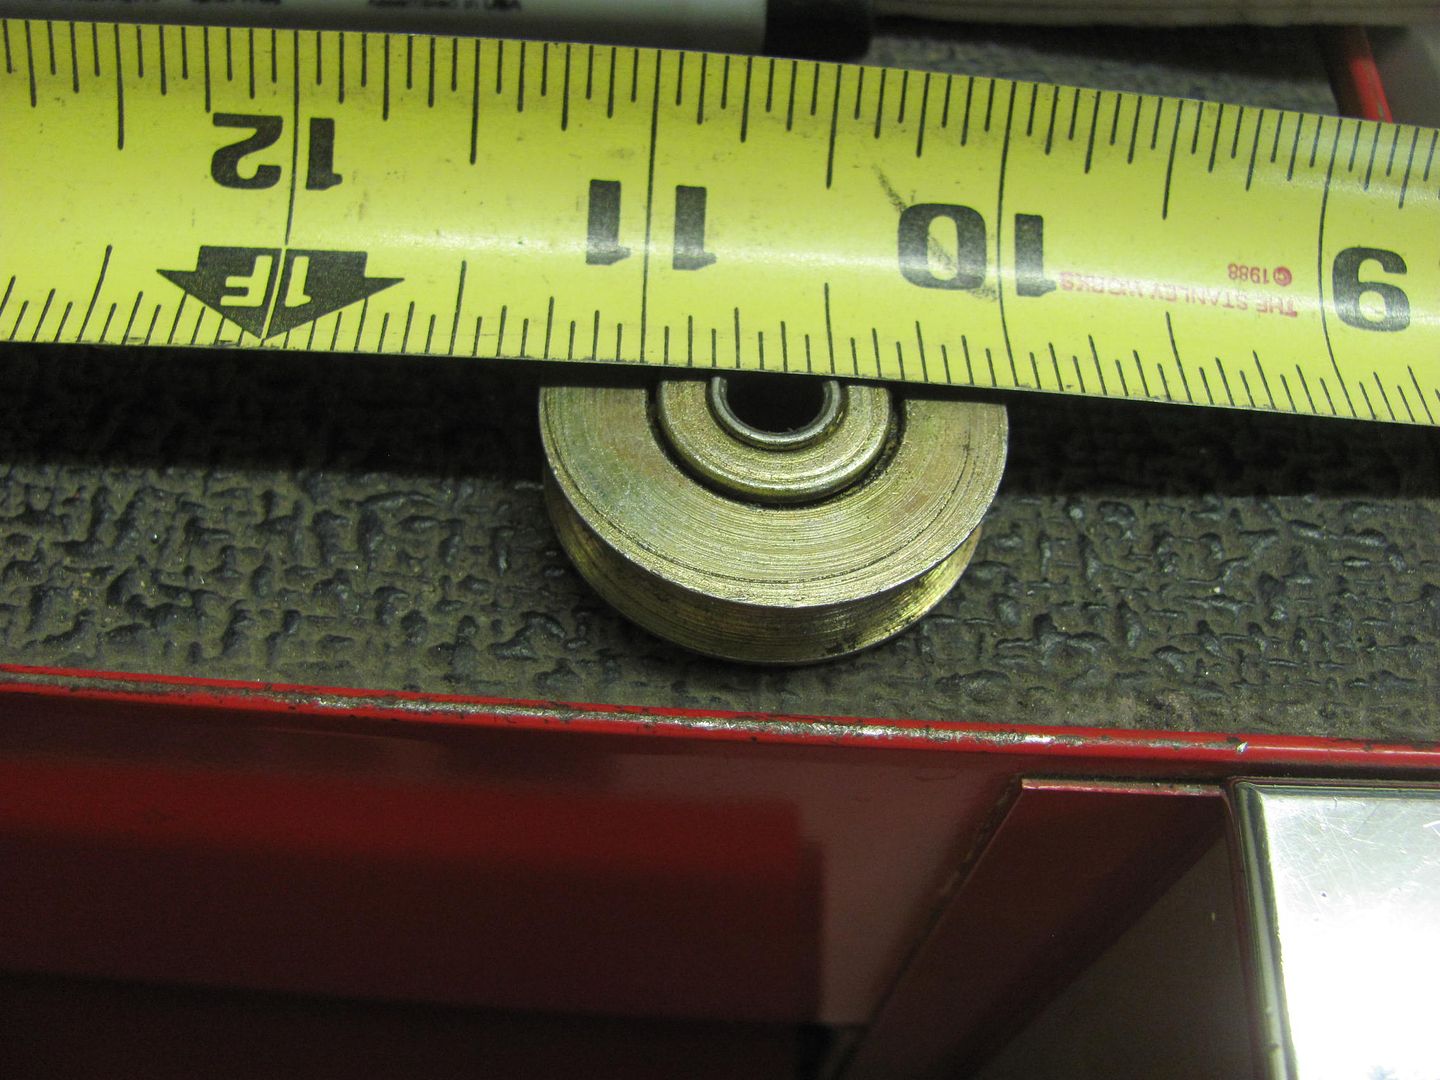
The front brake line distribution block showed up, so let's get the front lines finished up.. My tubing bender was not getting the nice small radius I was looking for, so time for a new tool. Here's a pulley out of the furniture and hardware parts bins at the local Ace store..
 Here's the comparison to the tubing bender.. 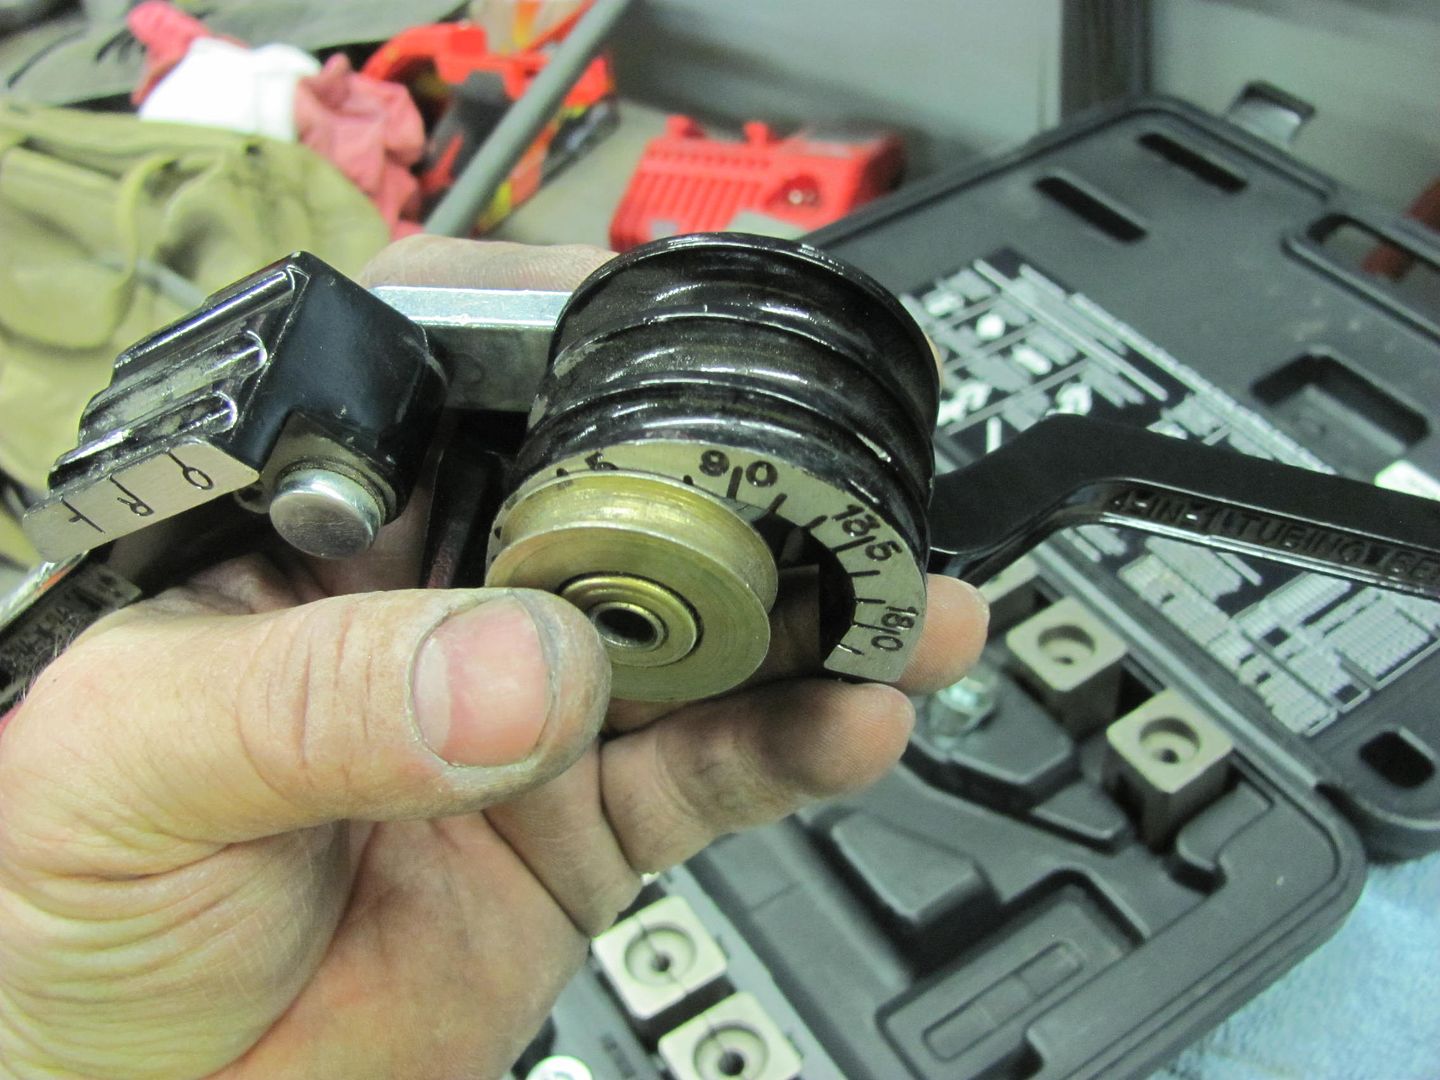 Bending the tubing... 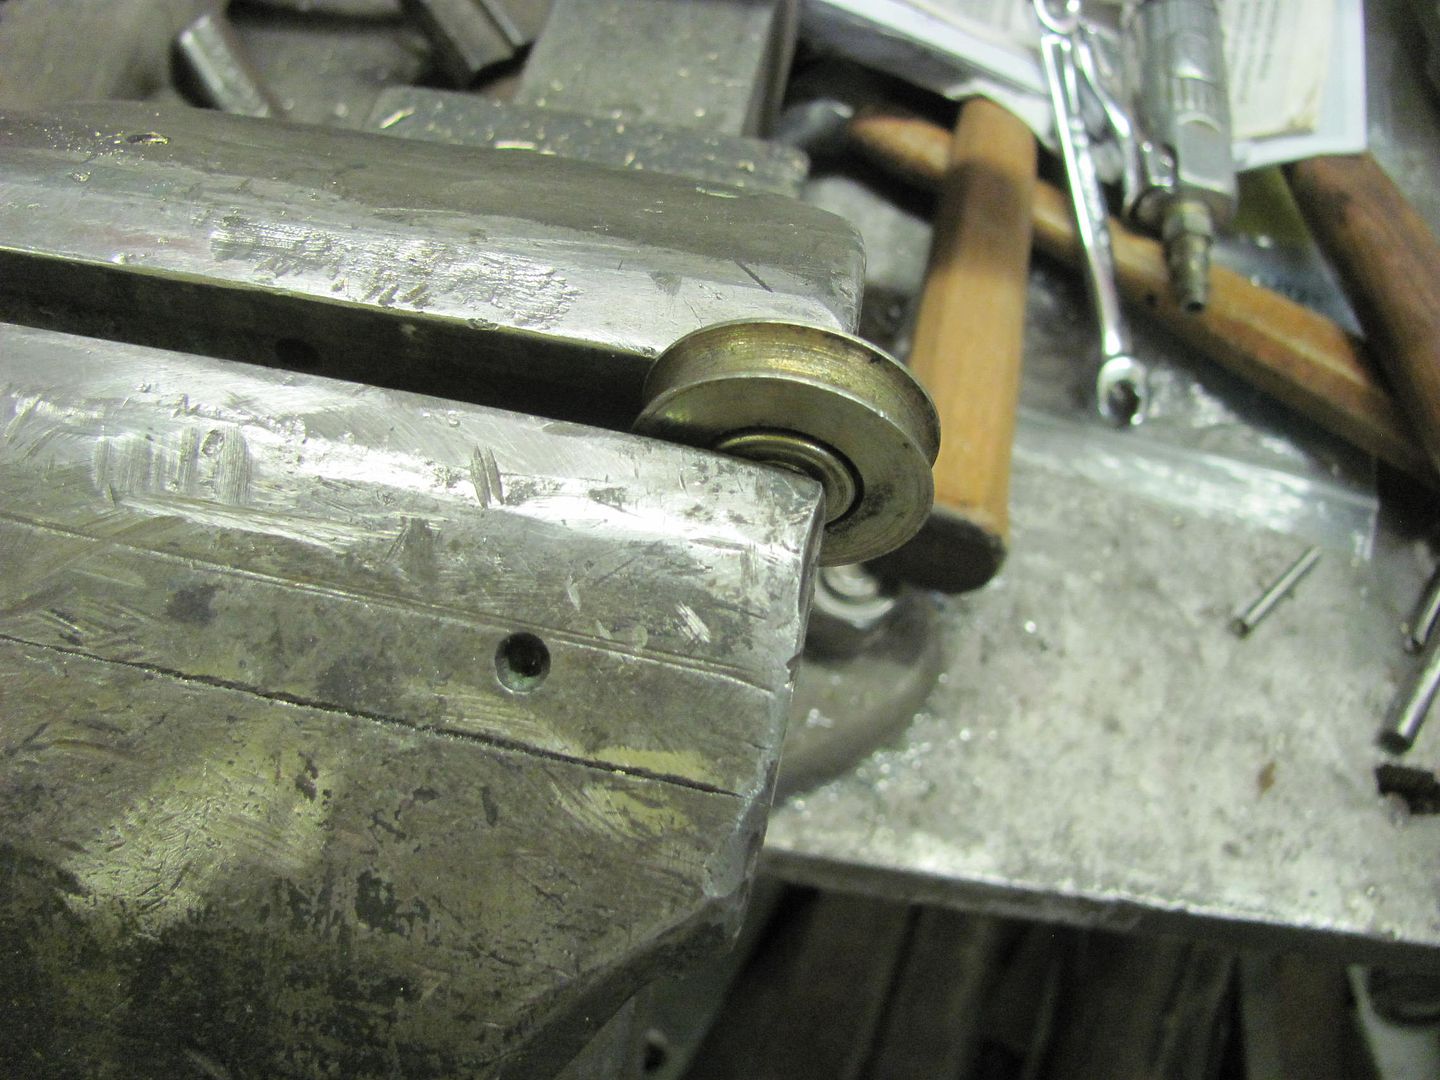 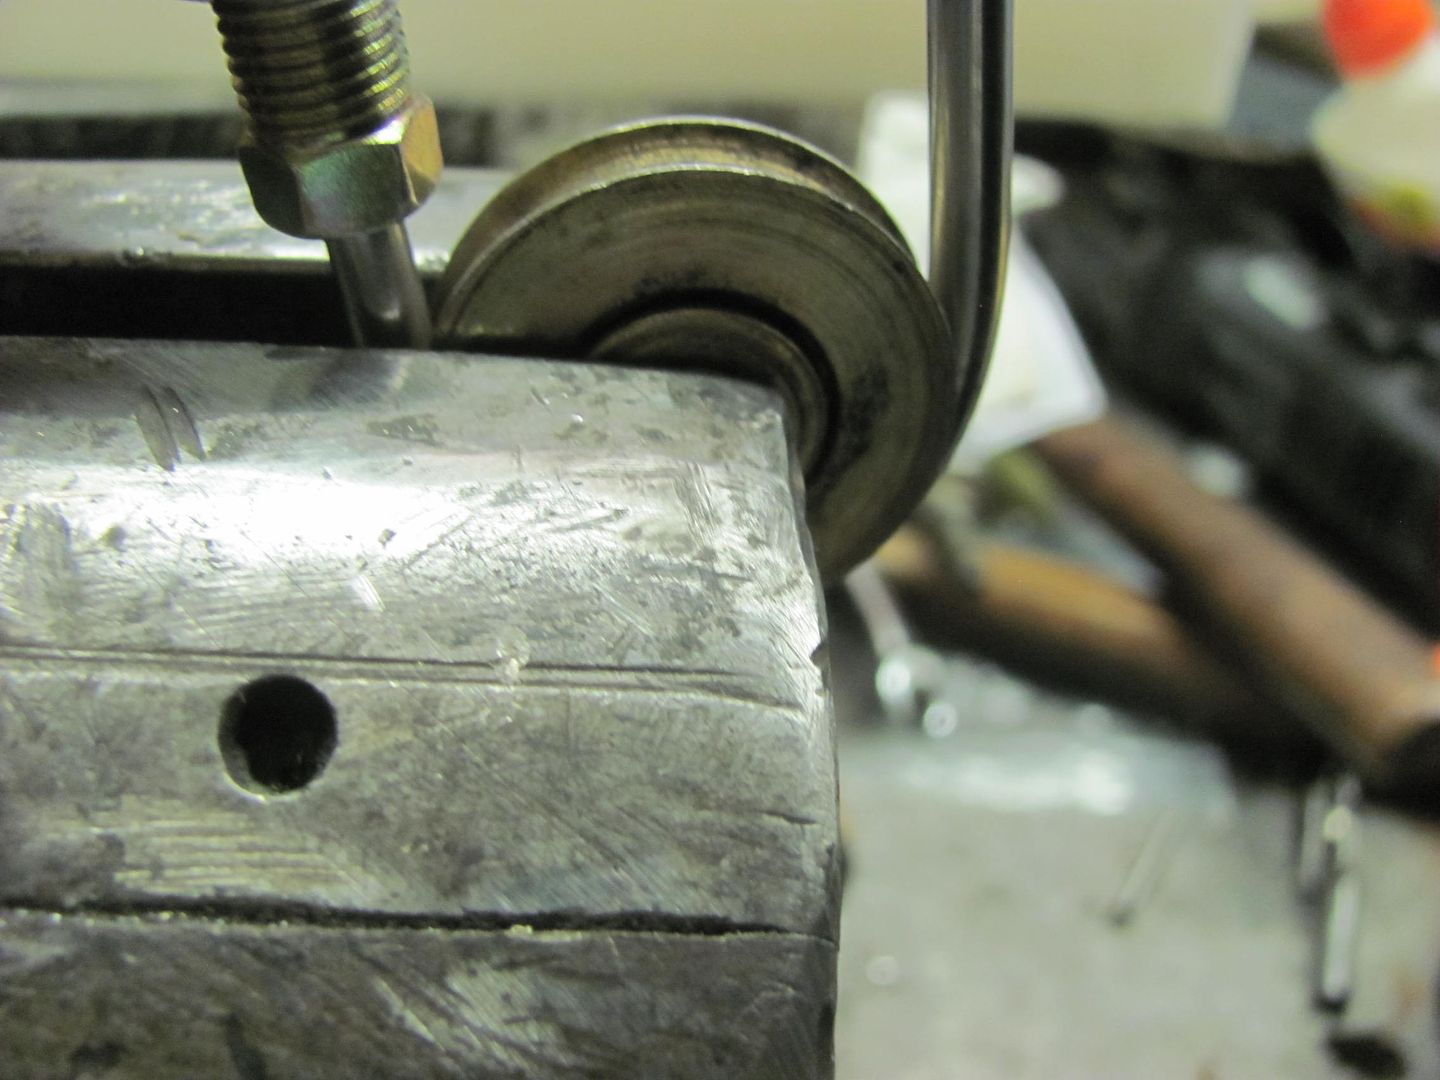 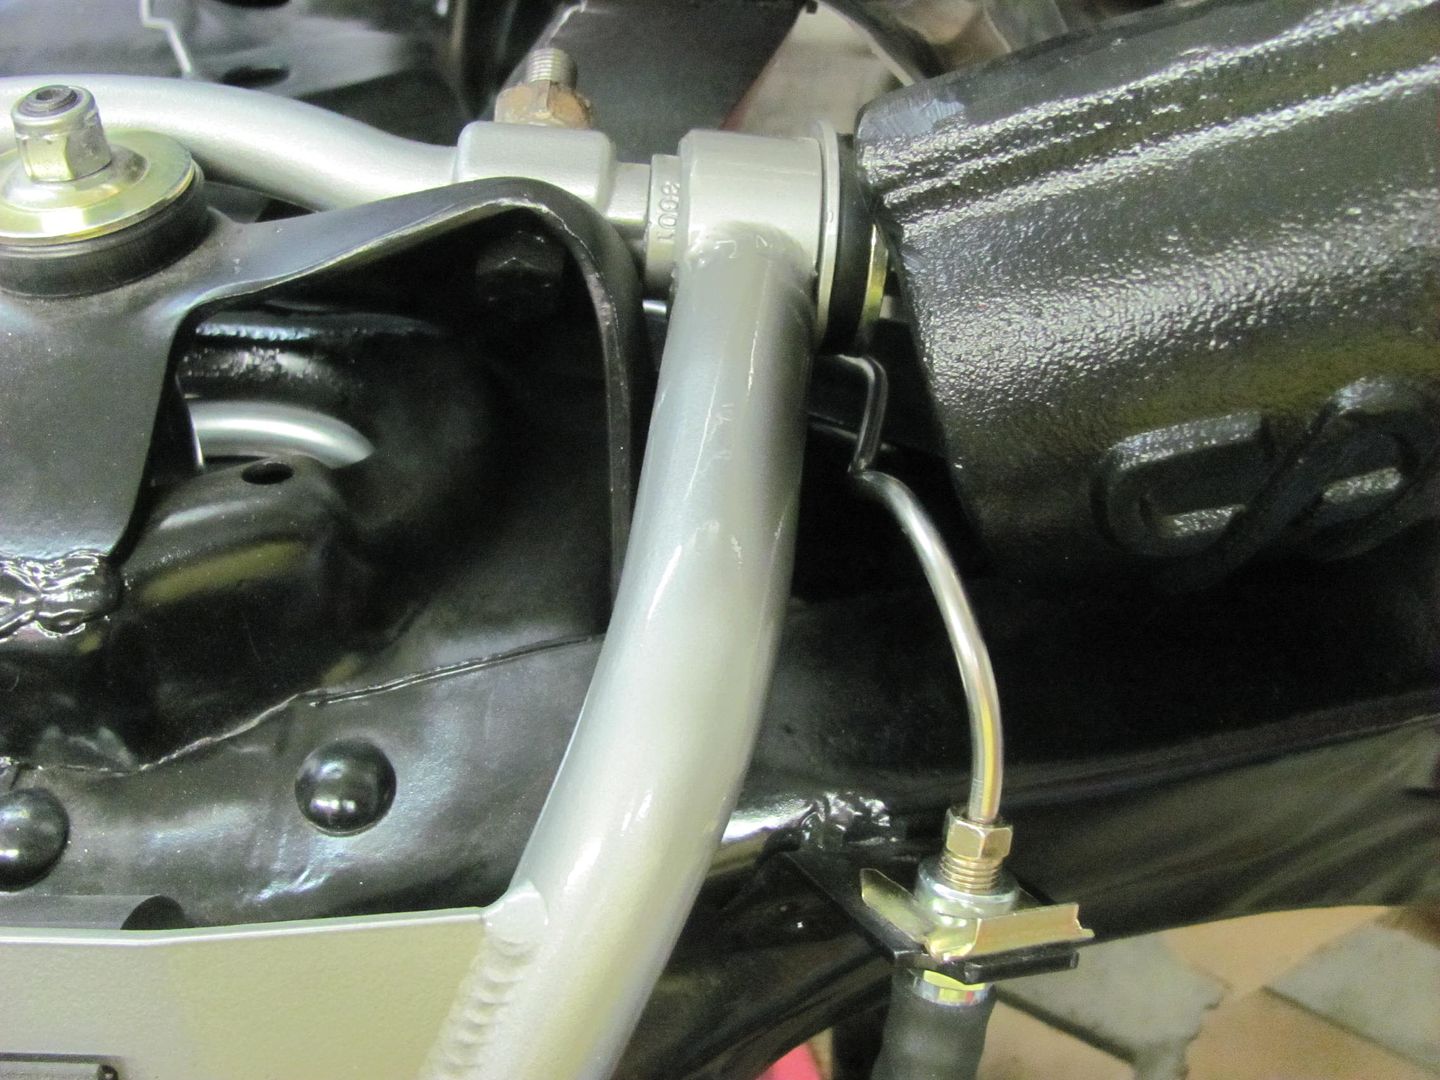 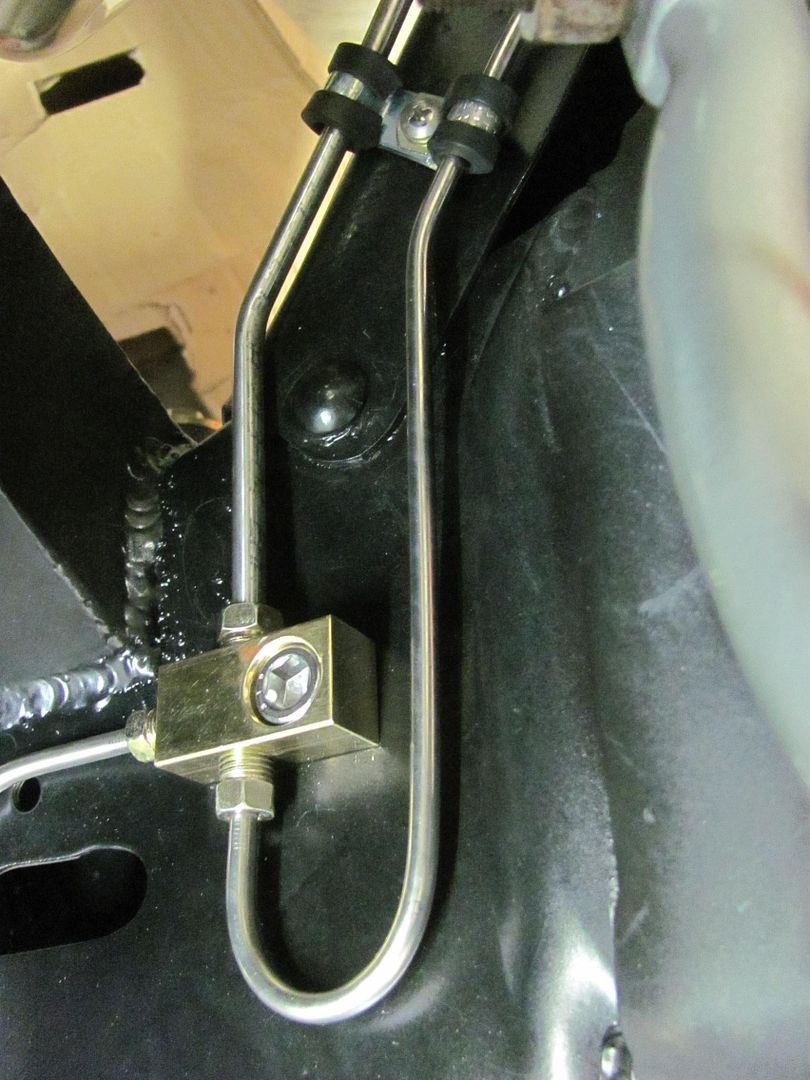 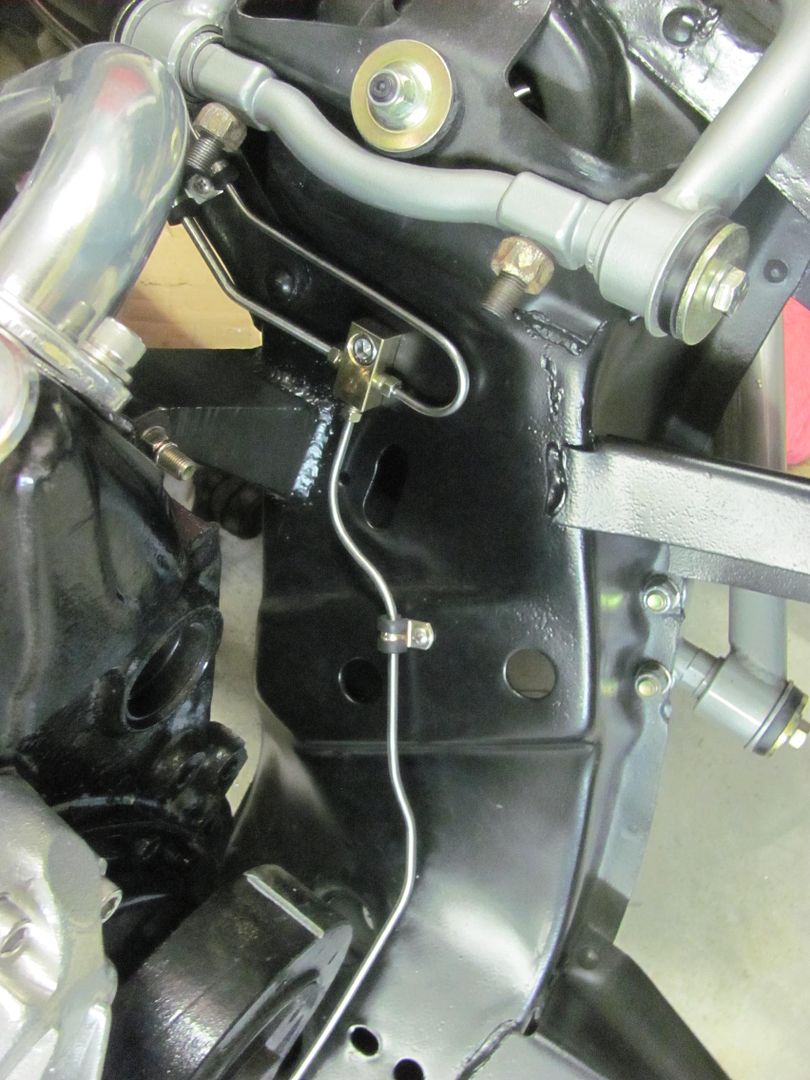
__________________
Robert |
|
|
|
|
03-18-2016, 12:12 AM
|
#20 |
|
Senior Member
Join Date: Mar 2011
Location: West Plains, Missouri
Posts: 7,555
|
Re: 55 Wagon Progress
Nice job...Jim
__________________
my build thread: http://67-72chevytrucks.com/vboard/s...d.php?t=459839 Jimbo's long bed step build:http://67-72chevytrucks.com/vboard/s...t=464626<br /> |
|
|
|
|
03-19-2016, 09:32 AM
|
#21 |
|
Registered User
Join Date: Apr 2011
Location: .
Posts: 3,104
|
Re: 55 Wagon Progress
Nice tight bends on the brake lines.
I've said it before and I'll say it again, your work makes me strive to better each time. Your glove box door looks like it was born that way. Great job and thanks for sharing. |
|
|
|
|
03-19-2016, 09:40 AM
|
#22 |
|
Senior Member
Join Date: Jul 2012
Location: Oblong, Illinois
Posts: 7,028
|
Re: 55 Wagon Progress
Peter's machine is really nice. He had one in Oblong last fall that went back to Wisconsin.
Good idea for the tighter radius on the brake lines. |
|
|
|
|
03-19-2016, 09:37 PM
|
#23 |
|
Registered User
Join Date: Apr 2008
Location: Md
Posts: 2,460
|
Re: 55 Wagon Progress
I tried to do that with a pulley wheel, it worked OK ( but)...You have the knack for making it Great. Super clean work as always. Thanks for sharing your skills.
__________________
http://67-72chevytrucks.com/vboard/s...d.php?t=635605 |
|
|
|
|
03-19-2016, 10:19 PM
|
#24 |
|
Registered User
Join Date: Jan 2013
Location: Leonardtown, MD
Posts: 1,640
|
Re: 55 Wagon Progress
Thanks for the comments everyone.. Well it wasn't supposed to rain in the mid-Atlantic states today until later tonight, but wouldn't you know, loading something in the back of the truck just seemed to coax the precipitation from the sky.
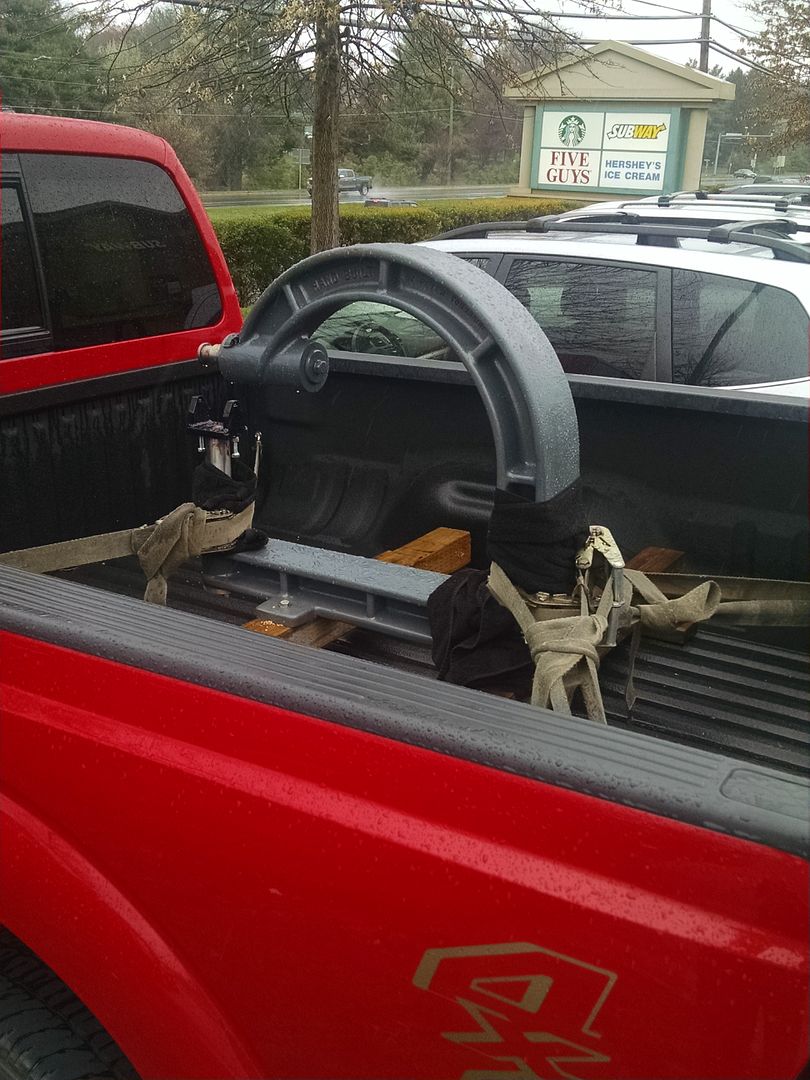 And here we are, unloaded back in the shop, still needing to make the stand. I'll pick up some materials likely on Monday.. 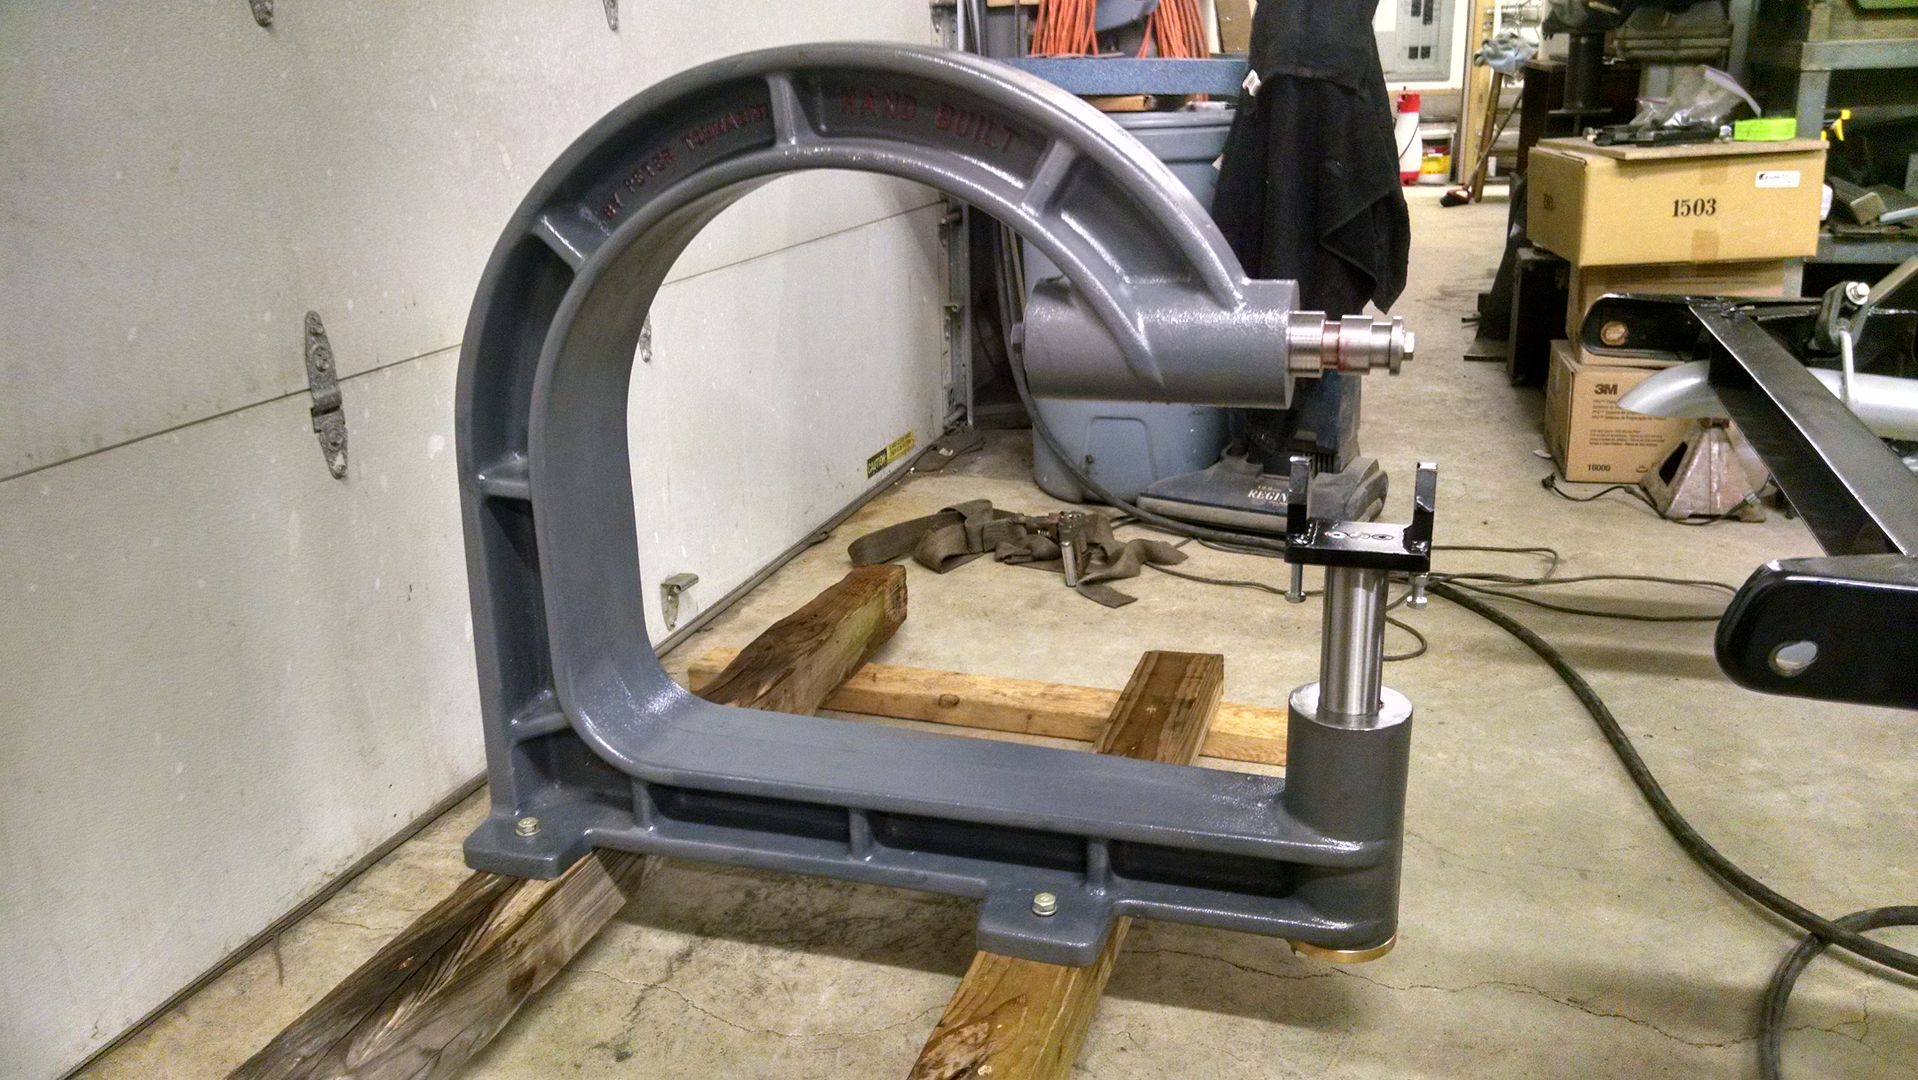
__________________
Robert |
|
|
|
|
03-22-2016, 10:10 PM
|
#25 |
|
Registered User
Join Date: Jan 2013
Location: Leonardtown, MD
Posts: 1,640
|
Re: 55 Wagon Progress
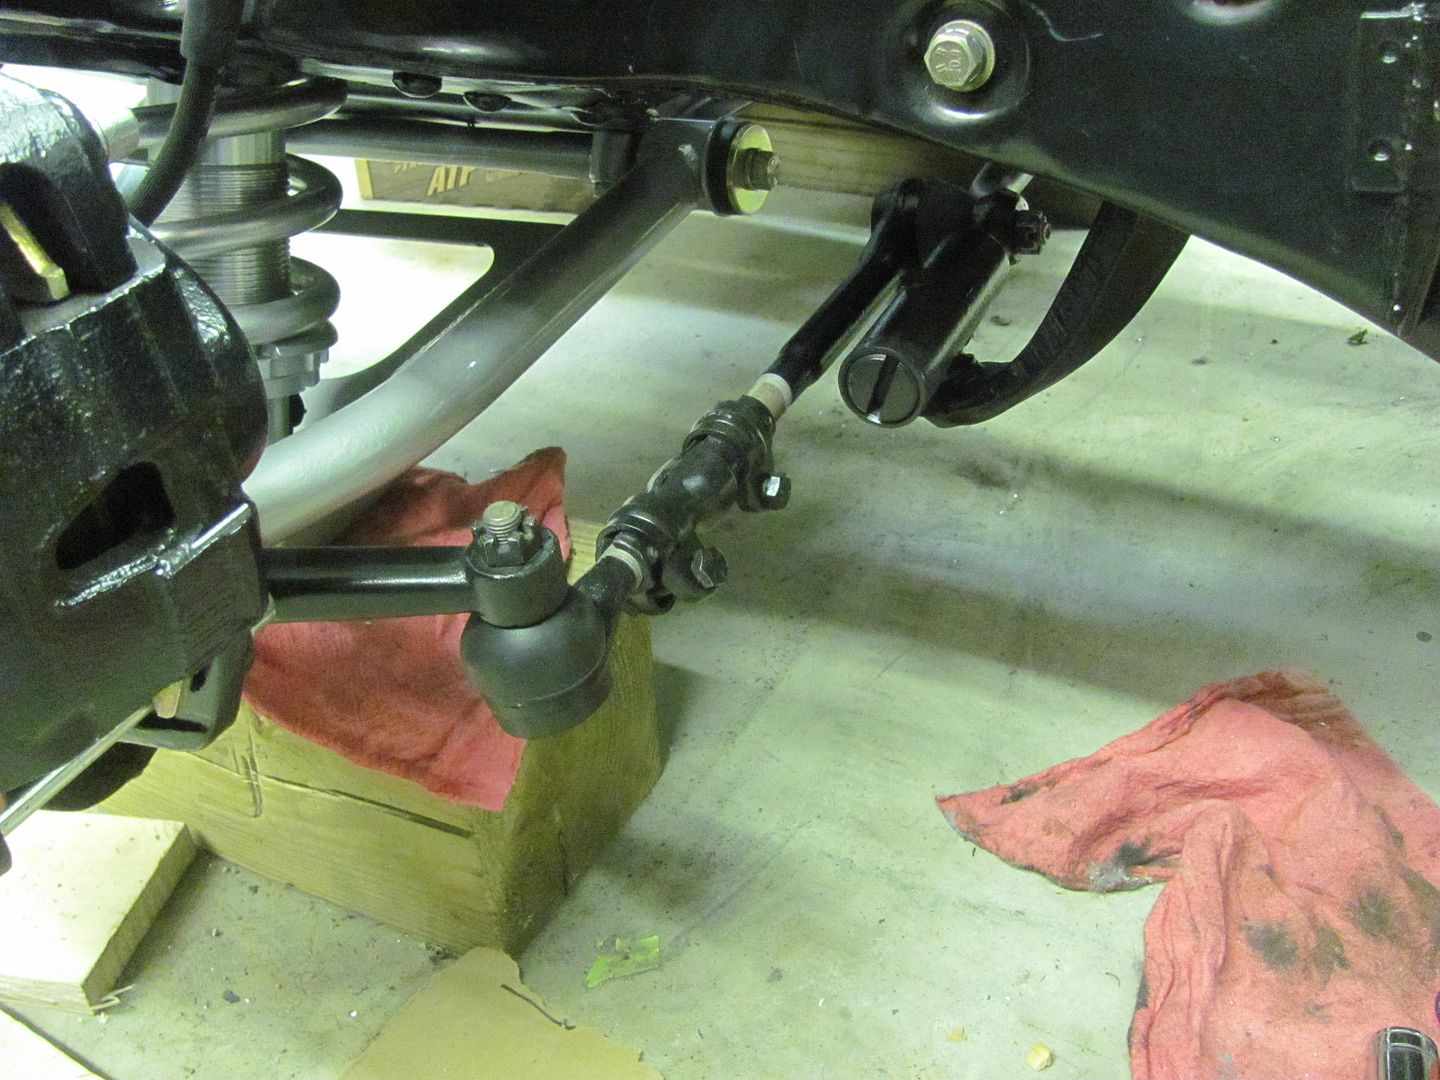
Tonight Kyle did some more media blasting as I was installing the idler arm bushings. Finally the drag link is off the floor, Thurs night we should get the front tires back on so we again have a roller..
 Then we worked on some stainless just to show Kyle another aspect of restoration. There were some minor scratches that the buffing wheels wouldn't begin to take out, so we opted for some 600 then 1200 w/d cross hatching, then moved to the 1500 then 3000 Trizact on the DA using the foam interface pad. With scratches gone, back to the buffing wheels... https://youtu.be/4VLocC_ZfJ0 https://youtu.be/vqcVXg-UXEQ 
__________________
Robert |
|
|
|
 |
| Bookmarks |
|
|


 Hybrid Mode
