
|
|
|
 03-23-2016, 10:27 AM
|
#1 |
|
Registered User
Join Date: Jul 2012
Location: Rosenberg, Texas
Posts: 3,506
|
Re: 55 Wagon Progress
Nice work, that stainless looks great!
__________________
-Duane C/10 Club Texas member 1971 Chevy C10 "Brutus" SWB Fleetside 2016 6.0L (L96) 6L90E (driver/project) 1965 Pontiac GTO "Royal Goat" 400/TH400 w/AC (my baby) |

|

|
|
03-23-2016, 08:46 PM
|
#2 |
|
Registered User
Join Date: May 2011
Location: Anderson SC
Posts: 3,881
|
Re: 55 Wagon Progress
I've really enjoyed following this thread Robert, it's one of my favorites of all the many forums I'm on. Always love to see quality work and new ideas, and you never disappoint.
__________________
Project Goldilocks '66 C10 Short Fleet BBW Build '65 C10 Highly Detailed Stock Restoration Thread '78 Camaro Targa Roof Build '55 International Metal/Body/Paint Work '66 F100 Full Rotisserie Restoration '40 Packard 120 Convertible Coupe Restoration How To Restore and Detail an Original Gauge Cluster How To Detail Sand Body Panels, Edges, Corners, Etc |
|
|
|
|
03-23-2016, 11:01 PM
|
#3 |
|
Registered User
Join Date: Jan 2013
Location: Leonardtown, MD
Posts: 1,637
|
Re: 55 Wagon Progress
Thanks John. I only we could get some parts in to make consistent progress
 First off, yes, it's still bolted to the pallet. 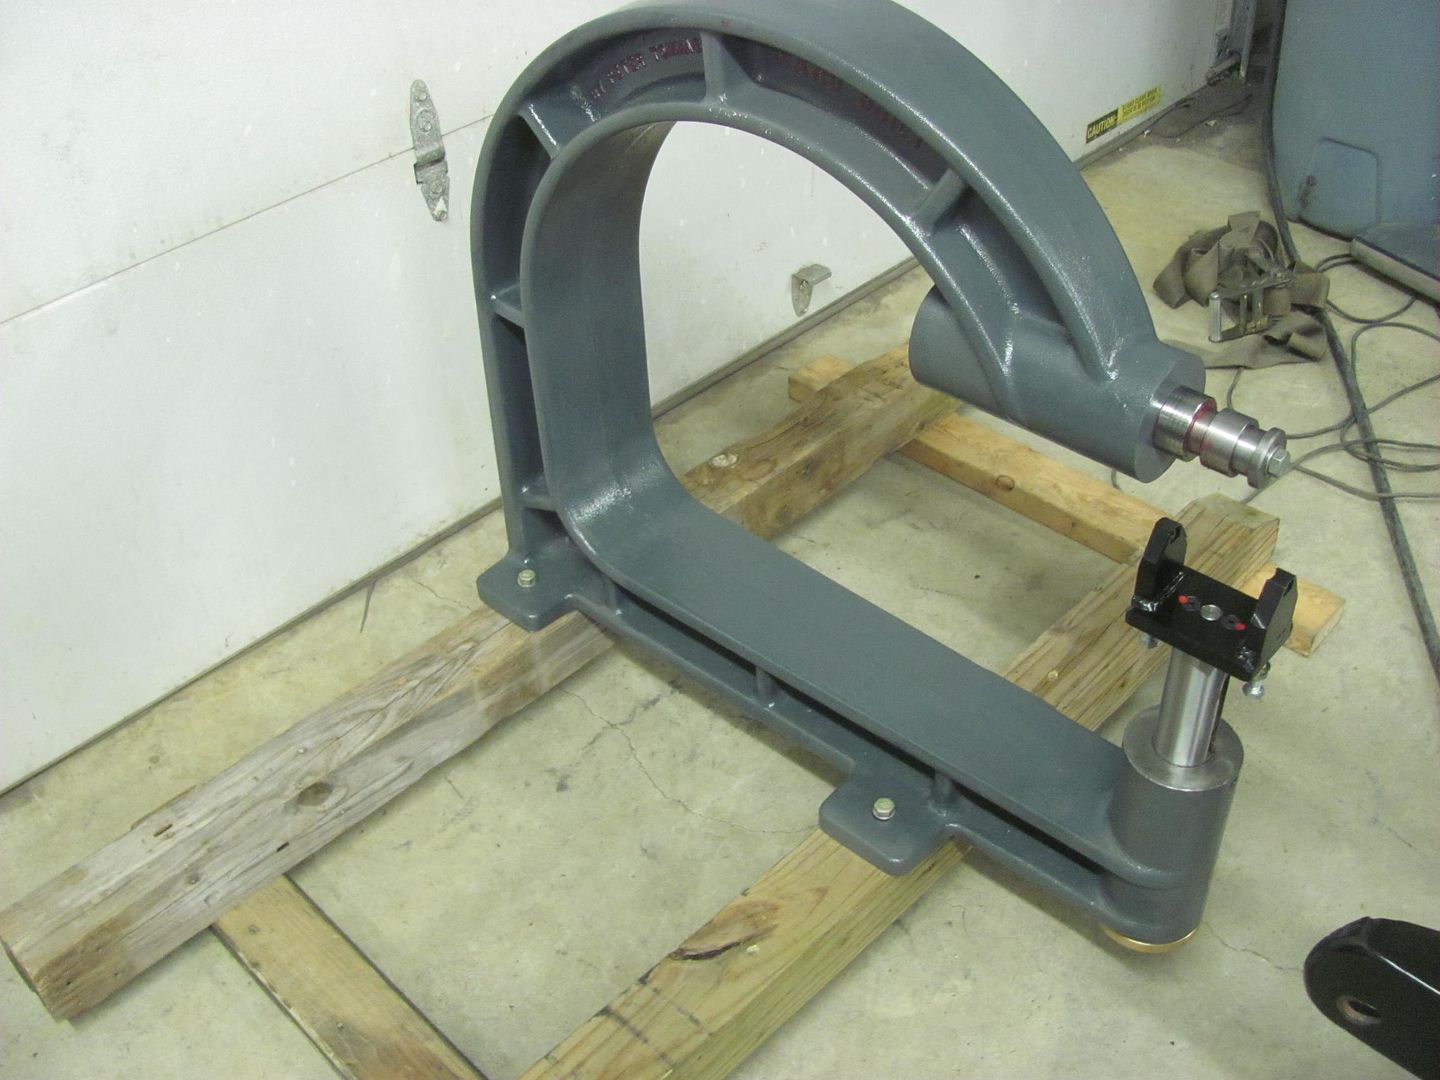 And the more I though of it I just couldn't bring myself to use fabricated legs. So today was spent driving a 5 hour round trip to pick up some suitable legs.. 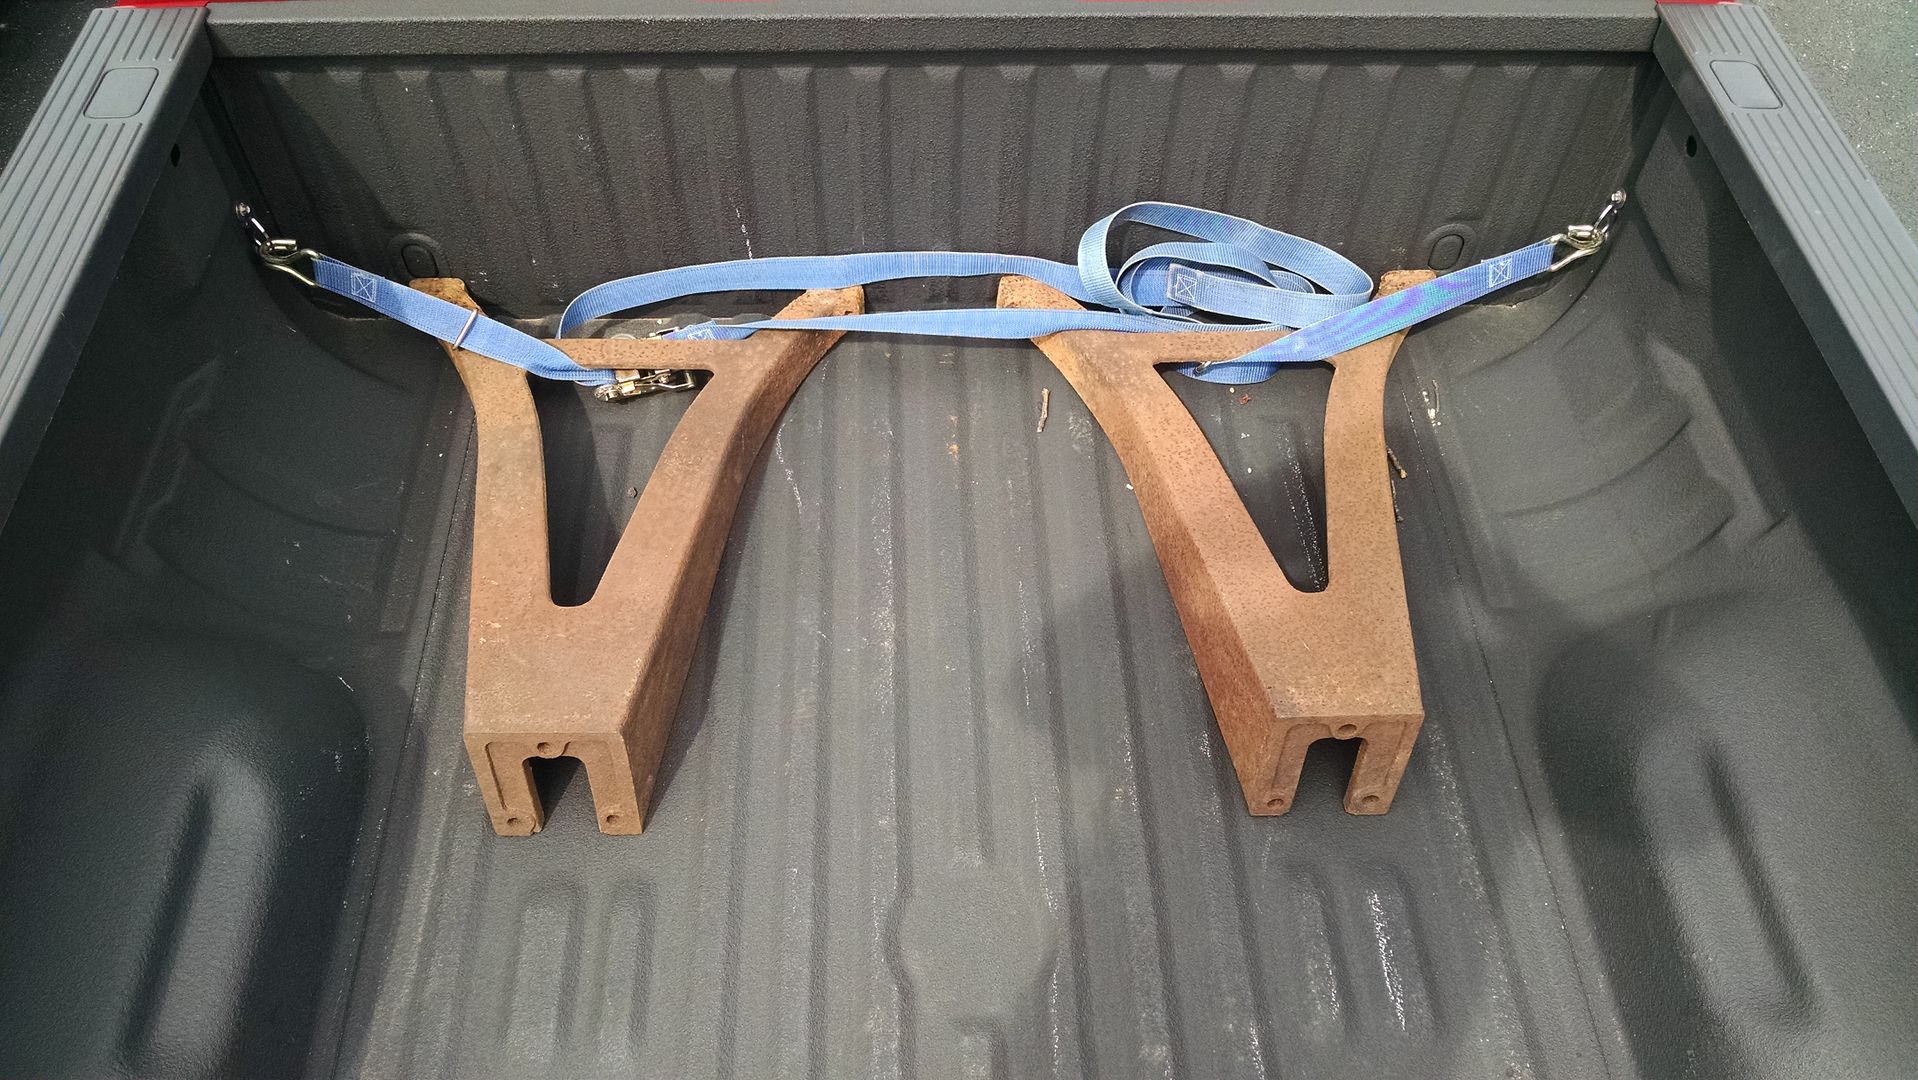 Here's the lower plate, and by my estimation I need about 4 inches of rise, so it will get some riser plates between the bottom plate and top plate.. 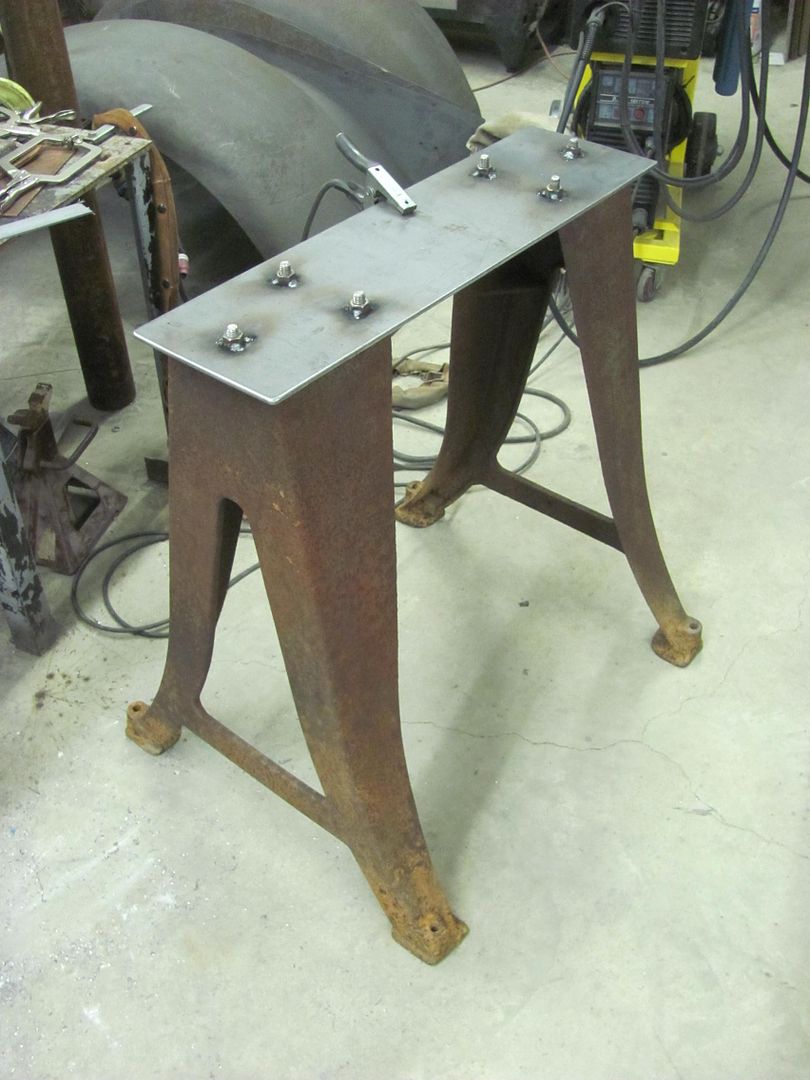 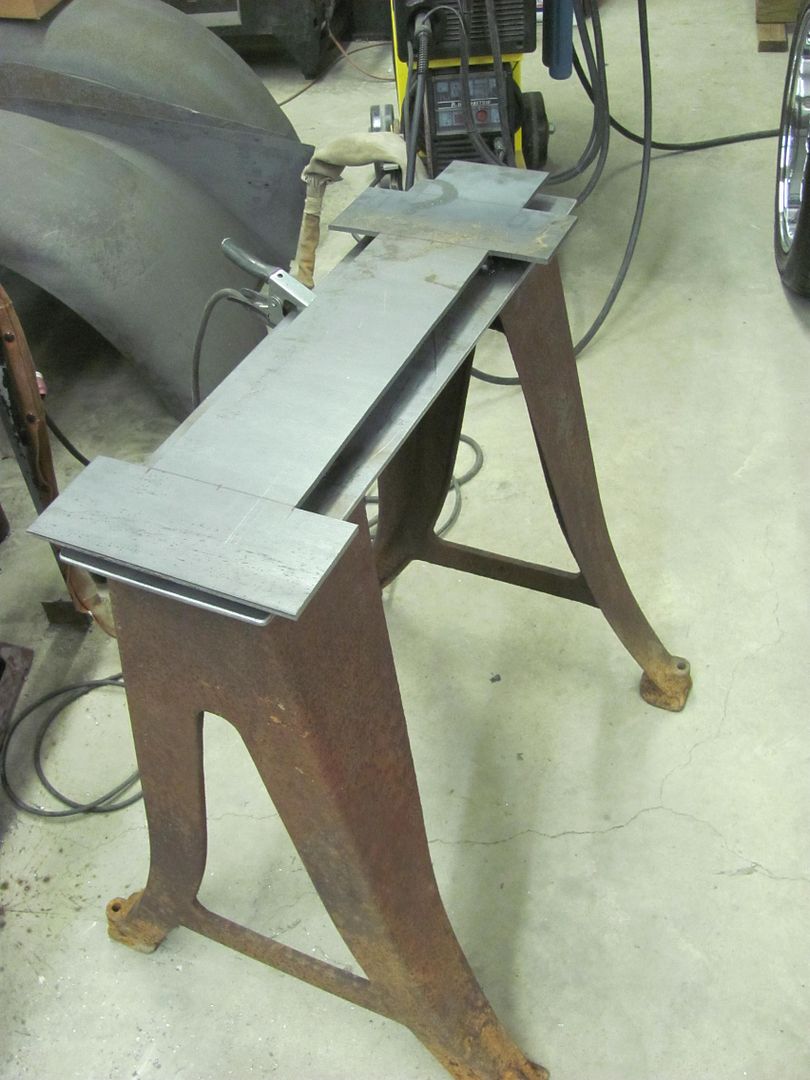 More to come..... need to find a nice bright color that will have Peter in sunglasses for his next visit..
__________________
Robert |
|
|
|
|
03-27-2016, 02:24 AM
|
#4 |
|
Registered User
Join Date: Jan 2013
Location: Leonardtown, MD
Posts: 1,637
|
Re: 55 Wagon Progress
Finishing up on the English wheel, the legs are bolted on with 1/2" bolts with nuts welded inside the riser.
The wheel is held on with 3/4 bolts, with nuts welded inside the top plate of the riser. 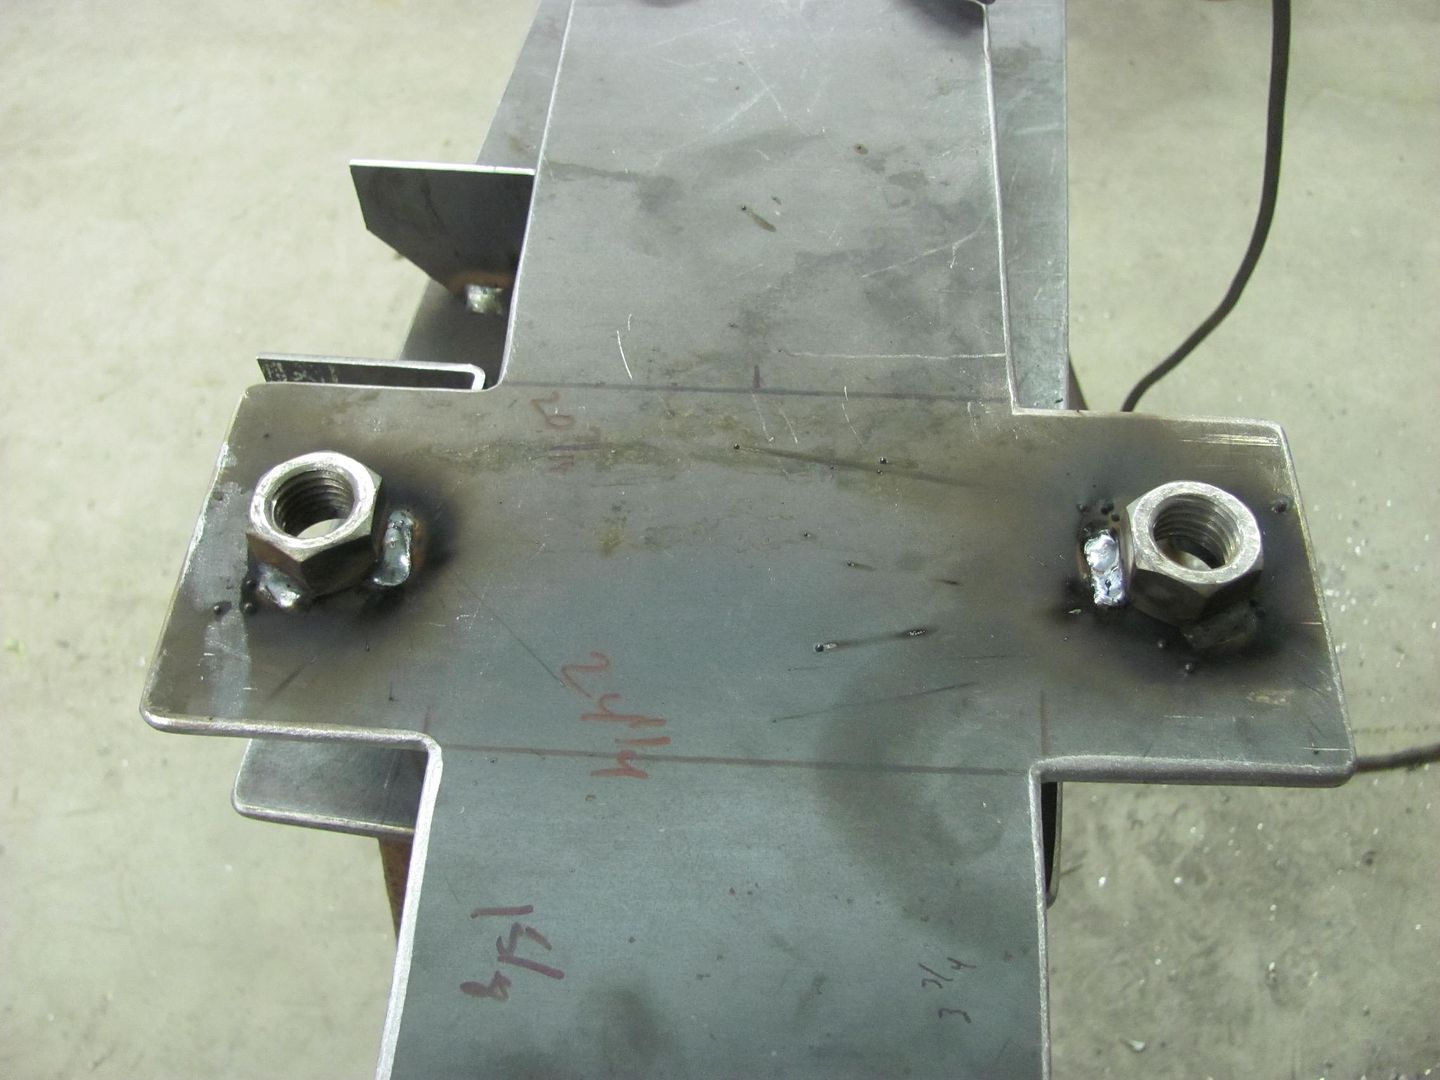 The John Deere lift device.... 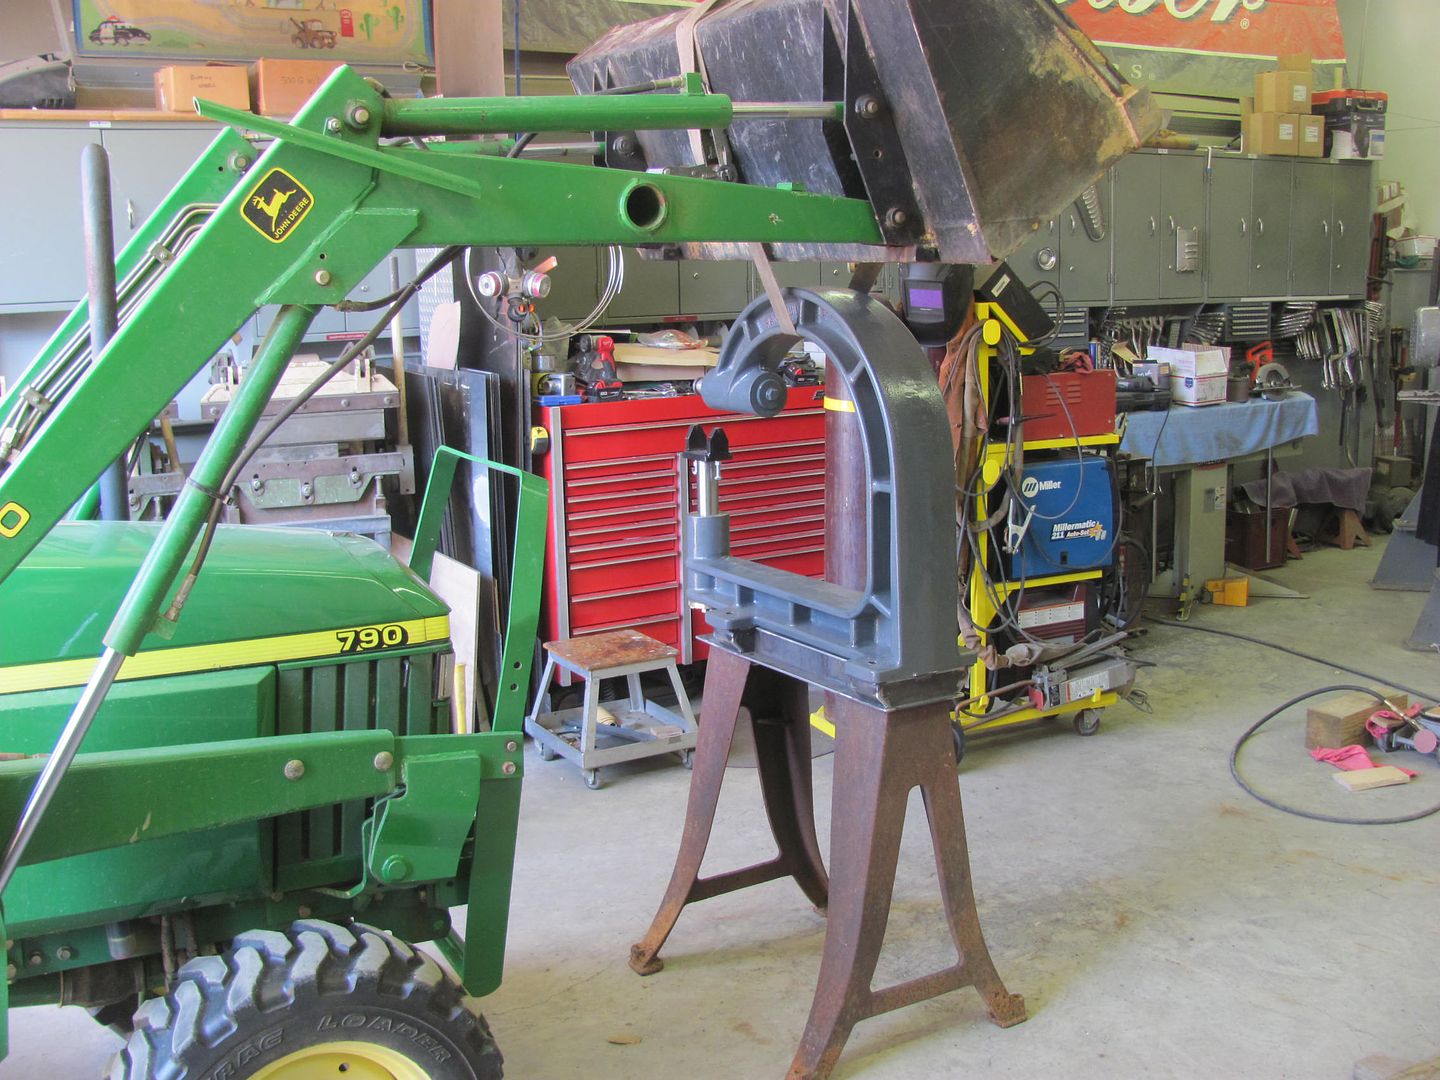 The wheel is set up at 48-1/2" 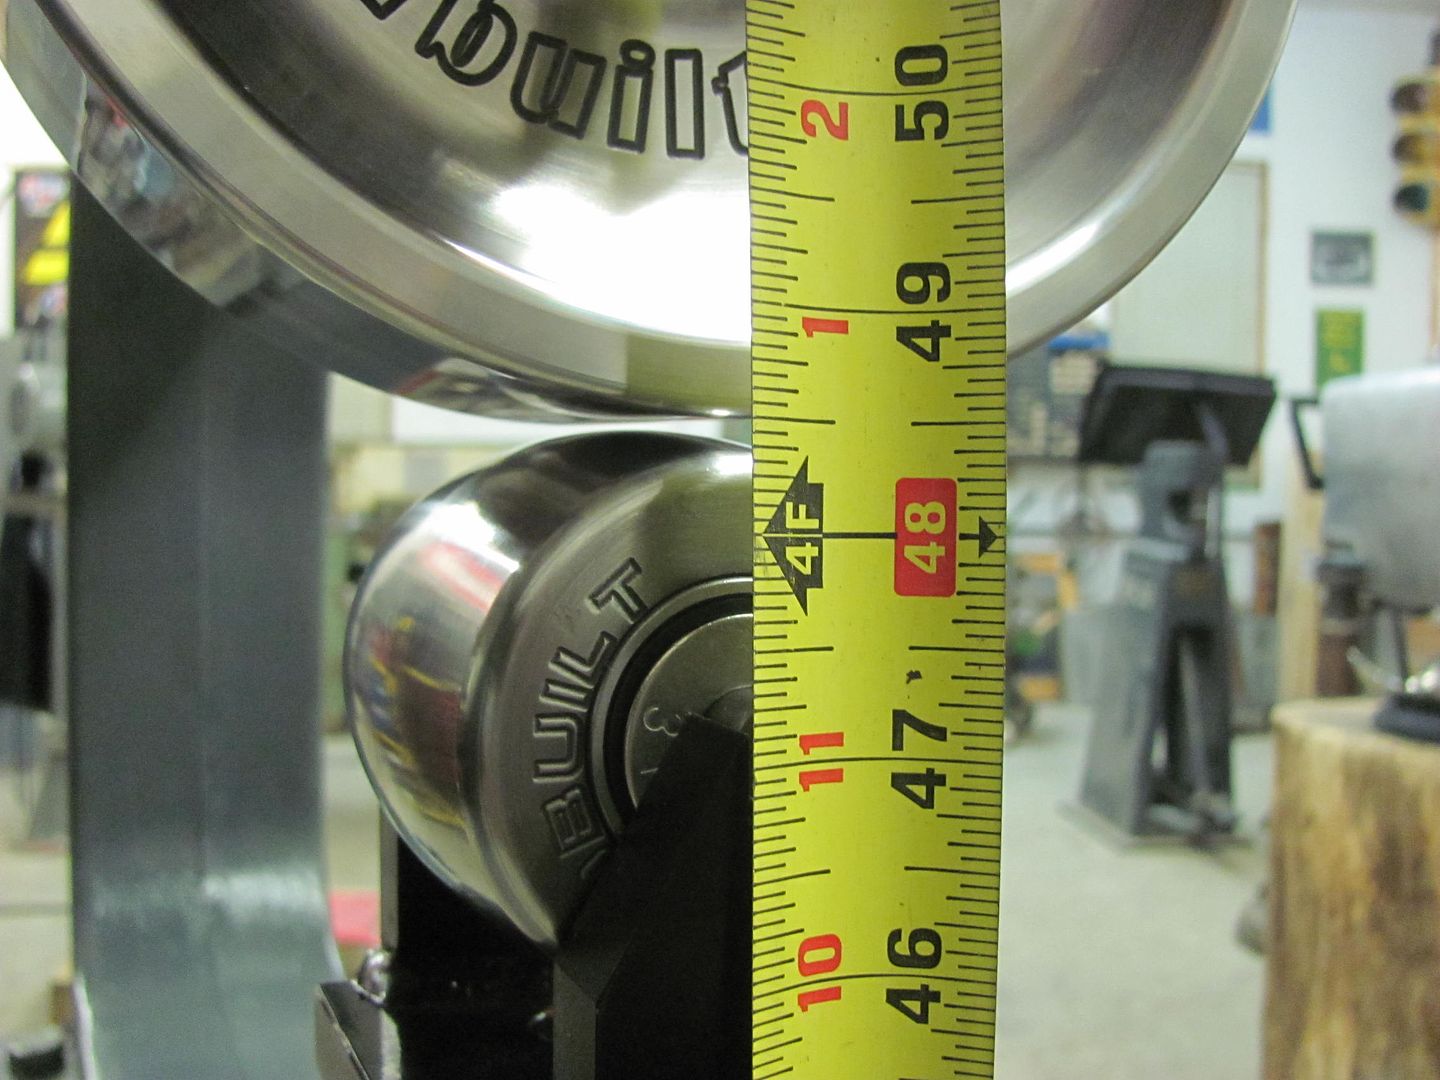  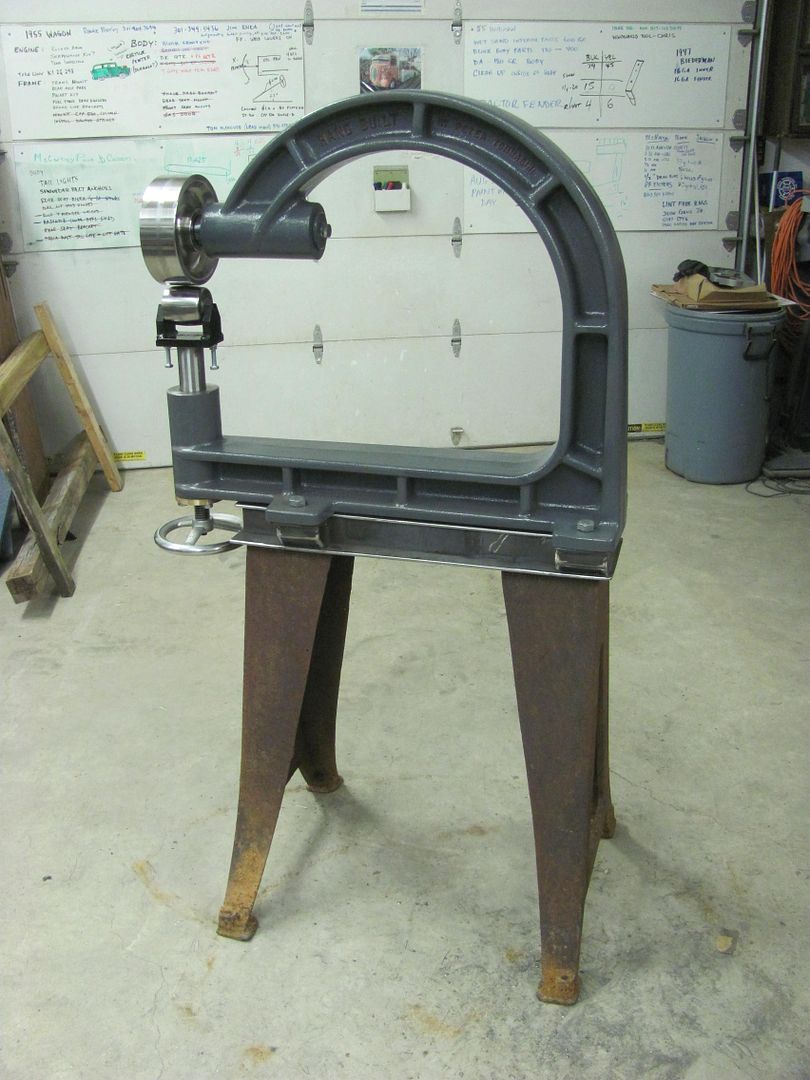 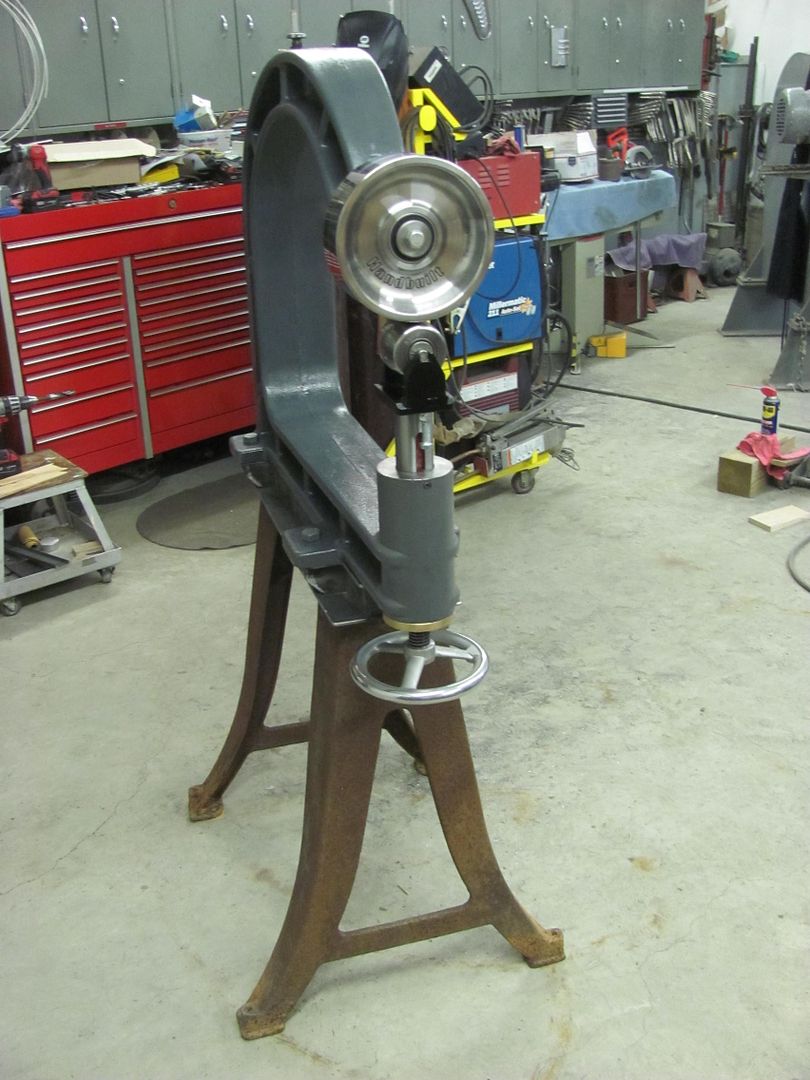 We wheeled a couple scrap panels, crushed some tucks, tipped a panel. Very pleased with the new wheeling machine.
__________________
Robert |
|
|
|
|
03-28-2016, 07:25 PM
|
#5 |
|
Registered User
 Join Date: May 2007
Location: Deale Md
Posts: 4,663
|
Re: 55 Wagon Progress
I like your wall cabinets, what's the dimension on them ? the garage door works good as a bulletin board except when it's up LOL
__________________
James 63 GMC V6 4speed carryall 65 chevy swb bbw V8 auto 68 K20 327/4 speed, buddy buckets 2002 GMC CC Dually Duramax 64 GMC lwb 3/4 V6 4speed SOLD 66 GMC swb bbw buddy buckets SOLD IG duallyjams The only thing that stays the same is constant change! |
|
|
|
|
04-12-2016, 10:52 PM
|
#6 |
|
Registered User
Join Date: Jan 2013
Location: Leonardtown, MD
Posts: 1,637
|
Re: 55 Wagon Progress
Sorry, forgot to get the cabinet dims in the shop tonight, will have to get them tomorrow. They were steel wall cabinets ordered from McMaster Carr. Not cheap, but I thought they would be less weight hanging on the side of the paint booth. On the "dry erase board", the marker holder has a hinge at the top to keep its contents inside.
Well I'm back from UK, Kyle is still plugging away on stainless polishing and repairs.. Here's just a few of the implements used. And I must stress, this is not an 18 ga panel, with stainless trim we use light taps for everything. Here's a piece of Delrin that was cut out and filed to match the bottom side of the door trim to act as a soft "anvil". 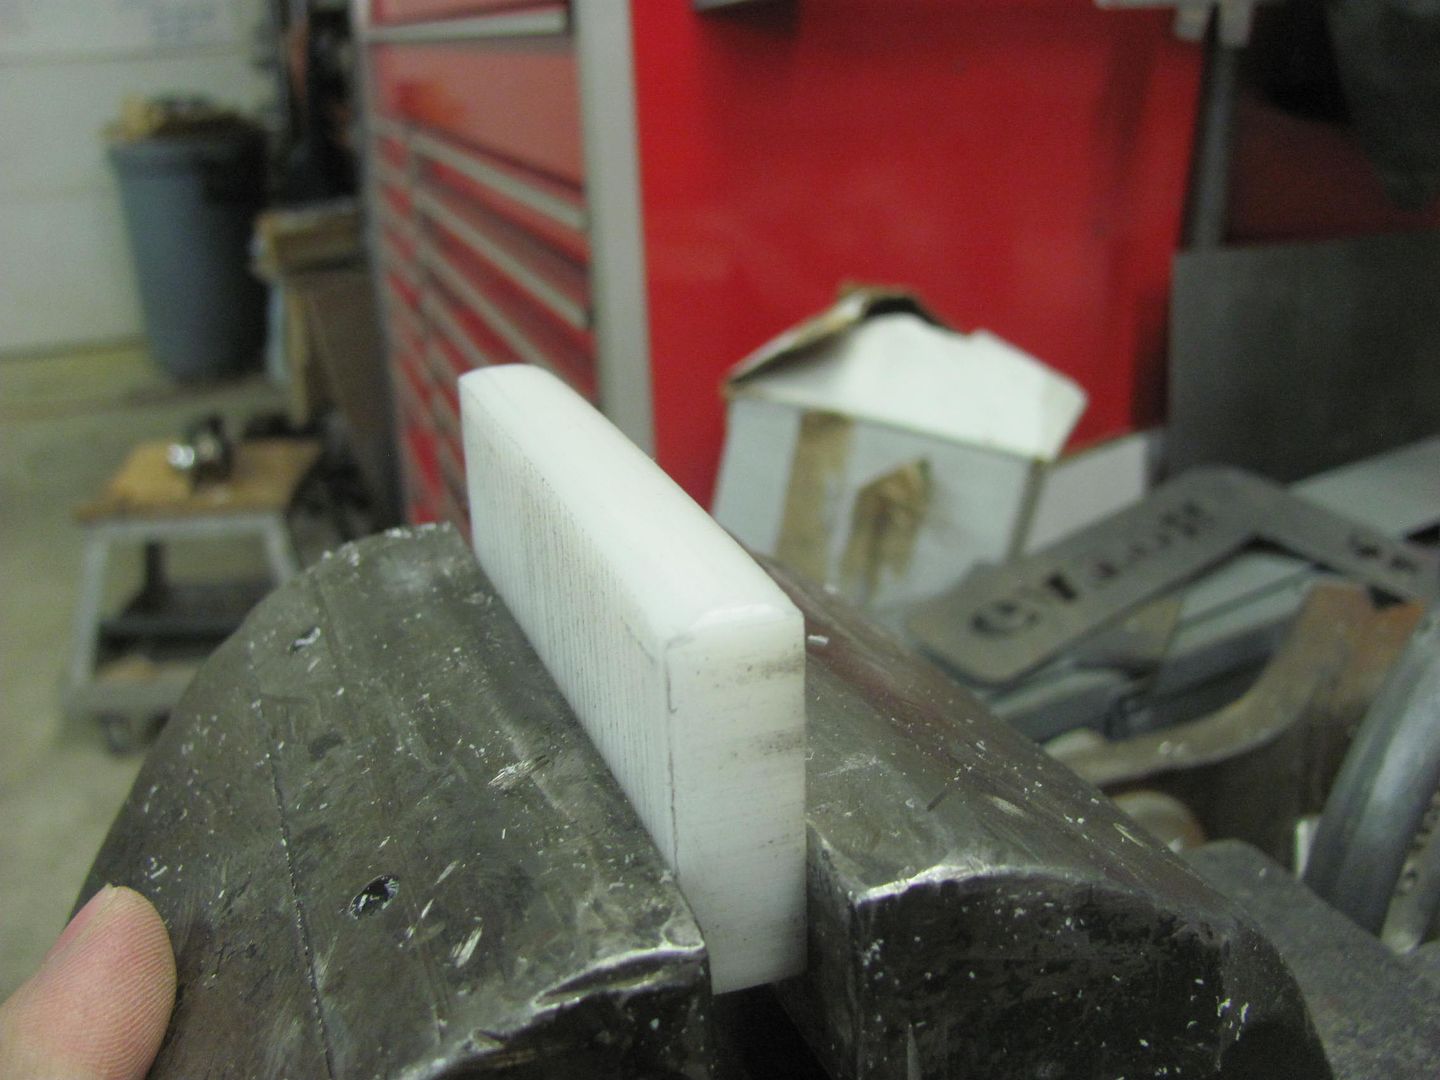 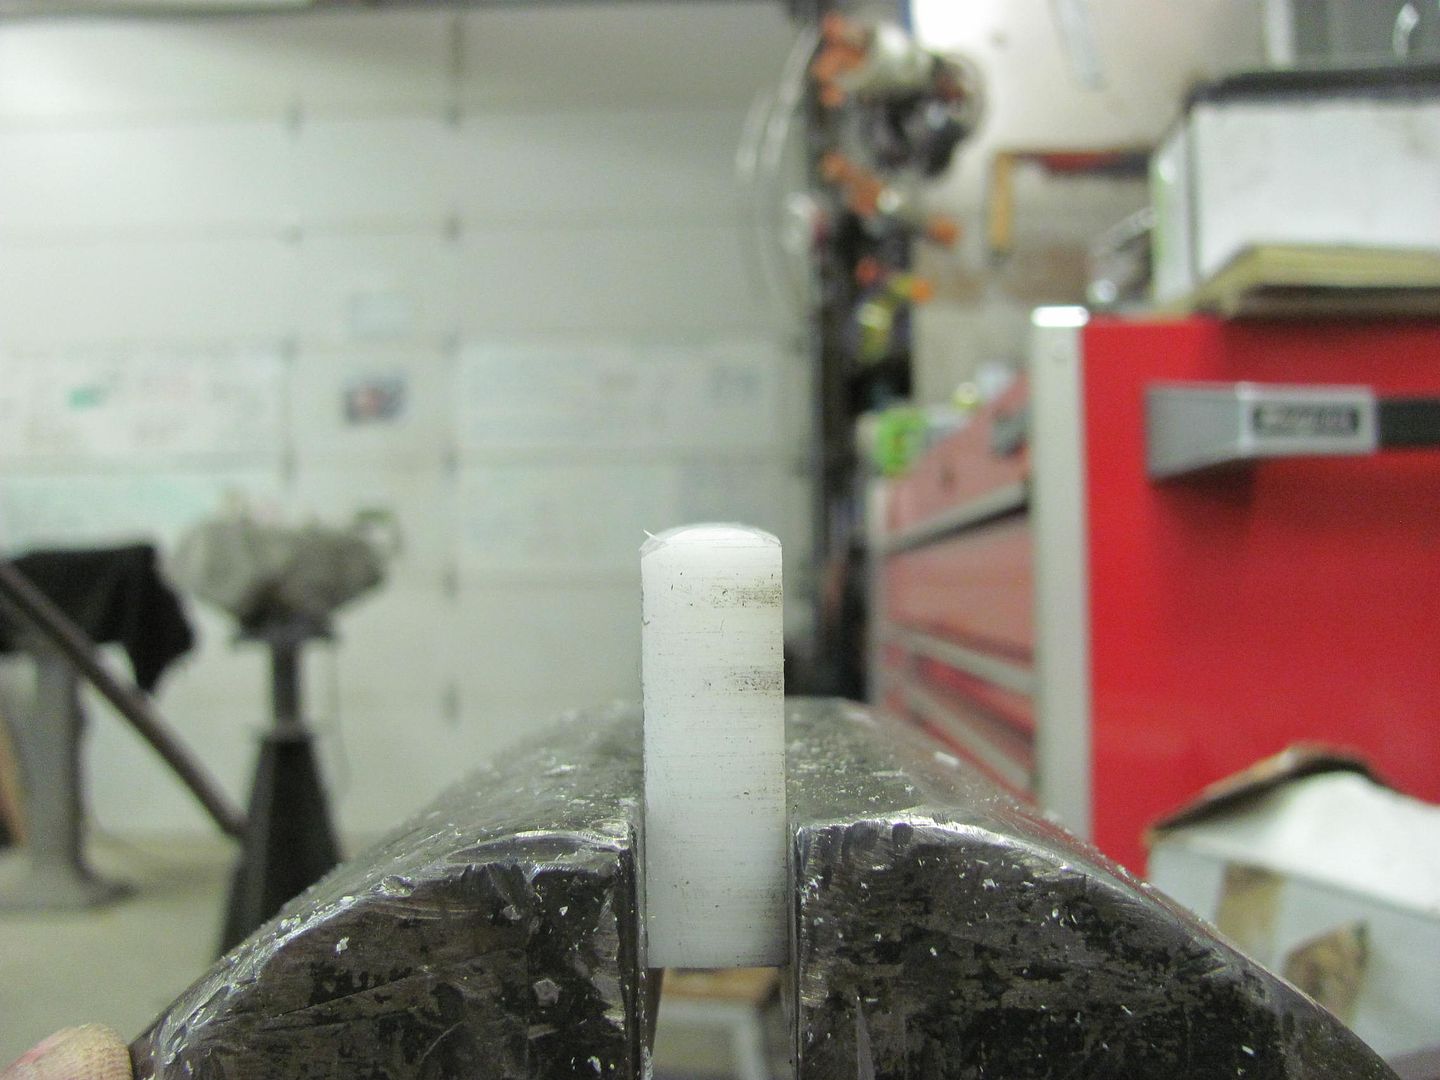 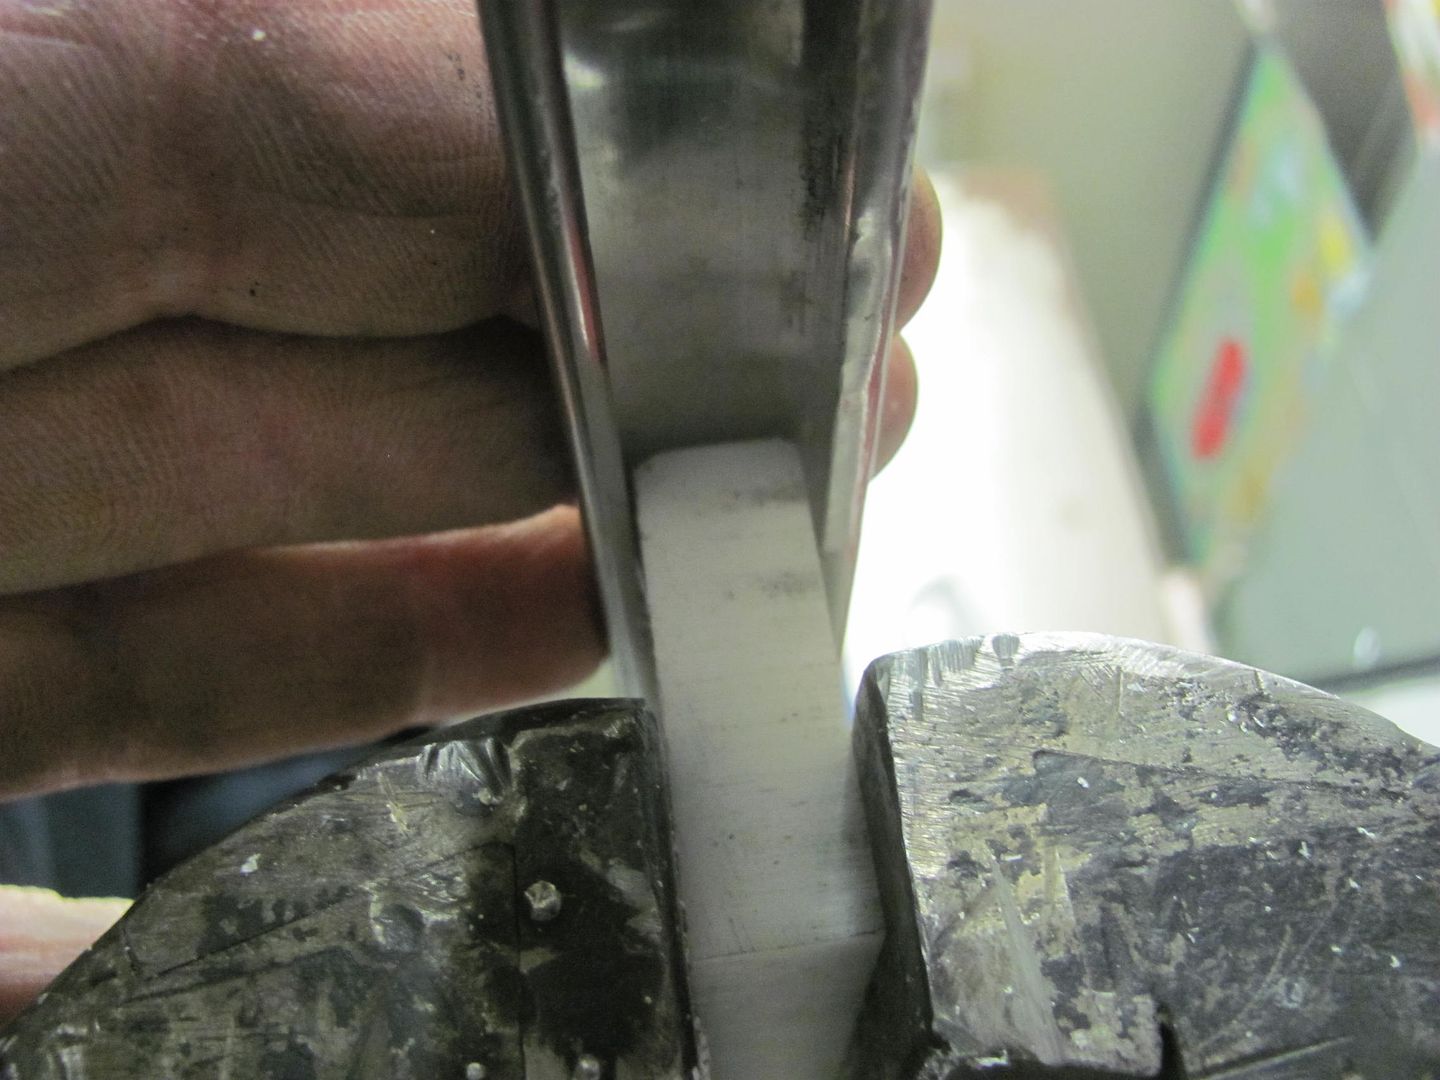 Then a spoon is used to bump.... LIGHTLY  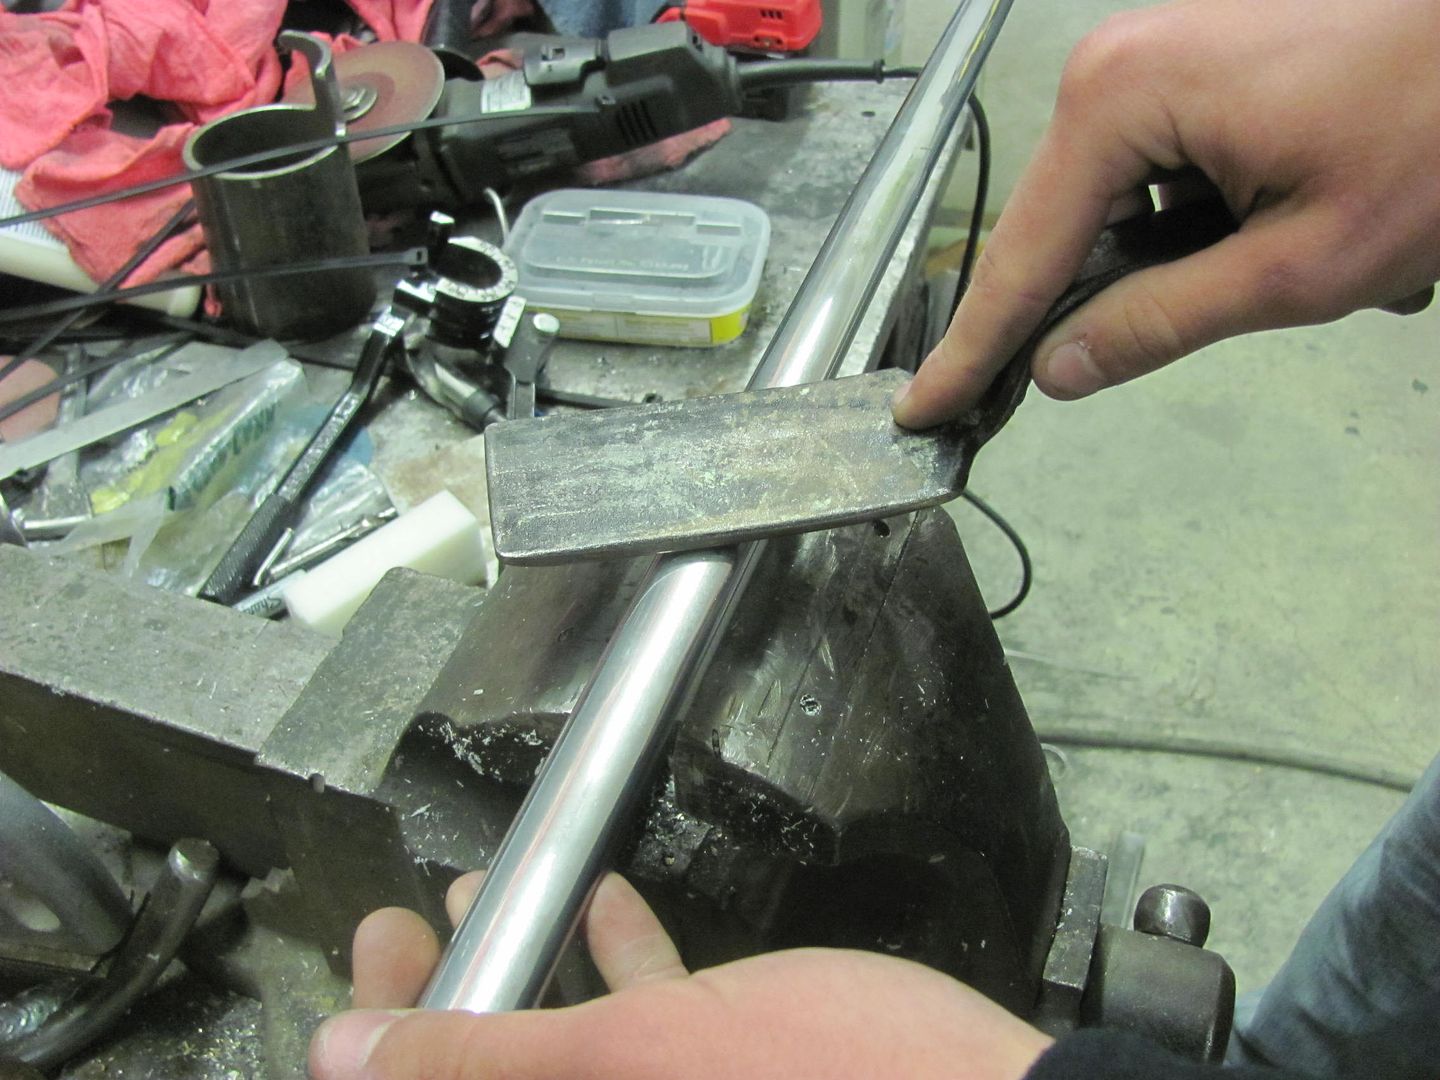 Many ways of bringing up low spots, here are just a couple of the tools used... This is a roller tool used for installing the "beading" to hold in screen material. The roller has been flattened from the original version, which had a hollow in the middle. A 3" roloc sander held just right will get the wheel spinning while sanding it flat.. 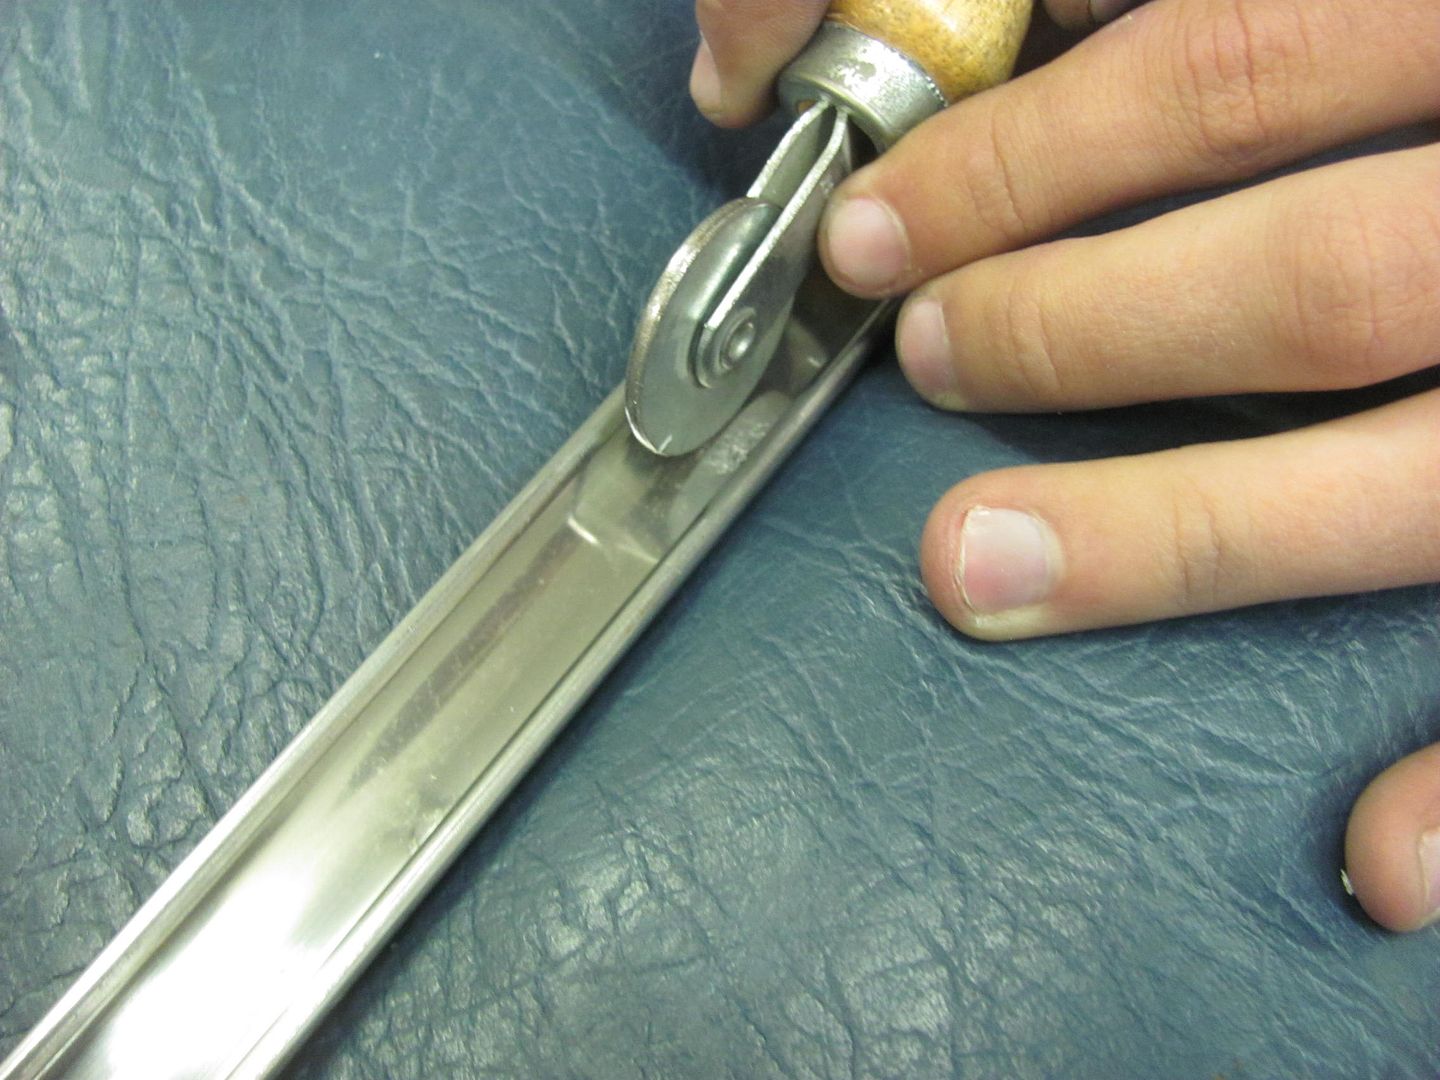 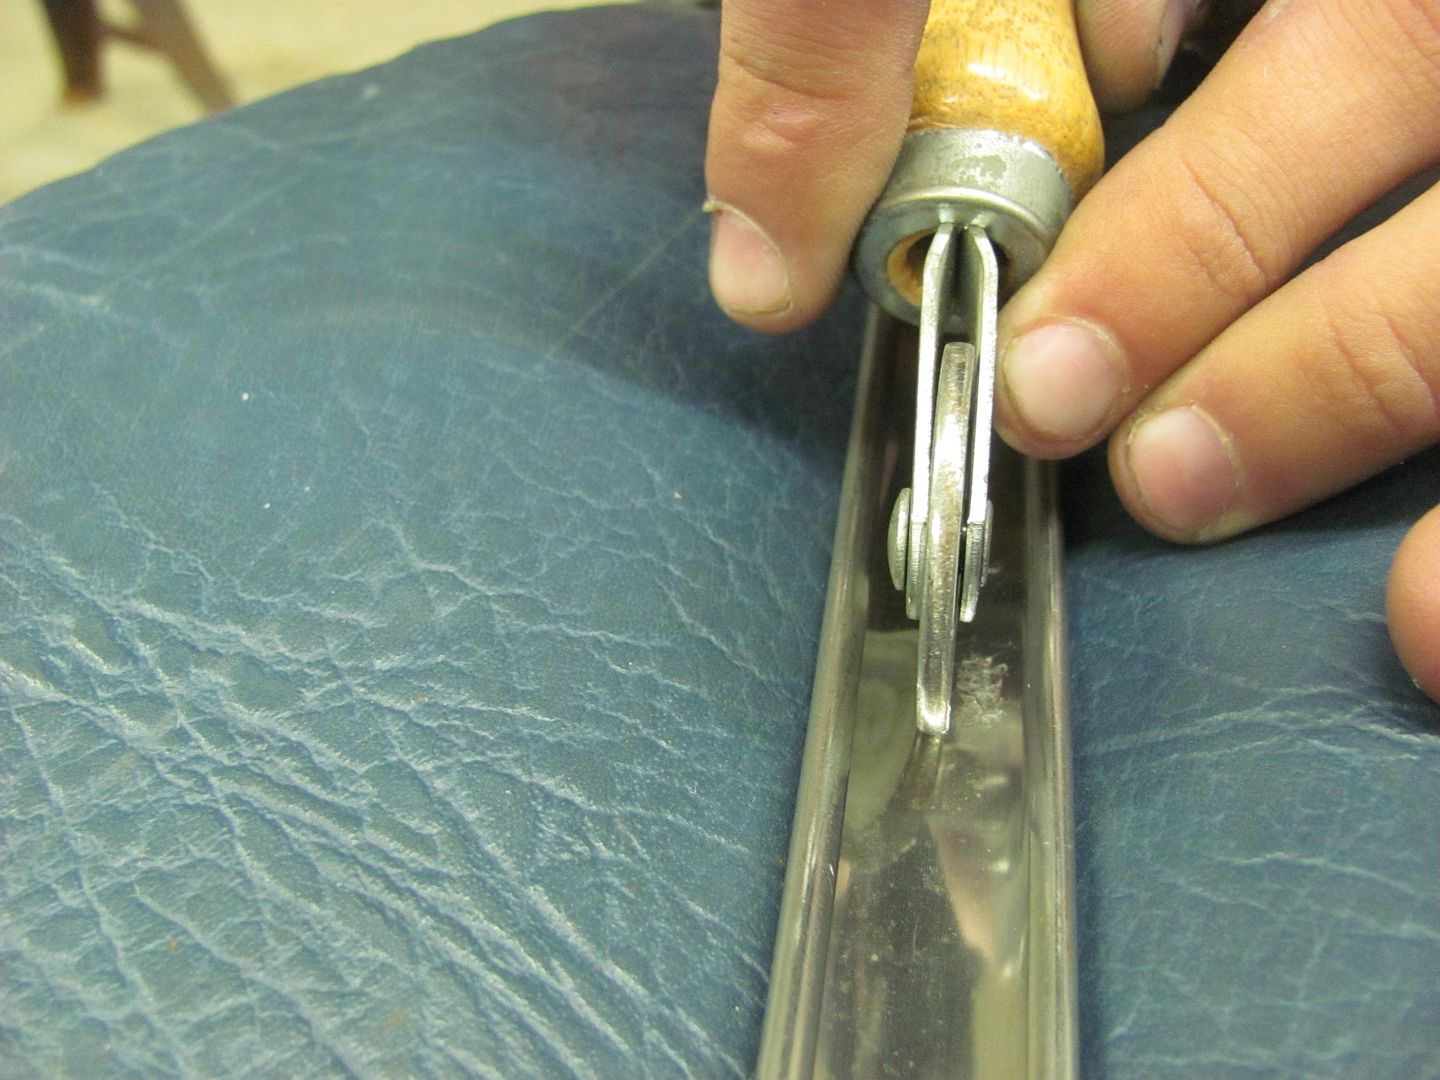 In many cases you'll bump the highs down, roll the lows out, and check your progress using the fluorescent light tube reflections, and repeat. It is not likely this is a one and done process. Another tool that can sneak in behind flanges. 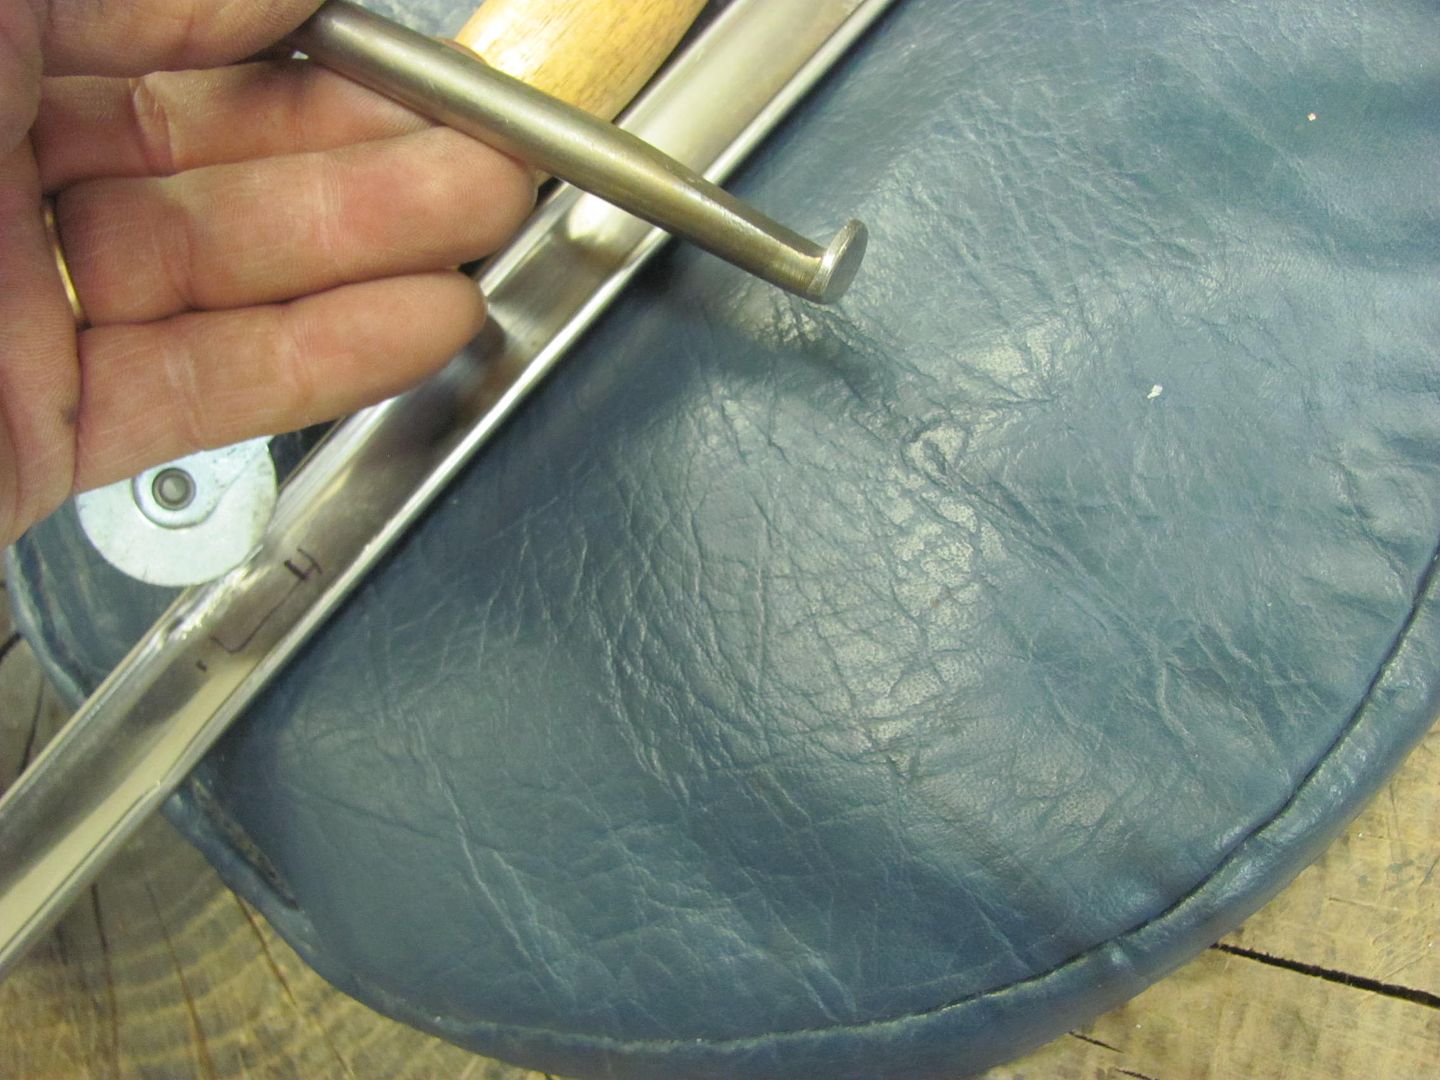 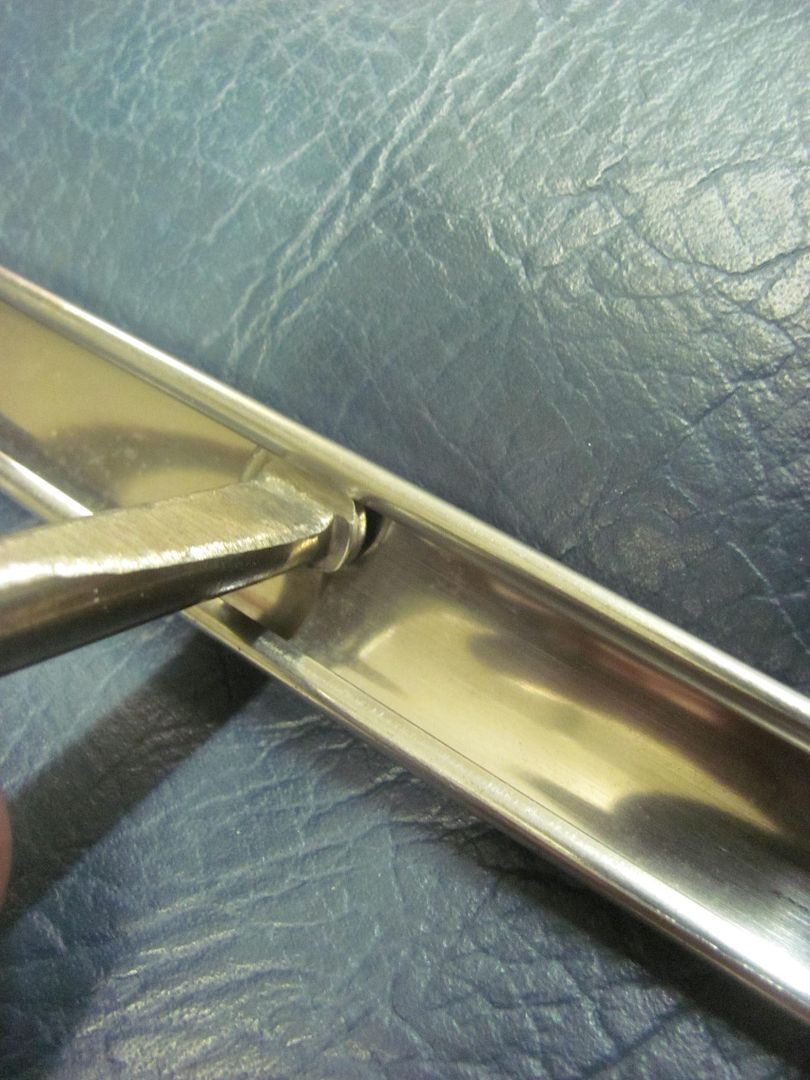 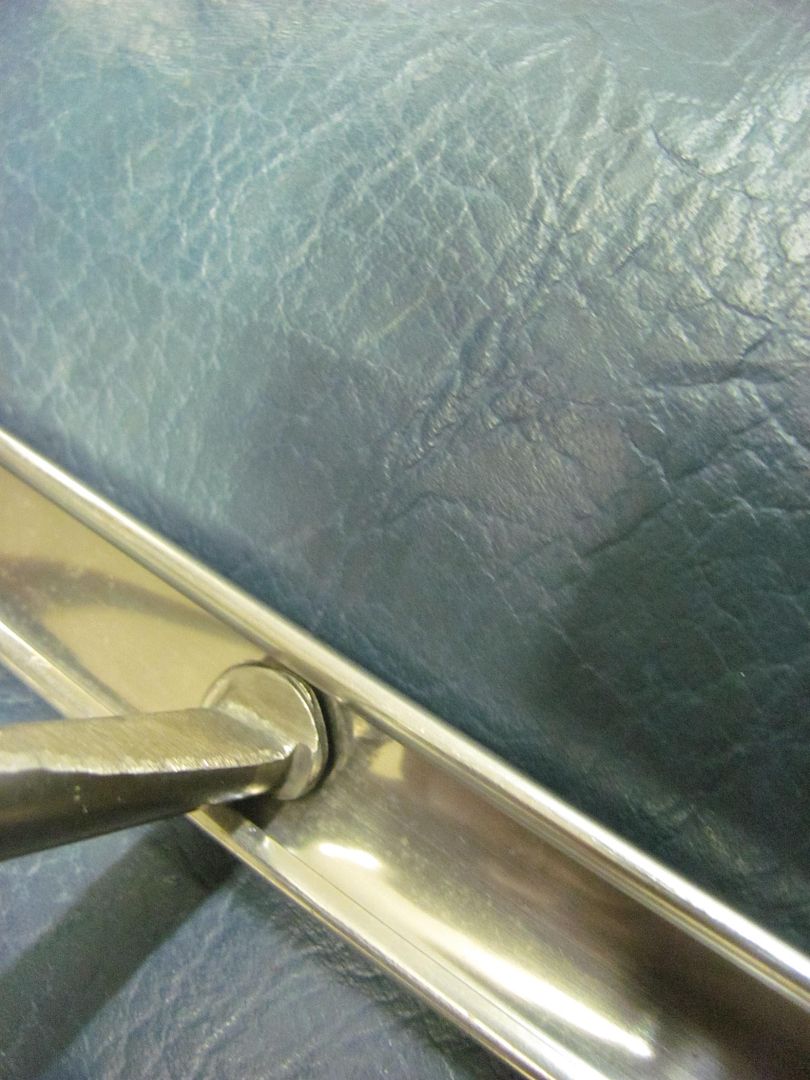 Also used some dry sanding with the durablock, here using 500 then 1200 paper. 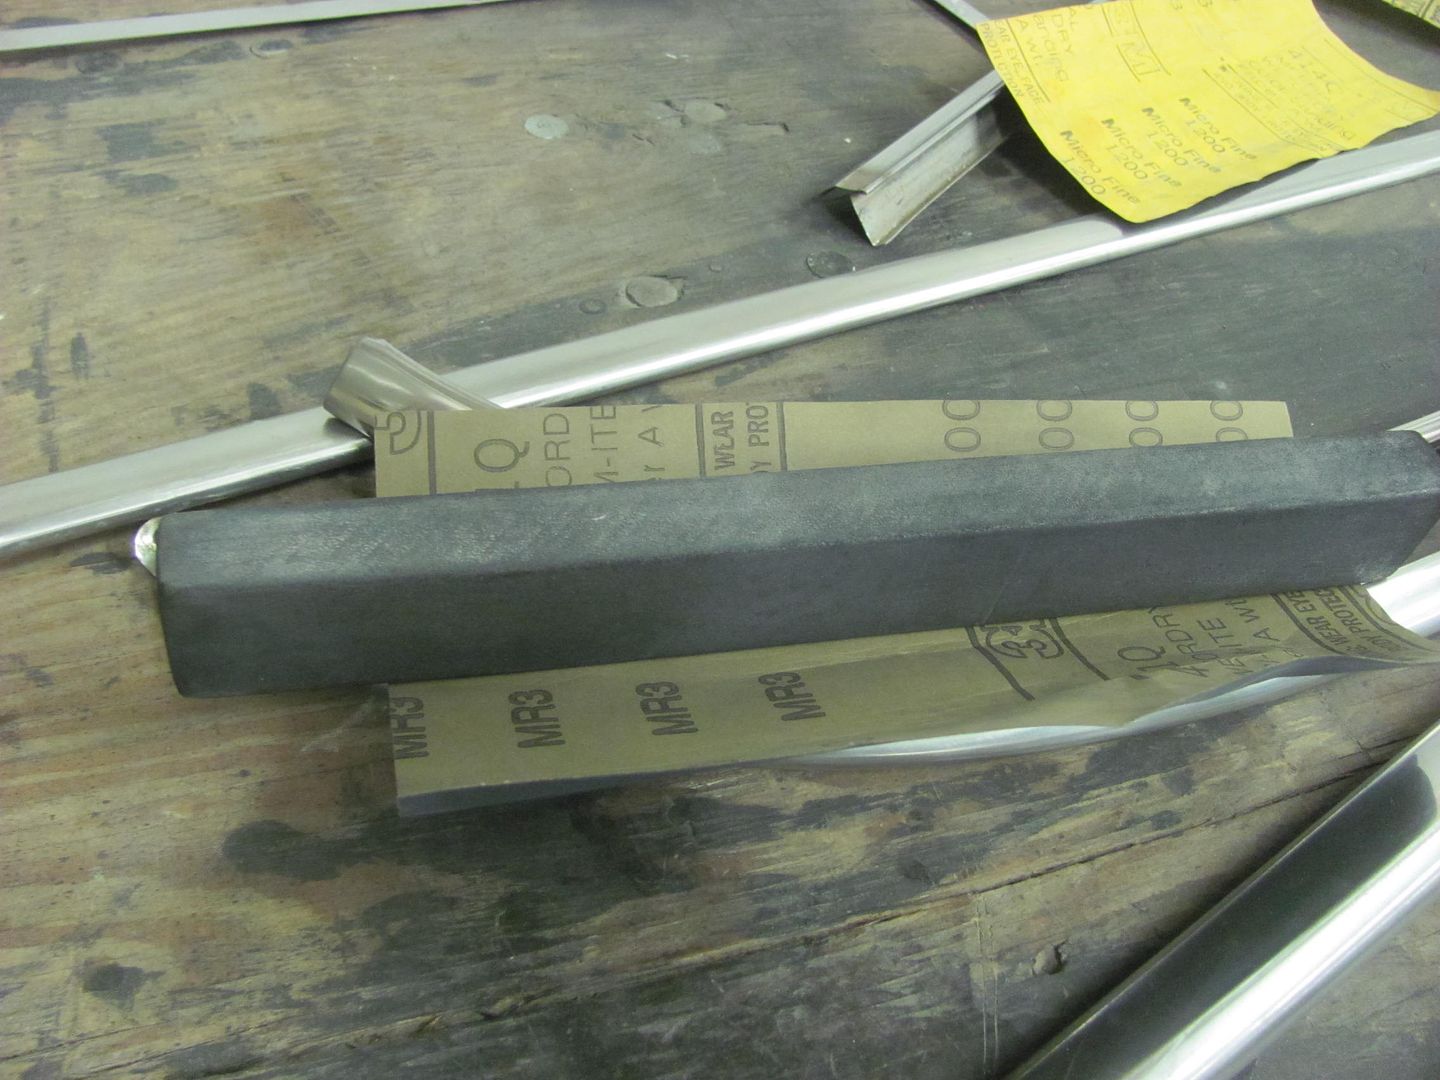 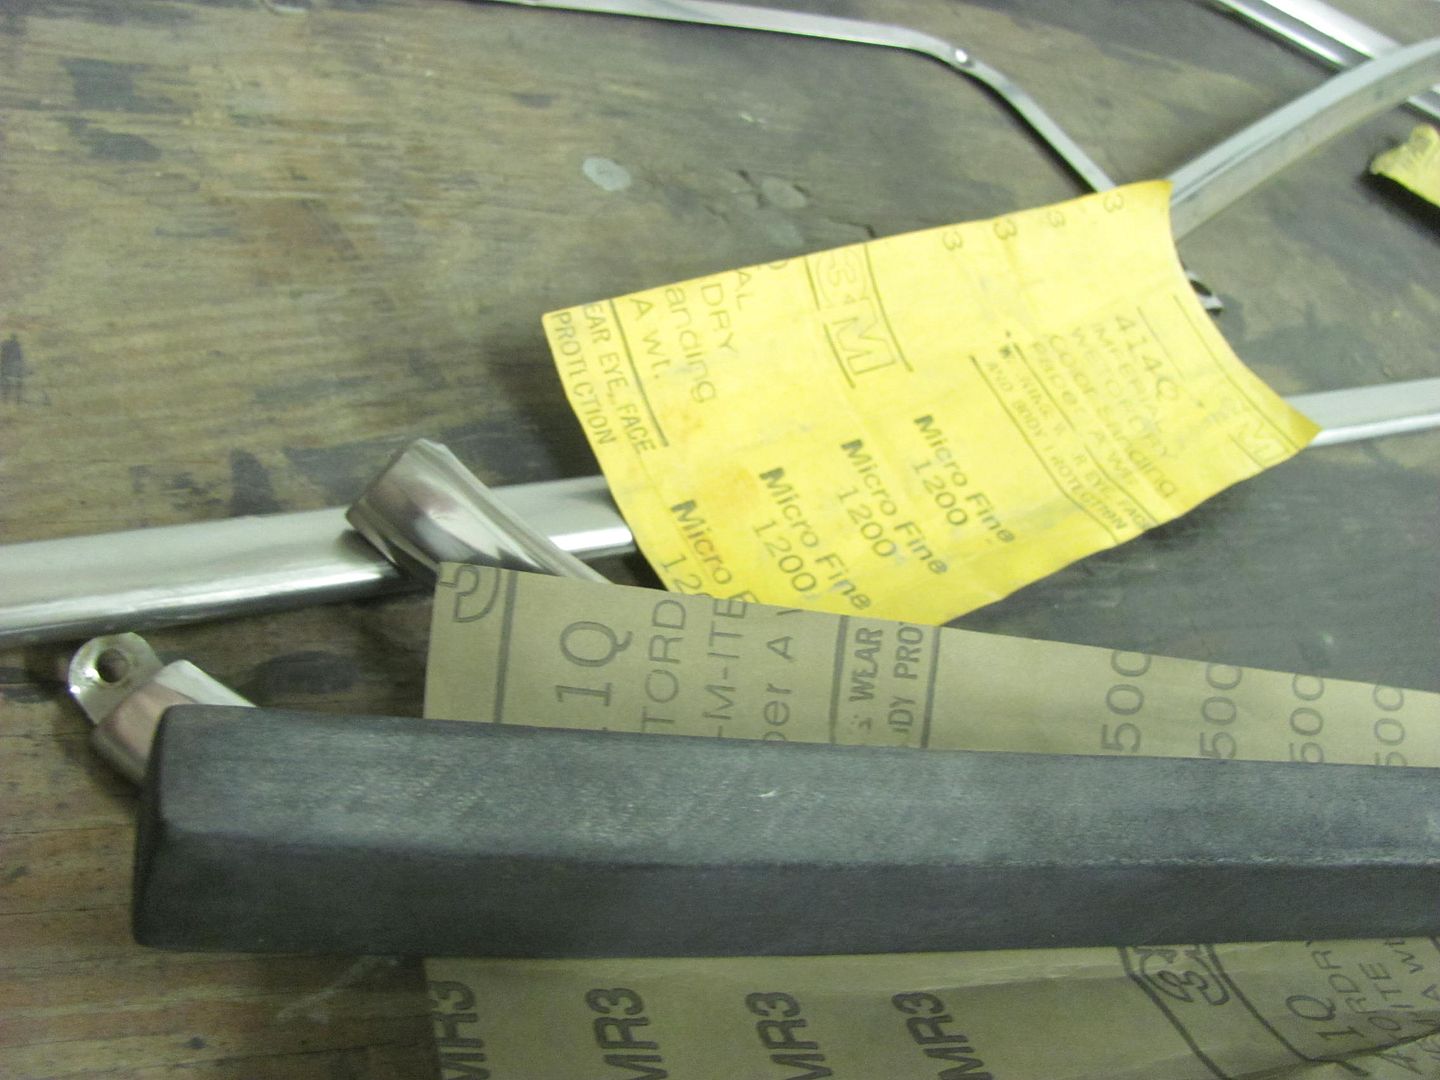 Then followed with the Trizact 1500, then 3000. Then it should be ready for the buffer.. 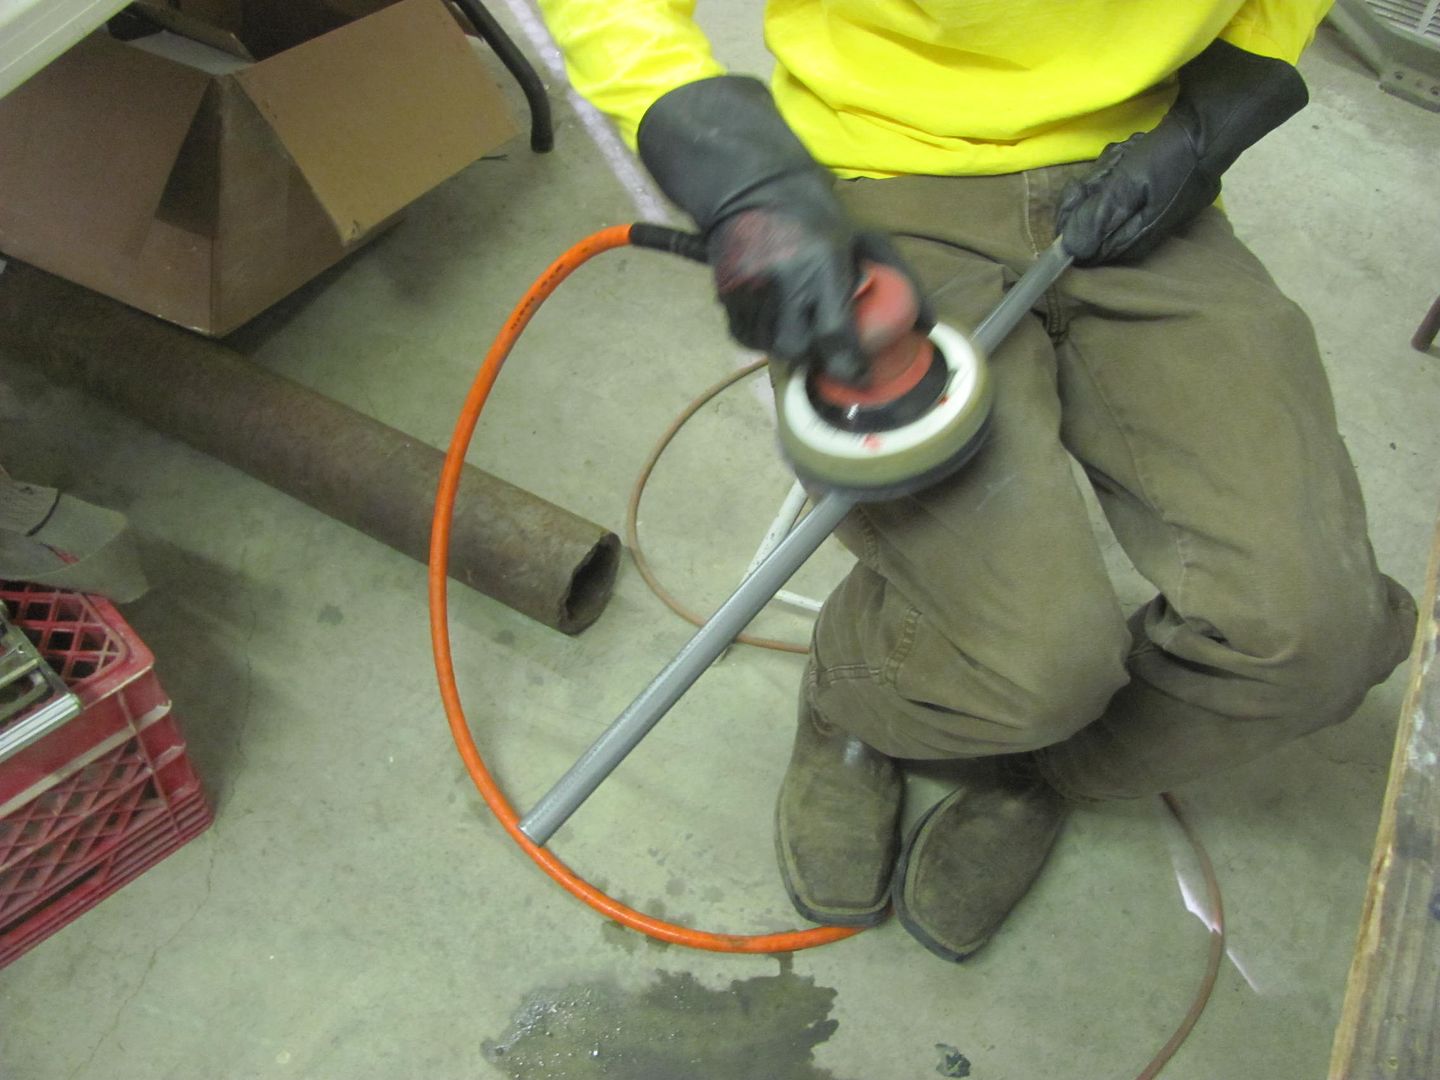
__________________
Robert |
|
|
|
|
04-13-2016, 03:26 PM
|
#7 |
|
Registered User
Join Date: May 2007
Location: Deale Md
Posts: 4,663
|
Re: 55 Wagon Progress
Now this is the class I want to attend or see the video series.
__________________
James 63 GMC V6 4speed carryall 65 chevy swb bbw V8 auto 68 K20 327/4 speed, buddy buckets 2002 GMC CC Dually Duramax 64 GMC lwb 3/4 V6 4speed SOLD 66 GMC swb bbw buddy buckets SOLD IG duallyjams The only thing that stays the same is constant change! |
|
|
|
|
04-14-2016, 08:57 PM
|
#8 |
|
6>8 Plugless........
 Join Date: Sep 2007
Location: Prairie City, Ia
Posts: 17,140
|
Re: 55 Wagon Progress
Nice 35, but really, what an awesome job on those flares! Modifying that hub assy was such a great idea. Continue the great work. Your thread needs an index so people can find your tips easier.
__________________
Ryan 1972 Chevy Longhorn K30 Cheyenne Super, 359 Inline 6 cylinder, Auto Trans, Tilt, Diesel Tach/Vach, Buckets, Rare Rear 4-link and air ride option Build Thread 1972 GMC Sierra Grande Longhorn 4x4 1972 Chevy Cheyenne Super K20 Long Step side tilt, tach, tow hooks, AC, 350 4 speed 1972 C10 Suburban Custom Deluxe 1969 Chevy milk truck 1971 Camaro RS 5.3 BTR STG3 Cam Super T10 1940 Ford 354 Hemi 46RH Ford 9" on air ride huge project Tired of spark plugs? Check this out. |
|
|
|
|
04-20-2016, 12:47 PM
|
#9 |
|
Registered User
Join Date: Apr 2003
Location: Indep, MO
Posts: 5,893
|
Re: 55 Wagon Progress
Great stuff! Love the new wheel.
__________________
Boppa's Old Yeller Truck Build, Old Yeller's New Heart! Project Buzz Bomb Flyin' Low! |
|
|
|
|
05-05-2016, 12:50 AM
|
#10 |
|
Registered User
Join Date: Jan 2013
Location: Leonardtown, MD
Posts: 1,637
|
Re: 55 Wagon Progress
Thanks for the comments!
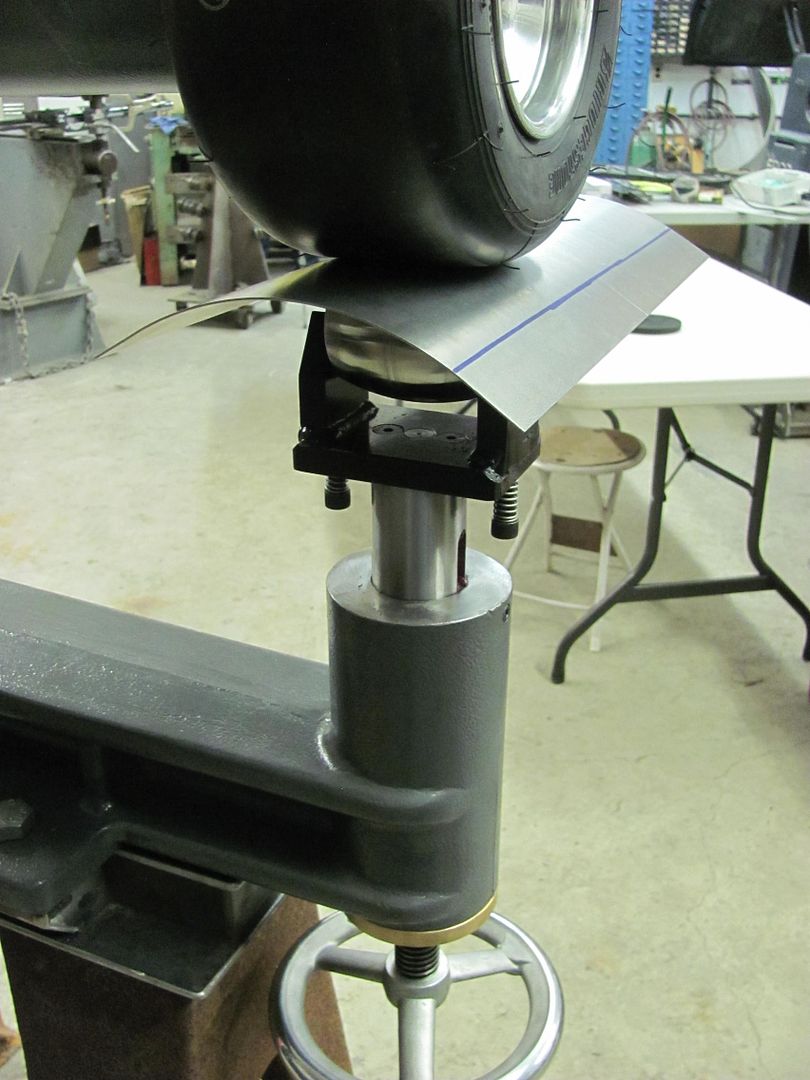
Sorry for the hiatus, the day job had me travelling, two weeks in UK and two weeks in HI. Got back this past Sunday. Tuesday afternoon we loaded up the wagon and dropped it off for media blasting.. should pick it up this weekend. 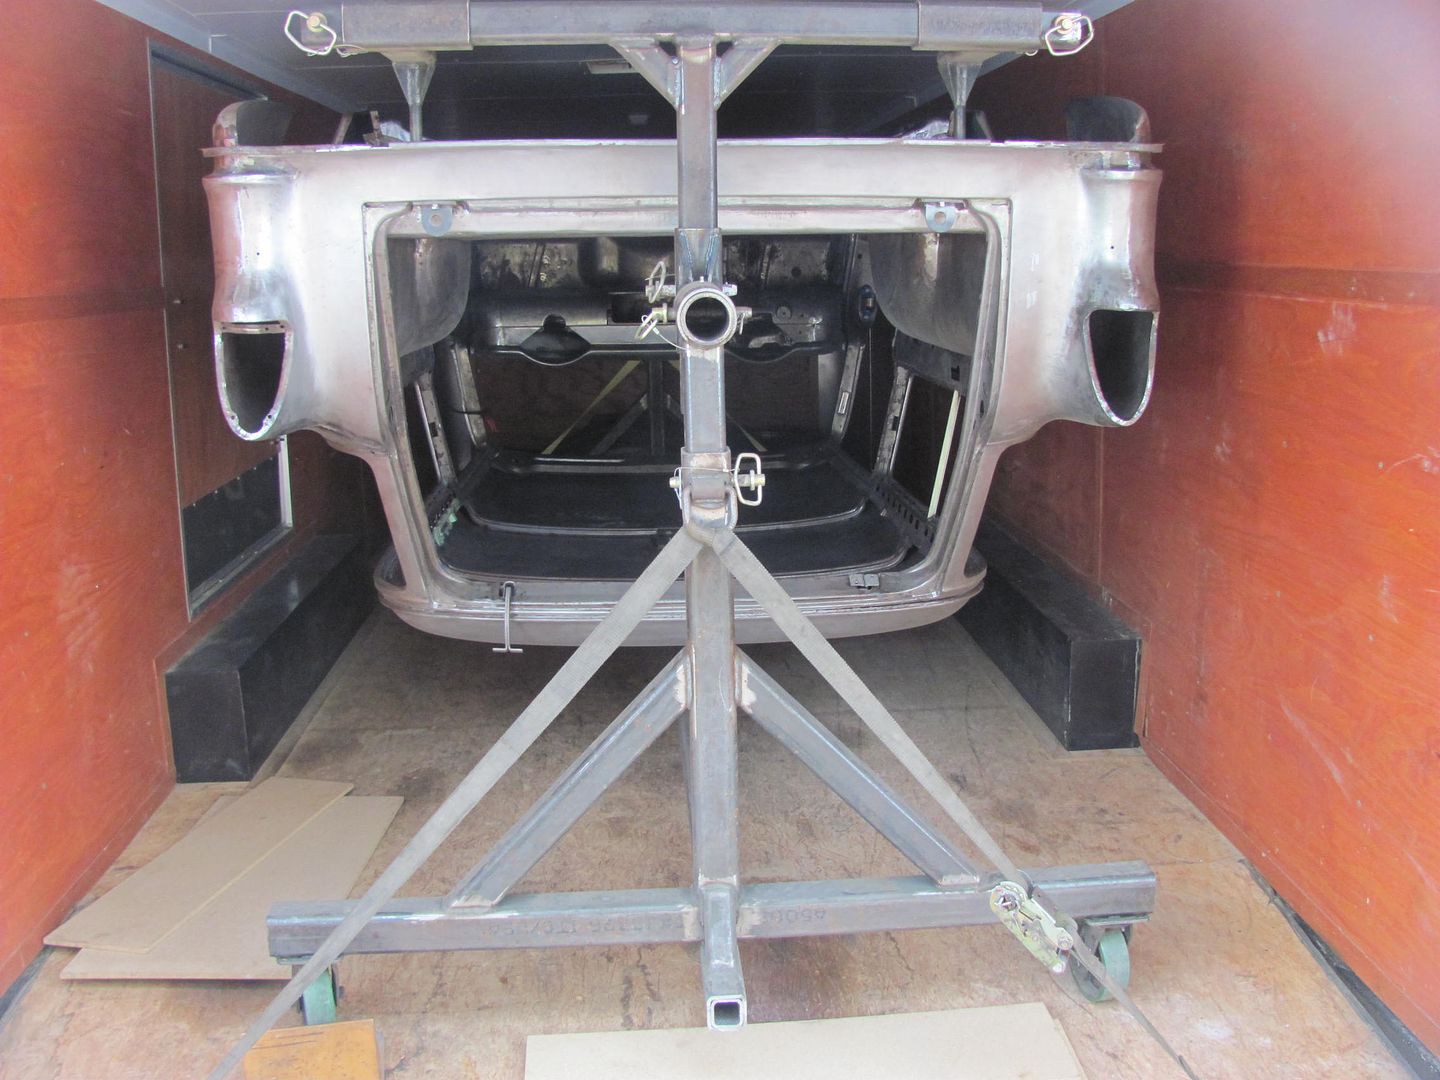 Tonight I worked on getting the Go Kart Slick hub fabricated for the wheeling machine.. I had stopped at a local machine shop and picked up a 3-1/2" diameter slug left over from their water jet. After some cleanup work on the South Bend, and a clearance hole for the 35mm upper shaft on the wheeling machine... 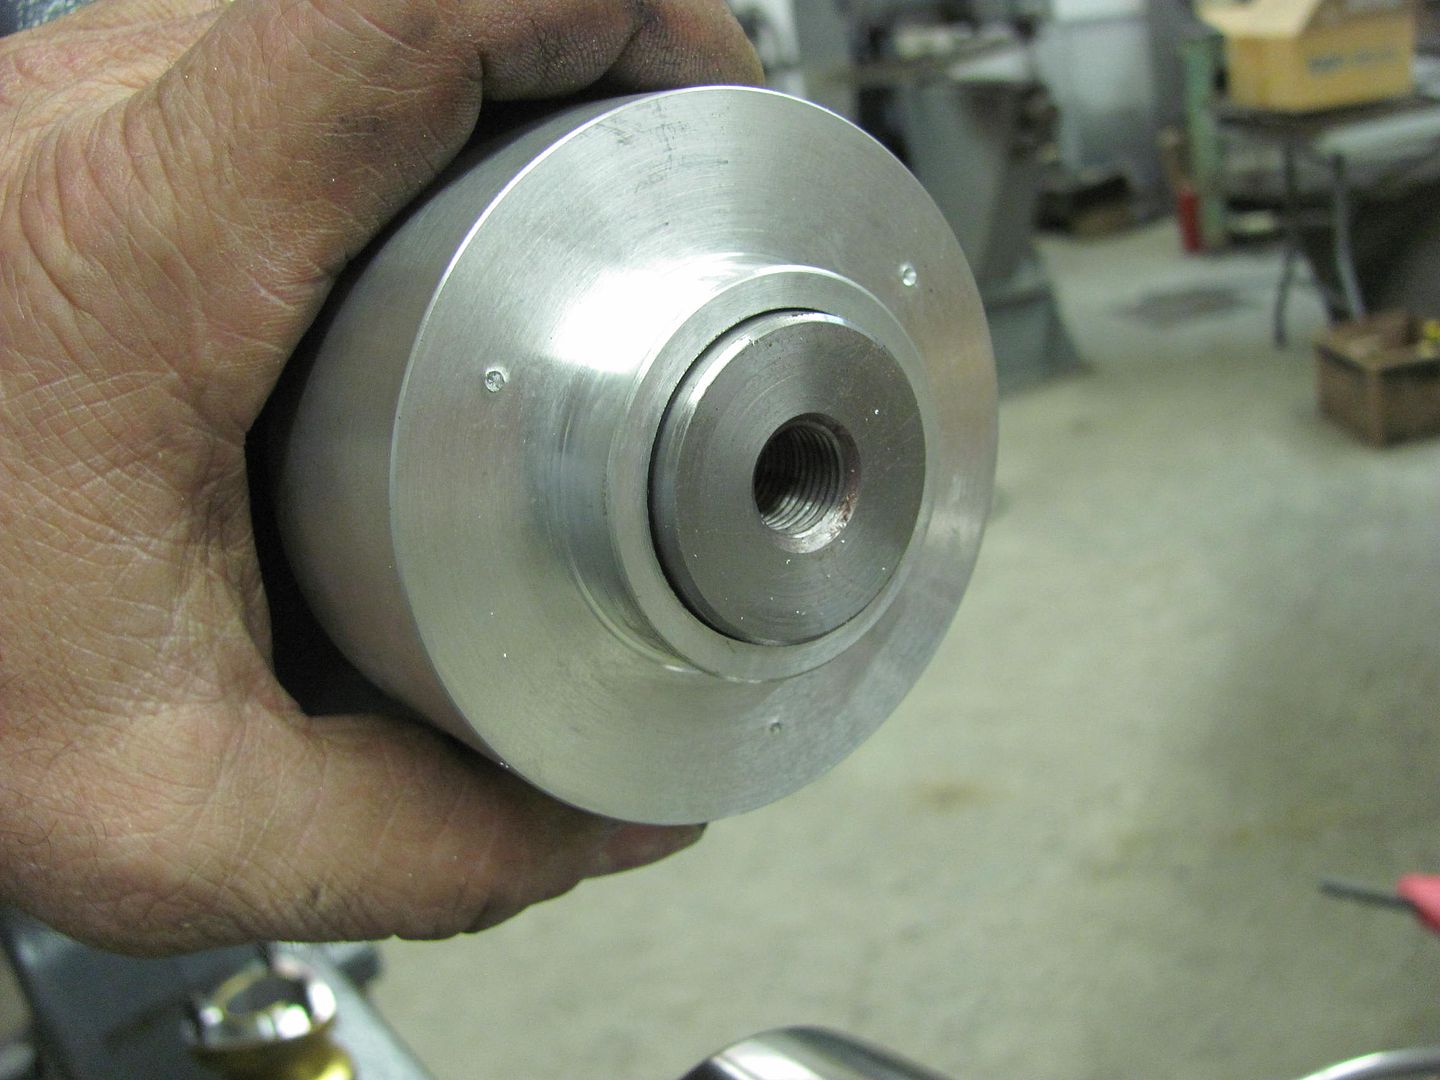 I had found this roller bearing (35mm ID) on ebay, as well as this thrust bearing... 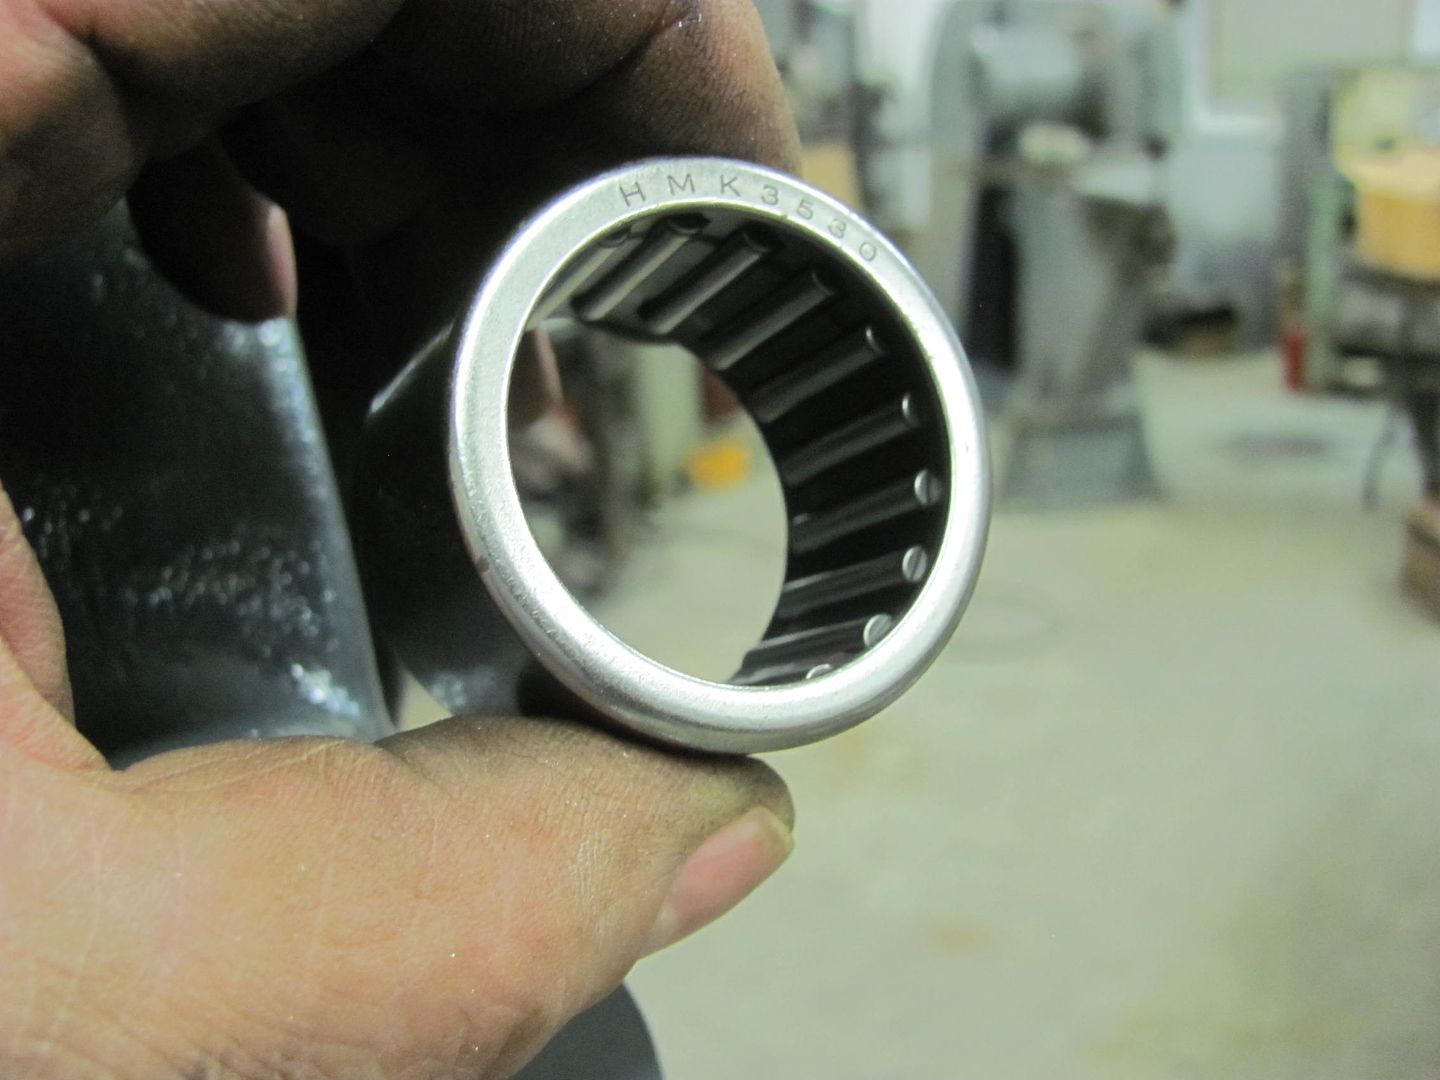 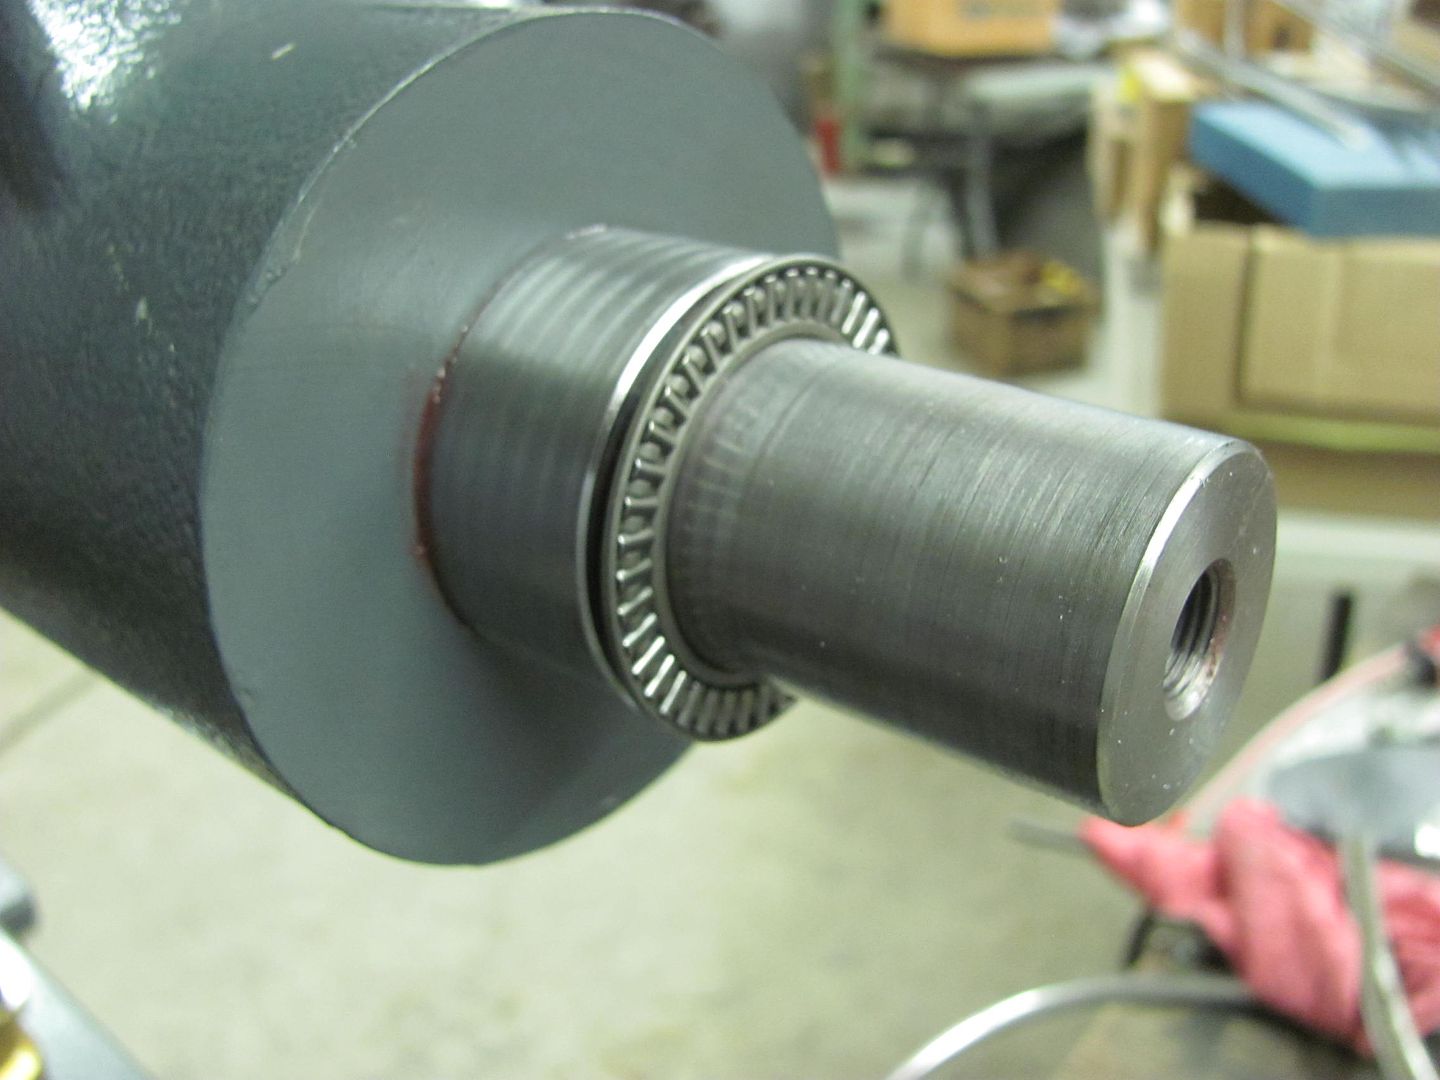 Getting close... 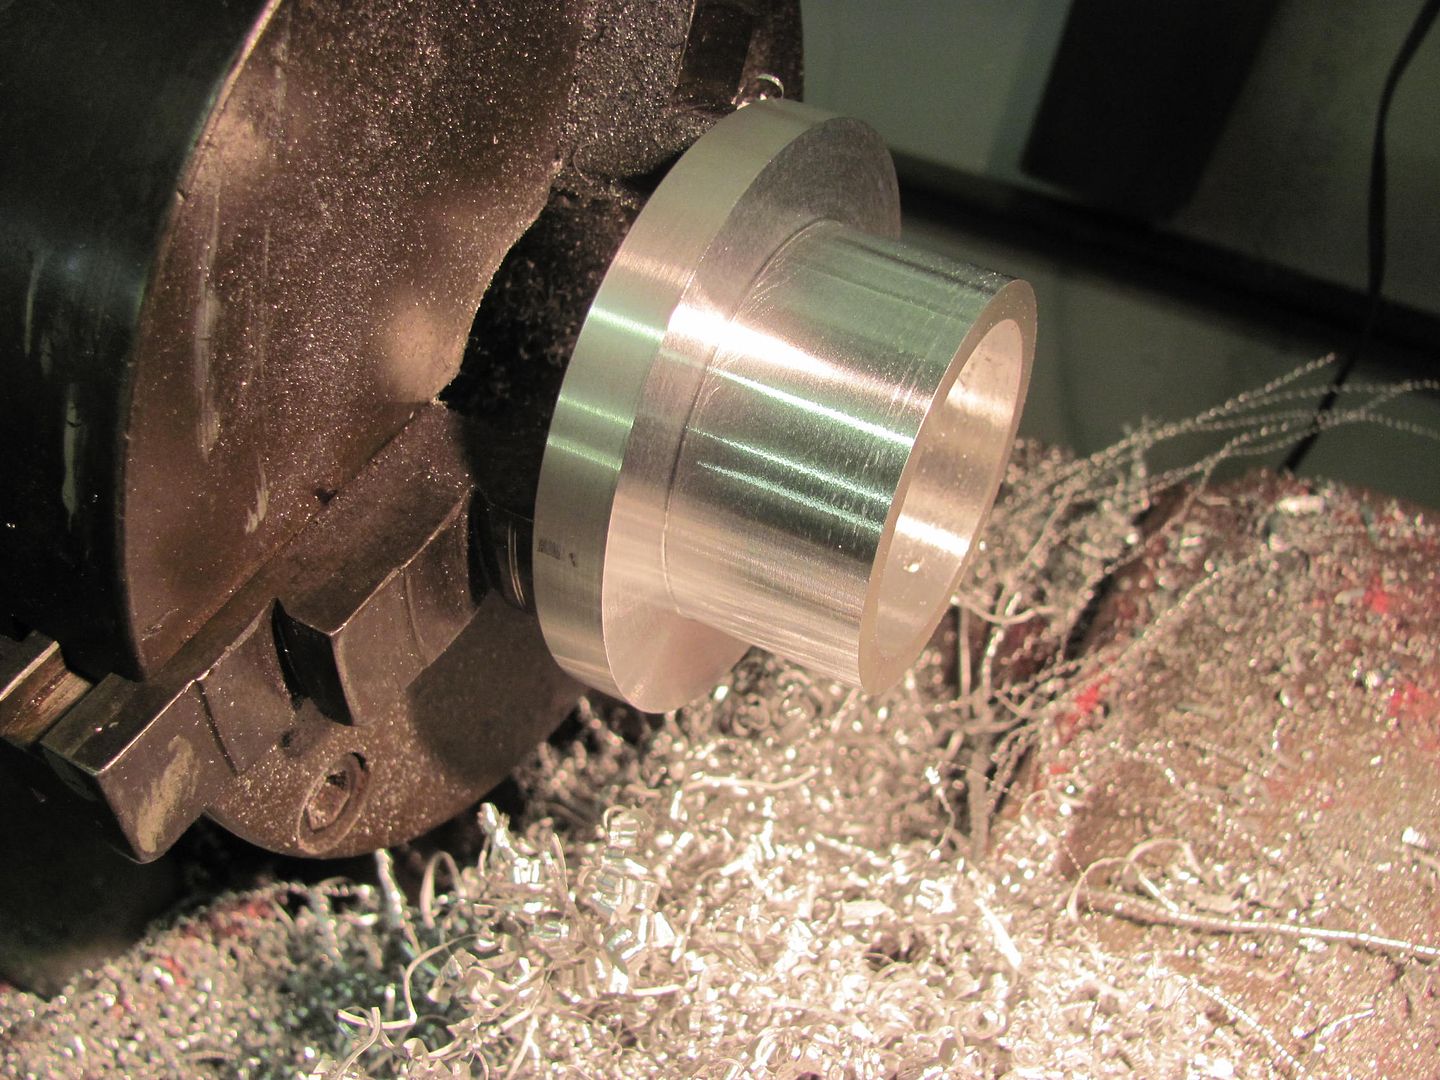 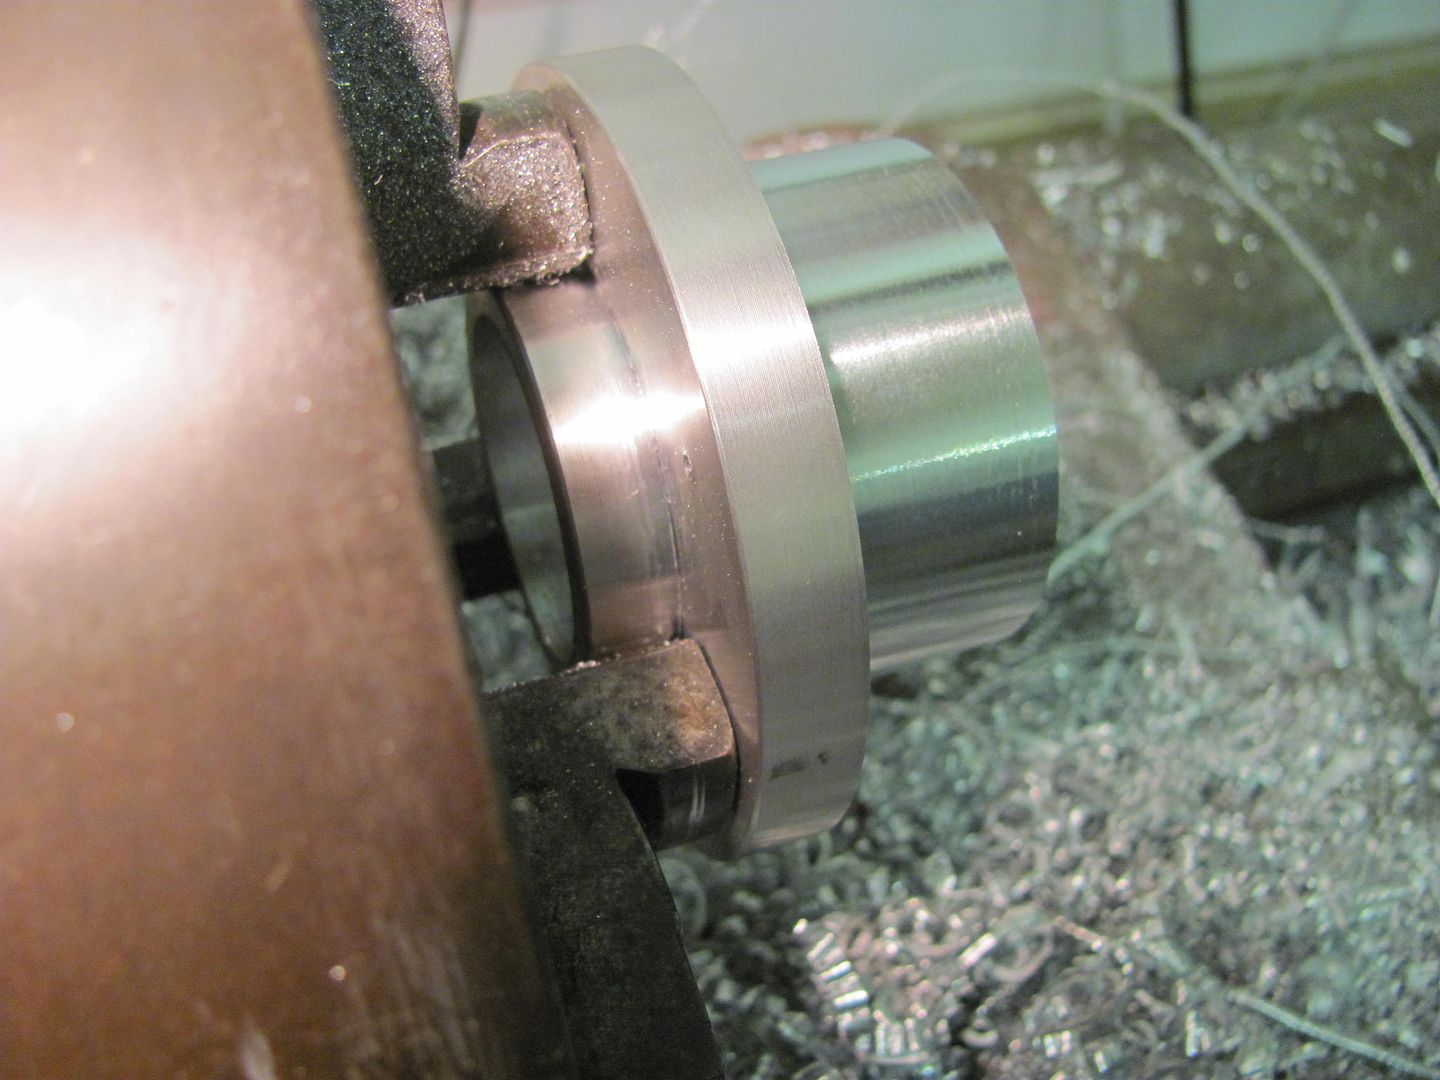  Bearing installed.... 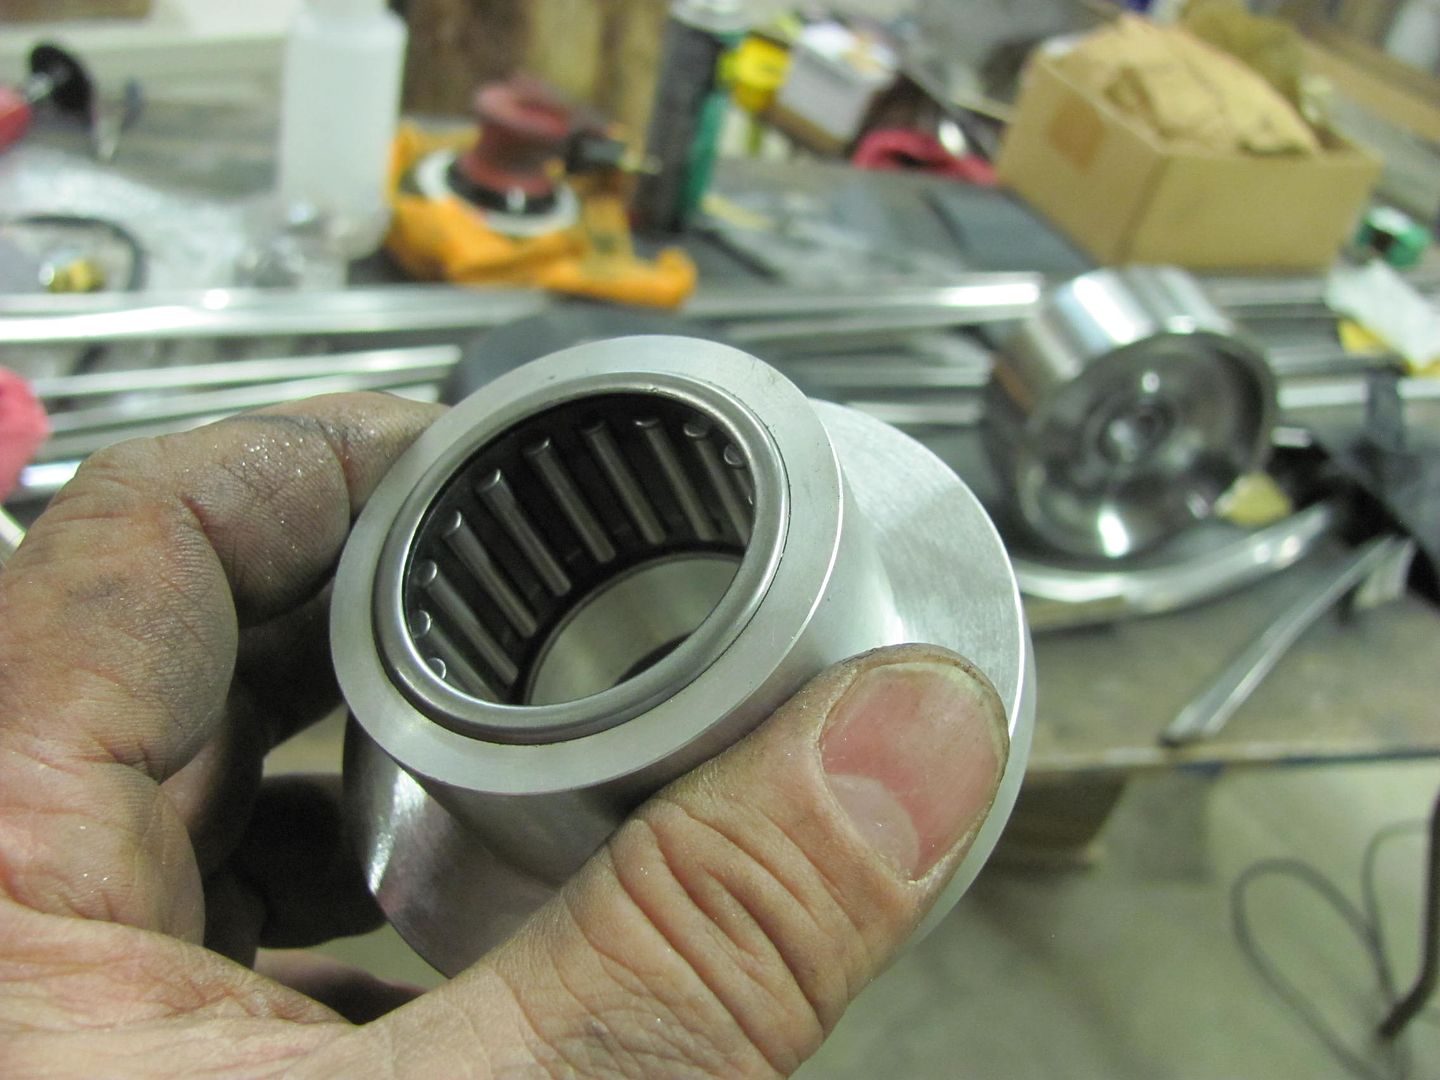 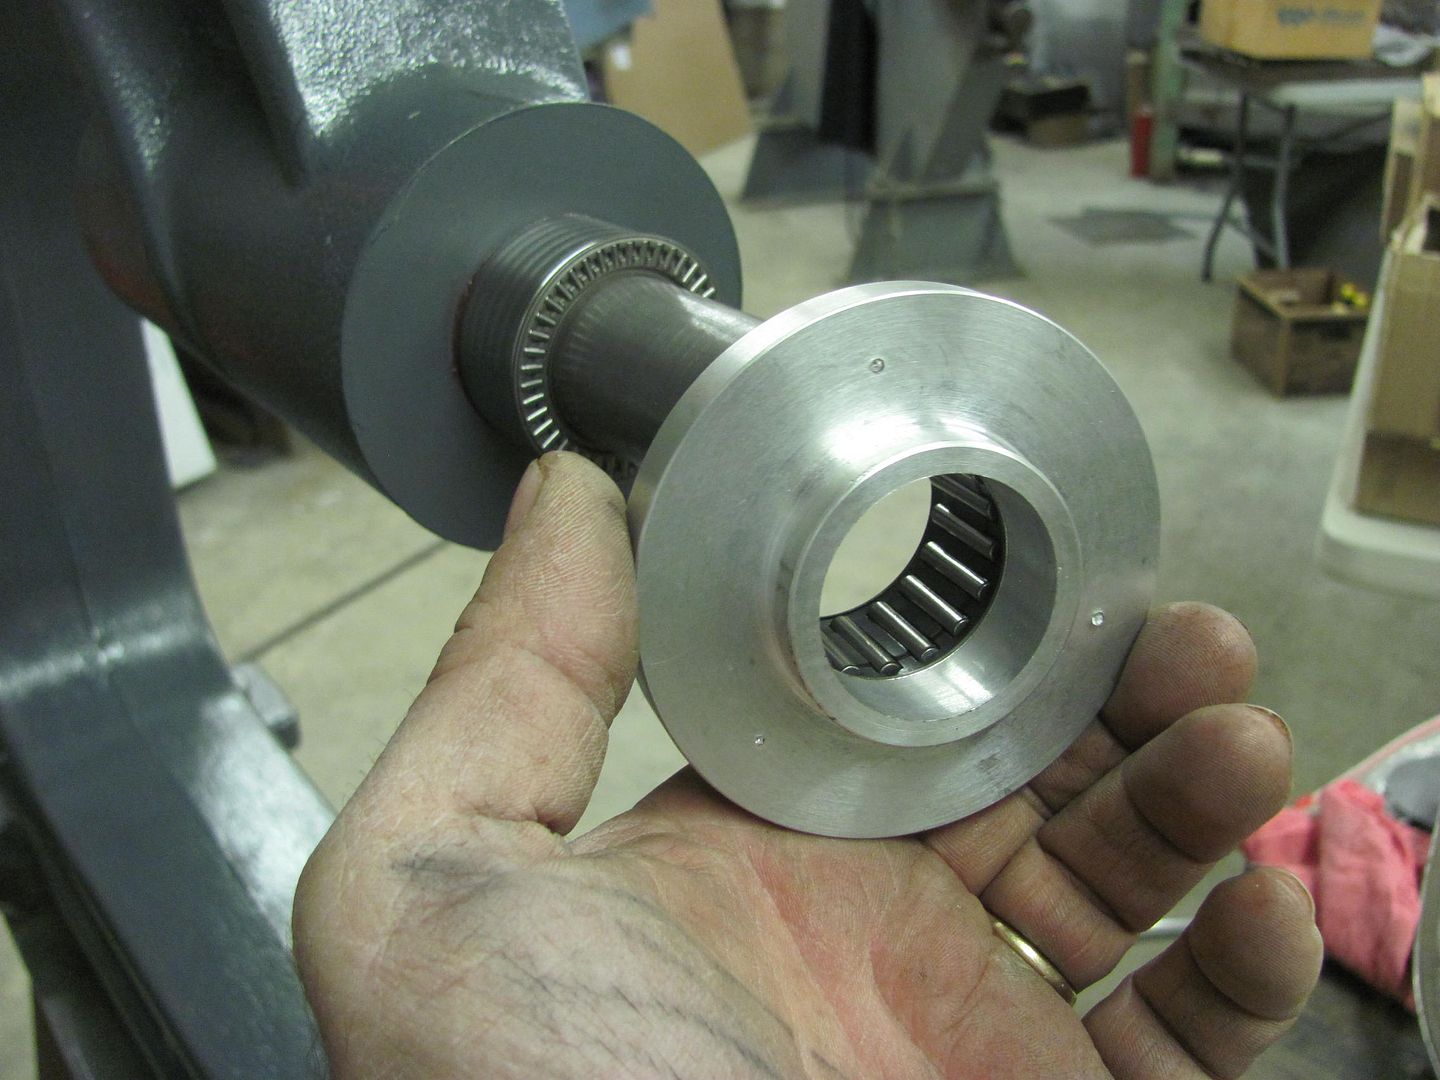 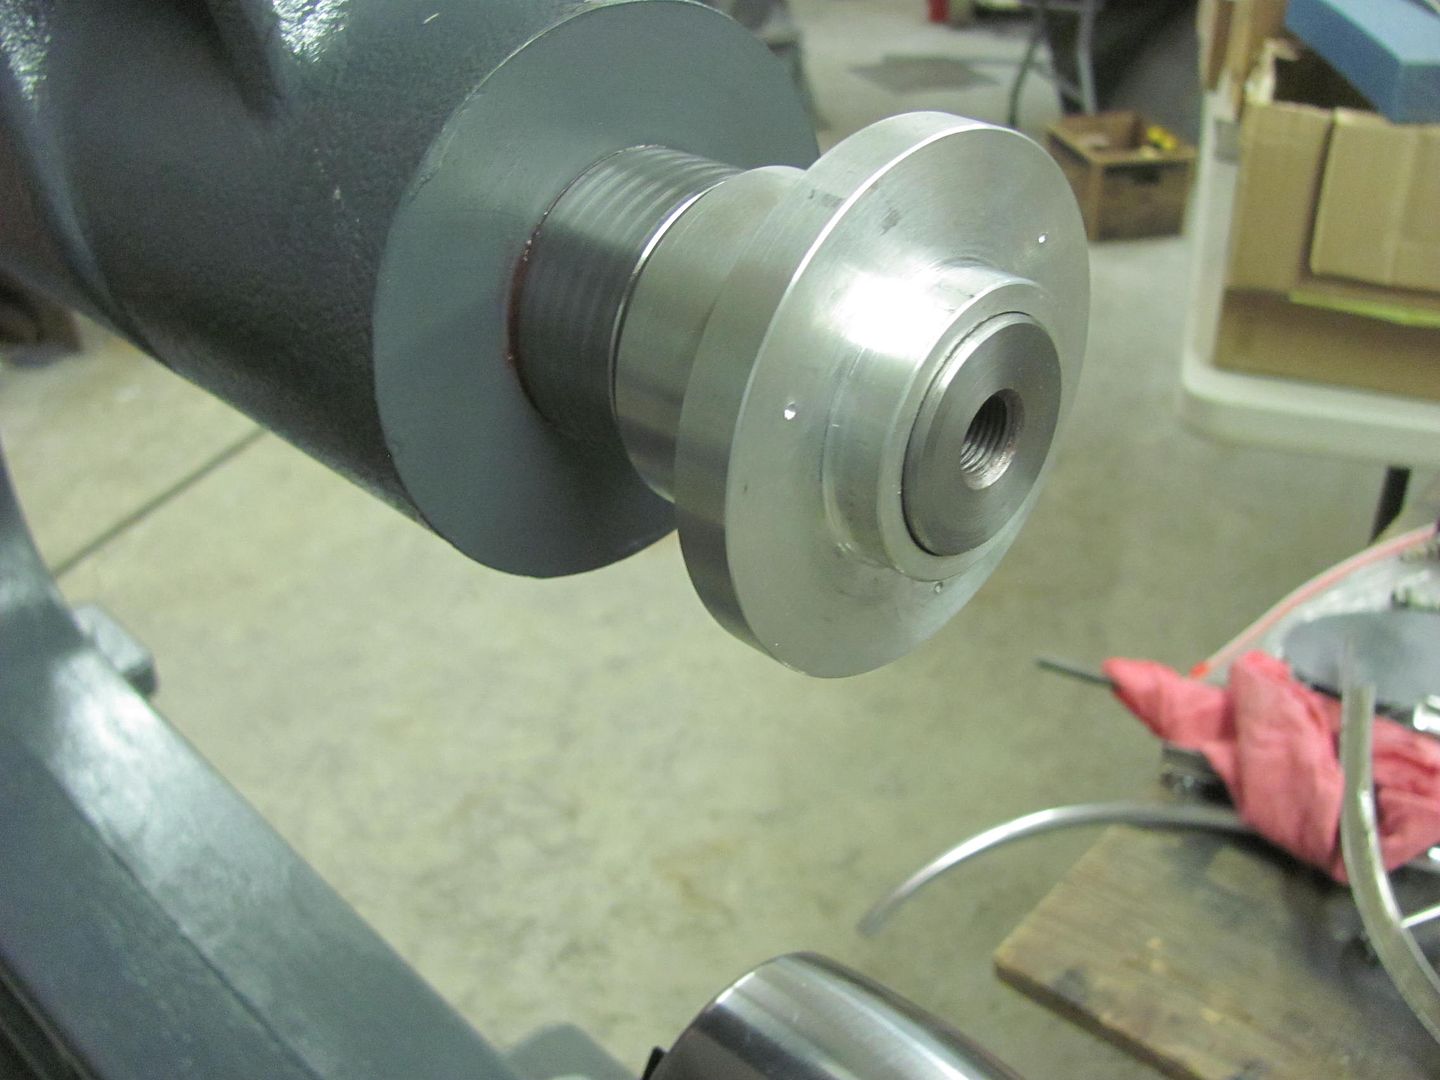 With slick held in place, the alignment looks pretty good... 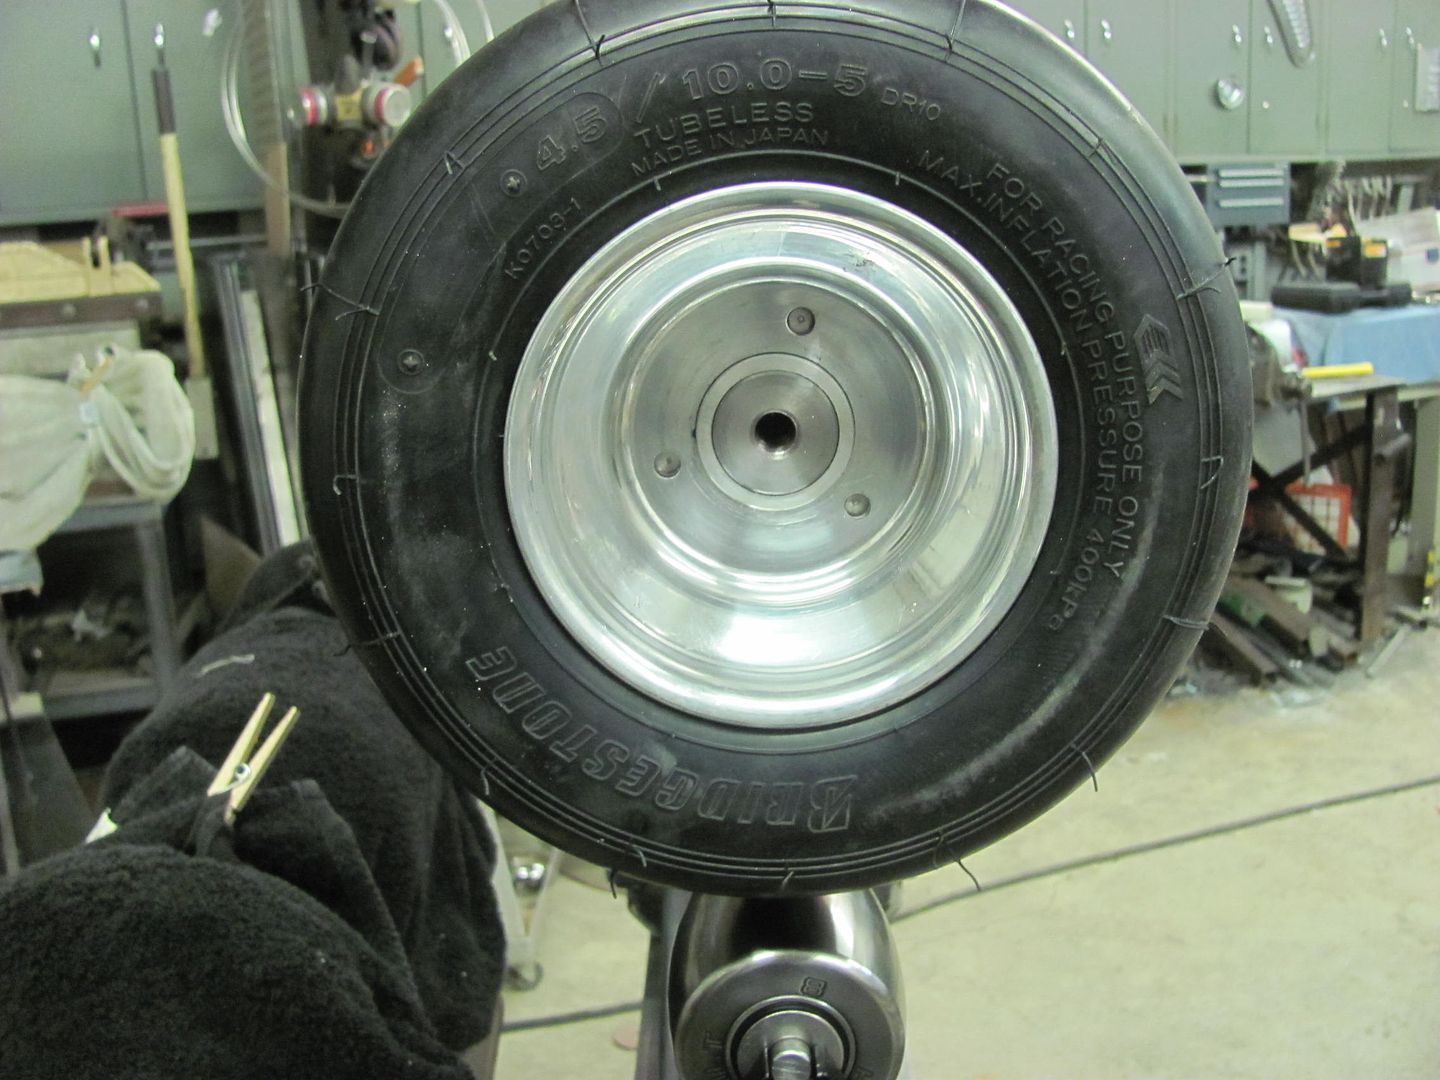 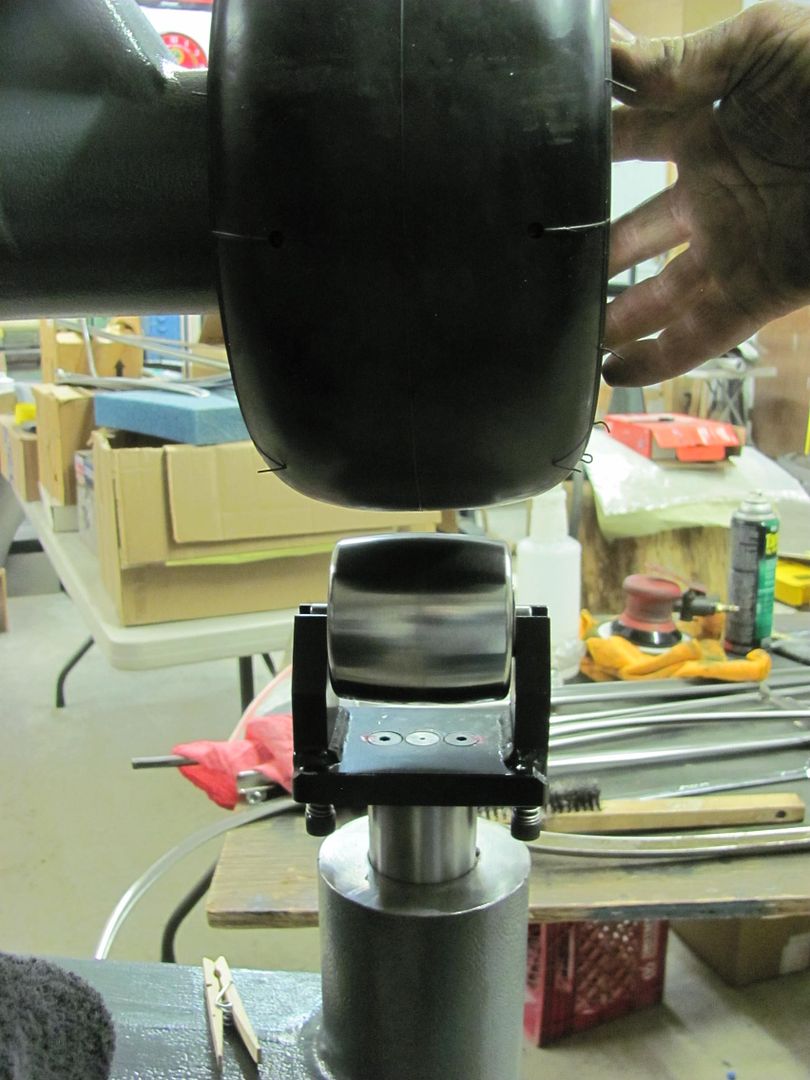 Motion picture version.... https://www.youtube.com/watch?v=HwVhZzGkBCE Still need to drill and tap the three lug holes and install the outer thrust bearing.. and then we can get working on the re-skinning of the glove box door..
__________________
Robert |
|
|
|
|
05-05-2016, 08:12 AM
|
#11 |
|
Registered User
Join Date: May 2007
Location: Deale Md
Posts: 4,663
|
Re: 55 Wagon Progress
Where do you get your media blasting done ?
__________________
James 63 GMC V6 4speed carryall 65 chevy swb bbw V8 auto 68 K20 327/4 speed, buddy buckets 2002 GMC CC Dually Duramax 64 GMC lwb 3/4 V6 4speed SOLD 66 GMC swb bbw buddy buckets SOLD IG duallyjams The only thing that stays the same is constant change! |
|
|
|
|
05-05-2016, 08:56 AM
|
#12 |
|
Registered User
Join Date: Jun 2006
Location: Indiana
Posts: 4,859
|
Re: 55 Wagon Progress
It looks like the wagon is being prepped for Australia.
I would have to be very careful if I were in your shop. Apparently drooling all over the equipment is considered bad form. 
__________________
'70 GMC C1500 LWB Power disc brakes. WooHoo! Posi 6 Lug Dana 60 |
|
|
|
|
05-13-2016, 10:25 AM
|
#13 | |
|
Registered User
Join Date: Jan 2013
Location: Leonardtown, MD
Posts: 1,637
|
Re: 55 Wagon Progress
Quote:
__________________
Robert |
|
|
|
|
|
05-05-2016, 02:33 PM
|
#14 |
|
Registered User
Join Date: Jan 2013
Location: Leonardtown, MD
Posts: 1,637
|
Re: 55 Wagon Progress
Yeah, that's the only way it fits in the trailer when on the rotisserie. The shop is an absolute mess right now, it could use a spit shine..
James, we had the frame done at a local machine shop, and when we went back to get the body done his air dryer system had broken. This was the first part of January, and they just fixed it last week. So I got tired of waiting, before I left for the UK trip I had found another place and made a reservation. Will pass on the details / results once I get the car back in a couple days and get to see how it turns out.
__________________
Robert |
|
|
|
|
05-11-2016, 12:35 PM
|
#15 |
|
Registered User
Join Date: Apr 2003
Location: Indep, MO
Posts: 5,893
|
Re: 55 Wagon Progress
Congrats on the mention in the new TRJ, Robert. The Louvers are cool!
__________________
Boppa's Old Yeller Truck Build, Old Yeller's New Heart! Project Buzz Bomb Flyin' Low! |
|
|
|
|
05-11-2016, 01:11 PM
|
#16 |
|
Registered User
Join Date: Jan 2013
Location: Leonardtown, MD
Posts: 1,637
|
Re: 55 Wagon Progress
Thanks! Should be getting a copy in a couple weeks

__________________
Robert |
|
|
|
|
05-16-2016, 12:28 AM
|
#17 |
|
Registered User
Join Date: Jan 2013
Location: Leonardtown, MD
Posts: 1,637
|
Re: 55 Wagon Progress
Well today was our Saturday so we put the newly installed GoKart slick to use on the cast wheeling machine, along with the 4" diameter lower anvil. Started with slight pressure and gradually increased. Tire was about 1/2 deflated.
  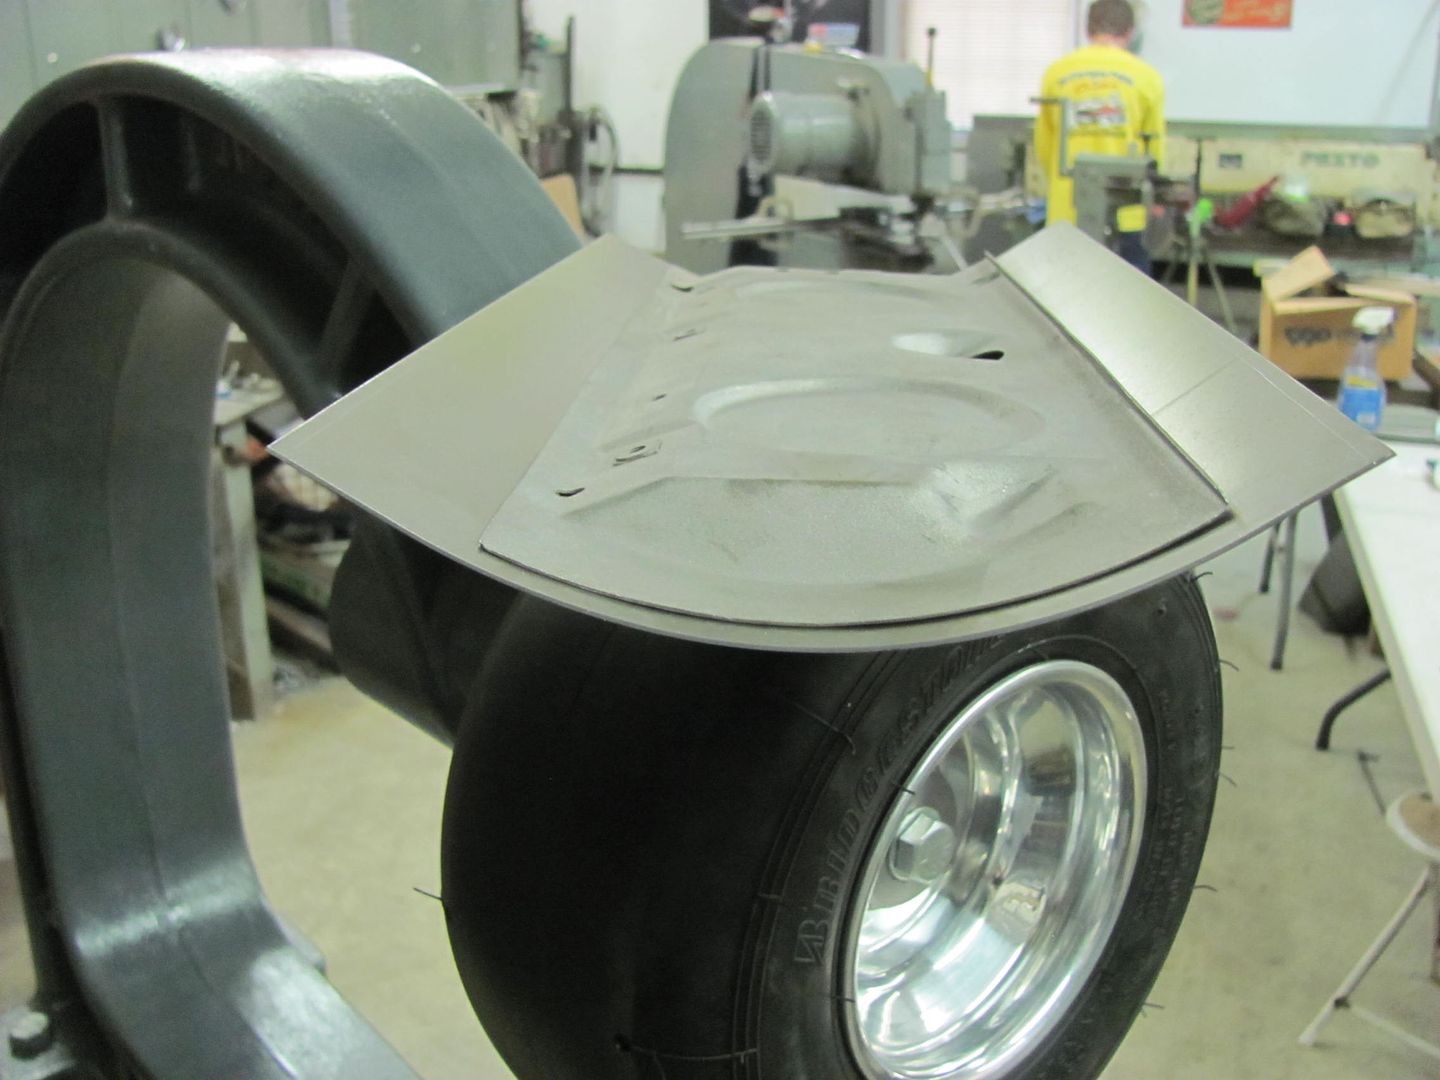 The sides (as shown) had been left a bit long to keep from flattening out fingertips, so now we trimmed one side and marked for the bends. The tipping wheel in the bead roller was used to thin the bend area for a bit of friendly persuasion.. 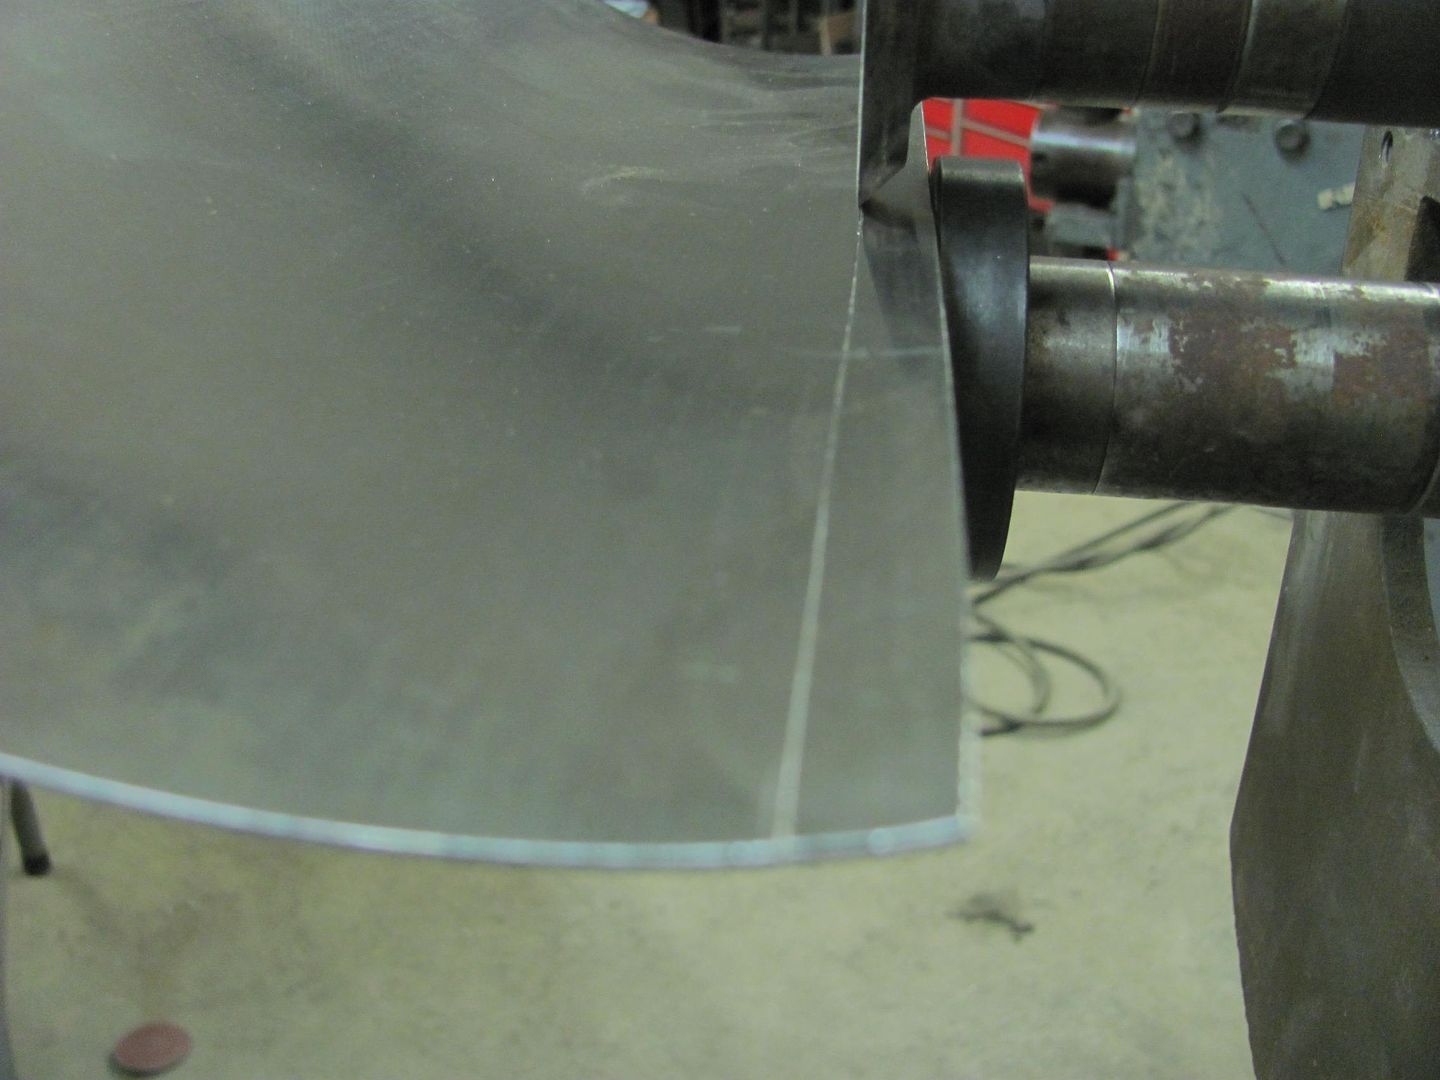 These were fun. About 3/16" from bend to bend....or less. Had to use all the tricks, hem is still loose, we'll epoxy all the pieces apart and then assemble, making all the folds tight.  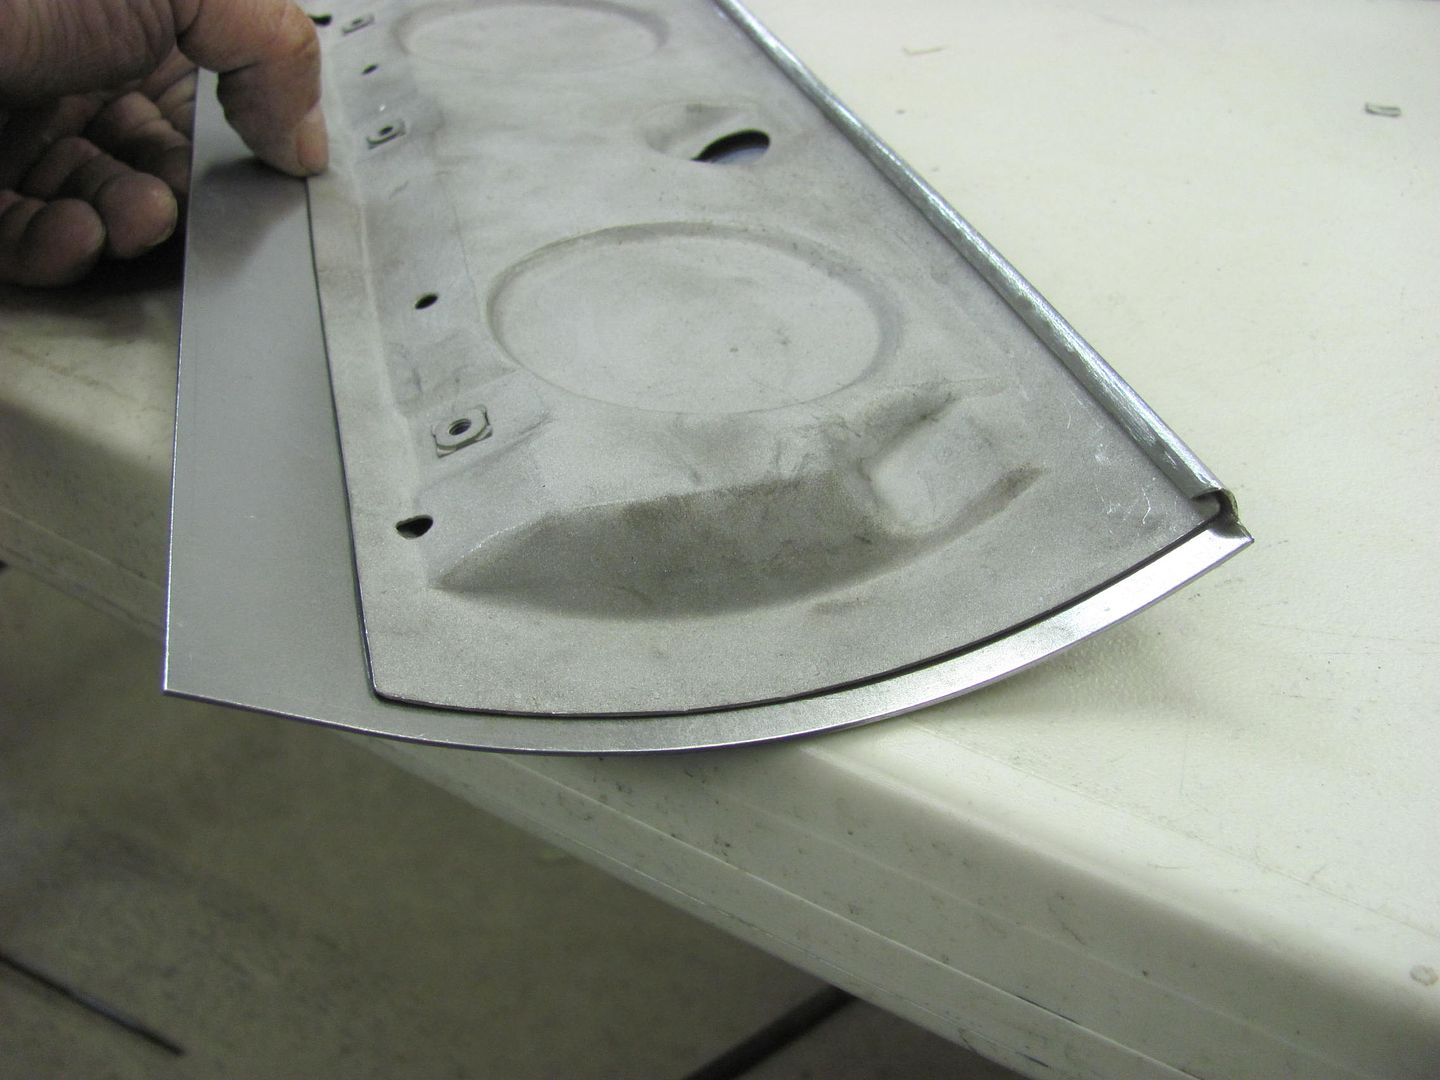 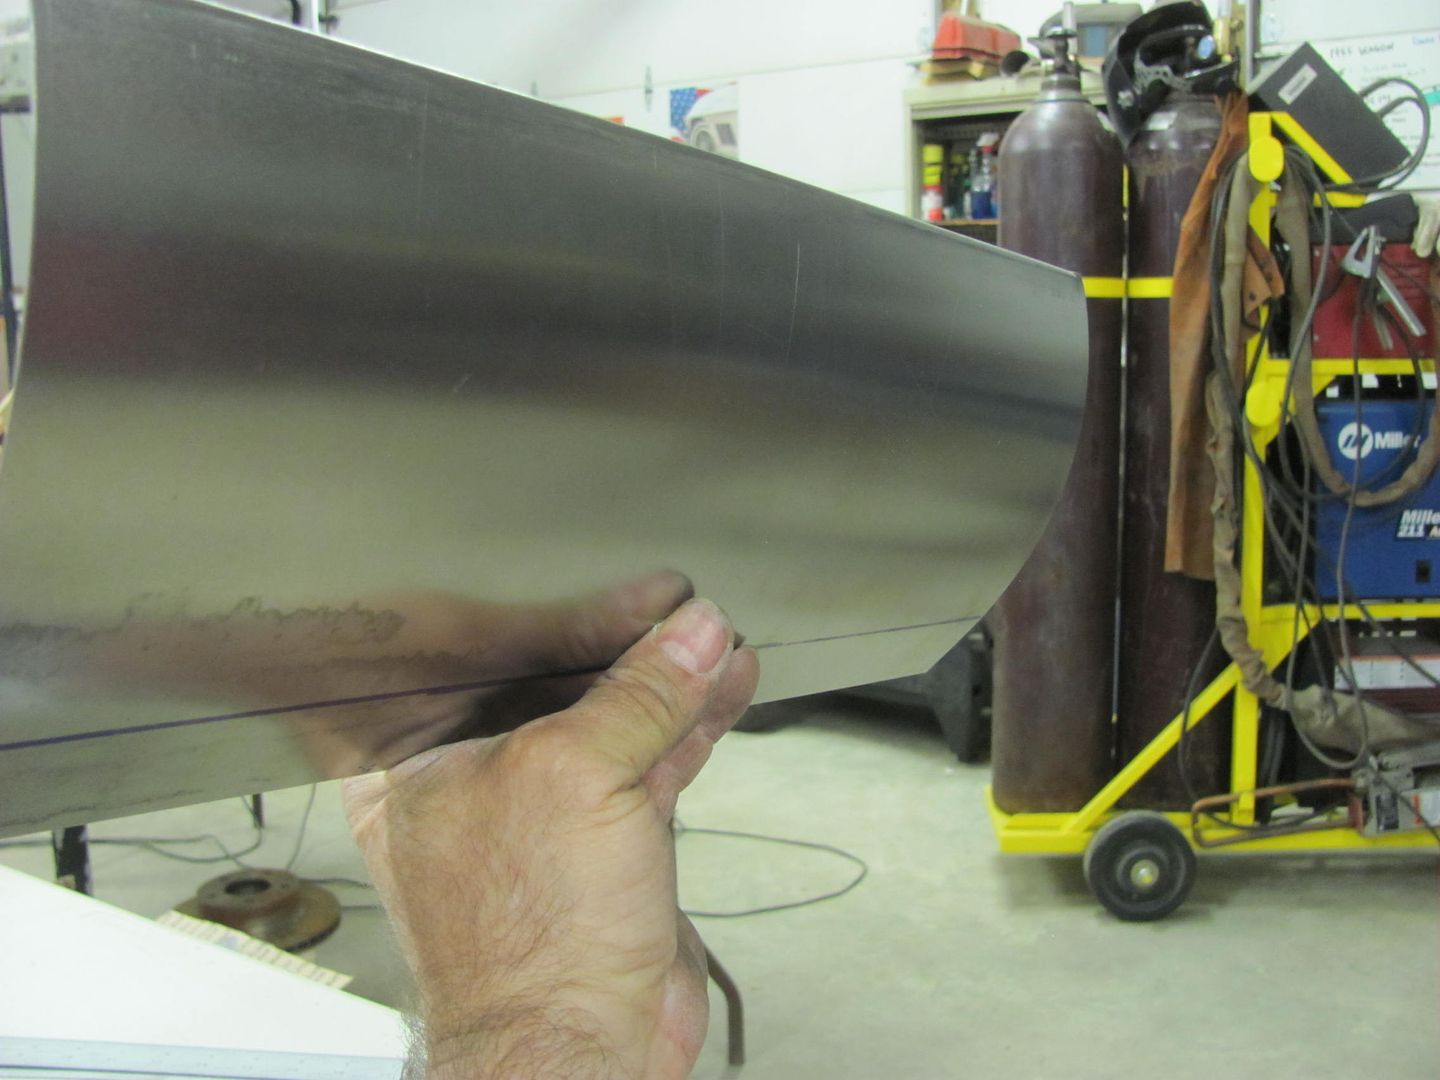 Still have the lock hole to go as well, we are going to leave this one smooth as opposed to the factory's vertical bead to simulate the gap at the ashtray..
__________________
Robert |
|
|
|
|
05-16-2016, 08:31 PM
|
#18 |
|
Registered User
Join Date: Apr 2011
Location: .
Posts: 3,104
|
Re: 55 Wagon Progress
So good it'll look factory and 99% of people won't even catch it. That is Skill.
|
|
|
|
|
05-17-2016, 06:47 AM
|
#19 |
|
Registered User
Join Date: Nov 2014
Location: Omaha
Posts: 558
|
Re: 55 Wagon Progress
One word... Gorgeous!
|
|
|
|
|
05-18-2016, 11:34 PM
|
#20 |
|
Registered User
Join Date: Jan 2013
Location: Leonardtown, MD
Posts: 1,637
|
Re: 55 Wagon Progress
Thanks!
Well with a nice radius on the face of the glove box door skin, we now need a flat area for the lock cylinder. Since I had a piece of Polyurethane here from the care package Rich B had sent me, it seemed the right tool for the job. 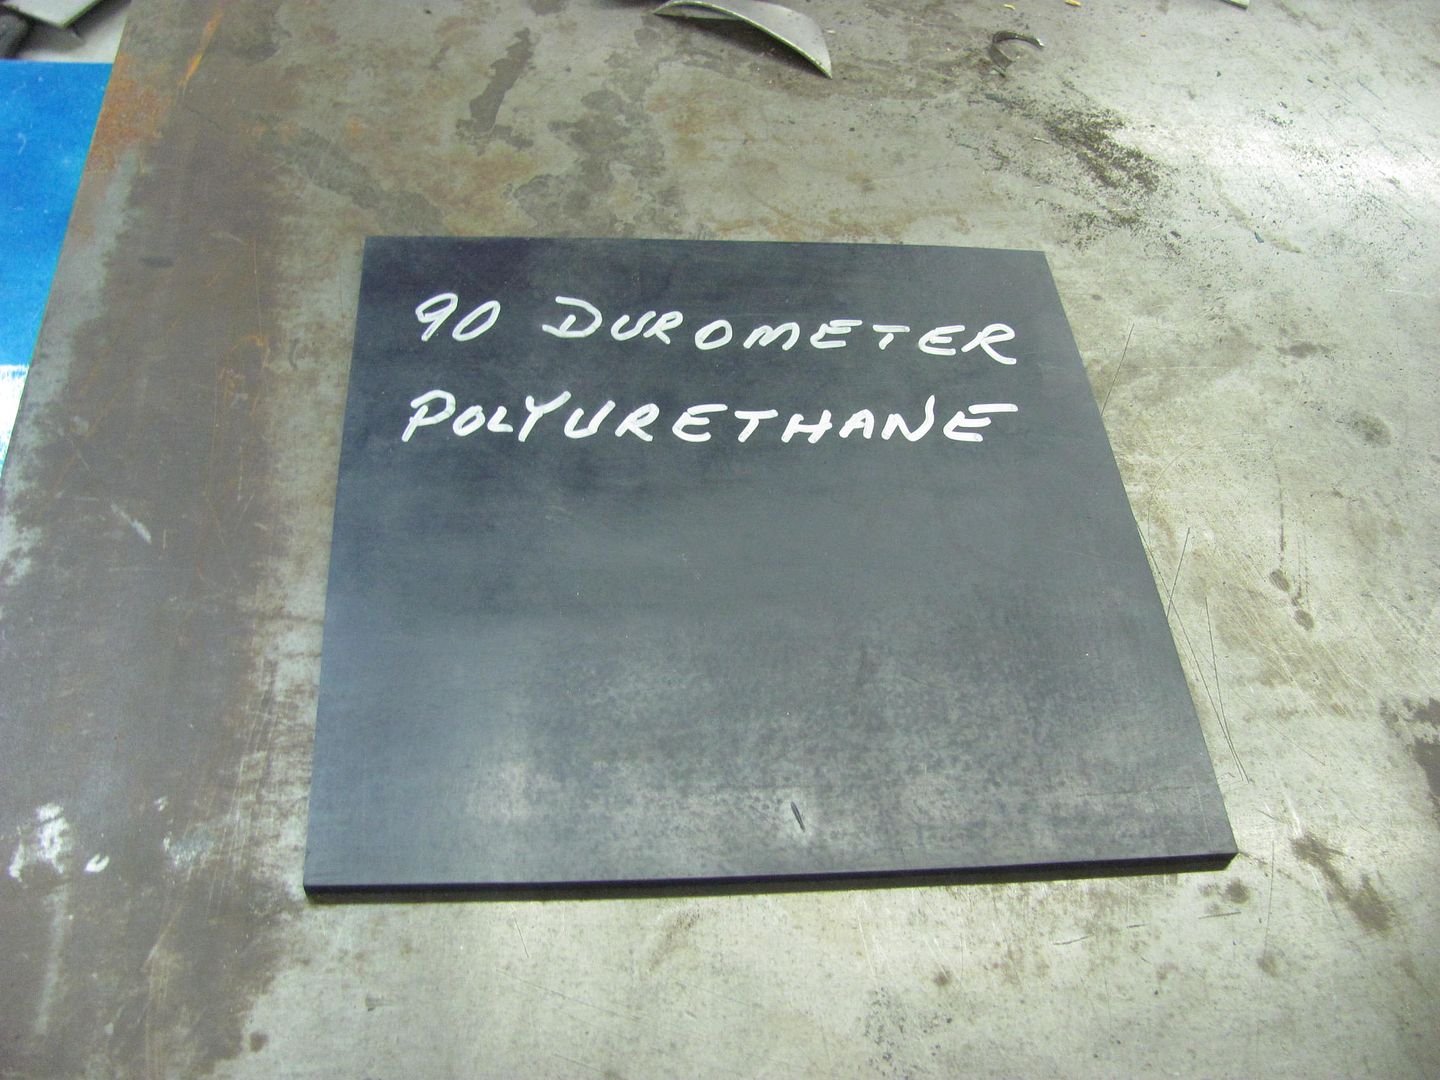 The lock cylinder hole was added using a step drill for the hole and a die grinder for the notch. 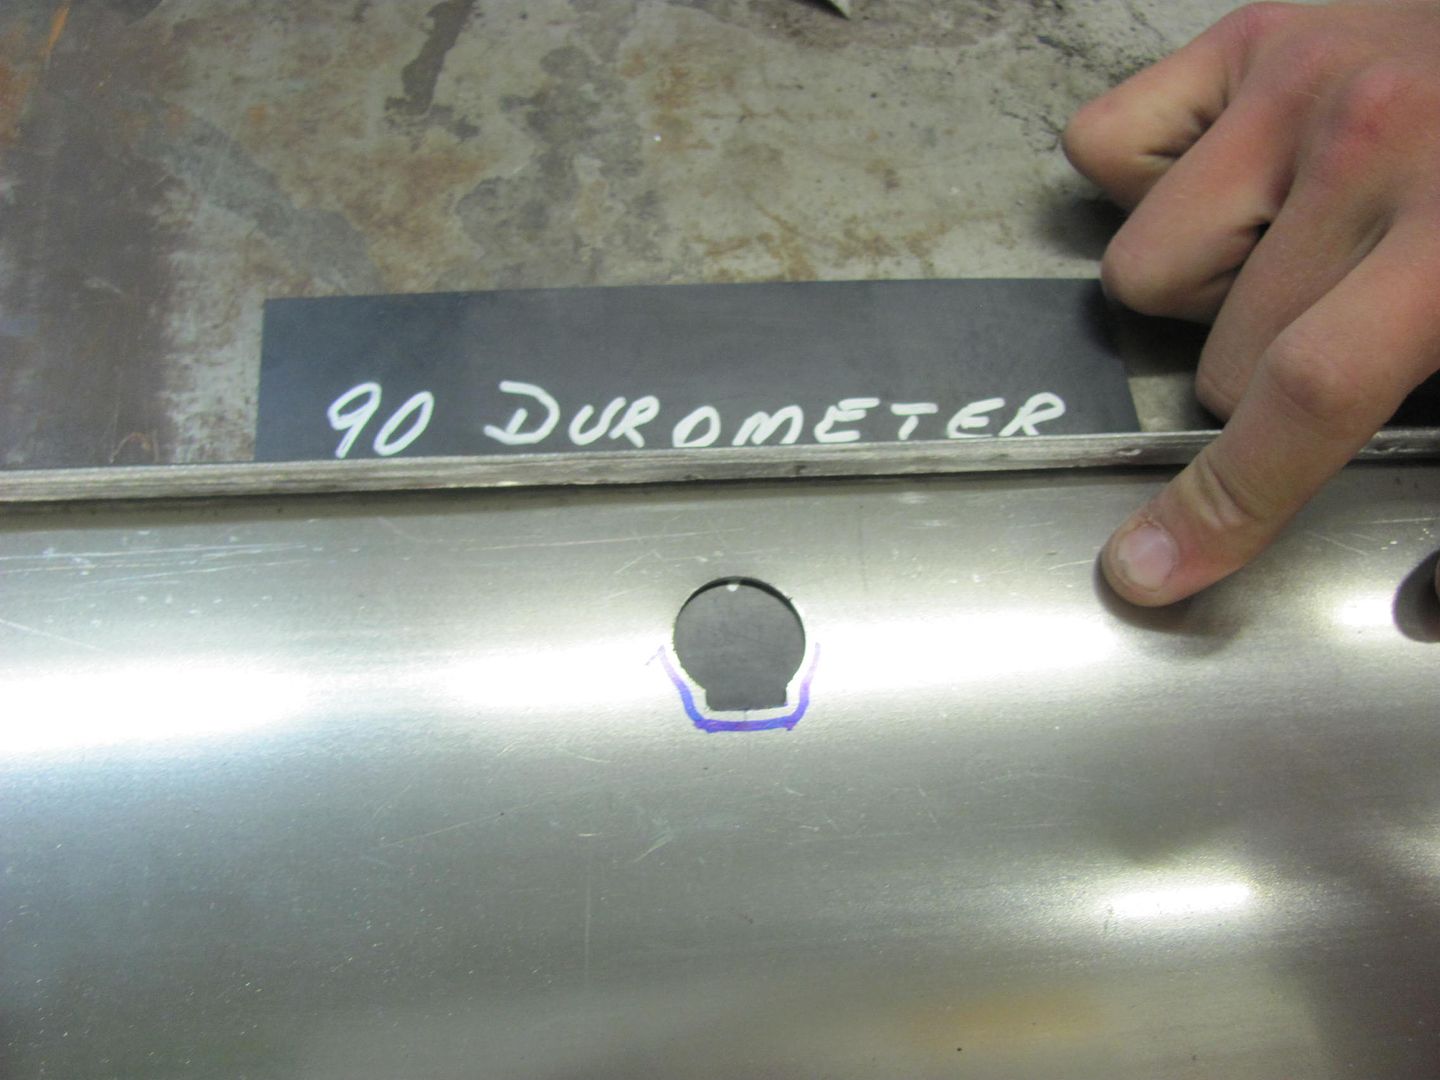 A punch is used to add the needed stretch to provide the flat area.. 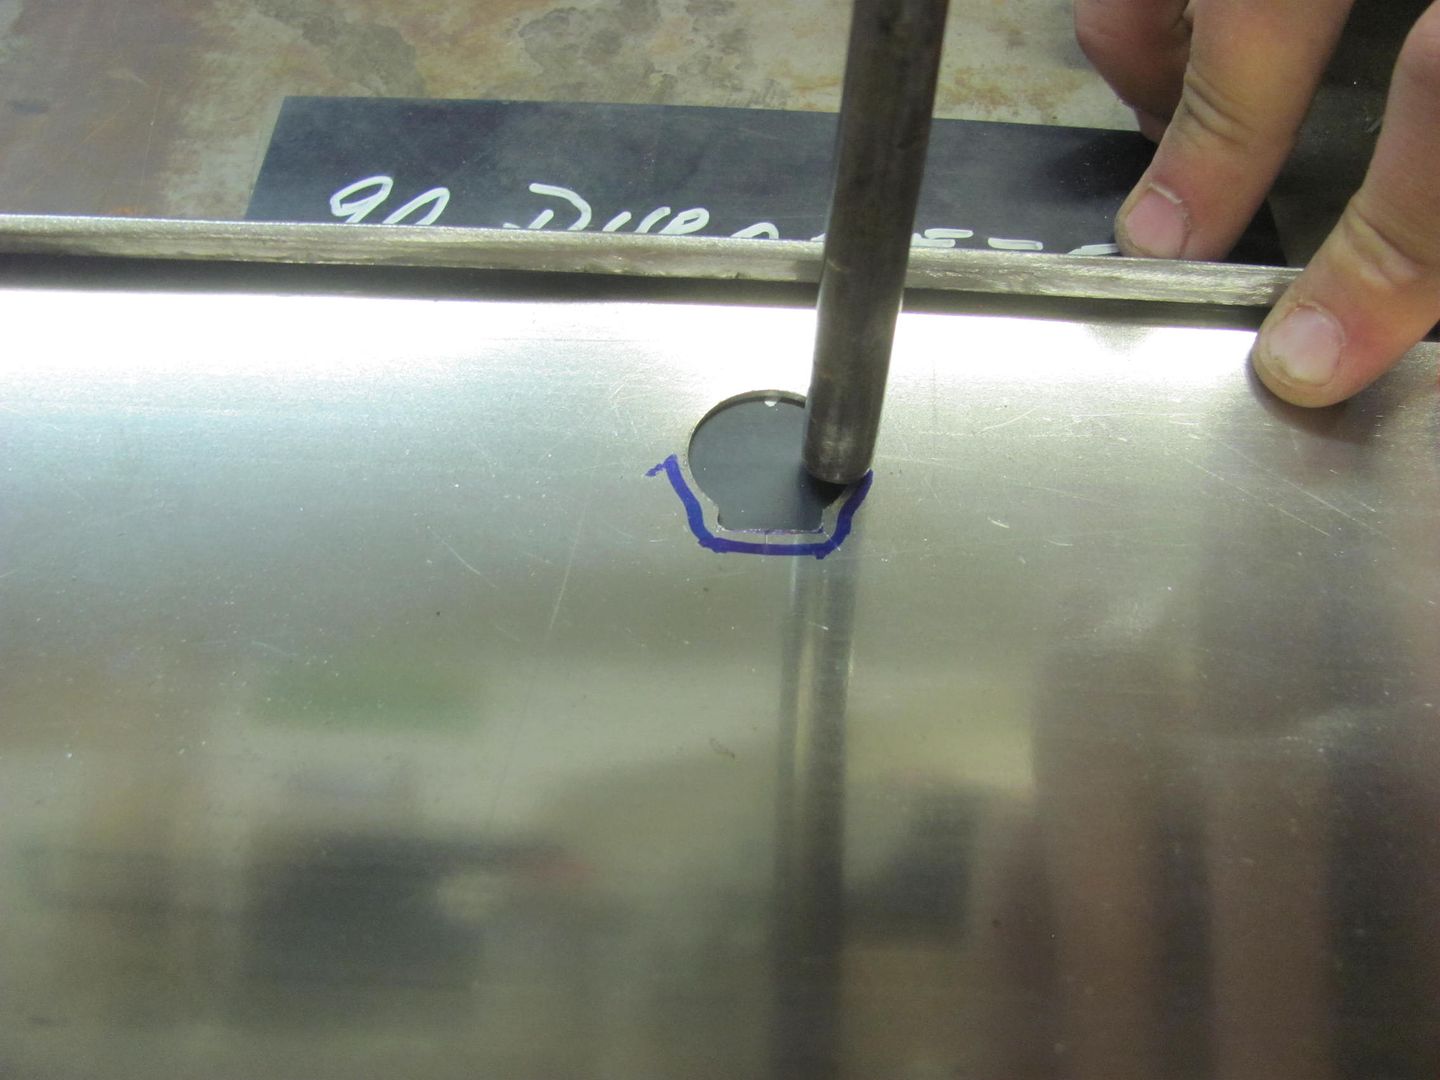 Starting to take shape.. 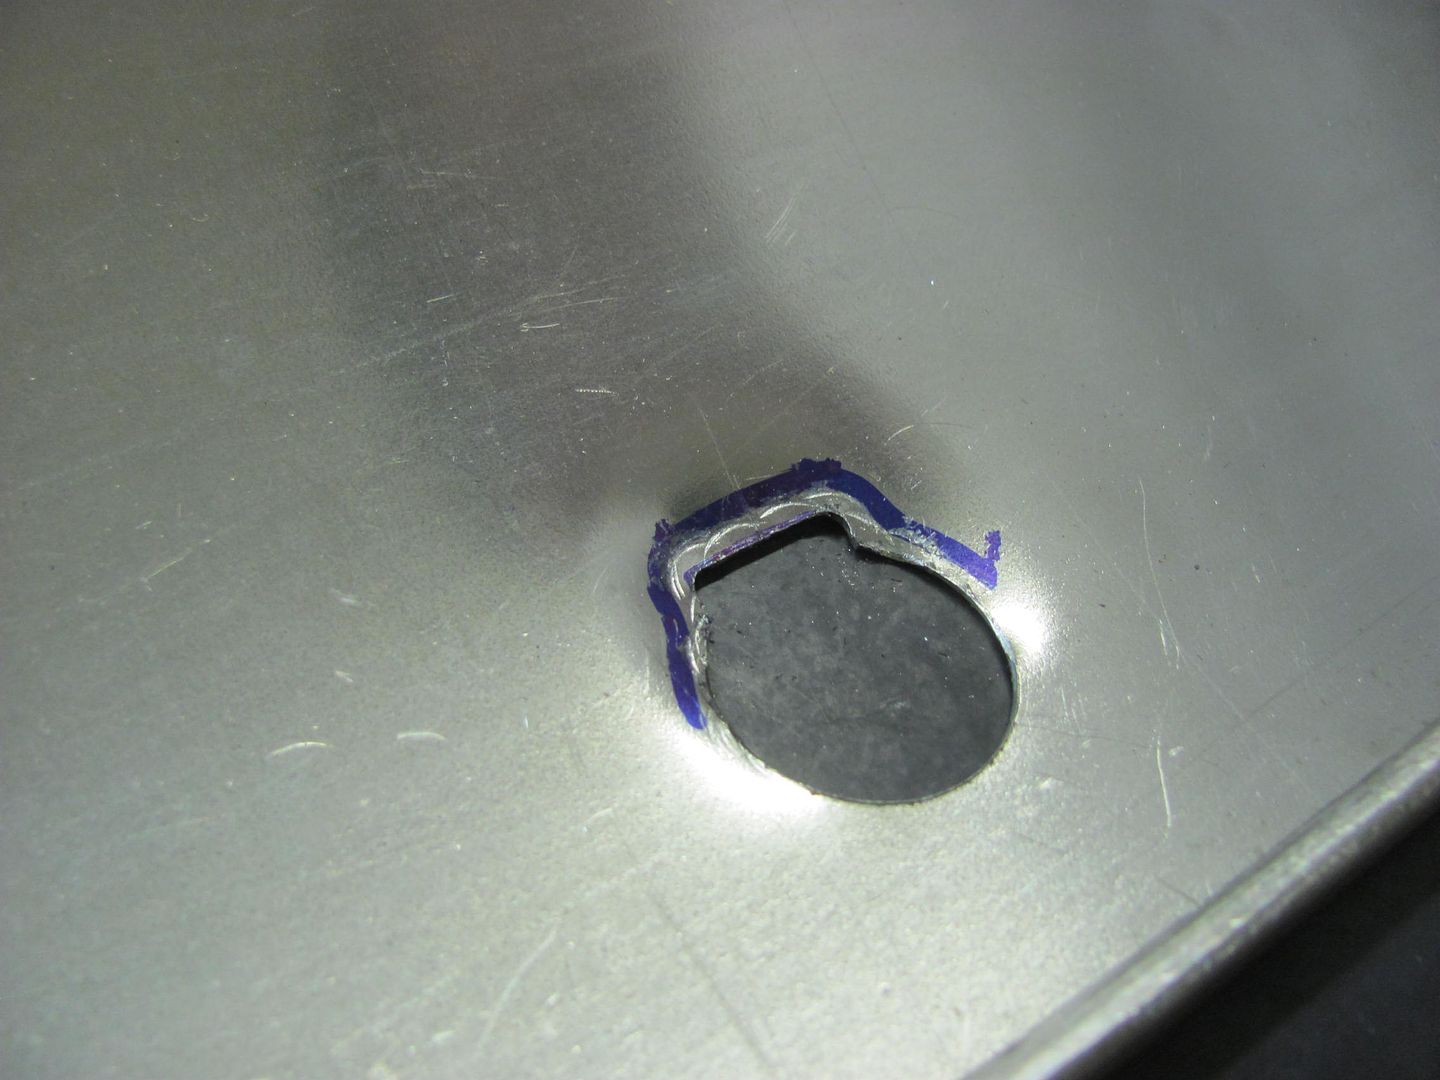 Some fine tuning of the detail... 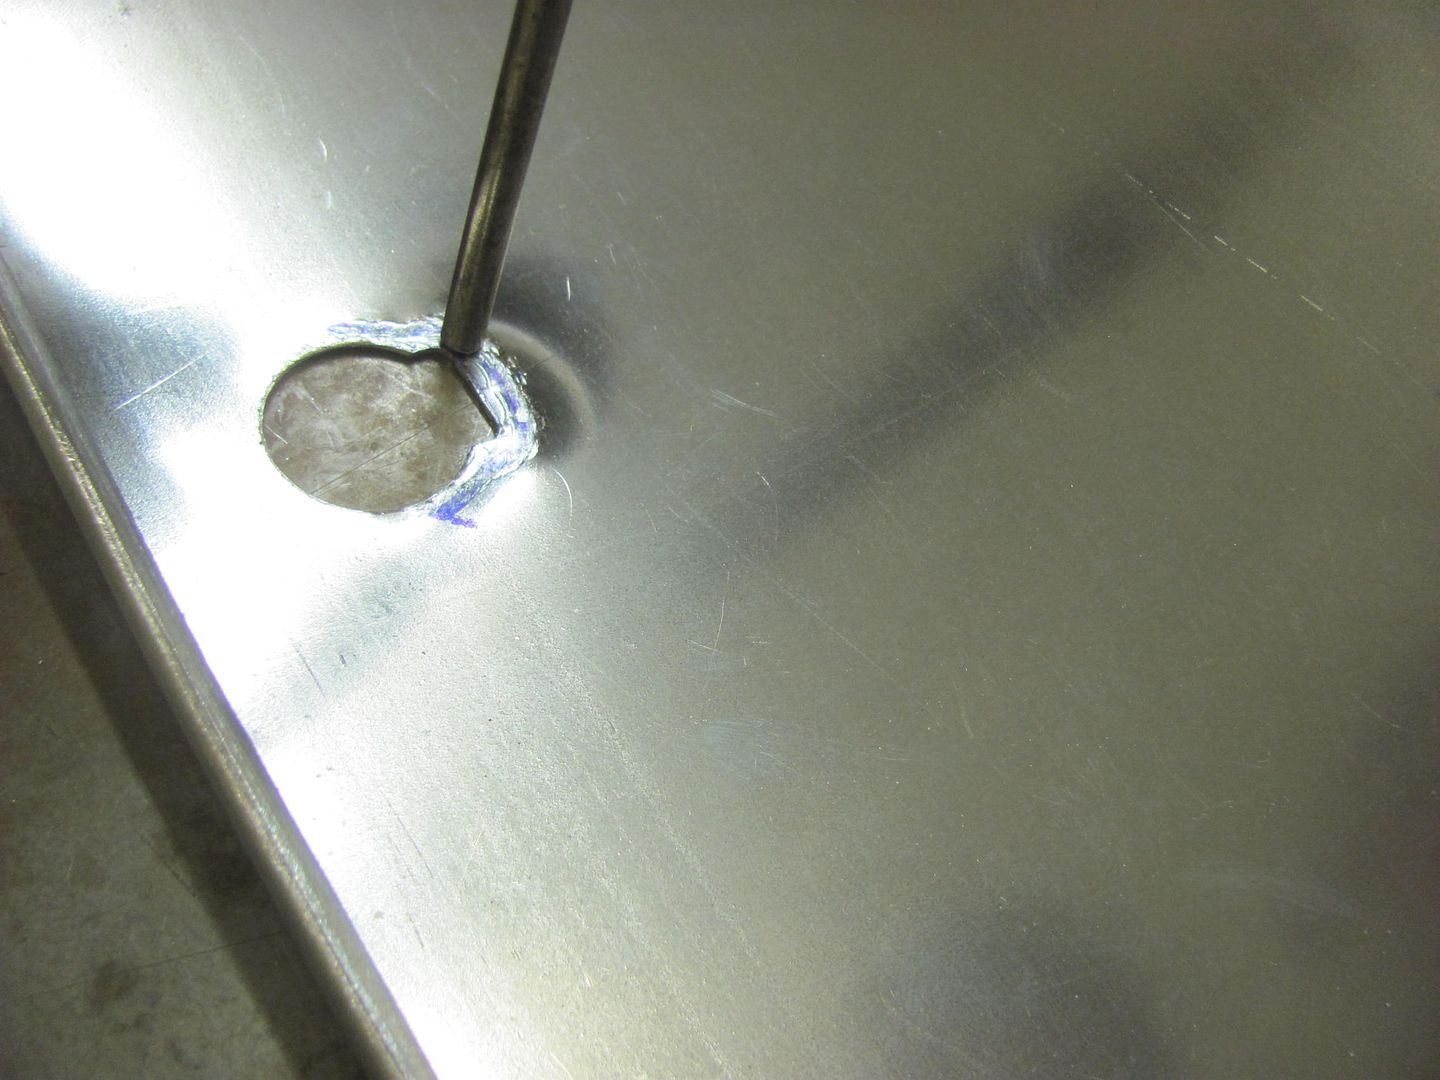 The bottom flange was measured, trimmed, and folded in the Diacro press brake 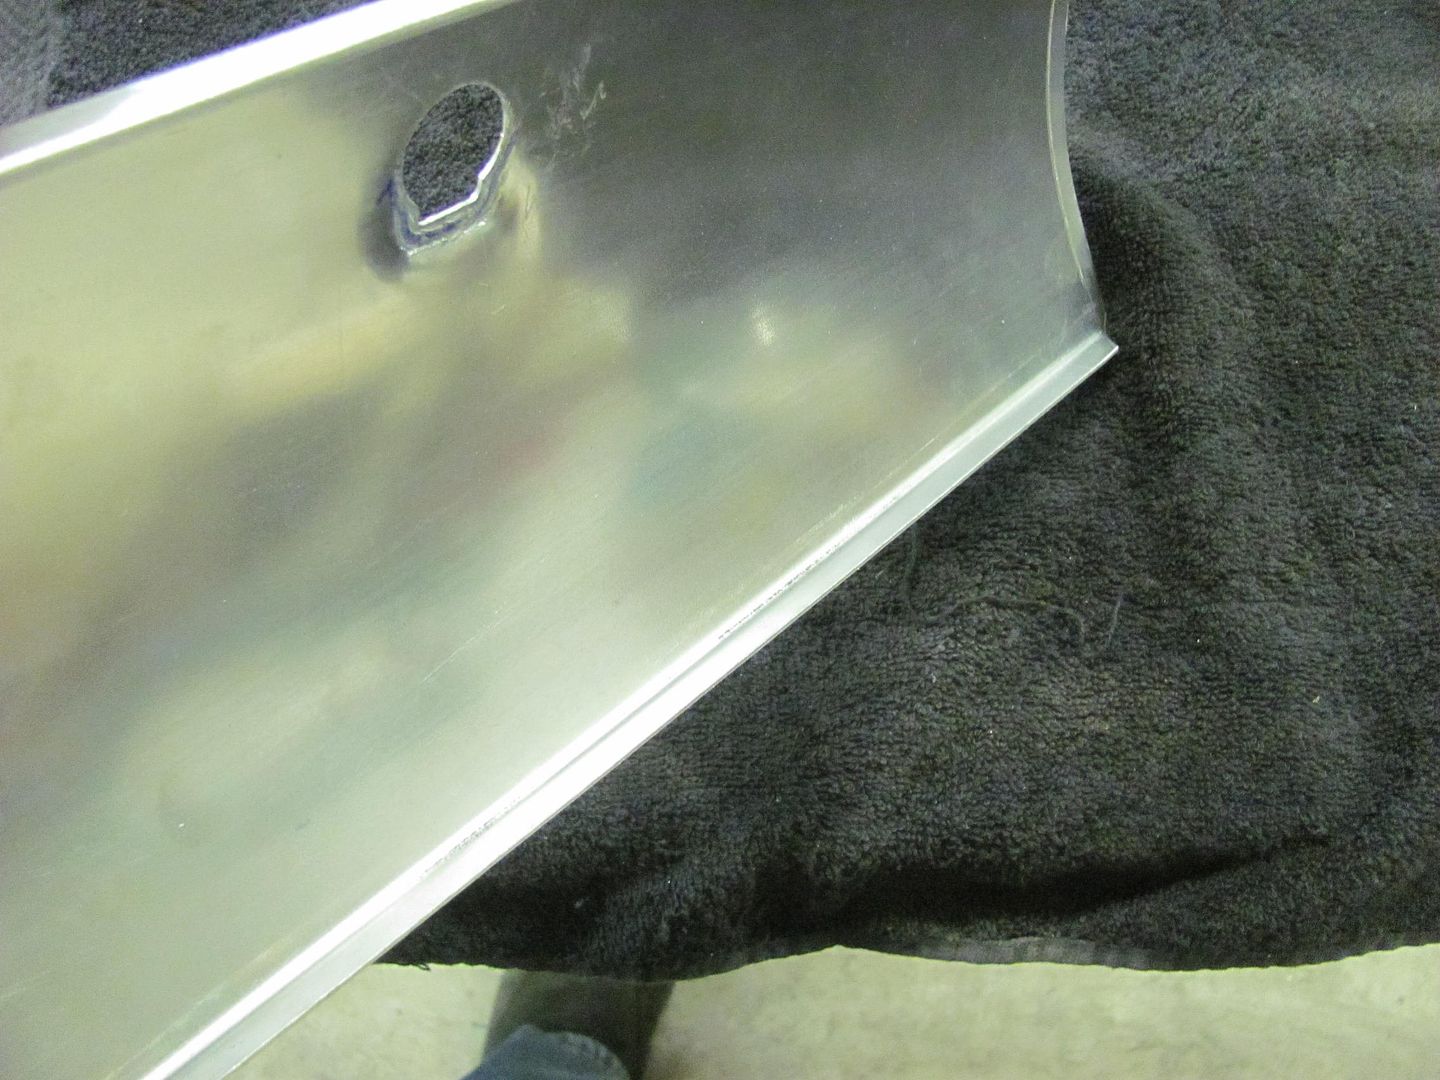 The side flanges were tipped slightly in the Bead Roller.. This also gives us a nice mark to show the fold line.. 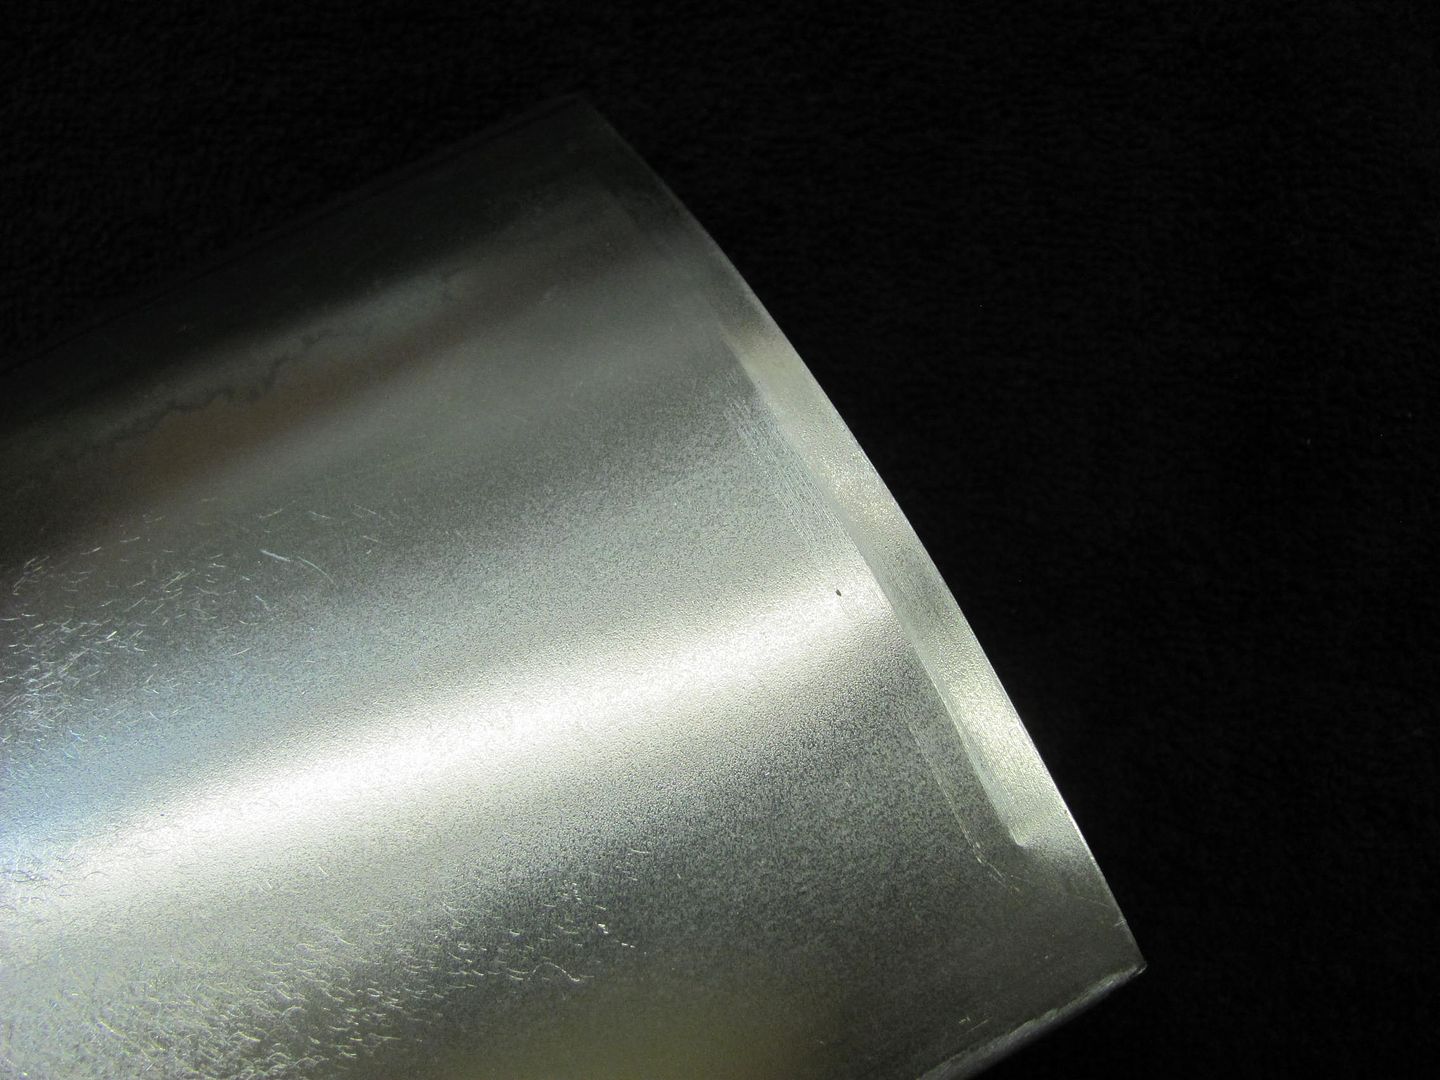 Touched up with the DA 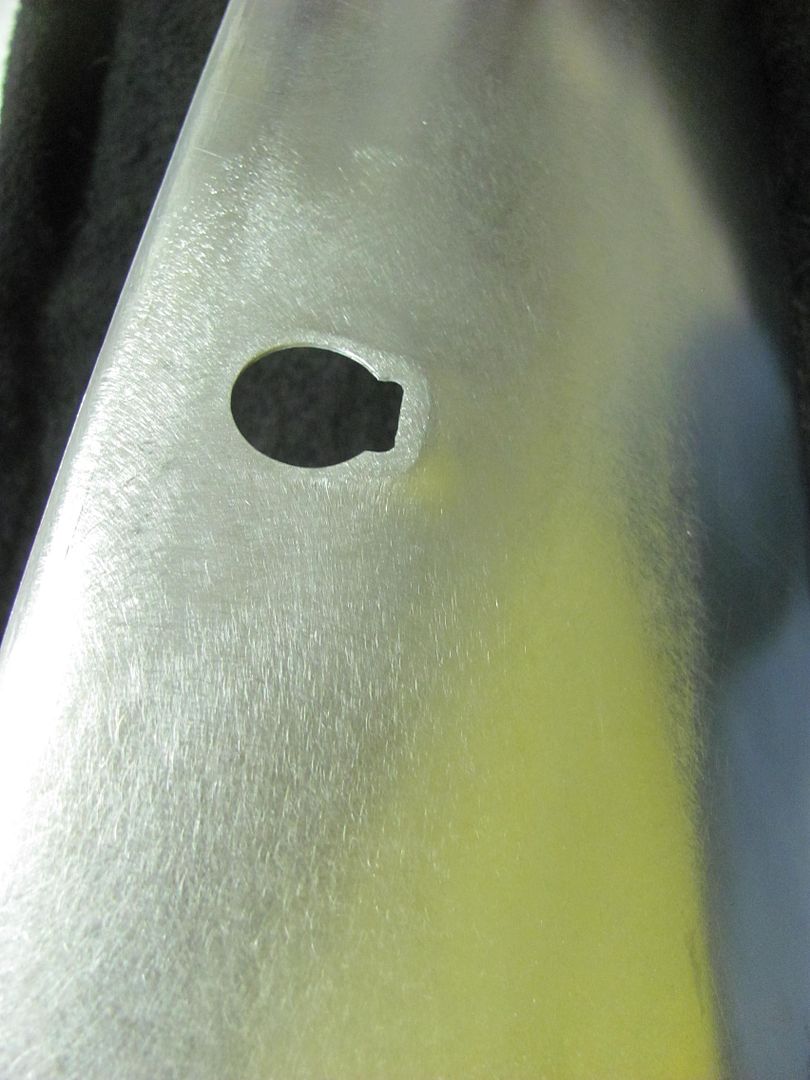 With the three flanges folded to a 90, now we'll media blast and epoxy before assembling the two halves. 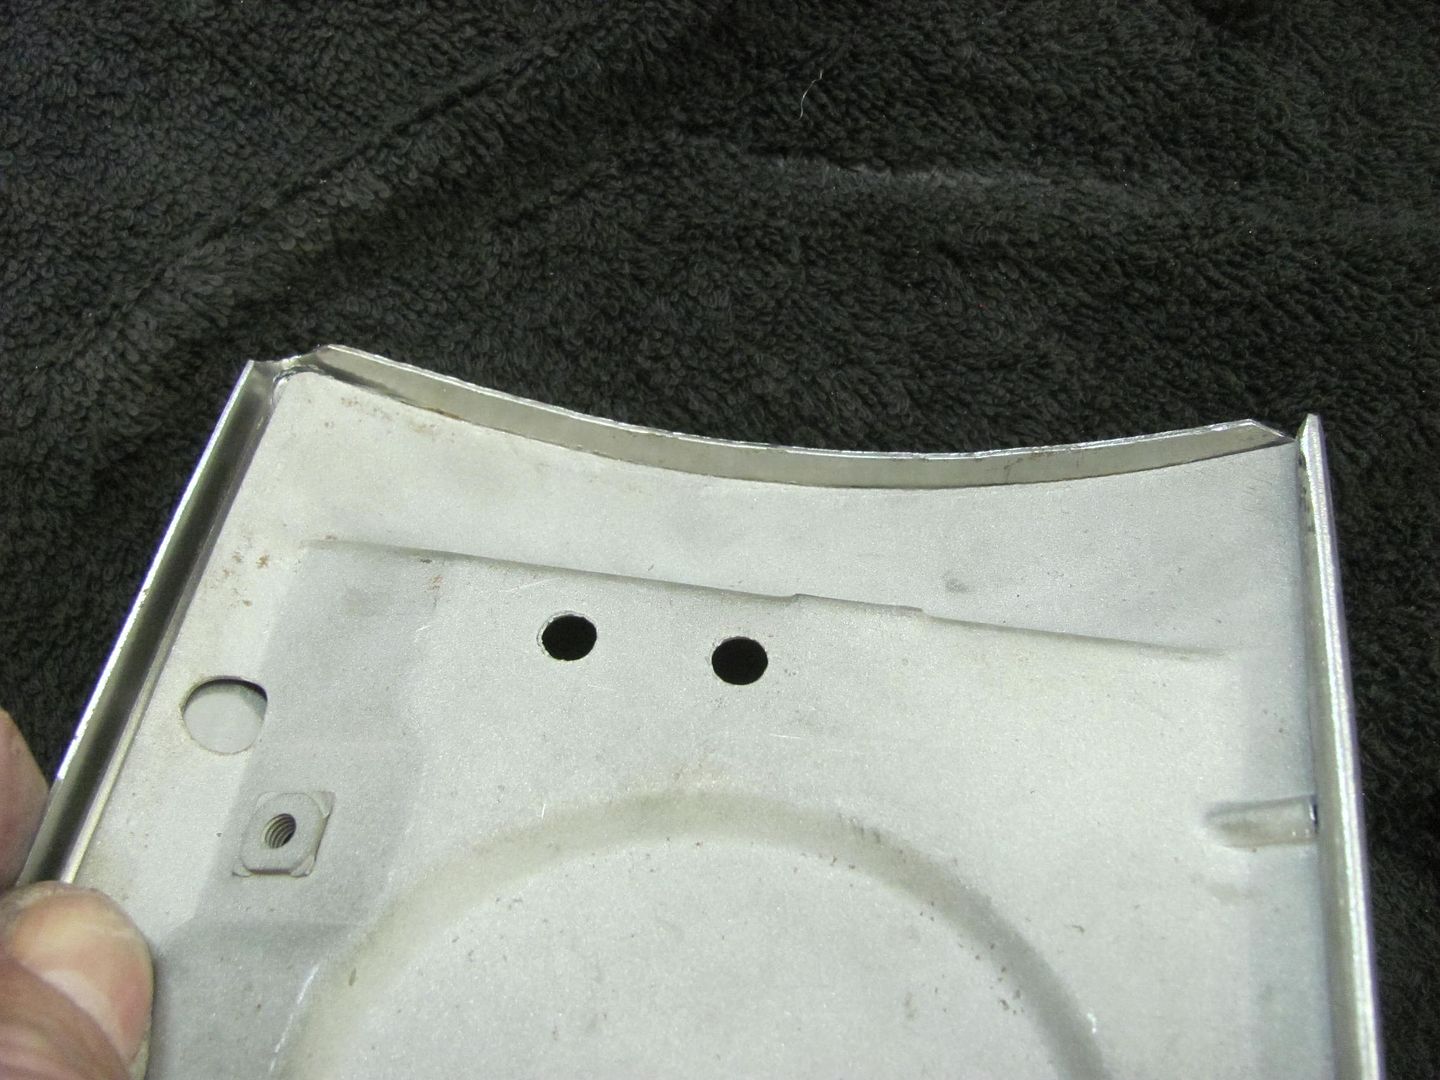 This shows the tipping tool used on the side flanges. 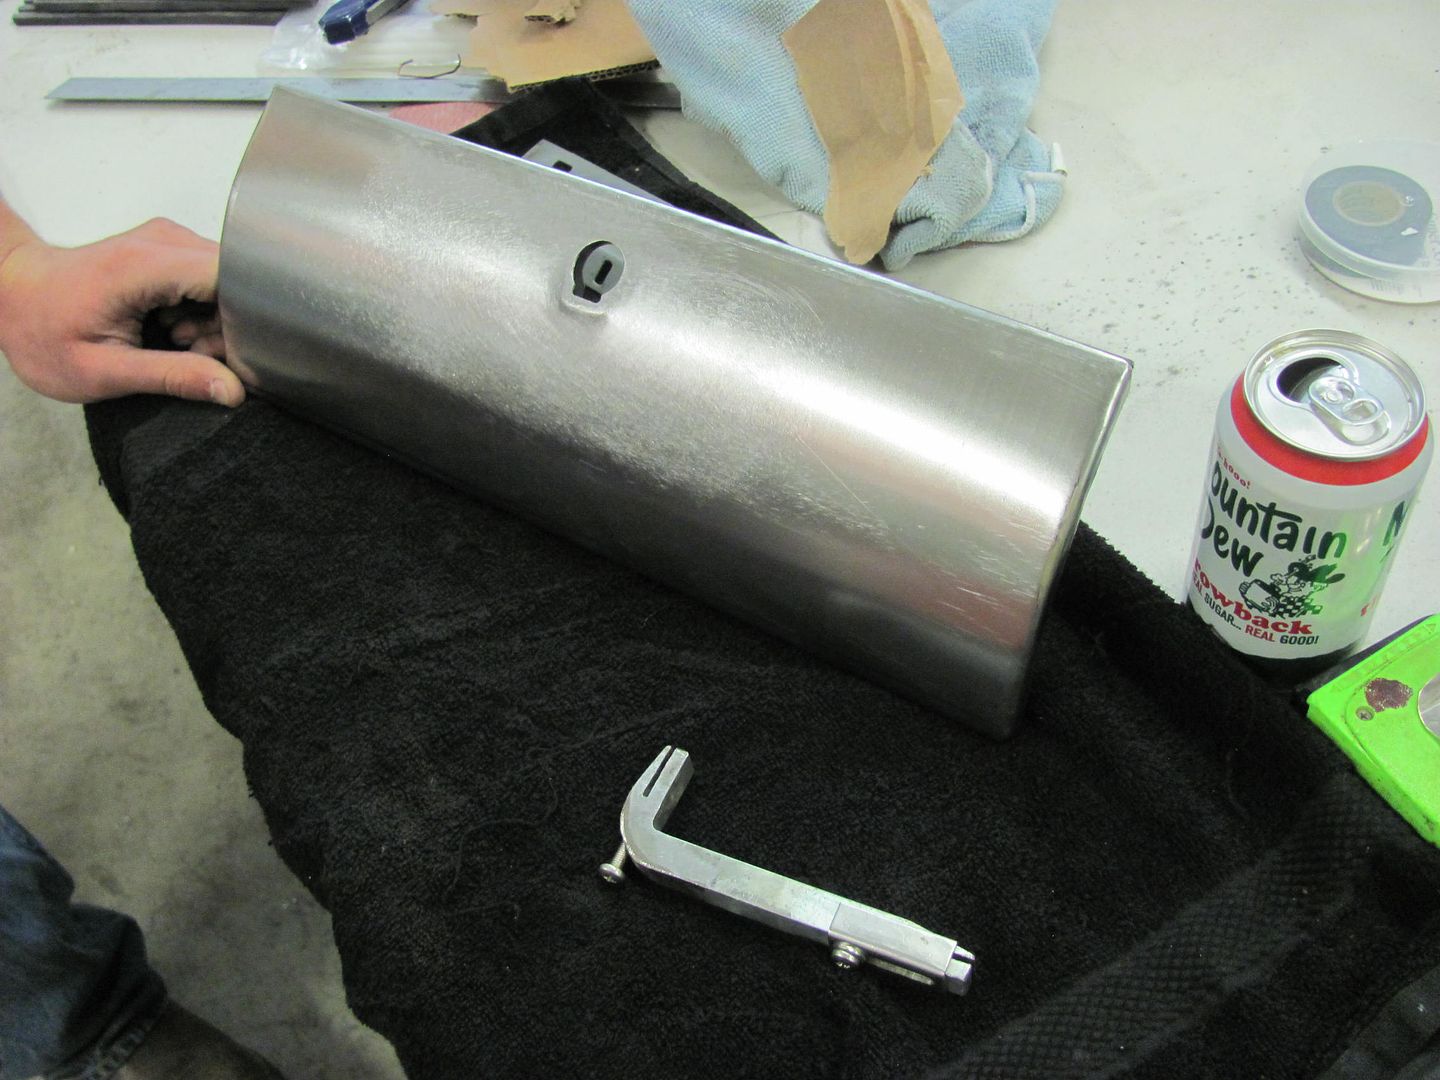 With lock cylinder. Looks almost factory... 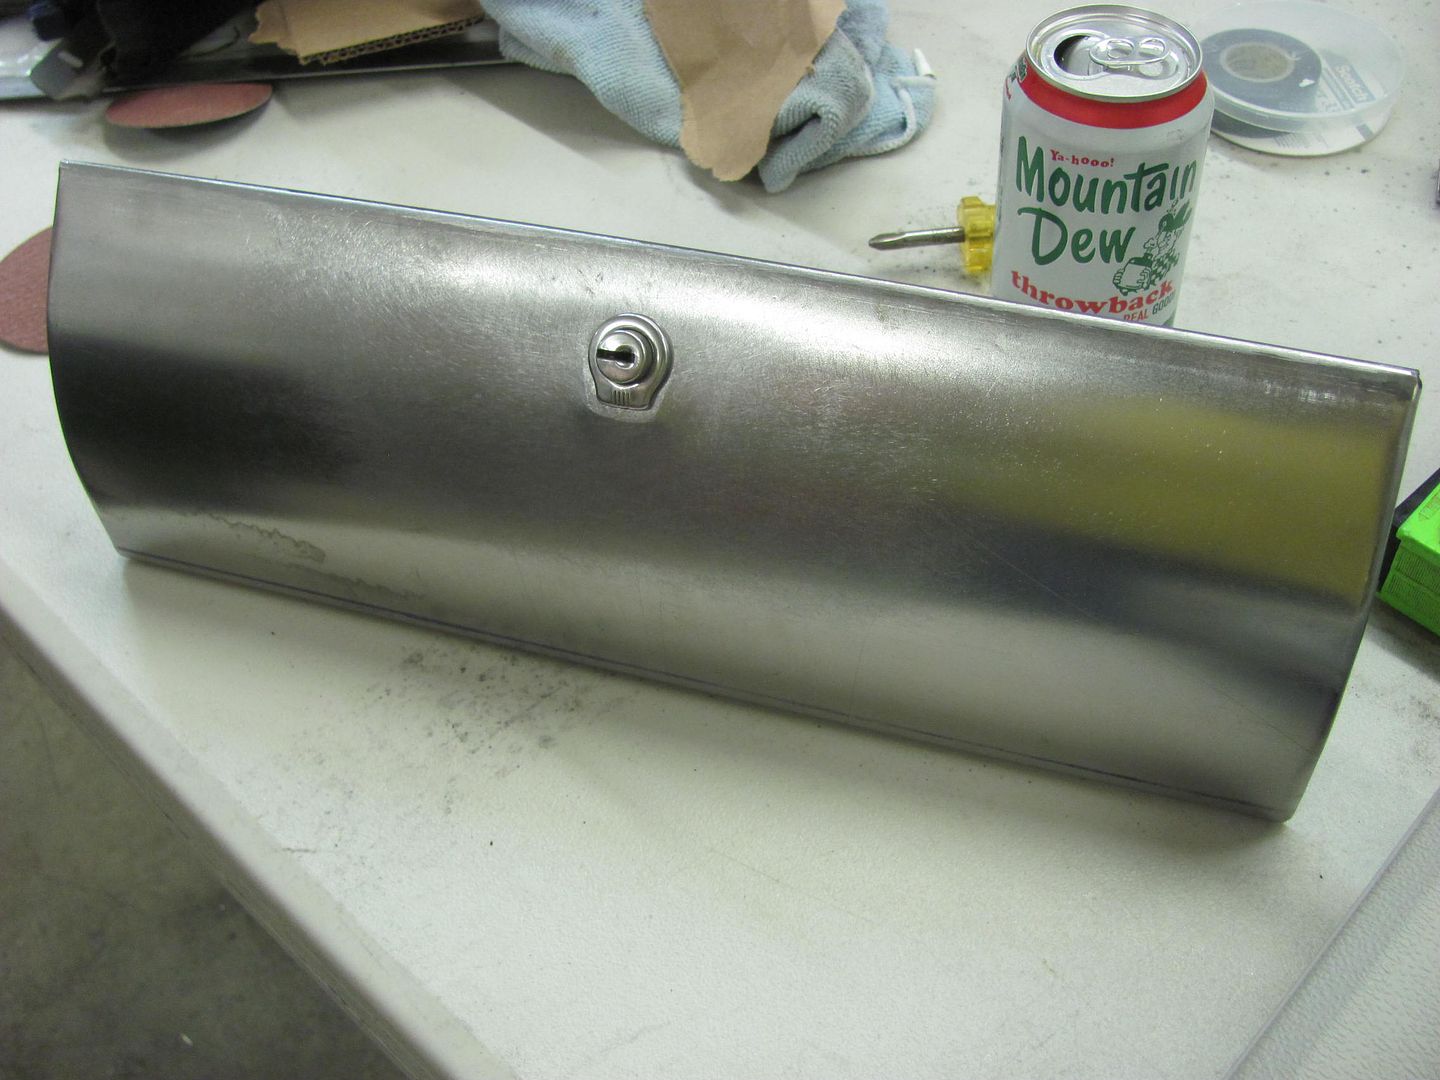
__________________
Robert |
|
|
|
|
05-19-2016, 09:16 AM
|
#21 |
|
Registered User
Join Date: Dec 2011
Location: Morris, Alabama
Posts: 184
|
Re: 55 Wagon Progress
Always amazed by your work, Robert!
|
|
|
|
|
05-19-2016, 08:46 PM
|
#22 |
|
Registered User
Join Date: Oct 2007
Location: Spanaway
Posts: 8,451
|
Re: 55 Wagon Progress
Nice!
__________________
Mike. Swamp Rat build thread : http://67-72chevytrucks.com/vboard/s...d.php?t=595019 72 3/4T 4X4 4" BDS Lift 33" BFG's |
|
|
|
|
05-19-2016, 09:34 PM
|
#23 |
|
Senior Member
Join Date: Jul 2012
Location: Oblong, Illinois
Posts: 7,026
|
Re: 55 Wagon Progress
Nice work and good tutorial Robert.
|
|
|
|
|
05-20-2016, 07:48 AM
|
#24 |
|
Registered User
Join Date: Jan 2013
Location: Leonardtown, MD
Posts: 1,637
|
Re: 55 Wagon Progress
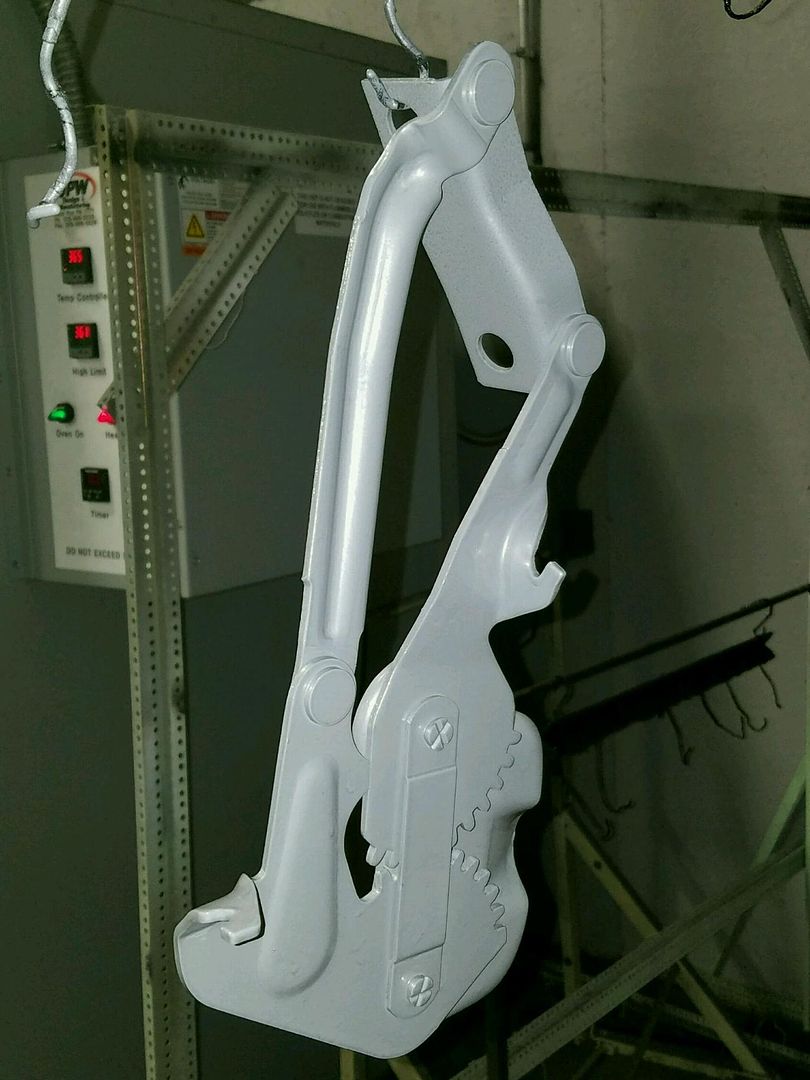
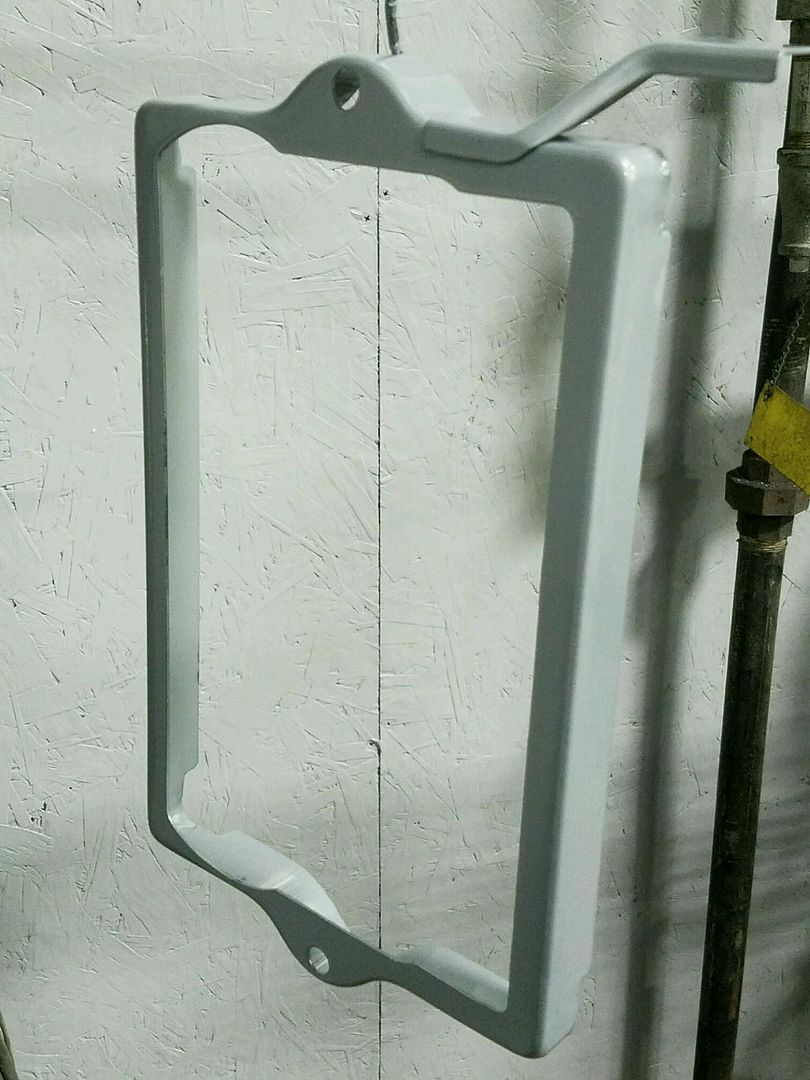
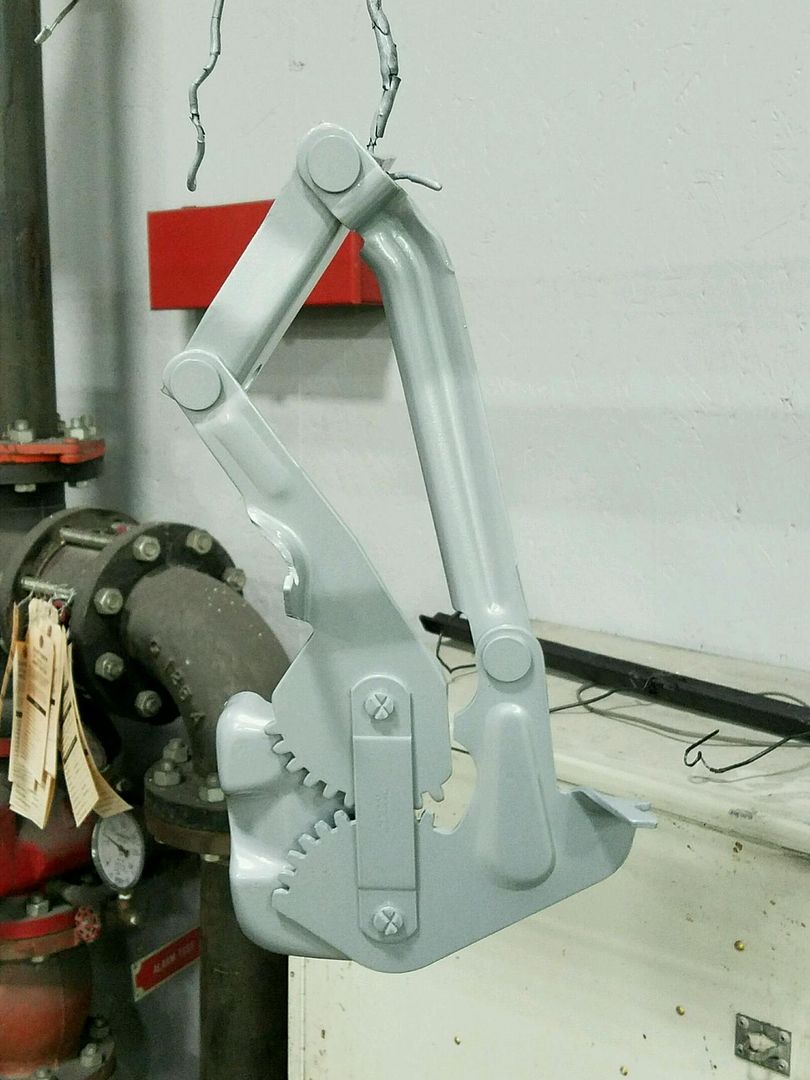
Thanks for the kind words fellas.. Well last night's efforts saw us media blasting, hanging the next batch of small parts for epoxy primer, and general cleanup.......which has been sorely needed. So we don't have much of interest to show, so let's turn it over to Dana (the owner) who got these parts powder coated yesterday for us...
__________________
Robert |
|
|
|
|
05-20-2016, 03:34 PM
|
#25 |
|
Registered User
Join Date: May 2010
Location: Lawrenceville, Ga
Posts: 2,641
|
Re: 55 Wagon Progress
You guys are magic. Thanks for explaining what you are doing and how you do it as you go.
|
|
|
|
 |
| Bookmarks |
|
|


 Hybrid Mode
