
|
 04-29-2012, 12:14 PM
|
#676 | |
|
GEARHEAD
Join Date: Aug 2003
Location: MN
Posts: 6,126
|
Re: Junkyard Jimmy Super Low Buck Build Thread
Quote:
  Time to start prepping for primer on all the firewall, dash, windshield frame, etc.
__________________
If no one knows what you're doing, they can't tell you you're doing it wrong HG's Dream Car Build - Shelby Cobra Kit Build your own adjustable track bar 71  Long Fleet C/10 Long Fleet C/10 72  Jimmy 4x4 (Junkyard Jimmy) Jimmy 4x4 (Junkyard Jimmy)HG's Plow Truck '78  K35 Dually K35 DuallyBigass Farm Truck HG's thread of miscellaneous stuff |
|

|

|
|
05-04-2012, 07:58 AM
|
#677 |
|
GEARHEAD
Join Date: Aug 2003
Location: MN
Posts: 6,126
|
Re: Junkyard Jimmy Super Low Buck Build Thread
Got the new sheetmetal yesterday. Now I just need to find time to work on it. Also got the new grill and front bumper for the C-10, so I have that to do also. There's a show and swap meet at the MN state fair grounds sunday that I want to check out also. Not enough free time lately to keep up.
__________________
If no one knows what you're doing, they can't tell you you're doing it wrong HG's Dream Car Build - Shelby Cobra Kit Build your own adjustable track bar 71 Long Fleet C/10 72 Jimmy 4x4 (Junkyard Jimmy)HG's Plow Truck '78 K35 DuallyBigass Farm Truck HG's thread of miscellaneous stuff |
|
|
|
|
05-16-2012, 11:20 PM
|
#678 |
|
GEARHEAD
Join Date: Aug 2003
Location: MN
Posts: 6,126
|
Re: Junkyard Jimmy Super Low Buck Build Thread
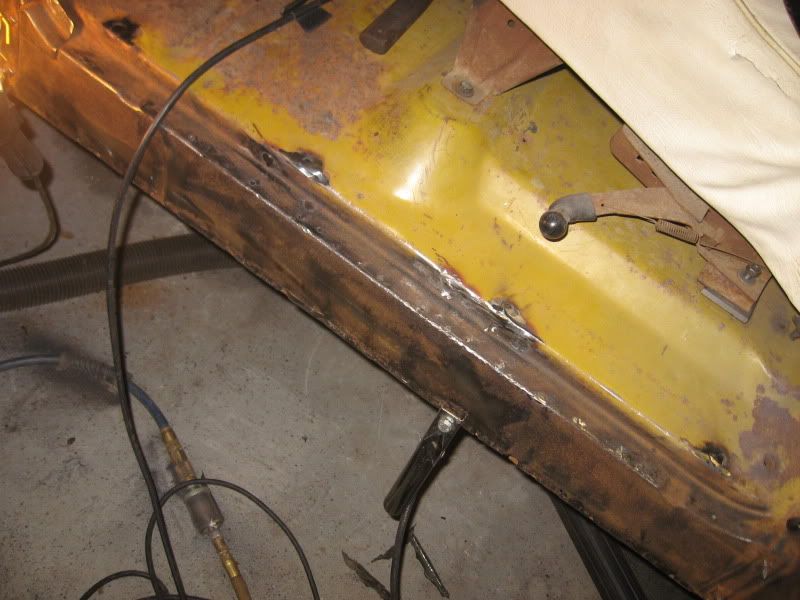
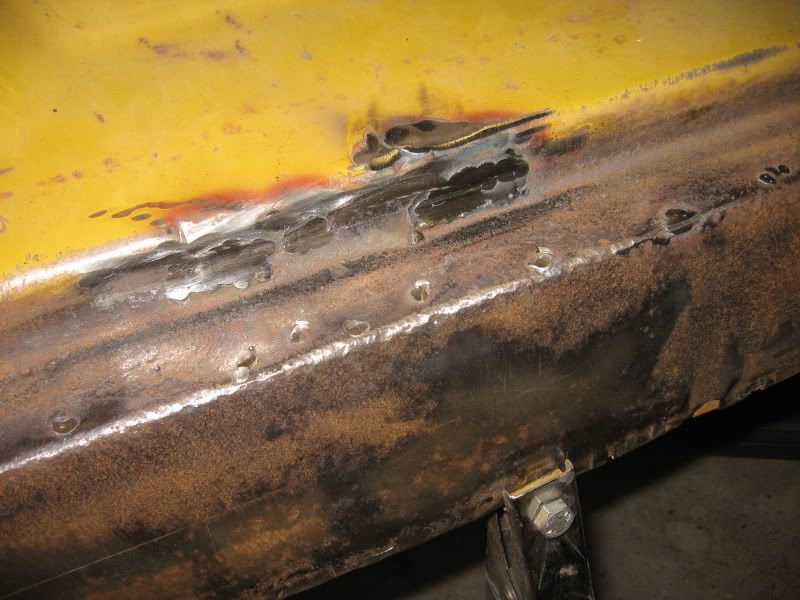
Finally got some progress on this thing. I welded in the new bottom of the A pillar. The hardest part was doing the fit up of the new piece. Lots of angles and bends in that piece and I was only using a small part of it. Not my best welding, but it'll hold.
 As for the cab floor support and inner rocker behind this, I cleaned it up good, then sprayed this stuff in through it. The body shop used this on my C-10 cab supports, rockers and in the rear cab floor brace. I also used it down through the A pillar from the top down. Every little bit of protection should help it. The little tube fits the cap on the can and the other end has a spray head that sprays in all directions, you can see that by my thumb. Pretty slick. 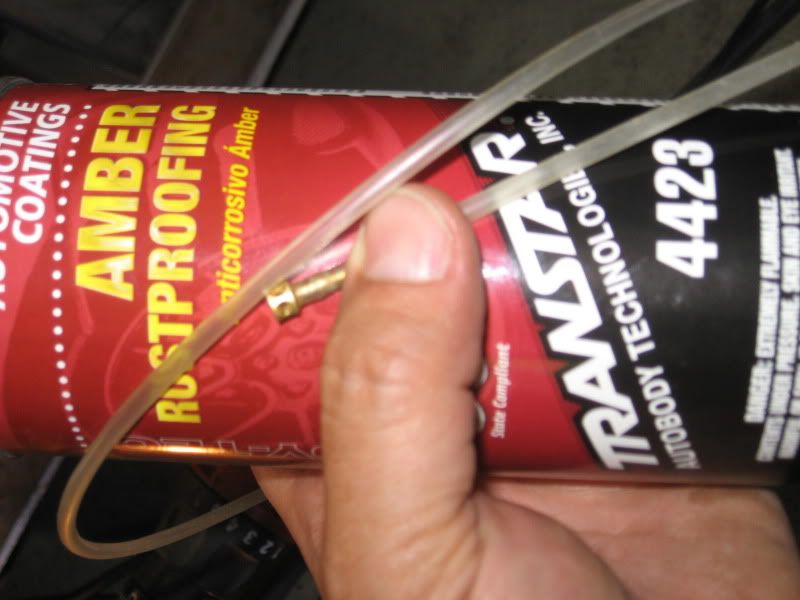 I had to see how the rocker fit. Its going to need some persuading to fit on there the way it's supposed to. Hopefully I can get that done tomorrow, then start on the other side. My oldest girl is home for the summer now and she wants to drive it. 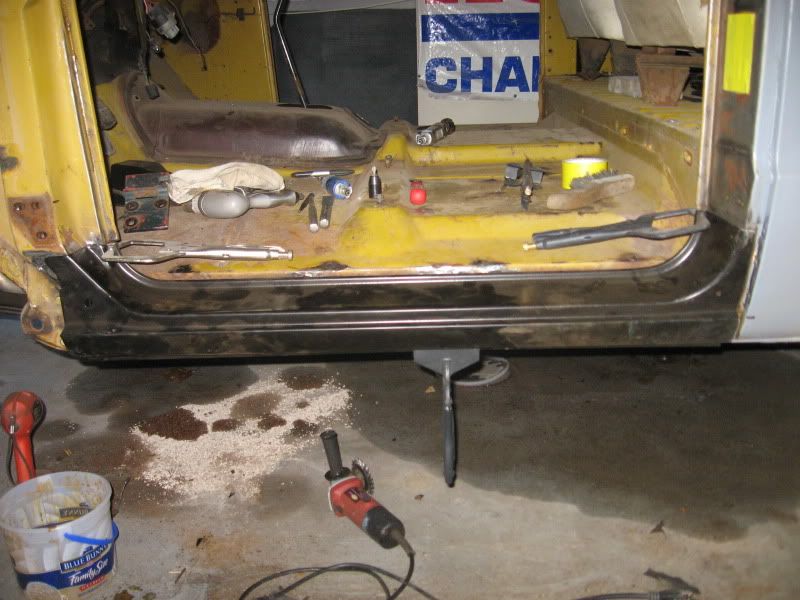
__________________
If no one knows what you're doing, they can't tell you you're doing it wrong HG's Dream Car Build - Shelby Cobra Kit Build your own adjustable track bar 71 Long Fleet C/10 72 Jimmy 4x4 (Junkyard Jimmy)HG's Plow Truck '78 K35 DuallyBigass Farm Truck HG's thread of miscellaneous stuff |
|
|
|
|
05-16-2012, 11:31 PM
|
#679 |
|
VA72C10
 Join Date: Mar 2008
Location: Midlothian, VA
Posts: 25,267
|
Re: Junkyard Jimmy Super Low Buck Build Thread
Nice progress!!!!
__________________
Looking for a 67-72 swb or blazer project in or around VA. 
|
|
|
|
|
05-17-2012, 11:01 PM
|
#680 |
|
GEARHEAD
Join Date: Aug 2003
Location: MN
Posts: 6,126
|
Re: Junkyard Jimmy Super Low Buck Build Thread
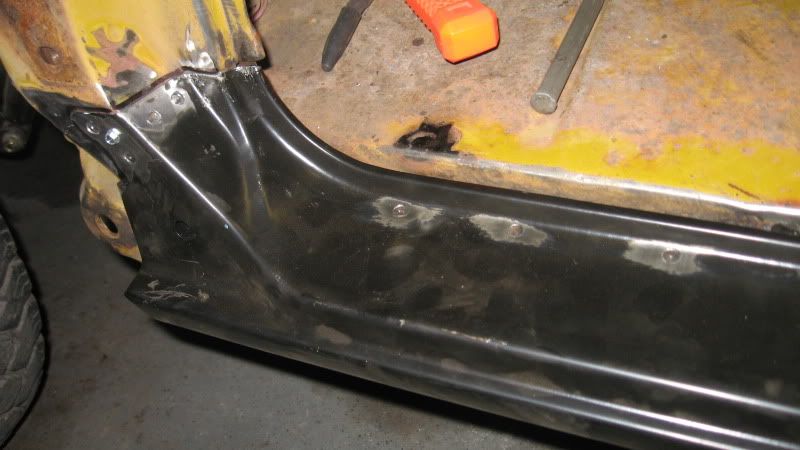
Well I didn't get it finished tonight, but did manage to get it fit ok. The front of the rocker was not pushing inward enough. I had to trim a little off the front where it slides over the A pillar. Then on the top front inside where it meets the door seal pinch weld was hitting. For the time being I just used some pliers to bend it out, so I could get it in position. After I weld the rest of the area in, I'll use a hammer and pound it back in using the A pillar as the form. Sometime in the next day or 2 it should be welded in.
You can see where it it bent outward, that will get hammered back down after welding. 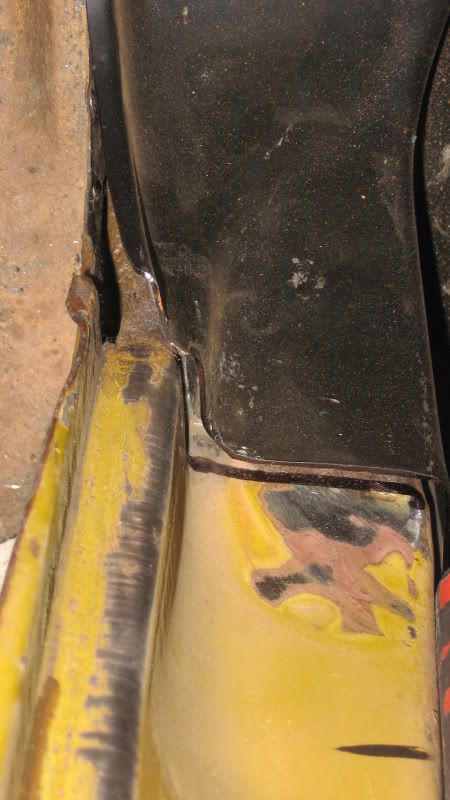 With the door on to see if the rocker is placed correctly. Close enough for government work. 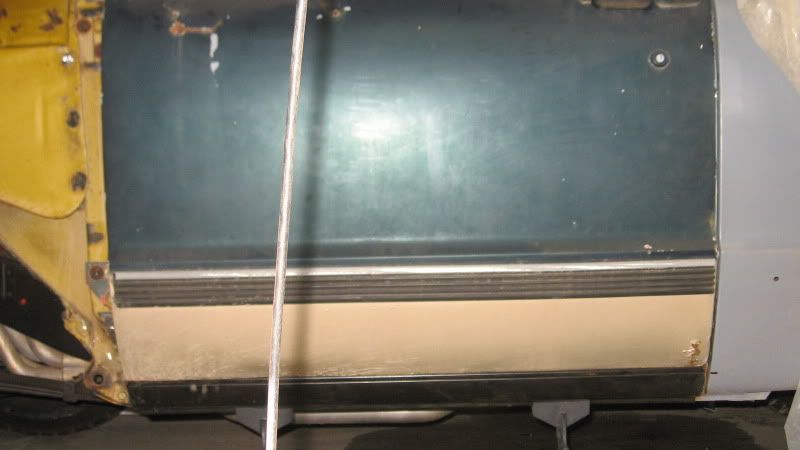
__________________
If no one knows what you're doing, they can't tell you you're doing it wrong HG's Dream Car Build - Shelby Cobra Kit Build your own adjustable track bar 71 Long Fleet C/10 72 Jimmy 4x4 (Junkyard Jimmy)HG's Plow Truck '78 K35 DuallyBigass Farm Truck HG's thread of miscellaneous stuff |
|
|
|
|
05-18-2012, 08:42 AM
|
#681 |
|
Senior Member
 Join Date: May 2006
Location: Philadelphia, Pa. 19454
Posts: 9,766
|
Re: Junkyard Jimmy Super Low Buck Build Thread
Well done, nice work so far.....
If it were me, and this just my opinion, cut the flange that goes under the seal of the rocker at the 90. Basically, a pie cut, and push it back to the seal flange, and weld. The small pie cut can be leveled out with body solder Same thing with the outside, use a C clamp to pull it in 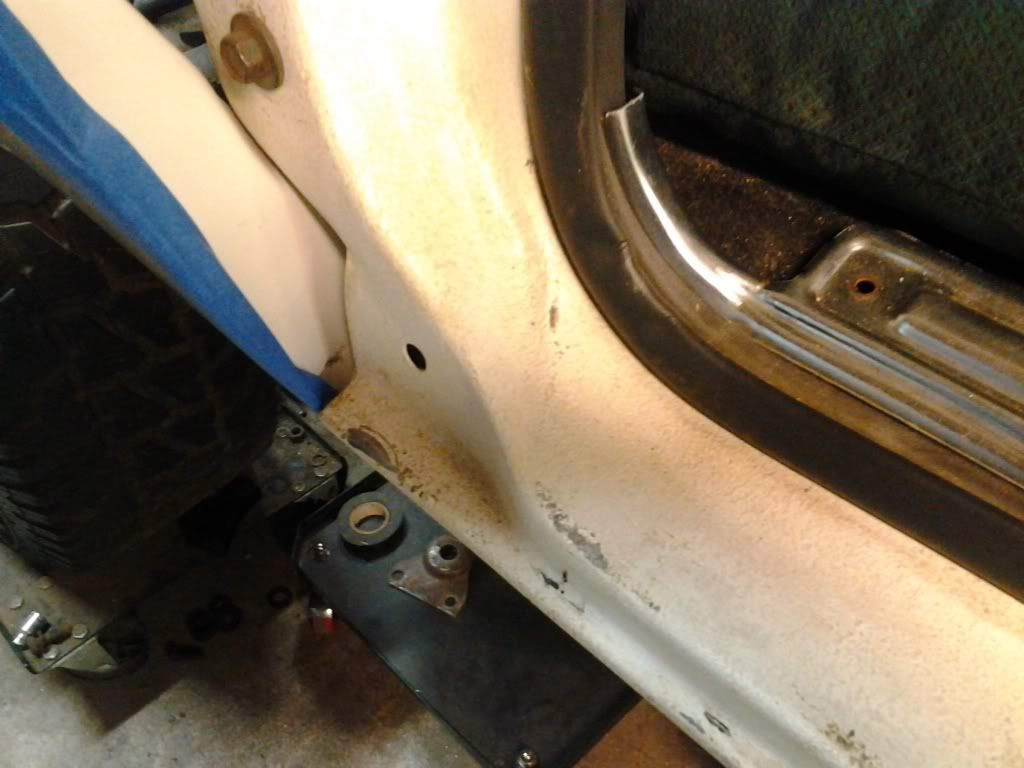 Wish i had a place to paint like you, paint looks great!
__________________
Semper Fi...Uncle Sam, you da man All parts offered to help are free, unless otherwise noted Dont try this stuff in my build thread, unless you have 55 years of mechanical OTJ training SAFETY FIRST AS usual, off topic They say your mind goes second, can't remember the first Jim Last edited by jaros44sr; 05-18-2012 at 08:53 AM. |
|
|
|
|
05-18-2012, 06:15 PM
|
#682 | |
|
GEARHEAD
Join Date: Aug 2003
Location: MN
Posts: 6,126
|
Re: Junkyard Jimmy Super Low Buck Build Thread
Quote:
LFD's thread is here for those interested. He has much better skills at this than me and he includes repairing the rest of the rust in that area. http://67-72chevytrucks.com/vboard/s...d.php?t=271066 As far as the paint, I did the tailgate in the garage, has some junk in it. Most should sand out. I'll spray the dash and firewall, inside of the fenders, etc in the garage. Also the Als Liner. Probably do the rest at the body shop though because I'll probably need the help and experience to get a decent paint job on it with the least amount of grit in the paint.
__________________
If no one knows what you're doing, they can't tell you you're doing it wrong HG's Dream Car Build - Shelby Cobra Kit Build your own adjustable track bar 71 Long Fleet C/10 72 Jimmy 4x4 (Junkyard Jimmy)HG's Plow Truck '78 K35 DuallyBigass Farm Truck HG's thread of miscellaneous stuff |
|
|
|
|
|
05-18-2012, 06:45 PM
|
#683 |
|
Senior Member
Join Date: May 2006
Location: Philadelphia, Pa. 19454
Posts: 9,766
|
Re: Junkyard Jimmy Super Low Buck Build Thread
yeah, i agree. zip screws are the way to go, used them alot. found out that if you use to differant size holes, bigger and smaller, they tend to grip and pull in better
good luck
__________________
Semper Fi...Uncle Sam, you da man All parts offered to help are free, unless otherwise noted Dont try this stuff in my build thread, unless you have 55 years of mechanical OTJ training SAFETY FIRST AS usual, off topic They say your mind goes second, can't remember the first Jim |
|
|
|
|
05-18-2012, 09:15 PM
|
#684 |
|
GEARHEAD
Join Date: Aug 2003
Location: MN
Posts: 6,126
|
Re: Junkyard Jimmy Super Low Buck Build Thread
Went back out to the garage, drilled a bunch of holes, cleaned everything up with the wire wheel, and set the rocker back in place. I used the self threading screws this time to hold it. The door was still on, so I checked my gaps again and I should be ok.
  At this point I realized that I hadn't drilled the holes for plug welds along the bottom pinch weld, but didn't remember LFD mentioning it in his write up and none of the pics show it. So I searched around a bit to see if others were welding this or just leaving it loose. I found at least one thread where it was welded and figured it was best to do it anyway, so I pulled it back off and drilled more holes. More cleaning with the wire wheel, then back on, but with the door off this time. I already had the screws holding it, so I wasn't worried about it being in a different spot this time. At this point it should be all ready to weld in. I hesitated, went back through the steps in my head, then went for it. 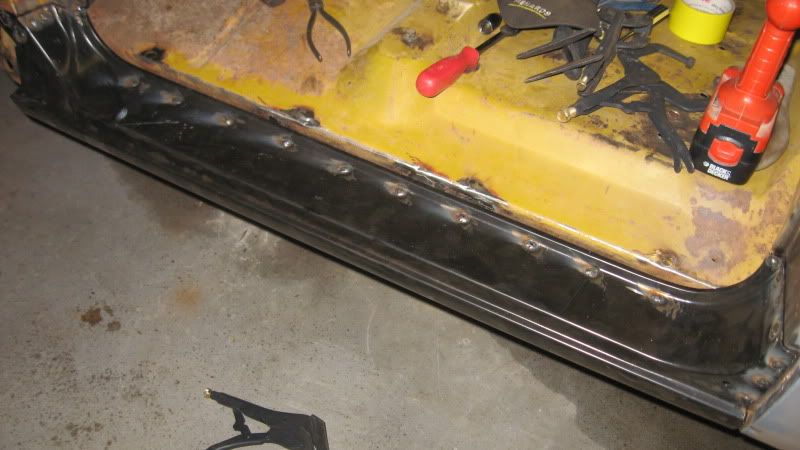 Notice the little mark on the bed side, that is where the top of the rocker was on the old one. I marked it before I cut it off. I also marked the front, but it is on the fender, which of course is no longer installed. 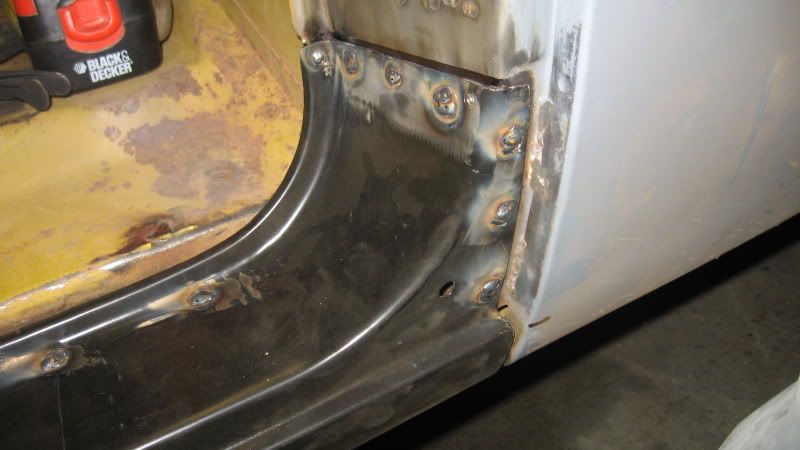 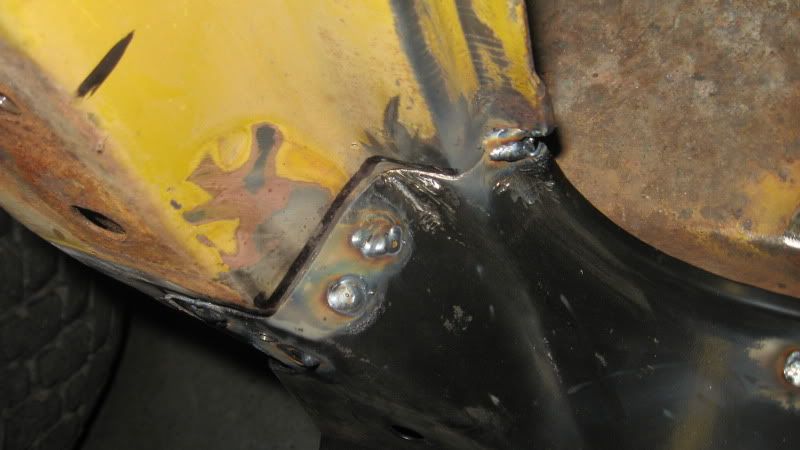 In the last pic it shows the area at the front for the door seal. Once I welded the 2 spots to the pillar, I used my air chisel to beat the metal back into the correct position. I added a little spot weld to the top of it and to the kick panel edge to hold it. There was enough steel there it just needed to be reshaped a bit. All thats left is to weld the plug welds along the bottom pinch weld, which I'll probably do in the morning. Then its time to turn it around and do the other side. BTW, this is my first attempt at a rocker replacement. My C-10 didn't need them. Its a bit of a pain, but the worst of it getting the old one off. Luckily I didn't have to do more major surgey behind it, like the inner rocker and kick panel and cab floor support and behind the B pillar, etc. like some guys have had to do.
__________________
If no one knows what you're doing, they can't tell you you're doing it wrong HG's Dream Car Build - Shelby Cobra Kit Build your own adjustable track bar 71 Long Fleet C/10 72 Jimmy 4x4 (Junkyard Jimmy)HG's Plow Truck '78 K35 DuallyBigass Farm Truck HG's thread of miscellaneous stuff |
|
|
|
|
05-18-2012, 10:03 PM
|
#685 |
|
Senior Member
Join Date: May 2006
Location: Philadelphia, Pa. 19454
Posts: 9,766
|
Re: Junkyard Jimmy Super Low Buck Build Thread
nice, glad the airchisel worked out.....
__________________
Semper Fi...Uncle Sam, you da man All parts offered to help are free, unless otherwise noted Dont try this stuff in my build thread, unless you have 55 years of mechanical OTJ training SAFETY FIRST AS usual, off topic They say your mind goes second, can't remember the first Jim |
|
|
|
|
05-18-2012, 10:05 PM
|
#686 |
|
Registered User
Join Date: Feb 2012
Location: Orange, CA
Posts: 300
|
Re: Junkyard Jimmy Super Low Buck Build Thread
Awesome job on your build so far, I REALLY like the paint color choice... This is gonna look sharp!
I am also very jealous of your build costs'... but I don't have your patience 
|
|
|
|
|
05-18-2012, 11:27 PM
|
#687 | ||
|
GEARHEAD
Join Date: Aug 2003
Location: MN
Posts: 6,126
|
Re: Junkyard Jimmy Super Low Buck Build Thread
Quote:
Quote:
 Speaking of build cost, I need to update again. Was at $3624, then bought the a pillars and a rocker and a new inner fender, bringing the total to $3751. Still need more paint supplies, door seals, door window felts, maybe a windshield (my freebie might be too rough). Punch list (in no particular order, * for priority items): *Rockers and A pillar repairs (half way done) *finish bedside body work *Finish roll bar install *fix dent on driver side fender *finish body work on fenders *body work on hood *body work on doors *tranny o-rings and kickdown cable *change fluid in both differentials *replace windshield *finish and install gauge cluster (need bezel, paint job sux and its cracked) *make sure wire for gas gauge is hooked up to sender *lights, lights and more lights *tranny cooler lines *seat belts (have them) seat covers (got 'em, not installed) Al's liner inside of tub mark/drill holes for single wall top in bed rails sandblast and paint front bumper electric fan install (got it, ordered controller) heater install wiper washer pump manual throttle glove box (need to buy) hammer out dents in grill door panels, dash pad, visors, etc. (have them, need paint, cleaning, etc.) stereo (have most of it) paint, started (mayan gold metallic)
__________________
If no one knows what you're doing, they can't tell you you're doing it wrong HG's Dream Car Build - Shelby Cobra Kit Build your own adjustable track bar 71 Long Fleet C/10 72 Jimmy 4x4 (Junkyard Jimmy)HG's Plow Truck '78 K35 DuallyBigass Farm Truck HG's thread of miscellaneous stuff Last edited by hgs_notes; 05-18-2012 at 11:35 PM. |
||
|
|
|
|
05-19-2012, 09:50 AM
|
#688 |
|
GEARHEAD
Join Date: Aug 2003
Location: MN
Posts: 6,126
|
Re: Junkyard Jimmy Super Low Buck Build Thread
Finished welding the bottom of the rocker this morning. Cleaned all the junk out of the way so I could turn it around to work on the other side. It started up fine and sounds nice. Can't wait to drive it around legally.
__________________
If no one knows what you're doing, they can't tell you you're doing it wrong HG's Dream Car Build - Shelby Cobra Kit Build your own adjustable track bar 71 Long Fleet C/10 72 Jimmy 4x4 (Junkyard Jimmy)HG's Plow Truck '78 K35 DuallyBigass Farm Truck HG's thread of miscellaneous stuff |
|
|
|
|
05-21-2012, 09:19 PM
|
#689 |
|
GEARHEAD
Join Date: Aug 2003
Location: MN
Posts: 6,126
|
Re: Junkyard Jimmy Super Low Buck Build Thread
I cleaned out the rust from the passenger side door pillar and cab support, then cut and fit up the new patch. Things were going pretty good so I welded that up. Still need to clean up the welds.
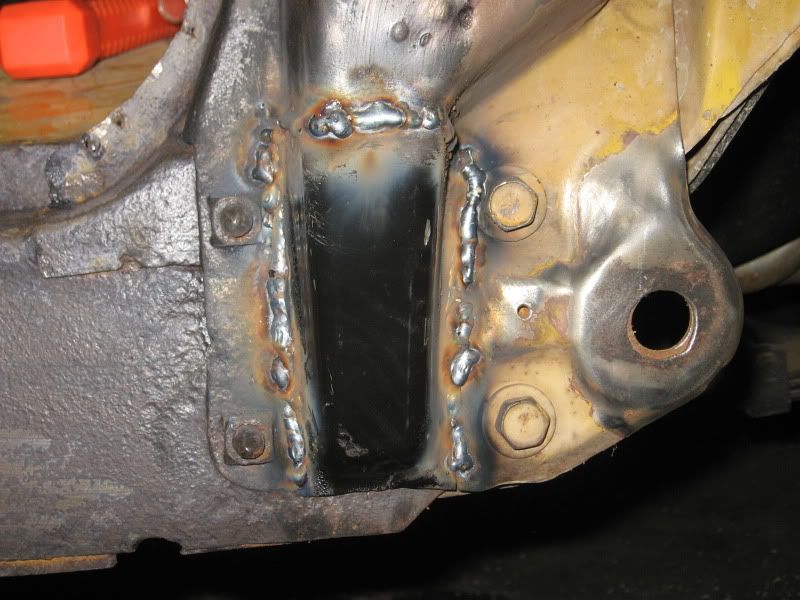 I also did the initial fit up of the rocker, but need to check it with the door on first. I expect it will be ok, but better to check anyway. This side was much easier so far, and another hour or 2 at most should finish it up.
__________________
If no one knows what you're doing, they can't tell you you're doing it wrong HG's Dream Car Build - Shelby Cobra Kit Build your own adjustable track bar 71 Long Fleet C/10 72 Jimmy 4x4 (Junkyard Jimmy)HG's Plow Truck '78 K35 DuallyBigass Farm Truck HG's thread of miscellaneous stuff |
|
|
|
|
05-22-2012, 01:16 PM
|
#690 |
|
I miss this truck.
Join Date: Dec 2001
Location: Lexington, KY U.S.A.
Posts: 2,863
|
Re: Junkyard Jimmy Super Low Buck Build Thread
You are into the part of a restoration that scares me to death. Your work is looking good, though.
__________________
'07 GMC Acadia SLT. Sweet ride. '08 Crew Cab Z-71 short bed. Really like this truck A LOT. |
|
|
|
|
05-22-2012, 02:47 PM
|
#691 |
|
GEARHEAD
Join Date: Aug 2003
Location: MN
Posts: 6,126
|
Re: Junkyard Jimmy Super Low Buck Build Thread
Tynee, this really isn't bad. The welding in these areas is basically hidden, so if you are a novice, don't sweat it. Welding sheetmetal always looks bad until you clean the welds up, unless you are TIGing it. I was lucky in that I didn't have to do the inner structure around the front of the floor and inner rocker. Welding the new rocker on was probably the easiest part of the whole job. Taking the old one off was the hardest.
Just my opinion, but the worst part of the body work is not the rust repair. It's the filling, primering, sanding cycle you have to go through to get things straight. Its a dirty, dusty tedious job that seems to never end and makes a huge mess of the garage.
__________________
If no one knows what you're doing, they can't tell you you're doing it wrong HG's Dream Car Build - Shelby Cobra Kit Build your own adjustable track bar 71 Long Fleet C/10 72 Jimmy 4x4 (Junkyard Jimmy)HG's Plow Truck '78 K35 DuallyBigass Farm Truck HG's thread of miscellaneous stuff |
|
|
|
|
05-22-2012, 10:53 PM
|
#692 | |
|
GEARHEAD
Join Date: Aug 2003
Location: MN
Posts: 6,126
|
Re: Junkyard Jimmy Super Low Buck Build Thread
Quote:
Rebuilding the hinges that are on it I don't think will correct it. I need to move it further than the wear on the pins if you get my meaning. The rocker doesn't fit as well on this side. It's pulled in a bit on the rear by the bedside. The rockers actually have a slight bow to them, with the middle out a good 1/8" or more than the ends. Same on both sides, which explains why some guys pie cut the rocker ends to make them straight and to align with the bedside and fender. BTW, I used a straight edge to check it, not comparison to the door bottom, which actually was pretty straight. I'm going to avoid sectioning the rocker, this is no show truck, but do my best to get a decent fit. We'll see what tomorrow brings.
__________________
If no one knows what you're doing, they can't tell you you're doing it wrong HG's Dream Car Build - Shelby Cobra Kit Build your own adjustable track bar 71 Long Fleet C/10 72 Jimmy 4x4 (Junkyard Jimmy)HG's Plow Truck '78 K35 DuallyBigass Farm Truck HG's thread of miscellaneous stuff |
|
|
|
|
|
05-24-2012, 10:32 AM
|
#693 |
|
GEARHEAD
Join Date: Aug 2003
Location: MN
Posts: 6,126
|
Re: Junkyard Jimmy Super Low Buck Build Thread
The other set of door hinges corrected the alignment problem with the door. But the front of the rocker is not fitting very well. It's too high and bringing it down pushes it outward at the top. I might have to section this one to get it in close.
__________________
If no one knows what you're doing, they can't tell you you're doing it wrong HG's Dream Car Build - Shelby Cobra Kit Build your own adjustable track bar 71 Long Fleet C/10 72 Jimmy 4x4 (Junkyard Jimmy)HG's Plow Truck '78 K35 DuallyBigass Farm Truck HG's thread of miscellaneous stuff |
|
|
|
|
05-24-2012, 04:55 PM
|
#694 |
|
GEARHEAD
Join Date: Aug 2003
Location: MN
Posts: 6,126
|
Re: Junkyard Jimmy Super Low Buck Build Thread
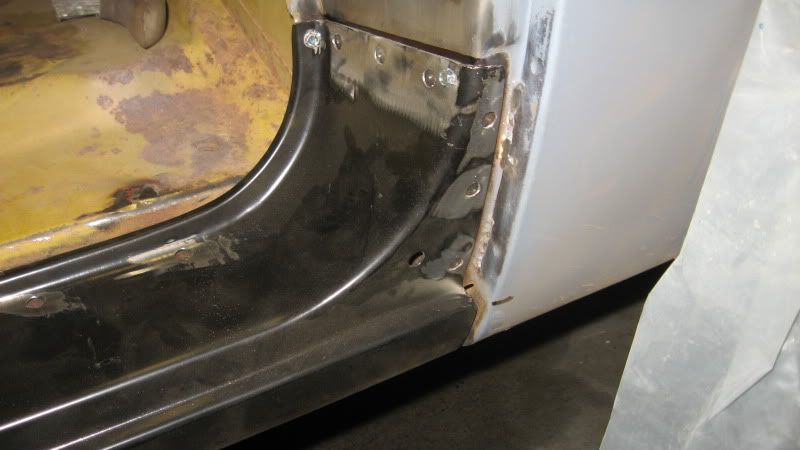
I finished welding up the passenger side rocker. Heres a pic of the initial fit up in front.
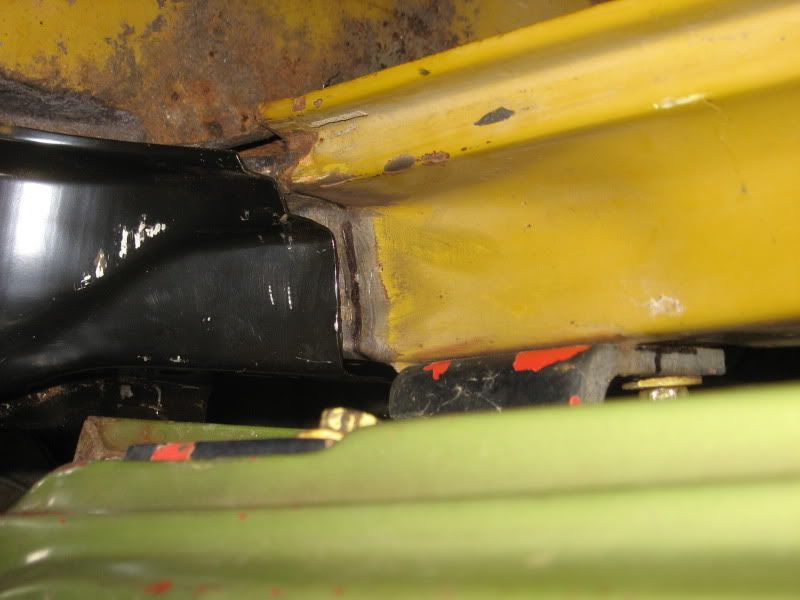 You can see its off a bit, wouldn't pull in. I used a couple of self tapping screws to push it in. That got it to where the alignment with the door was pretty good. 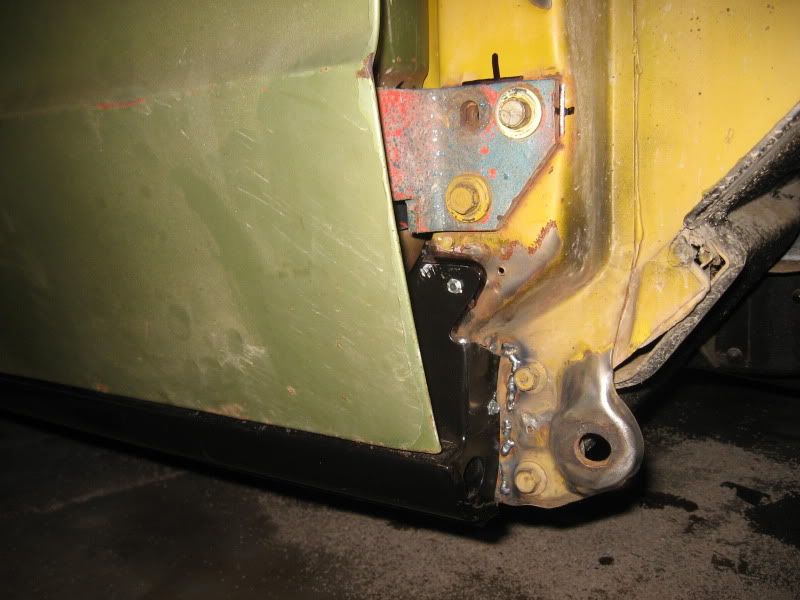 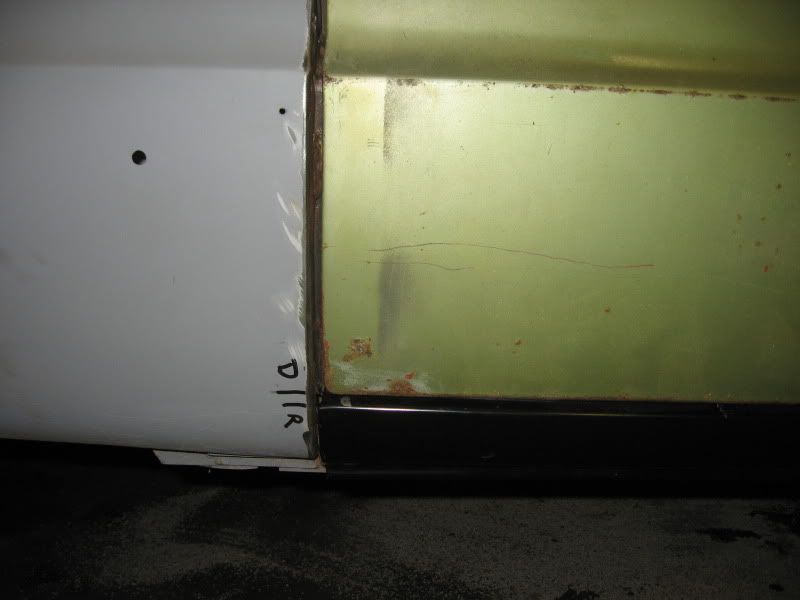 The plan at this point was to pull it off, clean up the welds on the A pillar, set it back in and check again. Also time to spray the rust proofing into the cab floor support.  That went alright, there is still a gap there at the front, pretty much the same as the other side was. So off it comes again to prep it for plug welds. 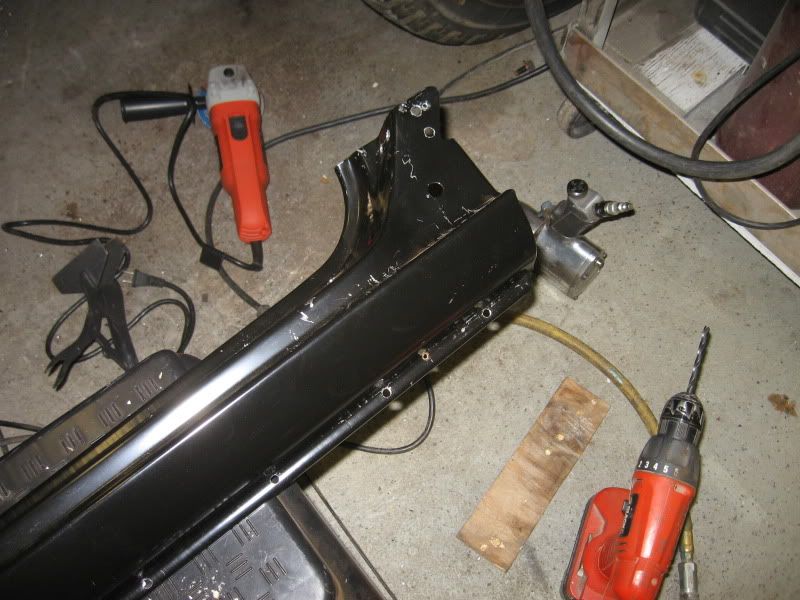 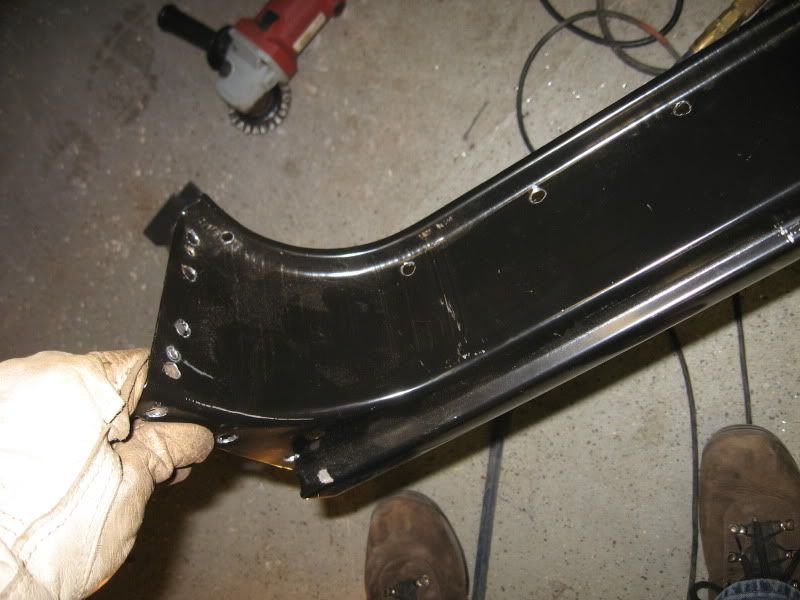 I used a 5/16" bit for most of the holes, but used a 1/4" bit on the bottom pinch weld and on the door seal pinch weld spots. Mainly because it's pretty tight there and it keeps the hole just a bit farther from the edges which can burn off during the welding. I also clean off the primer or E-coat on the rocker around all of the holes, both sides, to keep the weld cleaner. Rust and paint will make the weld pop and blow through, so clean it as much as you can. Then it's time to put it back on, position with the self tapping screws in the same holes as before. Then just weld the plug welds. I started at the front on the A pillar, then hammered that door seal flange like the other side so it would line up. Then I tacked that to the door seal flange above it. Then I welded the rear end, then the sill area, then the bottom pinch weld. 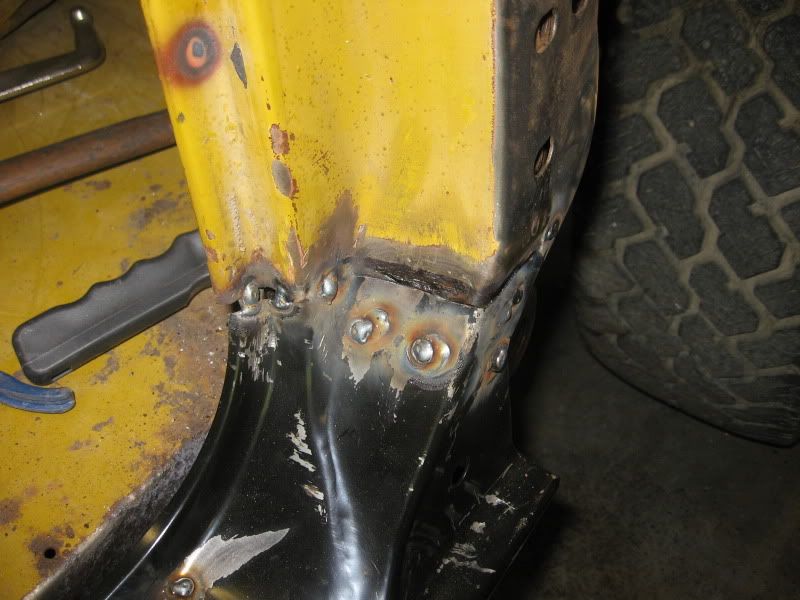 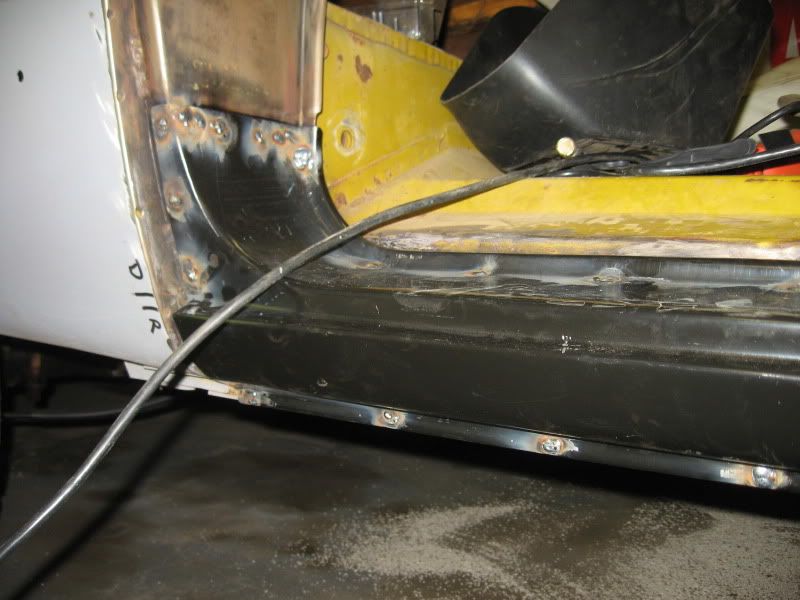 I found a couple problem areas during the door adjustment. First was that the door seal flange to kick panel spot welds were all broke loose. I drilled a few 1/4" holes in the kick panel side and plug welded them. The top 2 welds are just tacks because there wasn't much overlap there. That helped tighten up the windshield frame on that side which had a bit more flex in it than the other side. Now its solid. 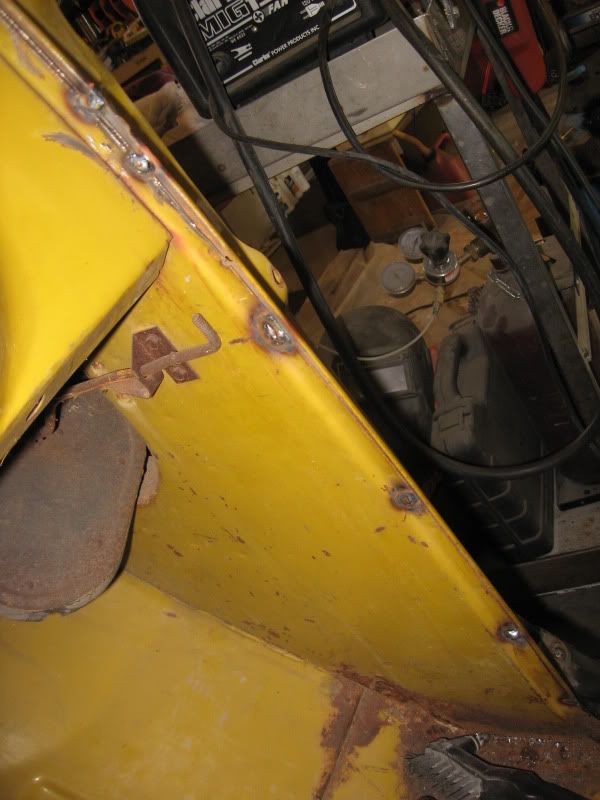 The second problem was that the bottom hinge area had been smacked in at some time. 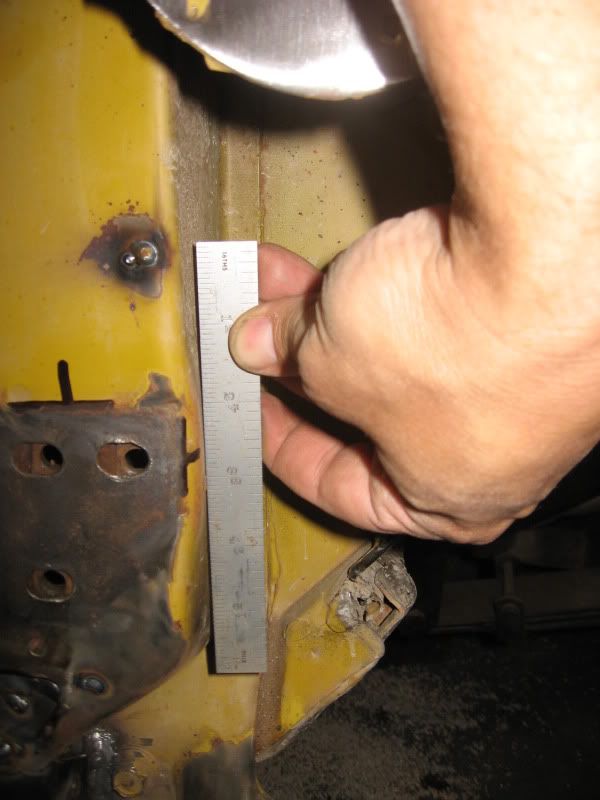 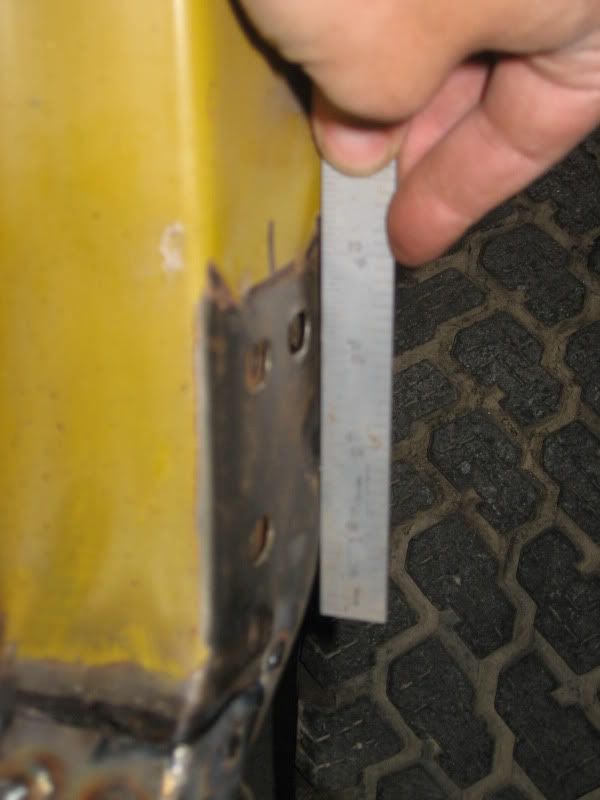 The hit that caused the damage at the hinge probably also popped the spot welds above it. Both of those and the worn hinge pins probably contributed to the problem I had with door alignment. So now I just need to spray the rust preventor into the passenger side A pillar and through both rockers. Then clean up the welds and prep the front half of the tub for paint. Not really much body work to do here, but it will need some filler to smooth out some areas.
__________________
If no one knows what you're doing, they can't tell you you're doing it wrong HG's Dream Car Build - Shelby Cobra Kit Build your own adjustable track bar 71 Long Fleet C/10 72 Jimmy 4x4 (Junkyard Jimmy)HG's Plow Truck '78 K35 DuallyBigass Farm Truck HG's thread of miscellaneous stuff |
|
|
|
|
05-25-2012, 07:35 AM
|
#695 |
|
Registered User
Join Date: Feb 2012
Location: Ruskin Florida
Posts: 4,566
|
Re: Junkyard Jimmy Super Low Buck Build Thread
So, just checking. Is this still a "low buck build".
What does this cost to do? Looks like you have a lot of experience and an awesome welder! Just wondering if it's worth fixing mine.
__________________
70 swb 4x4 406sbc 700r4 203/205 d60/14blt locker yadda yadda http://67-72chevytrucks.com/vboard/s...88#post6935688 Yeller 72 Blazer 2wd conversion project "No Daggum Money" http://67-72chevytrucks.com/vboard/s...d.php?t=550804 LS1-T56 3.73 LSD super budget build Blanco-2014 Sierra SWB https://67-72chevytrucks.com/vboard/...d.php?t=810350 |
|
|
|
|
05-25-2012, 08:18 AM
|
#696 | |
|
GEARHEAD
Join Date: Aug 2003
Location: MN
Posts: 6,126
|
Re: Junkyard Jimmy Super Low Buck Build Thread
Quote:
When it comes to the body work and welding the sheetmetal, this is only my 2nd project, and first time replacing rockers. My C-10 needed very little rust repair, mostly on the bed floor and door bottoms. I probably spent 10 hours repairing each door (including the finish body work) and the inner door bottoms probably cost $30 each. You see what I mean? Costs a lot of time, not so much for patches. My welder I got on sale at a small hardware store for $269 I think and it is considered about one step above the typical cheapo 120v mig welder. I also sold my older craftsman mig welder for $150 to recoup some of the cost. The reason for the change was that my old craftsman only had 2 settings for power, hi and low. Neither setting worked worth a damn for typical body sheetmetal. My new one is basically the same welder with 5 power settings and it does a great job for a low buck welder. I'd like to step up to a higher power welder sometime that would allow me to mig weld aluminum. The main thing to look for is a welder with the gas set up included. Flux core welding will do the job, but its a mess compared to gas shielded mig. Just rent or buy a small gas bottle (about $100 to buy) and start practicing. Most body work repairs is just a series of tack welds, so it really doesn't take much practice to figure it out. As to fixing yours, you won't really know the cost in parts and time until you cut it open to see how far the rust goes. I got very lucky. Many trucks have rust back into the floor boards, the cab floor supports, the kick panel bottoms, inner rockers etc. That means more patches, but the time involved will probably triple or more compared to my simple rocker replacement. There are threads on the board here where people have done all of that and more. A friend of mine told me once "It's just metal, if you mess up, cut it out and do it again." He's right. You can patch up holes, bend it, hammer it, glue it, weld it, rivet it, heat it, shrink it, stretch it, whatever. You just need to learn a little and give it a shot.
__________________
If no one knows what you're doing, they can't tell you you're doing it wrong HG's Dream Car Build - Shelby Cobra Kit Build your own adjustable track bar 71 Long Fleet C/10 72 Jimmy 4x4 (Junkyard Jimmy)HG's Plow Truck '78 K35 DuallyBigass Farm Truck HG's thread of miscellaneous stuff |
|
|
|
|
|
05-26-2012, 03:42 PM
|
#697 |
|
GEARHEAD
Join Date: Aug 2003
Location: MN
Posts: 6,126
|
Re: Junkyard Jimmy Super Low Buck Build Thread
Started cleaning up the welds, but found more problems. I must have shut the welder down, disconnected, reconnected and started back up like 5 times. More popped spot welds. I found them on the pich weld on the passender side windshield post, and on the pinch weld are on the rear of the door opening. I had to redo one of my plug welds a couple times because it popped loose too. Not because of stress, but just not able to clean out the surface rust on the inner panel after drilling it out. Dirty welds are weak.
Just need to clean up around the windshield frame and the driver side rocker, then its time to start scuffing, sanding, etc. for paint prep. 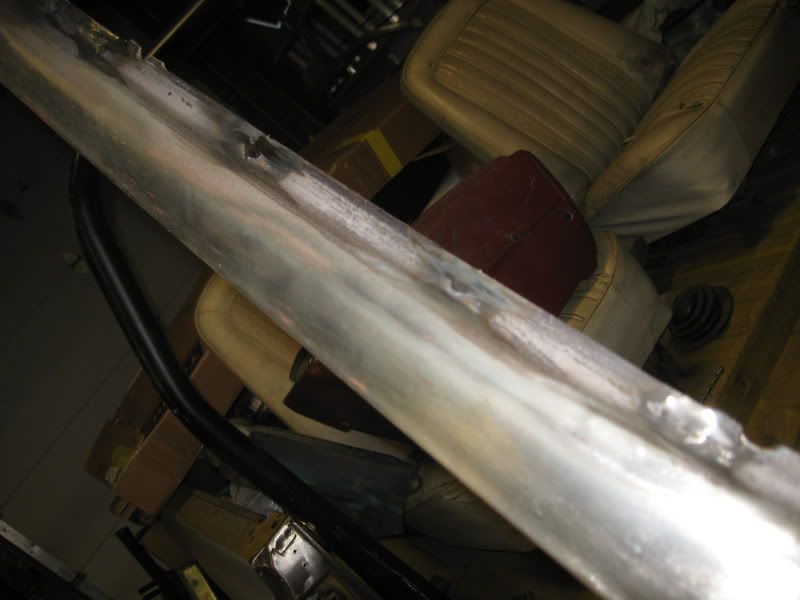 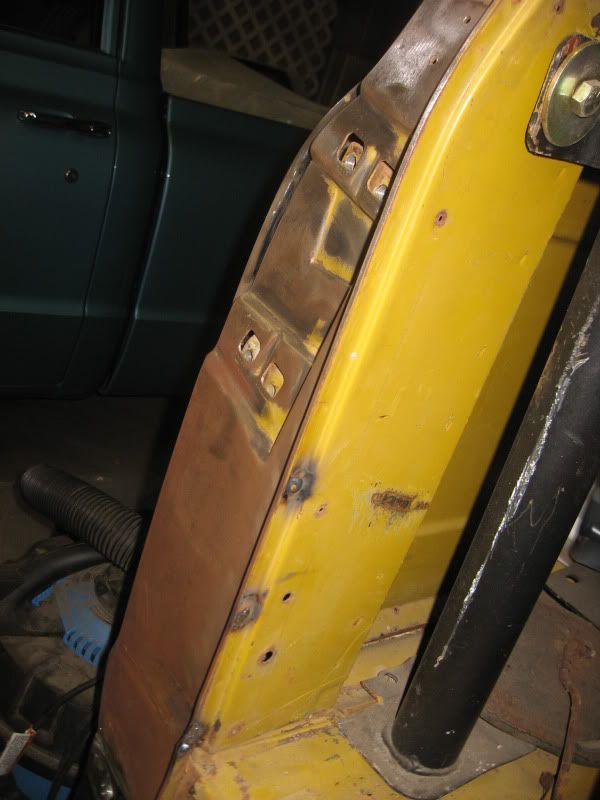
__________________
If no one knows what you're doing, they can't tell you you're doing it wrong HG's Dream Car Build - Shelby Cobra Kit Build your own adjustable track bar 71 Long Fleet C/10 72 Jimmy 4x4 (Junkyard Jimmy)HG's Plow Truck '78 K35 DuallyBigass Farm Truck HG's thread of miscellaneous stuff |
|
|
|
|
06-07-2012, 10:10 PM
|
#698 |
|
GEARHEAD
Join Date: Aug 2003
Location: MN
Posts: 6,126
|
Re: Junkyard Jimmy Super Low Buck Build Thread
Haven't been able to spend much time on this lately. The usual excuses like work, family activities, etc. There are a couple other projects I've been working on also.
My son bought his first truck a few weeks ago. A 95 S-10 2wd longbed reg cab, 2.2l 4 banger. Not a bad truck, but for $460 and about 173k miles you can expect to do some maintenance. I've been teaching him as we go and making him get his hands dirty. So far, so good. A few days ago we did the front brakes and new rotors. Yesterday was an oil change. Still some more routine maintenance to do, but he has to get paid first.  Then there is this little idea for a wagon I got into my head last year. I started putting that together the past couple weeks. Suspension is almost done, here's a teaser pic: 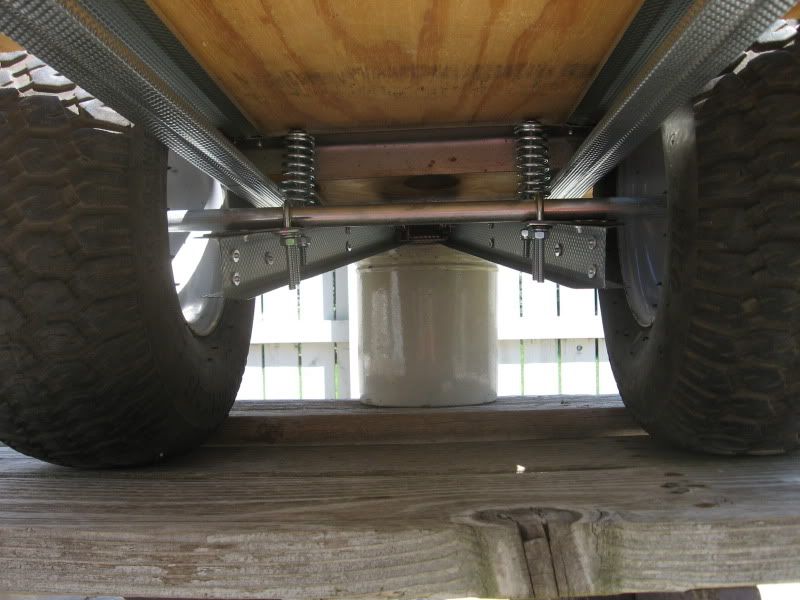 Then my C-10 started having electrical issues this past month. First it was draining the battery and I traced that to the starter circuit. But then it quit and I figured it was probably just a sticky wicket. But then I drove it the other day and the tach fried and it was blowing the main power fuse to the cab. Still working on that. And for the Jimmy, now that you have read about all my little distractions, all I managed to do was clean it up a bit and start taping it off. Still need to sand/scuff it, more taping and then I can spray the epoxy primer. 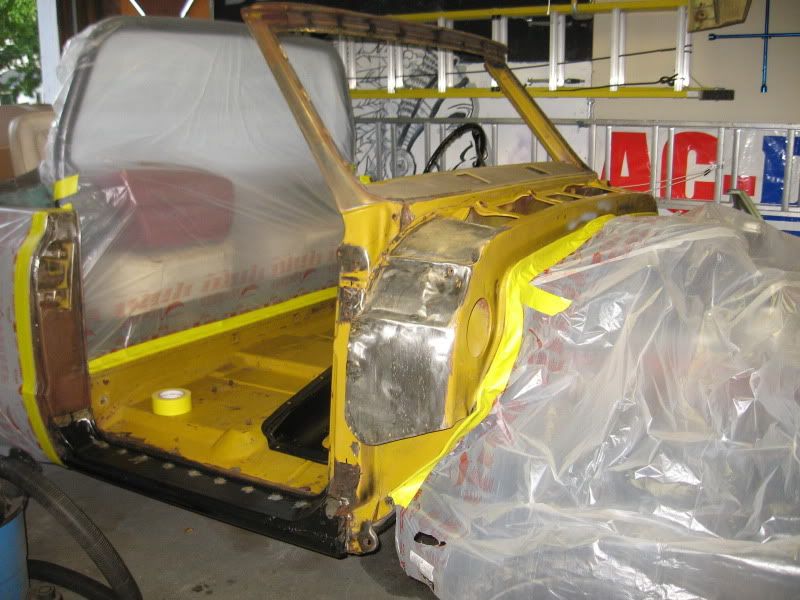 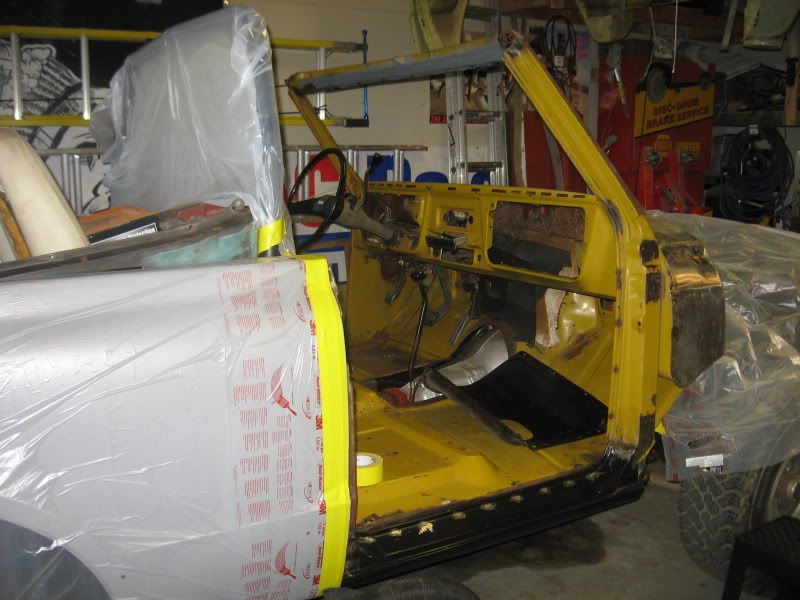
__________________
If no one knows what you're doing, they can't tell you you're doing it wrong HG's Dream Car Build - Shelby Cobra Kit Build your own adjustable track bar 71 Long Fleet C/10 72 Jimmy 4x4 (Junkyard Jimmy)HG's Plow Truck '78 K35 DuallyBigass Farm Truck HG's thread of miscellaneous stuff |
|
|
|
|
06-18-2012, 03:05 PM
|
#699 |
|
GEARHEAD
Join Date: Aug 2003
Location: MN
Posts: 6,126
|
Re: Junkyard Jimmy Super Low Buck Build Thread
Nope, haven't worked on it. I wanted to share my good fortune though. I borrowed the trailer from the body shop last week to haul my 2wd blazer from the farm to my house so I could work on it. And when I was putting the trailer back I saw an old hi-lift jack laying in the dirt behind the trailer. I asked the guys about it, none knew who it belonged to, so they checked with their dad today (he still comes to the shop regularly to work on stuff) and he forgot he even had it. He had no use for it so gave it to me.
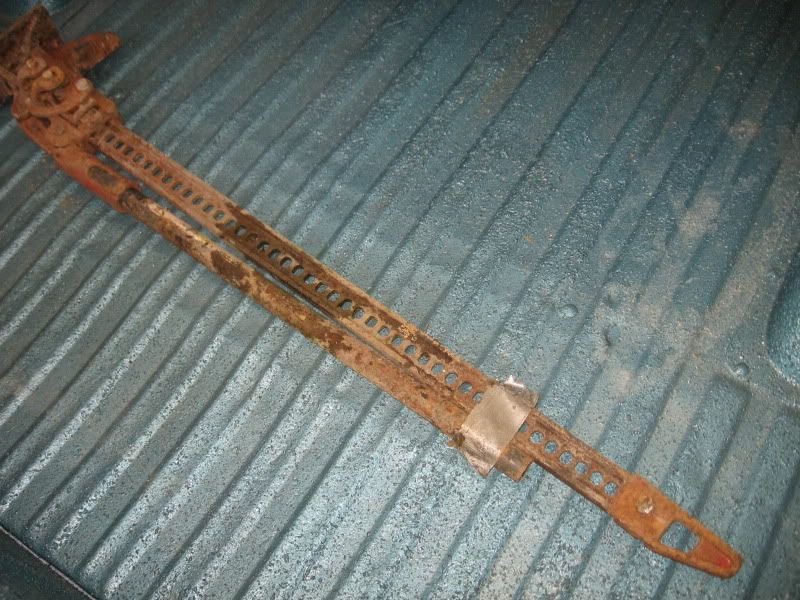 There are rebuild kits available... http://www.hi-lift.com/accessories/fix-it-kit.html I'll tear it down, sandblast and paint it up. Should look good mounted to my bedside. And it was free (minus the rebuild).
__________________
If no one knows what you're doing, they can't tell you you're doing it wrong HG's Dream Car Build - Shelby Cobra Kit Build your own adjustable track bar 71 Long Fleet C/10 72 Jimmy 4x4 (Junkyard Jimmy)HG's Plow Truck '78 K35 DuallyBigass Farm Truck HG's thread of miscellaneous stuff |
|
|
|
|
06-18-2012, 04:08 PM
|
#700 |
|
I miss this truck.
Join Date: Dec 2001
Location: Lexington, KY U.S.A.
Posts: 2,863
|
Re: Junkyard Jimmy Super Low Buck Build Thread
Score...
__________________
'07 GMC Acadia SLT. Sweet ride. '08 Crew Cab Z-71 short bed. Really like this truck A LOT. |
|
|
|
 |
| Bookmarks |
|
|


 Linear Mode

