
|
|
|
 05-21-2016, 09:31 AM
|
#1 |
|
Registered User
Join Date: Apr 2011
Location: .
Posts: 3,104
|
Re: 55 Wagon Progress
You make it look so easy.
What is the name of the tool pictured with the door? I've searched with no luck. |

|

|
|
05-21-2016, 10:56 AM
|
#2 |
|
Registered User
Join Date: Jan 2013
Location: Leonardtown, MD
Posts: 1,637
|
Re: 55 Wagon Progress
That's a tipping tool for folding a flange. It has a stop built in for setting a consistent depth. Saw the question on FB but was not part of the group to respond, got enough groups to keep up with now, haha. I did send you a link in FB message on how to build it, if that went through...
Posted via Mobile Device |
|
|
|
|
05-21-2016, 06:19 PM
|
#3 |
|
Registered User
Join Date: Apr 2011
Location: .
Posts: 3,104
|
Re: 55 Wagon Progress
Thank you but haven't seen it.
linky to my fb page Oh wait,,,,, enough surfing the Interweb found me a page you had posted. http://www.chevytalk.org/fusionbb/sh...hp?tid/291495/ Thank you for putting it out there. Last edited by Bomp; 05-21-2016 at 08:44 PM. Reason: Cause this build is so cool. |
|
|
|
|
05-22-2016, 12:53 AM
|
#4 |
|
Registered User
Join Date: Oct 2007
Location: Spanaway
Posts: 8,451
|
Re: 55 Wagon Progress
I just noticed the screw stops and bracket stop on your tweaking tool (lack of proper term) i like that, controlling the depth can come in handy I'm sure, i have wrestled with that a few times with my home made jobbers.
__________________
Mike. Swamp Rat build thread : http://67-72chevytrucks.com/vboard/s...d.php?t=595019 72 3/4T 4X4 4" BDS Lift 33" BFG's |
|
|
|
|
05-23-2016, 07:02 AM
|
#5 |
|
Registered User
Join Date: Jan 2013
Location: Leonardtown, MD
Posts: 1,637
|
Re: 55 Wagon Progress
It does come in handy for folding a flange where you can't use a brake, like around wheel openings, etc..
I've got a pretty good selection of dies for the bead roller and thought these may come in handy if we could adapt them to the lower anvil cradle on the Wheeling Machine.. I've got a couple dies I use for tipping, and you never know when some other odd shape may help out in a pinch. The Fasti bead roller uses a .94 shaft for the dies, so we started with an oilite bearing, 15/16 outer to 3/4 inner diameter, then a 3/4 outer to 1/2 inner, supported on a piece of 1/2" diameter hardened Stainless.. 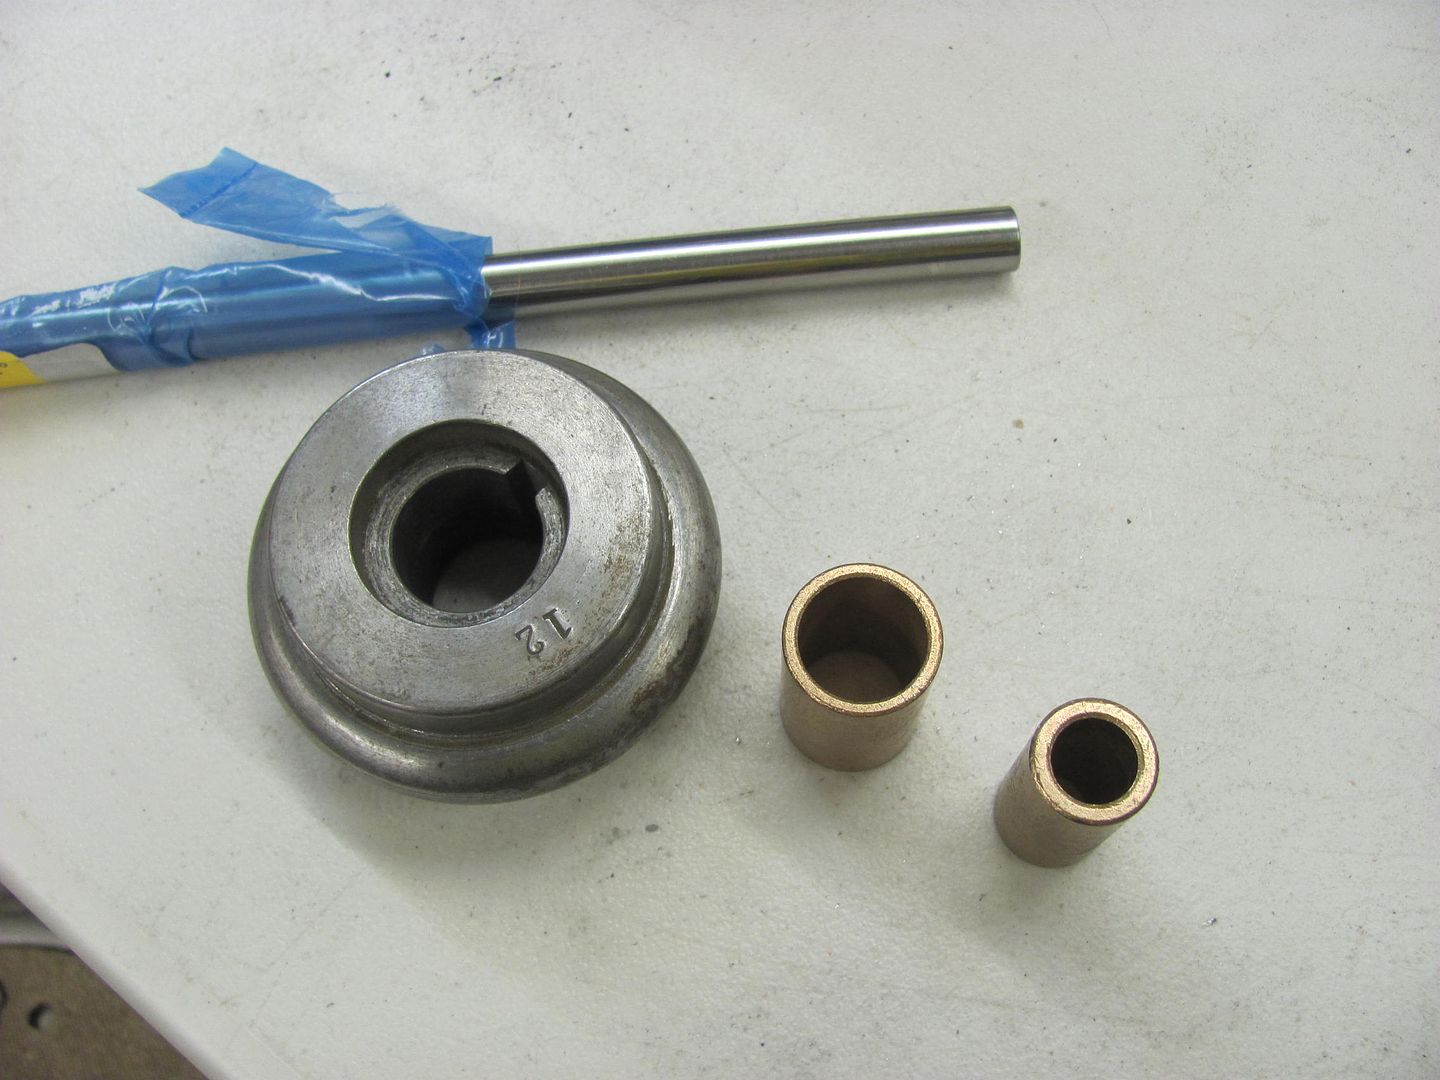 The two oilites were a tight fit, so they were "pressed" together in the vise.. 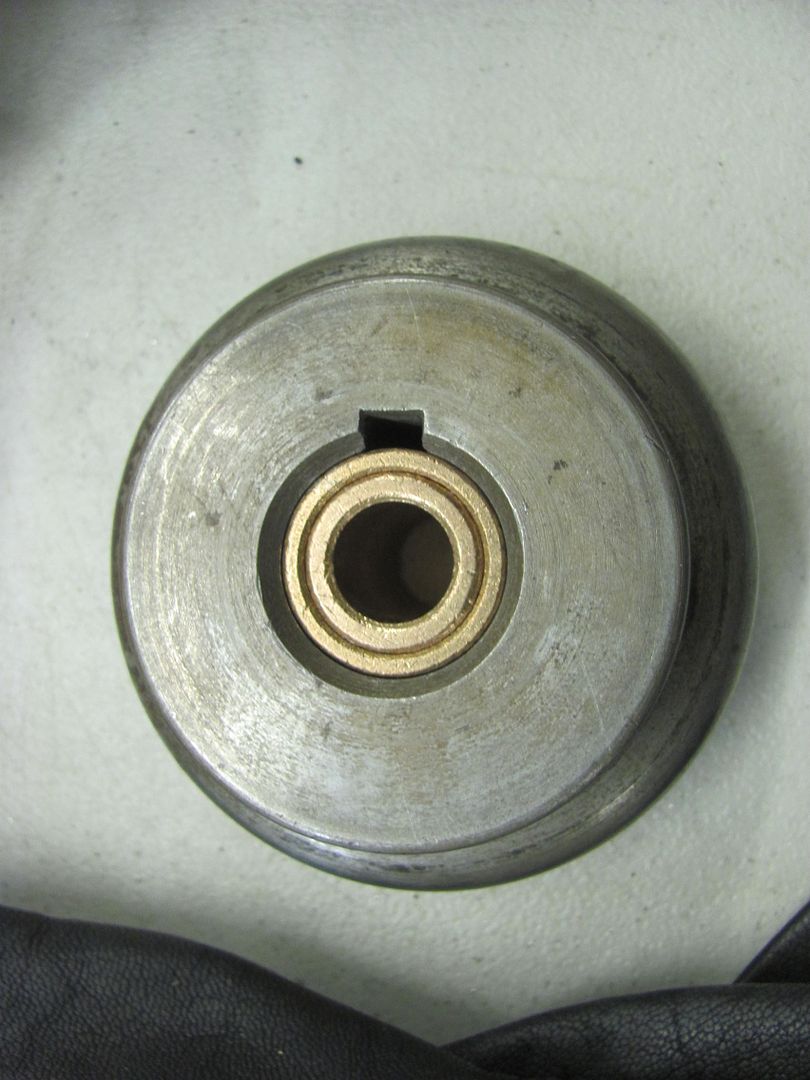  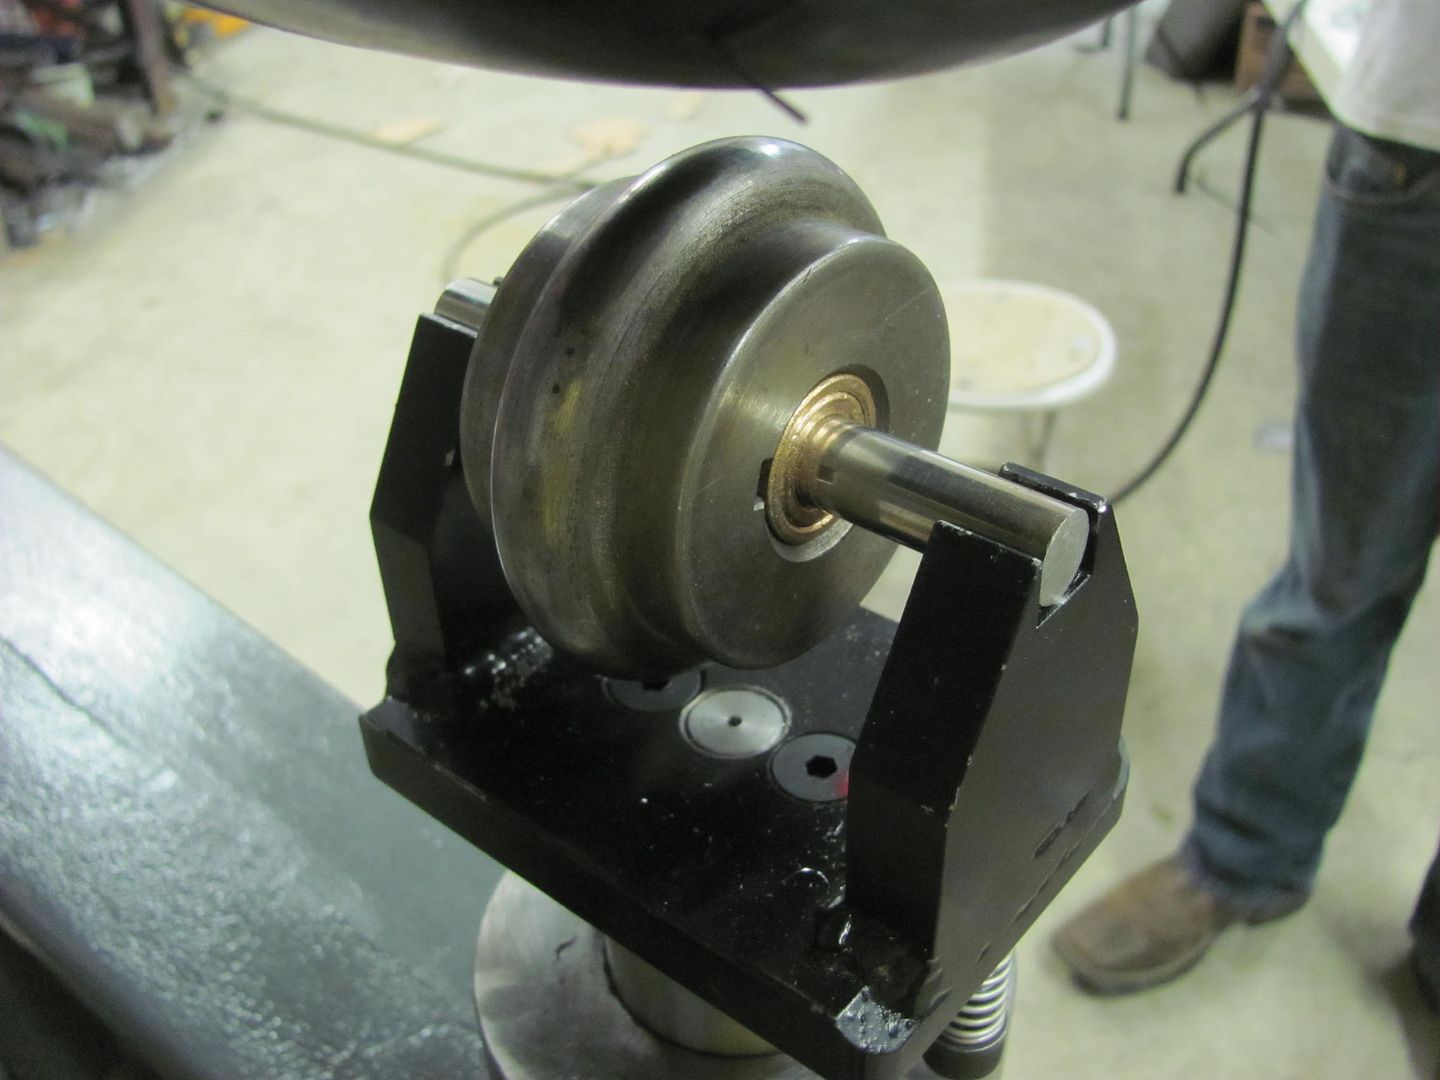 And to finish it off we have a couple of shaft collars on the way so the die won't walk on us while in use.. Saturday had us performing major shop cleanup so we could better get to an assembly line efficiency in polishing stainless trim and block sanding painted parts. I guess we walked past this one too many times...  ....and since the Lennox still had some dies in it from last week....  The outer perimeter will get trimmed a bit more and we'll add a small bead detail on the very edge prior to bolting it on... 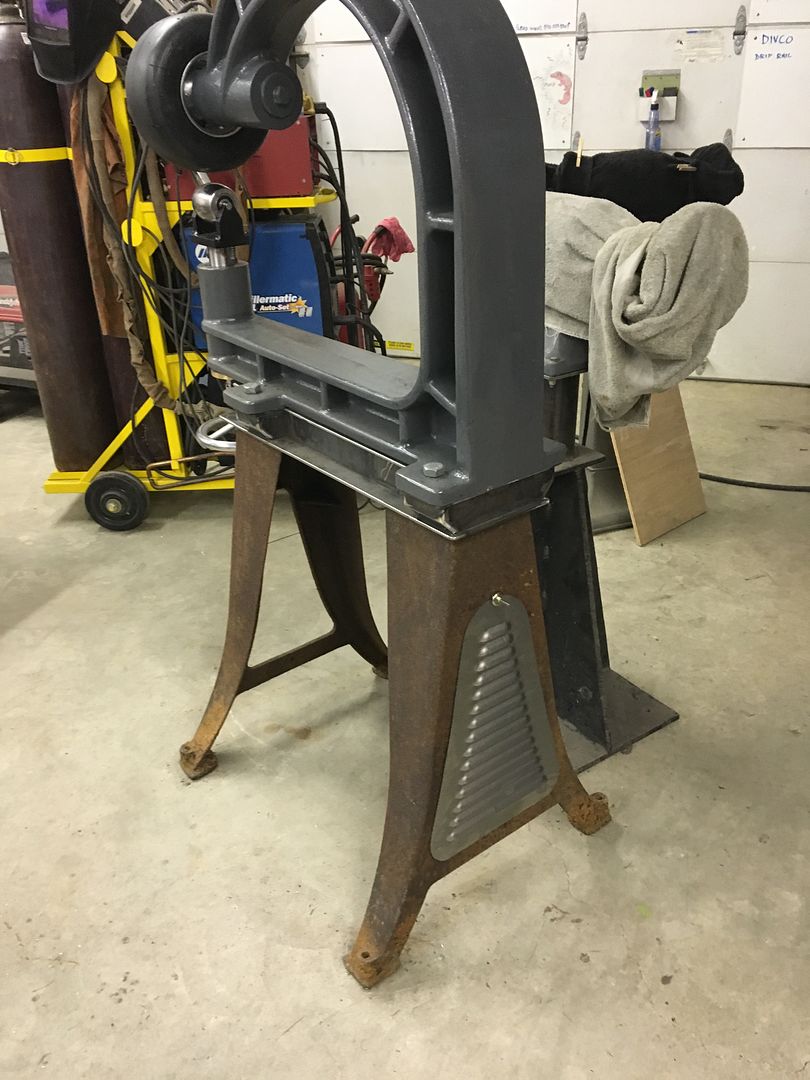
__________________
Robert |
|
|
|
|
05-26-2016, 10:49 PM
|
#6 |
|
Registered User
Join Date: Jan 2013
Location: Leonardtown, MD
Posts: 1,637
|
Re: 55 Wagon Progress
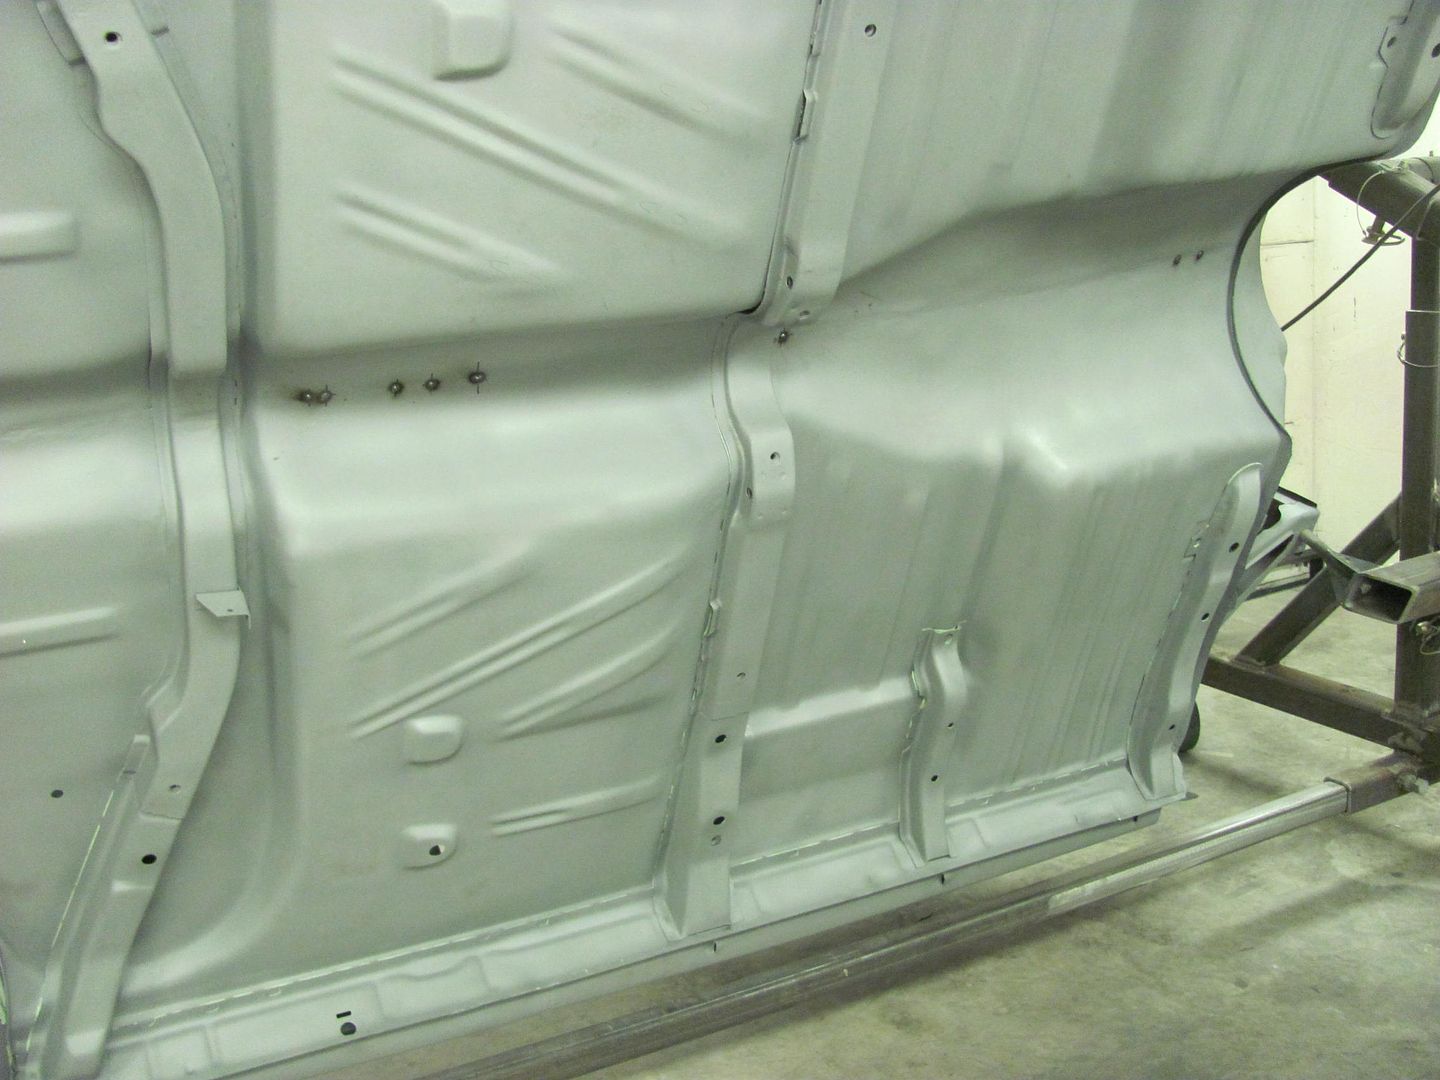
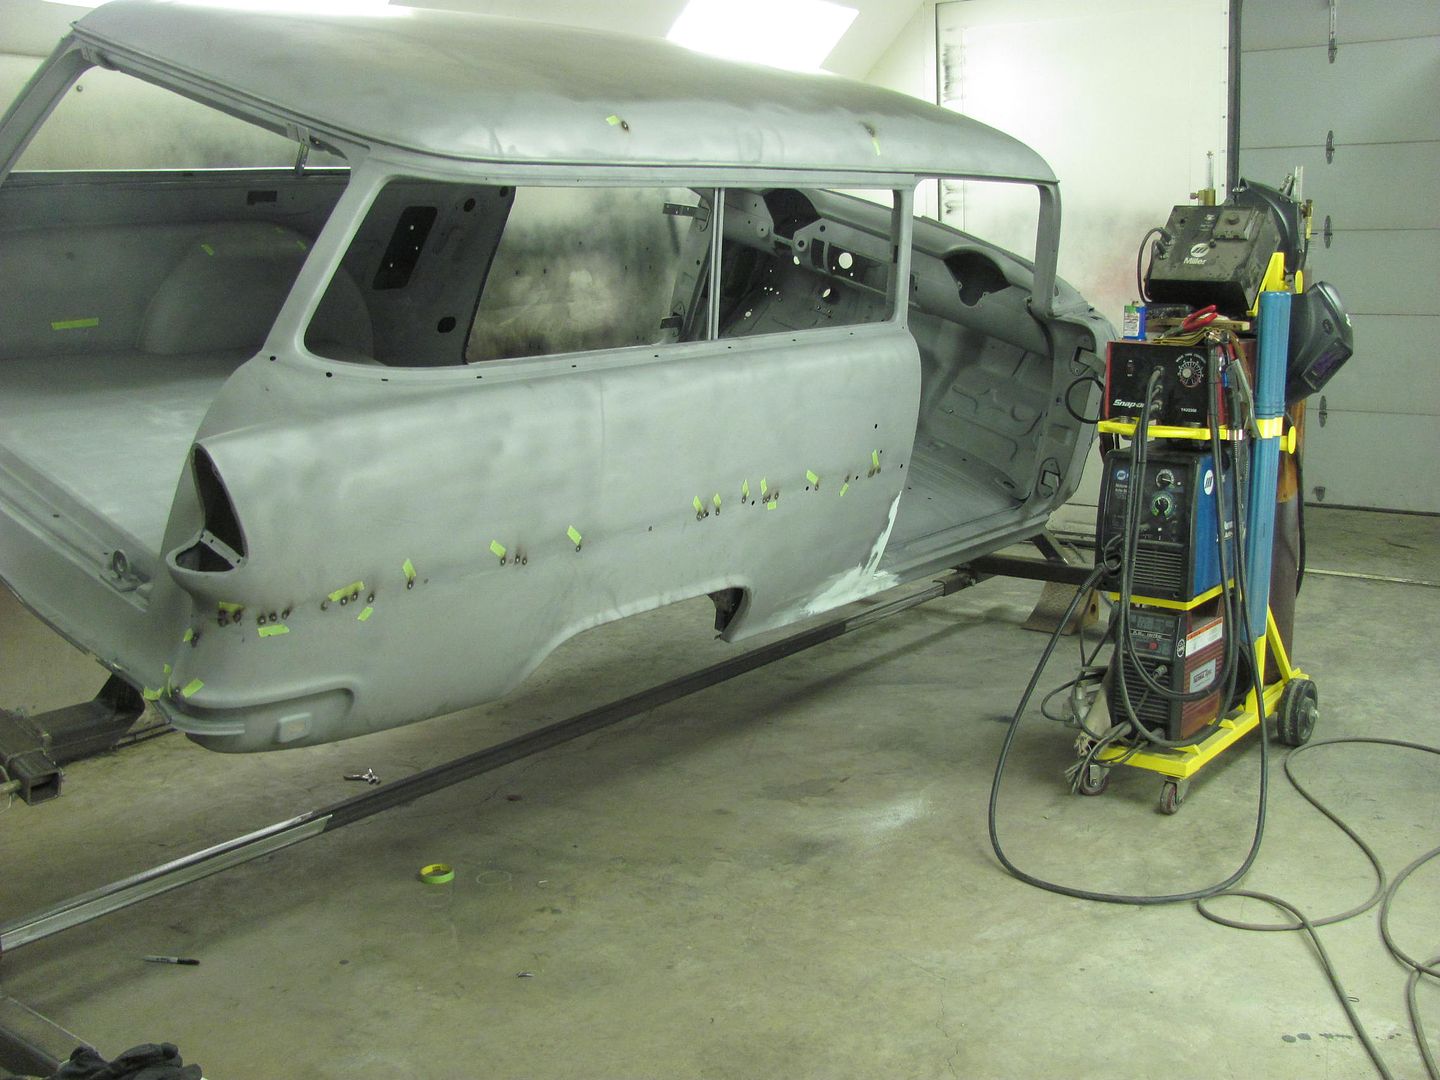
Well the two weeks plus of non stop rain has finally subsided where the media blasting could commence. Got a phone call today that the car was ready to pick up.. Here it is before we loaded it up..
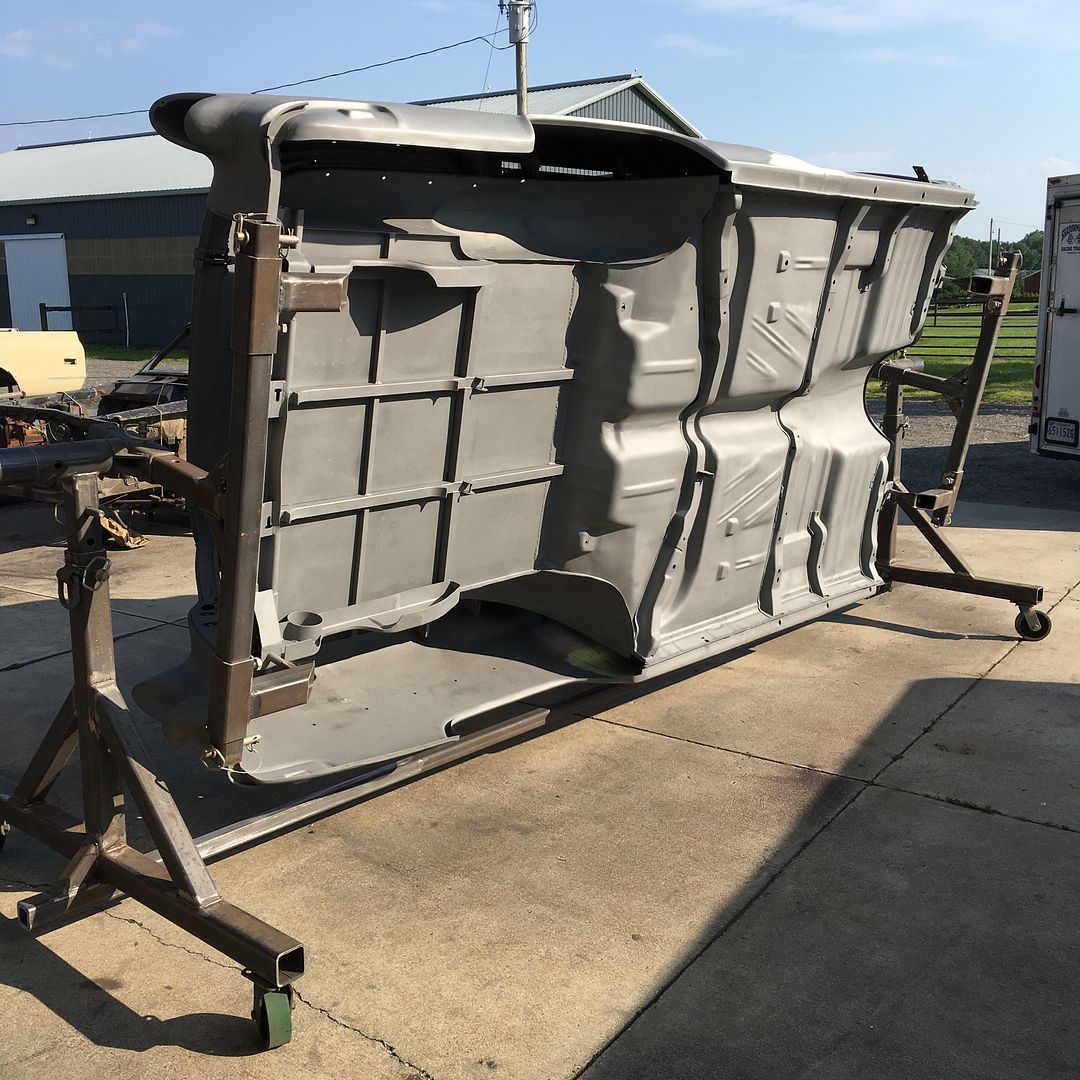  This is the part where you wish you had a tilt bed trailer so any media residue would be persuaded on out on the return trip home... But alas, we found a combination of using the air hose and a shop vac best to evacuate most of the media. That and about 50 or so revolutions on the rotisserie..... 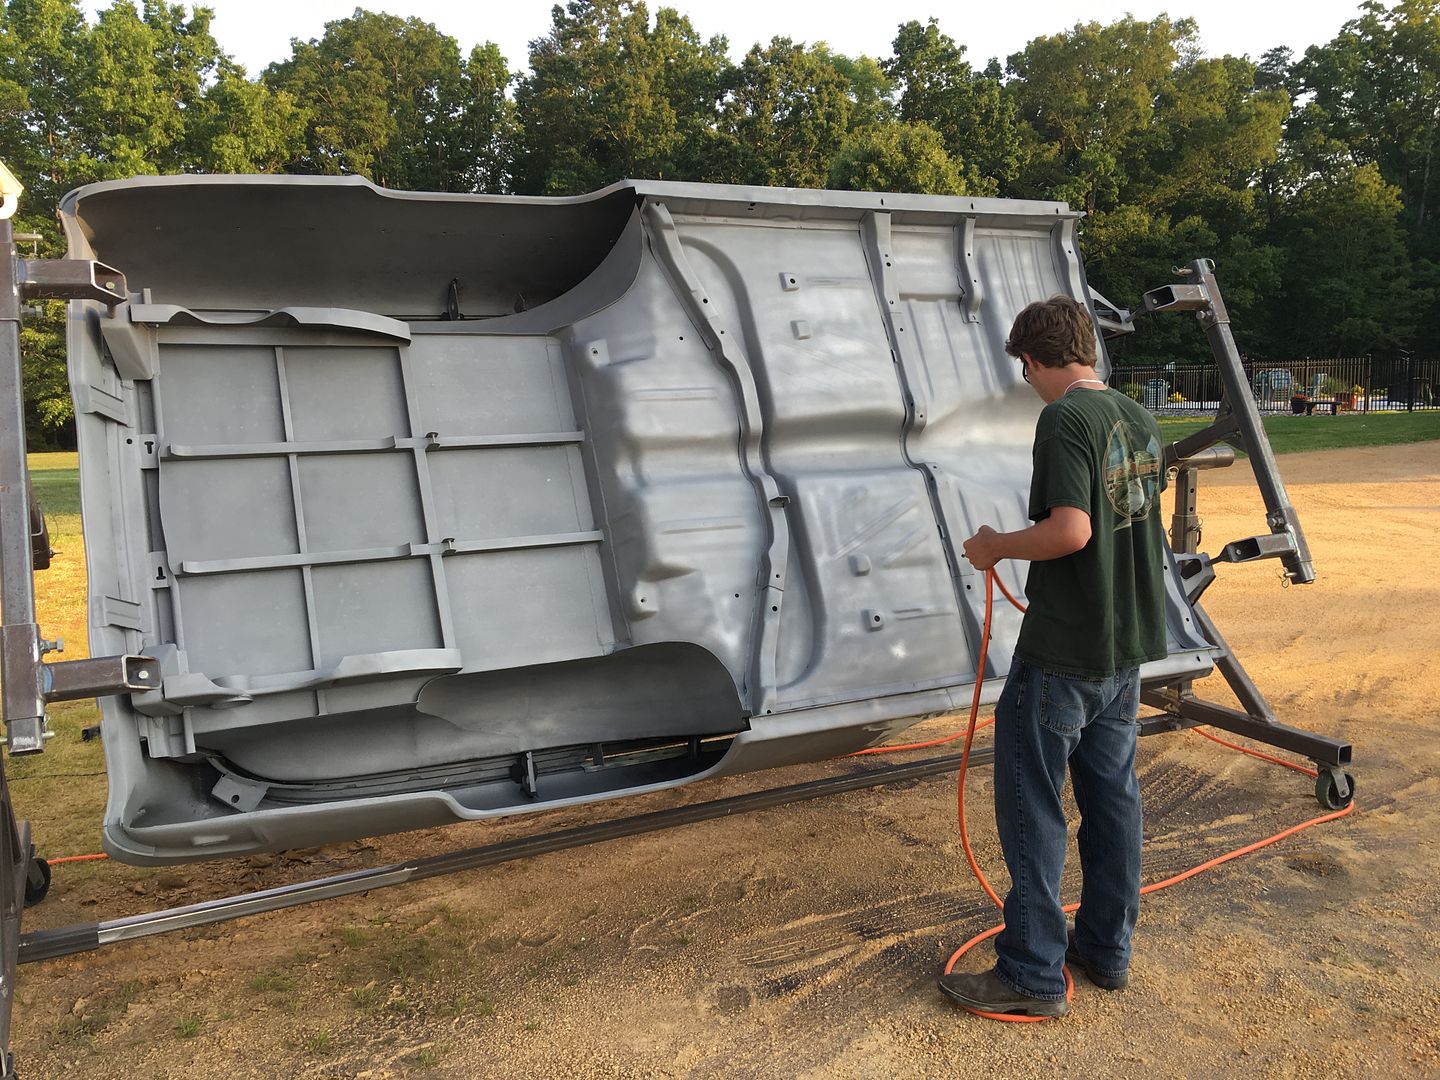 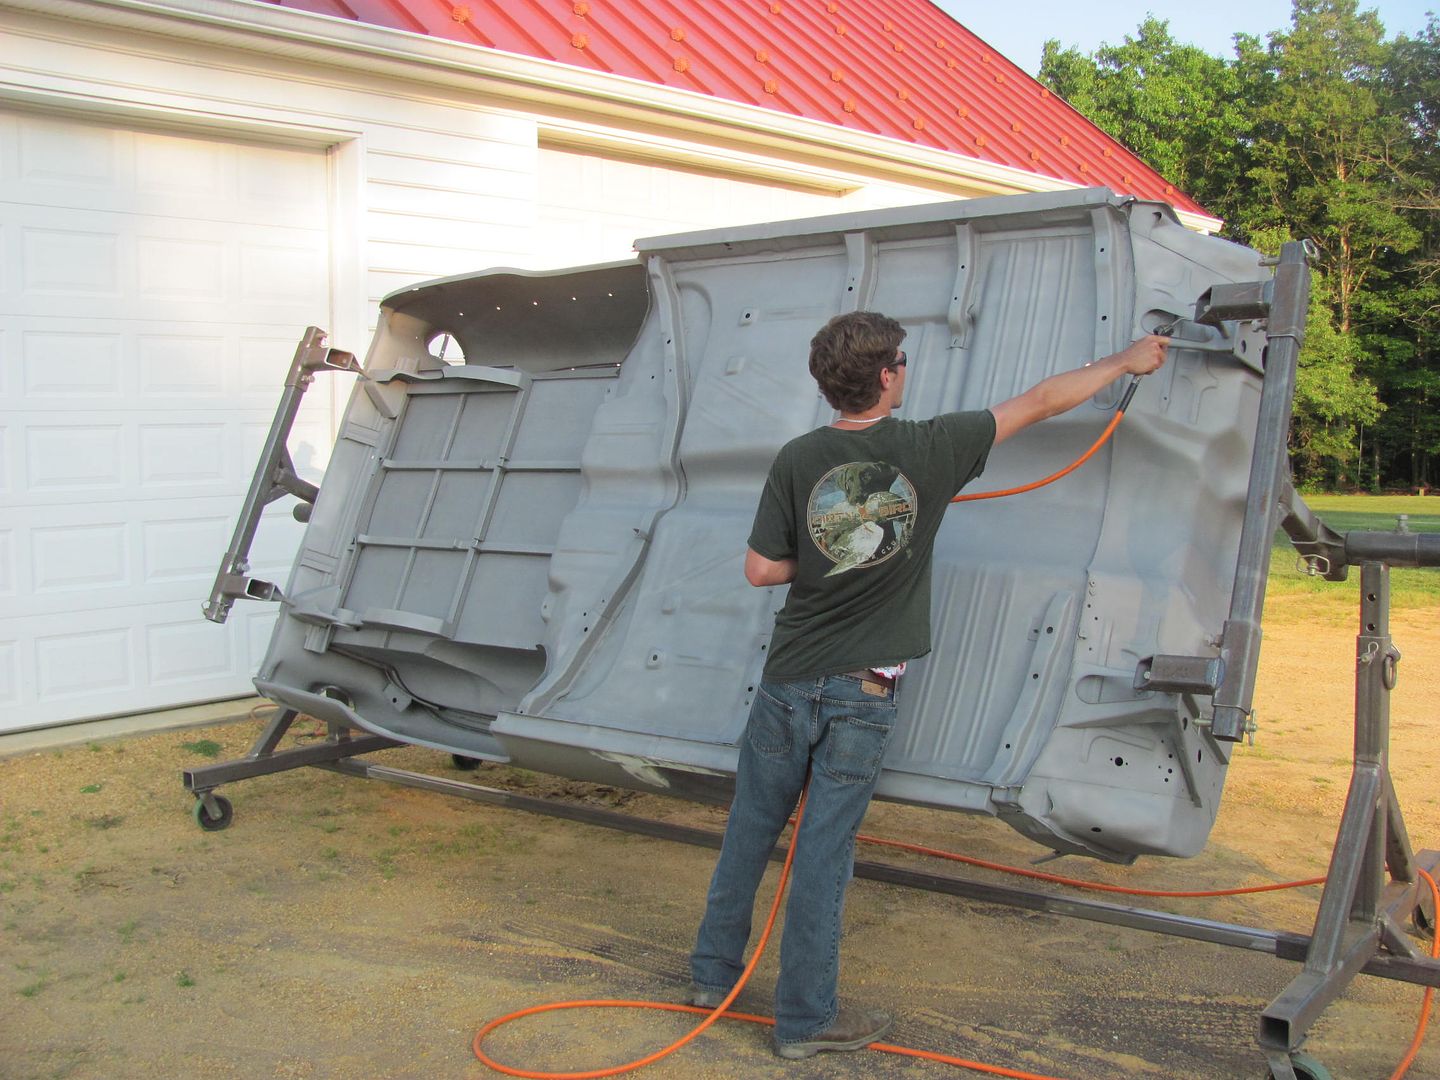 Real pleased with how well it turned out... here moved into the booth and the dehumidifier energized. 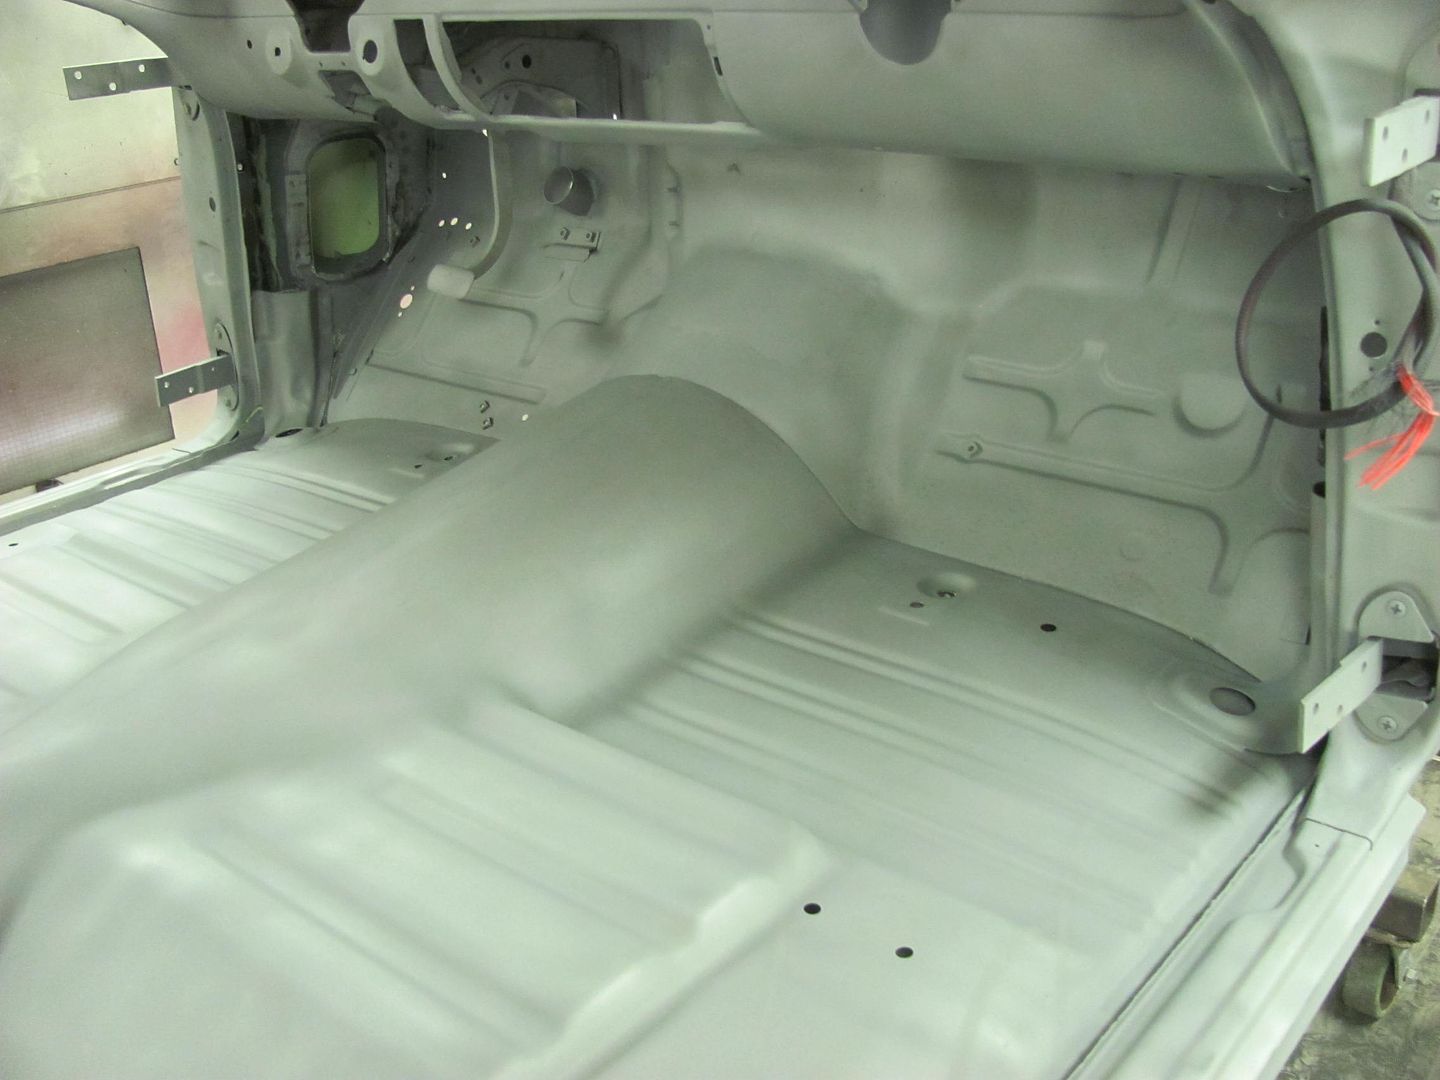 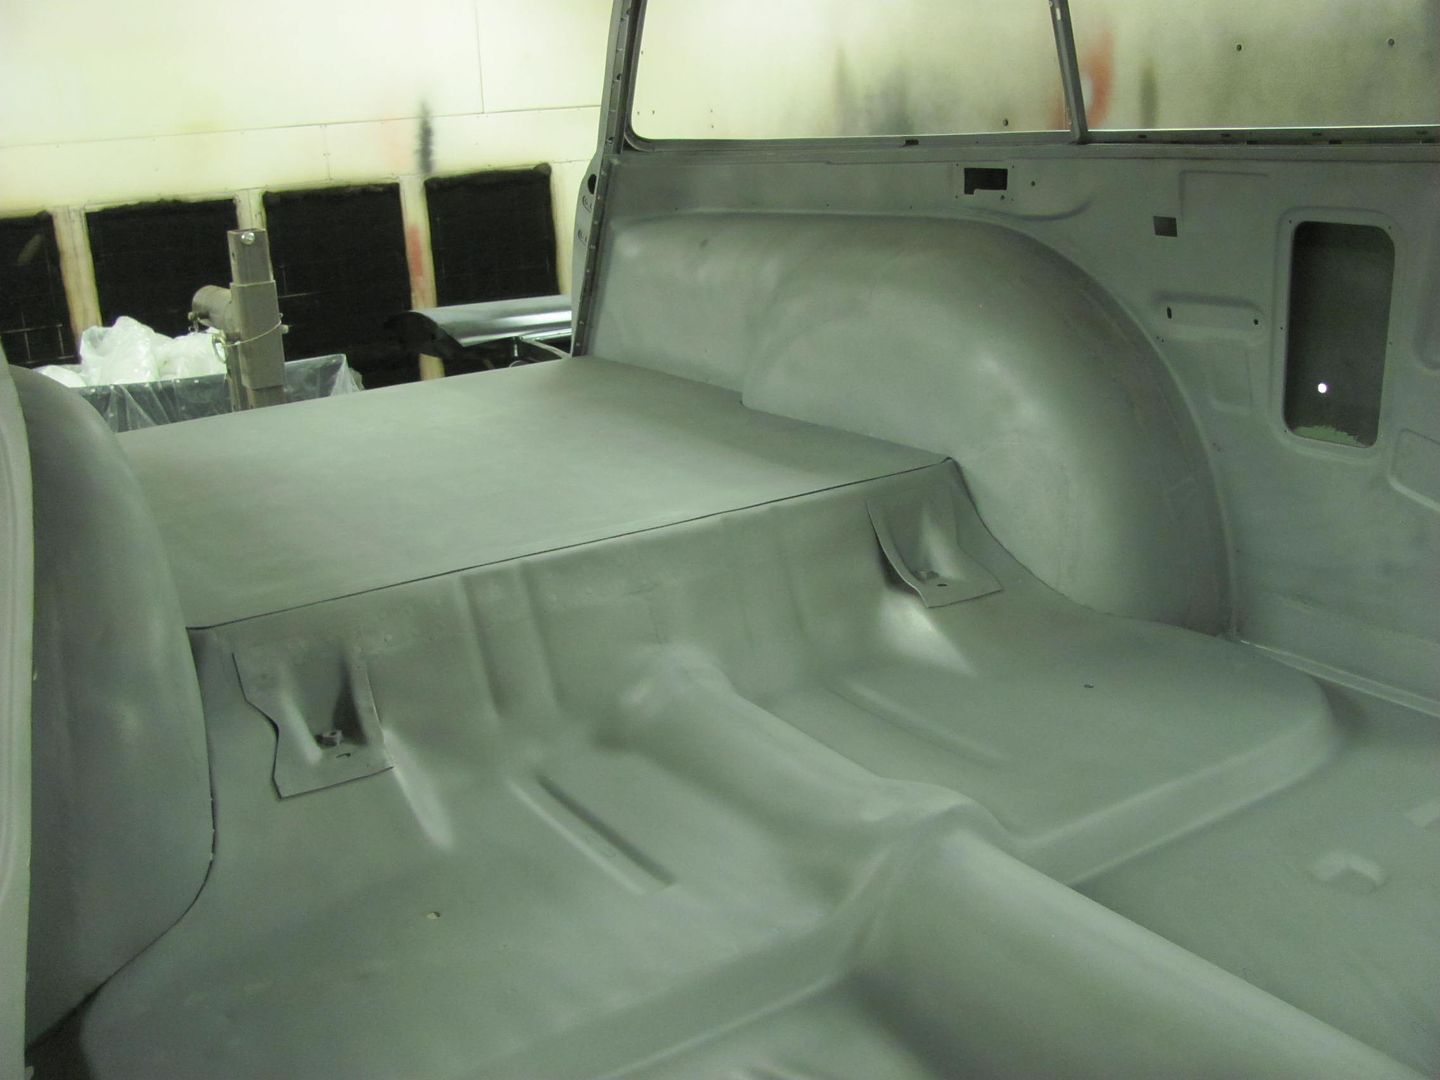  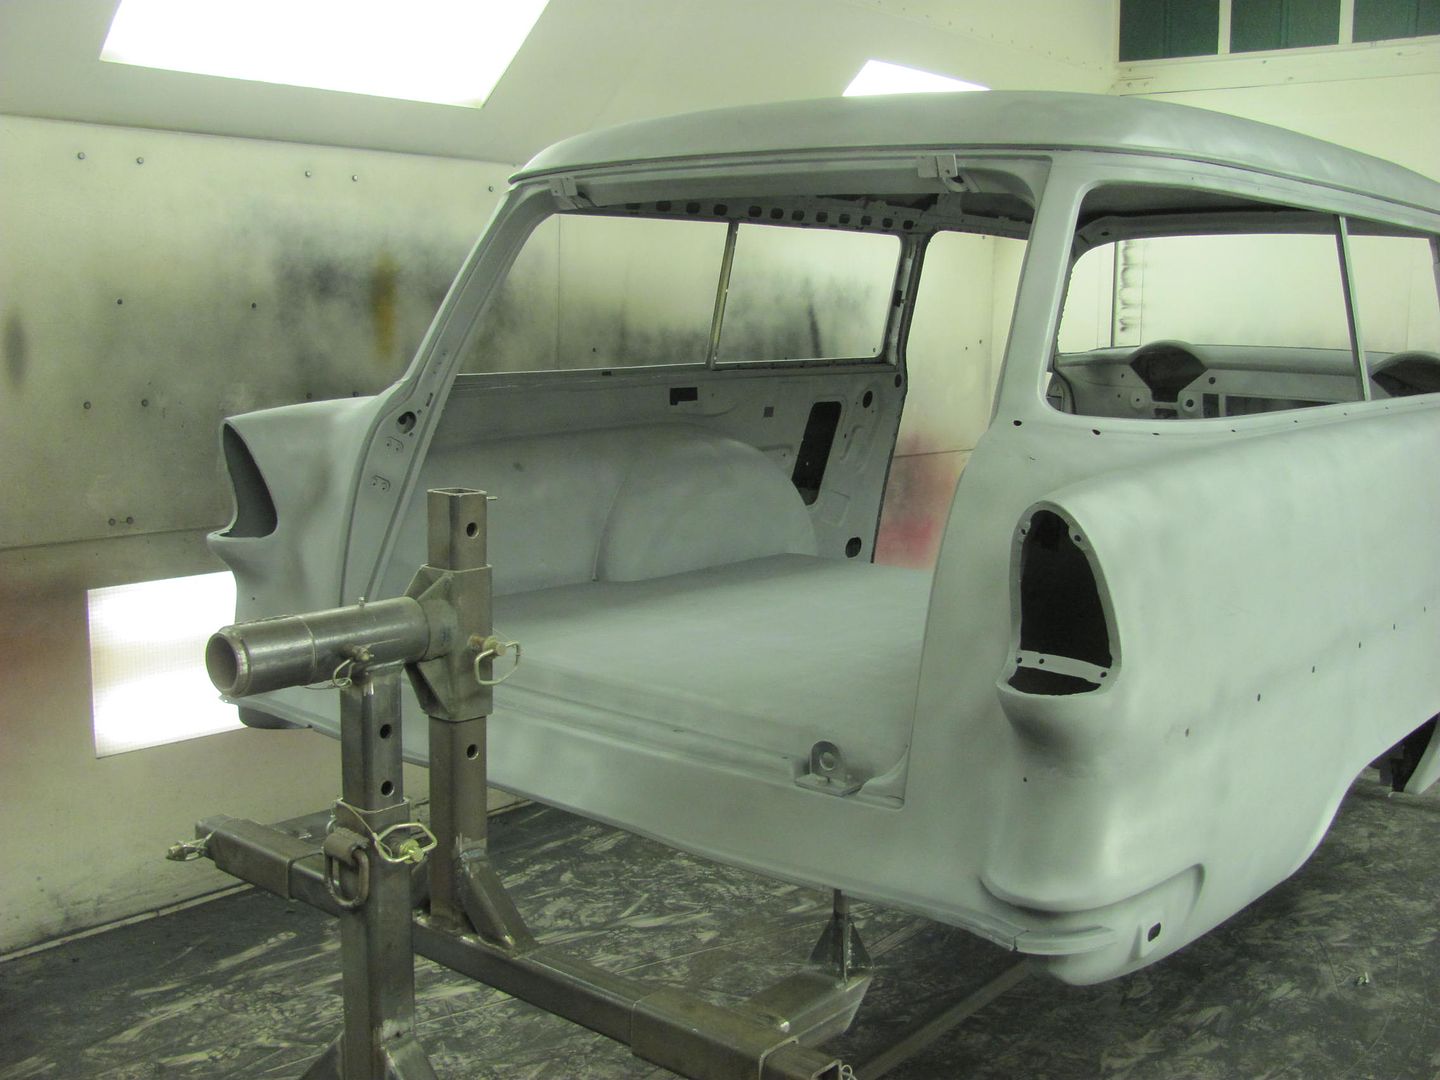 We do have some pin holes that are more apparent now, so we'll get those fixed Saturday morning and see how the weather looks for priming in the afternoon..
__________________
Robert |
|
|
|
|
05-26-2016, 11:37 PM
|
#7 |
|
Senior Member
 Join Date: Mar 2011
Location: West Plains, Missouri
Posts: 7,555
|
Re: 55 Wagon Progress
Body looks great. We have about a weeks worth of rain starting here in Missouri...Jim
__________________
my build thread: http://67-72chevytrucks.com/vboard/s...d.php?t=459839 Jimbo's long bed step build:http://67-72chevytrucks.com/vboard/s...t=464626<br /> |
|
|
|
|
05-27-2016, 07:53 AM
|
#8 |
|
Registered User
Join Date: Jan 2013
Location: Leonardtown, MD
Posts: 1,637
|
Re: 55 Wagon Progress
Thanks Jim, definitely glad to share the rain with others..

__________________
Robert |
|
|
|
|
05-28-2016, 02:57 PM
|
#9 | |
|
Registered User
Join Date: May 2007
Location: Deale Md
Posts: 4,663
|
Re: 55 Wagon Progress
Quote:
__________________
James 63 GMC V6 4speed carryall 65 chevy swb bbw V8 auto 68 K20 327/4 speed, buddy buckets 2002 GMC CC Dually Duramax 64 GMC lwb 3/4 V6 4speed SOLD 66 GMC swb bbw buddy buckets SOLD IG duallyjams The only thing that stays the same is constant change! |
|
|
|
|
|
05-30-2016, 01:18 AM
|
#10 |
|
Registered User
Join Date: Jan 2013
Location: Leonardtown, MD
Posts: 1,637
|
Re: 55 Wagon Progress
Well, no primer just yet, while Kyle was taking care of some pin holes that became more obvious after media blasting...
  I ran across this... 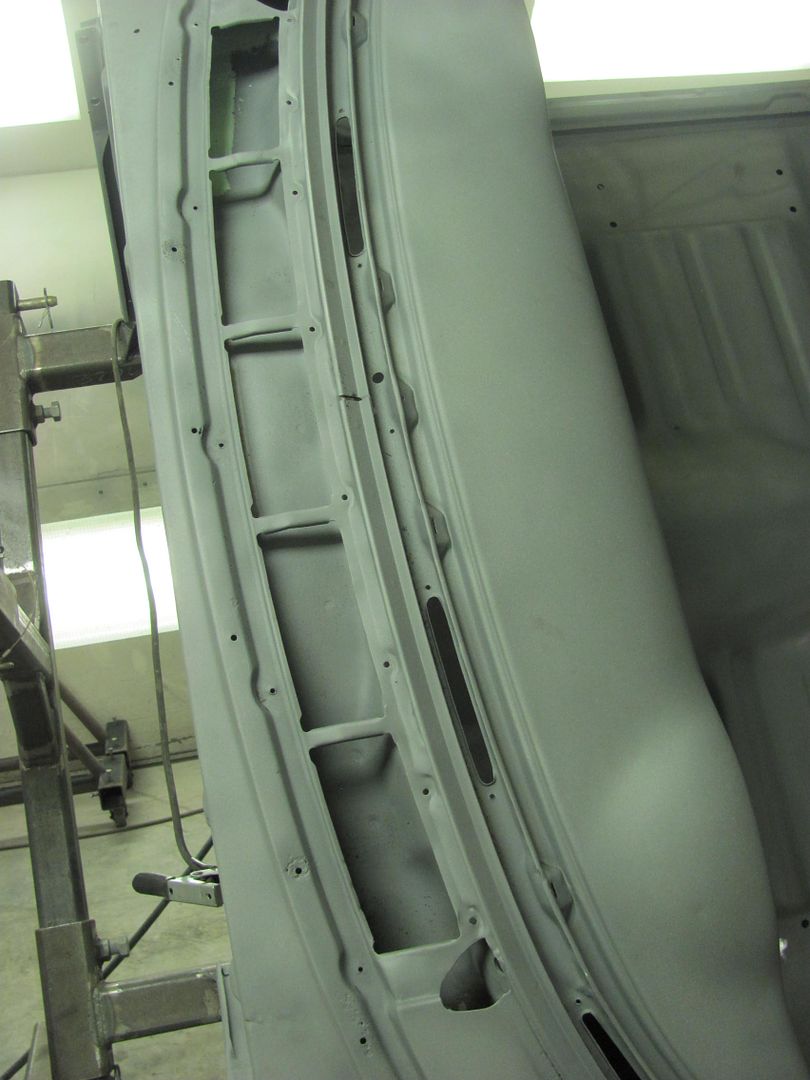 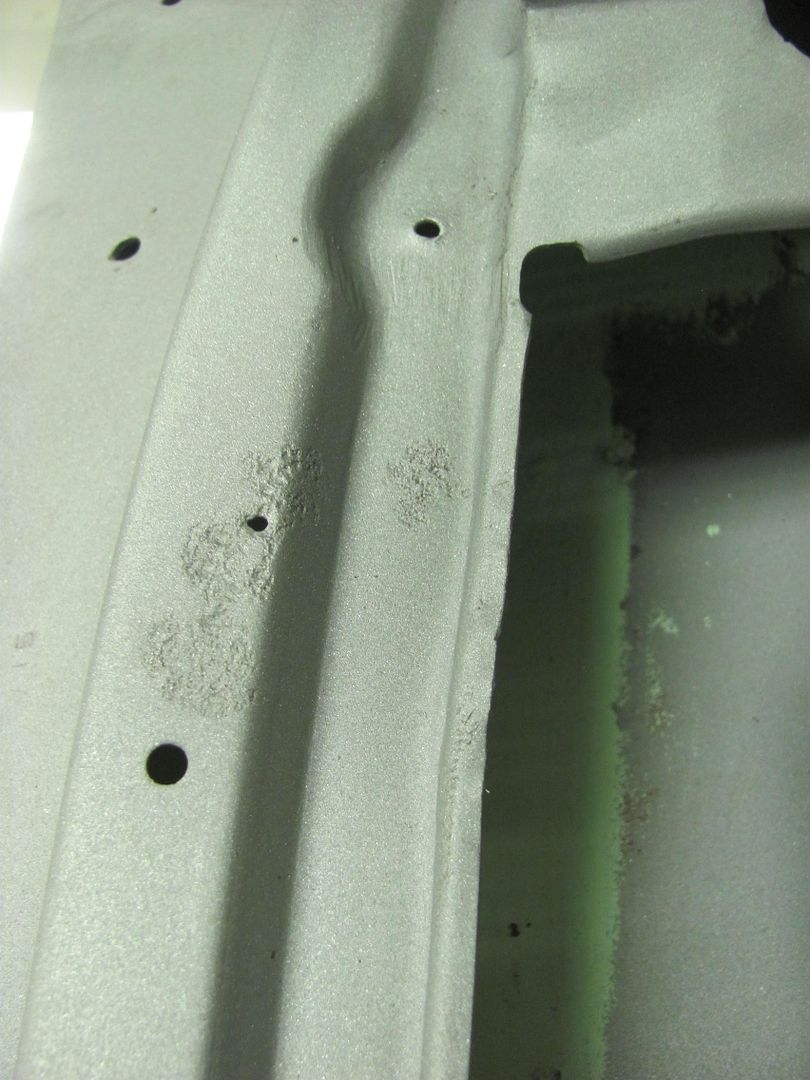 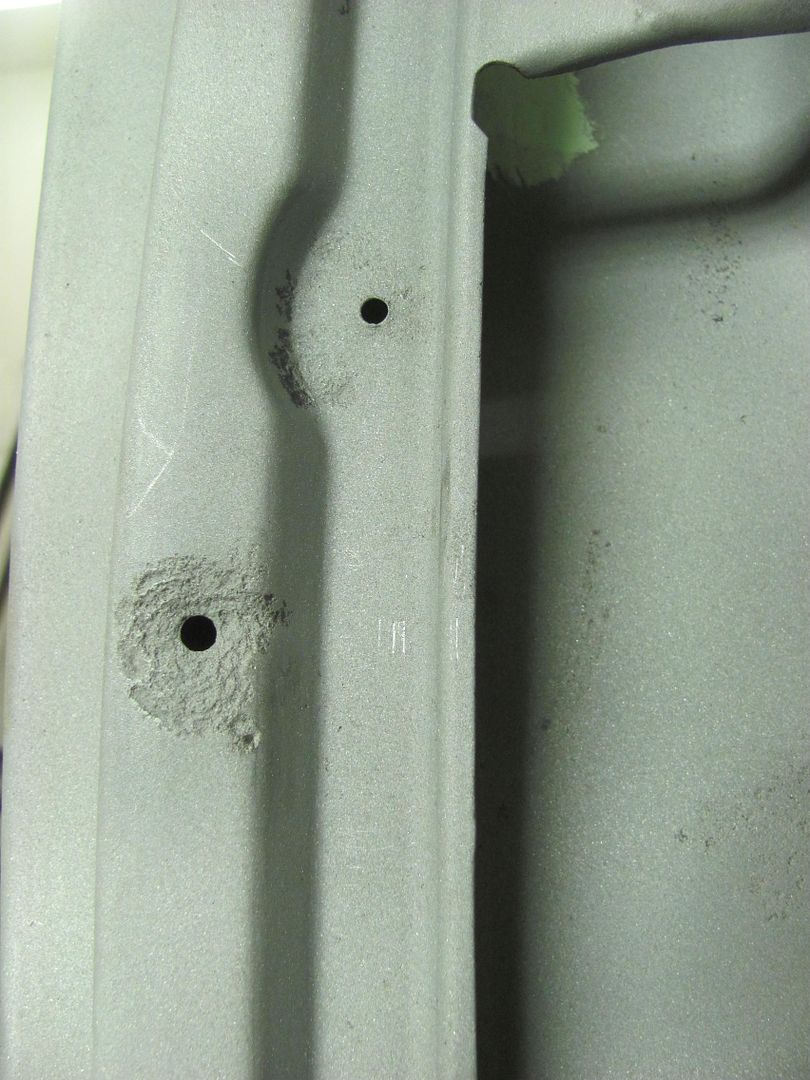 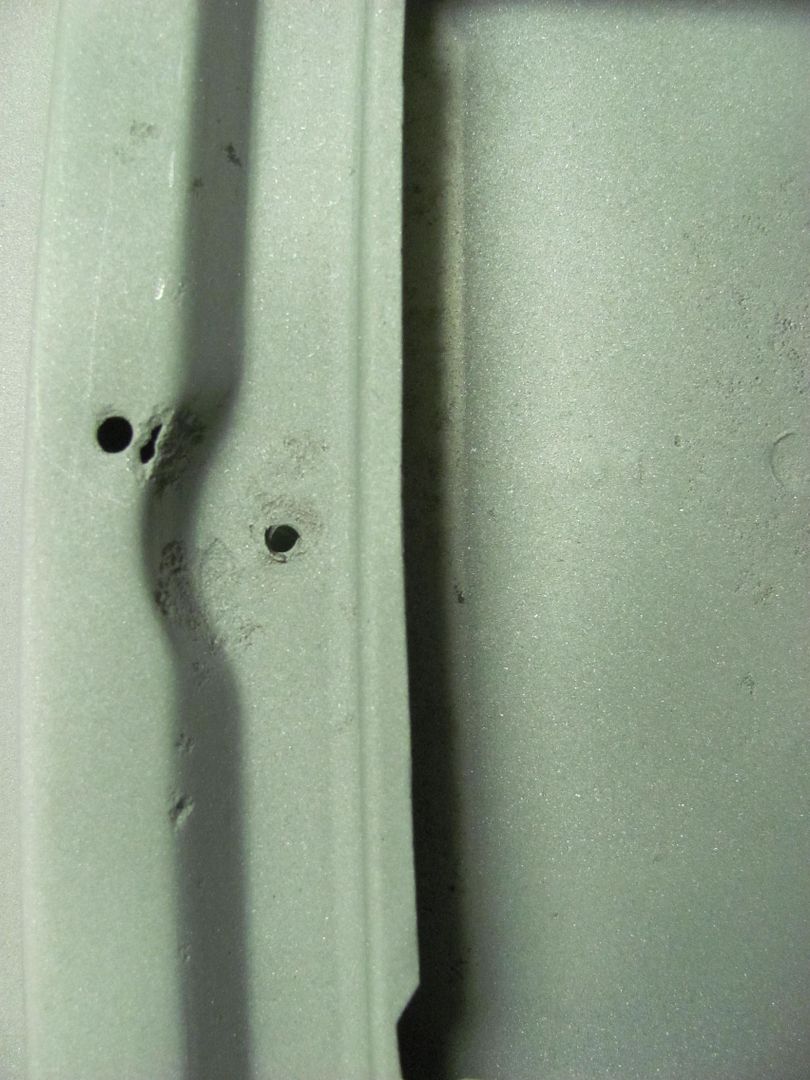 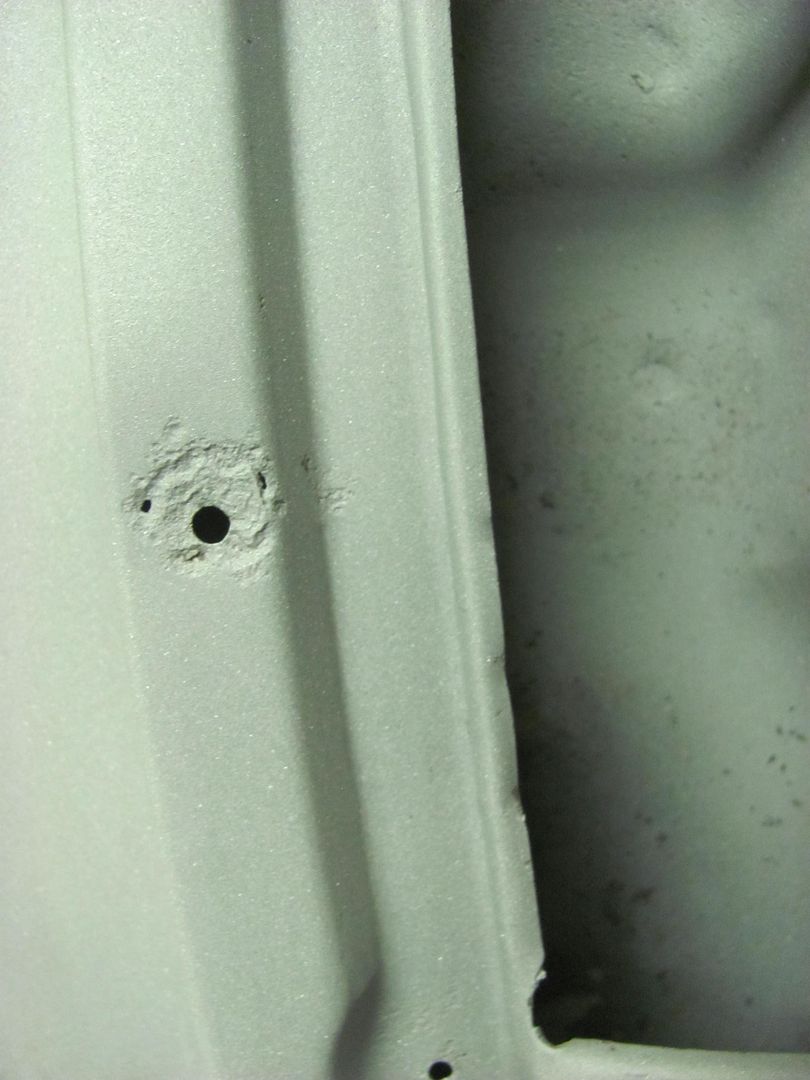 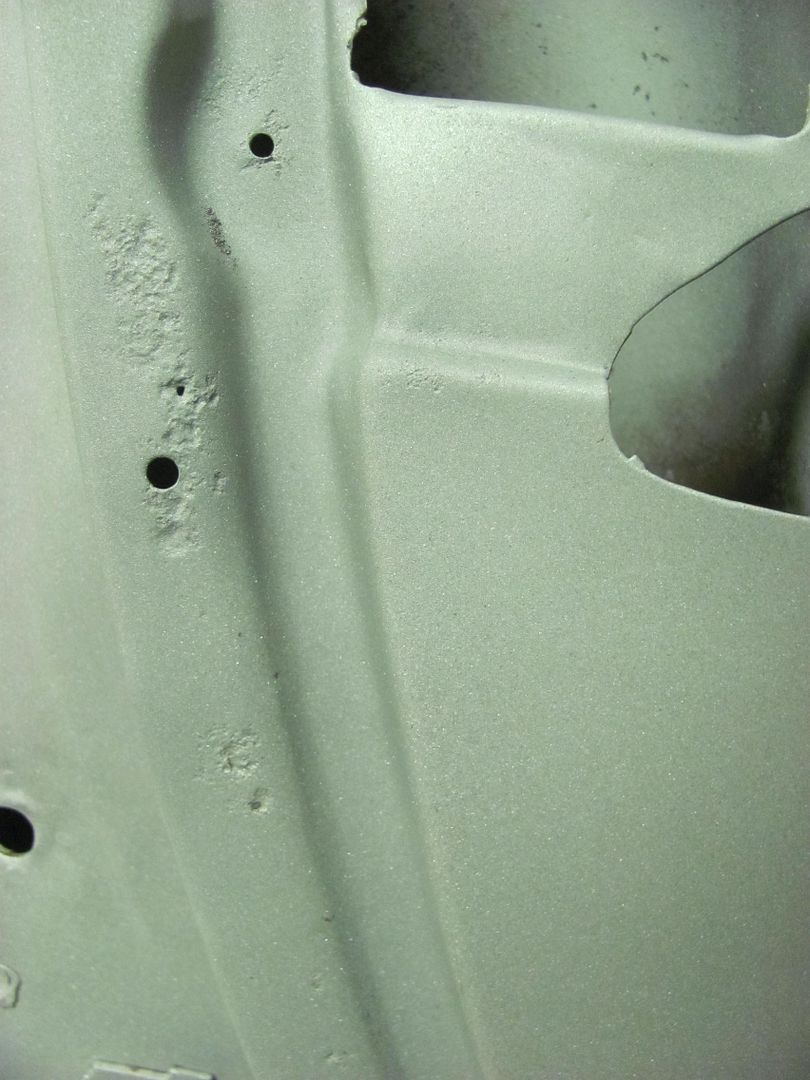 With so much widespread "issues", let's see if we can come close to duplicating this.. Taking a paper pattern.. 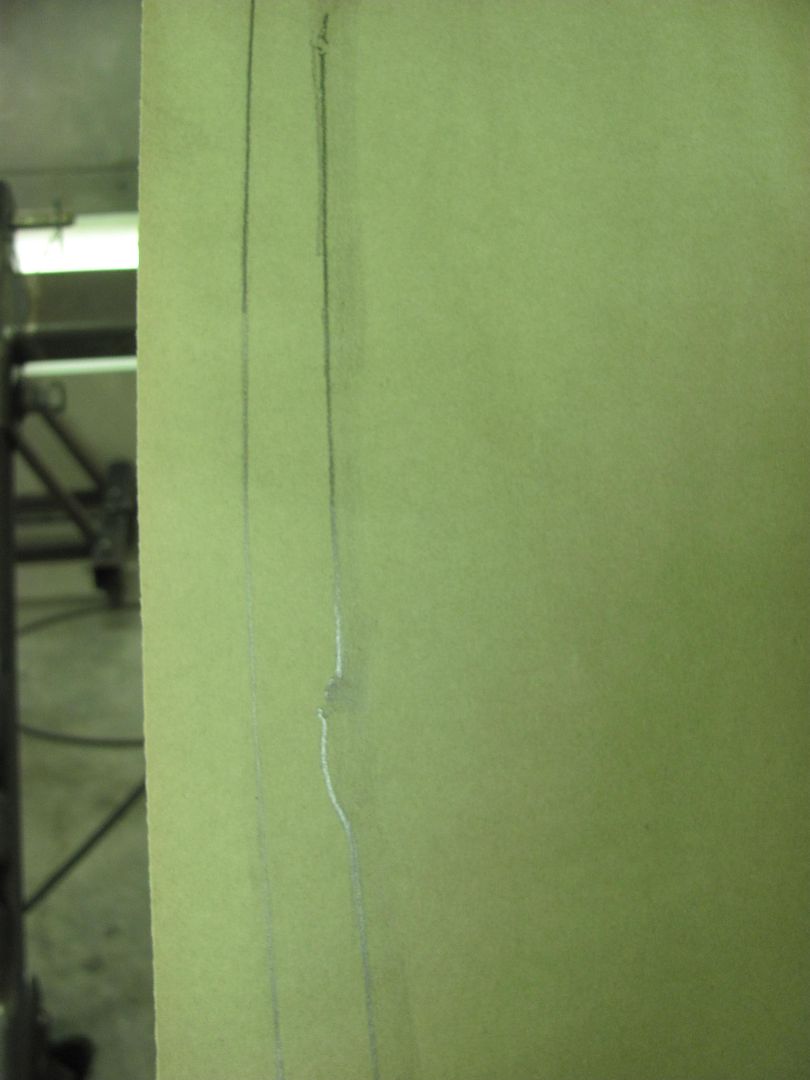 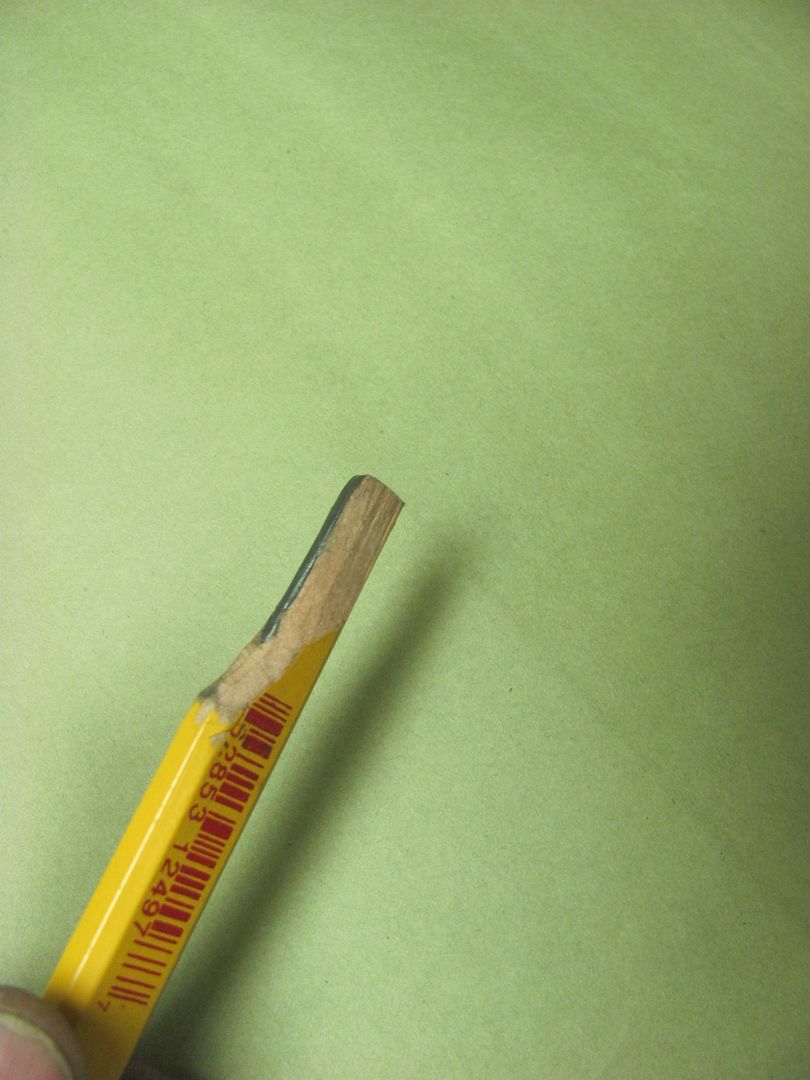 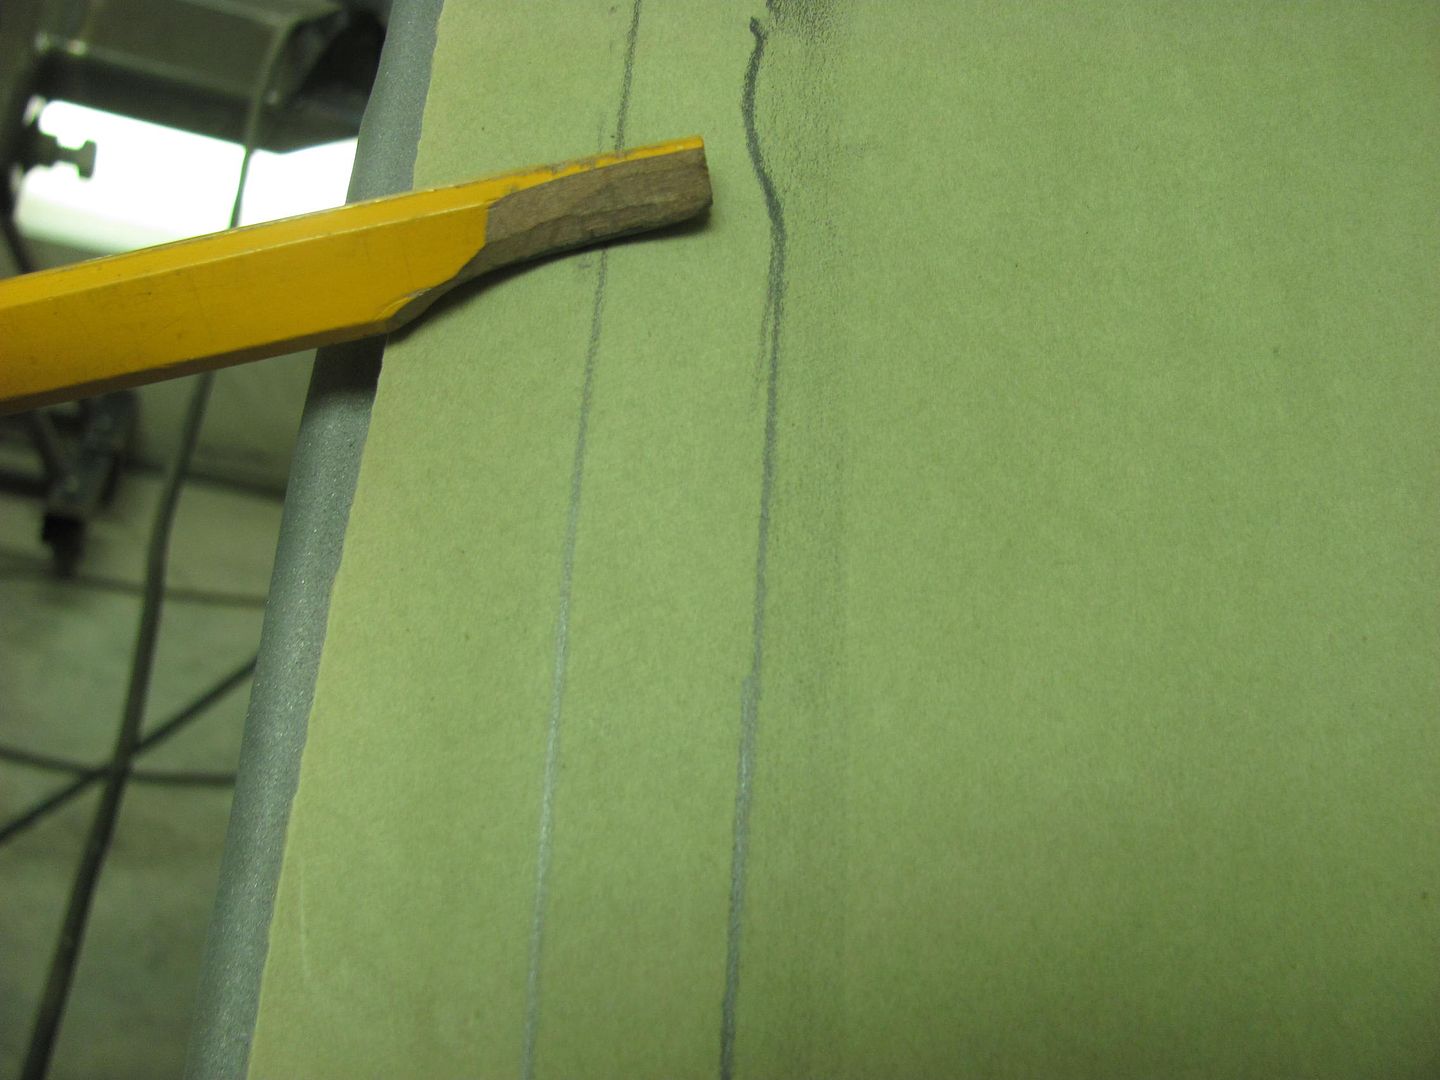 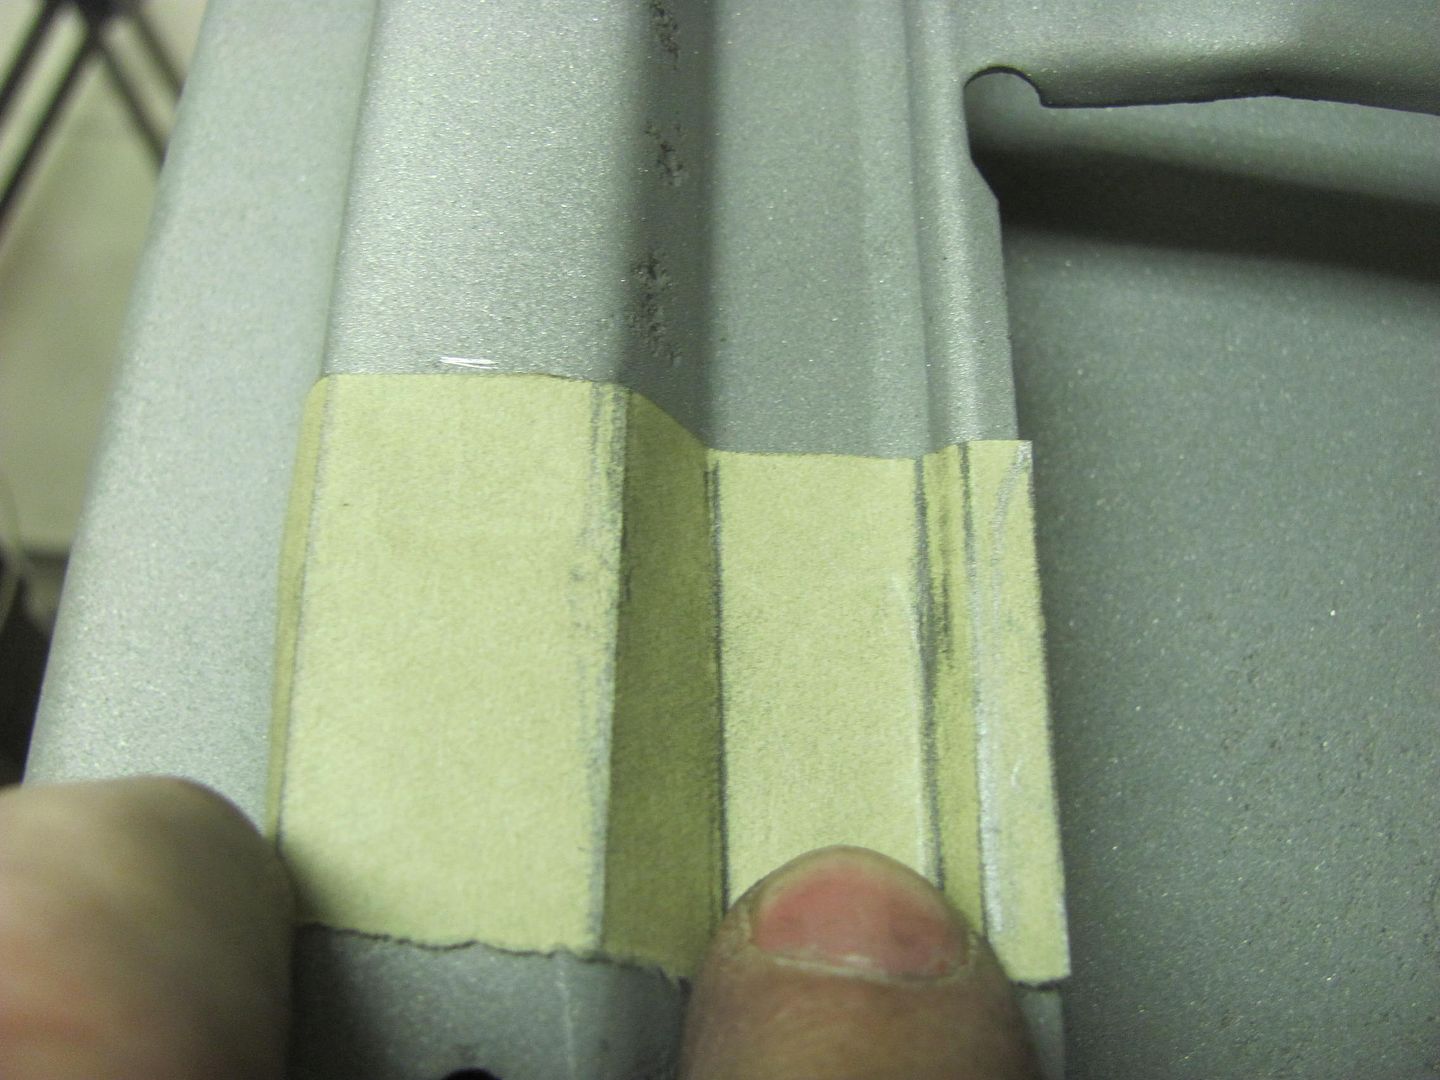 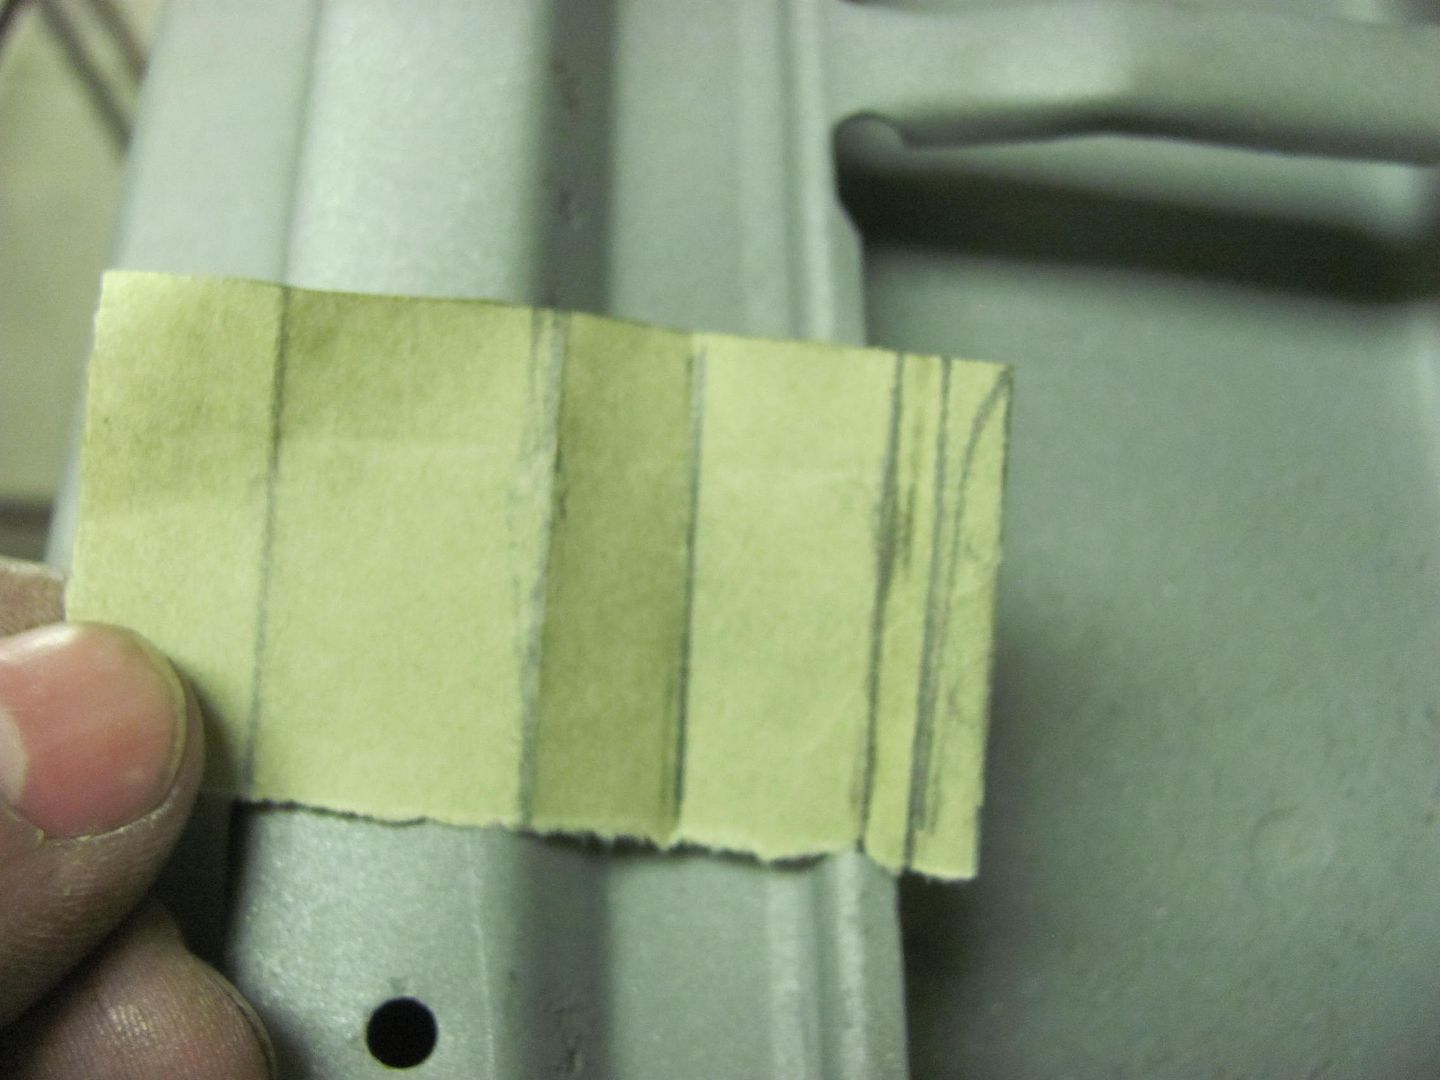 Here laid out on some 19 gauge AKDQ... 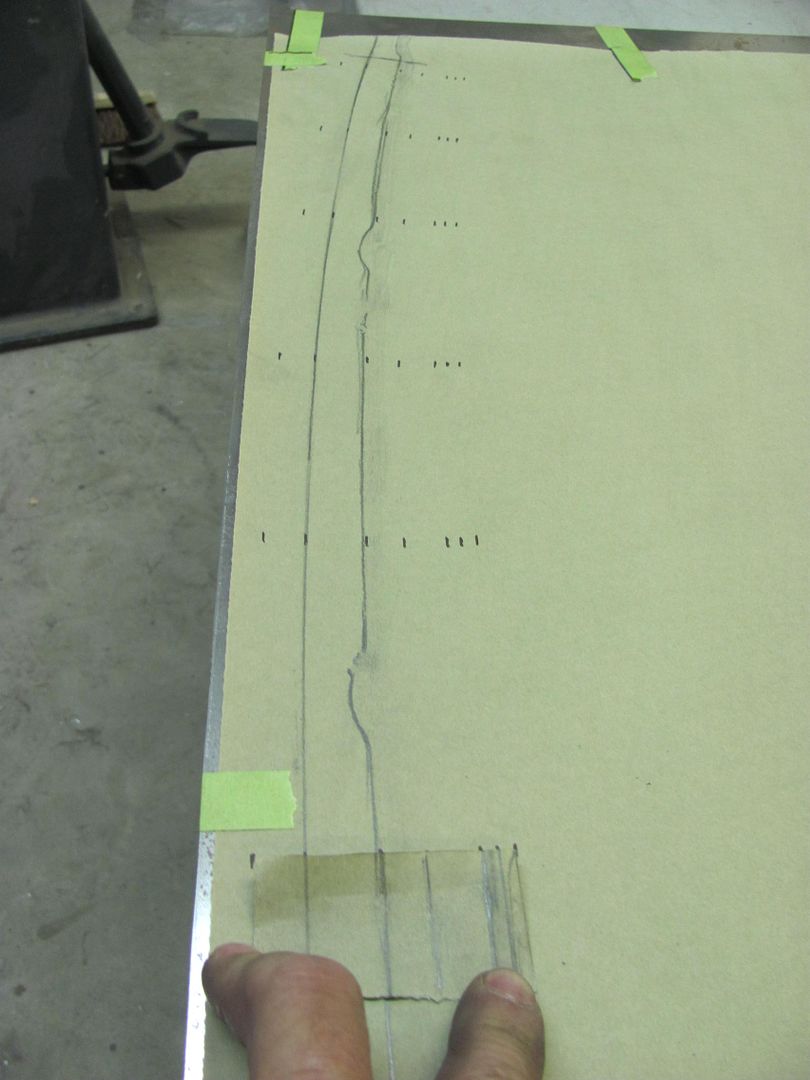 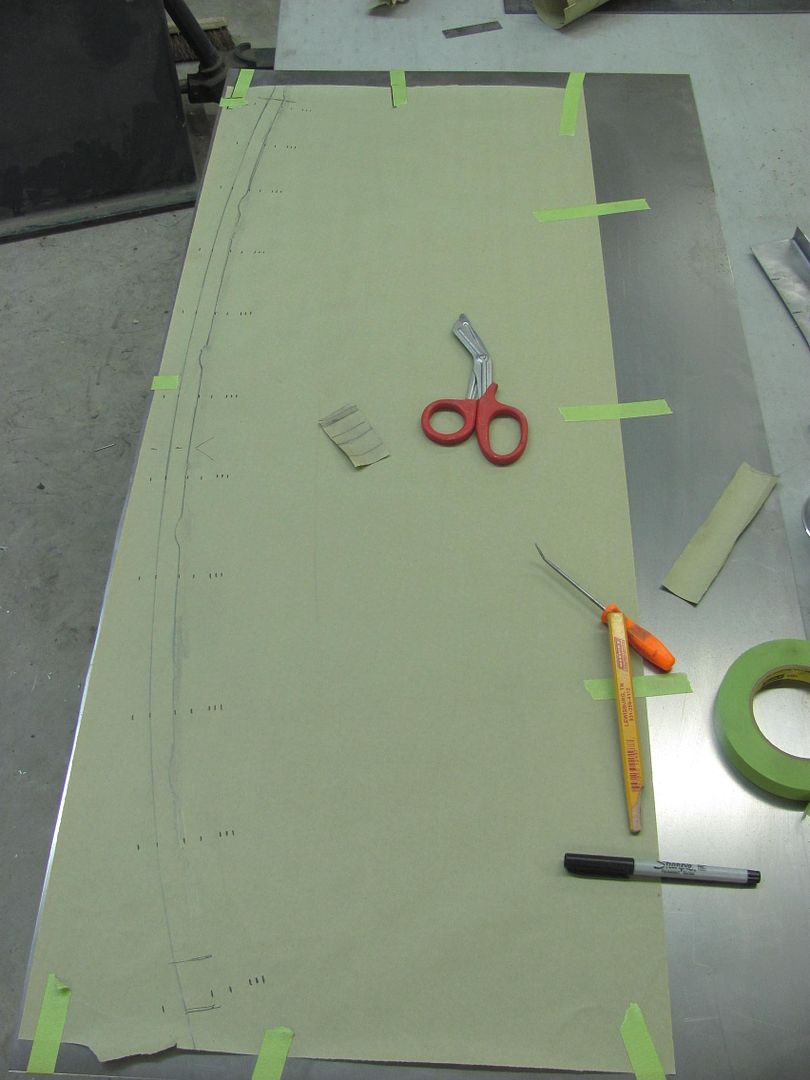 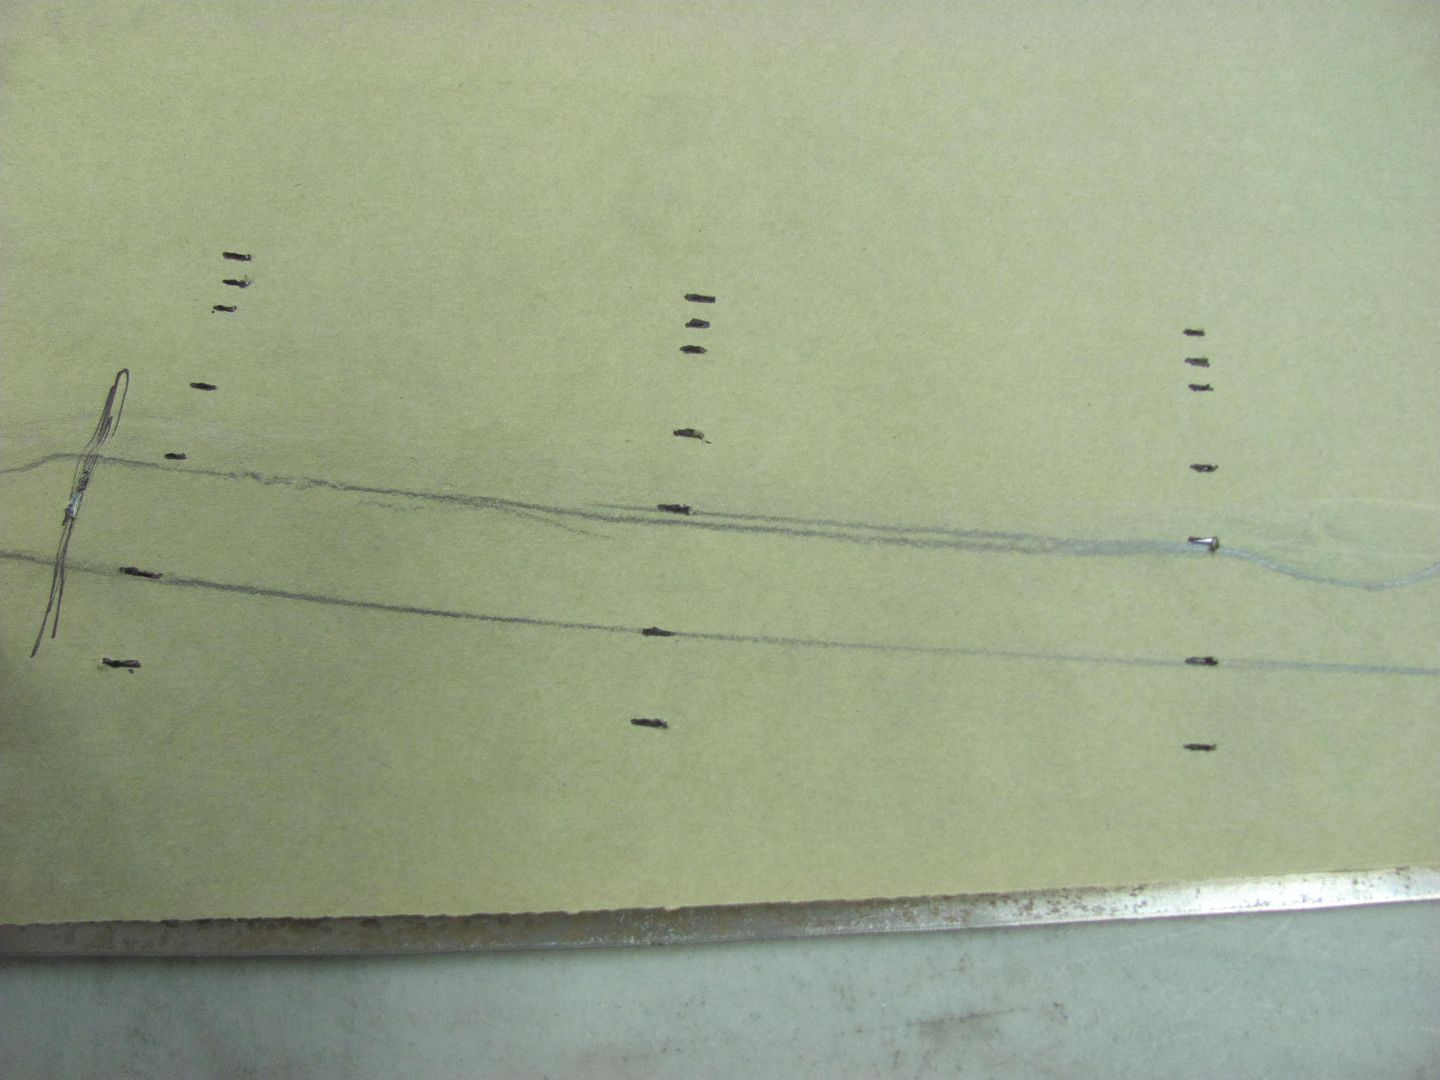 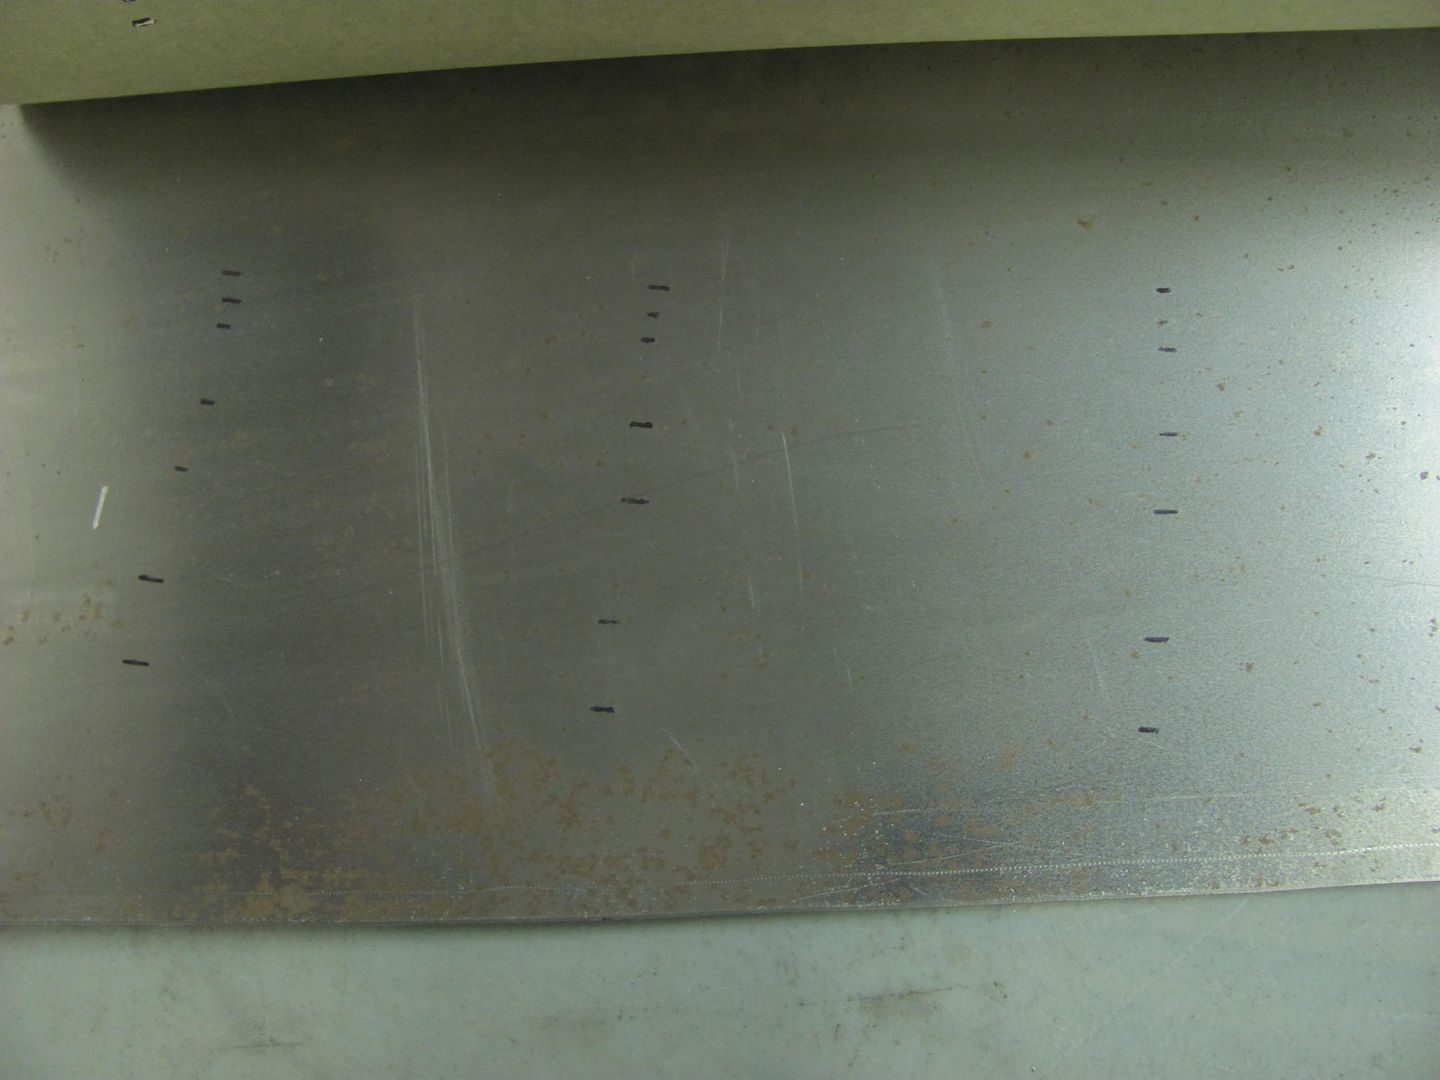 Trimming... 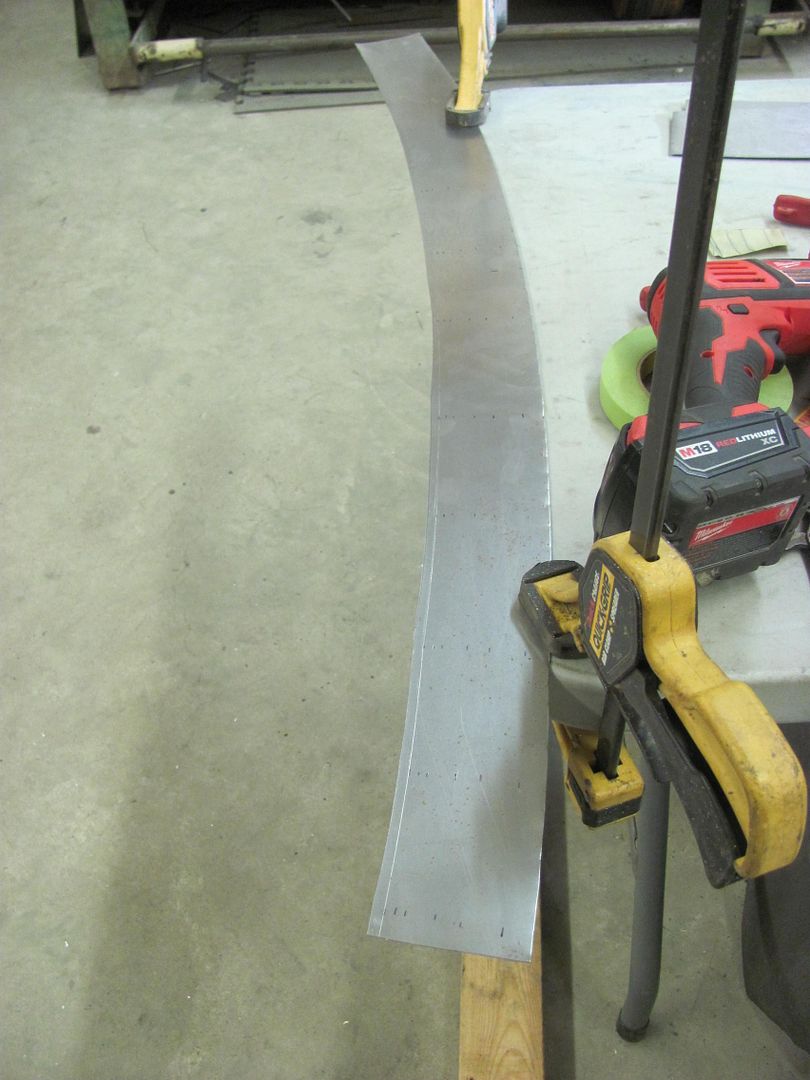 But I always prefer a test sample first... this done on the tipping wheel 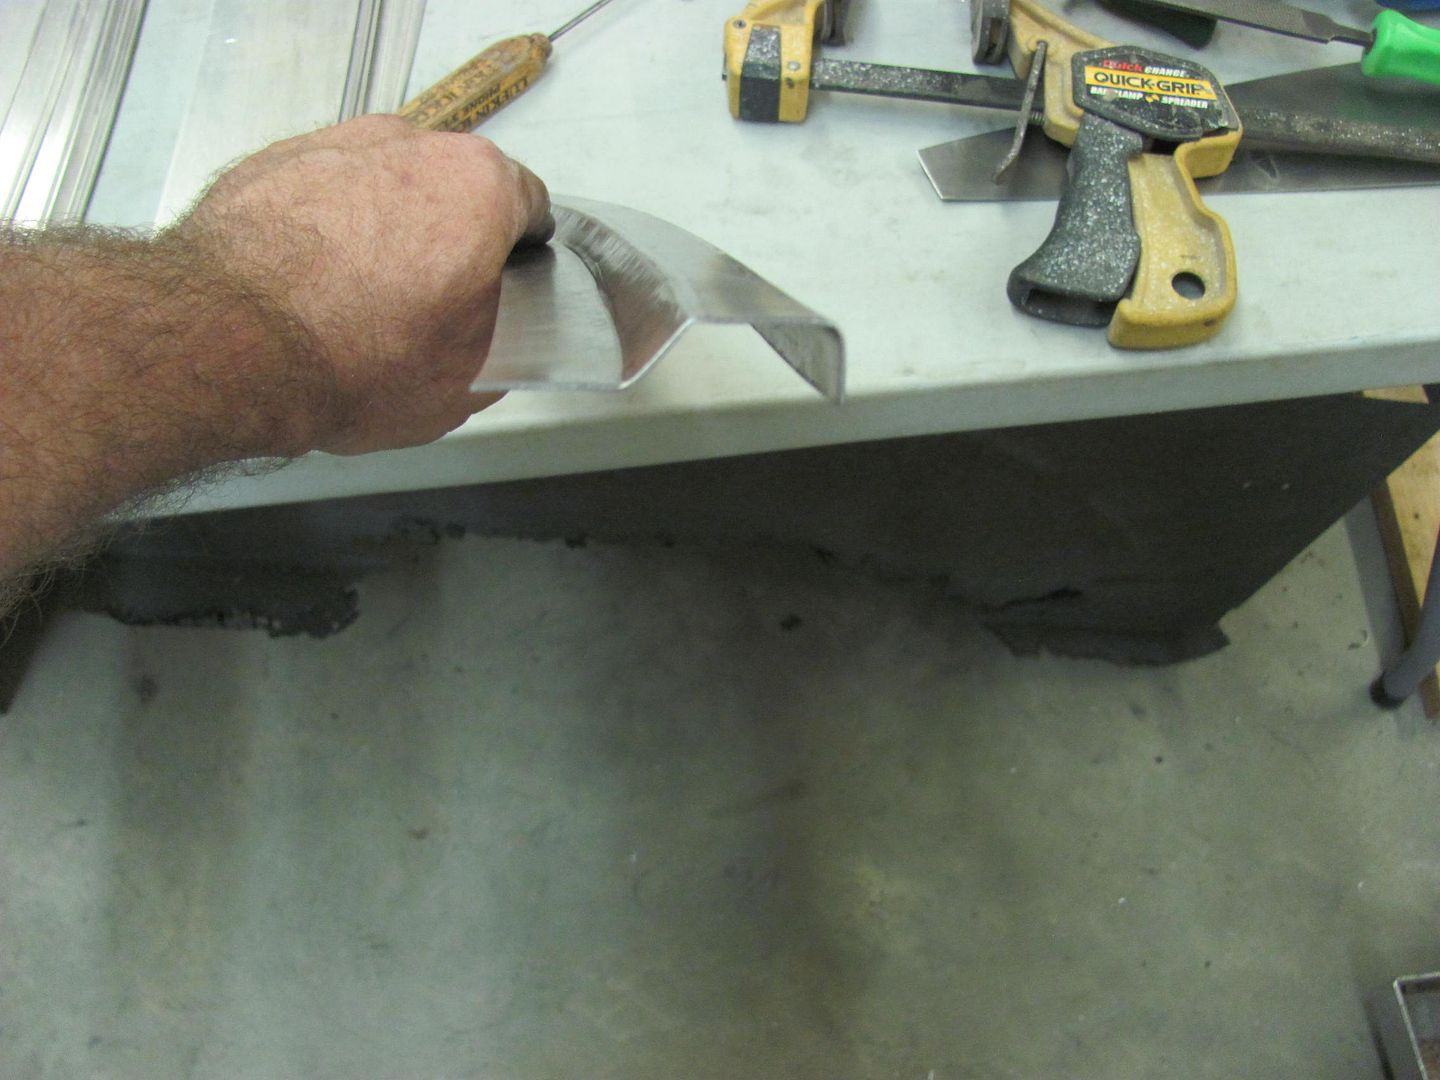 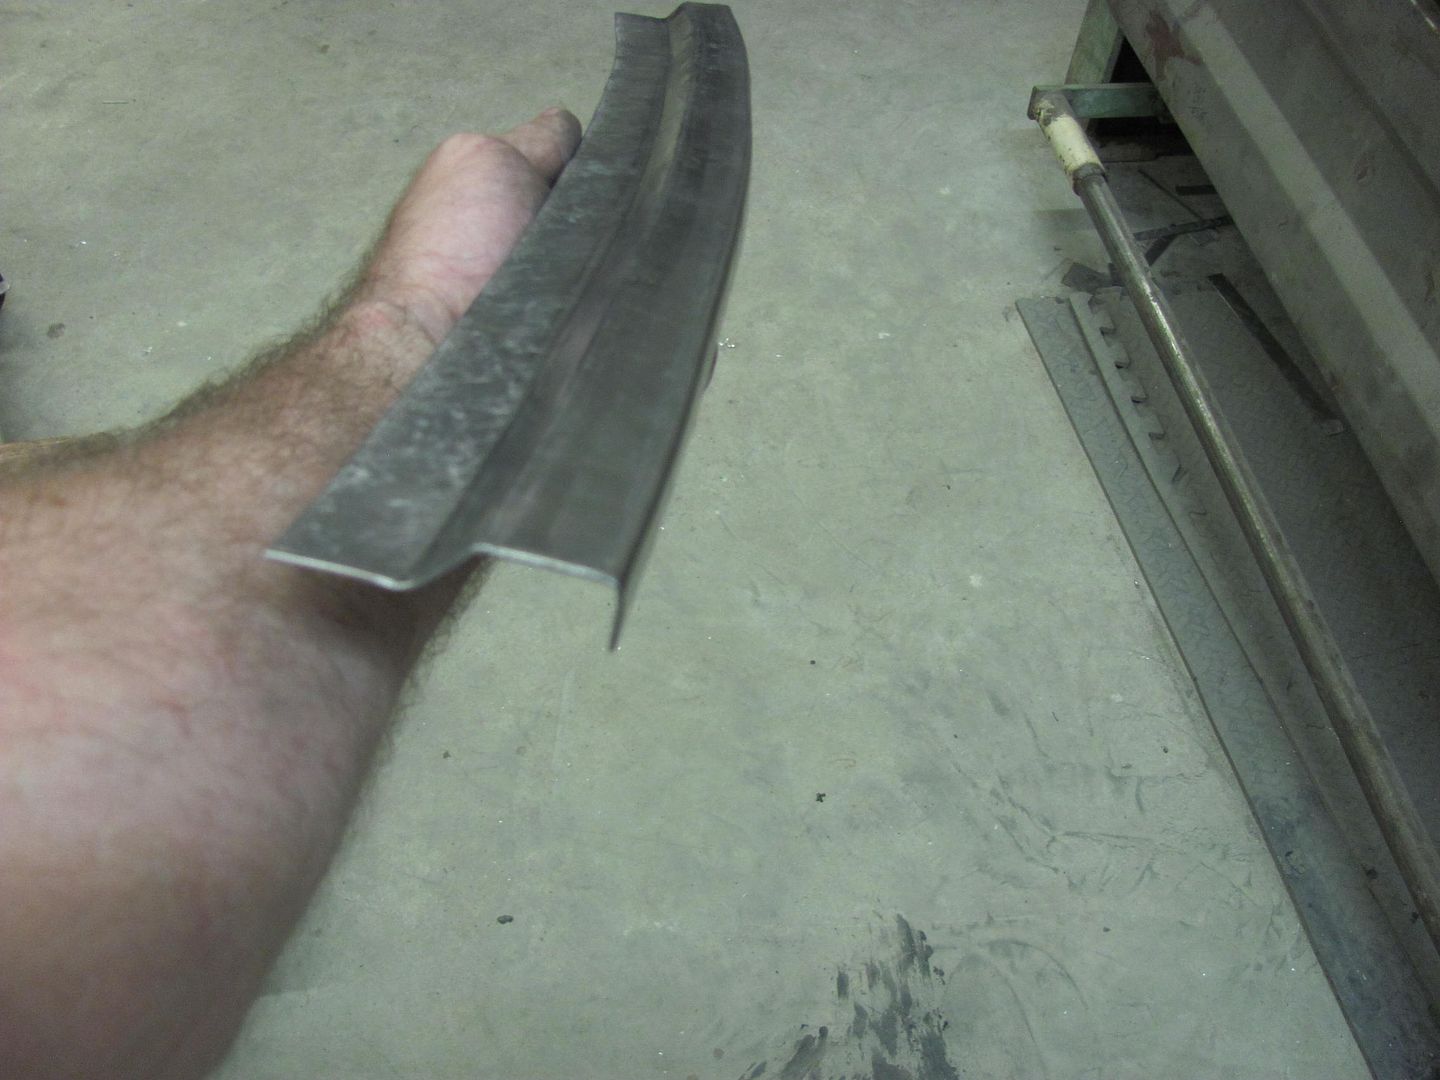 Step dies on the Lennox add the final detail... 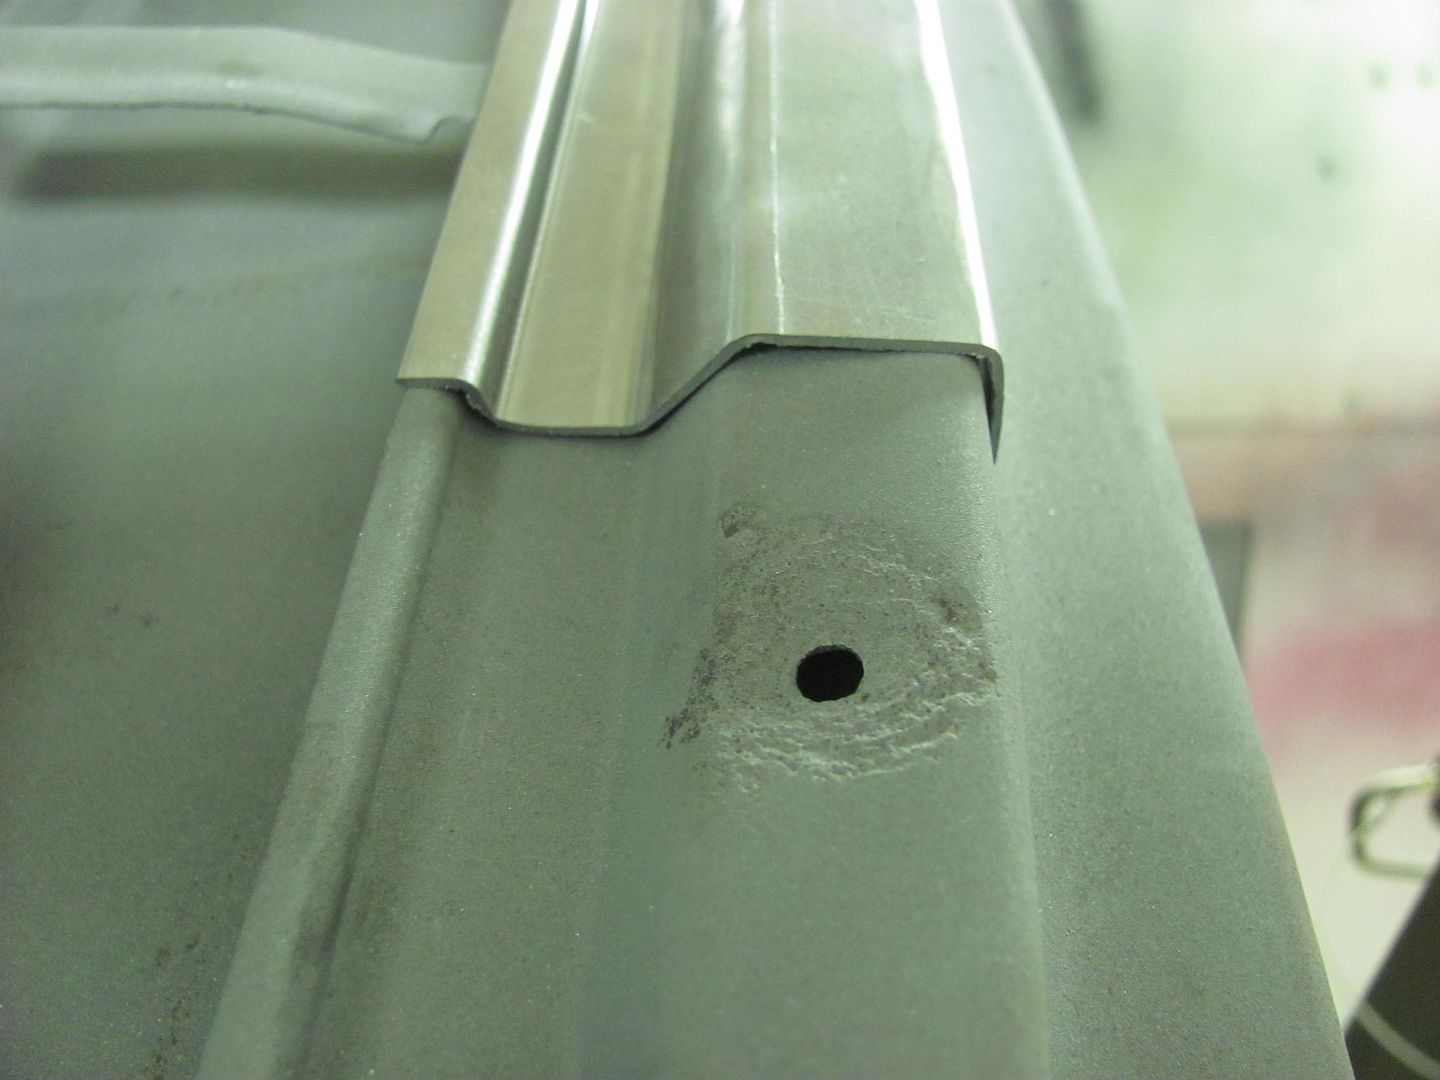 Need to fine tune the dimensions, but this looks close. I think I'll make up some dies for the Lennox for better consistency on the good piece.. 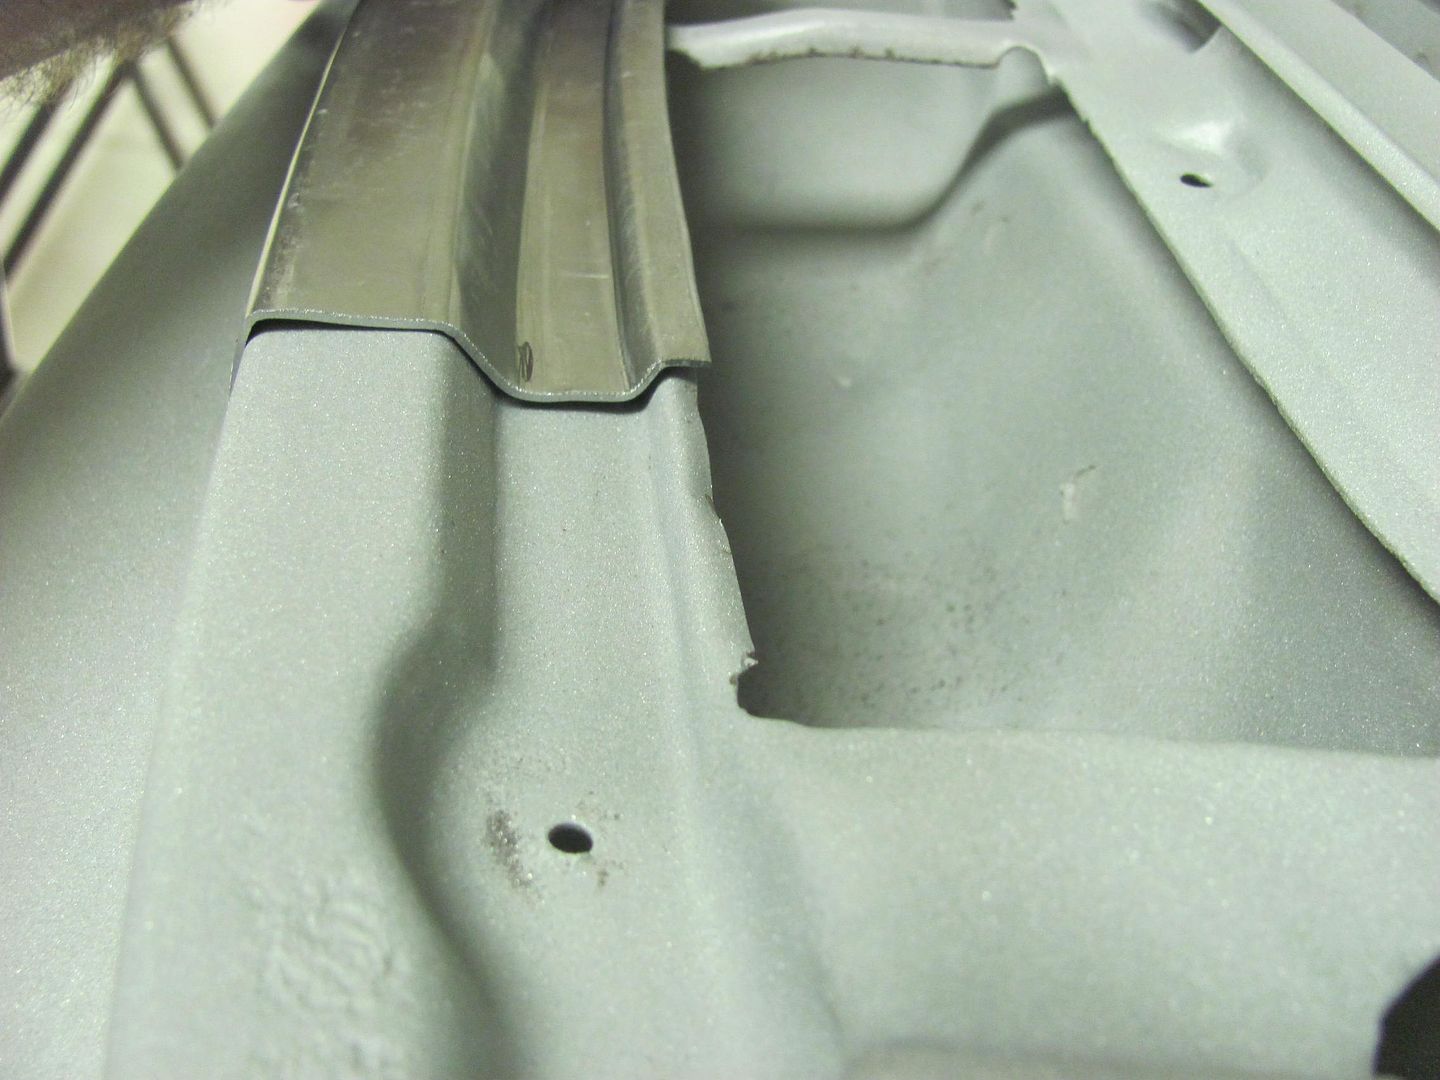 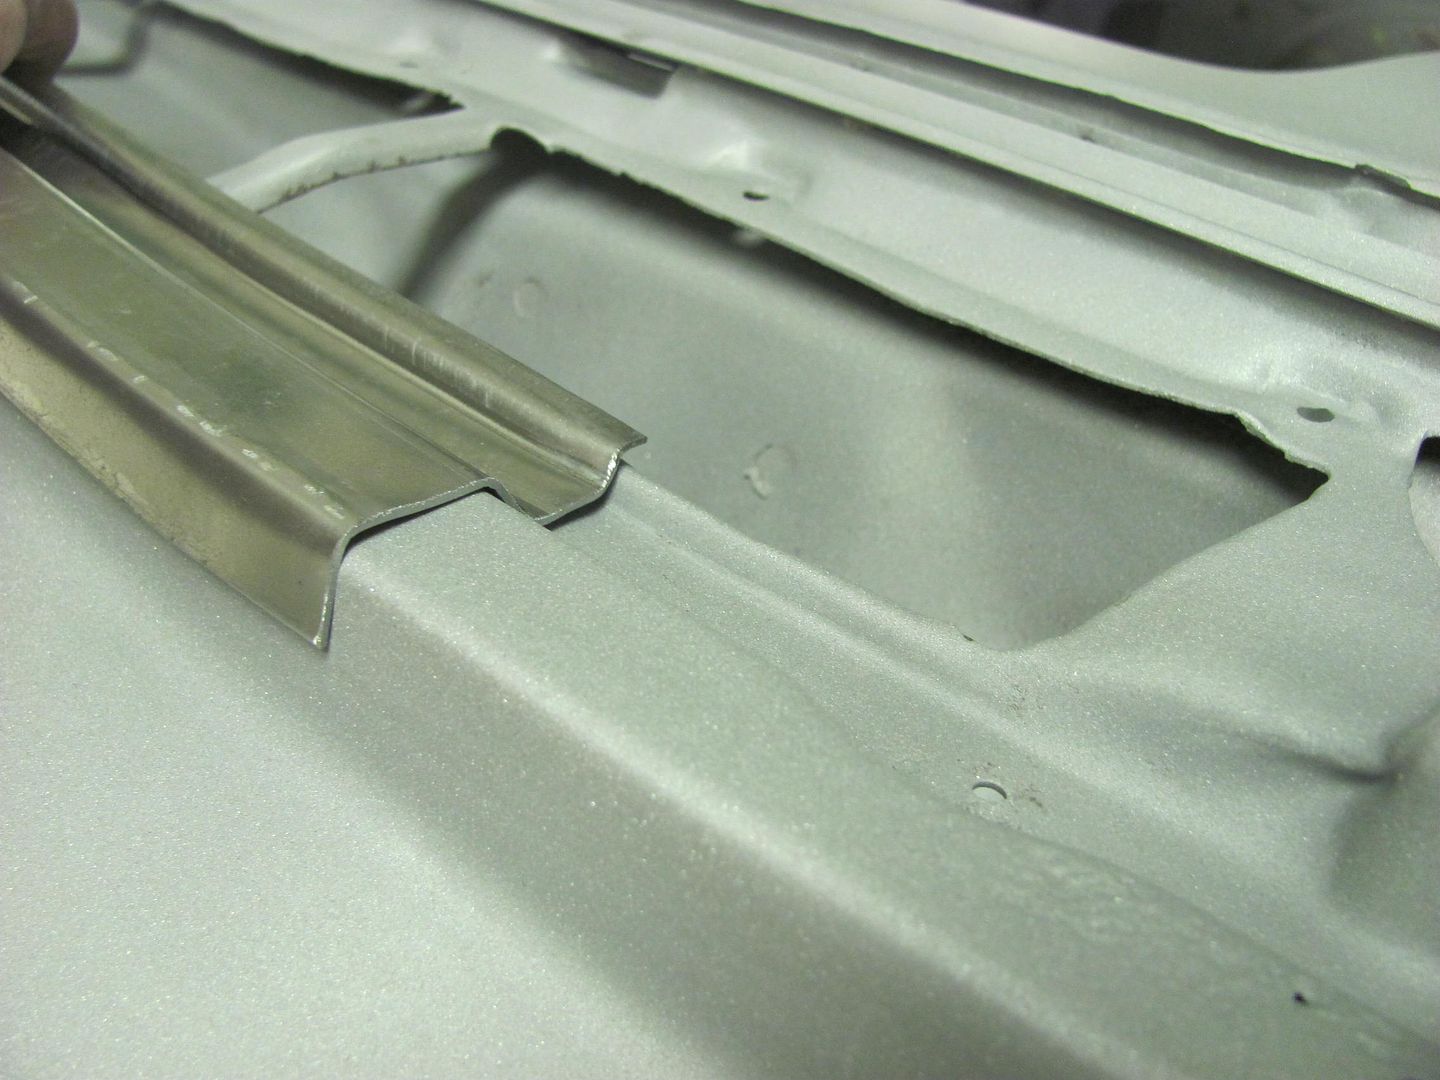 Should be priming soon... once the dominos stop falling.
__________________
Robert |
|
|
|
|
05-27-2016, 08:23 PM
|
#11 |
|
Registered User
Join Date: Apr 2011
Location: .
Posts: 3,104
|
Re: 55 Wagon Progress
Looks great.
No warpage in any of the panels? |
|
|
|
|
05-28-2016, 12:31 AM
|
#12 |
|
Registered User
Join Date: Jan 2013
Location: Leonardtown, MD
Posts: 1,637
|
Re: 55 Wagon Progress
Not that I've seen anywhere, he did a real nice job on it..
__________________
Robert |
|
|
|
|
05-30-2016, 09:29 AM
|
#13 |
|
Senior Member
Join Date: Mar 2011
Location: West Plains, Missouri
Posts: 7,555
|
Re: 55 Wagon Progress
Robert, most people would have put a thin layer of filler and called it good. You my man are in a class all your own...Jim
__________________
my build thread: http://67-72chevytrucks.com/vboard/s...d.php?t=459839 Jimbo's long bed step build:http://67-72chevytrucks.com/vboard/s...t=464626<br /> |
|
|
|
|
06-01-2016, 01:41 AM
|
#14 |
|
Registered User
Join Date: Jan 2013
Location: Leonardtown, MD
Posts: 1,637
|
Re: 55 Wagon Progress
Thanks Jim...
Time to make some dies for the Lennox, here fine tuning the fit.. 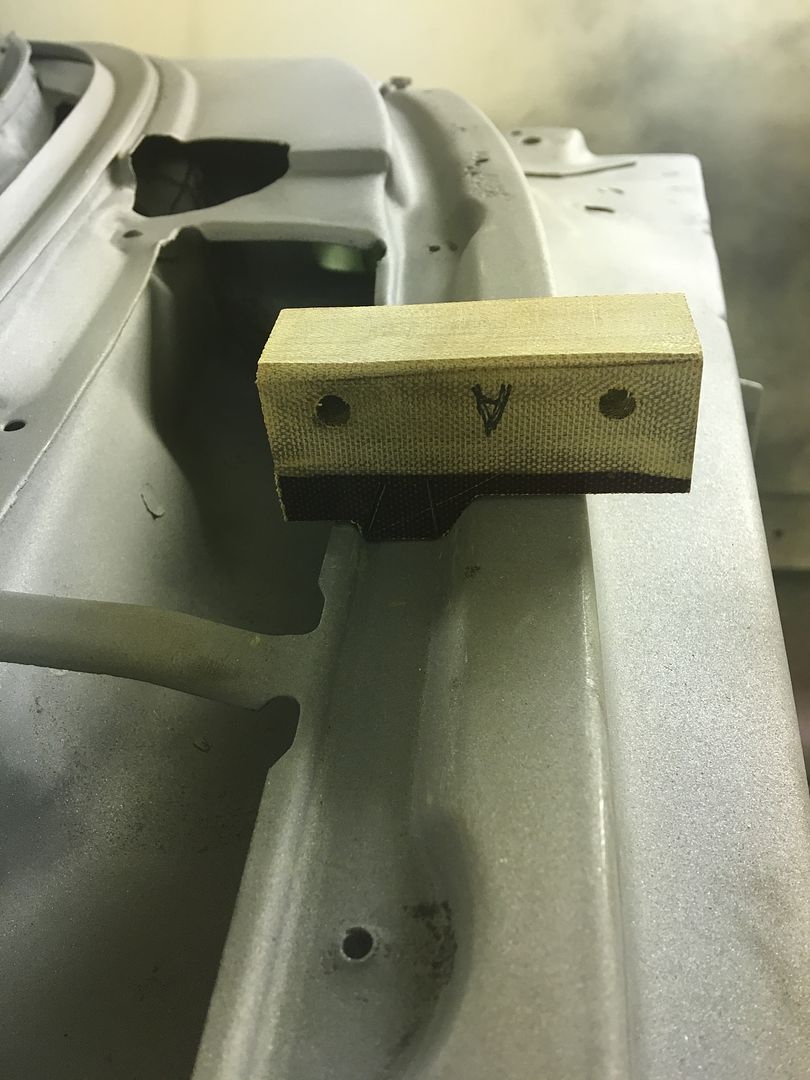 The outside corners will get some steel added for a sharper detail in the bends.. 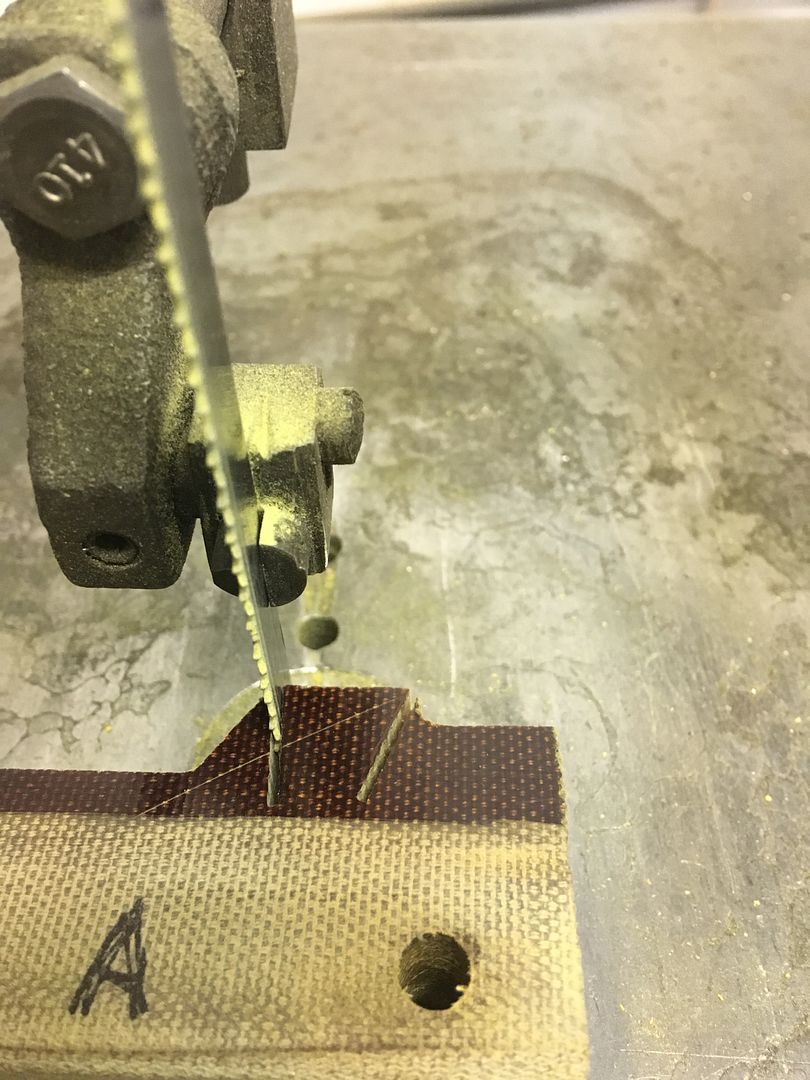 The 19 ga steel is a good snug fit for the band saw cuts... 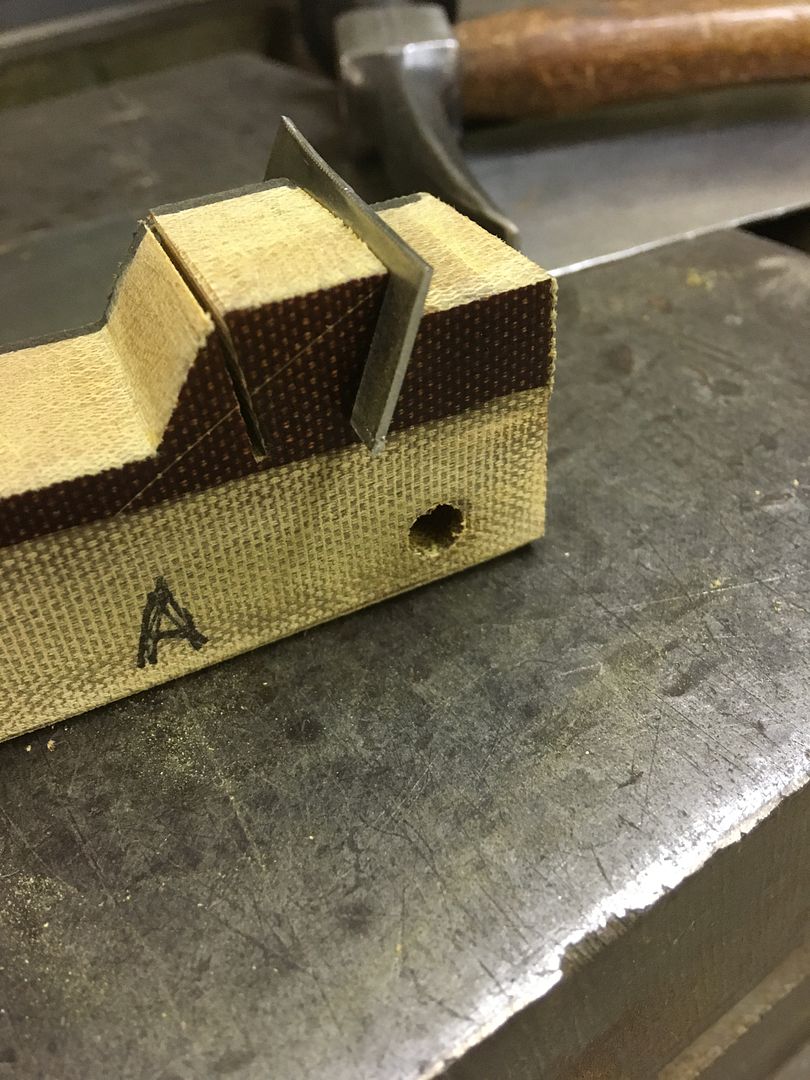 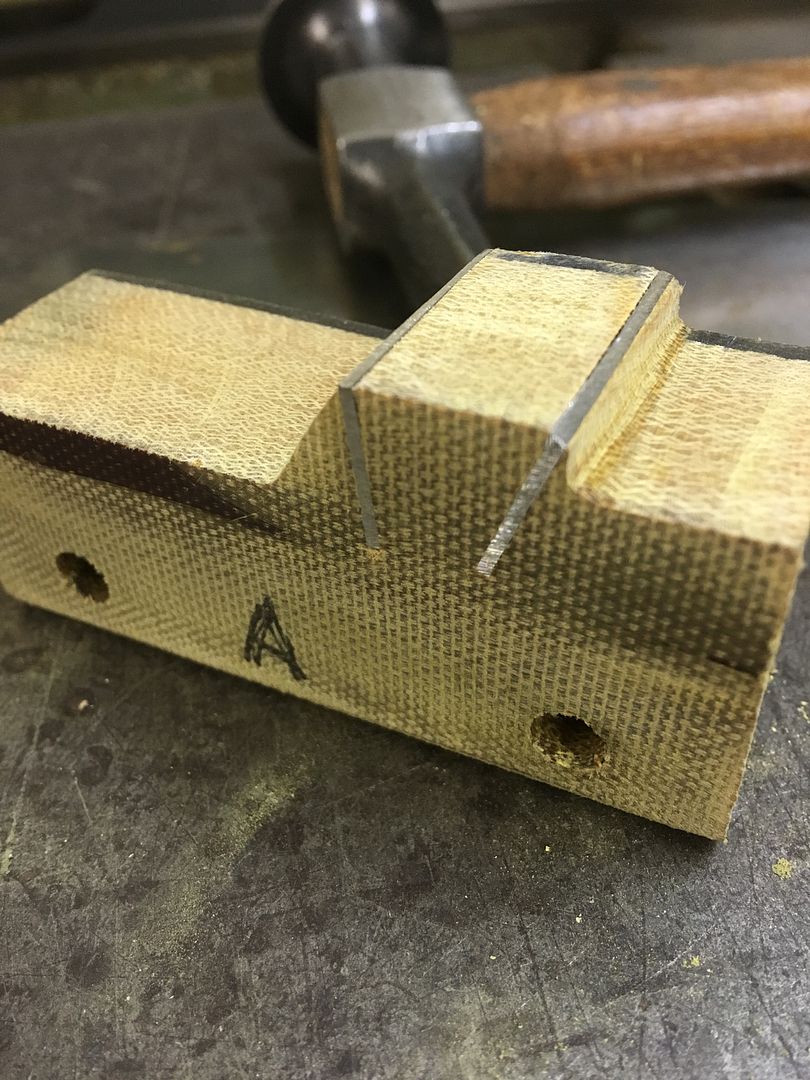 The front edge of the panel will be tipped prior to running it through the Lennox, the tipped flange will act as a guide in the slot in the lower die.. 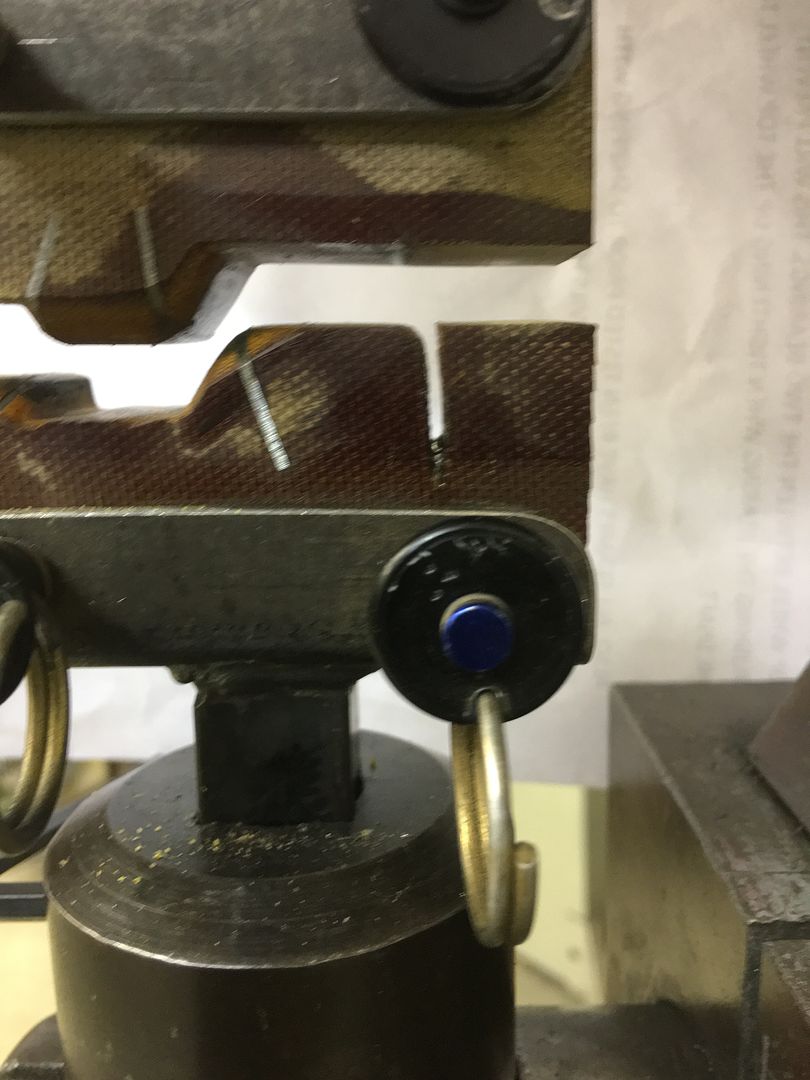 Another test run using a straight piece of scrap 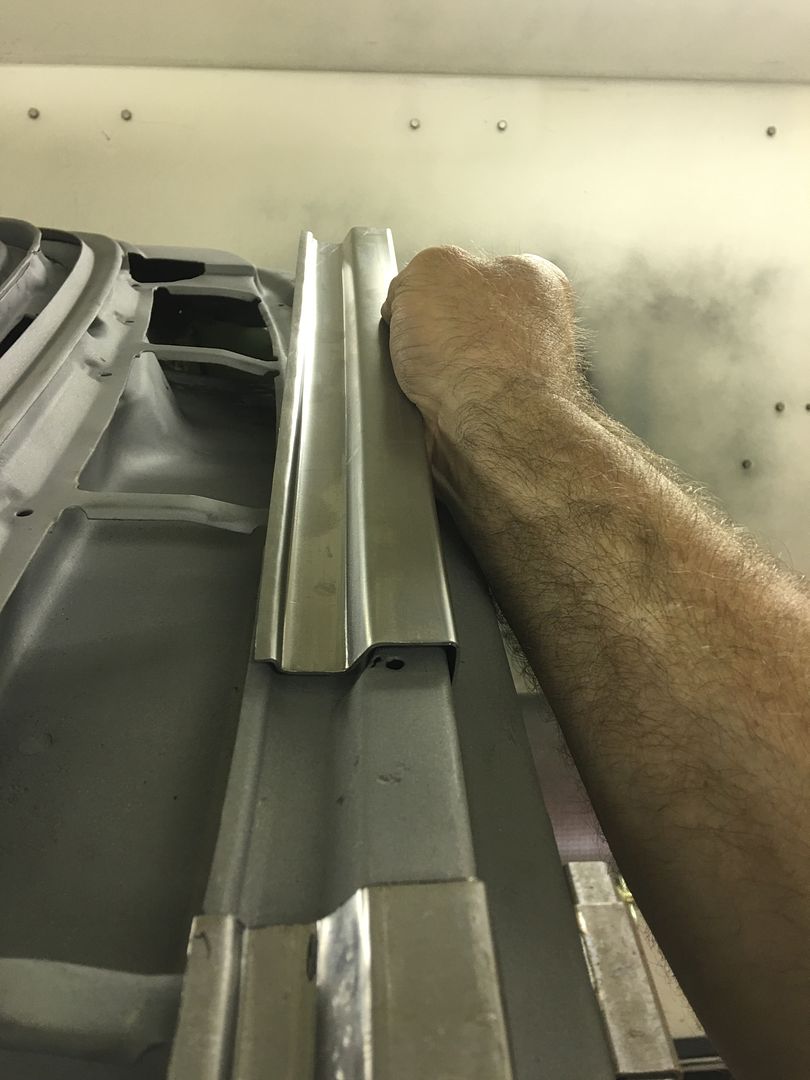 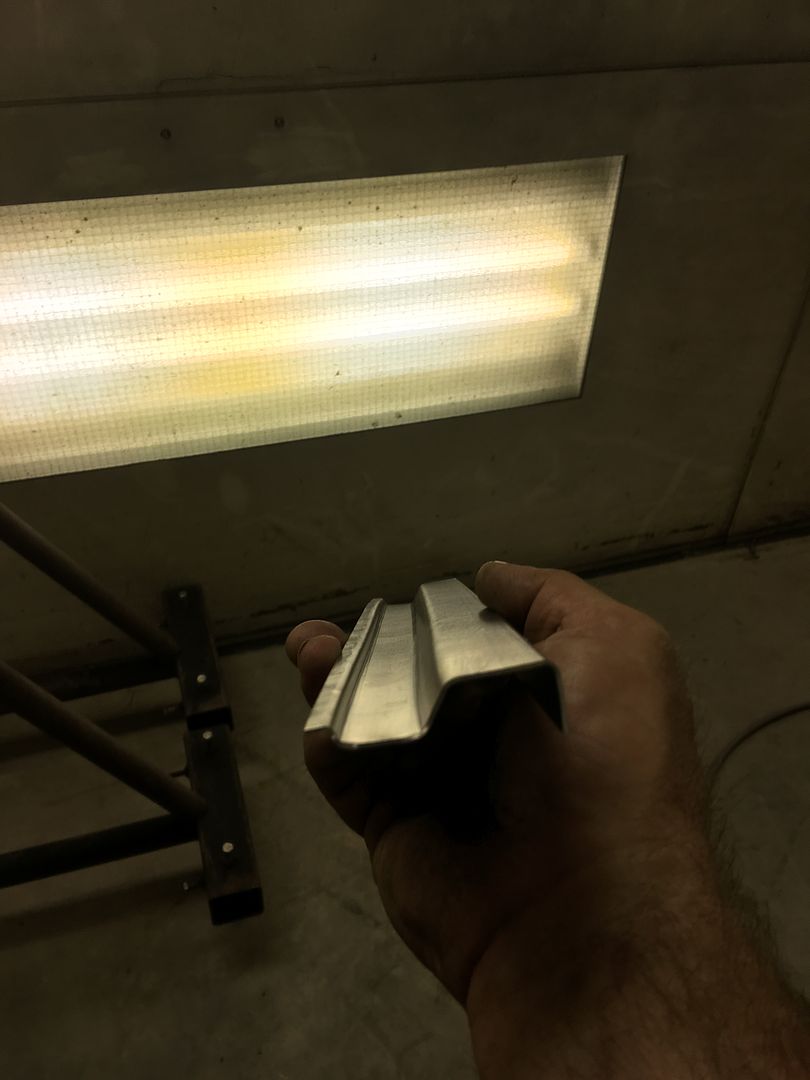 Dimensions looking much better. 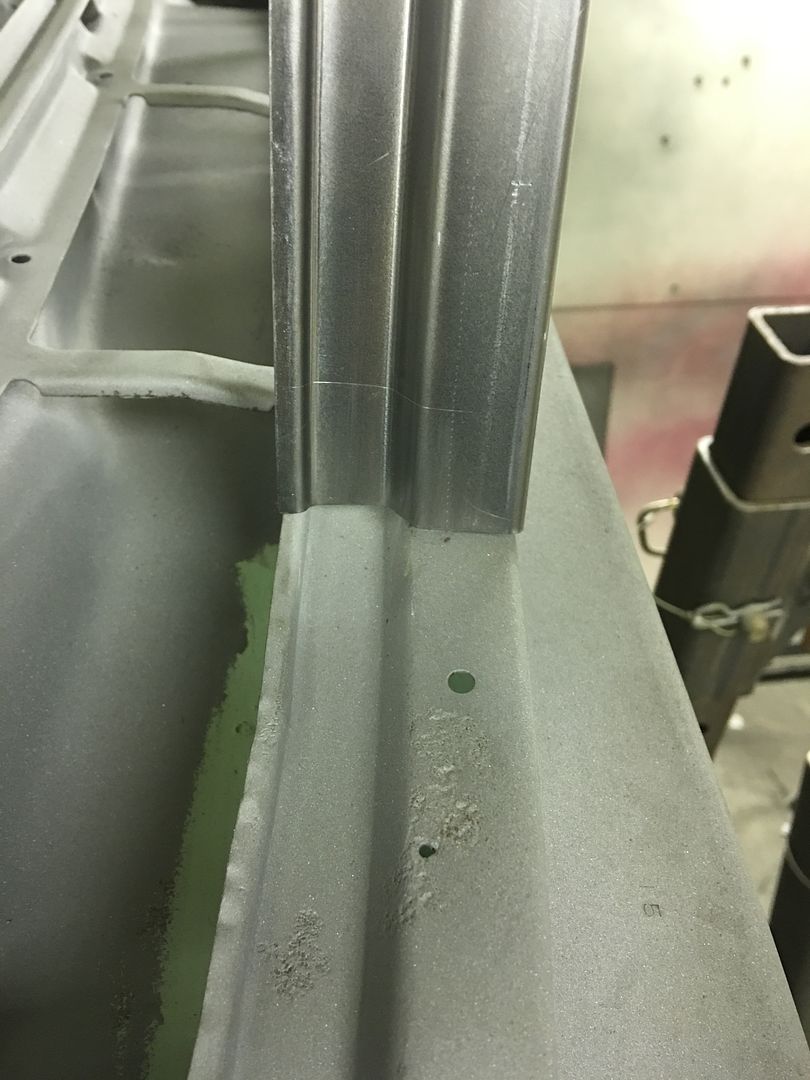 Enough practice, starting to tip the flange on the good piece.. The tipping wheel on the bead roller bends about 30 degrees and the remaining is done manually with the hand tipping tool.. 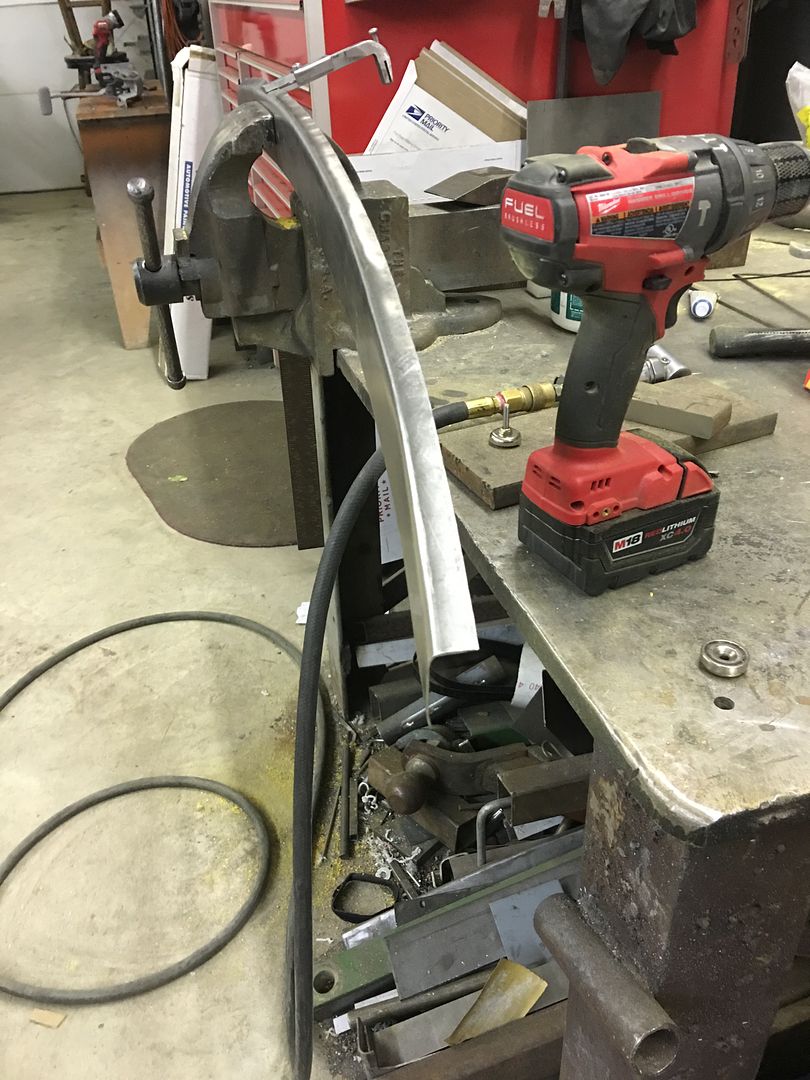 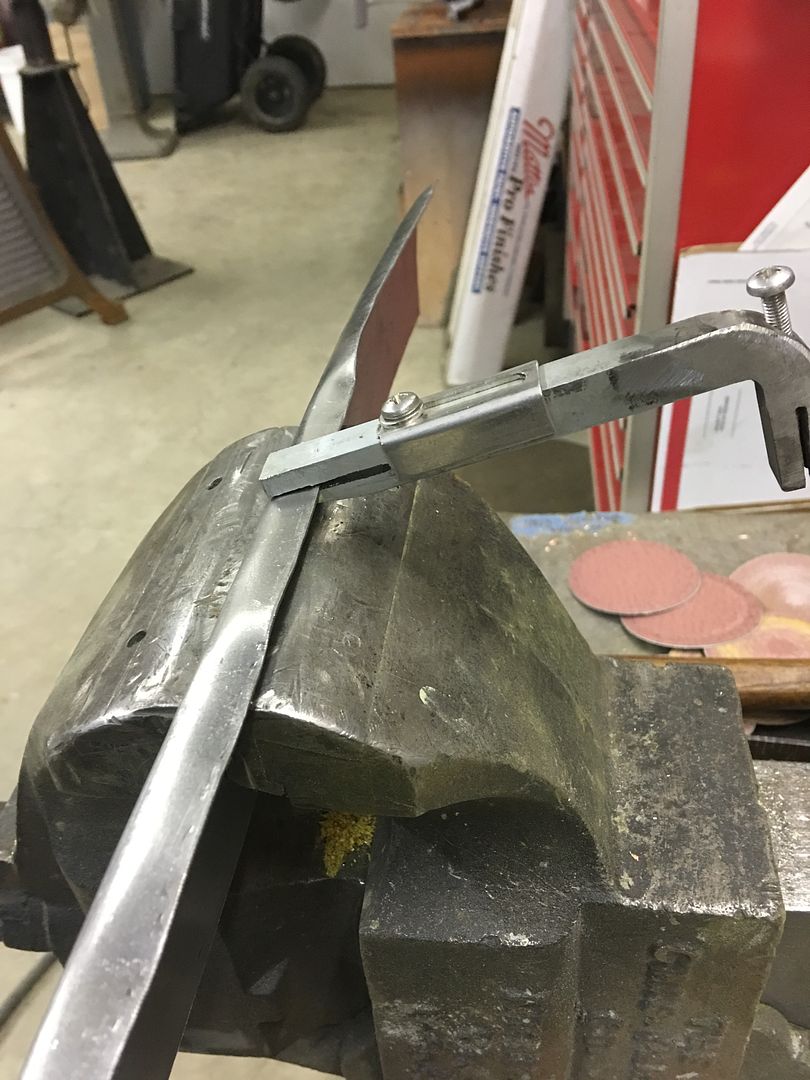 Flange tipped, some kick shrinking to get the right contour, and we're about ready for the Lennox.. As Kyle was off tonight we'll wait until he returns so we can have two people feeding this long piece through the machine.. 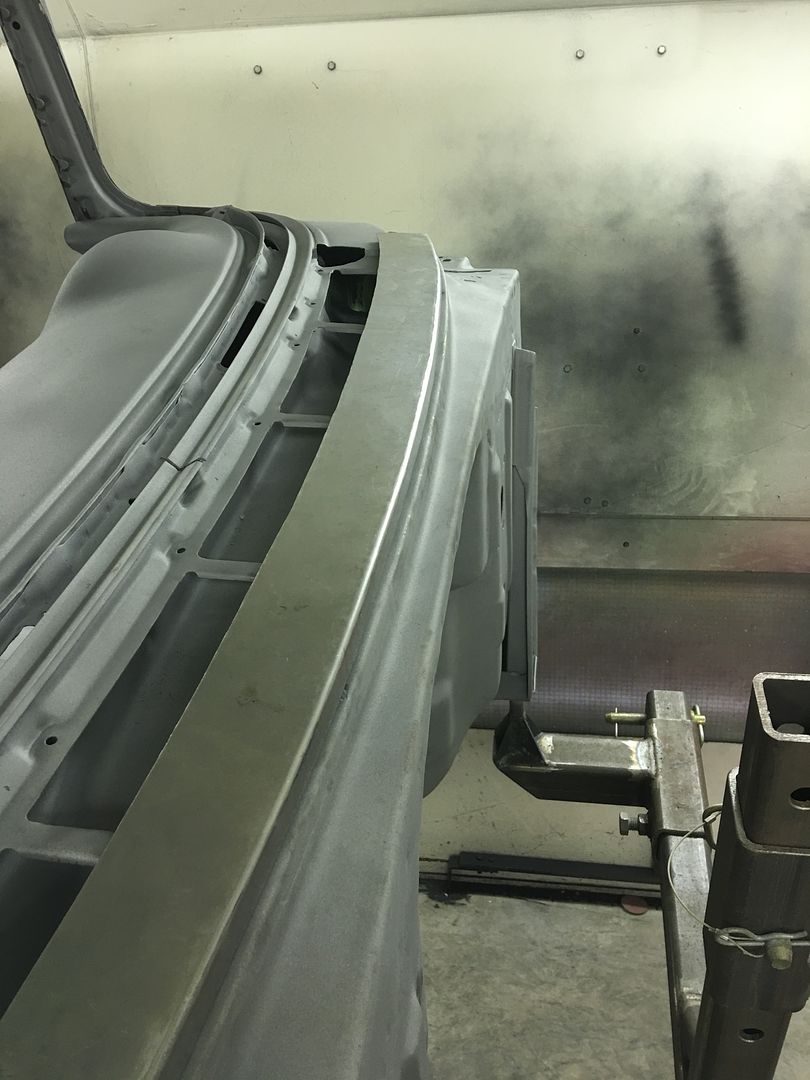 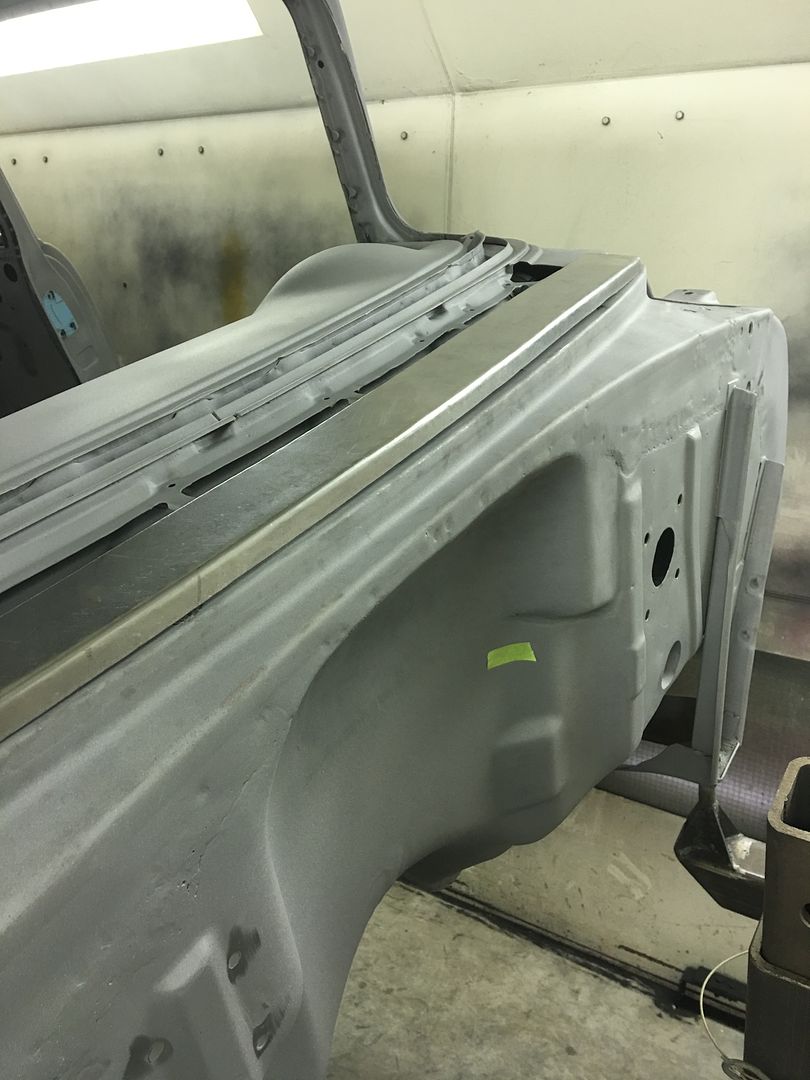
__________________
Robert |
|
|
|
|
06-01-2016, 03:18 PM
|
#15 |
|
6>8 Plugless........
 Join Date: Sep 2007
Location: Prairie City, Ia
Posts: 17,140
|
Re: 55 Wagon Progress
Very nice work Robert!
__________________
Ryan 1972 Chevy Longhorn K30 Cheyenne Super, 359 Inline 6 cylinder, Auto Trans, Tilt, Diesel Tach/Vach, Buckets, Rare Rear 4-link and air ride option Build Thread 1972 GMC Sierra Grande Longhorn 4x4 1972 Chevy Cheyenne Super K20 Long Step side tilt, tach, tow hooks, AC, 350 4 speed 1972 C10 Suburban Custom Deluxe 1969 Chevy milk truck 1971 Camaro RS 5.3 BTR STG3 Cam Super T10 1940 Ford 354 Hemi 46RH Ford 9" on air ride huge project Tired of spark plugs? Check this out. |
|
|
|
|
06-01-2016, 10:32 PM
|
#16 |
|
Registered User
Join Date: Apr 2011
Location: .
Posts: 3,104
|
Re: 55 Wagon Progress
Nice crisp edge.
|
|
|
|
|
06-02-2016, 09:47 PM
|
#17 |
|
Registered User
Join Date: Jan 2013
Location: Leonardtown, MD
Posts: 1,637
|
Re: 55 Wagon Progress
Thanks guys!
As we found with some of the practice pieces, when you try to shove metal too much into a hole it tends to pull in from the edges. 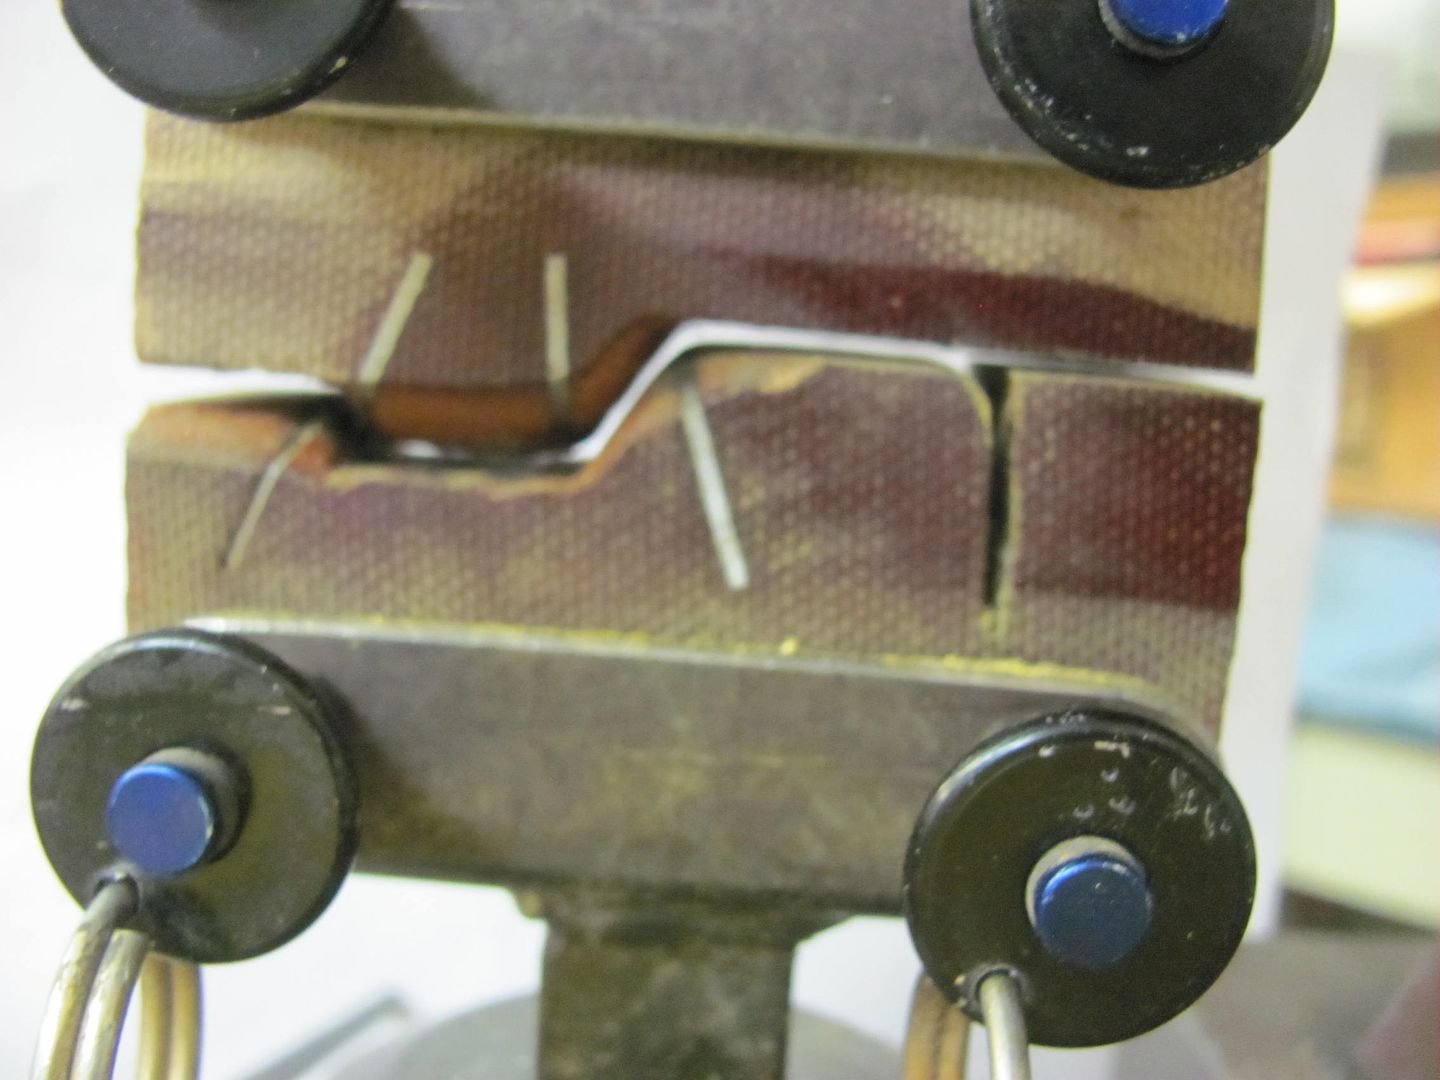 So to fix that we'll make up a new bottom die to form the ramp fold fully, then change back to the above die to form the step.. 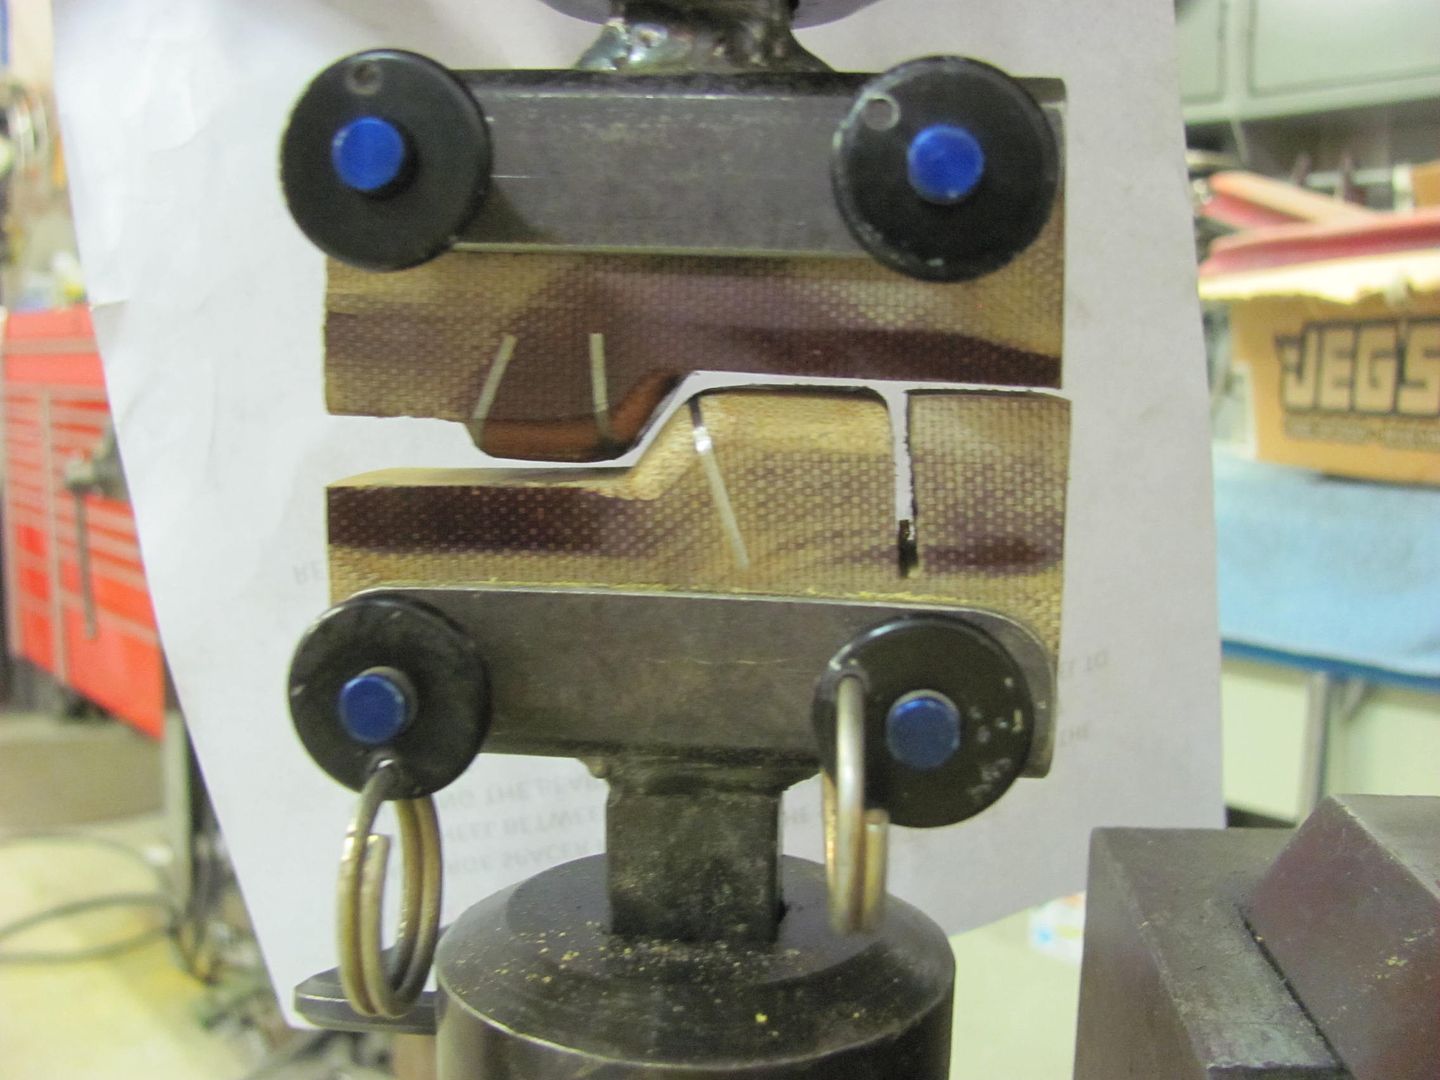 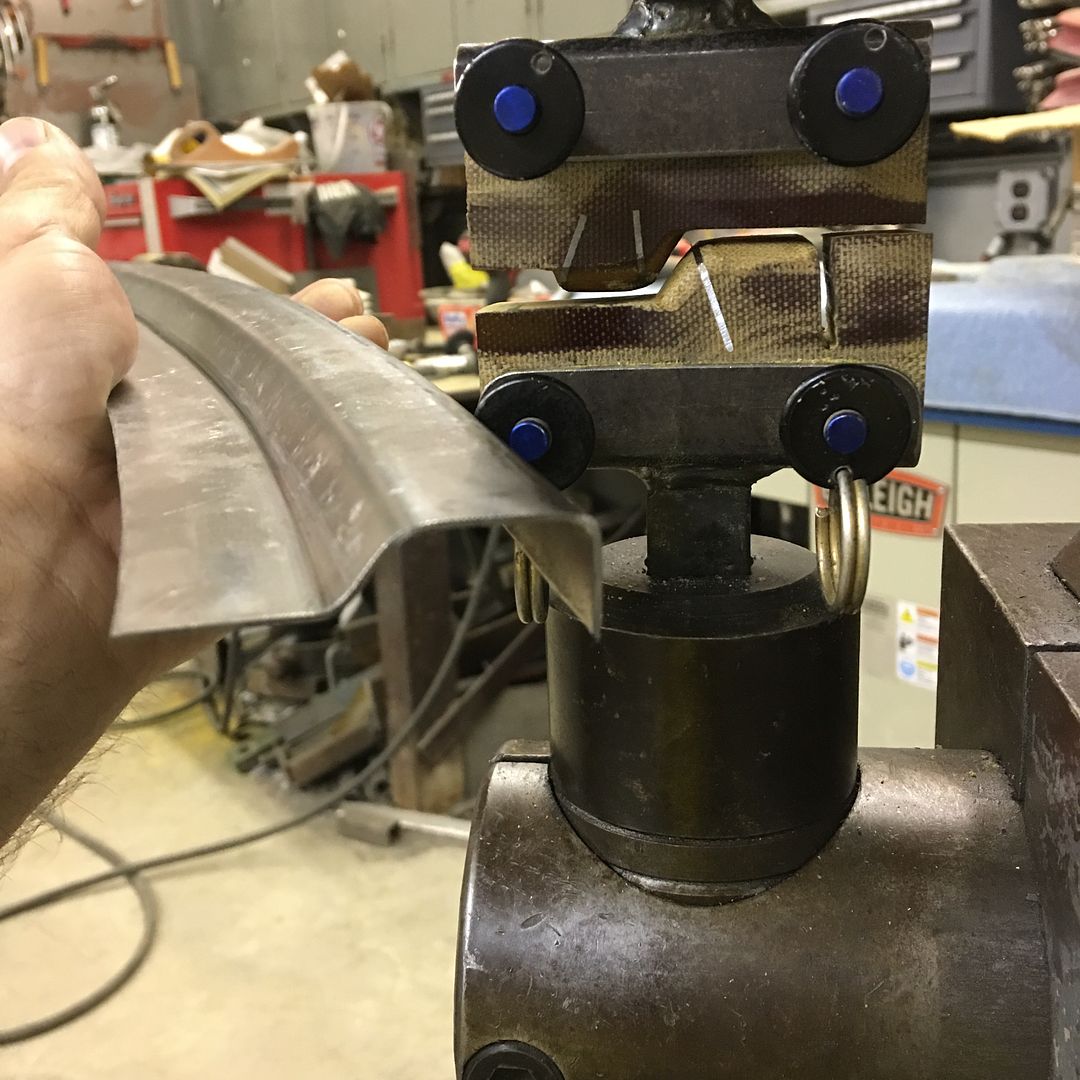 The down side to using phenolic is that it gives a bit where it doesn't make sharp creases well or short reverse folds either. The initial practice pieces wouldn't fold the step down flat, so a wrap of steel was added to the top die to better persuade the step flat... 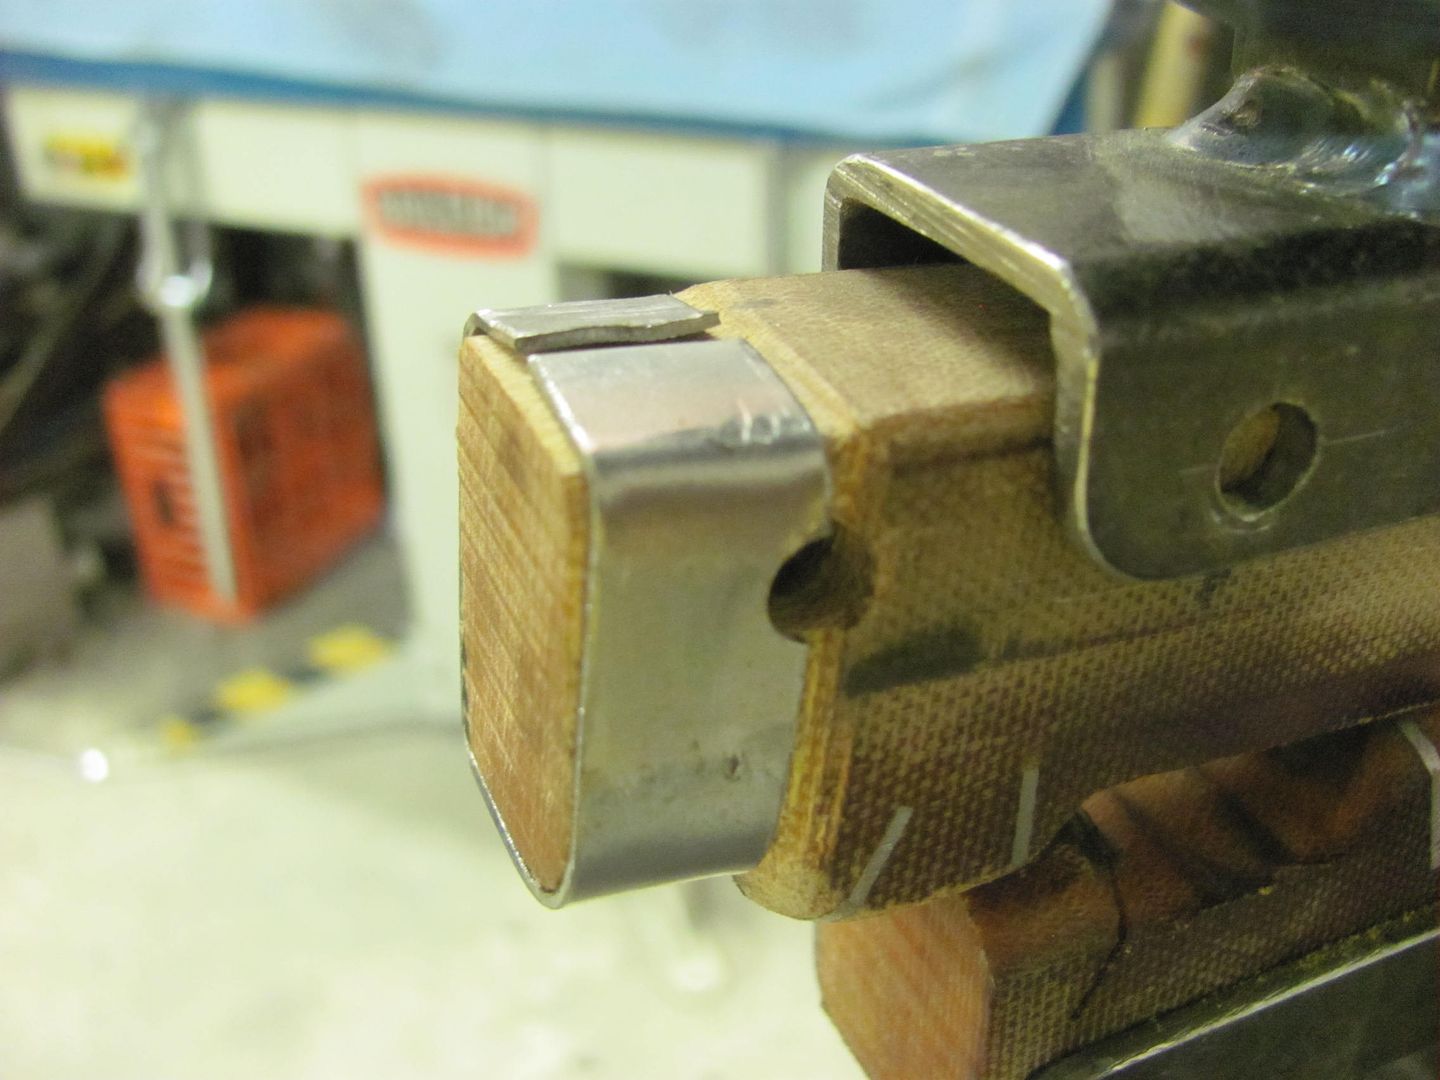 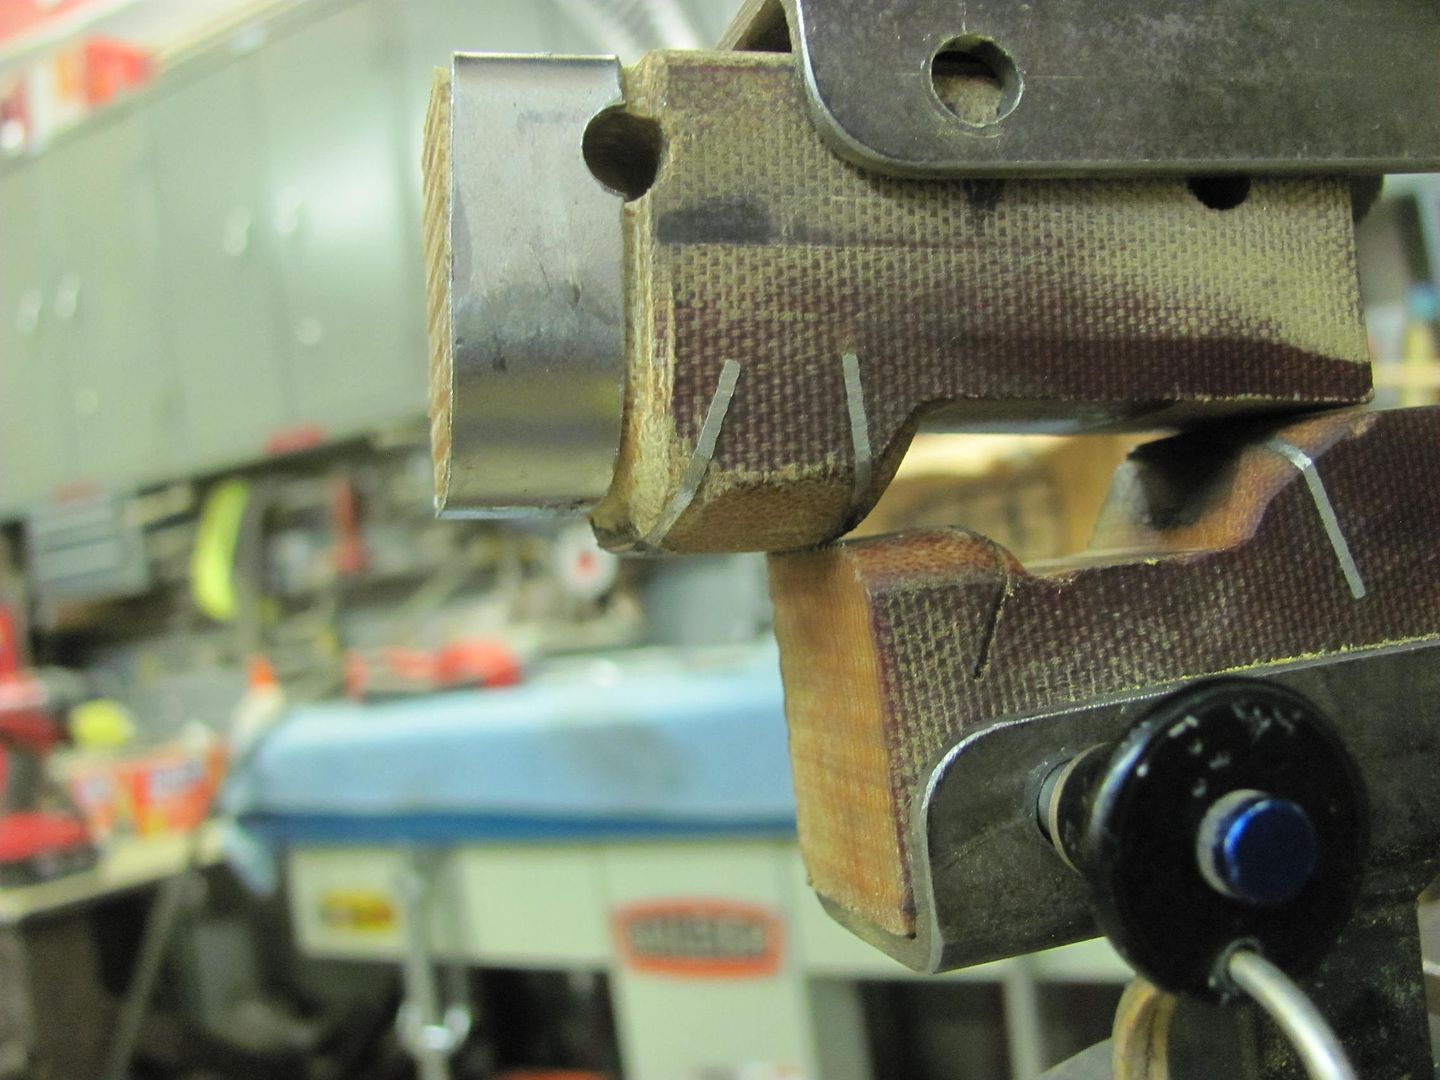 The upper die holder helps keep the wrapped steel in place. 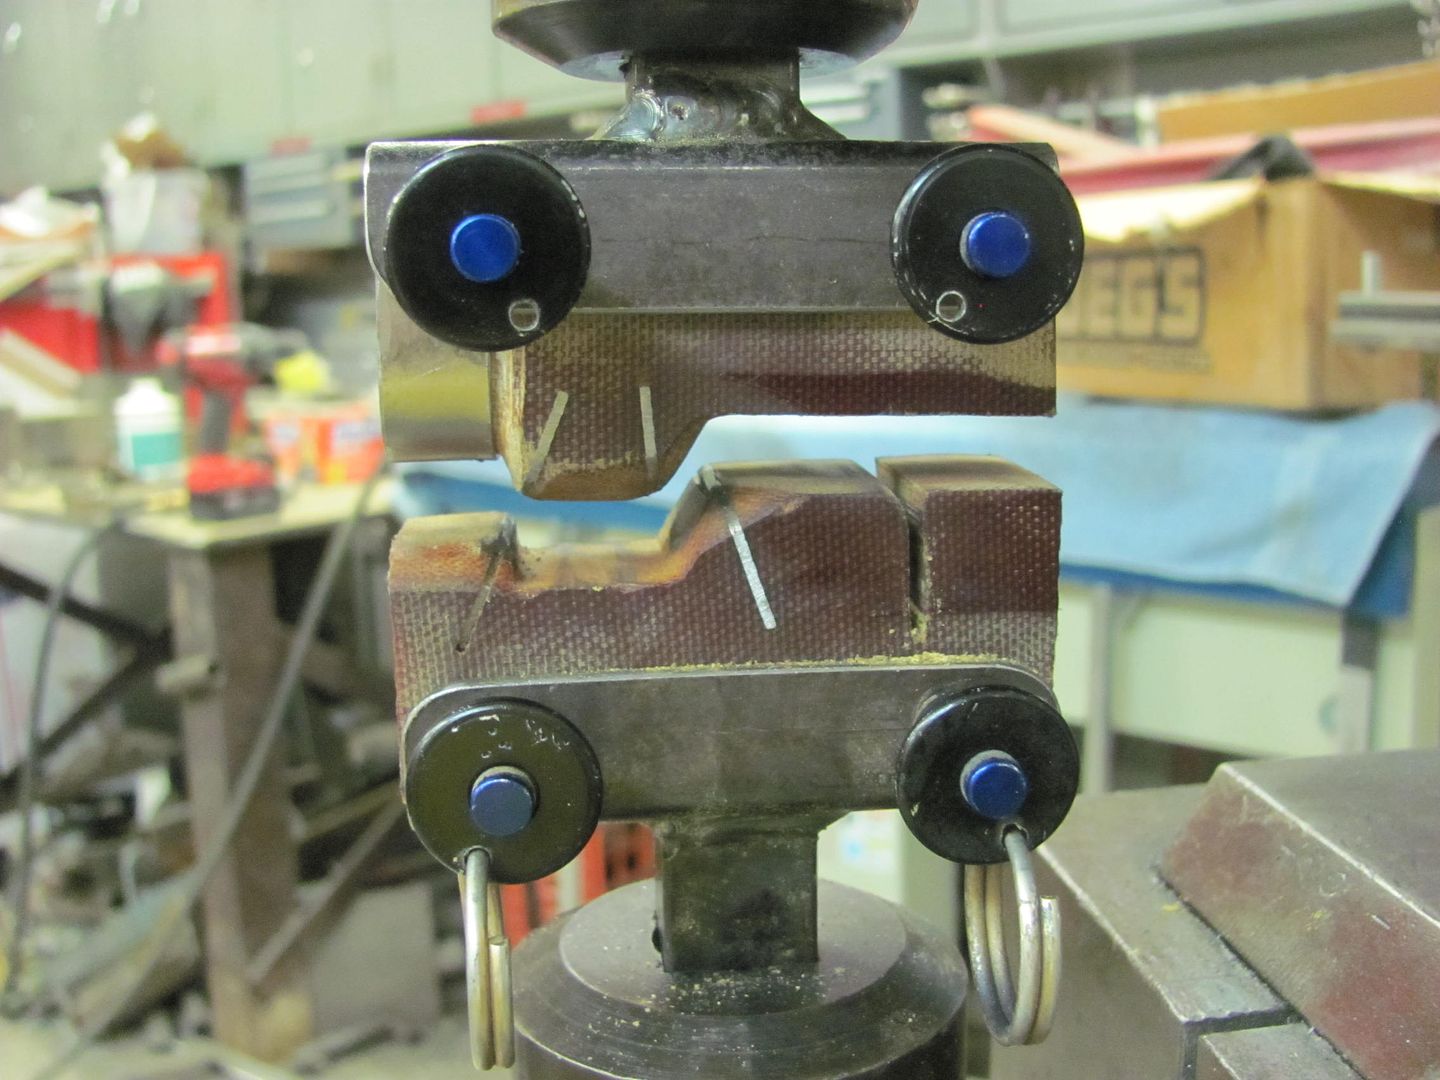 That did the trick, step is laying down nice and flat.. 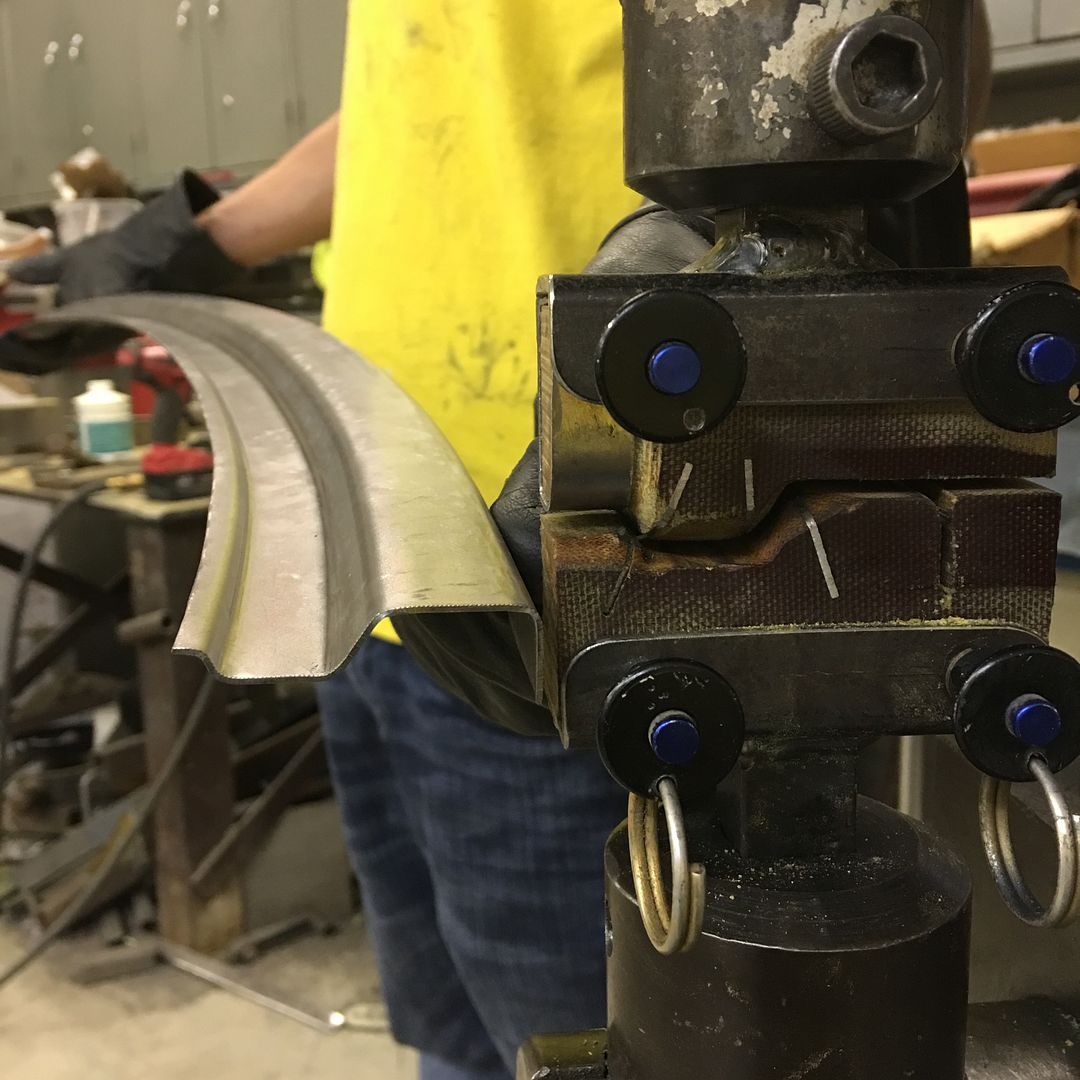 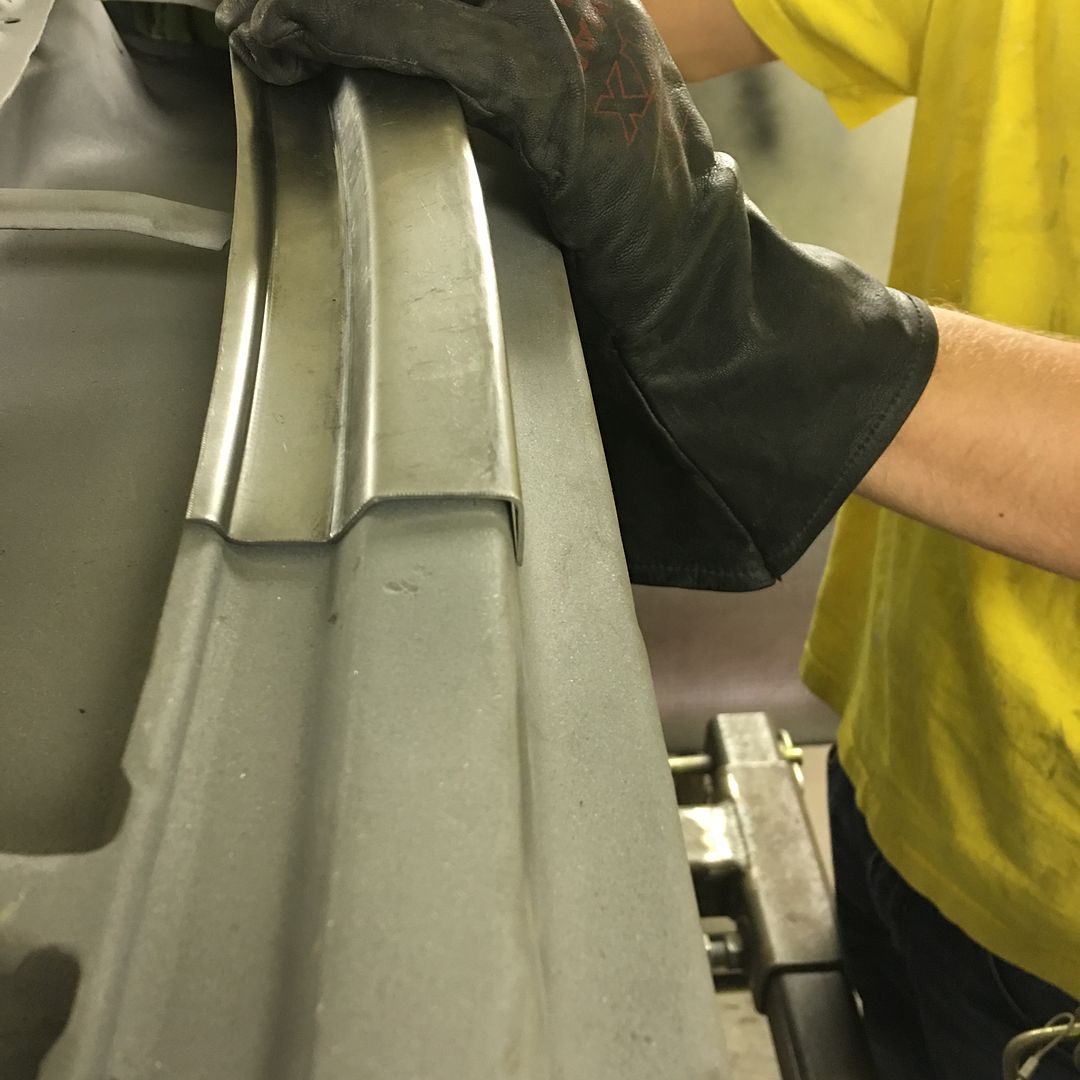 The front flange hangs over just a bit too much, some hammer action will bring it back in place. Real pleased with how well this turned out.. 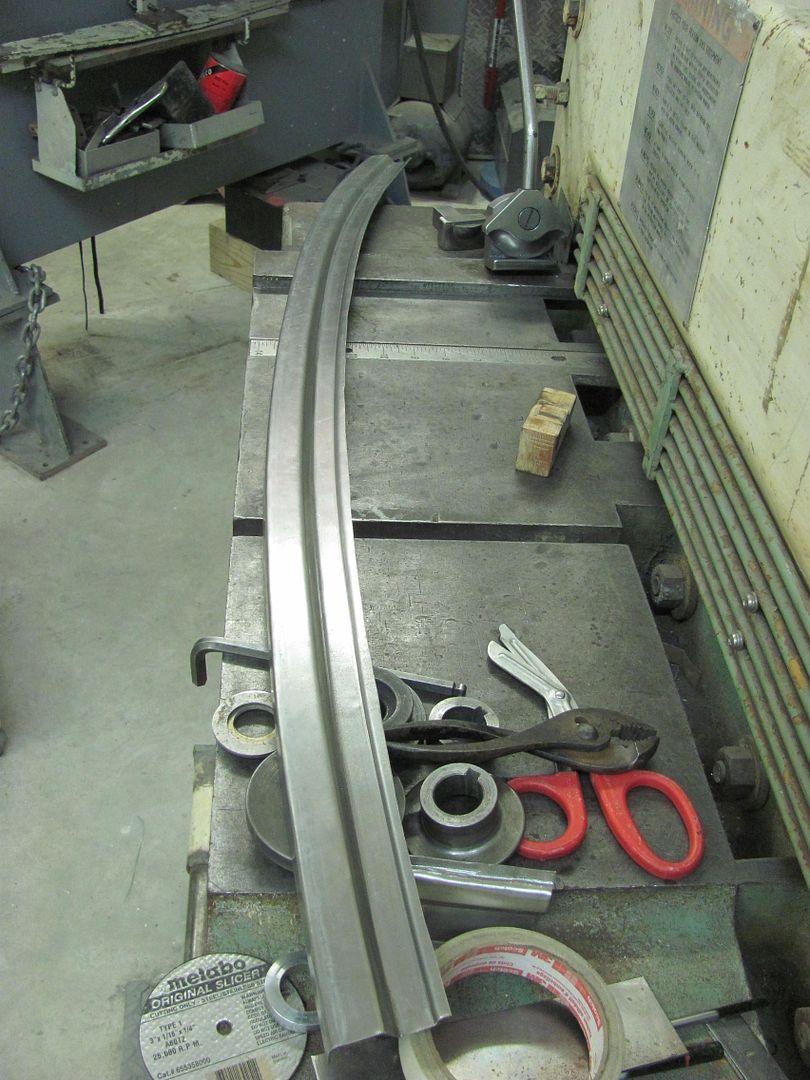 Some of the practice scraps.. 
__________________
Robert |
|
|
|
|
06-08-2016, 06:49 AM
|
#18 |
|
Registered User
Join Date: Jan 2013
Location: Leonardtown, MD
Posts: 1,637
|
Re: 55 Wagon Progress
Next task on the list is to add the semi-circular relief areas into the new cowl repair panel..
A suitable piece of Phenolic is cut out, notched at the bottom for "vise support", and used a roloc sander and drum sander to add the relief area in the "hammer form". 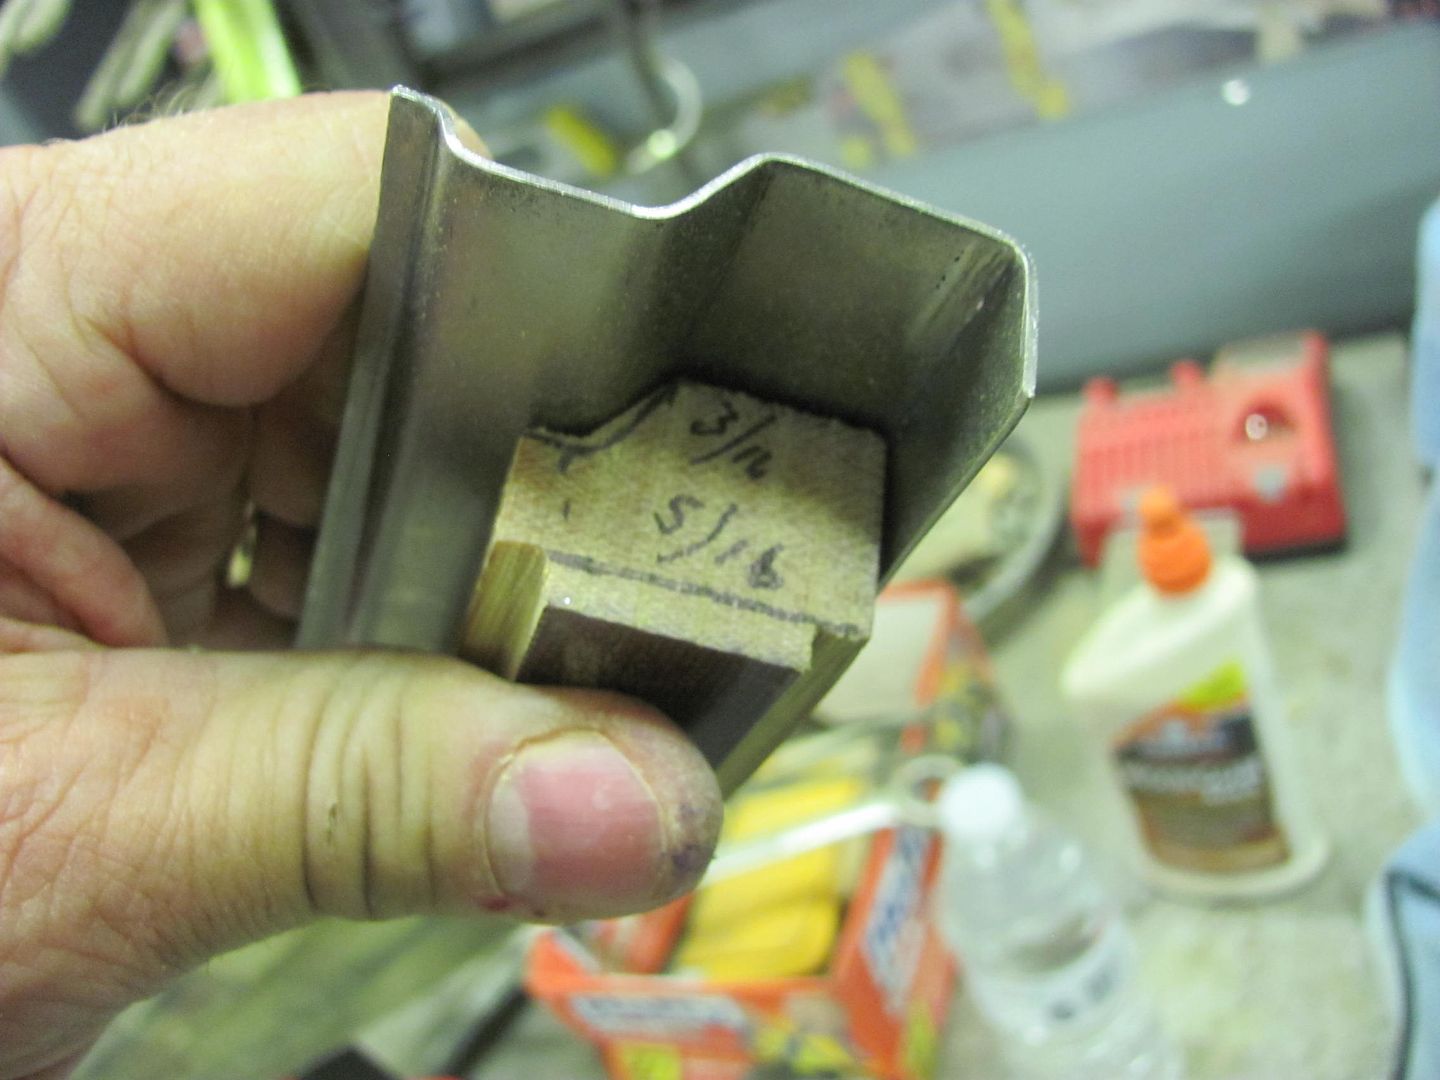 Here's the Vise support shown in action... should remain nice and stable through all the hammer action..  Centerline of the hammerform marked, as well as on the vise, to better align our new cowl.. 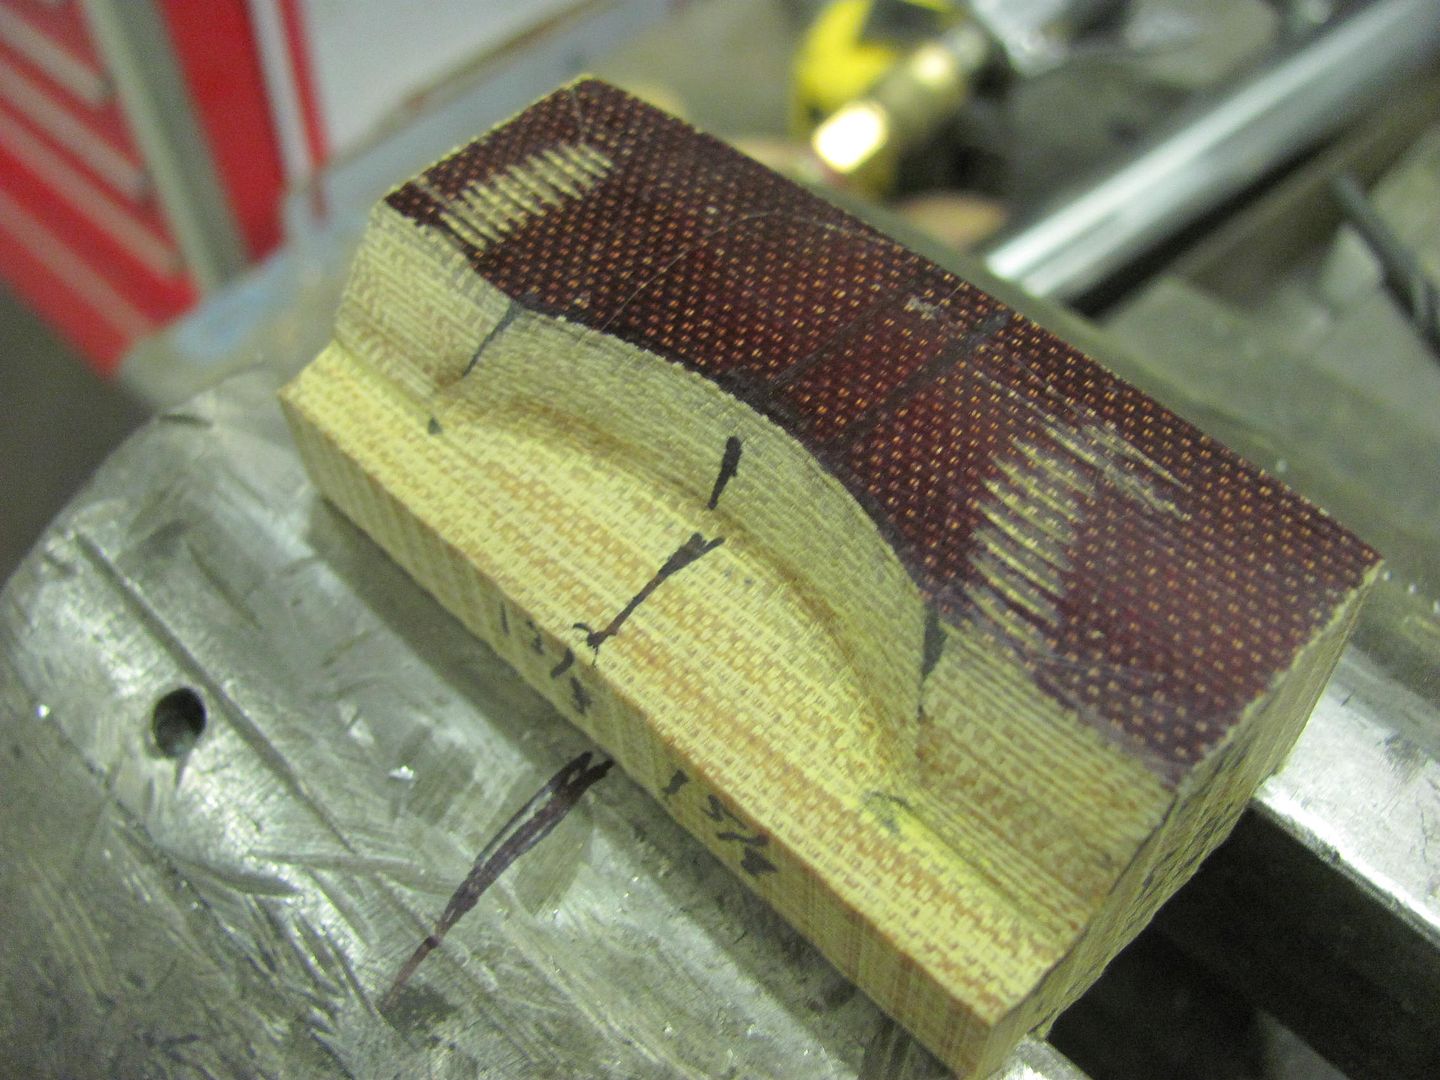 Door skin hammer will be used here to provide the radius, this one was touched up as the factory radius was a bit too large. 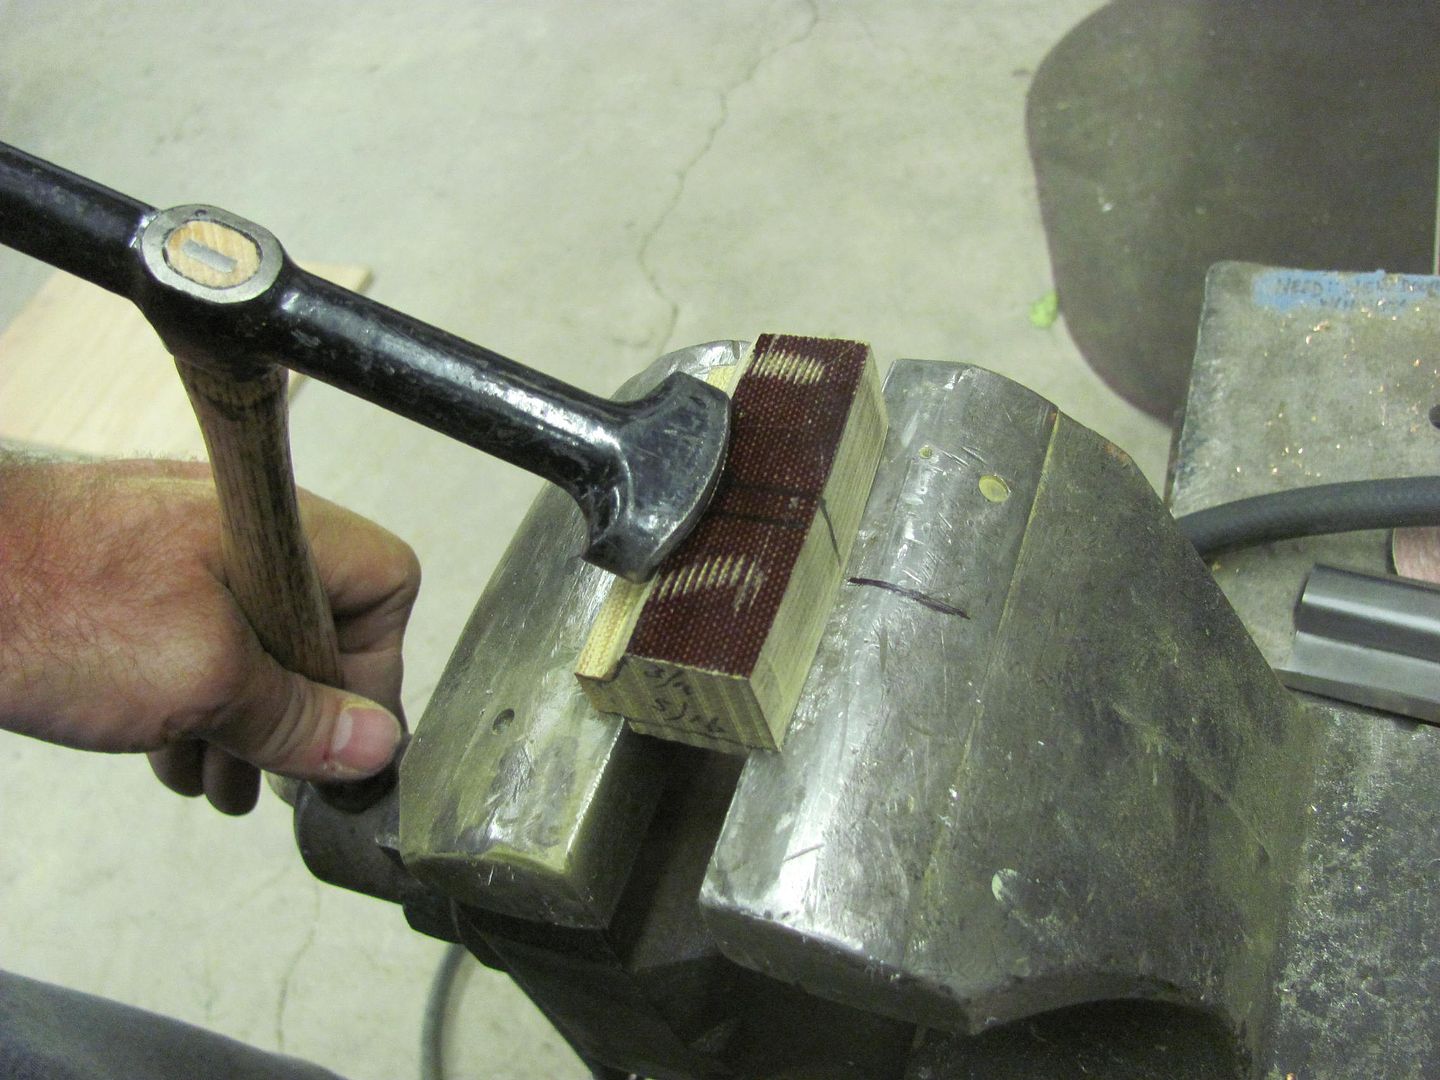 Tried it on one of our scrap pieces first.. 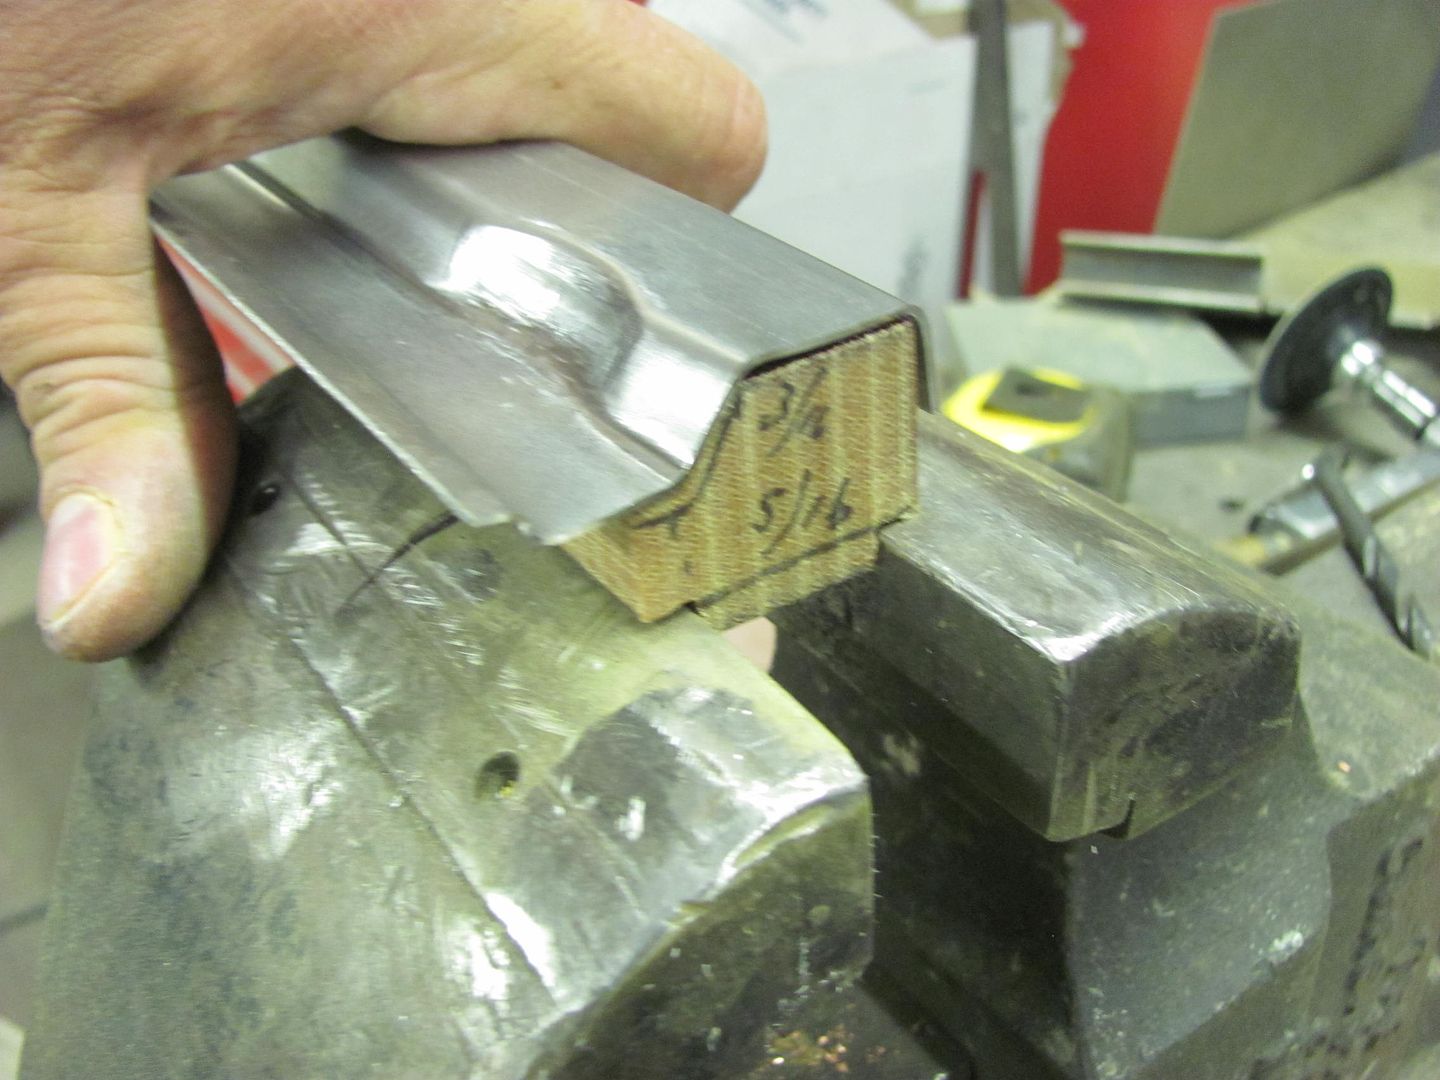 Back side.. 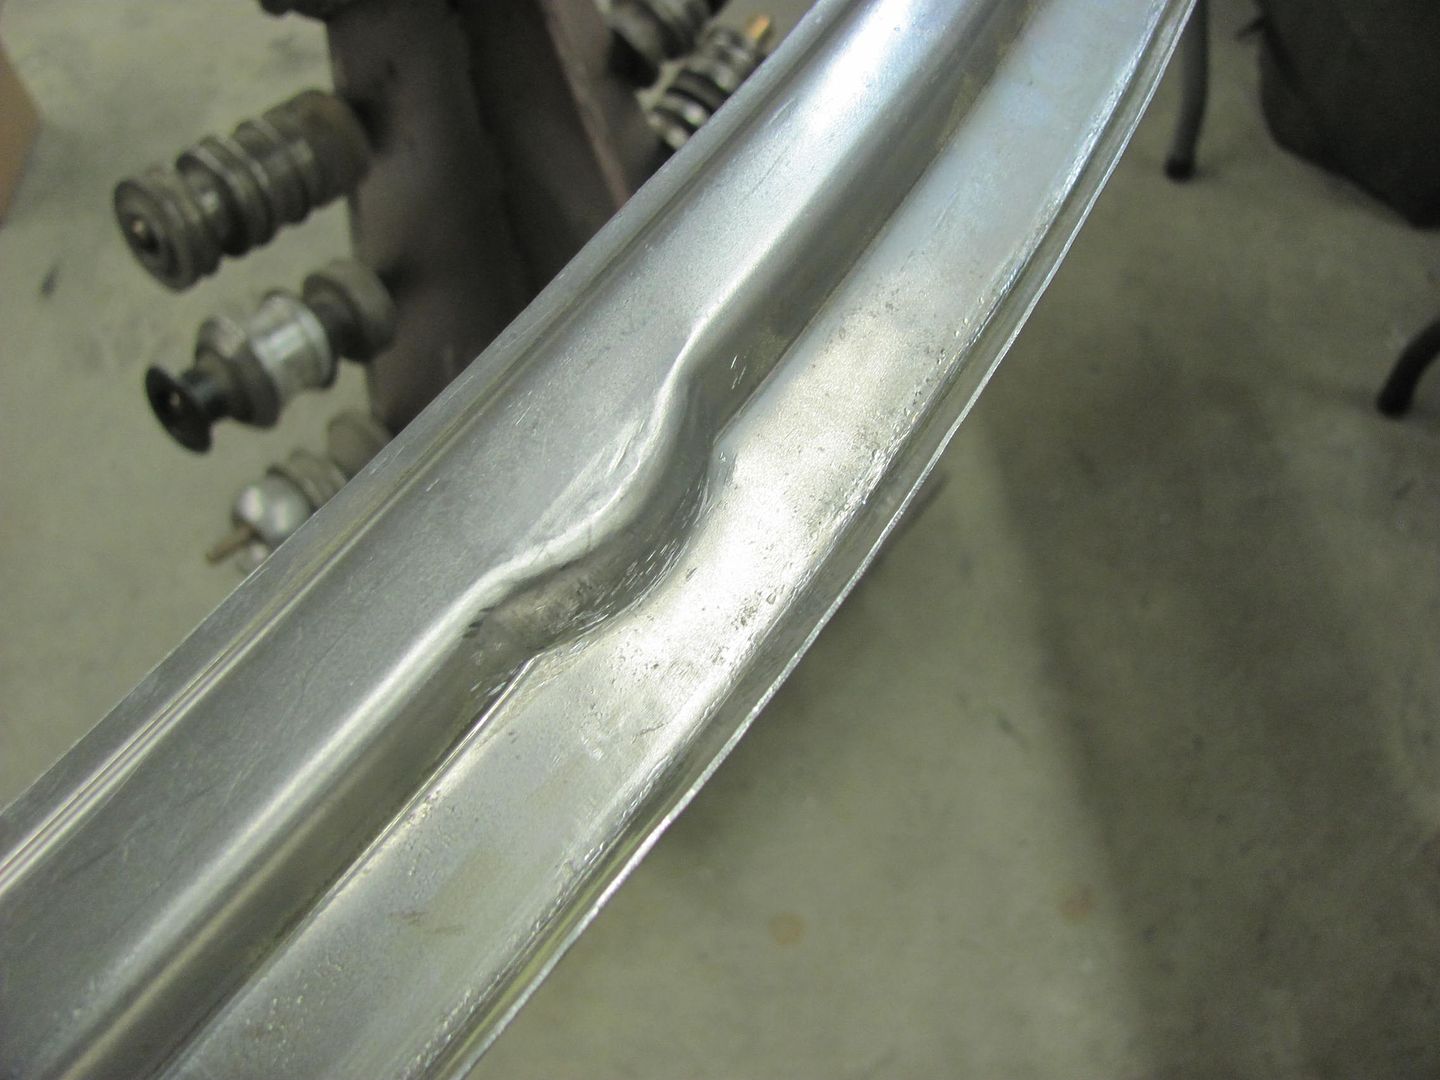 Front side and comparison to the factory version 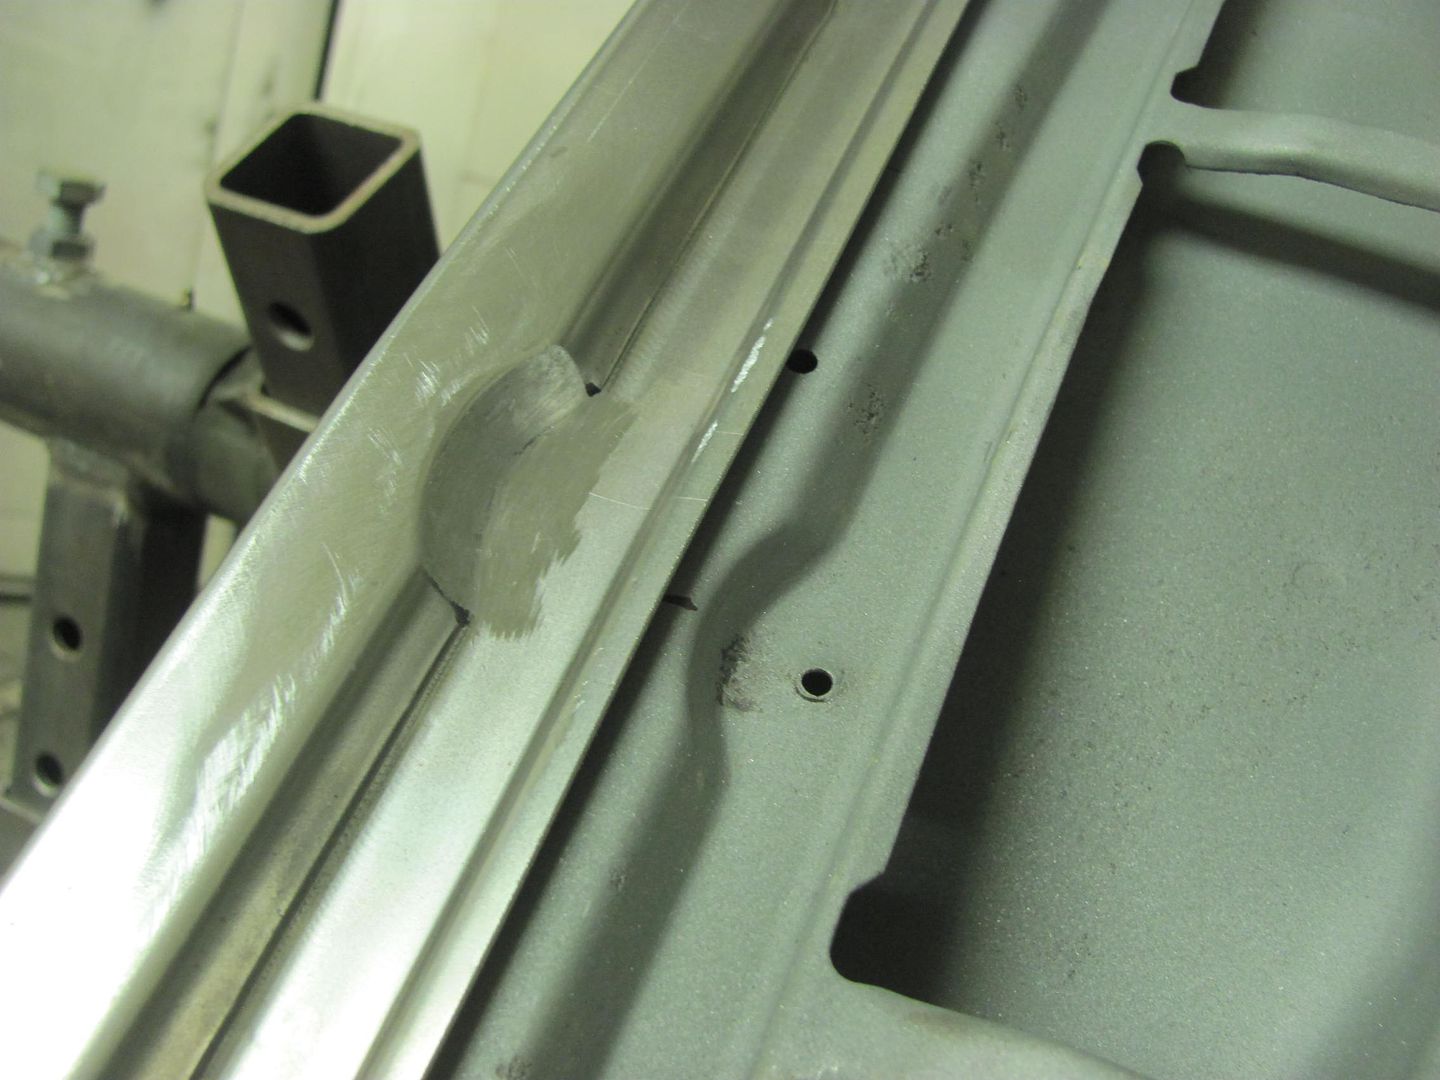 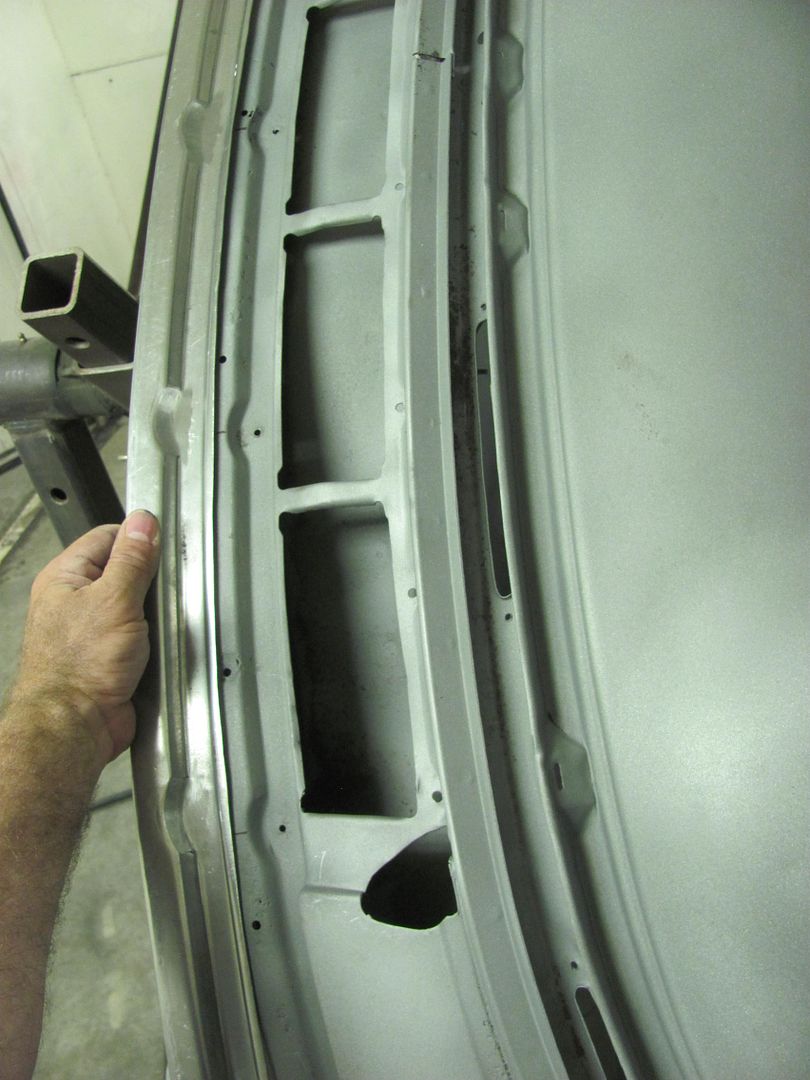 Action video showing the process: https://www.youtube.com/watch?v=3TawUVtIl5w
__________________
Robert |
|
|
|
|
06-08-2016, 08:44 AM
|
#19 |
|
Registered User
Join Date: Apr 2011
Location: .
Posts: 3,104
|
Re: 55 Wagon Progress
Thank you for taking the time to show how to do this.
Something learned every day. |
|
|
|
|
06-08-2016, 09:01 AM
|
#20 |
|
Senior Member
Join Date: Mar 2011
Location: West Plains, Missouri
Posts: 7,555
|
Re: 55 Wagon Progress
Nice work...Jim
__________________
my build thread: http://67-72chevytrucks.com/vboard/s...d.php?t=459839 Jimbo's long bed step build:http://67-72chevytrucks.com/vboard/s...t=464626<br /> |
|
|
|
|
06-13-2016, 01:51 PM
|
#21 |
|
Registered User
Join Date: Apr 2003
Location: Indep, MO
Posts: 5,893
|
Re: 55 Wagon Progress
Wow, good stuff. Great work as always.
__________________
Boppa's Old Yeller Truck Build, Old Yeller's New Heart! Project Buzz Bomb Flyin' Low! |
|
|
|
|
06-14-2016, 01:33 AM
|
#22 |
|
Registered User
Join Date: Oct 2007
Location: Spanaway
Posts: 8,451
|
Re: 55 Wagon Progress
I think my jaw needs to be reattached to my face LOL! Nice!!
__________________
Mike. Swamp Rat build thread : http://67-72chevytrucks.com/vboard/s...d.php?t=595019 72 3/4T 4X4 4" BDS Lift 33" BFG's |
|
|
|
|
06-17-2016, 06:16 AM
|
#23 |
|
Registered User
Join Date: Jan 2013
Location: Leonardtown, MD
Posts: 1,637
|
Re: 55 Wagon Progress
Thanks for the comments guys..
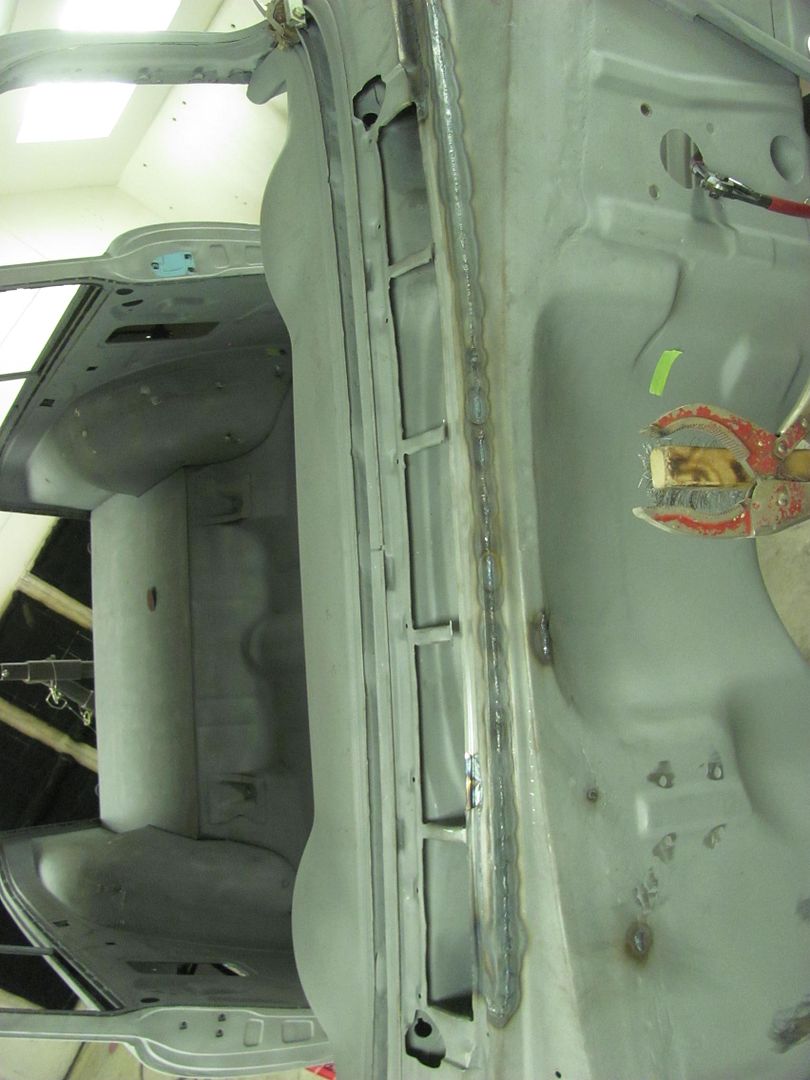
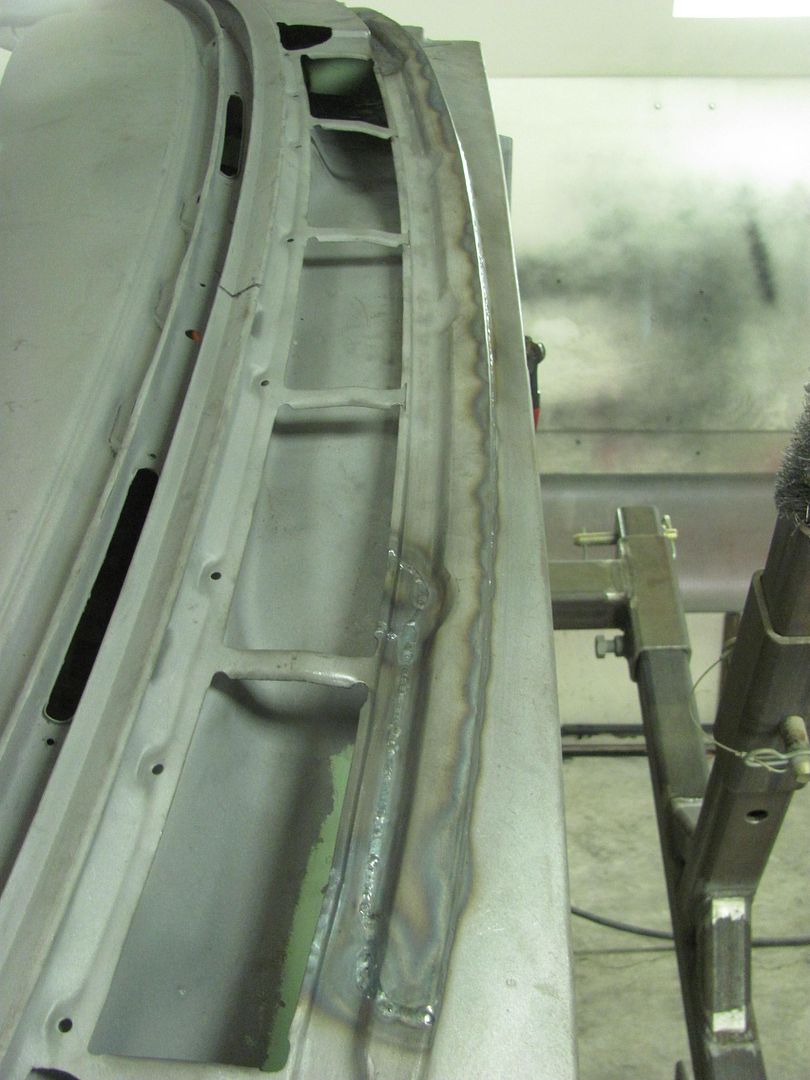
A bit further along on the cowl repair.. Repair patch trimmed to size... 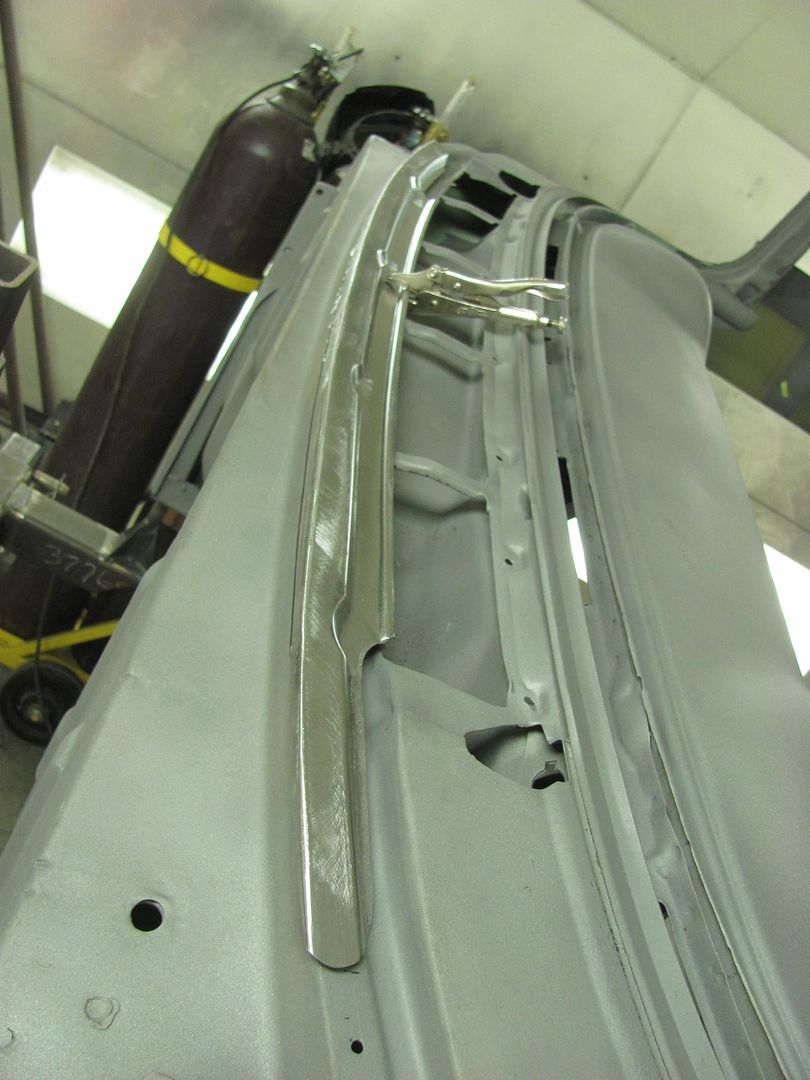 ....and then scribed to the cowl area, which gets rough cut using the 4-1/2" cut off wheel. About 1/4" excess is left for final trimming using the snips.. 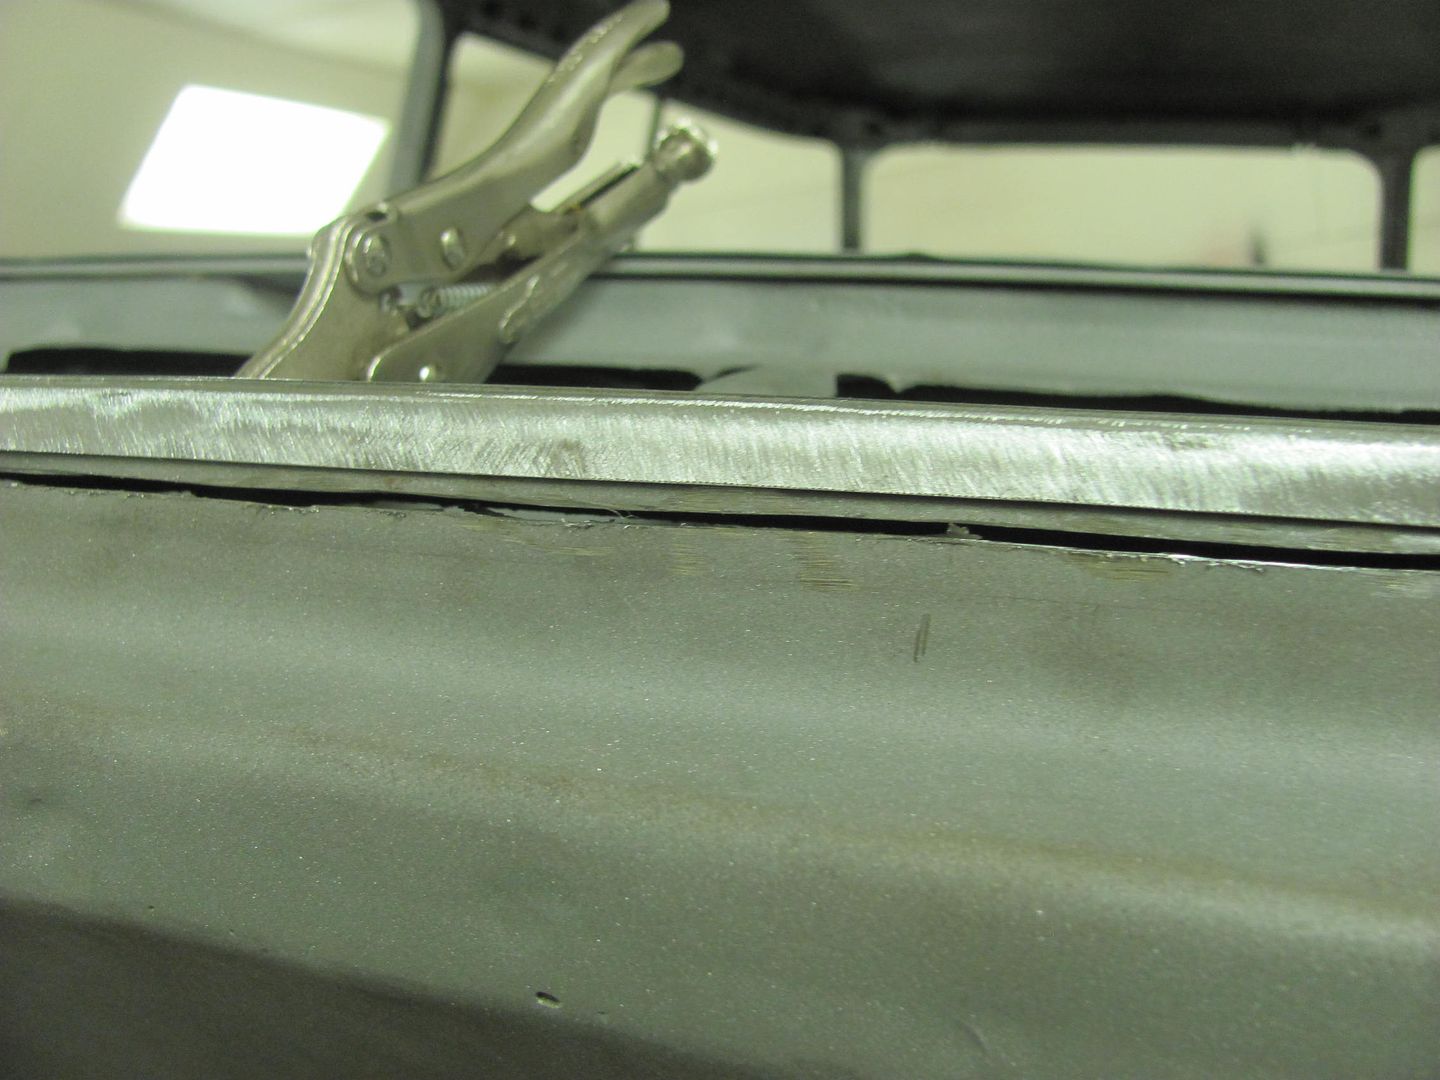 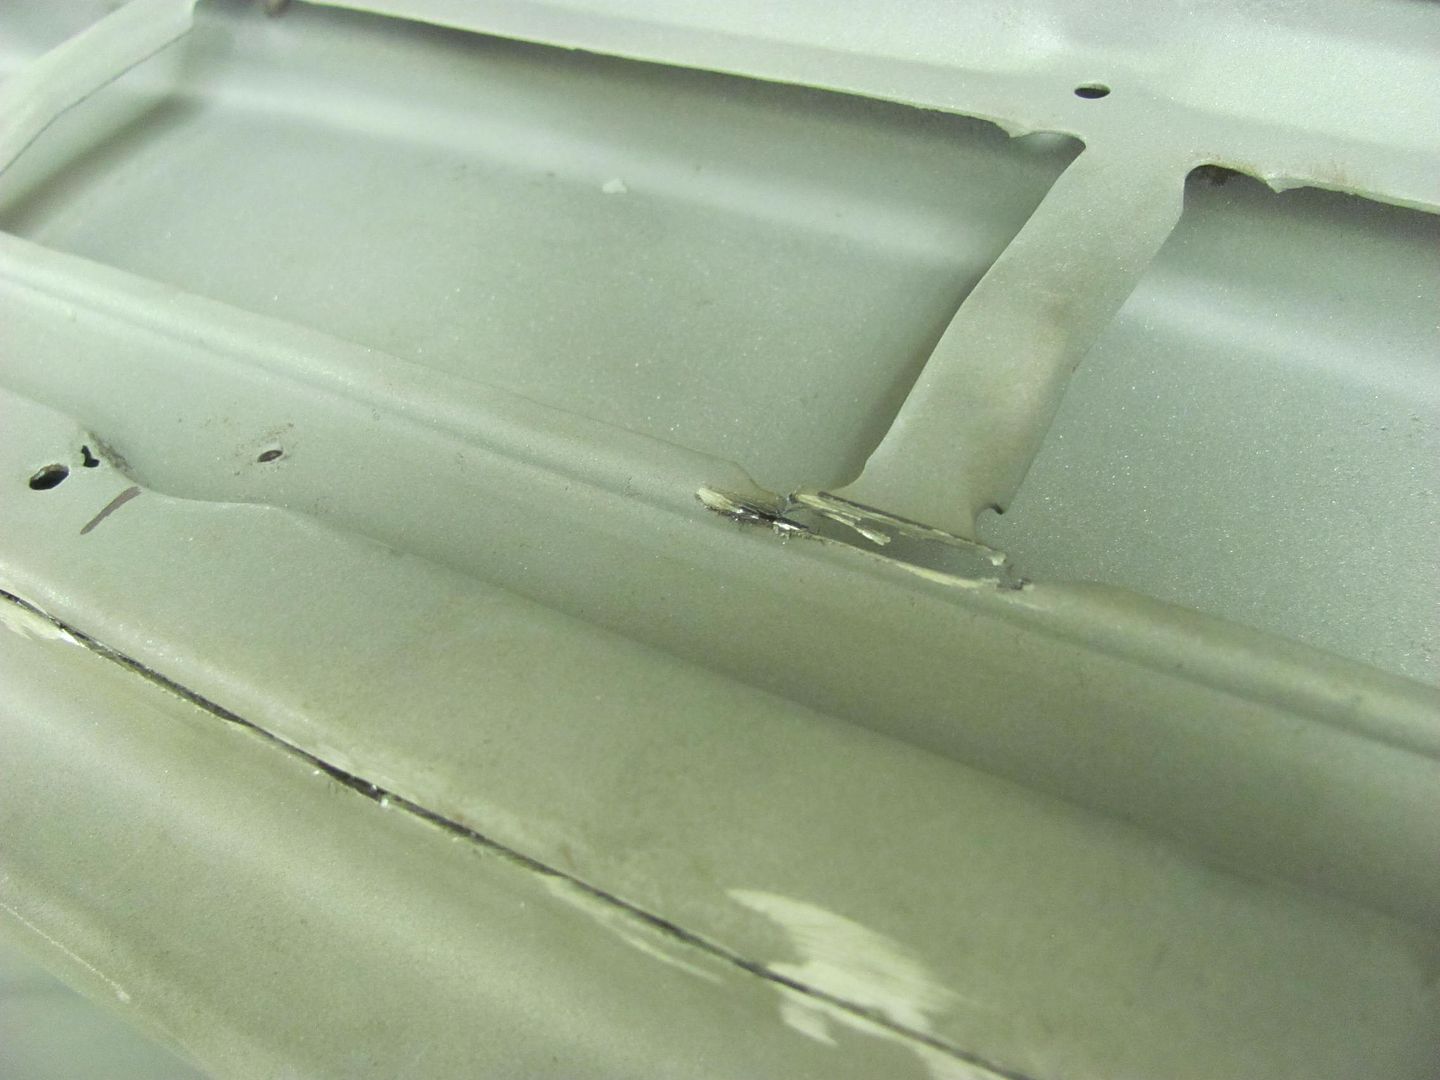 That should flow some air... 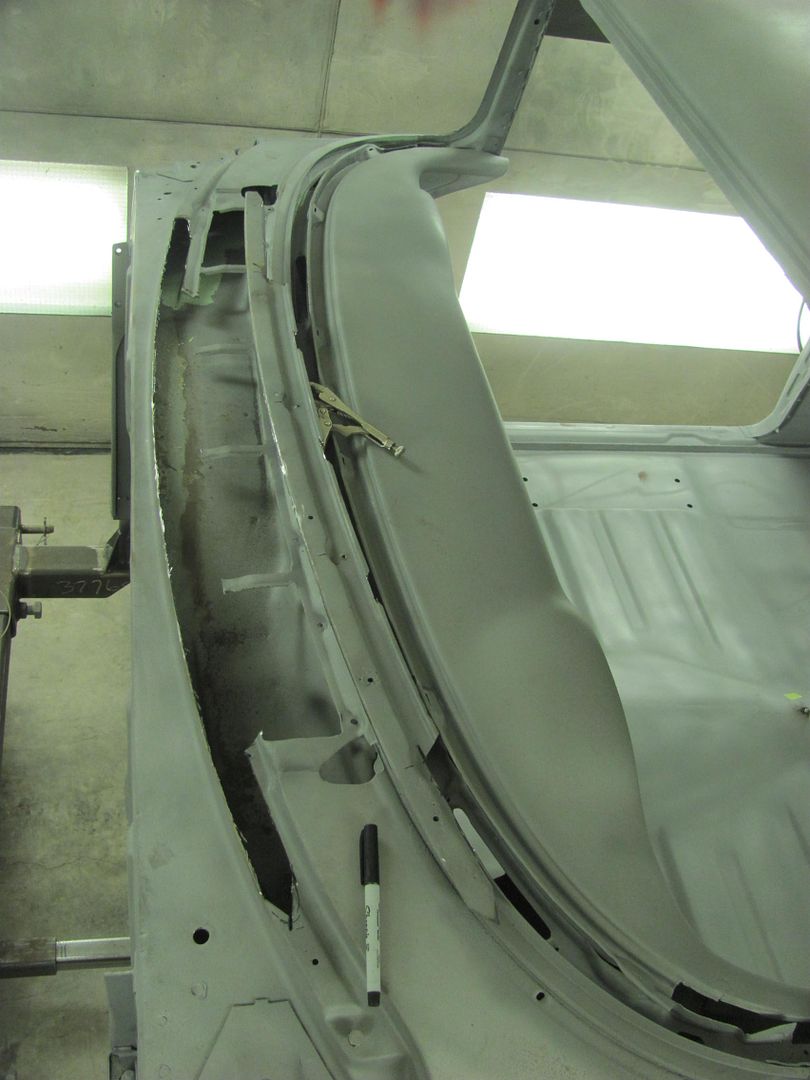 Tacked in place.. 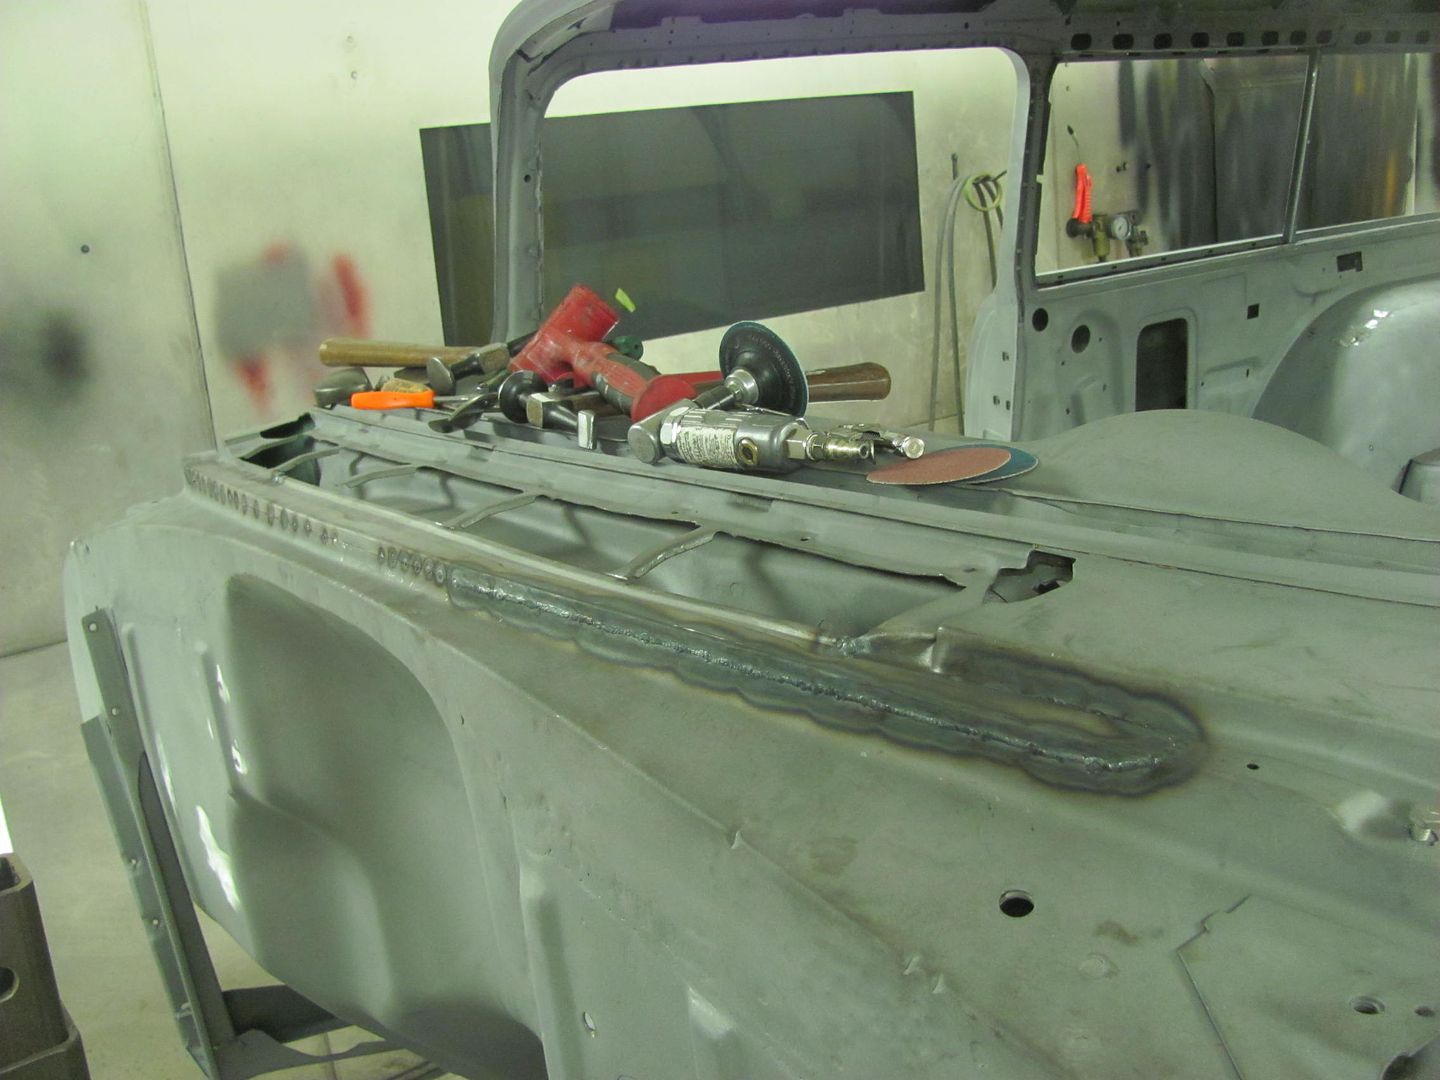 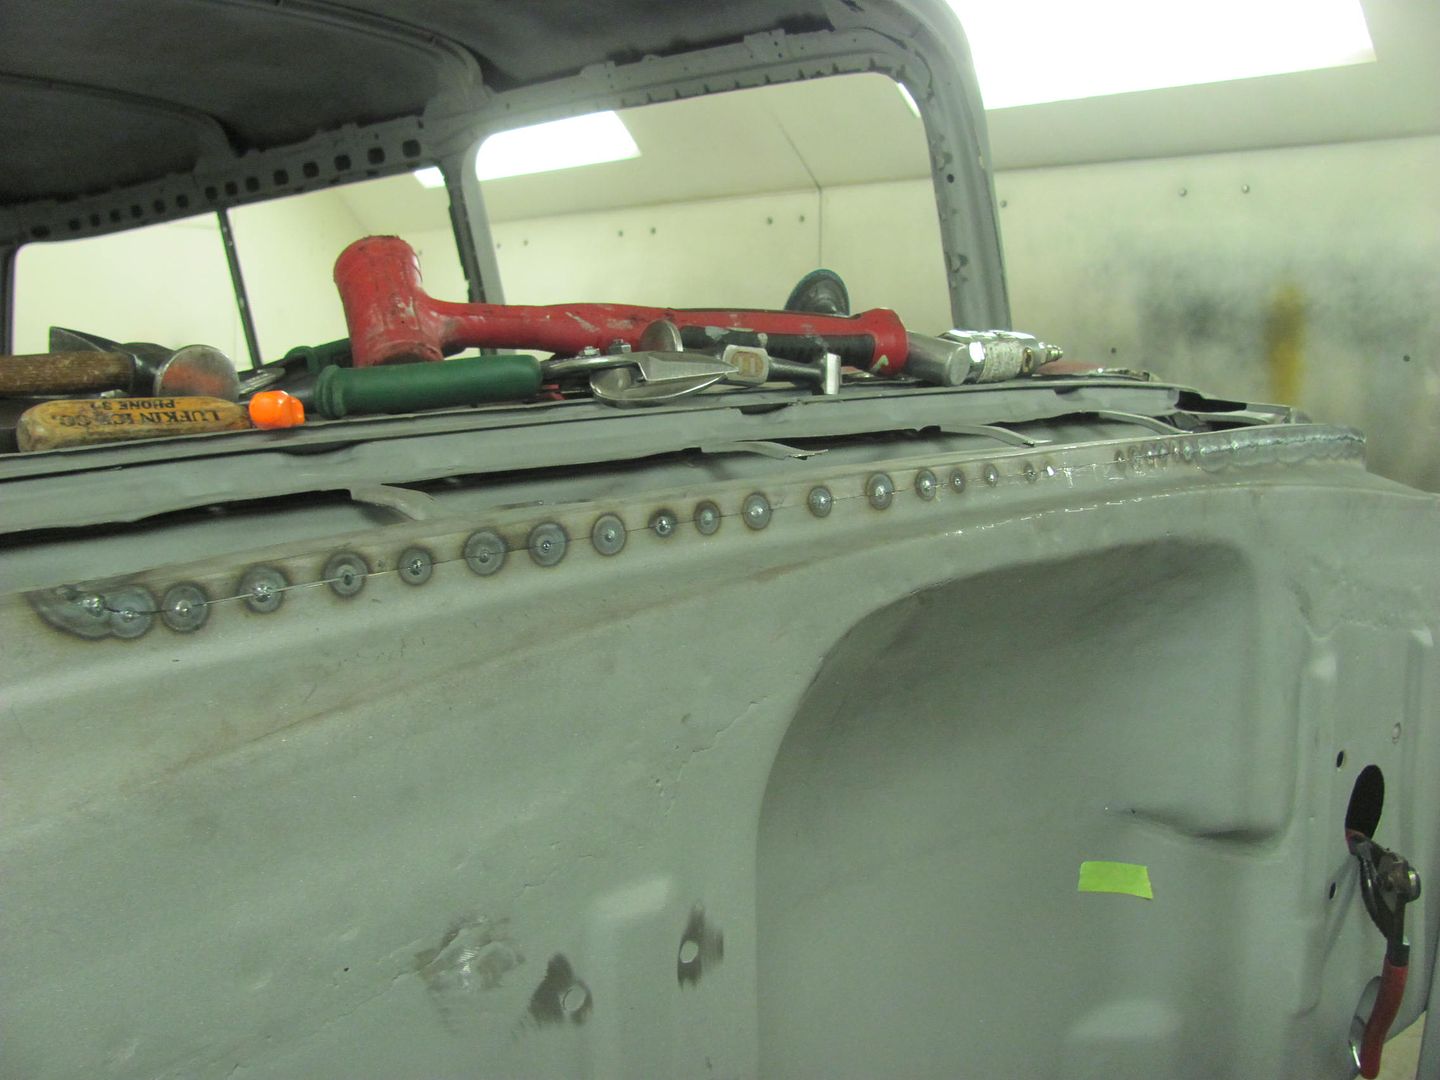 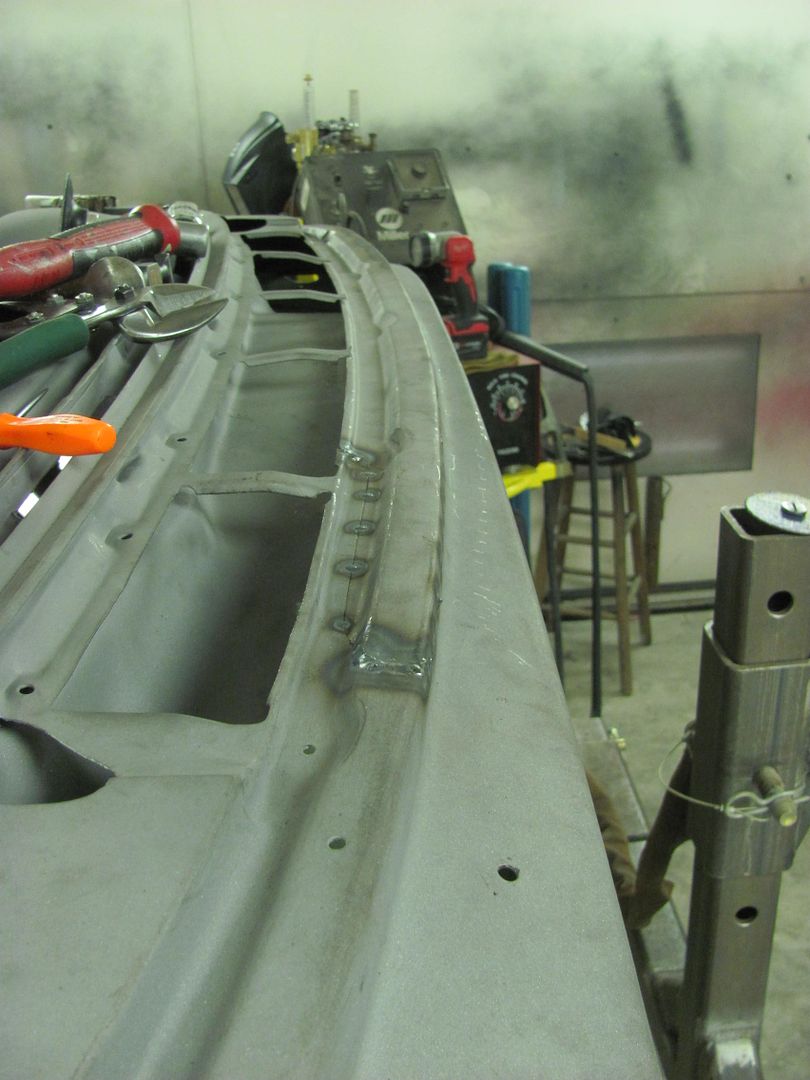
__________________
Robert |
|
|
|
|
06-17-2016, 02:37 PM
|
#24 |
|
Registered User
Join Date: Feb 2007
Location: Marana, Arizona
Posts: 3,416
|
Re: 55 Wagon Progress
That is cool, gives me hope for shaping basic patch panels.

__________________
"I feel the need for speed!"... as soon as I am done with my nap. |
|
|
|
|
06-18-2016, 11:46 PM
|
#25 |
|
Registered User
Join Date: Jan 2013
Location: Leonardtown, MD
Posts: 1,637
|
Re: 55 Wagon Progress
OK, it's been a while since I've TIG welded, and got a little too much heat near the edge. Blew a nice hole, so used one of the practice pieces to cut out a patch..
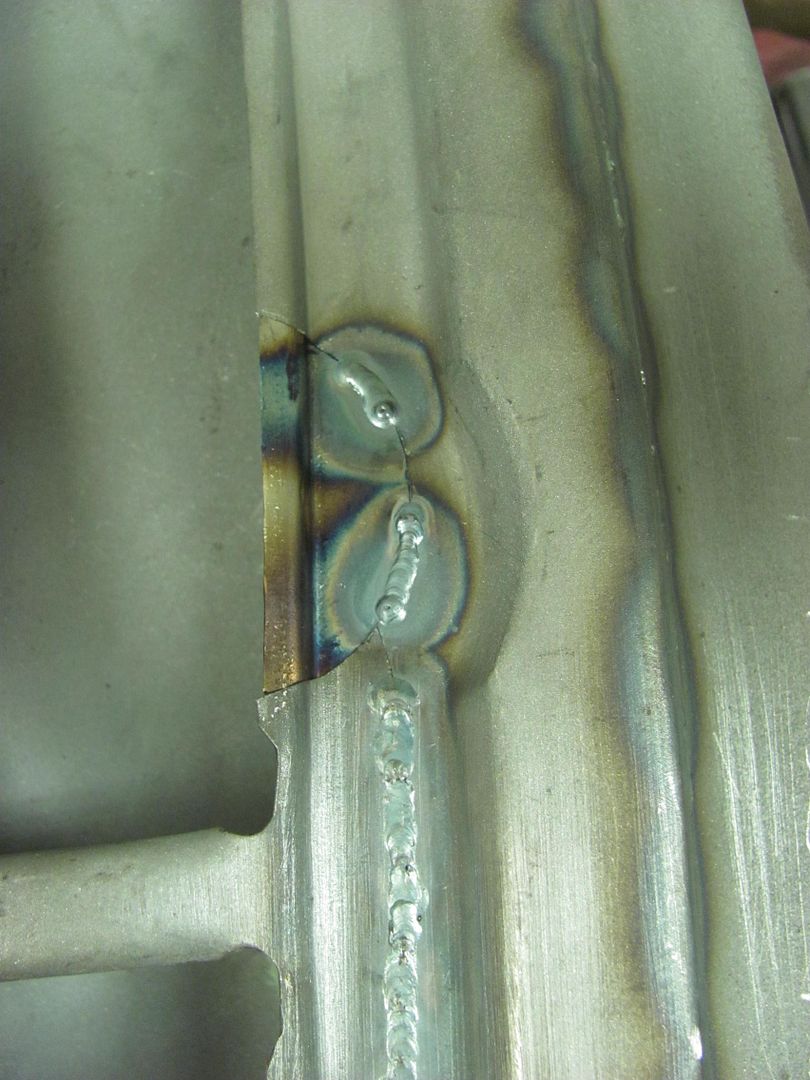   .....and I got a little heavy footed on the other end as well... 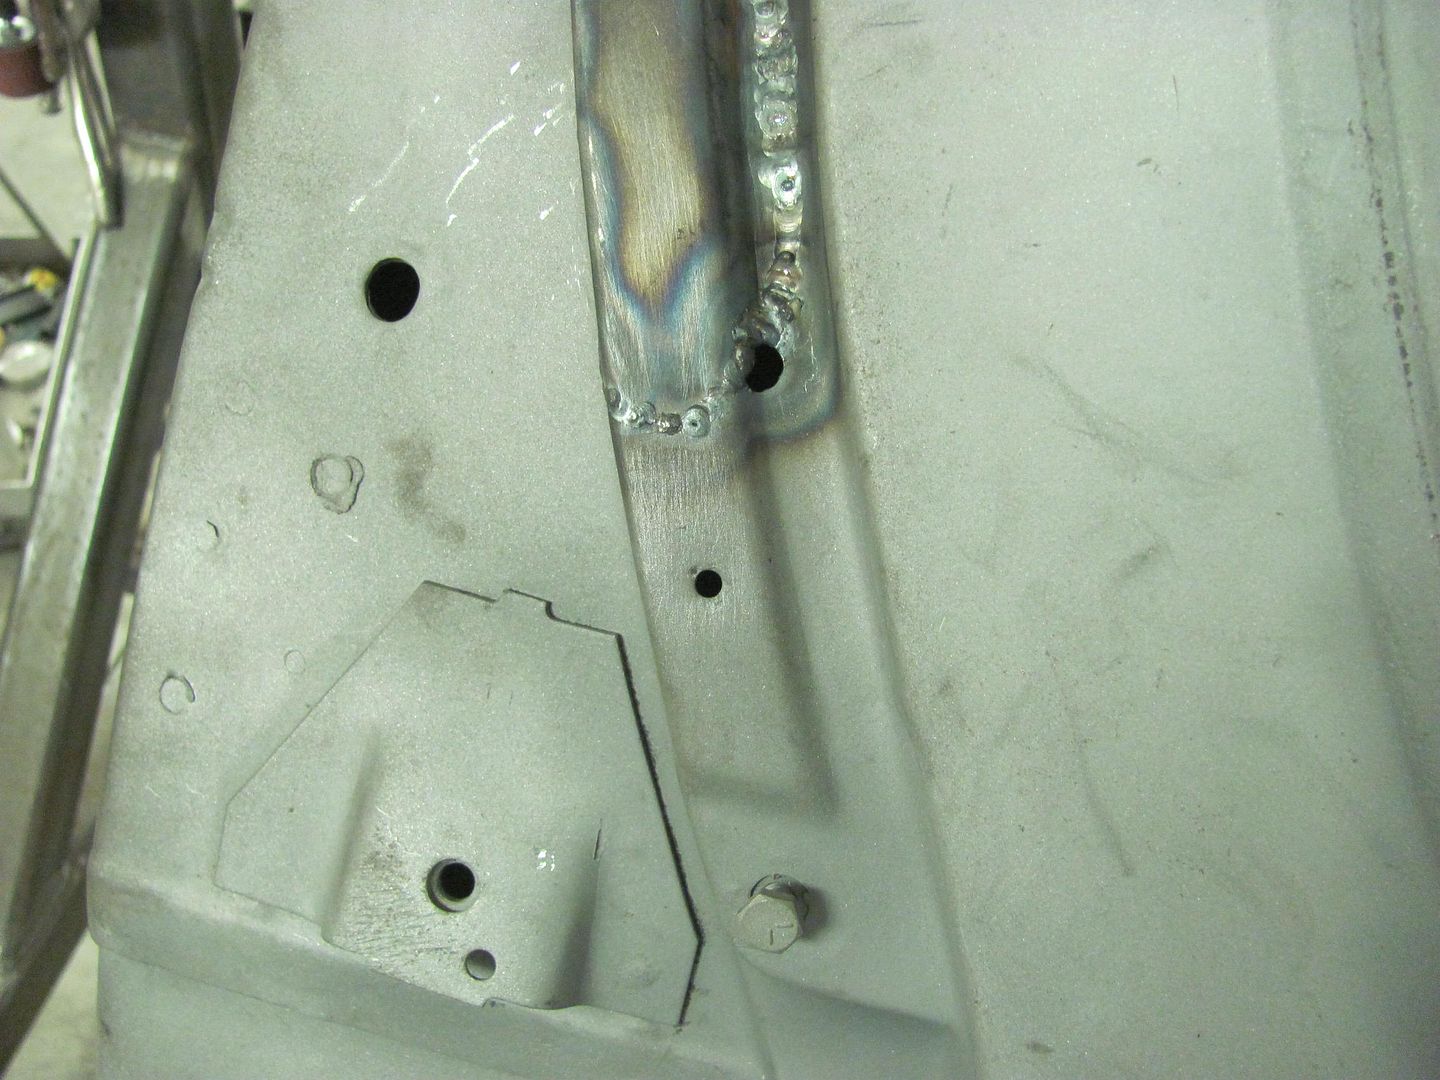 Trimming for the patch's patch. 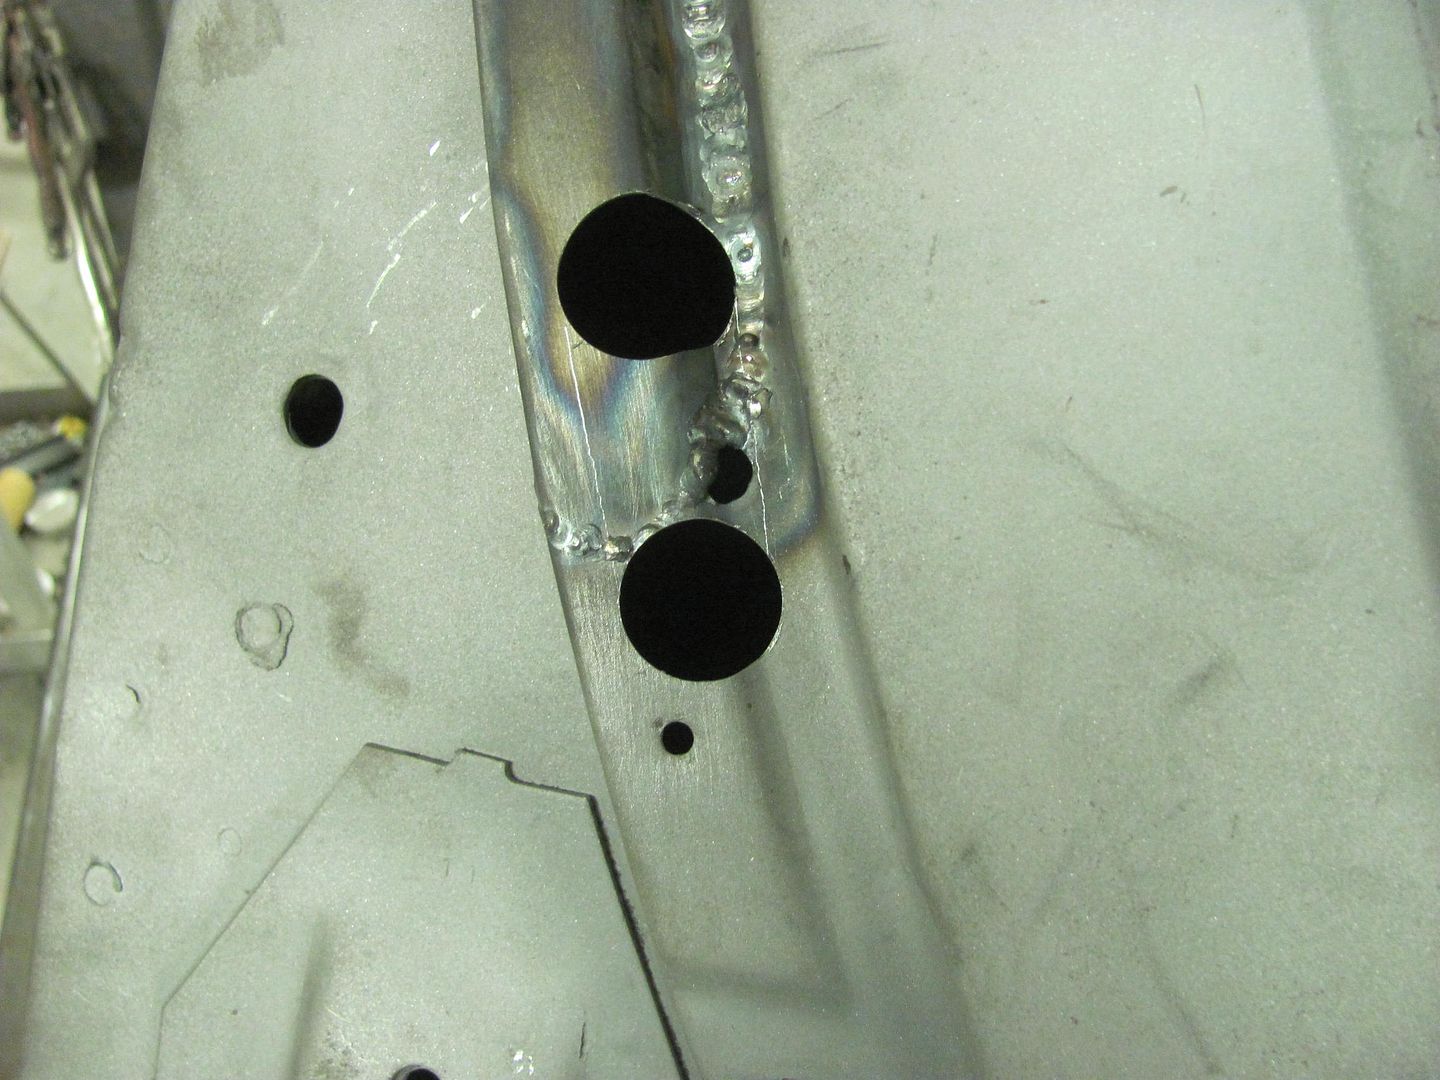 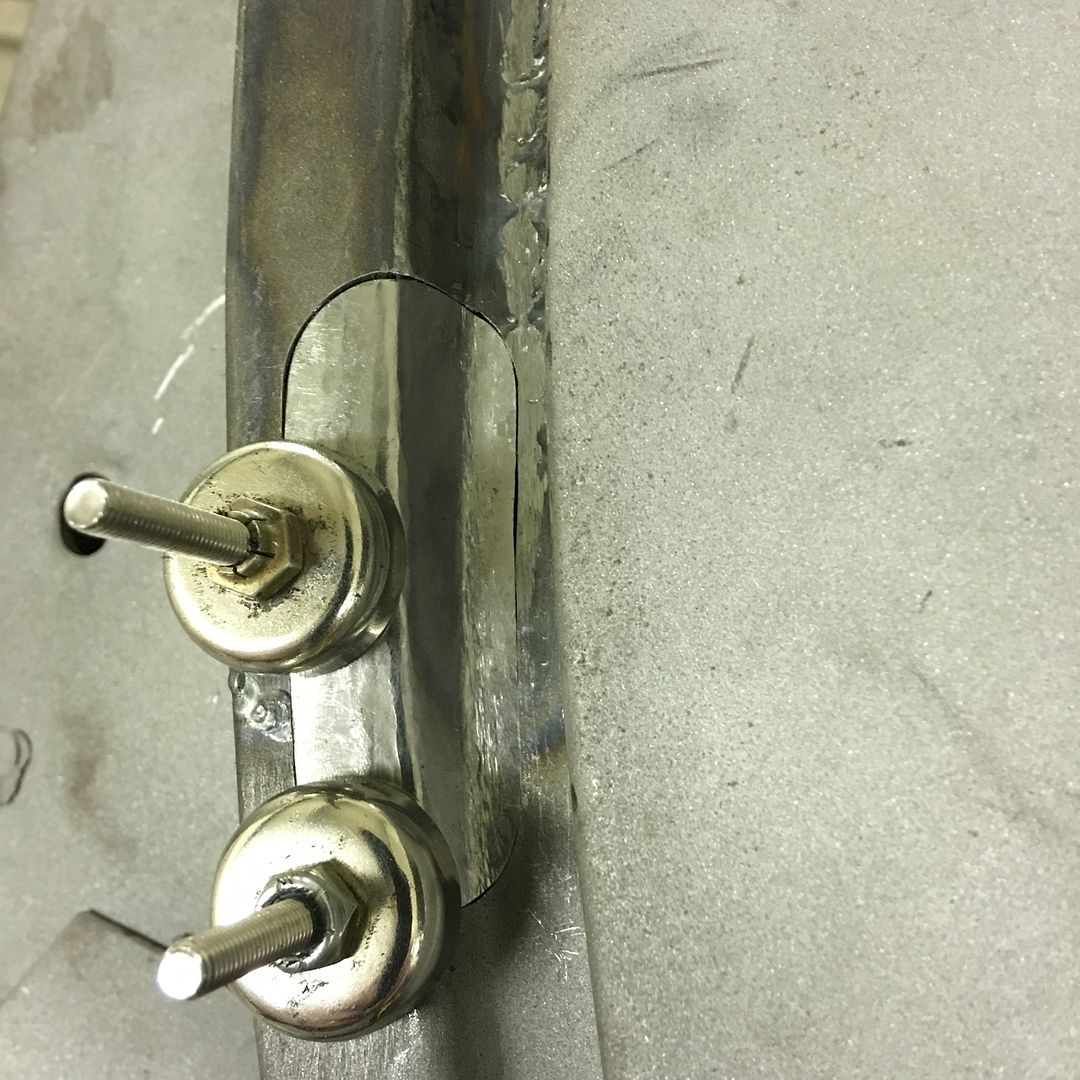 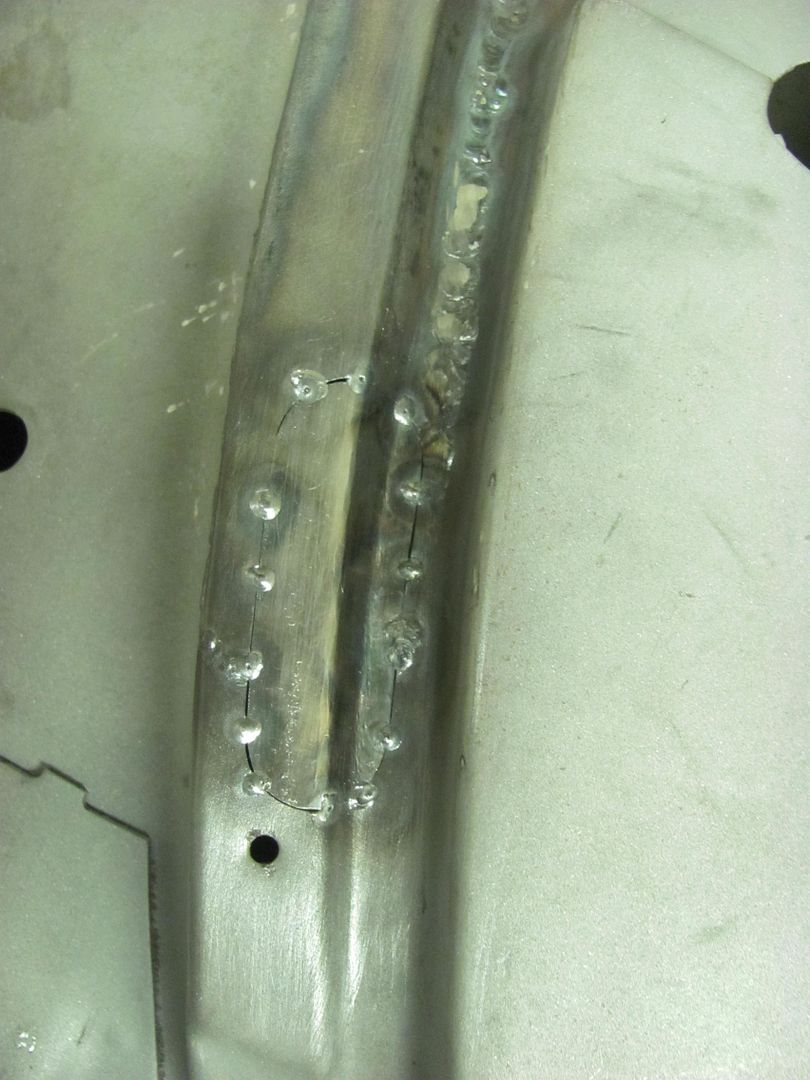 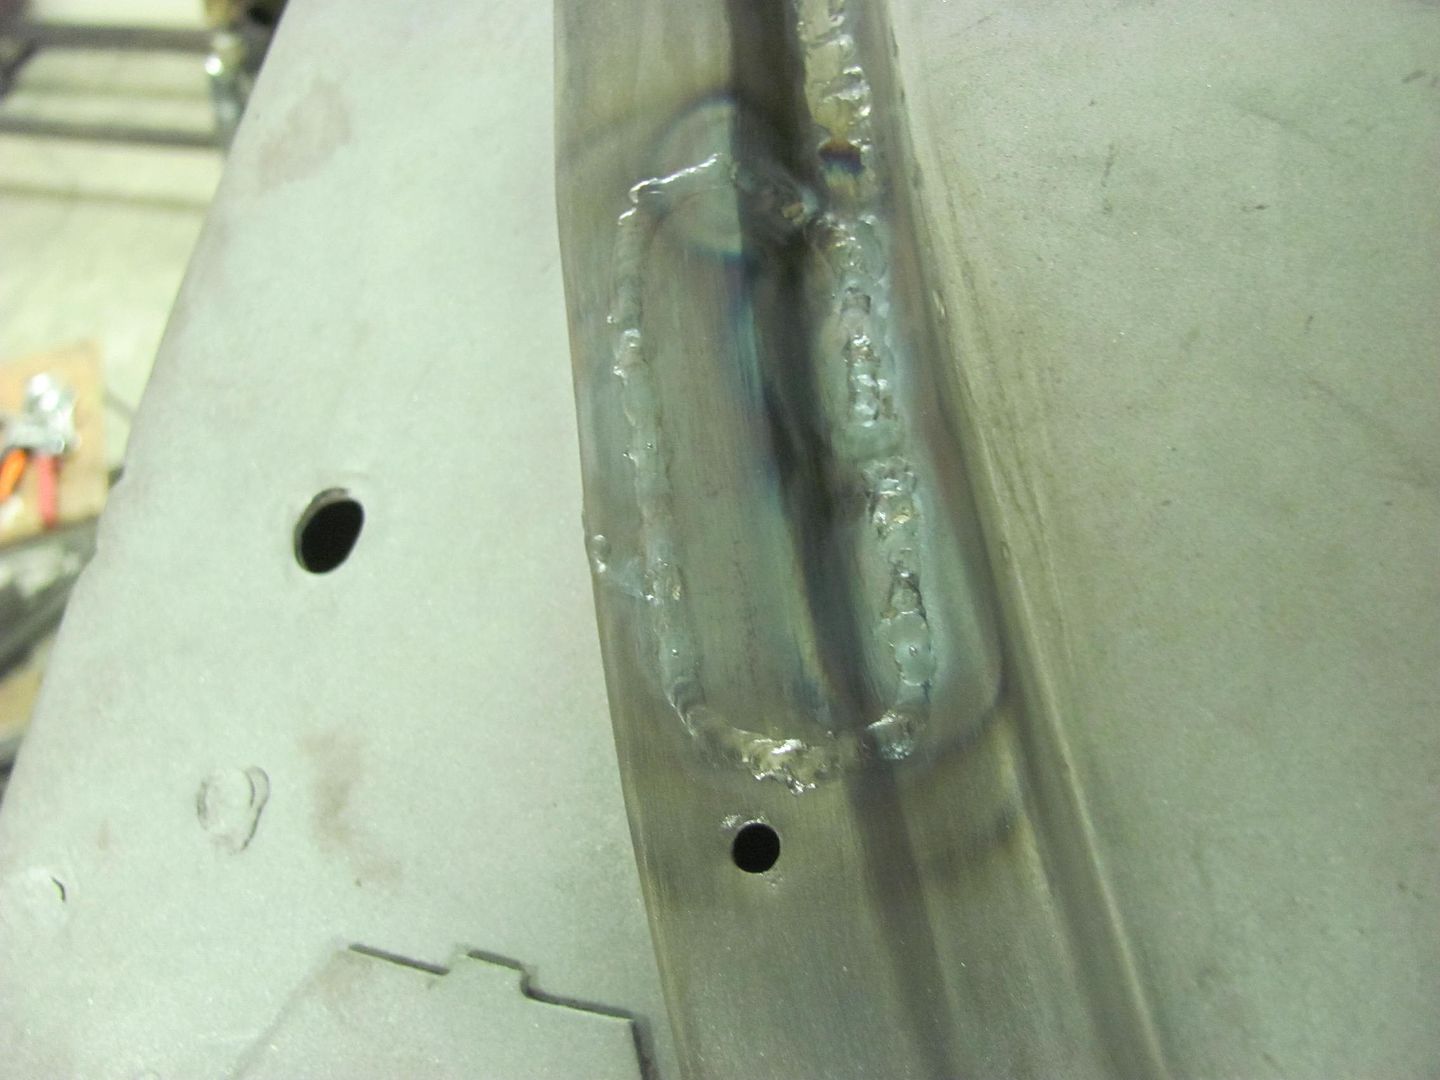 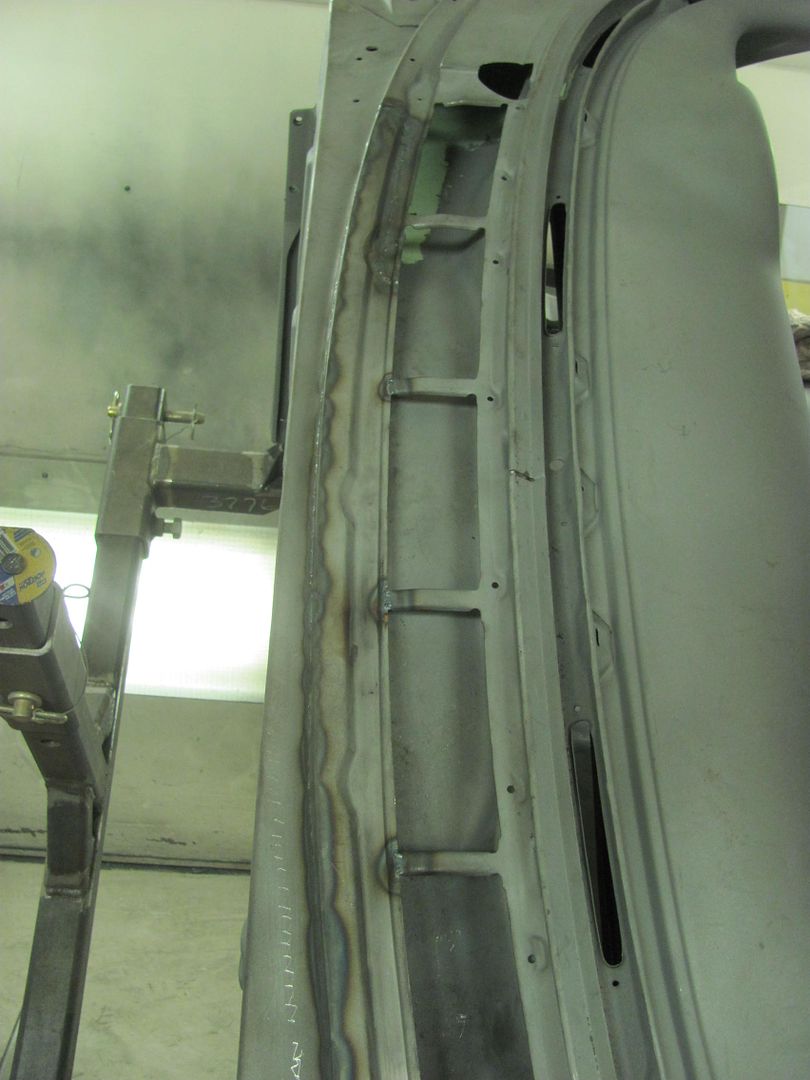 The final pieces to weld... 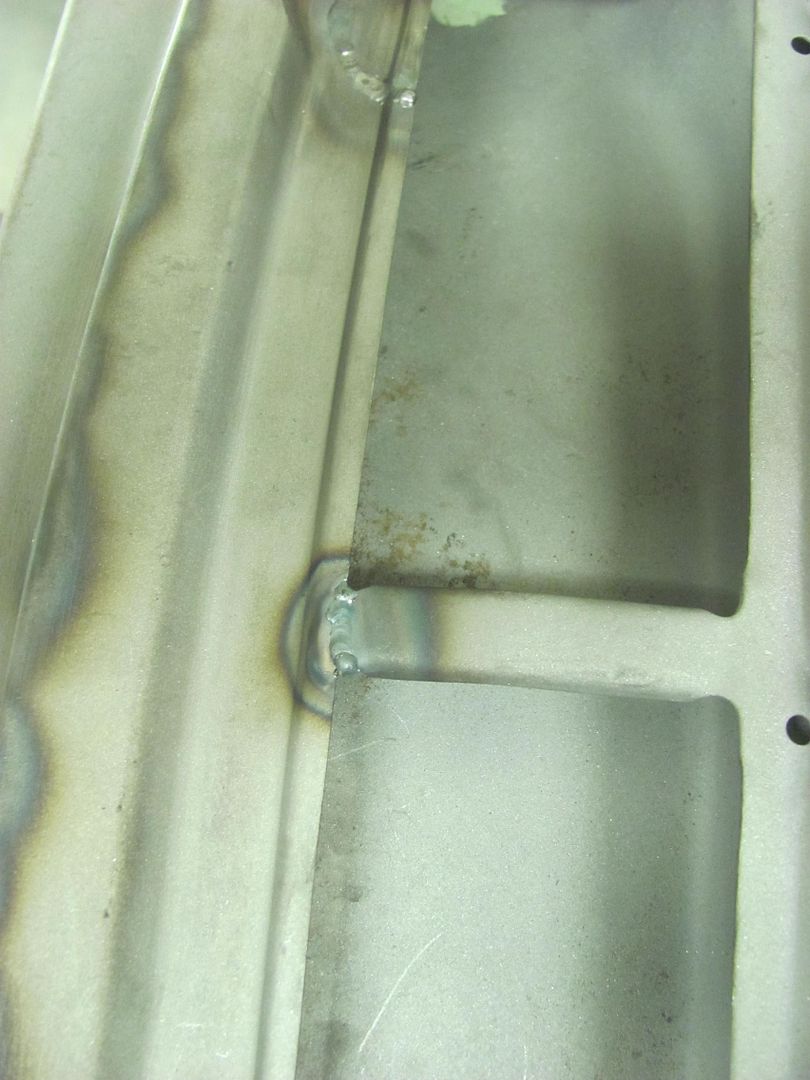 Weld dressed and factory relief added... 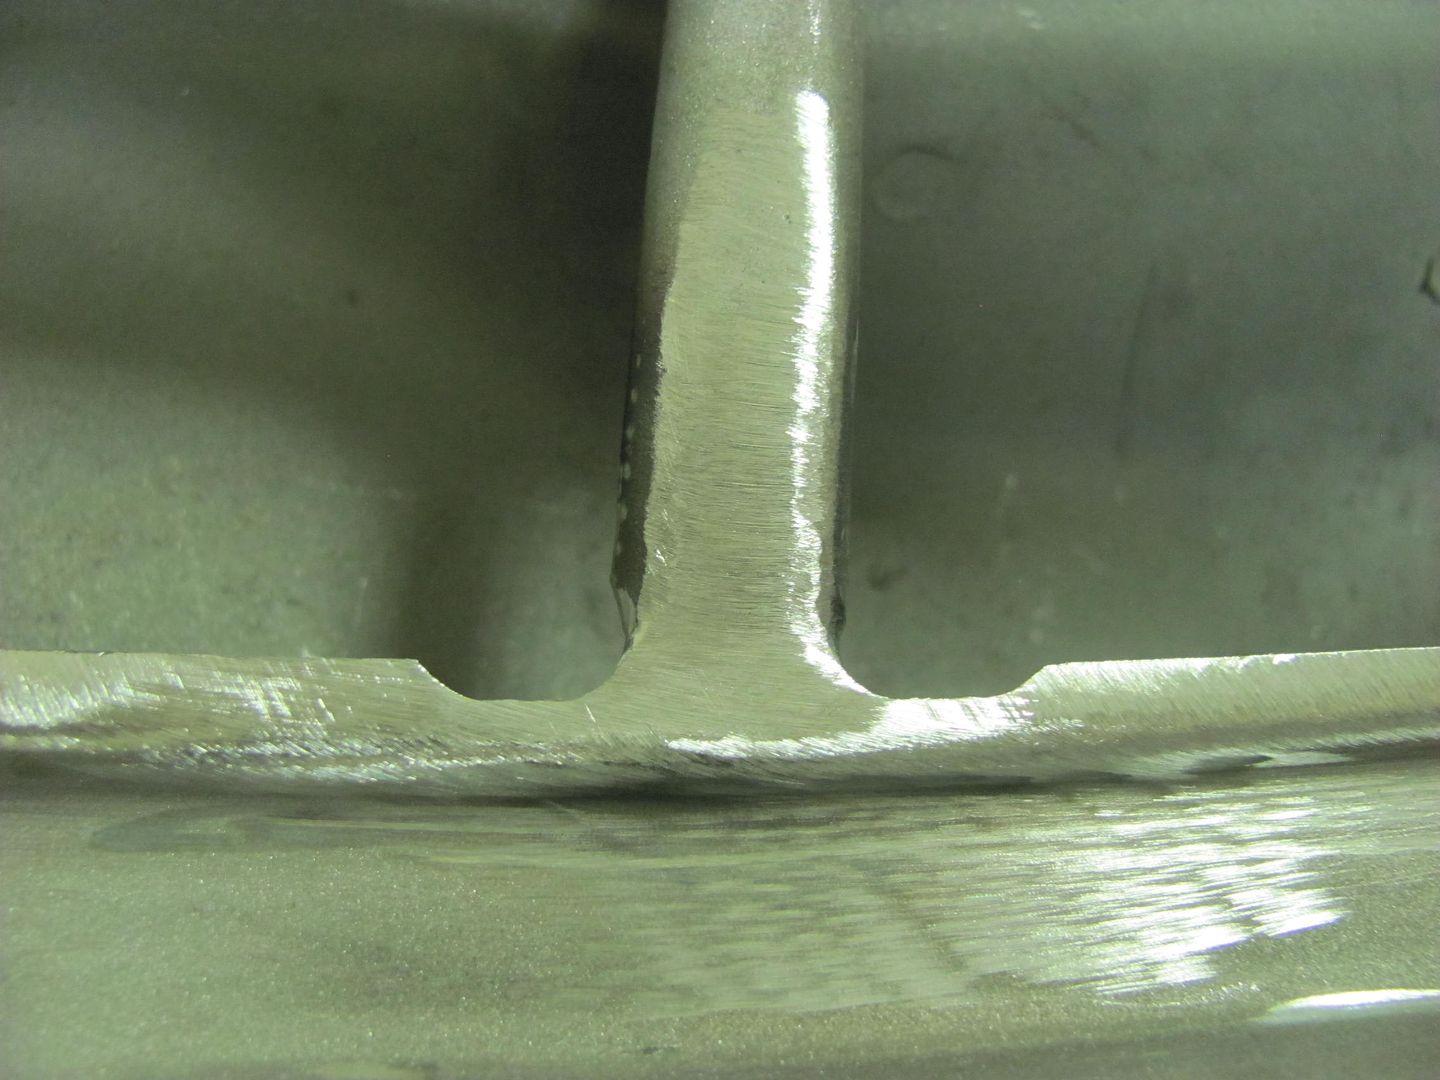 A few more welds to dress and this will be done... 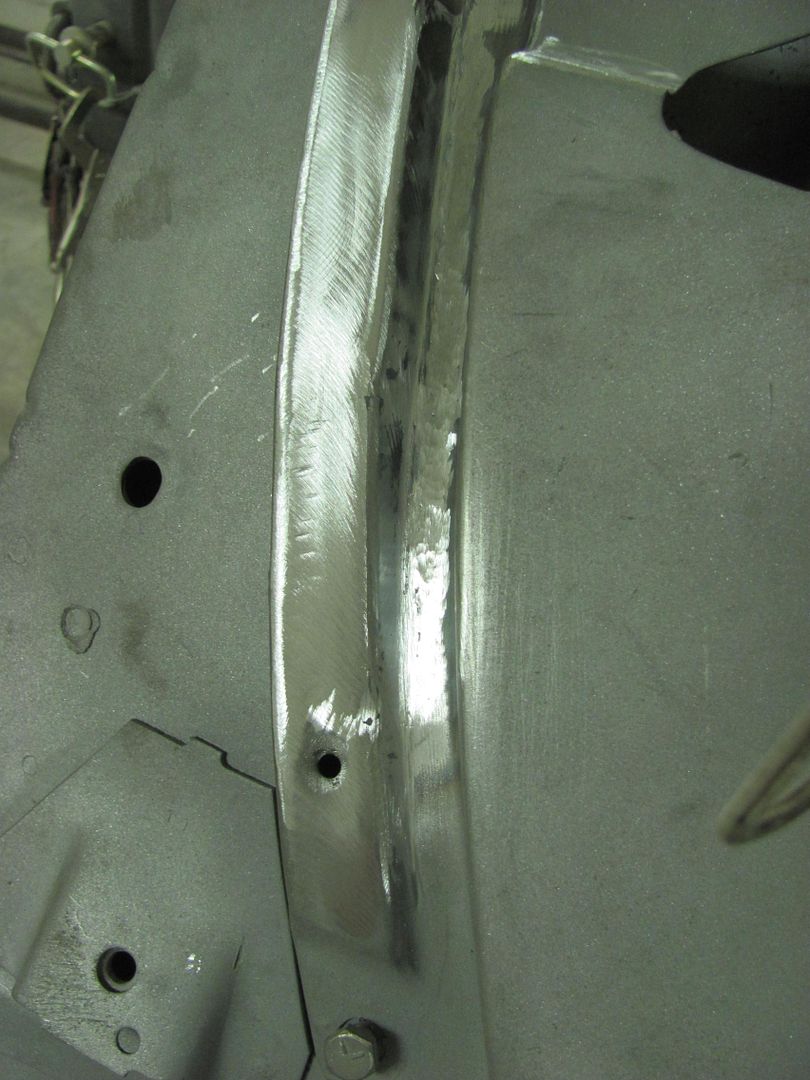 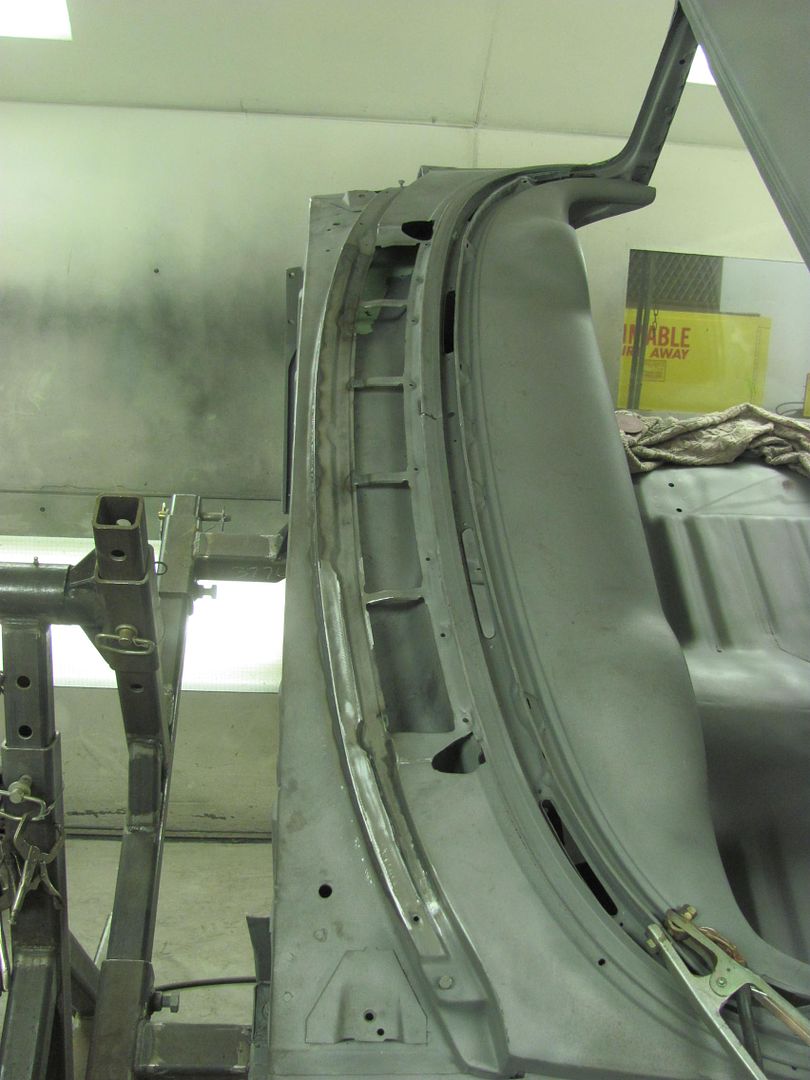 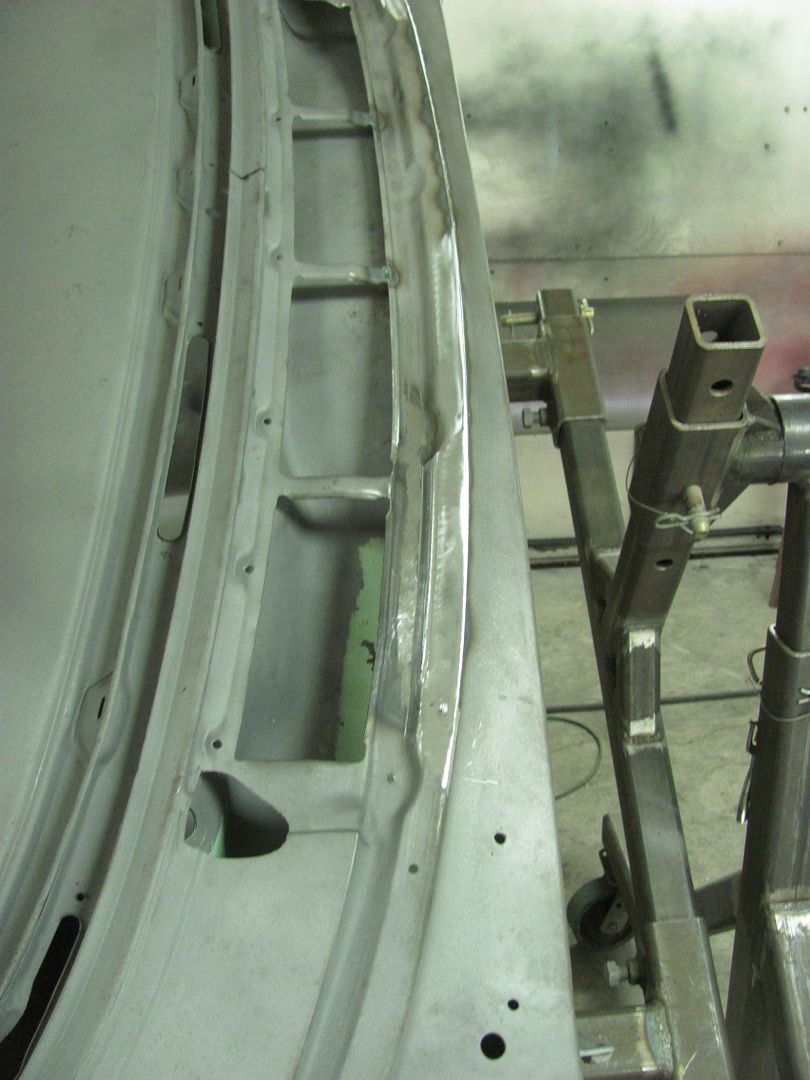
__________________
Robert |
|
|
|
 |
| Bookmarks |
|
|


 Hybrid Mode
