
|
 08-12-2011, 12:57 AM
|
#701 |
|
VA72C10
 Join Date: Mar 2008
Location: Midlothian, VA
Posts: 25,267
|
Re: Over 25 Years Later, Finally My 71 C-10 Truck Build
Keep at it....getting closer!!!
__________________
Looking for a 67-72 swb or blazer project in or around VA. 
|

|

|
|
08-12-2011, 09:31 AM
|
#702 | |
|
GEARHEAD
Join Date: Aug 2003
Location: MN
Posts: 6,126
|
Re: Over 25 Years Later, Finally My 71 C-10 Truck Build
Quote:
 There is no known treatment at this time, so please send donations to the HGs_Notes OCD Therapy Institute and Research Center (my garage). There is no known treatment at this time, so please send donations to the HGs_Notes OCD Therapy Institute and Research Center (my garage).
__________________
If no one knows what you're doing, they can't tell you you're doing it wrong HG's Dream Car Build - Shelby Cobra Kit Build your own adjustable track bar 71  Long Fleet C/10 Long Fleet C/10 72  Jimmy 4x4 (Junkyard Jimmy) Jimmy 4x4 (Junkyard Jimmy)HG's Plow Truck '78  K35 Dually K35 DuallyBigass Farm Truck HG's thread of miscellaneous stuff |
|
|
|
|
|
08-12-2011, 02:53 PM
|
#703 |
|
6>8 Plugless........
 Join Date: Sep 2007
Location: Prairie City, Ia
Posts: 17,142
|
Re: Over 25 Years Later, Finally My 71 C-10 Truck Build
I'd love to help ya, but I can't keep my own charitable donations a float.
By the way I'll be in Owatonna tomorrow. Is that anywhere near you?
__________________
Ryan 1972 Chevy Longhorn K30 Cheyenne Super, 359 Inline 6 cylinder, Auto Trans, Tilt, Diesel Tach/Vach, Buckets, Rare Rear 4-link and air ride option Build Thread 1972 GMC Sierra Grande Longhorn 4x4 1972 Chevy Cheyenne Super K20 Long Step side tilt, tach, tow hooks, AC, 350 4 speed 1972 C10 Suburban Custom Deluxe 1969 Chevy milk truck 1971 Camaro RS 5.3 BTR STG3 Cam Super T10 1940 Ford 354 Hemi 46RH Ford 9" on air ride huge project Tired of spark plugs? Check this out. |
|
|
|
|
08-13-2011, 12:59 AM
|
#704 | |
|
GEARHEAD
Join Date: Aug 2003
Location: MN
Posts: 6,126
|
Re: Over 25 Years Later, Finally My 71 C-10 Truck Build
Quote:
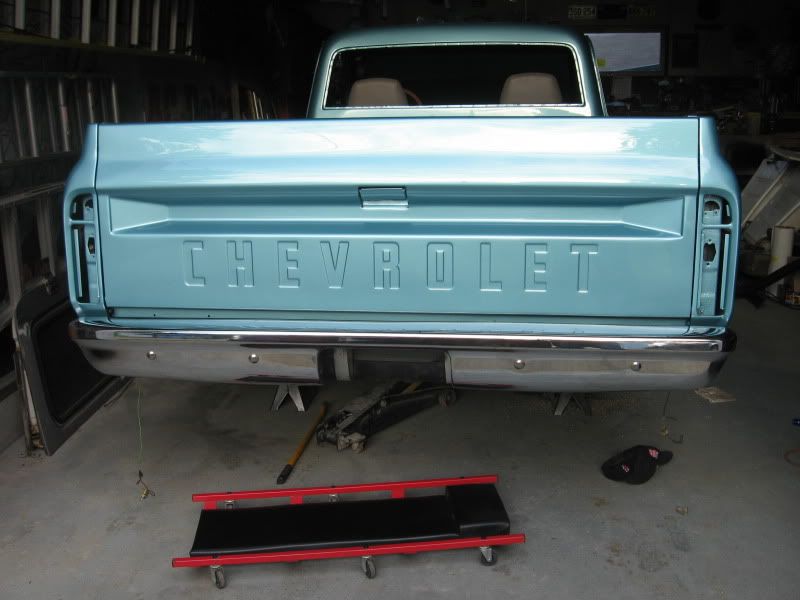
I'm about 80 miles due west of Owatonna on hwy 14. Really struggling to tune this thing up. I double checked everything on the timing marks, pulled a spark plug and turned the engine near tdc and I could feel the piston move at just the right spot, then pulled the valve cover and checked the valve motion. That was all good. Borrowed a vac pump and checked the vac advance on the dizzy, test sat. When I had the dizzy cap off I figured I would install the new adjustable vac advance and springs so I pulled the rotor off and noticed the end of the electrode part was bent badly. No idea how it would have happened, but I put a new one on. Then while moving the plug wires around a couple of the ends came off the cap, so I swapped in another cap also. I put it all back together and fired it up. Eventually I got it to idle long enough to set the initial timing, but it still backfires and pops waaaayyyy too much and doesn't have consistant idle. I think tomorrow I'll hook up the vacuum gage and see what that says. It only has a couple vac lines and they are all pretty much new, but maybe I have a valve or 2 turned too tight. After that continued frustration I thought I better get something done so I could feel better about my progress. I looked my tail light harness over and decided it wasn't worth the work to fix it. The one in the Jimmy has a few splices, but why pull that out. I have my 2wd blazer project sitting in a friends weeds, so I drove out to check that one. The lights all looked like hell, the insides even had black overspray on them, but the harness was great. It actually looks like a more recent replacement judging by the tape tage that were still on it. So I pulled that and put it on the truck. Decided to use some small carriage bolts (actually left overs from the bed) to hold the splash pans on. I had a UPS box on the step this morning with bumper bolts, so I was able to get that on. Also found my glove box button/latch in my tool bag today, which was nice.So other than exhaust pipes, light assemblies and the license plate holder and tightening a few bolts, the back half is almost done. The UPS box also had new center caps and lug nuts. I have a lot of sanding and polishing to do yet before I put them on. Maybe I'll put my new steering wheel on tomorrow too. I really feel like once it's tuned and running good that I'll have finally turned the corner and will be in the home stretch. Right now that's really bothering me. 
__________________
If no one knows what you're doing, they can't tell you you're doing it wrong HG's Dream Car Build - Shelby Cobra Kit Build your own adjustable track bar 71 Long Fleet C/10 72 Jimmy 4x4 (Junkyard Jimmy)HG's Plow Truck '78 K35 DuallyBigass Farm Truck HG's thread of miscellaneous stuff |
|
|
|
|
|
08-13-2011, 01:28 AM
|
#705 | |
|
VA72C10
Join Date: Mar 2008
Location: Midlothian, VA
Posts: 25,267
|
Re: Over 25 Years Later, Finally My 71 C-10 Truck Build
Quote:
 You'll get it figured out....We have faith in you.... 
__________________
Looking for a 67-72 swb or blazer project in or around VA.
|
|
|
|
|
|
08-13-2011, 08:58 AM
|
#706 | |
|
GEARHEAD
Join Date: Aug 2003
Location: MN
Posts: 6,126
|
Re: Over 25 Years Later, Finally My 71 C-10 Truck Build
Quote:
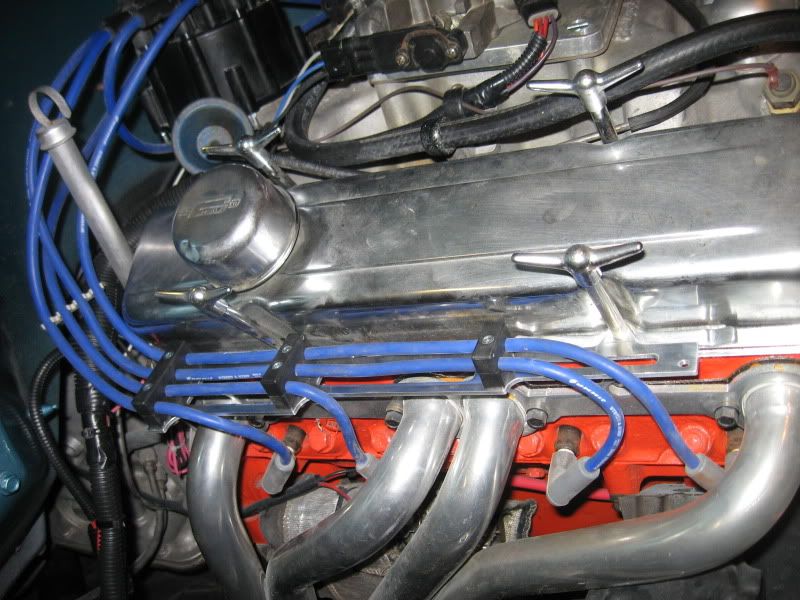
 New valve covers 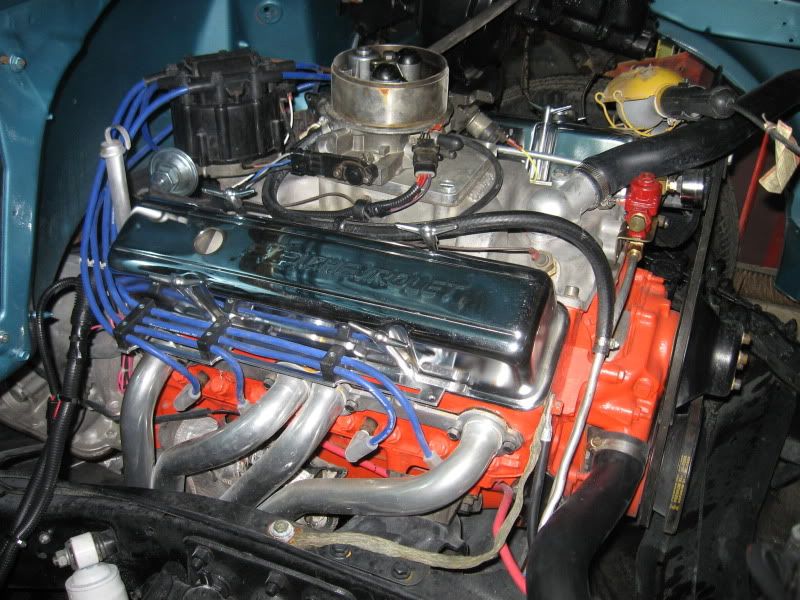 This should look better 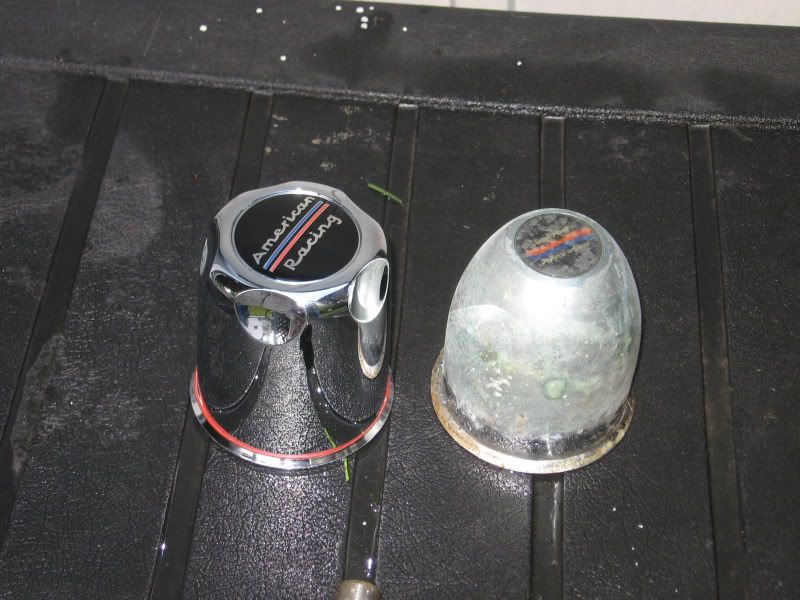 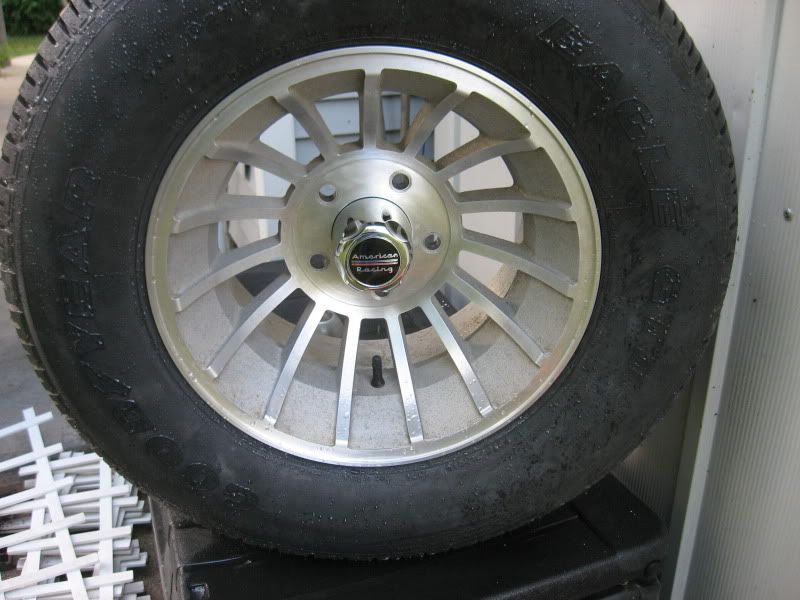
__________________
If no one knows what you're doing, they can't tell you you're doing it wrong HG's Dream Car Build - Shelby Cobra Kit Build your own adjustable track bar 71 Long Fleet C/10 72 Jimmy 4x4 (Junkyard Jimmy)HG's Plow Truck '78 K35 DuallyBigass Farm Truck HG's thread of miscellaneous stuff |
|
|
|
|
|
08-13-2011, 09:20 AM
|
#707 |
|
67cheby
 Join Date: Sep 2008
Location: siloam springs ar 72761
Posts: 17,890
|
Re: Over 25 Years Later, Finally My 71 C-10 Truck Build
NICE..looks great
|
|
|
|
|
08-13-2011, 09:31 AM
|
#708 |
|
VA72C10
Join Date: Mar 2008
Location: Midlothian, VA
Posts: 25,267
|
Re: Over 25 Years Later, Finally My 71 C-10 Truck Build
Looking good!!! Thanks for the pix fix

__________________
Looking for a 67-72 swb or blazer project in or around VA.
|
|
|
|
|
08-14-2011, 12:09 AM
|
#709 |
|
GEARHEAD
Join Date: Aug 2003
Location: MN
Posts: 6,126
|
Re: Over 25 Years Later, Finally My 71 C-10 Truck Build
Today I got the new steering wheel on, which should have been a piece of cake, but wasn't. I had the grant install kit, but the instructions are a generic one not specific to anything. The parts didn't really fit my tilt column and a few mods needed to be done. First, the horn kit was wrong and instructions no help at all. I eventually figured it out and used a grinder to reduce the size of the little wire that goes into the sprung horn button thing under the wheel. Then the horn button itself was just not going to work right with the parts from the kit. I had to use washers as spacers for the screws that hold the fiber disk the horn button attaches to so it would allow the horn button to both be on the wheel and actually move in and out. I also had to cut the horn button spring down because it had too much pressure for the button to stay on the wheel. Probably spent 3 hours on the steering wheel. The grant install kit was a joke.
Then I worked on the rear wheels. After a lot of reading I decided to try acid cleaning the wheels. I got some muiatic acid and dilouted it about 8:1, but that did almost nothing. Went to a 50/50 mix which worked well. Maybe too well. There are some real small pits in the metal that need to be sanded out. The cast areas really cleaned up though, and the pitting isn't any worse than the oxidation that was already there. So I went to a 4:1 ratio next and that worked pretty good. I used simple green to do the initial cleaning. Followed up with a stiff plastic floor scrub brush. Then used a brass wire brush on the cast areas, and sprayed some acid on. Let it work for a few minutes and hose it off. Next I'll sand the machined areas smooth and then polish that with mothers mini ball and polish compound. Should bring the wheels back to a near new finish, maybe even better. It's a lot of sanding though. I might need to see about using some tool to help out. Pics... 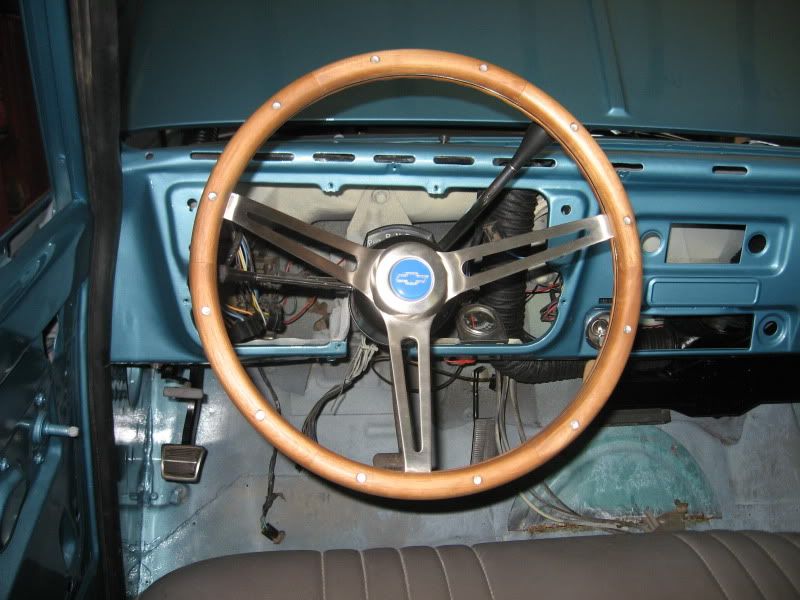 Wheel just after washing 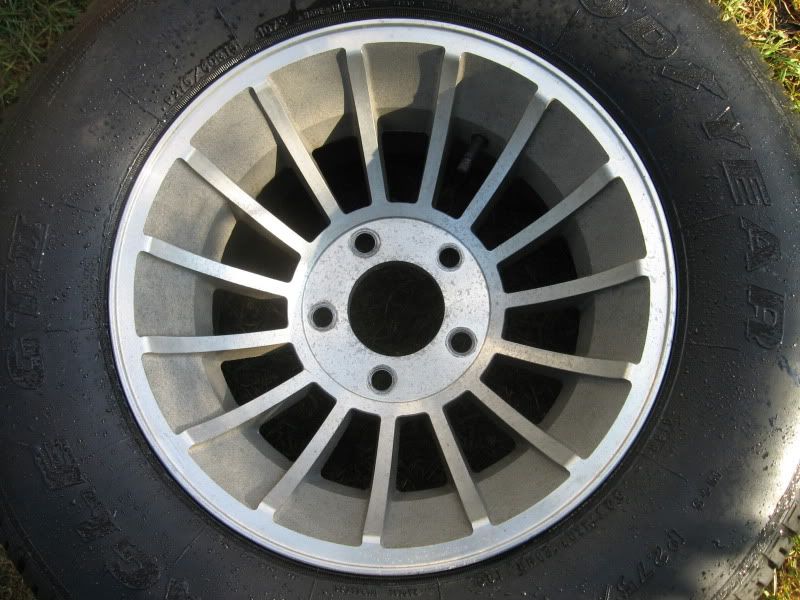 The one I've been experimenting on, it gets better all the time... 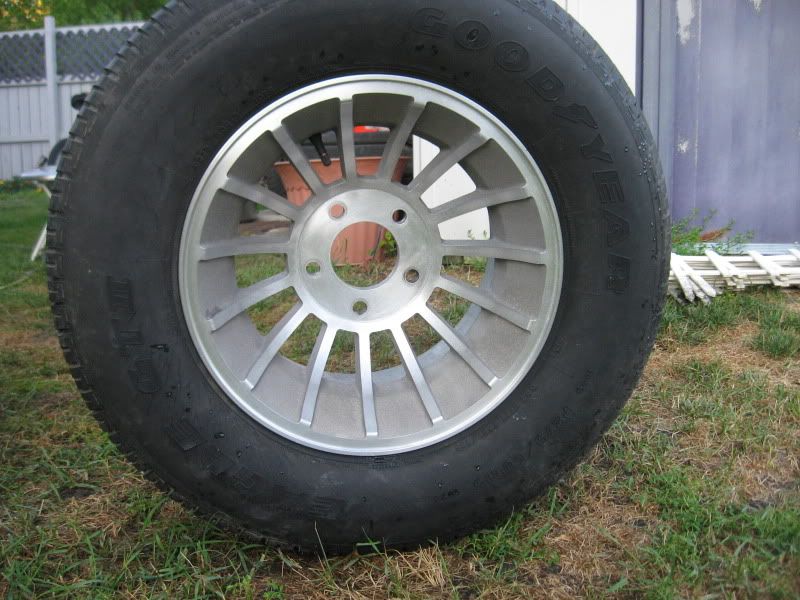 The other rear wheel after acid cleaning. 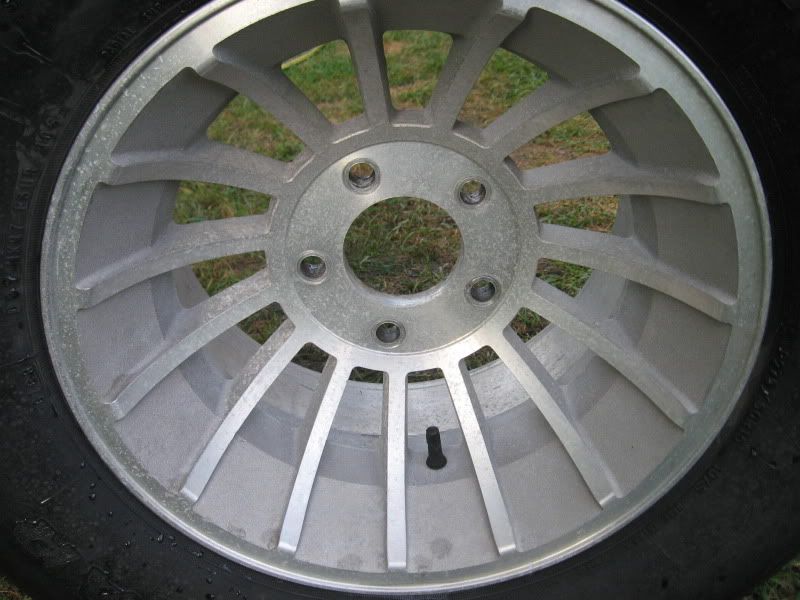 You can see the pitting in the finish of the machined areas which is just where the oxidation was. That will all sand out and get polished. My old school wheels should be good for a while anyway.
__________________
If no one knows what you're doing, they can't tell you you're doing it wrong HG's Dream Car Build - Shelby Cobra Kit Build your own adjustable track bar 71 Long Fleet C/10 72 Jimmy 4x4 (Junkyard Jimmy)HG's Plow Truck '78 K35 DuallyBigass Farm Truck HG's thread of miscellaneous stuff |
|
|
|
|
08-14-2011, 12:22 AM
|
#710 |
|
Still Learning
Join Date: Jul 2009
Location: Central Oklahoma
Posts: 10,108
|
Re: Over 25 Years Later, Finally My 71 C-10 Truck Build
Nice work on the wheels. You are making a lot of progress on this project. You'll be driving this pup in no time

|
|
|
|
|
08-14-2011, 02:57 AM
|
#711 |
|
VA72C10
Join Date: Mar 2008
Location: Midlothian, VA
Posts: 25,267
|
Re: Over 25 Years Later, Finally My 71 C-10 Truck Build
Steering wheel looks good and wheels looking better and better. What about taping the polished parts and spraying the darker rally color (name escapes me now) or possibly body color? Might be a way to make the wheels really pop w/out much $$$ or new wheels
__________________
Looking for a 67-72 swb or blazer project in or around VA.
|
|
|
|
|
08-14-2011, 09:18 AM
|
#712 | ||
|
GEARHEAD
Join Date: Aug 2003
Location: MN
Posts: 6,126
|
Re: Over 25 Years Later, Finally My 71 C-10 Truck Build
Quote:
Quote:
How many people can say they have 25 year old aluminum wheels on their ride? All those nice shiny new wheels out there will see their share of road grime, brake dust, salt, hard water and aggressive soaps at car washes, peeling clear coat, etc. and will need serious recovery efforts some time down the road. I'm just there now and hopefully my efforts will help someone else out like some of the threads on this board and elsewhere have helped me. http://67-72chevytrucks.com/vboard/s....php?p=3373377 http://www.englishcustompolishing.co...aluminum1.html
__________________
If no one knows what you're doing, they can't tell you you're doing it wrong HG's Dream Car Build - Shelby Cobra Kit Build your own adjustable track bar 71 Long Fleet C/10 72 Jimmy 4x4 (Junkyard Jimmy)HG's Plow Truck '78 K35 DuallyBigass Farm Truck HG's thread of miscellaneous stuff |
||
|
|
|
|
08-14-2011, 08:57 PM
|
#713 |
|
GEARHEAD
Join Date: Aug 2003
Location: MN
Posts: 6,126
|
Re: Over 25 Years Later, Finally My 71 C-10 Truck Build
I was nervous about sanding on my wheels and not convinced I'd be happy with the results. I'm happy to say it'll turn out alright or maybe even better than that. Started with another cleaning, then started with some 320 grit paper, dry. I wanted to find some kind of detail sander that would speed things along, and even tried making my own. It wasn't a complete failure, but didn't work as well as I had hoped.
Anyway, this is after the 320... 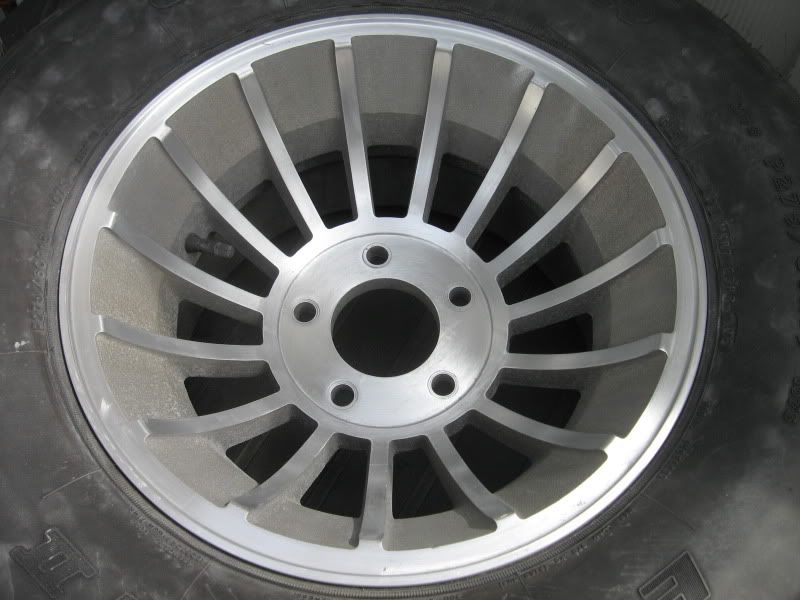 Then I wet sanded with 400... 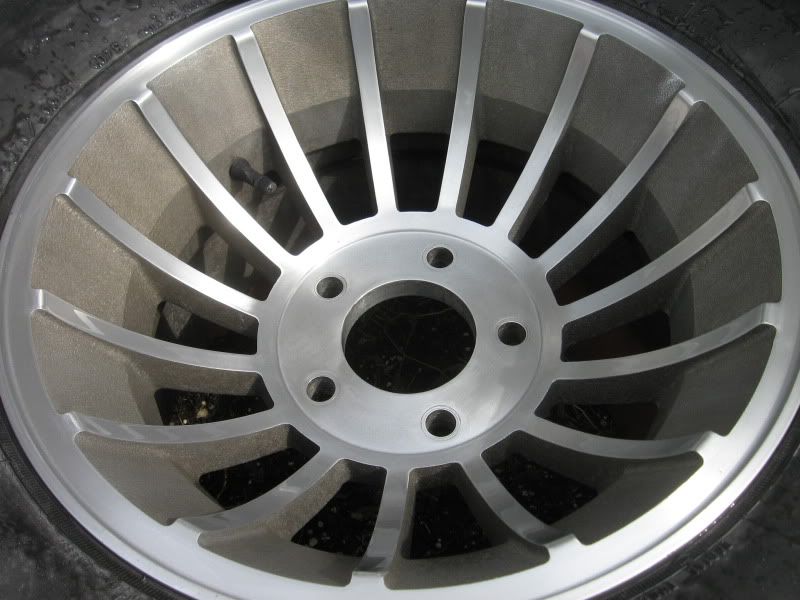 Then again with 600, followed by 1000 grit...  Then used 1500 grit... 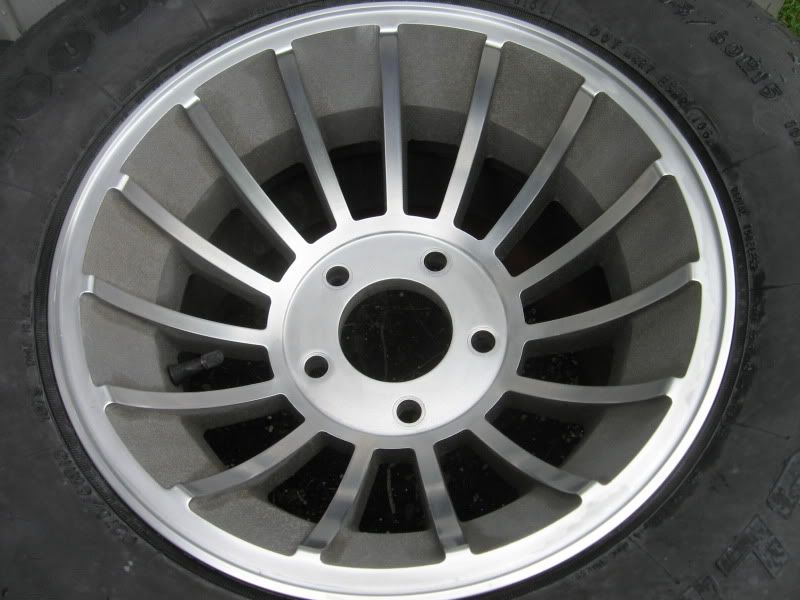 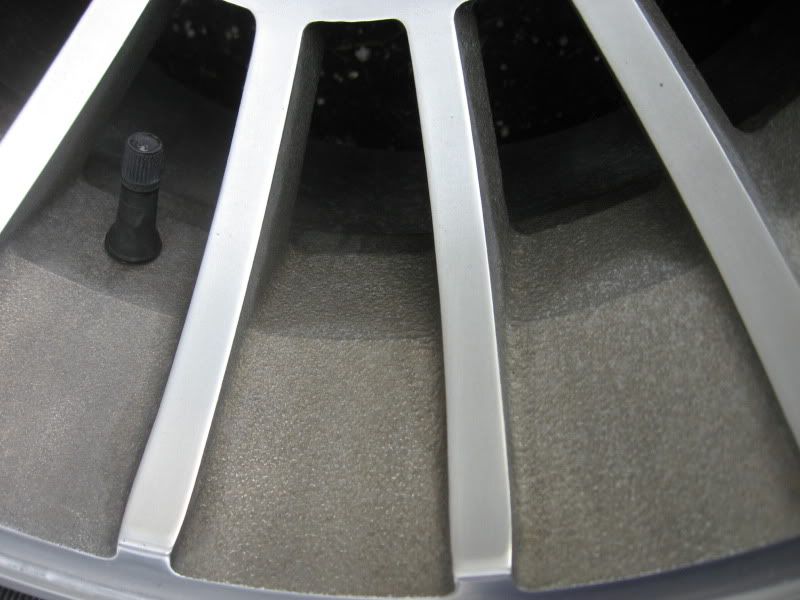 Then finally used a mothers mini ball with mothers mag polish... 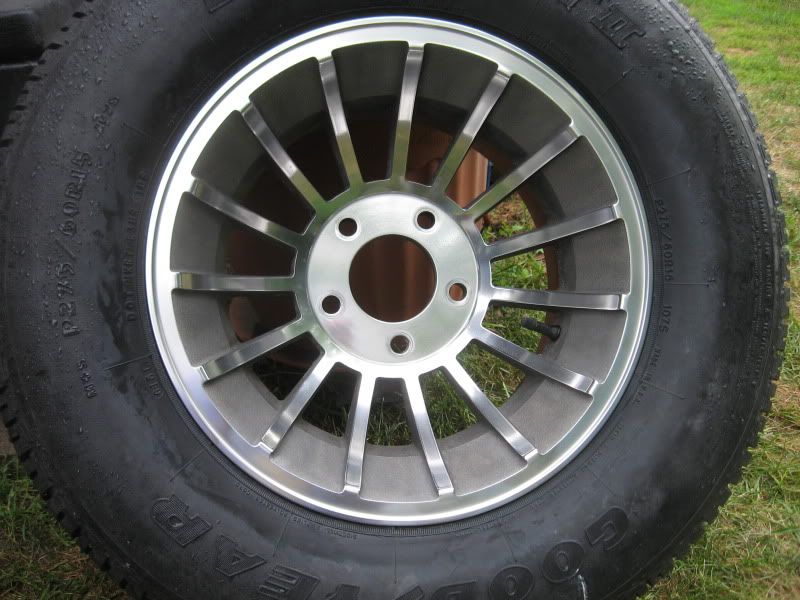 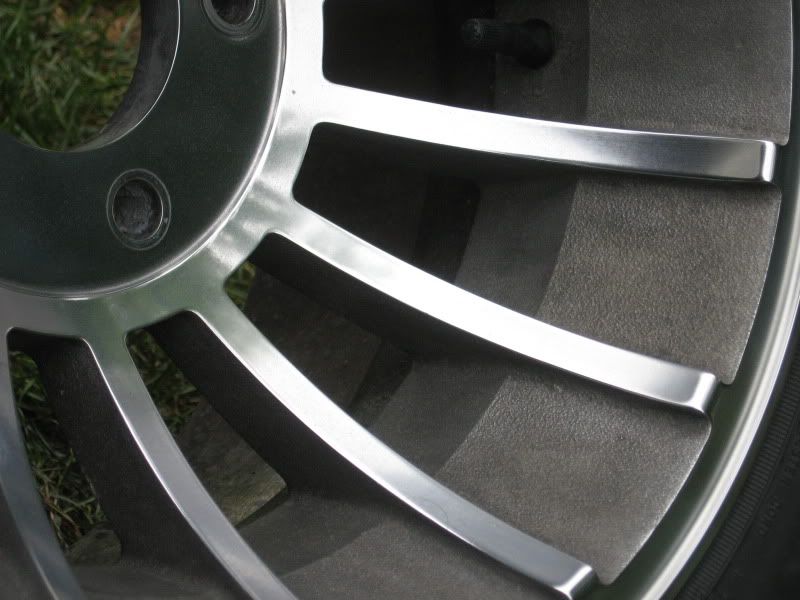 This was after just a few minutes and I ran out of polish. So I'll go over it again and then I have some mothers aluminum sealer that will go on last. I am real happy with the results. WARNING!! This took almost 4 hours, not including the time acid washing. The worst part is the initial 320 to remove the machine grooves. After that it goes pretty quick.
__________________
If no one knows what you're doing, they can't tell you you're doing it wrong HG's Dream Car Build - Shelby Cobra Kit Build your own adjustable track bar 71 Long Fleet C/10 72 Jimmy 4x4 (Junkyard Jimmy)HG's Plow Truck '78 K35 DuallyBigass Farm Truck HG's thread of miscellaneous stuff |
|
|
|
|
08-14-2011, 09:33 PM
|
#714 |
|
VA72C10
Join Date: Mar 2008
Location: Midlothian, VA
Posts: 25,267
|
Re: Over 25 Years Later, Finally My 71 C-10 Truck Build
AWESOME! Nice work! I know how time consuming that can be. Polished a machined radio back plate and it took me almost 3 hours...
__________________
Looking for a 67-72 swb or blazer project in or around VA.
|
|
|
|
|
08-14-2011, 09:35 PM
|
#715 |
|
State of Confusion!
  Join Date: Jul 2002
Location: Gulfport, MS USA
Posts: 47,216
|
Re: Over 25 Years Later, Finally My 71 C-10 Truck Build
Very nice and I am sure very nerve racking during the process. I always have to catch myself from trying to rush it.
__________________
Bill 1970 Chevy Custom/10 LWB Fleetside 2010 Toyota Tacoma PreRunner SR5 Double Cab - DD Member of Louisiana Classic Truck Club (LCTC) Bill's Gallery Life isn't tied with a bow, but it's still a gift. Live simply. Love generously. Care deeply. Speak kindly. Leave the rest to God! |
|
|
|
|
08-14-2011, 11:32 PM
|
#716 | |
|
Registered User
Join Date: Jun 2011
Location: Monroe, WA
Posts: 6
|
Re: Over 25 Years Later, Finally My 71 C-10 Truck Build
Quote:
__________________
-1972 Chevy C/20 Plans: 4wd conversion, restore, update, drive it till the wheels fall off. |
|
|
|
|
|
08-15-2011, 12:19 AM
|
#717 |
|
GEARHEAD
Join Date: Aug 2003
Location: MN
Posts: 6,126
|
Re: Over 25 Years Later, Finally My 71 C-10 Truck Build
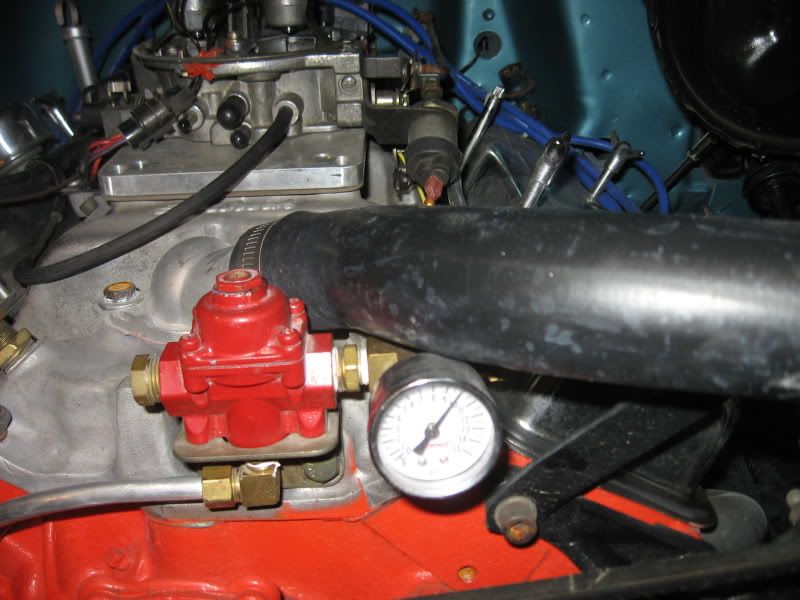
Just a summit set. They were fine with my old wire looms, but with this style I need a few inches longer or maybe one of those fancy caps that have the wires for one side of the block off that side of the cap.
__________________
If no one knows what you're doing, they can't tell you you're doing it wrong HG's Dream Car Build - Shelby Cobra Kit Build your own adjustable track bar 71 Long Fleet C/10 72 Jimmy 4x4 (Junkyard Jimmy)HG's Plow Truck '78 K35 DuallyBigass Farm Truck HG's thread of miscellaneous stuff |
|
|
|
|
08-15-2011, 08:32 AM
|
#718 |
|
Still Learning
Join Date: Jul 2009
Location: Central Oklahoma
Posts: 10,108
|
Re: Over 25 Years Later, Finally My 71 C-10 Truck Build
The wheels look great! I know that took some elbow grease and time.
Nice! |
|
|
|
|
08-18-2011, 12:50 AM
|
#719 |
|
GEARHEAD
Join Date: Aug 2003
Location: MN
Posts: 6,126
|
Re: Over 25 Years Later, Finally My 71 C-10 Truck Build
Some of my new parts showed up and I got a little time to install some tonight. I started with the new door handles. The holes in the door skins needed to be filed a bit for the bolts to work. Thats not a scratch by the lock, just a reflexion of the handle from the flash.
 Got the glove box door latch on finally. Got tired of it dropping open all the time. 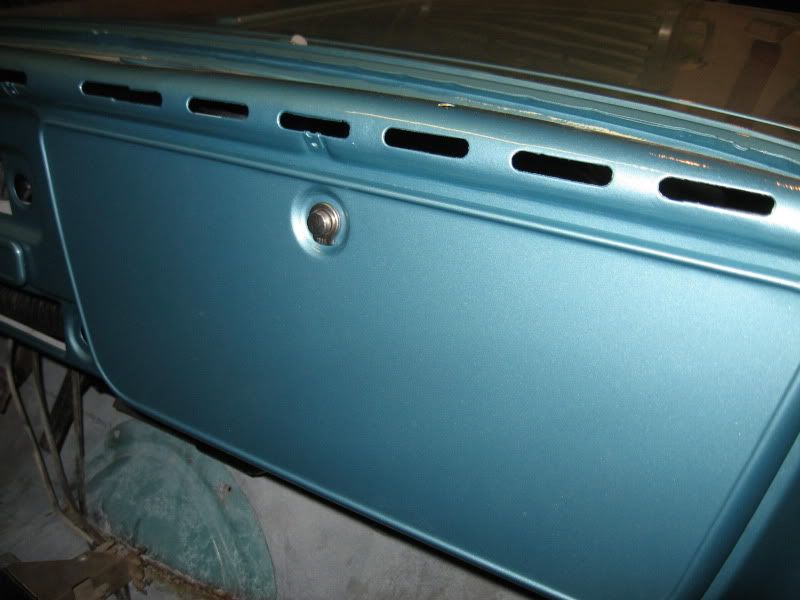 Went through the stack of gage clusters I had and picked the one that had the orangest needles and seemed to be in good shape. Once I had it apart I cleaned it up a little and found it was an 80 psi oil press gage, which was nice. The new lense is for a vac/tach cluster which I plan to upgrade to. Standard black and chrome bezel. Ran out of time to get it installed, but it won't be long. 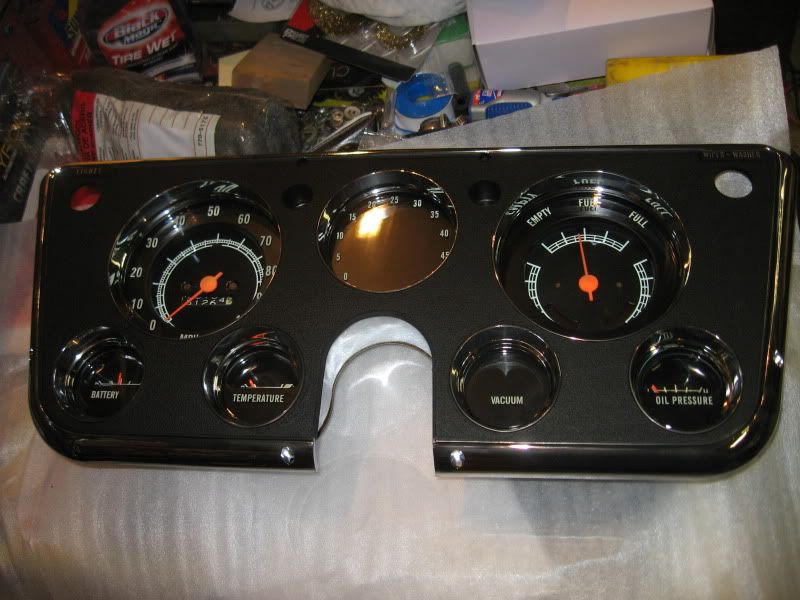 Another upgrade was the pair of 12" fans for the radiator. I might try and make a good sheetmetal mount or maybe just some small square tubing or angles. Haven't decided yet. 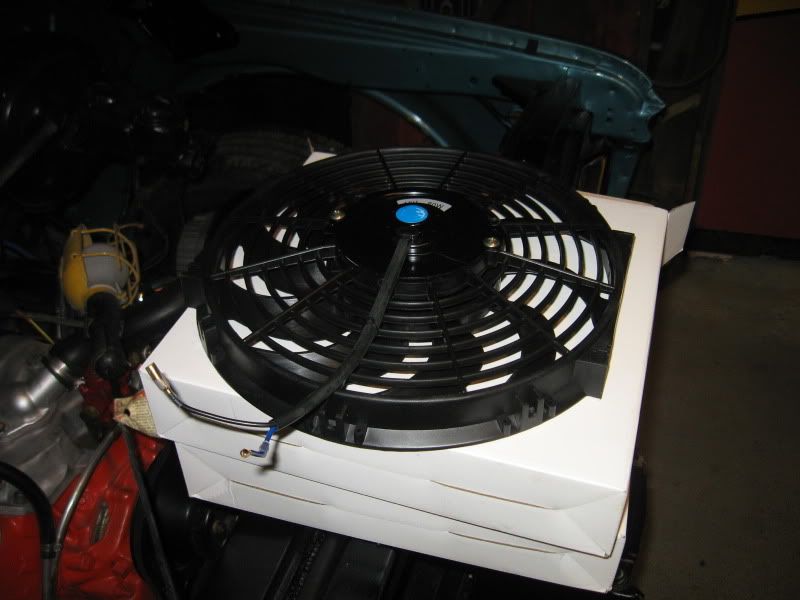
__________________
If no one knows what you're doing, they can't tell you you're doing it wrong HG's Dream Car Build - Shelby Cobra Kit Build your own adjustable track bar 71 Long Fleet C/10 72 Jimmy 4x4 (Junkyard Jimmy)HG's Plow Truck '78 K35 DuallyBigass Farm Truck HG's thread of miscellaneous stuff |
|
|
|
|
08-18-2011, 10:00 AM
|
#720 | |
|
PITbut
Join Date: Sep 2007
Location: monroe washington
Posts: 3,052
|
Re: Over 25 Years Later, Finally My 71 C-10 Truck Build
Quote:
WE are neck and neck. Idea on the fans. You could put them on the front of the radiator with those holddowns that go through the radiator. You wouldnt have to make a mount and it would look just as clean. Just a thought... Keep up the good work man. This sept. is my 4 year anniversary on workin on the truck. Funny i could of had it finished in a year, but i NEVER worked on it.
__________________
New project. 1971 Twin Turbo blazer http://67-72chevytrucks.com/vboard/s...d.php?t=676047 My new YOUTUBE channel.. Videos of my truck and a current walk around. Lyrikz74 Youtube channel DONE! SOLD!  My 1971 stepside build thread My Build Thread UPDATED 6/11. DONE and sold. |
|
|
|
|
|
08-18-2011, 10:34 PM
|
#721 | |
|
GEARHEAD
Join Date: Aug 2003
Location: MN
Posts: 6,126
|
Re: Over 25 Years Later, Finally My 71 C-10 Truck Build
Quote:
j/k I think my build could have gone faster if I hadn't tore a biceps tendon, but not much. It's a lot of work. Only one picture today, but it was plenty of work. And I found a few more problems in the process. I may end up just replacing the column. I tried to do a rebuild, which basically meant just taking it apart, cleaning and rattle can paint. The wire harness was spliced, the plastic where the blinker handle attaches has a new crack, the shifter is a bit loose, and it needs repainted. It'll do for now but I'll probably look for something better and sell this one. I got the light and wiper switches in, re-routed the oil pressure line and got it through the firewall grommet, found the knobs and screws, etc for the cluster and got it mounted. It looks good, but I haven't tested anything yet. Planning on the vac/tach upgrade in the future, maybe LED's also. I think everything is hooked up except the speedo. 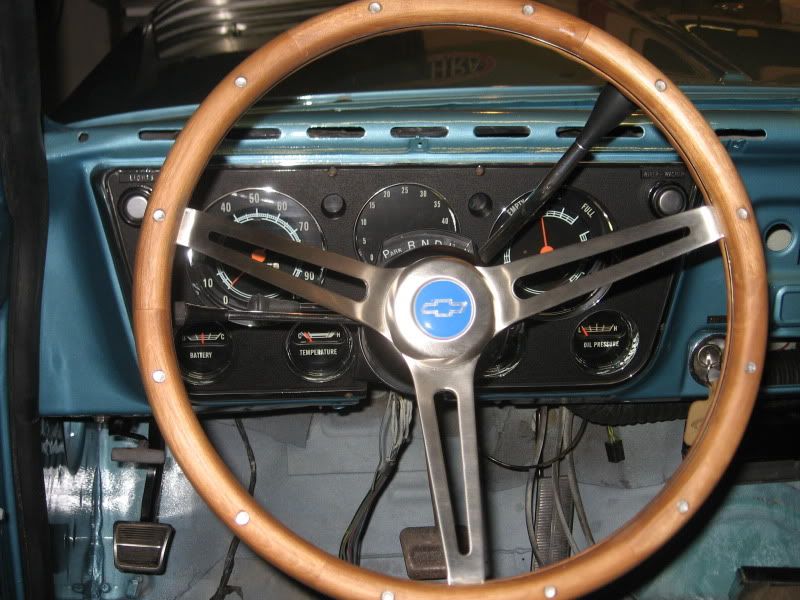 Found the screws for the door mirror and got it mounted. Found the little rubber stops for the glove box and put those in. Found my door locks, one is kinda dinged up and the key doesn't match, so I left them out for now. I'll have to contact lock doc about getting a matched set to the ignition. And I found the door lock knobs and put those in. A little more polishing on the one wheel I have and I'll mount that up and start sanding the next one. One more puzzle to figure out was found while bolting the bed down to the frame. I could only reach 6 out of 8 bolts. The ones that are by the gas tank I can't reach and not sure how I'm going to get those in. My arms are to big to fit between the frame and bed, or between the tank and frame. I might have to cut an access hole in the side of the frame to get a wrench in there from outside the frame rail.
__________________
If no one knows what you're doing, they can't tell you you're doing it wrong HG's Dream Car Build - Shelby Cobra Kit Build your own adjustable track bar 71 Long Fleet C/10 72 Jimmy 4x4 (Junkyard Jimmy)HG's Plow Truck '78 K35 DuallyBigass Farm Truck HG's thread of miscellaneous stuff |
|
|
|
|
|
08-19-2011, 10:24 AM
|
#722 | |
|
PITbut
Join Date: Sep 2007
Location: monroe washington
Posts: 3,052
|
Re: Over 25 Years Later, Finally My 71 C-10 Truck Build
Quote:
Well, i worked on it like once a week, once every two weeks. Sometimes i would go a month without doing anything. sometimes more. So a year seemed about right. oh well. Hey, some tips and a quick note. Your going to have to remove your cluster to put your dash pad in. ahaha I just did this.. You can get it in, but its kind of a ***** to do it.
__________________
New project. 1971 Twin Turbo blazer http://67-72chevytrucks.com/vboard/s...d.php?t=676047 My new YOUTUBE channel.. Videos of my truck and a current walk around. Lyrikz74 Youtube channel DONE! SOLD! My 1971 stepside build thread My Build Thread UPDATED 6/11. DONE and sold. |
|
|
|
|
|
08-19-2011, 07:54 PM
|
#723 | |
|
GEARHEAD
Join Date: Aug 2003
Location: MN
Posts: 6,126
|
Re: Over 25 Years Later, Finally My 71 C-10 Truck Build
Quote:
__________________
If no one knows what you're doing, they can't tell you you're doing it wrong HG's Dream Car Build - Shelby Cobra Kit Build your own adjustable track bar 71 Long Fleet C/10 72 Jimmy 4x4 (Junkyard Jimmy)HG's Plow Truck '78 K35 DuallyBigass Farm Truck HG's thread of miscellaneous stuff |
|
|
|
|
|
08-19-2011, 09:18 PM
|
#724 | |
|
Registered User
Join Date: Jul 2011
Location: Des Moines, Iowa
Posts: 3,016
|
Re: Over 25 Years Later, Finally My 71 C-10 Truck Build
Quote:
 Mine are 20 years old. Performance brand from Australia I think. 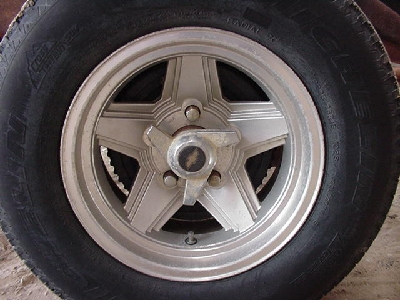
__________________
project: "my happy mess" |
|
|
|
|
|
08-20-2011, 12:54 AM
|
#725 | |
|
GEARHEAD
Join Date: Aug 2003
Location: MN
Posts: 6,126
|
Re: Over 25 Years Later, Finally My 71 C-10 Truck Build
Quote:
I didn't do much with the truck today. Finished buffing up the one wheel and got it mounted. I'll probably work on a front wheel next so it looks good from one side.  I put some clamps on the exhaust to hold it together for now. I plan on welding it later, but may have to tweak some tubing for fit better than it is now. I put some clamps on the exhaust to hold it together for now. I plan on welding it later, but may have to tweak some tubing for fit better than it is now. Still trying to figure out the tuning. It's been too rich and backfiring, so today I turned the idle setting all the way down and turned the choke down about half. It would start great, then die. Over and over. But less back firing and sounded more normal. I think tomorrow I'm going to turn the main and other settings down also. I think it's kinda flooding it as is. I could keep it running by pumping the pedal or revving it, but it would die a couple seconds after I stopped that. Crossing my fingers for better results this weekend. Once it's running normal and consistant I'll add the closed loop O2 sensor to the exhaust and it will fine tune itself after that. I still need to make sure the fuel return line is working also. And yet another pic of a wheel, but hey this one is mounted and has a nice shiny cap and lug nuts... 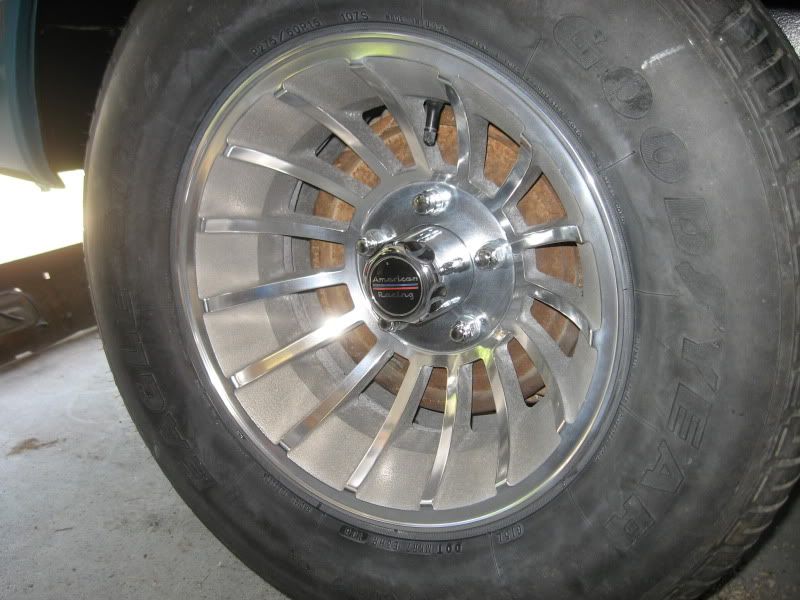 Note to self, grill and bumper, clean and buff check diff fluid level vent windows door glass, felts and chanels temp gage sensor heater controls heater box fat mat seat bolting plates hook up e-brake cable speedo cable wire tie wiring on frame battery hold down clamps headlight buckets, clean and paint, adjusters? seat belts tailgate letters rearview mirror and visors door panel upper trim and panel screws (need to order) Cowl screws kick panel vents, paint and mount rear window and windshield wiper/washer test (will probably need new pump) horn inner fenders (need new nuts, paint bolts) fusible link in wire harness for gage gas gage reads high manual throttle
__________________
If no one knows what you're doing, they can't tell you you're doing it wrong HG's Dream Car Build - Shelby Cobra Kit Build your own adjustable track bar 71 Long Fleet C/10 72 Jimmy 4x4 (Junkyard Jimmy)HG's Plow Truck '78 K35 DuallyBigass Farm Truck HG's thread of miscellaneous stuff Last edited by hgs_notes; 08-31-2011 at 07:39 PM. |
|
|
|
|
 |
| Bookmarks |
|
|


 Linear Mode

