
|
|
|
 05-20-2015, 09:20 AM
|
#1 |
|
Registered User
Join Date: Dec 2002
Location: Cactus Patch So. Az
Posts: 4,749
|
Re: Another way to skin the cat; the High Torque 292 LS swap
Thanks, got it
You have WAY more clearance than we have in that location, but I do like your idea (Many) of grouping 4 together Did you machine the valve cover adapters or are they a product of the later sbc center bolt adapters?
__________________
53 TuTone Extended Cab 350 4-Spd 3:08 (SOLD) 53 Chevy Moldy pearl green ZZ-4 4L60E 9" 3:25 55 GMC 1st Black Mll (ZZ4) ZZ6 TKO 600 5 sp 3:73 62 Solidaxle Corvette Roman Red (327 340hp 4spd 3:36) C4 & C5 suspension tube chassis LS 3 4L70E 65 Corvette Coupe 327 350hp 4spd 4:11 78 Black Silverado SWB (350/350) 5.3 & 4L60E 3:42 2000 S-Type 3.0 (wife cruiser) 2003 GMC SCSB 5.3 4L60E 3:42 |

|

|
|
05-20-2015, 09:55 AM
|
#2 | |
|
Senior Member
 Join Date: Jul 2009
Location: Athens, AL
Posts: 499
|
Re: Another way to skin the cat; the High Torque 292 LS swap
Quote:
|
|
|
|
|
|
05-20-2015, 06:01 PM
|
#3 |
|
I'm just glad to be here!
Join Date: Jan 2008
Location: Longview, TX
Posts: 4,788
|
Re: Another way to skin the cat; the High Torque 292 LS swap
Very nice job. Love the old school look you gave the new engine!
__________________
Karl  1965 Chevy Stepside(Grandpa's Old Blue) and (July 2015 Shop Build!)(2020, the Saga Continues) http://67-72chevytrucks.com/vboard/s...d.php?t=372424 The LST Challenge: http://67-72chevytrucks.com/vboard/s...=1#post7812257 Korbin's 1st Square: "Sunburn" http://67-72chevytrucks.com/vboard/s...d.php?t=418618 1985 GMC Sierra: "White Trash", Korbin's 2nd now... http://67-72chevytrucks.com/vboard/s...d.php?t=632305 Henry - 1984 Chevrolet, Owen's 1st Square |
|
|
|
|
06-19-2015, 10:52 AM
|
#4 |
|
Registered User
Join Date: Jul 2010
Location: Victoria,B.C. Canada
Posts: 175
|
Re: Another way to skin the cat; the High Torque 292 LS swap
[QUOTE=dayj1;7147162]
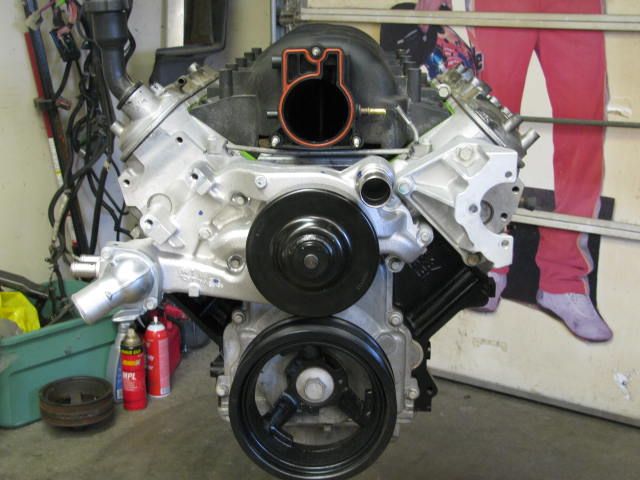
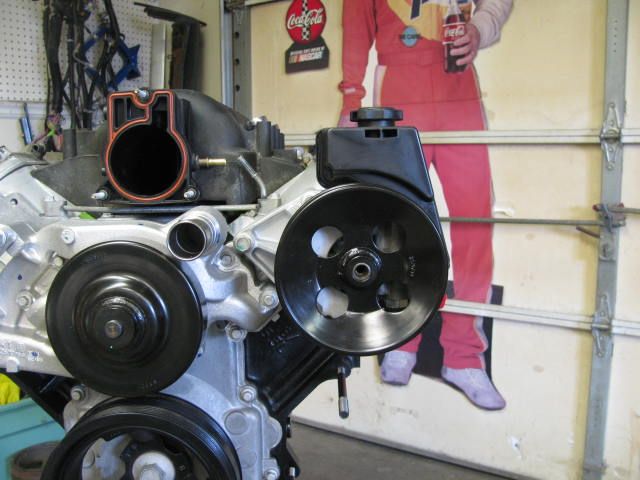
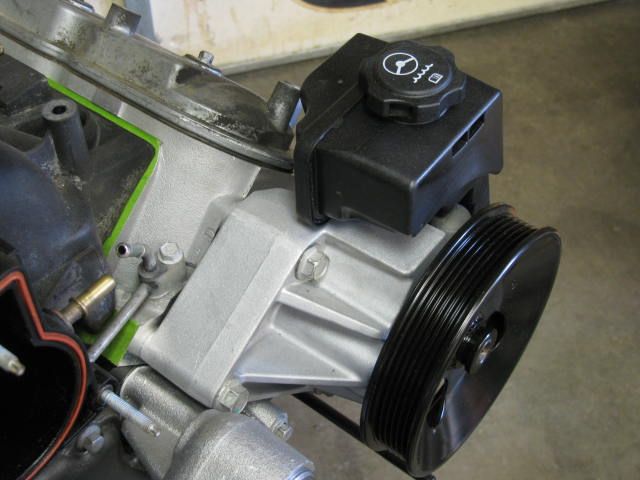
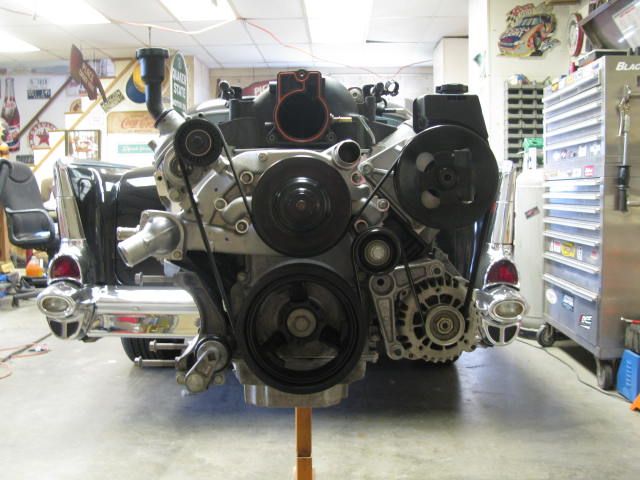
I've had this taking up room in my shop for the last year or so waiting on the right vehicle to come along for a swap:  It's the "littlest" LS; a 4.8. Since 4.8L converts to 292.9 cubic inches, I decided to round down and call this a 292 swap  The 4.8 came from a 79K mile 2003 Tahoe. I bought it over a year ago and slowly gathered parts. It's got a mish-mash of truck and Camaro parts for the accessory drive and a LS1 'vette intake Very cool build! Can you explain the mish mash of truck and Camaro parts of the Acc drive? Maybe what is from what or part numbers? Or what you did to make it work? the water pump looks like the l99 part number 19207665? Thanks in advance |
|
|
|
|
06-19-2015, 11:56 AM
|
#5 | ||
|
Senior Member
Join Date: Jul 2009
Location: Athens, AL
Posts: 499
|
Re: Another way to skin the cat; the High Torque 292 LS swap
Quote:
I had actually written all that up for a guy on the trifive board (notice my '57 BelAir behind the completed engine in the last pic). So, I cut and pasted from my post over there... Quote:
|
||
|
|
|
|
06-20-2015, 01:13 AM
|
#6 |
|
Registered User
Join Date: Jul 2010
Location: Victoria,B.C. Canada
Posts: 175
|
Re: Another way to skin the cat; the High Torque 292 LS swap
Wow, thanks for that..that's even more comprehensive than I expected. That's awesome. Lol but you did forget to mention what belt you used...
 What are the details on your 57? What are the details on your 57?
|
|
|
|
|
06-20-2015, 01:52 AM
|
#7 | |
|
Senior Member
Join Date: Jul 2009
Location: Athens, AL
Posts: 499
|
Re: Another way to skin the cat; the High Torque 292 LS swap
Quote:
As for the '57, I've had it since '99. It's all stock except the wheels and the drivetrain. It was my second LS swap. It has a 5.3 with a Radix blower running 11 psi. HP/TQ is about 450/490 to the rear wheels. 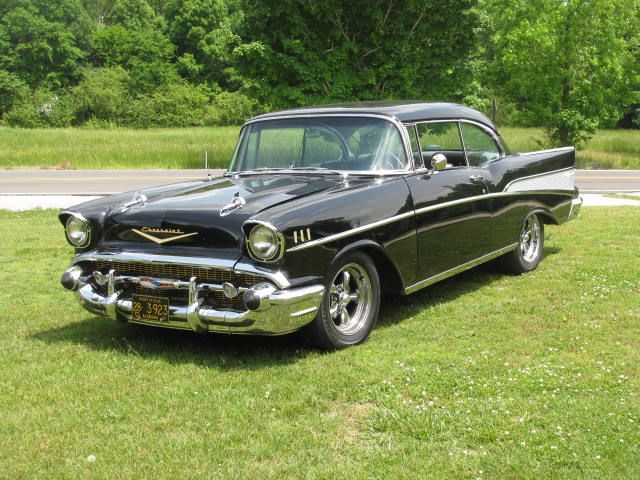 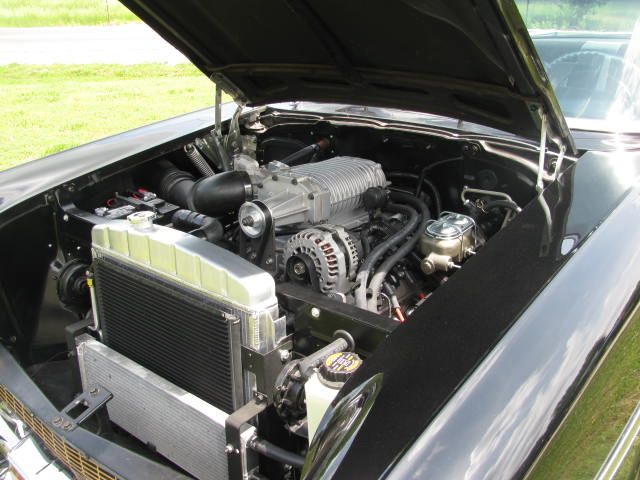
|
|
|
|
|
|
06-20-2015, 11:15 AM
|
#8 |
|
Registered User
Join Date: Jul 2010
Location: Victoria,B.C. Canada
Posts: 175
|
Re: Another way to skin the cat; the High Torque 292 LS swap
Nice, that is sexy. I'm guessing you surprise more than a few people. Funny how we seem to hold onto things. I've had my 55 since 97.
|
|
|
|
|
06-29-2015, 10:04 PM
|
#9 |
|
Registered User
Join Date: Jan 2008
Location: Cumming, Georgia
Posts: 416
|
Re: Another way to skin the cat; the High Torque 292 LS swap
I absolutely love the setup man ! I also did something very similar but used a cable t.b
 
|
|
|
|
|
06-30-2015, 12:45 AM
|
#10 | |
|
Senior Member
Join Date: Jul 2009
Location: Athens, AL
Posts: 499
|
Re: Another way to skin the cat; the High Torque 292 LS swap
Quote:
I also noticed the low mount AC compressor. I'm also in the middle of that right now. I should be making snowballs by the weekend if the rest of my parts get here
|
|
|
|
|
|
06-30-2015, 06:49 AM
|
#11 |
|
Registered User
Join Date: Jan 2008
Location: Cumming, Georgia
Posts: 416
|
Re: Another way to skin the cat; the High Torque 292 LS swap
It's not tuned yet but my tuner assures me he can make it run good on sd. If not I'll hide the maf sensor kinda like you did.
|
|
|
|
|
07-04-2015, 01:12 PM
|
#12 |
|
A guy with a truck
Join Date: Sep 2005
Location: Germany, for now
Posts: 5,920
|
Re: Another way to skin the cat; the High Torque 292 LS swap
This might be my favorite LS swap ever. Do you have a good overall pic of the complete engine bay?
__________________
-Chris Instagram _elgringoloco_ '70 Short-Wide How to: Ruin a perfectly good C10 70 Blazer ConversionHow To: Ruin a Perfectly Good 4wd '72 Highlander How To: Ruin a Perfectly Good K/5 (SOLD) '72 Blazer 2WD How to: Ruin a perfectly good Blazer (SOLD) '05 Yukon Daily Driven (not so stock) Yukon (SOLD) 07 Yukon Denali (daily) Members met list: SCOTI, darkhorse970, 67cheby, 67cheby'sGirl, klmore, porterbuilt, n2billet, Fastrucken, classicchev, Col Clank, GSFMECH, HuggerCST, Spray-Bomb, BACKYARD88, 5150, fine69, fatbass, smbrouss70, 65StreetCruiser, GAc10boy |
|
|
|
|
07-05-2015, 10:39 PM
|
#13 | |
|
Senior Member
Join Date: Jul 2009
Location: Athens, AL
Posts: 499
|
Re: Another way to skin the cat; the High Torque 292 LS swap
Quote:
|
|
|
|
|
|
07-19-2015, 03:00 AM
|
#14 | |
|
A guy with a truck
Join Date: Sep 2005
Location: Germany, for now
Posts: 5,920
|
Re: Another way to skin the cat; the High Torque 292 LS swap
Quote:
__________________
-Chris Instagram _elgringoloco_ '70 Short-Wide How to: Ruin a perfectly good C10 70 Blazer ConversionHow To: Ruin a Perfectly Good 4wd '72 Highlander How To: Ruin a Perfectly Good K/5 (SOLD) '72 Blazer 2WD How to: Ruin a perfectly good Blazer (SOLD) '05 Yukon Daily Driven (not so stock) Yukon (SOLD) 07 Yukon Denali (daily) Members met list: SCOTI, darkhorse970, 67cheby, 67cheby'sGirl, klmore, porterbuilt, n2billet, Fastrucken, classicchev, Col Clank, GSFMECH, HuggerCST, Spray-Bomb, BACKYARD88, 5150, fine69, fatbass, smbrouss70, 65StreetCruiser, GAc10boy |
|
|
|
|
|
07-06-2015, 12:26 AM
|
#15 |
|
Registered User
Join Date: Sep 2003
Location: Rayne, LA
Posts: 2,782
|
Re: Another way to skin the cat; the High Torque 292 LS swap
Are you doing an under dash A/C?
__________________
Steven "If dogs don't go to heaven, when I die I want to go wherever they went." -- Will Rogers R.I.P. Oscar R.I.P. Ratchet 1967 Pontiac GTO - Dad was the Original Owner 1970 Chevy 2wd SWB "Oscar's Truck" 1970 Chevy 2wd Blazer "Ratchet's Blazer" 2013 Chevy 2500HD Crew Cab Duramax/Allison Z71 LTZ "Brown Sugar" 2017 Chevy Suburban "BDB" 2020 Chevy Blazer Premier "Foxy" Member of Louisiana Classic Truck Club (LCTC) Shop Build |
|
|
|
|
07-06-2015, 02:38 AM
|
#16 |
|
Registered User
Join Date: Sep 2007
Location: Katy TX
Posts: 1,268
|
Re: Another way to skin the cat; the High Torque 292 LS swap
Great work, thanks for sharing!
__________________
HSRACERSlammed 53 5 window Blown/Bagged 54 Pickup Patinaed 67 LS stepside Supercharged 67 Nova Bagged 69 Suburban Turbo'ed 5.3 LS |
|
|
|
|
07-06-2015, 10:00 AM
|
#17 | ||
|
Senior Member
Join Date: Jul 2009
Location: Athens, AL
Posts: 499
|
Re: Another way to skin the cat; the High Torque 292 LS swap
Quote:
Quote:
|
||
|
|
|
|
07-13-2015, 01:20 AM
|
#18 |
|
Registered User
 Join Date: Jun 2014
Location: Shingle Springs, CA
Posts: 869
|
Re: Another way to skin the cat; the High Torque 292 LS swap
Are you still running in cab gas tank? Any plans on switching to under bed tank?
|
|
|
|
|
07-13-2015, 03:06 PM
|
#19 | |
|
Senior Member
Join Date: Jul 2009
Location: Athens, AL
Posts: 499
|
Re: Another way to skin the cat; the High Torque 292 LS swap
Quote:
I have run it below "E" on the gauge and have not experienced fuel starvation or pickup problems. The tall, narrow shape appears to have negated the need for baffles. For sound, I made sure to buy a genuine EP381 AC Delco pump (watch out for the cheapo gray market knock-offs on eBay). I wrapped the tank in a layer of Dynamat Extreme to add some mass and 1 layer of Raam Audio's self adhesive Ensolite foam. I can't hear fuel slosh in the tank at all anymore. The buzz of the pump is very faint. I can hear it with the truck idling, but the road noise drowns it out at anything over 15 MPH. With the windows rolled up and the AC on, the evaporator fan is all I hear, even idling and sitting still. |
|
|
|
|
|
07-16-2015, 08:17 PM
|
#20 |
|
Registered User
Join Date: Sep 2003
Location: Rayne, LA
Posts: 2,782
|
Re: Another way to skin the cat; the High Torque 292 LS swap
So how did the A/C turn out? Any pics?
__________________
Steven "If dogs don't go to heaven, when I die I want to go wherever they went." -- Will Rogers R.I.P. Oscar R.I.P. Ratchet 1967 Pontiac GTO - Dad was the Original Owner 1970 Chevy 2wd SWB "Oscar's Truck" 1970 Chevy 2wd Blazer "Ratchet's Blazer" 2013 Chevy 2500HD Crew Cab Duramax/Allison Z71 LTZ "Brown Sugar" 2017 Chevy Suburban "BDB" 2020 Chevy Blazer Premier "Foxy" Member of Louisiana Classic Truck Club (LCTC) Shop Build |
|
|
|
|
07-17-2015, 12:05 AM
|
#21 | |
|
Senior Member
Join Date: Jul 2009
Location: Athens, AL
Posts: 499
|
Operation: Snowballs
Quote:
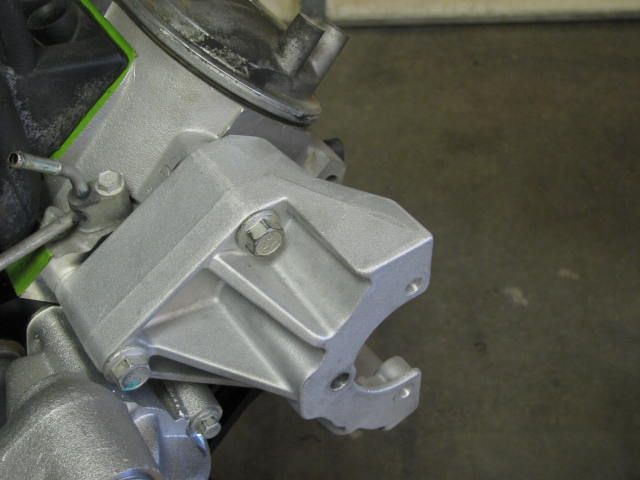
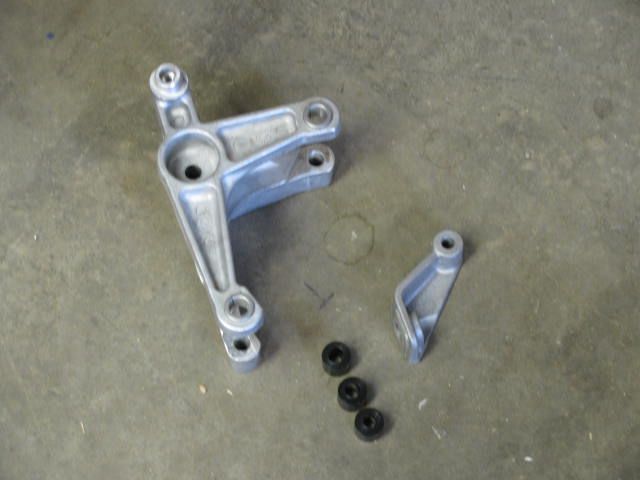
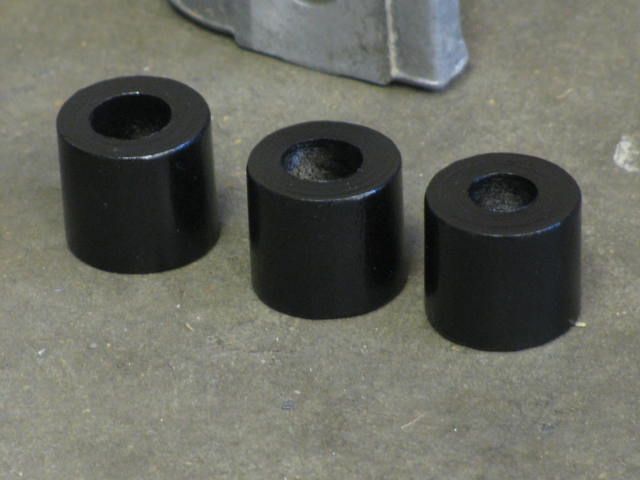
Notice in this pic that the bracket extends behind the compressor by a couple of inches. That's important because it interfered with the engine mount. 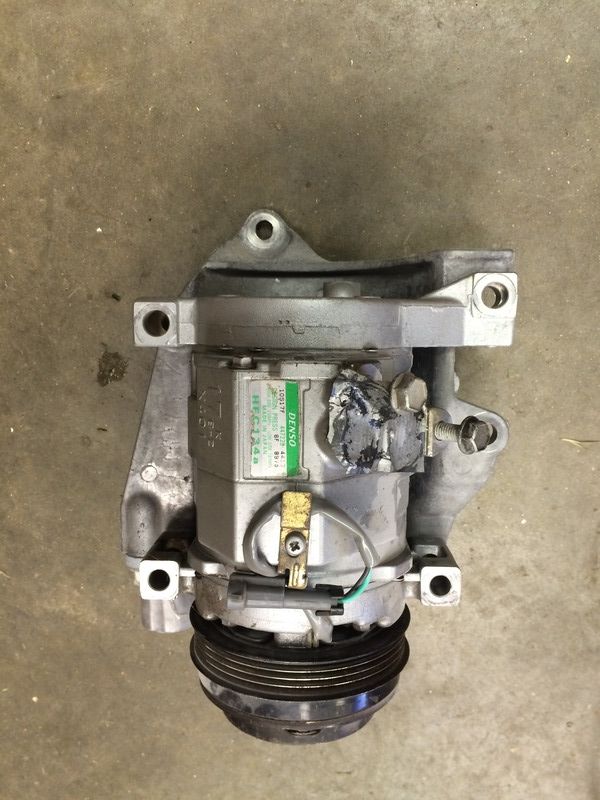 So, I marked the bracket even with the back of the compressor and cut it off: 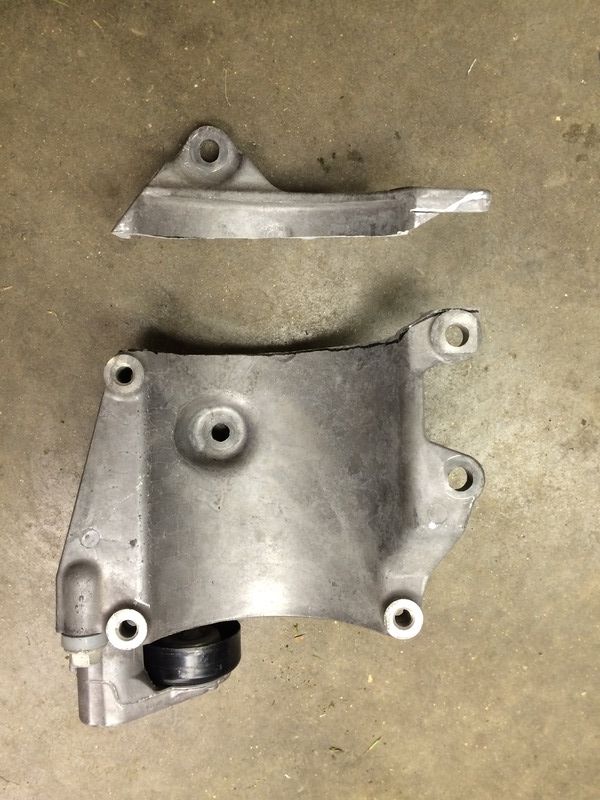 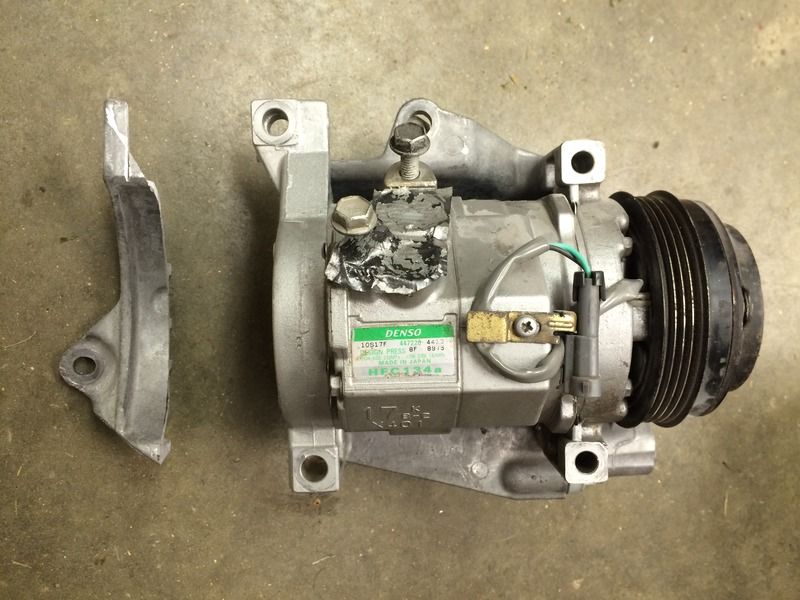 Here's the fit of the trimmed bracket: 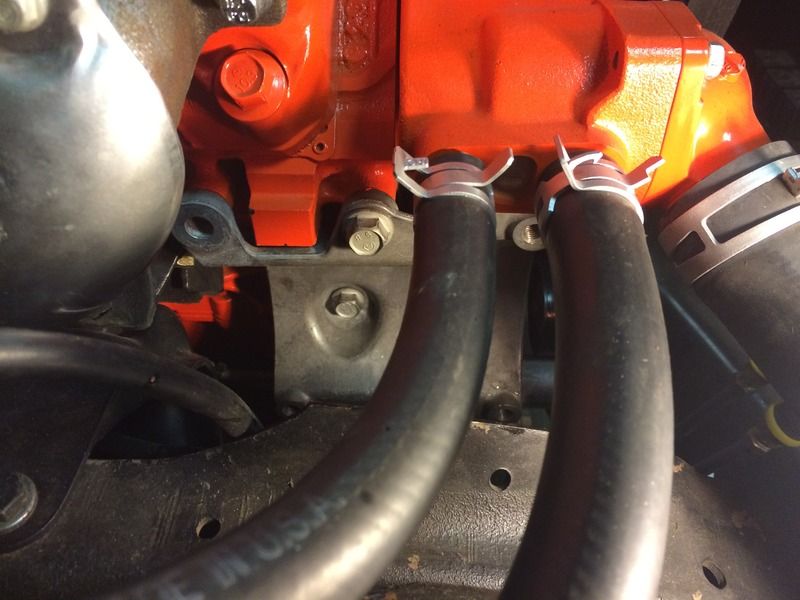 And the compressor: 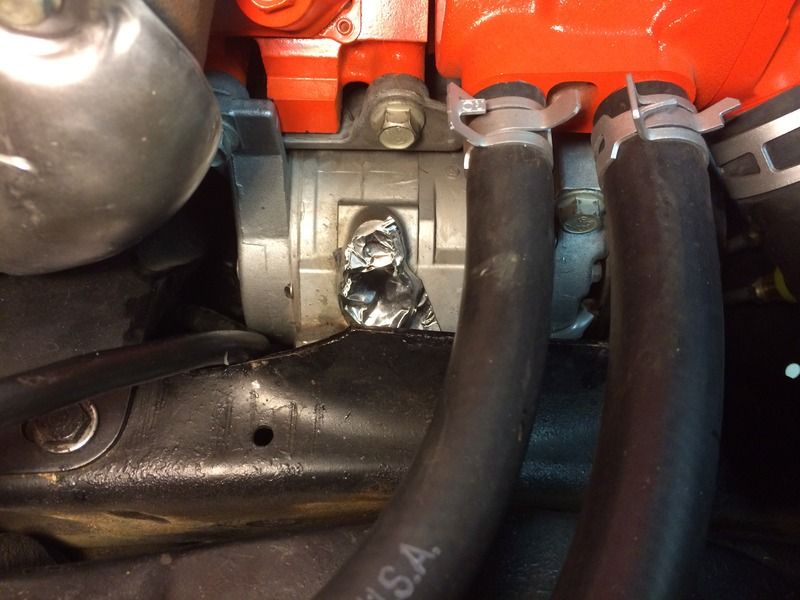 A little paint:  And bolted up for good: 
|
|
|
|
|
|
07-17-2015, 12:15 AM
|
#22 |
|
Senior Member
Join Date: Jul 2009
Location: Athens, AL
Posts: 499
|
Operation: Snowballs
I bought a universal 14" x 24" parallel flow condenser on eBay. I made a three bracket mounting system as well as a bracket for the receiver/drier:
 I called Vintage Air and ordered the 3 hard lines that are used in their condenser kits to mount the receiver drier and run through the core support and under the battery. Here it is mounted.: 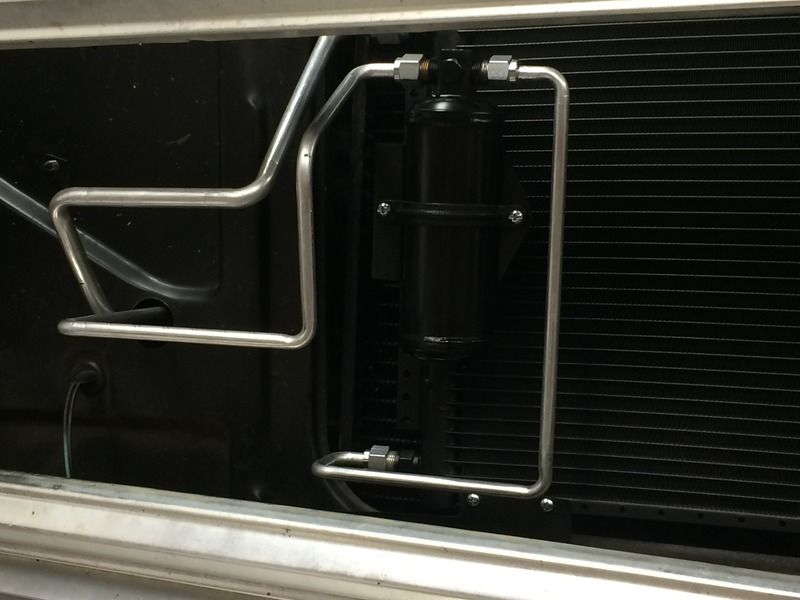 I made this simple bracket: 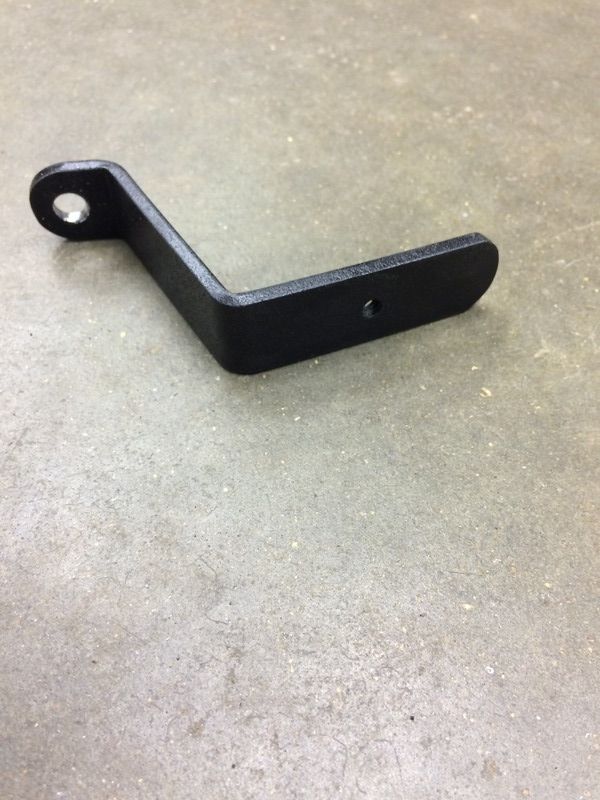 To hold the end of the hard lines under the battery box: 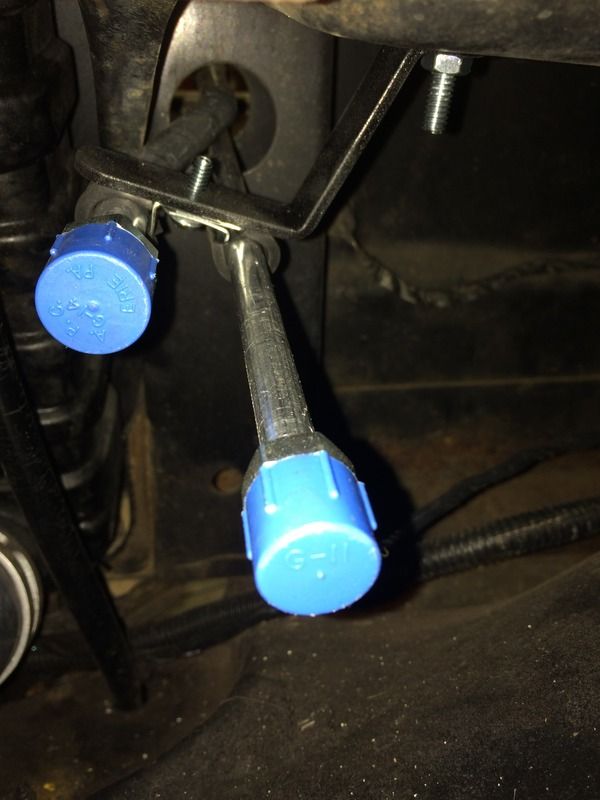 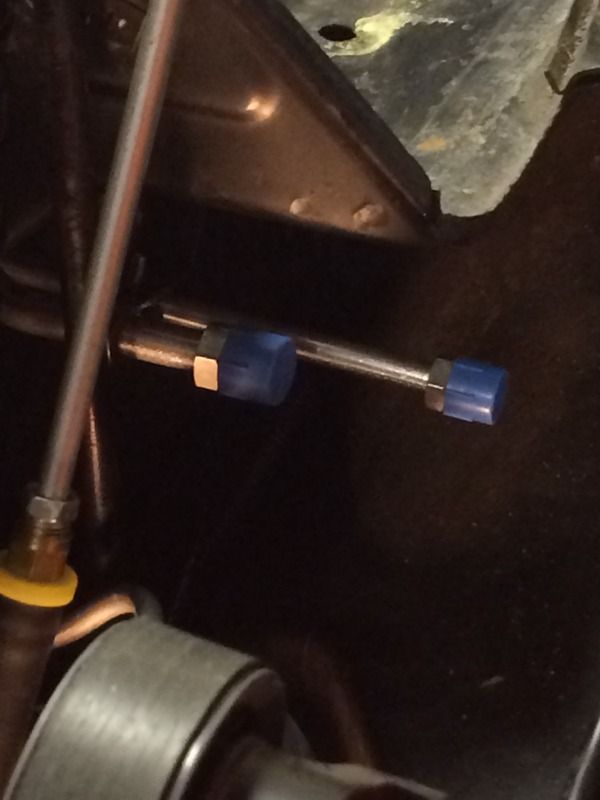
|
|
|
|
|
07-17-2015, 12:25 AM
|
#23 |
|
Senior Member
Join Date: Jul 2009
Location: Athens, AL
Posts: 499
|
Operation: Snowballs
The last major component of the system is the evaporator. I bought a universal under dash unit off eBay. Here are a couple of pictures of it mounted:
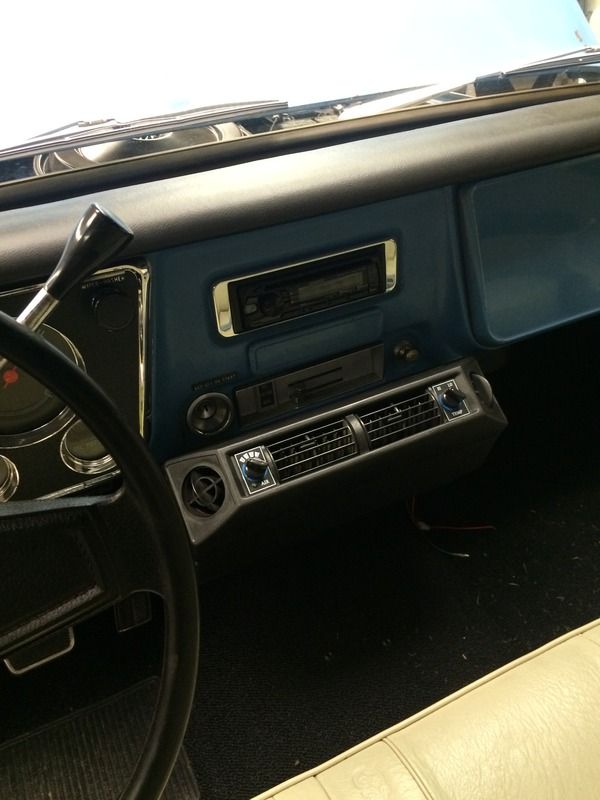 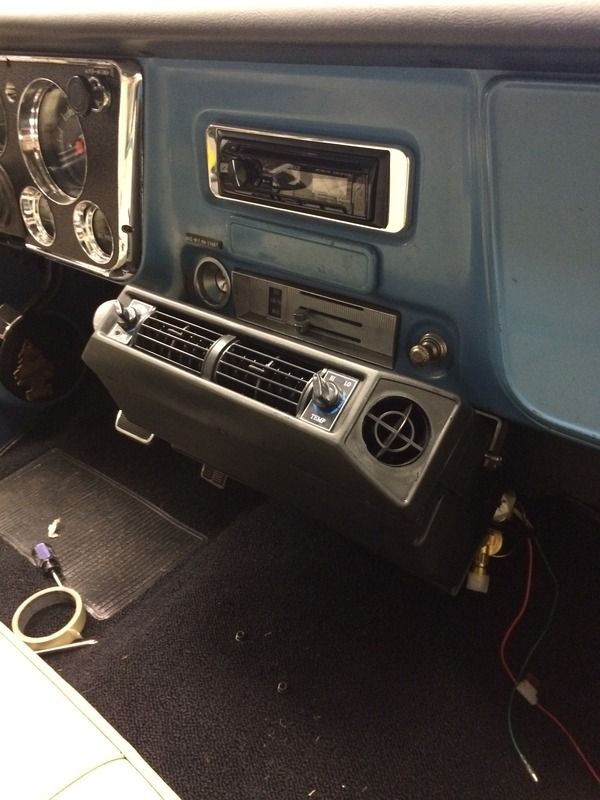 In case someone tries to duplicate my setup, there was a major problem with the evaporator unit as delivered. It moved very little air through the core. Upon inspection, I noticed that the blower motor was rotating the wrong direction! Since it's a DC motor, that's a simple fix. Just swap the positive and negative leads going to the bower motor. That made things much,much better but I made one more "improvement". I swapped the blower motor fan blades side for side. This result is that it reversed the slope of the blades. A squirrel cage fan will move a higher volume of air with reverse pitched blades than with forward pitched blades. |
|
|
|
|
07-17-2015, 12:44 AM
|
#24 |
|
Senior Member
Join Date: Jul 2009
Location: Athens, AL
Posts: 499
|
Operation: Snowballs
The last part of the system is the lines. I already mentioned that I used hard lines from Vintage Air on the condenser.
The discharge line from the compressor to the condenser required some fabrication. I started with the end of a condenser line from a 2000 Tahoe that picked up from the salvage yard. I bent it up as needed and added a M10 switch port fitting and a weld on bead lock fitting. Here is is before welding: 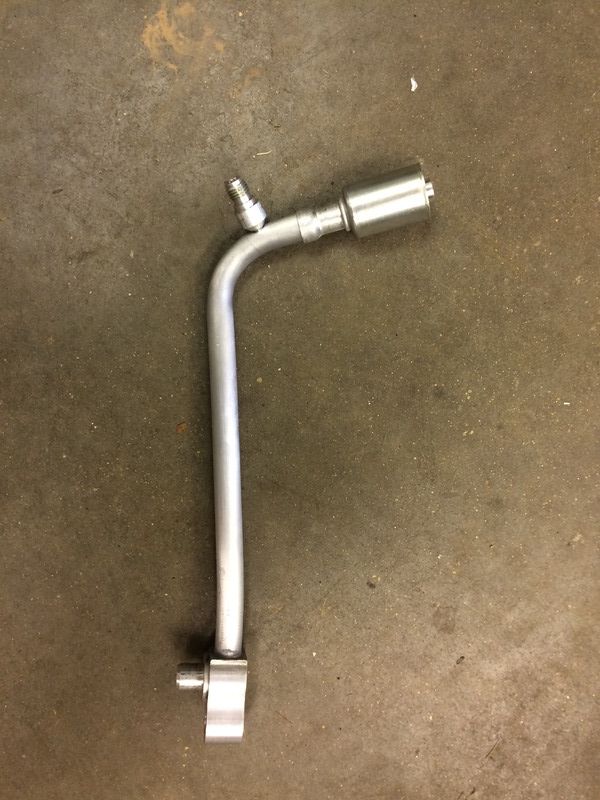 And a closer pic of the joints to be welded: 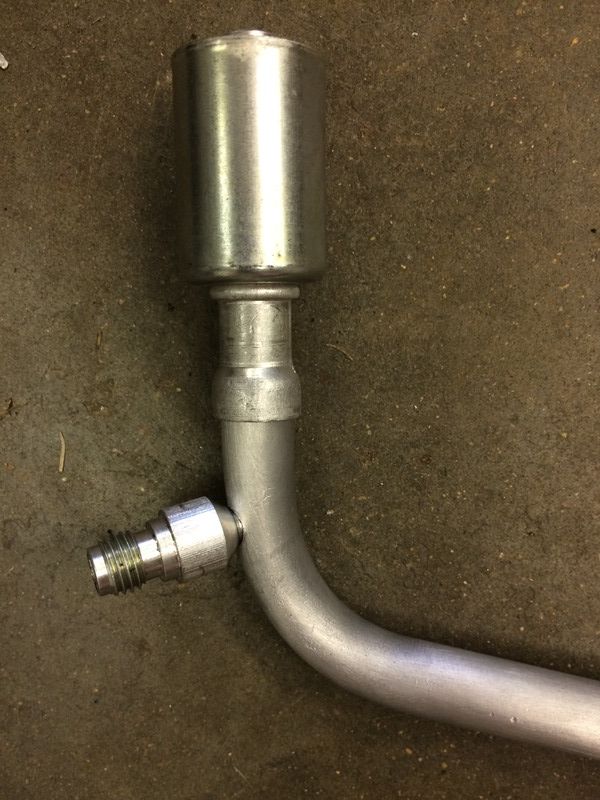 Here it is finish welded and crimped: 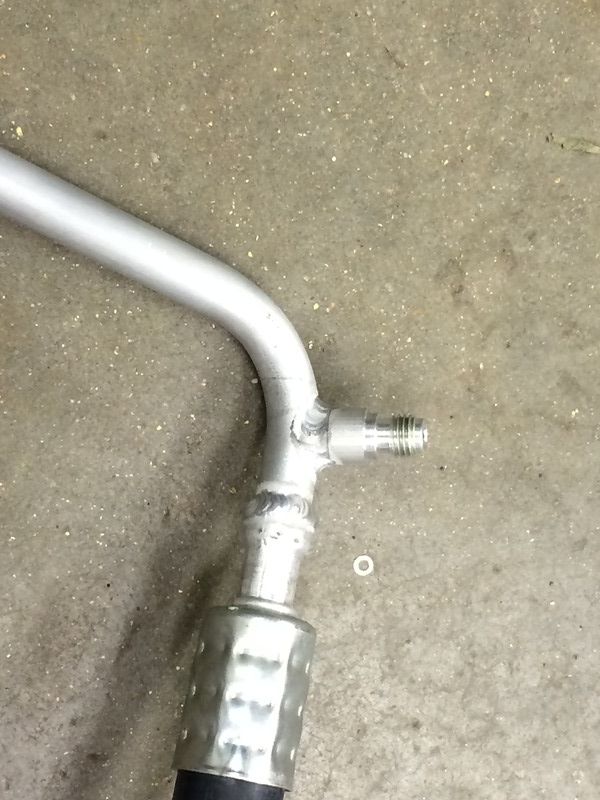 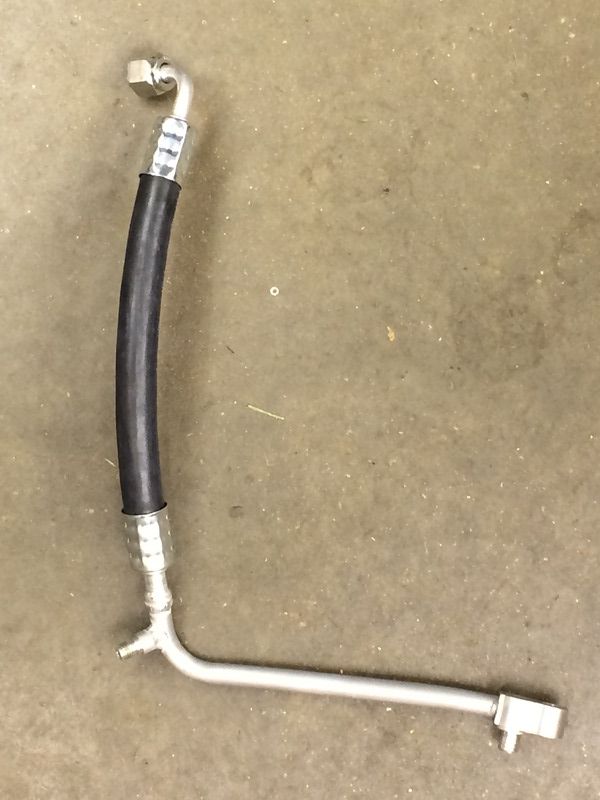 Here's the compressor suction line: 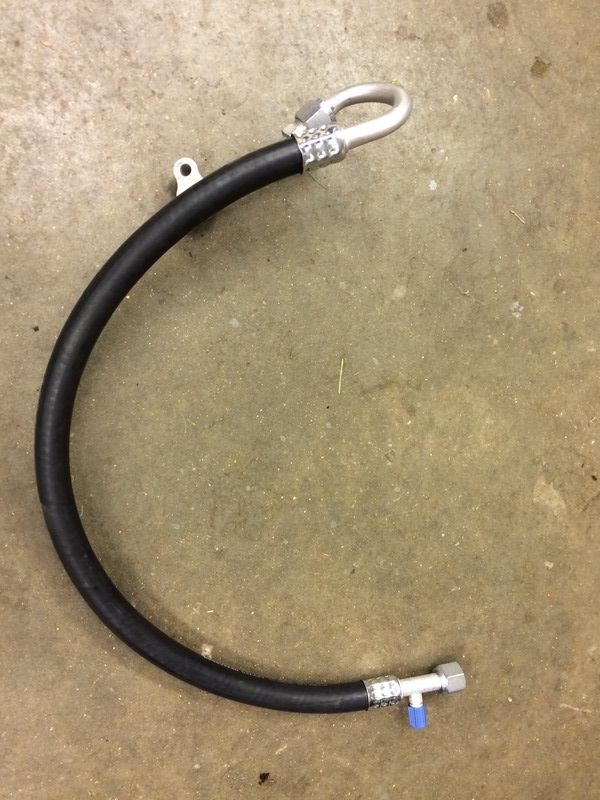 And a better pic of the compressor end: 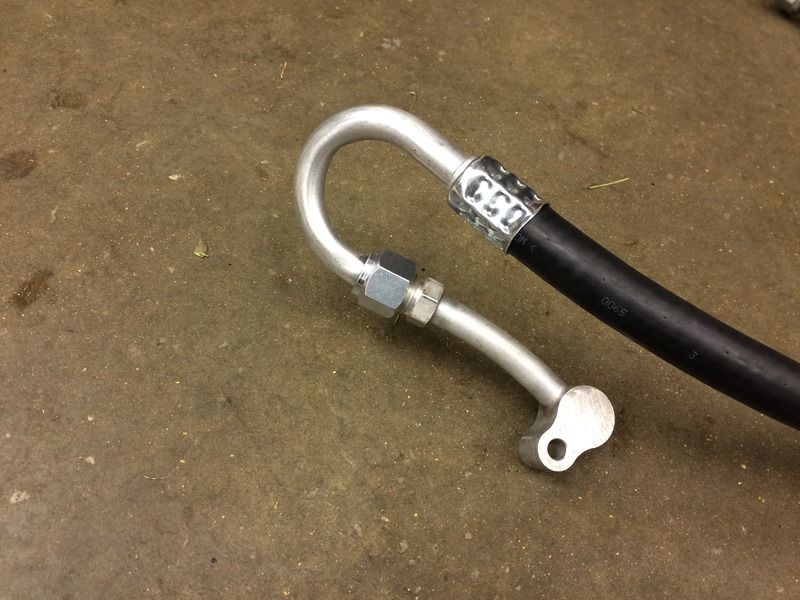 And here are the evaporator hoses that go inside the cab: 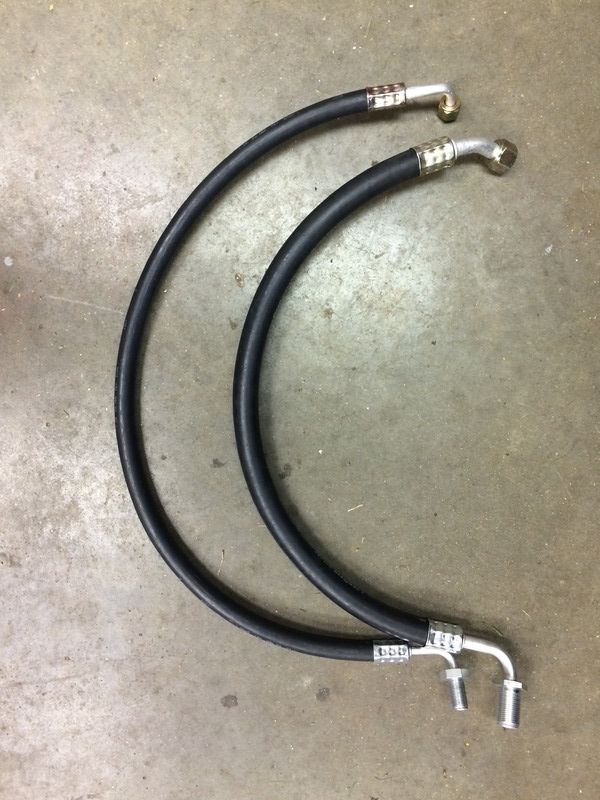 The bulkhead fittings on the end of the evap lines exit the cab just above the heater box: 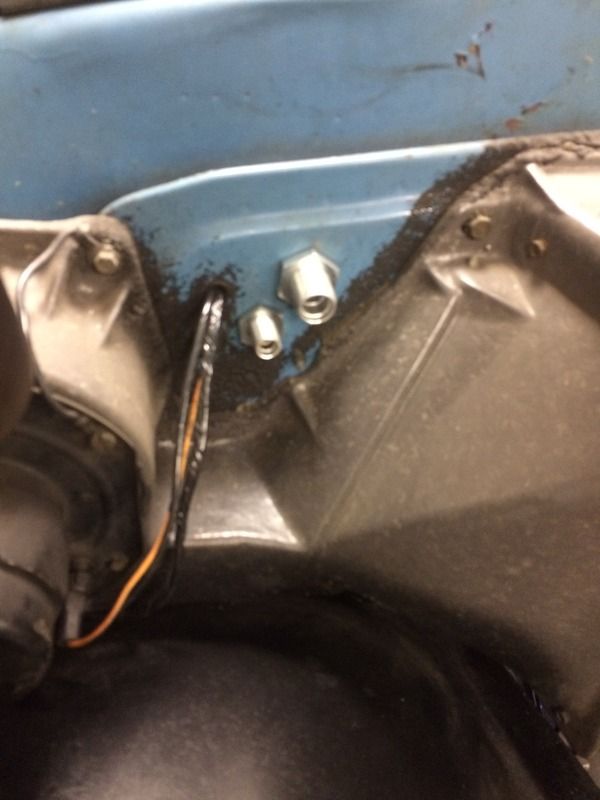 Here's an overall shot of the lines: 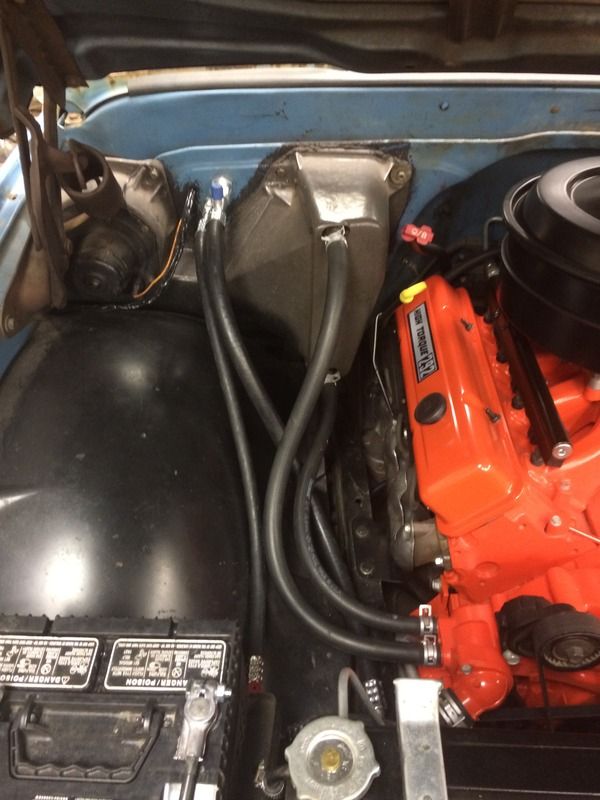 At the firewall: 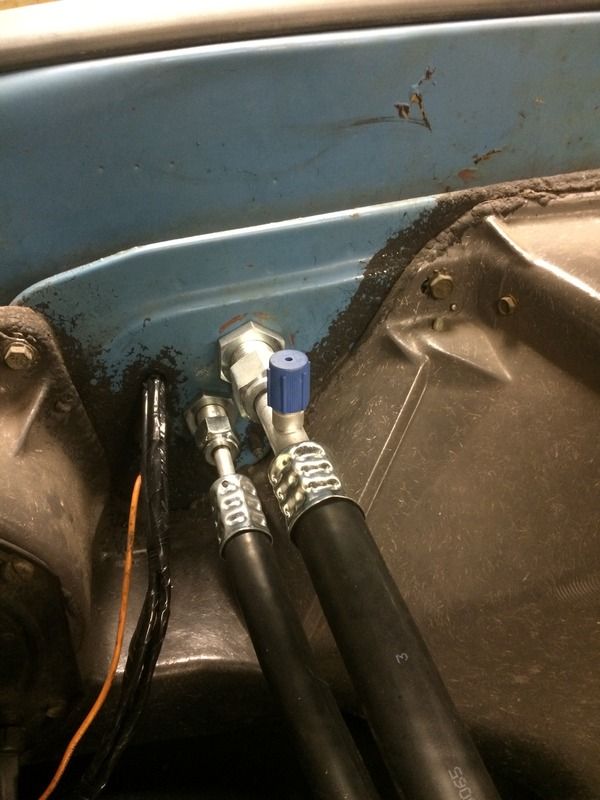 The compressor: 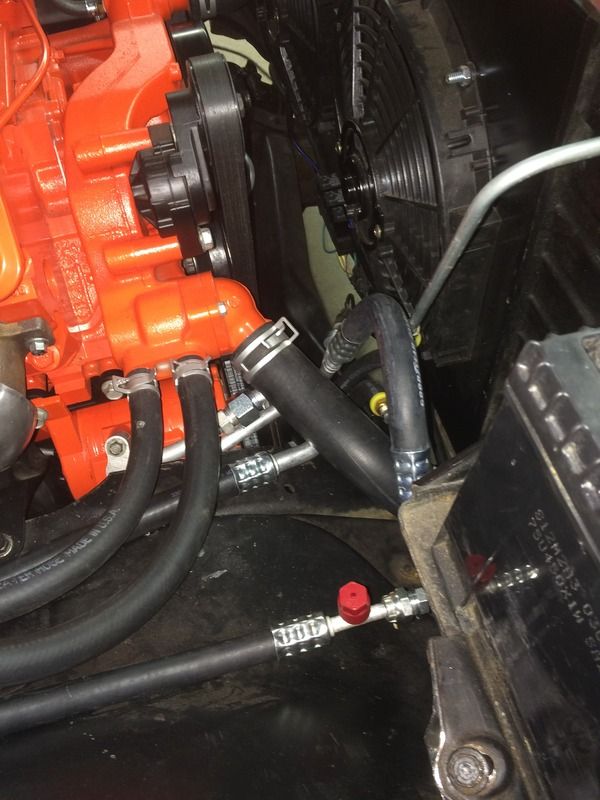 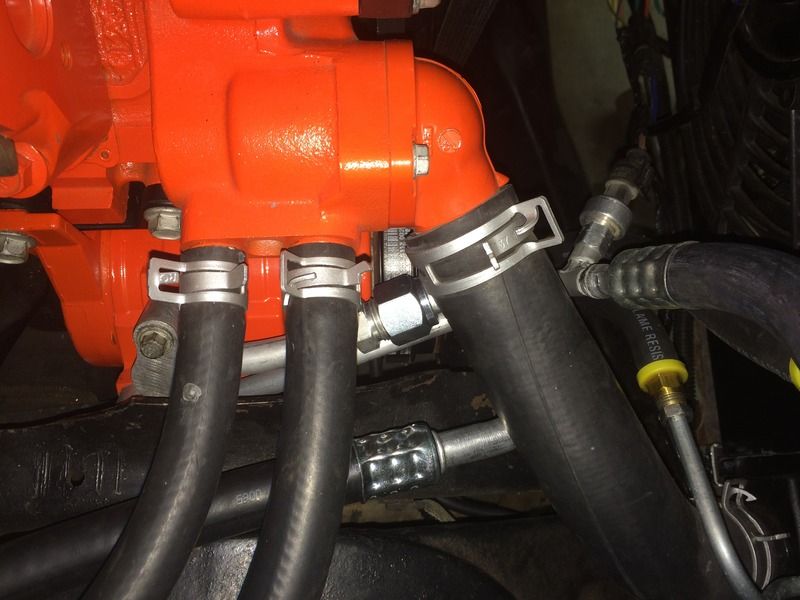
|
|
|
|
|
07-17-2015, 12:32 AM
|
#25 |
|
Registered User
Join Date: May 2010
Location: Mountain House, CA
Posts: 555
|
Re: Another way to skin the cat; the High Torque 292 LS swap
Looks good, I noticed that your compressor does not have the high pressure switch on the back. What year is the compressor? Top notch build.
__________________
My Chevy habit is paid for by Ford diesels... Here is my SLOW LS install: http://67-72chevytrucks.com/vboard/s...55#post6456355 Caliper Rebuild: http://67-72chevytrucks.com/vboard/s...d.php?t=613748 Upper Control Arm Bushings: http://67-72chevytrucks.com/vboard/s...d.php?t=616974 IG mattcrp1 |
|
|
|
 |
| Bookmarks |
|
|


 Hybrid Mode
