
|
Register or Log In To remove these advertisements. |
|
|
|
|||||||
 |
|
|
Thread Tools | Display Modes |
|
|
 05-06-2012, 12:41 PM
|
#1 |
|
Junk Yartist
Join Date: Jul 2009
Location: Greeley, CO
Posts: 2,203
|
Re: '63 GMC 4x4 "Just Because I can" Build
So in my last post on your thread, I asked if you pressed the extensions into the housing... well, what I should have asked was if you had to extend the long side of the eaton housing any more than the section that is inside the inner C. Or did you have to cut the long side down any? In the pictures it doesn't look like the long side had to be extended out more. All I can see is your plug weld grinds. Also, what was the wall thickness of the eaton housing? did you have to turn it any to get it true so it would fit over your freakin awesome axle extensions?
Too many questions?
__________________
-Jeremy YOU ONLY FAIL IF YOU STOP TRYING 70 Crew Cab Build Link 70 GMC Suburban 4X4 build thread 95 Yukon Daily Driver Rebuilding an NP205 |

|

|
|
05-08-2012, 02:30 AM
|
#2 | |
|
Registered User
Join Date: Jul 2010
Location: Sierra Vista, Arizona
Posts: 79
|
Re: '63 GMC 4x4 "Just Because I can" Build
Quote:
Other than the part that is in the C on the long side, I did not extend it. Actually had to trim about 1/8'' off the long side to get everything right where I wanted it. And the Eaton housing uses 3 1/4'' x 5/16'' wall tubes, and I didn't turn the housing itself, I just turned the extensions to a certain size to match the side it was going on (one extension I had to turn about .007 smaller than the other to get it to fit tight, but not too tight). Small update, I put the 3rd back in the housing to check if the shaft lengths were right, and they were right on the money. I also checked it again with a buddy's setup bar and found that I just slightly tweaked the drivers side inner C forward by about 1/16'' from welding. Used the flame bending method to pull it straight (Use of heat only, no force, uses steel's natural expansion/contraction properties to bend something) , worked like charm, so its good to go now. Made some shackles, not 100% done with them yet (still have to punch the holes out to the final size on the ironworker at work and plug weld the 2 holes in the middle I cut for that.) All TIG welded, 1/2'' thick overall, each is 2 pieces of 1/4'' thick steel, and they are 5.5'' long from bolt center to bolt center. 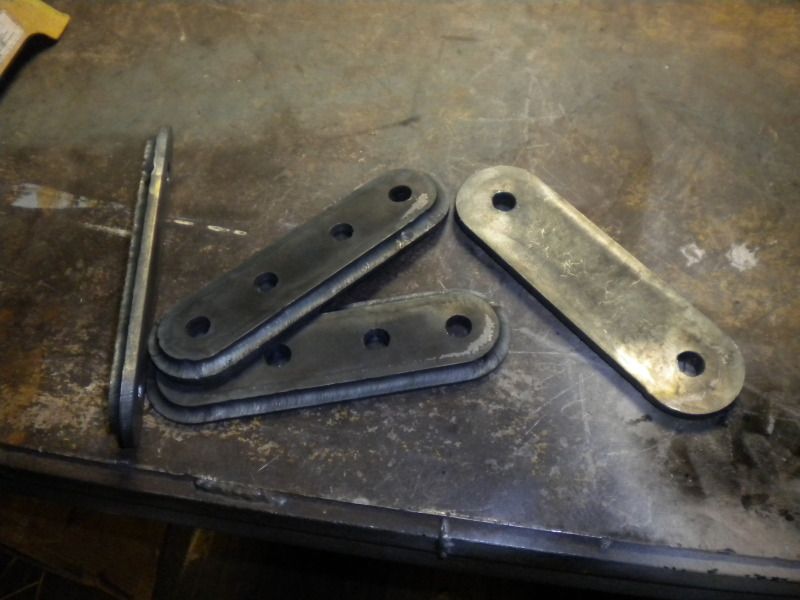 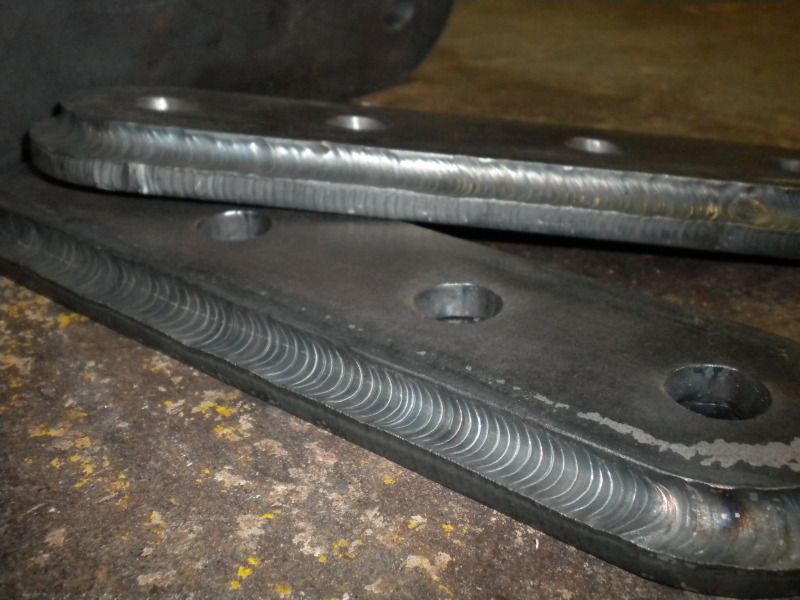 And made some 1/4'' thick rings with the Eaton HO52/72 diff cover bolt pattern cut in them, should make for a nice heavy duty diff cover or diff cover guard. 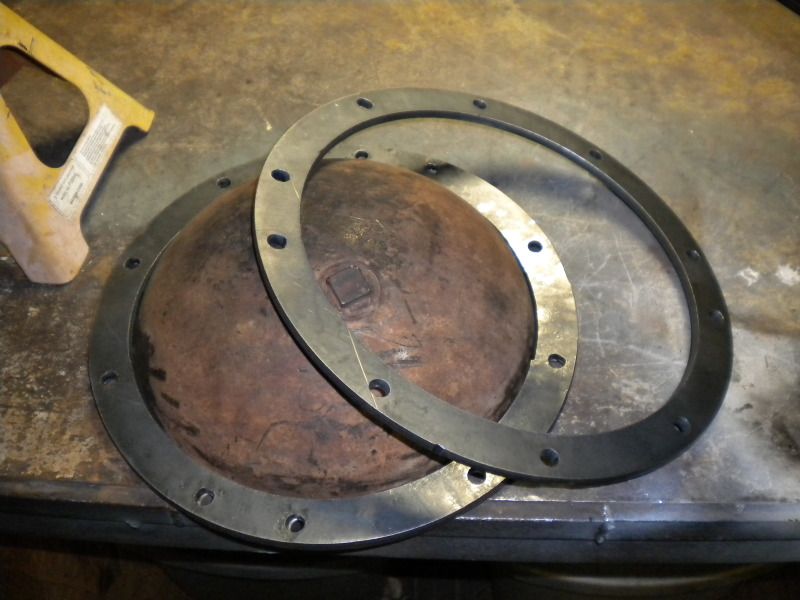 And I got 3 more H1 wheels/tires from a buddy, 7 total now (7 good wheels, 5 good tires). 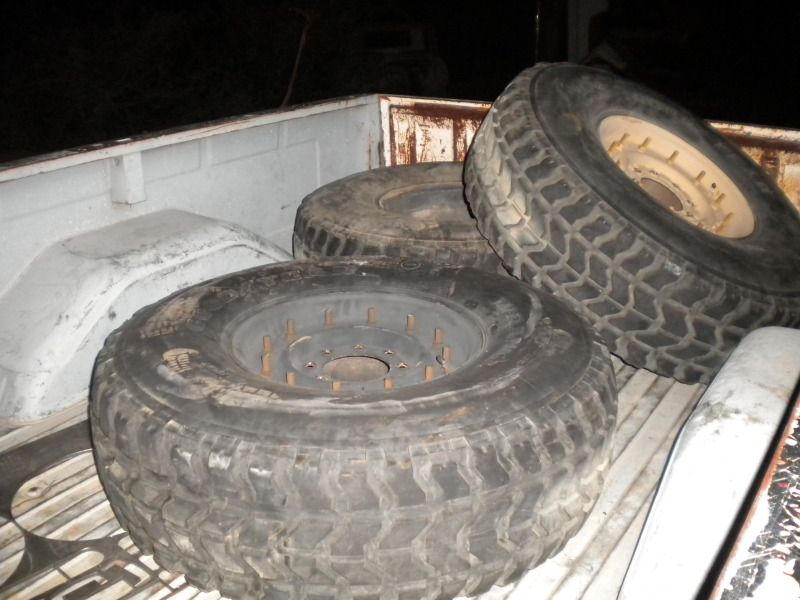 I'm selling the wheels BTW, if anyone is interested send me a PM!
__________________
'63 GMC K20 Work In Progess - 350/400/205/HO72-60/HO72/52's/56's "Because I can" 
|
|
|
|
|
|
05-30-2012, 08:11 AM
|
#3 |
|
Registered User
Join Date: Feb 2011
Location: muskogee, ok
Posts: 1,091
|
Re: '63 GMC 4x4 "Just Because I can" Build
love ur work man keep it up!!!! i see you used the drill bit to bevel the holes but does it work well as a normal drill bit with that much angle? looks like it would work great but i was just curious
__________________
 bagged 66 longbed build http://67-72chevytrucks.com/vboard/s...d.php?t=449548 my favorite colors.. black, rust, and shiny!!!! instagram: @coulter918 Last edited by coulter; 05-30-2012 at 08:17 AM. |
|
|
|
|
05-31-2012, 01:53 AM
|
#4 | |
|
Registered User
Join Date: Jul 2010
Location: Sierra Vista, Arizona
Posts: 79
|
Re: '63 GMC 4x4 "Just Because I can" Build
Quote:
Thanks! I actually haven't tried to use it as a normal drill bit since then, only used it to put the taper on those holes, but I don't see why it wouldn't work, although it may try to bite and stick with as long as the cutting edges are now. It'll get thrown in with the rest of my specialty tools anyway though. Just a quickie update from today, got the steering box bolted up to the frame, using some flange nuts for spacers since they have a taper at 1 end for a good weld and the large flanged end for lots of contact area on the steering box. The nuts will be welded on. And of course, used grade 8 bolts to secure the box. Also note that that is a stock 2wd pitman arm on there with the standard amount of drop, clears the frame with plenty of room. When I boxed and plated the frame I moved the steering box forward about 1'' and rotated it so the pitman shaft was more vertical, not by much but it definitely will keep the pitman arm from swinging in such an extreme low(turned to lock) to high (center) to low (turned to lock) arc. 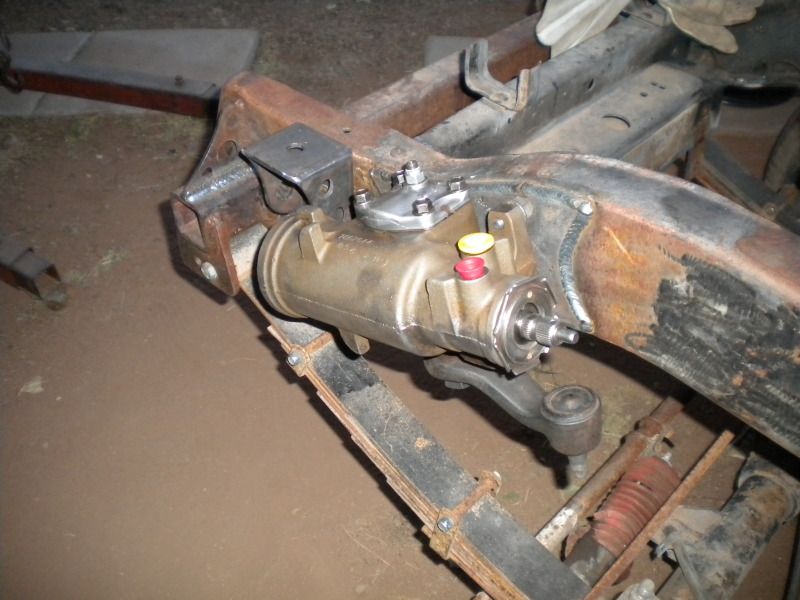 Just the right amount of room. 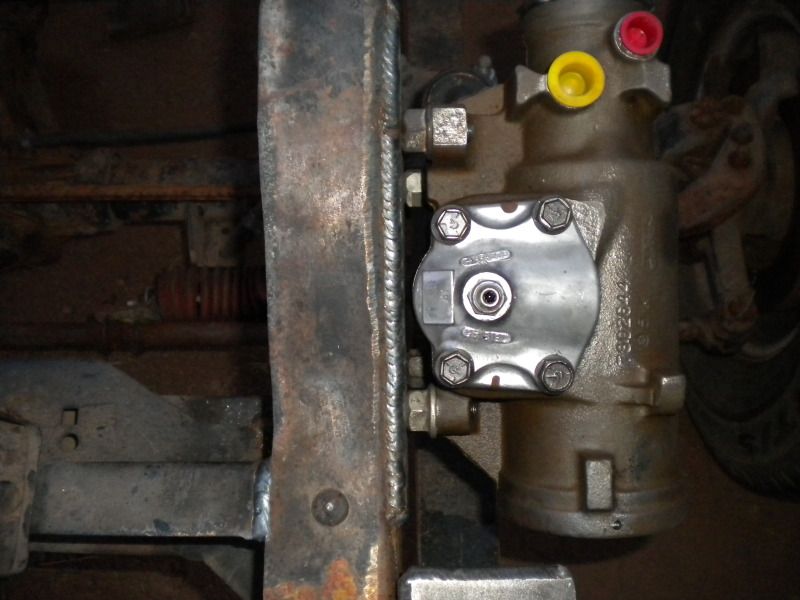 I modified some old front clip mounts I made a while back to look a little better, bolted them to the frame temporarily just to get them in position, I've since welded them on. The holes make it go faster too.  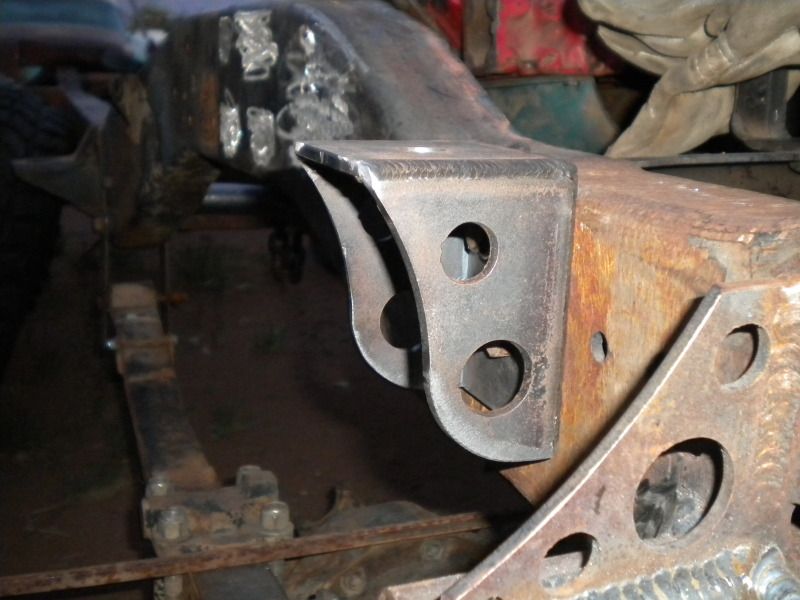 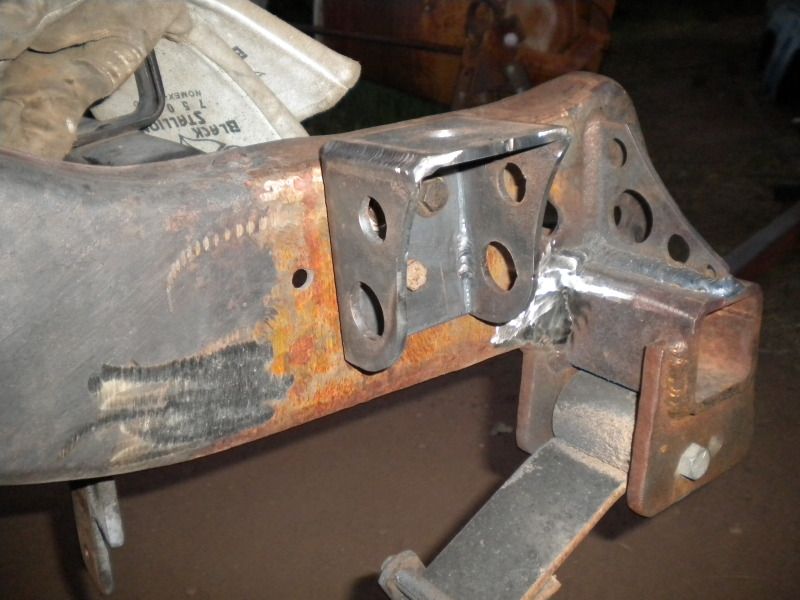 And I bolted up an oil pan to check for clearance, unfortunately I don't think I would be able to pull the pan with main caps and a crank in the way, but the motor mount cross member is easy enough to drop if the need arises. I've got about ~1.25'' of clearance with that particular pan.  Hoping to get the transfer case done over the weekend, should only take me a few hours since I've done it a couple times already. I'll doing the twin stick mod to the shift rails while I'm at it.
__________________
'63 GMC K20 Work In Progess - 350/400/205/HO72-60/HO72/52's/56's "Because I can"
|
|
|
|
|
|
05-31-2012, 09:58 AM
|
#5 |
|
Junk Yartist
Join Date: Jul 2009
Location: Greeley, CO
Posts: 2,203
|
Re: '63 GMC 4x4 "Just Because I can" Build
Your TIG welds shouldn't be hidden. Those are amazing.
__________________
-Jeremy YOU ONLY FAIL IF YOU STOP TRYING 70 Crew Cab Build Link 70 GMC Suburban 4X4 build thread 95 Yukon Daily Driver Rebuilding an NP205 |
|
|
|
|
05-31-2012, 01:44 PM
|
#6 | |
|
Registered User
Join Date: Jul 2010
Location: Sierra Vista, Arizona
Posts: 79
|
Re: '63 GMC 4x4 "Just Because I can" Build
Quote:
__________________
'63 GMC K20 Work In Progess - 350/400/205/HO72-60/HO72/52's/56's "Because I can"
|
|
|
|
|
|
06-01-2012, 12:09 AM
|
#7 |
|
Registered User
Join Date: Jul 2010
Location: Sierra Vista, Arizona
Posts: 79
|
Re: '63 GMC 4x4 "Just Because I can" Build
Progress on the transfer case....
Got the Ford divorced NP205 housing painted, Chevy Orange of course, that makes up having a Ford part in a GM truck. 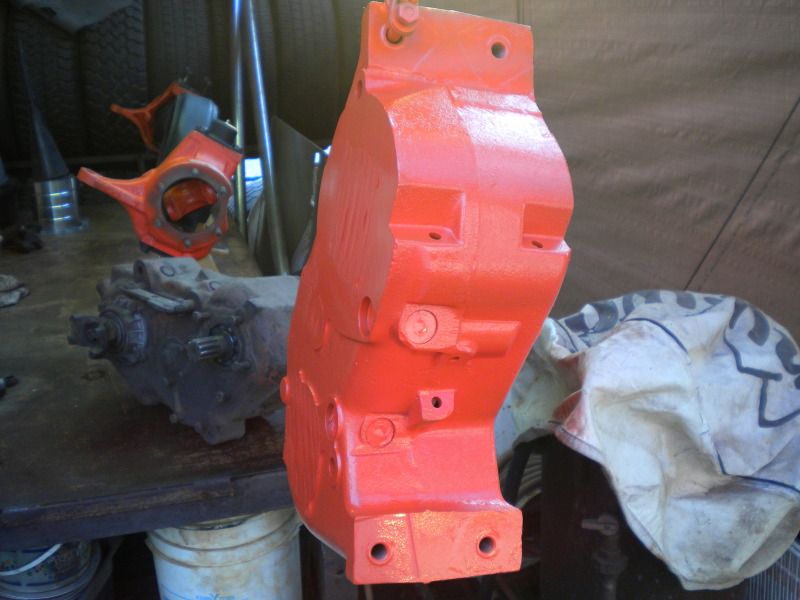 Started pulling the mated Ford 205 apart to rob it of its internals to put in the divorced housing. I started by pulling the shift rails to do the usual twin stick mod. 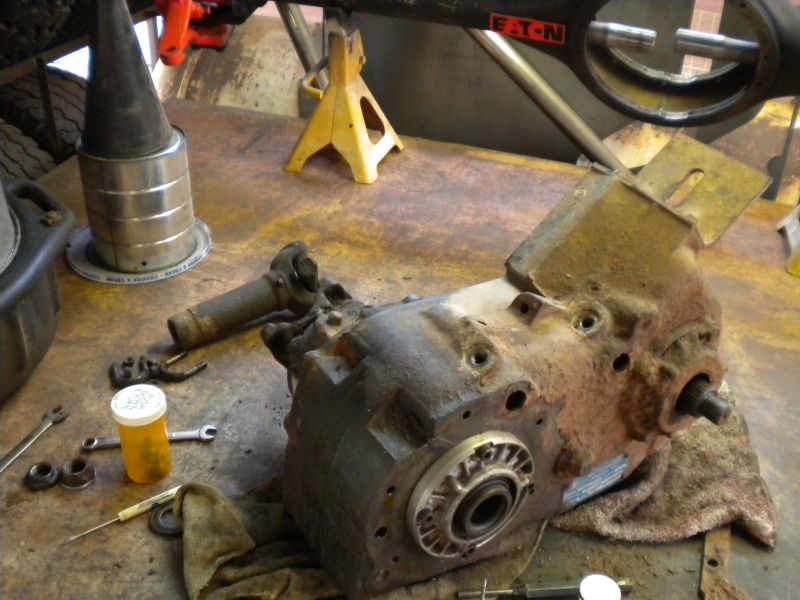 On the rear shift rail ONLY for the twin stick mod, mark out 3/8'' from the end and 7/16'' from the end of the middle interlock pin slot, as shown in the picture.  Then grind the rail until the sharpie markings are gone, and it should look like what is shown in the picture. Remember if you remove too much from the rail, it's a pretty expensive mistake since you have to try to buy a used one or a brand new one. Don't remove too much and you'll be fine. Measure twice, cut once.  I did the grinding with a die grinder and grinding disc attachment, its very controllable but works fast. I did the grinding with a die grinder and grinding disc attachment, its very controllable but works fast.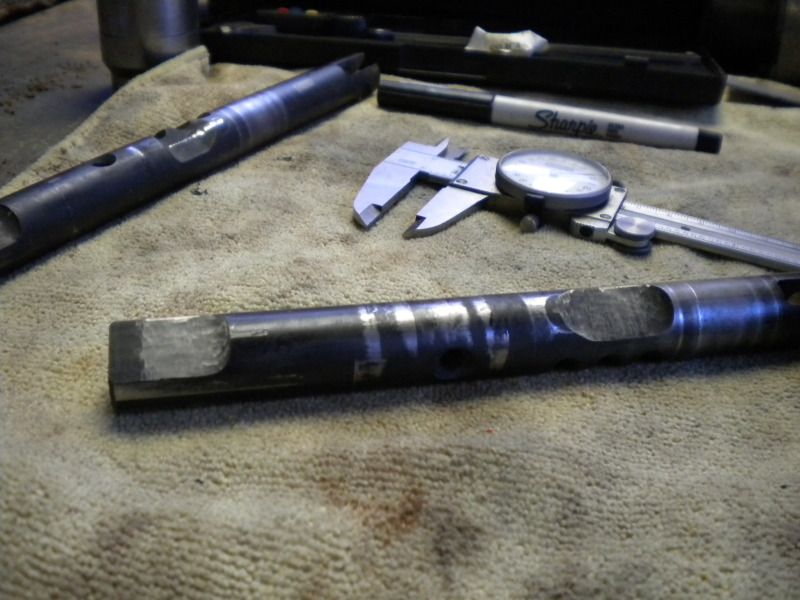 Almost looks factory! 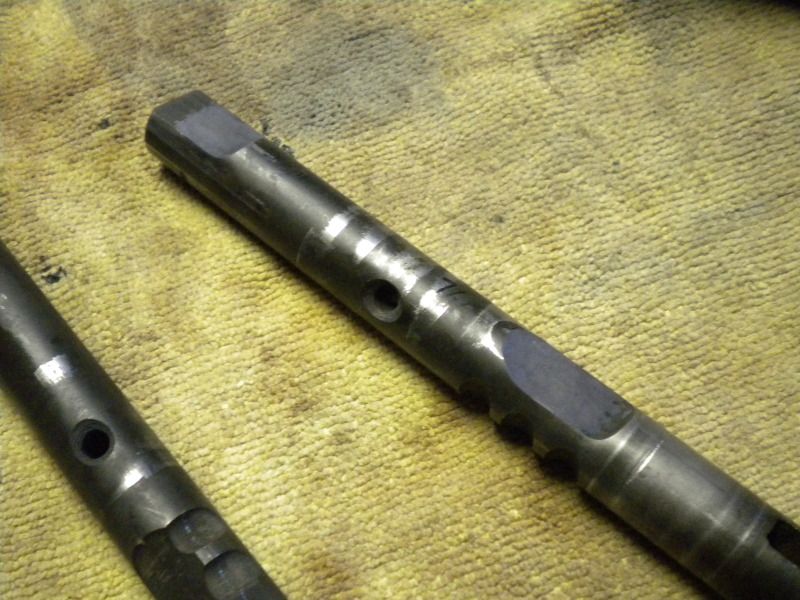 Then I tore into the case, since I've done this a few times it probably only took me 30 minutes to tear it down. Nothing to these NP205's. The internals are nice and clean but I'm going to pull everything completely apart and inspect/clean, I really only want to have to do this once so the extra time spent now is well worth it in the long run. 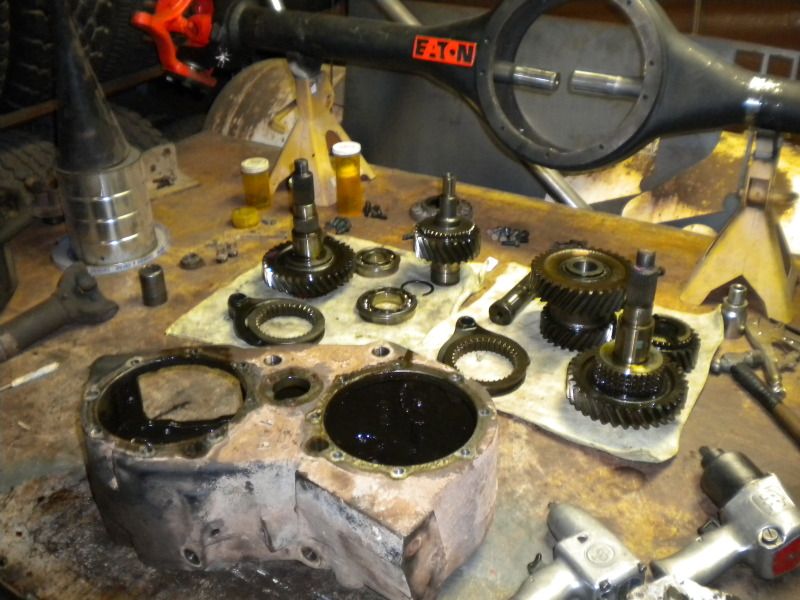
__________________
'63 GMC K20 Work In Progess - 350/400/205/HO72-60/HO72/52's/56's "Because I can"
|
|
|
|
|
07-24-2012, 02:47 PM
|
#8 |
|
Registered User
Join Date: Sep 2010
Location: Hancock Md
Posts: 397
|
Re: '63 GMC 4x4 "Just Because I can" Build
Amazing work man! I had a 305v6 63 gmc stepside 4x4 and always hope to get another one (if I ever do it is going to be 478V6 4spd truck lol). I was wondering if you dont want a lift block in rear why not do a shackle flip like alot or us 73-87 guys do, you could make the rear mount yourself and I think the trucks ride bit better like that.
|
|
|
|
|
08-06-2012, 04:09 PM
|
#9 |
|
Junk Yartist
Join Date: Jul 2009
Location: Greeley, CO
Posts: 2,203
|
Re: '63 GMC 4x4 "Just Because I can" Build
Hey man, seems like a lot of threads on pirate and other 4x4 boards say the tubes can't take the stress as a front. I really hope that's not true! I have a HO52 waiting to become a front once i get to that point. Didn't Napco use Eatons up front?
Posted via Mobile Device
__________________
-Jeremy YOU ONLY FAIL IF YOU STOP TRYING 70 Crew Cab Build Link 70 GMC Suburban 4X4 build thread 95 Yukon Daily Driver Rebuilding an NP205 |
|
|
|
|
08-07-2012, 12:08 AM
|
#10 | |
|
60-66 Nut
  Join Date: Mar 2007
Location: Coeur d'Alene, Idaho
Posts: 23,246
|
Re: '63 GMC 4x4 "Just Because I can" Build
I know the 1/2 ton Napco's used the same Eaton HO32 third member, and what appeared to be essentially the same housing as the rear. Of course the center was offset to the pass side. I would imagine the 3/4 tons would have used the Eaton HO52/72 on the front in the same way.
Quote:
__________________
Power Steering Box Adapter Plates For Sale HERE Power Brake Booster Adapter Brackets For Sale '63-'66 HERE and '67-'72 HERE and '60-'62 HERE and "60-'62 with clutch HERE Rear Disc Brake Brackets For Sale. Impala SS calipers HERE Camaro Calipers HERE D52 Calipers HERE 6 Lug HERE Hydroboost Mounting Plates HERE |
|
|
|
|
|
08-07-2012, 08:49 PM
|
#11 | |||
|
Registered User
Join Date: Jul 2010
Location: Sierra Vista, Arizona
Posts: 79
|
Re: '63 GMC 4x4 "Just Because I can" Build
Quote:
I decided against a shackle flip because this truck will be used to tow stuff that I can't with my daily driver (1990 2wd 1500 Suburban), like my tractor or anything else too heavy for my 'Burb. Shackle flips are known to be iffy for towing if not set up right. Not to say that a compression shackle is bad, a lot of the later dodge trucks (like 3rd gen and up I guess?) use a compression shackle, but they are set up for it from the factory, and the angle of the shackle has a lot to do with that too (again, they are set up right from the factory). The problem with towing with a truck that has a shackle flip with a shackle angle that is accepted as correct to the off road crowd (generally something like 30* back) is that the weight of the truck is forcing the shackle to move and flatten the spring, it makes it feel very spongy/flexy, that's why it works good offroad, bad when towing, any extra weight just applies more leverage to the shackle to flatten out the spring. In a tension shackle, the weight of the truck is naturally trying to keep the shackle vertical because its pulling down and forward on the shackle against the spring, so it doesn't get spongy with more weight, making it safer for towing. Quote:
Quote:
And yes, the Napco 4x4 conversion trucks of the 50's had a Napco Eaton front axle. I know for the 3/4 tons they used the HO52/72 diff, with closed knuckles and Rzeppa joints (Similar to a Birfield/CV) and they had the diff on the passenger side. EDIT: I've seen it mentioned on Pirate that 14BFF tubes are weak and bend easily and more so in a front application, but never seen any mention of that for an Eaton front. There is a guy on Pirate who used a Napco Eaton front axle in his build, did a cut and turn, and a rebuild, and I don't remember reading anything about him being concerned about the tube strength. As far as I know, I'm the only one on Pirate who has built an Eaton front using as much of the original tubes as possible, the other guy that is building an Eaton/60 front used D60 tubes welded to just the center section of the Eaton housing, and I don't believe he is finished yet. Really we are in uncharted territory with the Eaton front axles because the Napco front axles are so rare and myself and 1 other guy so far are the only ones I know of to build an Eaton/60, so it's really more of an experiment at this stage, it's not proven like a 14b front which has been done hundreds of times before. If you are planning on building one, I would dive right into it, go at it however you think it should be done. There is no right way or wrong way at this stage, my Eaton front is built in a much different way than the other one on Pirate, either way is good if care is taken to make everything turns out right without cutting corners. I just did what worked best for me with the tools (and budget) I had available.
__________________
'63 GMC K20 Work In Progess - 350/400/205/HO72-60/HO72/52's/56's "Because I can"
Last edited by 63GMCKid; 08-07-2012 at 09:06 PM. |
|||
|
|
|
|
08-08-2012, 09:42 AM
|
#12 |
|
Registered User
Join Date: May 2007
Location: Deale Md
Posts: 4,663
|
Re: '63 GMC 4x4 "Just Because I can" Build
Everything looking good.
__________________
James 63 GMC V6 4speed carryall 65 chevy swb bbw V8 auto 68 K20 327/4 speed, buddy buckets 2002 GMC CC Dually Duramax 64 GMC lwb 3/4 V6 4speed SOLD 66 GMC swb bbw buddy buckets SOLD IG duallyjams The only thing that stays the same is constant change! |
|
|
|
|
01-09-2013, 11:15 PM
|
#13 |
|
Registered User
Join Date: Nov 2012
Location: Miles City MT
Posts: 240
|
Re: '63 GMC 4x4 "Just Because I can" Build
Very Impressed...! What a build!
|
|
|
|
|
03-04-2013, 01:54 AM
|
#14 |
|
Registered User
Join Date: Jul 2010
Location: Sierra Vista, Arizona
Posts: 79
|
Re: '63 GMC 4x4 "Just Because I can" Build
Well with the spring warm up comes more work, more money, and more progress on the projects. This damn quad has still been sucking up most of my project money lately with a complete tear down, a "reliability rebuild" for the engine, and fresh powder coat and matte blue plastics. Otherwise known as the money pit, just a cool picture of it from the last time I rode my Raptor 660 before tearing it down a couple weeks ago. Now on to the good stuff, the GMC.
 Once again, I'll try not to say too much, and let the pictures do the talking. So I finally put the cab back on the frame. Haven't welded in the plates to box in the frame yet, but I needed to get the cab out of the way, and now would be a great time to put it on the frame. Gave me motivation to continue with it, I got rather burned out, the quad helped with that some, but nothing helps more with motivation for a burned out project than just doing something with it. Ignore the duct tape on the windshield, the windshield is not actually in place, its just sitting there, the duct tape is to keep it from falling off when I move it. Looks much better with the cab on the frame now with the 52's in the front to level it out and the 3/4 ton 56's out back. Sits level, shackle angle is pretty good, should be perfect once it has more weight on it. 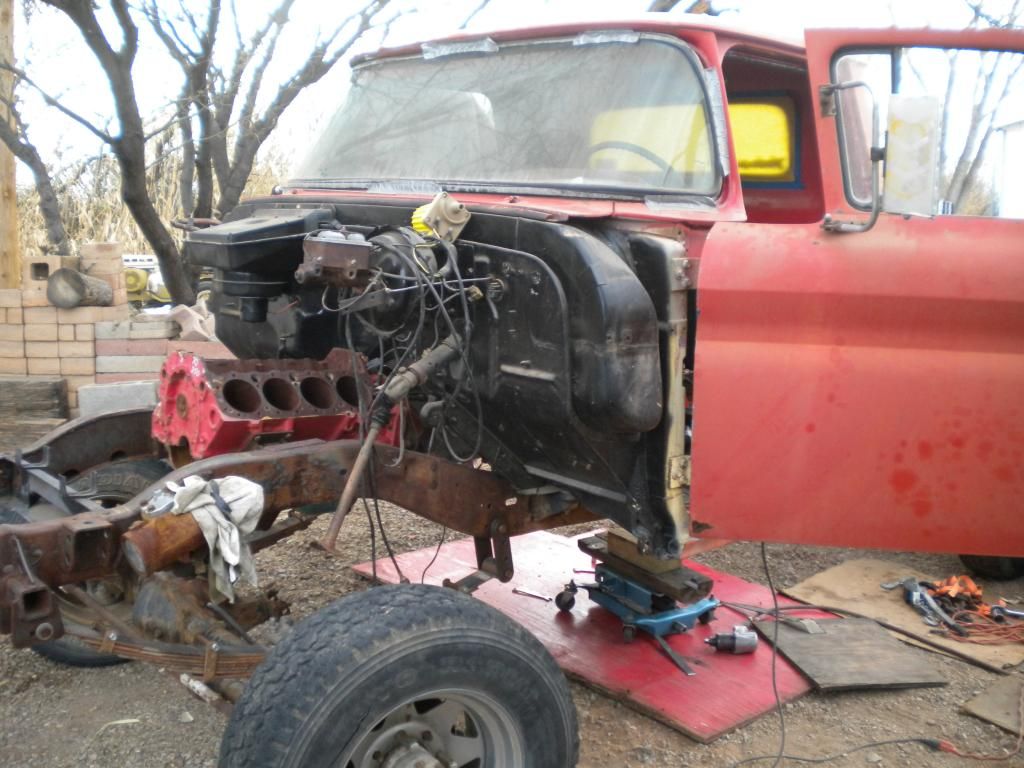 Tons of room behind the engine to get a ratchet on the bell housing bolts, sticking to the ease of maintenance theme here. 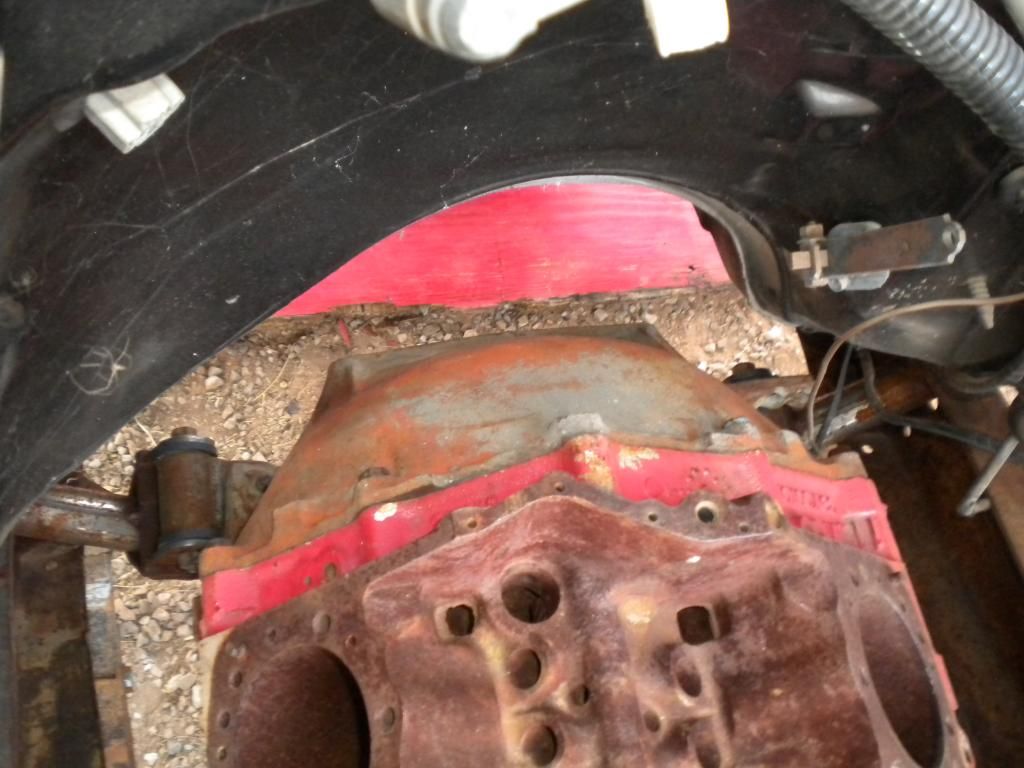 Now I know this next picture is going to make a lot of you guys cringe, but it had to be done.... hacked up the perfect floor just to have a flat bottom frame. Divorced 205 in place, fits pretty good, but I have to redo my e-brake caliper bracket, caliper does not clear the rear structural member of the cab, and I would rather not hack that up. (e-brake caliper bracket removed in these pictures, had to take it off to get the 205 in)  Beef, it's whats for dinner. Beefy 1410 bolt on high angle flange yoke that I made with some 1410 parts from a set of half shafts of unknown origin that I acquired for free from a friend and a bit of 1/2'' steel. Puts that low angle cast 1350 bolt on yoke to shame. 1410 slip yoke assembly on the left, notice the width difference of the yoke compared to the 1350 on the right. That cast 1350 bolt yoke will probably find its way to the front drive shaft if I buy another flange from WFO. 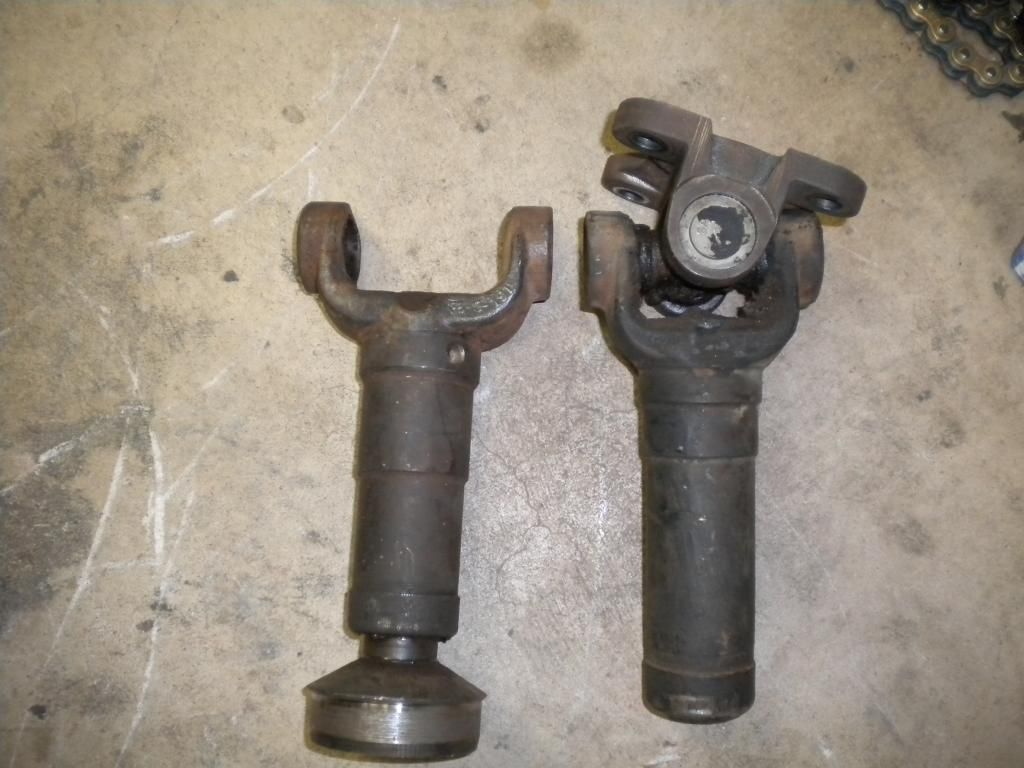 And the big haul for the winter, scored a 42'' x 96'' x 3/8'' thick piece of 2024 aluminum, which has all the strength of 7075, but slightly cheaper due to being less corrosion resistant, for cheap. Traded a 14bff housing for it, not a bad deal right?  Will be made into a full skid plate, from oil pan to transfer case and then some. Will be made into a full skid plate, from oil pan to transfer case and then some.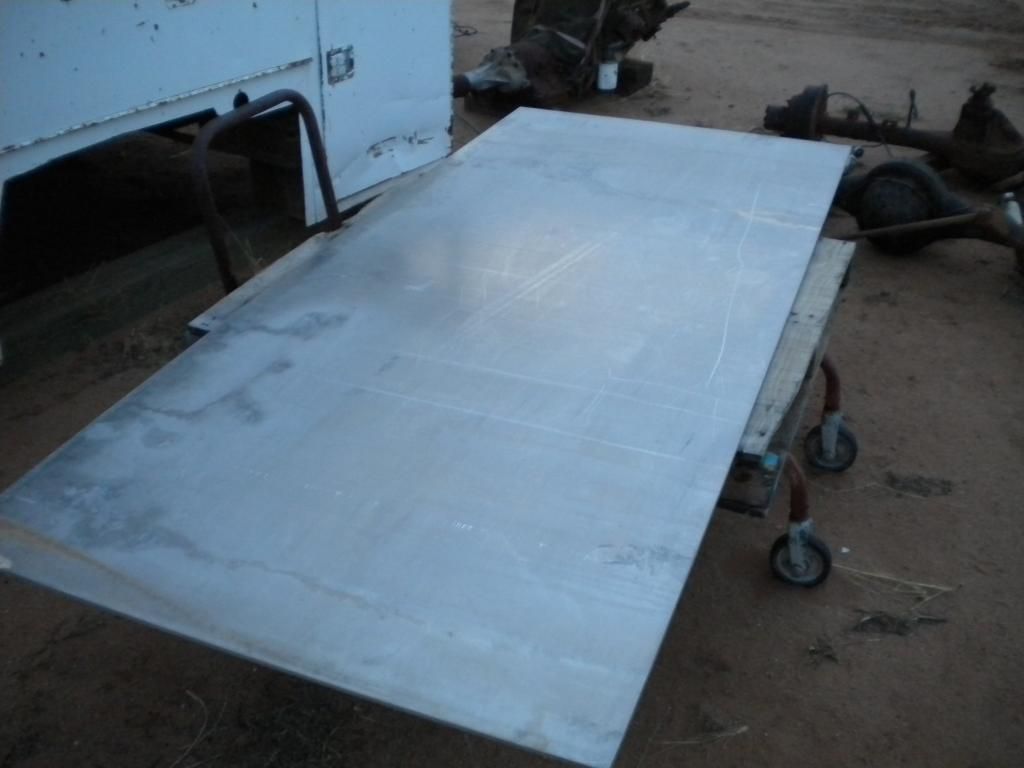 One more good score for this update, picked up a pair of Eaton HO72's for $100, one is out of a '68 Chevy 3/4 ton with 4.10's, and the other is out of a '54 Chevy 3/4 ton with 4.56's, both have the taper roller pinion bearing, unknown condition on the inside currently, but for $100 I couldn't pass them up. 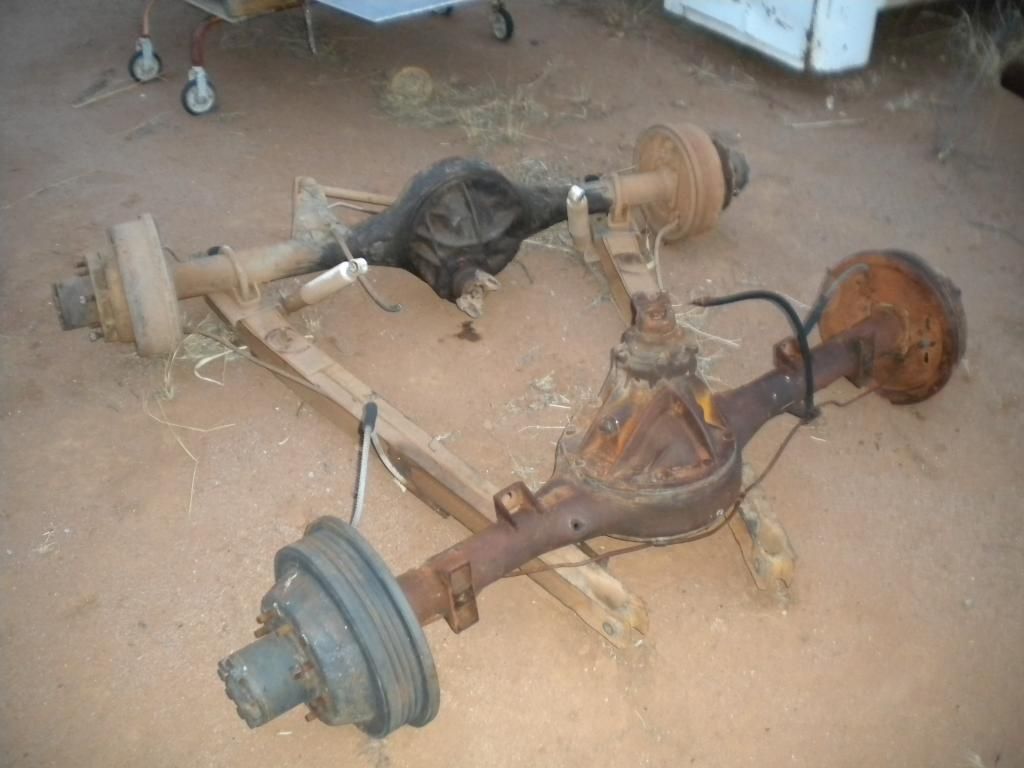 And that's all for now folks! Once I finish up with a couple other small projects, it's back to working on this one as much as possible, so stay tuned!
__________________
'63 GMC K20 Work In Progess - 350/400/205/HO72-60/HO72/52's/56's "Because I can"
|
|
|
|
|
03-04-2013, 02:15 AM
|
#15 |
|
Junk Yartist
Join Date: Jul 2009
Location: Greeley, CO
Posts: 2,203
|
Re: '63 GMC 4x4 "Just Because I can" Build
Sticking around for the eaton front axle build still.
Posted via Mobile Device
__________________
-Jeremy YOU ONLY FAIL IF YOU STOP TRYING 70 Crew Cab Build Link 70 GMC Suburban 4X4 build thread 95 Yukon Daily Driver Rebuilding an NP205 |
|
|
|
|
03-04-2013, 02:33 AM
|
#16 | |
|
Registered User
Join Date: Jul 2010
Location: Sierra Vista, Arizona
Posts: 79
|
Re: '63 GMC 4x4 "Just Because I can" Build
Quote:
 , here is a refresher pic. All I need for it now is hubs to get it rolling, then I can weld on the spring perches and sling it under the truck. Just waiting for a good deal on hubs... There are 2 more front Eatons on Pirate now, one using a fabricated aftermarket housing with the Eaton 3rd, and another that was built using pretty much the same method as mine (turn down tubes for inner c adapters/extensions, etc.). I believe the one built in a similar fashion as mine is almost done on Pirate, check the Eaton thread in the Chevy section there for more details on it. , here is a refresher pic. All I need for it now is hubs to get it rolling, then I can weld on the spring perches and sling it under the truck. Just waiting for a good deal on hubs... There are 2 more front Eatons on Pirate now, one using a fabricated aftermarket housing with the Eaton 3rd, and another that was built using pretty much the same method as mine (turn down tubes for inner c adapters/extensions, etc.). I believe the one built in a similar fashion as mine is almost done on Pirate, check the Eaton thread in the Chevy section there for more details on it.  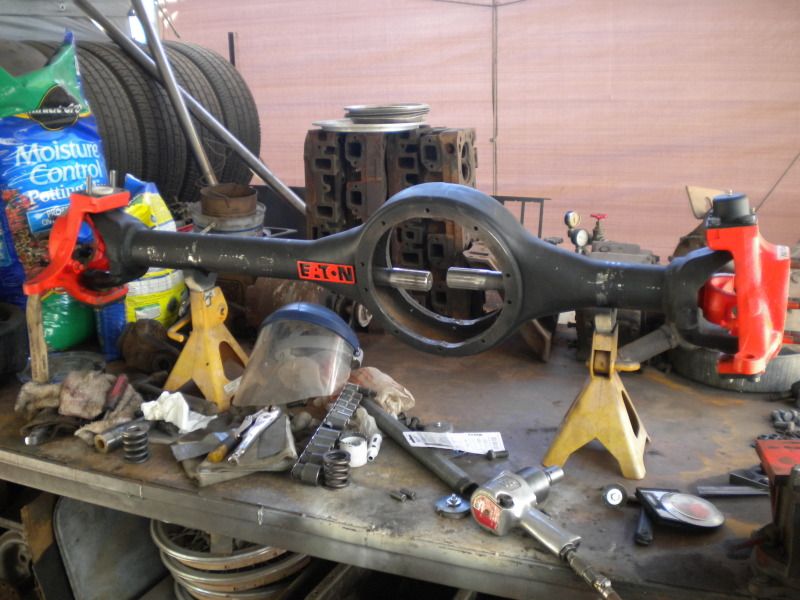
__________________
'63 GMC K20 Work In Progess - 350/400/205/HO72-60/HO72/52's/56's "Because I can"
|
|
|
|
|
|
03-04-2013, 08:40 PM
|
#17 |
|
Junk Yartist
Join Date: Jul 2009
Location: Greeley, CO
Posts: 2,203
|
Re: '63 GMC 4x4 "Just Because I can" Build
Yeah, that's the one thread on pIrate that I subscribe to. I am post as jwbennett there. I try not to comment there mostly because of the juvenile bickering that is so common. I have big plans for the Eaton I have for my Suburban.
Hey man, I started a thread on here a while ago that I think you could be a major contributor to. I haven't posted too much info as of yet, but here is a LINK
__________________
-Jeremy YOU ONLY FAIL IF YOU STOP TRYING 70 Crew Cab Build Link 70 GMC Suburban 4X4 build thread 95 Yukon Daily Driver Rebuilding an NP205 Last edited by jbclassix; 03-04-2013 at 08:46 PM. |
|
|
|
|
03-24-2013, 04:02 PM
|
#18 |
|
high-Tech Red Neck
Join Date: Feb 2008
Location: Livingston, MT/On my boat WA/BC/AK
Posts: 2,294
|
Re: '63 GMC 4x4 "Just Because I can" Build
Cool build man I am subscribed.
Some great fab work there.
__________________
"He used to be a pretty nice feller, now he's a welder!" |
|
|
|
|
04-24-2013, 01:27 AM
|
#19 |
|
Junk Yartist
Join Date: Jul 2009
Location: Greeley, CO
Posts: 2,203
|
Re: '63 GMC 4x4 "Just Because I can" Build
Hey man, any updates on the Eaton60?
__________________
-Jeremy YOU ONLY FAIL IF YOU STOP TRYING 70 Crew Cab Build Link 70 GMC Suburban 4X4 build thread 95 Yukon Daily Driver Rebuilding an NP205 |
|
|
|
|
04-24-2013, 02:25 AM
|
#20 |
|
Registered User
Join Date: Jul 2010
Location: Sierra Vista, Arizona
Posts: 79
|
Re: '63 GMC 4x4 "Just Because I can" Build
Nothing new lately other than I built a massive axle straightening/building stand out of a 14'' tall I-beam. The weather has been great here, which means I've been working on my quad to get it going again for summer riding, takes up most of the time I have off from work. Hopefully soon I'll have it under the truck.
__________________
'63 GMC K20 Work In Progess - 350/400/205/HO72-60/HO72/52's/56's "Because I can"
|
|
|
|
|
01-12-2014, 12:01 AM
|
#21 |
|
Registered User
Join Date: Jul 2010
Location: Sierra Vista, Arizona
Posts: 79
|
Re: '63 GMC 4x4 "Just Because I can" Build
I just sold the cab, front clip, and frame for this truck, so the rest is being parted out. The front Eaton/60, rear Eaton HO72, and the NP205 transfer case are all for sale, along with other misc. parts from this truck. Please PM me if you are interested.
The build is over with folks, sorry to disappoint. Maybe if these axles sell to someone on here they will be put to good use.
__________________
'63 GMC K20 Work In Progess - 350/400/205/HO72-60/HO72/52's/56's "Because I can"
|
|
|
|
|
01-12-2014, 12:15 PM
|
#22 | |
|
Registered User
Join Date: Oct 2007
Location: Spanaway
Posts: 8,451
|
Re: '63 GMC 4x4 "Just Because I can" Build
Quote:
__________________
Mike. Swamp Rat build thread : http://67-72chevytrucks.com/vboard/s...d.php?t=595019 72 3/4T 4X4 4" BDS Lift 33" BFG's |
|
|
|
|
|
| Bookmarks |
|
|


 Hybrid Mode
