 |
|
|
|
|
#1 |
|
Registered User
 Join Date: Jan 2007
Location: Columbus, Ohio
Posts: 4,347
|
Re: 1972 Blazer - 'Bullet' Project
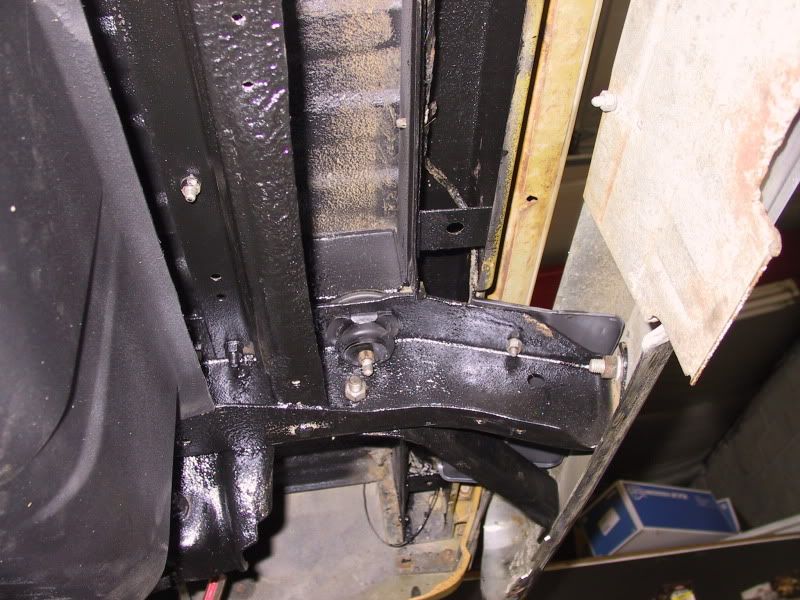
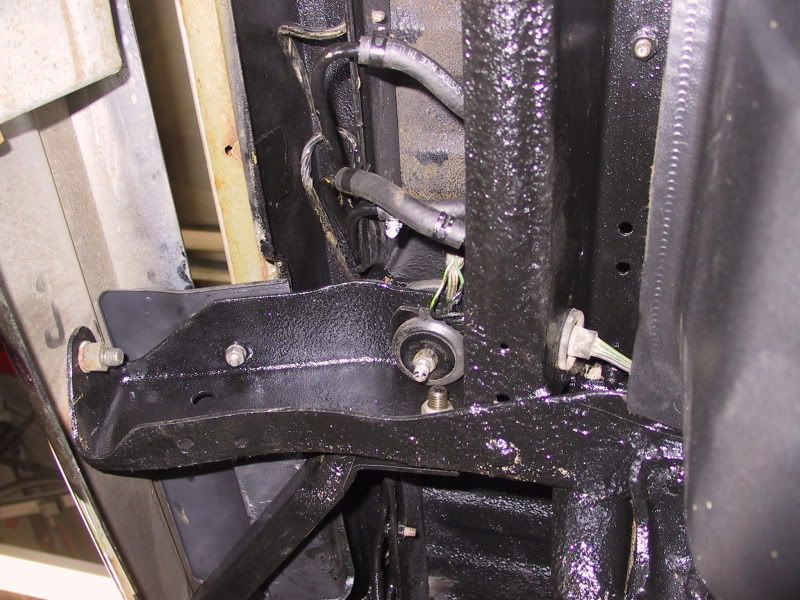
Since I mentioned it in my list of upcoming things I need to do - I guess I should show pix of how the body mounts look now (or at least how they looked on the 13th) -
 This is going from the driver side front to the back and then around to the passenger side and then up toward the front - some are worse than others - but I think I should replace all of them before I do any body work or remove the top. First batch here is mostly the driver side... |
|
|

|
|
|
#2 |
|
Registered User
 Join Date: Jan 2007
Location: Columbus, Ohio
Posts: 4,347
|
Re: 1972 Blazer - 'Bullet' Project
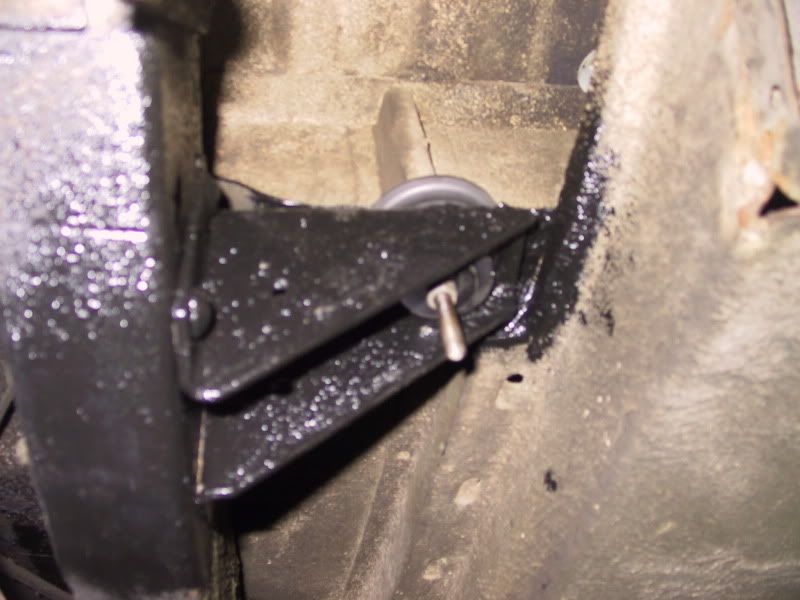
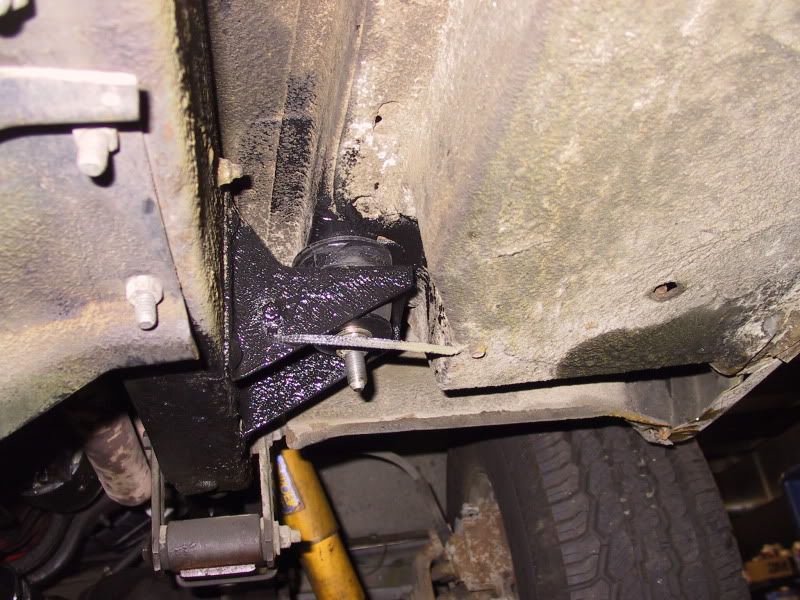
Then on to the two back mounts and then up the passenger side...
|
|
|

|
|
|
#3 |
|
Registered User
 Join Date: Jan 2007
Location: Columbus, Ohio
Posts: 4,347
|
Re: 1972 Blazer - 'Bullet' Project
last one - I will order a kit here in a few weeks - after I get my Dad's truck done and get going on this thing...
I will need to order a kit with bolts since most of these things will snap when I put any torque to them (the gas tank bolts did - 1 turn=snap) I hope to get this done before the snow starts here - so I can start some bodywork in the cold months this time in the garage - 
|
|
|

|
|
|
#4 |
|
GEARHEAD
Join Date: Aug 2003
Location: MN
Posts: 6,126
|
Re: 1972 Blazer - 'Bullet' Project
So thats what those rear mounts look like. Mine are so far gone, it's just air and iron oxide now. If you get a chance would you measure the hieght of those rear mounts on the tub? I'm going to have to make a pair.
__________________
If no one knows what you're doing, they can't tell you you're doing it wrong HG's Dream Car Build - Shelby Cobra Kit Build your own adjustable track bar 71  Long Fleet C/10 Long Fleet C/10 72  Jimmy 4x4 (Junkyard Jimmy) Jimmy 4x4 (Junkyard Jimmy)HG's Plow Truck '78  K35 Dually K35 DuallyBigass Farm Truck HG's thread of miscellaneous stuff |
|
|

|
|
|
#5 |
|
Registered User
 Join Date: Jan 2007
Location: Columbus, Ohio
Posts: 4,347
|
Re: 1972 Blazer - 'Bullet' Project
I can do that (get measurements) tonight/tomorrow - I am off work tomorrow (hopefully finishing the paint job on my Dad's truck).

|
|
|

|
|
|
#6 |
|
Registered User
 Join Date: Jan 2007
Location: Columbus, Ohio
Posts: 4,347
|
Re: 1972 Blazer - 'Bullet' Project
Looks to be right at/under 3" - don't know if that metal at the bottom is a washer or part of the metal mount (yet).
Last edited by lks dcvn; 09-17-2009 at 07:22 PM. |
|
|

|
|
|
#7 |
|
Senior Member
Join Date: Jun 2007
Location: Pine Ridge Florida
Posts: 4,125
|
Re: 1972 Blazer - 'Bullet' Project
Is this the area you are talking about?
  I can get pics and measurement of any of my mounts, they are all new and solid? |
|
|

|
|
|
#8 |
|
Senior Member
Join Date: Jun 2007
Location: Pine Ridge Florida
Posts: 4,125
|
Re: 1972 Blazer - 'Bullet' Project
or these?
  Just trying to help you out? |
|
|

|
|
|
#9 |
|
GEARHEAD
Join Date: Aug 2003
Location: MN
Posts: 6,126
|
Re: 1972 Blazer - 'Bullet' Project
Thanks guys, I appreciate it. I think I can make something that will work up there with some square tubing, when I get to that point.
__________________
If no one knows what you're doing, they can't tell you you're doing it wrong HG's Dream Car Build - Shelby Cobra Kit Build your own adjustable track bar 71  Long Fleet C/10 Long Fleet C/10 72  Jimmy 4x4 (Junkyard Jimmy) Jimmy 4x4 (Junkyard Jimmy)HG's Plow Truck '78  K35 Dually K35 DuallyBigass Farm Truck HG's thread of miscellaneous stuff |
|
|

|
|
|
#10 |
|
Registered User
Join Date: Mar 2003
Location: Cheboygan, MI
Posts: 998
|
Re: 1972 Blazer - 'Bullet' Project
subscribed
__________________
Tony Johnson -- '71 Blazer w/L-31 Vortec 350, SM465, NP205, performer intake, edelbrock 1406, HEI, 4" lift, Boyd EFI tank, Vintage A/C My Blazer -- |
|
|

|
|
|
#11 |
|
Registered User
 Join Date: Jan 2007
Location: Columbus, Ohio
Posts: 4,347
|
Re: 1972 Blazer - 'Bullet' Project
Well - I have been working on other things so I haven't spent too much time on this...
But I did get some other work started on it. I swapped the passenger/driver seat brackets so I didn't have a ripped driver seat anymore. I lubed up the channels and cleaned the seat up so I could sit down on it and not be dirty when I got out. I cleaned up the inside a bit more and bought all the stuff I needed to do the body mount swap...if I get the time and weather on my side this week - I will be swapping the new stuff in. Wish me luck...I am ready to cut the bolts out and get started when the items arrive. I will likely be cleaning up the mounts and putting some rust prevention (www.nomorerust.com) paint on them while I am in there. Then I can look at the rust repairs and see where I stand. I am hoping to work on this through the winter this year depending on what happens with my storage contact. I want to store the 69 Blazer and the 95 Impala SS and make some room in the garage to work on this indoors when the snow flies this year. |
|
|

|
|
|
#12 |
|
Registered User
 Join Date: Jan 2007
Location: Columbus, Ohio
Posts: 4,347
|
Re: 1972 Blazer - 'Bullet' Project
I didn't realize what a pain this project would be to swap the body mounts and bolts...
Except for the last two (position 5 at the tailgate) bolts - I had to drill out the head on each of the bolts and then bang them through from the top. I attached a pic of what I was working with - yikes. I started at 9am and quit for dinner and trick or treaters around 6. So in that time I got 9 of the 10 replaced (I have the driver floor mount to do yet tomorrow). Each mount got a layer of rust prevention paint and then put back together. I attached a fex pix during the process and a few that are done waiting to be tightened up. Right now the psgr door won't latch so it will need to be checked for alignment/shimming... Once I see how the both doors open/close I will shim accordingly, tighten up the mounts and then check out the rust repair needs - 
|
|
|

|
|
|
#13 |
|
Can't wait to retire!!
Join Date: Feb 2003
Location: Corunna, MI
Posts: 1,575
|
Re: 1972 Blazer - 'Bullet' Project
Good job...your one step closer.
__________________
 2009 4x4 Chevy Crew Cab 6.0 1989 4x4 Siverado (270,000 miles) 1972 4x4 Blazer 2007 Chevy Cutaway 1 ton 1970 Corvette (sons project) RIP - CLR 10/11/09 |
|
|

|
|
|
#14 |
|
Registered User
 Join Date: Jan 2007
Location: Columbus, Ohio
Posts: 4,347
|
Re: 1972 Blazer - 'Bullet' Project
Got the last bolt (driver floor) out on Sunday morning - PITA!
Had to cut the floor around it to get it out since it was rusted/welded all the way around and it would not release - that shouldn't really matter since I will likely be replacing the floors anyway. After that fiasco I checked the doors - had to add a few shims here and there, but the doors open/close as they should. After I went to put the driver floor pan bolt back in - it wouldn't go in - it was like the body had shifted and wouldn't allow the bolt to drop through the mount/frame...WTF! All the other bolts lining up with the mounts were OK for the most part - one of the rears was tricky - but it eventually went back in. Now I know I will have to remove that bolt again to get the new floors back in -  How can I get this shifted back over to drop the bolt through the floor mount when I replace the driver side floor metal - any advice? How can I get this shifted back over to drop the bolt through the floor mount when I replace the driver side floor metal - any advice?So - now the first step of the process is out of the way for rust repairs... 1. Replace Body Mounts if crappy - done 2. Have Top Bolted to the Body & Windshield Frame - my w/s frame is rusted out so the top isn't bolted to it - any advice here on how to proceed? |
|
|

|
|
|
#15 |
|
GEARHEAD
Join Date: Aug 2003
Location: MN
Posts: 6,126
|
Re: 1972 Blazer - 'Bullet' Project
If there is not a lot of misalignment on the bolt hole, you might be able to just run a drill bit through it to clean up the hole edges and drop the bolt through. I had to do this on my cab after replacing the floor pans. I have an extra windshield frame you can PM me if interested.
__________________
If no one knows what you're doing, they can't tell you you're doing it wrong HG's Dream Car Build - Shelby Cobra Kit Build your own adjustable track bar 71  Long Fleet C/10 Long Fleet C/10 72  Jimmy 4x4 (Junkyard Jimmy) Jimmy 4x4 (Junkyard Jimmy)HG's Plow Truck '78  K35 Dually K35 DuallyBigass Farm Truck HG's thread of miscellaneous stuff |
|
|

|
|
|
#16 |
|
Registered User
 Join Date: Jan 2007
Location: Columbus, Ohio
Posts: 4,347
|
Re: 1972 Blazer - 'Bullet' Project
Should I get the windshield frame replaced before taking off the doors and starting to work in the floors? I can get a picture of how it looks when I get home so you can see what I am working with.
I only ask because everybody says to keep the top bolted on to keep the things aligned when cutting out/replacing rusty metal - well that doesn't seem to be an option at this point since the frame is rusted out pretty good so there is nothing to bolt to. Just want to make sure I can keep this stuff lined up when I start the dismantle process over the winter for rust repair. I would hate to do this more than once -  Looking forward to hearing advice/comments on this. Last edited by lks dcvn; 11-06-2009 at 12:29 PM. |
|
|

|
|
|
#17 |
|
Registered User
 Join Date: Jan 2007
Location: Columbus, Ohio
Posts: 4,347
|
Re: 1972 Blazer - 'Bullet' Project
Here are some pix of my windshield frame...
|
|
|

|
|
|
#18 |
|
Registered User
 Join Date: Jan 2007
Location: Columbus, Ohio
Posts: 4,347
|
Re: 1972 Blazer - 'Bullet' Project
few more pix...curious to hear what you guys think.
As you can see the top isn't bolted on at the front so if I start cutting - 
|
|
|

|
|
|
#19 | |
|
Registered User
Join Date: Oct 2003
Location: Central Vermont
Posts: 8,538
|
Re: 1972 Blazer - 'Bullet' Project
Quote:
Keeping the top bolted down is basically the 'easiest' way of making sure things stay put but it's not the 'only' way to get it done accurately. Having the correct measurements and a couple of strategically placed supports are all you really need. Look at the skillz your building. 
Last edited by vtblazer; 11-08-2009 at 08:15 AM. |
|
|
|

|
|
|
#20 |
|
GEARHEAD
Join Date: Aug 2003
Location: MN
Posts: 6,126
|
Re: 1972 Blazer - 'Bullet' Project
If you lift the top off the windshield frame to replace the frame I don't think it will matter much for the other repairs. You can bolt it back down and all the other work is on the bottom end.
__________________
If no one knows what you're doing, they can't tell you you're doing it wrong HG's Dream Car Build - Shelby Cobra Kit Build your own adjustable track bar 71  Long Fleet C/10 Long Fleet C/10 72  Jimmy 4x4 (Junkyard Jimmy) Jimmy 4x4 (Junkyard Jimmy)HG's Plow Truck '78  K35 Dually K35 DuallyBigass Farm Truck HG's thread of miscellaneous stuff |
|
|

|
|
|
#21 |
|
Registered User
 Join Date: Jan 2007
Location: Columbus, Ohio
Posts: 4,347
|
Re: 1972 Blazer - 'Bullet' Project
Had some nice weather today so I started to look at the rust on this thing...
I didn't want to remove the door yet - so I got to what I could with it still on and found quite a bit of work ahead -  I cleaned about 5 lbs of rust/dirt/nest out of the psgr side rocker and torsion box alone... |
|
|

|
|
|
#22 |
|
Registered User
 Join Date: Jan 2007
Location: Columbus, Ohio
Posts: 4,347
|
Re: 1972 Blazer - 'Bullet' Project
I then turned to the rear quarter which I could tell had some bondo in it - little did I know how much -
 At least I know what I am working with now. Floor Pans, A Pillar for sure, B Pillar for sure, Inner Rocker, Outer Rocker, etc. LOT of work ahead. OK - what do I need to do to get a volunteer to come help and teach me how to weld - 
|
|
|

|
|
|
#23 |
|
Registered User
Join Date: Nov 2004
Location: Lindenhurst, IL
Posts: 659
|
Re: 1972 Blazer - 'Bullet' Project
Hey. Why don't you bring this thing to my shop and we'll get yours and mine knocked out at the same time. Looks like we're going thru the same things. You buy the beer and pizza.
|
|
|

|
|
|
#24 |
|
Registered User
 Join Date: Jan 2007
Location: Columbus, Ohio
Posts: 4,347
|
Re: 1972 Blazer - 'Bullet' Project
That would be great - that way we can scratch our heads in unison and curse GM for not putting any rust prevention on any of their metal at the factory...
Actually, I don't know when I would have time to get it there, do the work and get it back home. Most of my weekends get booked up with crap months in advance and I need to 'strategically' find ways to work on these things when I can.  I could use the help trust me... |
|
|

|
|
|
#25 |
|
Registered User
Join Date: Oct 2009
Location: Charleston, SC
Posts: 21
|
Re: 1972 Blazer - 'Bullet' Project
Holy crap, it looks like the rust is holding it together! Careful with the grinder

|
|
|

|
 |
| Bookmarks |
|
|