
 |
|
|
#51 |
|
Registered User
 Join Date: Nov 2008
Location: chino ca
Posts: 215
|
Re: Project 67 DRGNWGN - 67 Burban!!
your bags should handle at least 160 psi. i have firestones and i hooked them straight up to shop air. your ride height psi should be somewhere around 60psi, the rear probably less
__________________
69' 1/2 ton LONGBED__ _______ |__\__ |__(O)______(O)]  My build thread: http://www.67-72chevytrucks.com/vboa...d.php?t=354115 |
|
|

|
|
|
#52 |
|
low n' slo
 Join Date: Mar 2009
Location: rosenberg, texas
Posts: 5,172
|
Re: Project 67 DRGNWGN - 67 Burban!!
ya I have the gauges for them, but my t fittings for the valves are STILL on back order, so I haven't ran everything yet.
__________________
67 1/2 ton Suburban - Project DRGNWGN. Build thread  -_--_--_ _________ _--_-_ -/____|__|__\__ ,.,,,.,.,,.,|_O _______ O_] |
|
|

|
|
|
#53 |
|
low n' slo
 Join Date: Mar 2009
Location: rosenberg, texas
Posts: 5,172
|
Re: Project 67 DRGNWGN - 67 Burban!!
little update. i started on my other rear lower quarter panel yesterday. on this side i figured i would do it a little different. on the driver side i used a long base bed side panel because i didnt need an entire quarter panel. so this side i bought the whole thing since i needed it anyways. i also decided to use some rust converter this time around, unlike the other side. which is ok though because i decided i might cut out the entire rear floor anyways, so i can still repair the driver side if i needed to. anyways, here a few pics after a few hours of work...
some genius thought it would be good to make a "custom" hitch, and they also welded the bottom of the bumper across the top of the hitch, so i had to cut that off. i will cut off the hitch later, but i need to find a bumper anyways so its gonna stay for now... 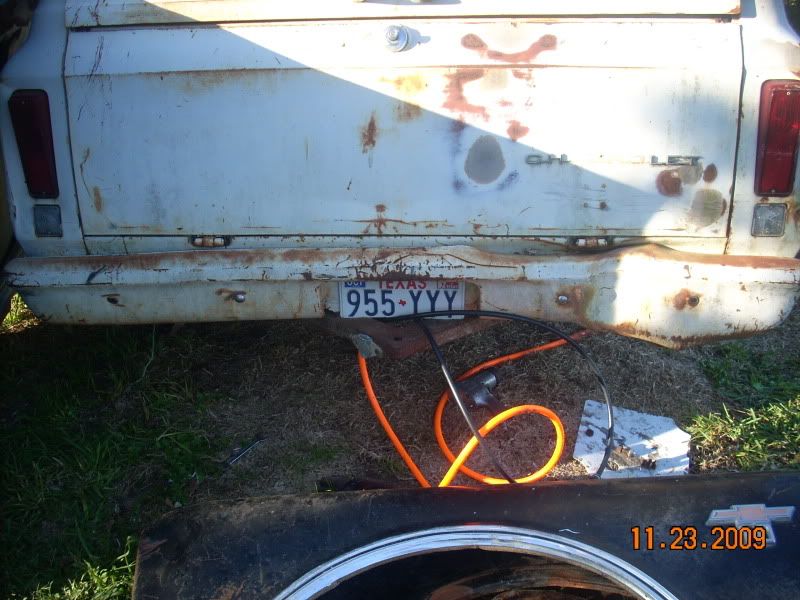 here is the cutout with some dupli color rust fix, then followed by some krylon rust tough enamel... 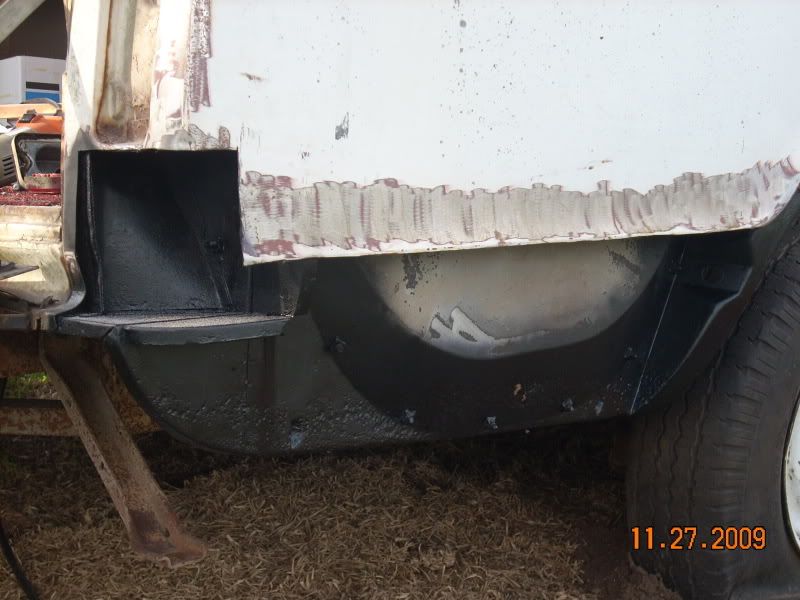 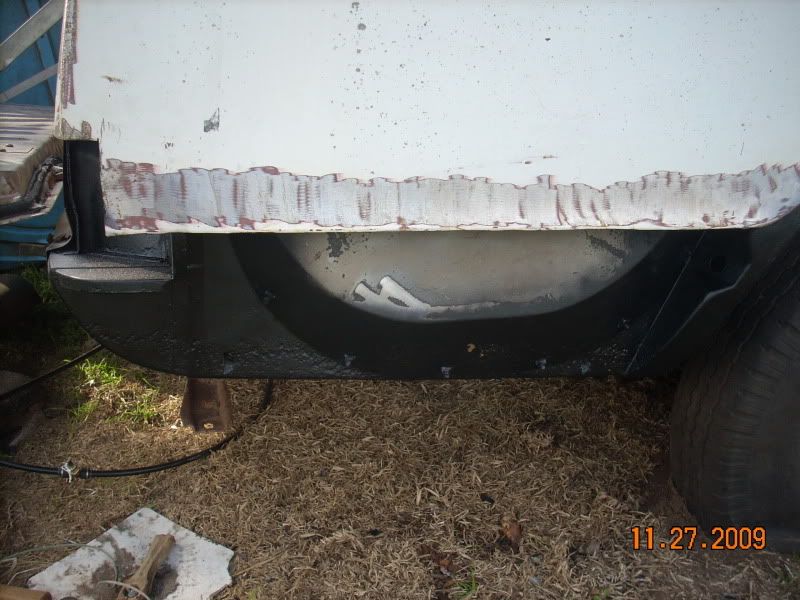 im not sure if all the replacement parts include the reverse light mounting piece, but mine didnt. so i had to cut it out of the old piece, then weld it in on the new piece. i welded it in on the back side, then sprayed the rust fix then rust tough enamel, just to be sure. 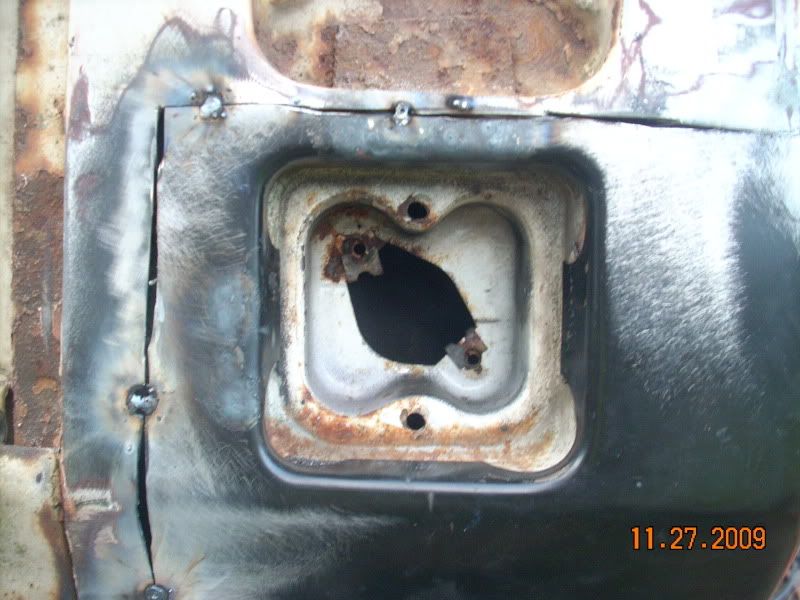 then i lined it up the best way i thought looked good, then tacked a few spots in. 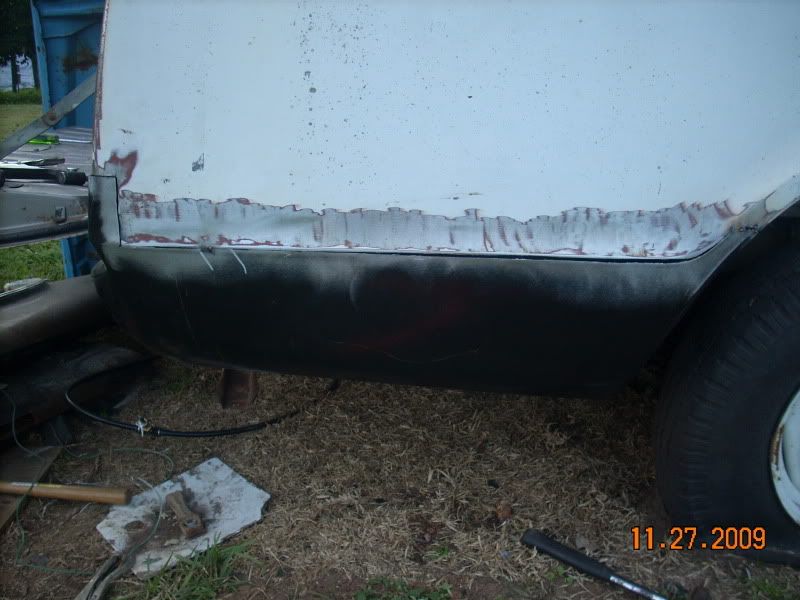 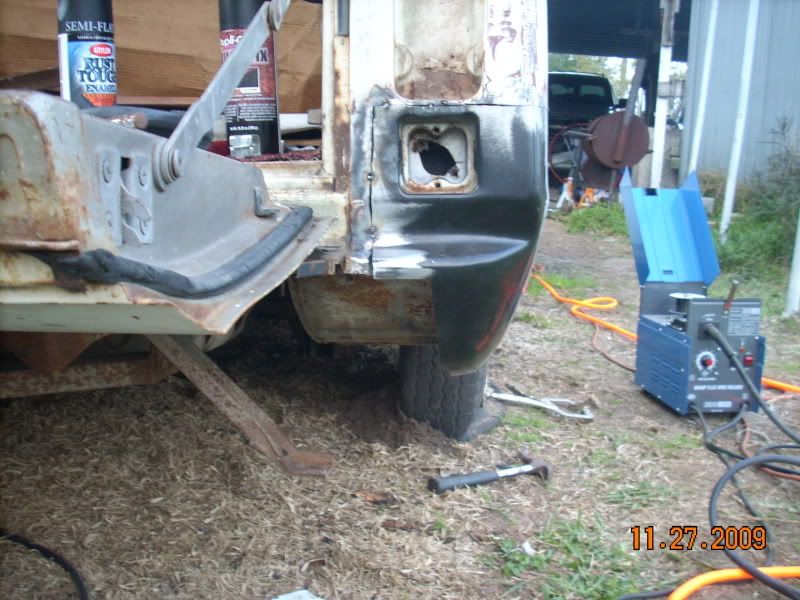 i will try to go back tomorrow and tack some more...i have to figure out something around the tailight area body line. the new sheet metal is more boxier than the original, so i have to fix that before fully welding it in.
__________________
67 1/2 ton Suburban - Project DRGNWGN. Build thread  -_--_--_ _________ _--_-_ -/____|__|__\__ ,.,,,.,.,,.,|_O _______ O_] Last edited by kev2809; 11-28-2009 at 05:51 PM. |
|
|

|
|
|
#54 |
|
low n' slo
 Join Date: Mar 2009
Location: rosenberg, texas
Posts: 5,172
|
Re: Project 67 DRGNWGN - 67 Burban!!
got it all welded up today. started grinding down the welds with a flap disc but im starting to run out of light. gonna finish it up in the morning and hopefully spray a can of primer on it then lay some filler next week.
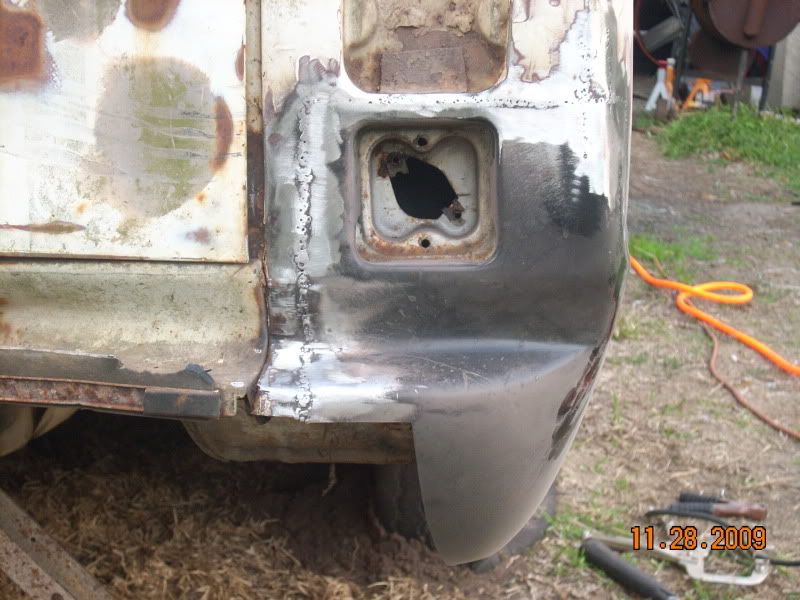 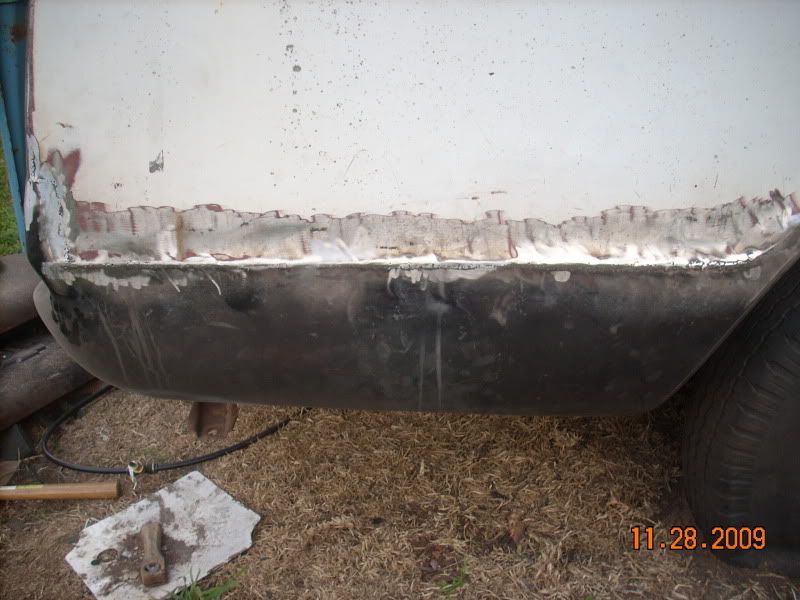 since the new piece is a little more boxier than what it should be, i had to pie cut both sides, shape it to match, and weld it up. this left a little indention a little less than 1/4", so im gonna have to address this later. im gonna try to pull it out some before i start laying filler. 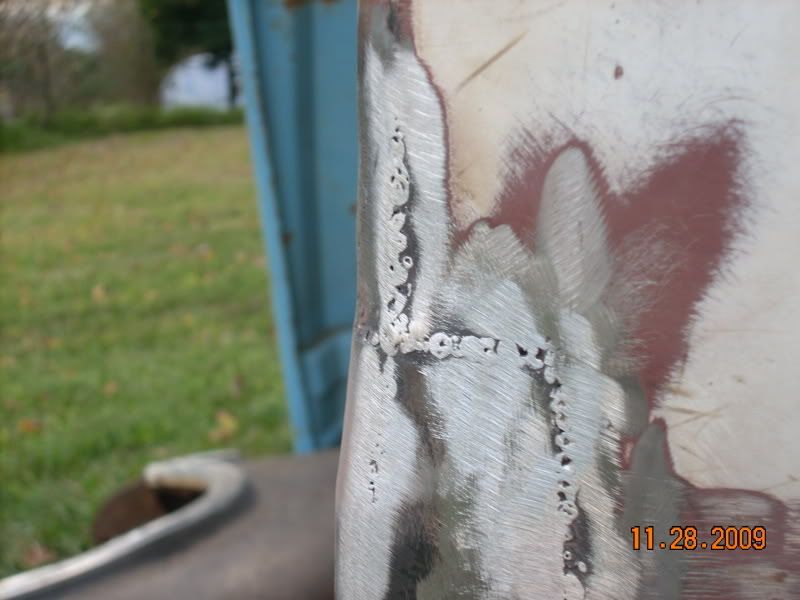 i found this interesting....i noticed a few spots of filler the previous owner had put on , so i stripped it down and found this. looks like a bullet hole, lol. there is 2 more spots like this so im gonna see if theres anymore. 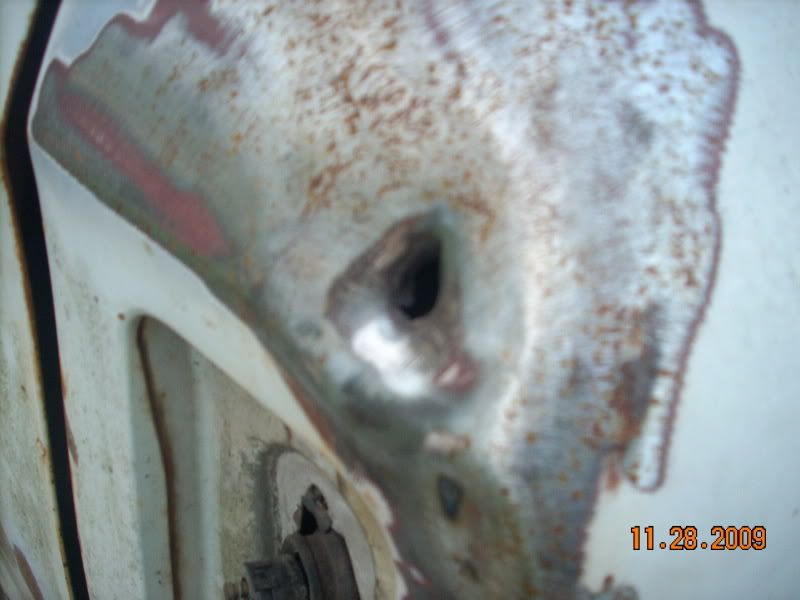
__________________
67 1/2 ton Suburban - Project DRGNWGN. Build thread  -_--_--_ _________ _--_-_ -/____|__|__\__ ,.,,,.,.,,.,|_O _______ O_] Last edited by kev2809; 11-28-2009 at 07:09 PM. |
|
|

|
|
|
#55 |
|
VA72C10
 Join Date: Mar 2008
Location: Midlothian, VA
Posts: 25,269
|
Re: Project 67 DRGNWGN - 67 Burban!!
Looking good.
__________________
Looking for a 67-72 swb or blazer project in or around VA. 
|
|
|

|
|
|
#56 |
|
Account Suspended
 Join Date: Nov 2008
Location: Prunedale California
Posts: 782
|
Re: Project 67 DRGNWGN - 67 Burban!!
Great job Kevin! Watching you do all this stuff makes me wonder why wouldnt you dare to make your own c-notch....Trust me,,,you got the skillz!!
|
|
|

|
|
|
#57 |
|
low n' slo
 Join Date: Mar 2009
Location: rosenberg, texas
Posts: 5,172
|
Re: Project 67 DRGNWGN - 67 Burban!!
lol. i wish i could. i think for the notch im gonna go with what you and n2trux suggested with the pipe. ima try to go monday to get the 8.5" pipe. how long you think i need for the front lca's and the rear notches? i was thinking maybe 18" long?
__________________
67 1/2 ton Suburban - Project DRGNWGN. Build thread  -_--_--_ _________ _--_-_ -/____|__|__\__ ,.,,,.,.,,.,|_O _______ O_] |
|
|

|
|
|
#58 |
|
Account Suspended
 Join Date: Nov 2008
Location: Prunedale California
Posts: 782
|
Re: Project 67 DRGNWGN - 67 Burban!!
18" should be plenty, just remember the measuring rule....mesuare twice, cut once. Also what is the reason you want to cup your LCA's?
|
|
|

|
|
|
#59 |
|
low n' slo
 Join Date: Mar 2009
Location: rosenberg, texas
Posts: 5,172
|
Re: Project 67 DRGNWGN - 67 Burban!!
right now the stance is waaay to high lol. i plan on running drop spindles but i want those extra 2 inches it should give me. actually its more like 5" lower than now because my cups are 3", and with the recessed cups thats a 5" swing. that should finish the stance i want for the front, and the rear im still thinking of stealing your idea with that rear z. that should be a nice low stance hopefully
__________________
67 1/2 ton Suburban - Project DRGNWGN. Build thread  -_--_--_ _________ _--_-_ -/____|__|__\__ ,.,,,.,.,,.,|_O _______ O_] |
|
|

|
|
|
#60 |
|
Account Suspended
 Join Date: Nov 2008
Location: Prunedale California
Posts: 782
|
Re: Project 67 DRGNWGN - 67 Burban!!
I've never cupped LCA's before, but I've read you dont gain any drop from it,(and it makes sense because of the UCA ball joint binding) Thats if youre using bags of course ..

Last edited by Puropedo; 11-29-2009 at 07:32 PM. |
|
|

|
|
|
#61 |
|
low n' slo
 Join Date: Mar 2009
Location: rosenberg, texas
Posts: 5,172
|
Re: Project 67 DRGNWGN - 67 Burban!!
really? i thought that since they became recessed into the cup instead of sitting on top it drops it some?
__________________
67 1/2 ton Suburban - Project DRGNWGN. Build thread  -_--_--_ _________ _--_-_ -/____|__|__\__ ,.,,,.,.,,.,|_O _______ O_] |
|
|

|
|
|
#62 |
|
Registered User
Join Date: Jan 2008
Location: HOUSTON TX
Posts: 1,161
|
Re: Project 67 DRGNWGN - 67 Burban!!
it allows the front crossmember to lay on the ground. also lets you bolt the bag to the lower arm instead of cup just sitting in. not that important.
|
|
|

|
|
|
#63 |
|
VA72C10
 Join Date: Mar 2008
Location: Midlothian, VA
Posts: 25,269
|
Re: Project 67 DRGNWGN - 67 Burban!!
The main advantage is to allow you to have more air in the bag when riding low. It won't you to drop any more than just standard cups in the lower control arms trimmed down. You'd hit the inner fenders or the heater box anyways.
__________________
Looking for a 67-72 swb or blazer project in or around VA. 
|
|
|

|
|
|
#64 |
|
Account Suspended
 Join Date: Nov 2008
Location: Prunedale California
Posts: 782
|
Re: Project 67 DRGNWGN - 67 Burban!!
The upper control arm only goes so far up binding the balljoint preventing it going further up. I hope this makes sense, if not, try pulling the spring out, bolt the spindle back and use a jack to lift the whole assembly, you will notice the travel will stop before the LCA hits the crossmember, that is the point where the upper balljoint is binding not allowing for more travel.
|
|
|

|
|
|
#65 |
|
Registered User
Join Date: Jan 2008
Location: HOUSTON TX
Posts: 1,161
|
Re: Project 67 DRGNWGN - 67 Burban!!
sorry man, but mine hits the pavement before the balljoint binds, stock upper arm. it does ride a lot better with the a arms cupped. more air in the bag.
|
|
|

|
|
|
#66 | |
|
Senior Member
Join Date: Jul 2005
Location: Winters Ca. 95694
Posts: 4,843
|
Re: Project 67 DRGNWGN - 67 Burban!!
Quote:
Before you do this look into PorterBuilts 3" dropped rear trailing arms. They will let you lay frame (with a notch) and the arm never comes close to the frame like the stock ones do. This is one of (not the only) the reasons guys Z the rear but now you don't need to. Might be worth looking into. Kevin LFD Inc. |
|
|
|

|
|
|
#67 |
|
low n' slo
 Join Date: Mar 2009
Location: rosenberg, texas
Posts: 5,172
|
Re: Project 67 DRGNWGN - 67 Burban!!
good idea rokcrln. I think I looked into them once. im gonna have to check them out again. u know the price off the top of ur head
__________________
67 1/2 ton Suburban - Project DRGNWGN. Build thread  -_--_--_ _________ _--_-_ -/____|__|__\__ ,.,,,.,.,,.,|_O _______ O_] |
|
|

|
|
|
#68 |
|
low n' slo
 Join Date: Mar 2009
Location: rosenberg, texas
Posts: 5,172
|
Re: Project 67 DRGNWGN - 67 Burban!!
$499 for a set...ouch. i think i could run a link setup for that price. is there any advantage for those trailing arms compared to a link setup other than these bolt in? they look like a nice product..
__________________
67 1/2 ton Suburban - Project DRGNWGN. Build thread  -_--_--_ _________ _--_-_ -/____|__|__\__ ,.,,,.,.,,.,|_O _______ O_] |
|
|

|
|
|
#69 | |
|
Account Suspended
 Join Date: Nov 2008
Location: Prunedale California
Posts: 782
|
Re: Project 67 DRGNWGN - 67 Burban!!
Quote:
If you decide to go with Porterbuilts "arms" you will also need to buy/fab the step notch. It seems Nate from porterbuilt is still working in this set up, Im pretty sure you wont be able to use the "stock spring location for mounting your bags, also you will need to relocate youre shocks and miselaneus items. Those arms are a beuty thought and if you have some cash to spend this would be a good option as LFD suggested. Last edited by Puropedo; 11-30-2009 at 12:59 PM. |
|
|
|

|
|
|
#70 |
|
low n' slo
 Join Date: Mar 2009
Location: rosenberg, texas
Posts: 5,172
|
Re: Project 67 DRGNWGN - 67 Burban!!
i wonder if anyone can chime in on the cup issue. ive got quoted for 120 to cup them, so its not that expensive but if its not gonna gain anything theres no point in doing it. anyone with comparing shots of cupping them and with running cut down cups?
__________________
67 1/2 ton Suburban - Project DRGNWGN. Build thread  -_--_--_ _________ _--_-_ -/____|__|__\__ ,.,,,.,.,,.,|_O _______ O_] Last edited by kev2809; 11-30-2009 at 04:06 PM. |
|
|

|
|
|
#71 |
|
Account Suspended
 Join Date: Nov 2008
Location: Prunedale California
Posts: 782
|
Re: Project 67 DRGNWGN - 67 Burban!!
Hey Kevin, any updates on your burb?
|
|
|

|
|
|
#72 |
|
low n' slo
 Join Date: Mar 2009
Location: rosenberg, texas
Posts: 5,172
|
Re: Project 67 DRGNWGN - 67 Burban!!
nothing really lately, i was working on fixing the rust on the 3rd door at the bottom, i got the rust spots cut on on the inside and outside and a friend borrowed my welder so im stuck with a hole in my door until i get it back lol. i did get about all my fittings put together last night. just waiting to do the leader hose for the comp and the pressure switch until i can figure where everything goes. im going to order my wiring kit for the switches tomorrow.
also, i got a quote from a local welding company for 18" long pipe and they said about $65, that includes cutting...but the biggest they had was 6.5"...which i dont think will work. that will only give me a 3.25" notch which is not worth it to me. and i dont even think 6.5" is big enough for my front bag cups 
__________________
67 1/2 ton Suburban - Project DRGNWGN. Build thread  -_--_--_ _________ _--_-_ -/____|__|__\__ ,.,,,.,.,,.,|_O _______ O_] |
|
|

|
|
|
#73 |
|
Sofa King Crazy!!
Join Date: Oct 2008
Location: Houston, TX
Posts: 3,090
|
Re: Project 67 DRGNWGN - 67 Burban!!
I want to see some dang progress pics, Kevin!!!!!!

__________________
You found the Tater.  My Blazer Build (New) - http://67-72chevytrucks.com/vboard/s...d.php?t=654650 My 67 Build - http://67-72chevytrucks.com/vboard/s...d.php?t=335650 67 Chevy LWB big window a/c AKA TOTALLED BY A JACKASS.  1972 2wd Blazer "Porterbuilt and Sloshed" 
Last edited by Slick67; 12-14-2009 at 12:16 PM. |
|
|

|
|
|
#74 |
|
Account Suspended
 Join Date: Nov 2008
Location: Prunedale California
Posts: 782
|
Re: Project 67 DRGNWGN - 67 Burban!!
$65 for 18" of 6.5 od tube? That is insane! Try looking somewhere else.

|
|
|

|
|
|
#75 |
|
low n' slo
 Join Date: Mar 2009
Location: rosenberg, texas
Posts: 5,172
|
Re: Project 67 DRGNWGN - 67 Burban!!
well the inner diameter was 6.5, the od was 7"...but still sounded a little dumb. she was telling me about another place but i wasnt even listening to her lol. i kinda figured if she was overpriced, the place she is referring me to would be too. i may have to make a few calls to houston area places, i think it would be cheaper there.
__________________
67 1/2 ton Suburban - Project DRGNWGN. Build thread  -_--_--_ _________ _--_-_ -/____|__|__\__ ,.,,,.,.,,.,|_O _______ O_] |
|
|

|
 |
| Bookmarks |
|
|