
 |
Register or Log In To remove these advertisements. |
|
|
|
|||||||
|
|
Thread Tools | Display Modes |
|
|
#1 |
|
Registered User
 Join Date: May 2011
Location: Long Island NY
Posts: 787
|
AUX input jack for 67-72 AM radio
Here is my simple install of a Stereo type 1/8” input lack into my stock 67-72 AM Radio. This allows for the use of any low signal output to be played right through the radio without sacrificing the AM portion of the radio. Such devices like an MP3, Ipod, or portable CD player, or in my case my adroid phone with Pandora app. You won’t need any separate switch. The stereo jack used will give priority to any device plugged into it. And when the device is remove from the jack your AM radio will function as it normally would.
This is a pretty basic install and with a few basic tools and a careful approach nearly anyone should be able to do this for about $20 including the 3’ patch cable. You’ll need to visit your local radio shack and obtain a pack of small resistors 1k or 2k ohms and an 1/8” Stereo Phone jack (Closed circuit) If you don’t have one already grab a 3’ or so patch cable. (This is a standard headphone type end) Below is a diagram I found very useful that I found out on an antique radio forum. Basically you’ll need to remove the top cover of the radio and locate the blue wire from the volume potentiometer to the circuit board. You’ll be installing the input inline between the board and the pot in this circuit. 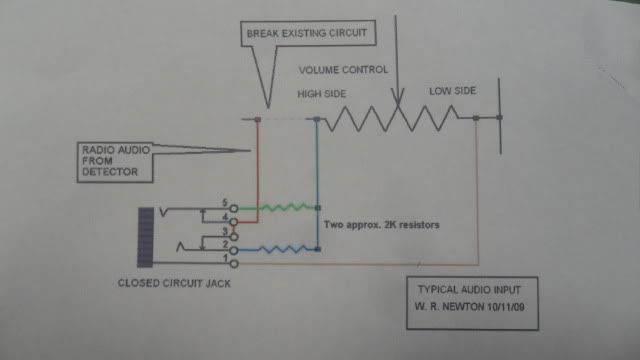 First I assembled and soldered my input jack. If you are installing the jack in a ground metal opening then there is no need for a ground wire and the #1 terminal need not be used. The two resistors get soldered together at the #5 and #2 Terminal and then one lead gets attached. The #3 and #4 terminal get “jumped” and than a second lead will be attached. For the leads I used some old thin speaker wire off an other radio I had. 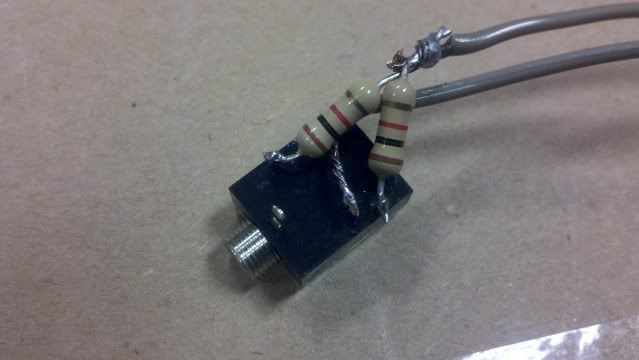 I than removed the chrome face of the radio and located and drilled a 15/64 hole all the way to one side. (I wanted to be sure the AM dial needle would not hit my stereo jack inside the radio once completed) Be sure to carefully de-burr the inside and outside edges of the new hole. 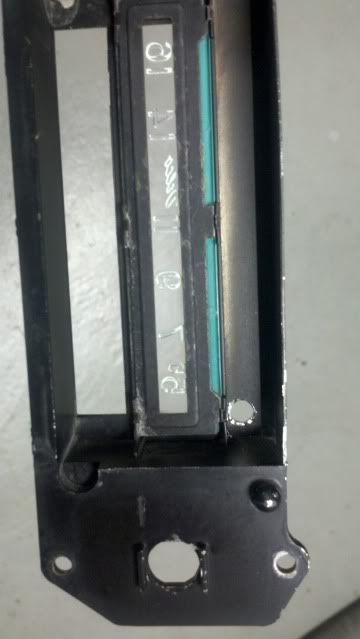 The terminal lugs on the back of the stereo jack are very close to the edge and once installed could ground out on the inside edge of the faceplate. So I slightly bent the terminals inward with a needle nose pliers and put a few small scraps of heat shrink tubing in different spots. Im sure electrical tape would work fine too. I than carefully installed and tightened the stereo jack into the faceplate. 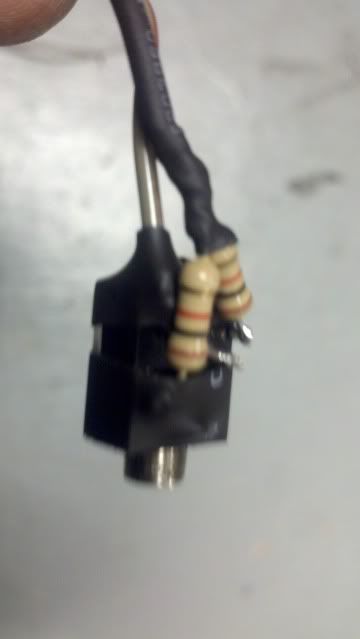 Once I fished the leads into the case and re-installed the faceplate I was ready to connect the leads. I “de-soldered” the blue lead at the circuit board. The lead without the resistors was than soldered in its place. The lead with the resistors is than soldered to the blue lead going to the potentiometer. And that’s it! I used a small wire tie to keep all the leads away from the dial and put the top cover back on. Check out the picture below of my Android playing music through my radio. 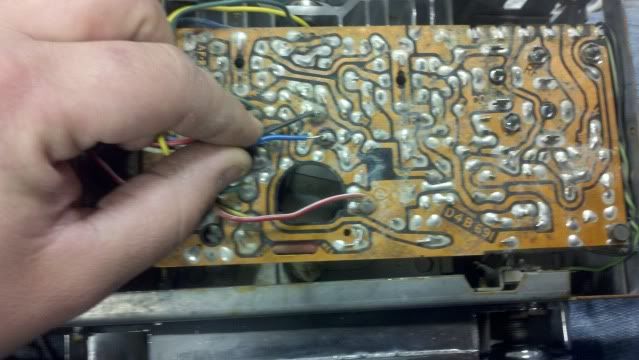 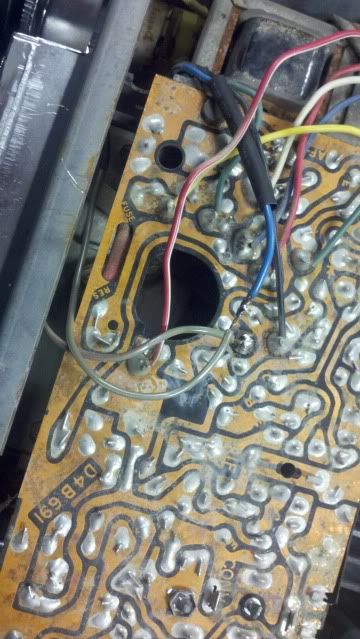 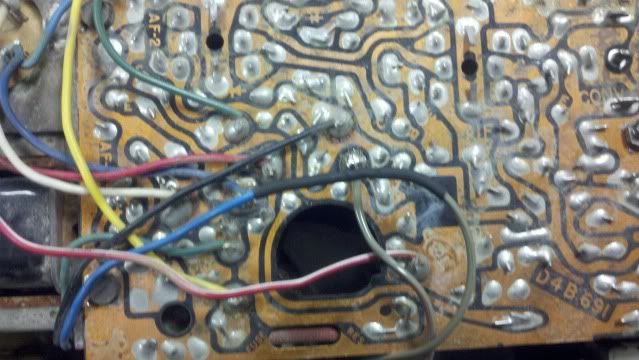 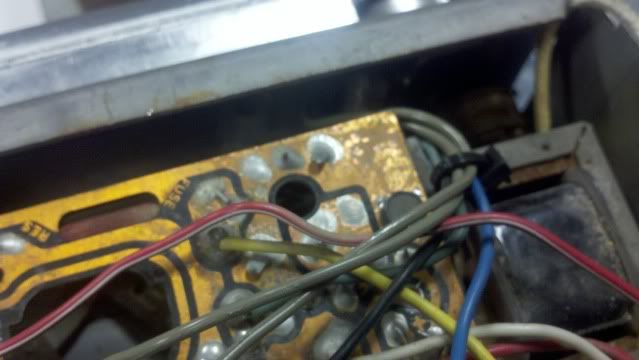 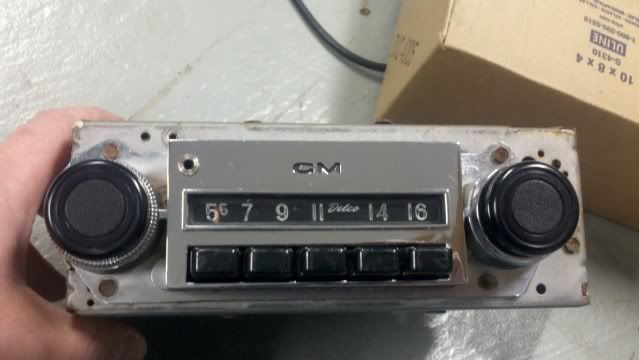 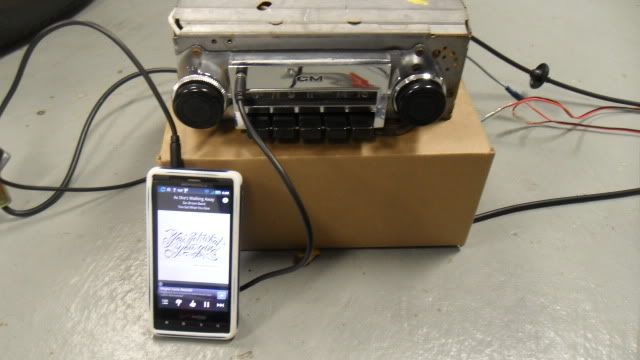 Just so everyone is aware. Im in no way any kind of electronics wiz. I used all this info that I found on the net and combined it to set up a 67-72 Delco AM radio as shown above. I plan to install this in my truck and don’t forsee it will damage anything but do this conversion at your own risk. Below are a few links to other people who have posted thier "succesful" conversions and from where all my info has come from http://www.antiqueradios.com/forums/...p?f=6&t=166720 http://www.spridgetguru.com/TA0041.html http://autoxer.skiblack.com/nallm/mp3jackinamfm.htm |
|
|

|
| Bookmarks |
|
|