
 |
|
|
#51 |
|
Senior Member
 Join Date: May 2007
Location: Doodah Kansas
Posts: 7,774
|
Re: Wamego: 1949 GMC 150
yeah I love the crap out of it. now even my wife is spoiled, when we order stuff that is "curbside delivery" usually I have to meet them with the flatbed and grunt it around, now I just go down the 200ft to the curb and unload it from the semi (then watch them turn around in the cul de sac, the smart ones back up the 1000 ft to the intersection!)
I got the bolts back through the body mounts and checked my engine move. worked out almost like I planned for it! 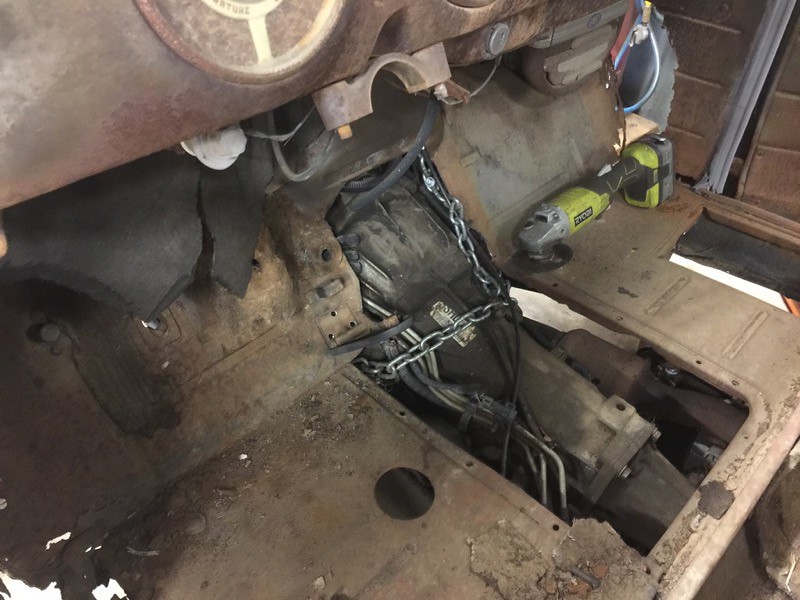 IMG_0366 by Joe Doh, on Flickr IMG_0366 by Joe Doh, on Flickr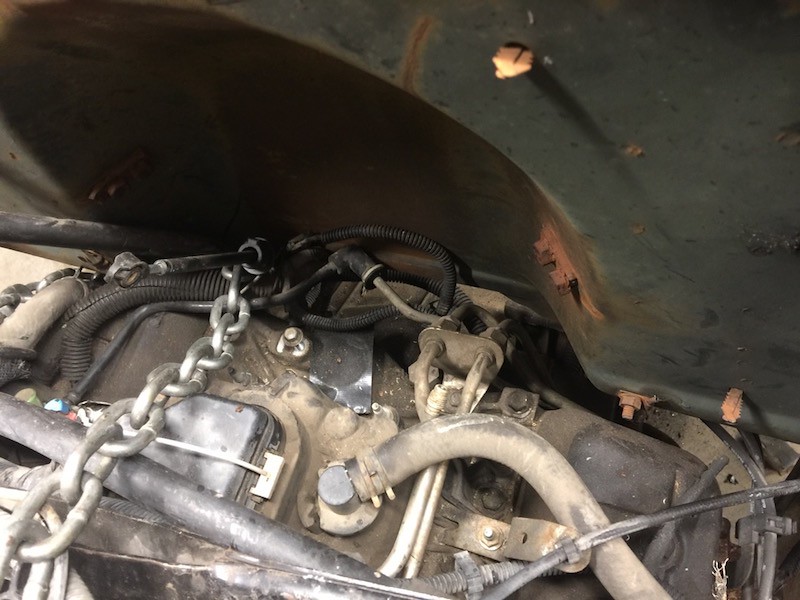 IMG_0372 by Joe Doh, on Flickr IMG_0372 by Joe Doh, on Flickrfinal measurement of the move: 8 3/4", fits perfectly. I was getting stabbed in the side by what I THOUGHT was a broken hinge, I was kind of worked up about it actually because hinges on these AD are kind of a fickle thing. turns out it was only bent because they tried to remove it without taking out the 4th bolt. a little oil and it worked fine, I even got some oil on the cowl vent and it worked like butter too. 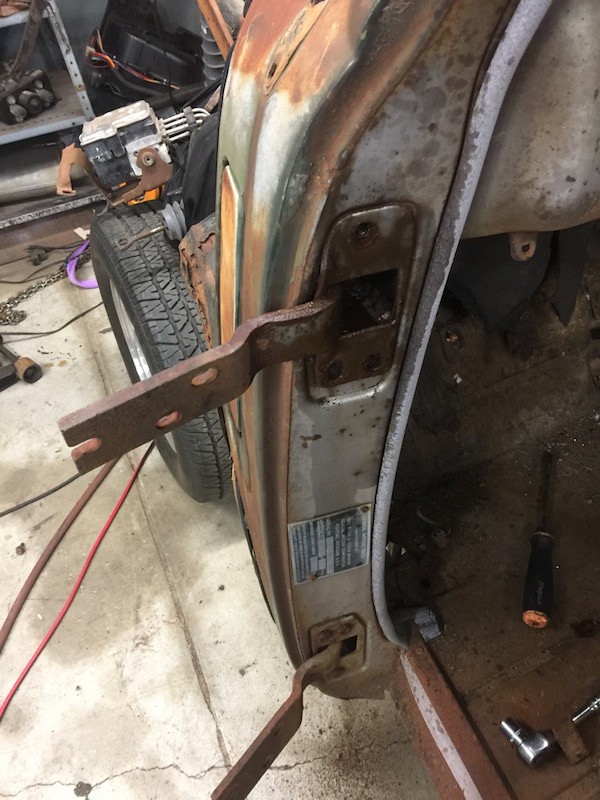 IMG_0362 by Joe Doh, on Flickr IMG_0362 by Joe Doh, on Flickr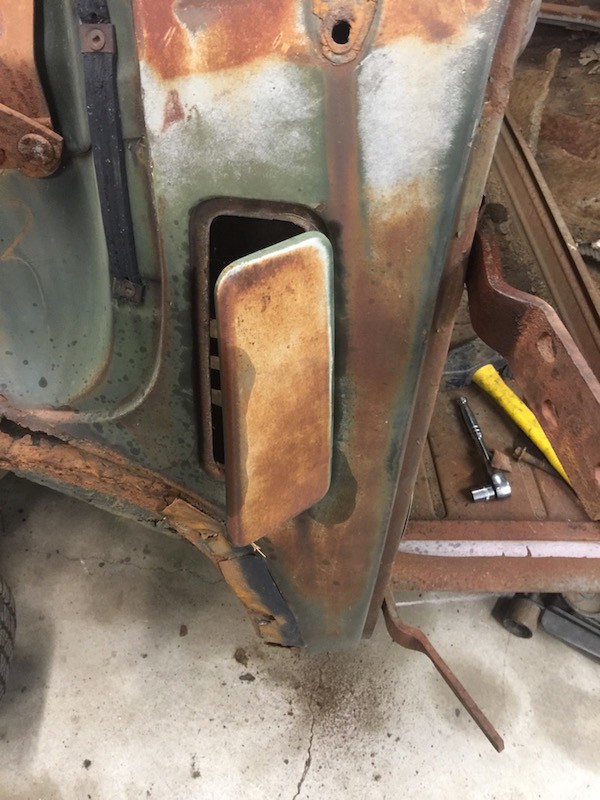 IMG_0363 by Joe Doh, on Flickr IMG_0363 by Joe Doh, on Flickr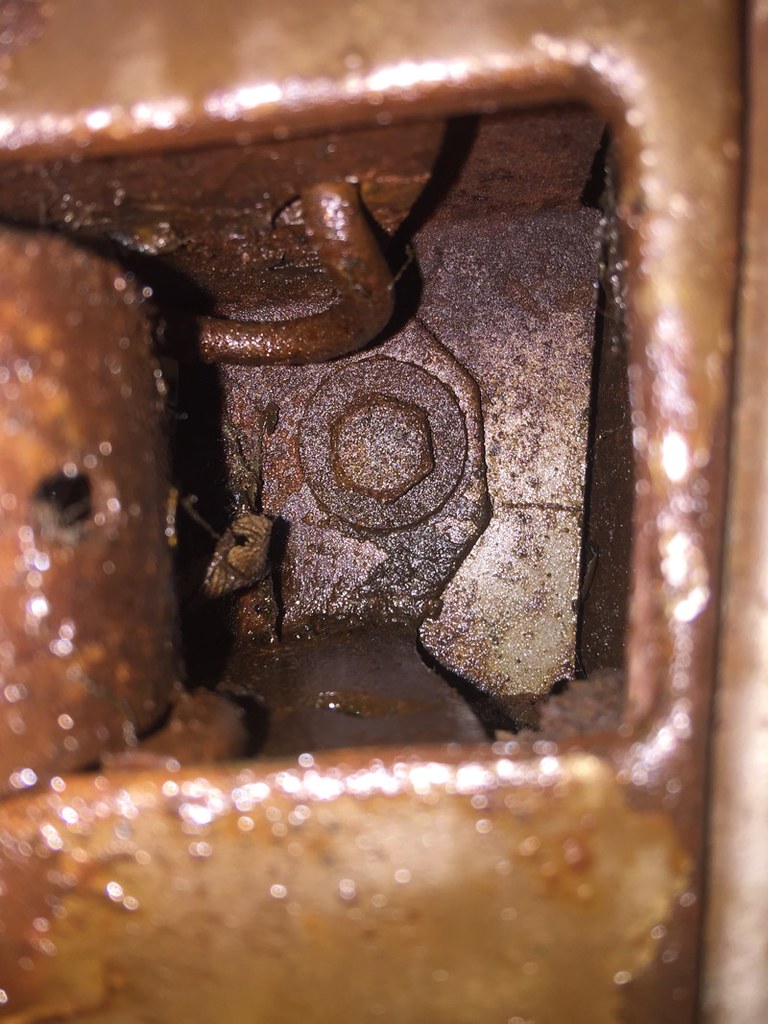 IMG_0365 by Joe Doh, on Flickr IMG_0365 by Joe Doh, on Flickrthis truck, the odometer says 1354 miles or something like that. given the condition of everything I cant imagine there is 100k added to that, it really looks like a low mileage truck that got wrecked and parked. this is a good time to talk about what is "level" on these trucks. my wife came out and asked why the back was sitting lower. well it wasnt. in fact the tires give it a rake to the front, but to prove it to her I put a bubble on the floor and then on the bottom of the frame. 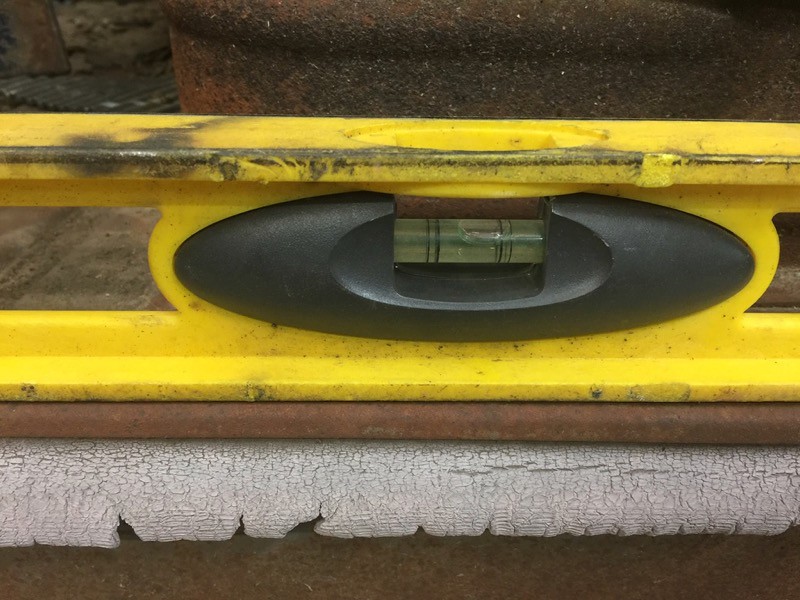 IMG_0367 by Joe Doh, on Flickr IMG_0367 by Joe Doh, on Flickr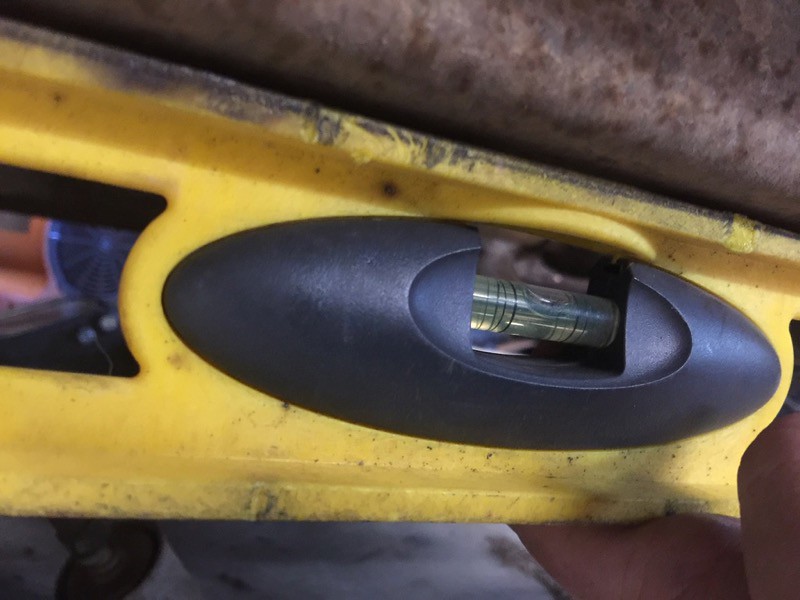 IMG_0368 by Joe Doh, on Flickr IMG_0368 by Joe Doh, on Flickrthe way the s10 frame gets wide and the cab tapers out as it goes back, looking from the side gives an illusion of leaning back, but it doesnt! I cleaned off the firewall and started on the pedals. who says a guy cant learn? on the last 49 I built a big complicated steel box to mount the pedals to the original aluminum S10 mount. it worked, but it was a BEAR to build and fit and run wiring around etc. on the last two trucks I used the steel pedal mounts after cutting out the spotwelds on the firewall section. the 98-03 dont have any sheetmetal mounts on the firewall section though, so I will have to build them after getting the firewall section grafted in the right spot. still with me? trimming the firewall I started slow instead of needing to build it back. worked great so far! 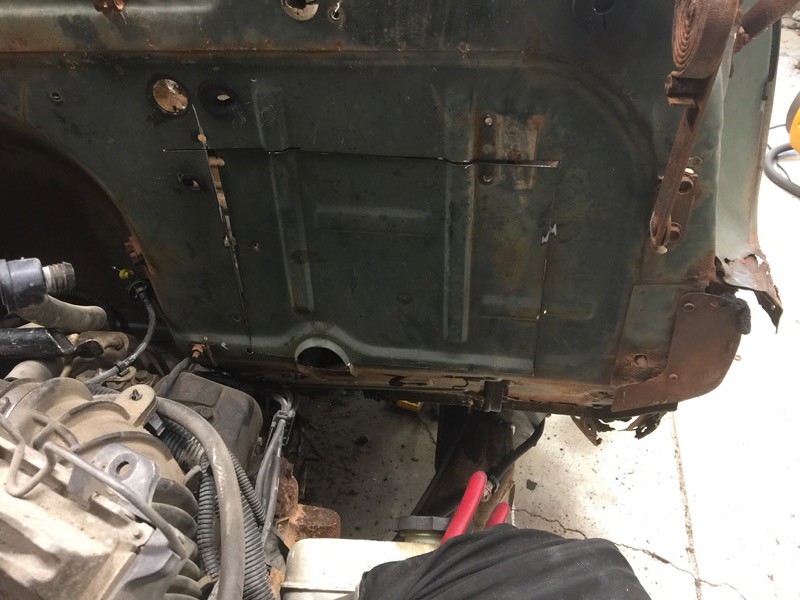 IMG_0381 by Joe Doh, on Flickr IMG_0381 by Joe Doh, on Flickr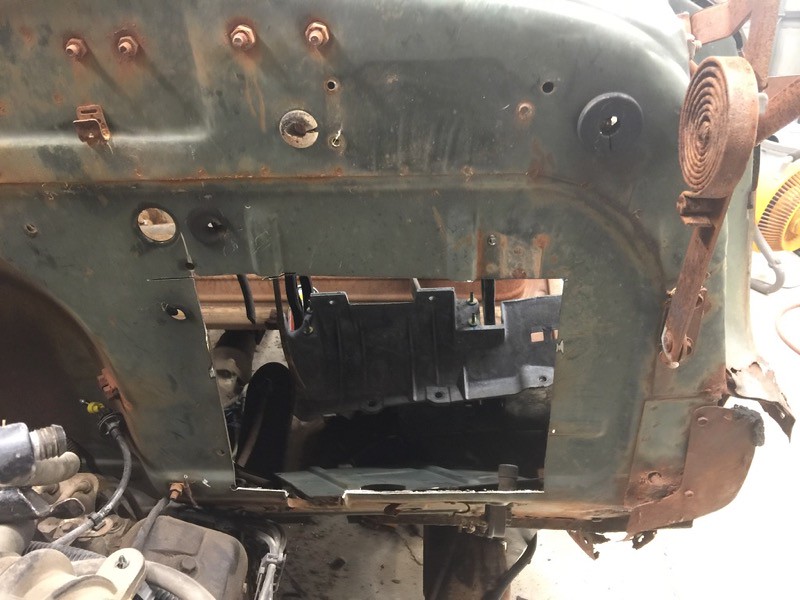 IMG_0382 by Joe Doh, on Flickr IMG_0382 by Joe Doh, on Flickr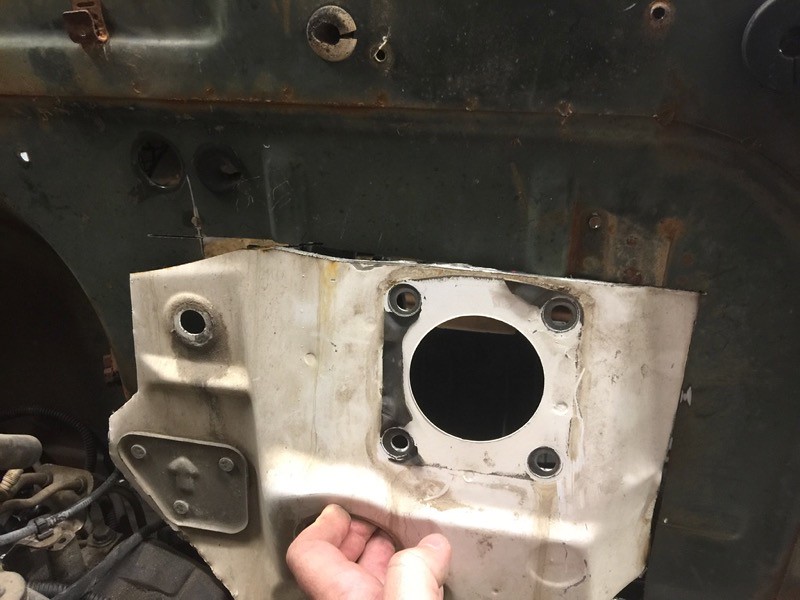 IMG_0383 by Joe Doh, on Flickr IMG_0383 by Joe Doh, on Flickr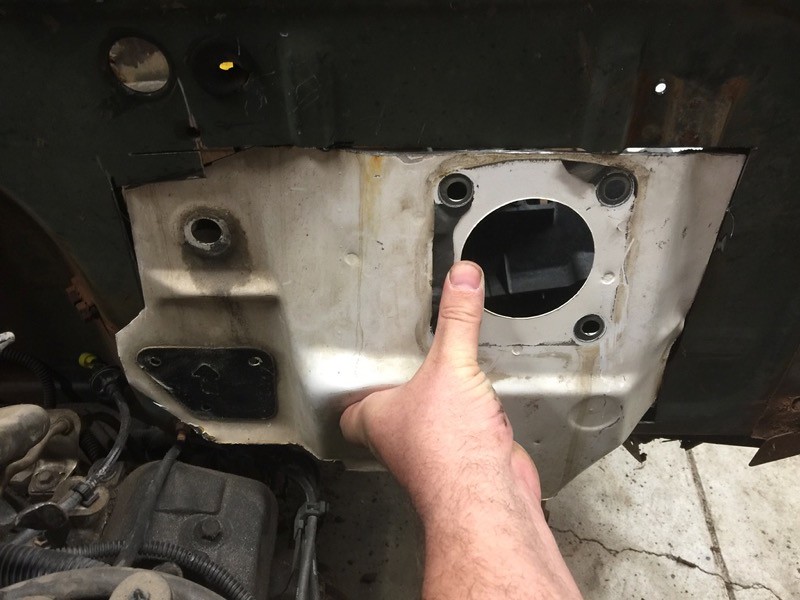 IMG_0384 by Joe Doh, on Flickr IMG_0384 by Joe Doh, on Flickr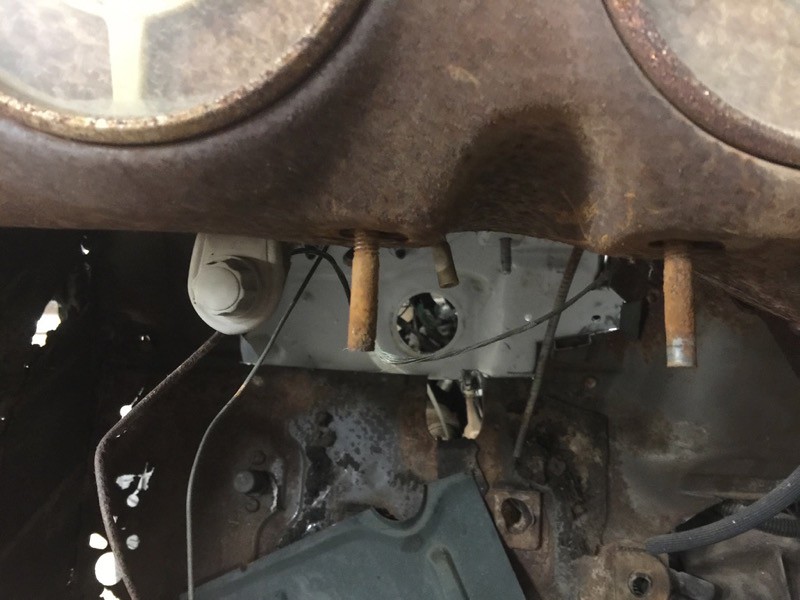 IMG_0387 by Joe Doh, on Flickr IMG_0387 by Joe Doh, on Flickr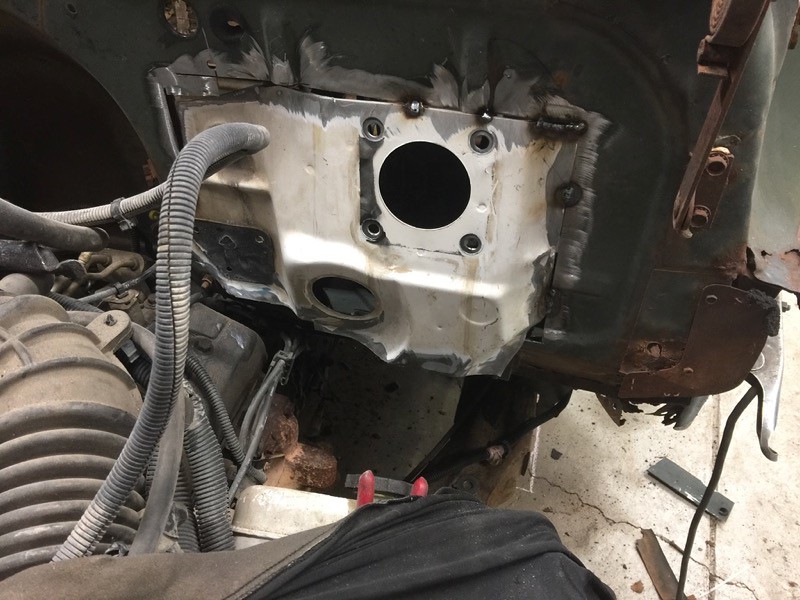 IMG_0385 by Joe Doh, on Flickr IMG_0385 by Joe Doh, on Flickr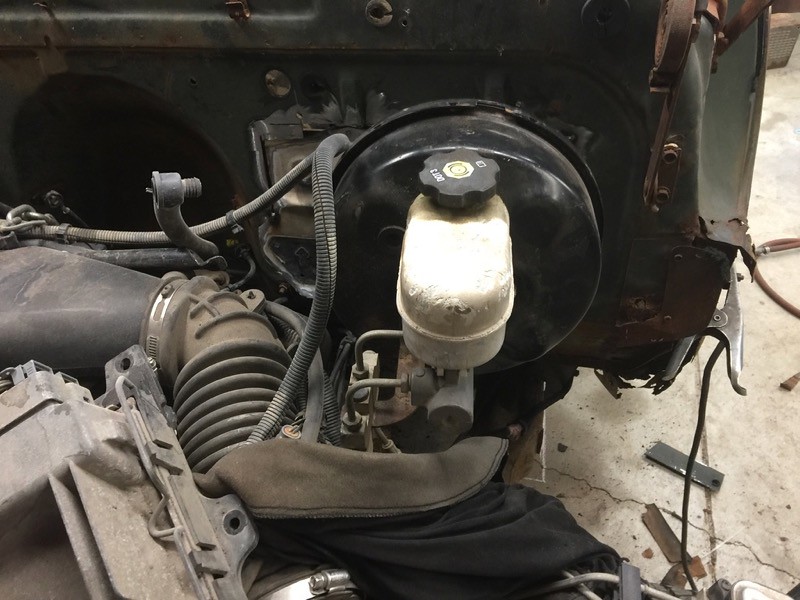 IMG_0386 by Joe Doh, on Flickr IMG_0386 by Joe Doh, on Flickrso thats the gas pedal mounted, and the brake booster mounted, now I just need the steel bracket to hold the column and the brake and I have an excellent plan for that. I did trim off the wiring pass through, but only for ease of work, I will put it back on in almost the same spot. I tried to make it to automobilia this last weekend but the stellar heat all day and threat of rain kept me home. if it sounds like the excuses of a guy who killed himself all last week in the west exposure concrete refractory oven that is my driveway, so be it. haha.
__________________
the mass of men live lives of quiet desperation if there is a problem, I can have it. new project WAYNE http://67-72chevytrucks.com/vboard/s...d.php?t=844393 |
|
|

|
|
|
#52 |
|
State of Confusion!
  Join Date: Jul 2002
Location: Gulfport, MS USA
Posts: 47,083
|
Re: Wamego: 1949 GMC 150
Nice work!
__________________
Bill 1970 Chevy Custom/10 LWB Fleetside 2010 Toyota Tacoma PreRunner SR5 Double Cab - DD Member of Louisiana Classic Truck Club (LCTC) Bill's Gallery Life isn't tied with a bow, but it's still a gift. Live simply. Love generously. Care deeply. Speak kindly. Leave the rest to God! |
|
|

|
|
|
#53 |
|
Senior Member
 Join Date: Mar 2011
Location: West Plains, Missouri
Posts: 7,559
|
Re: Wamego: 1949 GMC 150
Nice...Jim
__________________
my build thread: http://67-72chevytrucks.com/vboard/s...d.php?t=459839 Jimbo's long bed step build:http://67-72chevytrucks.com/vboard/s...t=464626<br /> |
|
|

|
|
|
#54 |
|
Senior Member
 Join Date: Sep 2017
Location: Bryan, Texas
Posts: 2,357
|
Re: Wamego: 1949 GMC 150
That looks like it was built for it.
If you get to it, some measurements of where the steering column hole is on the firewall would help some of us who aren't as experienced. |
|
|

|
|
|
#55 |
|
Senior Member
 Join Date: May 2007
Location: Doodah Kansas
Posts: 7,774
|
Re: Wamego: 1949 GMC 150
I moved it over the inch and a 1/4 from the original column pass through and a scootch more because it let the gas pedal mount be on the flat. one thing guys will need to know is that the scootch extra wont matter in the long run, the 98-03 s10 column does not pass through the firewall, only the 3/4 DD steering shaft does, so there is plenty of room to center the steering column and have it "look" right. if it was a column that passed through the firewall I would have been a lot more careful with the placement.
__________________
the mass of men live lives of quiet desperation if there is a problem, I can have it. new project WAYNE http://67-72chevytrucks.com/vboard/s...d.php?t=844393 |
|
|

|
|
|
#56 |
|
Senior Member
 Join Date: May 2007
Location: Doodah Kansas
Posts: 7,774
|
Re: Wamego: 1949 GMC 150
needed it welded in a little for the next step so I squared it up and tacked around as much as touched, which was quite a bit, shouldnt need much patching. on the bottom I was able to slice both the patch and the firewall in sections to make the contour it needed, it worked really well.
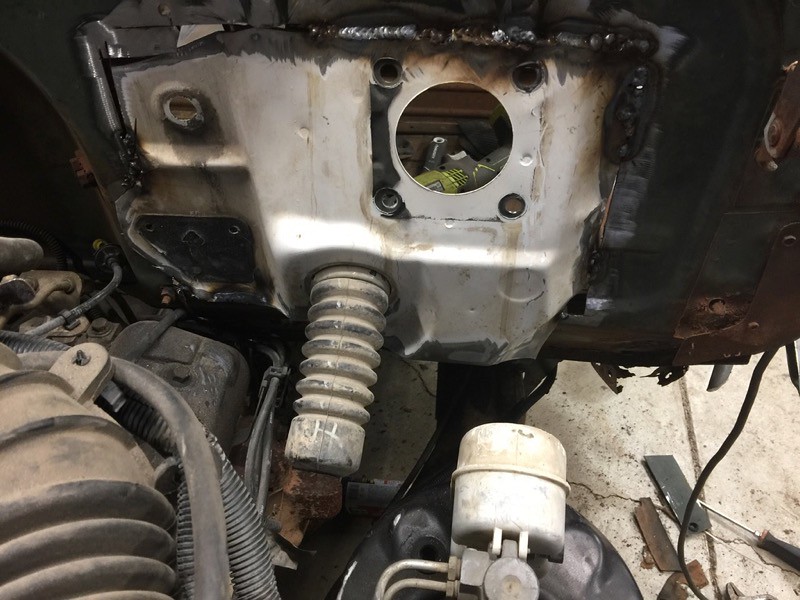 IMG_0390 by Joe Doh, on Flickr IMG_0390 by Joe Doh, on FlickrI am ashamed at how much time it took to remove the gauges, what a pain in the poker that I had forgotten. some of the nuts arent quite 3/8 (big) and arent quite 11/32 (small), if thats freaking possible? probably just corrosion. 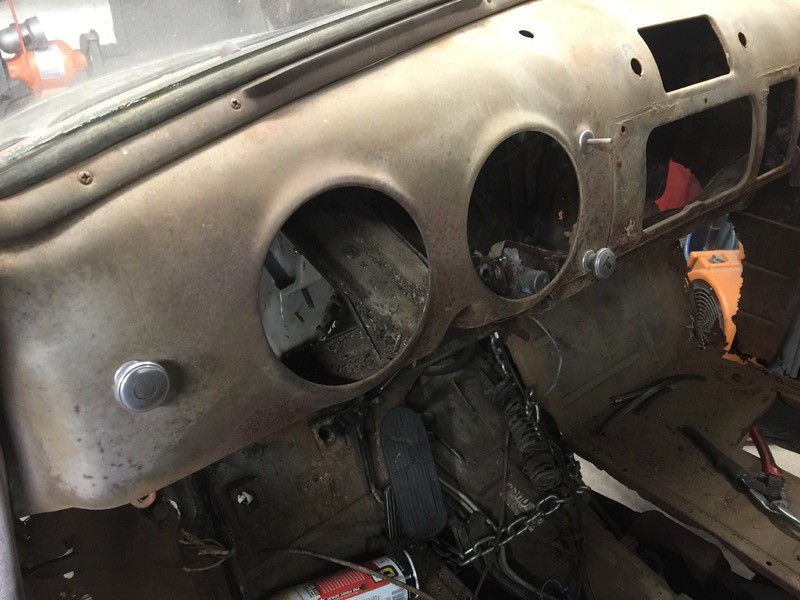 IMG_0392 by Joe Doh, on Flickr IMG_0392 by Joe Doh, on FlickrI needed a pattern of the booster mount but I just welded it to the firewall. luckily this is not the first s10 I have cut up. I think I still have a whole 98 blazer firewall section in the back but I also had this one on the shelf. you may not see it underneath but I already cut the center hole and drilled the mount holes. 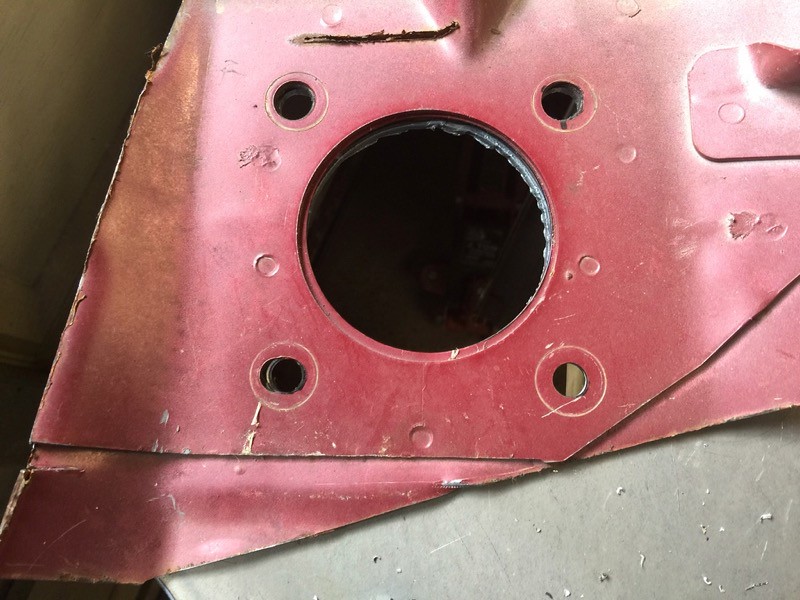 IMG_0395 by Joe Doh, on Flickr IMG_0395 by Joe Doh, on Flickrit even had a bracket still on it that I was able to bolt to the aluminum pedal bracket to get the dimensions. 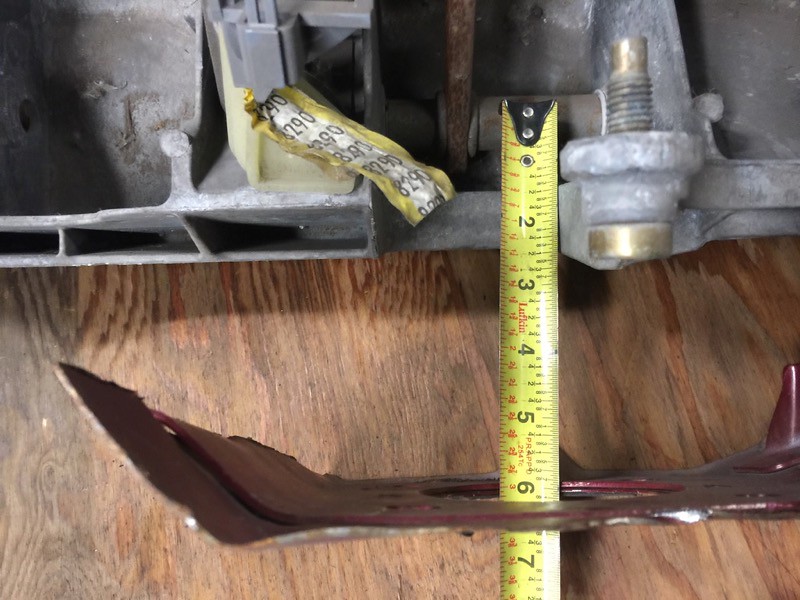 IMG_0400 by Joe Doh, on Flickr IMG_0400 by Joe Doh, on Flickrthe spacing of the pedal was 3 5/8 but that wasnt wide enough to let the nuts go on the booster studs, so I built some medallions from some 10 ga and set it up to weld inside the 1/8, which would give strength to the pedal area from the doubler, and also let the inside width get to 4 3/8 (roughly) and clear the booster nuts. thusly 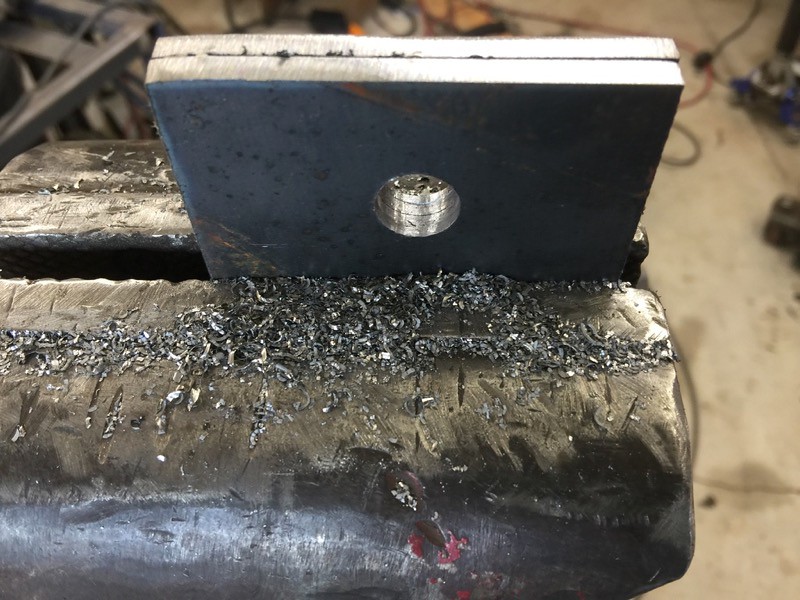 IMG_0401 by Joe Doh, on Flickr IMG_0401 by Joe Doh, on Flickr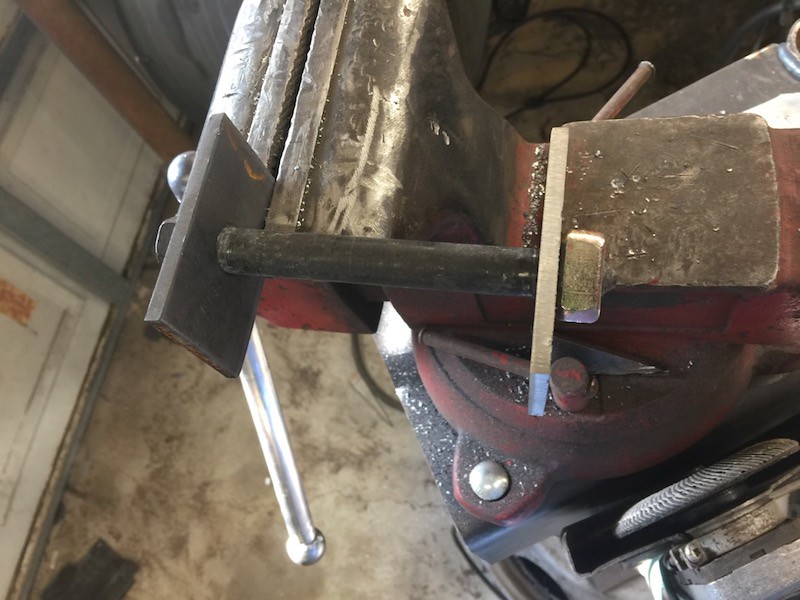 IMG_0402 by Joe Doh, on Flickr IMG_0402 by Joe Doh, on Flickr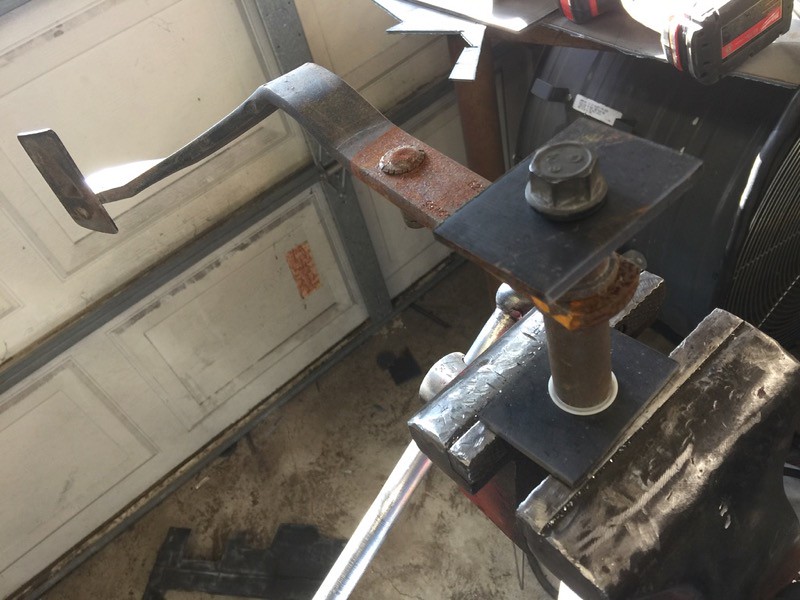 IMG_0403 by Joe Doh, on Flickr IMG_0403 by Joe Doh, on Flickr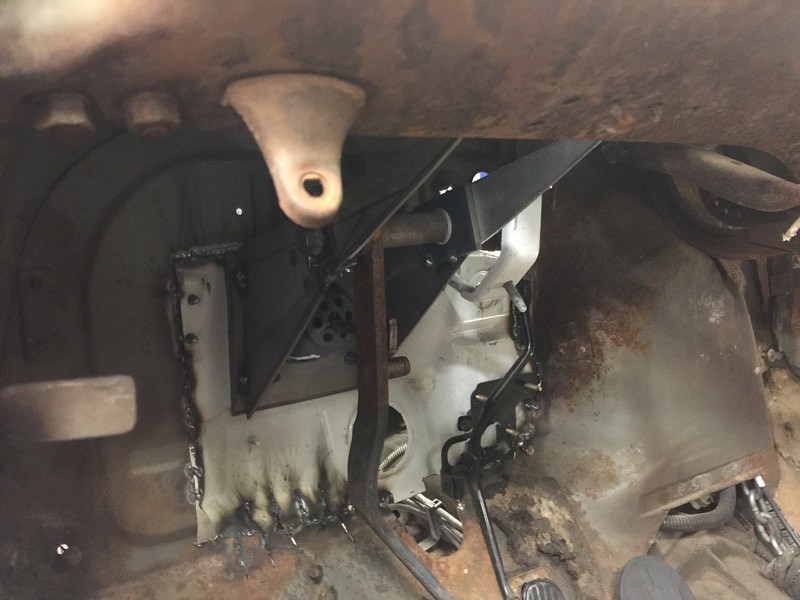 IMG_0407 by Joe Doh, on Flickr IMG_0407 by Joe Doh, on FlickrI know it LOOKS like I didnt get the pedal lined up with the rod on the booster but the explanation is that the booster isnt screwed down yet and is leaning down outside the firewall, which means the rod is leaning up. I didnt feel like stressing the rod for a trial fit haha. more to come! I know it doesnt look like it but this is most of the work done, adding the column mounts to the bracket then adding bracing is all that is left, easy peasy from here on in.
__________________
the mass of men live lives of quiet desperation if there is a problem, I can have it. new project WAYNE http://67-72chevytrucks.com/vboard/s...d.php?t=844393 |
|
|

|
|
|
#57 |
|
Senior Member
 Join Date: Mar 2011
Location: West Plains, Missouri
Posts: 7,559
|
Re: Wamego: 1949 GMC 150
Joe, nice job, this will help other's a great deal...Jim
__________________
my build thread: http://67-72chevytrucks.com/vboard/s...d.php?t=459839 Jimbo's long bed step build:http://67-72chevytrucks.com/vboard/s...t=464626<br /> Last edited by oldman3; 07-18-2018 at 09:11 AM. |
|
|

|
|
|
#58 |
|
State of Confusion!
  Join Date: Jul 2002
Location: Gulfport, MS USA
Posts: 47,083
|
Re: Wamego: 1949 GMC 150

__________________
Bill 1970 Chevy Custom/10 LWB Fleetside 2010 Toyota Tacoma PreRunner SR5 Double Cab - DD Member of Louisiana Classic Truck Club (LCTC) Bill's Gallery Life isn't tied with a bow, but it's still a gift. Live simply. Love generously. Care deeply. Speak kindly. Leave the rest to God! |
|
|

|
|
|
#59 |
|
Senior Member
 Join Date: Sep 2017
Location: Bryan, Texas
Posts: 2,357
|
Re: Wamego: 1949 GMC 150
That worked well. Thanks for posting it.
|
|
|

|
|
|
#60 |
|
Senior Member
 Join Date: May 2007
Location: Doodah Kansas
Posts: 7,774
|
Re: Wamego: 1949 GMC 150
so I finally figured out (thanks to some help!) that my weird welds were because the tank was 100% argon. at full power it wasnt getting good penetration. I switched to the mix tank and it works perfectly now, no more blue welds, good penetration.
started on the steering column mount. doing this in 3D means a lot of checking and adapting 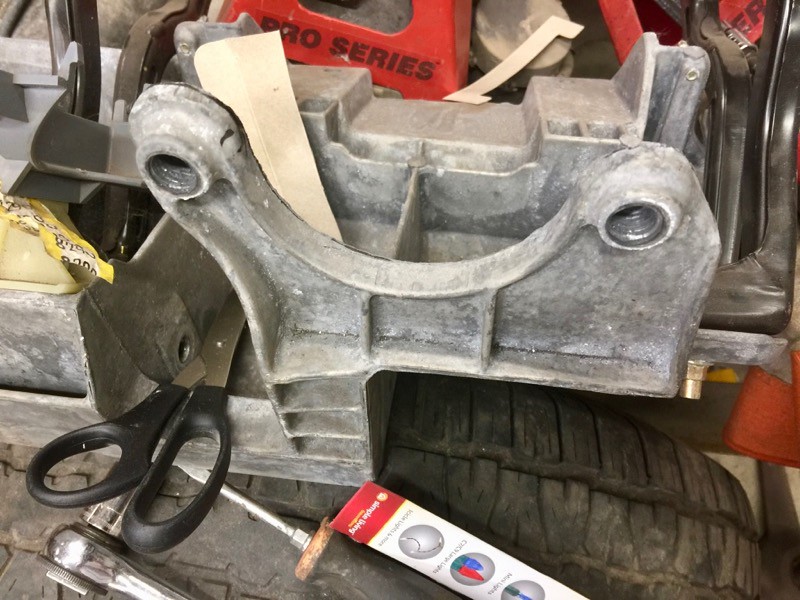 IMG_0433 by Joe Doh, on Flickr IMG_0433 by Joe Doh, on Flickr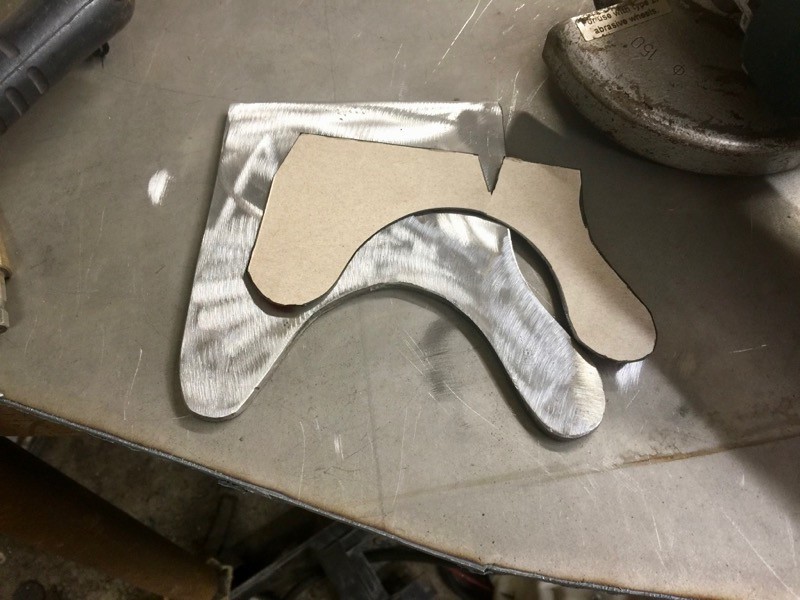 IMG_0432 by Joe Doh, on Flickr IMG_0432 by Joe Doh, on Flickr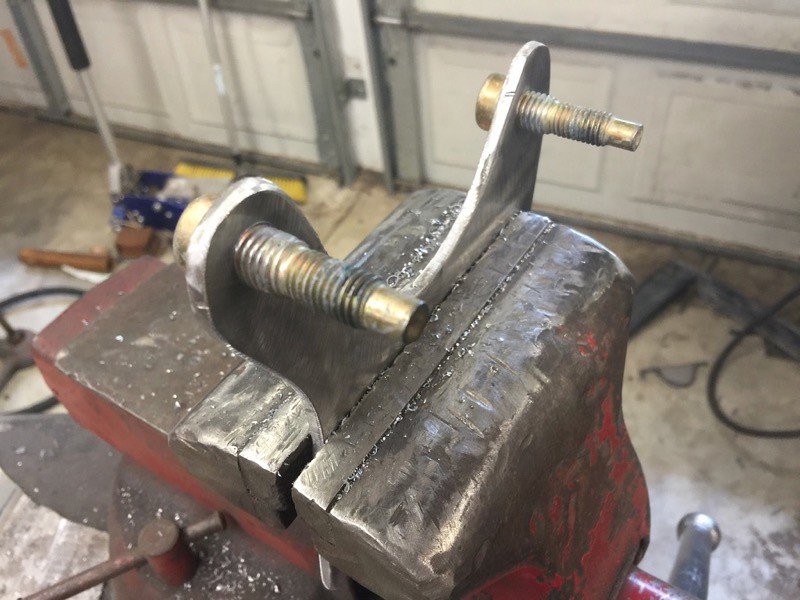 IMG_0435 by Joe Doh, on Flickr IMG_0435 by Joe Doh, on Flickrthat chunk of old steering column came in handy again. I used the tube on the inside and the shaft on the outside to make sure everything pointed at the steering box. 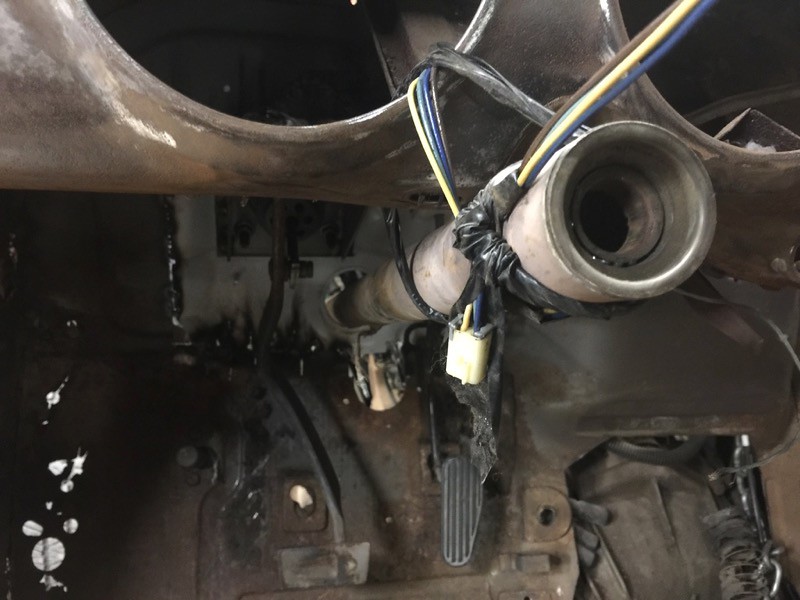 IMG_0436 by Joe Doh, on Flickr IMG_0436 by Joe Doh, on Flickr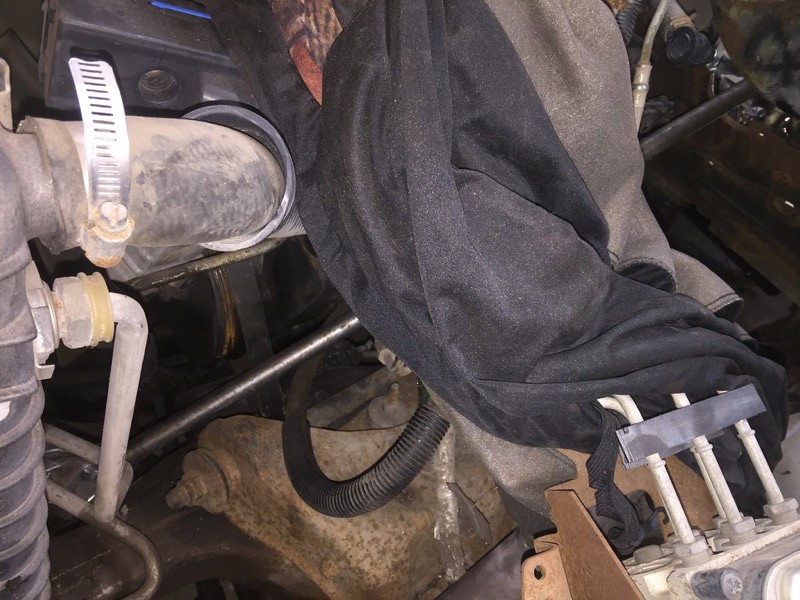 IMG_0441 by Joe Doh, on Flickr IMG_0441 by Joe Doh, on Flickrfirst fit up was too far forward (into the dash), it would have worked and looked great but the column would not have tilted up. 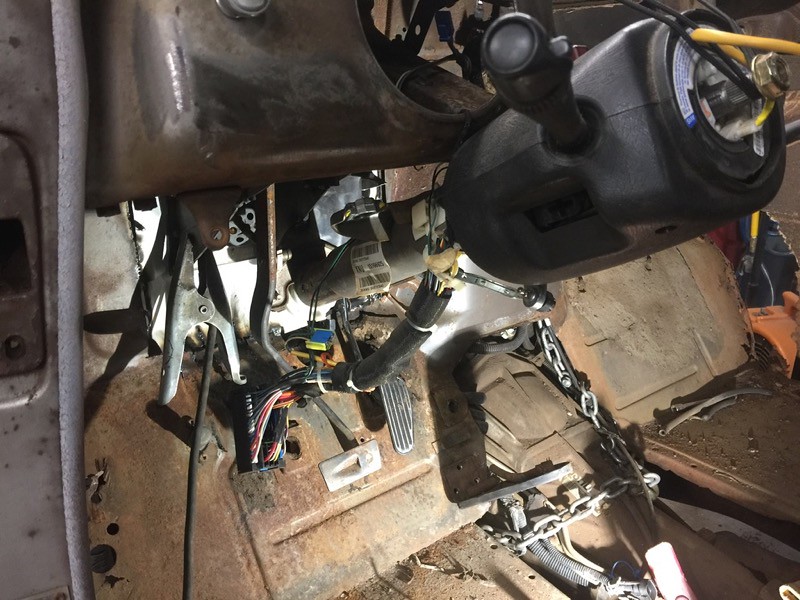 IMG_0444 by Joe Doh, on Flickr IMG_0444 by Joe Doh, on Flickrthere was also some interference with the brake pedal, I could have trimmed the mount but sheesh it would have bothered me for years. YEARS. I moved the whole pedal up about an inch instead, and moved it out of the dash about an inch. fits mucho bueno, in fact moving it up made it line up better with the firewall hole. 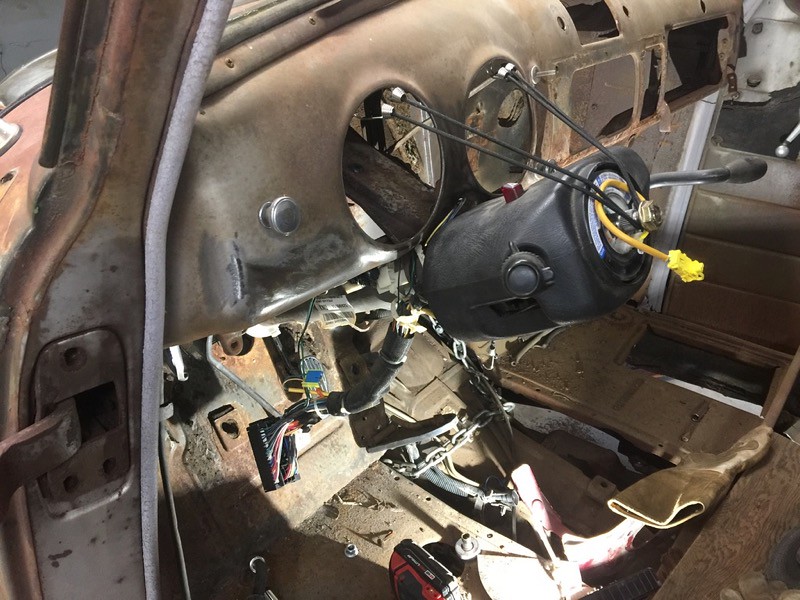 IMG_0445 by Joe Doh, on Flickr IMG_0445 by Joe Doh, on Flickr IMG_0446 by Joe Doh, on Flickr IMG_0446 by Joe Doh, on Flickrthe lower column mount is done now, and I built all the bracing to make it bolt to the original dash support, and added a 3" bracket on top to give it a couple more bolts to the firewall. tomorrow I will make the upper column mount. after that I will try and pound out some dents on the front clip and get a mount started unless its a million degrees outside. if its too hot I will take the pedal/column bracket out and finish weld and brace it. there is a pant load more room under the dash for wiring this time, just have to make sure to sand and pad all the sharp edges. what I really want is easier to install gauges and wipers, on the last 49 I had scratches on my forearm from reaching through the speaker opening to install everything because access from the bottom was NIL.
__________________
the mass of men live lives of quiet desperation if there is a problem, I can have it. new project WAYNE http://67-72chevytrucks.com/vboard/s...d.php?t=844393 |
|
|

|
|
|
#61 |
|
Senior Member
 Join Date: May 2007
Location: Doodah Kansas
Posts: 7,774
|
Re: Wamego: 1949 GMC 150
I will try to post this quick because I am actually on my 30 minute fire watch, after welding enough to kick the AC on!
first, Clay54 mentioned I didnt explain the all thread in my motor mount buildup, it was from an older project, Fenix, and I used the all thread to move the motor back 11 inches, here are the pictures and descriptions, and I will also fix the broken links in the Fenix thread. first I run the all thread through the existing mounts, but because they are at a 4 degree down angle it would actually lower the motor, so I stacked the all thread to gain the half inch back that it drops over the 10 inches. 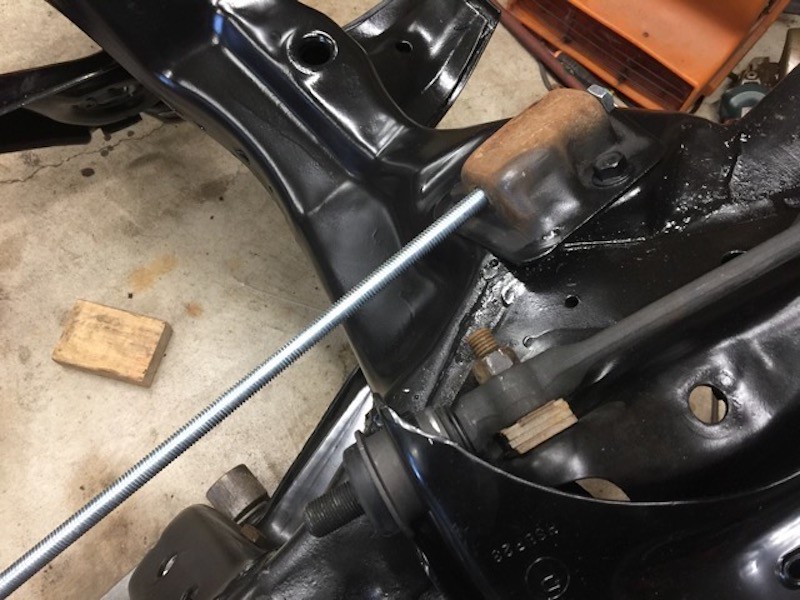 IMG_5680 by Joe Doh, on Flickr IMG_5680 by Joe Doh, on Flickr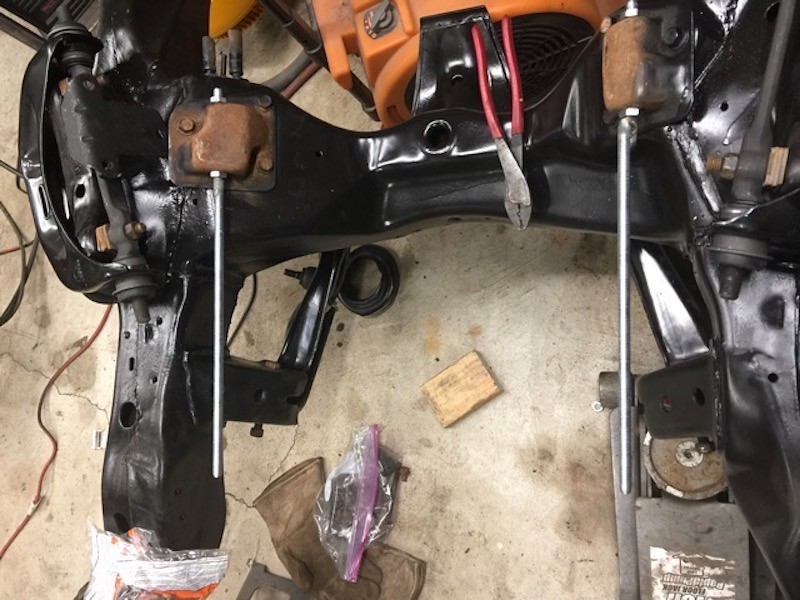 IMG_5682 by Joe Doh, on Flickr IMG_5682 by Joe Doh, on Flickrthen I slide my pipe on the all thread to the correct position, in the 41 it was 10 inches, on this 49 it was 8 3/4. 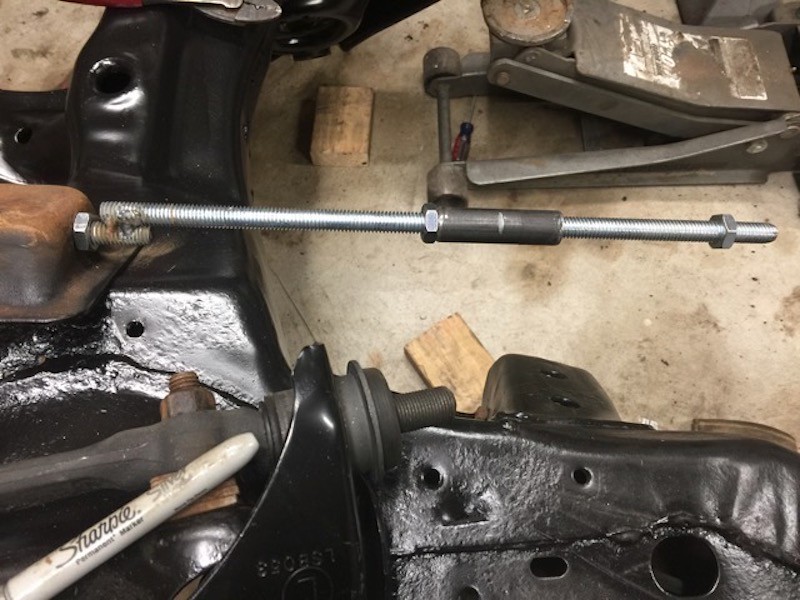 IMG_5683 by Joe Doh, on Flickr IMG_5683 by Joe Doh, on Flickr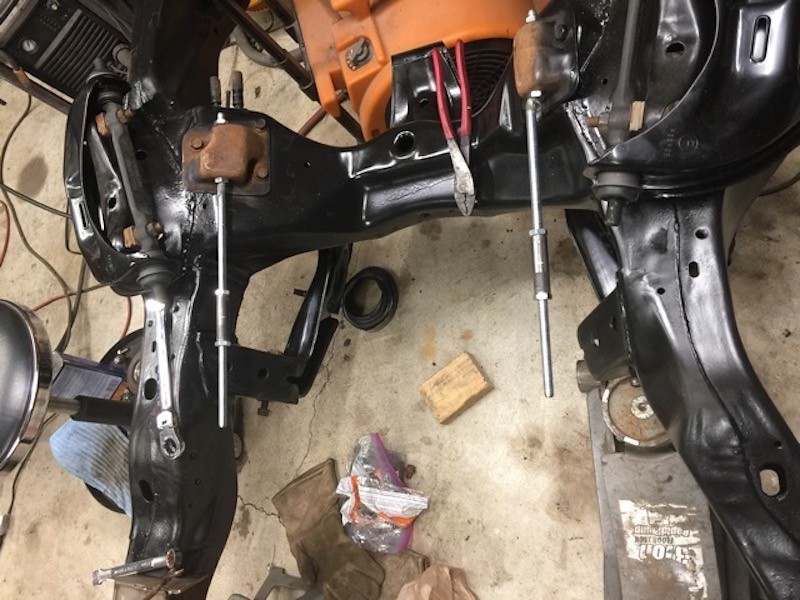 IMG_5685 by Joe Doh, on Flickr IMG_5685 by Joe Doh, on Flickrthen I verify the pipes are 16.5 inches apart, and at a 4 degree down angle, and also verify the measurement from the ground to the mount, and build the legs. viola! engine mounts moved back 10 inches without a lot of guessing or working in 3D space with 2D parts. easy peasy, rice and cheesy. 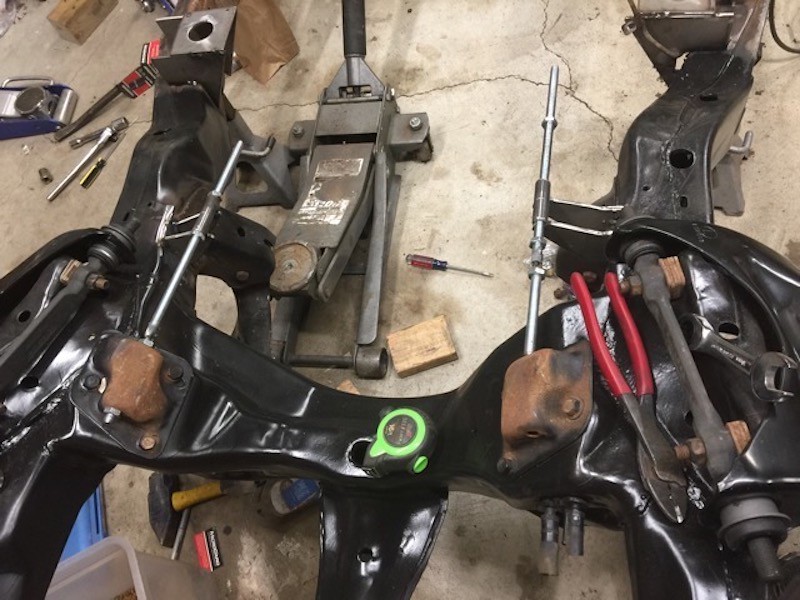 IMG_5687 by Joe Doh, on Flickr IMG_5687 by Joe Doh, on Flickrso back on wamego today, I needed to add that piece of firewall that had the wiring pass through, but the one from this truck is pretty wallered out, who knows why. 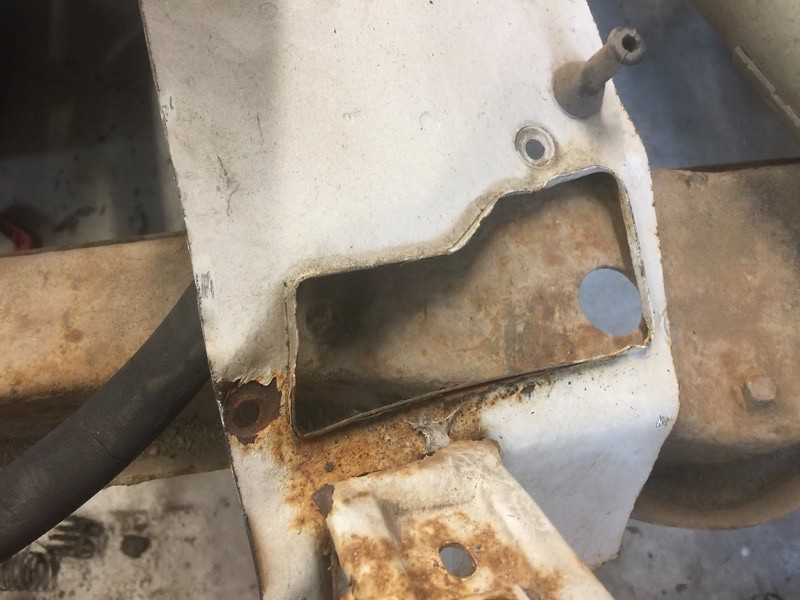 IMG_0514 by Joe Doh, on Flickr IMG_0514 by Joe Doh, on Flickrluckily this is not my first s10  so I had a spare. so I had a spare. 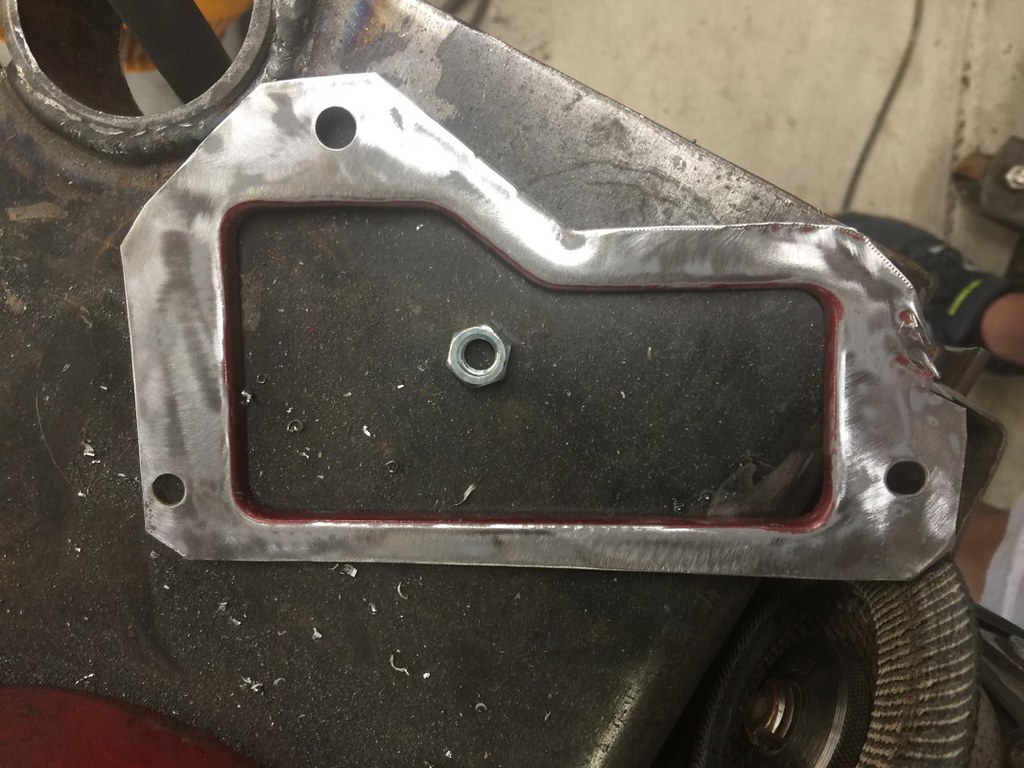 IMG_0516 by Joe Doh, on Flickr IMG_0516 by Joe Doh, on Flickr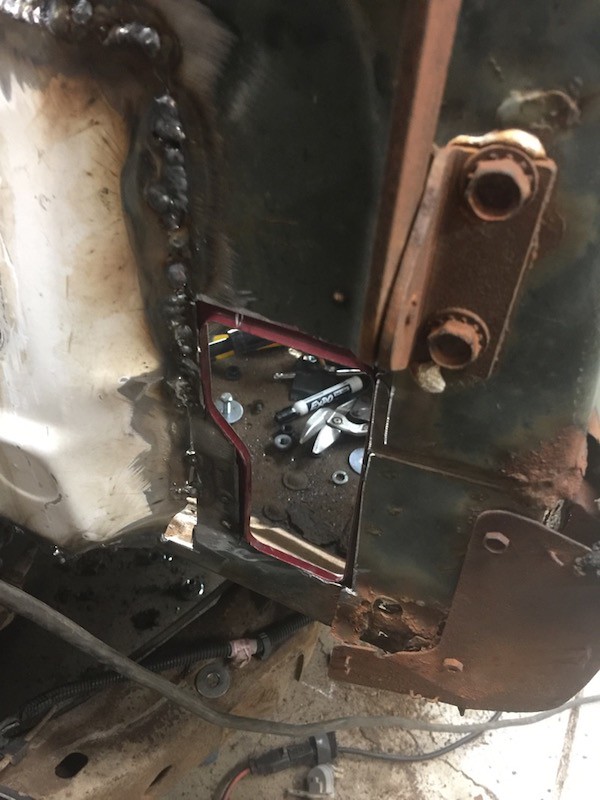 IMG_0517 by Joe Doh, on Flickr IMG_0517 by Joe Doh, on Flickrthen I closed up all the gaps in the firewall. having the right gas really does wonders for your confidence. 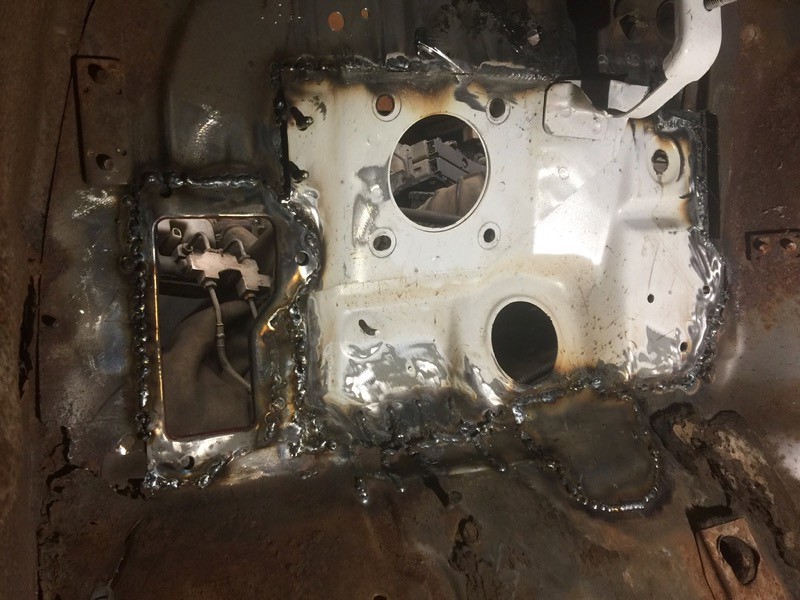 IMG_0519 by Joe Doh, on Flickr IMG_0519 by Joe Doh, on Flickr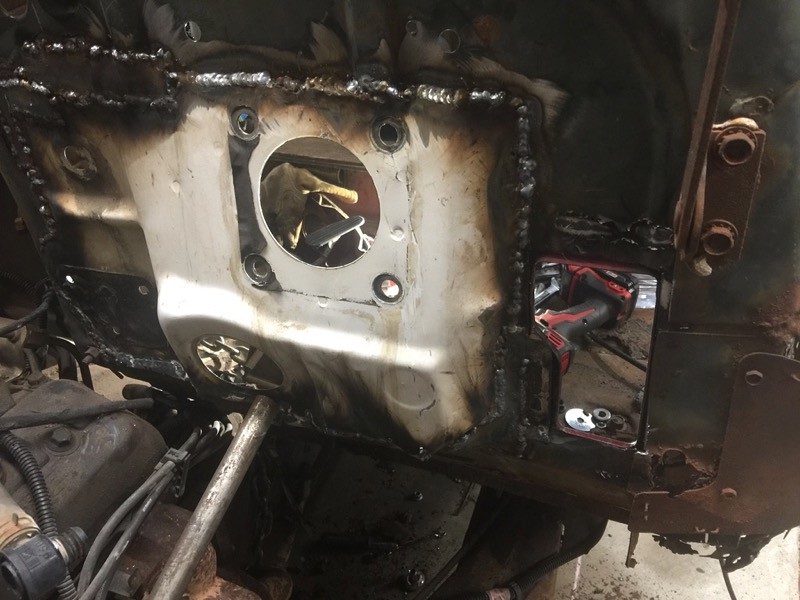 IMG_0520 by Joe Doh, on Flickr IMG_0520 by Joe Doh, on FlickrI made the pedal bracket removable as you can see, so while it was out I started welding up all the joints. you can see the difference here between the old welding gas (tall bloopy welds) and the new gas (nice welds). 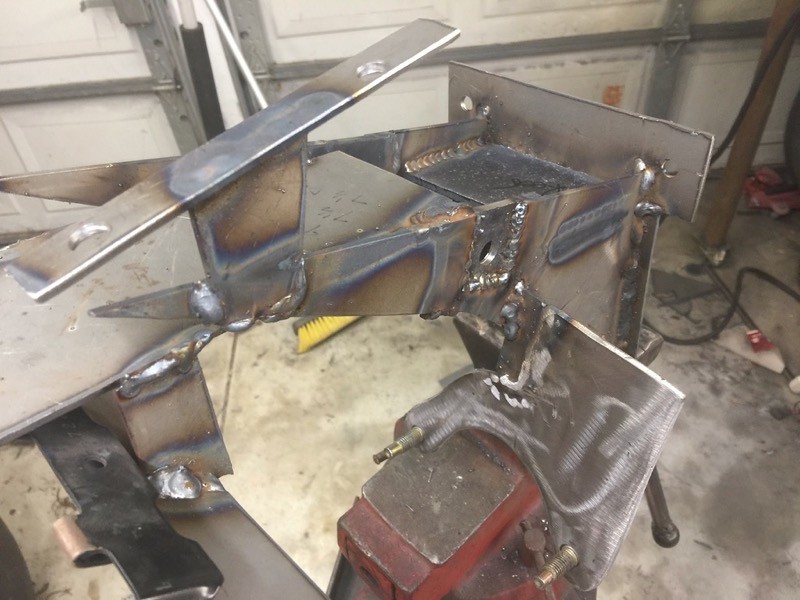 IMG_0518 by Joe Doh, on Flickr IMG_0518 by Joe Doh, on FlickrI still have to connect and brace the column mount and support the forward leg that goes to the dash support. before I welded up the firewall it still wiggled like a two year old in church, and the bracket had a lot of twist. after just welding what I did, the firewall is like a ROCK and the bracket does not twist any more, and I still have legs to add for the column. I like this way a lot better than the last time I did it, the wiring will be a lot easier.
__________________
the mass of men live lives of quiet desperation if there is a problem, I can have it. new project WAYNE http://67-72chevytrucks.com/vboard/s...d.php?t=844393 |
|
|

|
|
|
#62 |
|
Senior Member
 Join Date: Mar 2011
Location: West Plains, Missouri
Posts: 7,559
|
Re: Wamego: 1949 GMC 150
Nice....Jim
__________________
my build thread: http://67-72chevytrucks.com/vboard/s...d.php?t=459839 Jimbo's long bed step build:http://67-72chevytrucks.com/vboard/s...t=464626<br /> |
|
|

|
|
|
#63 |
|
Senior Member
 Join Date: May 2007
Location: Doodah Kansas
Posts: 7,774
|
Re: Wamego: 1949 GMC 150
thanks jim, I really like watching your truck come back from the wreck, and all the fun you and your wife have in it.
but wait, there is more! first: fire watch: its the 30-40 minute period after a welding session where you wait for things to smoke or outright burst into flame. years ago there was a local forum for projects and builds and it was fun to see what guys were working on. a guy was doing an old dodge on a dakota frame and posted pictures of him welding up some of the cab floor. then his next post was an hour later of him standing next to a smoldering truck. he was lucky to push it out of the garage after he noticed the fire but I wouldnt have even done that. since that day I always hang around with all the fans off and look for smoldering insulation or a smoky haze, so that I dont have to make that push it out/dont push it out decision. so while I was hanging around I grabbed the old HVAC firewall side box from the donor for my last 41. here is the problem with trying to use the s10 box. the blower side hangs out further than the hood hinges. 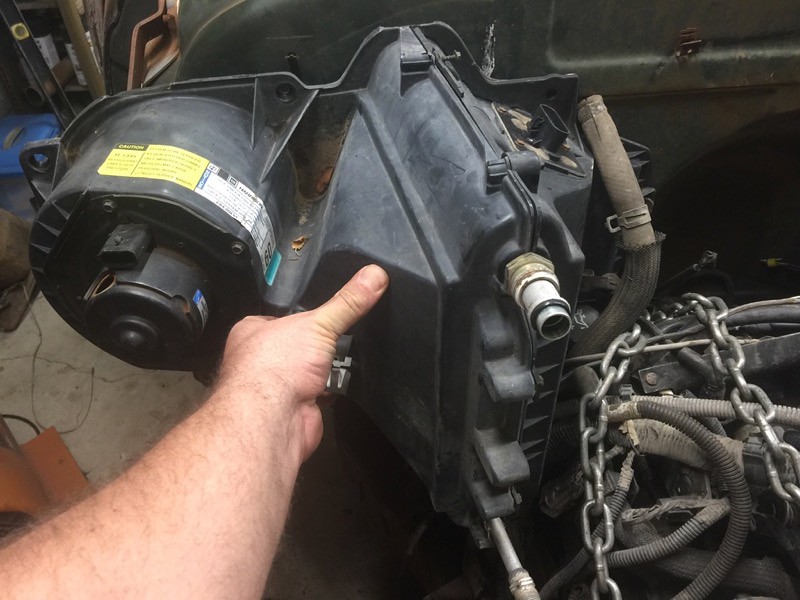 IMG_0522 by Joe Doh, on Flickr IMG_0522 by Joe Doh, on Flickrbummer right? well, the reason its where it is, is because the fresh air/cabin air valve is in that corner on the s10. the inside box doesnt actually come over any further than the AC evaporator. and the blower housing is a scroll style blower, it works on high pressure flow and not just on air direction. so if you resign yourself to a fresh air system (for defrost to work, also having AC on recirc in kansas humidity will freeze up the system) and you respect the very important scroll housing of the blower, you could actually change the system to fit. the old verse is "if thine eye offend thee, pluck it out!". so I plucked. that must be eye juice (its mineral oil from inside the evaporator) 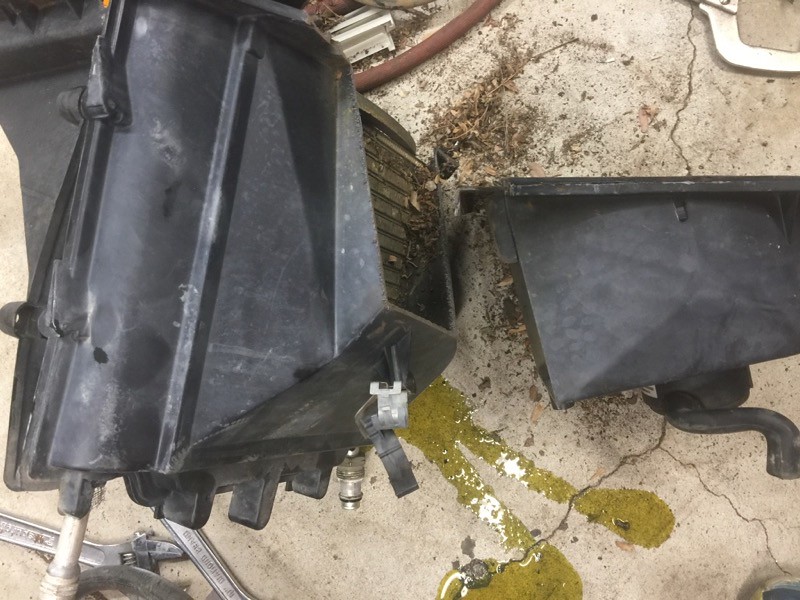 IMG_0523 by Joe Doh, on Flickr IMG_0523 by Joe Doh, on Flickrviola! 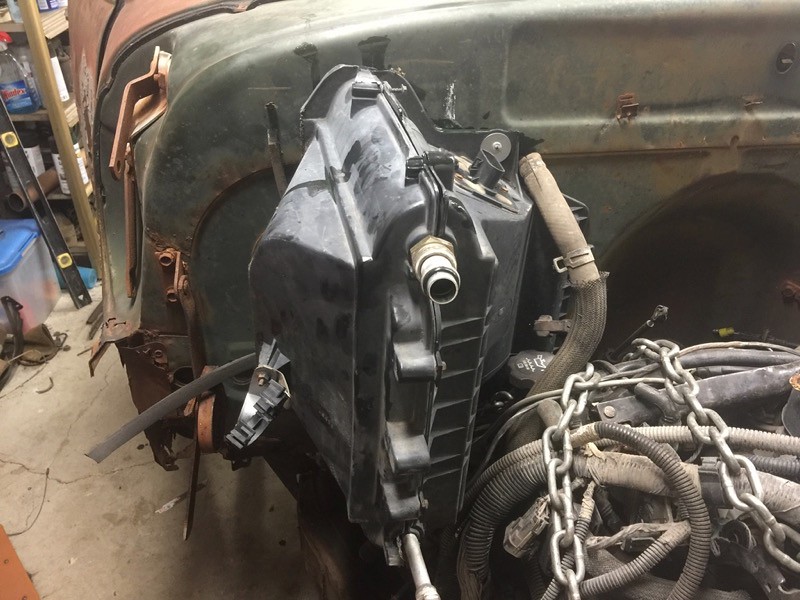 IMG_0524 by Joe Doh, on Flickr IMG_0524 by Joe Doh, on Flickr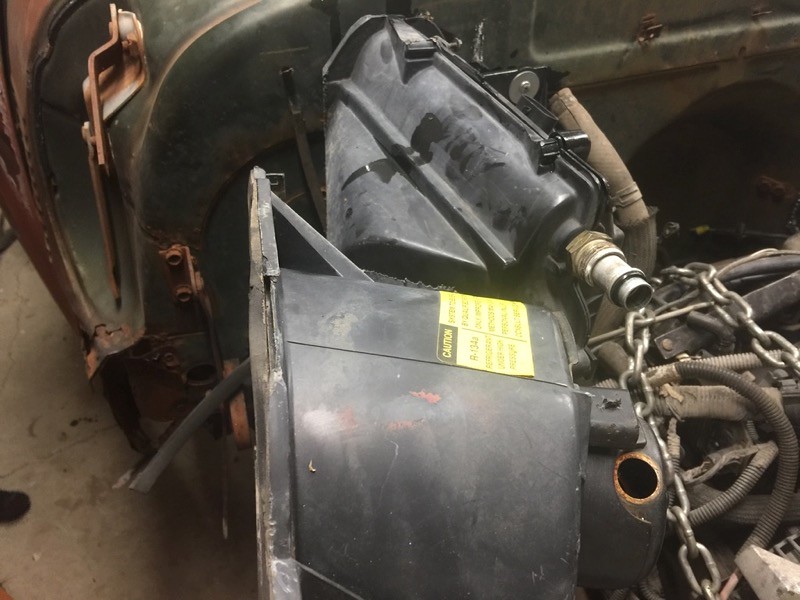 IMG_0526 by Joe Doh, on Flickr IMG_0526 by Joe Doh, on Flickrscroll intact! I bet I could even reverse louver the hood (maybe even cut the louvers off the cab side in front of the door where the accessory heater pulls air from and relocate them on the hood) and use a closed cell foam gasket to let you open and close the hood. 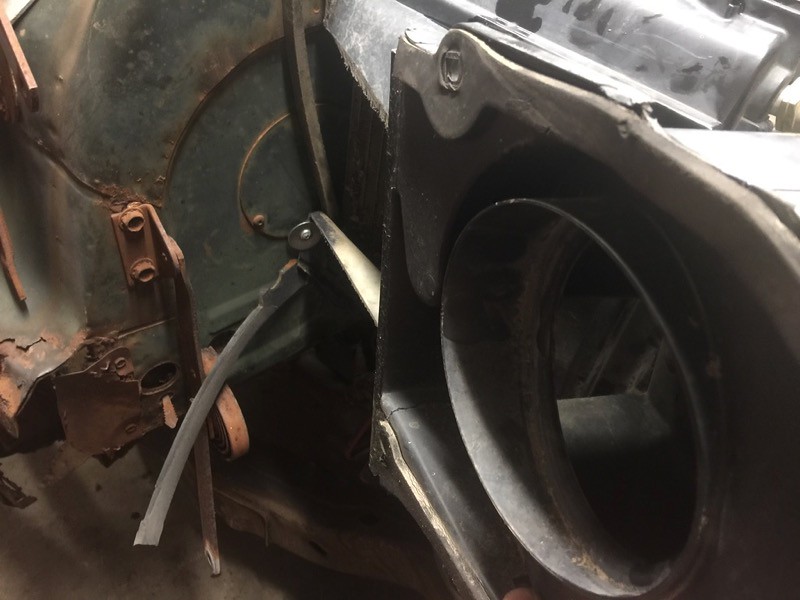 IMG_0527 by Joe Doh, on Flickr IMG_0527 by Joe Doh, on Flickryou can see the scroll section is intact. I have the firewall section, this could actually work. its actually less work than that time I used a tahoe air box.
__________________
the mass of men live lives of quiet desperation if there is a problem, I can have it. new project WAYNE http://67-72chevytrucks.com/vboard/s...d.php?t=844393 |
|
|

|
|
|
#64 |
|
Senior Member
 Join Date: Mar 2011
Location: West Plains, Missouri
Posts: 7,559
|
Re: Wamego: 1949 GMC 150
Thanks joedoh, hope to have it so I can take her out in it soon...Jim
__________________
my build thread: http://67-72chevytrucks.com/vboard/s...d.php?t=459839 Jimbo's long bed step build:http://67-72chevytrucks.com/vboard/s...t=464626<br /> |
|
|

|
|
|
#65 |
|
Senior Member
 Join Date: Sep 2017
Location: Bryan, Texas
Posts: 2,357
|
Re: Wamego: 1949 GMC 150
I like that engine mounting trick. Very helpful, if I ever get that far!
|
|
|

|
|
|
#66 |
|
Registered User
Join Date: Dec 2009
Location: San Angelo, Texas
Posts: 268
|
Re: Wamego: 1949 GMC 150
Thanks for the pictures joedoh, much appreciated. Clay
|
|
|

|
|
|
#67 |
|
Senior Member
 Join Date: May 2007
Location: Doodah Kansas
Posts: 7,774
|
Re: Wamego: 1949 GMC 150
no problem Clay, I am glad you asked.
well nothing ventured nothing gained. I started by cutting a large hole in the firewall and trimming to fit. 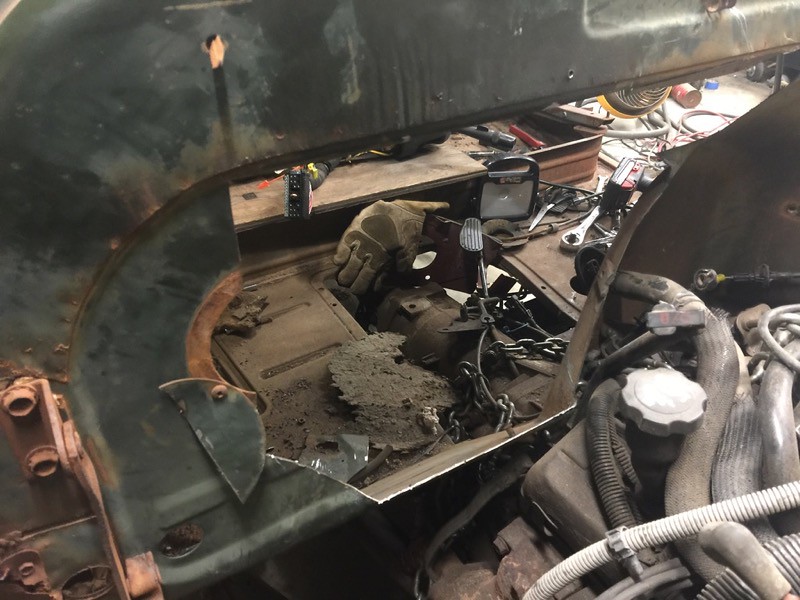 IMG_0546 by Joe Doh, on Flickr IMG_0546 by Joe Doh, on Flickr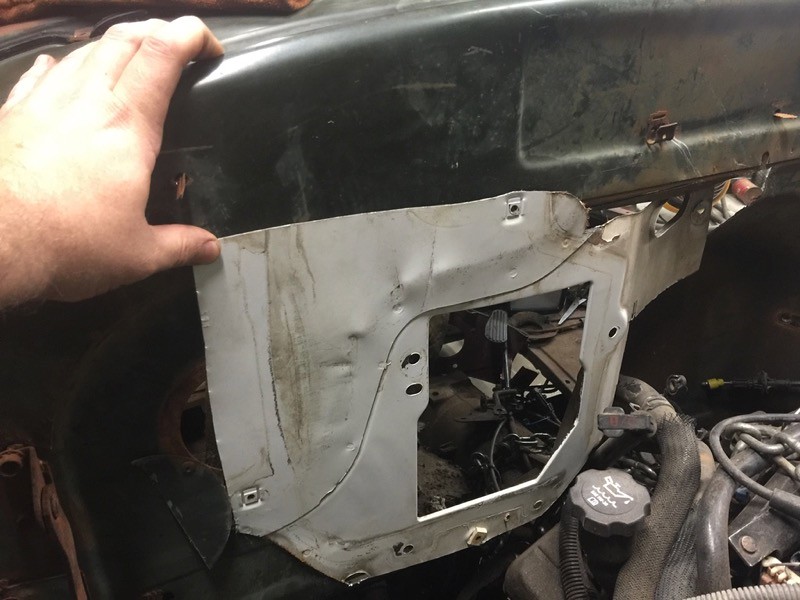 IMG_0547 by Joe Doh, on Flickr IMG_0547 by Joe Doh, on Flickr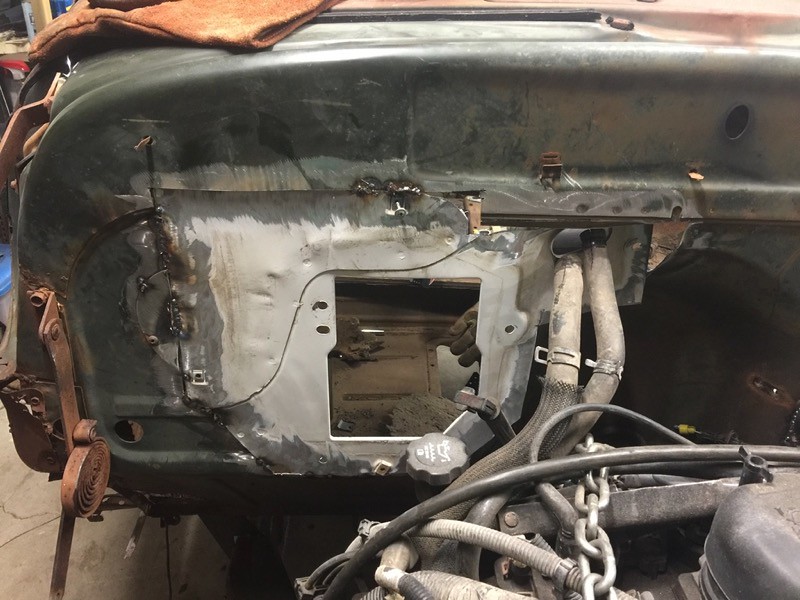 IMG_0549 by Joe Doh, on Flickr IMG_0549 by Joe Doh, on Flickrwell I'll be dipped. 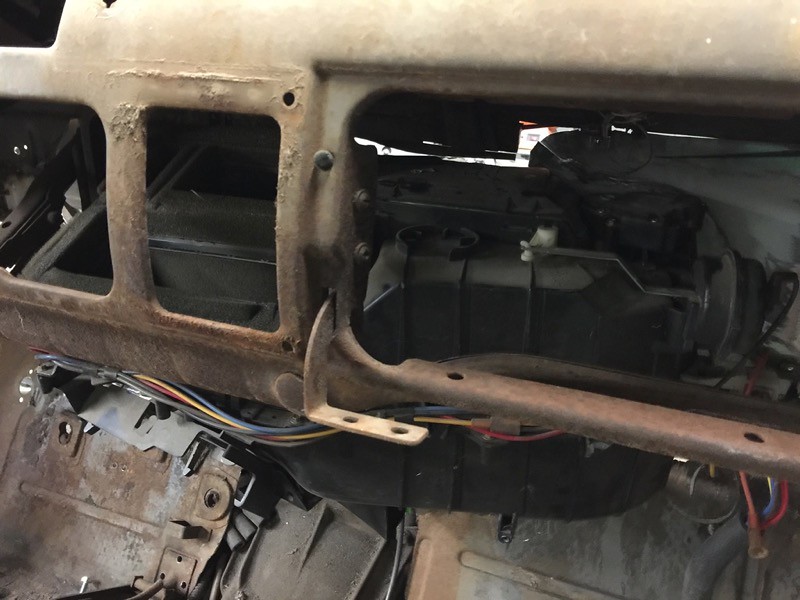 IMG_0551 by Joe Doh, on Flickr IMG_0551 by Joe Doh, on Flickr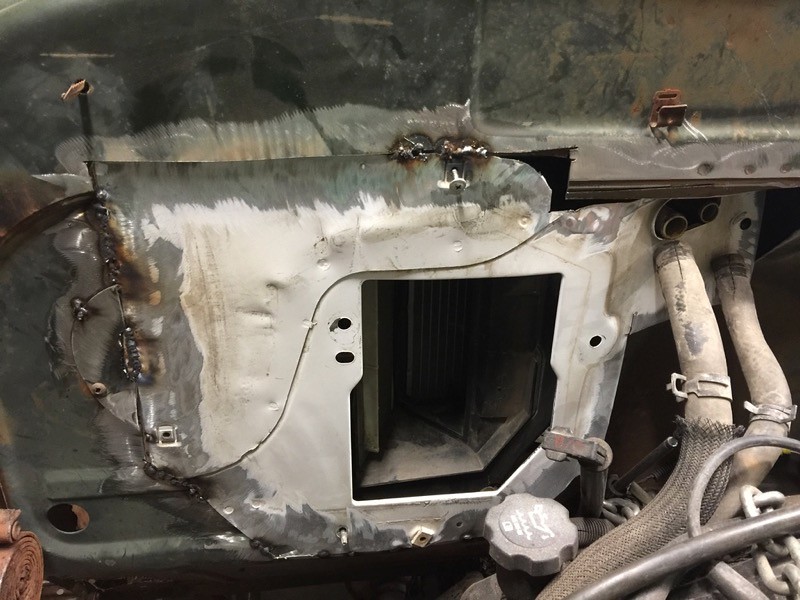 IMG_0552 by Joe Doh, on Flickr IMG_0552 by Joe Doh, on Flickr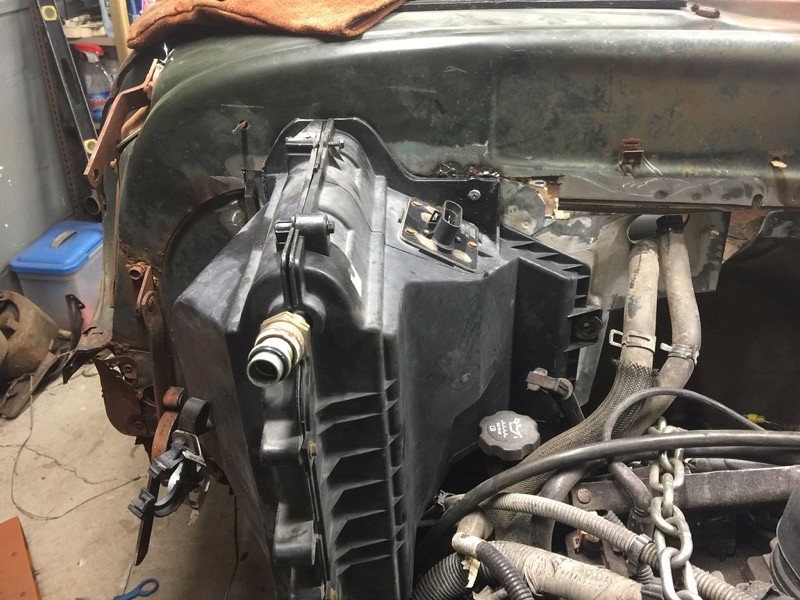 IMG_0548 by Joe Doh, on Flickr IMG_0548 by Joe Doh, on Flickreverything fits. the interior distribution box JUST clears the cowl vent mechanism. you can still check the trans fluid and add oil, and put all the blower housing bolts in. even the stock heater and AC hoses will fit. I already know how to put the AC condenser in front of the rad, I did it on the last 49. I am literally a small firewall trim and some fiberglass work (to mount the blower) away from having actual defrost, AC, and heat, working from the stock s10 controls. I am gobsmacked. I think I spent more time fiddling with the last vintage air system and still didnt hook up the ac (hoses were incompatible with the s10 stuff) I think I can have this buttoned up tomorrow and start on either rust repair on the cab or mounting the front sheetmetal. I beat around on the fenders a bit the other day, that stuff is as tough as I remember. I have most of a GMC clip in the back yard but I want to use it as a last resort.
__________________
the mass of men live lives of quiet desperation if there is a problem, I can have it. new project WAYNE http://67-72chevytrucks.com/vboard/s...d.php?t=844393 |
|
|

|
|
|
#68 |
|
State of Confusion!
  Join Date: Jul 2002
Location: Gulfport, MS USA
Posts: 47,083
|
Re: Wamego: 1949 GMC 150
Very Nice!

__________________
Bill 1970 Chevy Custom/10 LWB Fleetside 2010 Toyota Tacoma PreRunner SR5 Double Cab - DD Member of Louisiana Classic Truck Club (LCTC) Bill's Gallery Life isn't tied with a bow, but it's still a gift. Live simply. Love generously. Care deeply. Speak kindly. Leave the rest to God! |
|
|

|
|
|
#69 |
|
Senior Member
 Join Date: Mar 2011
Location: West Plains, Missouri
Posts: 7,559
|
Re: Wamego: 1949 GMC 150
joe, you amaze me with how you make things work...Jim
__________________
my build thread: http://67-72chevytrucks.com/vboard/s...d.php?t=459839 Jimbo's long bed step build:http://67-72chevytrucks.com/vboard/s...t=464626<br /> |
|
|

|
|
|
#70 |
|
Registered User
Join Date: Jul 2014
Location: Clear and Still Idaho
Posts: 509
|
Re: Wamego: 1949 GMC 150
General Joe
Wins another round, what's the score: 100 to 2? smoking......... Strong work NC
__________________
Been there, wrecked that 
|
|
|

|
|
|
#71 |
|
Senior Member
 Join Date: May 2007
Location: Doodah Kansas
Posts: 7,774
|
Re: Wamego: 1949 GMC 150
thanks fellas.
nut usually I am beat up from the feet up from all the unintended but necessary work on these projects, but this one is almost falling together. I am outside in the beautiful weather today, cleaning the shop first and pounding on front ends.
__________________
the mass of men live lives of quiet desperation if there is a problem, I can have it. new project WAYNE http://67-72chevytrucks.com/vboard/s...d.php?t=844393 |
|
|

|
|
|
#72 |
|
Registered User
Join Date: Aug 2016
Location: Hunkered Down
Posts: 1,882
|
Re: Wamego: 1949 GMC 150
Amazing display of ingenuity and skill.
|
|
|

|
|
|
#73 |
|
Senior Member
 Join Date: May 2007
Location: Doodah Kansas
Posts: 7,774
|
Re: Wamego: 1949 GMC 150
thanks!
today was gorgeous! mid 80s, a little humidity, partly cloudy. I spent about 5 hours cleaning and rearranging the garage. this truck is so dirty, just every time you touch it piles of dirt and rust accumulate. I havent pressure washed it yet. anyway, stem to stern cleaning. wamego watched. 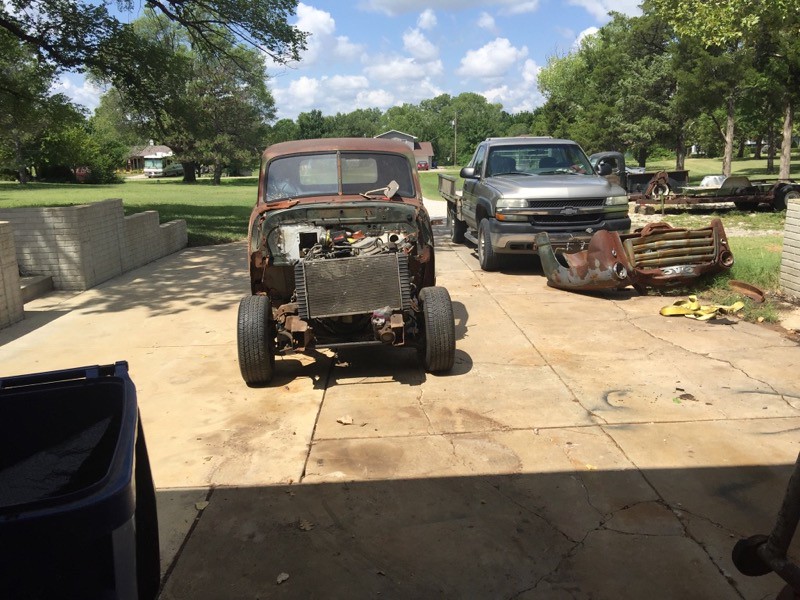 IMG_0553 by Joe Doh, on Flickr IMG_0553 by Joe Doh, on FlickrI got rid of the shelves on the south wall (passenger side) and that cleared up a bunch of room. I moved my mini motorcycle and workbench too, there is a ton more room now. 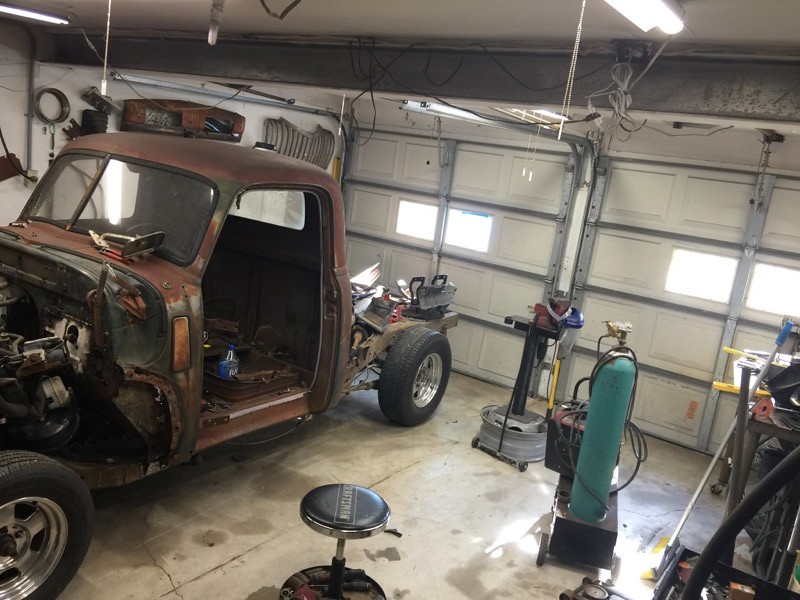 IMG_0557 by Joe Doh, on Flickr IMG_0557 by Joe Doh, on FlickrI tried to pie cut the 49 firewall hump but it didnt give me everything I needed for room, its ok. just more welding. everything fits so nice though, like it was made for it really. 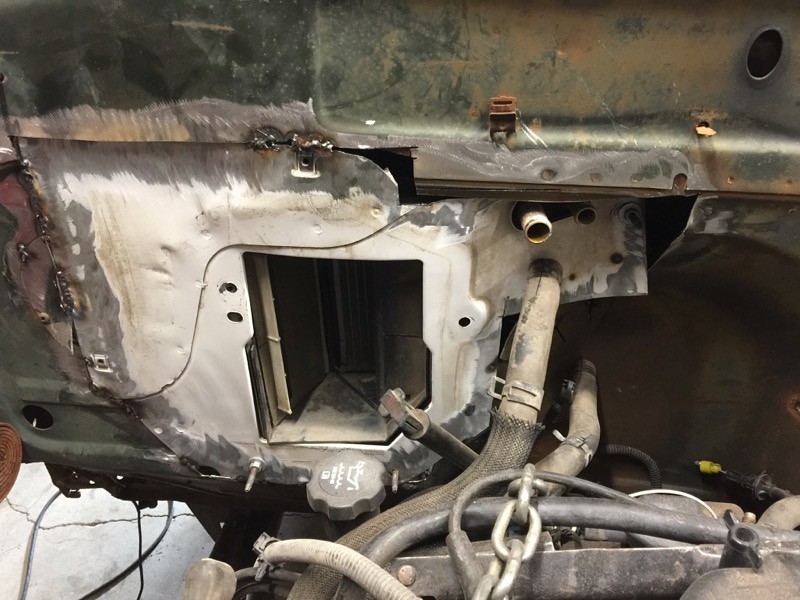 IMG_0558 by Joe Doh, on Flickr IMG_0558 by Joe Doh, on Flickr IMG_0559 by Joe Doh, on Flickr IMG_0559 by Joe Doh, on Flickr IMG_0560 by Joe Doh, on Flickr IMG_0560 by Joe Doh, on FlickrI know I have been talking about adding a shop/garage, but there is some other things going on, I am being actively headhunted and we may have a move coming. cant really say yet, but the quotes we got on building a shop would buy a reasonable place someplace new.
__________________
the mass of men live lives of quiet desperation if there is a problem, I can have it. new project WAYNE http://67-72chevytrucks.com/vboard/s...d.php?t=844393 |
|
|

|
|
|
#74 |
|
Senior Member
 Join Date: Mar 2011
Location: West Plains, Missouri
Posts: 7,559
|
Re: Wamego: 1949 GMC 150
Truck looks good...Jim
__________________
my build thread: http://67-72chevytrucks.com/vboard/s...d.php?t=459839 Jimbo's long bed step build:http://67-72chevytrucks.com/vboard/s...t=464626<br /> |
|
|

|
|
|
#75 |
|
Senior Member
 Join Date: May 2007
Location: Doodah Kansas
Posts: 7,774
|
Re: Wamego: 1949 GMC 150
thanks jim, as always
I needed more room to get the HVAC box to fit the firewall correctly, so I cut a viewing window. 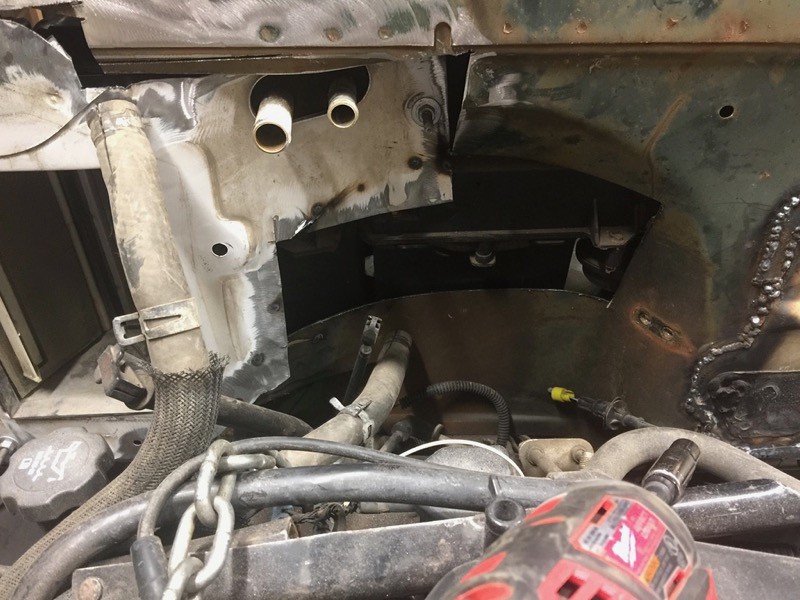 IMG_0629 by Joe Doh, on Flickr IMG_0629 by Joe Doh, on Flickrlooks like the distributor will still fit! whew! 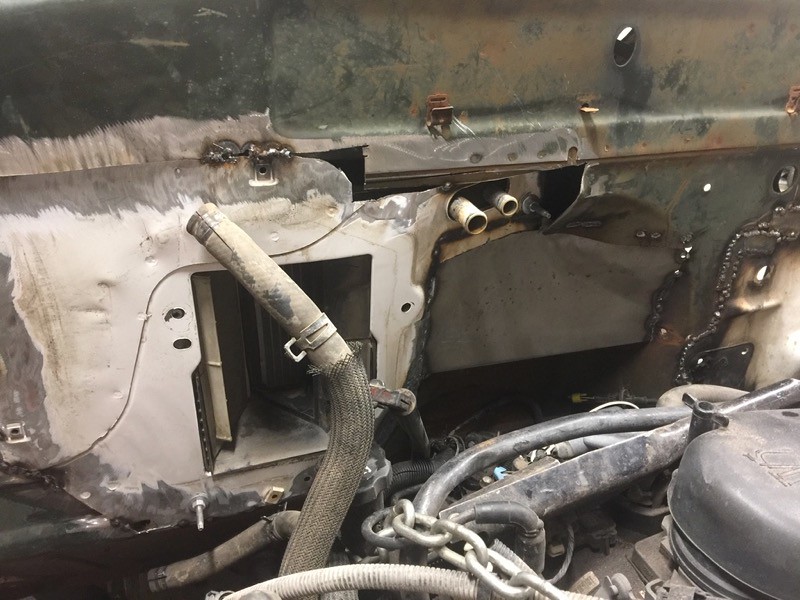 IMG_0630 by Joe Doh, on Flickr IMG_0630 by Joe Doh, on Flickr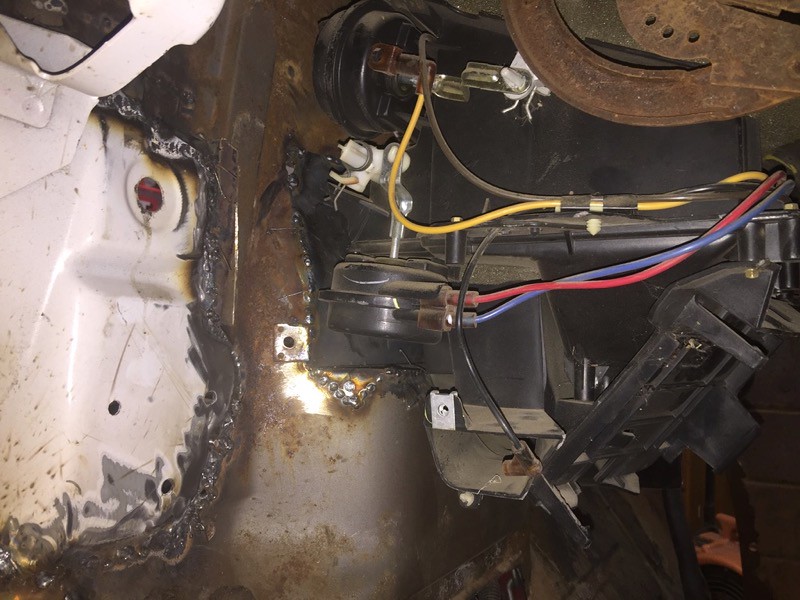 IMG_0631 by Joe Doh, on Flickr IMG_0631 by Joe Doh, on Flickr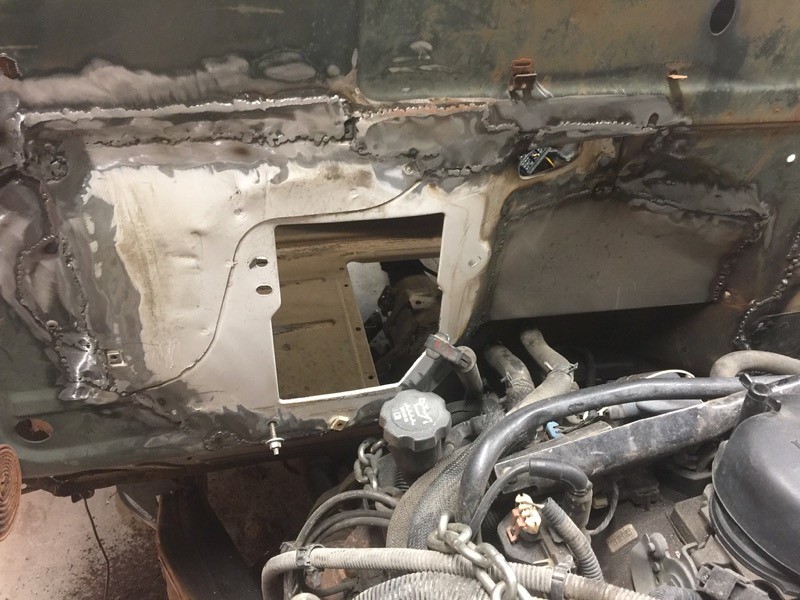 IMG_0632 by Joe Doh, on Flickr IMG_0632 by Joe Doh, on FlickrI got the pedal/column bracket done too. just need to grind on it a bunch 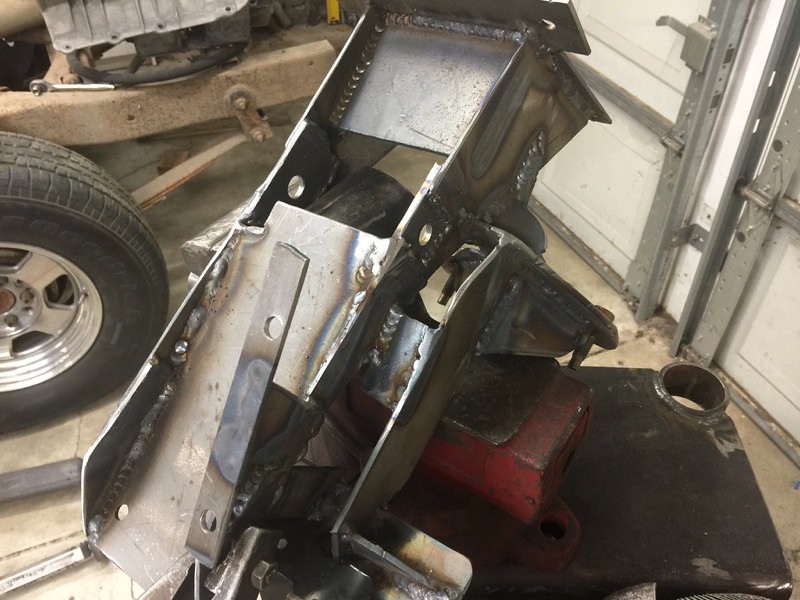 IMG_0633 by Joe Doh, on Flickr IMG_0633 by Joe Doh, on Flickrspeaking of the distributor, I put a 2x2 piece of gorilla tape over the dizzy hole, so far it has blocked some serious JUNK from falling in, but as I was, persuading, the firewall my 44oz QT tea fell off the cowl and guess where it dumped? right on the gorilla tape. WHEW! I feel like I have said it before but tomorrow I will take the front clip apart. hate to do it, because I like leaving it all together, easier to align, but this truck was in a small collision and I need to straighten the drivers fender. I wish it was the passenger fender, I have a spare GMC fender in old paint, the drivers fender I have someone primed.
__________________
the mass of men live lives of quiet desperation if there is a problem, I can have it. new project WAYNE http://67-72chevytrucks.com/vboard/s...d.php?t=844393 |
|
|

|
 |
| Bookmarks |
|
|