
|
|
|
 06-04-2012, 12:00 PM
|
#1 |
|
Registered User
Join Date: Sep 2009
Location: South Texas
Posts: 171
|
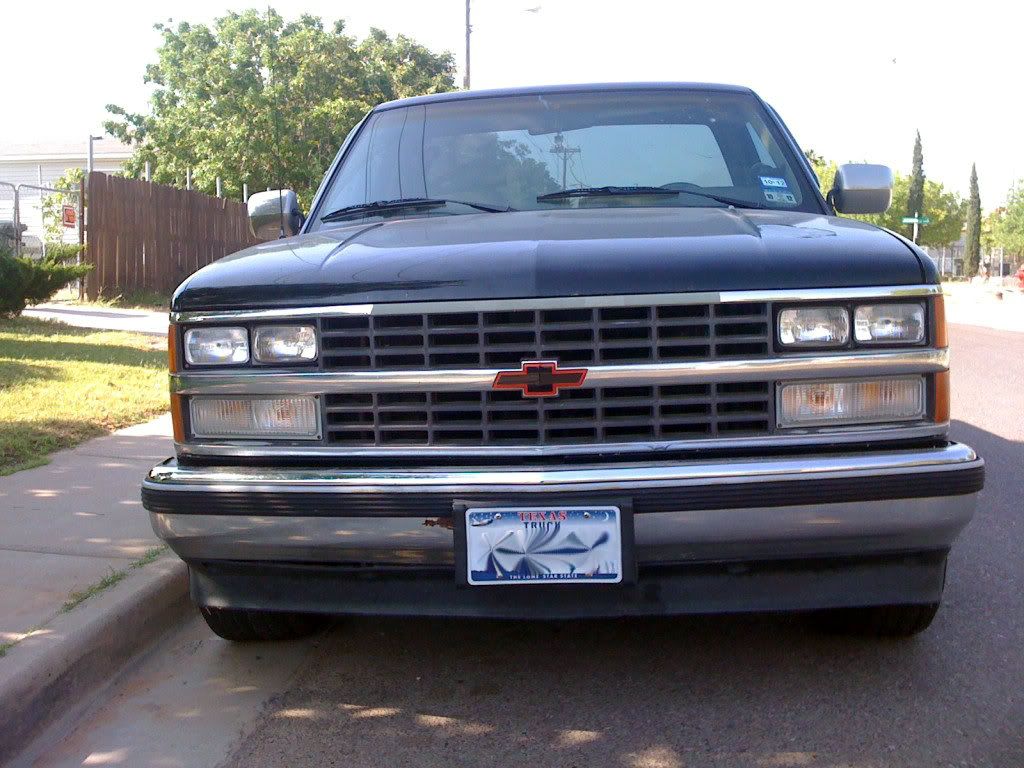
Re: My 88 Silverado
Thanks Chris, little by little Ill get her done.
Posted via Mobile Device
__________________
It takes 8,460 bolts to assemble an automobile, and one nut to scatter it all over the road...  1988 Chevrolet Silverado Single Cab, Short bed, 350, 5.7L: daily driver/on a budget restoration |

|

|
|
06-04-2012, 03:57 PM
|
#2 |
|
GM Parts Guy
Join Date: Jan 2011
Location: Attleboro MA
Posts: 375
|
Re: My 88 Silverado
Definitely looks alot better!
__________________
1975 Chevrolet C-10 Custom Deluxe (DD/WIP) 1989 Chevrolet C1500 reg cab stepside (Winter Truck) 1977 Harley Davidson XLH 1000 (Summer Cruiser) |
|
|
|
|
06-04-2012, 10:46 PM
|
#3 |
|
Registered User
Join Date: Sep 2009
Location: South Texas
Posts: 171
|
Re: My 88 Silverado
 My stock steels were rusting where the beauty rings grab on. I went super cheap, I used the same engine enamel rattle can that I used on my air filter housing. Later on I plan to have them sand blasted and powdercoated. Posted via Mobile Device
__________________
It takes 8,460 bolts to assemble an automobile, and one nut to scatter it all over the road... 1988 Chevrolet Silverado Single Cab, Short bed, 350, 5.7L: daily driver/on a budget restoration |
|
|
|
|
06-10-2012, 02:51 PM
|
#4 |
|
Registered User
Join Date: Sep 2009
Location: South Texas
Posts: 171
|
Re: My 88 Silverado
My battery tray was kinda rusting and the paint was cracking so I painted it. Liz gave me the idea of painting it chevy orange, hopefully one day my engine block will be orange also.
Front: 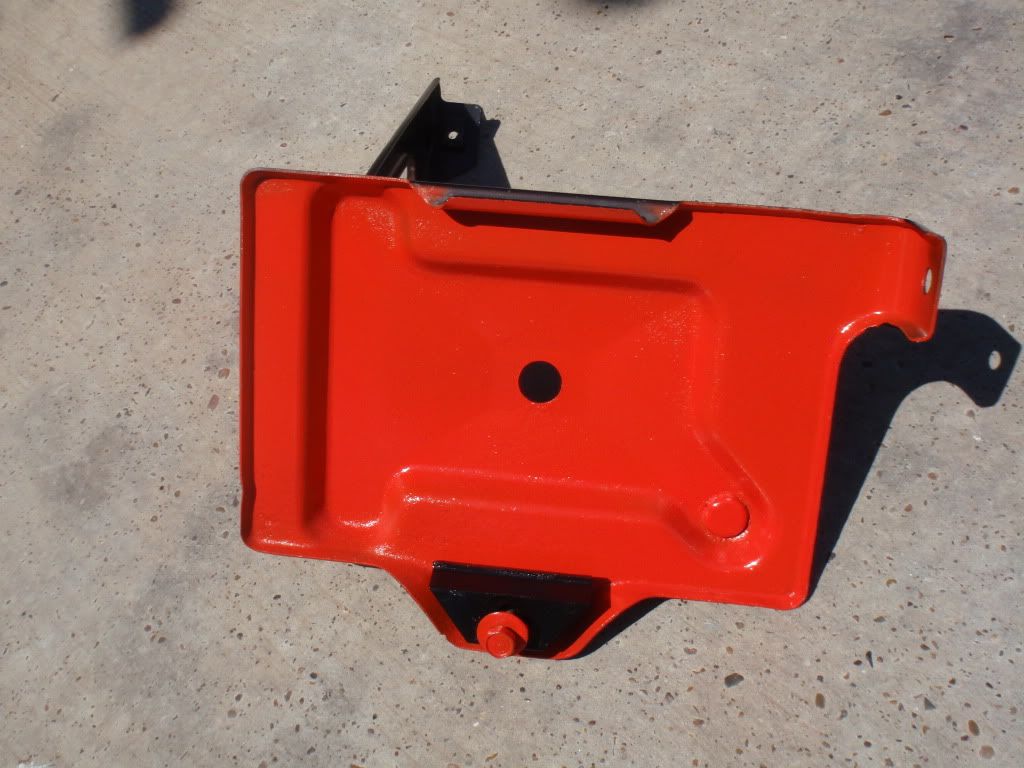 Back: 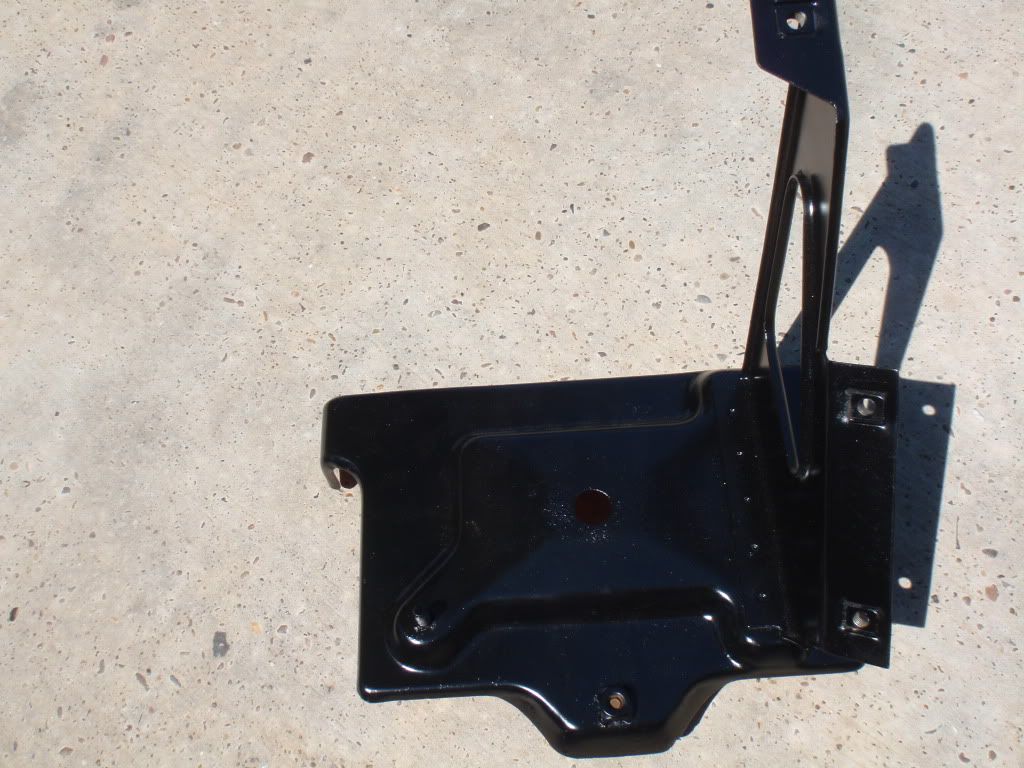
__________________
It takes 8,460 bolts to assemble an automobile, and one nut to scatter it all over the road... 1988 Chevrolet Silverado Single Cab, Short bed, 350, 5.7L: daily driver/on a budget restoration |
|
|
|
|
06-14-2012, 06:51 PM
|
#5 |
|
Registered User
Join Date: Sep 2009
Location: South Texas
Posts: 171
|
Re: My 88 Silverado
Painted my wiper arms with Rustoleum Semi-Gloss Black.
__________________
It takes 8,460 bolts to assemble an automobile, and one nut to scatter it all over the road... 1988 Chevrolet Silverado Single Cab, Short bed, 350, 5.7L: daily driver/on a budget restoration |
|
|
|
|
06-23-2012, 01:32 AM
|
#6 |
|
Registered User
Join Date: Sep 2009
Location: South Texas
Posts: 171
|
Re: My 88 Silverado
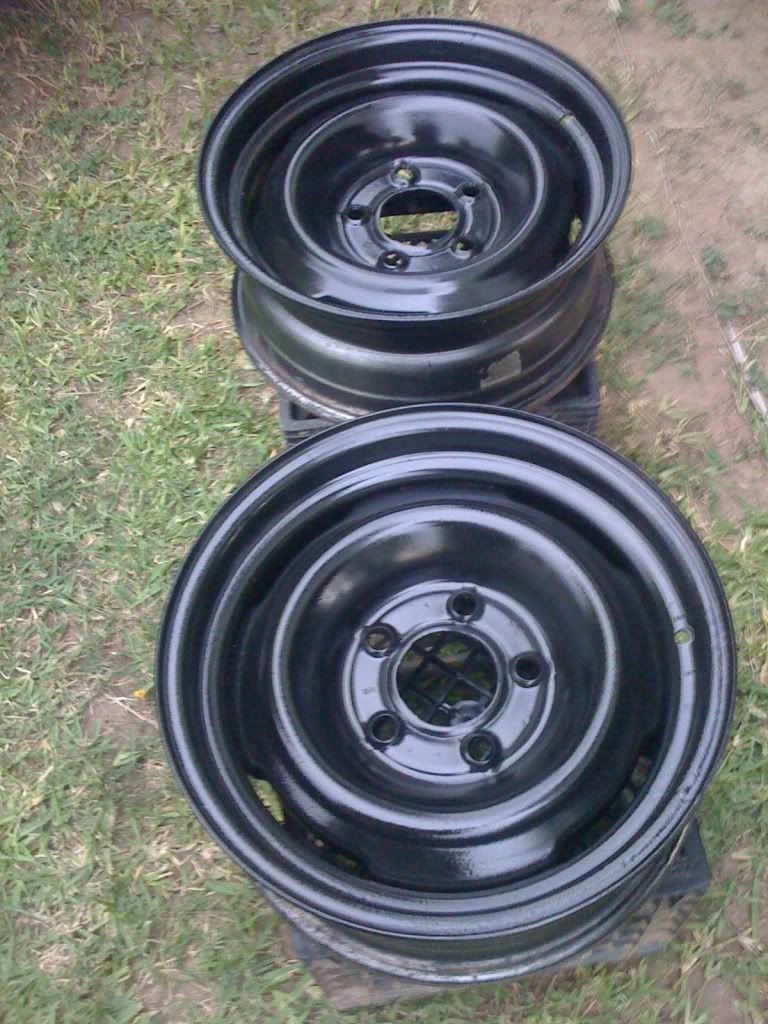
Got some new Cooper Trendsetter 235/75/r15 tires installed today on my painted steels. I lost my intrest on white walls a long time ago so I stuck to the black wall. Here are some pics:
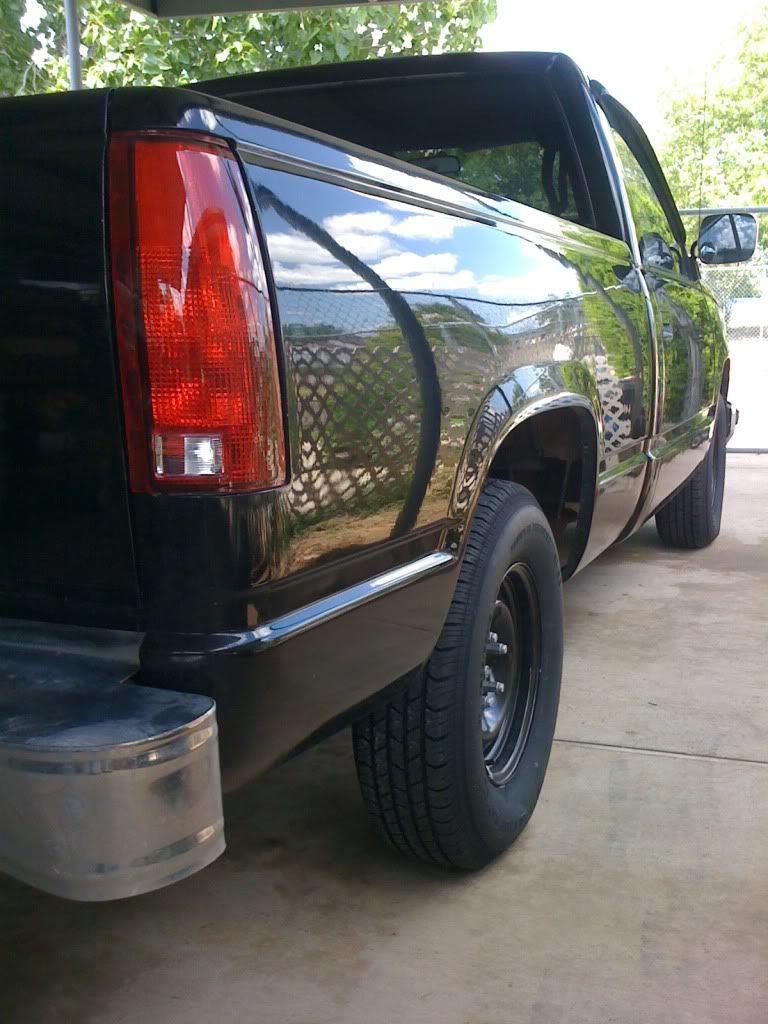 Here's one of the old rims sitting next to the black ones. 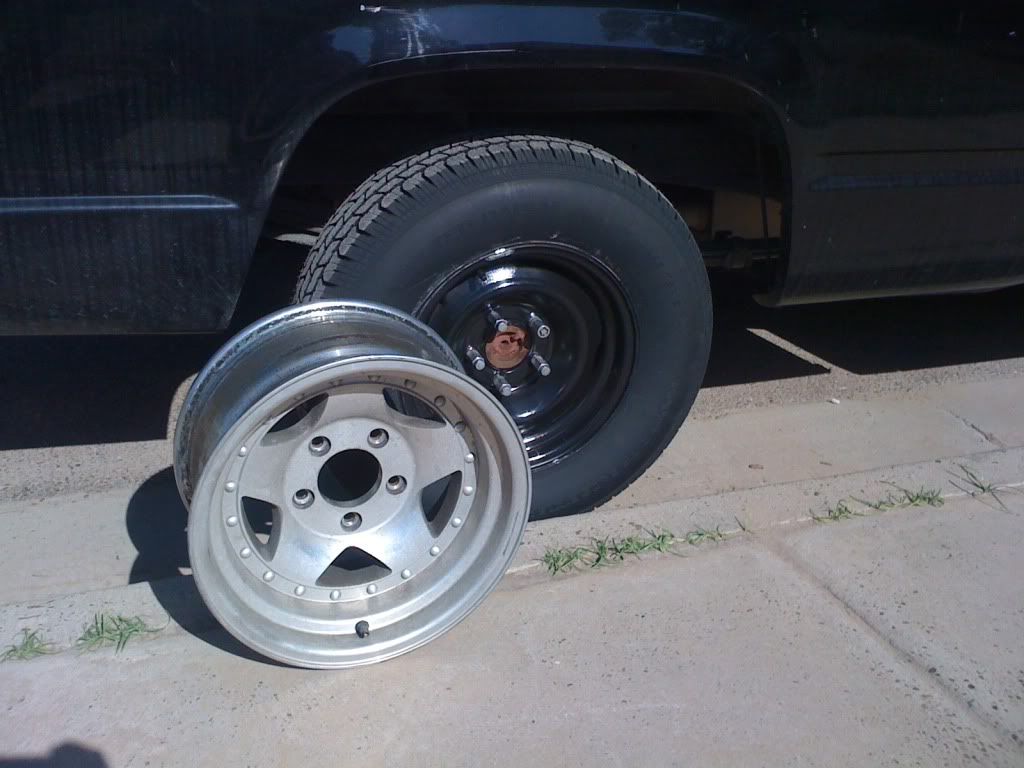 Posted via Mobile Device Posted via Mobile Device
__________________
It takes 8,460 bolts to assemble an automobile, and one nut to scatter it all over the road... 1988 Chevrolet Silverado Single Cab, Short bed, 350, 5.7L: daily driver/on a budget restoration |
|
|
|
|
07-10-2012, 09:19 PM
|
#7 |
|
Registered User
Join Date: Sep 2009
Location: South Texas
Posts: 171
|
Re: My 88 Silverado
July 9 2012.
I began working on my truck by opening the hood and disconnecting my battery terminals. I removed the bolts holding my taillights and replaced all four wit new square socket screws and lock washers. In the rear of the truck I removed the excess cables on the license plate bulbs and patched the cable with red liquid tape. The wires had scuffs exposing bare wire and the bulbs were connected in an unorganized manner(being a teenager in a hurry to drive, I ignored all common sense). I removed my previous mistakes(wrong tape and poor connections) and began to wire everything correctly and liquid taped it as a temporary bandage. I still need to return to solder the connections, place a spot of dielectric grease, and shrink tube all connections. depending on how the liquid tape holds on, I will put some on the shrink tubing. I also sanded the tail light ground on the frame and on the bottom of the bolt head. There was a butchered cable, that was used to ground the blue LED license plate bolts hanging taped up. I removed the extra cable and stripped off about half an inch and tied it around the tail lamp frame ground. After I re-bolted the harness ground, I painted the area with some rustoleum black engine enamel. I re-opend the hood and painted both headlight harness grounds on the core support to protect it from dust. Liz sprayed my hood latch with super purple degreaser and scrubbed it with a toothbrush. the latch was full of old crusty grease; when Liz was finished scrubbing, it looked semi new. I sprayed it with white lithium grease and let it soak for a bit. When I closed the hood and pulled the release handle, I was surprised on how awesomely the hood popped open. No more banging the hood to release the latch.
__________________
It takes 8,460 bolts to assemble an automobile, and one nut to scatter it all over the road... 1988 Chevrolet Silverado Single Cab, Short bed, 350, 5.7L: daily driver/on a budget restoration |
|
|
|
|
07-11-2012, 12:46 AM
|
#8 |
|
Registered User
Join Date: Sep 2009
Location: South Texas
Posts: 171
|
Re: My 88 Silverado
I love the look of fog lamps in the valance on Silverados with quad beam headlights. I had my fogs behind the grille in highschool. I completely ignored the fact that my lights wouldnt illuminate jack squat so I took them off so long ago that I misplaced them. For now, I am planning ahead and want to wire a switch inside the truck to put the fog light control at arms reach. For years I had them connected by a rocker switch screwed into the plastic panel next to my fuse box. Since I took off my lamps, I took off the switch cause we were having issues with an electrical drain (another story). My horn button is there for now, until I get a new steering wheel with a functioning horn button. Well I would like to hook up the lights via "add-a-circuit" to the parking light fuse. What size fuse should I install here along with the 15 from the parking lights? The way I have this diagram wired, would the "add a circuit" power the relay?
 I drew this diagram to lay it all out and see if I can make my own fog relay harness. The inline fuse would be a 20Amp to power the relay from the battery. The stock connectors are weatherproof and keep the truck feeling stock. 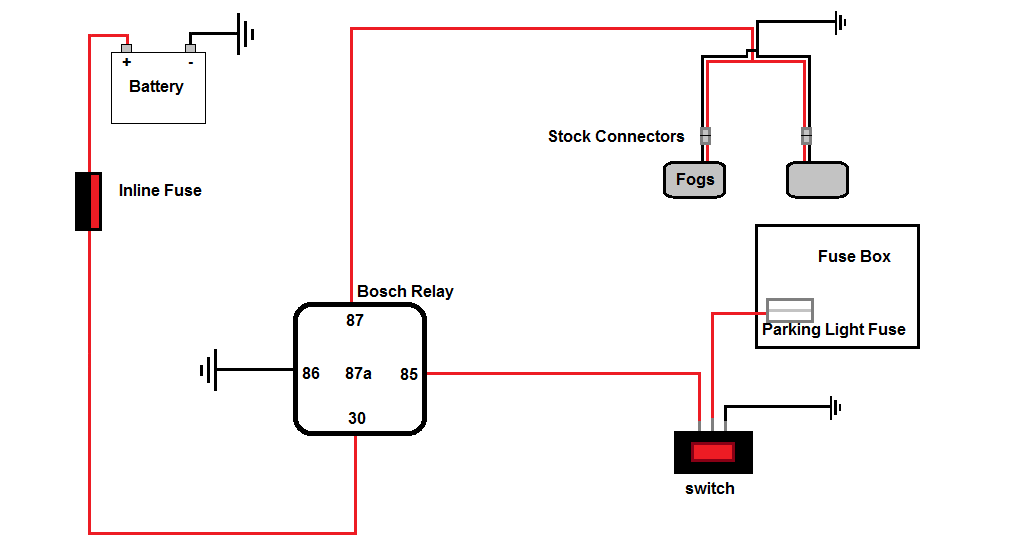 i still have my doubts on it as im no electrician. lol I was planning on cutting out a small spot on my instrument bezel where the OEM switch would go and place the center of a spare rocker switch on the dash. Location:  Rocker Switch: 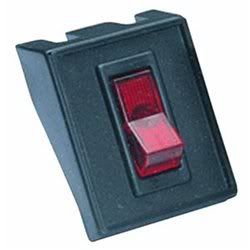 My current instrument bezel is cracked and has a broken corner, so i wouldnt mind installing that switch horizontally as a temp. I have plans on purchasing a new instrument bezel some time in the way future, maybe then I'll switch to the OEM style switch but we'll cross that bridge when we get there.
__________________
It takes 8,460 bolts to assemble an automobile, and one nut to scatter it all over the road... 1988 Chevrolet Silverado Single Cab, Short bed, 350, 5.7L: daily driver/on a budget restoration |
|
|
|
|
05-18-2013, 12:58 AM
|
#9 |
|
Registered User
Join Date: Sep 2009
Location: South Texas
Posts: 171
|
Re: My 88 Silverado
I've had my air pump disabled for over 10 years and I still have it on my truck along with some other parts it needed. I decided to start removing parts connecting it to my air canister. There was a rubber hose going from the pump to the air filter housing with a little plastic filter, I removed the hose and was left with a hole on the air canister. So now I was left with 2 giant holes on my air filter housing, one was from the hose and the other was from the heat riser that was connected to the stock manifold.
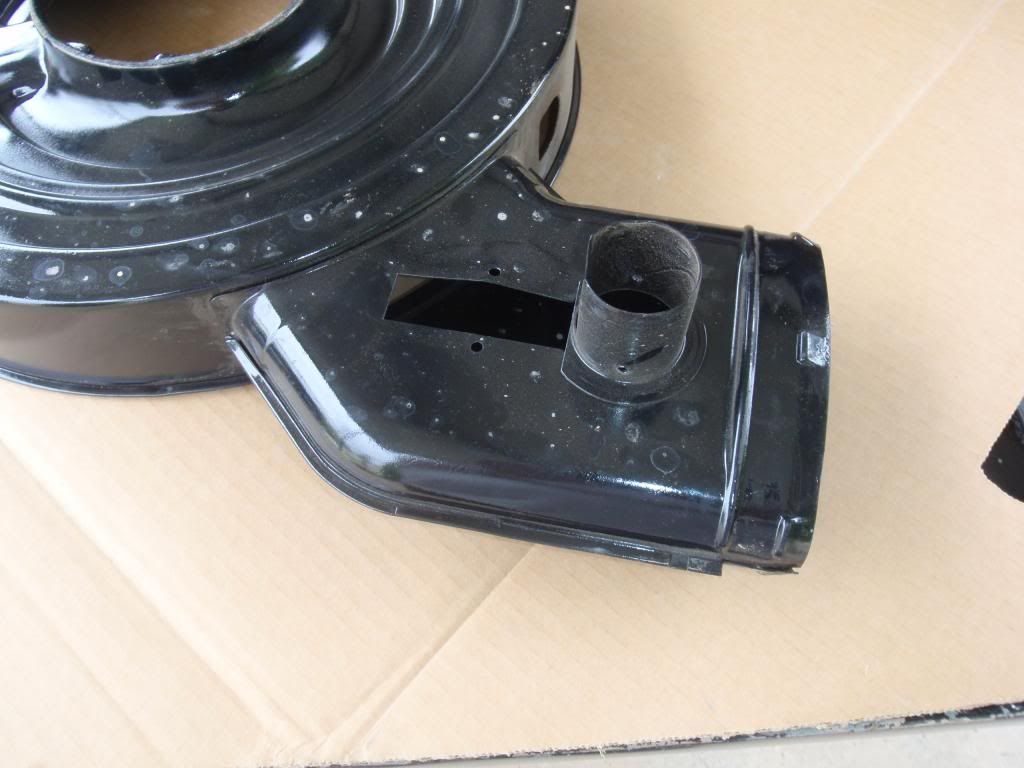 Since I changed to headers I no longer needed the heat riser so I took the air housing off to work on it. I had already removed the flap inside the air housing tube to give it some better air flow and under the air housing there was a circular tube where the heat riser would go. Since I didn't need it I went ahead and cut it off to give it a flushed look. 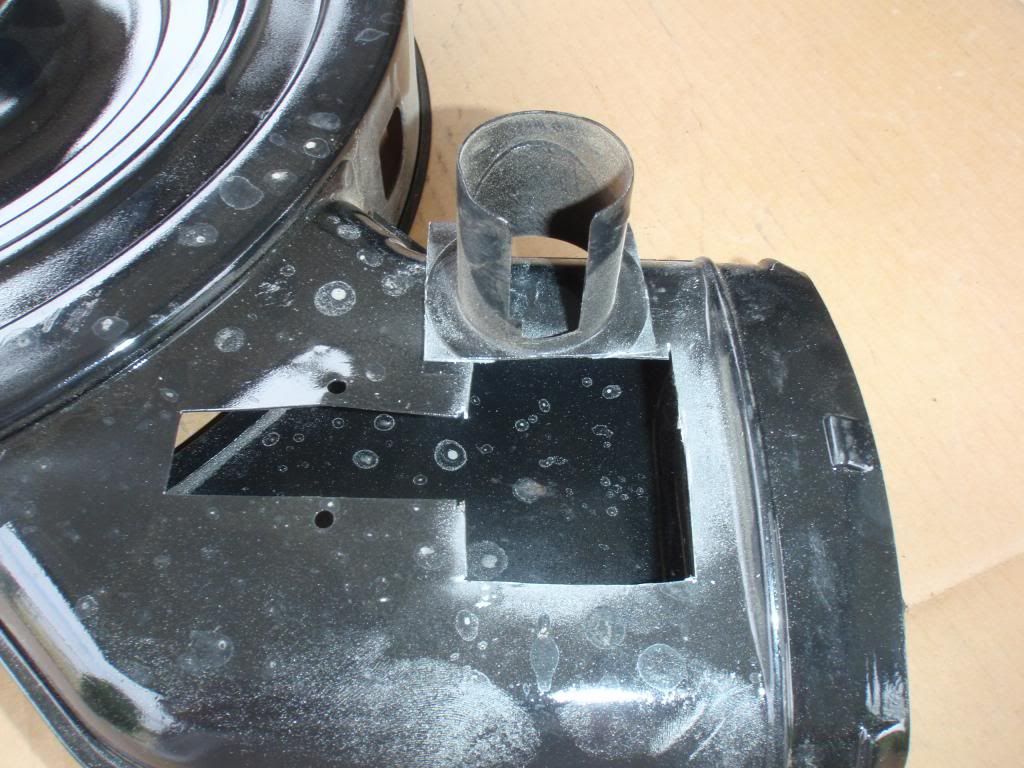 I didn't have any scrap steel laying around so I made lemonade out of lemons, I used some thin aluminum I had laying around. I cut two pieces of aluminum into the desired size and covered the holes on the housing. 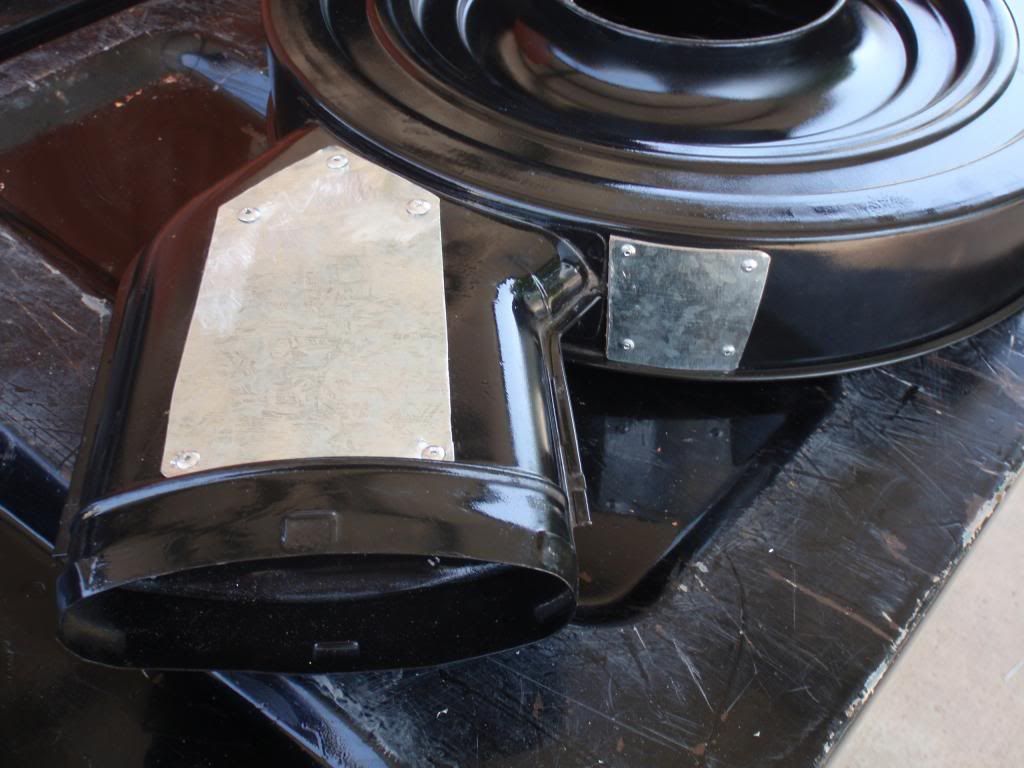 I had read in another forum that they used cardboard as a gasket so I was going to use a cereal box. Liz was doing the laundry and she gave me the flaps from the detergent box which was way better than the cereal box I was planning on using, so I made my gaskets and drilled the aluminum and the air canister to install some rivets. 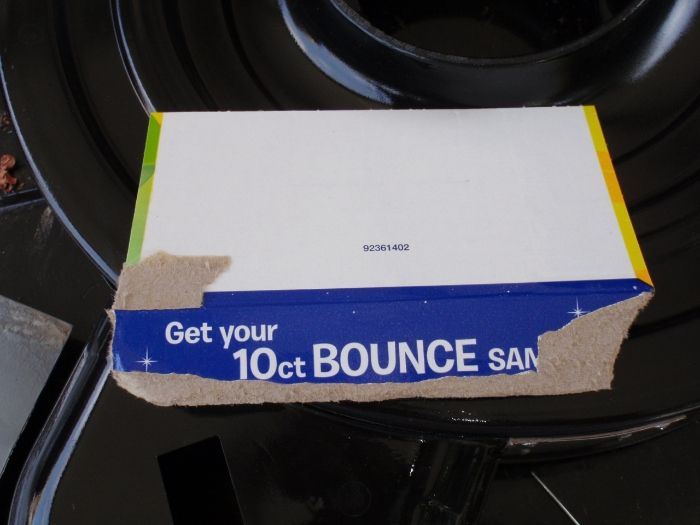 After both pieces were riveted I went ahead and added some spray paint to give it a more finished look. 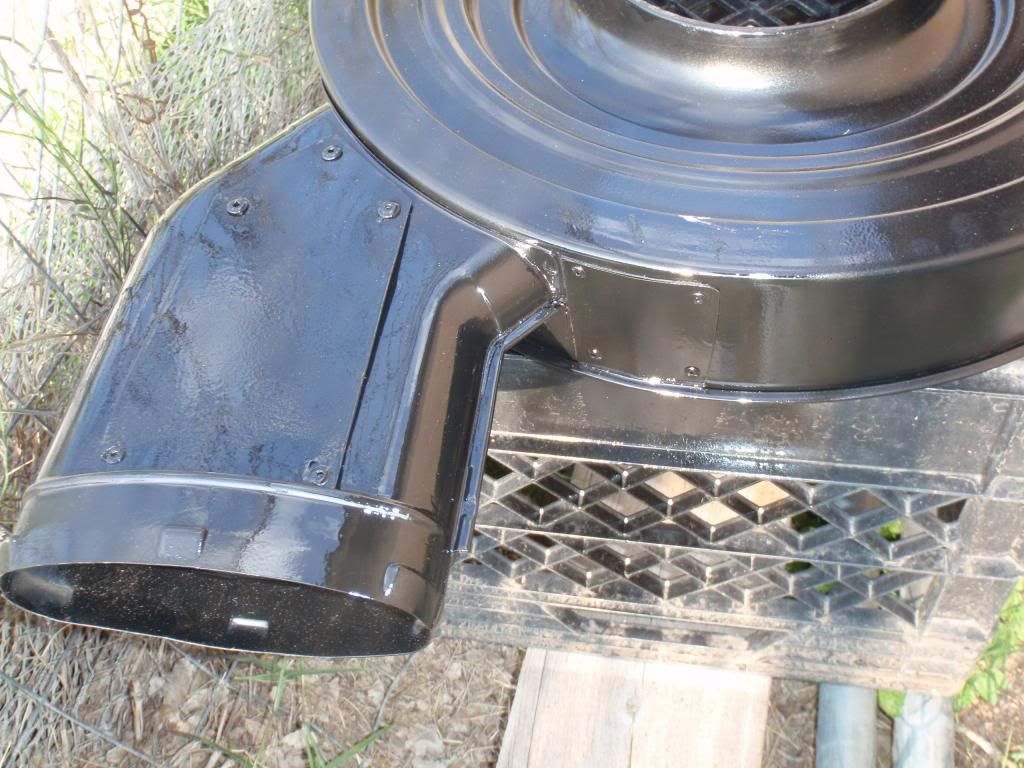 I also removed the thin plastic hose that went to the egr and the air pump. I installed some rubber vacuum caps i got for free thanks to my autozone rewards to avoid any air leaks. Now all I need to flip over my air lid is to get the intake duct behind the headlights and clean my K&N filter. 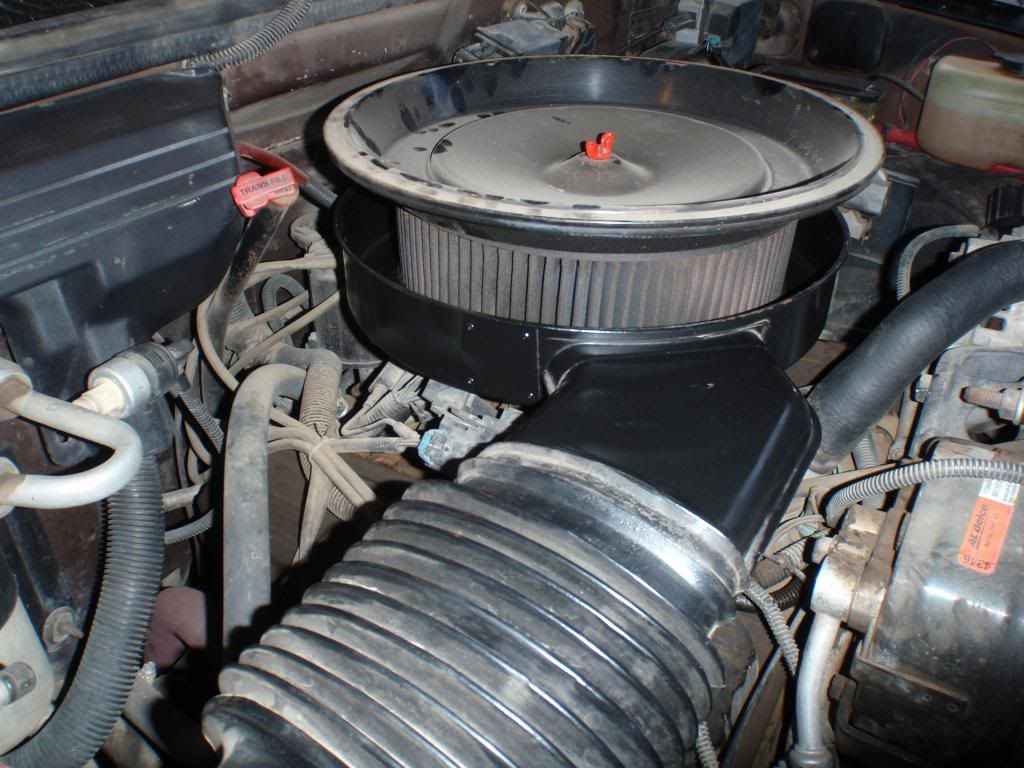 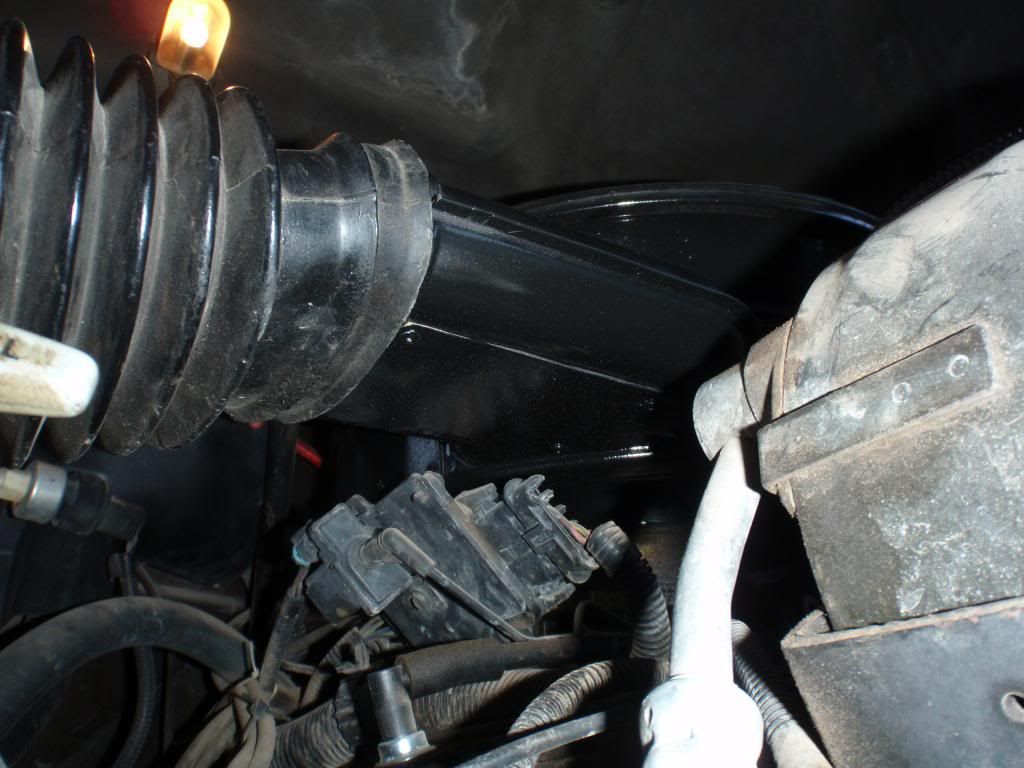
__________________
It takes 8,460 bolts to assemble an automobile, and one nut to scatter it all over the road... 1988 Chevrolet Silverado Single Cab, Short bed, 350, 5.7L: daily driver/on a budget restoration |
|
|
|
 |
| Bookmarks |
| Tags |
| 1988, silverado |
|
|


 Hybrid Mode
