
 |
|
|
#51 |
|
Registered User
Join Date: Apr 2015
Location: Wichita Kansas
Posts: 455
|
Re: 1941 1/2 ton project Hannah
Looking good, carry on.
That 55 cab looks like a great start. Whats the plans with that?
__________________
My 57 GMC build |
|
|

|
|
|
#52 |
|
Senior Member
 Join Date: May 2007
Location: Doodah Kansas
Posts: 7,774
|
Re: 1941 1/2 ton project Hannah
well first I have to buy it. the guy isnt reliably answering his phone.
other than that I plan to pick up a fleet short bed and a donor 1/2 ton and make myself a big window 55 1/2 ton. lots on the plate before that though.
__________________
the mass of men live lives of quiet desperation if there is a problem, I can have it. new project WAYNE http://67-72chevytrucks.com/vboard/s...d.php?t=844393 |
|
|

|
|
|
#53 |
|
Registered User
Join Date: Oct 2010
Location: Ocean Springs, MS
Posts: 1,746
|
Re: 1941 1/2 ton project Hannah
I have an 85 GMC S15 I have been working on, so I found the S10 forum to read for some advice. Not a lot going on with the first gens, but I have found some useful information. I think the frame is not much different from later models. I have done quite a bit of work on it, and I think these are pretty well-made little trucks. It has a 2.5 Iron Duke in it.
__________________
Gary 1971 Chevrolet C/10 1951 GMC 100 1977 GMC C15 1955 Chevrolet 3100 |
|
|

|
|
|
#54 |
|
Senior Member
 Join Date: May 2007
Location: Doodah Kansas
Posts: 7,774
|
Re: 1941 1/2 ton project Hannah
I love the iron dukes, great engines, ultra reliable. I would put them in more projects but I built a 2.2 powered 65 fullsize and when I sold it everyone shrugged. 4.3 is a great motor in these trucks though.
been busy in the house, and other stuff, but I DID get the exhaust done. not bad for under $200 including mufflers. I wish I could have made it all myself with mandrel bends like Hussey does but this is enough. I may have the exhaust shop take it out the back depending on how it sounds.  IMG_7586 by Joe Doh, on Flickr IMG_7586 by Joe Doh, on Flickr IMG_7616 by Joe Doh, on Flickr IMG_7616 by Joe Doh, on FlickrI couldnt find rod hangers anywhere, and I didnt want to use rubber or strap hangers, so I went to The Yard and got 11 feet of 3/8 rod for 90 cents. haha I love that place. it was an end cut off a 20 ft stick and had a little rust, but the 20ft stick was 10 bucks!
__________________
the mass of men live lives of quiet desperation if there is a problem, I can have it. new project WAYNE http://67-72chevytrucks.com/vboard/s...d.php?t=844393 |
|
|

|
|
|
#55 |
|
Senior Member
 Join Date: May 2007
Location: Doodah Kansas
Posts: 7,774
|
Re: 1941 1/2 ton project Hannah
little scrounging today, will maybe help someone. The first is a driveshaft trick, I usually have the driveshaft shortened at ITP but their prices have been creeping up. I dont mind a cost of living adjustment but over two years its gone up 15% each year, so 138 bucks now when it used to be right around 100. On the last truck I moved the motor back 9.5" and a colorado driveshaft was right at 54". but it just BARELY fit. so I wanted to find one more in the 53 or even 52 range. first gen s10 are 53, but the thought of a 30 year old driveshaft didnt really make me excited so I started looking for a late model replacement, and I found one. turns out a 2wd 2002+ trailblazer has a 52" aluminum driveshaft, I hopped over to the local chevy salvage and they had 6 on the shelf, my choice, $50. I cant check the fit though because...
I took the springs out today, I didnt get a picture but if I had one it would need those black censor bars because I cursed almost the whole time. what a futhermocker those rusty u bolts were, and some mensa candidate put the drivers perch bolt in from the gas tank side. %^$&*^## I got them out and dropped at atlas for dearching, 4 inches. he said maybe monday, so that give me the weekend to fart with the front springs and shocks, ceiling wax, and other fancy stuff. then tonight I answered an ad for a guy who was dying to give a caravan third row seat away for about any offer. I offered 10 bucks and he gave me the seat and the two middle row buckets, all with integral seat belts and really nice. be a shame to recover them but I am gonna. might even do it myself!  IMG_7658 by Joe Doh, on Flickr IMG_7658 by Joe Doh, on Flickrmore to come!
__________________
the mass of men live lives of quiet desperation if there is a problem, I can have it. new project WAYNE http://67-72chevytrucks.com/vboard/s...d.php?t=844393 |
|
|

|
|
|
#56 |
|
Senior Member
 Join Date: Jul 2012
Location: Oblong, Illinois
Posts: 7,028
|
Re: 1941 1/2 ton project Hannah
That was a resourceful idea on finding a drive shaft to fit. Seems maybe basic, and many of us probably forget to do that.
Wow, nice score on the seats for $10! |
|
|

|
|
|
#57 |
|
Post Whore
  Join Date: May 2015
Location: Alabama
Posts: 14,662
|
Re: 1941 1/2 ton project Hannah
good score on the seats...
|
|
|

|
|
|
#58 |
|
Senior Member
 Join Date: May 2007
Location: Doodah Kansas
Posts: 7,774
|
Re: 1941 1/2 ton project Hannah
yeah I bought the bench and he threw in the buckets! the bench even has a fore-aft adjuster. I will put the buckets in the next truck, one I am actually pretty excited to get to.
I bought some belltech springs at a swap meet last year and they were a little crusty so I sanded them up and spritzed a little silver hammer on them  IMG_7663 by Joe Doh, on Flickr IMG_7663 by Joe Doh, on Flickrmade sure not to cover the proof  IMG_7664 by Joe Doh, on Flickr IMG_7664 by Joe Doh, on FlickrI started to put them in tonight when the paint dried. I believe that I am a lightning rod for ridiculous "who else but me can have these problems", so I plan ahead, I bought new shocks because I ALWAYS end up cutting the old ones out, new sway bar end links for the same reason. still, the drivers side took an hour before I had it ready for the shocks that I cant install yet because one of the speed clips broke and I am going to get the right ones at the dealer this time. 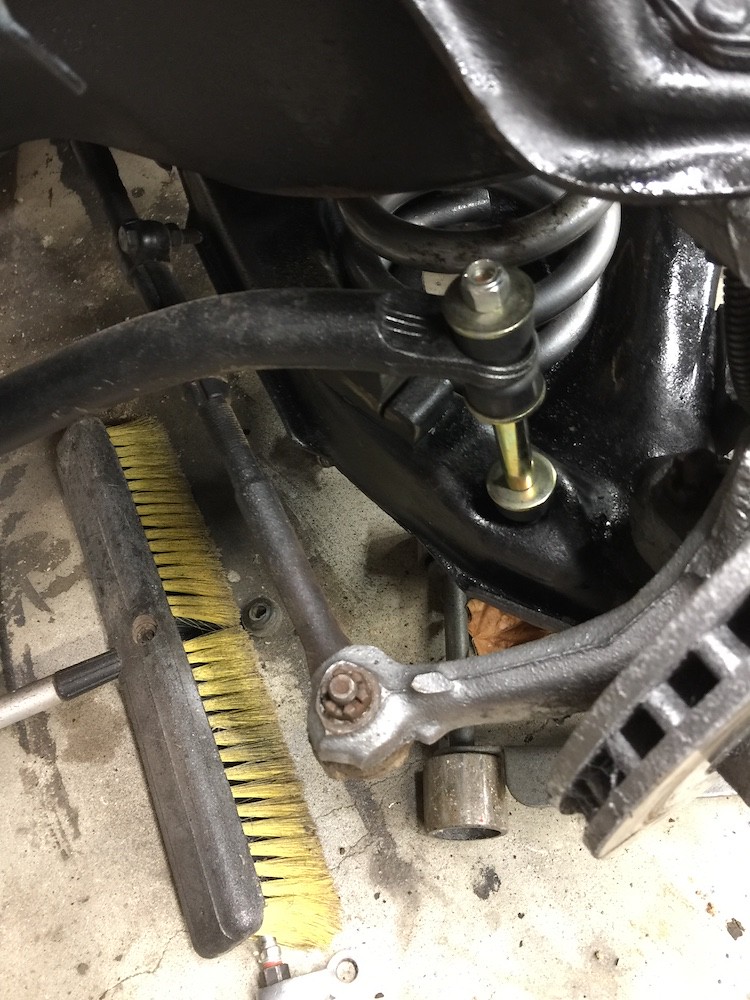 IMG_7665 by Joe Doh, on Flickr IMG_7665 by Joe Doh, on Flickrthe front end on this truck has been completely rebuilt recently, all the bushings are newish looking and the ball joints are tight. there wasnt a single cotter pin in the drivers side though and the passenger side paid back in spades by breaking all the cotter pins requiring careful (and timely) extraction. then the lower balljoint stud spun while loosening it. *sigh*. I will try some more in the morning. if I cant get the balljoint nut off, all I can think to do is cut it off. which means replacing the lowers again, which means might as well do the uppers too. lets hope clamping it works.
__________________
the mass of men live lives of quiet desperation if there is a problem, I can have it. new project WAYNE http://67-72chevytrucks.com/vboard/s...d.php?t=844393 |
|
|

|
|
|
#59 |
|
Registered User
Join Date: Oct 2014
Location: Hanover PA
Posts: 59
|
Re: 1941 1/2 ton project Hannah
Good deal on the driveshaft. Around hear a nice used driveshaft with a good yoke is $100 and up! Can't beat the price on the seats!
__________________
46 Chevy Pickup (project) 60 Chevy Biscayne 93 Caprice wagon(Impala SS style) 99 Corvette convertible 2014 Silverado 2500HD 92 Chevy 1500 (Shop/plow truck) 02 Silverwing 05 H-D Springer Classic 2011 Civic (Wifes car) 03 Highlander (beater) 96 Honda Elite 80 |
|
|

|
|
|
#60 |
|
Senior Member
 Join Date: May 2007
Location: Doodah Kansas
Posts: 7,774
|
Re: 1941 1/2 ton project Hannah
yeah he had 6 on the shelf, he wanted me to buy them all.
 SOOOOOOOooooooo. in true application of the joedoh rule, I am fish again, specifically a doom bass. I bought a set of belltech drop spindles and springs at a swap meet last year, but since I really like using springs I sold the spindles on to another guy doing an AD swap. when I cleaned up the springs and installed one I noticed that it... seemed to be almost as big a pain in the butt to install as the originals. I ran the part number and WHO KNEW? Belltech makes 1" drop springs.  so I actually considered calling the guy I sold the spindles and beg for them back, because a 1" drop is going to look pretty silly with a 4" rear drop. I looked at new ones online and it offended my frugal bone. I looked at craigslist and the only semi-local pair was outlaw drifters a cool 3 hour drive away. I went and picked up the lower control arm south of town after considering drop control arms from DJM (two birds, one bb says I) and I was about 3 miles from that salvage yard that sold me the driveshaft. hmmmm I wonder if he ever had a truck come in with drop spindles? yyyep.  A quick squirt of paint and about 200 bucks in new rotors, bearings, seals, spindle nuts, and caps plus a tub of wheel bearing grease and I was back where I was two months ago. A quick squirt of paint and about 200 bucks in new rotors, bearings, seals, spindle nuts, and caps plus a tub of wheel bearing grease and I was back where I was two months ago. 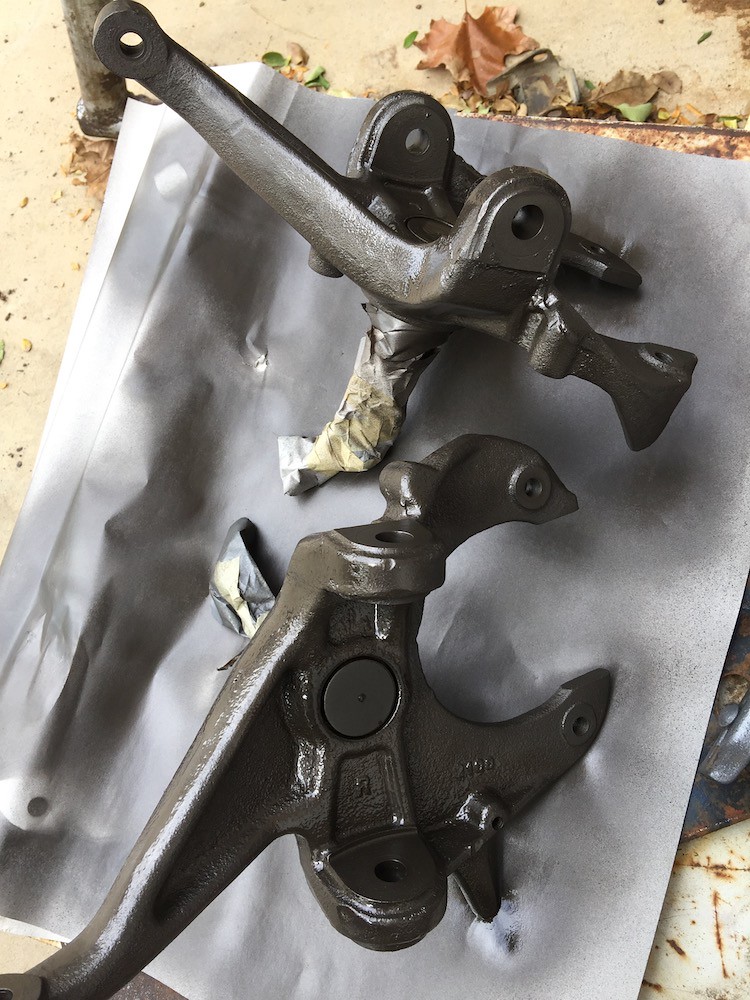 IMG_7671 by Joe Doh, on Flickr IMG_7671 by Joe Doh, on Flickr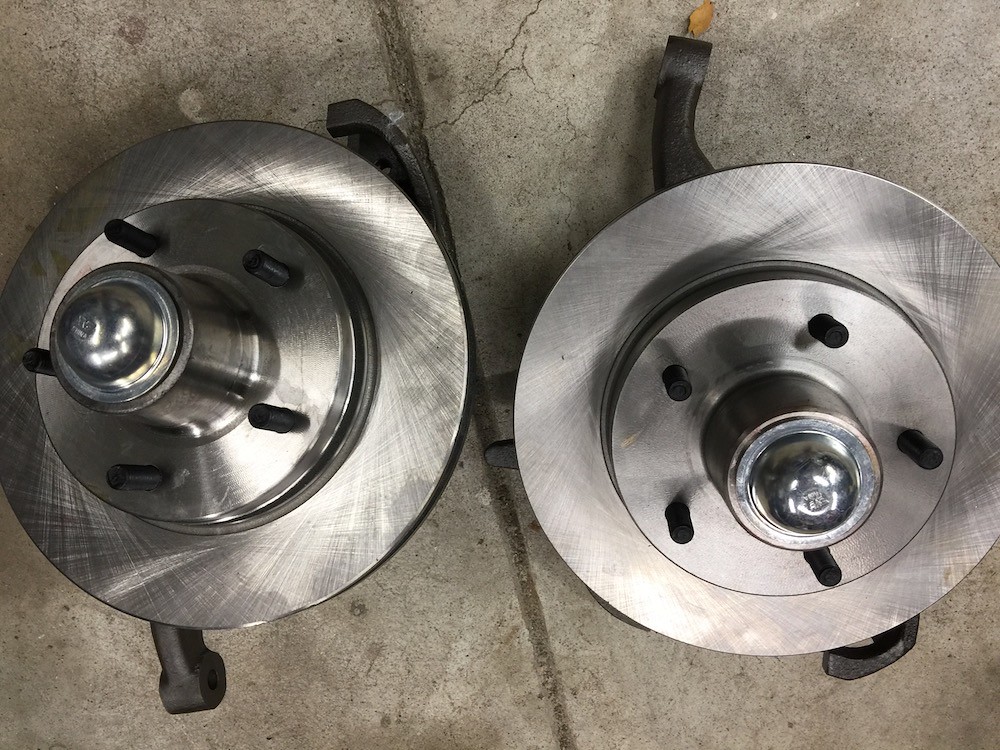 IMG_7674 by Joe Doh, on Flickr IMG_7674 by Joe Doh, on FlickrI could have used all the parts I had on the stock spindles, but you know my luck with that stuff. HAPPY BIRTHDAY! Hannah is one, this was exactly a year ago. 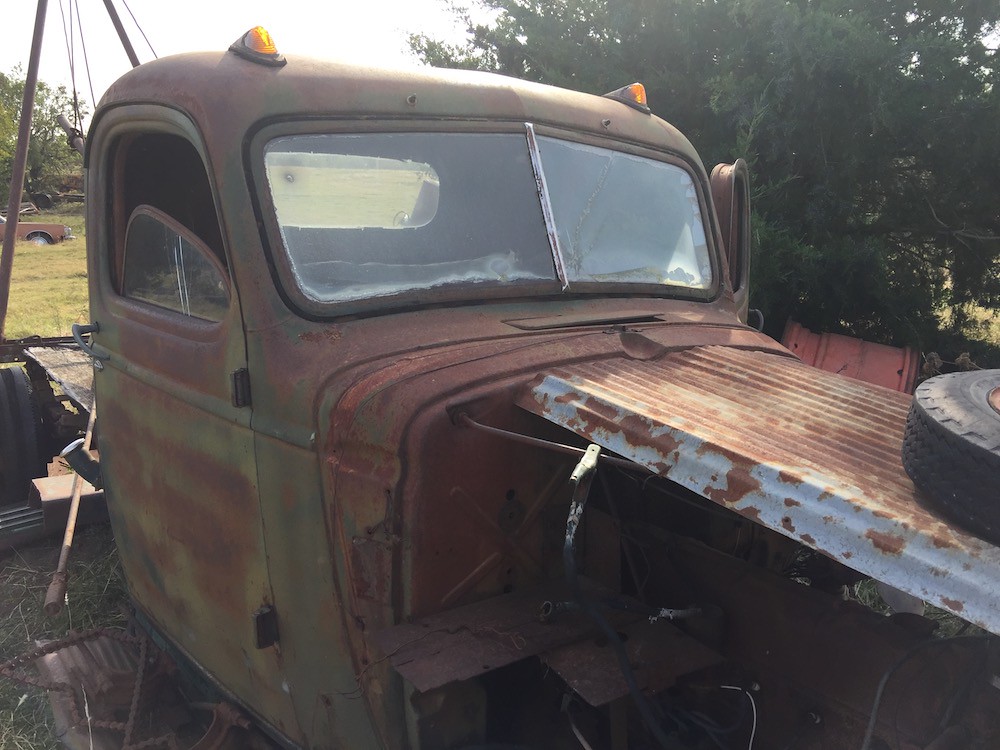 IMG_4663 by Joe Doh, on Flickr IMG_4663 by Joe Doh, on Flickr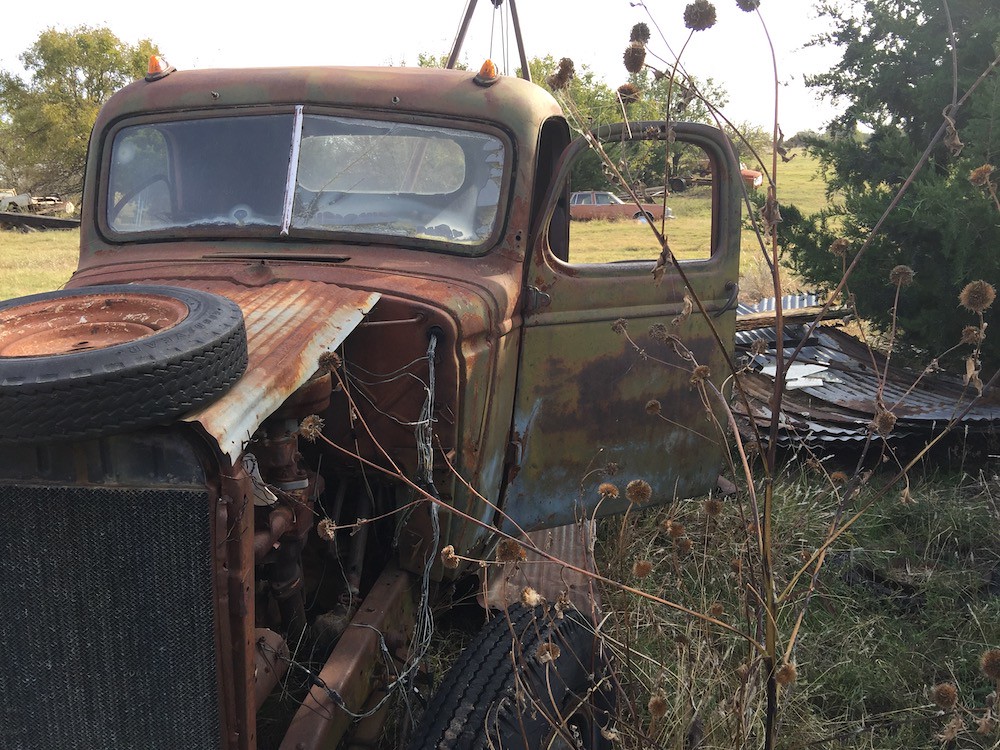 IMG_4665 by Joe Doh, on Flickr IMG_4665 by Joe Doh, on FlickrI should have the leafs back tomorrow, and the front end buttoned up too. after some more paint and some reinforcing of the mounts, its time for cab repair.
__________________
the mass of men live lives of quiet desperation if there is a problem, I can have it. new project WAYNE http://67-72chevytrucks.com/vboard/s...d.php?t=844393 |
|
|

|
|
|
#61 |
|
Registered User
Join Date: Dec 2015
Location: HixtonWI
Posts: 33
|
Re: 1941 1/2 ton project Hannah
So far so good.

|
|
|

|
|
|
#62 |
|
Senior Member
 Join Date: May 2007
Location: Doodah Kansas
Posts: 7,774
|
Re: 1941 1/2 ton project Hannah
well I hit a snag this week, I bought a new lower arm from the auto parts store and it had a lock nut on the balljoint instead of a castle nut, progress you see. apparently its one less part in the box and one less step in assembly especially on a factory production line, and the mechanics just have to suck it up and install them. the problem with lock nuts is, they lock, and while that seems pretty obvious, when you have a highly tensed spring held in place by a floor jack as you try to compress the balljoint into the taper on the spindle there comes forth a stream of obscenities so well reasoned and spoken with such authority that all the old women praying at the local catholic church instinctively genuflect and light extra candles.
this is a photo of the process, the nut WOULD. NOT. GO. ON. ANY. GIU$Y$*(&$. FURTHER. 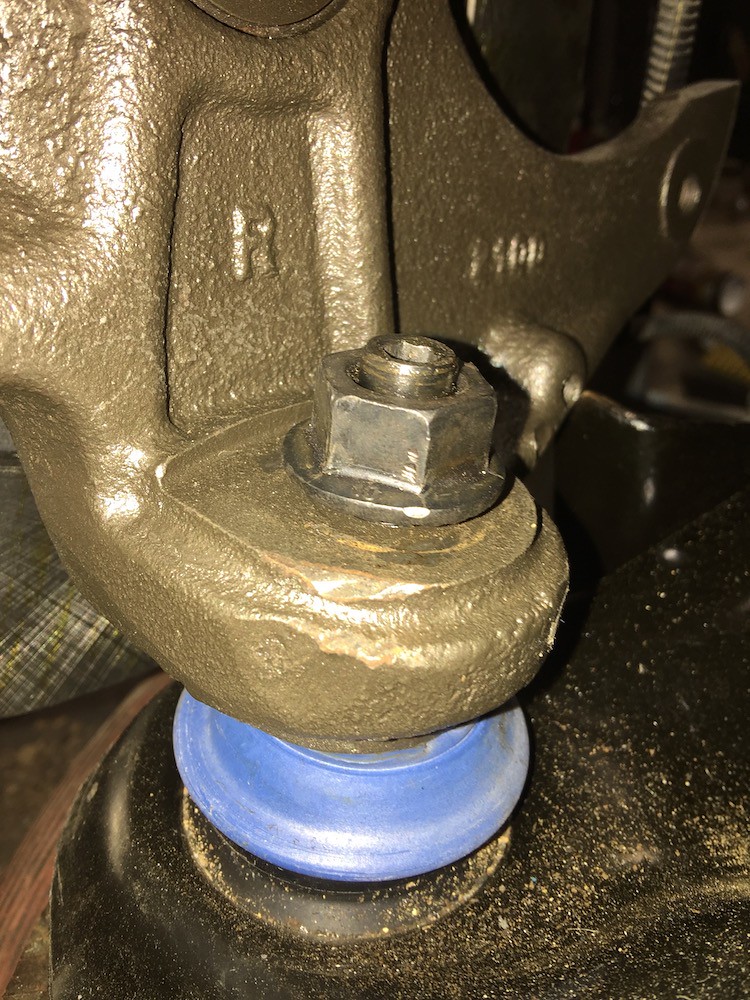 IMG_7676 by Joe Doh, on Flickr IMG_7676 by Joe Doh, on Flickryou can see the hex in the top, so I schlepped out to buy the 6MM hex socket (allen wrench just bent) and a 21mm open end wrench. it still didnt budge. I fought with it like a guy who could embed wrenches in drywall at a single throw (seems extraneous, doesnt it?) and I even went to find a new nut when I thought the threads looked a little galled. when I calmed down, turns out no such thing as an M14 1.5 flanged lock nut exists within 400 miles, I just returned the arm for another. as it eventually came out, the flange nut on the arm was the wrong thread for the balljoint, the nut was a coarse and the balljoint was fine. the new arm fixed it and I buttoned it up BOTH SIDES in about 30 minutes. I think I am going to replace the calipers too, you know, "while I am in there". 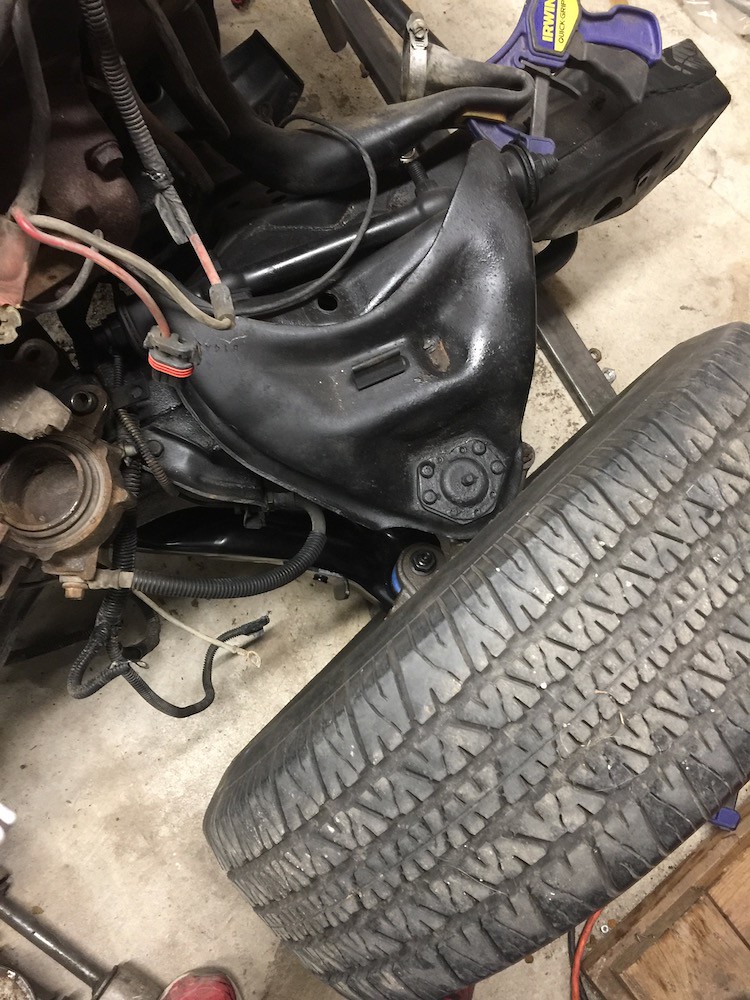 IMG_7697 by Joe Doh, on Flickr IMG_7697 by Joe Doh, on Flickrleafs tomorrow! 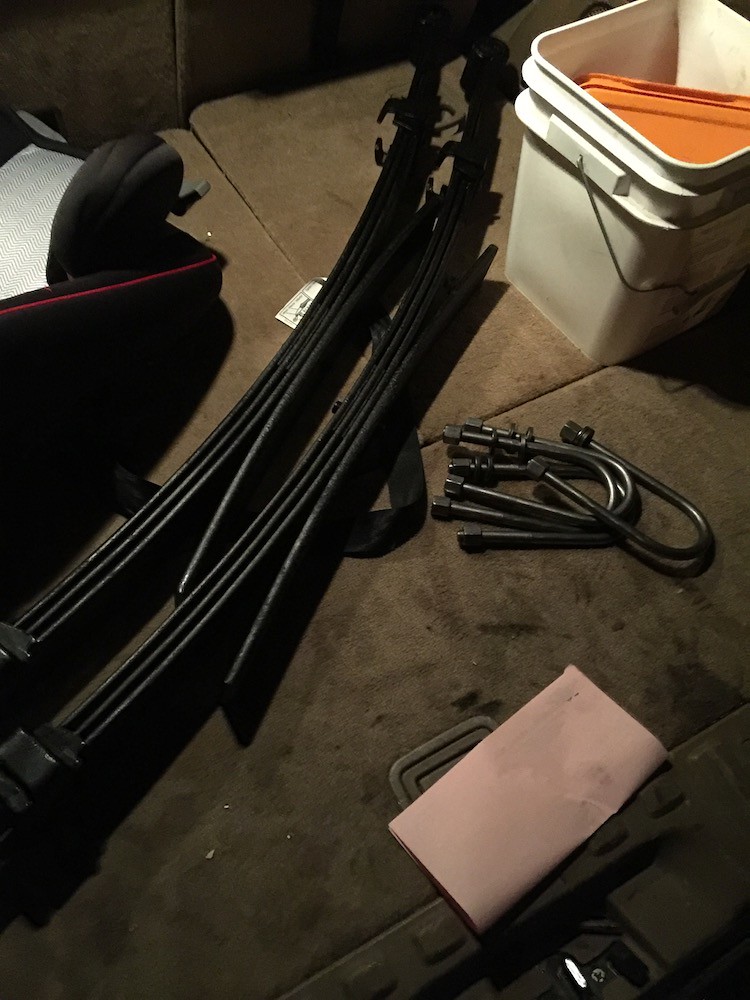 IMG_7698 by Joe Doh, on Flickr IMG_7698 by Joe Doh, on Flickrthis thing looks like it will be... lower than the last one. hmm.
__________________
the mass of men live lives of quiet desperation if there is a problem, I can have it. new project WAYNE http://67-72chevytrucks.com/vboard/s...d.php?t=844393 |
|
|

|
|
|
#63 |
|
Registered User
Join Date: Jul 2014
Location: Clear and Still Idaho
Posts: 509
|
Re: 1941 1/2 ton project Hannah
Joe
I hate to disagree, but I hold the "Title" of, if anything can go sideways it's me coming the other way at mach 10. We could all take lessons for the dad on a Christmas story, I would like to learn his spiel. Remember in the end you did prevail. Keep on keepin on NC
__________________
Been there, wrecked that 
|
|
|

|
|
|
#64 |
|
Senior Member
 Join Date: Jul 2012
Location: Oblong, Illinois
Posts: 7,028
|
Re: 1941 1/2 ton project Hannah
Sounds like one of my adventures. Have never seen a lock nut on a ball joint.
Chuckled with the reference to the extra candles being lit.... |
|
|

|
|
|
#65 |
|
Registered User
Join Date: Oct 2014
Location: Hanover PA
Posts: 59
|
Re: 1941 1/2 ton project Hannah
Nothing slows down progress more than wrong or bad parts. It seems like I see it every day at work. And customers definitely don't understand.
__________________
46 Chevy Pickup (project) 60 Chevy Biscayne 93 Caprice wagon(Impala SS style) 99 Corvette convertible 2014 Silverado 2500HD 92 Chevy 1500 (Shop/plow truck) 02 Silverwing 05 H-D Springer Classic 2011 Civic (Wifes car) 03 Highlander (beater) 96 Honda Elite 80 |
|
|

|
|
|
#66 |
|
Senior Member
 Join Date: May 2007
Location: Doodah Kansas
Posts: 7,774
|
Re: 1941 1/2 ton project Hannah
luckily I am my only customer!
 and the other thing that slows down progress is sneaking another job in. my wifes pilot has been an amazing car but the valves were getting a little ticky. It was about time to change plugs too so might as well have it done at the same time, since getting to the rear cylinder bank is easier while doing the valves. Honda didnt see it that way, $120 to change plugs with or without the SEVEN HUNDRED DOLLAR valve adjustment. thats a cool grand with shop supplies and tax. how about NO? so I did it. check out the color difference between front and rear cylinders, that is because the rear cylinders are the VCM (variable cylinder, turns off while coasting or not under high load) so literally the rear cylinders have half the miles. also note the bridge assembly of the VCM on the rear bank. to adjust the exhaust valves you have to lay over the engine and use a mirror. it took 40 minutes to adjust the front bank and the intakes on the rear bank, and another hour and a half to adjust the exhausts on the rear.  IMG_7703 by Joe Doh, on Flickr IMG_7703 by Joe Doh, on FlickrI got it done though, honda said 4.5 hours, I took about 7. still, with new plugs and an oil change, total spend was $124 bucks. I got the leafs back in too, rolled the truck out and the cab in to do the floor repairs. I am going to pull the leafs again though, the pass side is a little high so I will swap em and see if I can combat the chevy lean  IMG_7710 by Joe Doh, on Flickr IMG_7710 by Joe Doh, on Flickr IMG_7713 by Joe Doh, on Flickr IMG_7713 by Joe Doh, on Flickr IMG_7712 by Joe Doh, on Flickr IMG_7712 by Joe Doh, on Flickr
__________________
the mass of men live lives of quiet desperation if there is a problem, I can have it. new project WAYNE http://67-72chevytrucks.com/vboard/s...d.php?t=844393 |
|
|

|
|
|
#67 |
|
Registered User
Join Date: Oct 2015
Location: Powhatan VA
Posts: 91
|
Re: 1941 1/2 ton project Hannah
As a Honda dealer parts dept employee, we see your fun on a daily basis. Just wait for the oil consumption fun thats hopefully not on its way. It'll need a ring job done at that point, good news is its usually a warranty deal. We do, on average, 3-4 a week here.
The lock nut lower ball joint deal is just odd, I'll have to keep an eye out for that in my future projects.
__________________
my 54 s10 build |
|
|

|
|
|
#68 | |
|
Senior Member
 Join Date: May 2007
Location: Doodah Kansas
Posts: 7,774
|
Re: 1941 1/2 ton project Hannah
Quote:
oil consumption is about a quart a month :/ but I dont think warranty applies at 170k.  however its not fouling plugs, so iI think ts going somewhere else other than through the cylinders however its not fouling plugs, so iI think ts going somewhere else other than through the cylindersthe local honda dealer just built a new complex, and all parts got the 3x treatment. The power steering o-ring was 75 cents three years ago, $2.45 now. the valve cover bolts are $7 list, $21 at the dealer. even the valve adjustment, $700 does not figure to 4.5 hours labor. they are just robbing people here.
__________________
the mass of men live lives of quiet desperation if there is a problem, I can have it. new project WAYNE http://67-72chevytrucks.com/vboard/s...d.php?t=844393 Last edited by joedoh; 11-10-2017 at 12:44 PM. |
|
|
|

|
|
|
#69 |
|
Registered User
Join Date: Oct 2015
Location: Powhatan VA
Posts: 91
|
Re: 1941 1/2 ton project Hannah
Yeah some guys love to hit the customer at full tilt and wonder why nobody comes back haha. I can't rape folks like most do, I try to be fair.
__________________
my 54 s10 build |
|
|

|
|
|
#70 |
|
Registered User
Join Date: Apr 2015
Location: Wichita Kansas
Posts: 455
|
Re: 1941 1/2 ton project Hannah
Making good progress. Looks like its about time for the dreaded rust repairs in the cab, haha
__________________
My 57 GMC build |
|
|

|
|
|
#71 |
|
Senior Member
 Join Date: May 2007
Location: Doodah Kansas
Posts: 7,774
|
Re: 1941 1/2 ton project Hannah
yep, no excuses. tomorrow is the day. there was a guy on the vintage parts board had a bare 46 cab and 1/2 ton frame for $500 and I waited too long to make an offer.
__________________
the mass of men live lives of quiet desperation if there is a problem, I can have it. new project WAYNE http://67-72chevytrucks.com/vboard/s...d.php?t=844393 |
|
|

|
|
|
#72 |
|
Senior Member
 Join Date: May 2007
Location: Doodah Kansas
Posts: 7,774
|
Re: 1941 1/2 ton project Hannah
I REEEEEEEEEALLY didnt want to do rust repair and I figured the sure way to make me do it was to beauty up the cab a little. I didnt like that it was more rust than paint, I dont mind rust but it was like 80% and more than that after pressure washing. I found a green (charleston green) that was really close to the original juniper green, but it didnt really look close when I put it on, and when I sanded it the blue in the juniper green really started to show.
I watched some patina videos and didnt really like what I saw, painting the whole truck several times. I decided to break down what was wrong with the charleston green and make a plan to fix it. I ignored flash times and laid down a wet black, a wet navy blue, a wet hunter green, and then topped with the wet charleston green. it was really runny and thick, I was aiming to let it mix as a miasma instead of distinct layers, knowing I was going to sand it back.  IMG_7724 by Joe Doh, on Flickr IMG_7724 by Joe Doh, on FlickrI sanded it back with some 120 grit then some 320 when I started seeing color  53223155830__2C23AA26-CC3B-4F22-A369-619E15EF3D8C-1 by Joe Doh, on Flickr 53223155830__2C23AA26-CC3B-4F22-A369-619E15EF3D8C-1 by Joe Doh, on FlickrI like it. the door is the original color and I think after some wet sanding I will be there. so today I started on the floor. my temp brace was still holding so I cut back to good steel and started by making the brace for between the door jambs and mocking up the first floor piece  IMG_7725 by Joe Doh, on Flickr IMG_7725 by Joe Doh, on Flickrone brace wasnt going to cut it for the seats, so I added some support.  IMG_7728 by Joe Doh, on Flickr IMG_7728 by Joe Doh, on FlickrI drilled a million holes, going for the monocoque strength tie to the original cross bar and floor.  IMG_7729 by Joe Doh, on Flickr IMG_7729 by Joe Doh, on Flickr IMG_7731 by Joe Doh, on Flickr IMG_7731 by Joe Doh, on Flickrso tomorrow I will get some pipe for a pass through of the rear body mounts and make a tie in to the back wall. I over lapped the pieces in the center so its already super strong, gonna be stronger, without adding a bunch of useless tube. supposed to rain a bunch tommorrow, maybe I will have it back on the frame and working the pedals. maybe edit: I forgot to mention, I got the registration done yesterday  IMG_7726 by Joe Doh, on Flickr IMG_7726 by Joe Doh, on Flickr
__________________
the mass of men live lives of quiet desperation if there is a problem, I can have it. new project WAYNE http://67-72chevytrucks.com/vboard/s...d.php?t=844393 Last edited by joedoh; 11-14-2017 at 10:42 AM. |
|
|

|
|
|
#73 |
|
Registered User
Join Date: Sep 2012
Location: Midway, NC
Posts: 3,275
|
Re: 1941 1/2 ton project Hannah
Cool work. Can’t wait to see the rest of color finishing. I’m interested.
__________________
http://67-72chevytrucks.com/vboard/s...d.php?t=581873 The low buck build threads. Check'em out! http://67-72chevytrucks.com/vboard/s...d.php?t=666022 My build thread Crossmembers CC |
|
|

|
|
|
#74 |
|
Registered User
Join Date: Apr 2015
Location: Wichita Kansas
Posts: 455
|
Re: 1941 1/2 ton project Hannah
That is looking like the original color. Floor looks good. Yep... I always make sure to get title and registration right away... Kansas is a real stick in the mud if you have to have an inspection done by that "nice" guy at the KHP inspection office.
__________________
My 57 GMC build |
|
|

|
|
|
#75 |
|
Senior Member
 Join Date: May 2007
Location: Doodah Kansas
Posts: 7,774
|
Re: 1941 1/2 ton project Hannah
yeah that guy. I heard a rumor, when they were building the new inspection station he didnt want to drive out there for work so he retired. then registrations of out of state vehicle and inspections just started just flying through the office, and revenues went down. so they hired him out of retirement to continue putting bureaucracy through its slow and profitable paces.
here is the stock coloring on the doors vs my added color on the roof. you can see all the colors represented.  IMG_7734 by Joe Doh, on Flickr IMG_7734 by Joe Doh, on Flickr IMG_7733 by Joe Doh, on Flickr IMG_7733 by Joe Doh, on Flickrthe rear of the floor was next today. it has this weird multi layer sandwich of metal for the body mounts and only the top layer was rusted, but what I DIDNT want to happen was for the layers to collapse when you tighten the body bolt down. I devised a plan to cap the rusted part with some 11ga, and use tubes to weld all the layers together, making it crush proof and give a good tie to the rectangle tube I put in yesterday.  IMG_7738 by Joe Doh, on Flickr IMG_7738 by Joe Doh, on Flickr IMG_7739 by Joe Doh, on Flickr IMG_7739 by Joe Doh, on Flickr IMG_7740 by Joe Doh, on Flickr IMG_7740 by Joe Doh, on Flickrinstead of welding the patch in the back way I decided to screw it in for now, in case I need to adjust some of the floor I made. that hole was convenient to get to some areas I wouldnt have been able to otherwise.  IMG_7741 by Joe Doh, on Flickr IMG_7741 by Joe Doh, on FlickrI would have put the cab back on today but I took a long time designing the repair for the front body mount, so tomorrow.
__________________
the mass of men live lives of quiet desperation if there is a problem, I can have it. new project WAYNE http://67-72chevytrucks.com/vboard/s...d.php?t=844393 Last edited by joedoh; 11-14-2017 at 11:18 PM. |
|
|

|
 |
| Bookmarks |
|
|