
|
 02-18-2012, 01:30 PM
|
#51 | |
|
Registered User
 Join Date: Jan 2012
Location: Antioch, IL
Posts: 418
|
Re: 1965 Suburban Resto-Rebuild
Quote:
BTW---Antioch is in the far northeast corner of the state on the stateline--25 mins from Lake Michigan... Posted via Mobile Device |
|

|

|
|
02-18-2012, 11:37 PM
|
#52 |
|
Registered User
Join Date: Jan 2012
Location: Antioch, IL
Posts: 418
|
Re: 1965 Suburban Resto-Rebuild
Here's pics from today... I decided to start cleaning the 12-bolt in hopes that when the new 5-lug axles arrive, I can have the housing and backing plates ready for reassembly.. Well, I found something that made me happy.. After a couple hours spent with a wire brush and the die grinder with brush attached, I pulled off the rear cover to reveal... a posi!! I had no idea this thing had a posi unit inside.. Nice little surprise.. Oh well--here are the pics..
Code on the passenger side axle tube is HC 5 D 05 W 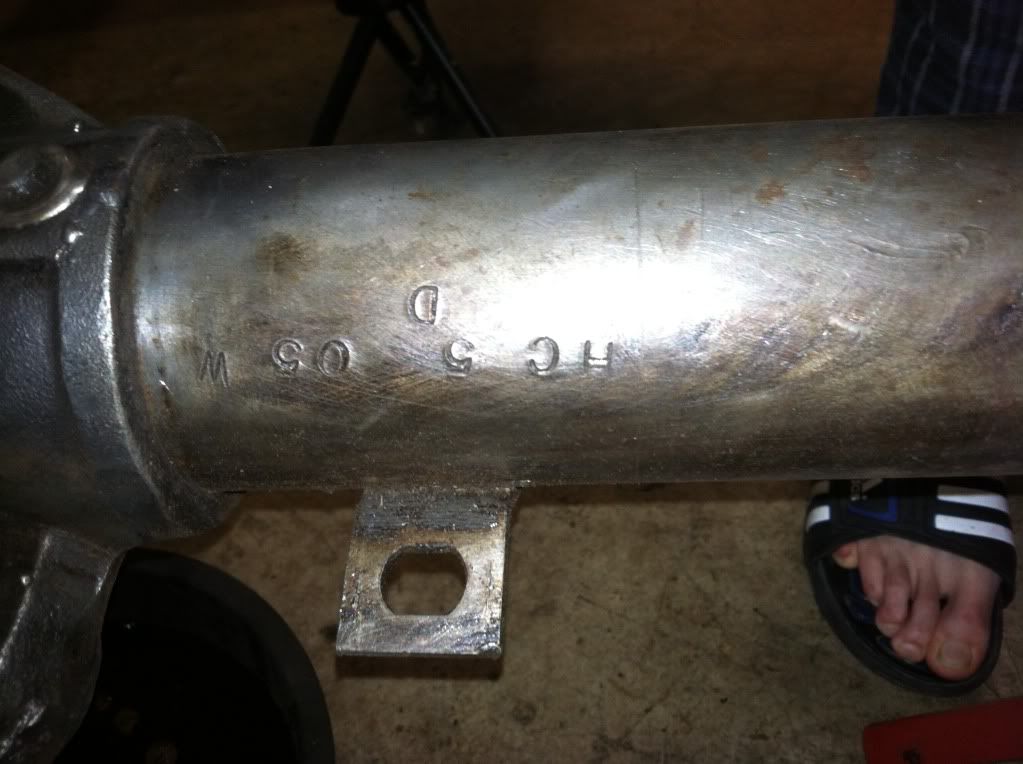 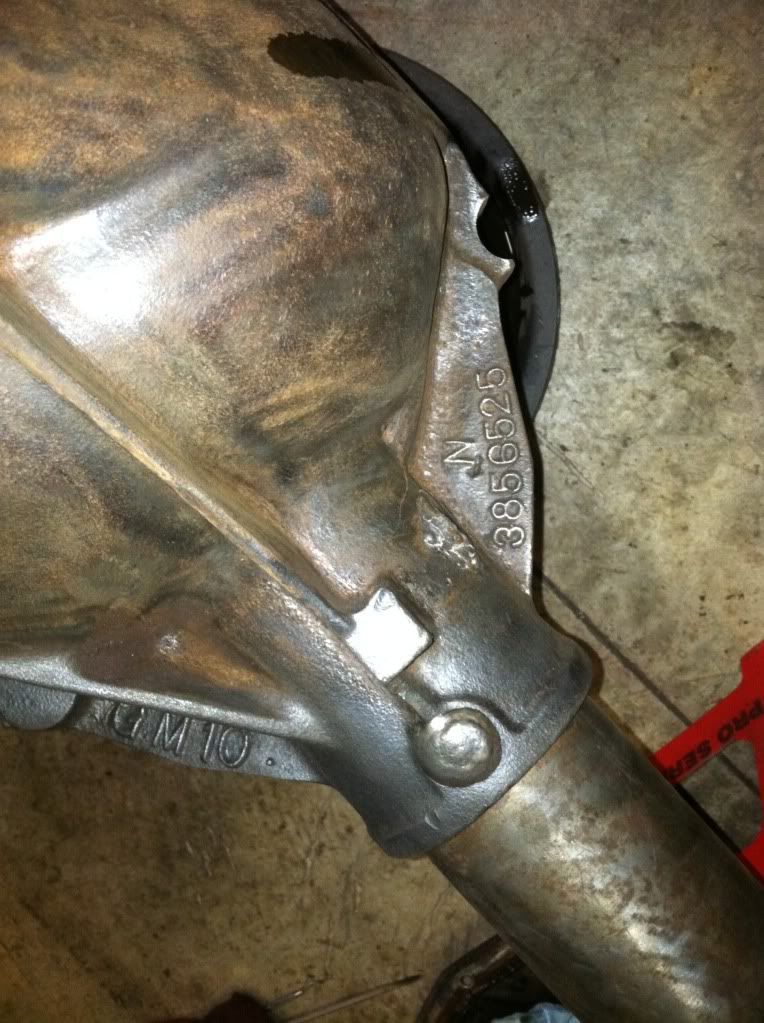 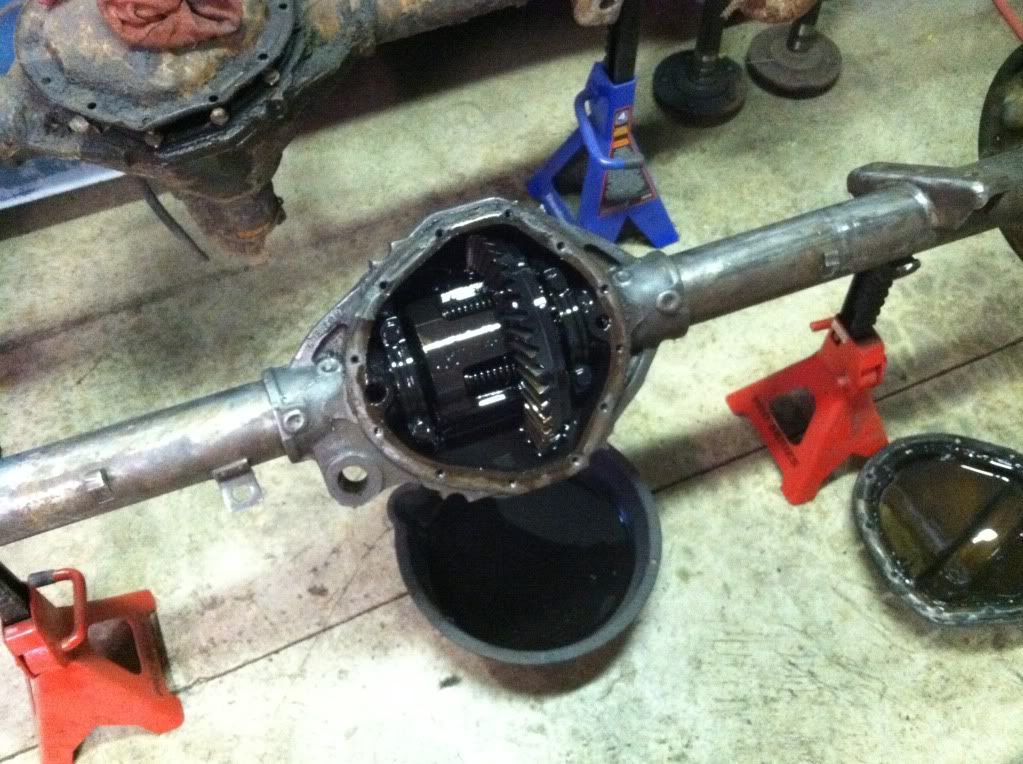 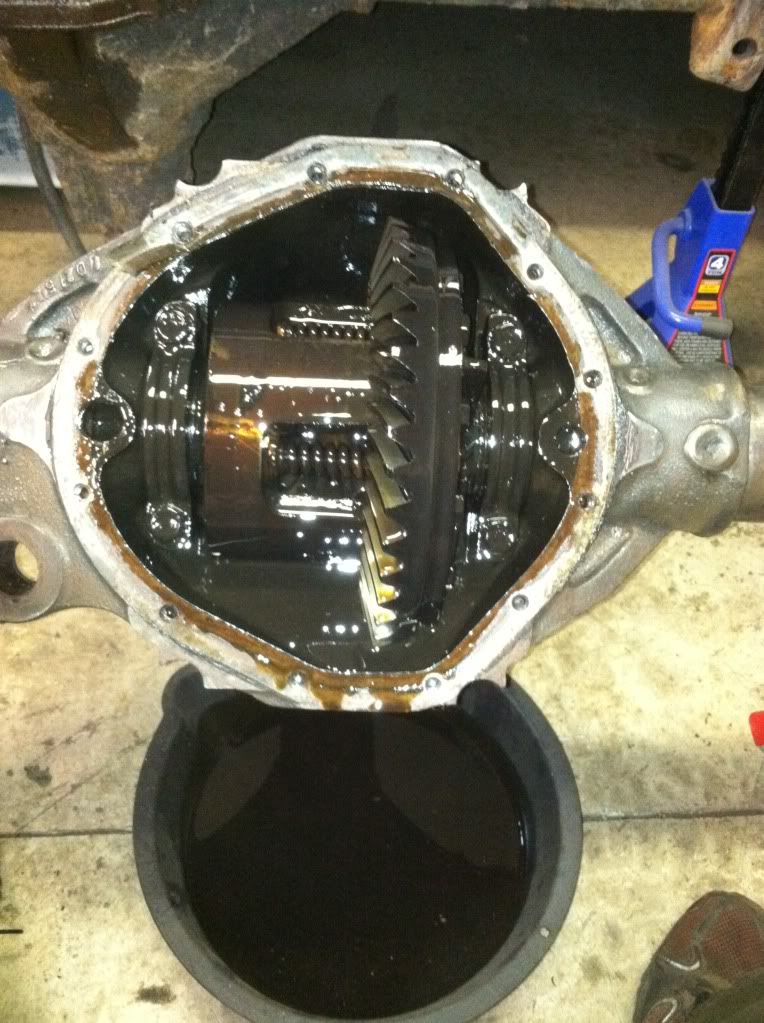 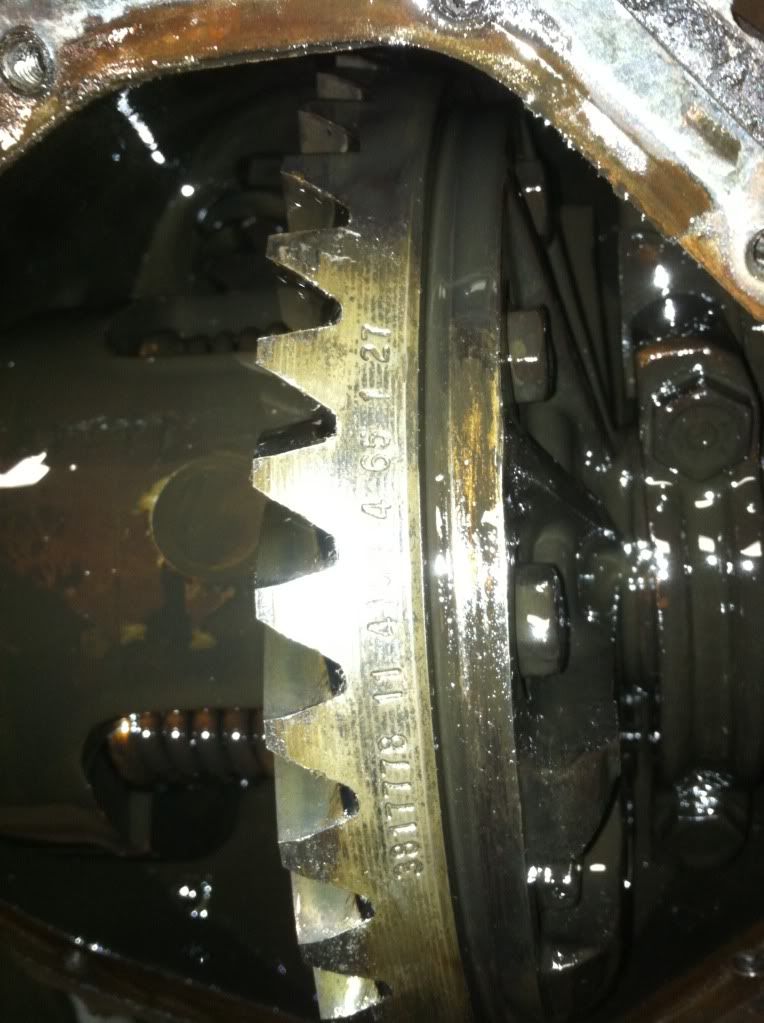 Code on the ring gear is 3817778 11 41GM 4 65 1 27 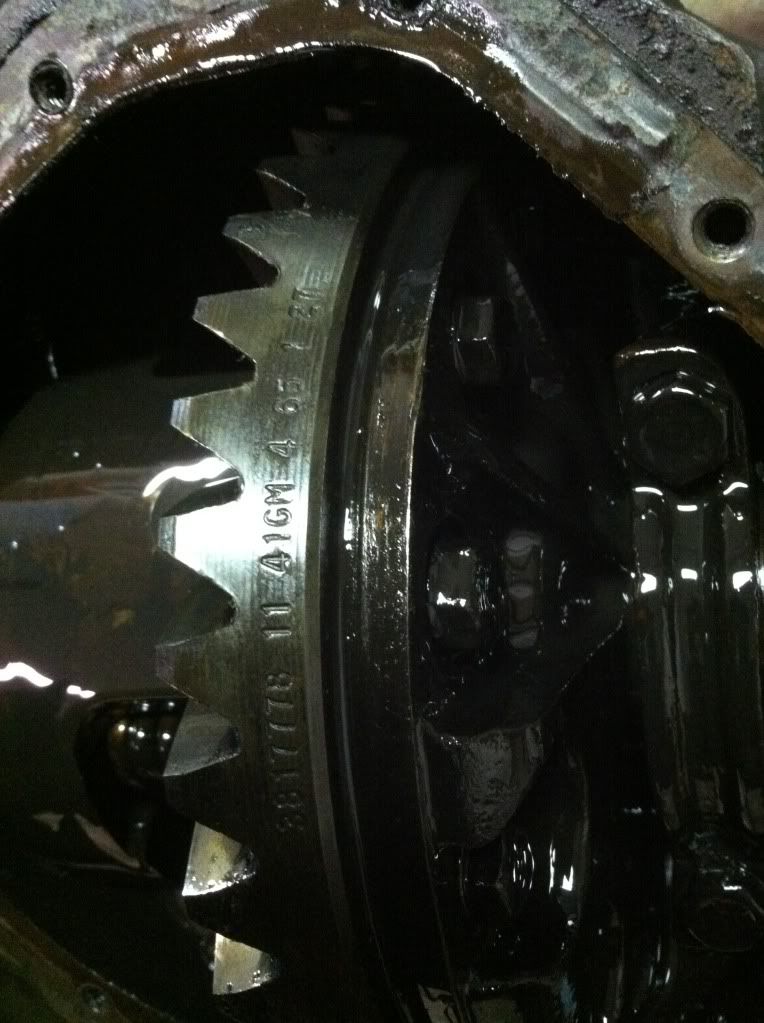 So, if my research is correct, this is a 3:73 gearing in my stock rearend.. I looked around to try and decipher all the numbers... No luck though.. |
|
|
|
|
02-19-2012, 12:02 AM
|
#55 |
|
1 thing at a time is progress.
Join Date: Jun 2007
Location: Ball Ground GA
Posts: 5,511
|
Re: 1965 Suburban Resto-Rebuild
Also taking the numbers off the ring gear 41 divided by 11 also confirms that it's a 3.73.
I bet the posi was a nice surprise. 
__________________
Alan
Philippians 2:14-16 |
|
|
|
|
02-19-2012, 12:23 AM
|
#56 | |
|
Registered User
Join Date: Jan 2012
Location: Antioch, IL
Posts: 418
|
Re: 1965 Suburban Resto-Rebuild
Quote:
Yeah.. it was a great surprise.. when I pulled the rear out--I shoulda known when the wheels wouldn't spin independent of one another when trying to pivot it from under the frame... |
|
|
|
|
|
02-19-2012, 12:29 AM
|
#57 | |
|
Resistance is Futile
Join Date: Dec 2006
Location: Mesa,Arizona
Posts: 3,520
|
Re: 1965 Suburban Resto-Rebuild
Quote:
 Required safety gear when it's 100* + out here. Thanx for looking at the trucks; just having fun with them and trying to improve my skills as I go. Required safety gear when it's 100* + out here. Thanx for looking at the trucks; just having fun with them and trying to improve my skills as I go.I'll keep checking in and seeing how things are going.
__________________
64 CHEVY PICK-UP > http://67-72chevytrucks.com/vboard/s...otrash+re-hash 64 CARRYALL >http://67-72chevytrucks.com/vboard/s...=1964+suburban 66 LB >http://67-72chevytrucks.com/vboard/s...d.php?t=427852 STRENGTH/DETERMINATION/MERCILESS/FOREVER .......posted via stationary device |
|
|
|
|
|
02-19-2012, 12:42 AM
|
#58 | |
|
Registered User
Join Date: Jan 2012
Location: Antioch, IL
Posts: 418
|
Re: 1965 Suburban Resto-Rebuild
Quote:
Hahahahahah.. I can honestly say those were only on my feet for the pictures.... No welding or other dangerous activities involved in those... Besides its only 50 degrees--(maybe) in my garage! Posted via Mobile Device |
|
|
|
|
|
02-19-2012, 02:19 AM
|
#59 |
|
60-66 Nut
 Join Date: Mar 2007
Location: Coeur d'Alene, Idaho
Posts: 23,252
|
Re: 1965 Suburban Resto-Rebuild
That is always a pleasant surprise when you pop open a rear end cover
 That is what I consider the heavier duty posi unit. In my first experience with them, they were referred to as a 'Dana posi' unit. They have very stiff springs that sit in aluminum plates, which push on the clutches. I did not know they were made with the 30 spline side spiders.
__________________
Power Steering Box Adapter Plates For Sale HERE Power Brake Booster Adapter Brackets For Sale '63-'66 HERE and '67-'72 HERE and '60-'62 HERE and "60-'62 with clutch HERE Rear Disc Brake Brackets For Sale. Impala SS calipers HERE Camaro Calipers HERE D52 Calipers HERE 6 Lug HERE Hydroboost Mounting Plates HERE |
|
|
|
|
02-19-2012, 10:06 AM
|
#60 | |
|
Registered User
Join Date: Jan 2012
Location: Antioch, IL
Posts: 418
|
Re: 1965 Suburban Resto-Rebuild
Quote:
|
|
|
|
|
|
02-19-2012, 04:51 PM
|
#61 |
|
Registered User
Join Date: Jan 2012
Location: Antioch, IL
Posts: 418
|
Re: 1965 Suburban Resto-Rebuild
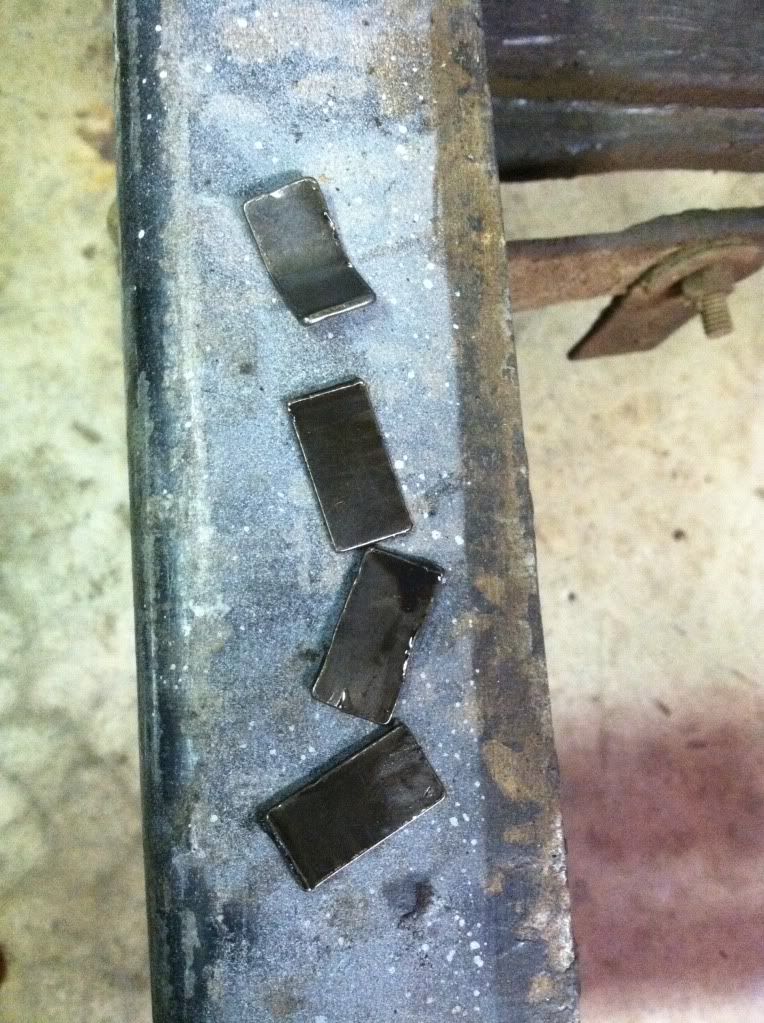
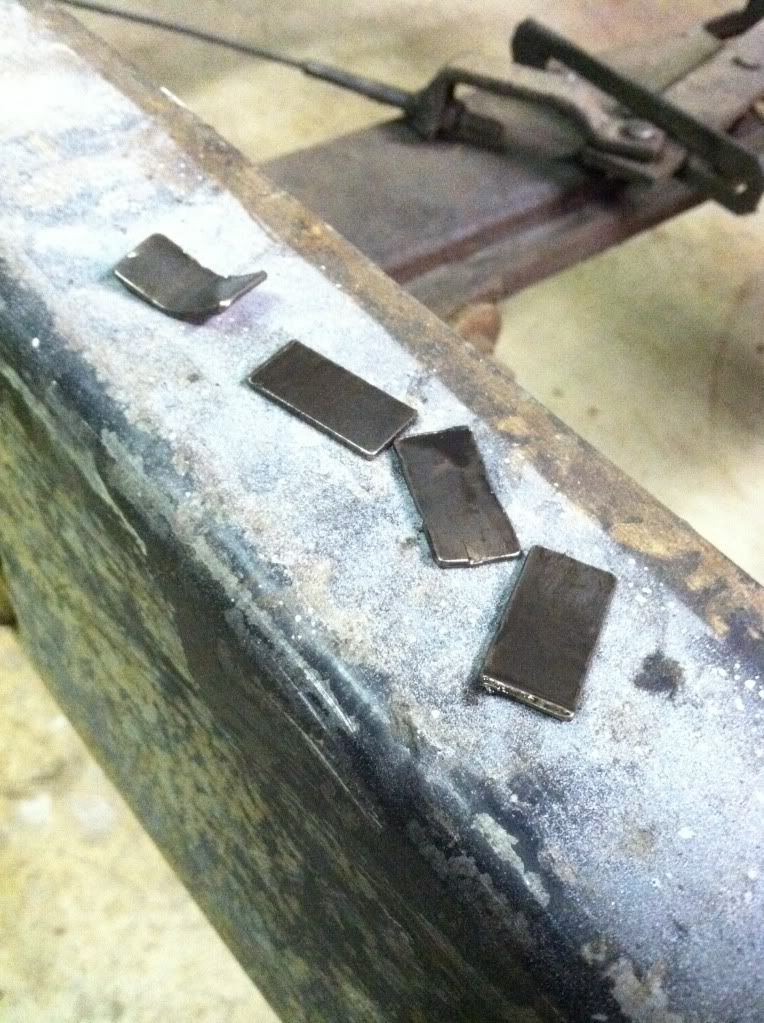
I finished removing the backing plates today.. And, when rotating the housing--these four little pieces of metal came out of the center of the housing... Any idea what they are? I had noticed some little "peck" marks on the inside of the rear cover--had no idea what would have caused it--I'm guessing these were the culprit after getting snagged by the ring gear at some time..
  and, I spent some time removing some parts from the parts-cab.. I got the rockers off (they are in pretty damned good shape--- no rust through or scale on the inside or outside. Only rot is on the passenger side at the top lip on the inside near the toe/floor board.. It'd be an easy fix. I also removed the portion of trans tunnel and the cab corners.. They are in great shape except for the very bottom flange area on the one side.. It'd be an easy repair..      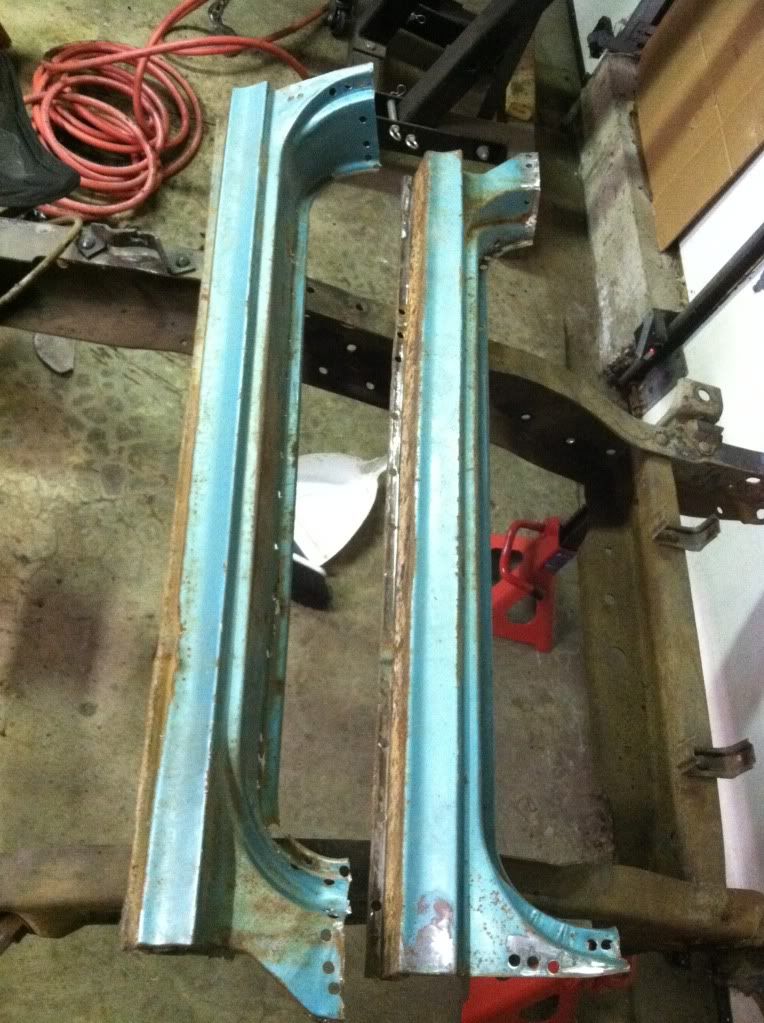 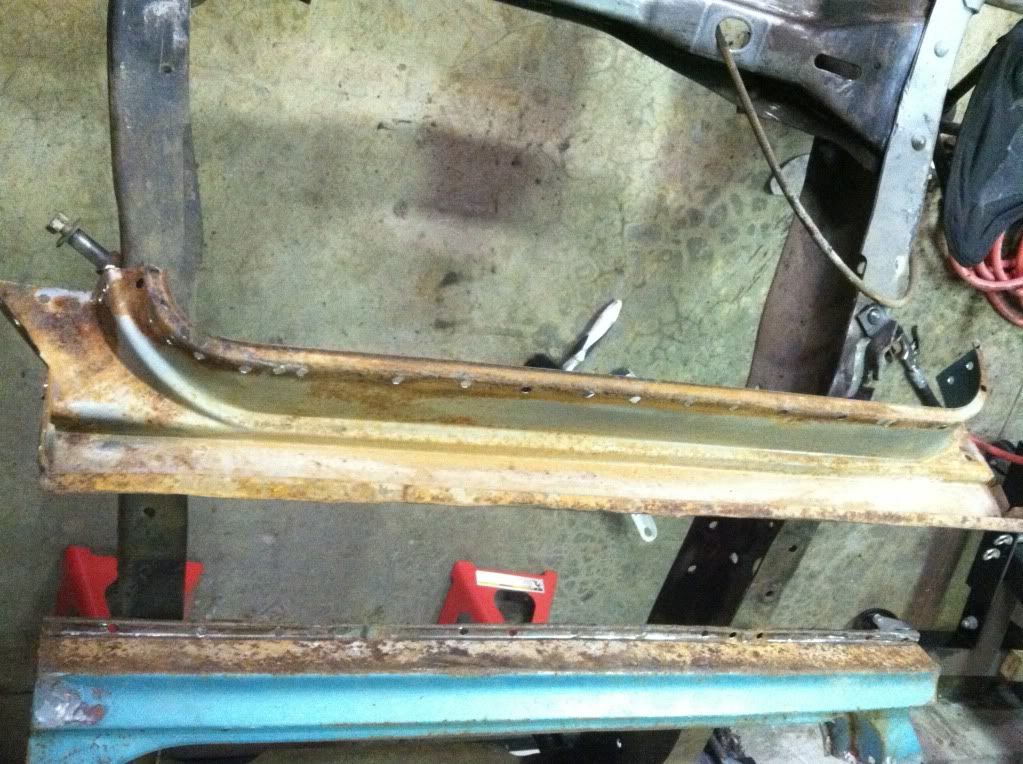 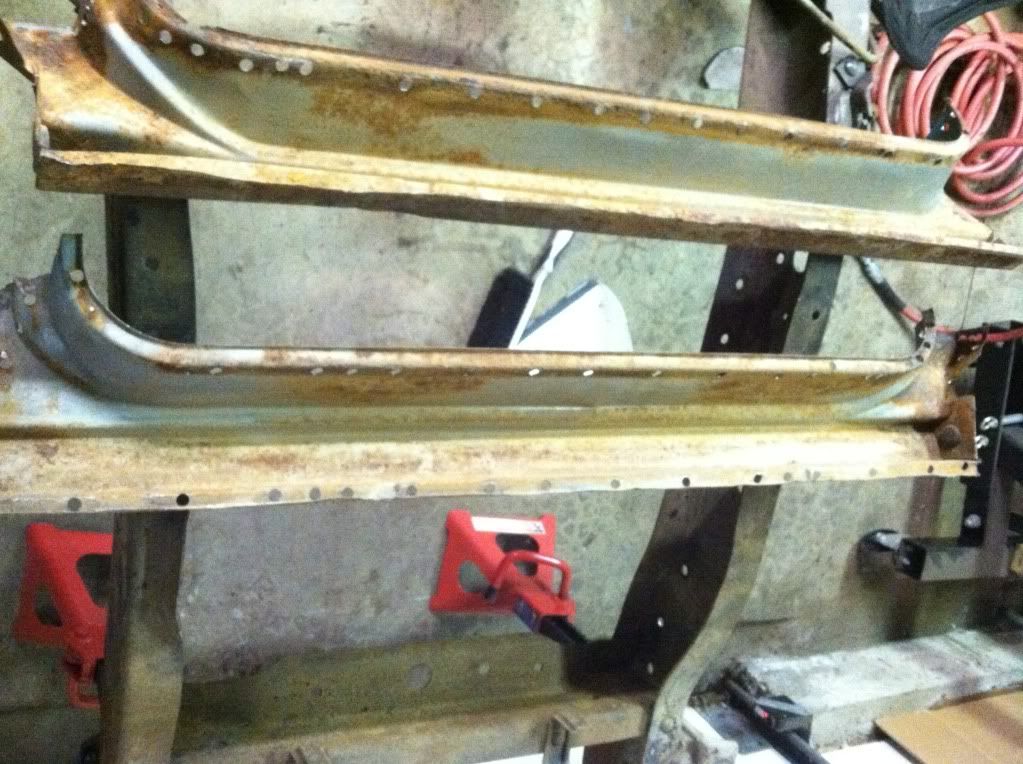
|
|
|
|
|
02-20-2012, 01:38 AM
|
#62 |
|
60-66 Nut
Join Date: Mar 2007
Location: Coeur d'Alene, Idaho
Posts: 23,252
|
Re: 1965 Suburban Resto-Rebuild
I really can't think what those pieces out of your rear end are from. It is possible they could have been accidentially left in there as something used for installation of the springs.
__________________
Power Steering Box Adapter Plates For Sale HERE Power Brake Booster Adapter Brackets For Sale '63-'66 HERE and '67-'72 HERE and '60-'62 HERE and "60-'62 with clutch HERE Rear Disc Brake Brackets For Sale. Impala SS calipers HERE Camaro Calipers HERE D52 Calipers HERE 6 Lug HERE Hydroboost Mounting Plates HERE |
|
|
|
|
02-20-2012, 10:27 PM
|
#63 |
|
Registered User
Join Date: Jan 2012
Location: Antioch, IL
Posts: 418
|
Re: 1965 Suburban Resto-Rebuild
Yeah... I couldn't make any sense of those pieces...
Posted via Mobile Device |
|
|
|
|
03-07-2012, 12:25 AM
|
#64 |
|
Registered User
Join Date: Jan 2012
Location: Antioch, IL
Posts: 418
|
Re: 1965 Suburban Resto-Rebuild
Well.. Here's where I'm at this week.. Just been cleaning parts.. Brake pieces, and slowly working towards getting to the frame for clean up. I spent hours in a blast box blasting some of the small parts.. I'm about ready to put the heater assembly back together, but I want to get the core boiled as I ran some hot water through it for about 10 minutes and junk kept coming and coming and coming... well, you get the point.. I make sure it's clean and all before slapping it all back together. I dropped off the front control arms today at the local NAPA to get boiled before I blast them--they were so dirty.. I spent some time on my new bench grinder/wire wheel cleaning up brake parts a couple days ago and today spent a couple hours cleaning up the front suspension cross member. I'll take it to a blaster to have it roughed up a little bit along with the trailing arms.
I ordered the AG111 Master Series kit to do the frame and suspension bits. I went ahead and Rustoleum'd (Semi-Gloss Black) the rear backing plates and other small pieces. I've always had good luck with the spray can stuff.. So, i'll keep using it until otherwise. I think that's about it. I'm gonna set a goal, that will probably not work out--but I'd like to get the frame/chassis back together by the end of the month.. We shall see. Here's the no-frills pics from the past 10 days or so. I flipped the frame upside down tonight too.. 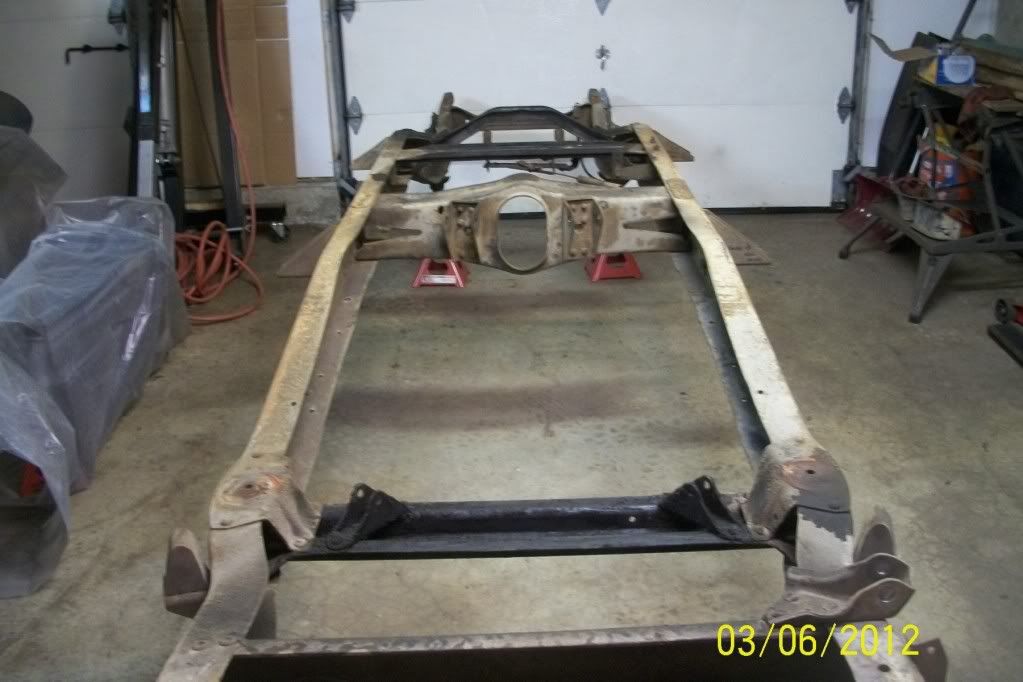 I have one little crack to weld up back here.. 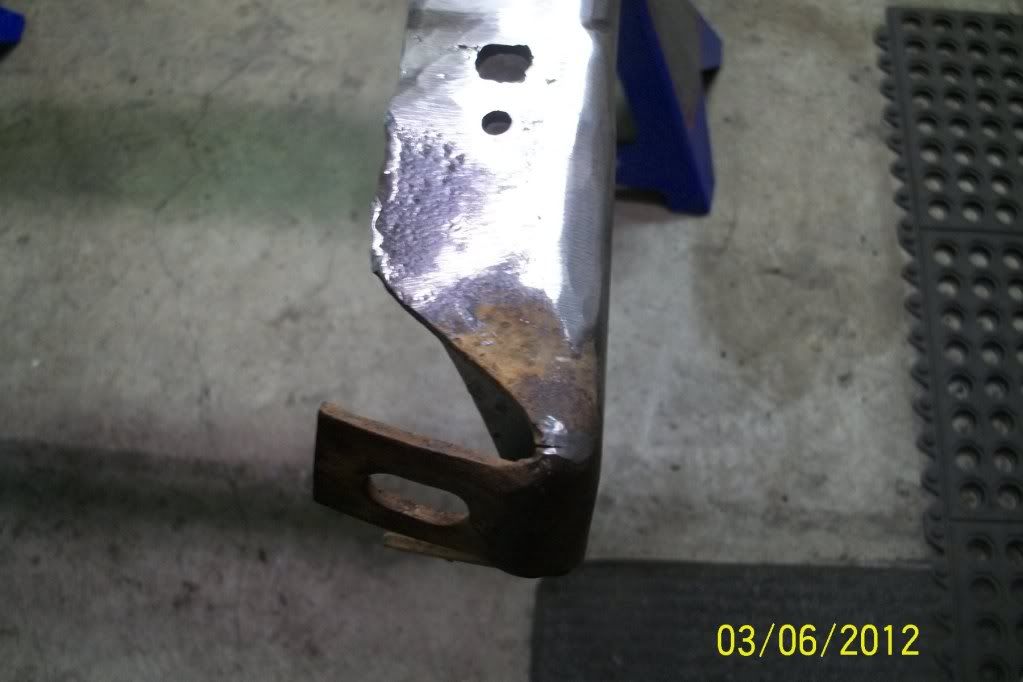 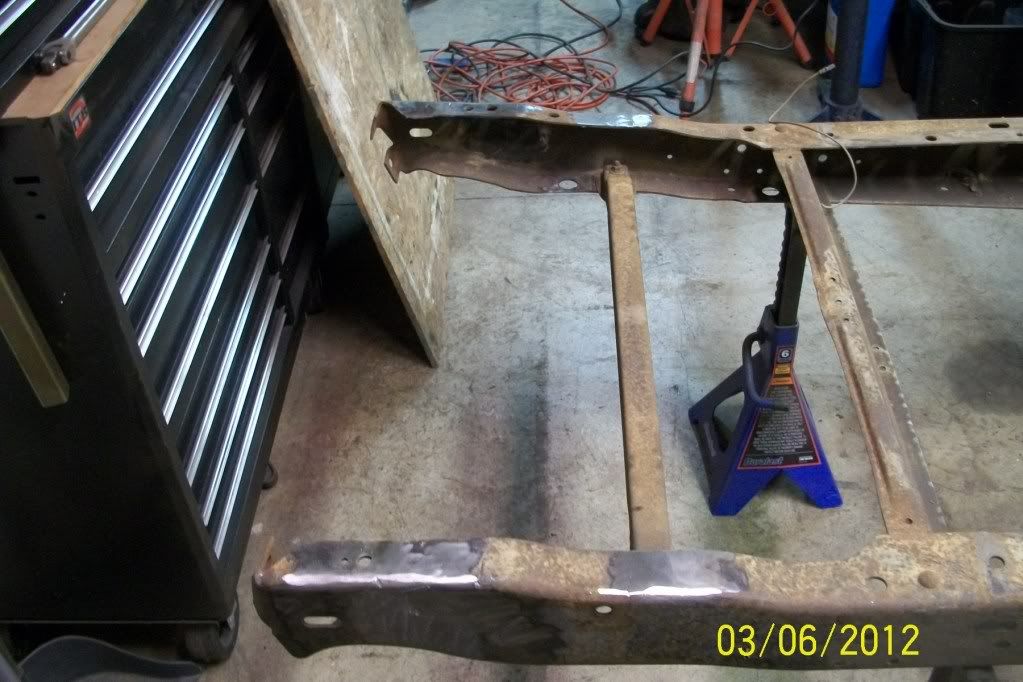 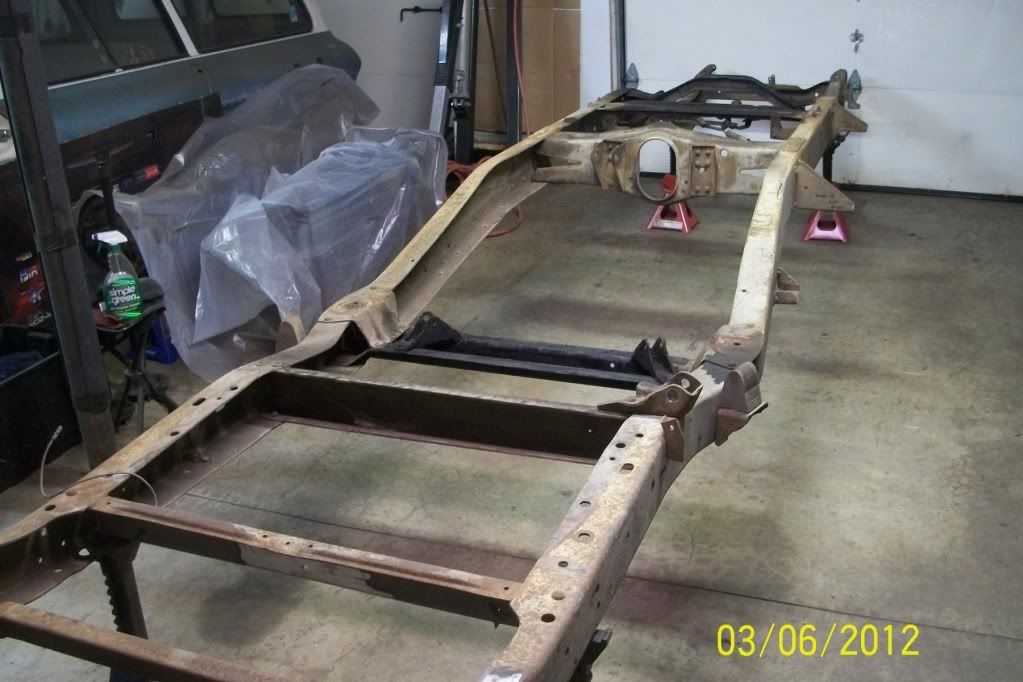 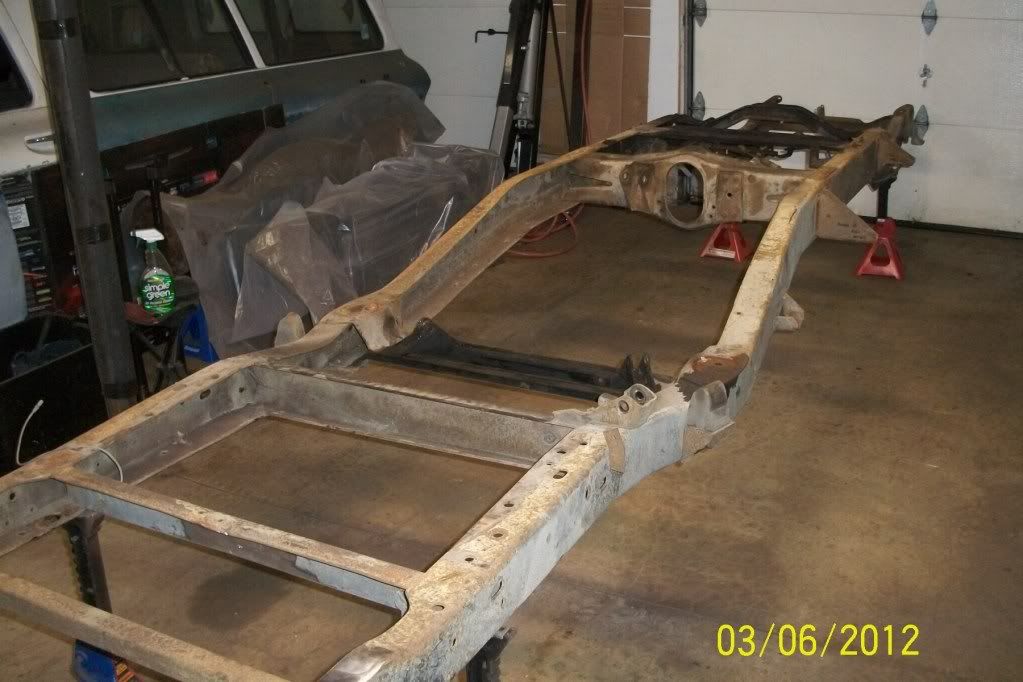 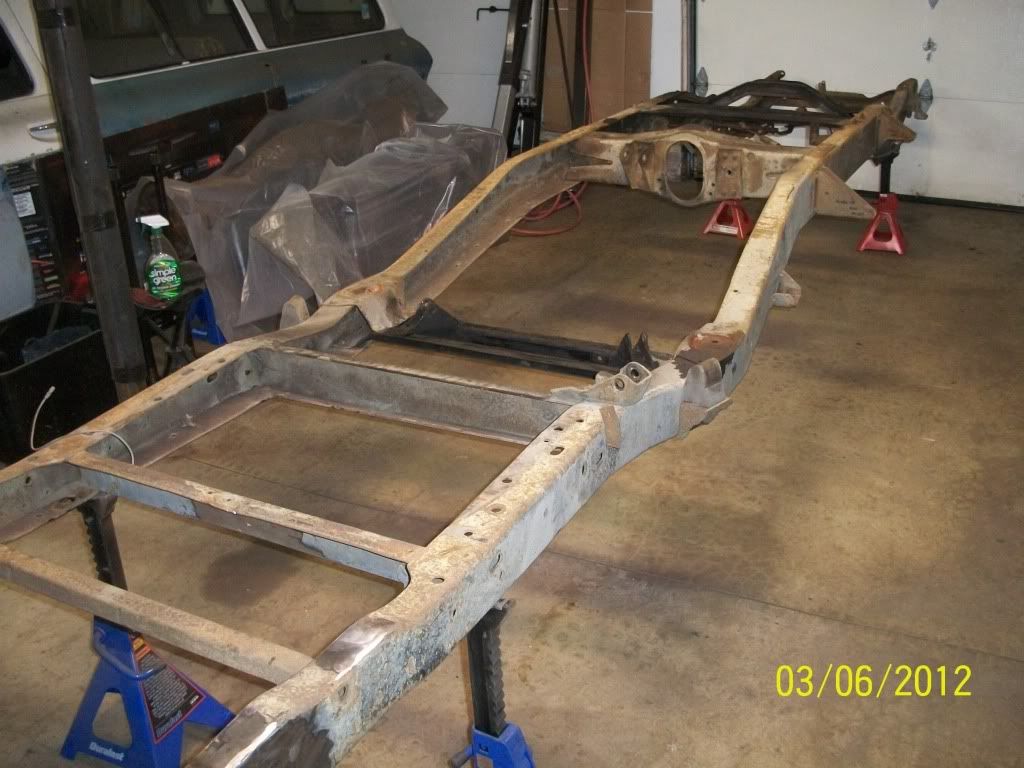 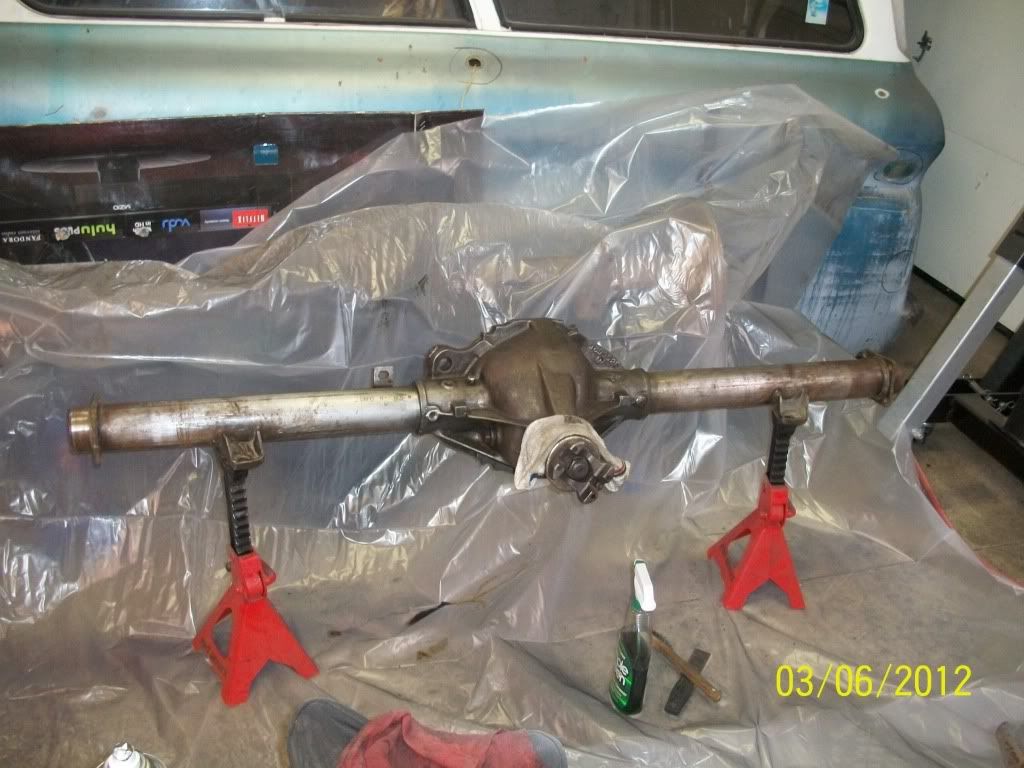 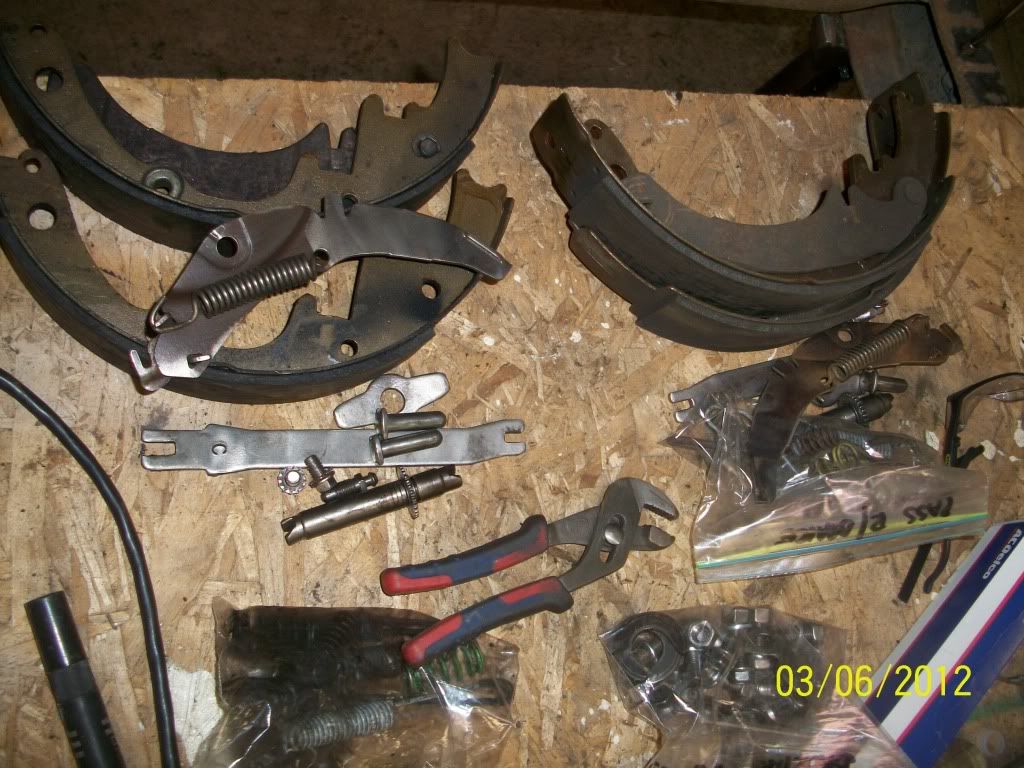 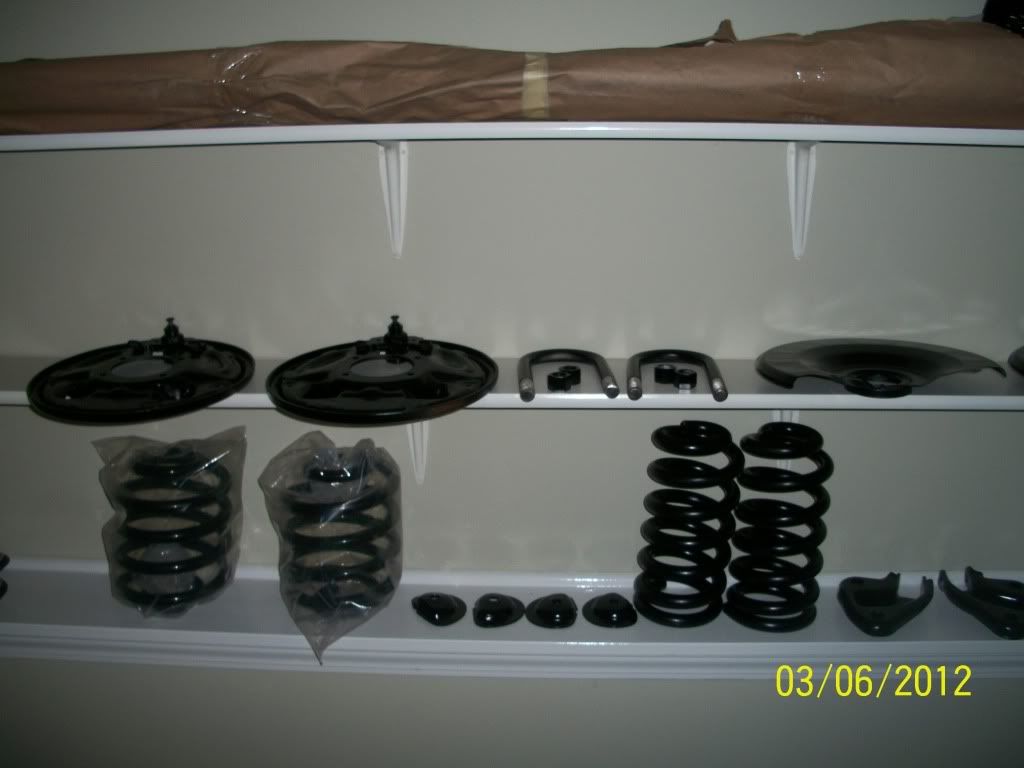 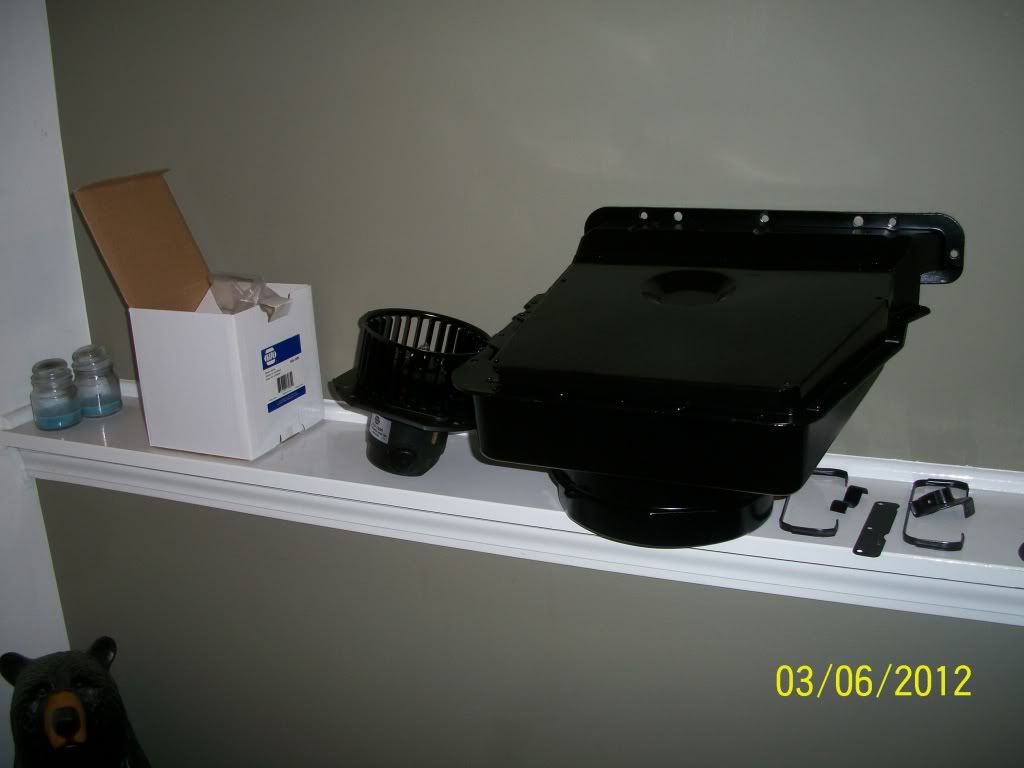 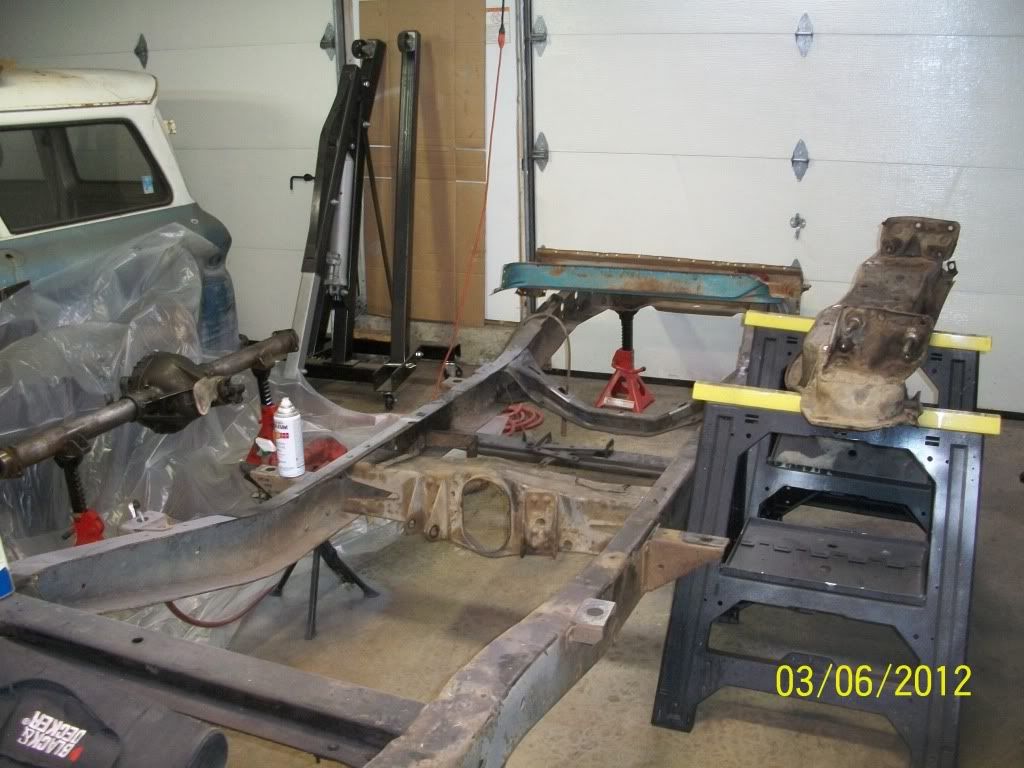 Oh, and I got the '71 ball joints today--they cost $200 for the U.S.A. made ones.. These are the upper and lowers..as much as I don't want to--I don't think I'll be going straight to the local parts store when it comes to prices like this any longer.. I'm building a Chevy, not a Bentley.. :-( Last edited by hemifalcon; 03-07-2012 at 07:56 AM. |
|
|
|
|
03-26-2012, 09:36 PM
|
#65 |
|
Registered User
Join Date: Jan 2012
Location: Antioch, IL
Posts: 418
|
Re: 1965 Suburban Resto-Rebuild
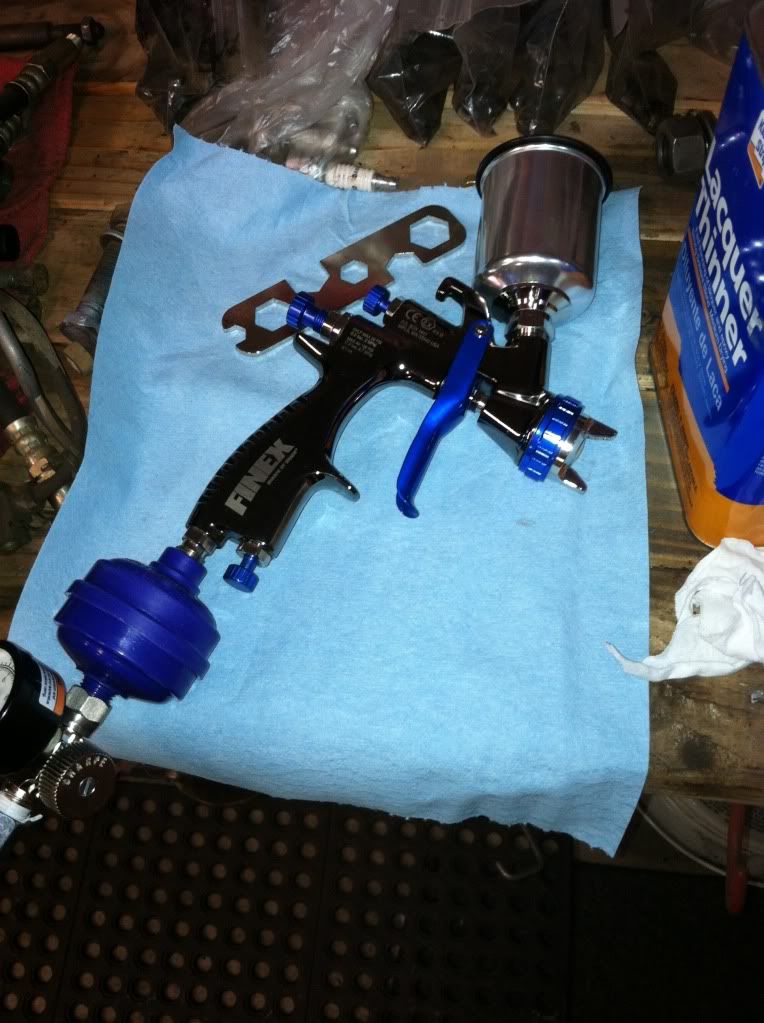
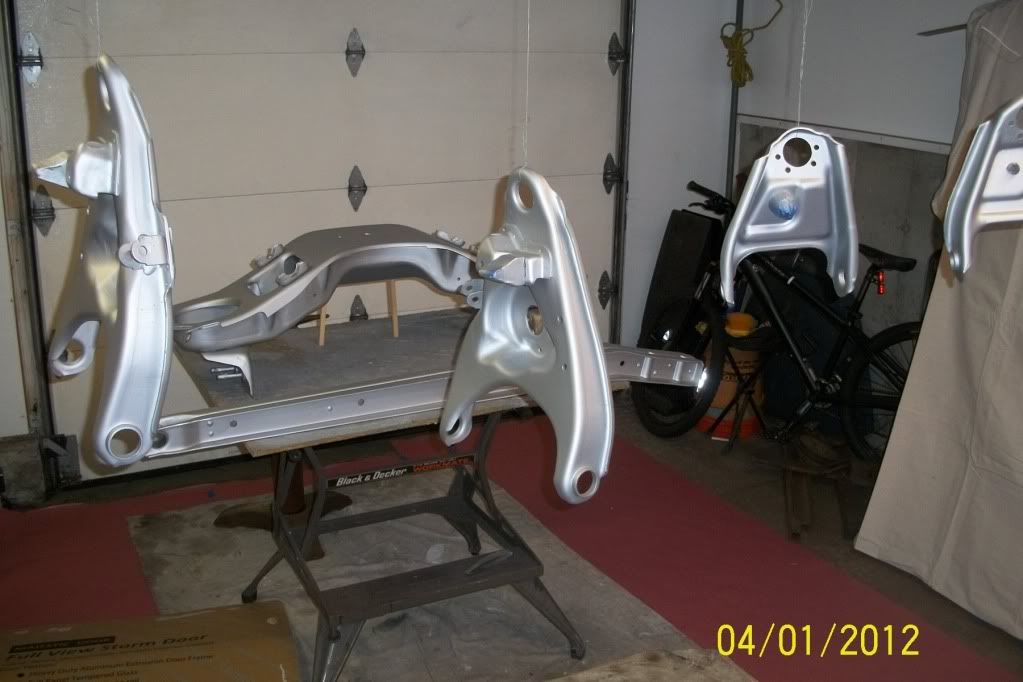
Here’s the most recent pics of “progress” as I’ve not taken any pics lately. It’s been slow moving also since the process of sand-blasting is not all that exciting so I didn’t want to bore any of you with pics of cleaned metal.. I did decide to take the trailing arms and frame to Strip Rite in Union Grove, WI to have them blast them as I had no place to do them myself. The cost was fairly decent and I figured it was the best way of ensuring a good clean surface for proper coating. As far as coatings go—I did chose to go with the Master Series line of coatings to include their sliver primer and their AG111 TractorKote kit. You will see the pictures below as silver is the first part I did. I started with a foam brush applying the primer to the control arms, but I don’t like the way that was looking. I decided to pay out some $$$ for a nice Sharpe FX3000 HVLP gun. I was able to buy it from the local NAPA and they just happened to be on sale so I got a really good price in comparison to some online markets. I also ordered the 1.8 tip for spraying the primer, but they got me the 1.0 on accident. I decided to use the 1.5 tip that came with my gun, and it worked really nice. NOW, “really nice” may be subjective as I’ve never sprayed paint from anything but a spray can before, but the pattern was really decent on a well contrasted background when I tested the gun initially. I really didn’t have to do much as the gun seemed to be spraying very nicely straight out of the box. Along with the gun I ended up buying some extra desiccant filters from Sharpe, another regulator mounted directly to the gun, and a small cup so I don’t have to use the large one for small jobs. The coating went on nicely, no runs in any of the parts, and I like how the spray can get into all the nooks of the parts without trouble. Needless to say, I feel this was a good investment for about $260 in total cost.
 And here are the control arms, trailing arms, and front cross member all coated. 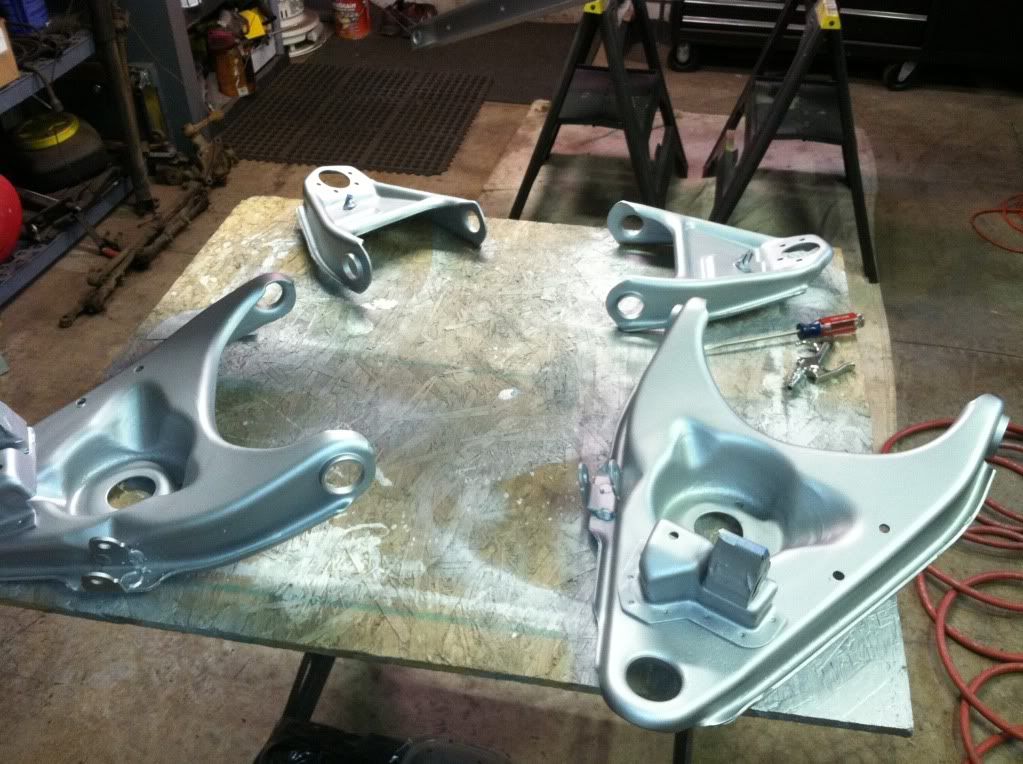 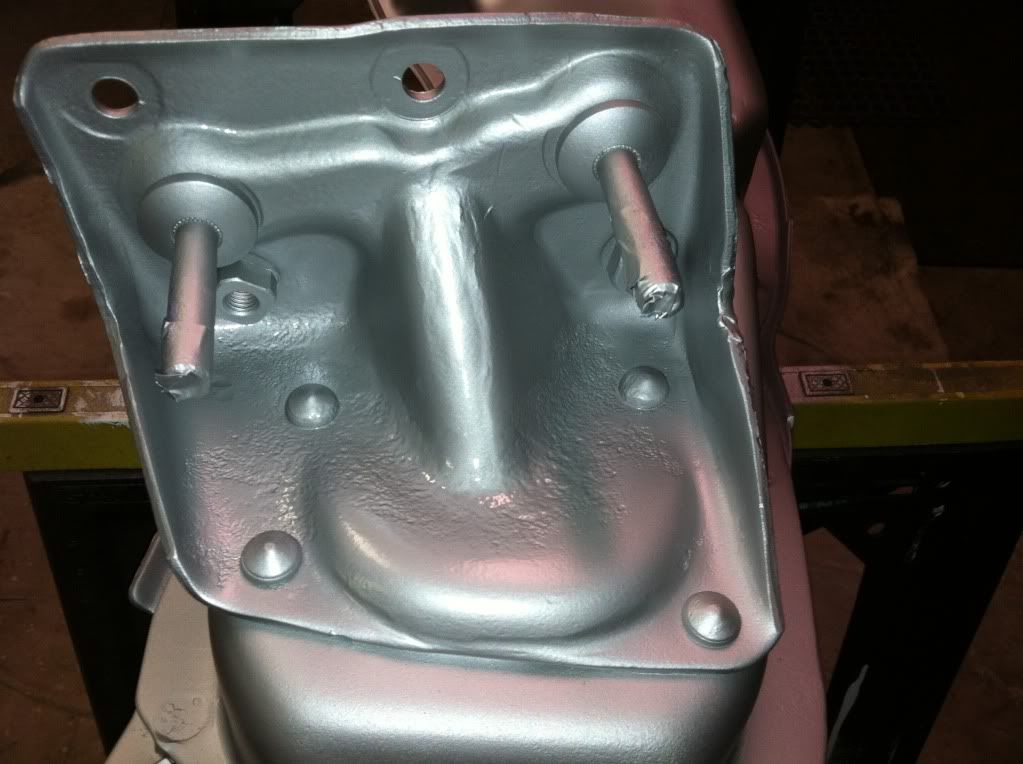 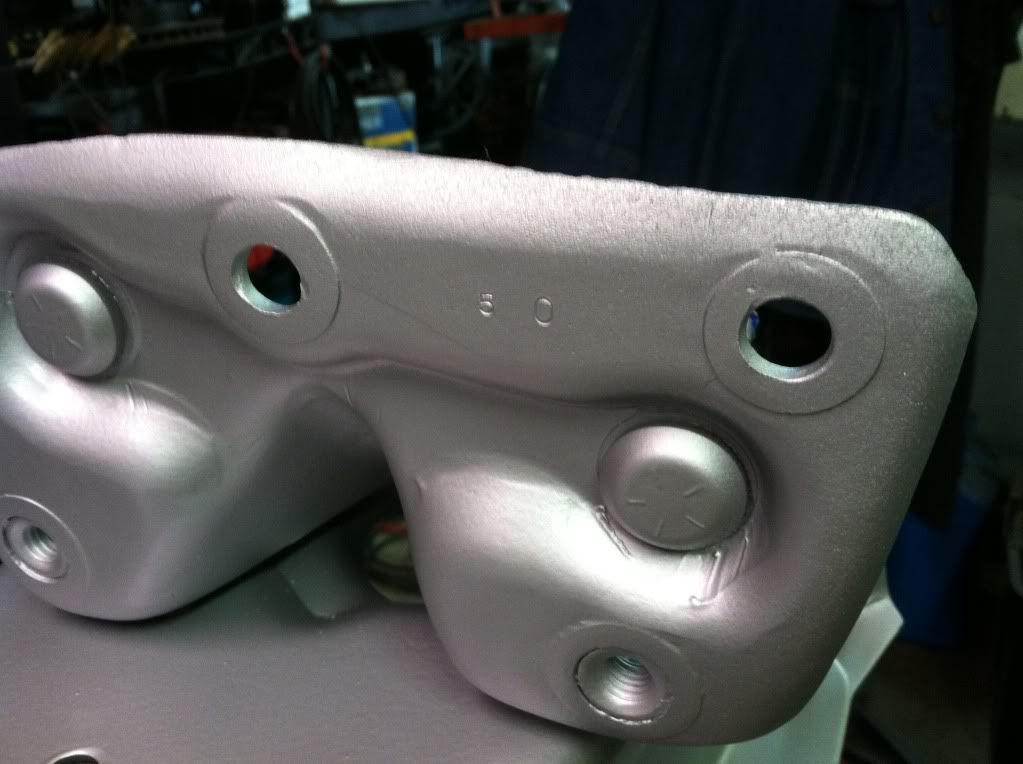 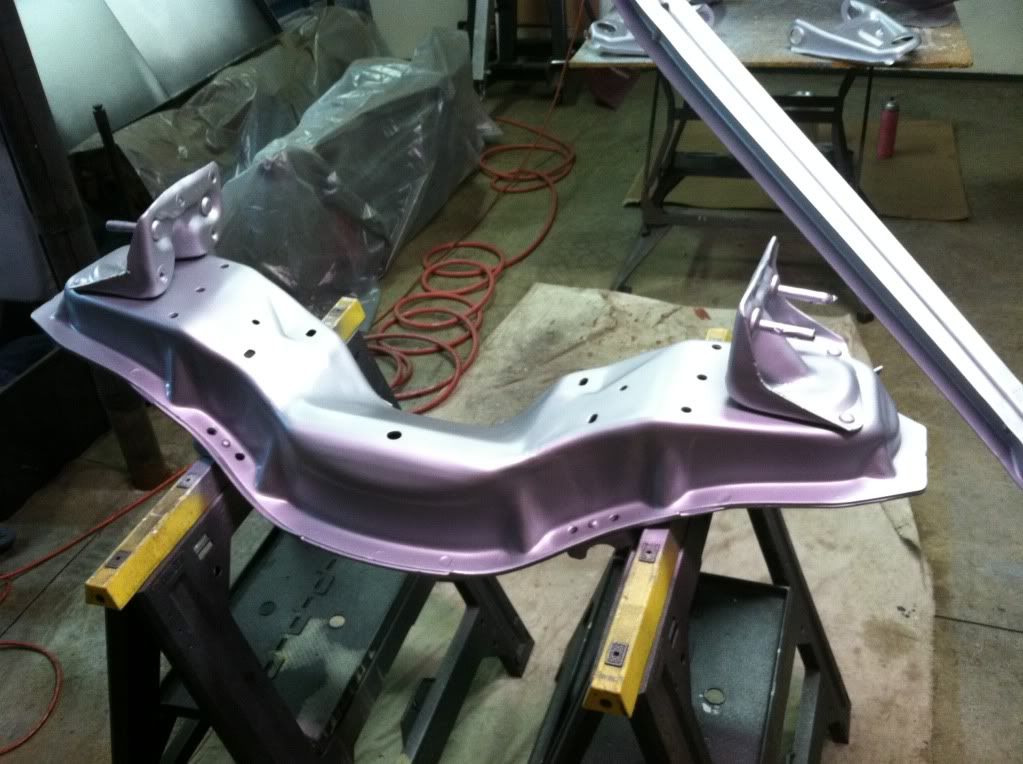 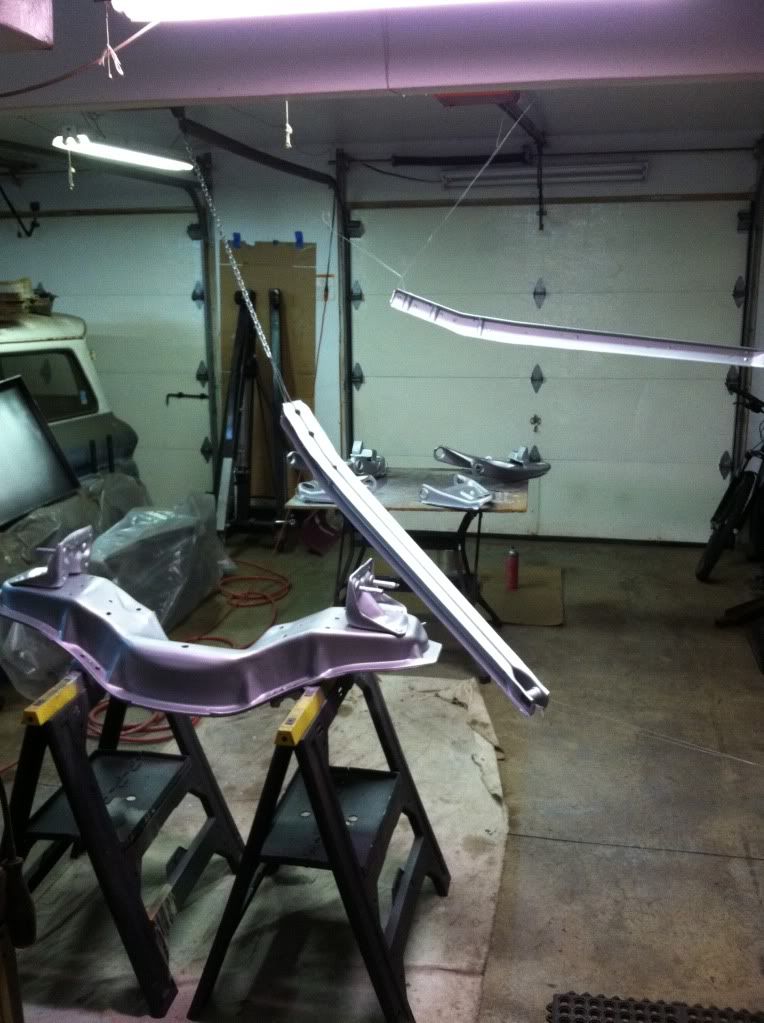 The heater is completely rebuilt with the core having been flushed and pressure tested. (I tried to blow all the crap out and flush it out with hot water—but I had no way of getting all the junk out of it..) I put a new blower motor in as the old one whined really bad—then re-sealed it with some of the rope caulk. I cleaned up each little sheetmetal screw and managed to NOT lose any along the way even after launching them across my garage with my bench grinder/wire wheel 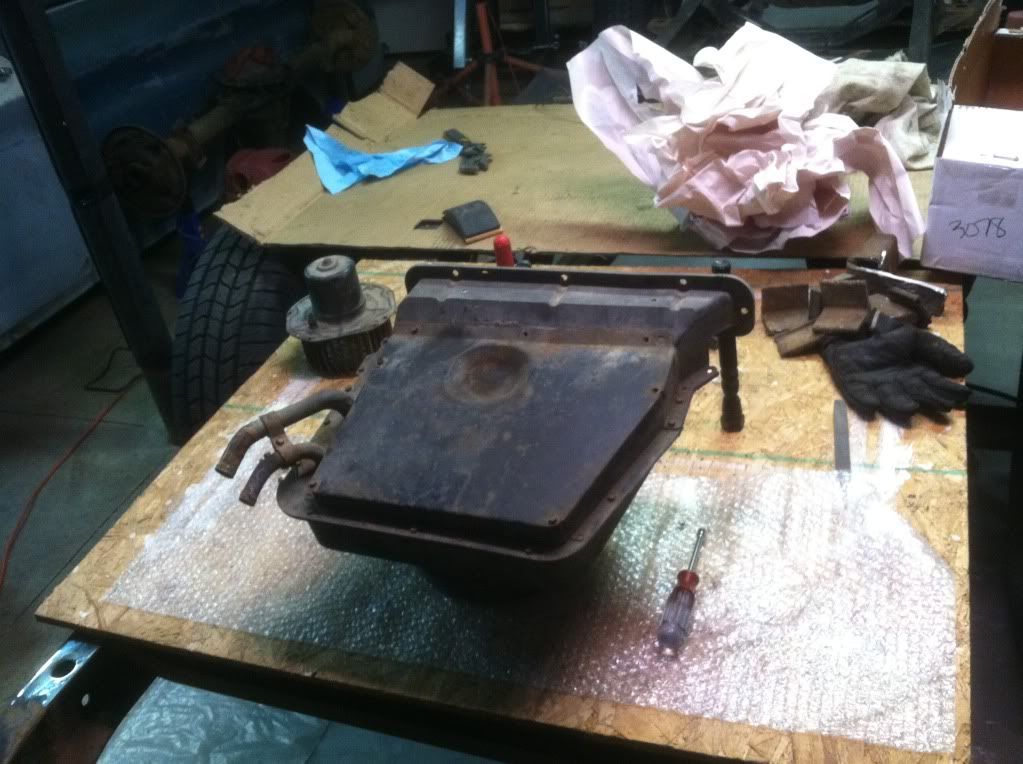 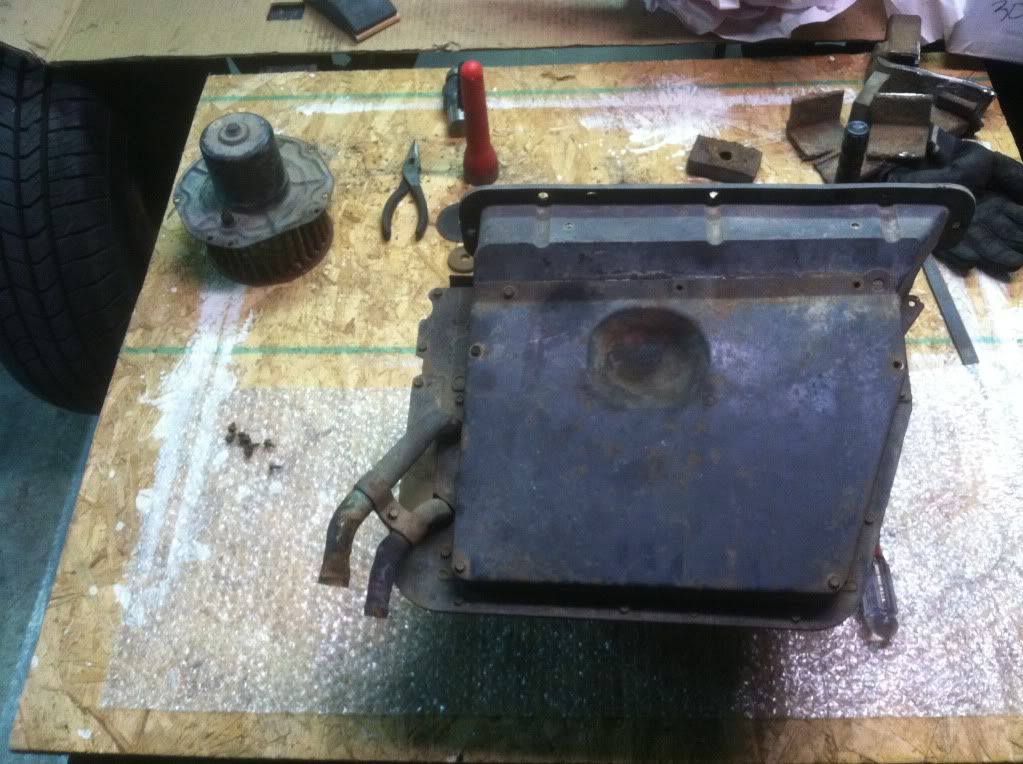 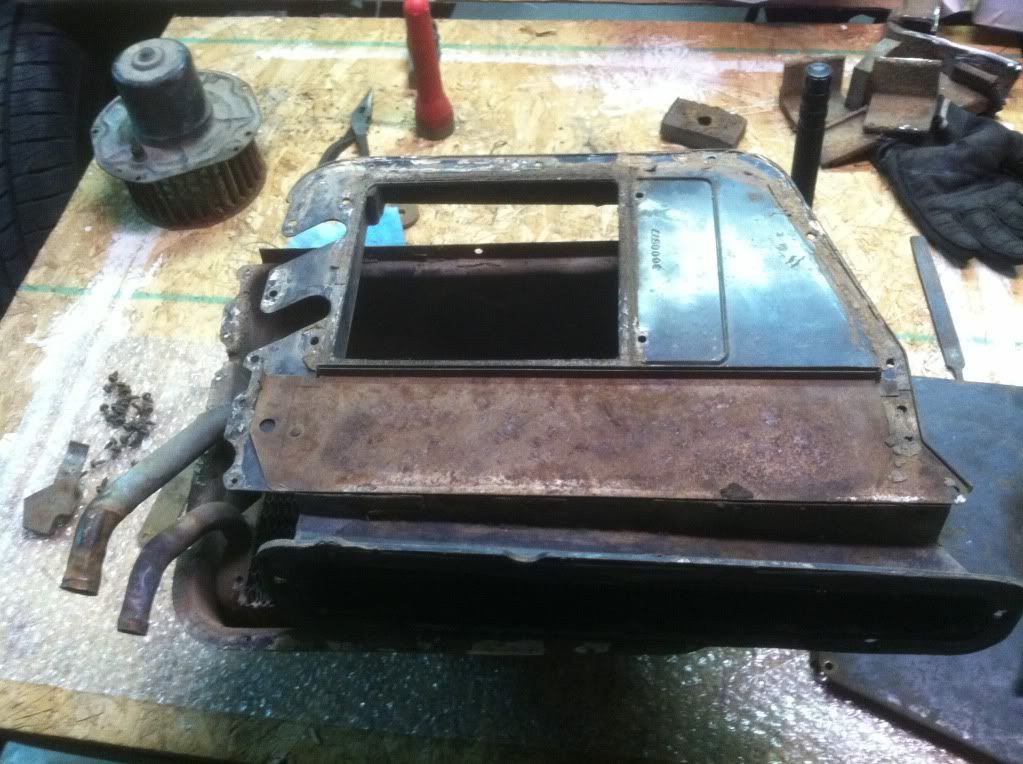 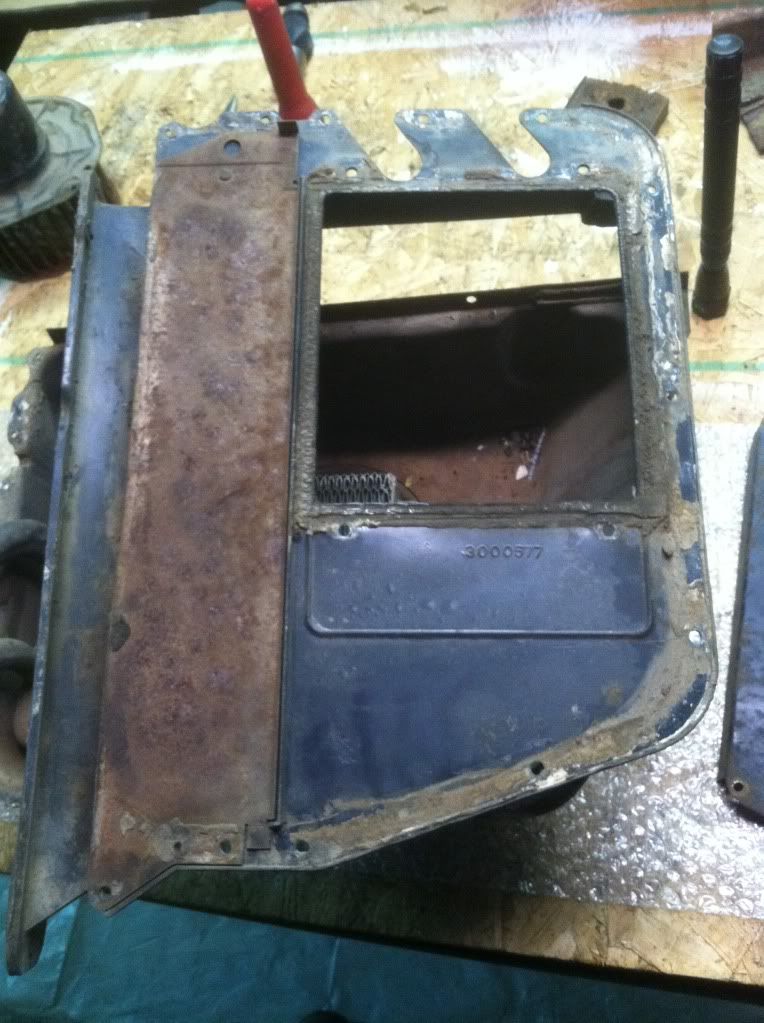 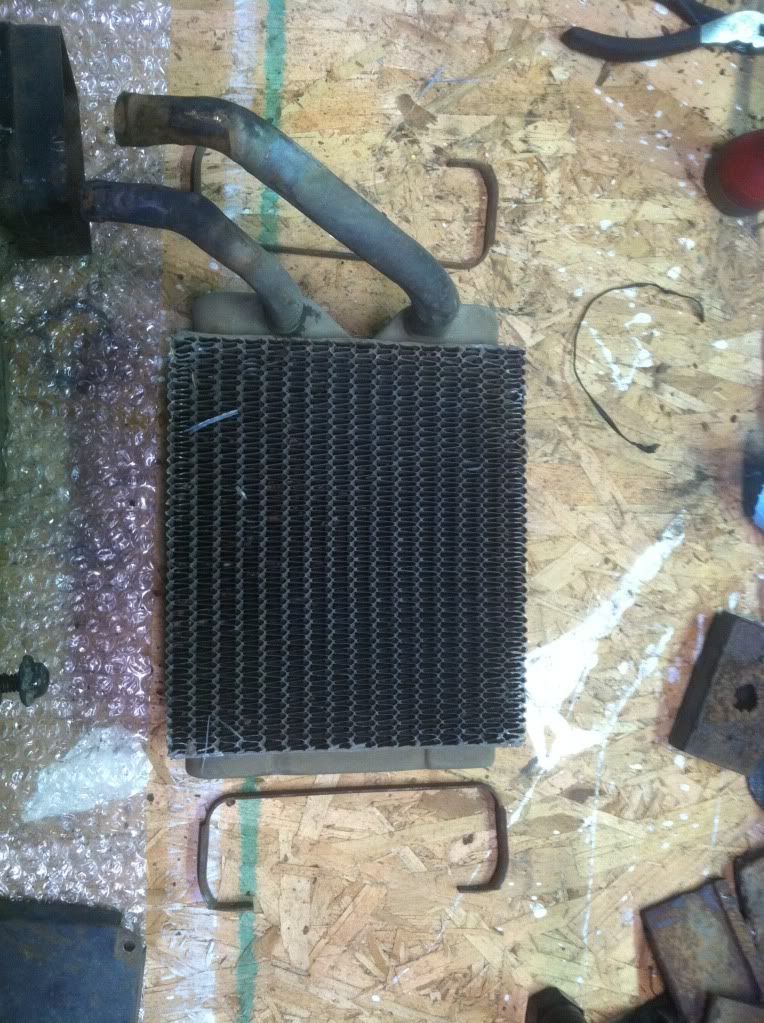 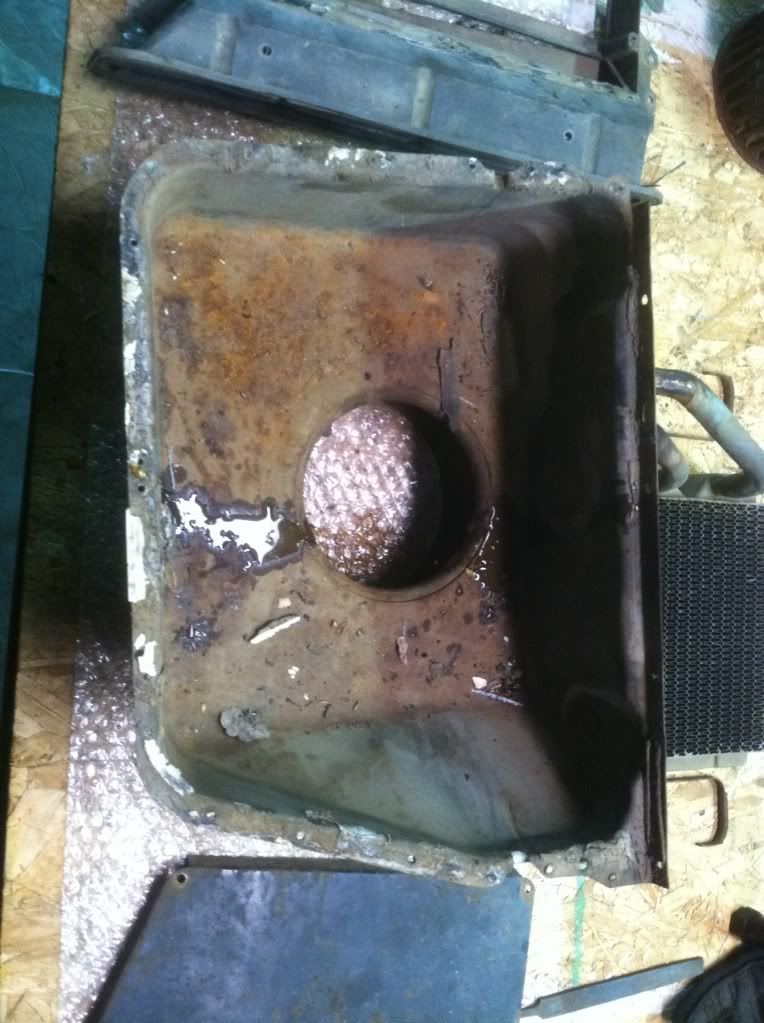 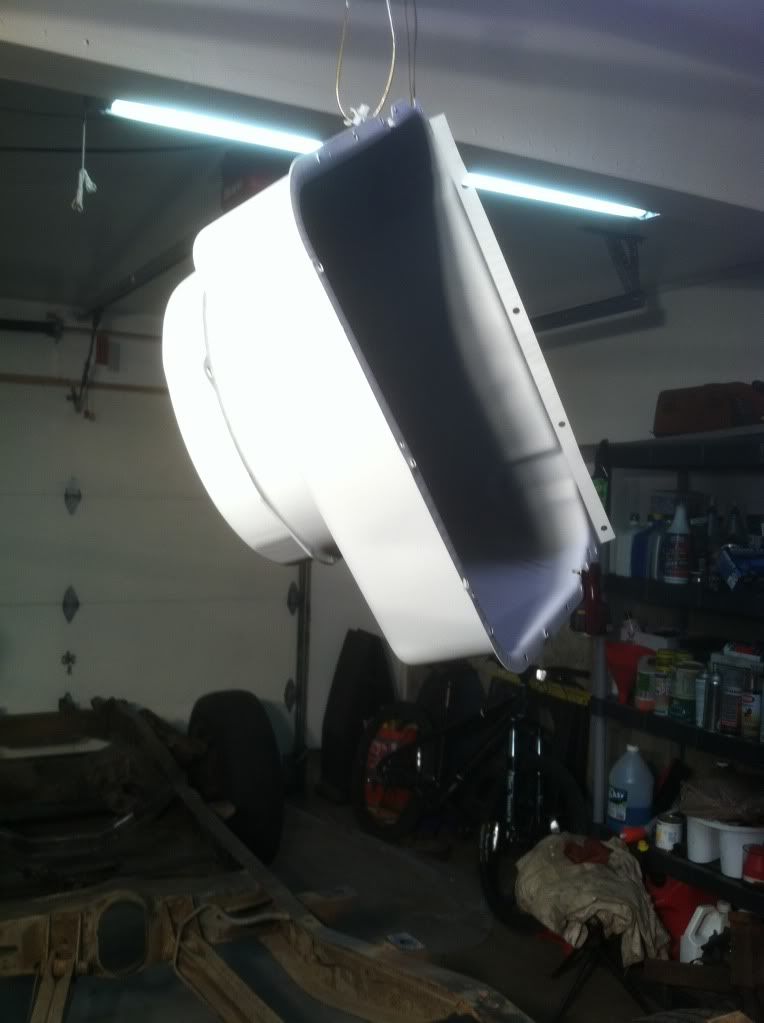 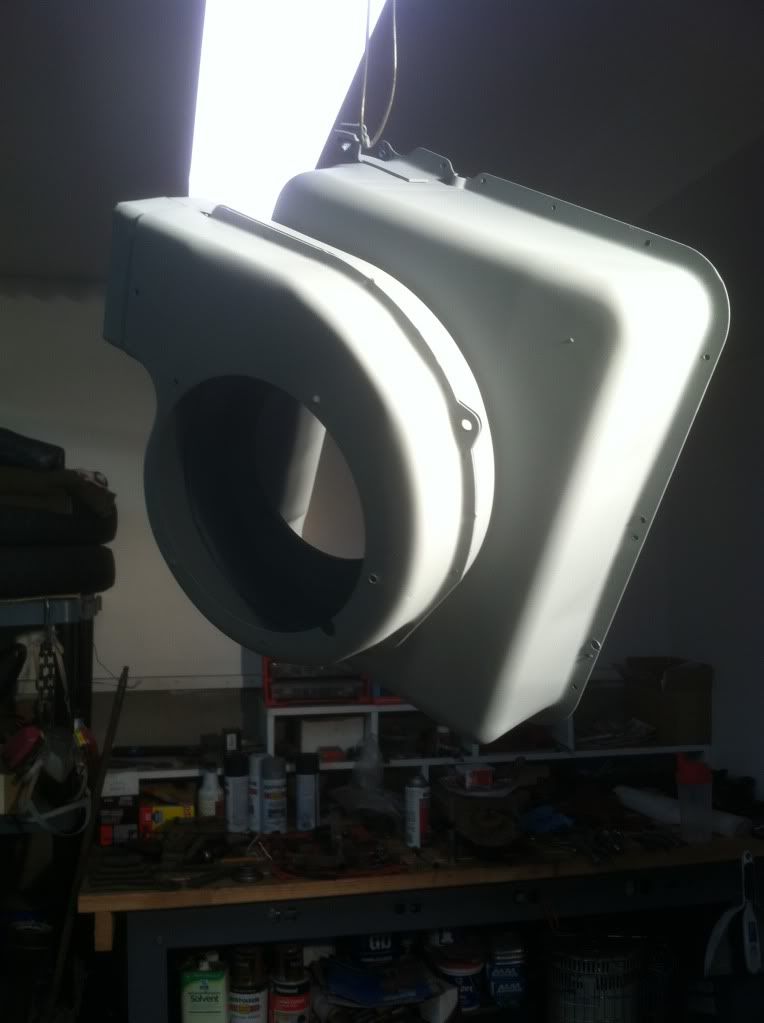 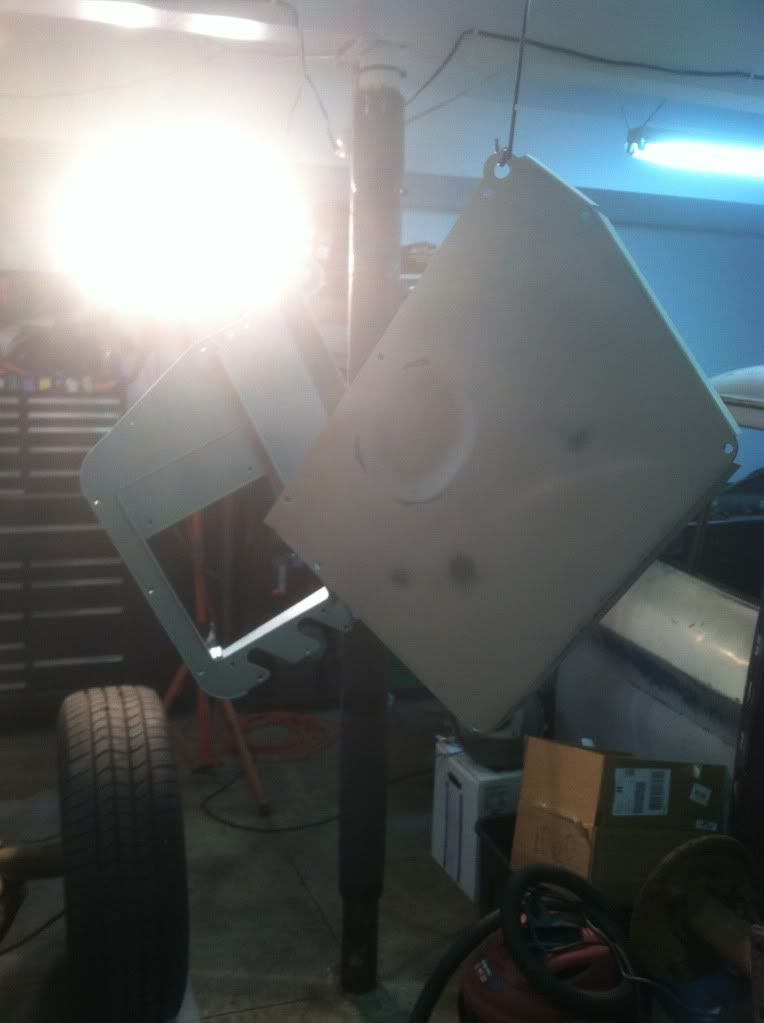 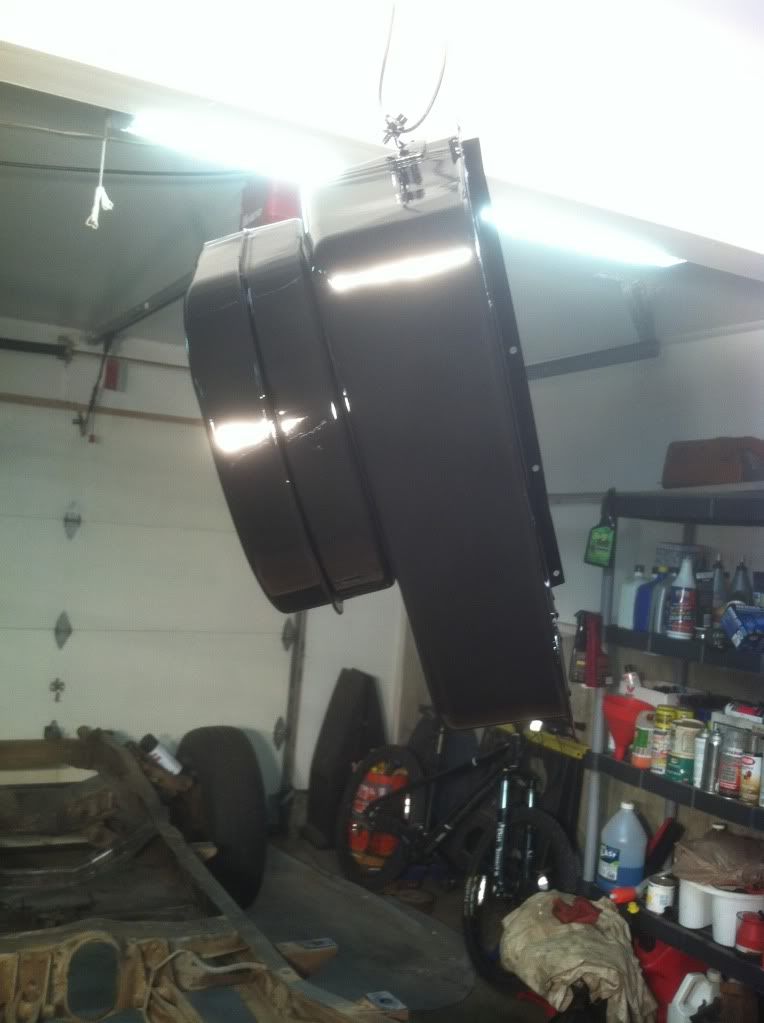 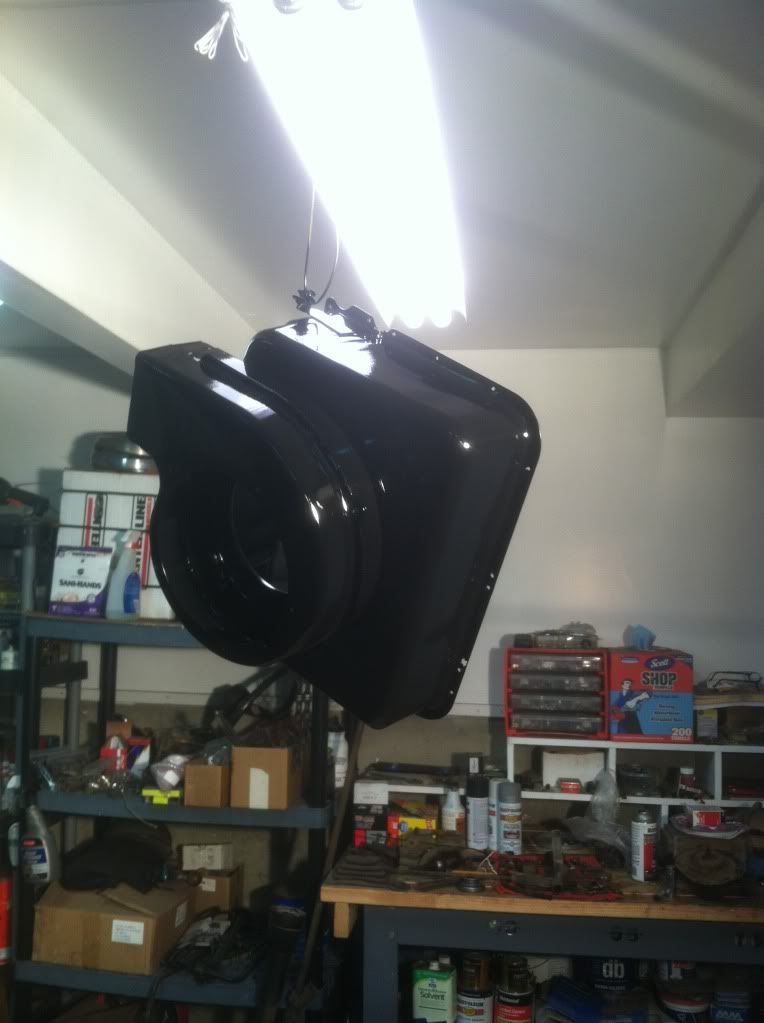  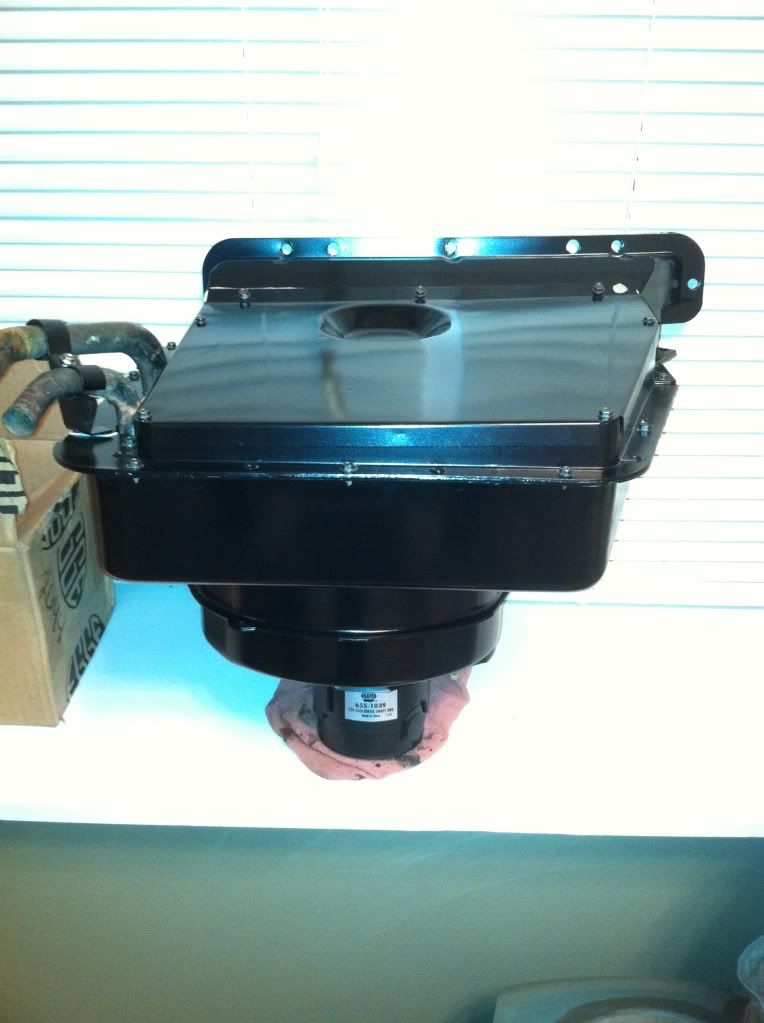  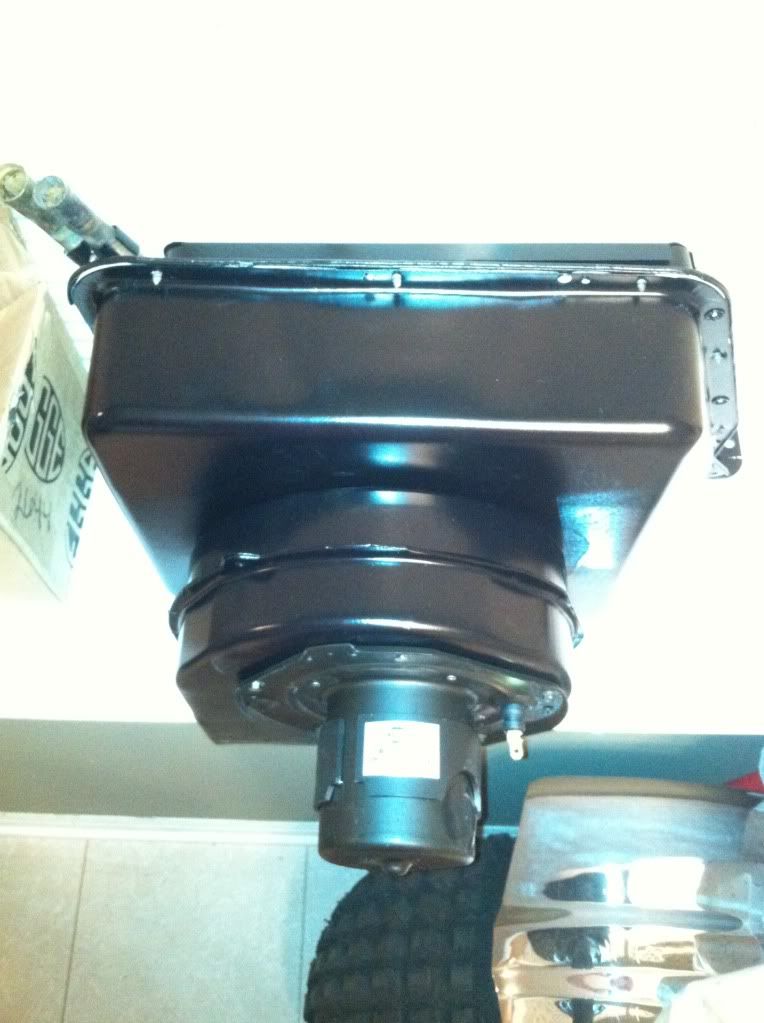 I also bought another toy this past Friday as I have recently been introduced to estate sales hunting. I picked up an old (but brand new) Enco 12-spd floor mount drill press. It runs perfect and had I gotten to the sale a little earlier, I would have had a whole mess of vices and pieces for the work table.. Oh well—I’ll catch those parts at another sale hopefully. ] 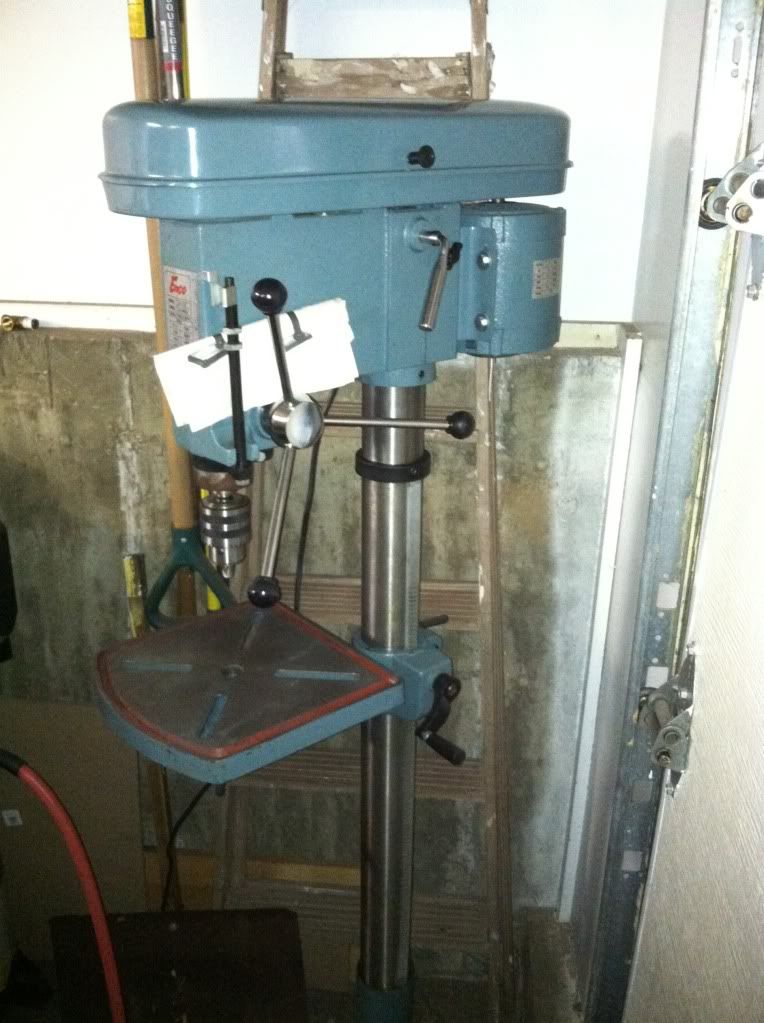
Last edited by hemifalcon; 03-26-2012 at 09:41 PM. |
|
|
|
|
04-01-2012, 10:23 PM
|
#66 |
|
Registered User
Join Date: Jan 2012
Location: Antioch, IL
Posts: 418
|
Re: 1965 Suburban Resto-Rebuild
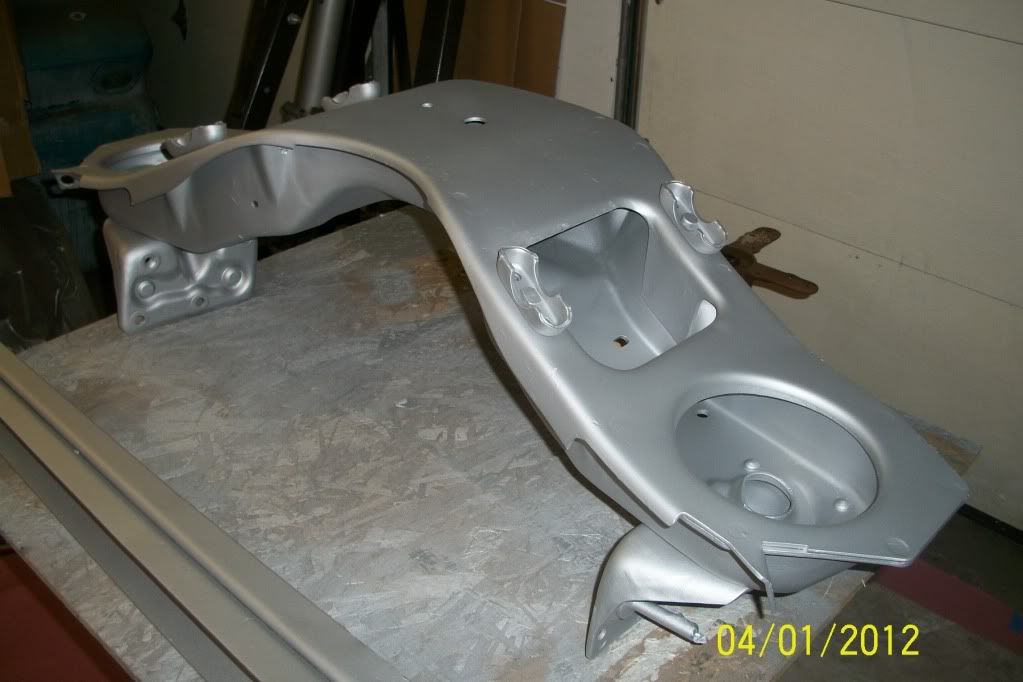
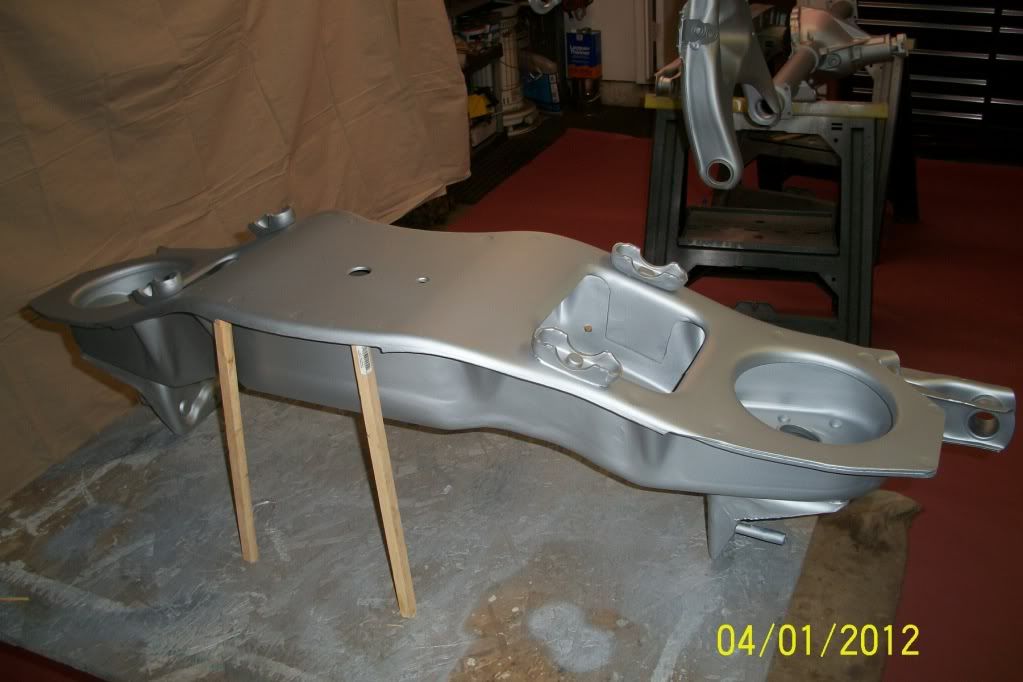
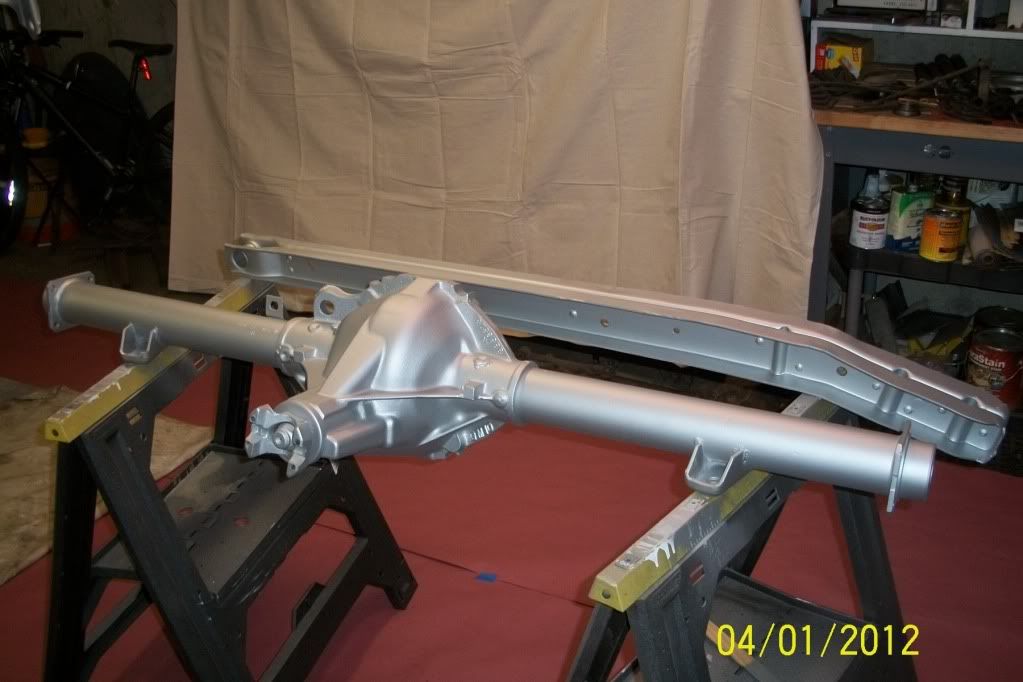
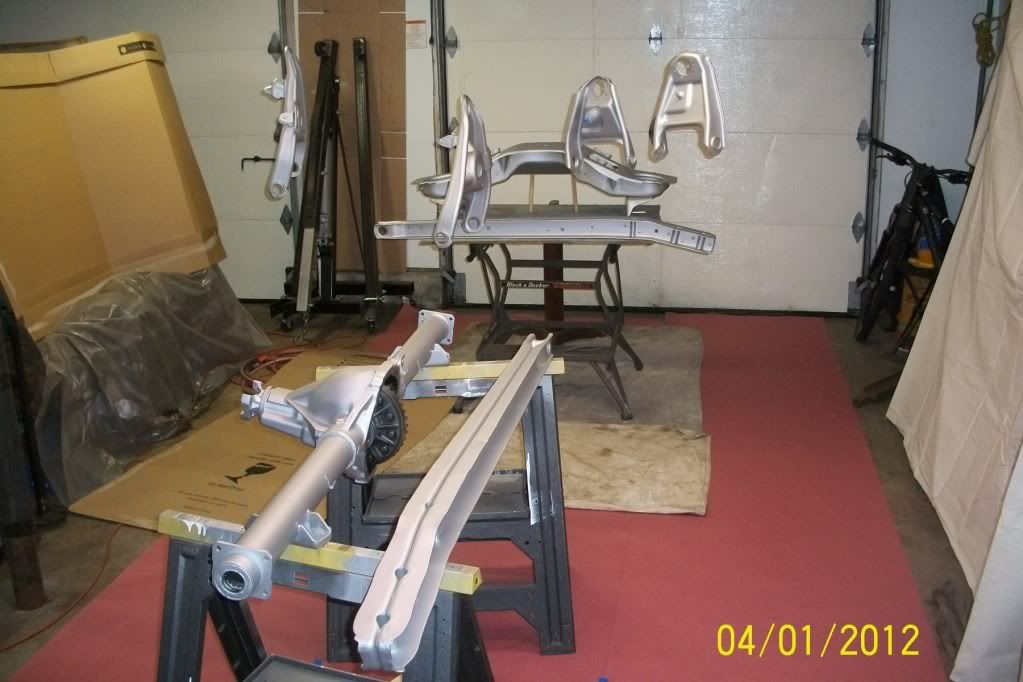
Here's all the bolt on parts to the frame.. Planning on spraying the first coat of the TractorKote Black tomorrow..
|
|
|
|
|
04-01-2012, 10:45 PM
|
#67 |
|
Rollin' Old Skool
Join Date: Jun 2007
Location: Hattiesburg, MS
Posts: 5,371
|
Re: 1965 Suburban Resto-Rebuild
very nice! that's looking really clean
__________________
_____________________________________________ Phillip My Build threads: 1966 Chevy C-10 "Black Betty" shortbed, fleetside, BBW, 327 V8/ Powerglide (under construction) http://67-72chevytrucks.com/vboard/s...ighlight=betty 1997 Chevy Tahoe, 2dr/2wd, mild custom (Daily driver) http://67-72chevytrucks.com/vboard/s...d.php?t=601142 Pics: '66 C-10 https://flic.kr/s/aHsjHWD4h9 '97 Tahoe https://flic.kr/s/aHsjGZ7wKP '93 C-1500 https://flic.kr/s/aHskxdpdnQ '88 S-10 Blazer https://flic.kr/s/aHsjYGx4Md Previous Rides: 1993 Chevy S-10 ext. cab, 4.3L, 4/5 drop (Sold) 1993 Chevy C-1500 short/step Retro-Rod (Sold) 1988 S-10 Blazer 2dr/2wd mild custom (Sold) |
|
|
|
|
04-04-2012, 02:49 PM
|
#68 | |
|
Registered User
Join Date: Jan 2012
Location: Antioch, IL
Posts: 418
|
Re: 1965 Suburban Resto-Rebuild
Quote:
Here we go.. Everything that bolts to the chassis is now black.. The frame will be coming back to the house this week (weekend) and will be made black as well.. I had to order another of the Master Series AG111 kits, as I ran out of material just painting all the peripherals.. 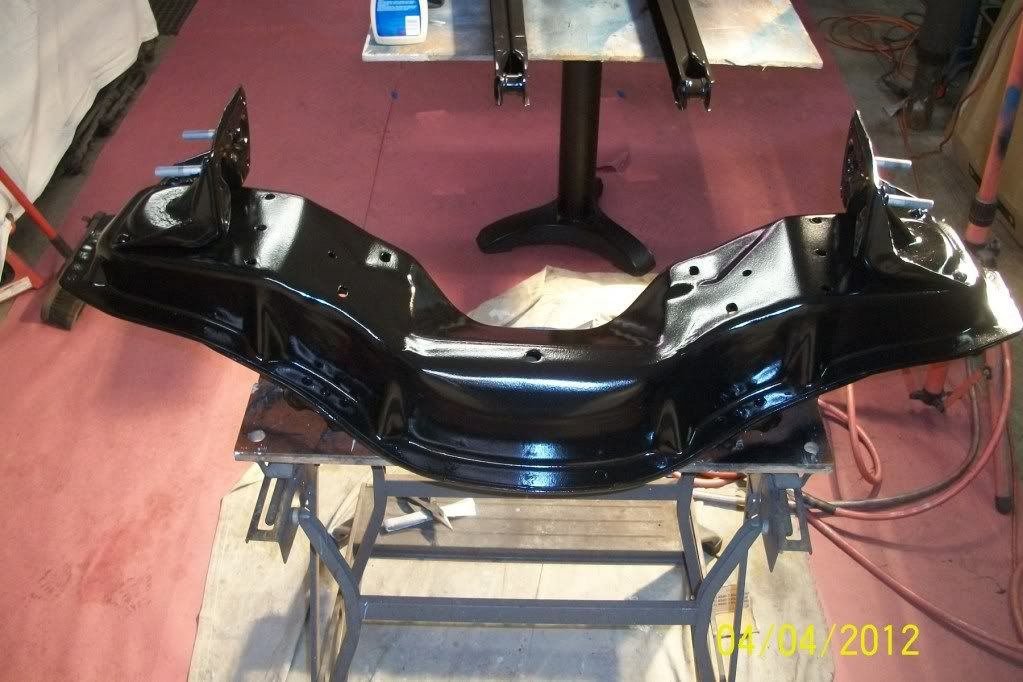 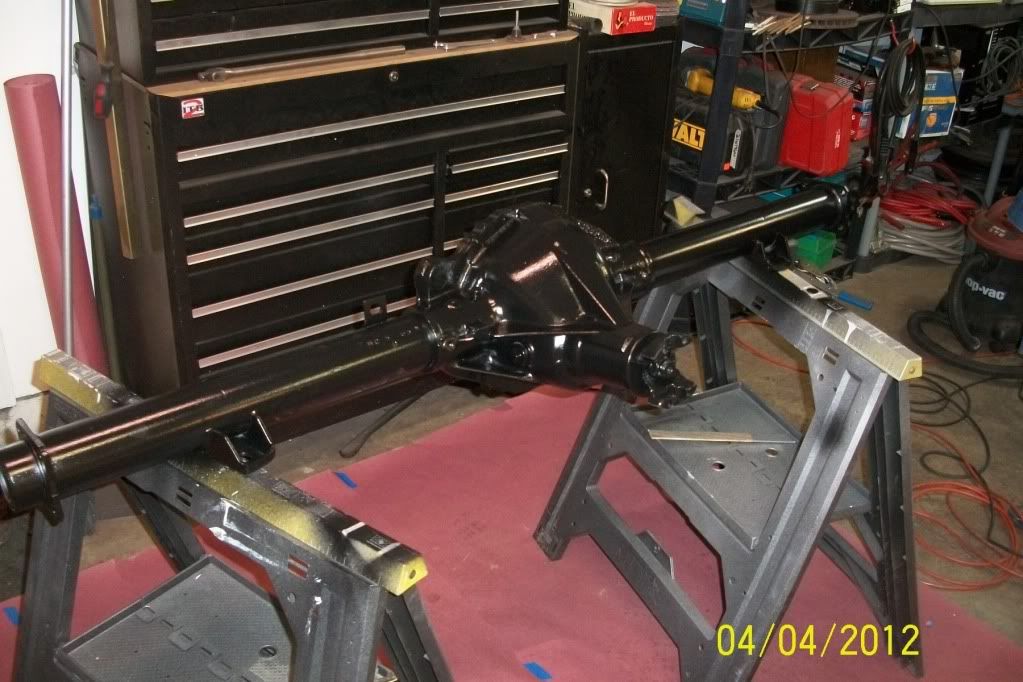 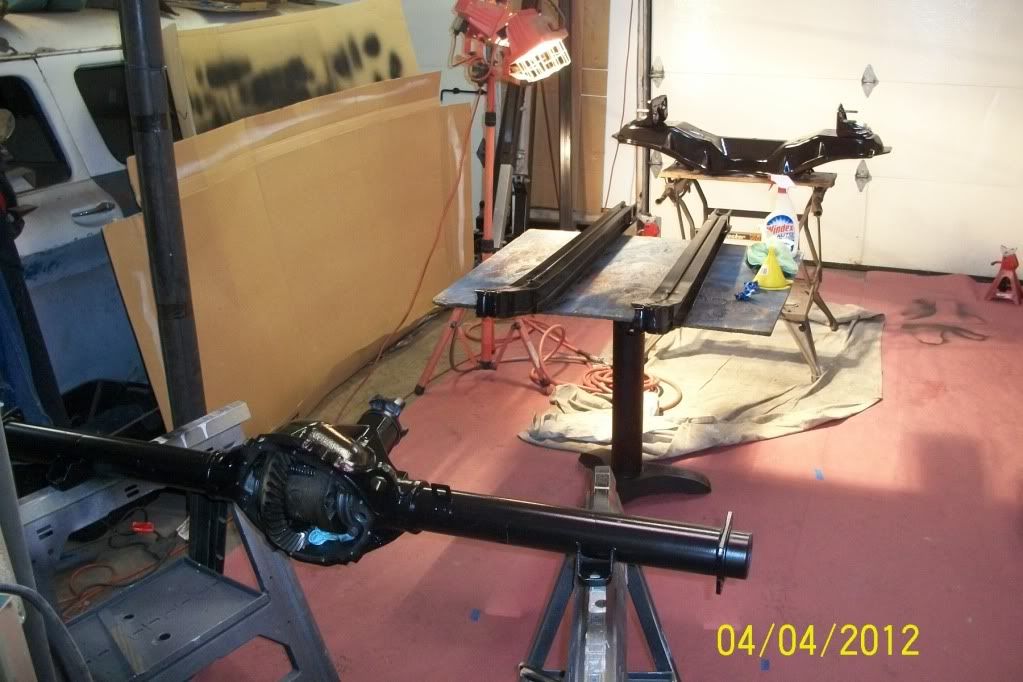
|
|
|
|
|
|
04-17-2012, 08:55 PM
|
#69 |
|
Senior Member
Join Date: Feb 2005
Location: St. Amant Louisiana
Posts: 840
|
Re: 1965 Suburban Resto-Rebuild
It's been 13 days...Whats going on with the build
|
|
|
|
|
04-17-2012, 11:21 PM
|
#70 |
|
Registered User
Join Date: Jan 2012
Location: Antioch, IL
Posts: 418
|
Re: 1965 Suburban Resto-Rebuild
Nobby...
I am sidetracked with reorganizing my garage.. I'm determined to get rid of the crappy plastic shelving.. I got some neat old metal shop cabinets today... Gonna get them up tomorrow and free up some floor area.. Here are the pictures of the cabinets I grabbed from a retired body-man in Beach Park, IL.. And the new concrete floor which will serve well for doubling the size of my mom's garage. It'll now be a full 30'x24' interior... 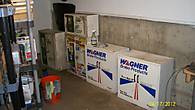 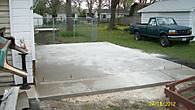
Last edited by hemifalcon; 04-18-2012 at 06:11 PM. |
|
|
|
|
04-27-2012, 10:34 PM
|
#71 |
|
Registered User
Join Date: Jan 2012
Location: Antioch, IL
Posts: 418
|
Re: 1965 Suburban Resto-Rebuild
Okay.. so, here's the finished version of my garage after my reorganizing project.. New (old) shop cabinets and my self-constructed pipe-framed bench with 1 1/2 Maple butcher block top. I moved a bunch of flack outta the the garage into my storage unit just to free some work space up. Now I just have to keep it clean.
Here is the before and after.. 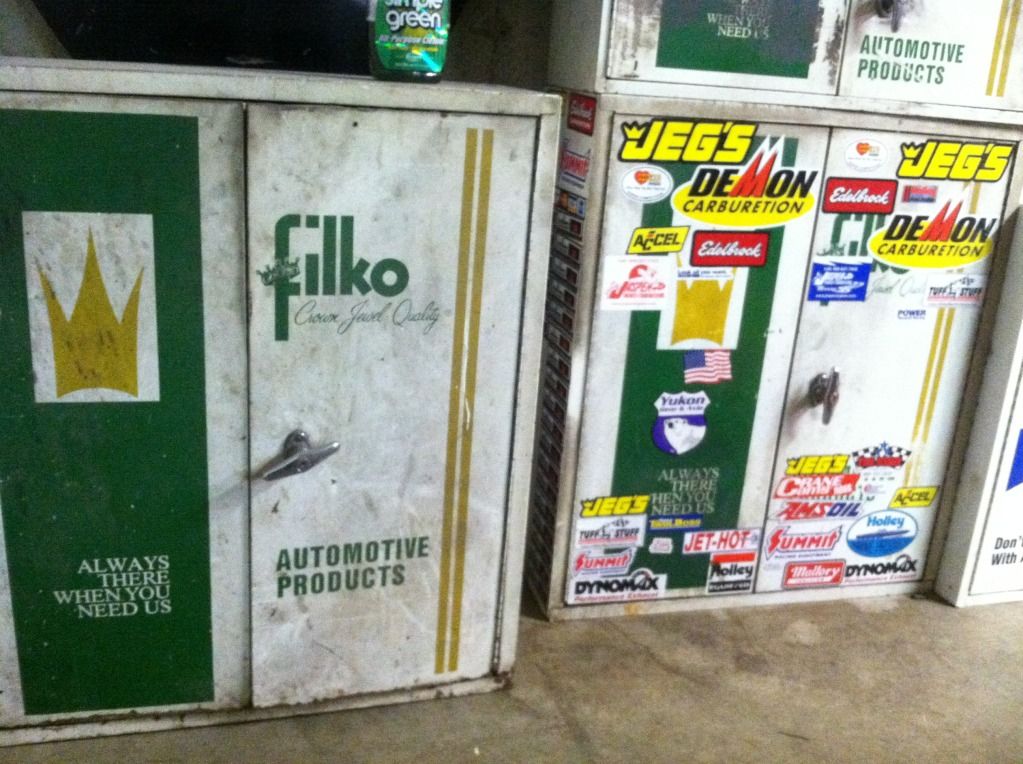 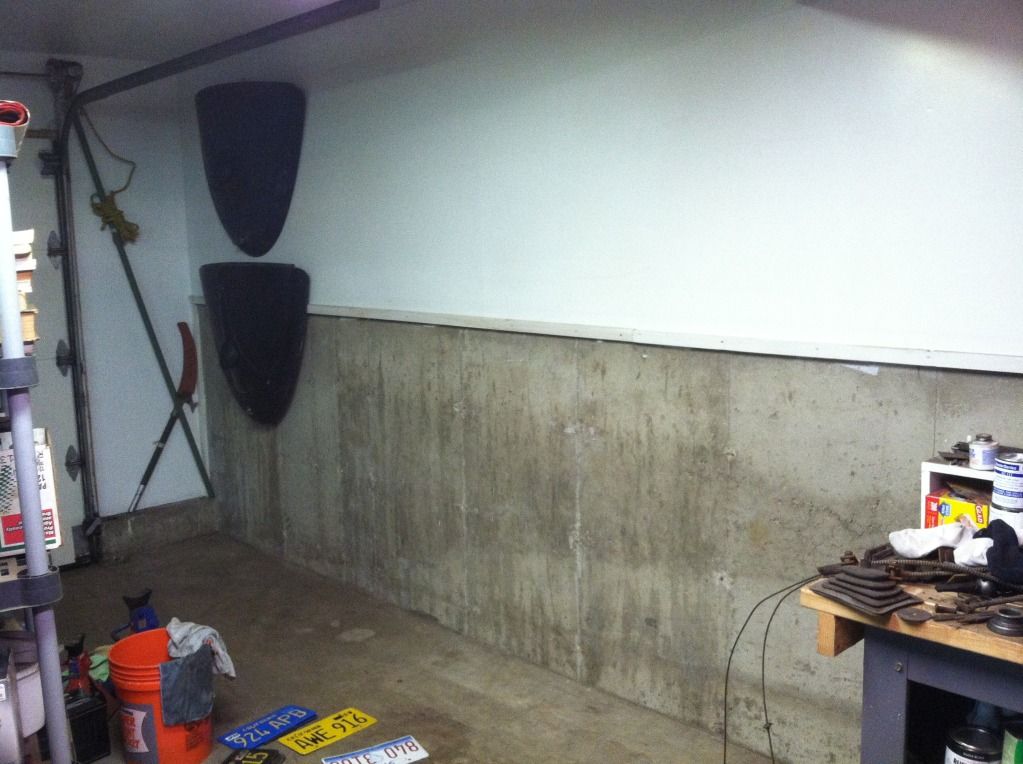 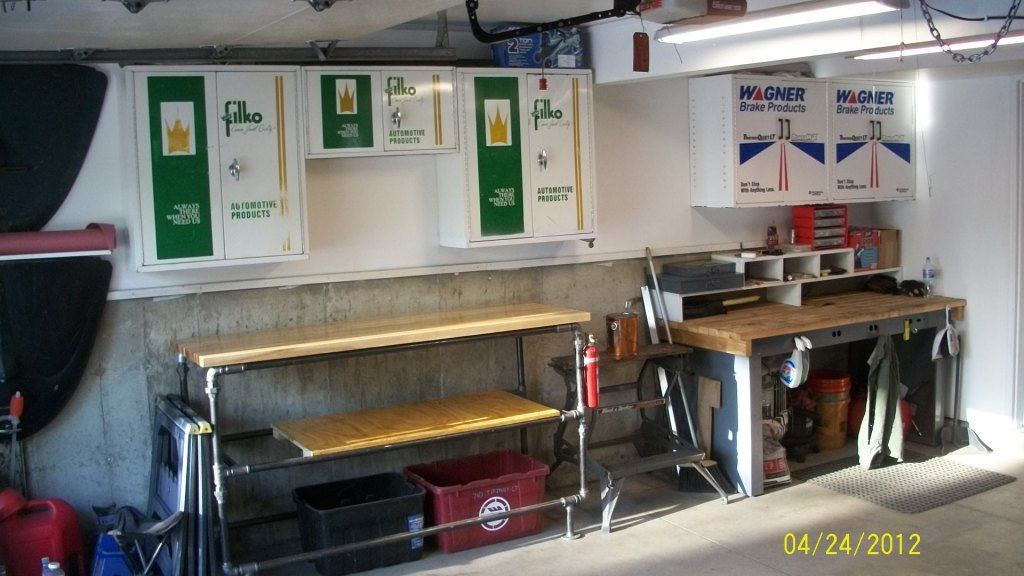  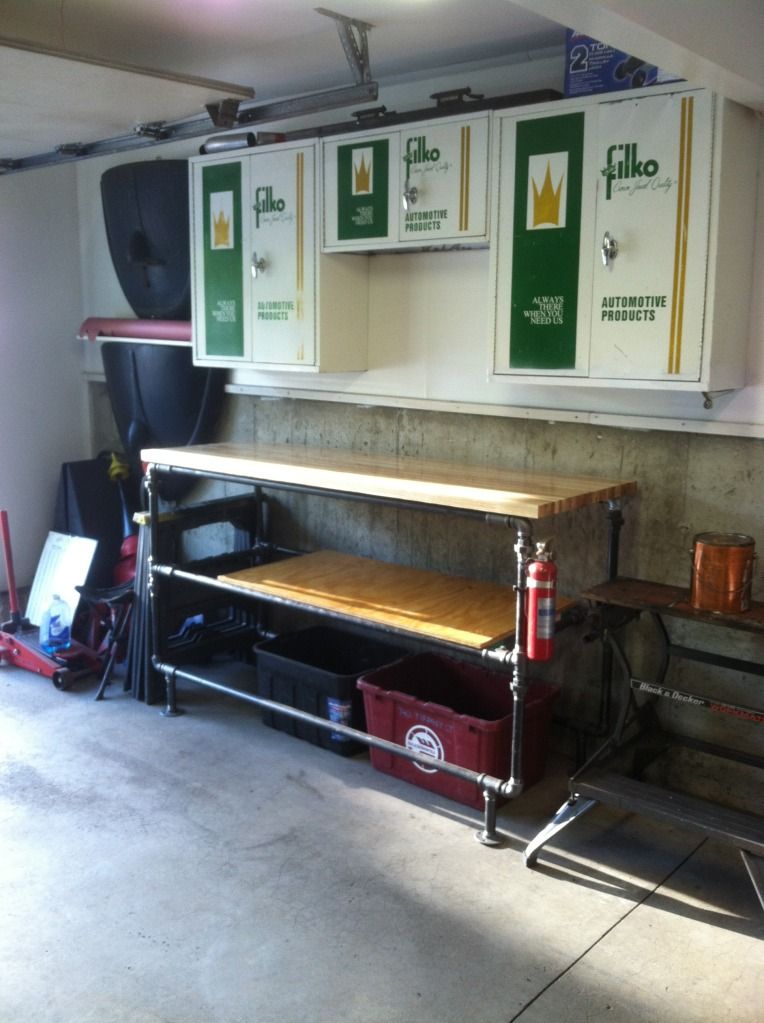 And, here is some fat-trimming I did on the Burb tonight. I drilled out over 100 spot welds on the drivers air box and took the main cowl suppot off. I had to do this to find all the cowl rot. Well, it's pretty significant, but I am pretty certain the old '65 truck cab will donate 90% of th enecessary parts.. So, here are some pics.. Rust-Surgery maybe starting this next week.. I have some other non-project car things to deal with $$-wise..I'm glad I got to practice removing these same parts from the old truck cab--made it easier for sure..  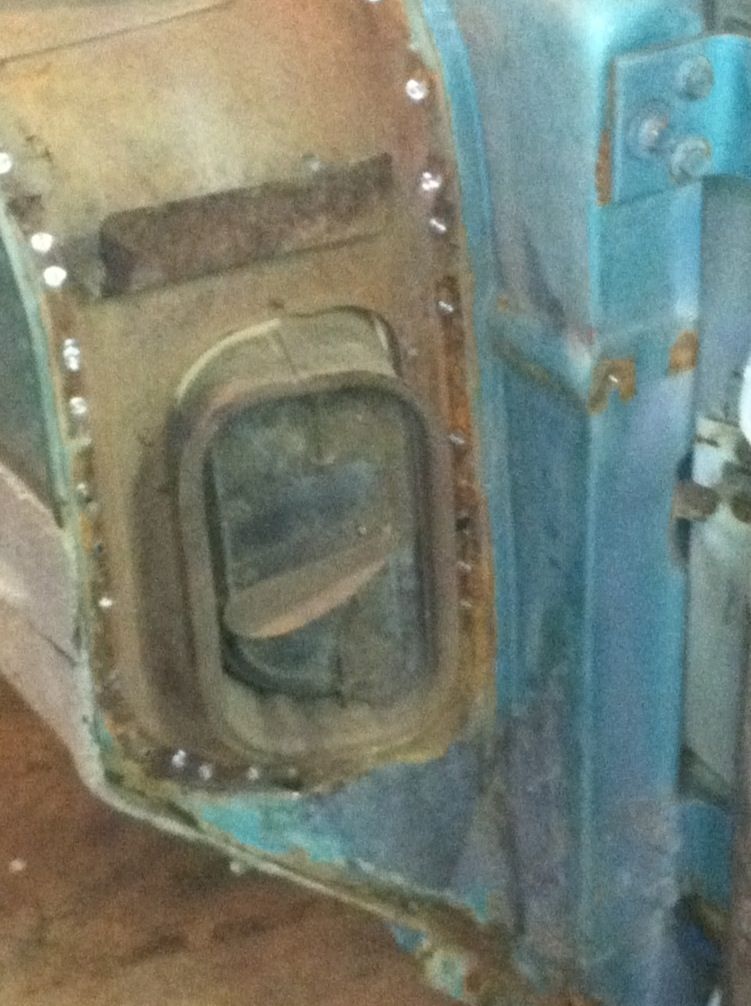 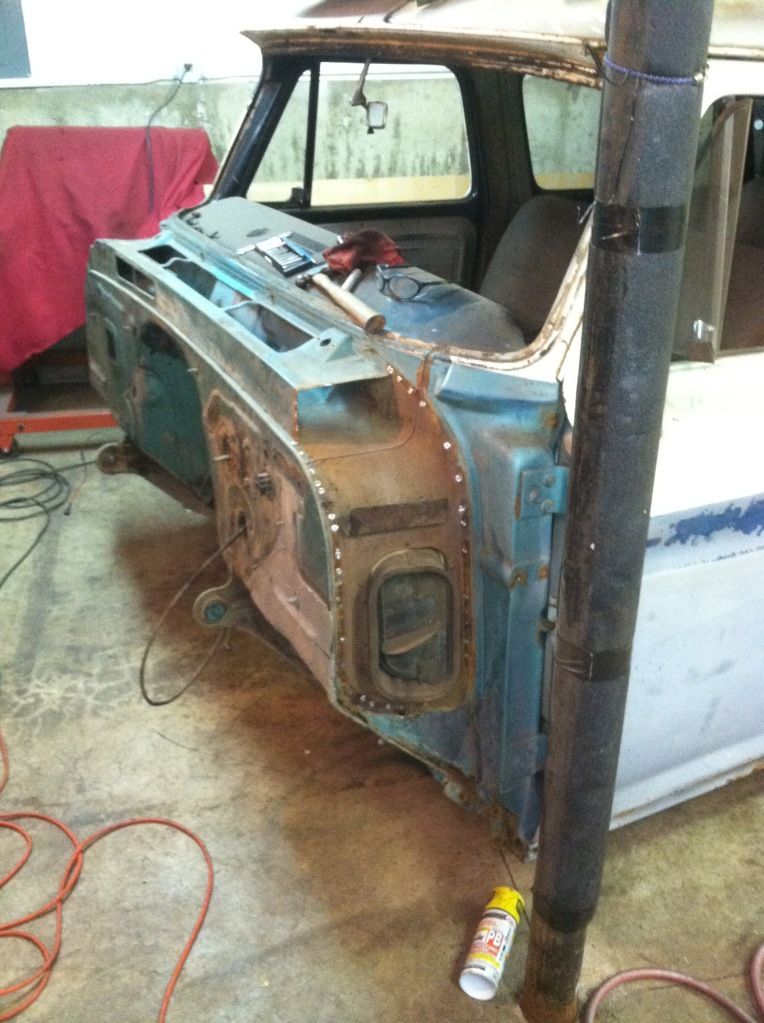 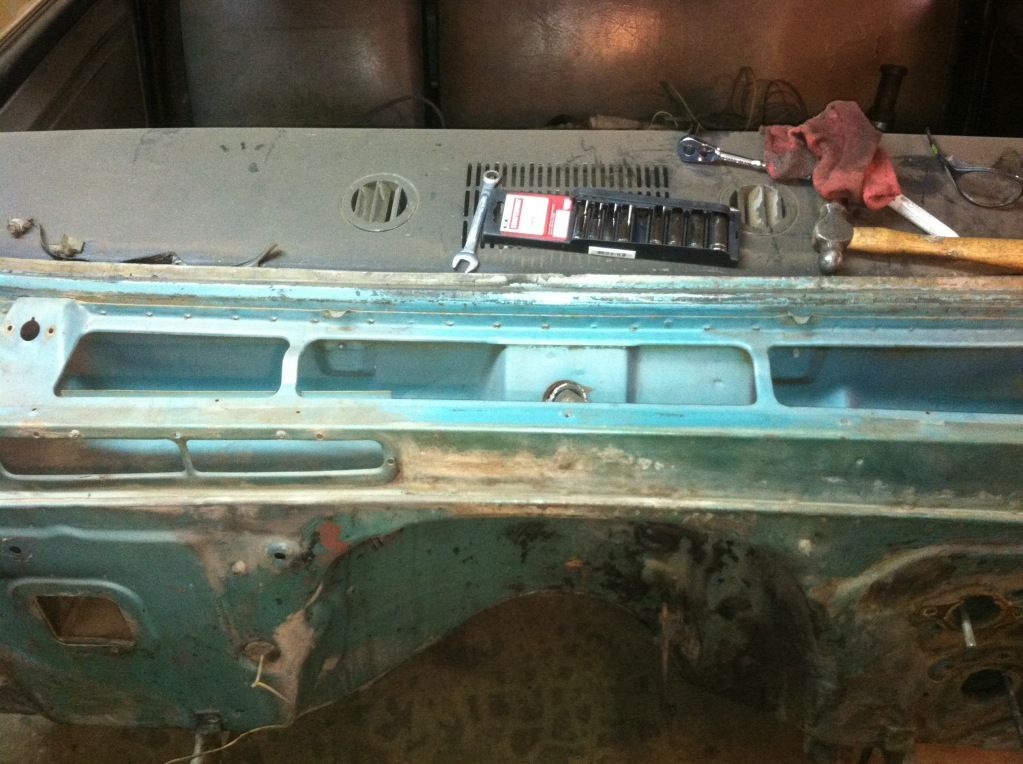 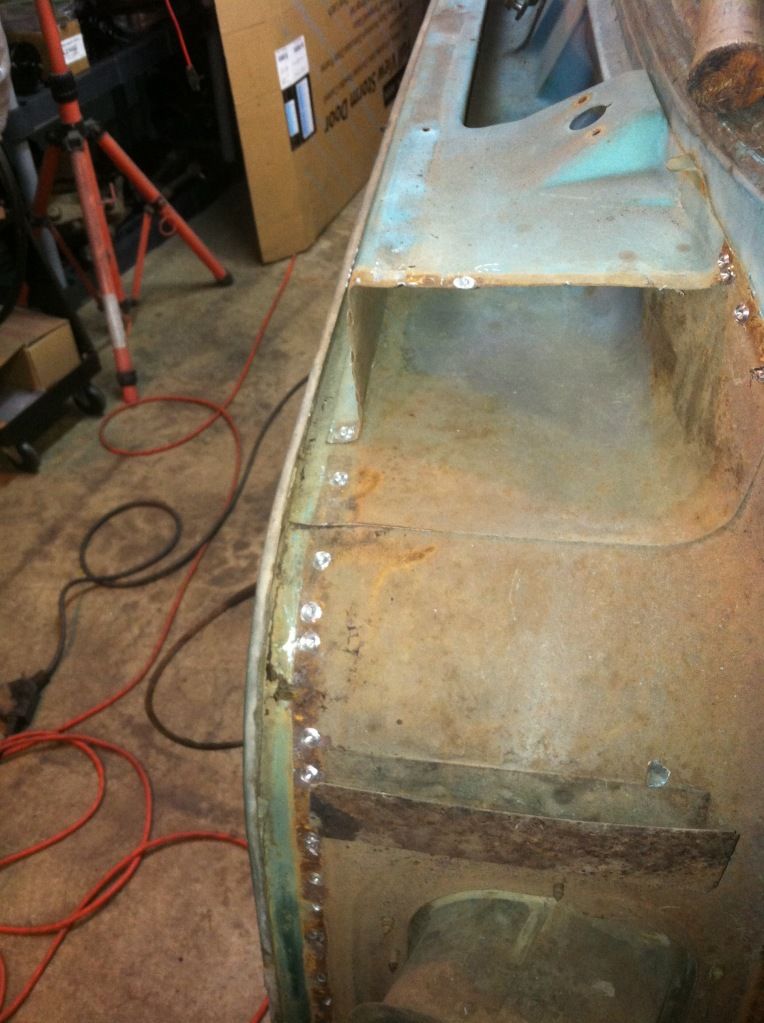 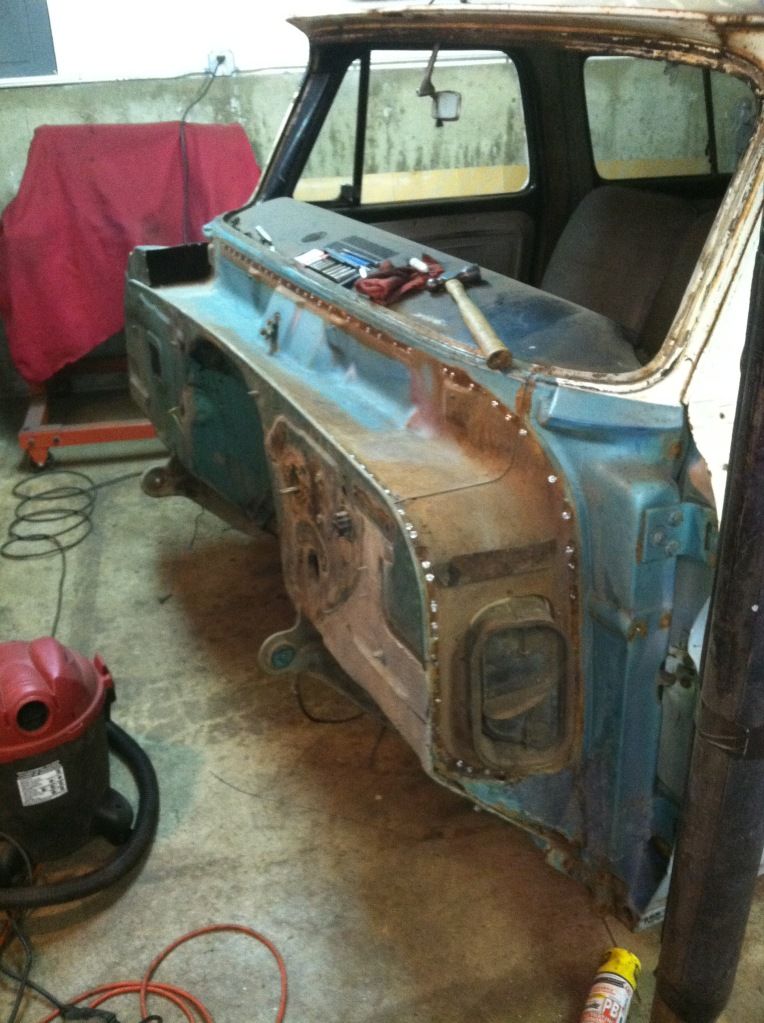 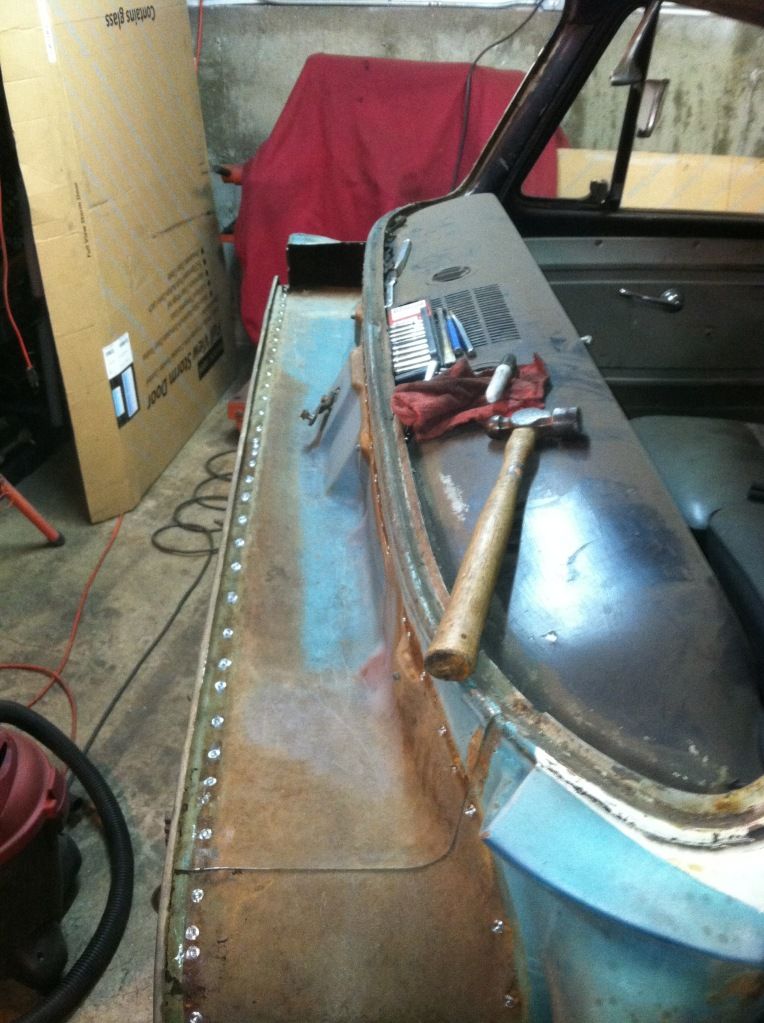 "sorry for the crappy phone pics.." Last edited by hemifalcon; 04-27-2012 at 10:42 PM. |
|
|
|
|
04-28-2012, 01:11 AM
|
#72 |
|
60-66 Nut
Join Date: Mar 2007
Location: Coeur d'Alene, Idaho
Posts: 23,252
|
Re: 1965 Suburban Resto-Rebuild
Your garage looks good. Those cabinets cleaned up real nice. I never would have thought of using steel pipe and fittings to build a bench frame, very ingenious.
Yeah, that is a lot of spot welds in removing the cowl pieces. I don't think I have ever seen one with it mostly removed. Seeing that makes me wonder what customizing could be done there.....hhmmmmm.
__________________
Power Steering Box Adapter Plates For Sale HERE Power Brake Booster Adapter Brackets For Sale '63-'66 HERE and '67-'72 HERE and '60-'62 HERE and "60-'62 with clutch HERE Rear Disc Brake Brackets For Sale. Impala SS calipers HERE Camaro Calipers HERE D52 Calipers HERE 6 Lug HERE Hydroboost Mounting Plates HERE |
|
|
|
|
04-28-2012, 07:00 AM
|
#73 | |
|
Registered User
Join Date: Jan 2012
Location: Antioch, IL
Posts: 418
|
Re: 1965 Suburban Resto-Rebuild
Quote:
Captain--there wil likely be no customizing here--but I may pull off the other air box although there is no rot on the passenger side. I am thinking of welding the seams completely together on both sides to elminate water getting in there again in the future. But, as far as customizing--I like the no-rust way of customizing.. I'll take photos as I go.. |
|
|
|
|
|
04-28-2012, 10:54 PM
|
#74 | |
|
Registered User
Join Date: Sep 2011
Location: Tacoma, WA
Posts: 2,425
|
Re: 1965 Suburban Resto-Rebuild
Quote:
__________________
Michael McMurphy My 66 Stepside My 64 Tow Truck My 66 Tempest Table Of Contents Added to Page1 |
|
|
|
|
|
04-28-2012, 11:48 PM
|
#75 |
|
Registered User
Join Date: Jan 2012
Location: Antioch, IL
Posts: 418
|
Re: 1965 Suburban Resto-Rebuild
Hmmmmm.. Like old crotch coolers found on the early trucks???
Posted via Mobile Device |
|
|
|
 |
| Bookmarks |
|
|


 Linear Mode

