
|
|
|
 06-19-2016, 10:05 AM
|
#1 |
|
Senior Member
 Join Date: Mar 2011
Location: West Plains, Missouri
Posts: 7,557
|
Re: 55 Wagon Progress
As usual, very nice work...Jim
__________________
my build thread: http://67-72chevytrucks.com/vboard/s...d.php?t=459839 Jimbo's long bed step build:http://67-72chevytrucks.com/vboard/s...t=464626<br /> |

|

|
|
06-25-2016, 11:51 PM
|
#2 |
|
Registered User
Join Date: Jan 2013
Location: Leonardtown, MD
Posts: 1,642
|
Re: 55 Wagon Progress
Thanks Jim!
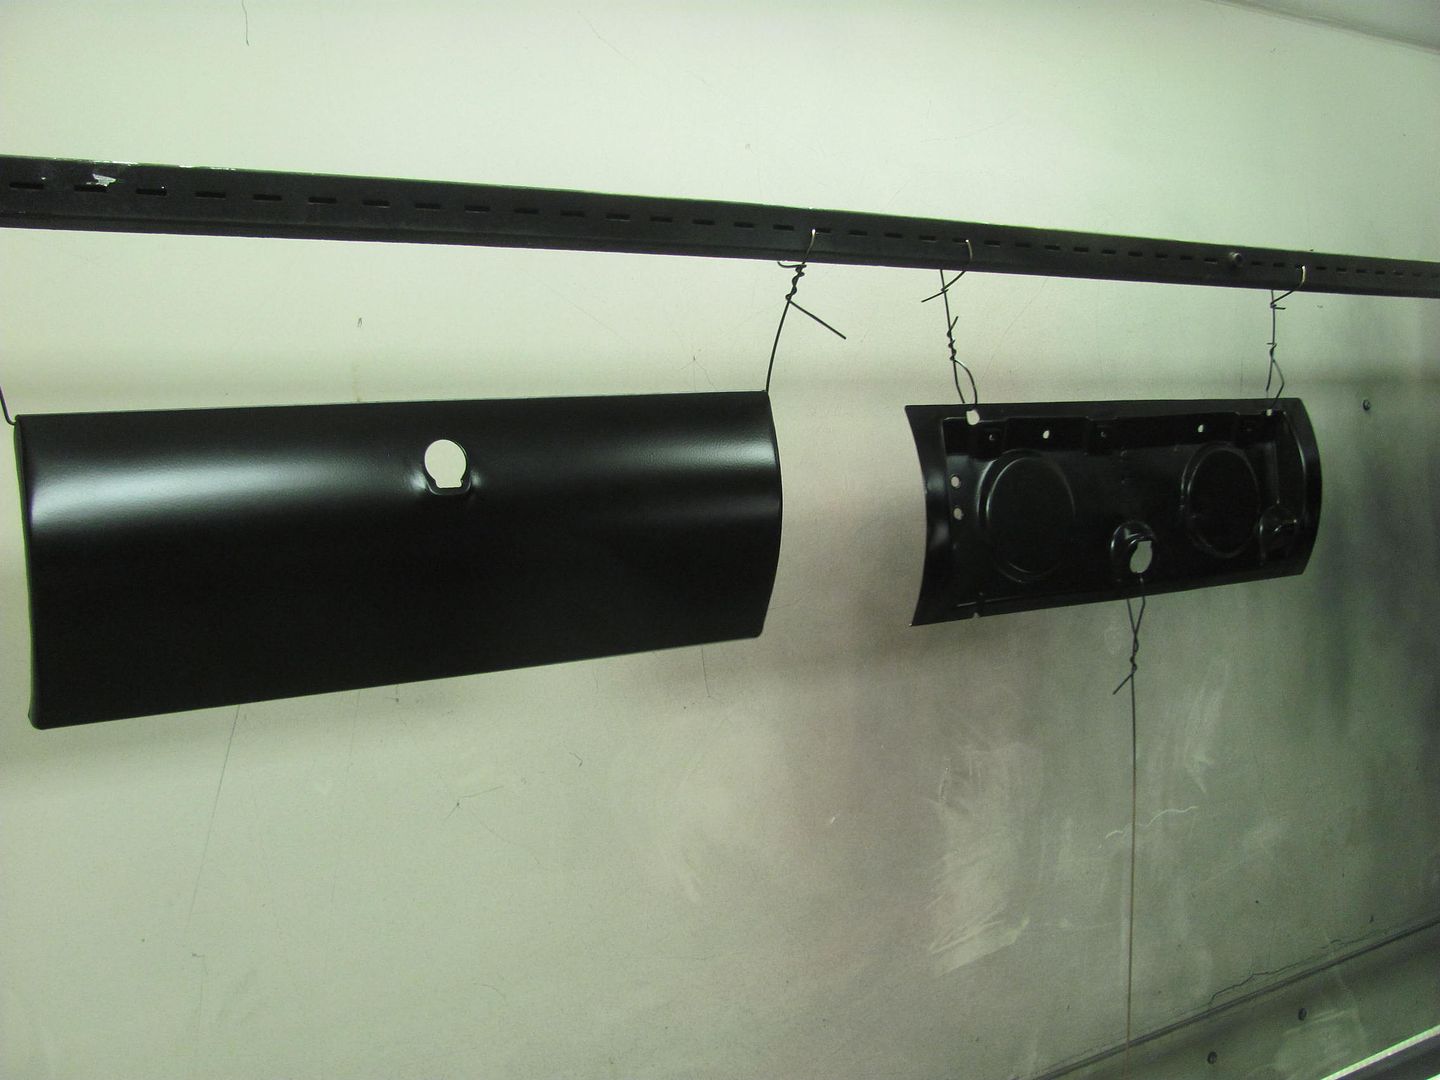
Cowl repair all complete... 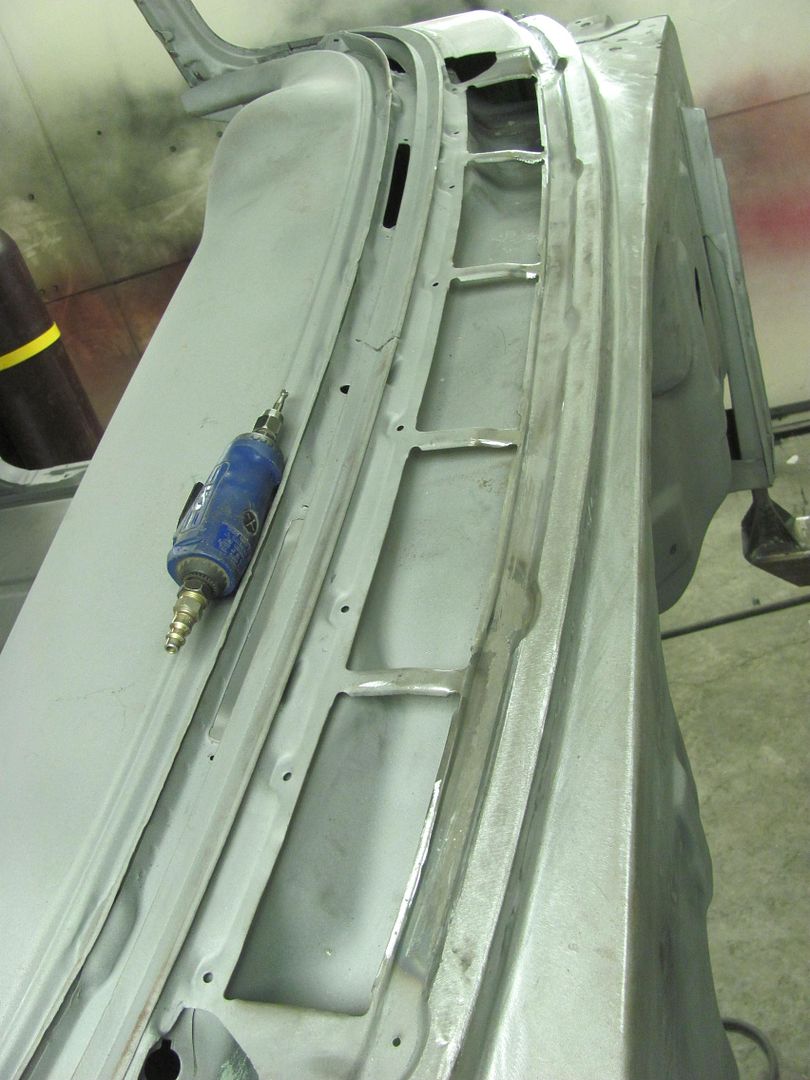 One more thin spot from the media blasting where we had removed the leaded seam... 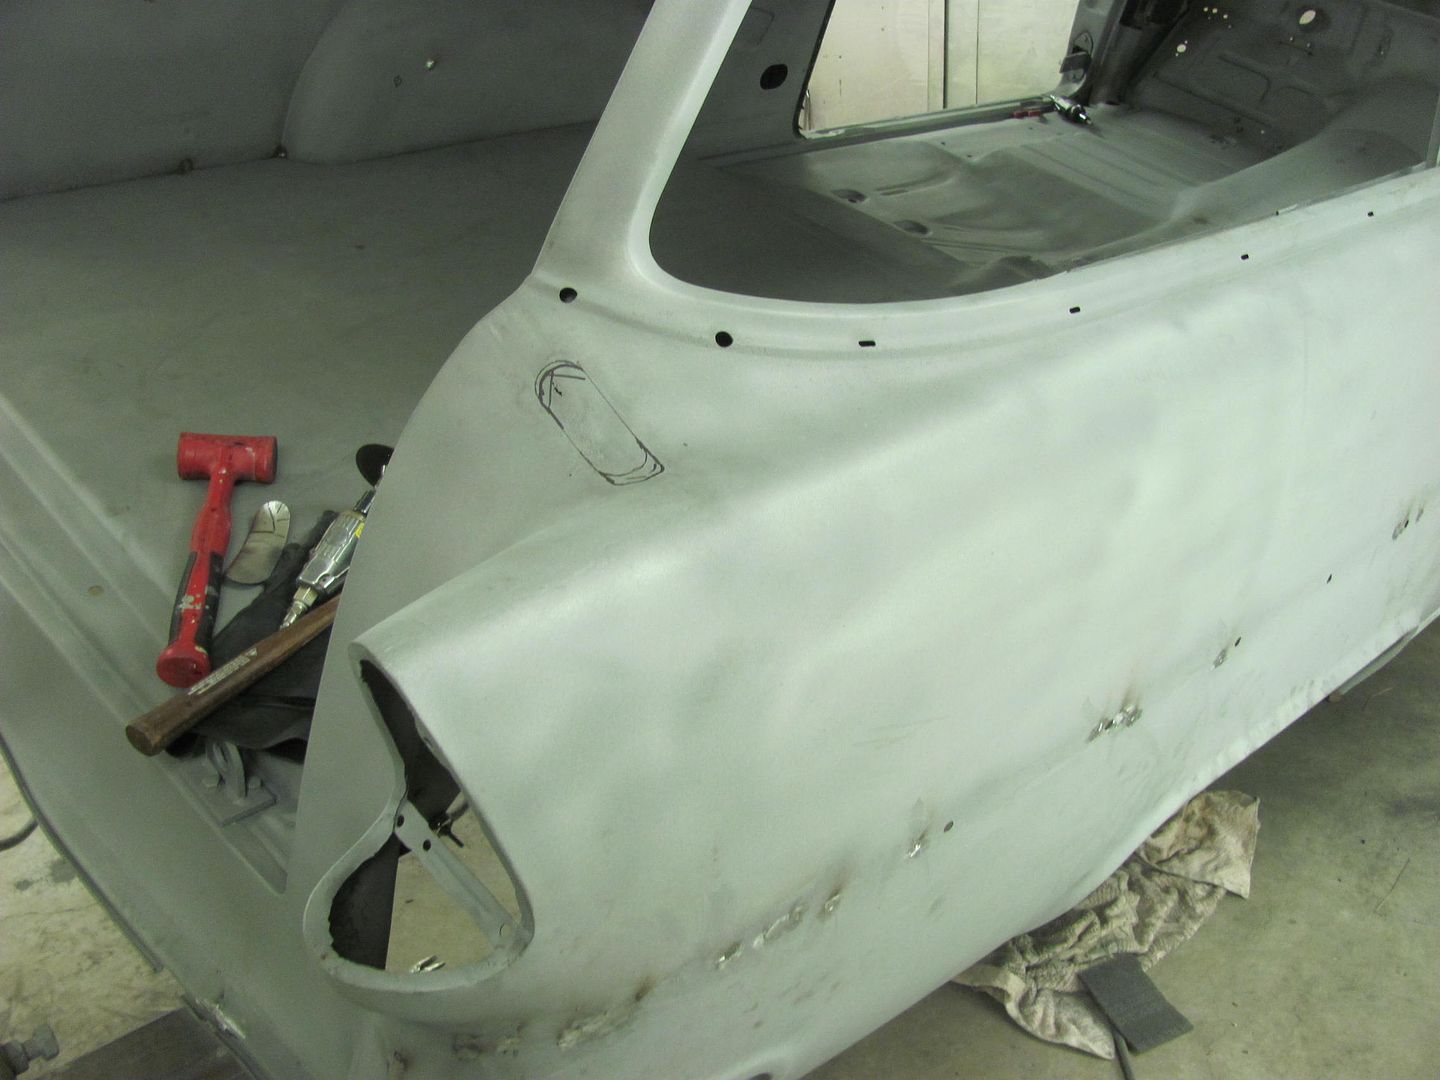 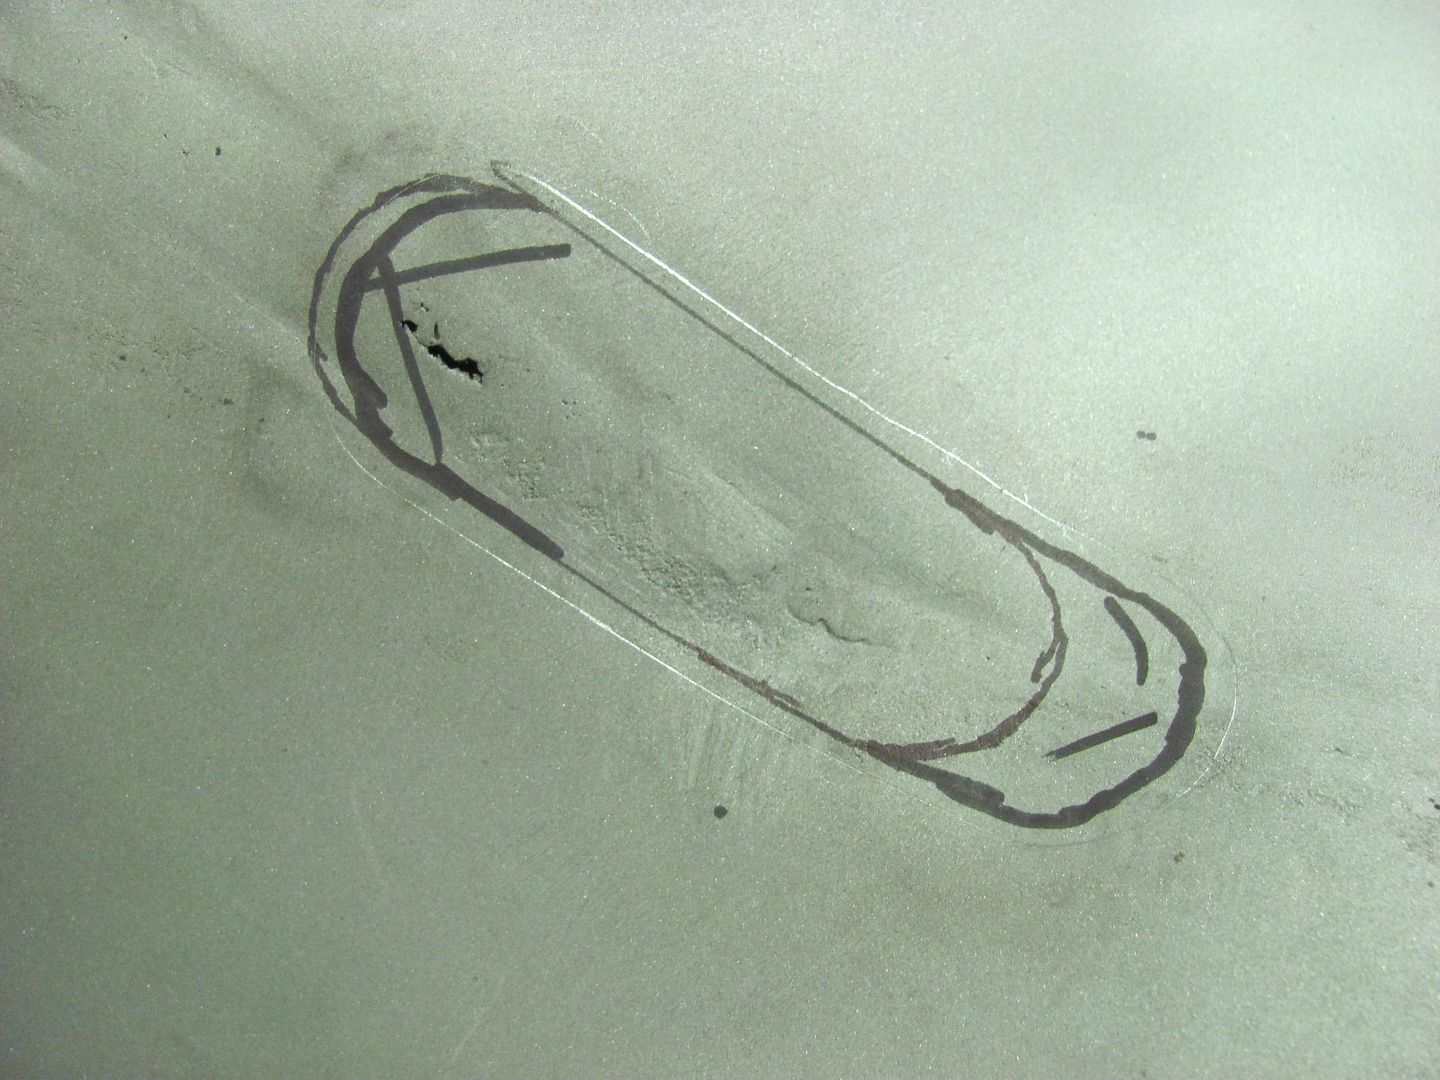 Test fitting the patch for proper contour.. 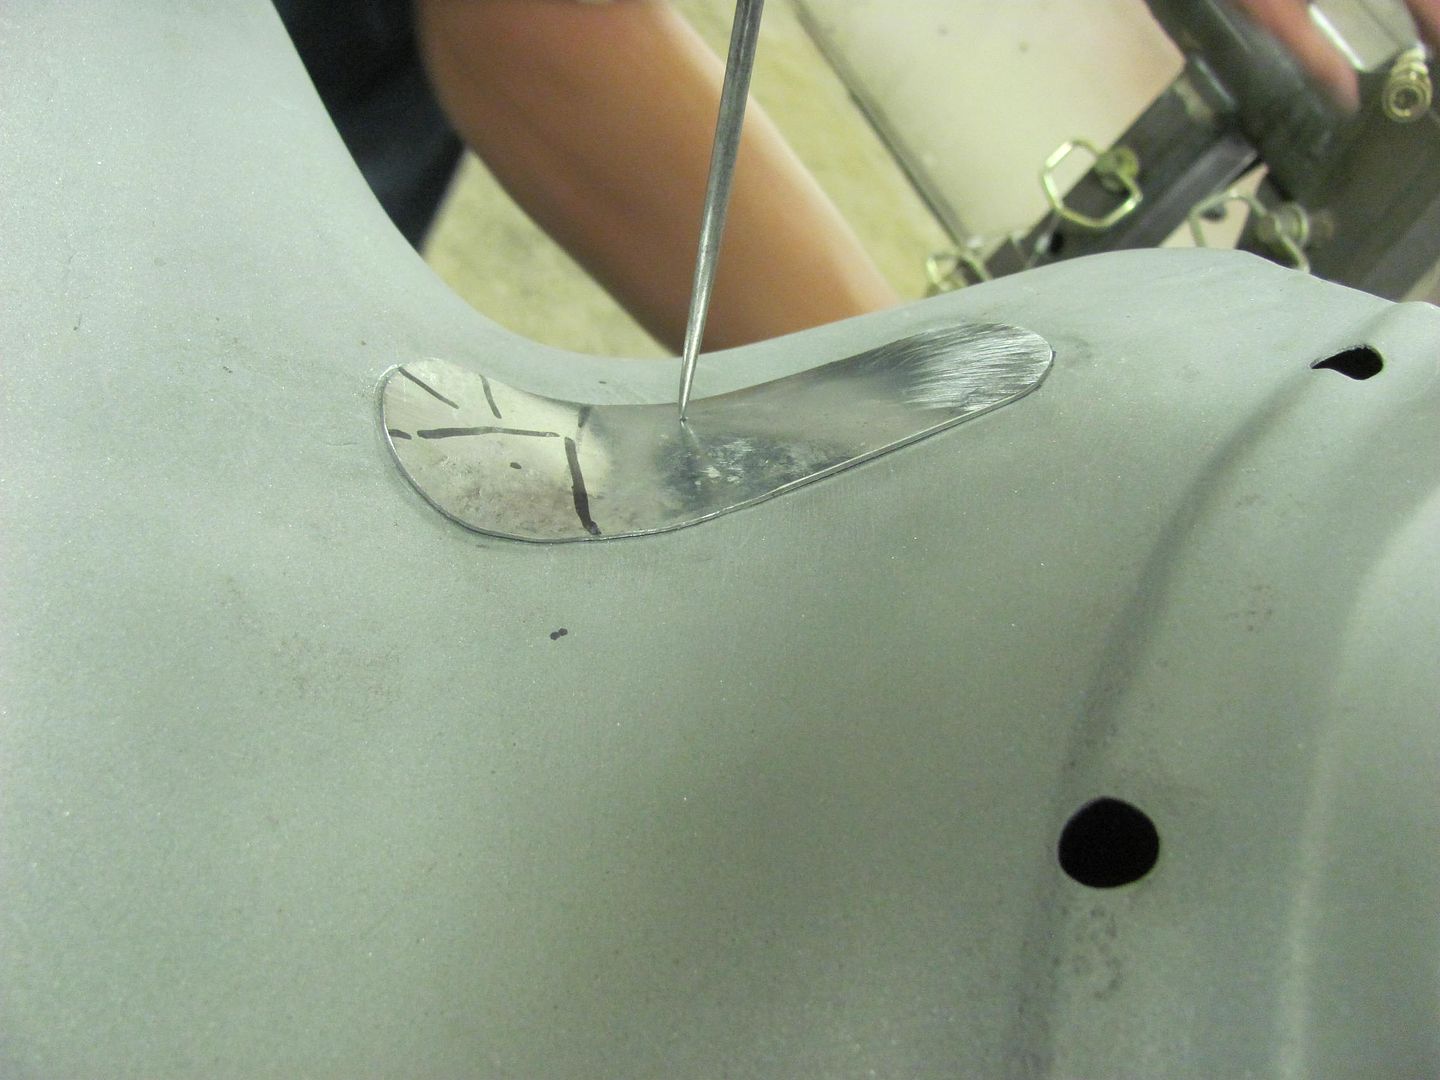 TIG welded in place... 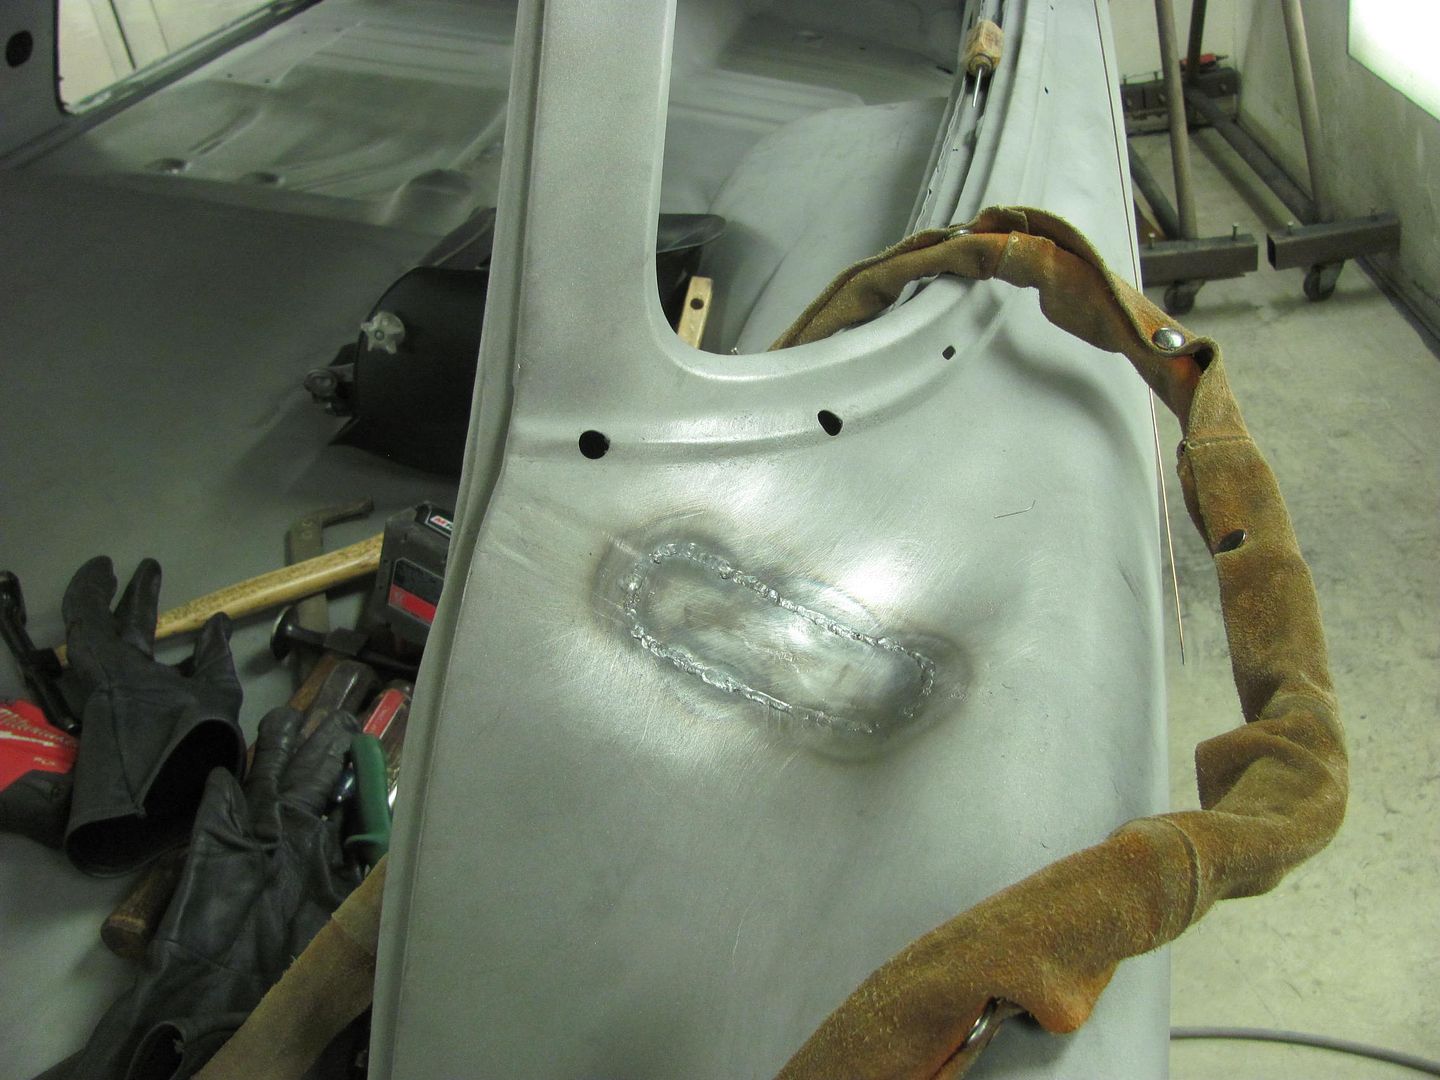 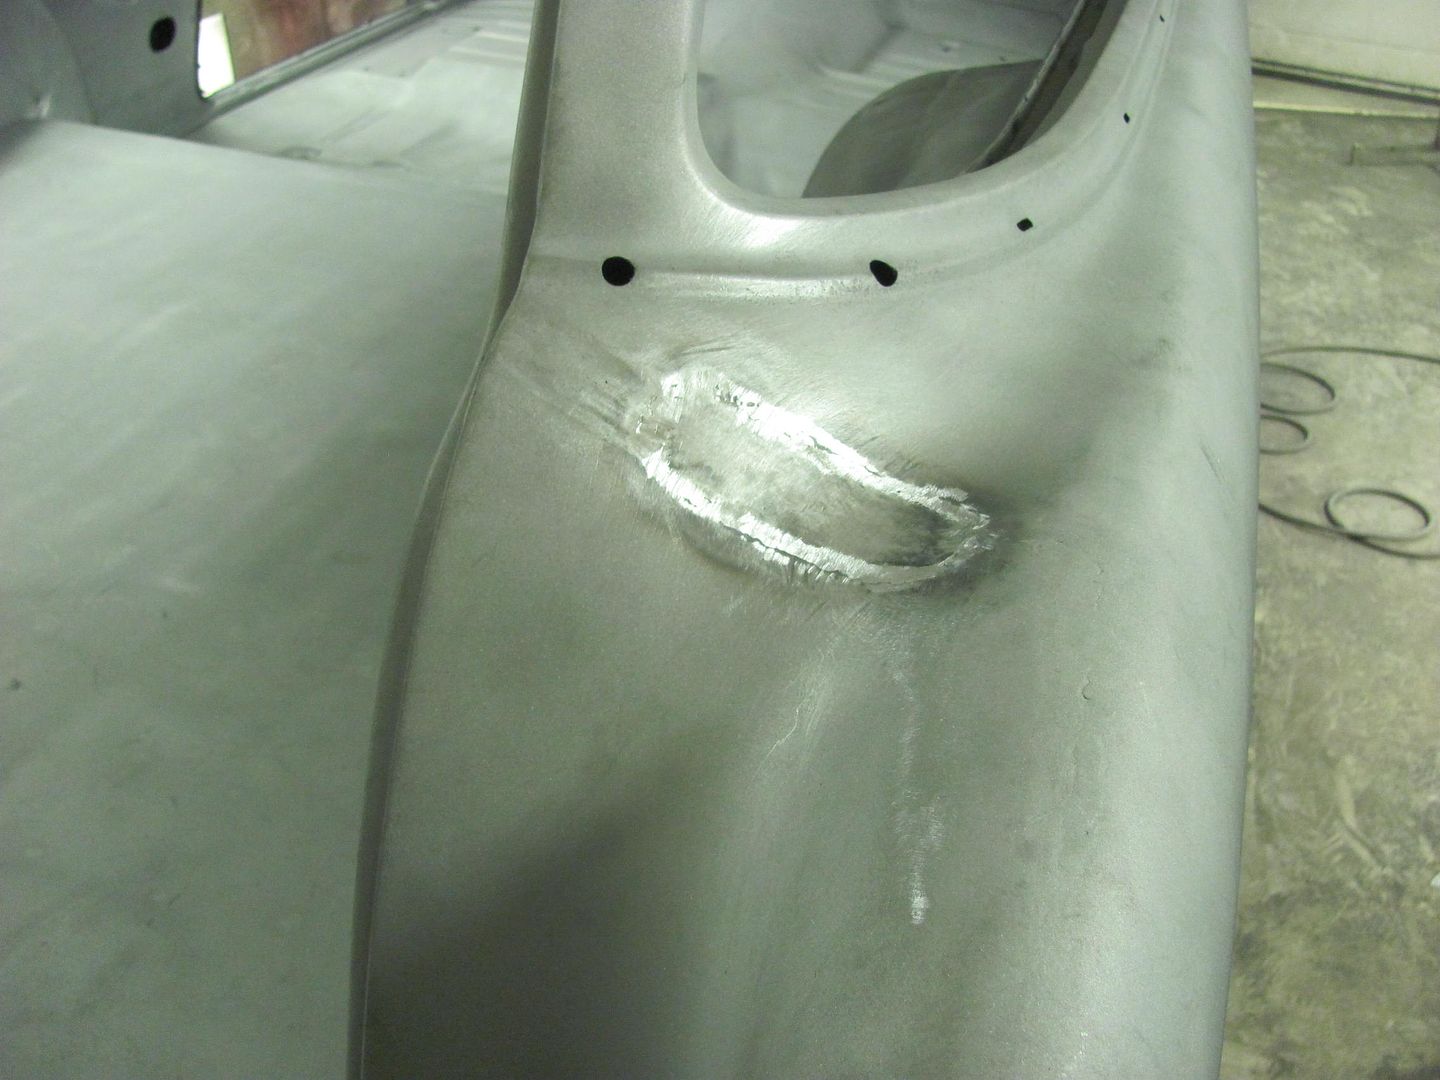 Started off with some SPI epoxy on the underside... 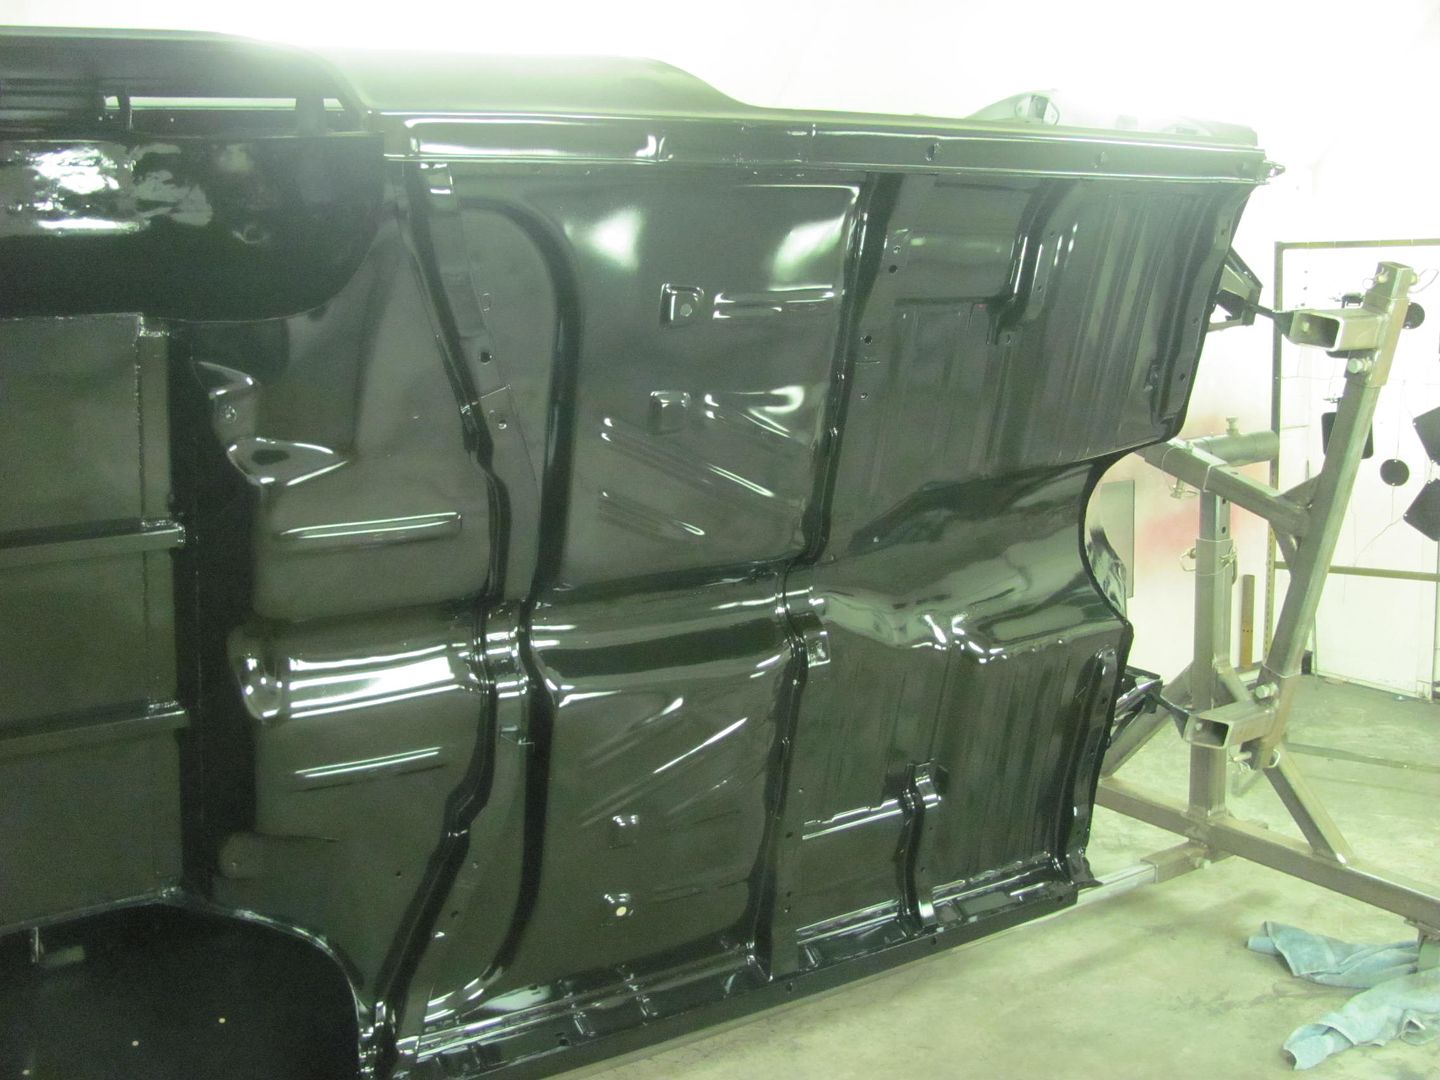 ....and then the firewall 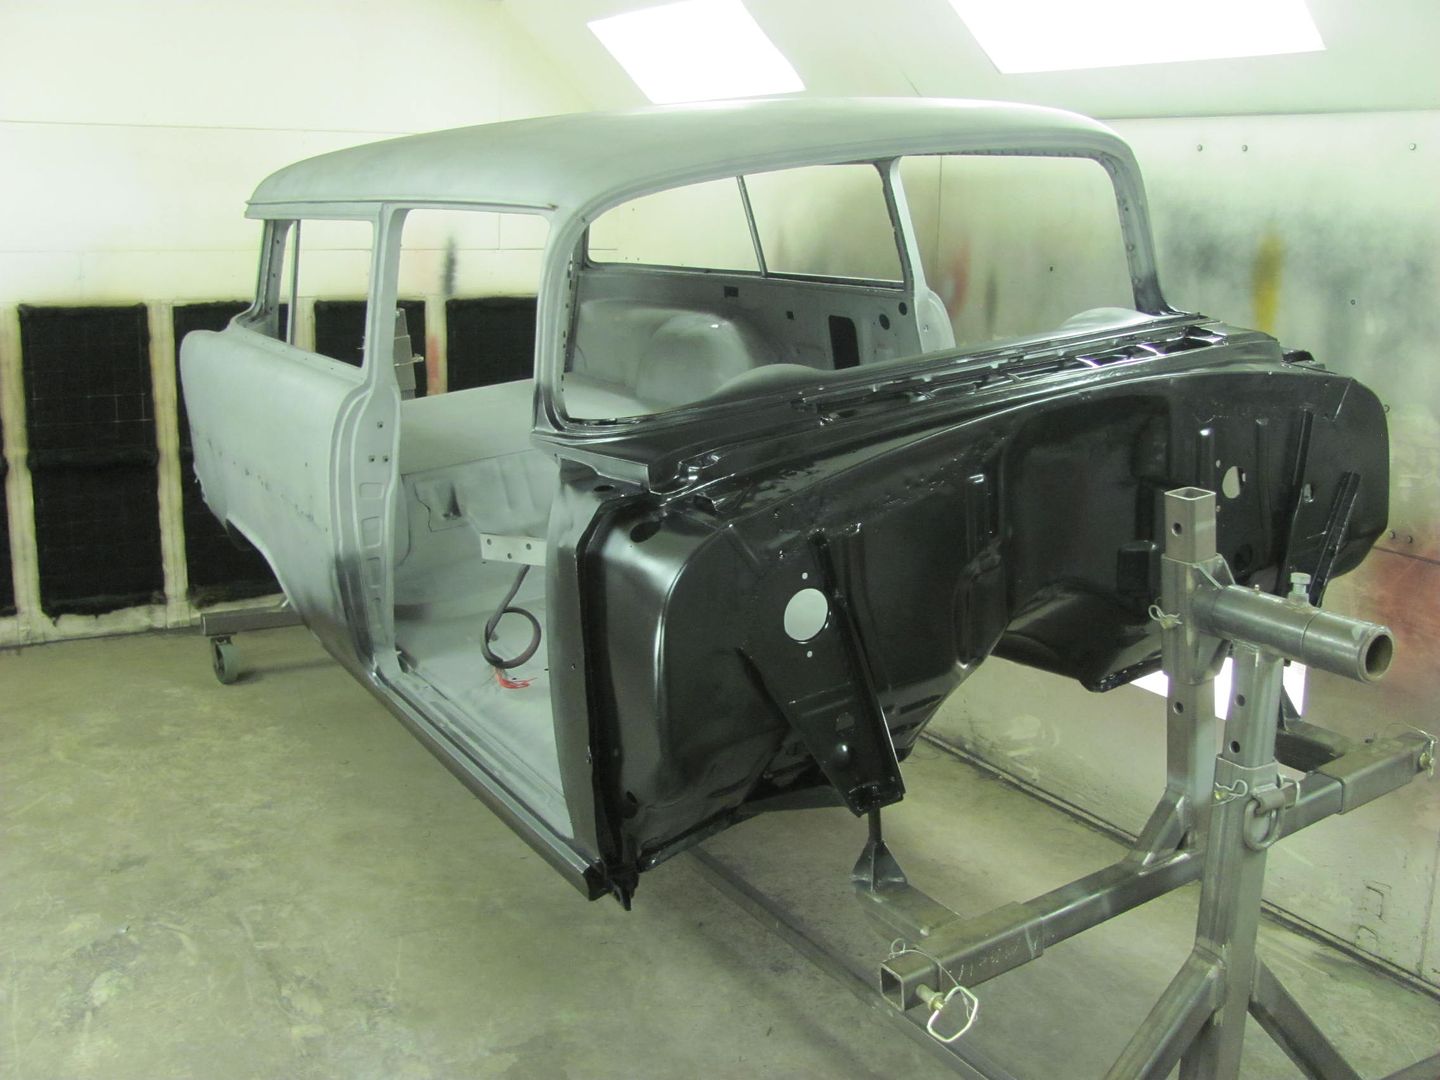 .....as well as the new glove box door skin... 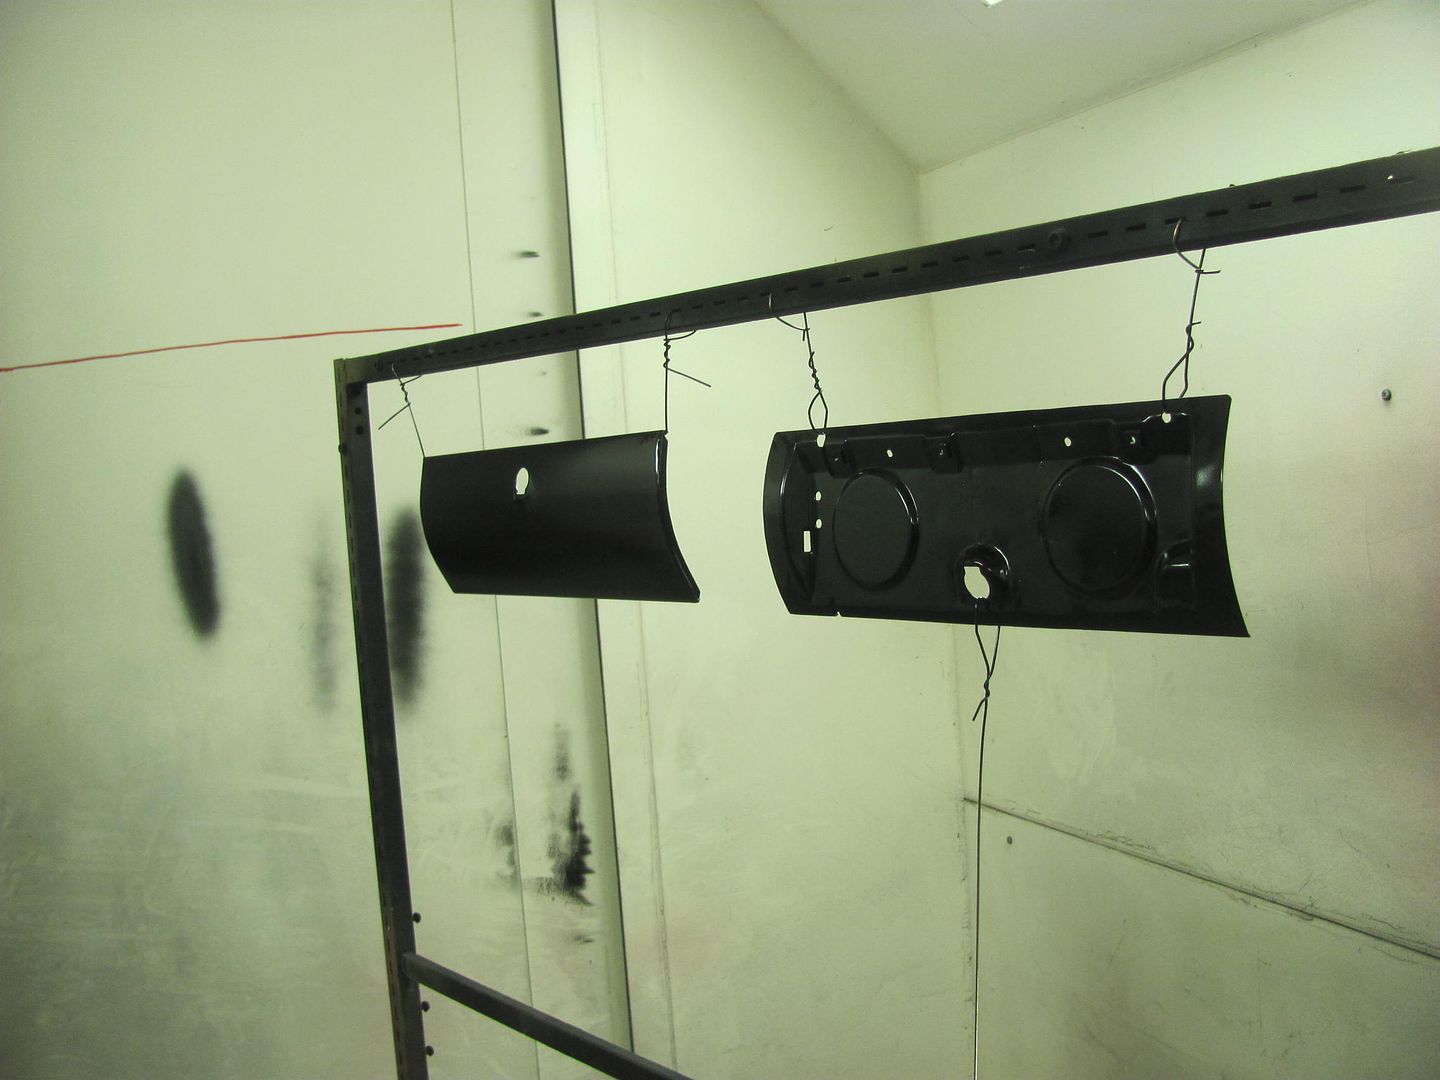 The entire interior was primed by standing through the window openings... 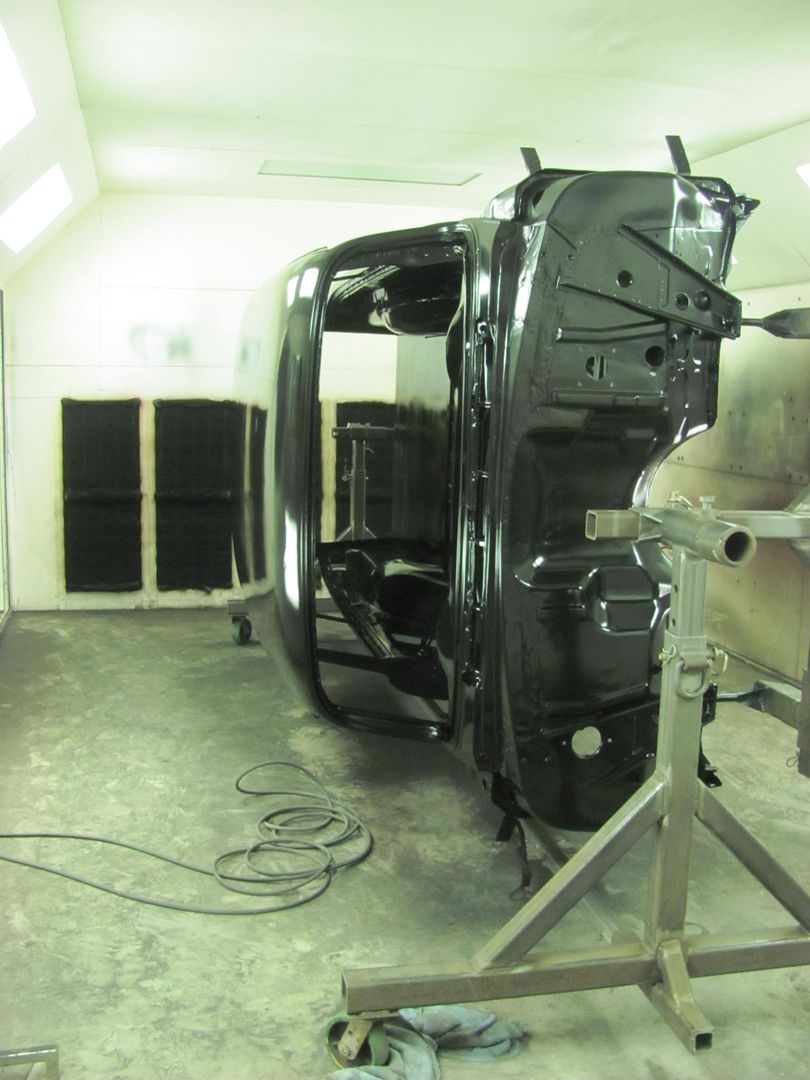 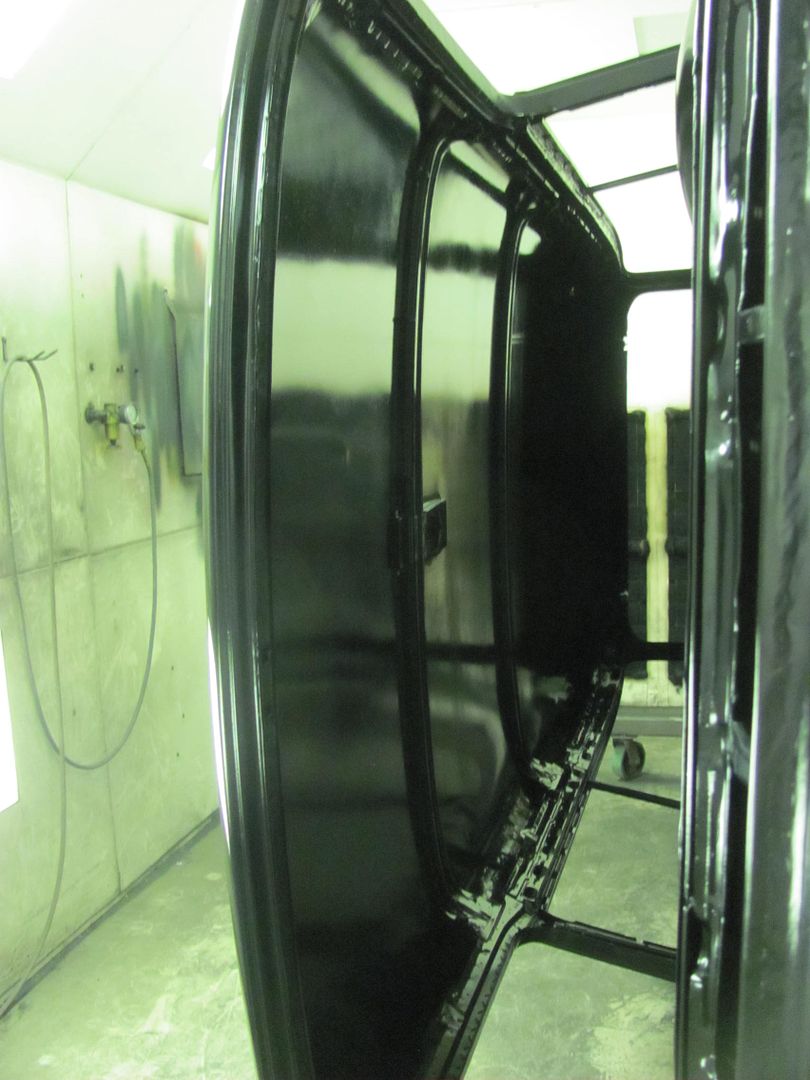 Then the outside was tackled... 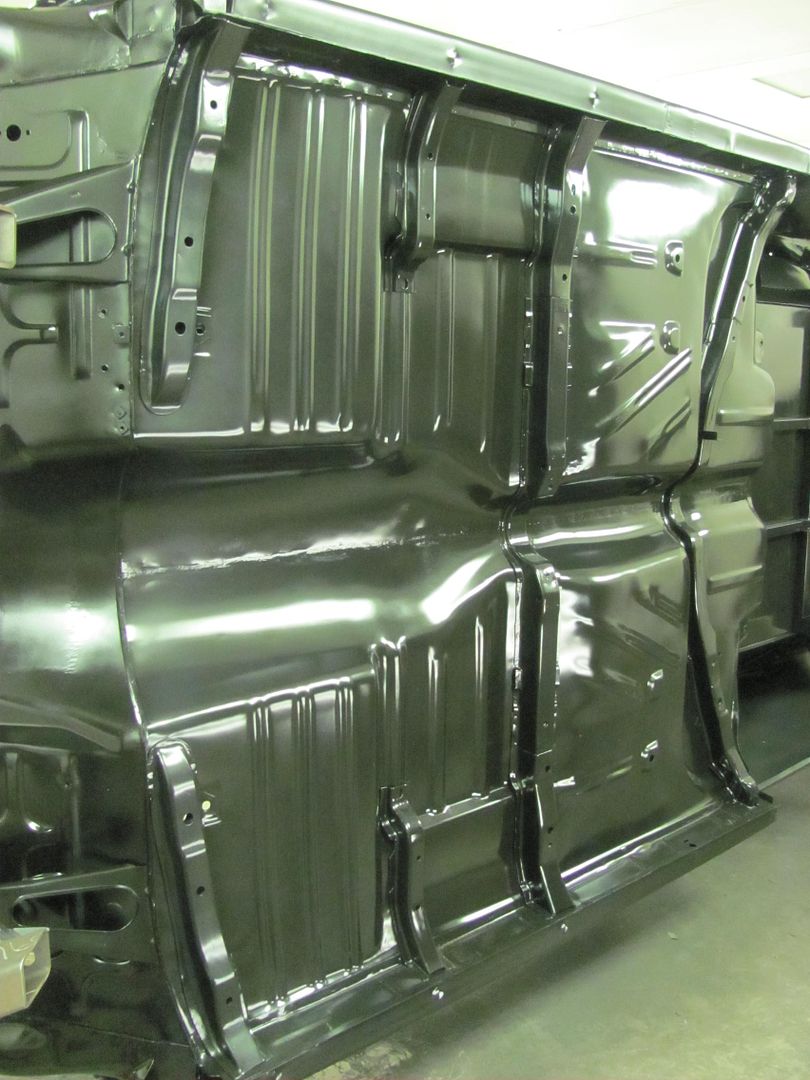 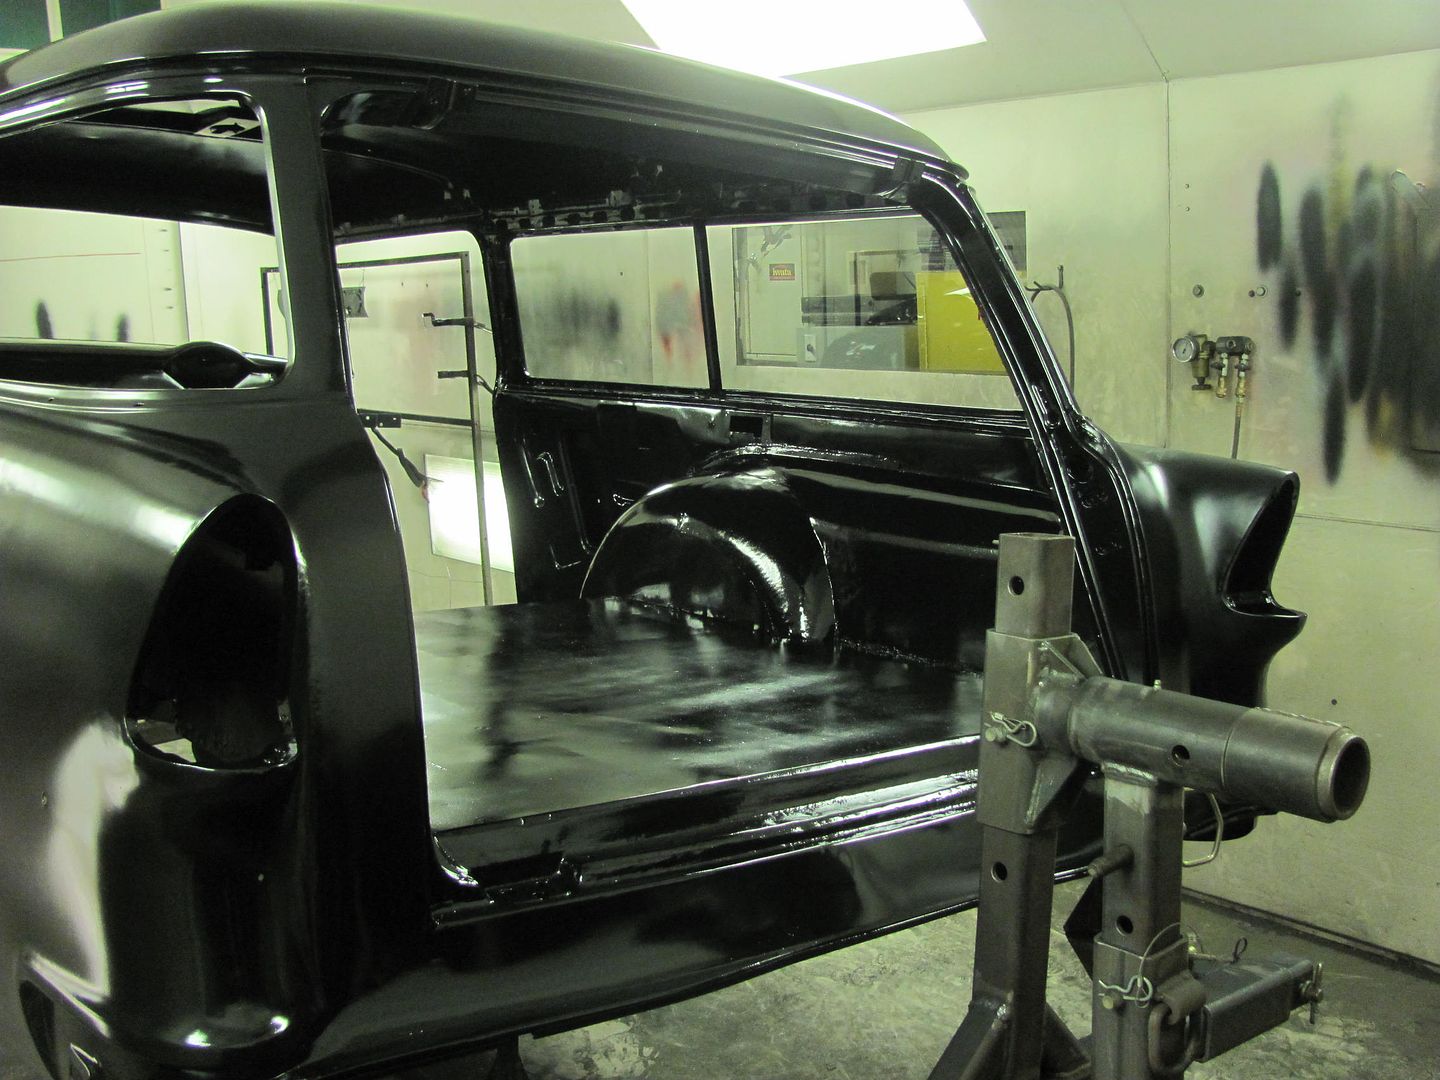 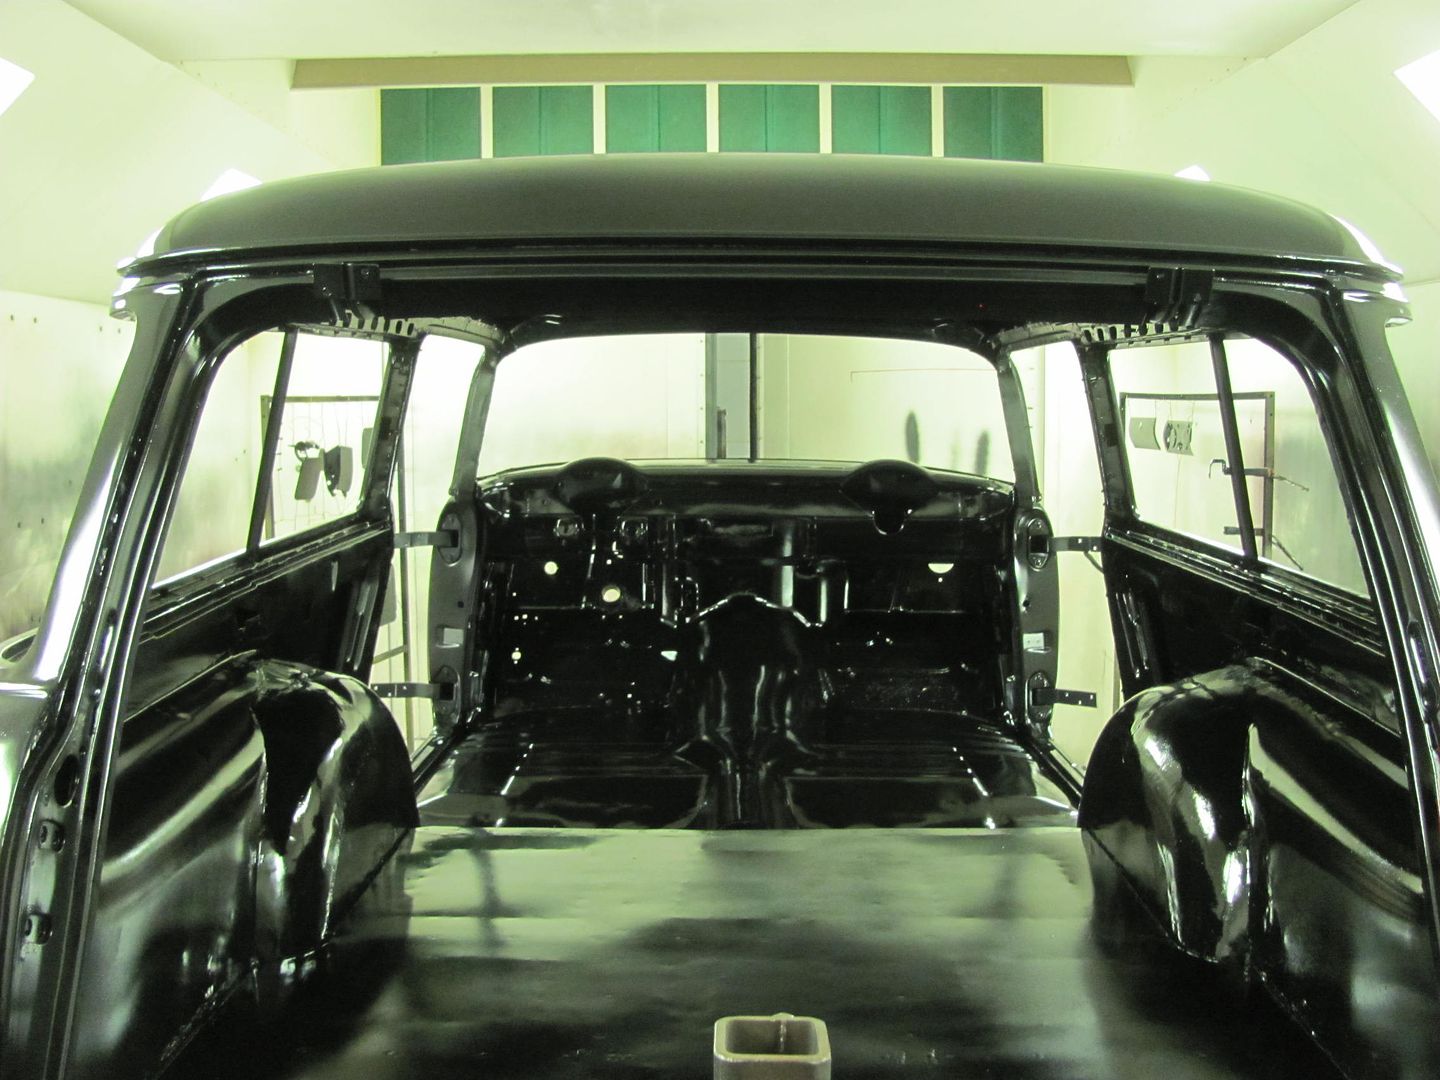 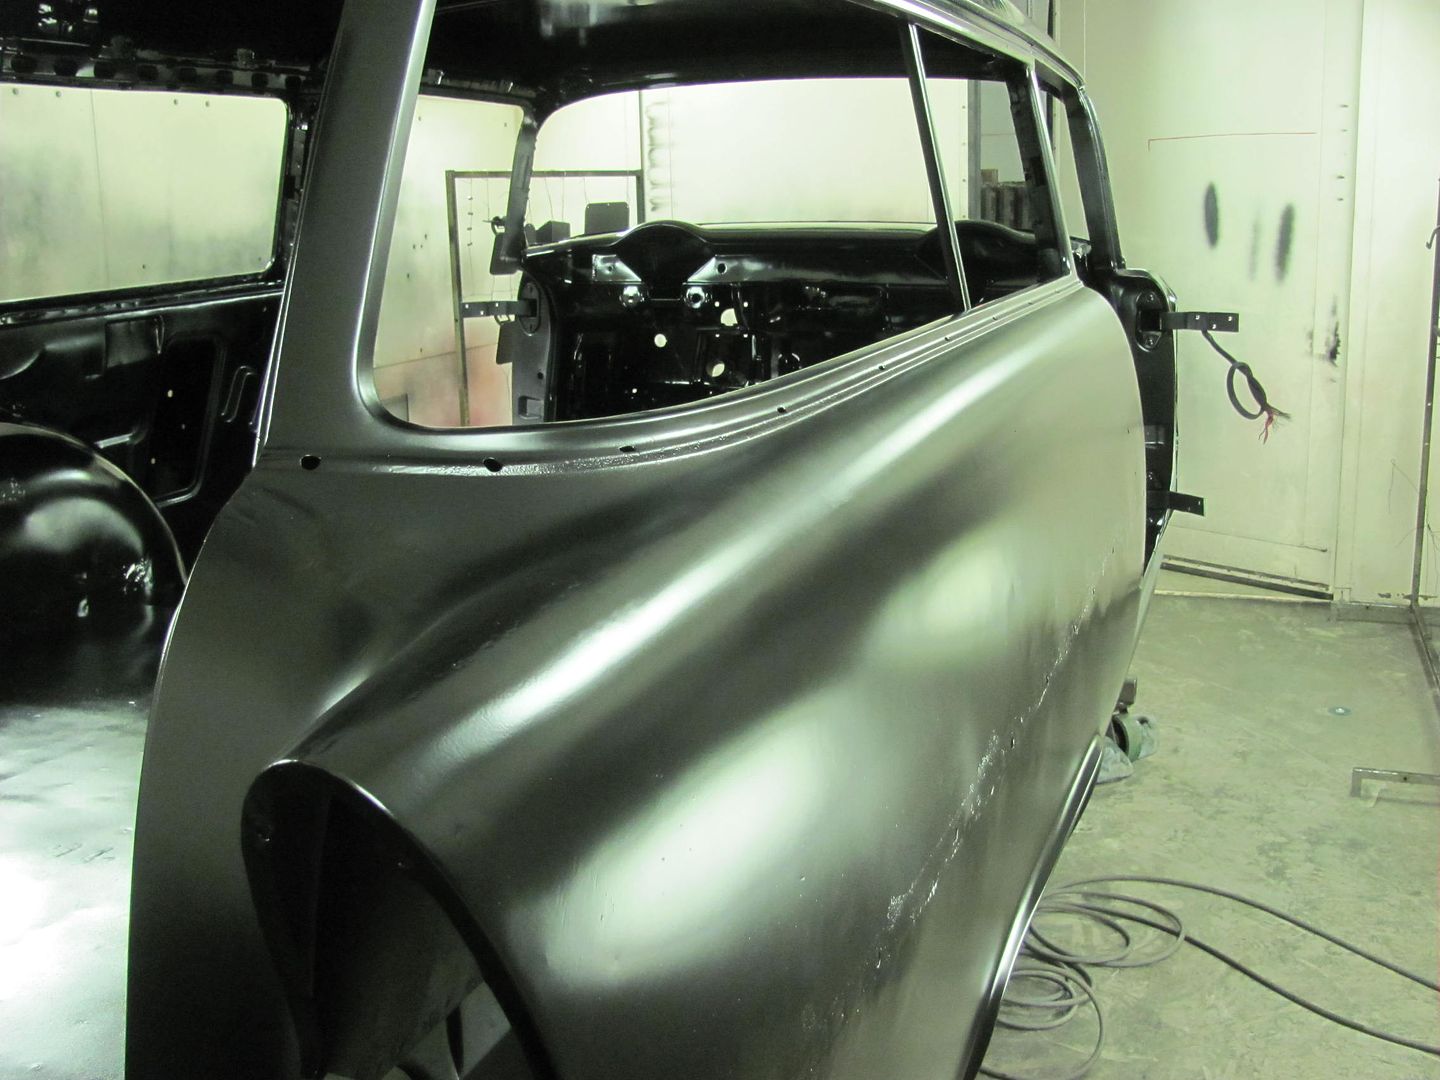 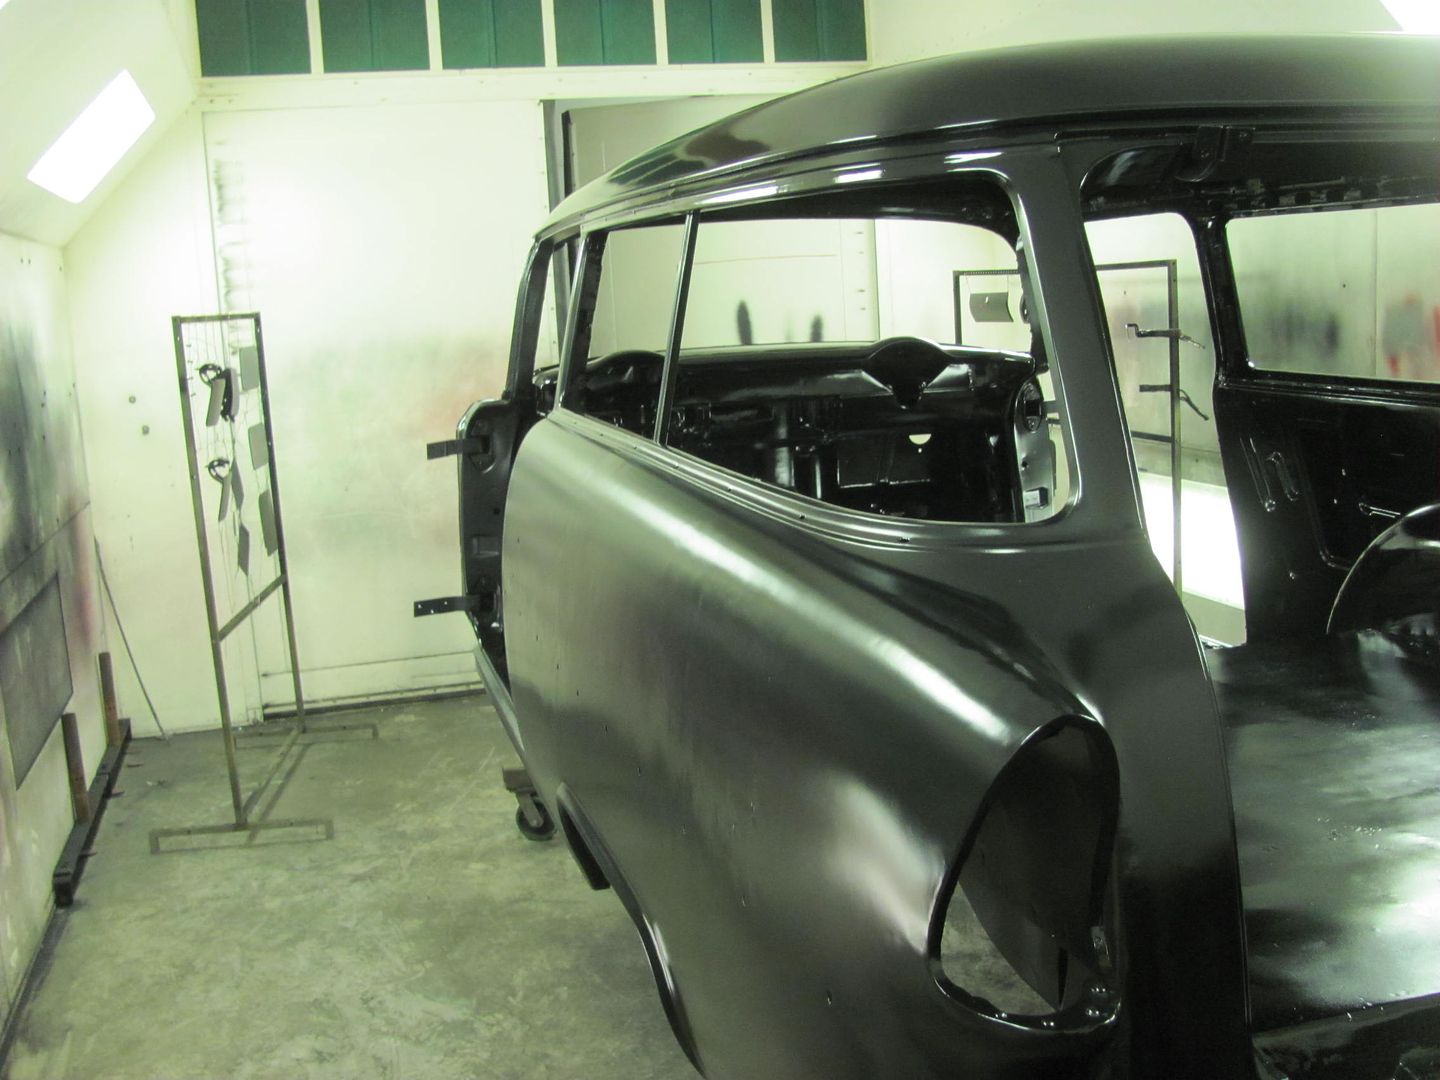
__________________
Robert |
|
|
|
|
06-26-2016, 06:26 AM
|
#3 |
|
Registered User
Join Date: Dec 2011
Location: Mobile, Alabama
Posts: 996
|
Re: 55 Wagon Progress
Uh-oh...going to primer...I'm sure going to miss the metal working lessons! dug
__________________
My Build - http://67-72chevytrucks.com/vboard/s...d.php?t=515876 |
|
|
|
|
06-28-2016, 11:21 PM
|
#4 |
|
Registered User
Join Date: Jan 2013
Location: Leonardtown, MD
Posts: 1,642
|
Re: 55 Wagon Progress
There may be a bit more metal work before all is said and done..
  Well the epoxy has cured for about three days, time to put the glove box back together... The adjacent areas are scuffed for some official door skin adhesive.. 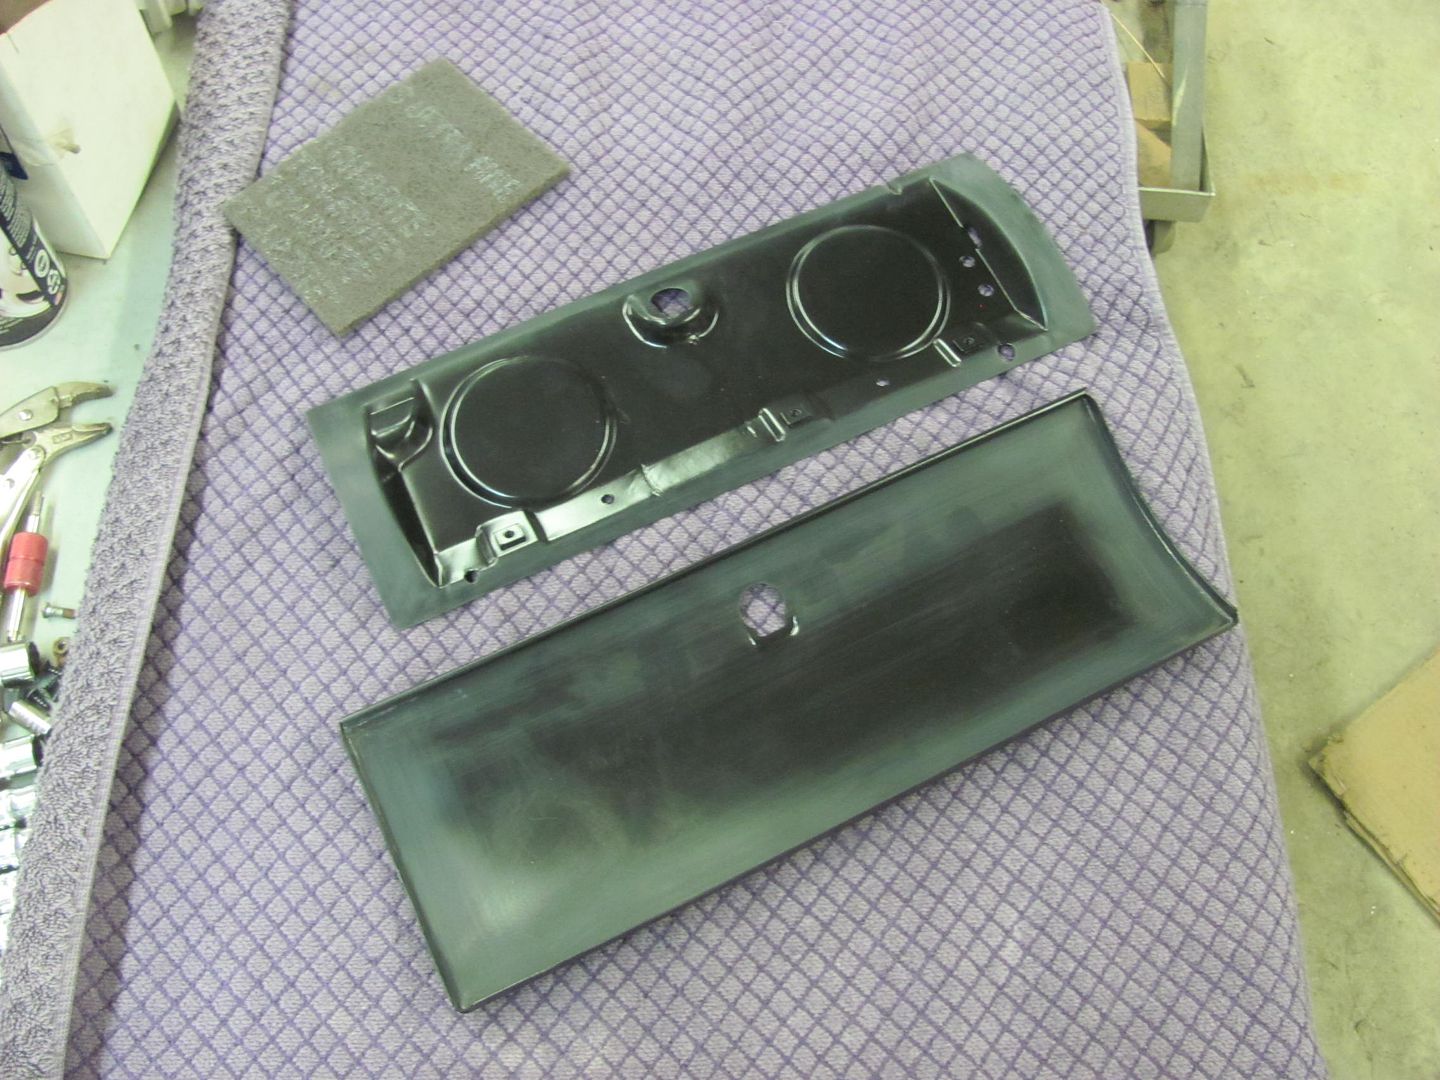 ....in the form of some leftover primer from this weekend.. 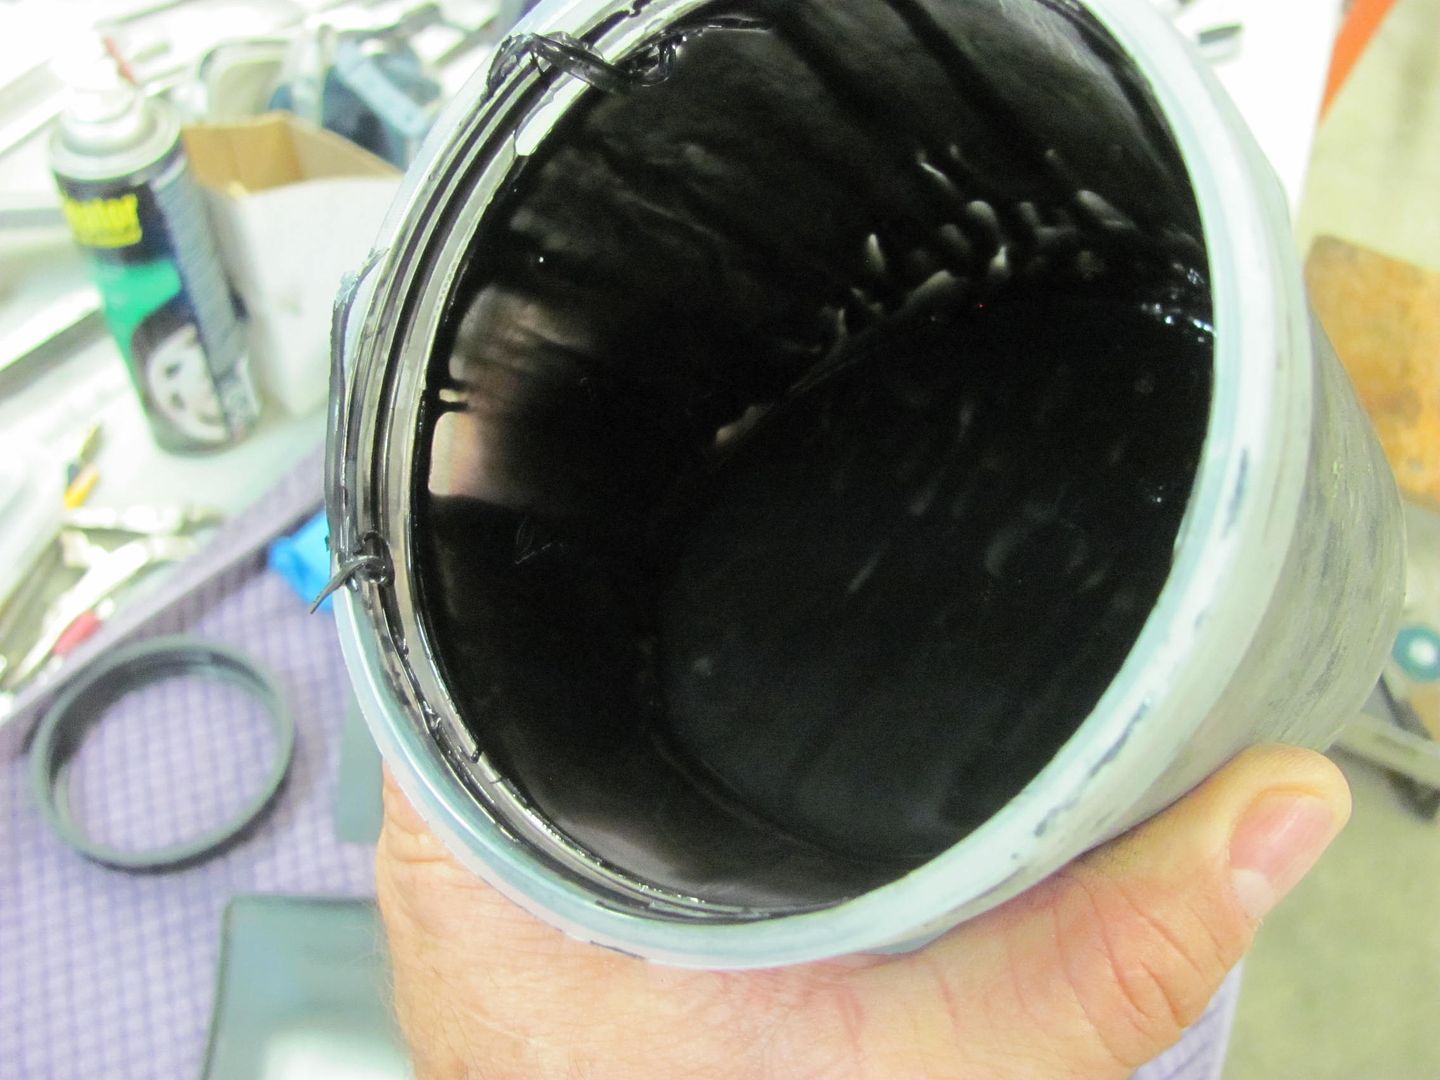 Good thing this gets covered up... 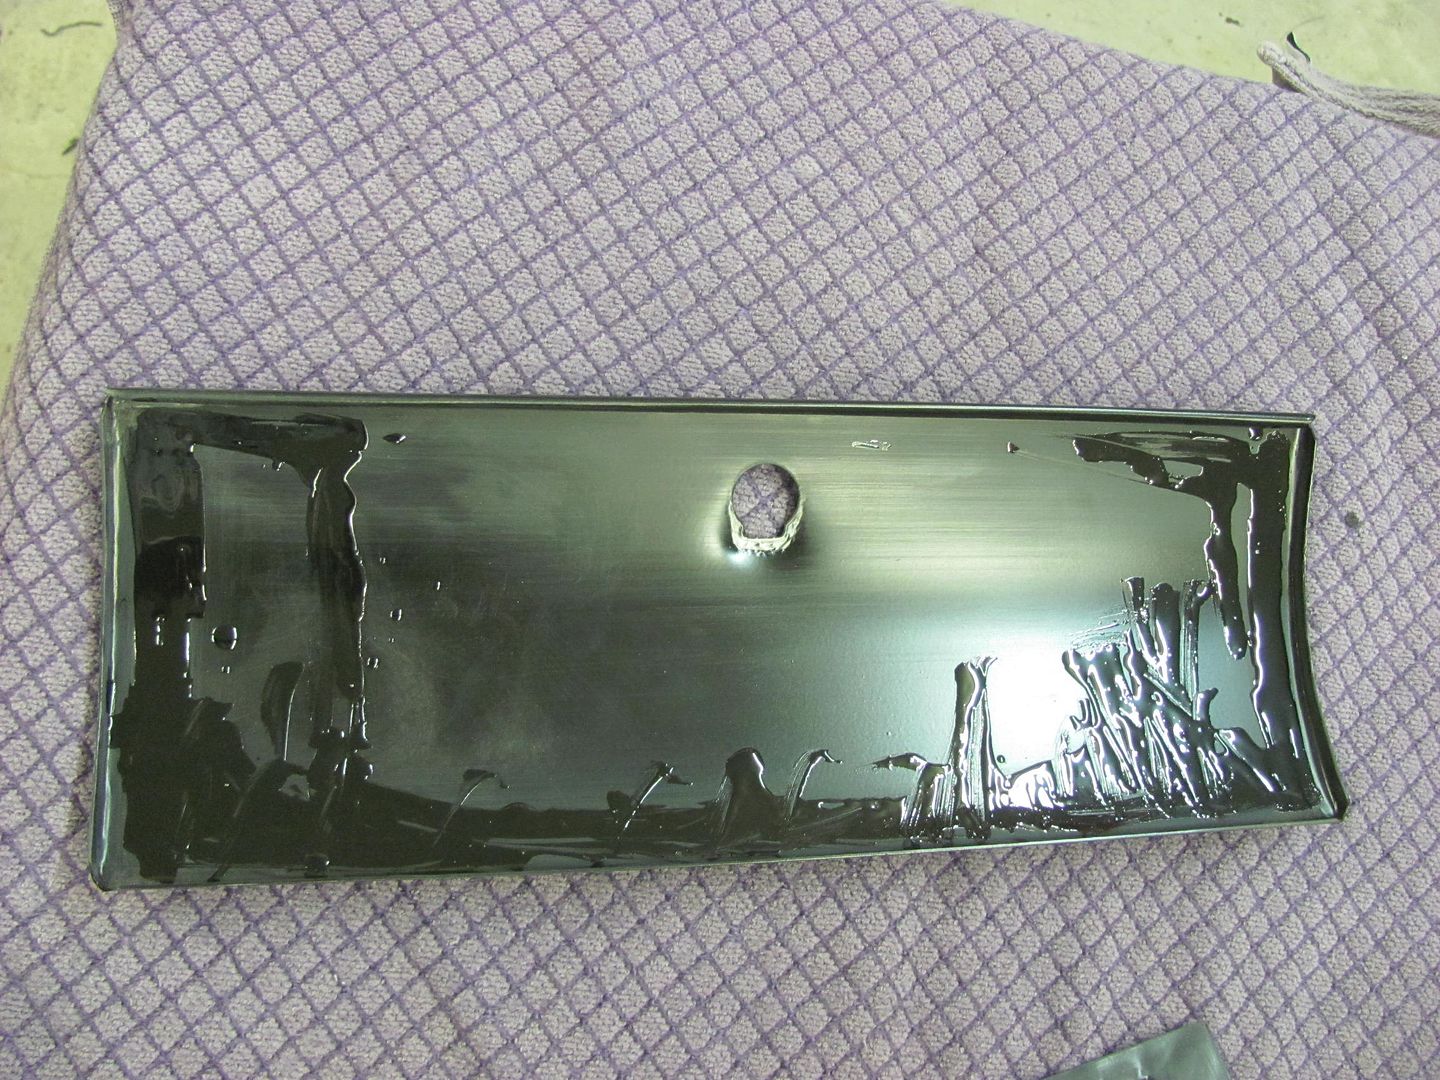 Using the door skin hammer on the leather shot bag, the ends are folded first... 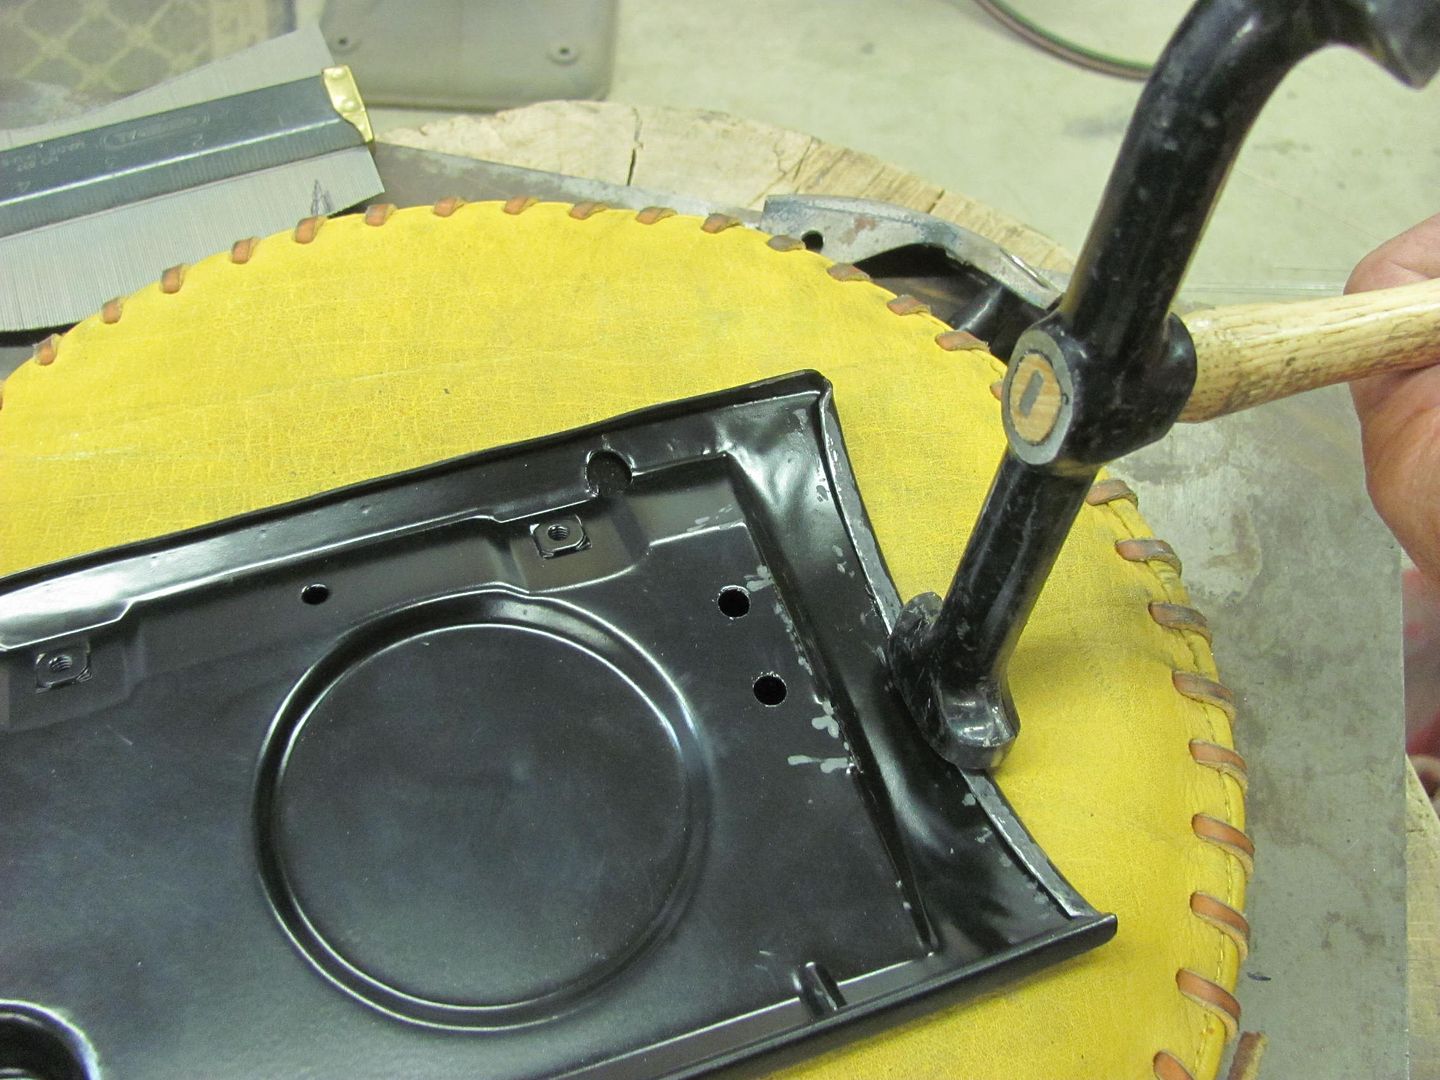 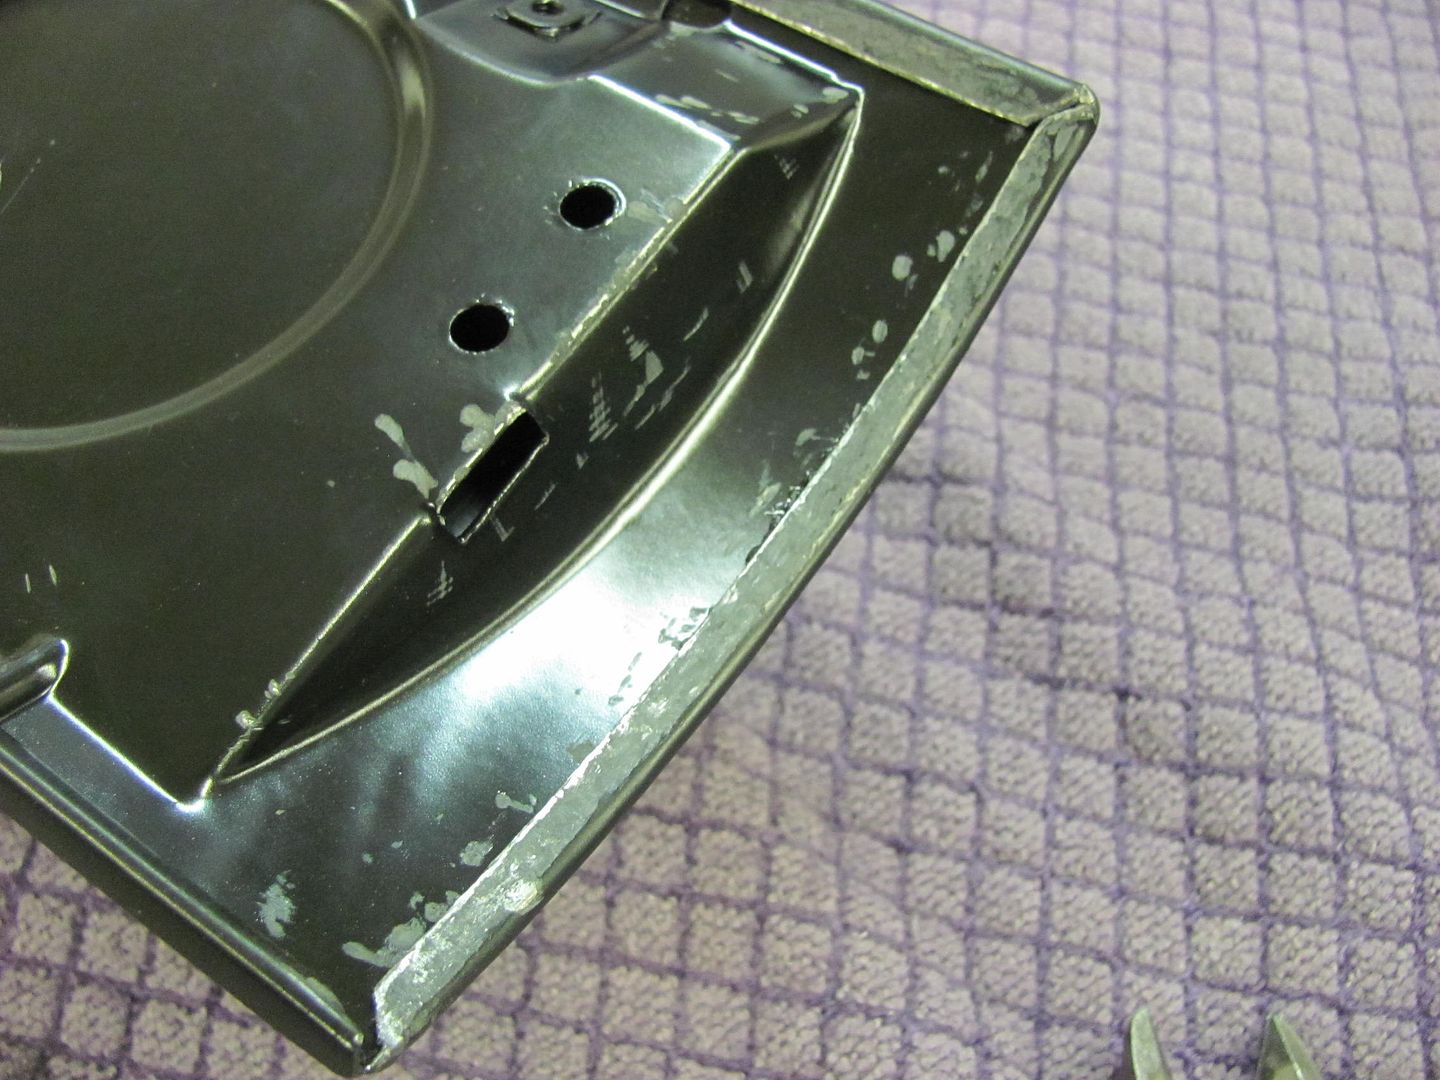 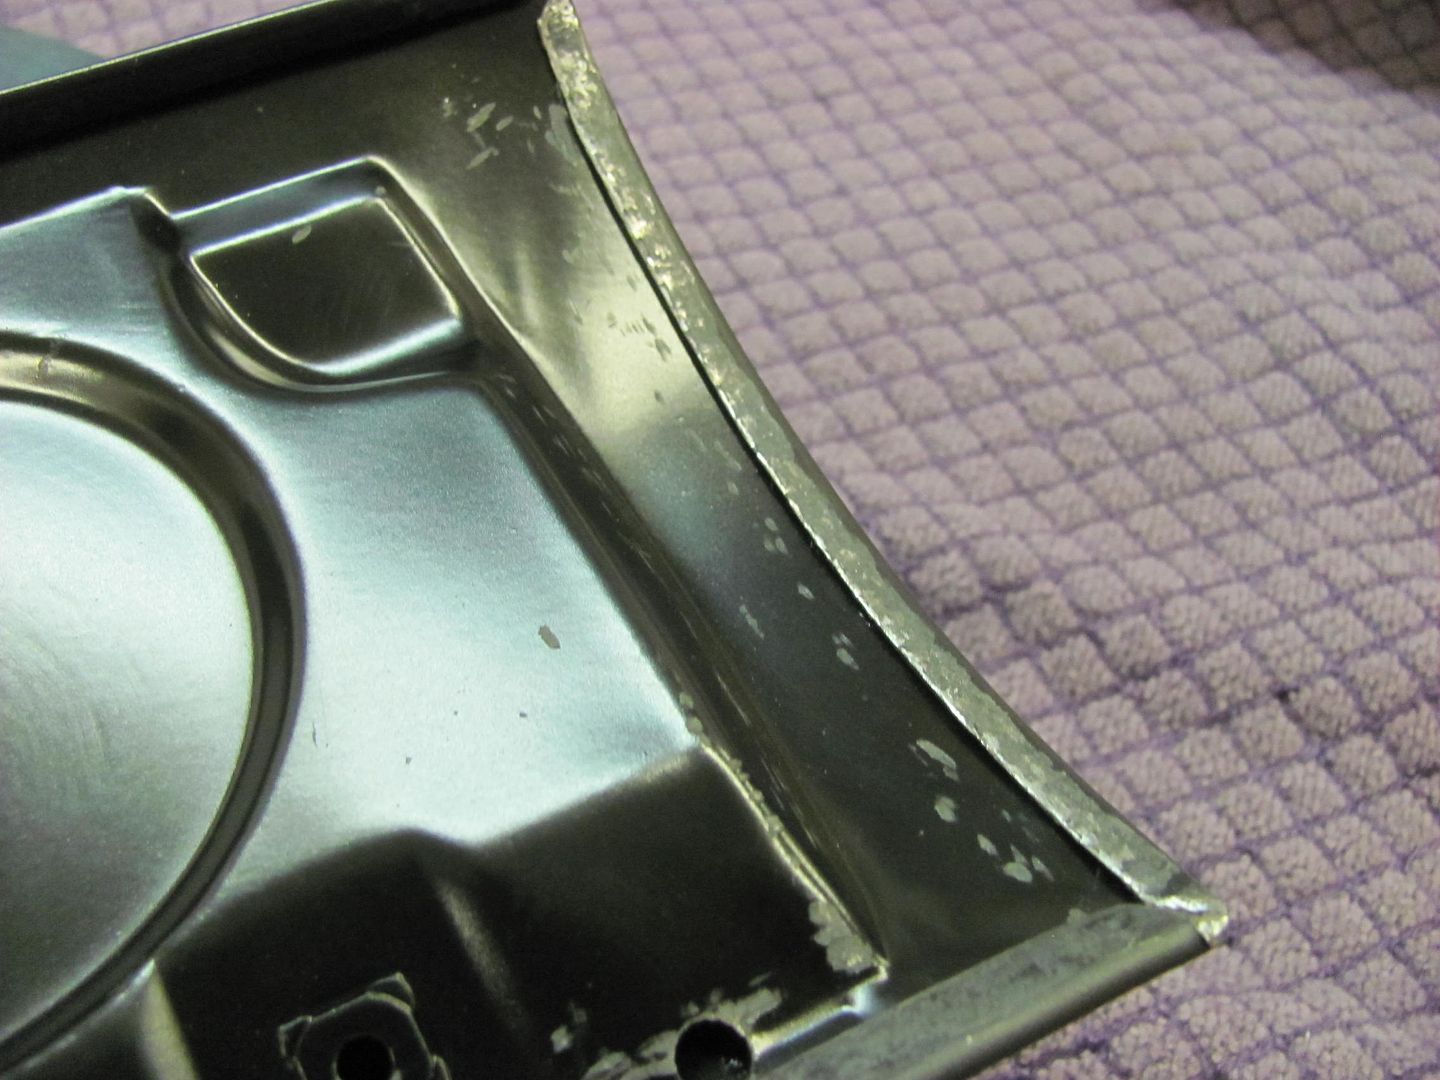 and then the bottom flange... 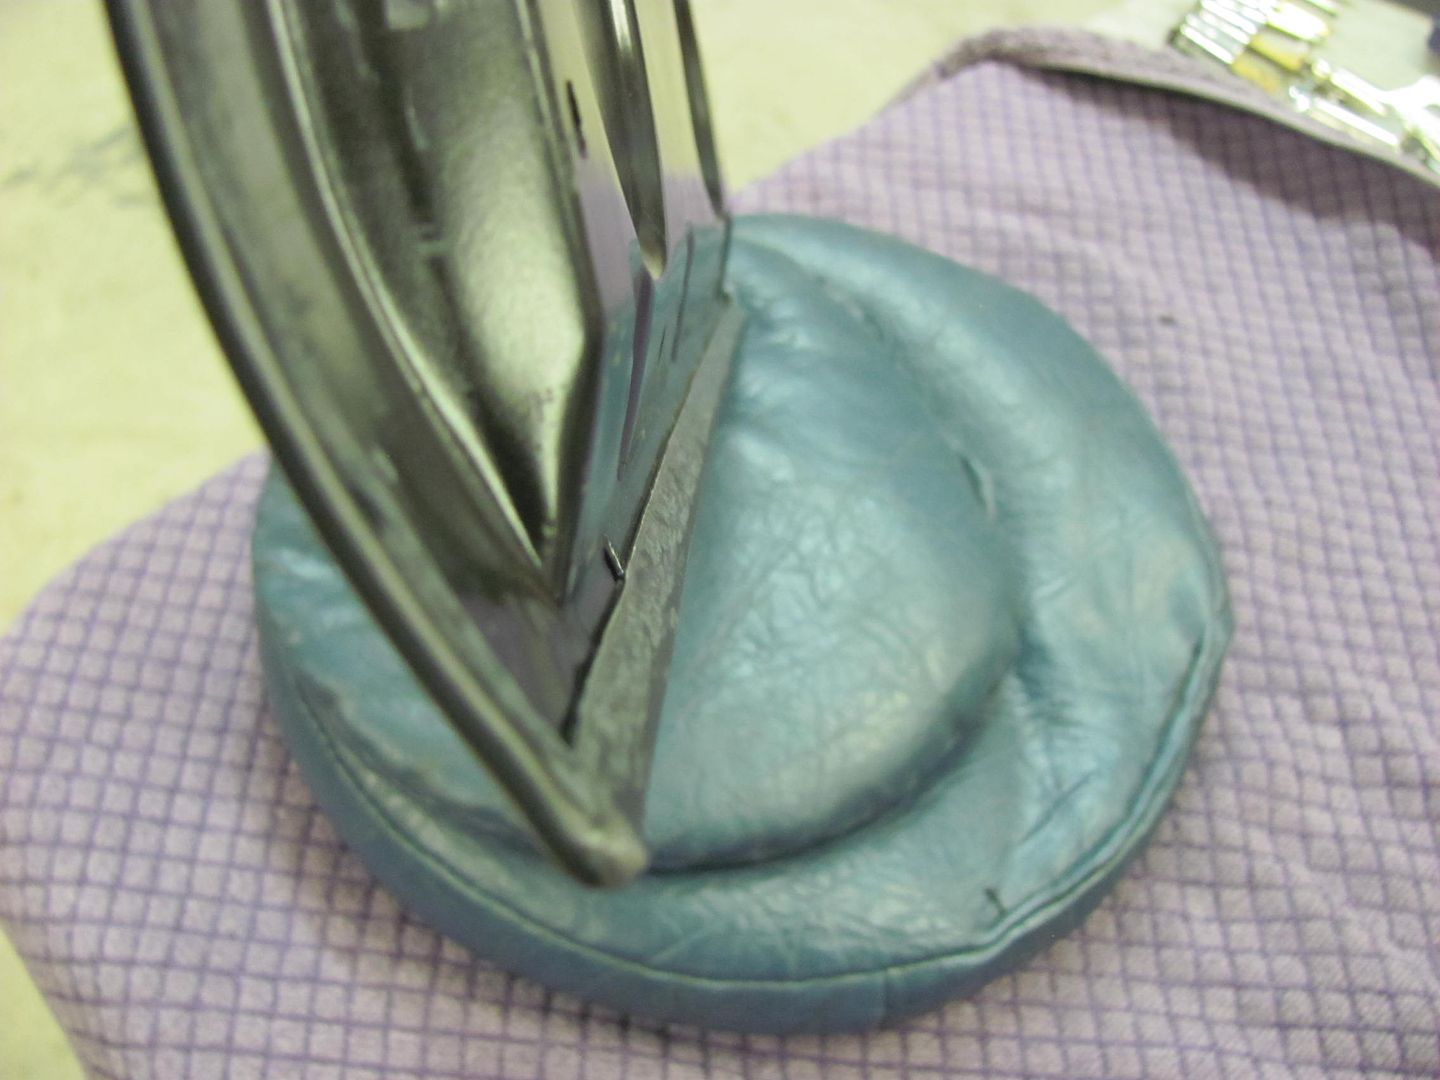 All together... 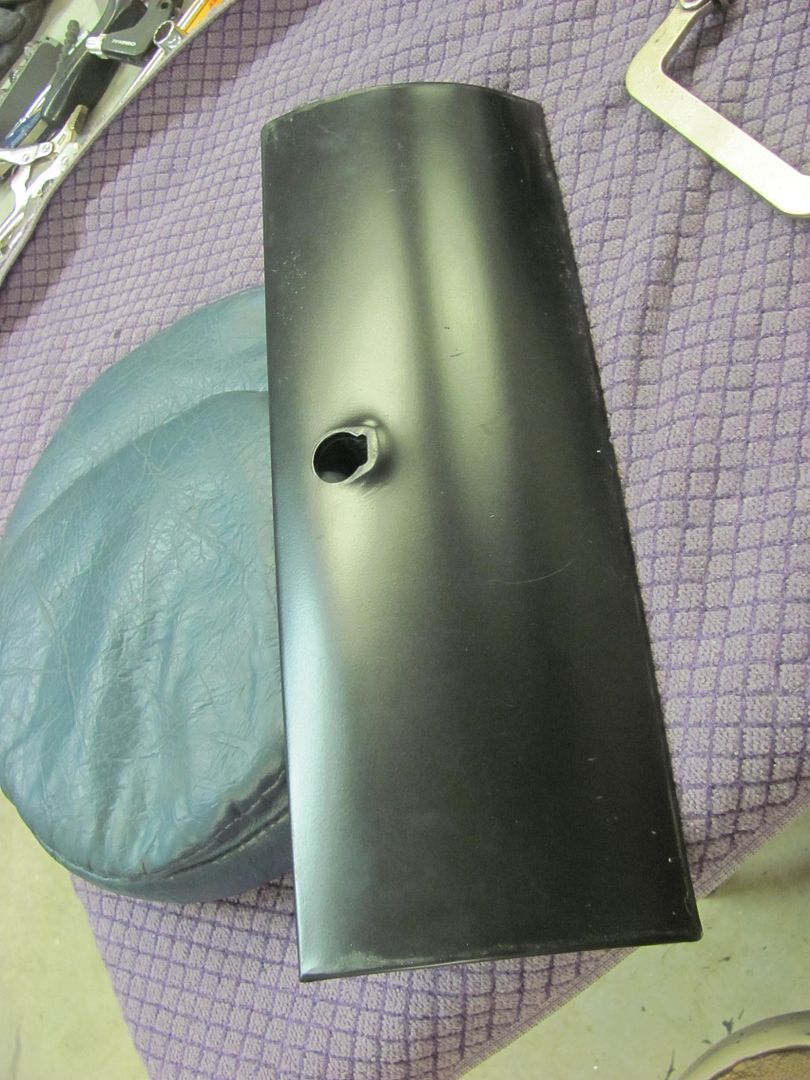
__________________
Robert |
|
|
|
|
07-07-2016, 11:46 PM
|
#5 |
|
Registered User
Join Date: Jan 2013
Location: Leonardtown, MD
Posts: 1,642
|
Re: 55 Wagon Progress
Got a "requirement" for some bead detail work and don't need the panels losing any of their shape. The bead roller does a nice job, but the forming process is more of a relocation of the metal from elsewhere, which would cause a panel to possibly lose some crown.
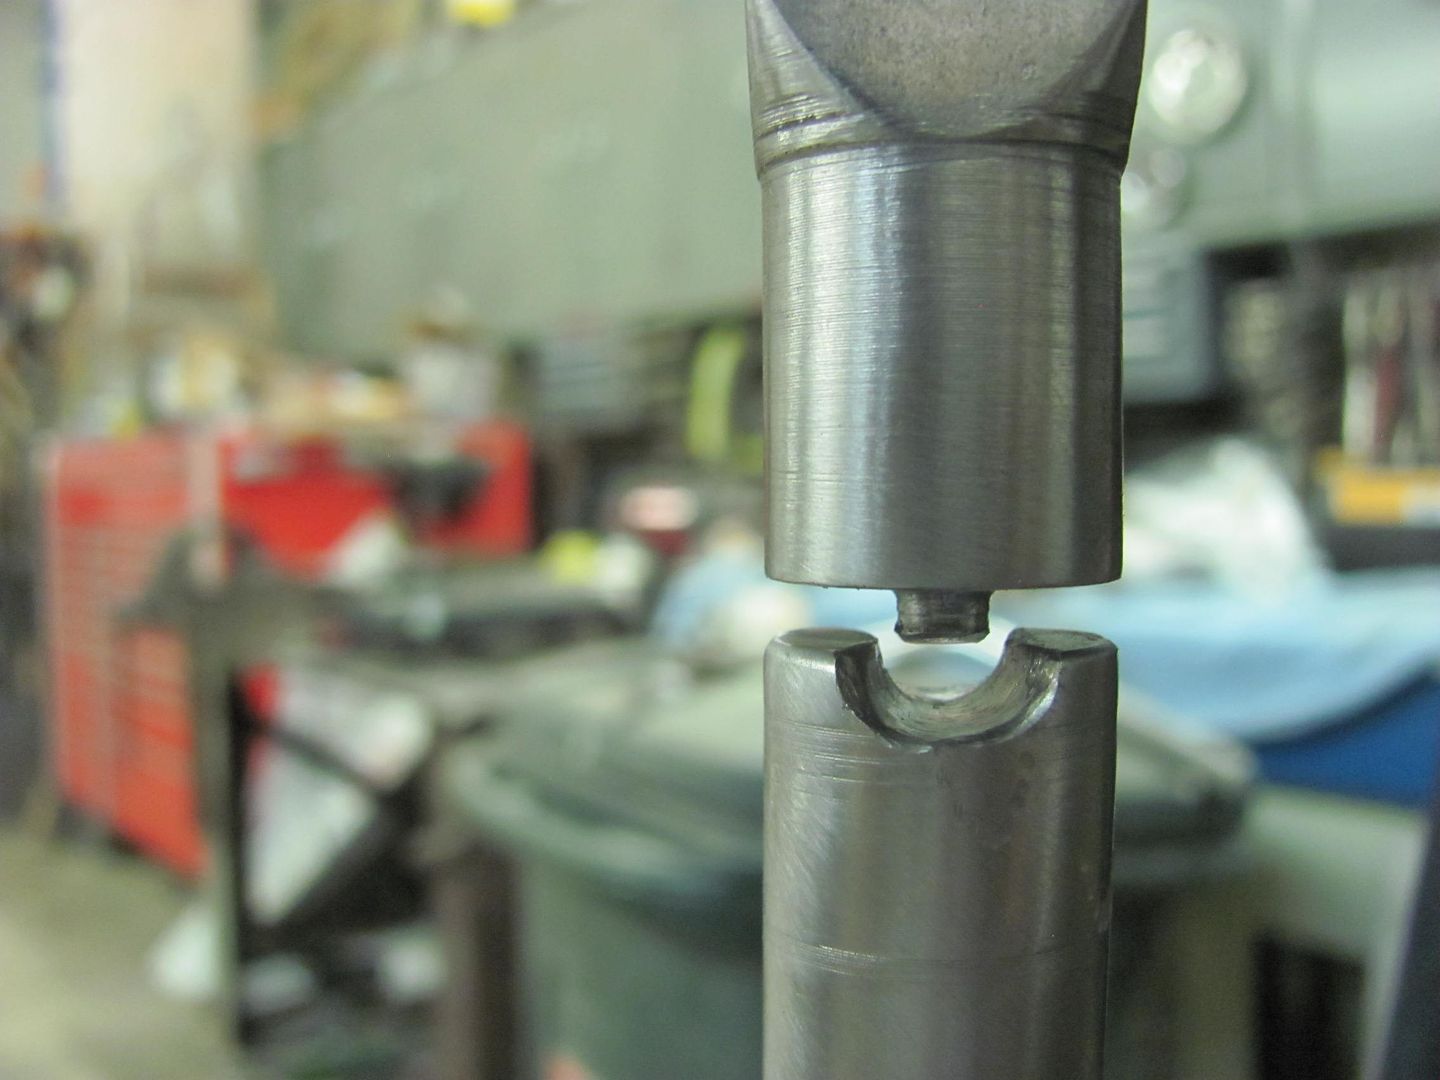
The Lennox (Pullmax) as a reciprocating machine does a better job of stretching the metal as the bead is formed, so there is less issue of losing panel crown. Here we're making the female die in the South Bend milling machine.  Ball end milling bit clamped in the chuck, square stock clamped in the Aloris tool holder.. 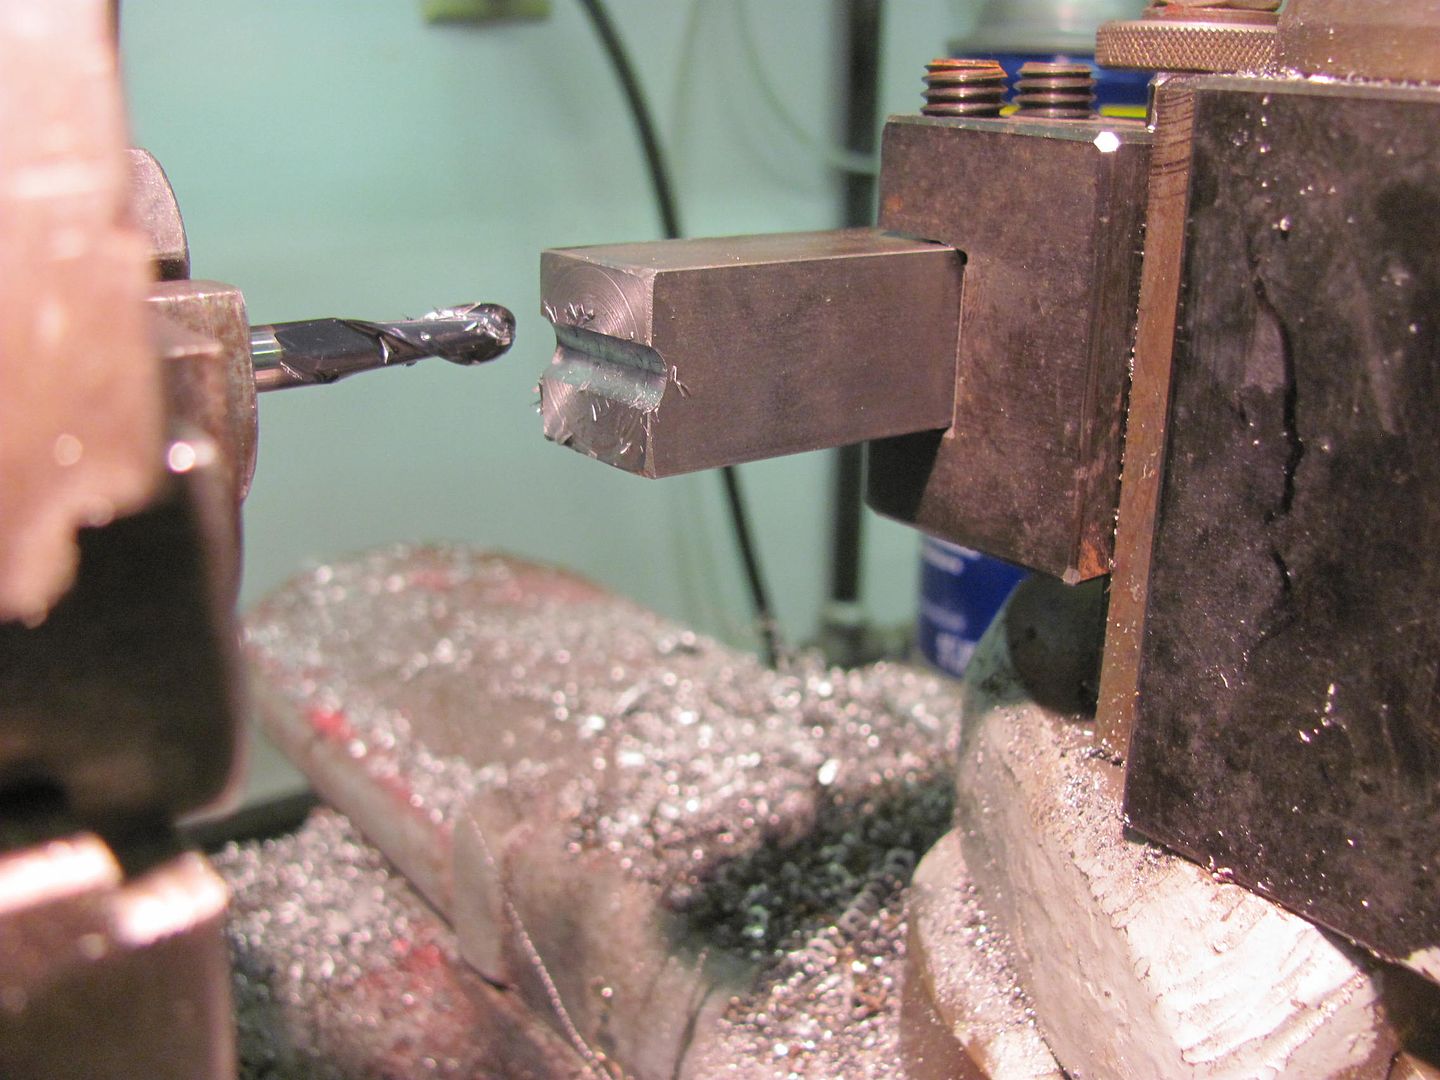 The ends of the tooling was also turned in the lathe to give a nice round feature that will work better for use with a guide. 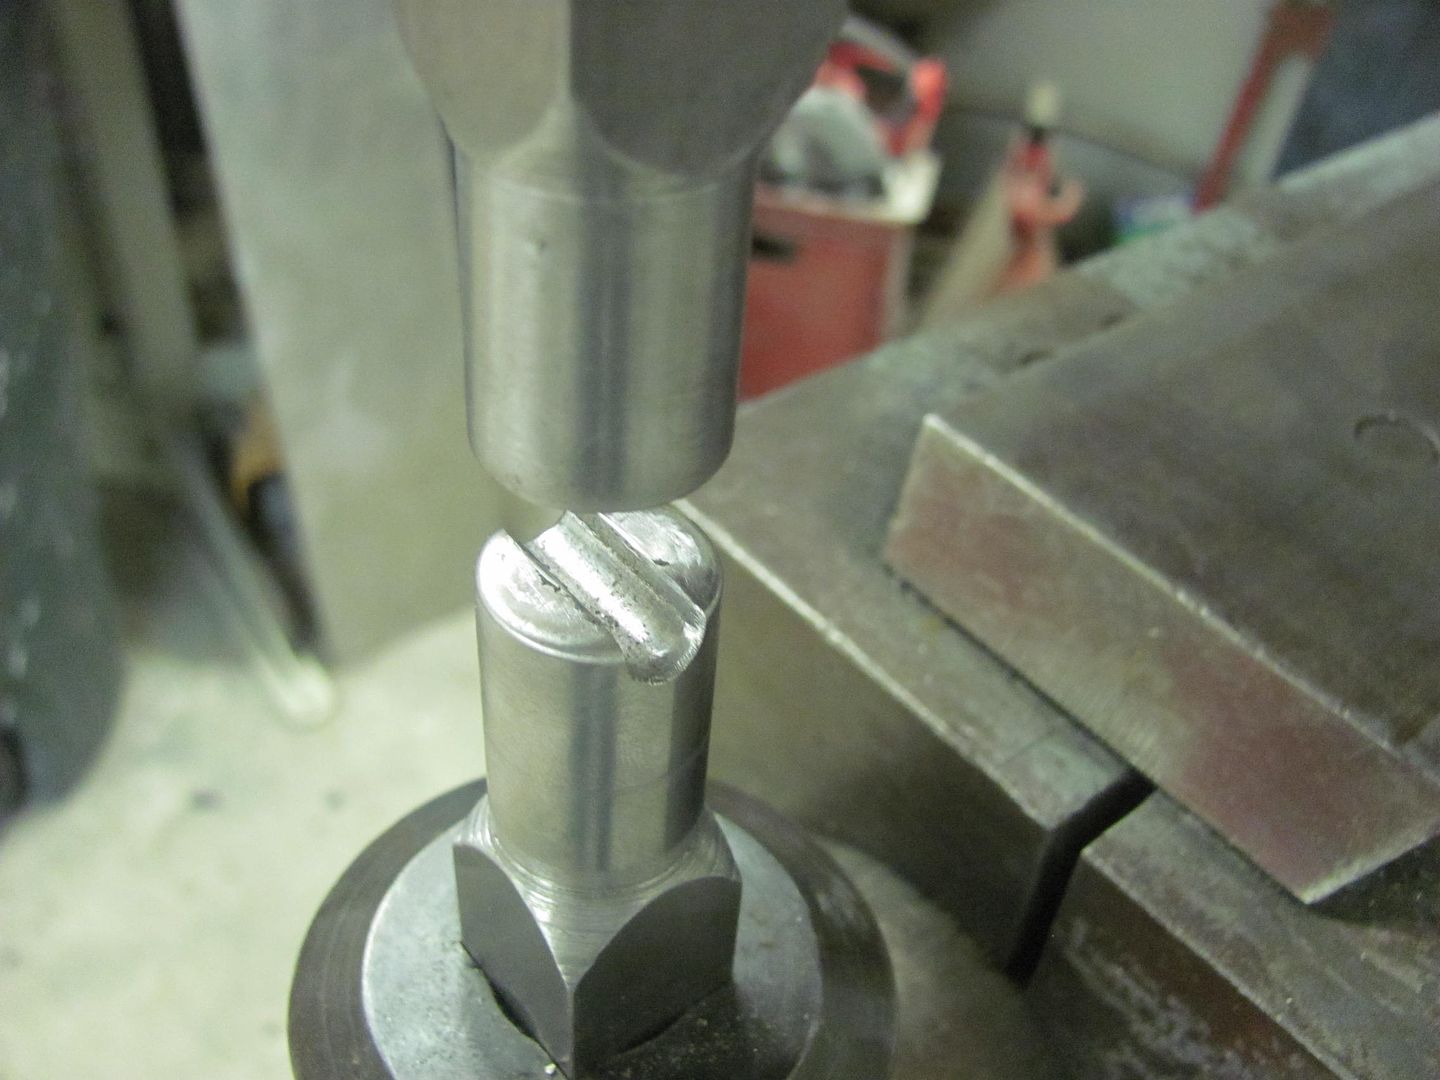  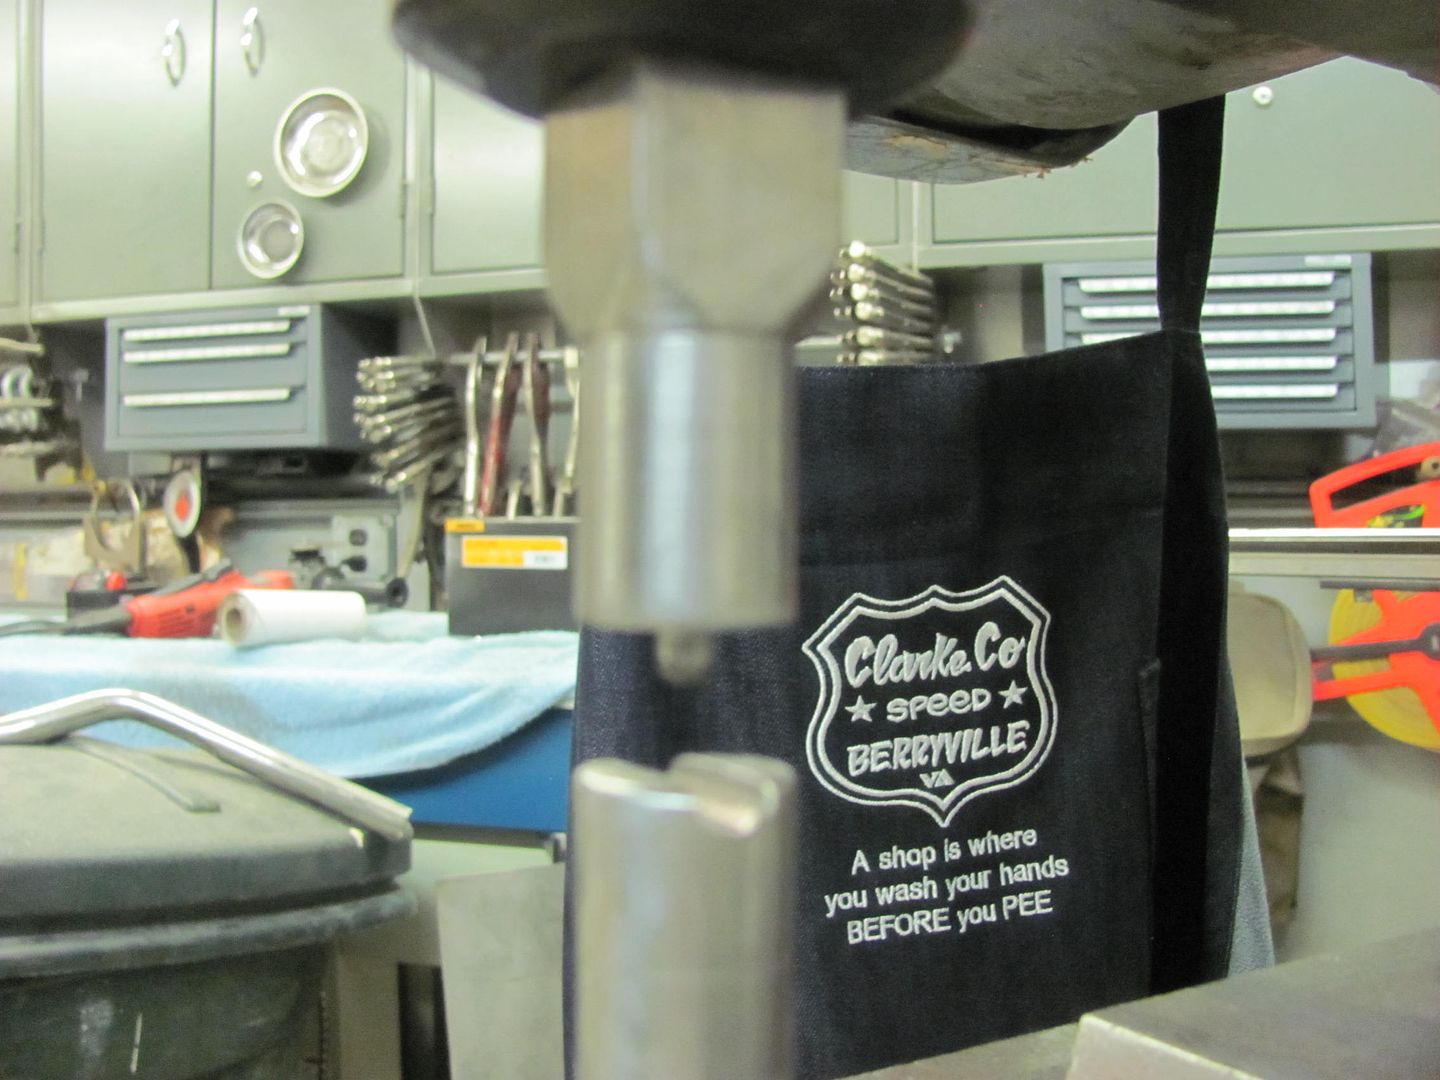 Test run... 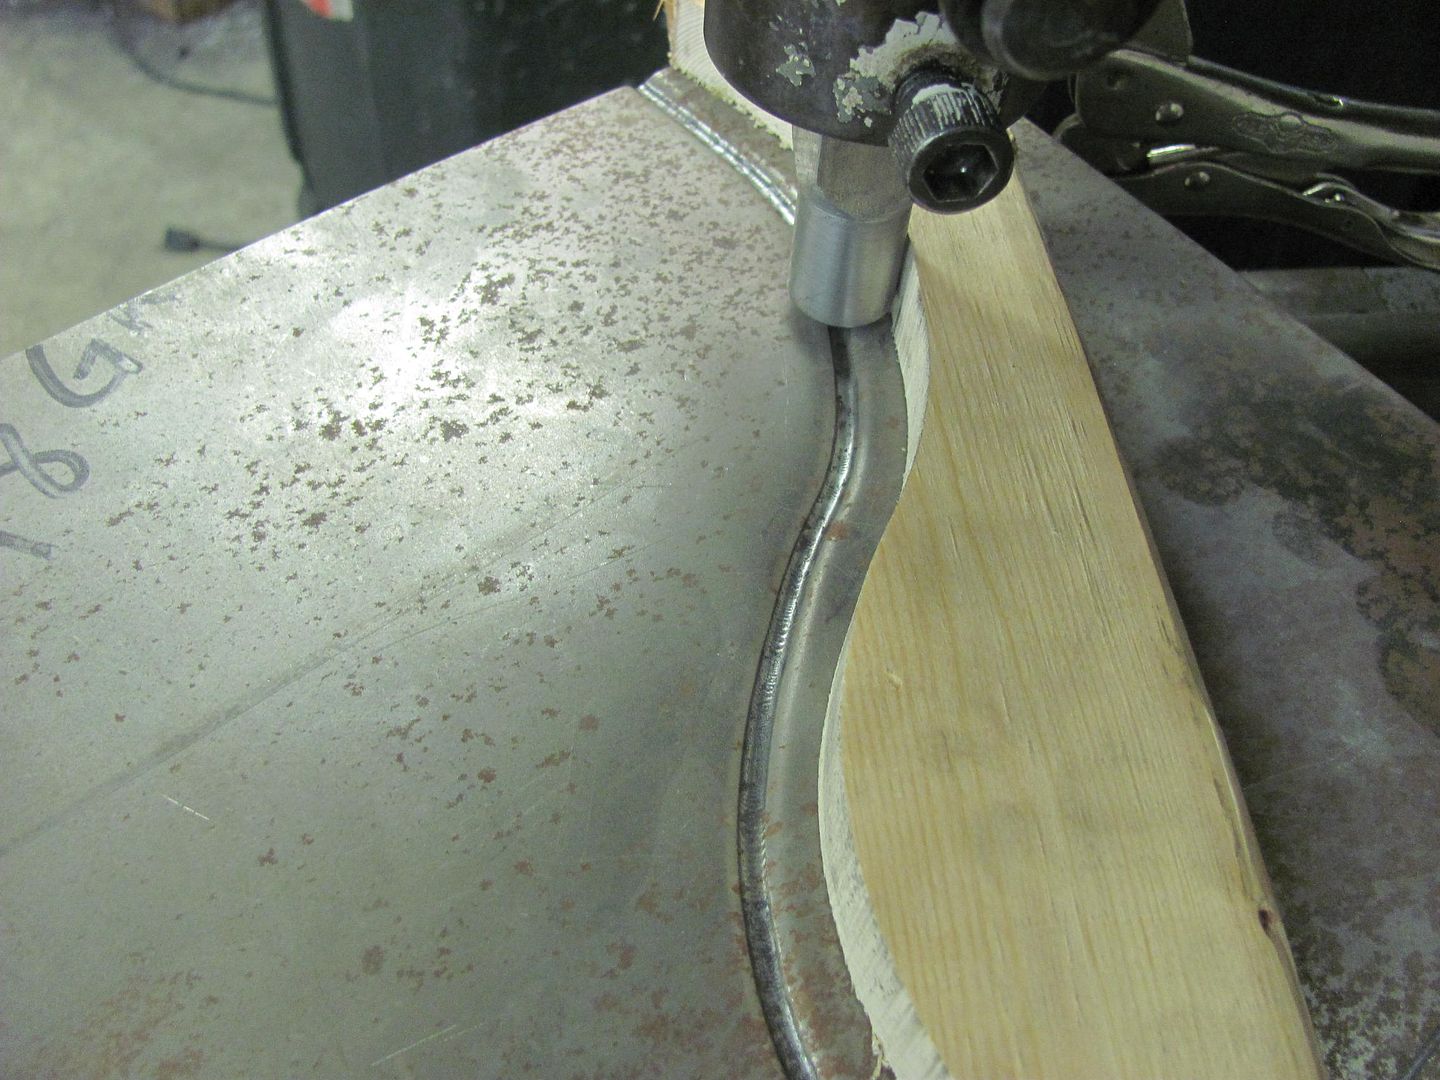 Nice crisp lines, the "chatter" should be cleaned up if I can get the feed speed more consistent. The small diameter of the upper die's "punch" provides the needed stretch, with the downside being the marking from too fast of a feed speed. Making the upper die in more of an oval shape will eliminate most of the marking, but it won't stretch as well.. To keep from losing panel crown, stretch is our preference here.. 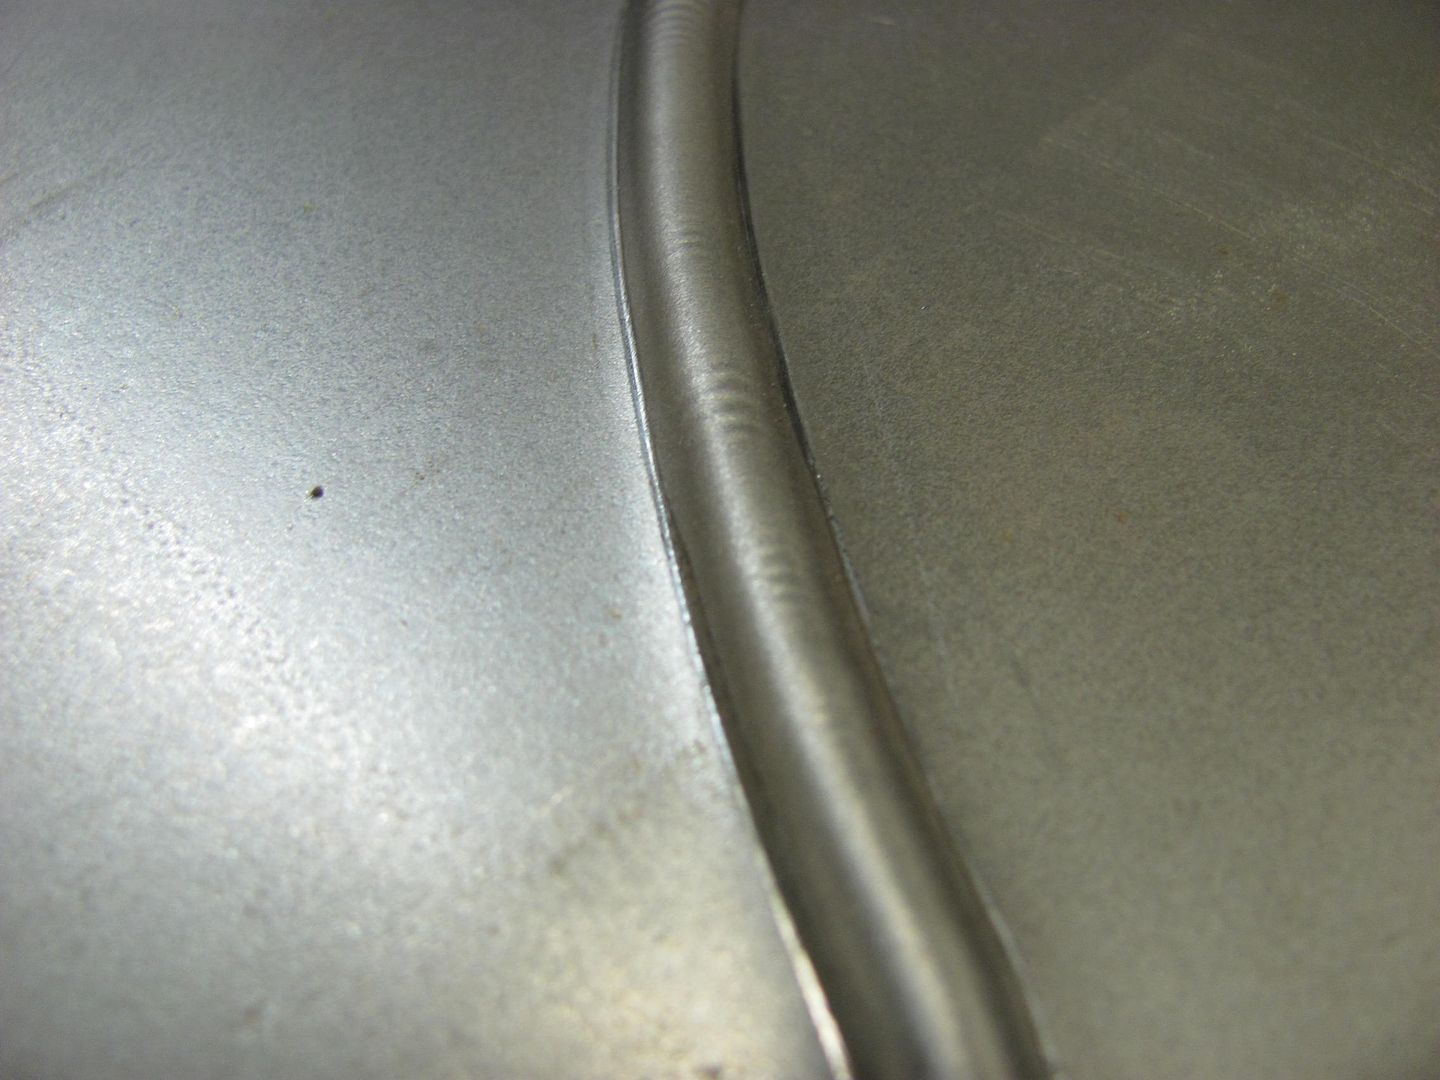 This shows how well the die provides stretch, when you can add a bead in the middle of a panel.... 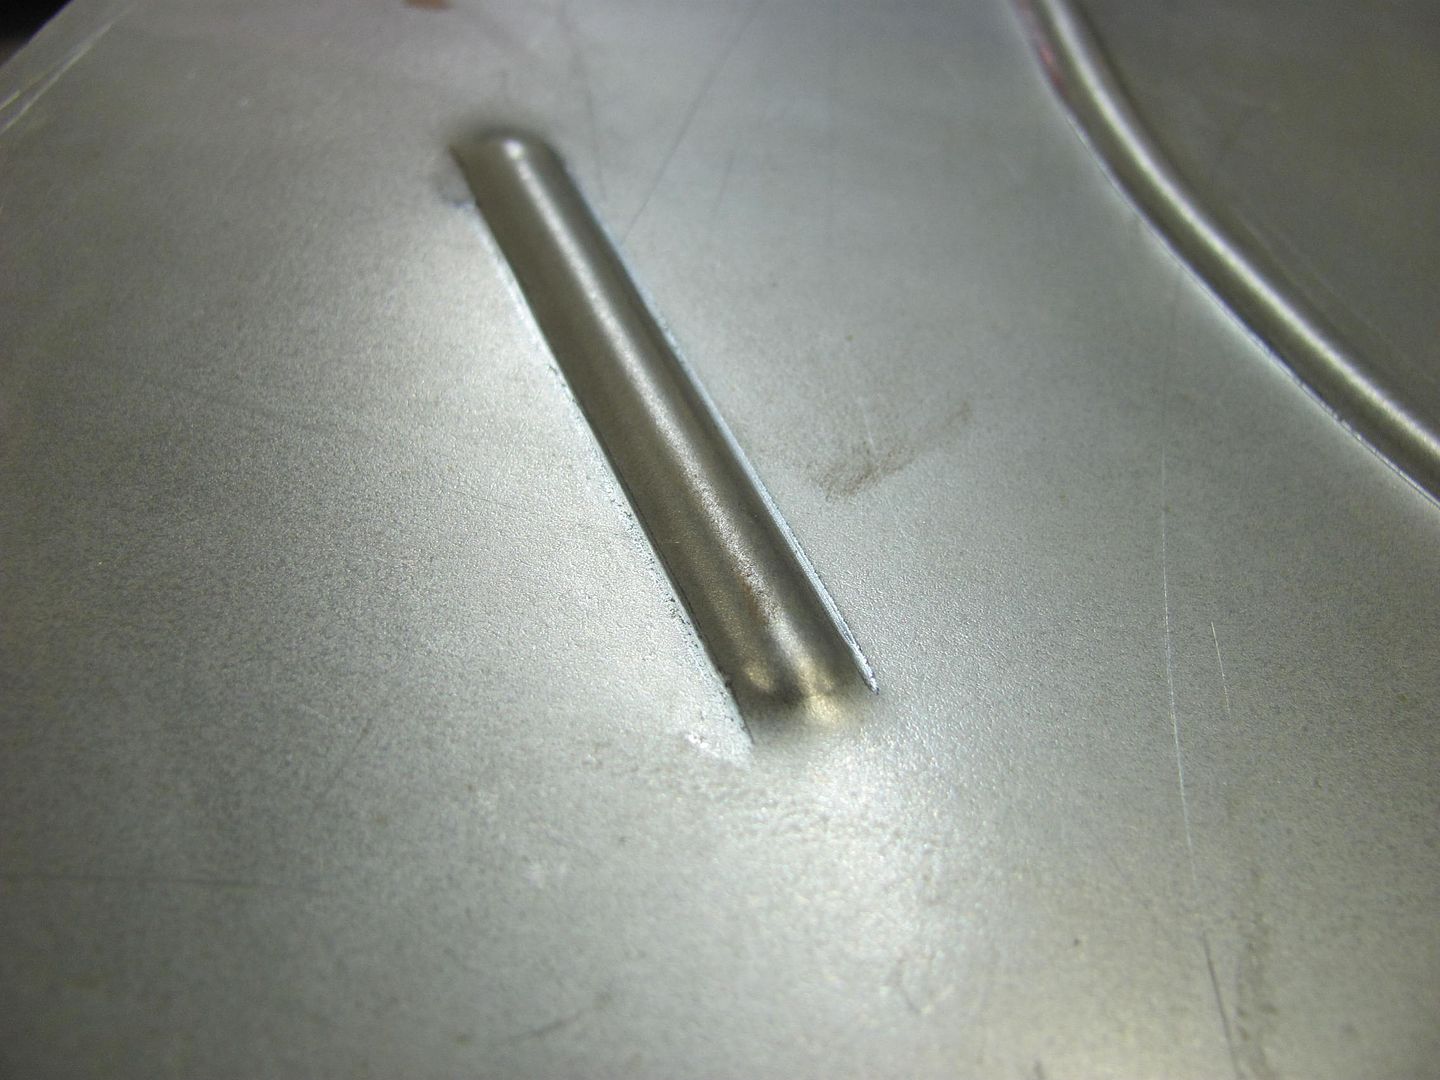 ......and there's no distortion on the ends of the bead on an otherwise flat panel.. 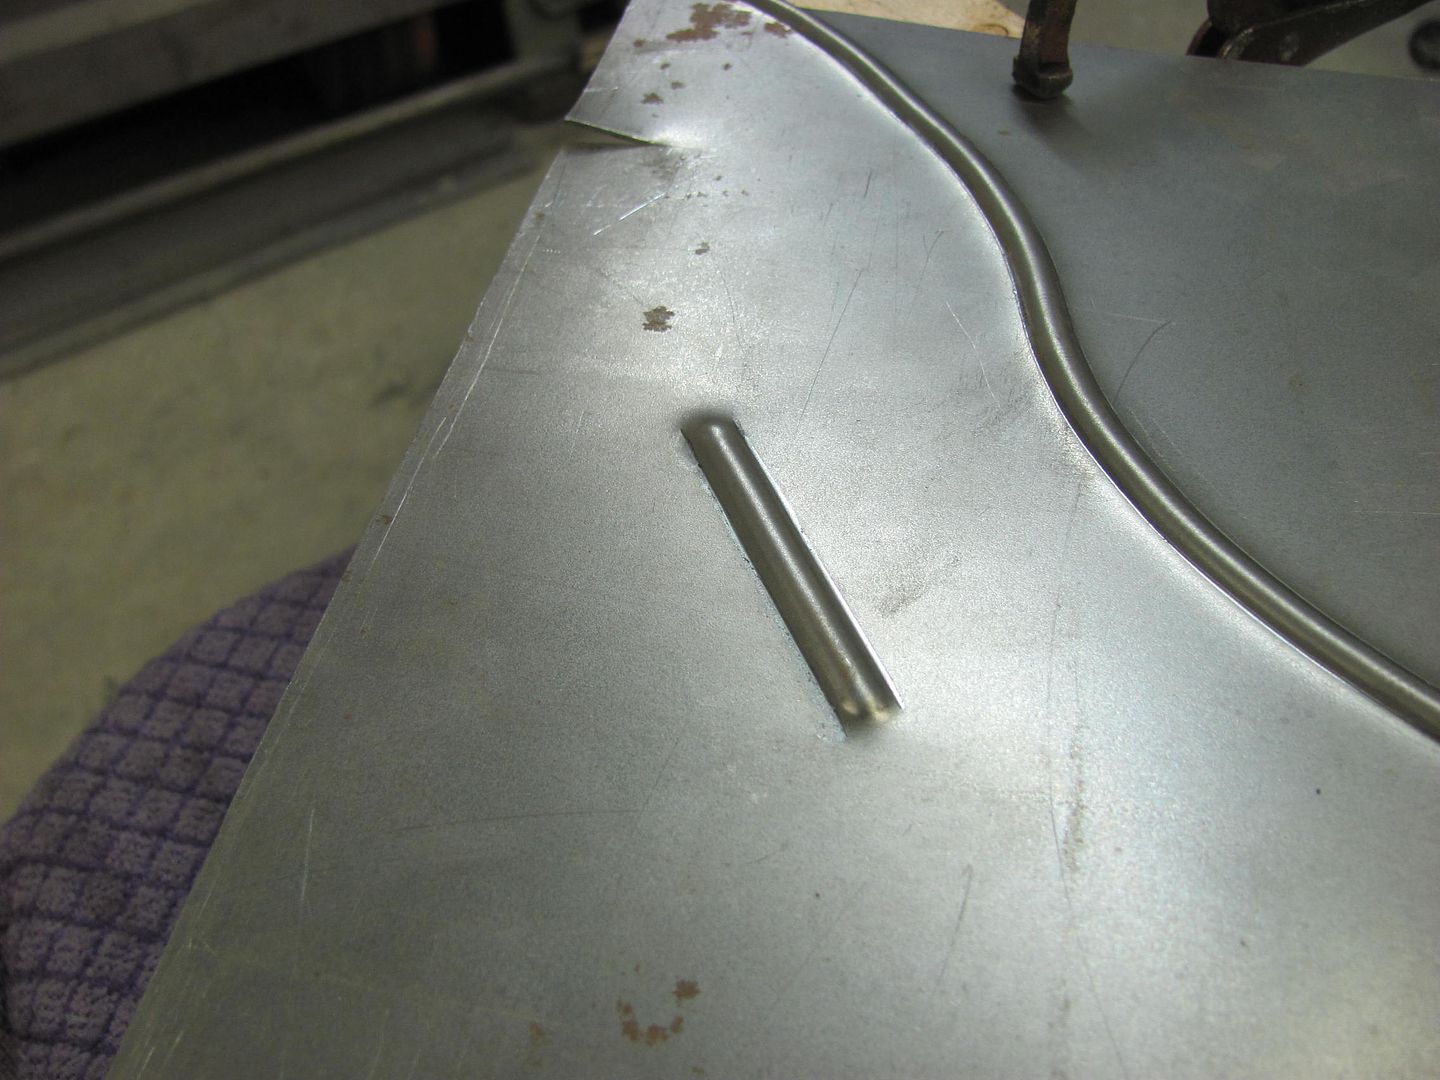
__________________
Robert |
|
|
|
|
07-08-2016, 07:32 AM
|
#6 |
|
Registered User
Join Date: Dec 2011
Location: Mobile, Alabama
Posts: 996
|
Re: 55 Wagon Progress
Love the Clarke Co. apron verbiage!! dug
__________________
My Build - http://67-72chevytrucks.com/vboard/s...d.php?t=515876 |
|
|
|
|
07-10-2016, 10:14 AM
|
#7 |
|
Registered User
Join Date: Apr 2011
Location: .
Posts: 3,104
|
Re: 55 Wagon Progress
Here I thought I was the only one to blow off stuff while tig welding. lol
Thanks for showing the little hiccups along the way. Excellent bead work. |
|
|
|
|
07-13-2016, 09:08 AM
|
#8 |
|
Registered User
Join Date: Jan 2013
Location: Leonardtown, MD
Posts: 1,642
|
Re: 55 Wagon Progress
Thanks for the comments guys! Not much to show on the 55, we've been block sanding, metal bumping, adding filler, lather, rinse, repeat. On the beading dies from the other night I wasn't too pleased with the shape, IMO they were too rounded. Especially for where this will be used, it needs to better match the rest of the car. So another upper die was made using a more blunt end tip with a slight ramp.
 The lower die was relieved to better accommodate tighter corners... 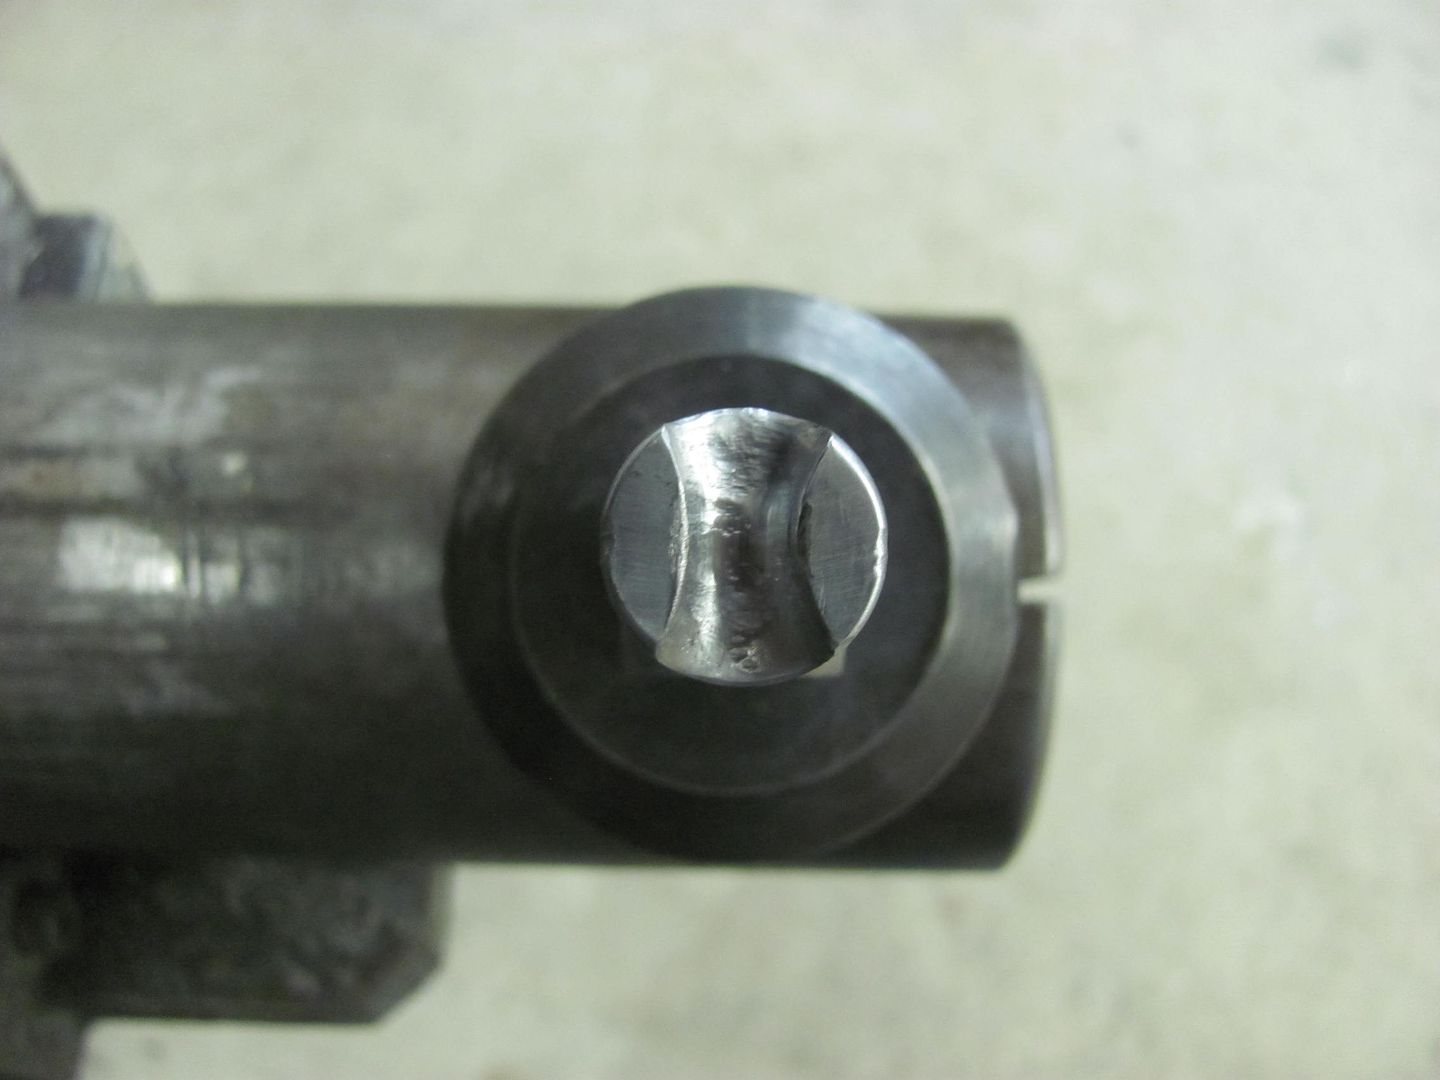 Comparing the two dies.... 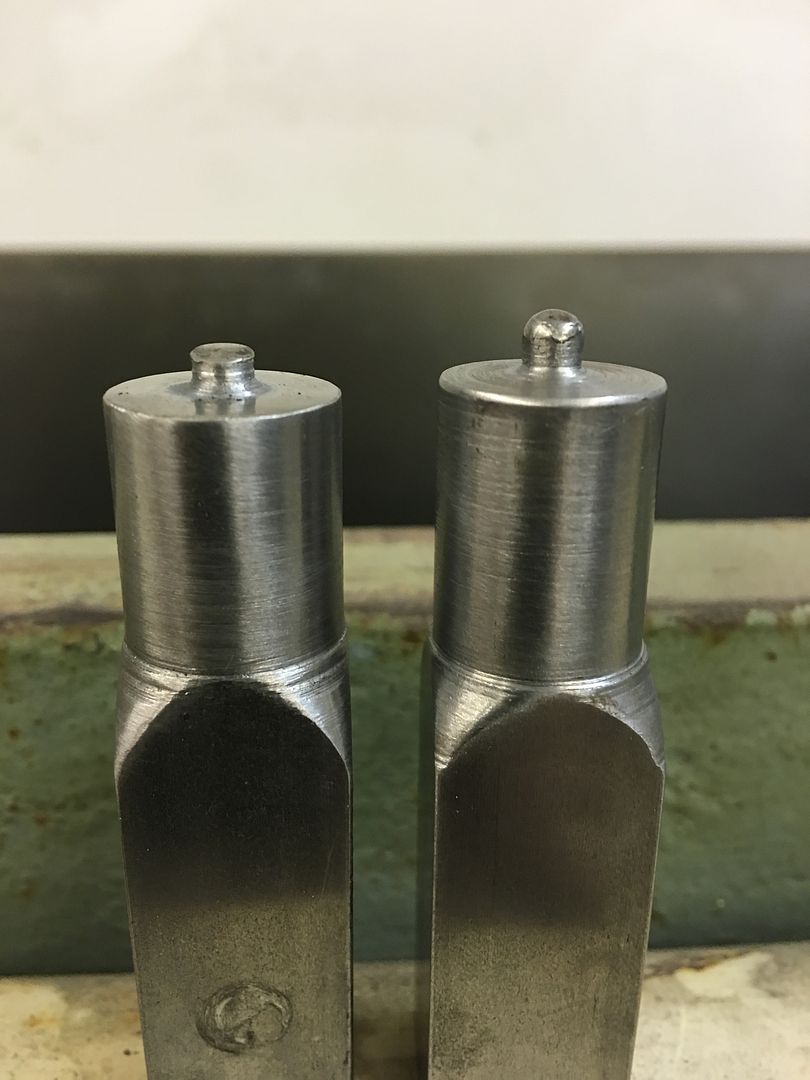 Looking at the center two sample beads, the one toward the left shows a flatter bead using the new die.. 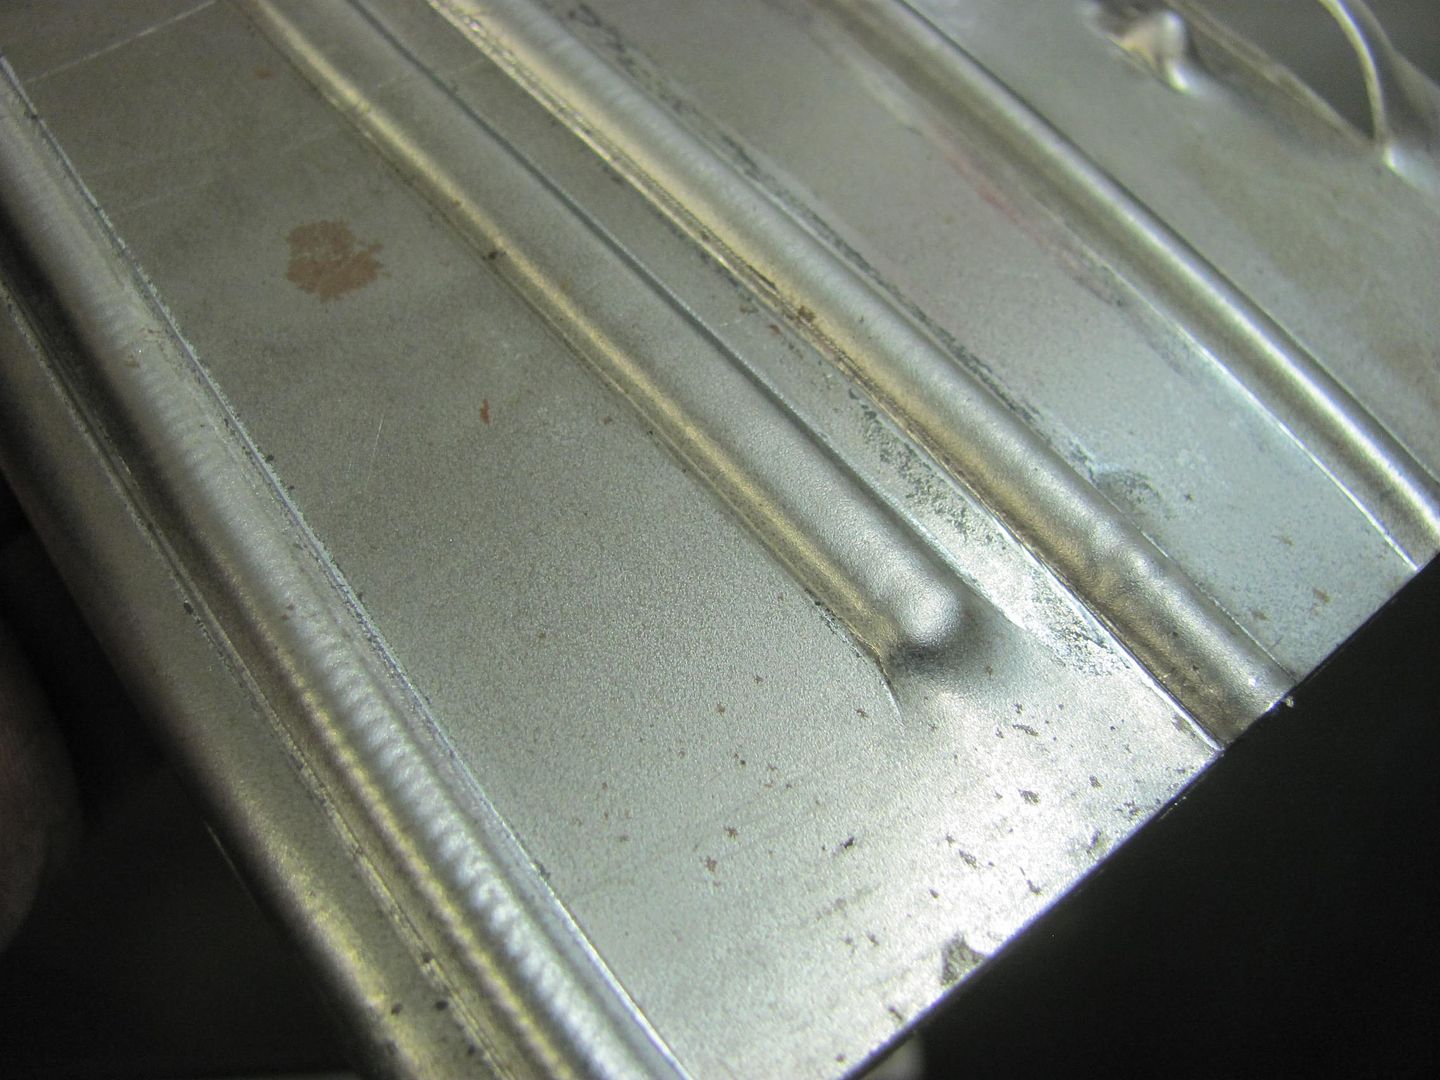 And on the Wheeling Machine front, I've been contemplating a storage drawer for under the base, but have struggled to find a good slide track to hold it.. Until yesterday, the guys at Dyna Rep Company came through for me, a 6" long full extension slide, in stock! Thanks Brad! 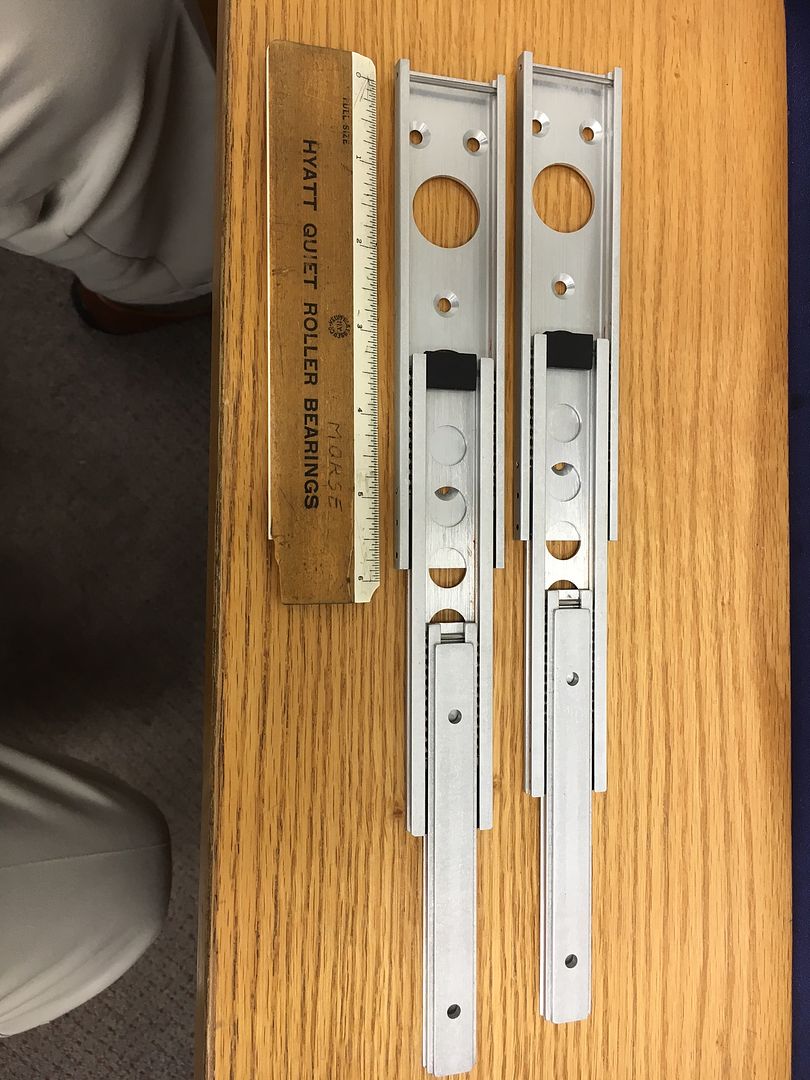 These will be mounted between the mounting legs coming in from the side, drawer deep enough to hold all the extra lower anvils and hopefully the goKart slick... 
__________________
Robert |
|
|
|
|
08-06-2016, 10:26 PM
|
#9 |
|
Registered User
Join Date: Jan 2013
Location: Leonardtown, MD
Posts: 1,642
|
Re: 55 Wagon Progress
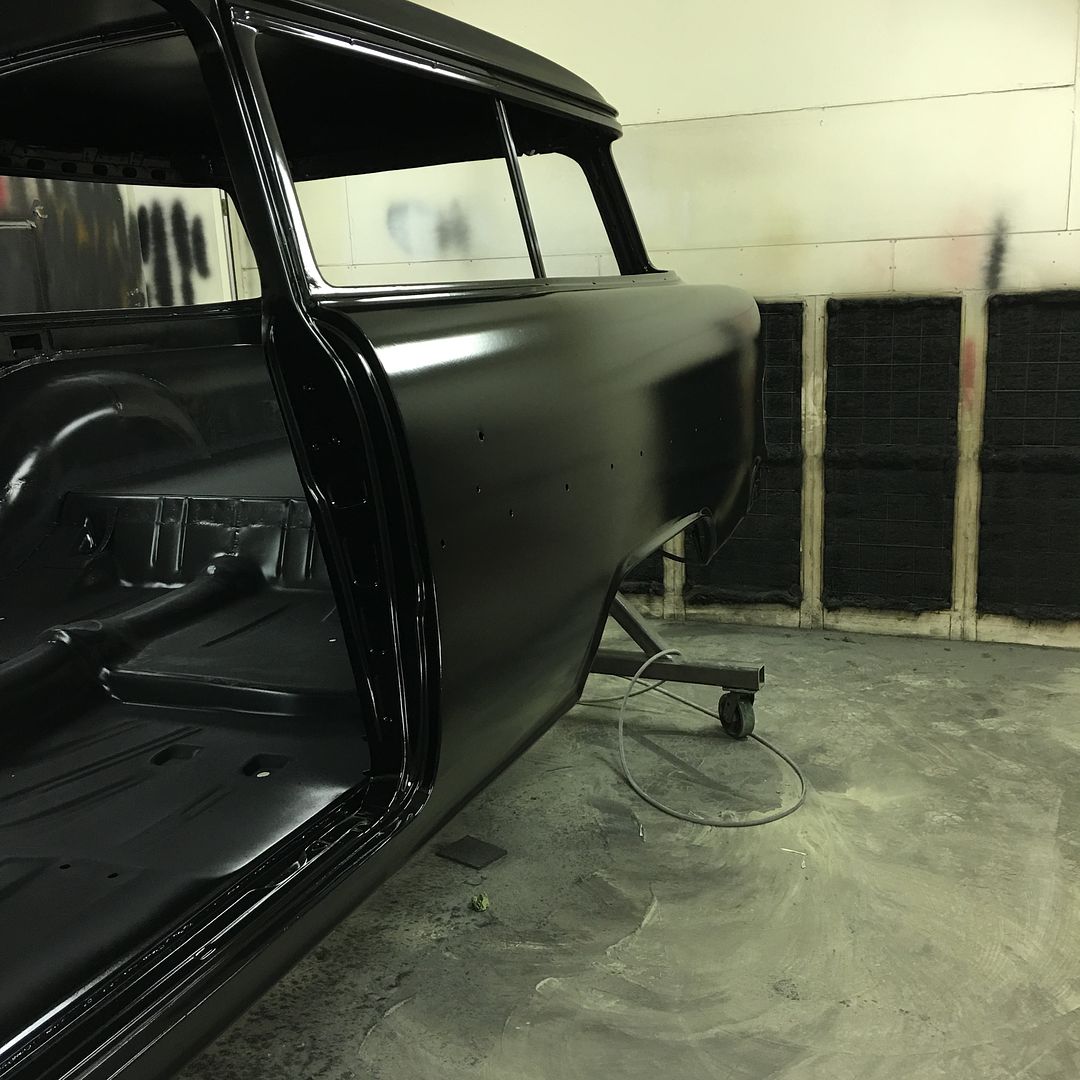
Sorry I've been lax on wagon pics. When you get to the bodywork stage it doesn't show progress well. We did get another dose of SPI epoxy sprayed on the quarters today so we can better see how we're coming along..
__________________
Robert |
|
|
|
|
08-06-2016, 11:03 PM
|
#10 |
|
Senior Member
Join Date: Mar 2011
Location: West Plains, Missouri
Posts: 7,557
|
Re: 55 Wagon Progress
Yes, body work is one of those things that takes forever, with little results, until the paint goes on. Then it really shows....Jim
__________________
my build thread: http://67-72chevytrucks.com/vboard/s...d.php?t=459839 Jimbo's long bed step build:http://67-72chevytrucks.com/vboard/s...t=464626<br /> |
|
|
|
|
08-06-2016, 11:04 PM
|
#11 |
|
Registered User
Join Date: Jul 2012
Location: Rosenberg, Texas
Posts: 3,506
|
Re: 55 Wagon Progress
Wow, that looks pretty good!
__________________
-Duane C/10 Club Texas member 1971 Chevy C10 "Brutus" SWB Fleetside 2016 6.0L (L96) 6L90E (driver/project) 1965 Pontiac GTO "Royal Goat" 400/TH400 w/AC (my baby) |
|
|
|
|
08-07-2016, 09:37 AM
|
#12 |
|
Man of Mini-Talents
Join Date: Sep 2009
Location: Oklahoma City, OK
Posts: 4,295
|
Re: 55 Wagon Progress
Outstanding work
__________________
Steve Project - Ruth 66 Skylark Project - Lola 60 Biscayne Project - Iron Ox 54 GMC 100 Project - Darth 69 Camaro |
|
|
|
|
08-10-2016, 10:10 PM
|
#13 |
|
Registered User
Join Date: Apr 2011
Location: .
Posts: 3,104
|
Re: 55 Wagon Progress
Coming along straight as a pin.
|
|
|
|
|
08-11-2016, 03:46 PM
|
#14 |
|
6>8 Plugless........
 Join Date: Sep 2007
Location: Prairie City, Ia
Posts: 17,140
|
Re: 55 Wagon Progress
That looks really sweet!
__________________
Ryan 1972 Chevy Longhorn K30 Cheyenne Super, 359 Inline 6 cylinder, Auto Trans, Tilt, Diesel Tach/Vach, Buckets, Rare Rear 4-link and air ride option Build Thread 1972 GMC Sierra Grande Longhorn 4x4 1972 Chevy Cheyenne Super K20 Long Step side tilt, tach, tow hooks, AC, 350 4 speed 1972 C10 Suburban Custom Deluxe 1969 Chevy milk truck 1971 Camaro RS 5.3 BTR STG3 Cam Super T10 1940 Ford 354 Hemi 46RH Ford 9" on air ride huge project Tired of spark plugs? Check this out. |
|
|
|
|
08-29-2016, 07:48 AM
|
#15 |
|
Registered User
Join Date: Jan 2013
Location: Leonardtown, MD
Posts: 1,642
|
Re: 55 Wagon Progress
Thanks for the comments guys. Well after block sanding the latest coat of epoxy....
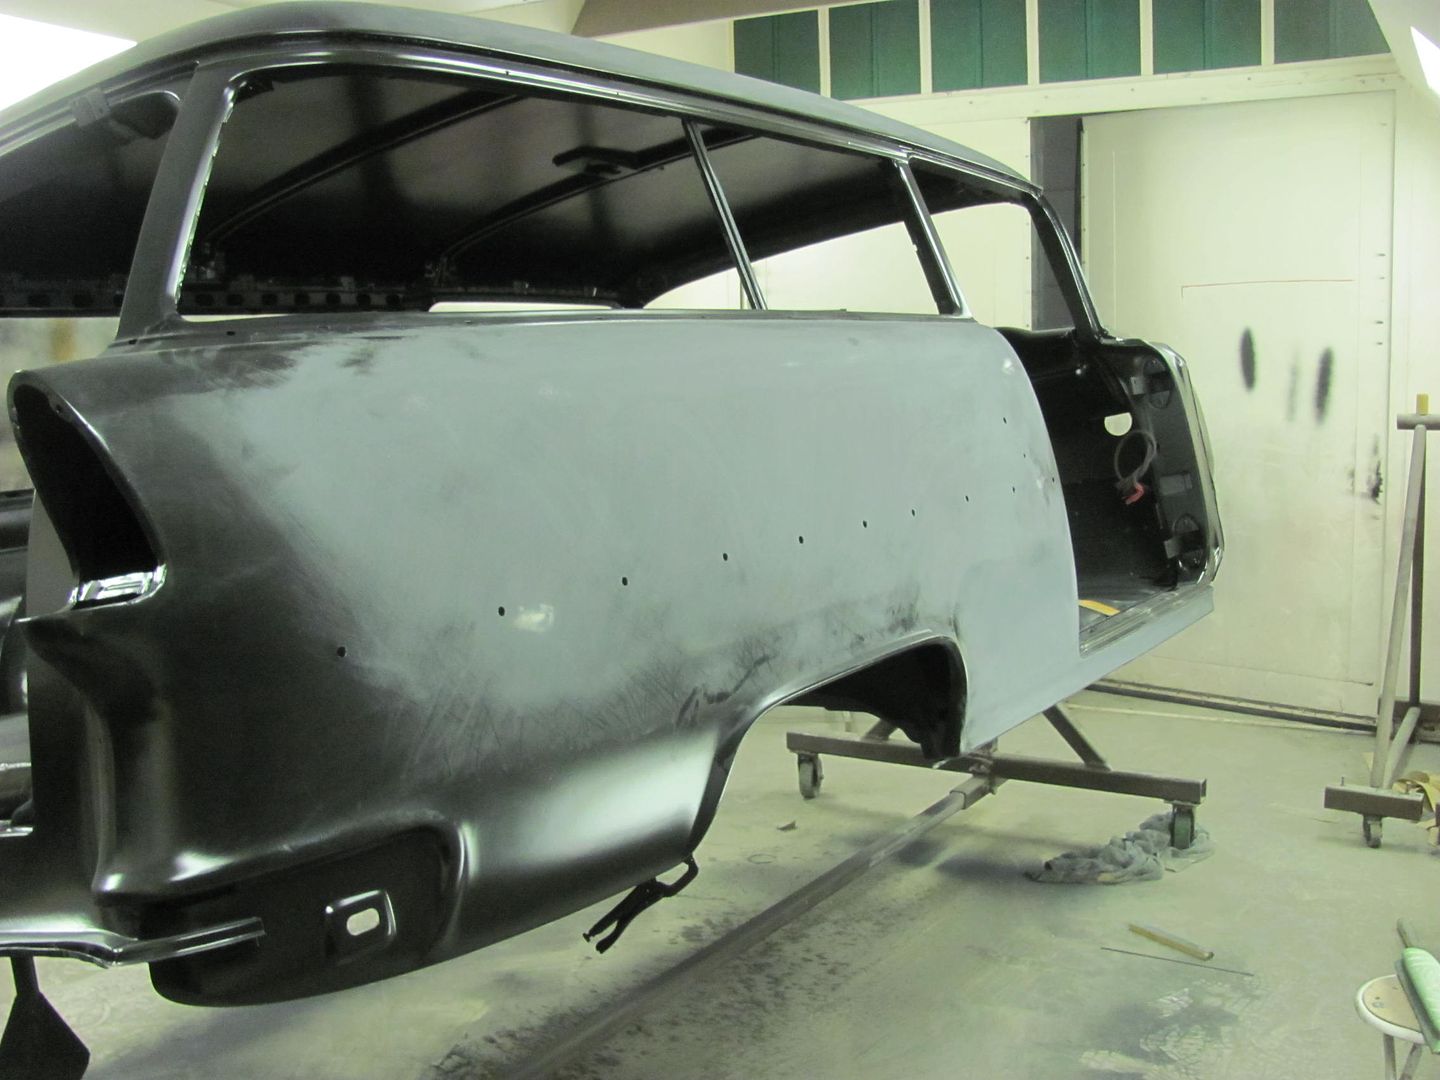 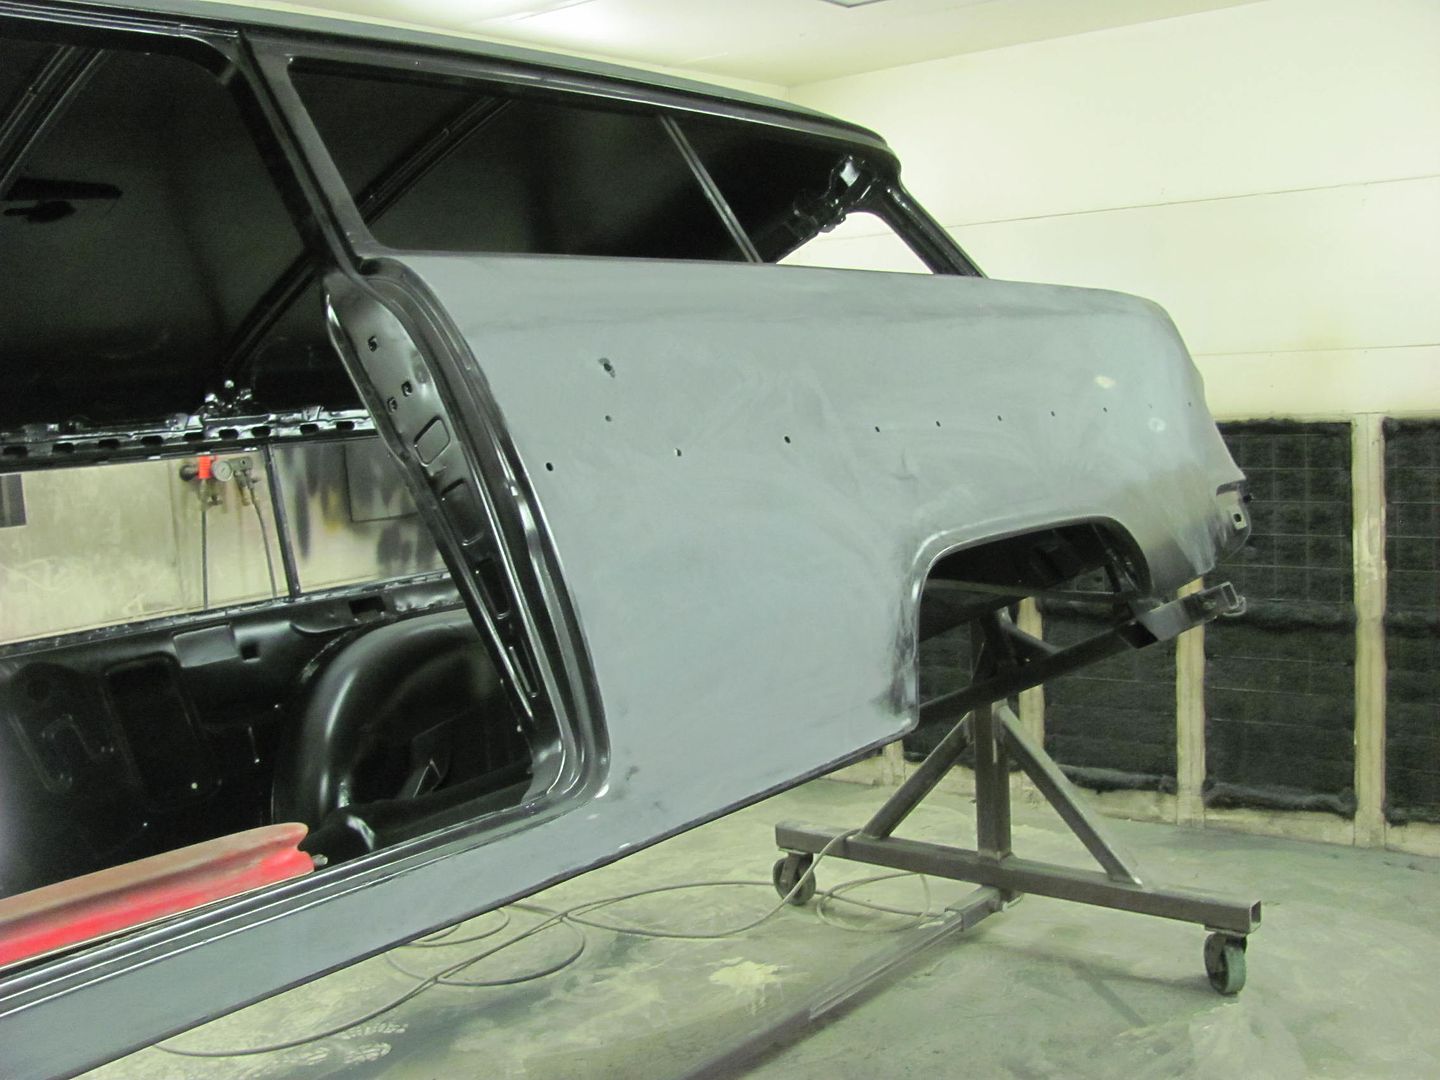 We had a local car show we could attend, but didn't know whether to take the body or the frame...  I didn't think the rotisserie would fit in my 16' trailer for some reason, but another measurement proved otherwise. Since it showed more of our metal fabrication, we opted for the body.. All loaded up, height limitations on the ceiling do require inverted travel... 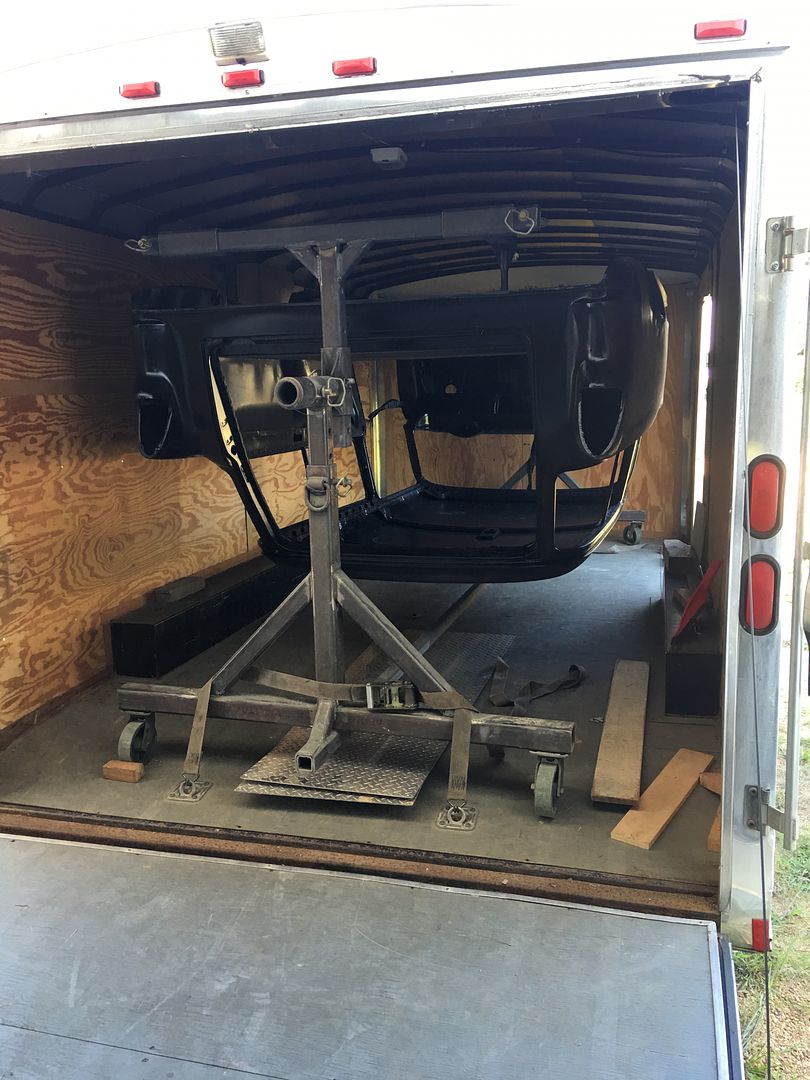 At the show with the "trailer queen" 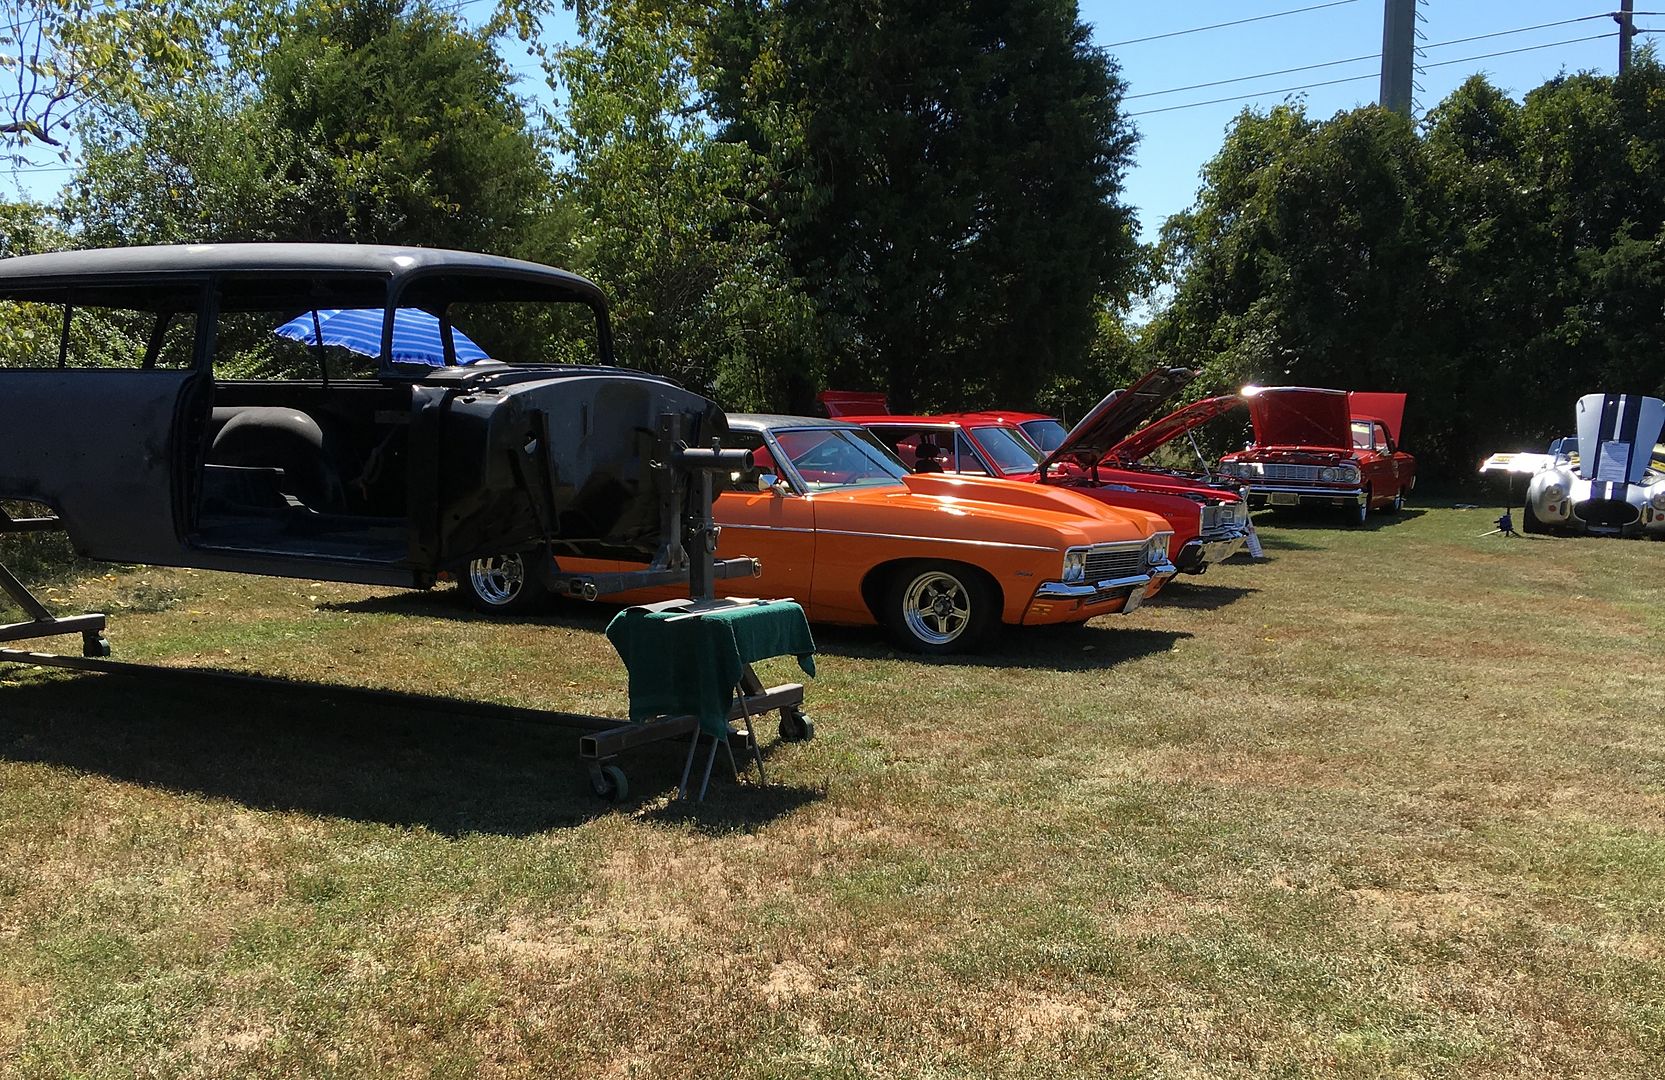
__________________
Robert |
|
|
|
|
08-29-2016, 08:17 AM
|
#16 |
|
*************
Join Date: Apr 2005
Location: Pensacola, FL
Posts: 17,837
|
Re: 55 Wagon Progress
Outstanding! I'm not sure what you are charging the guy that owns this, but it's worth every penny!

__________________
Rob - https://www.instagram.com/hart_rod_c10 As Iron Sharpens Iron, So One Man Sharpens Another. Proverbs 27:17 FOR SALE: DBW pedal bracket - http://67-72chevytrucks.com/vboard/s...d.php?t=651123 FOR SALE: Hood Brackets http://67-72chevytrucks.com/vboard/s...d.php?t=679945 1987 Silverado SWB - 34.5K original miles http://67-72chevytrucks.com/vboard/s...d.php?t=801834 1969 SuperBurb - http://67-72chevytrucks.com/vboard/s...d.php?t=200387 1968 Farm truck - http://67-72chevytrucks.com/vboard/s...d.php?t=358692 1968 SWB - http://67-72chevytrucks.com/vboard/s...d.php?t=551258 1948 Chevy - http://67-72chevytrucks.com/vboard/s...=122164&page=3 |
|
|
|
|
08-29-2016, 08:55 AM
|
#17 |
|
Senior Member
Join Date: Mar 2011
Location: West Plains, Missouri
Posts: 7,557
|
Re: 55 Wagon Progress
Bet that drew some attention...Jim
__________________
my build thread: http://67-72chevytrucks.com/vboard/s...d.php?t=459839 Jimbo's long bed step build:http://67-72chevytrucks.com/vboard/s...t=464626<br /> |
|
|
|
|
08-29-2016, 09:06 AM
|
#18 |
|
Registered User
Join Date: Jan 2013
Location: Leonardtown, MD
Posts: 1,642
|
Re: 55 Wagon Progress
We pulled in and was promptly directed to "trailer parking" where we could unload and "drive" on in.. Uh.. yeah... that's not going to work...

__________________
Robert |
|
|
|
|
09-06-2016, 02:15 PM
|
#19 |
|
Hittin E-Z Street on Mud Tires
Join Date: Nov 2004
Location: Greenville, SC
Posts: 23,090
|
Re: 55 Wagon Progress
Caster wheels can barely roll over a zip tie, I bet that was fun (perhaps a little scary?) to load/unload?
Ridiculously awesome work so far.
__________________
Jesse James 1967 C10 SWB Stepside: 350/700R4/3.73 1965 Ford Mustang: 289/T5-5spd/3.25 Trac-Loc 1968 Pontiac Firebird: Project Fire Chicken! 2015 Silverado Double Cab 5.3L Z71 2001 Jeep Wrangler Sport 4.0L 5spd 2020 Chevrolet Equinox Premium 2.0L Turbo 2011 Mustang V6 ~ Wife's ride American Born, Country by the Grace of God  1967 CST Shop Truck Rebuild! My 1967 C-10 Build Thread My Vintage Air A/C Install Project "On a Dime" Trying my hand at Home Renovation! 1965 Mustang Modifications! |
|
|
|
|
09-06-2016, 10:21 PM
|
#20 |
|
Registered User
Join Date: Jan 2013
Location: Leonardtown, MD
Posts: 1,642
|
Re: 55 Wagon Progress
Two of us to load it up at the shop, and to unload at the show. Five to load it up from the grassy knoll..
__________________
Robert |
|
|
|
|
09-08-2016, 03:19 PM
|
#21 |
|
Registered User
Join Date: May 2007
Location: Deale Md
Posts: 4,663
|
Re: 55 Wagon Progress
You didn't even need a easy up it provided plenty of shade to even catch a nap.
__________________
James 63 GMC V6 4speed carryall 65 chevy swb bbw V8 auto 68 K20 327/4 speed, buddy buckets 2002 GMC CC Dually Duramax 64 GMC lwb 3/4 V6 4speed SOLD 66 GMC swb bbw buddy buckets SOLD IG duallyjams The only thing that stays the same is constant change! |
|
|
|
|
09-10-2016, 09:03 PM
|
#22 |
|
Registered User
Join Date: Jan 2013
Location: Leonardtown, MD
Posts: 1,642
|
Re: 55 Wagon Progress
At one point we did roll it up on the side and stood in the shade!
Today was more blocking on the 55, and moving forward to get it ready for the Linex that will go on the bottom side. We need to get seat brackets complete and welded into the floor, finish epoxy prime on cavities (rocker and inner quarter), install wheel houses, etc. Yesterday was a road trip to get a paint sample and other paint supplies. here's the proposed color for above the quarter...  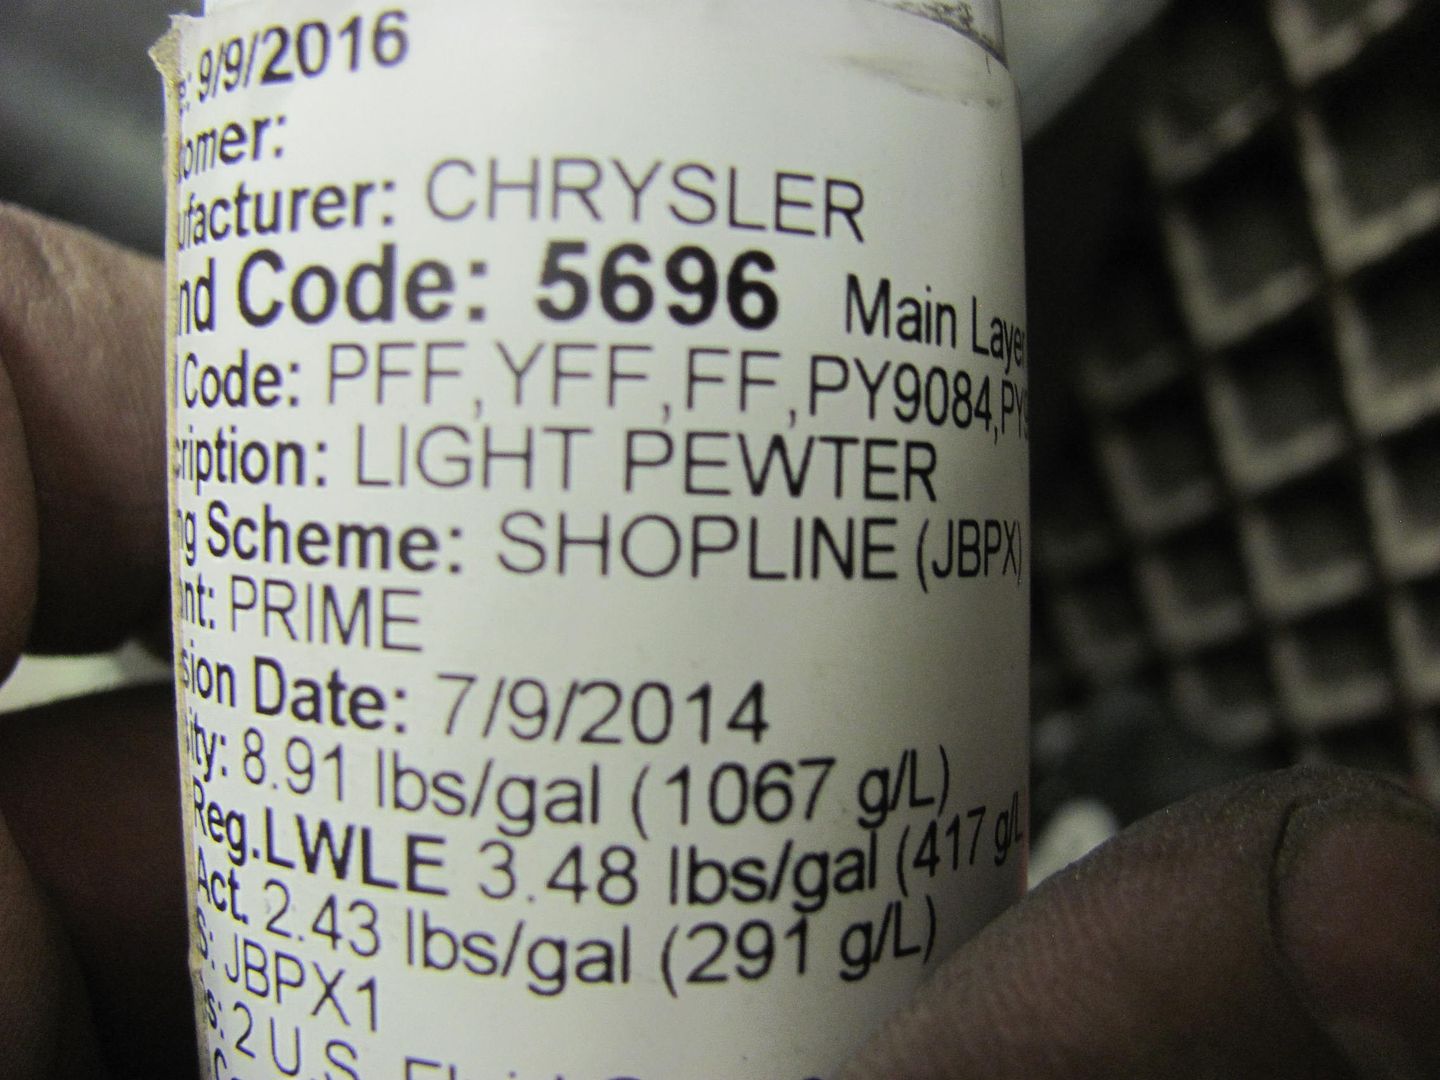 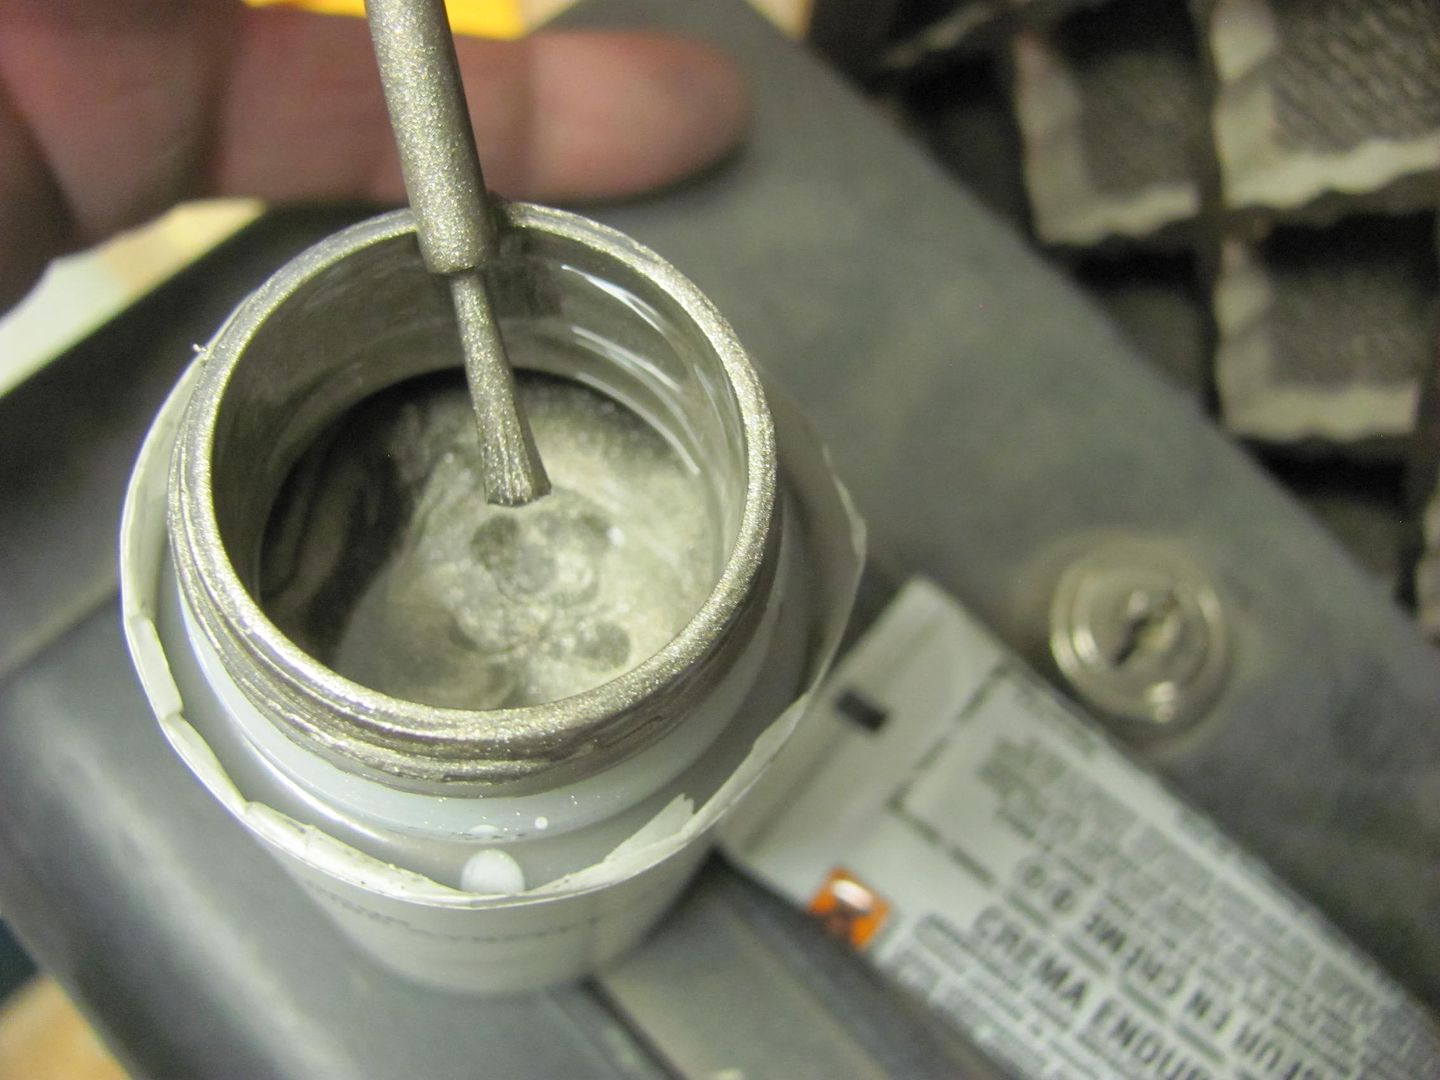 With the H/K Organic Green Kandy basecoat on the quarters down. To better get a feel for the test sprayout of the Kandy, a panel was made to simulate the top of the quarter, so we can better see the effects in the sunlight... 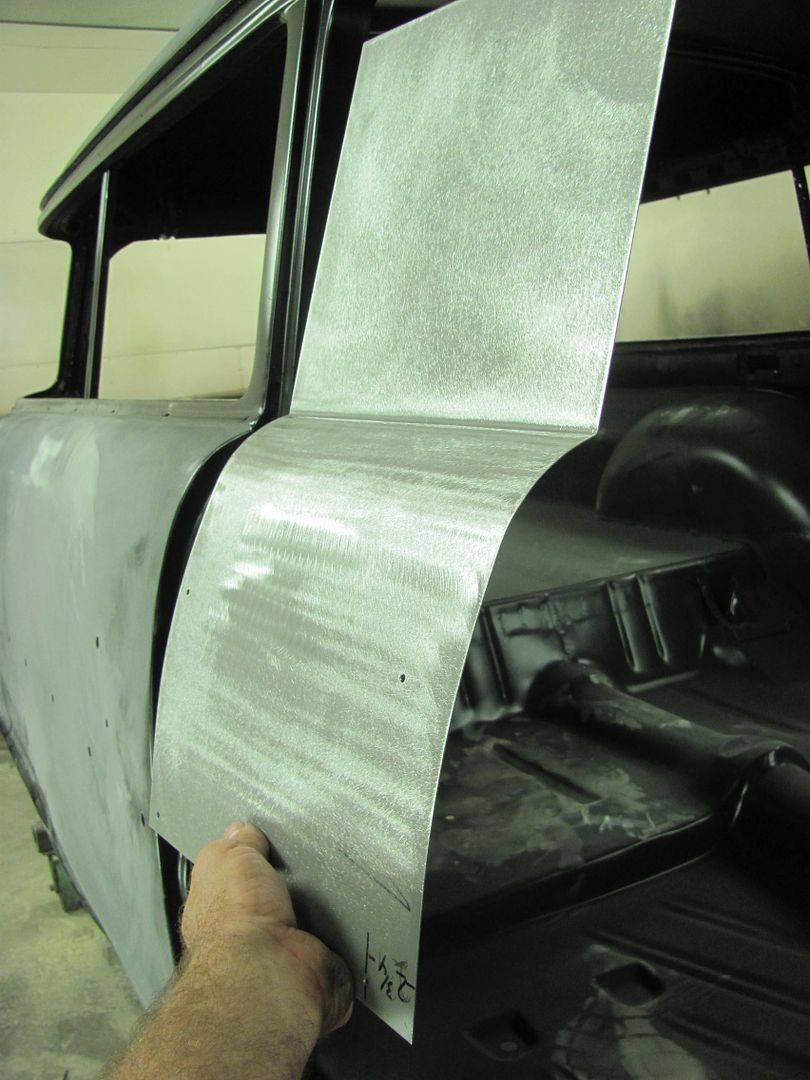 Next, epoxy in the cavities. I had looked at cavity spraying wands and the like, and did not care for what was available. So lets get basic, after all it is unseen when complete.. 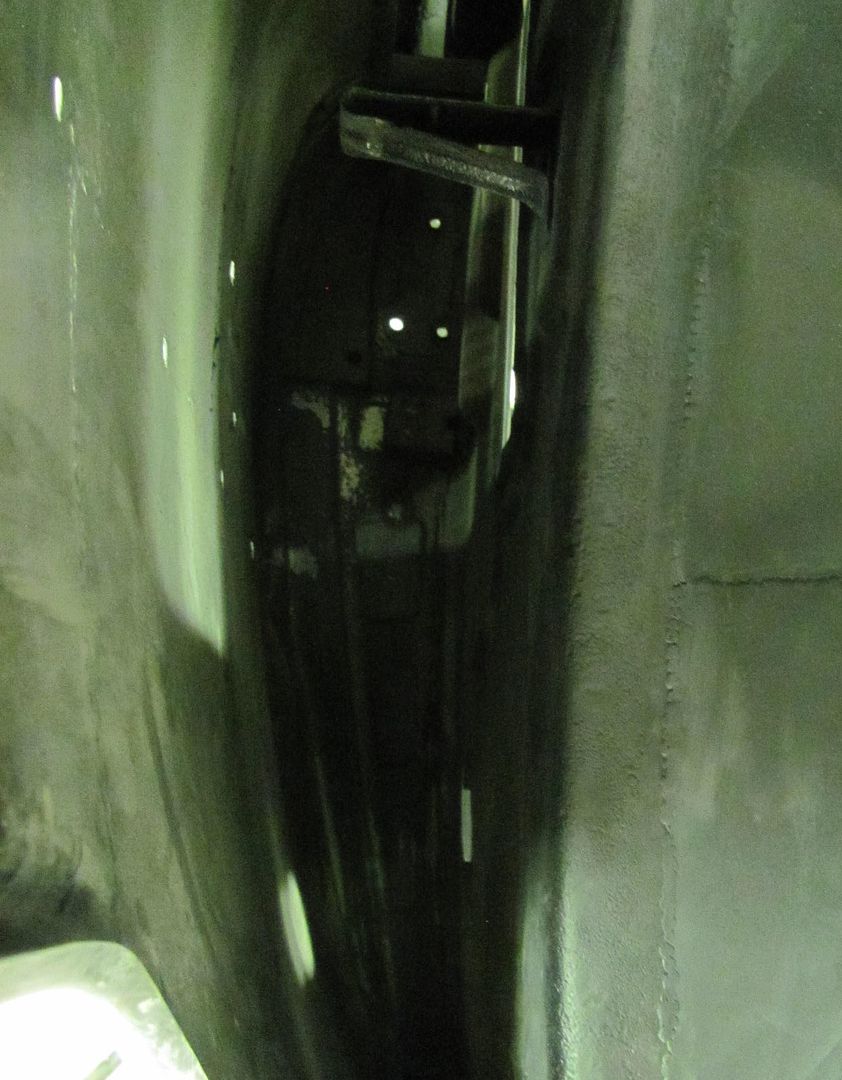 This area doesn't have to be pretty, so picked up this goodie at the local hardware store.. 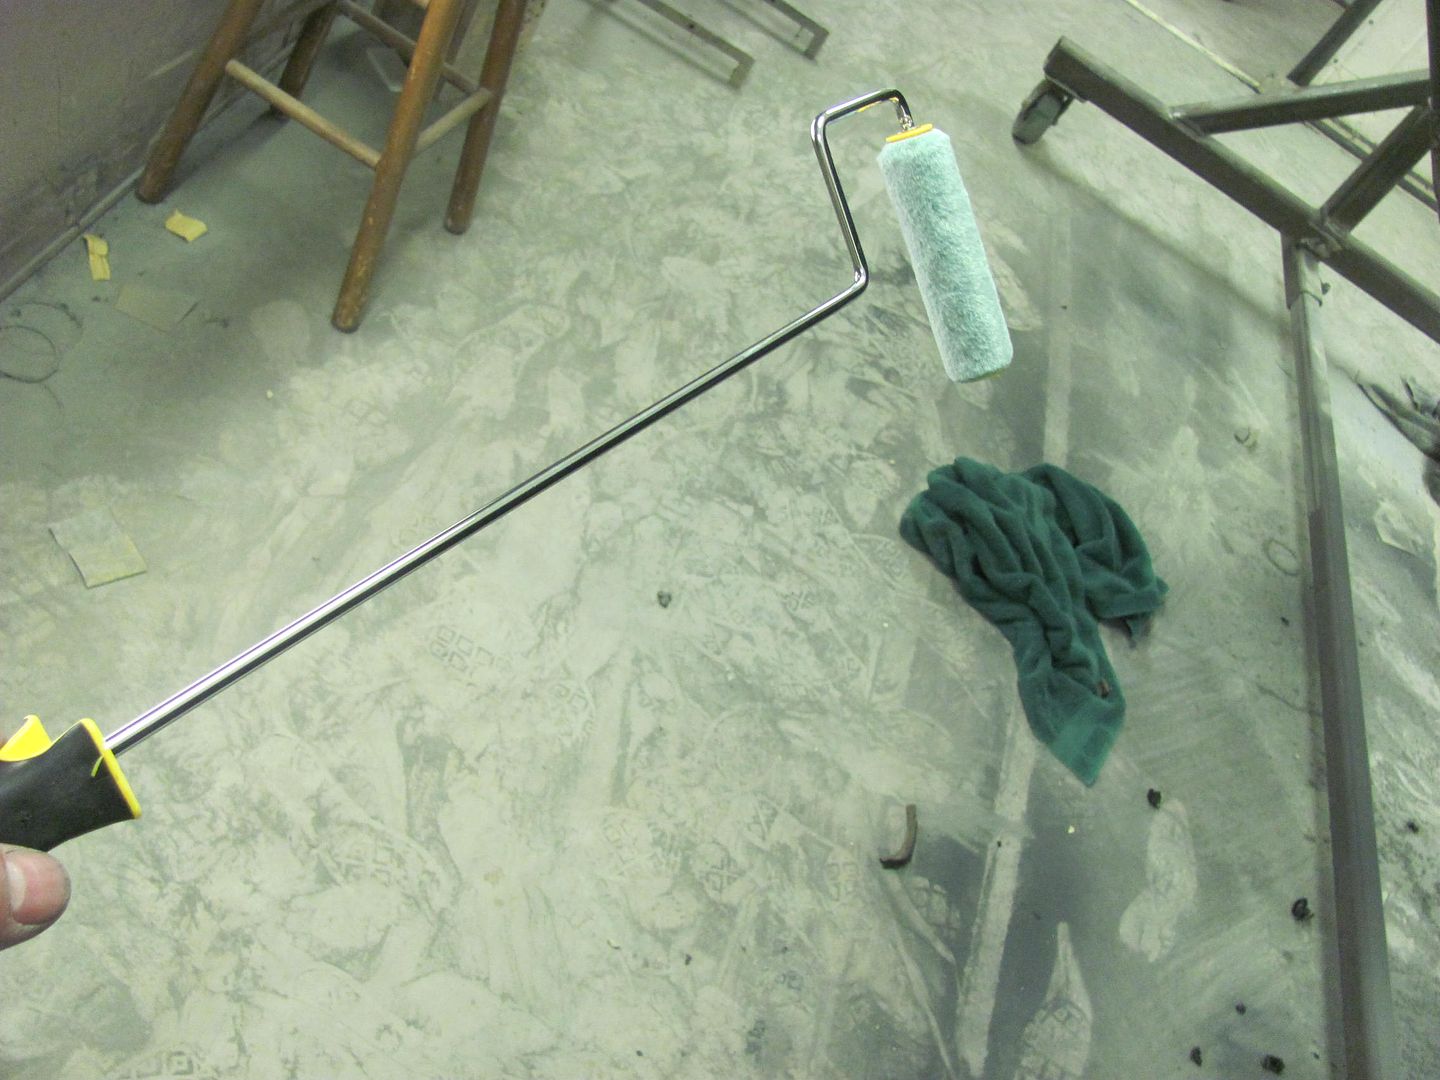 .....which should get enough on the inner quarter to seal things up.. For the rocker, needed a bit more reach, both to scuff things up and roll on some paint. Here's the new multi-tool, with a 4' lift kit. 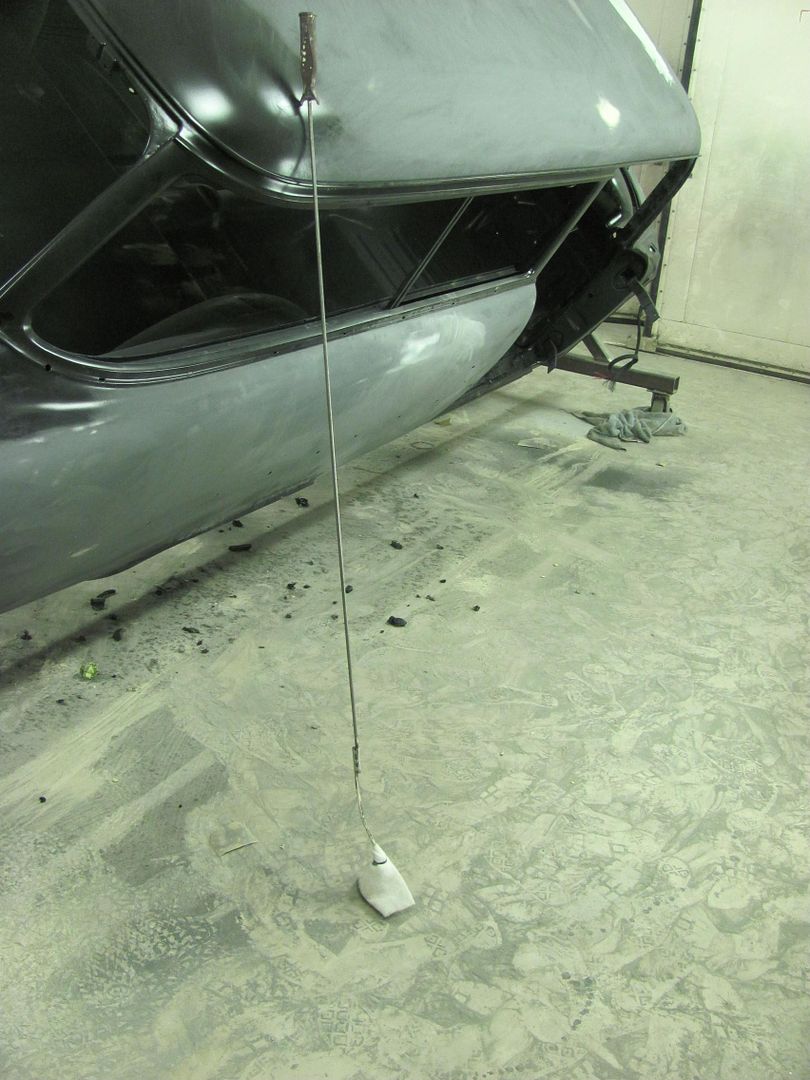 Scuffing attachment 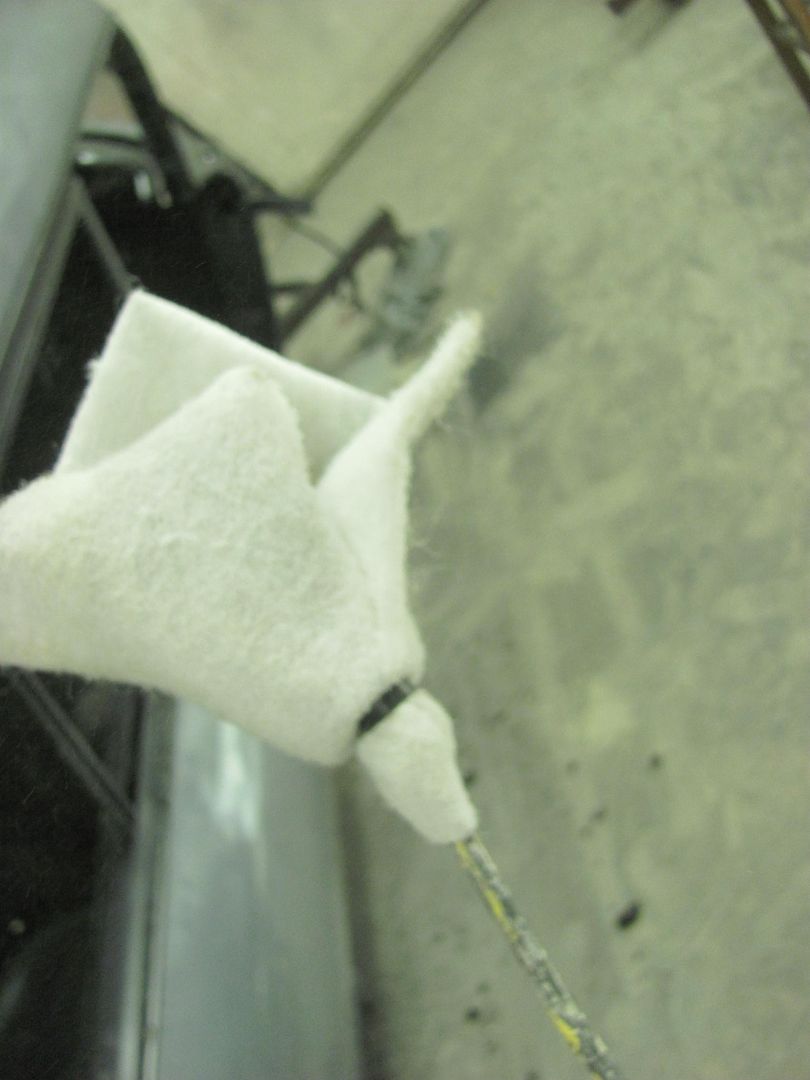 Target area.. 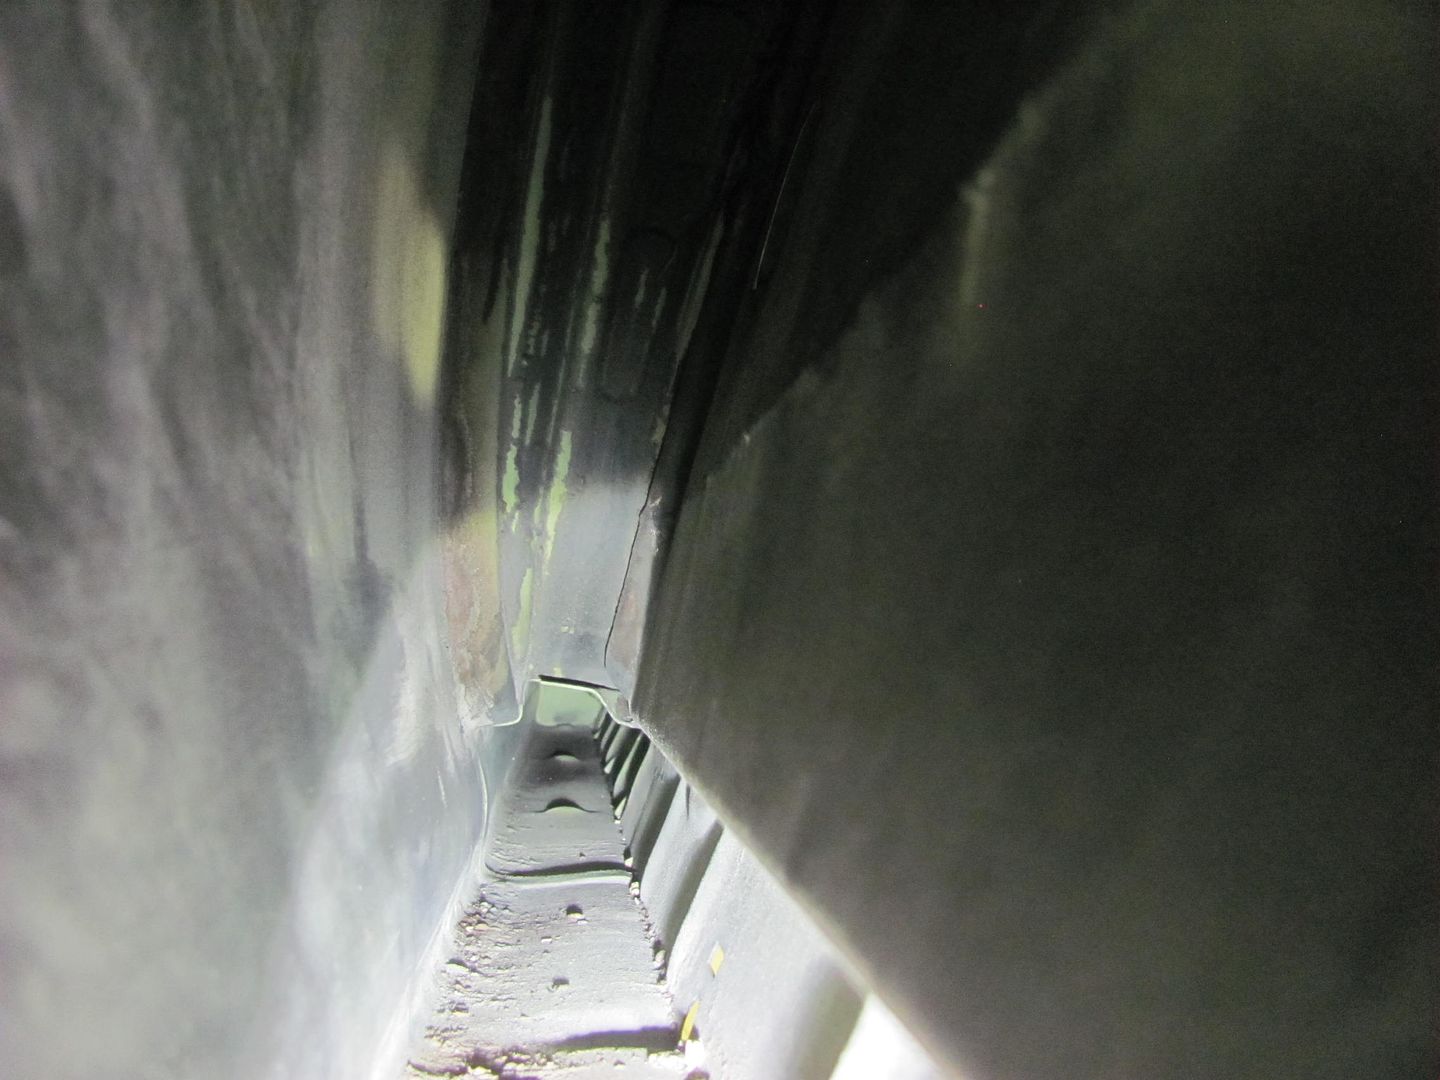 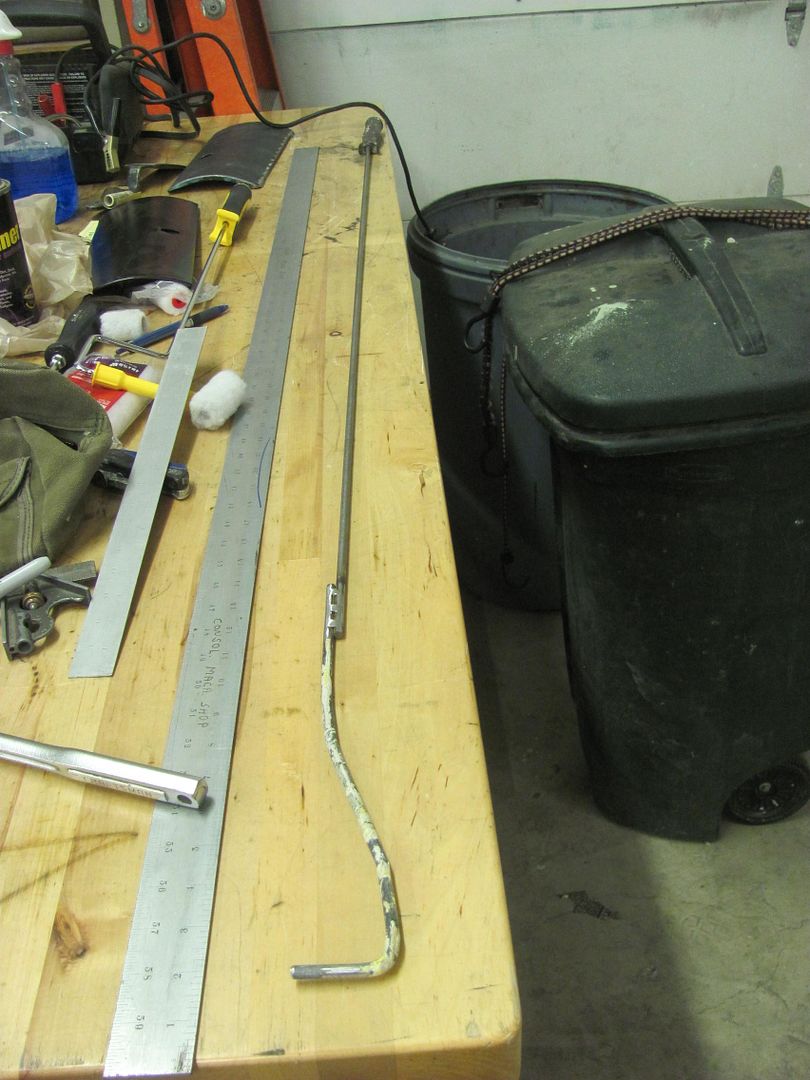 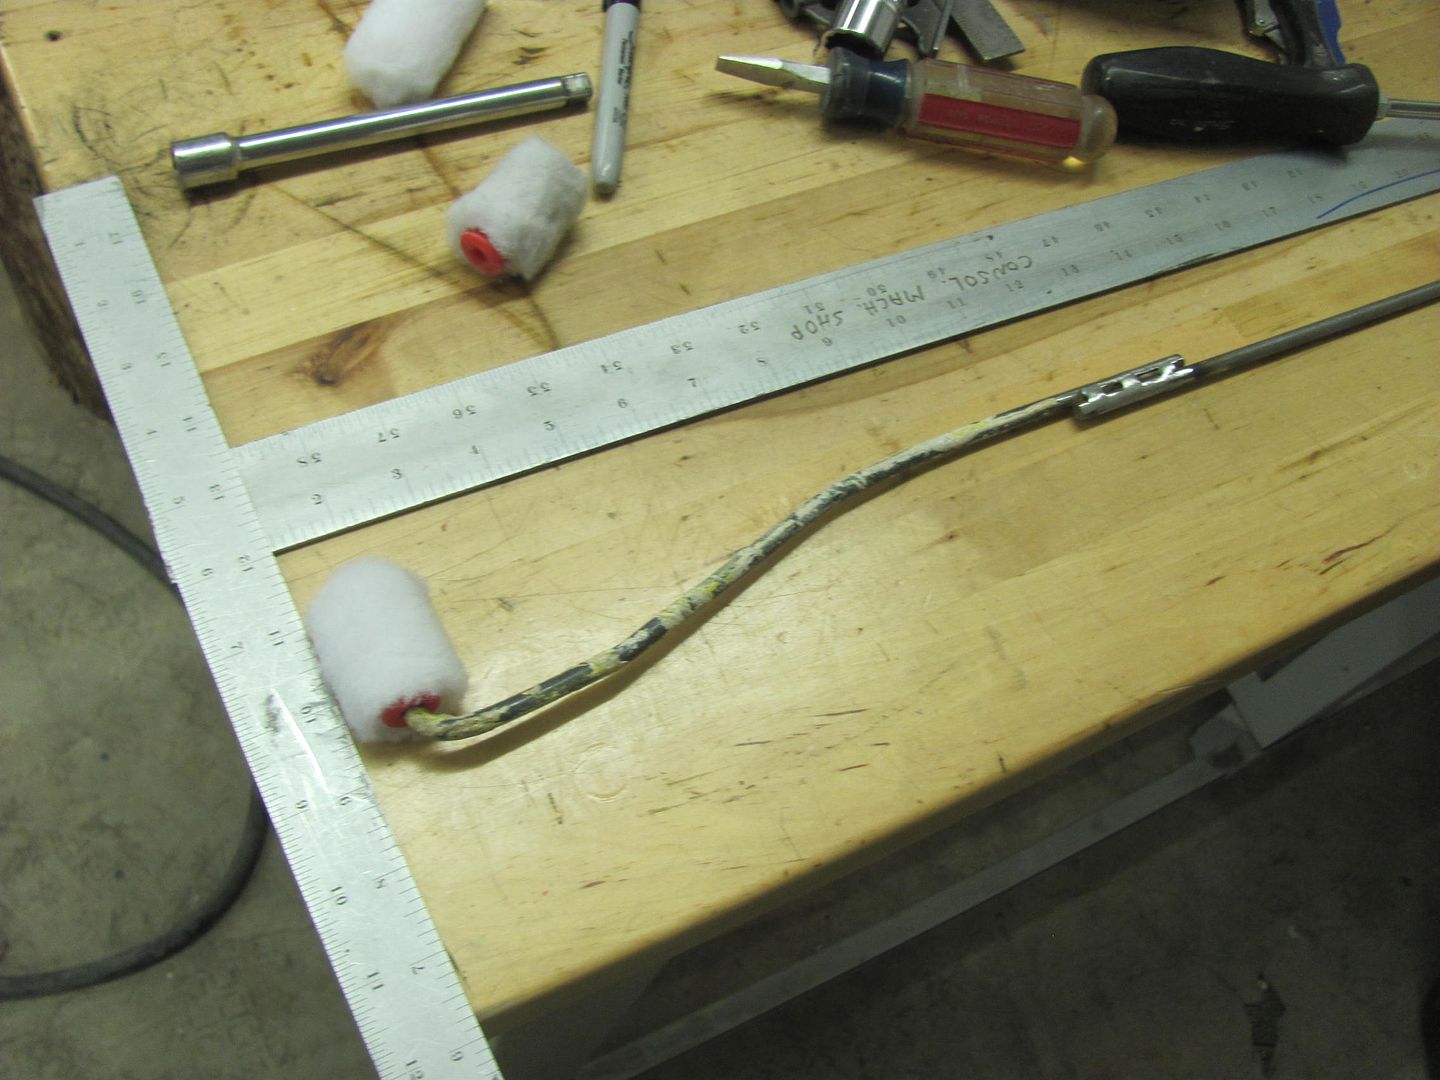 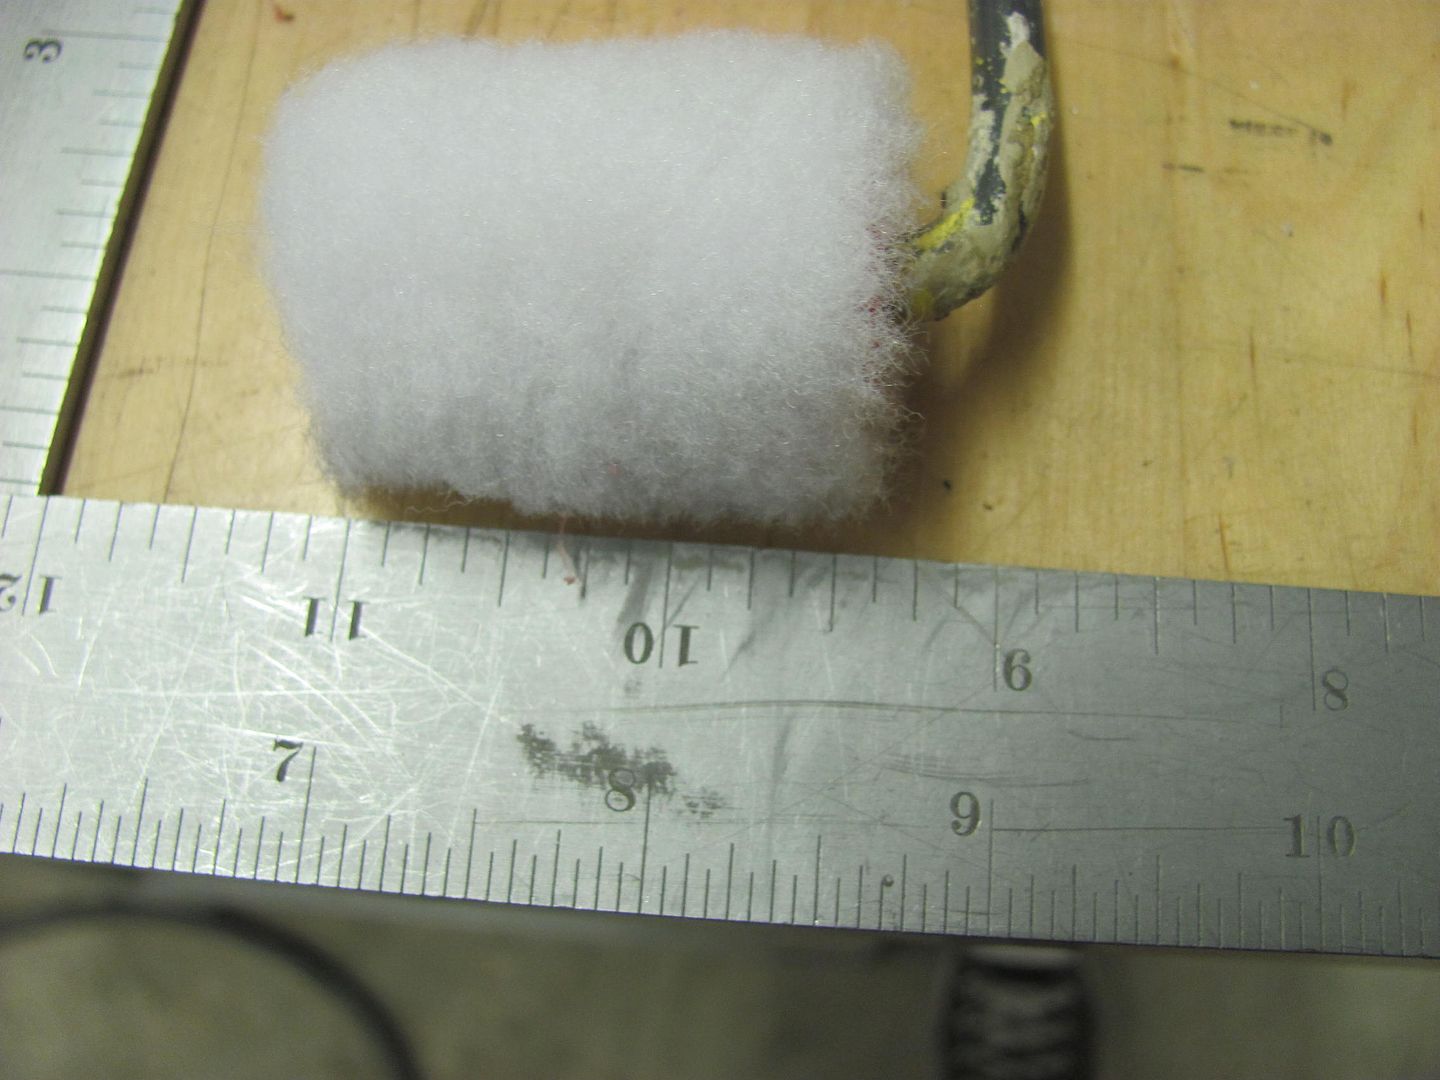 These dividers sit above the wheelwells inside the top of the quarter, and a bottom flange serves as a welding anchor for the top of the wheelwell. If they both had a bottom flange.. 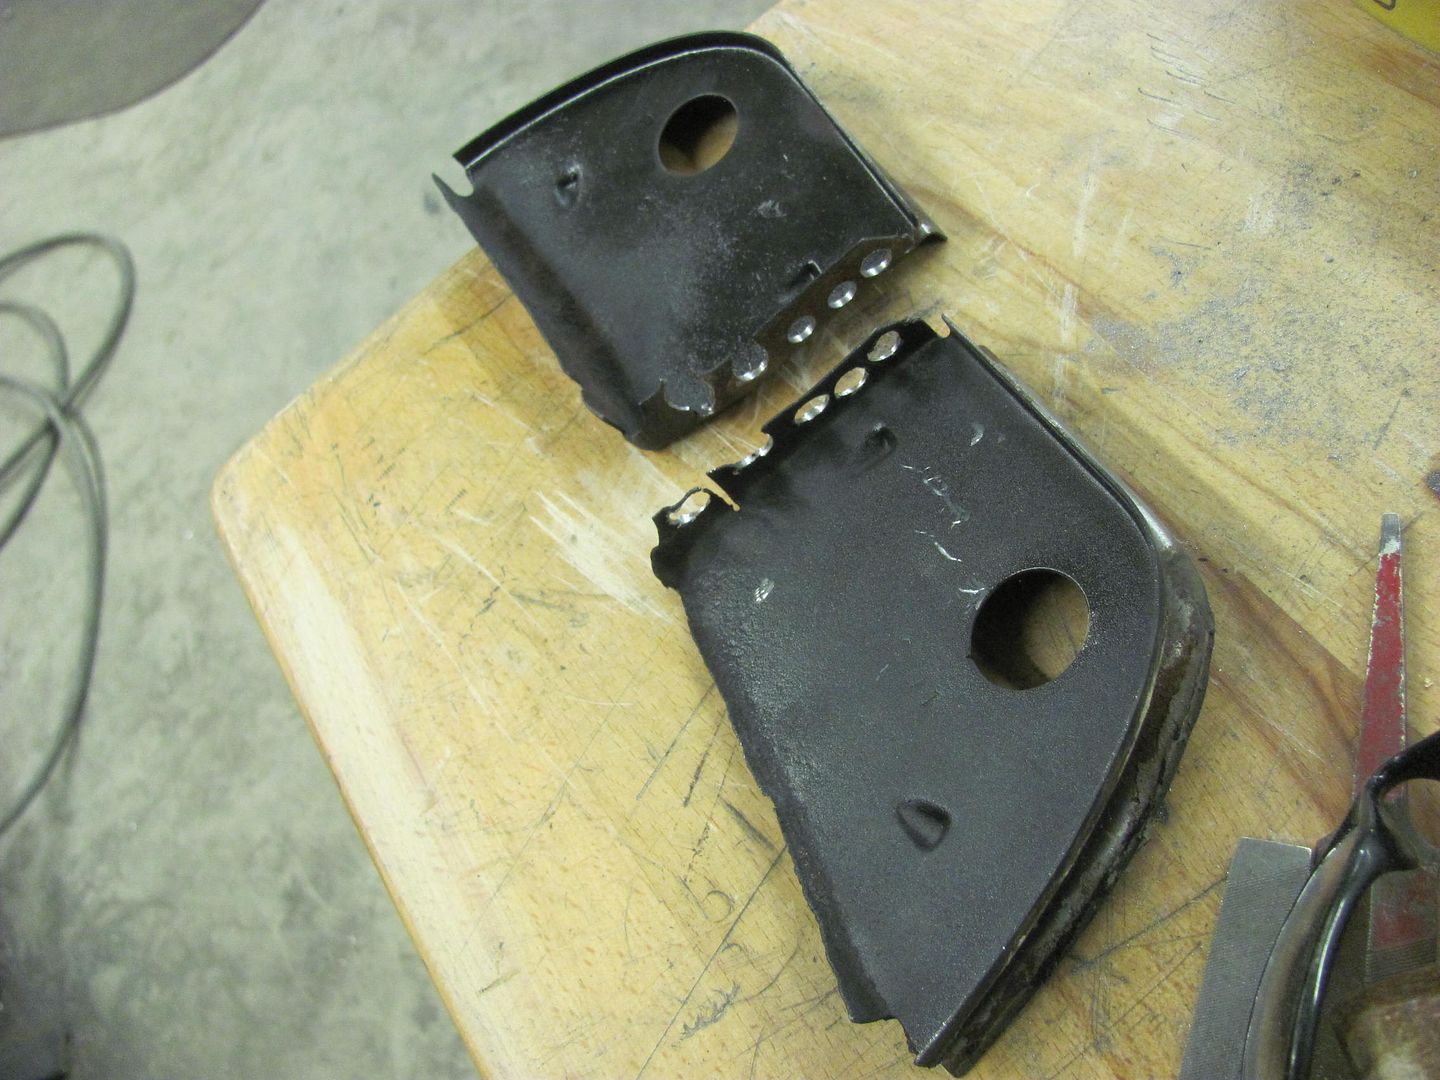 On top of those was a nice foam seal, which also served to trap water and cause one of our pits in the original quarter that we removed. 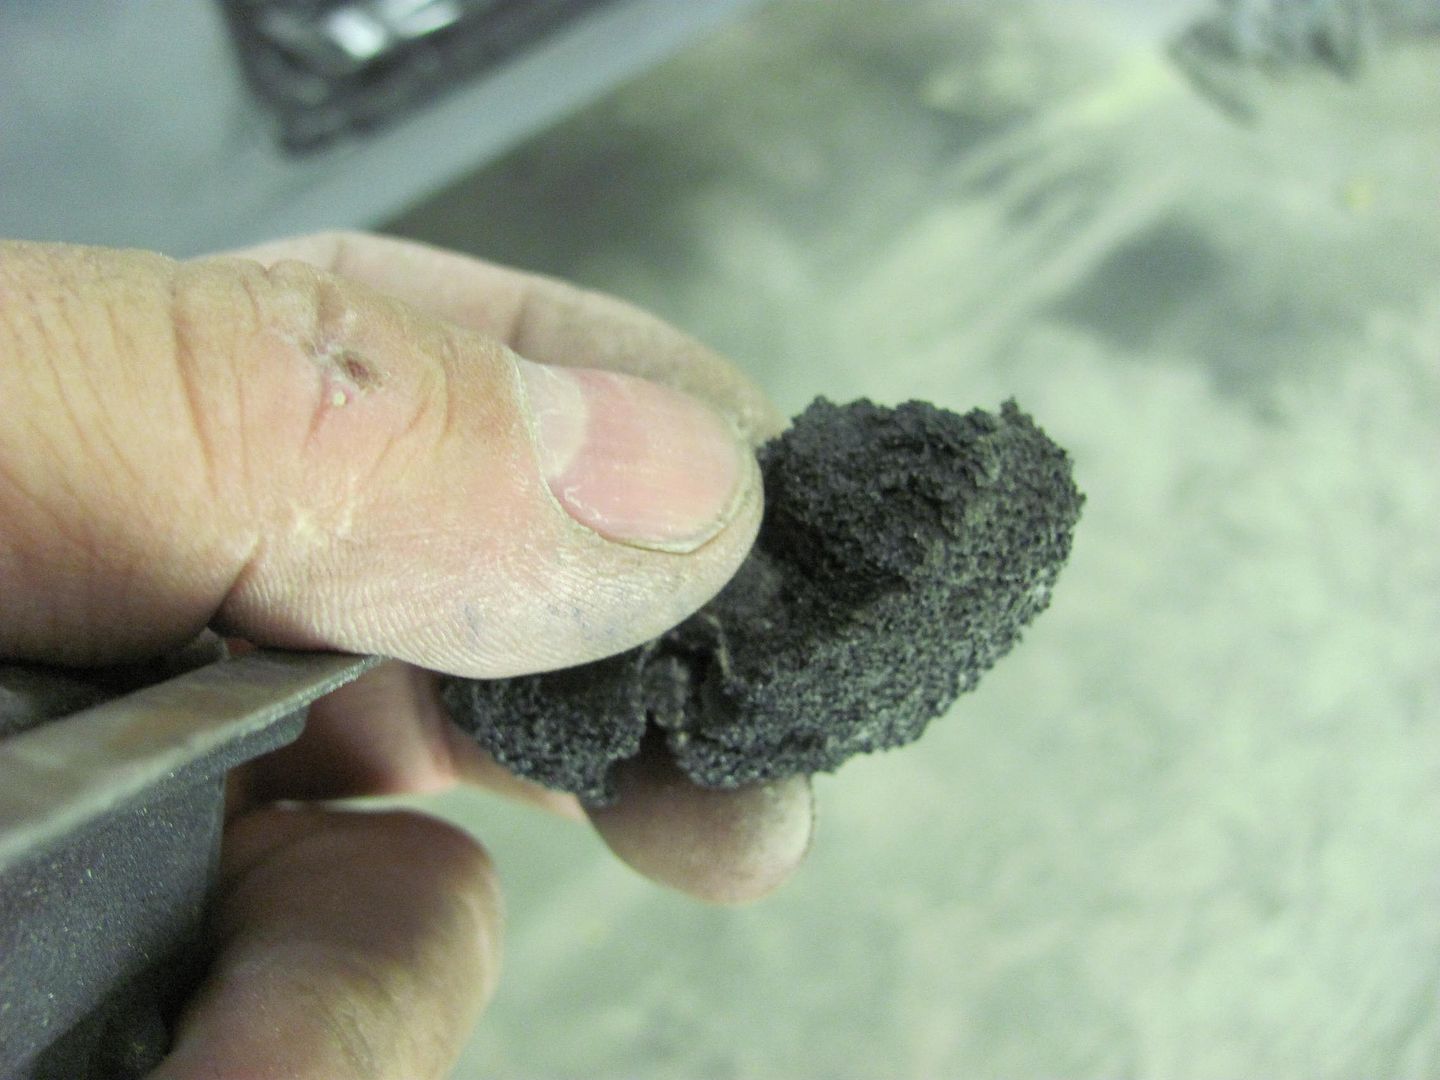 So the thought is to replace these with new ones made of 16 gauge, using a bulb seal at the top for less water absorption/retention... 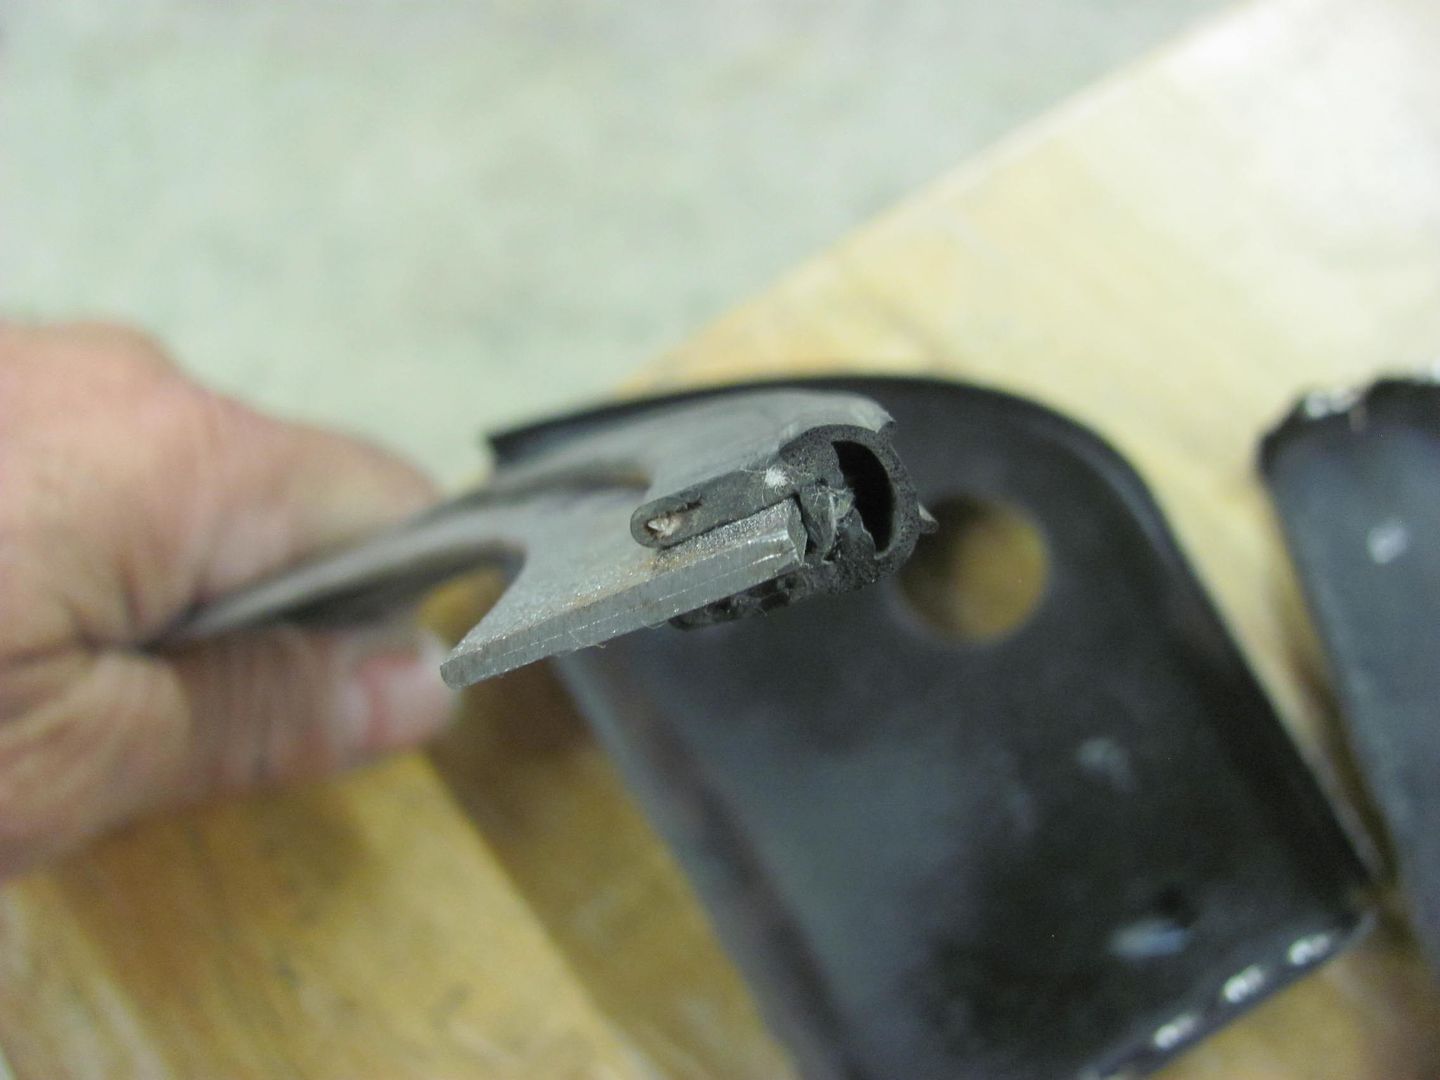 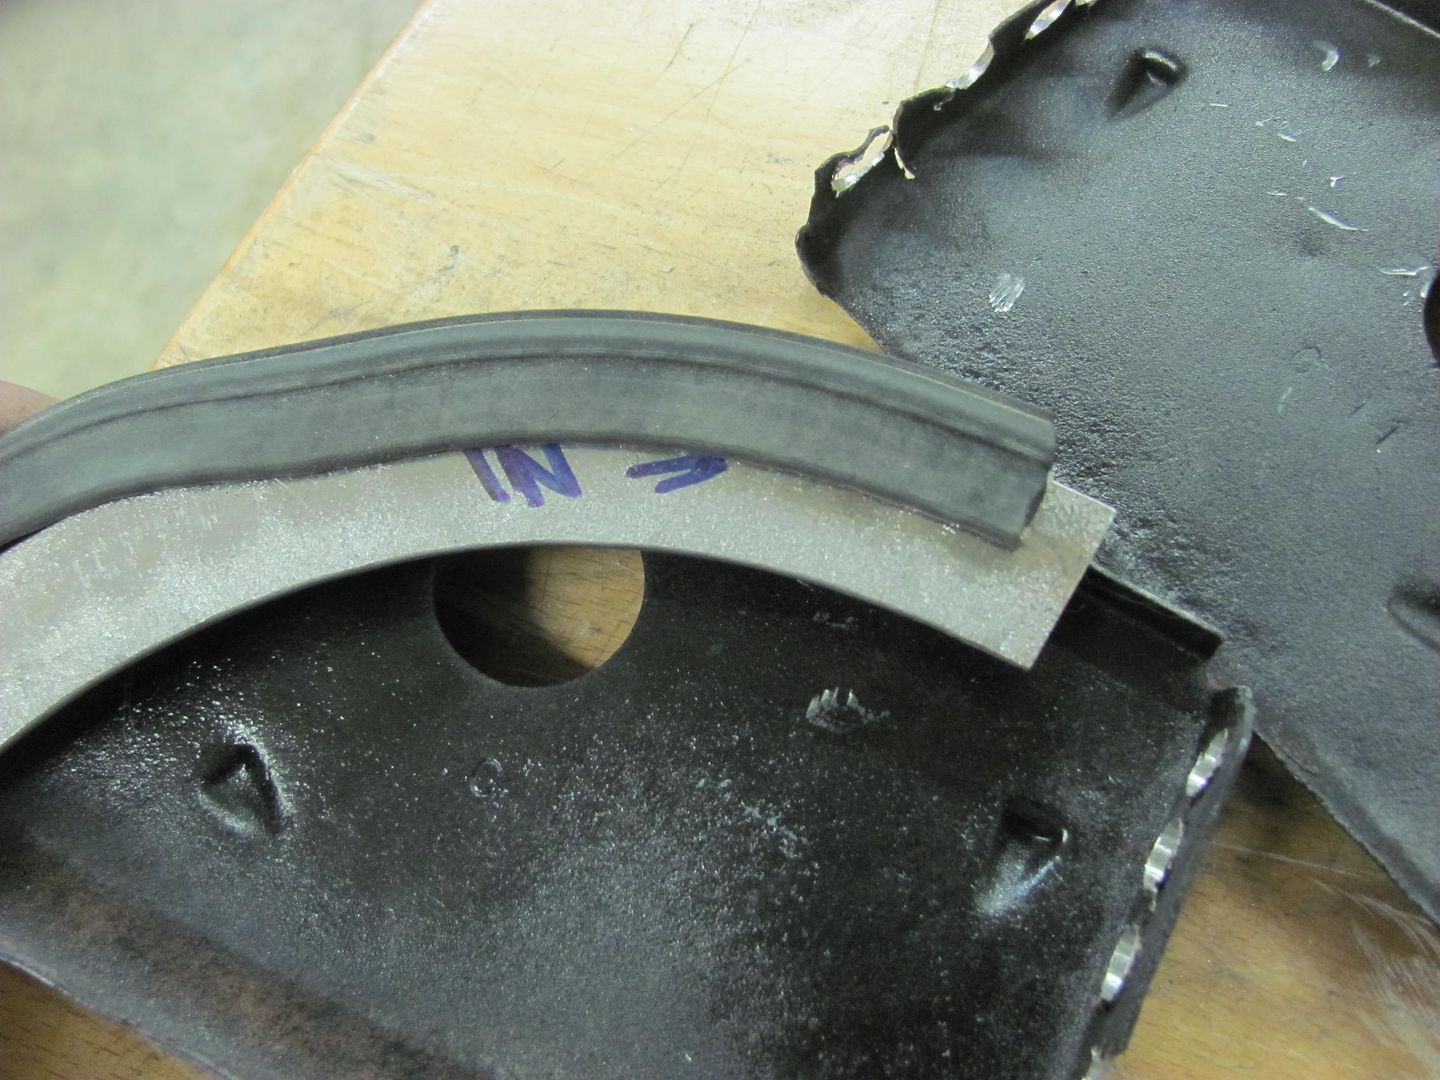 With these now removed, you can see the still bare 1955 sheet metal that we'll also get covered with epoxy prior to installing the new brackets..  After all this fun, we loaded up one of the Biederman fenders and took it over to Saufley Sandblasting to get a quote on those. We'll get all the parts blasted individually, then sealed in epoxy primer, then assembled. After assembly, one more dose of Epoxy and they're off to the painter..
__________________
Robert |
|
|
|
|
09-10-2016, 09:22 PM
|
#23 |
|
Registered User
Join Date: Apr 2011
Location: .
Posts: 3,104
|
Re: 55 Wagon Progress
Wow, thats what I dig about this build. Going to any and all lengths to make it right.
|
|
|
|
|
09-17-2016, 10:50 PM
|
#24 |
|
Registered User
Join Date: Jan 2013
Location: Leonardtown, MD
Posts: 1,642
|
Re: 55 Wagon Progress
Thanks Bomp!
Working today on fitting up the wheel wells. The front half is re-popped and uses the same part as the sedans, the rear part is not available. Fitting the front, notice the right lower corner (as shown) tapers up with less overlap for plug/spot welding. 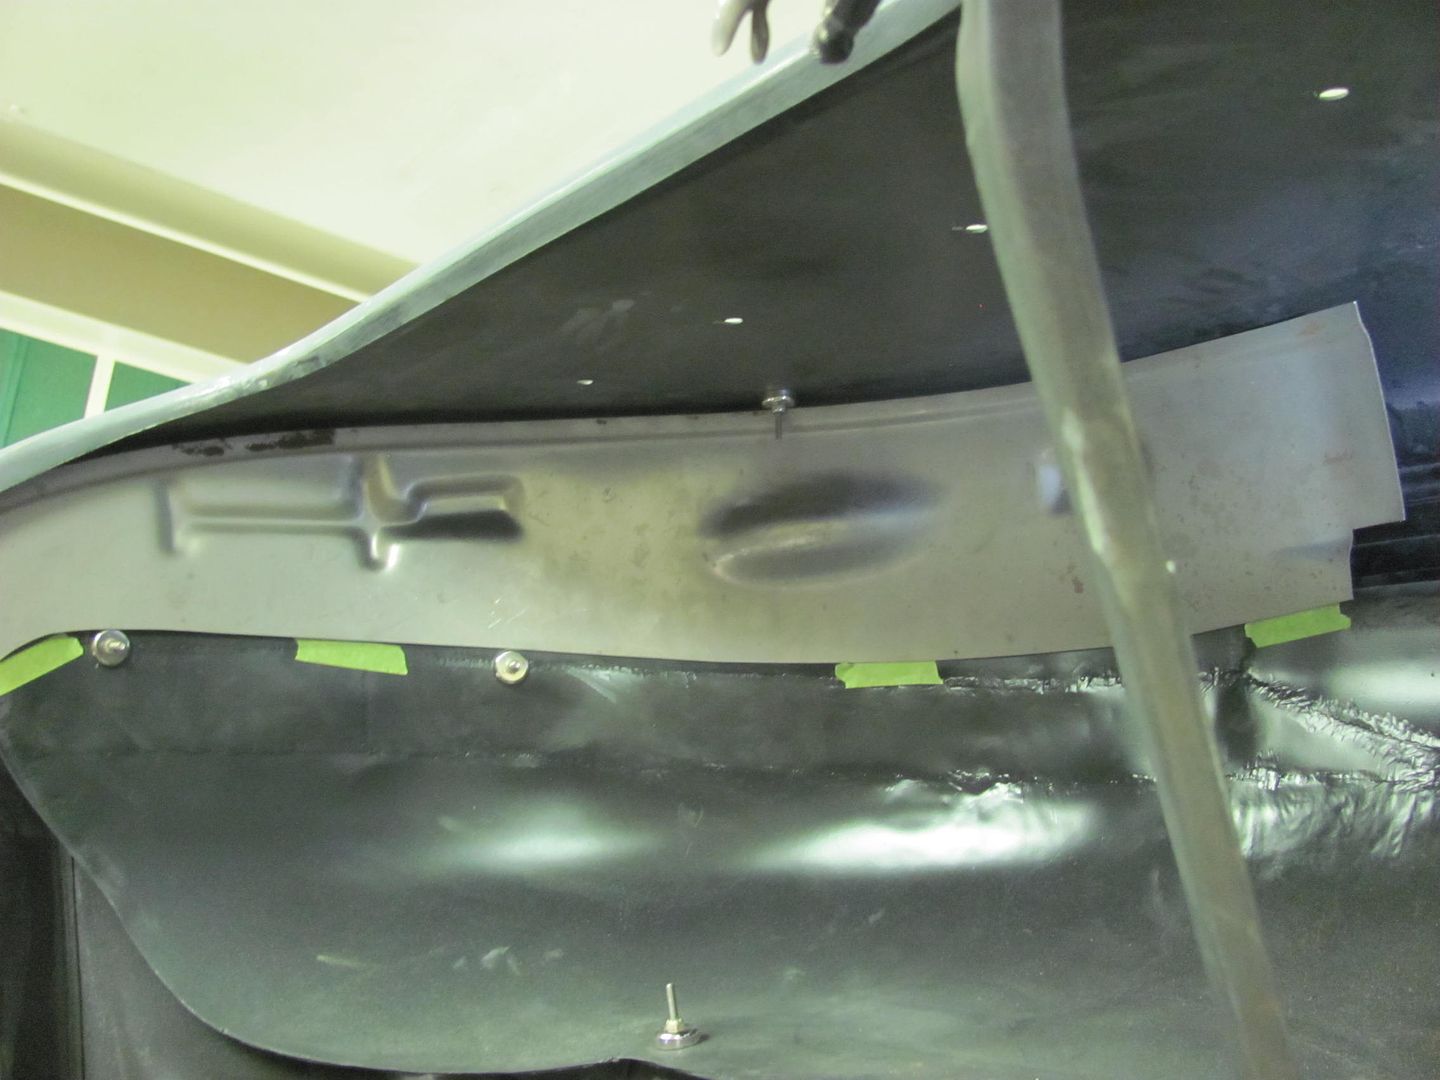 The rear section has a notch to clear where the leaf springs used to be attached outside the frame. As the leafs are now suspended inside/under the frame, these notches aren't needed. So we'll make a new set that fills that in... 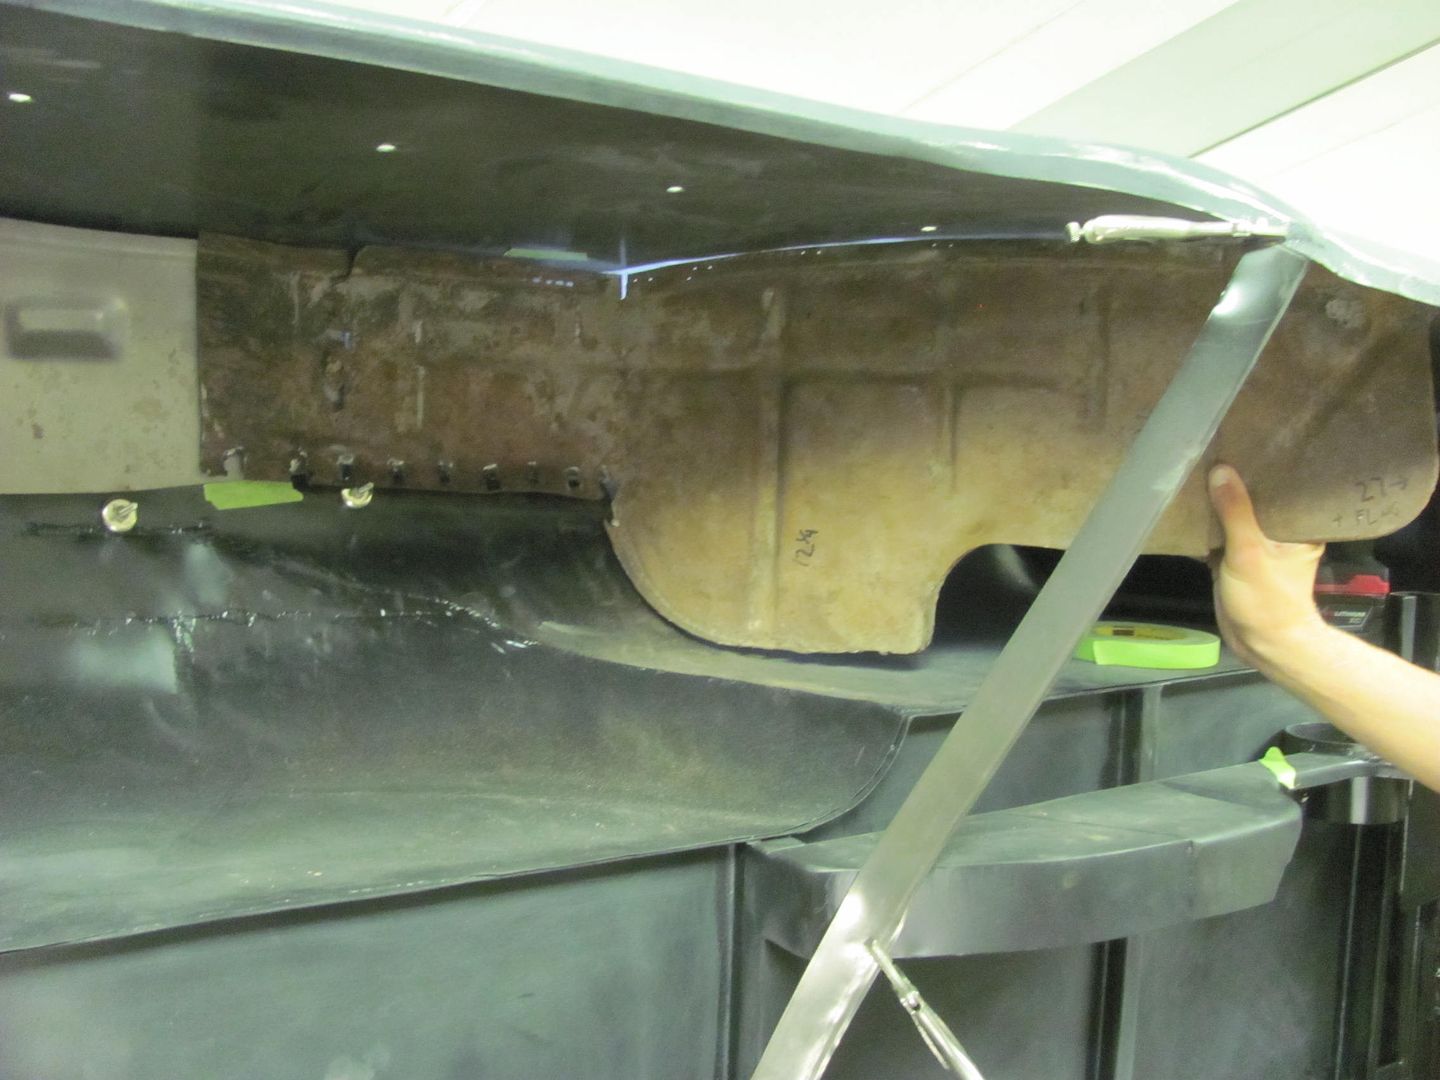 To fix our front repop, a piece of 18 gauge is TIG welded to give us a square corner... 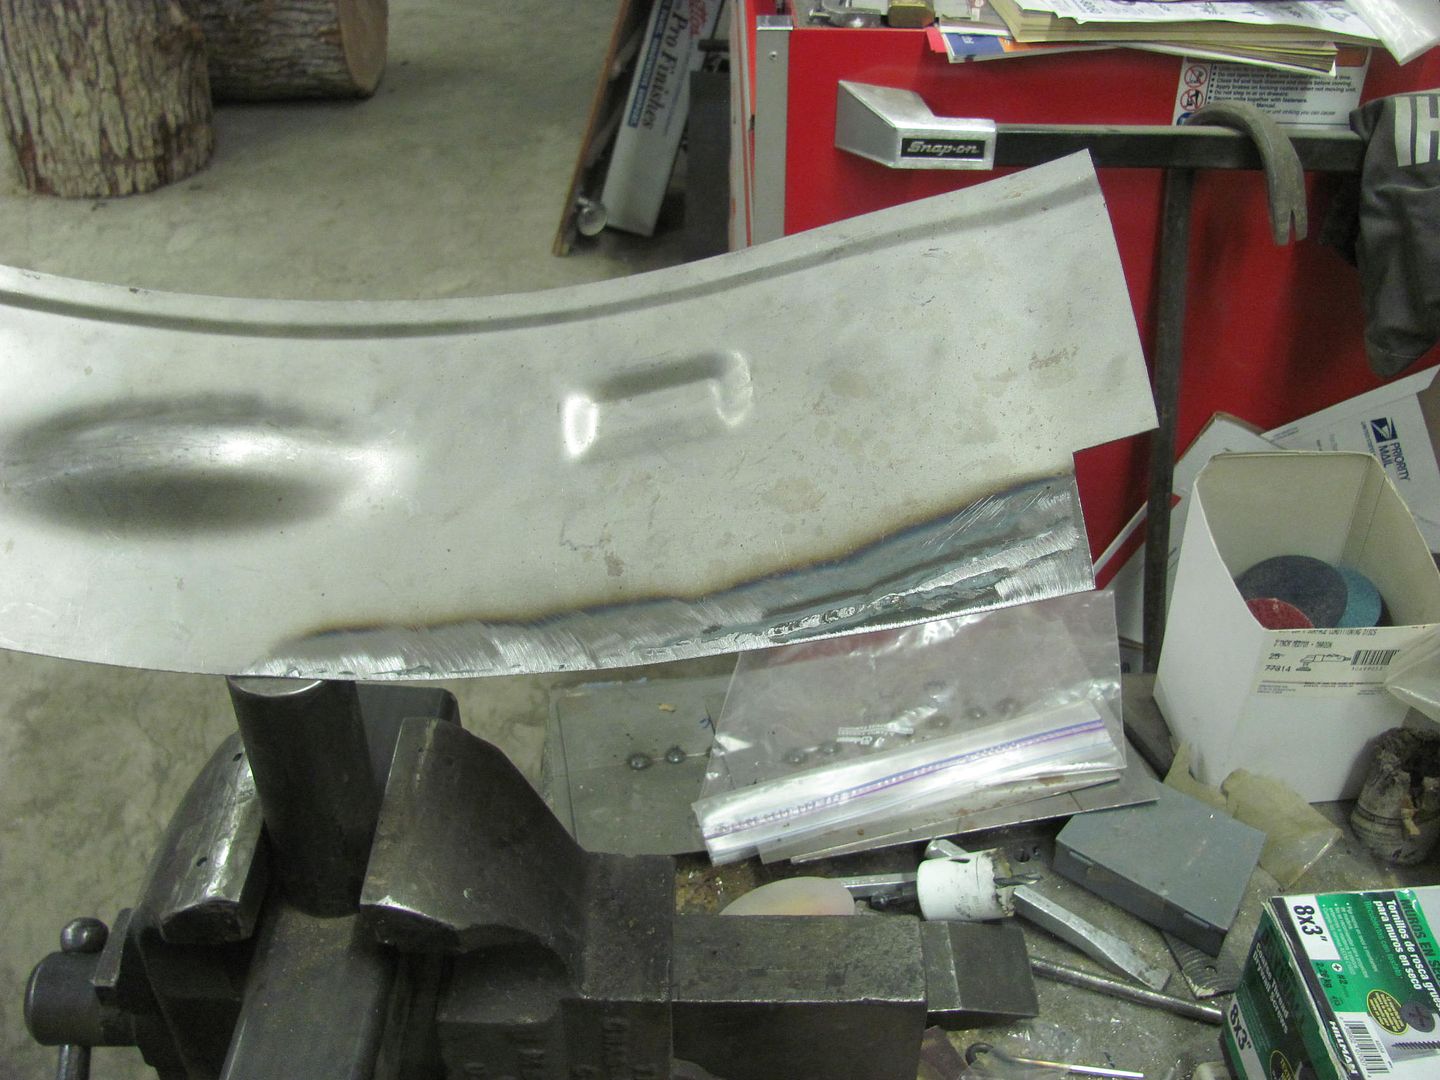 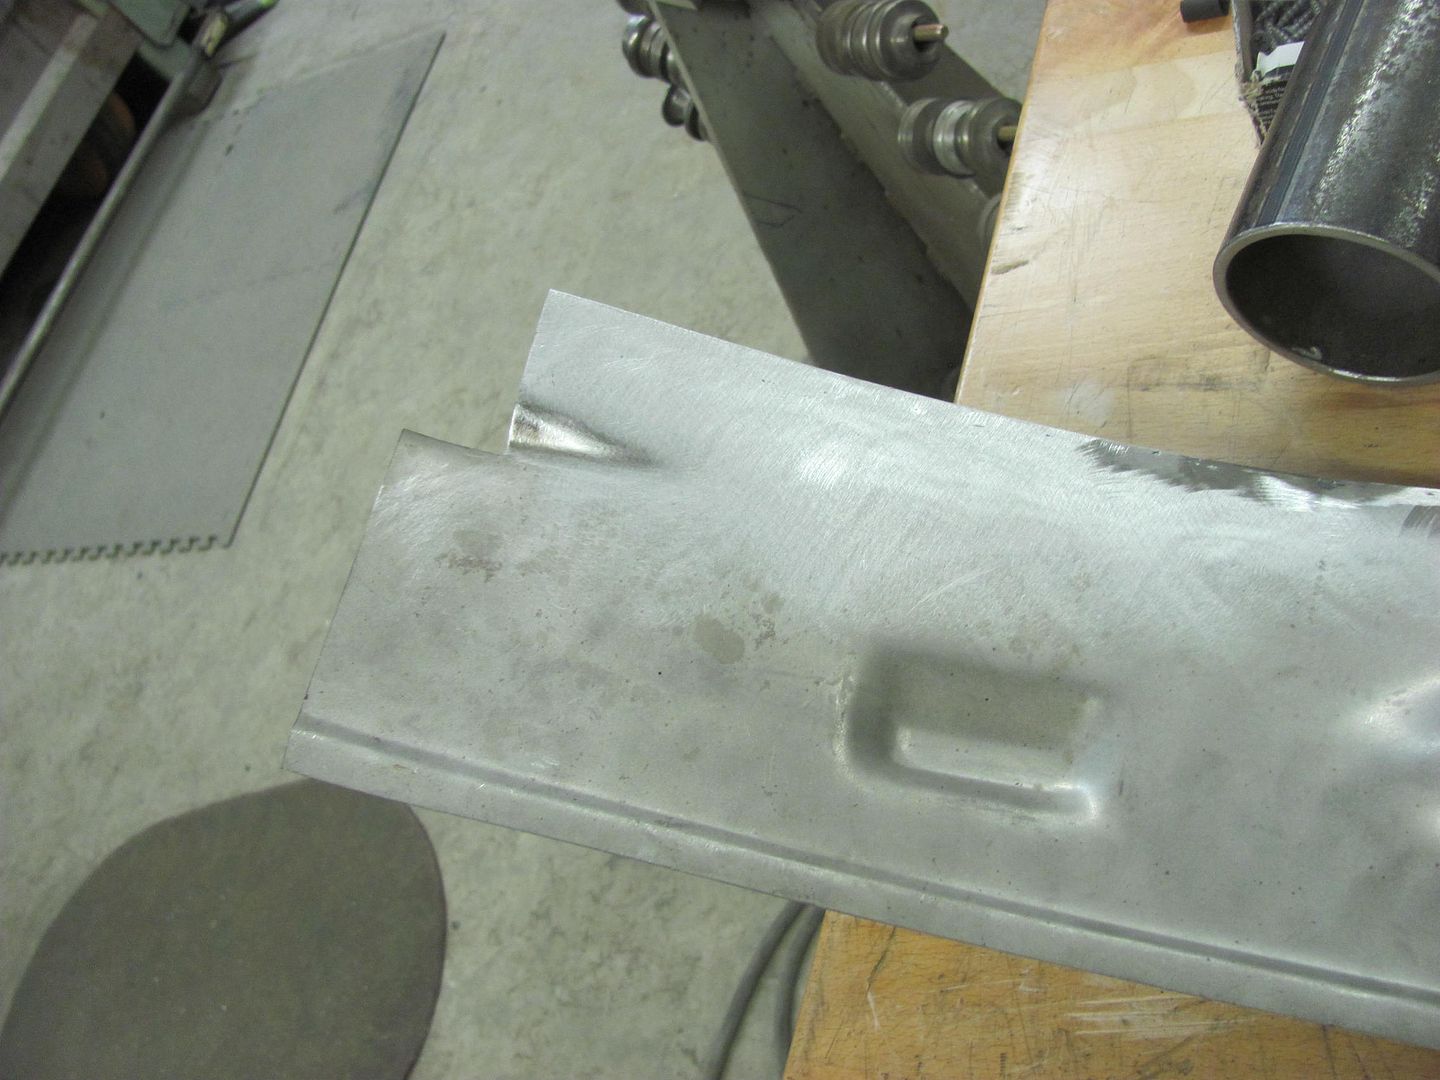 To make the new piece for the rear, we'll need a method to add beads that cross each other. This will entail a small table to use on the Lennox, an upper punch, and two pieces of matched MDF. Slots will be cut into the MDF, the top used as a guide for the punch, the bottom acts as our bottom die as it "rests" on the table.. The table will be supported in the lower tool holder using a 3/4 shank. The end is turned down to 1/2" to mate into a 1/2" hole in the 4 x 12 table, which is then plug welded. 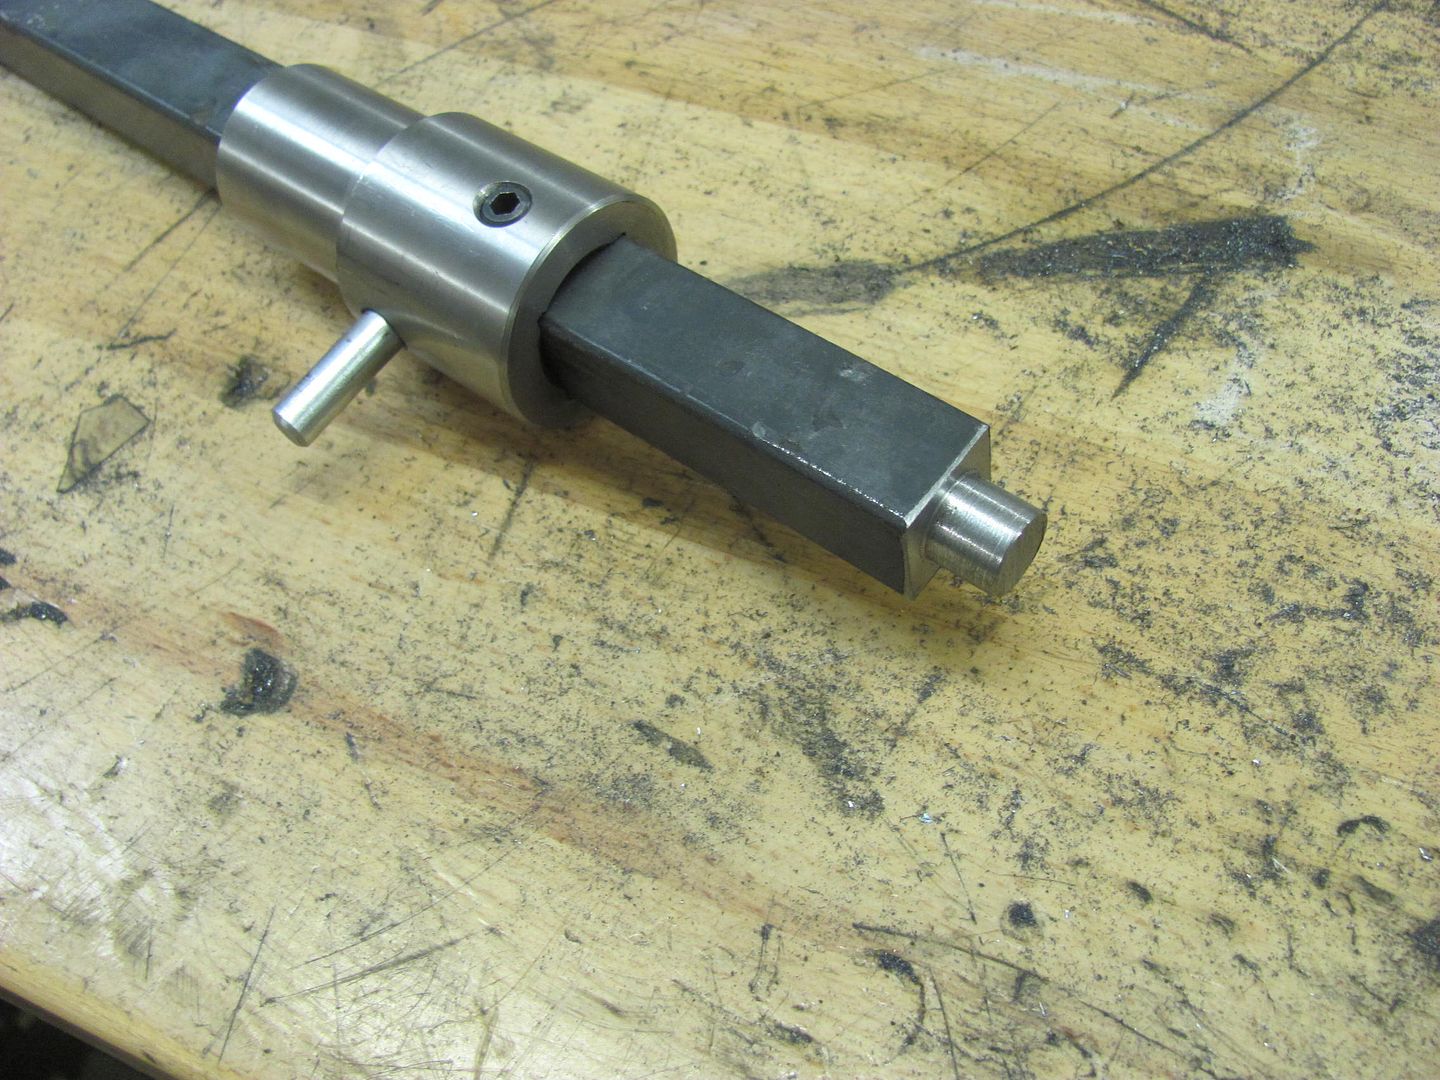 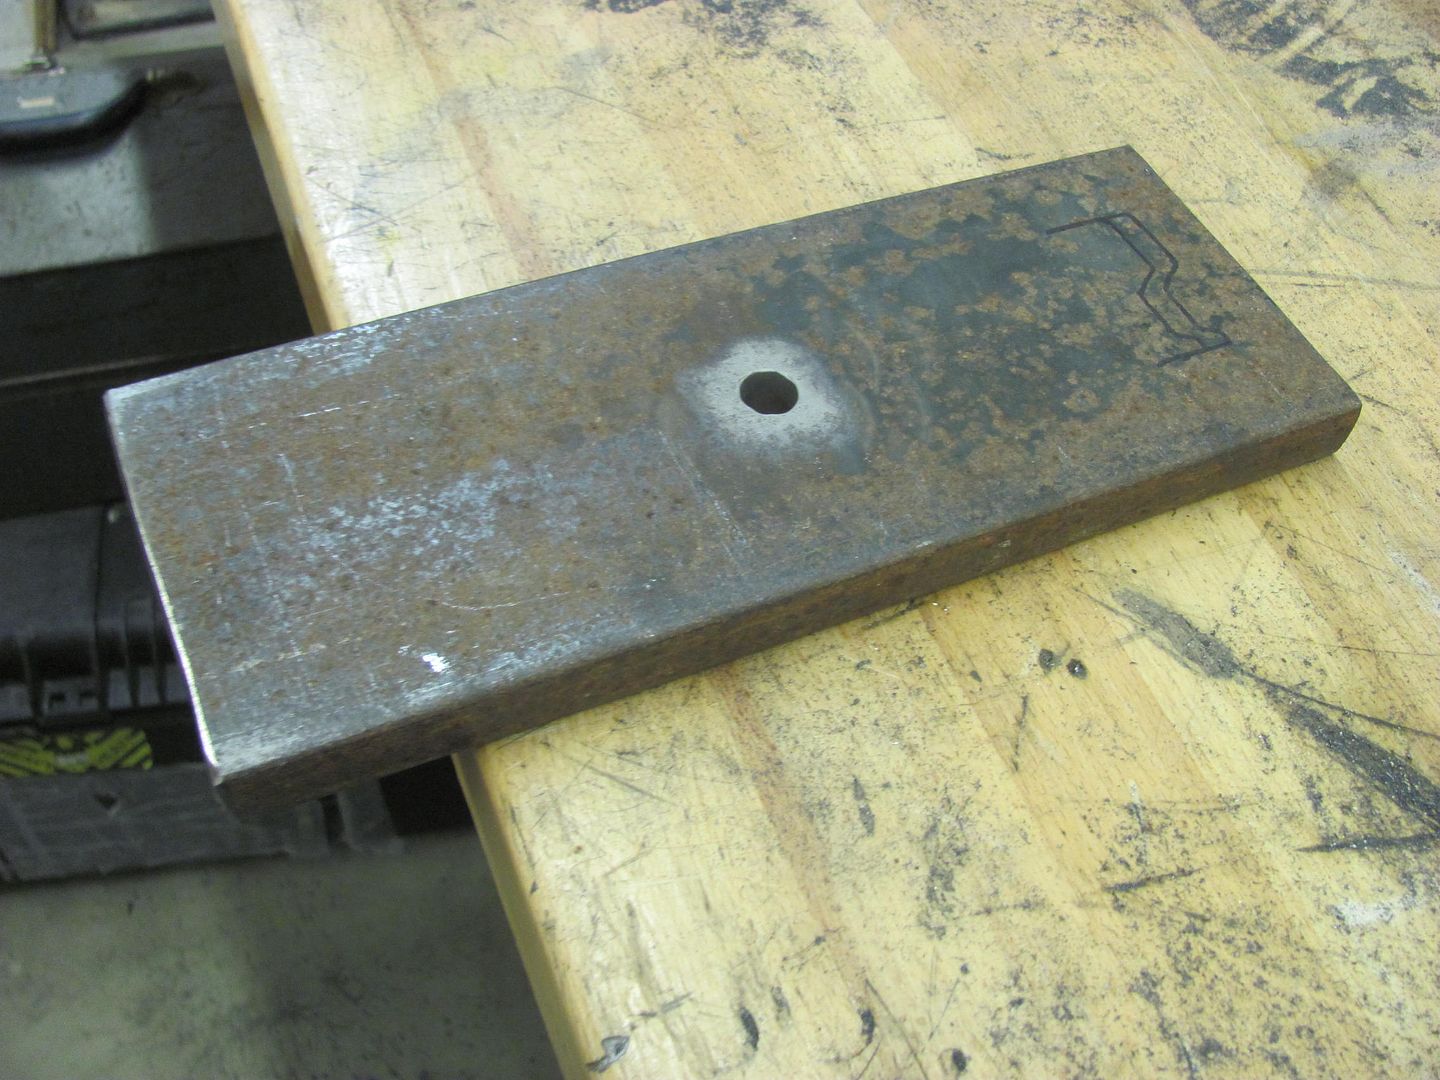 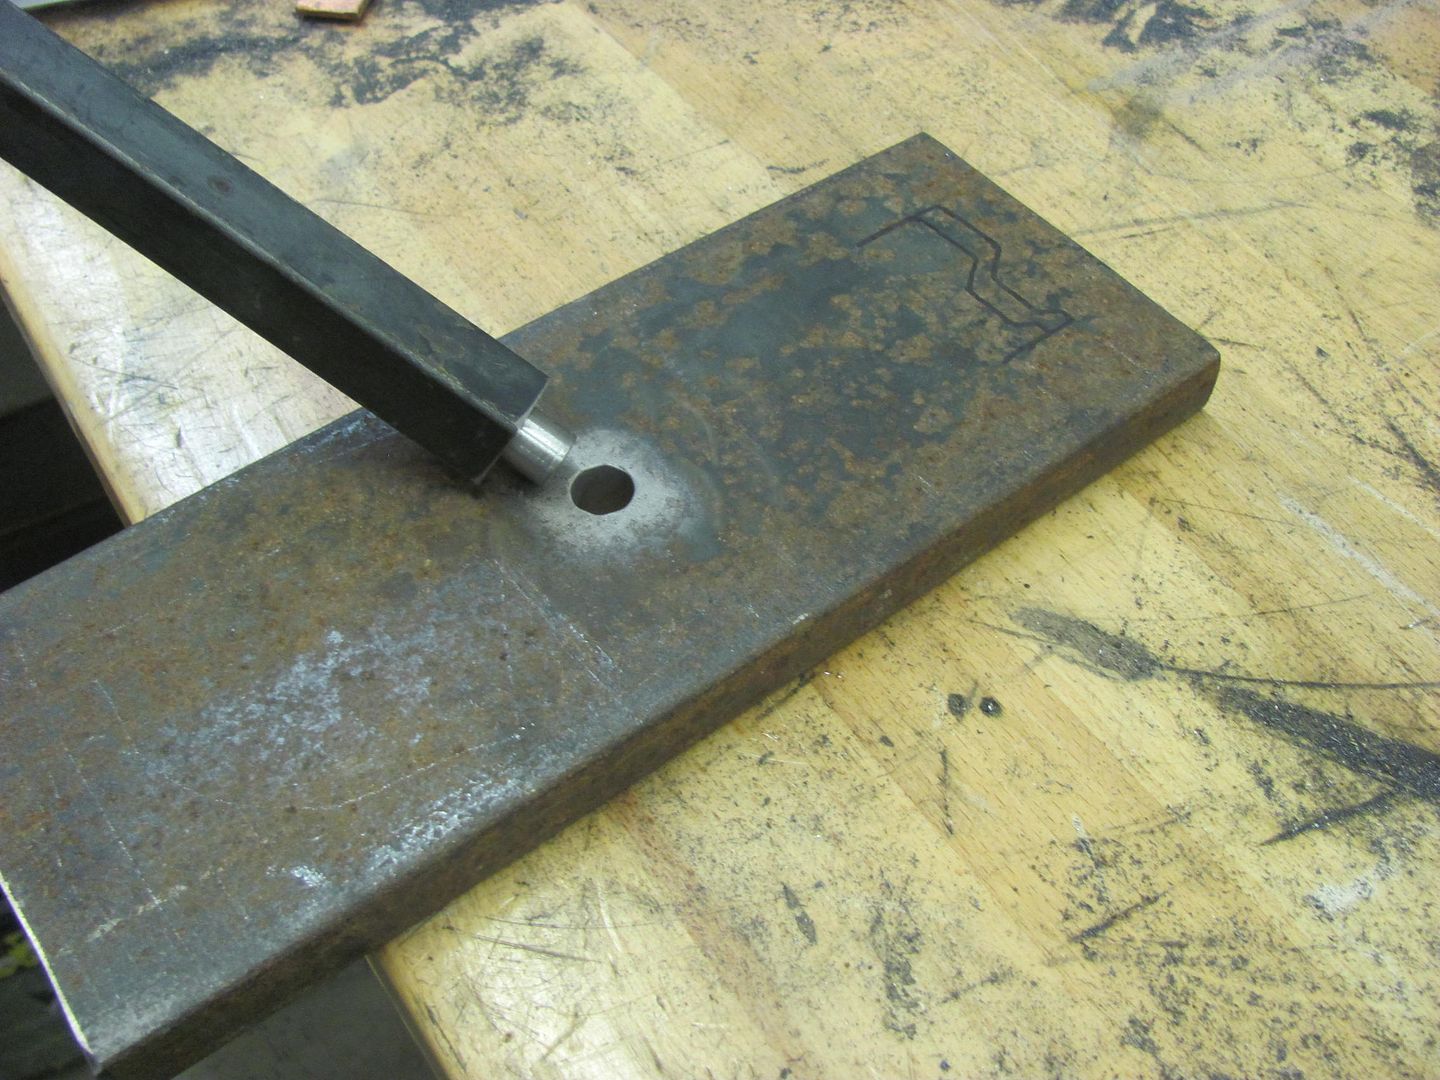 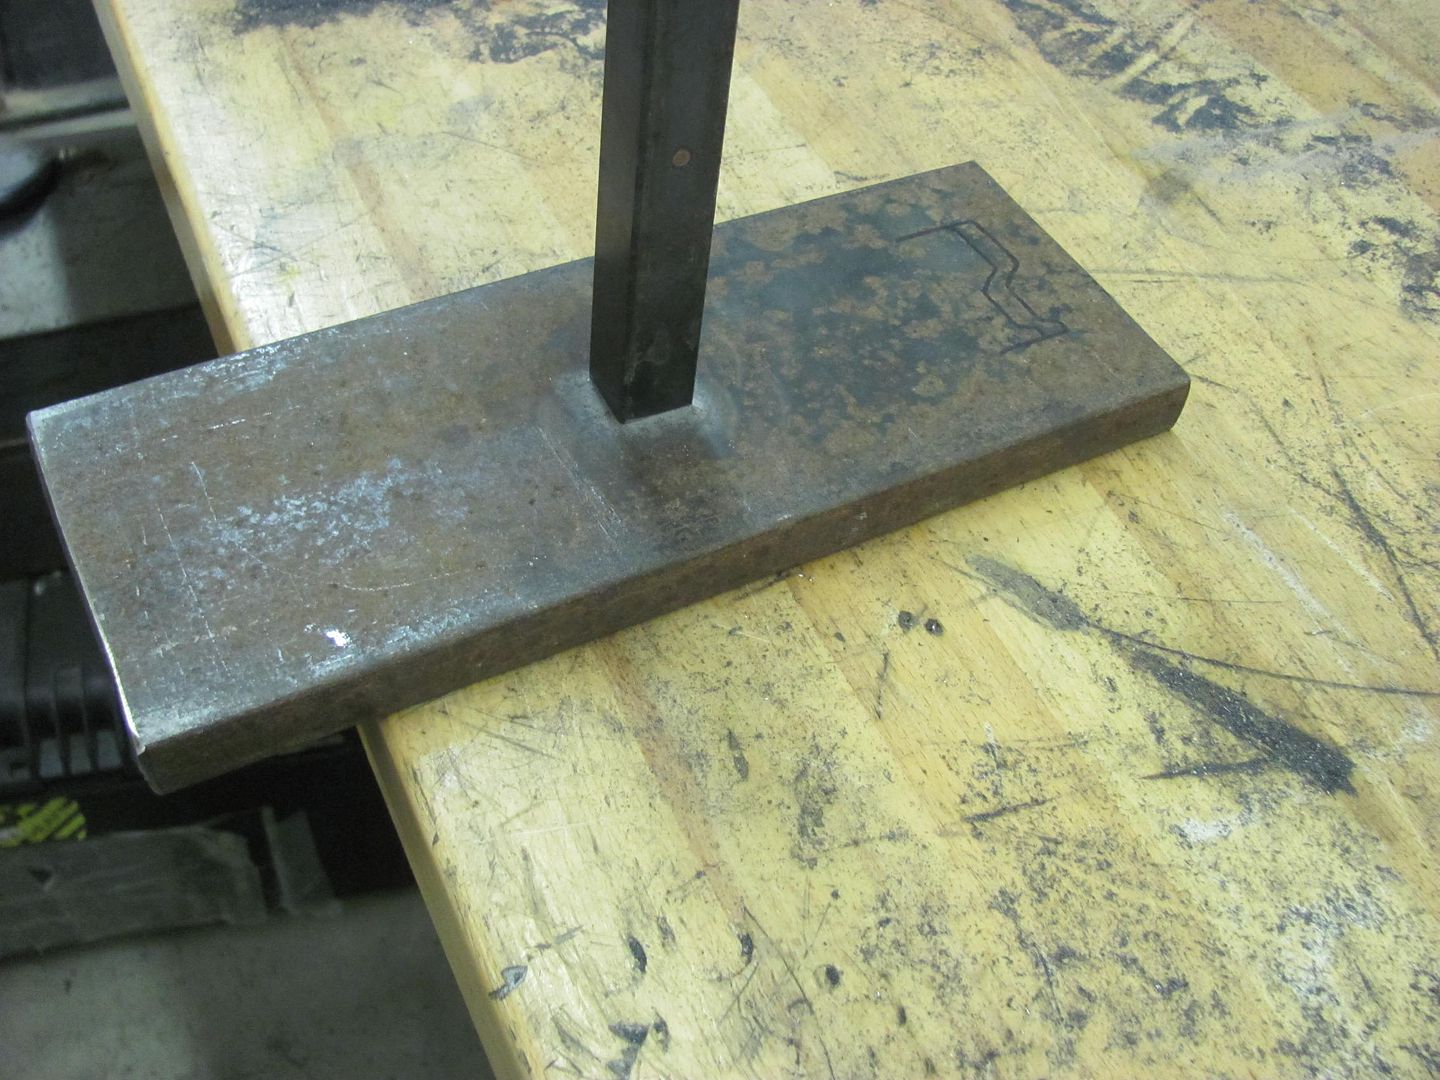 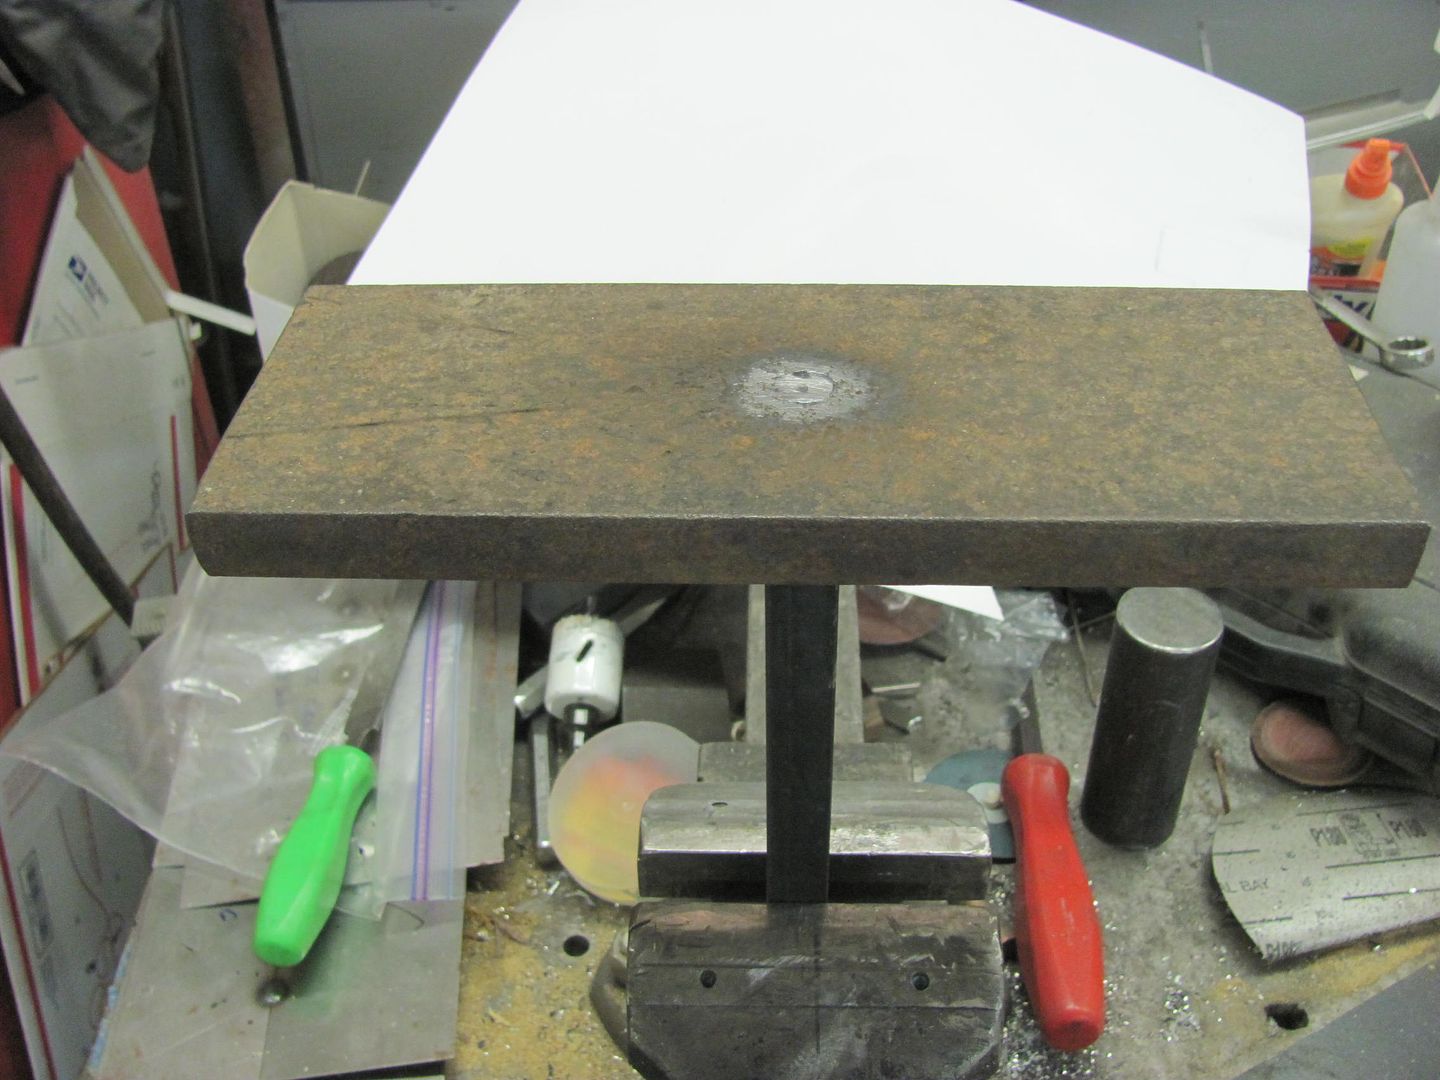 For an upper punch, we'll use some 3/4 oil hardening 4140, making it less pointed than the original just in case we want to use it for something besides the 55.  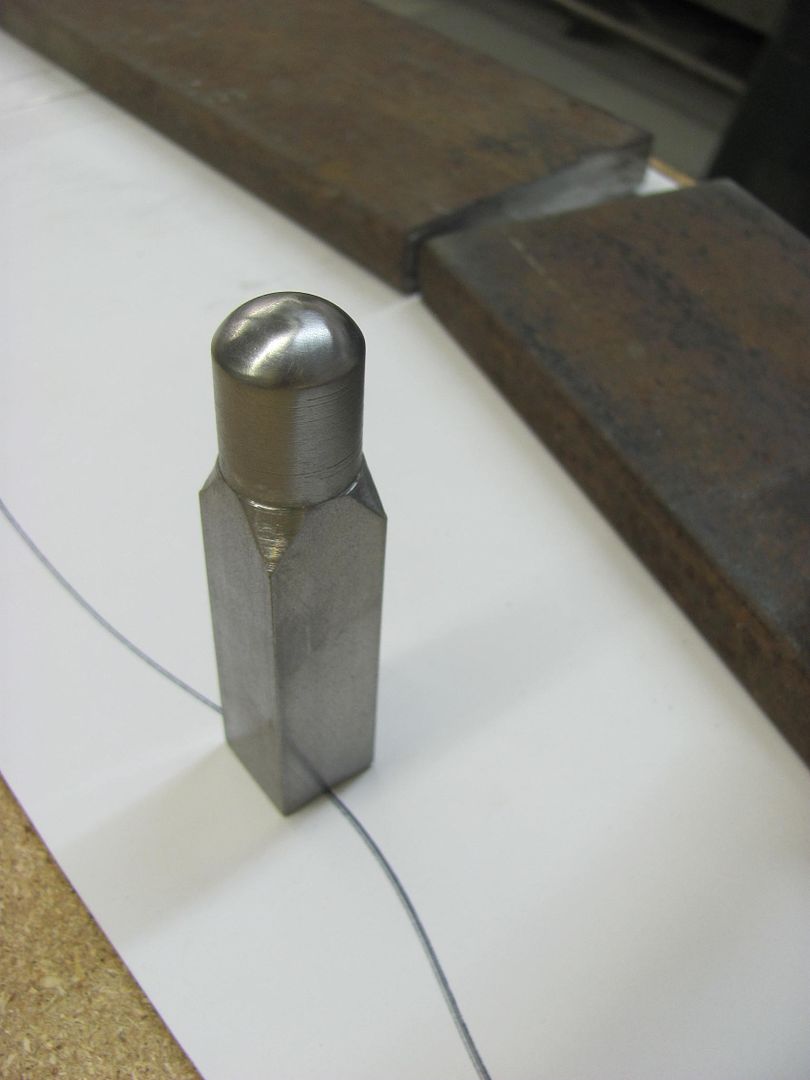  For a bead guide we first need to get a good template of the inside of the quarter. The adjustable spline comes in handy... 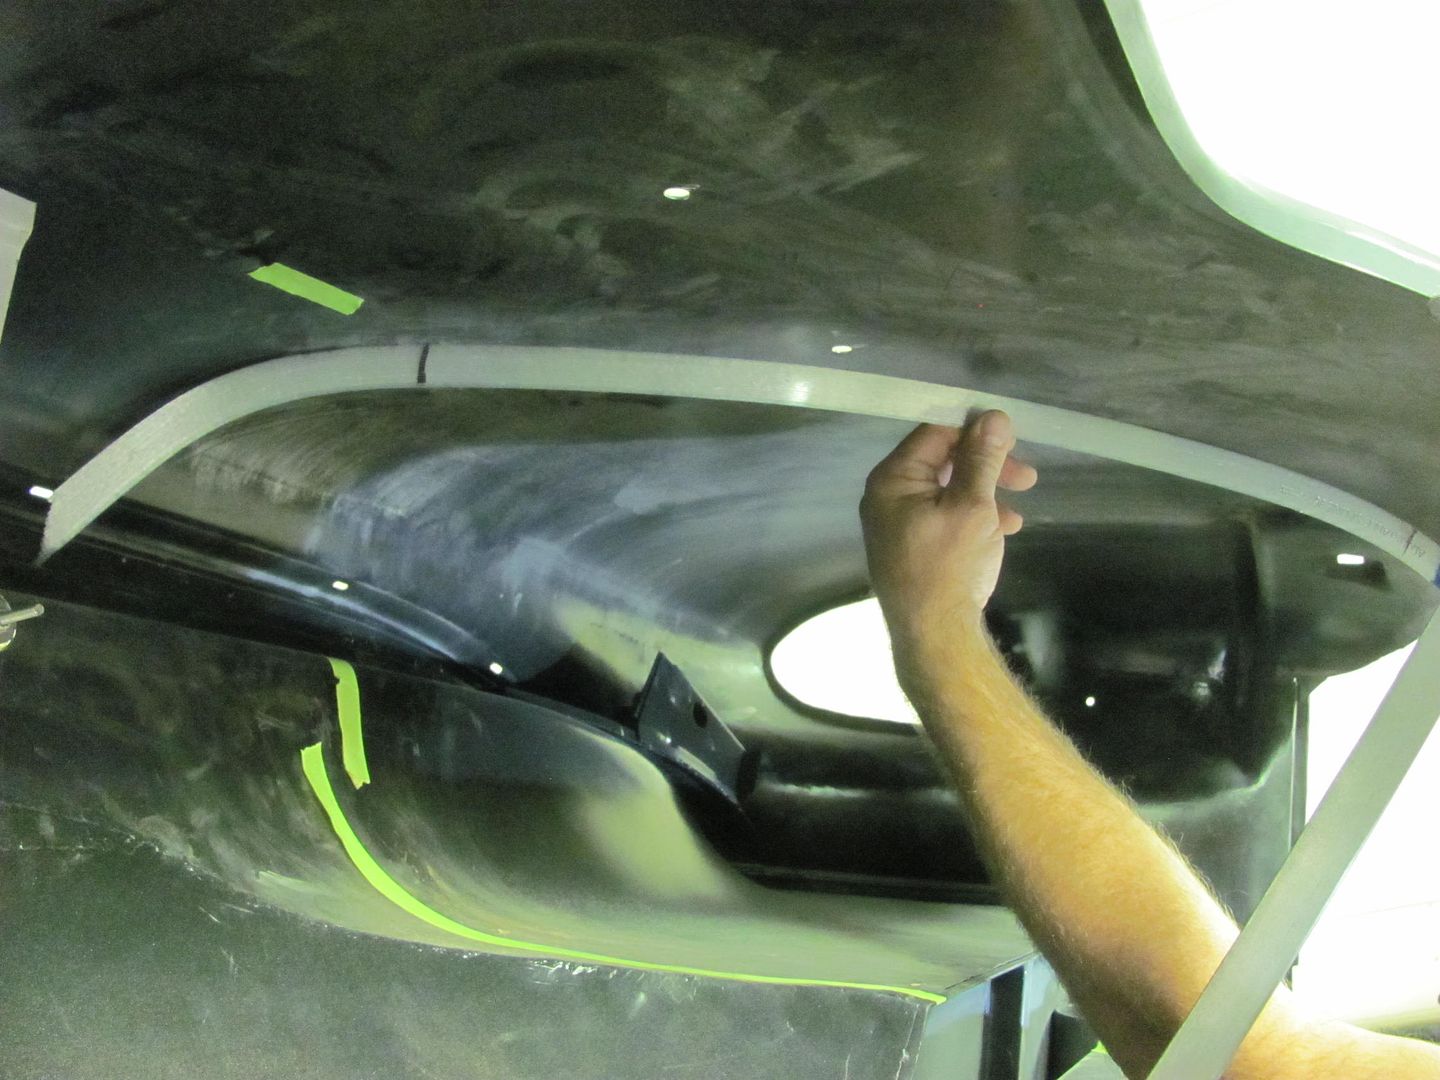 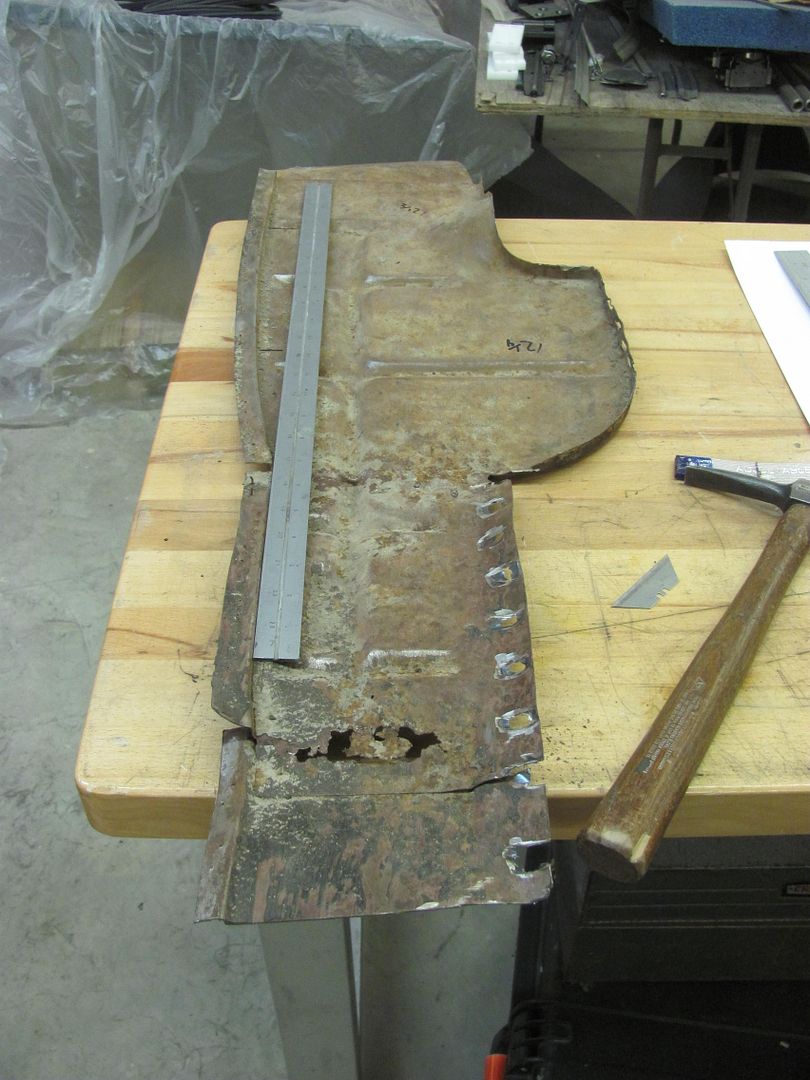 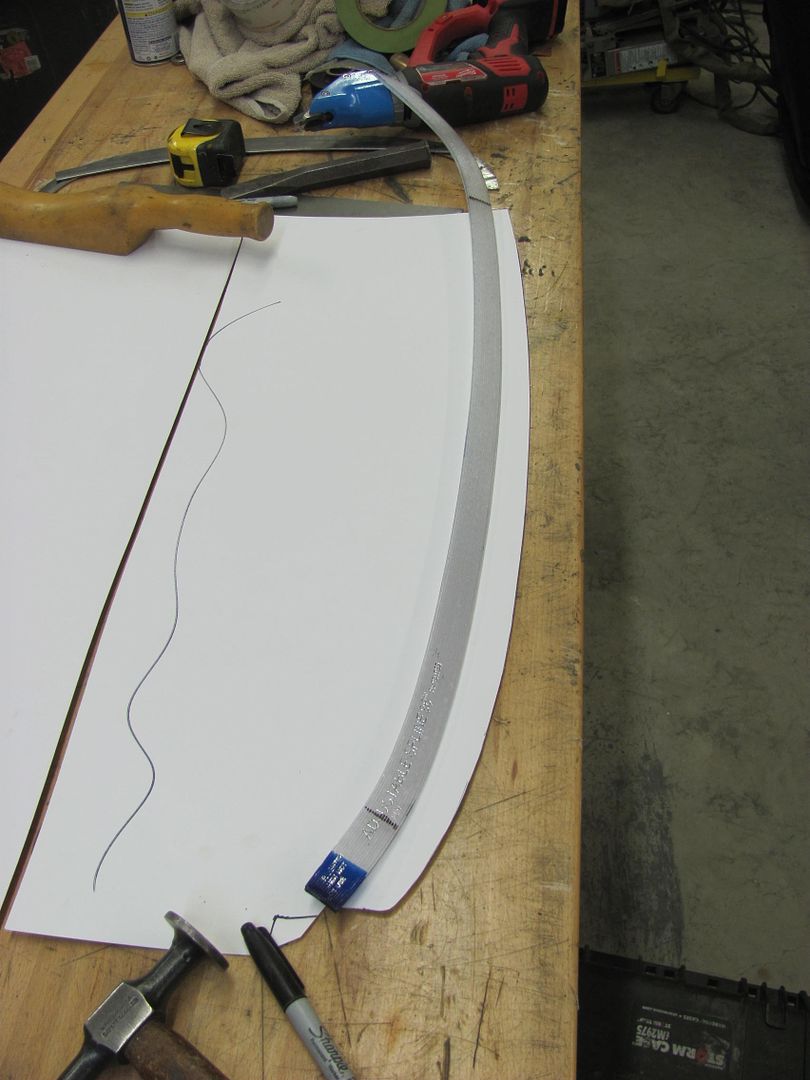 MDF is screwed together and then the edge profile cut.. 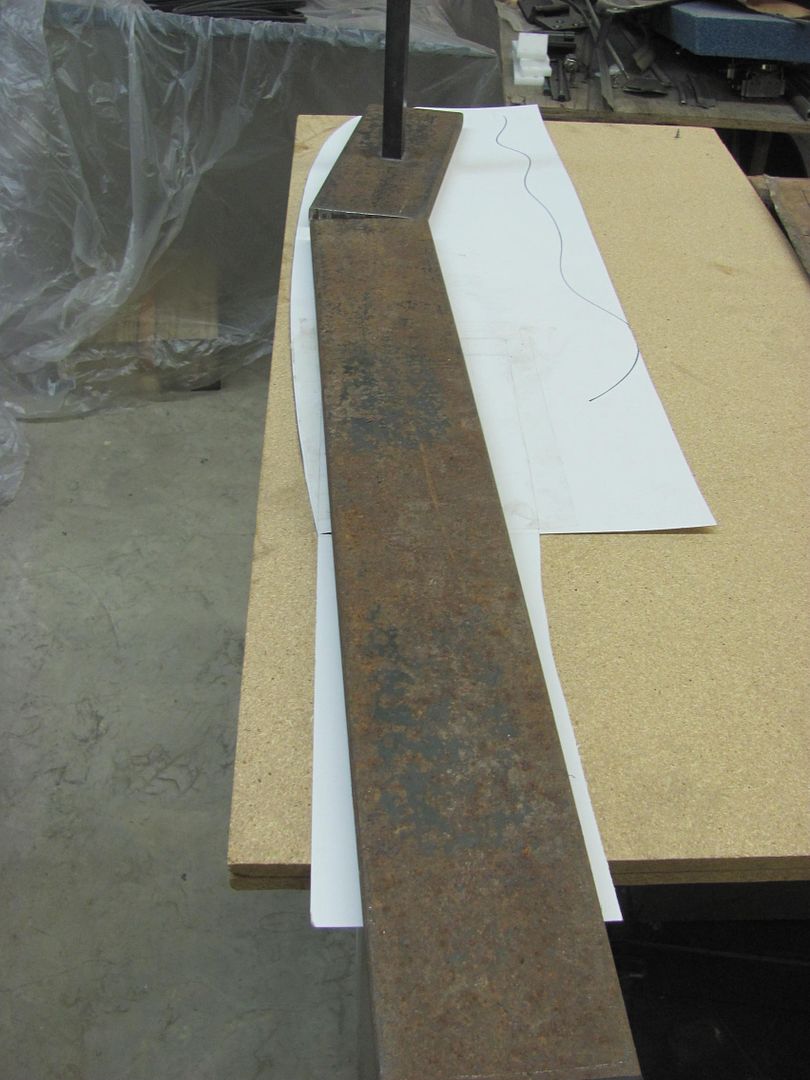 Cutting our bead pattern.. 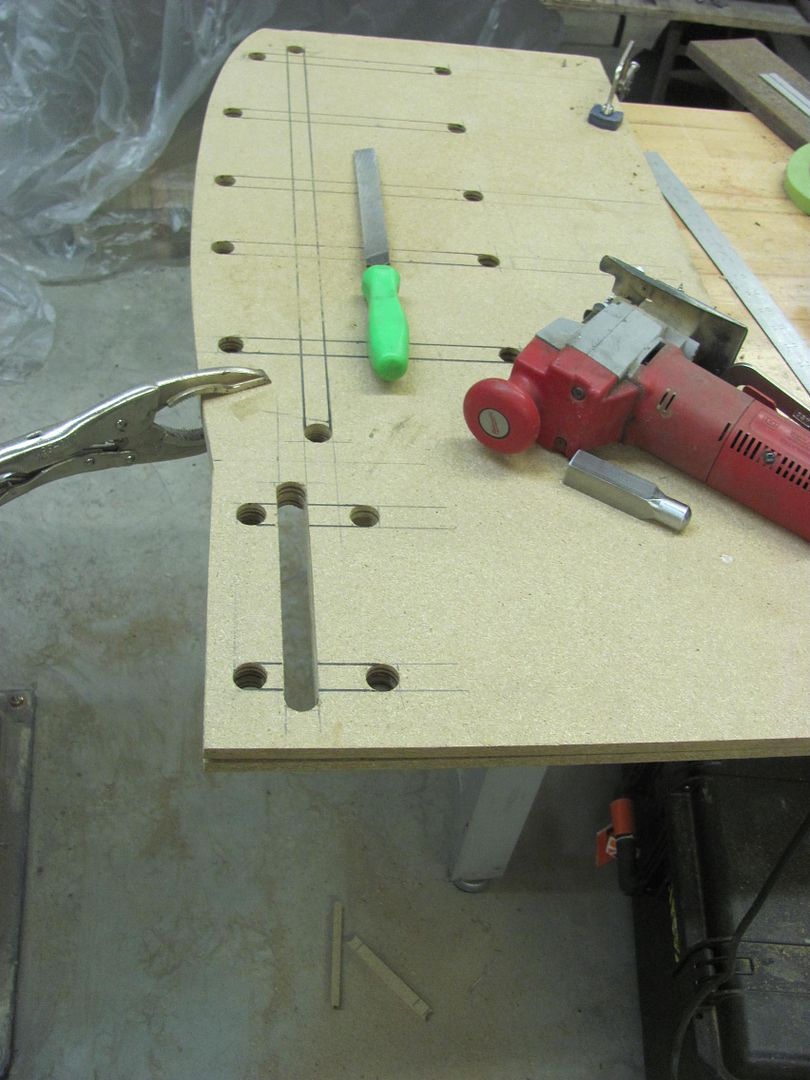 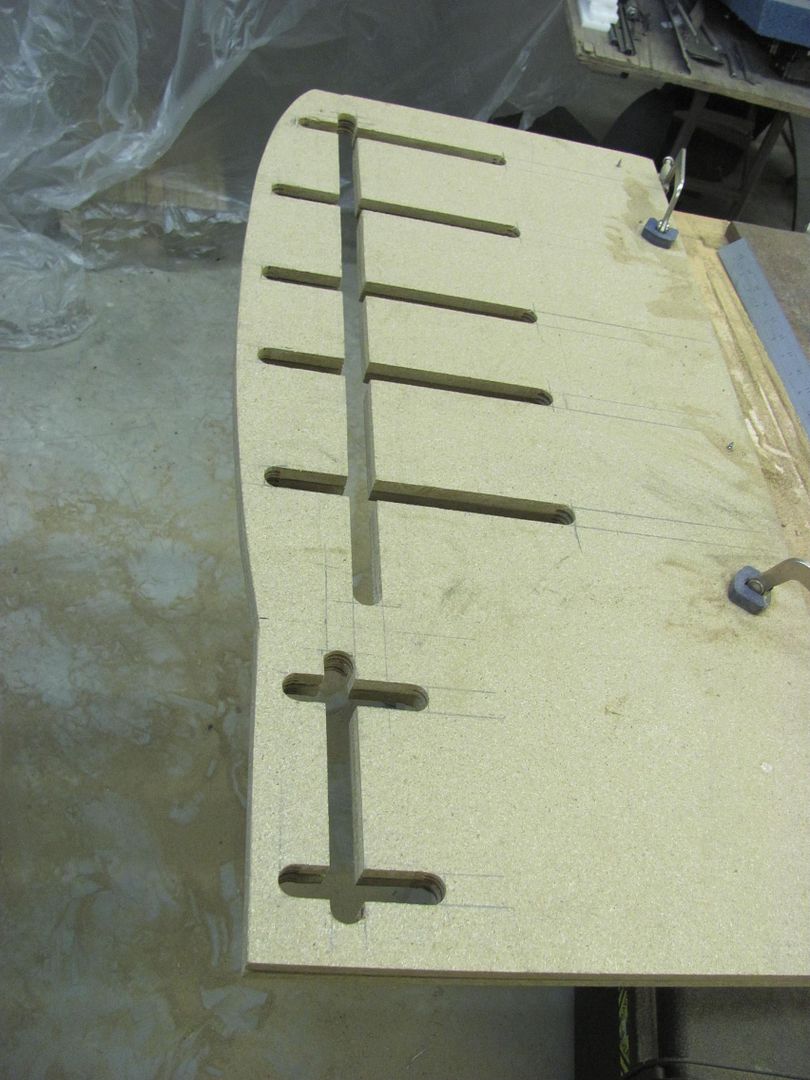 The offset of the original for the quarter seal is added using a tipping die in the Lennox, slight modification on the backstop for the correct width.. 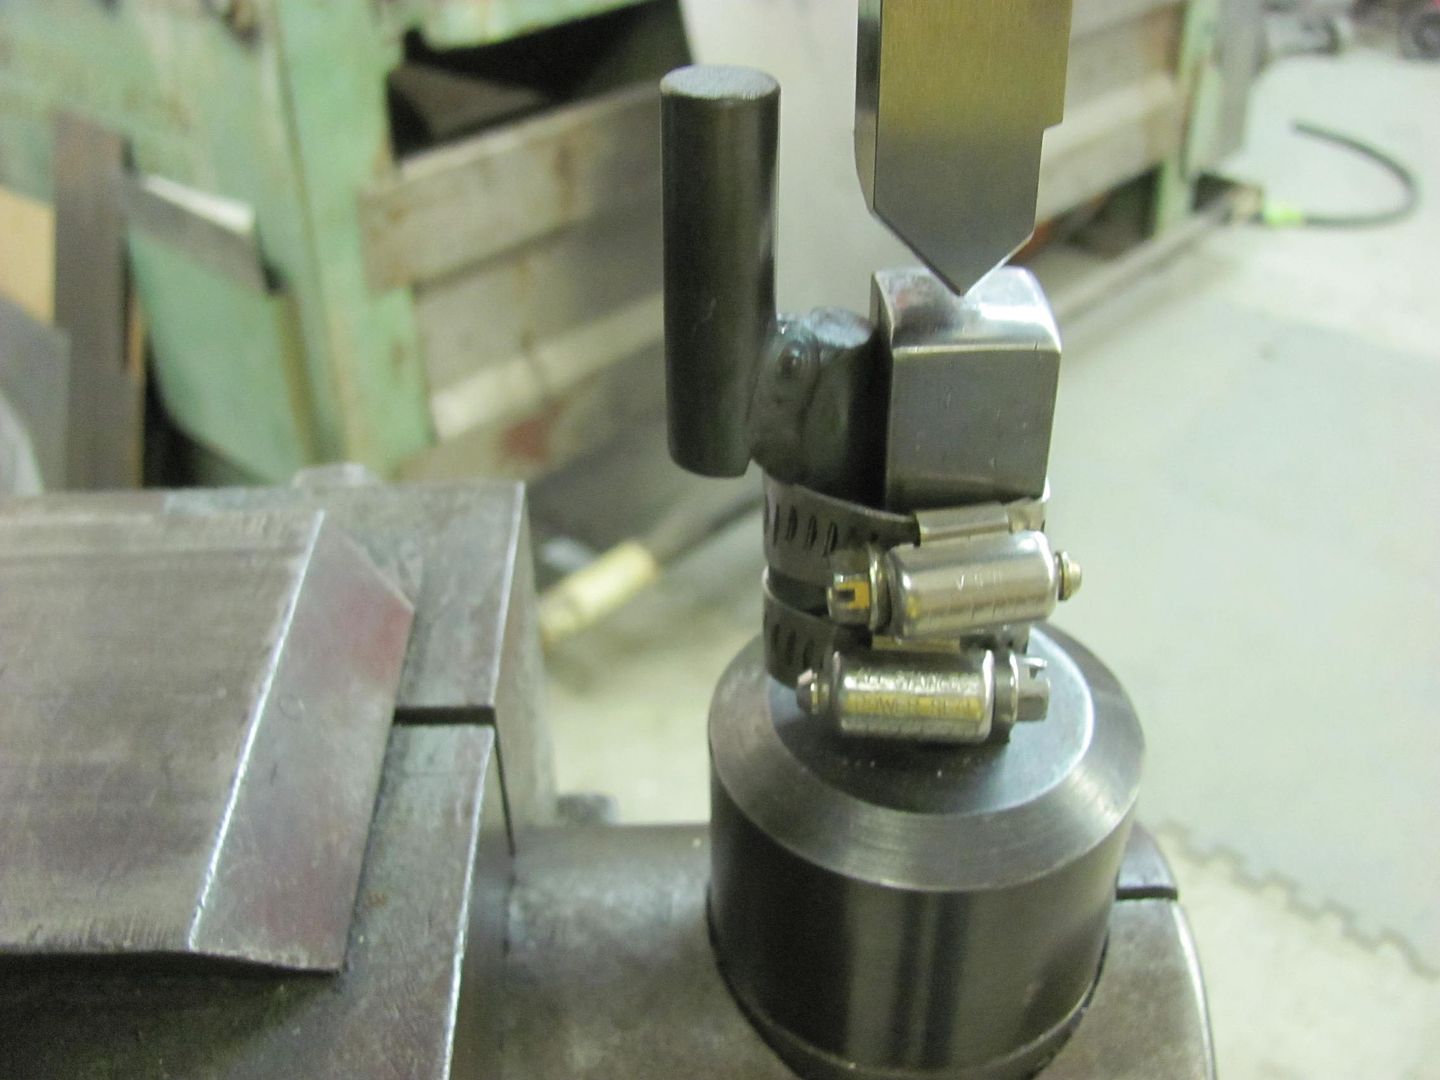 New matches the repop.... 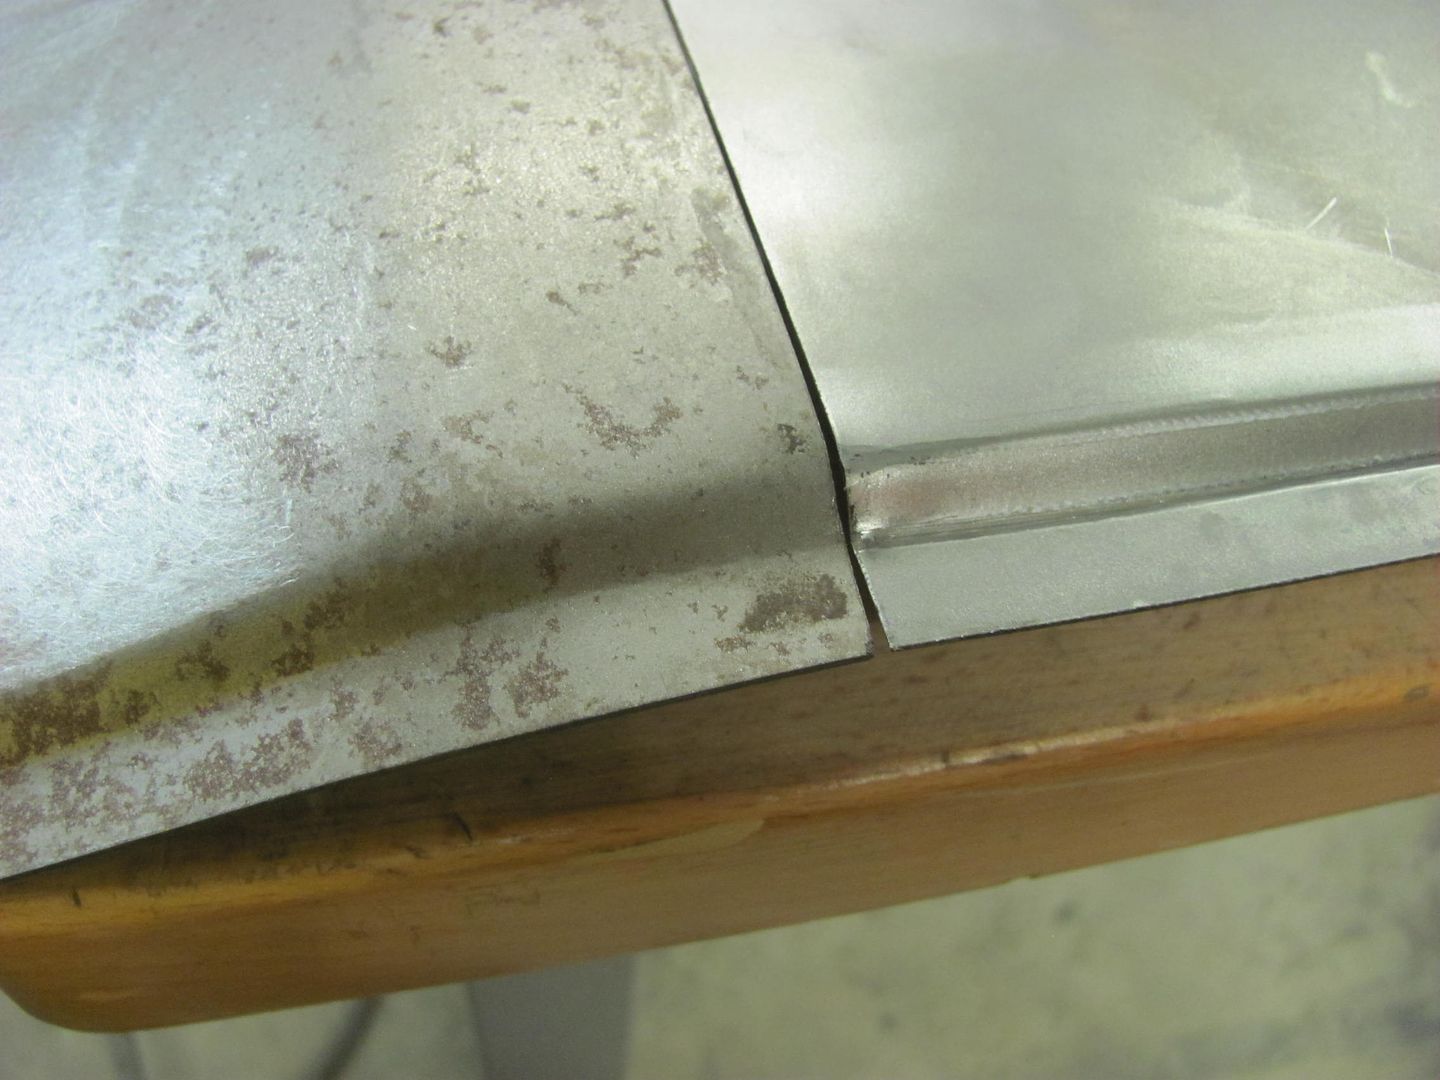 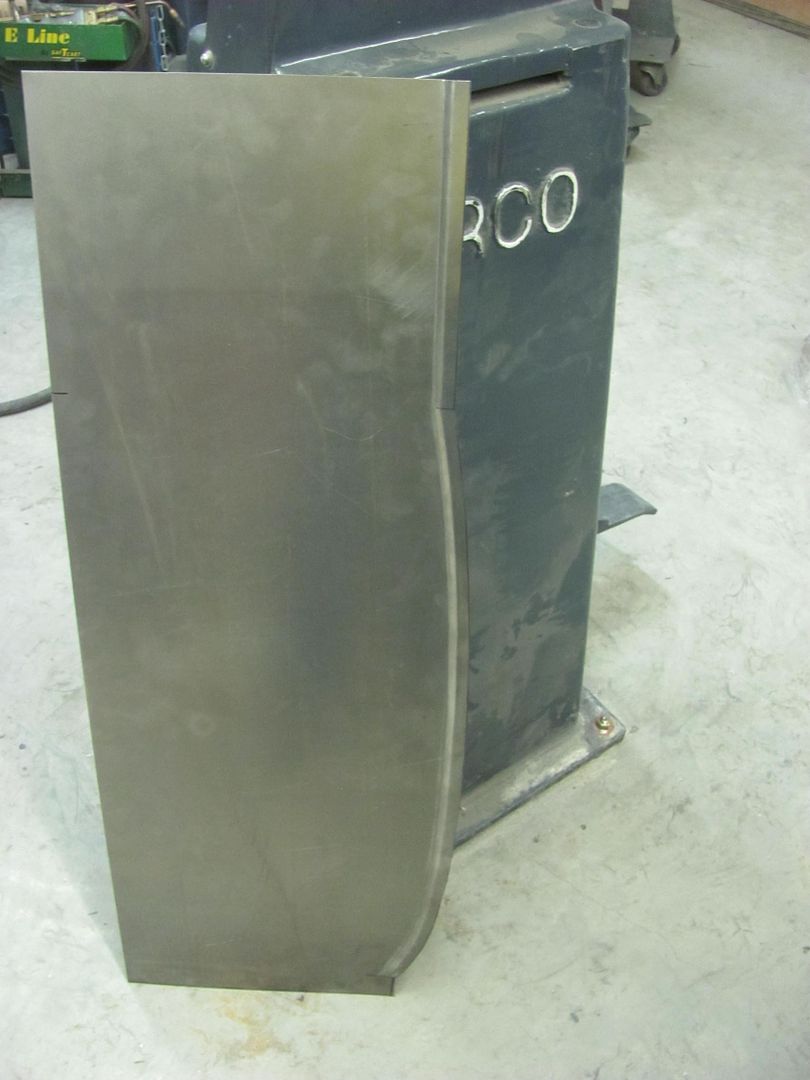 This seal will be used against the inside of the quarter.. 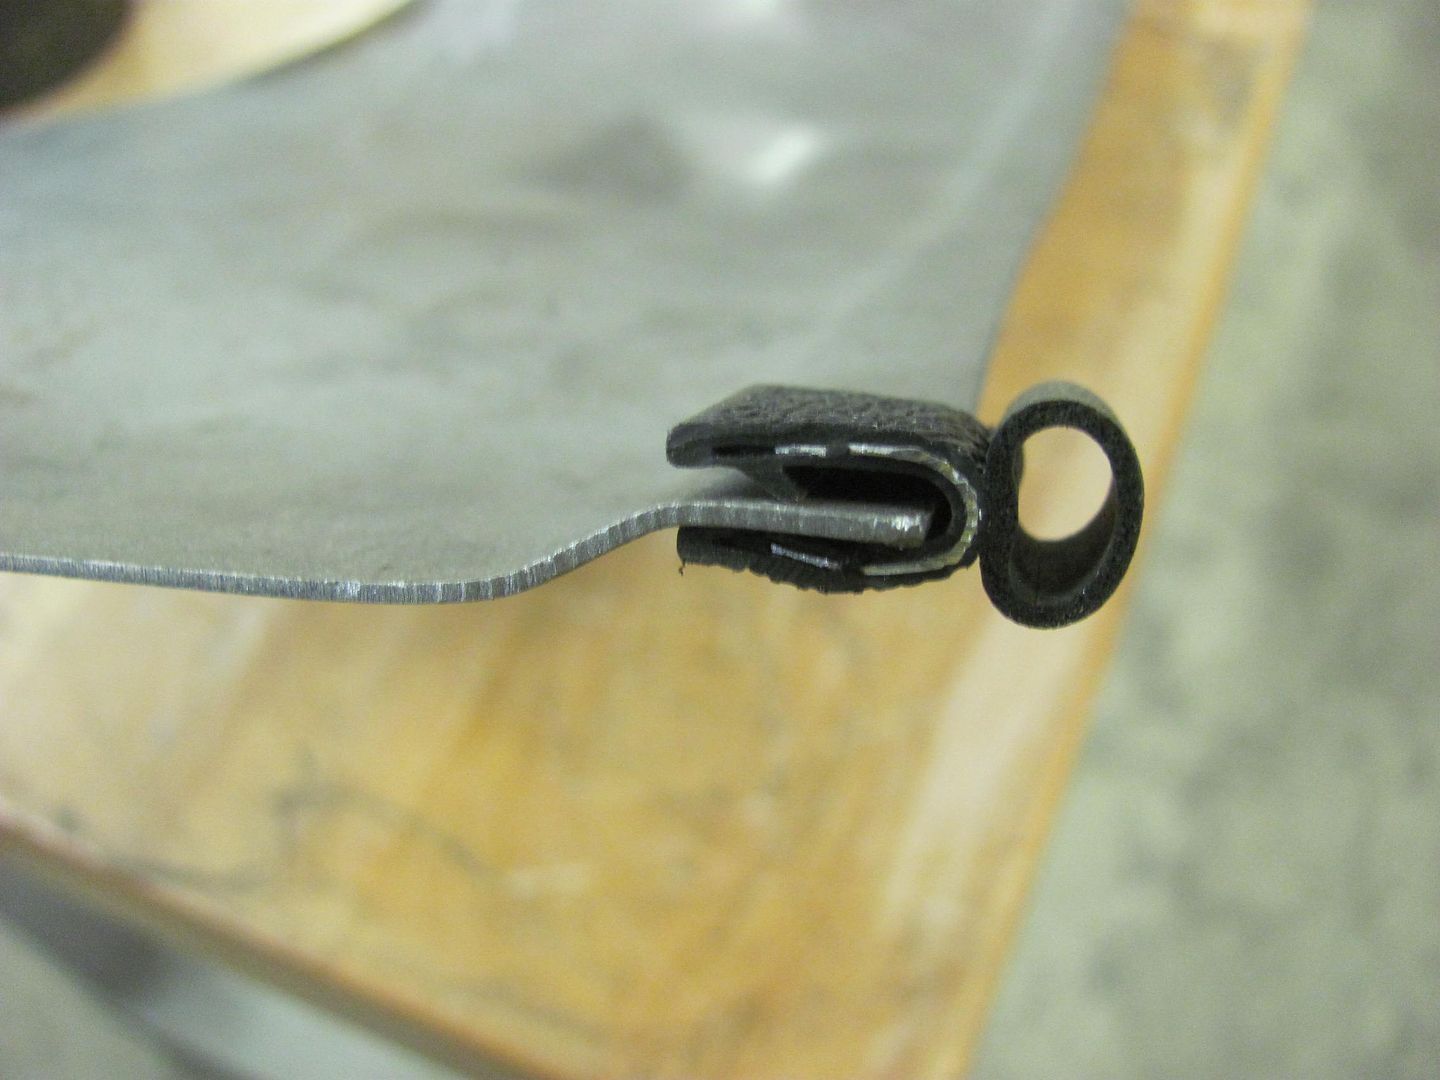 Running a test pattern... The table height is adjusted to set the punch depth... 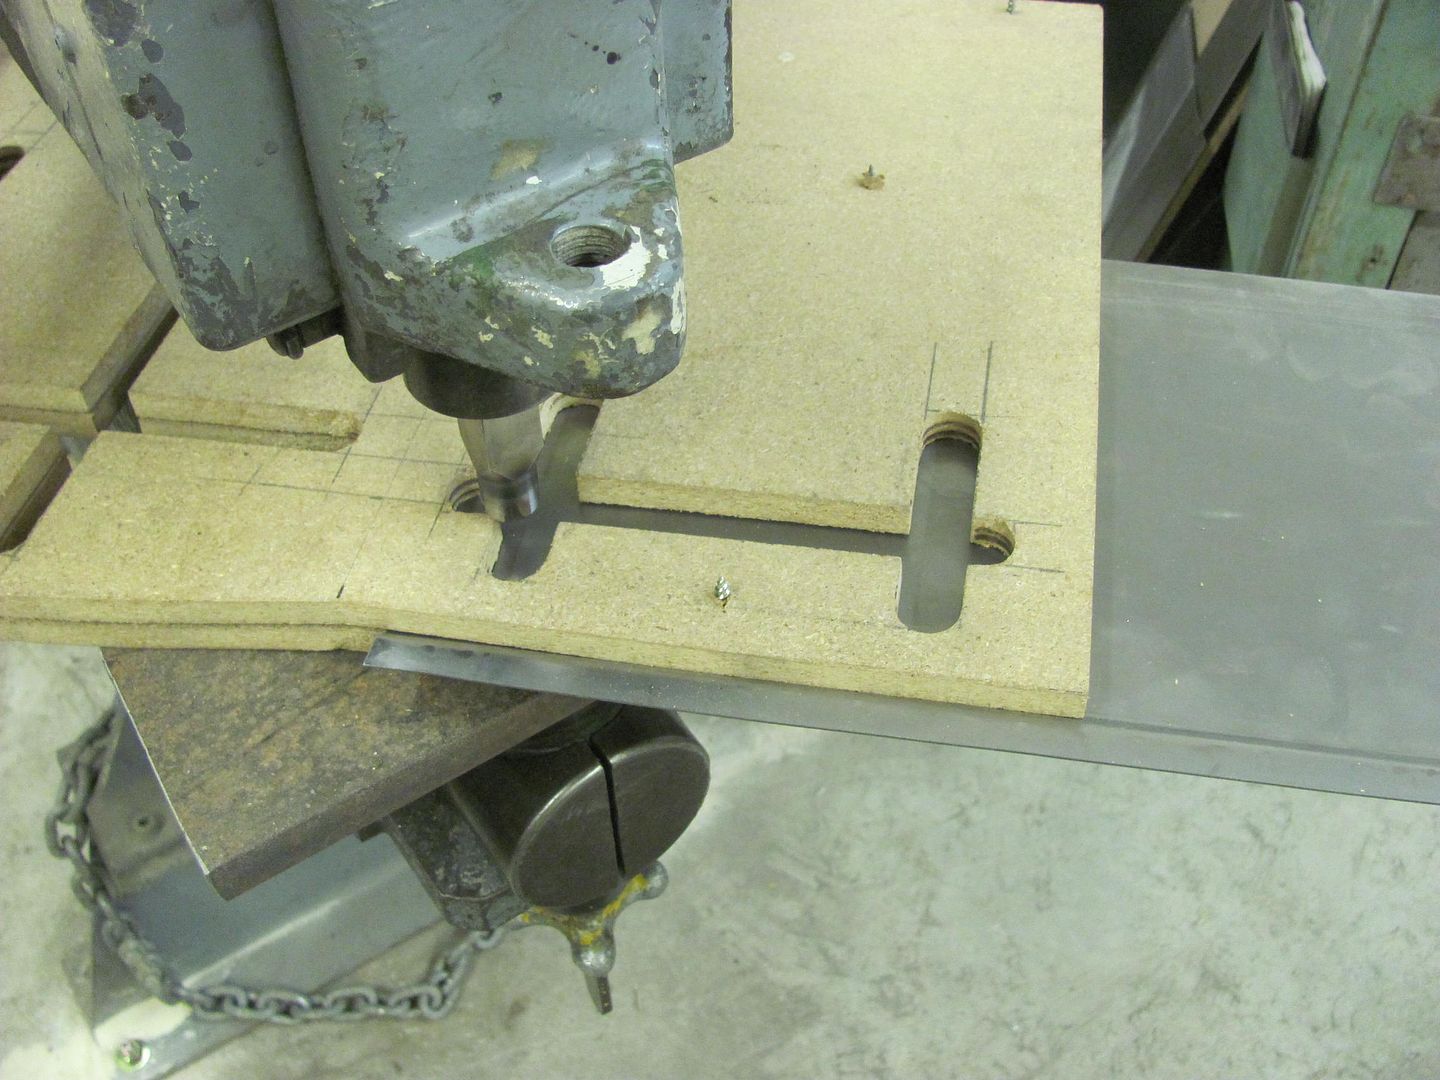 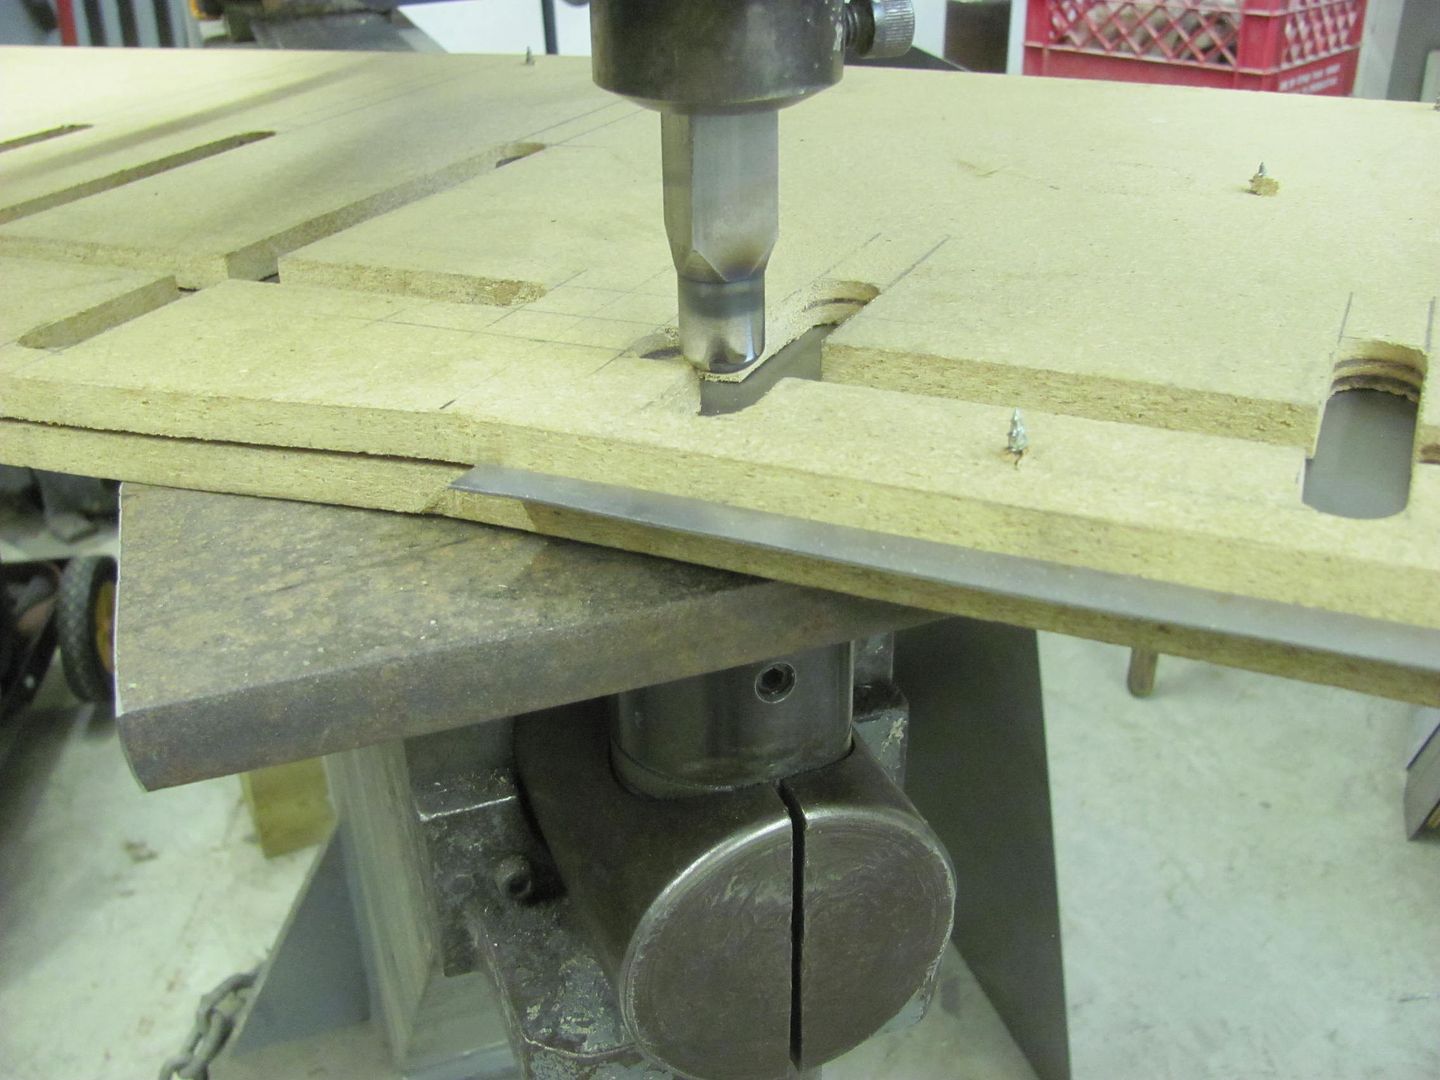 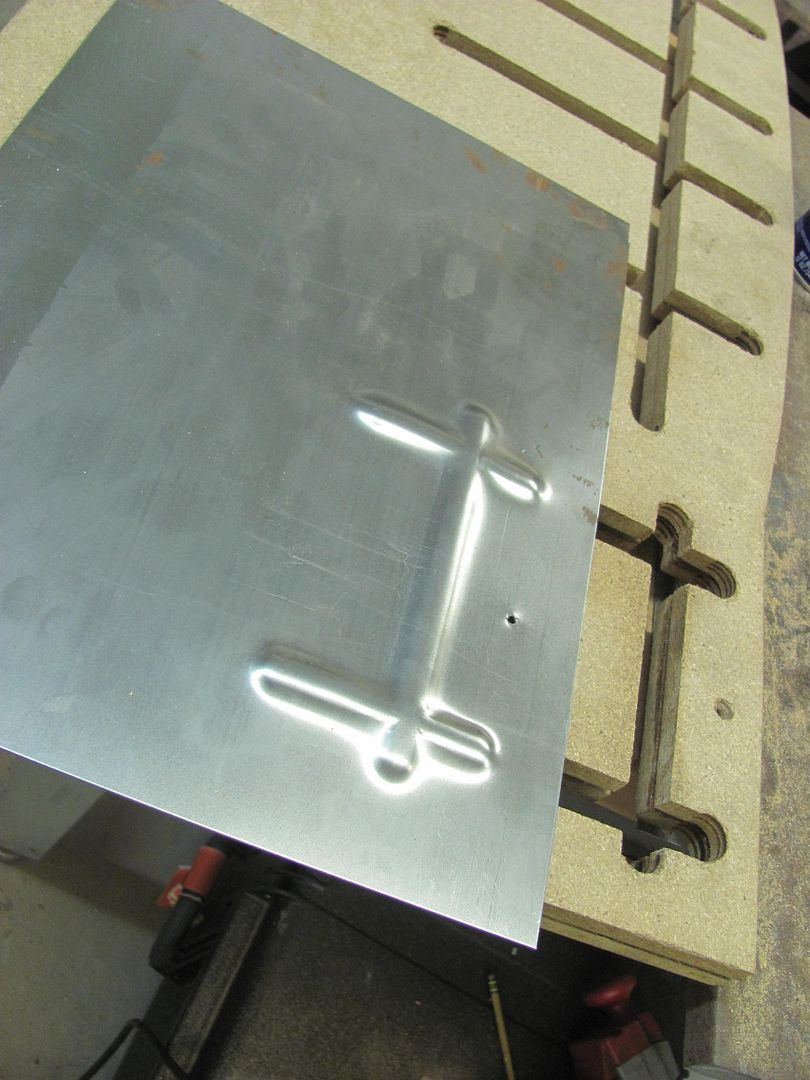 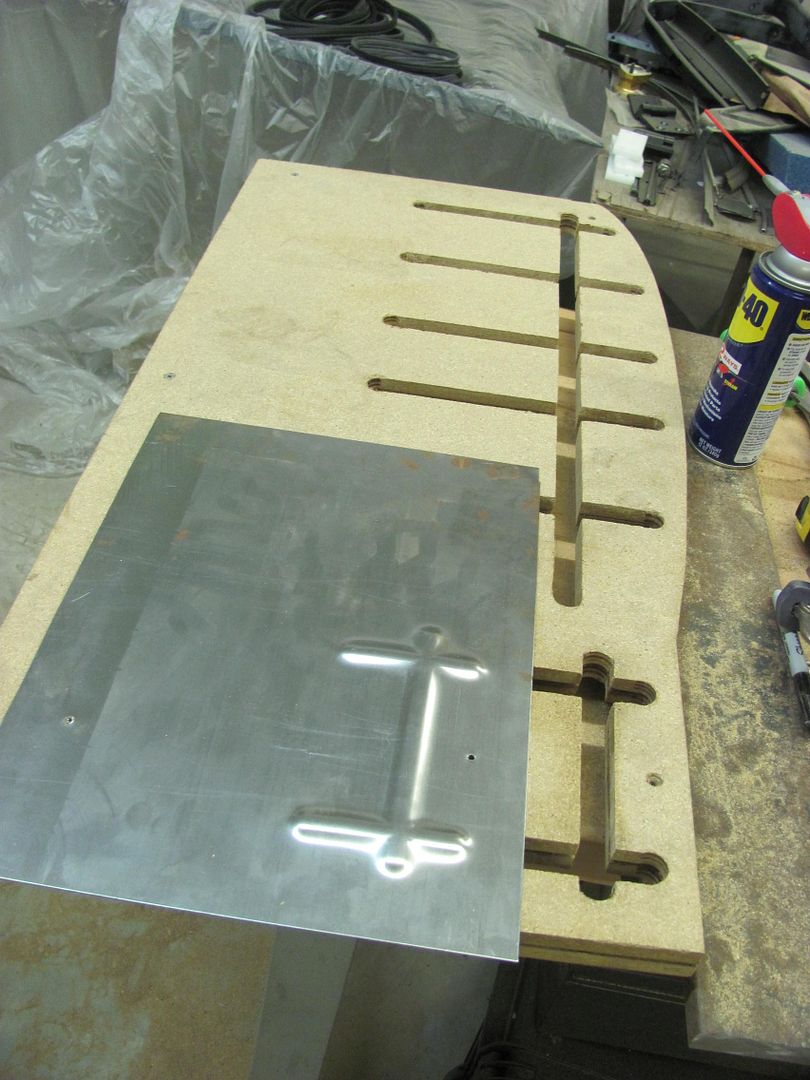 All clamped up, ready to go. Kyle has already left for the day so we'll finish up next time.. 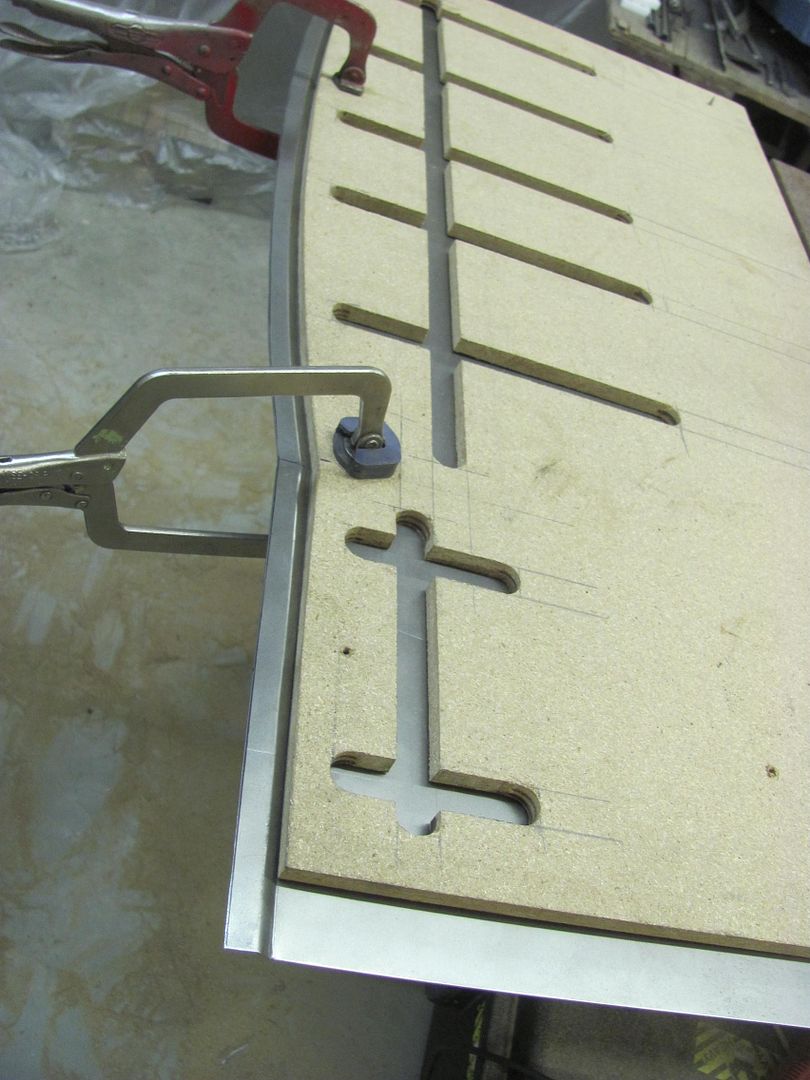 
__________________
Robert |
|
|
|
|
09-18-2016, 02:06 PM
|
#25 |
|
Registered User
Join Date: Apr 2011
Location: .
Posts: 3,104
|
Re: 55 Wagon Progress
Yup, bucket list:
Get a Lennox TRU-EDGE You have mad skills, like spinning straw into gold. |
|
|
|
 |
| Bookmarks |
|
|


 Hybrid Mode
