
 |
|
|
#726 |
|
Registered User
Join Date: Aug 2012
Location: Rathdrum ID
Posts: 1,129
|
Re: What did you do to your truck today part II.
I finally got my control arms back from powder coating. I forgot to tell them to mask off the threads and ball joint holes so I spent a couple of hours cleaning them up. Got the shafts in and took the lowers in to have the ball joints installed. One of the holes was so big the ball joint just slid in and had extra room. I decided not to weld it in. I found a used ont at the local wrecking yard and also a set of 5x5 wheels with ok tires for $30. Got the new to me lca stripped and ready to go to the coater. Of course I made sure the ball joint hole was tight. Got the uppers ready to put in. I just need to stop by Captfabs shop and pick up a steering box mount.
__________________
66 shorty 
|
|
|
|
|
#727 |
|
Registered User
 Join Date: Feb 2014
Location: Stephens City, VA
Posts: 326
|
Re: What did you do to your truck today part II.
|
|
|
|
|
#728 | |
|
Registered User
 Join Date: Oct 2009
Location: Moline, IL
Posts: 157
|
Re: What did you do to your truck today part II.
Quote:
The booster came from CPP on eBay. I'm really happy with how it all works. I did have to cut the end off my original pedal to master push rod and weld on a nut extension from the hardware store to match up with the threaded rod from the booster. I also lowered the rod mounting point 1 inch on the pedal for more correct power brake leverage, it helped. |
|
|
|
|
|
#729 |
|
Senior Member
 Join Date: Aug 2013
Location: corktown,mi.
Posts: 5,194
|
Re: What did you do to your truck today part II.
CL awesome find, most sellers aint tryin to rip you off. paid $150 shipped
|
|
|
|
|
#730 | |
|
Registered User
 Join Date: Feb 2014
Location: Stephens City, VA
Posts: 326
|
Re: What did you do to your truck today part II.
Quote:
Pimpton, nice find. Seems like when I find stuff on CL I don't have the means to buy. I'm not seeing much in my area for the trucks prior to 1990...
__________________
1962 Chevy C-10 Stepside 383 Stroker, Turbo 400 1966 Chevy C-10 Stepside 250 6Cyl, 3OTT- Daily Driver John 3:16 |
|
|
|
|
|
#731 | |
|
Senior Member
 Join Date: Aug 2013
Location: corktown,mi.
Posts: 5,194
|
Re: What did you do to your truck today part II.
Quote:
|
|
|
|
|
|
#732 |
|
Registered User
Join Date: May 2014
Location: Ca
Posts: 9
|
Re: What did you do to your truck today part II.
Driving my self crazy. Can't get the starter grind to stop. And my carb
Developed a heasition of idle . |
|
|
|
|
#733 |
|
Registered User
Join Date: Dec 2012
Location: Rochester, KENT
Posts: 10,565
|
Re: What did you do to your truck today part II.
Ordered a complete new wiring loom for the truck tonight.
I have gone with EZ as Martin has gone that route, and he will be overseeing my rewiring, so if he has done one, a second one should be easier. The EZ 21 wire/18 fuse kit was £144.00 delivered, and the Rebel kit, locally sourced is £159.00 so price of EZ is better, but I have also not heard one complaint yet. I did order my EZ Wiring loom today, and less than an hour later got the message it had been dispatched. Tonight was also the monthly hot rod and classic car gathering at Chatham dockside. Loads of cars and a couple of quirky bits. I was contacted last week by a member on Rods n Sods with a single electric cutout and pipe to sell. So after looking at it and testing the close off valve, I bought it. Now the trick will be to find or build another one. 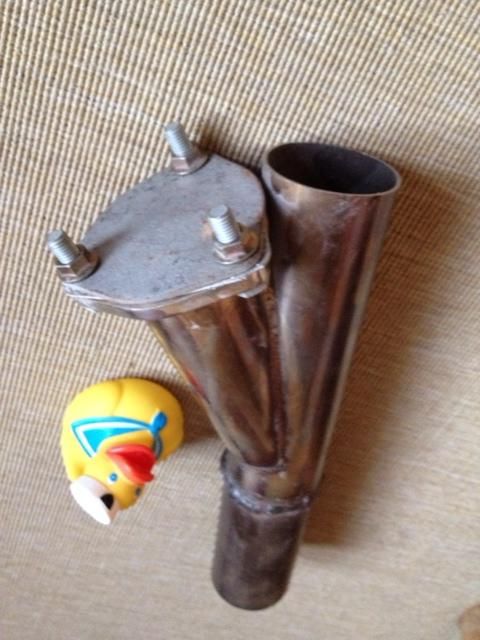 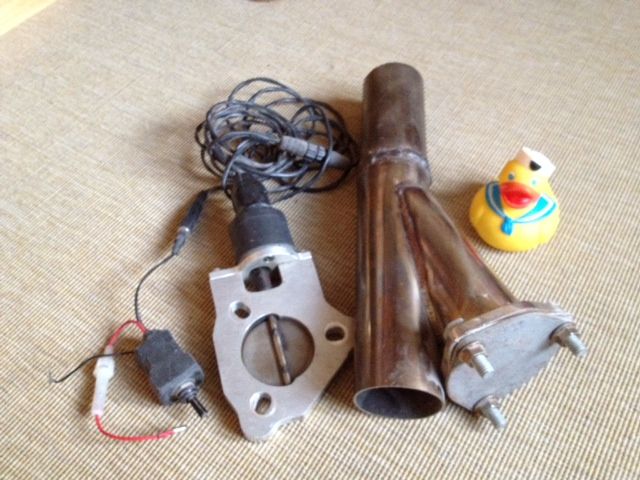 I did not take many photos tonight, but there was one very quirky attendee which I hope some of you will like. This Citroen was one of about 100 build for over night, transcontinental newspaper deliveries. Most were driven into the ground or crashed as drivers fell asleep. However the 1964 Piper Comanche plane that had been converted into a small sleeping caravan was what got my attention. 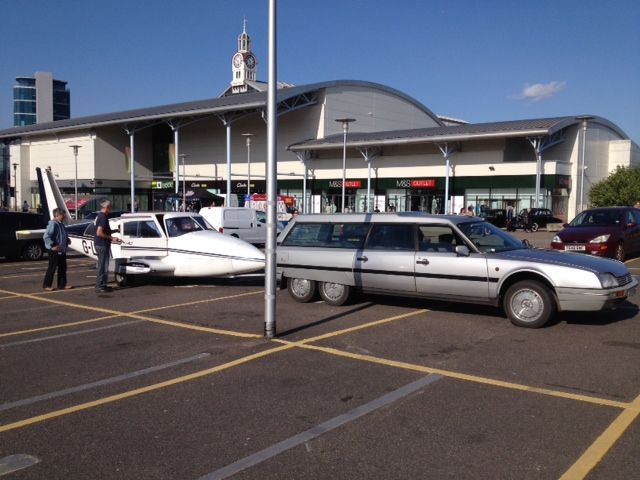 Table and stools 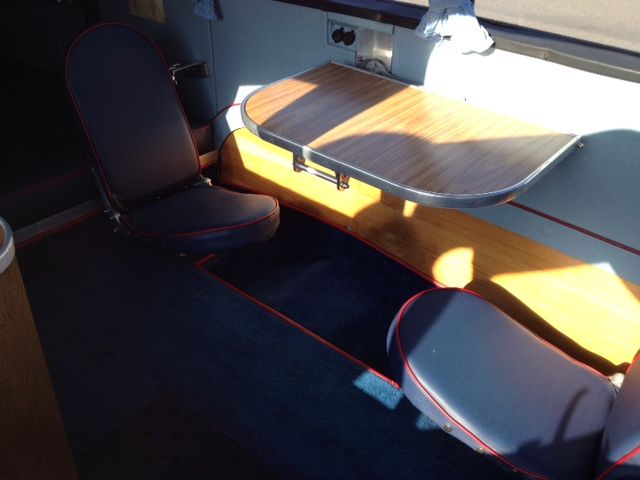 Sleeping space. 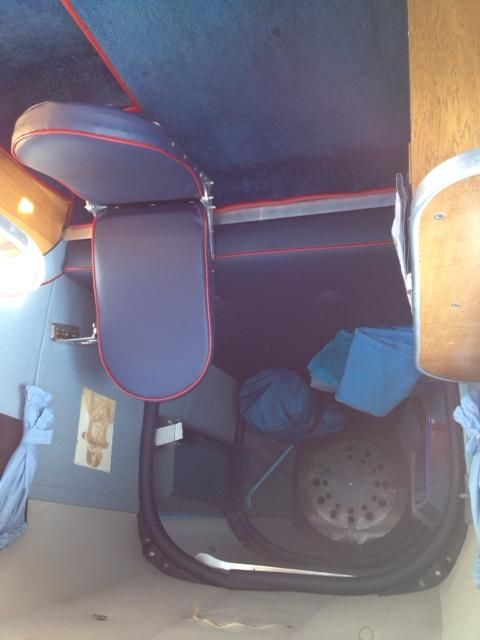 Forward dash area. 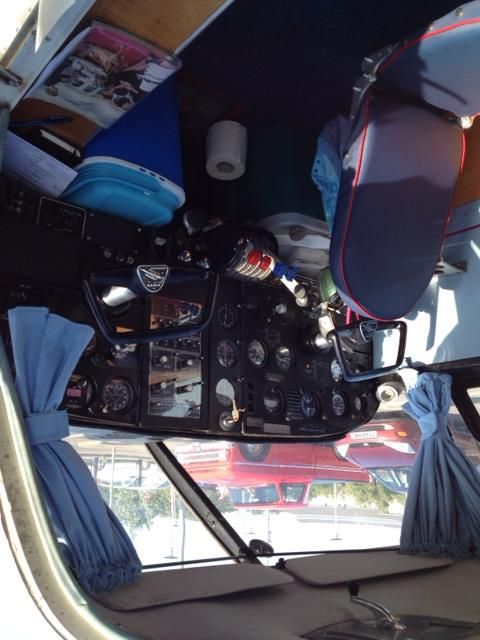 Self contained galley. 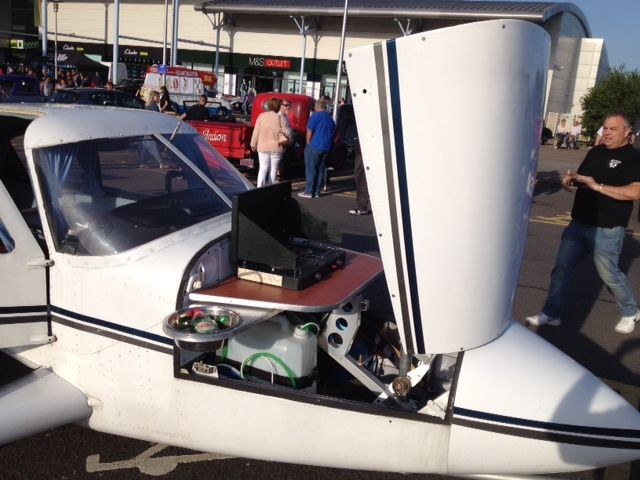 Now I just need to find someone who can cut some ally on a CNC machine for me to the same spec as the one cutout valve.
__________________
MY BUILD LINK: http://67-72chevytrucks.com/vboard/s...585901]Redneck Express - 1966 C10 Short Fleetside MY USA ROADTRIPS http://forum.retro-rides.org/thread/...2018-humdinger IF YOU CAN'T FIX IT WITH A HAMMER, YOU'VE GOT AN ELECTRICAL PROBLEM MATE. |
|
|
|
|
#734 |
|
Registered User
 Join Date: Aug 2011
Location: Kingman, AZ
Posts: 1,574
|
Re: What did you do to your truck today part II.
Sanding the old heap.....and it's 107 degrees outside Not enough beer in the world to keep me outside when it's this hot.
__________________
http://s994.photobucket.com/albums/af62/ScottAz2/ |
|
|
|
|
#735 |
|
Registered User
 Join Date: Sep 2006
Location: San Francisco
Posts: 4,781
|
Re: What did you do to your truck today part II.
I hooked up my gauges. The only one that is giving me trouble is the Gas gauge.. I would think that would be really important with a Big Block..
 Still want to change the interior color and yes the steering wheel will be going bye bye. Still want to change the interior color and yes the steering wheel will be going bye bye.
__________________
"A man and his truck, what a beautiful thing" 65 Short Fleetside BBC 65 Long Fleetside 283 3 on the tree for now. my build thread http://www.67-72chevytrucks.com/vboa...d.php?t=259536 |
|
|
|
|
#736 |
|
Registered User
 Join Date: Nov 2010
Location: LITTLETON NH
Posts: 106
|
Re: What did you do to your truck today part II.
Looks Great!
I think from 1965 to the late 90’s, GM decided to change the Ohm reading coming out of the fuel sender from 0 – 30 to 0 – 90 (0 empty – 90 full). Do you have the correct gauge for your sender? |
|
|
|
|
#737 |
|
It's Better With Nitro
Join Date: Apr 2008
Location: Chino Hills, CA
Posts: 2,262
|
Re: What did you do to your truck today part II.
Finally had a Saturday off, and while waiting for the Belmont, I got a burr to modify my spare deluxe steering wheel. I used an older (1961-2) Pontiac wheel that I had cut up to make smaller awhile back...
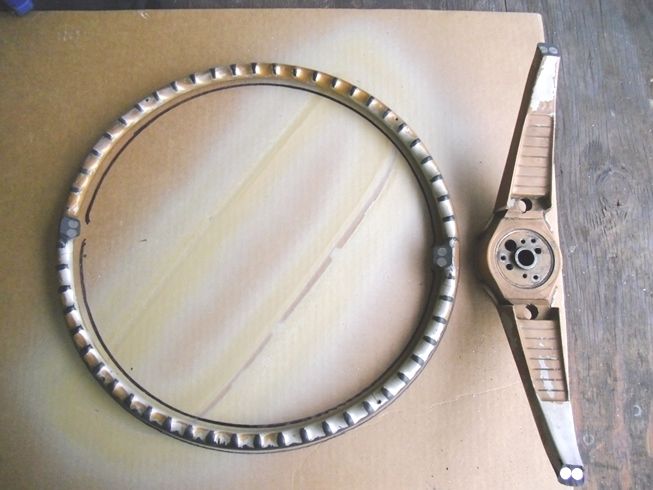 ...a side-by-side comparison: 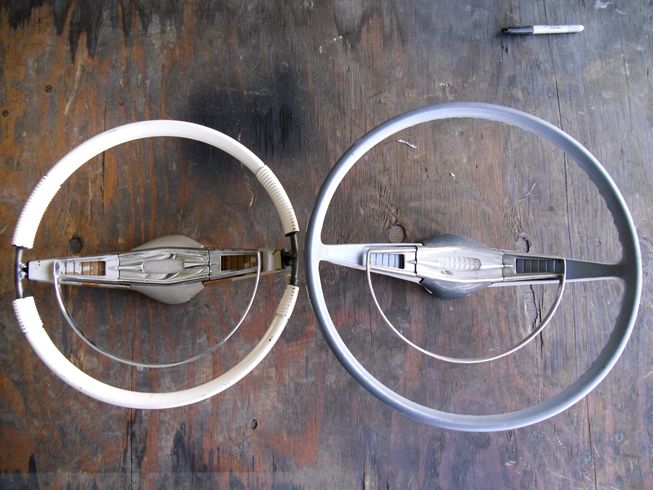
__________________
1963 C-10: Deluxe-optioned cab, shortbed, fleetside Pontiac 462 ci, Kauffman D-Port alum. heads 4L80E, narrowed sheetmetal Ford 9-inch Tubular front and rear suspension Custom 6-piston front disc and 4-piston rear disc brakes |
|
|
|
|
#738 |
|
Registered User
Join Date: Dec 2012
Location: Rochester, KENT
Posts: 10,565
|
Re: What did you do to your truck today part II.
I had forgotten about my MOT expiring this month, so when Nicola reminded me it was panic stations for a while.
Last weekend Martin came over and sorted out the side lights wiring etc. This lead to me ordering in a full replacement wiring harness from the USA. £145.00 well spent I think. So today I followed Martin who had his Mercedes booked in for MOT to a testing station, after which we were going to a spares warehouse. Happy to say the truck passed its test (not that I had any concerns) The tester commented that he thought it was a lovely bit of kit and he looked forward to testing it again once restored. The station operates on a 1st come first served basis, so we were there by 08.10 for an 09.00 spot. CHEEKY MONKEY, MARTIN suggested I just weigh in the truck for scrap as we were next to a scrapyard. 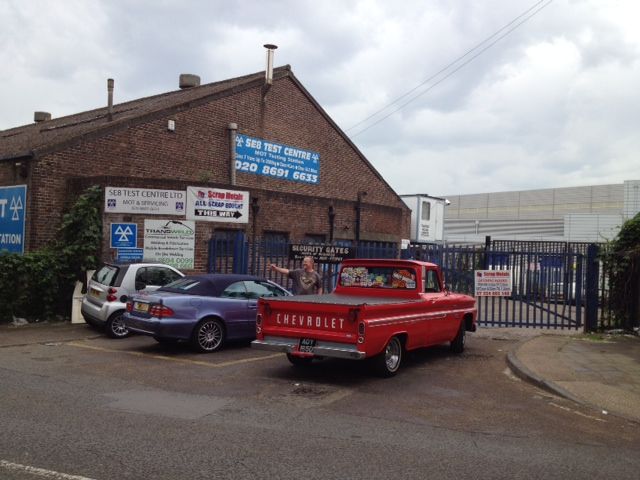 Up on the ramps and on with business. 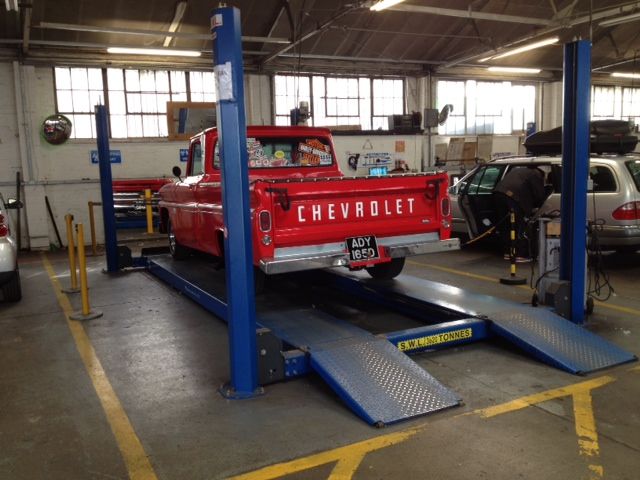 After the test we went spares shopping, and I bought some long reach 1/2 inch sockets, a stumpy ratchet with 1/4 and 1/2 inch drive. Then we went to Dartford to get some timber, taking a shortcut over the Woolwich Ferry. Only one ferry running, meant we had a 20 minute wait, but a chance to chat about the plan for the bits of equipment I would be building later. Thames river in the background. 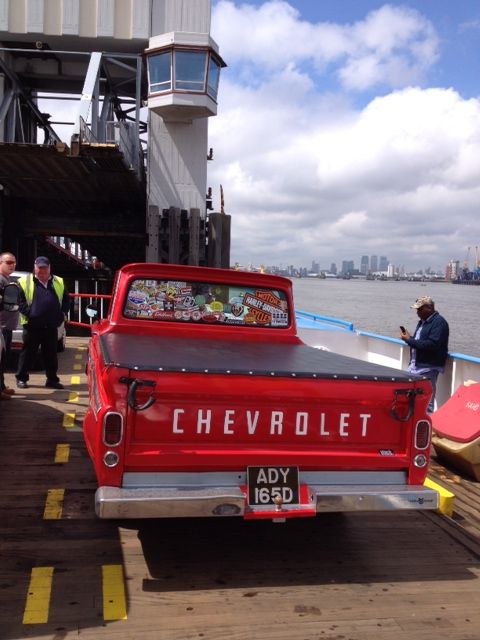 After the DIY shop, I came home with 12 meters of 6X2 inch lumber, and Martin went home to disconnect everything on the truck and remove his windscreen etc. The design is a direct copy of a picture of one built by Pimpston65 in Corktown Misouri. I came home to build a single handed cab lifter attachment to fit to the end of a 3 ton engine hoist which will be used tomorrow, and later possibly on my cab as well, If I do fool myself into removing my cab. This actually fits just outside the door rubber ridges, stopping the cab from slipping off when you lift it. 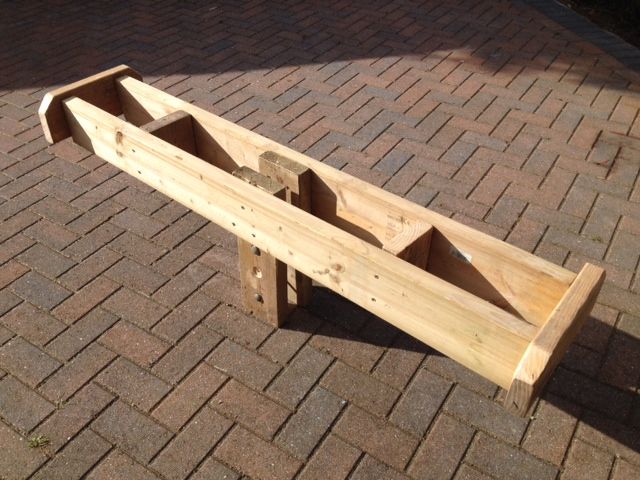 This is the upside down view, imagine the diagonal timber is the boom of the engine hoist. 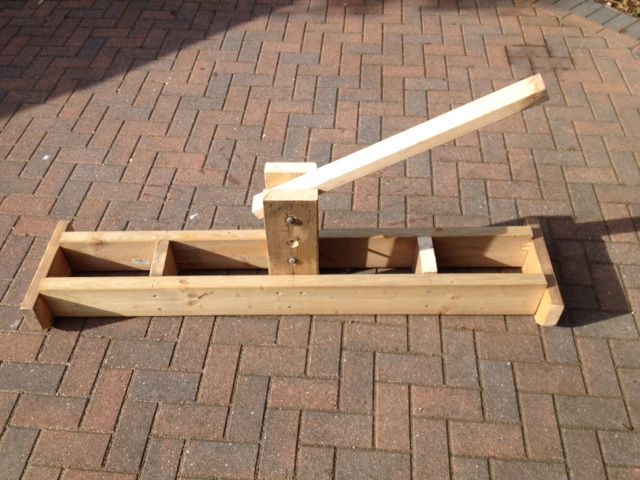 While I was at it, I also prepped all the wood for the cab trolley, onto which the cab will be mounted, I will also make up, or we may weld another 500mm raising table so that one can get to work on the sills. This lot gets bolted together with 10mm coach screws. And then the wheels are mounted underneath. 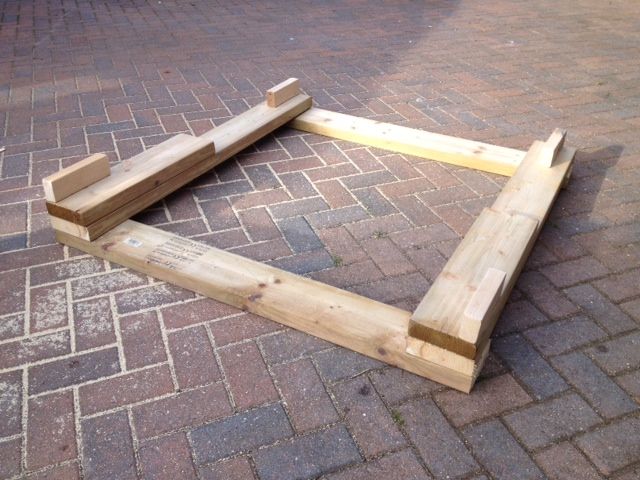 Looking forward to tomorrow. Only problem is that Marin keeps on putting Carp ideas in my head, which creates more work for me.
__________________
MY BUILD LINK: http://67-72chevytrucks.com/vboard/s...585901]Redneck Express - 1966 C10 Short Fleetside MY USA ROADTRIPS http://forum.retro-rides.org/thread/...2018-humdinger IF YOU CAN'T FIX IT WITH A HAMMER, YOU'VE GOT AN ELECTRICAL PROBLEM MATE. |
|
|
|
|
#739 |
|
Registered User
Join Date: Dec 2013
Location: Fresno
Posts: 24
|
Re: What did you do to your truck today part II.
New Edelbrock intake, new Holly carb, new summit racing distributor and Taylor wires. My new headers will be in next week!
|
|
|
|
|
#740 |
|
Registered User
 Join Date: Sep 2006
Location: San Francisco
Posts: 4,781
|
Re: What did you do to your truck today part II.
I have the blazer tank with the 0-90 ohm sender. The gauge will not peg when grounded but will reach empty, I just think the gauge is bad but will poke further into it.
__________________
"A man and his truck, what a beautiful thing" 65 Short Fleetside BBC 65 Long Fleetside 283 3 on the tree for now. my build thread http://www.67-72chevytrucks.com/vboa...d.php?t=259536 |
|
|
|
|
#741 |
|
Registered User
 Join Date: Sep 2006
Location: San Francisco
Posts: 4,781
|
Re: What did you do to your truck today part II.
I took the truck out for a cruise, even hit the freeway for a bit. Hooked up the switch for the converter lock-up also.
__________________
"A man and his truck, what a beautiful thing" 65 Short Fleetside BBC 65 Long Fleetside 283 3 on the tree for now. my build thread http://www.67-72chevytrucks.com/vboa...d.php?t=259536 |
|
|
|
|
#742 |
|
Registered User
Join Date: Mar 2010
Location: Chandler,Tx
Posts: 78
|
Re: What did you do to your truck today part II.
Scored a good deal on Craig's list, 94 model Astro van hydro boost. Anybody have an idea if I can swap the master cylinder so I can get rid of the plastic one from the van. I like the looks of the corvette style. I will be running discs on front and drums on back.
|
|
|
|
|
#743 |
|
Registered User
 Join Date: Nov 2010
Location: Kalamazoo, MI
Posts: 1,008
|
Re: What did you do to your truck today part II.
New tail light kit from LMC installed
__________________
LIFE IS SHORT HAVE FUN |
|
|
|
|
#744 | |
|
Moderator
 Join Date: Dec 2012
Location: ON, Canada
Posts: 2,170
|
Re: What did you do to your truck today part II.
Quote:
|
|
|
|
|
|
#745 |
|
Senior Member
 Join Date: Aug 2013
Location: corktown,mi.
Posts: 5,194
|
Re: What did you do to your truck today part II.
Quote:
|
|
|
|
|
#746 |
|
Registered User
Join Date: Sep 2013
Location: Kent England
Posts: 1,025
|
Re: What did you do to your truck today part II.
Re: Martin's mi-STRESS, 1965 Long Fleetside C10 "Rebuild in ENGLAND"
For those as impatient as I am.......... Here is a video link of what we got up to today. Full write up to follow later. Thank you to Pimpston1965 for the design idea. http://youtu.be/LxcuePYK-8Q This is so easy It's untrue GENIUS ! |
|
|
|
|
#747 | |
|
Senior Member
 Join Date: Aug 2013
Location: corktown,mi.
Posts: 5,194
|
Re: What did you do to your truck today part II.
Quote:
|
|
|
|
|
|
#748 |
|
Registered User
Join Date: Sep 2013
Location: Kent England
Posts: 1,025
|
Re: What did you do to your truck today part II.
|
|
|
|
|
#749 |
|
Registered User
Join Date: Dec 2012
Location: Rochester, KENT
Posts: 10,565
|
Re: What did you do to your truck today part II.
Today was a great day for me.
I spent about 5 hours over at mate Martins place today. We removed his cab, which has set me thinking that I should maybe remove mine as well, to get better access to the underside of the chassis. On removing the cab, he found a lot more rust, terrible historic patches an a load of sand inside the chassis outriggers. I will post up the pics to tell the story of getting the "special tool" in and moving the cab away. Final inspection before removing the last two chassis mounting bolts.  One broke off, despite all preparation. 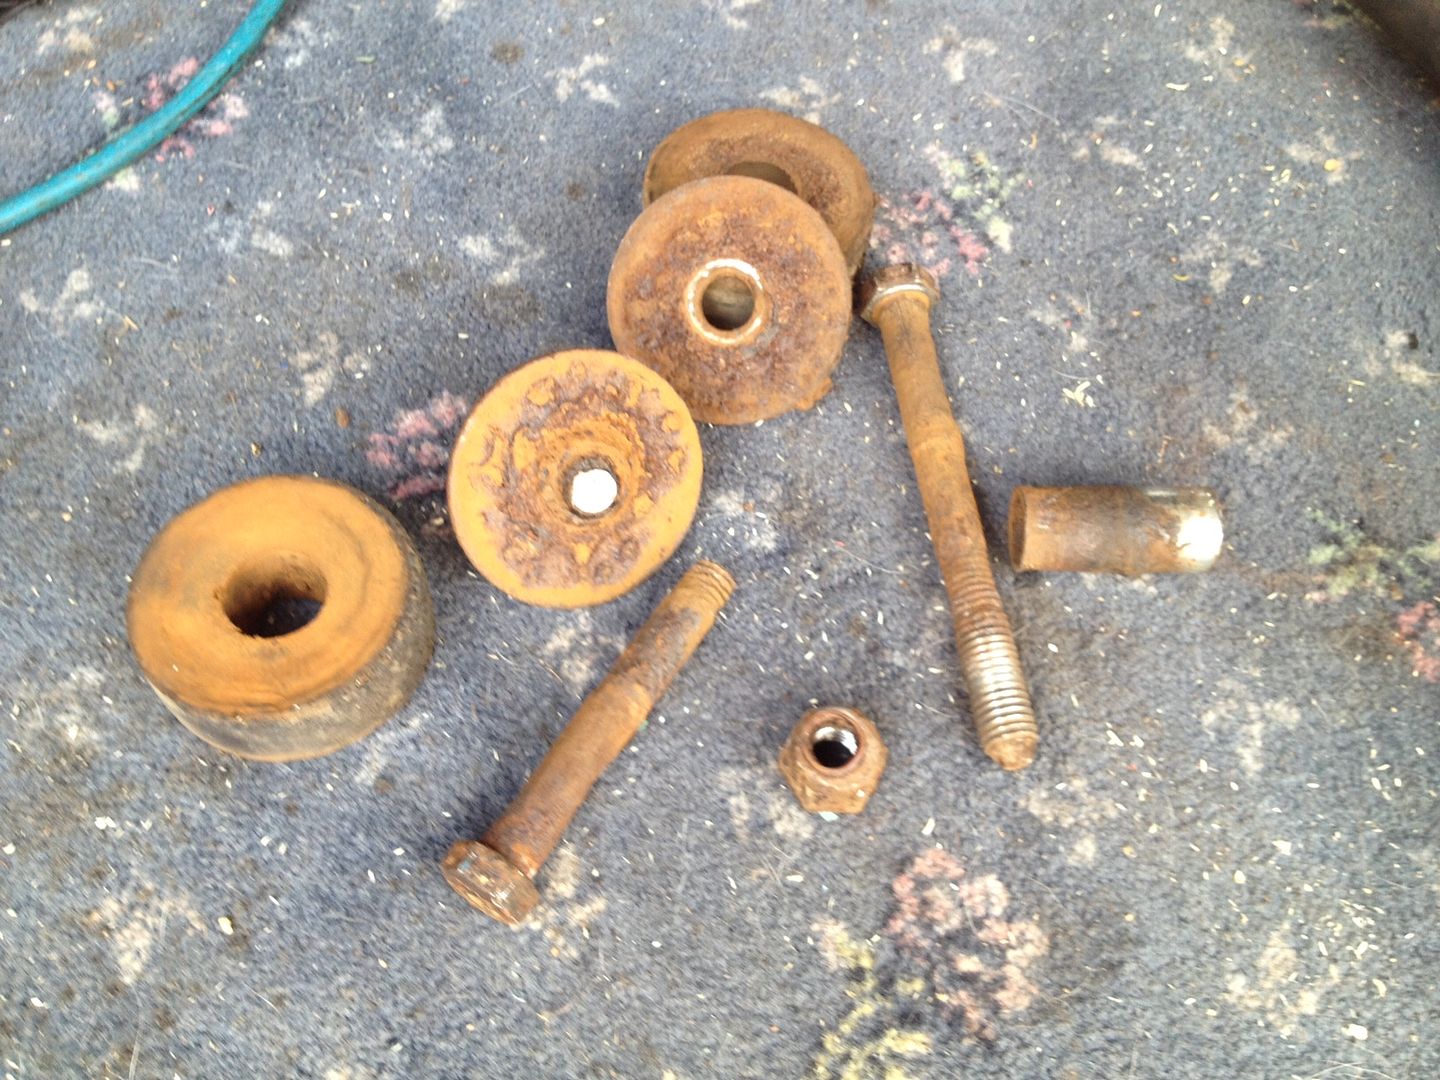 Lifting jig fitted to three ton hoist.  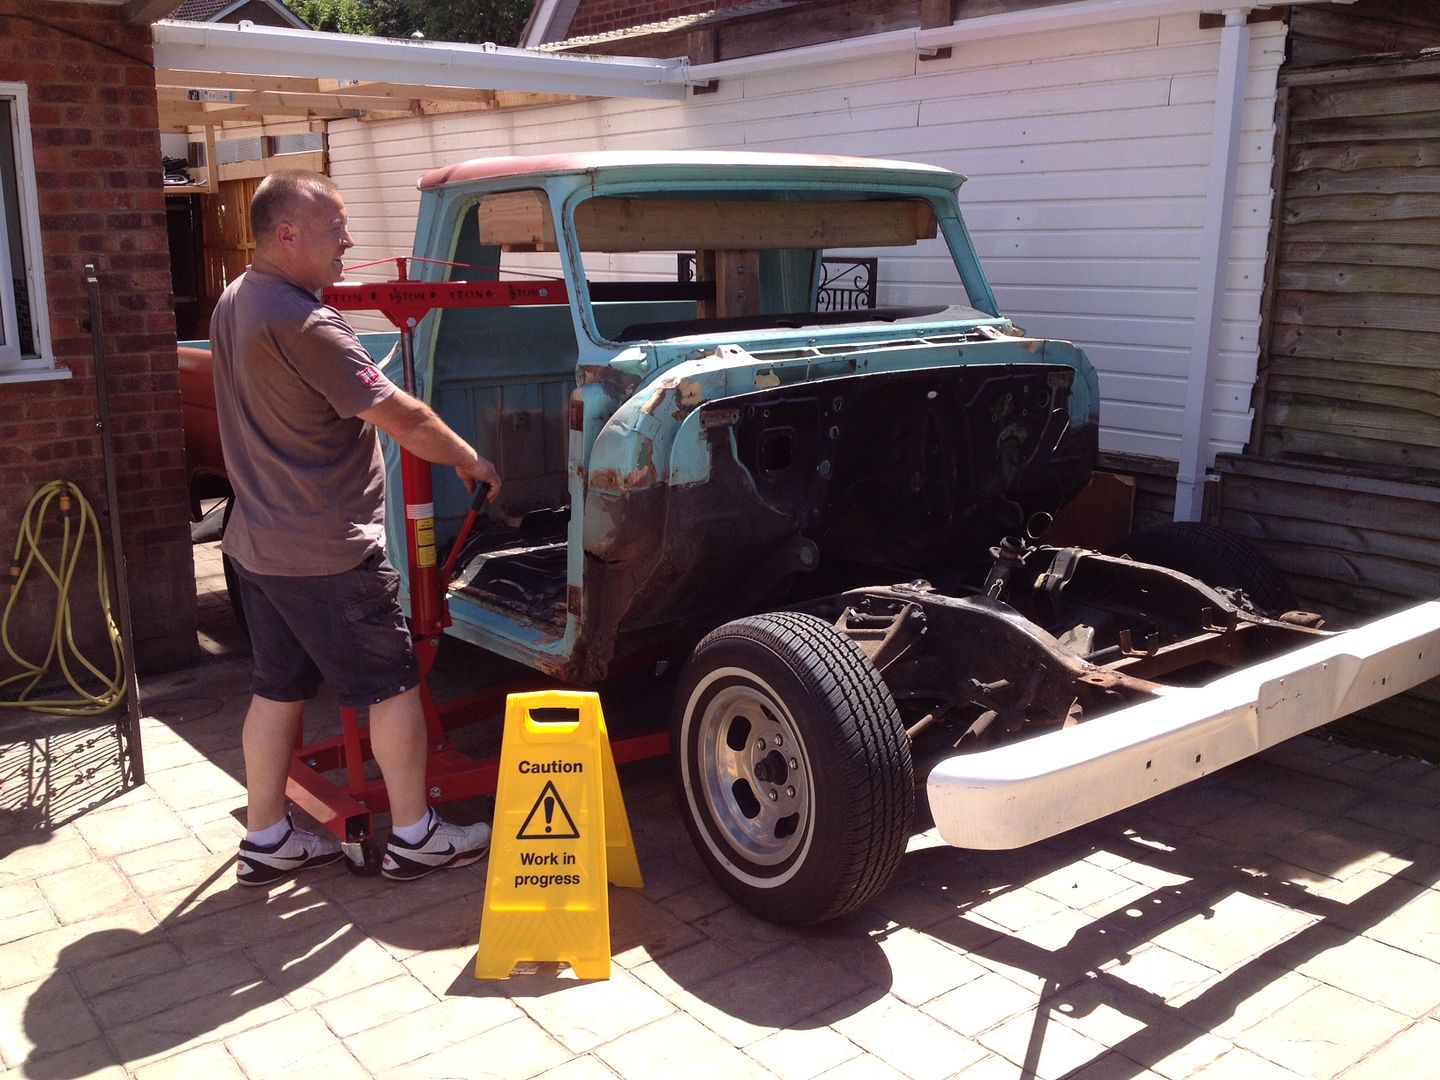  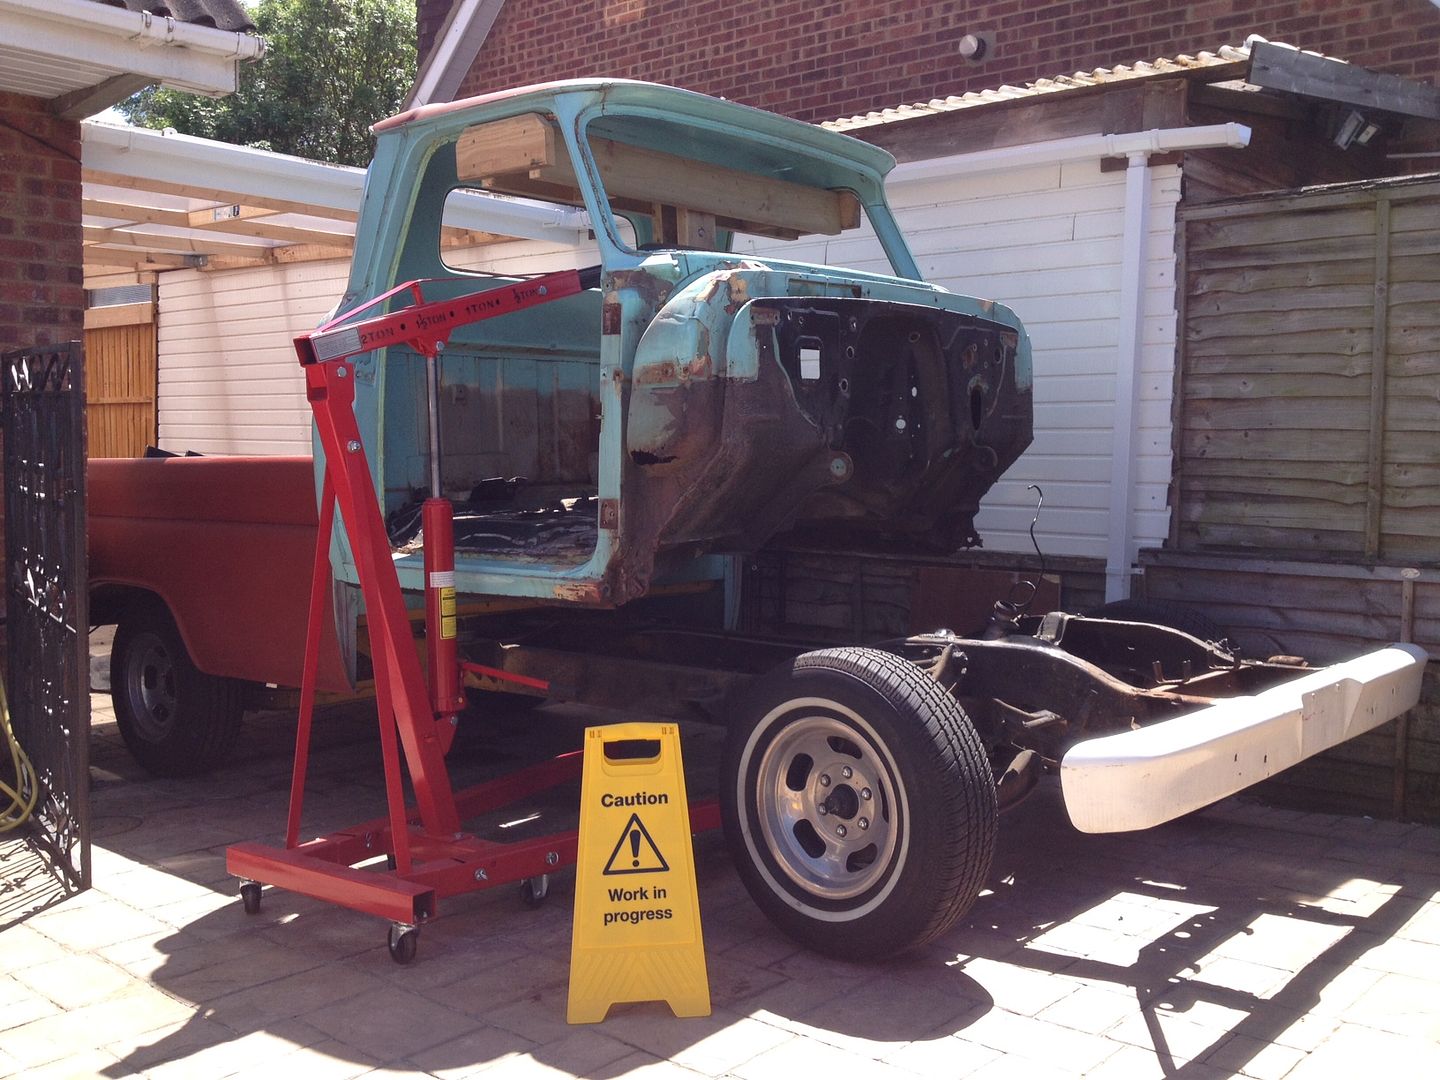 AND THIS IS HOW IT WAS DONE: https://www.youtube.com/watch?v=Lxcu...lt8TvG8KEwT5Kg IMPRESSIVE STUFF, AND RESULT. 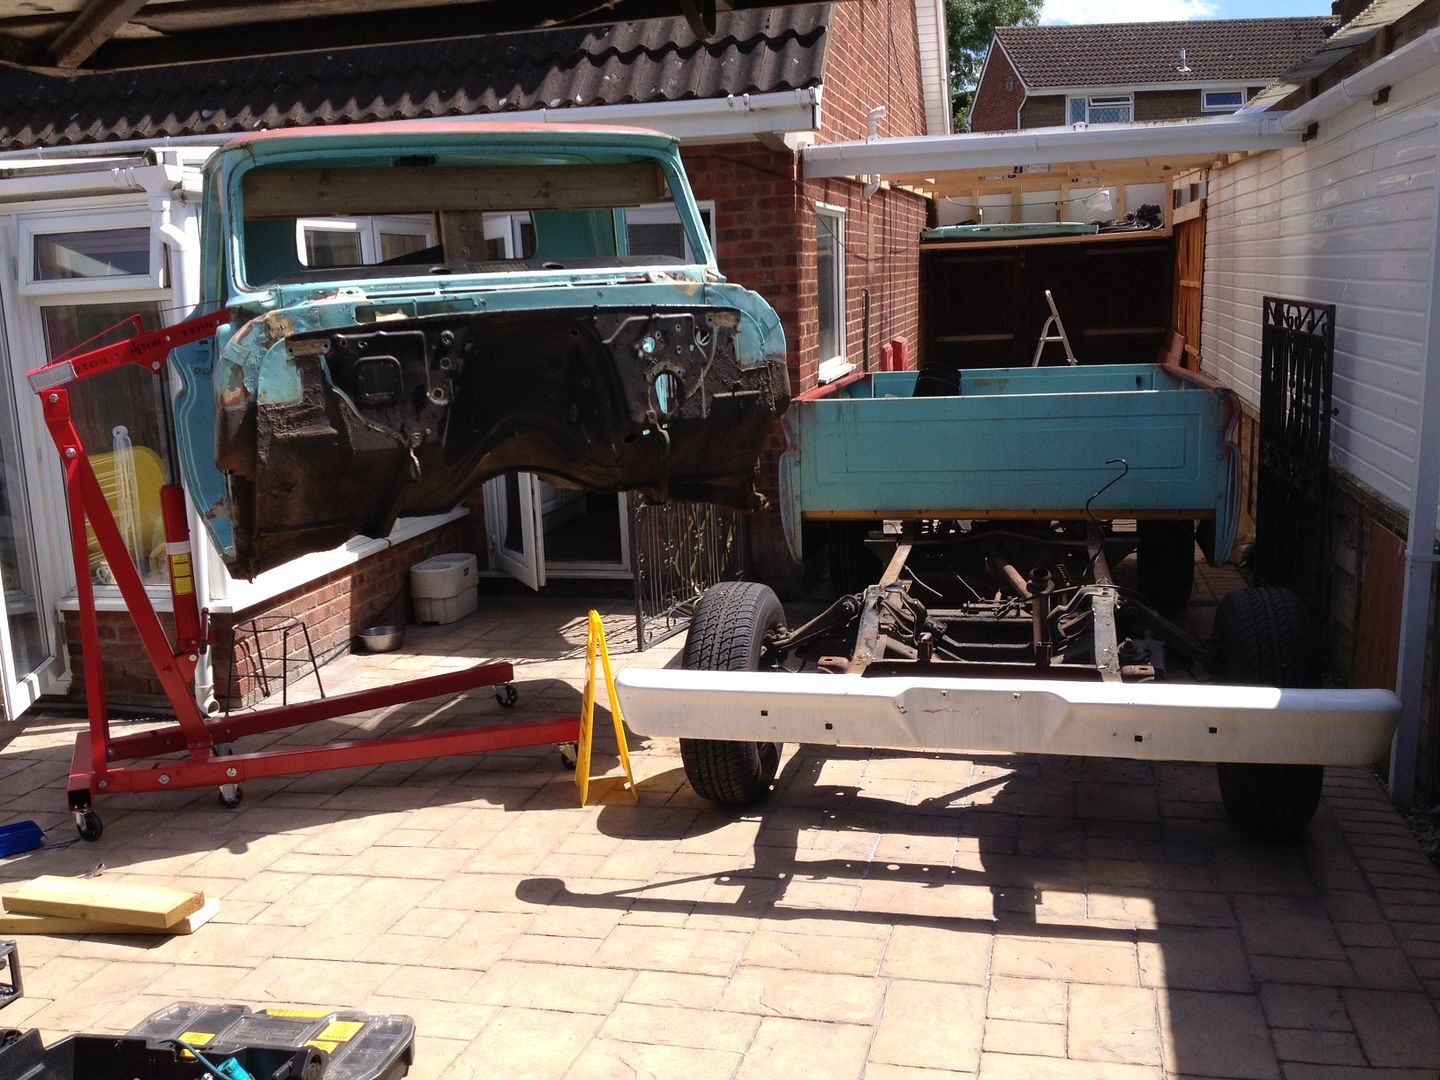 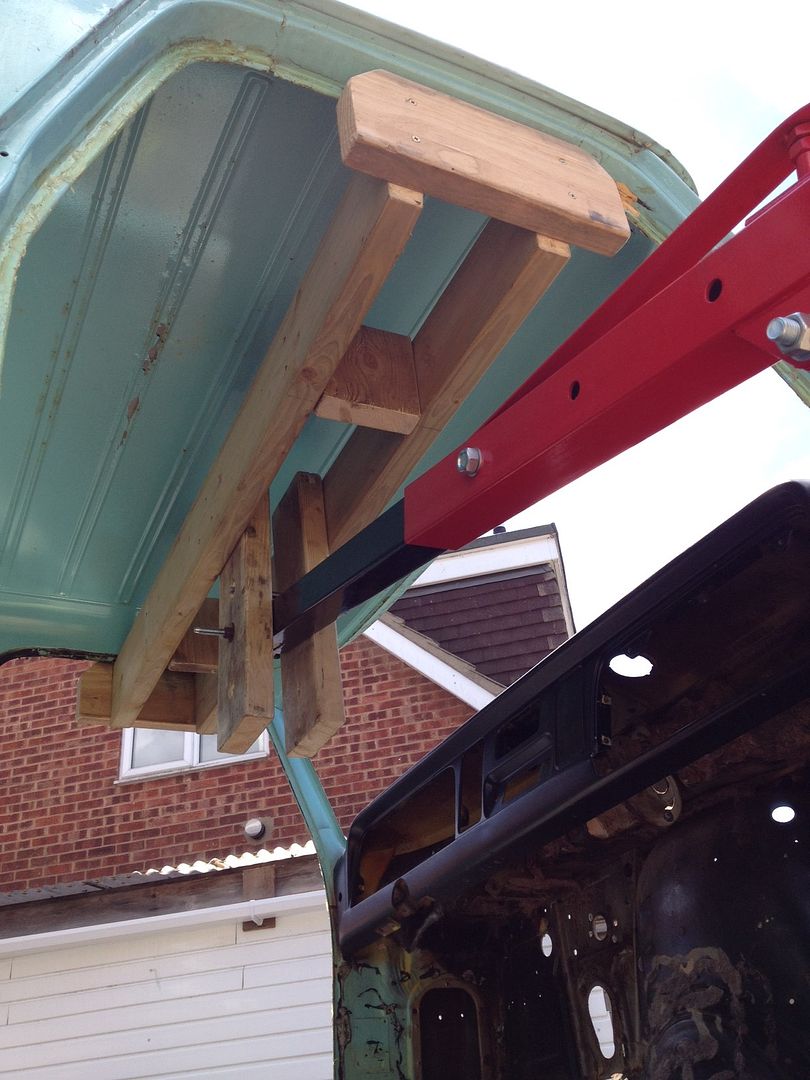 Next up we parked the cab out the way, the trolley needs another 24 inches of height, which will happen later. 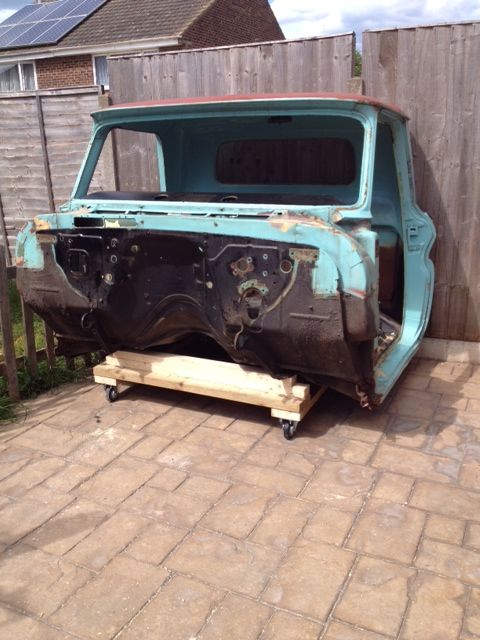 Farmer Brown........ 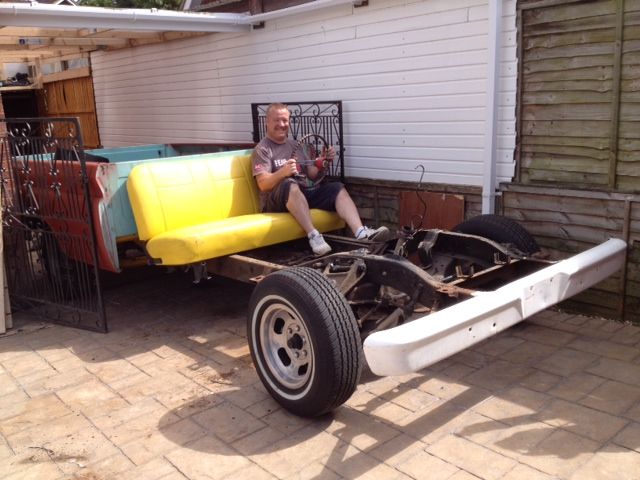 Lastly Martin removed the welded on front bumper and the truck was put back into its tight spot.  That was it for this weekend. As we go on working together, I am learning more and more.
__________________
MY BUILD LINK: http://67-72chevytrucks.com/vboard/s...585901]Redneck Express - 1966 C10 Short Fleetside MY USA ROADTRIPS http://forum.retro-rides.org/thread/...2018-humdinger IF YOU CAN'T FIX IT WITH A HAMMER, YOU'VE GOT AN ELECTRICAL PROBLEM MATE. |
|
|
|
|
#750 |
|
Registered User
 Join Date: Sep 2006
Location: San Francisco
Posts: 4,781
|
Re: What did you do to your truck today part II.
I drove mine. Even picked up some plywood at the store. I either need a fan shroud bigger radiator or an electric pusher fan to help in cooling the BB.
__________________
"A man and his truck, what a beautiful thing" 65 Short Fleetside BBC 65 Long Fleetside 283 3 on the tree for now. my build thread http://www.67-72chevytrucks.com/vboa...d.php?t=259536 |
|
|
 |
| Bookmarks |
|
|