
|
|
|
 11-20-2012, 10:13 PM
|
#1 |
|
Registered User
 Join Date: Jun 2011
Location: Elk city ok
Posts: 891
|
Re: Junkyard Jimmy Super Low Buck Build Thread
This build is turning out far better than I ever thought when ya started. Looking very nice!!!! My first 72 I bought had a 67 hood on it. All they did was shave some off the front and weld some sheetmetel back in to tie it back together. Whoever did the bodywork was terrible!!! But the hood mod actually looked pretty decent. I've always been partial to the 67-68 trucks. Wish I had some pics of the work done.... Here's the only pic I have of the truck
Posted via Mobile Device |

|

|
|
11-20-2012, 11:59 PM
|
#2 | |||
|
GEARHEAD
Join Date: Aug 2003
Location: MN
Posts: 6,122
|
Re: Junkyard Jimmy Super Low Buck Build Thread
Quote:
Quote:
Quote:
Maybe I'll regret having done the hood my way rather than just cutting off the front and filling it in. We'll see how it goes. If I can get this part to look good, the next part should be a piece of cake.
__________________
If no one knows what you're doing, they can't tell you you're doing it wrong HG's Dream Car Build - Shelby Cobra Kit Build your own adjustable track bar 71  Long Fleet C/10 Long Fleet C/10 72  Jimmy 4x4 (Junkyard Jimmy) Jimmy 4x4 (Junkyard Jimmy)HG's Plow Truck '78  K35 Dually K35 DuallyBigass Farm Truck HG's thread of miscellaneous stuff |
|||
|
|
|
|
11-21-2012, 06:28 PM
|
#3 |
|
2wd FTW!!!!
Join Date: Jan 2007
Location: SLC UTAH
Posts: 673
|
Re: Junkyard Jimmy Super Low Buck Build Thread
Love the hood idea! But if your not going to use the trim on your fenders you can just switch out the trim piece on the top of your grill with one from a 67-68 GMC grill and you can just bolt on a 67-68 hood without any cutting or welding on the hood.
|
|
|
|
|
11-21-2012, 07:09 PM
|
#4 | |
|
GEARHEAD
Join Date: Aug 2003
Location: MN
Posts: 6,122
|
Re: Junkyard Jimmy Super Low Buck Build Thread
Quote:
I really could not have asked for better weather this week. Day before Thanksgiving and I worked in the garage with the doors open in a t-shirt. Supposed to cool off this weekend, but I'll take every day like this I can get. As for the Jimmy, I have doors that latch now. Bonus! 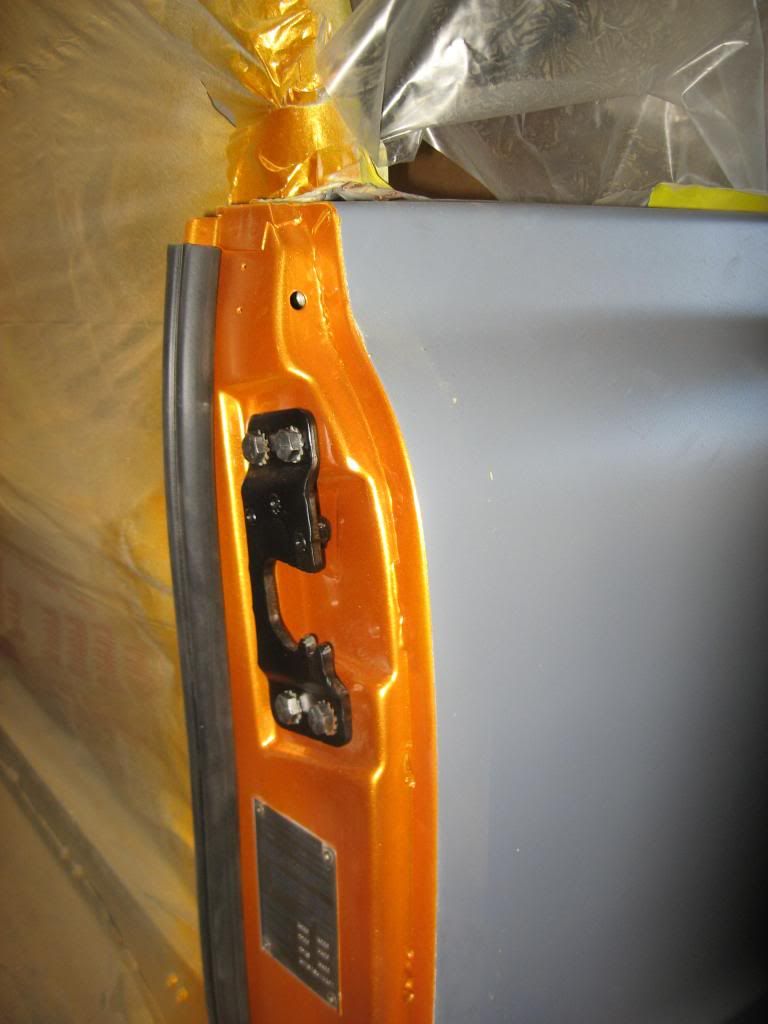 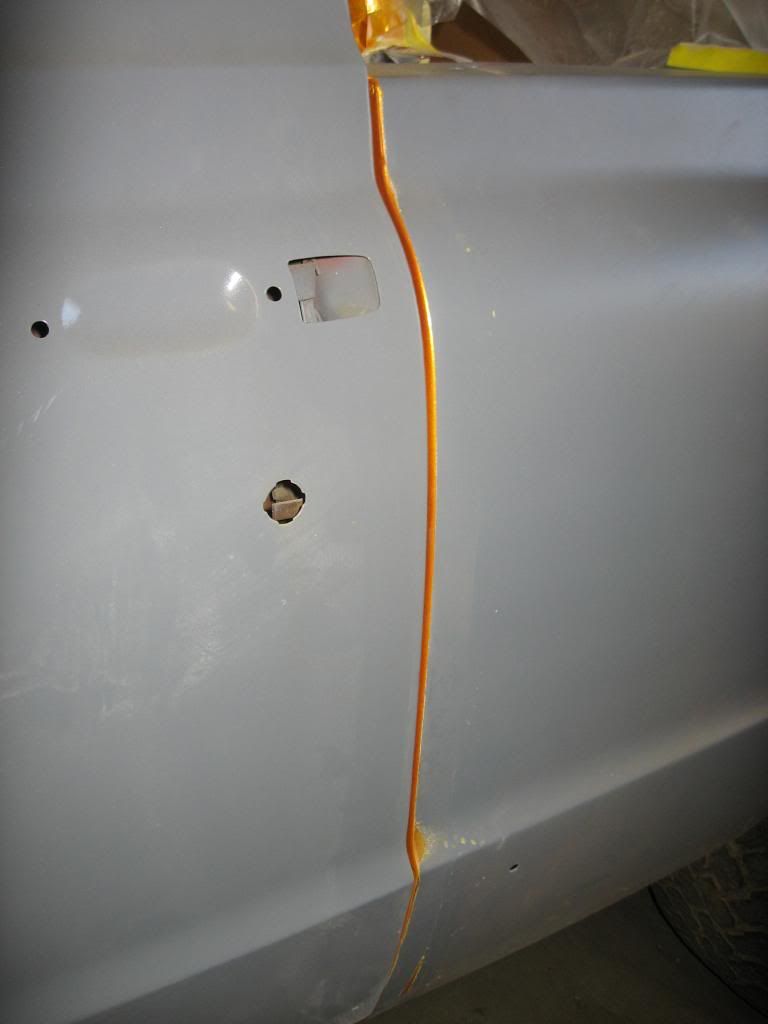 And I worked on the hood some more. Here's the beginning of stage 2. The smooth look. 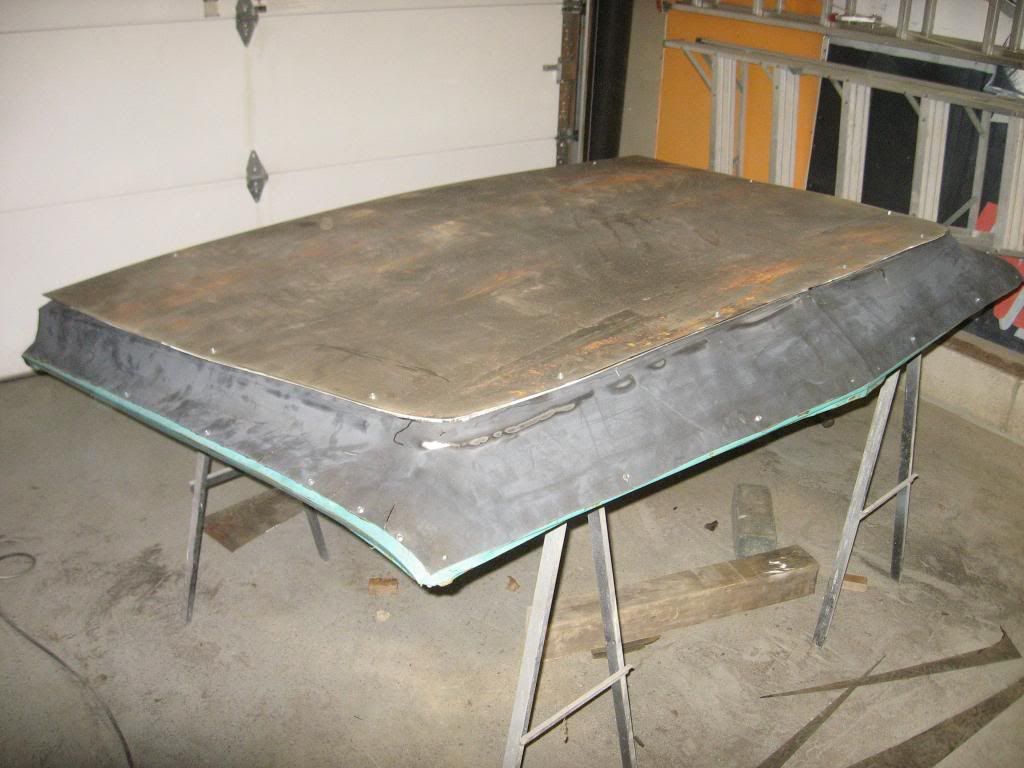 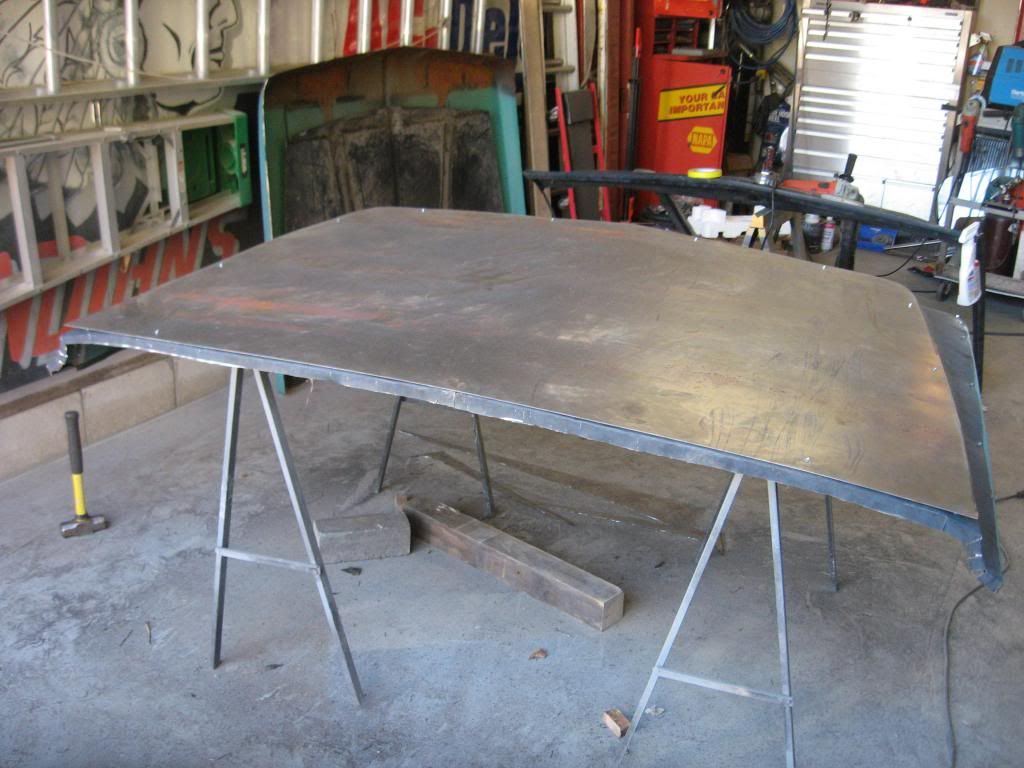 I made some relief cuts on the front sides, which helped it lay down better. 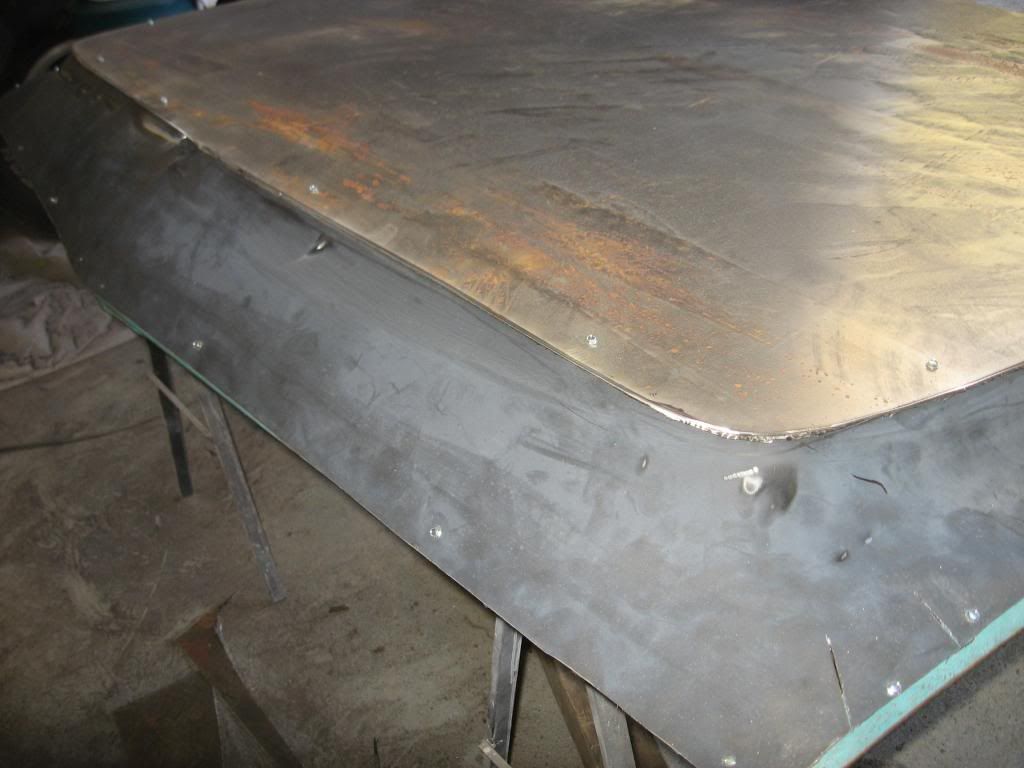 Upside down...  Lets see if it fits... 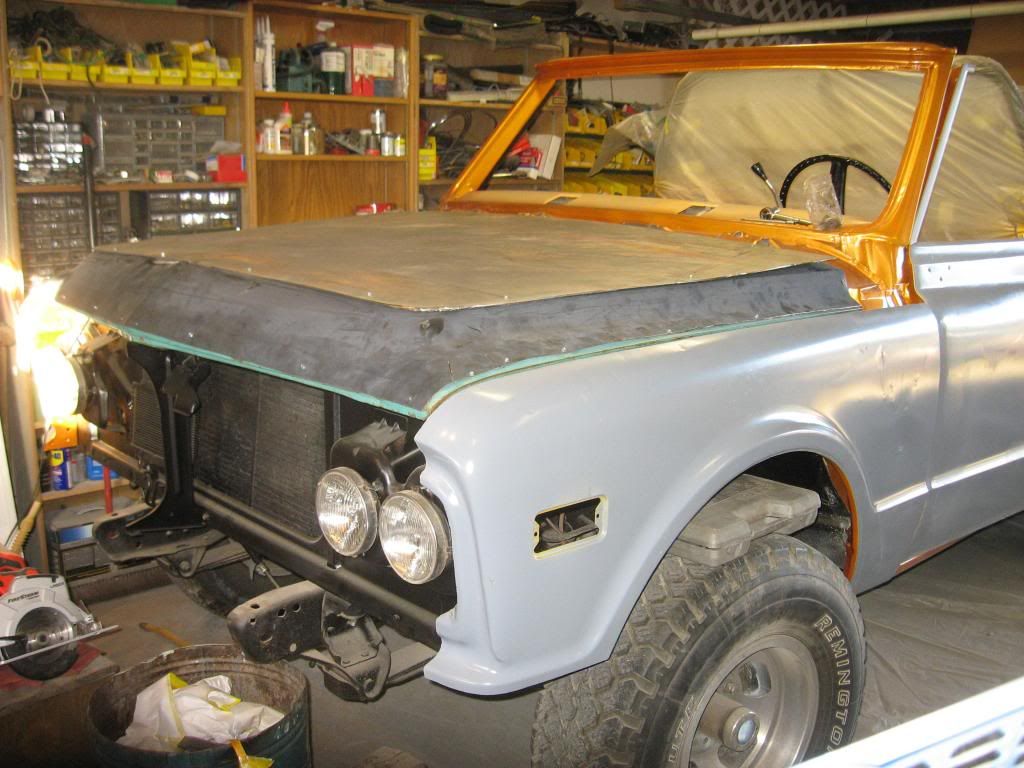 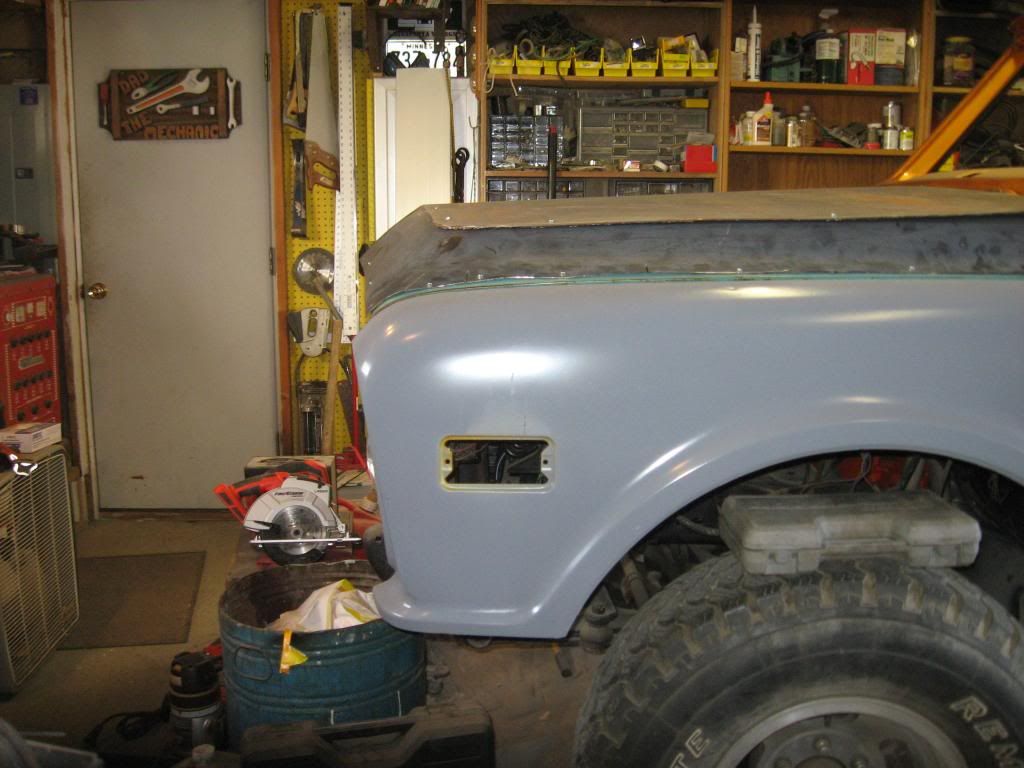 So this mod may be anti-climatic for some (many?), but its something I wanted to try and I can't recall seeing it done before. It will give it a smoother sleeker look and most people won't even notice the ridgeline is gone. I still have a long ways to go before I'm spraying paint on it. Its held together with self tapping screws right now. For those wondering why I didn't just cut the ridge out and fill it in, this was at the advice of a few different body professionals. They said the seams would show up in the sun when it gets hot. I figured if my edges were at the natural body lines I will eliminate most of that. All this mod cost me was 2 hoods I couldn't sell (believe me I tried), about 6 cutoff wheels, $34 for the new sheet of steel, and a bunch of my time. Hopefully I don't have any major issues getting everything bonded/welded together and the finish body work goes well. This toy is where my inspiration came from... 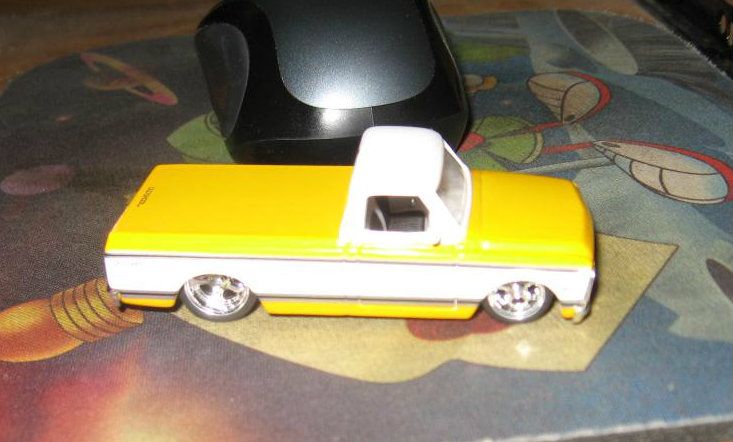
__________________
If no one knows what you're doing, they can't tell you you're doing it wrong HG's Dream Car Build - Shelby Cobra Kit Build your own adjustable track bar 71 Long Fleet C/10 72 Jimmy 4x4 (Junkyard Jimmy)HG's Plow Truck '78 K35 DuallyBigass Farm Truck HG's thread of miscellaneous stuff |
|
|
|
|
|
11-22-2012, 05:05 PM
|
#5 |
|
2wd FTW!!!!
Join Date: Jan 2007
Location: SLC UTAH
Posts: 673
|
Re: Junkyard Jimmy Super Low Buck Build Thread
Hummmm??? Interested in how the hood turns out.
|
|
|
|
|
11-24-2012, 04:14 PM
|
#6 |
|
Registered.........
Join Date: May 2006
Location: Livermore,CA
Posts: 288
|
WOW!!! I just finished reading ALL 33 pages, what an amazing transformation! Not only have you taken cast off pieces of other vehicles and turned it into something to be proud of, you've accomplished something far greater. You were able to do what most married men strive for but seldom achieve - you managed to gain not only your wife's but your entire families approval for the project AND desire to be seen in it! My hat is off to you sir, keep up the good work! Subscribed!
__________________
1966 C10 panel-400 small block/TH 350 combo Nothing is fool proof to a talented fool! Popcorn: Pops at exactly 444 degreese Expands to 44 times it's original size Has a 4 year shelf life |
|
|
|
|
11-24-2012, 08:47 PM
|
#7 | |||
|
GEARHEAD
Join Date: Aug 2003
Location: MN
Posts: 6,122
|
Re: Junkyard Jimmy Super Low Buck Build Thread
Quote:
Quote:
Quote:
Today started out slow. I was mostly working on cleaning up the garage, added some lighting, insulated the door to my attic pull down stairs, hung up more stuff, built a small shelf between the work benches to hold tools in cases so I could use the cabinet they were in for a bunch of cordless tools so I could quit tripping over them, etc, etc,... New lights... 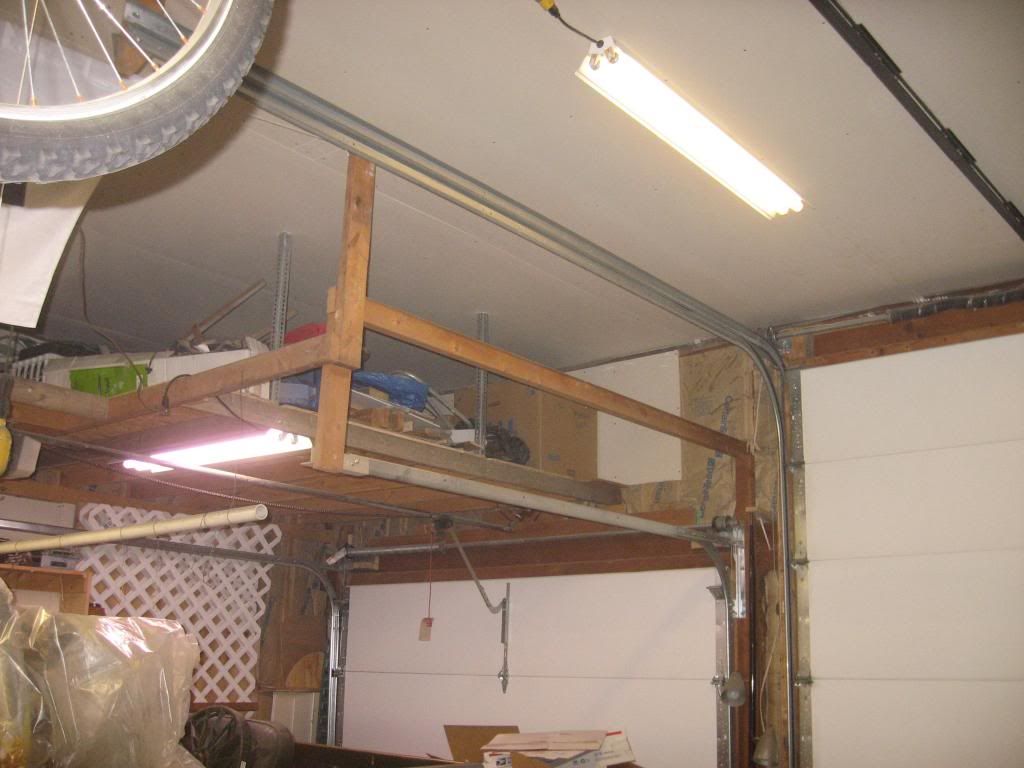 The front part of the garage was kinda dark and I needed to mount lights direct to the ceiling so the garage doors would not hit them. Kind of a pain because I had to take the lights apart to mount, then put them back together. Well worth the effort though. Much better lighting in the whole garage now. Then the jimmy got some love. I'm not ready to finish the hood yet. Needed a break from it. So I started doing what needs to be done to get the dash back together. I found a better bezel for the gauge cluster, so I got that put together. 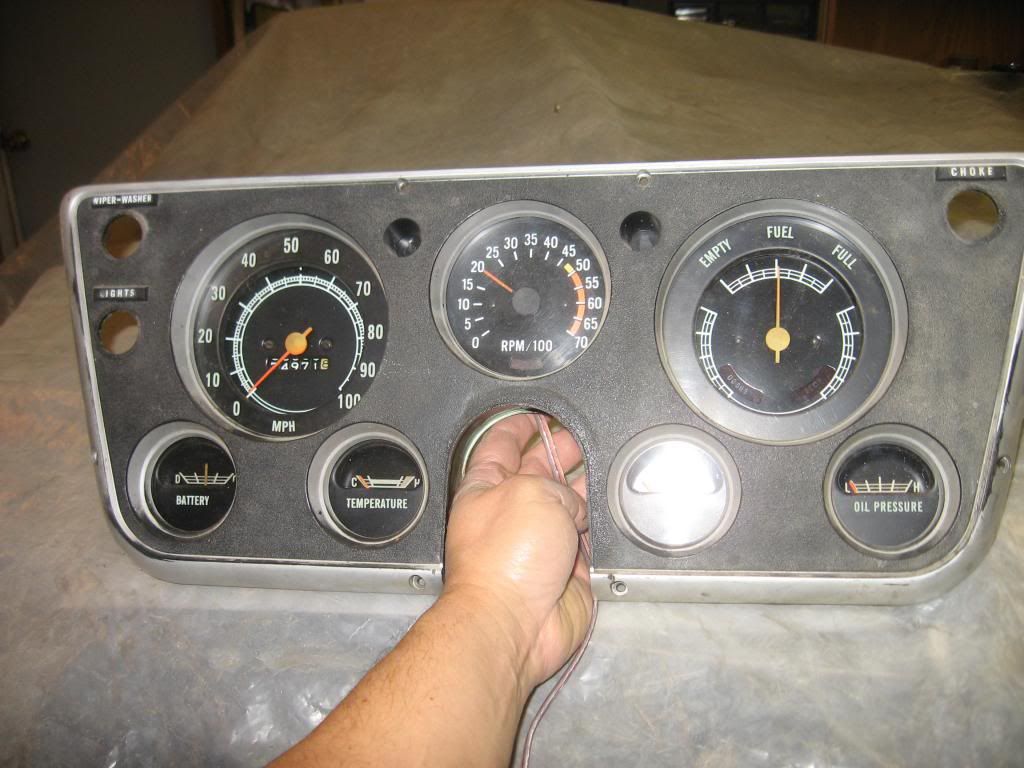 The steering column and top of the dash needed to be painted satin black. After what seemed like hours of taping, they got sprayed. 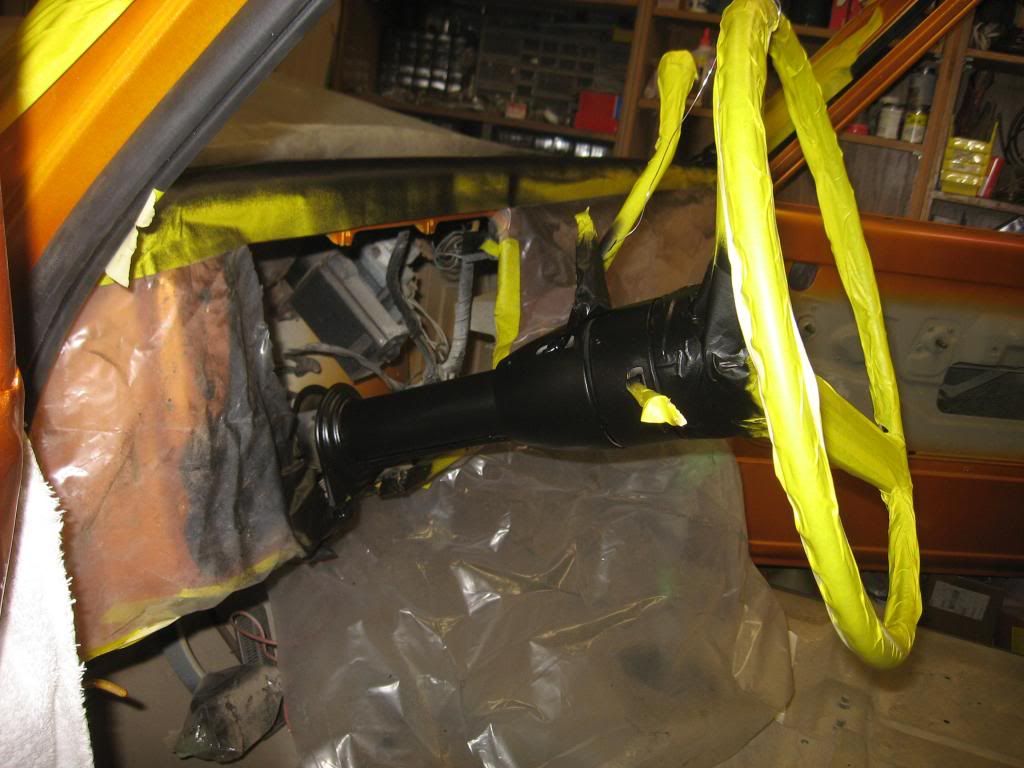 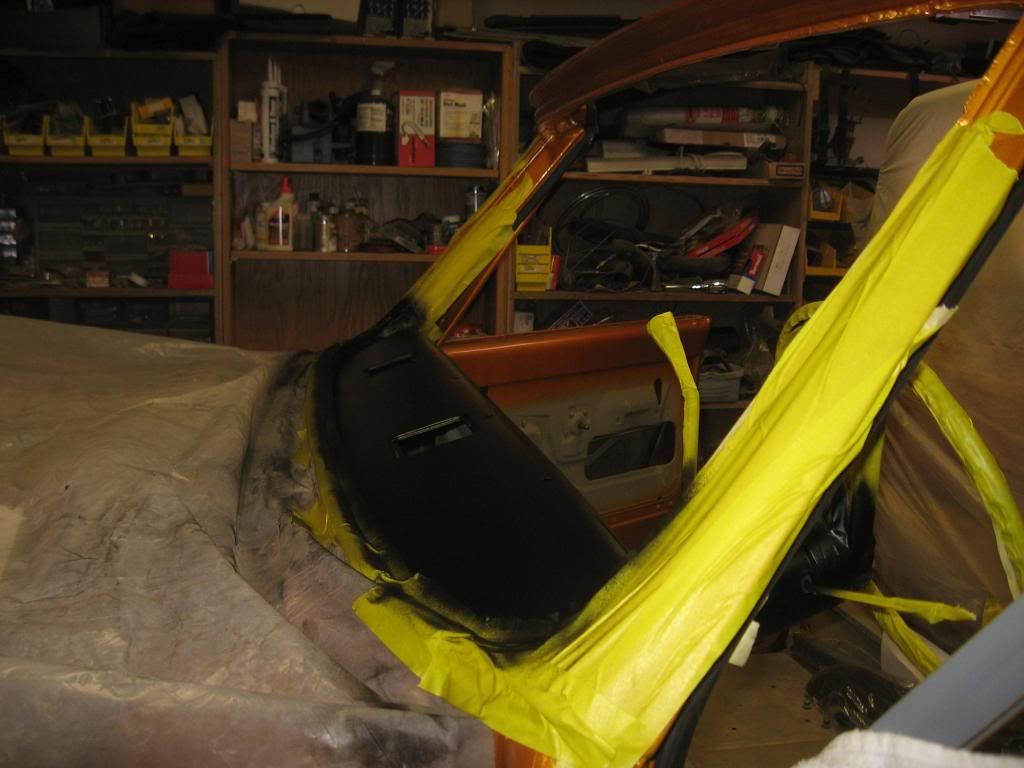 Looks much better with the tape removed. 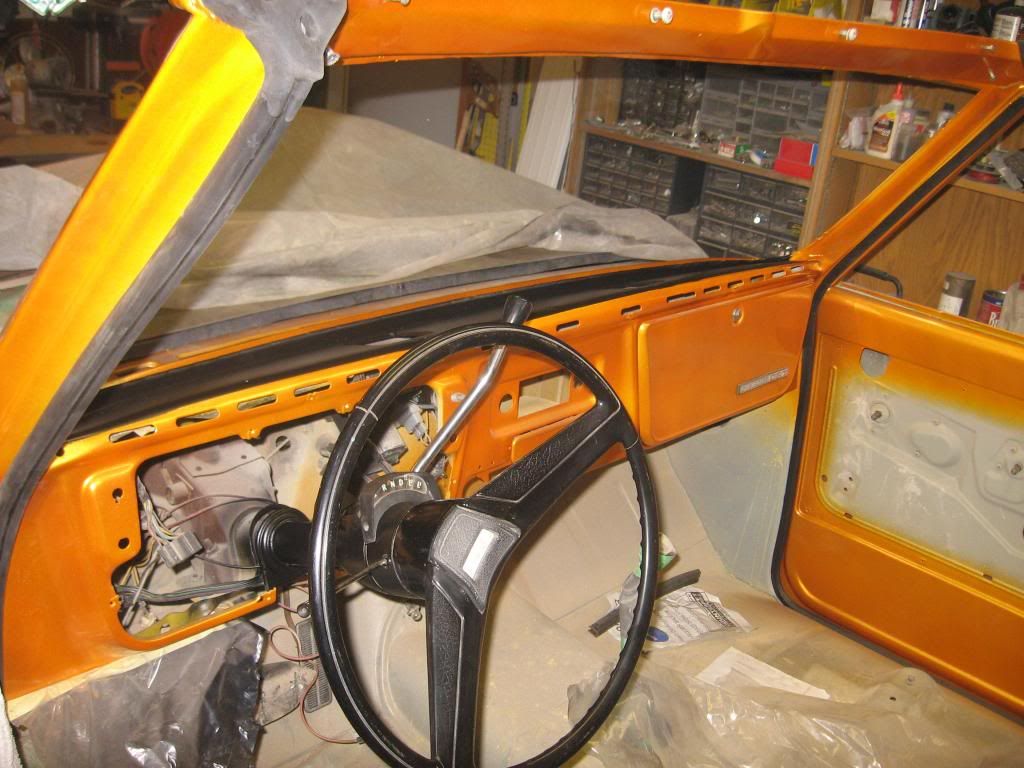 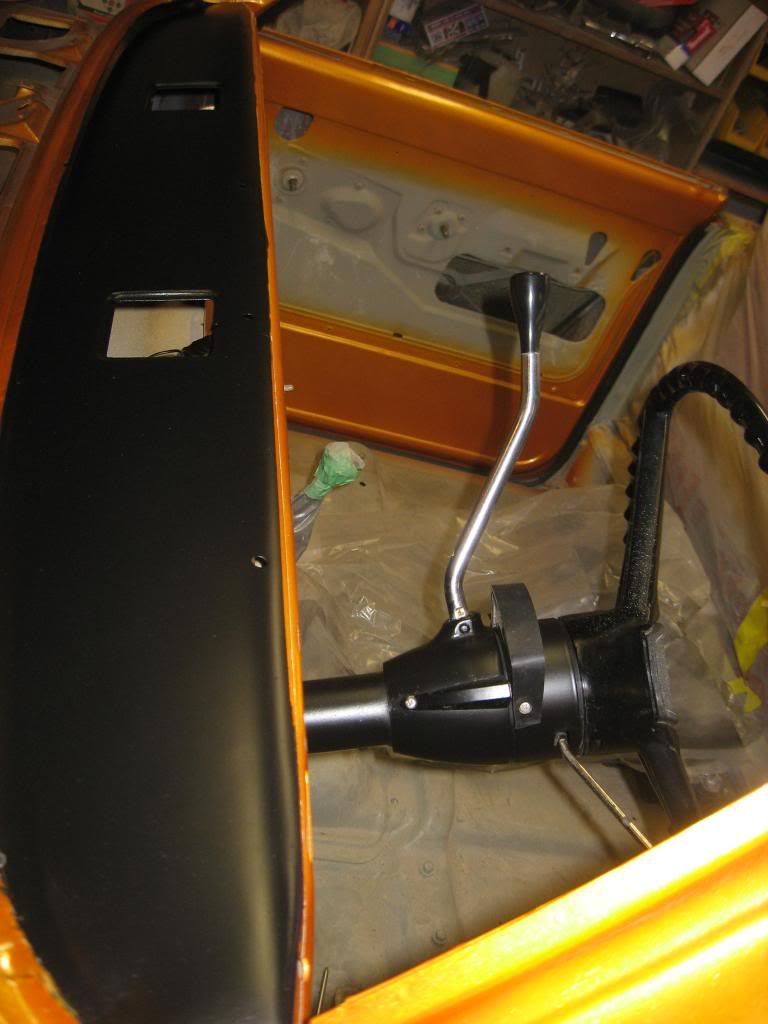 During the morning I was digging through the parts boxes, attic, bed of the jimmy, where ever and found most of what I need to get the dash back together. But I might have to wait a few days so I can order some black vinyl paint for the dash pad, and a glove box. Probably won't get much time tomorrow because it's the wifes birthday. We'll be doing what ever she wants to do. 
__________________
If no one knows what you're doing, they can't tell you you're doing it wrong HG's Dream Car Build - Shelby Cobra Kit Build your own adjustable track bar 71 Long Fleet C/10 72 Jimmy 4x4 (Junkyard Jimmy)HG's Plow Truck '78 K35 DuallyBigass Farm Truck HG's thread of miscellaneous stuff |
|||
|
|
|
|
11-25-2012, 10:08 PM
|
#8 |
|
GEARHEAD
Join Date: Aug 2003
Location: MN
Posts: 6,122
|
Re: Junkyard Jimmy Super Low Buck Build Thread
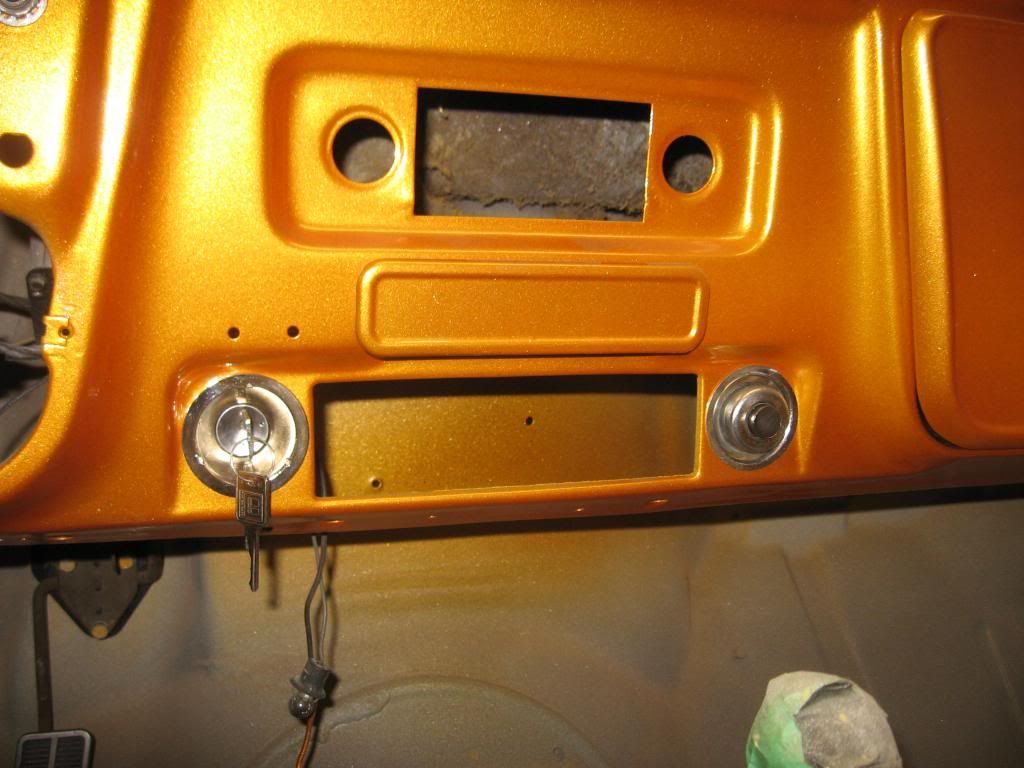
I did manage to get some more garage time today. Not a ton got done, but hey, progress is progress. I got my ignition switch, wiper switch, light switch and lighter in. The hardest part of this was just finding it all.
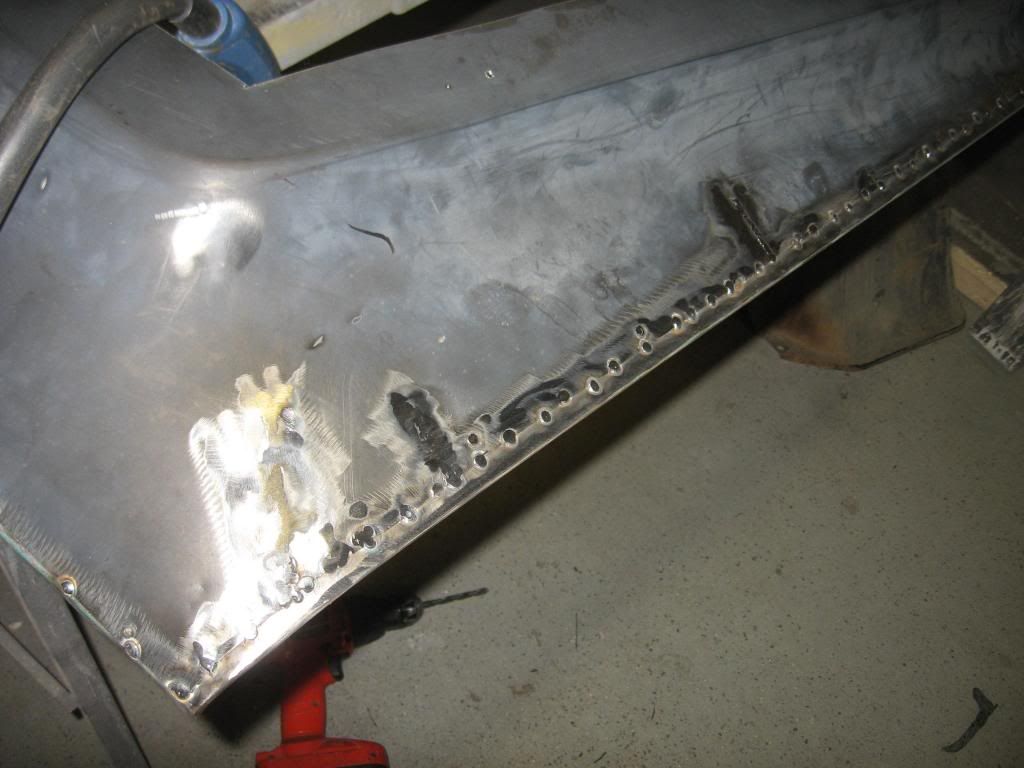
 I started to weld the hood together also. I had planned on using the panel adhesive, but after seeing how much work it was going to be to get a good fit, drill all the holes for rivets, countersink them all, glue it and rivet it, I had second thoughts. So I welded the back middle, where I had cut out the ridge, back together, and left the screws in place there to hold the position. Then I welded the front middle down to hold the center line. I ran out of time but I did start welding one side.  The front half of each side is where the most problems with the fit are at. I may have to add another relief cut or 2, or extend ones I have now on the front corners, but I think it will be alright. Just going to take some time. Oh yeah, bonus of the day. I sold a tailgate on ebay and the guy came to pick it up. He also needed a windshield frame for his blazer. I had the one I cut off the very first jimmy tub that started this whole project. So another $100 comes of the total. Now at $4099.
__________________
If no one knows what you're doing, they can't tell you you're doing it wrong HG's Dream Car Build - Shelby Cobra Kit Build your own adjustable track bar 71 Long Fleet C/10 72 Jimmy 4x4 (Junkyard Jimmy)HG's Plow Truck '78 K35 DuallyBigass Farm Truck HG's thread of miscellaneous stuff |
|
|
|
|
11-25-2012, 10:37 PM
|
#9 |
|
Registered User
Join Date: Nov 2007
Location: NLR, AR
Posts: 1,387
|
Re: Junkyard Jimmy Super Low Buck Build Thread
I know what you mean on finding everything. Been having that issue the past few days.
|
|
|
|
|
11-25-2012, 10:51 PM
|
#10 | |
|
GEARHEAD
Join Date: Aug 2003
Location: MN
Posts: 6,122
|
Re: Junkyard Jimmy Super Low Buck Build Thread
Quote:
I just ordered some more paint supplies (just to be sure I got enough to finish it), and a carb rebuild kit, and dash pad paint, and heater (water) hoses. Still need to order the glove box and heater vent hoses. Going to get the kick panels painted this week I hope. Then spray the liner on the front floor half (need to remember to get the tint). Maybe get the dash back together by next weekend. Need to keep rolling along on the hood. Get the windshield down from the attic to see if it's really worth keeping and using.
__________________
If no one knows what you're doing, they can't tell you you're doing it wrong HG's Dream Car Build - Shelby Cobra Kit Build your own adjustable track bar 71 Long Fleet C/10 72 Jimmy 4x4 (Junkyard Jimmy)HG's Plow Truck '78 K35 DuallyBigass Farm Truck HG's thread of miscellaneous stuff |
|
|
|
|
|
11-26-2012, 07:41 PM
|
#11 |
|
GEARHEAD
Join Date: Aug 2003
Location: MN
Posts: 6,122
|
Re: Junkyard Jimmy Super Low Buck Build Thread
Snuck out to the garage for a few minutes to do more tack welds. Both sides of the hood are tacked in except for the front 5-6". I need to do more cutting and hammering there. Then I'll need to trim more off the front edge of the skin before I tack that down. So far so good though.
__________________
If no one knows what you're doing, they can't tell you you're doing it wrong HG's Dream Car Build - Shelby Cobra Kit Build your own adjustable track bar 71 Long Fleet C/10 72 Jimmy 4x4 (Junkyard Jimmy)HG's Plow Truck '78 K35 DuallyBigass Farm Truck HG's thread of miscellaneous stuff |
|
|
|
|
11-26-2012, 08:51 PM
|
#12 |
|
6>8 Plugless........
 Join Date: Sep 2007
Location: Prairie City, Ia
Posts: 17,140
|
Re: Junkyard Jimmy Super Low Buck Build Thread
It's been a long time since I checked in on this build. Holy cow you're doing a bang up job! (Pun intended)
 Keep up the great work. This Jimmy looked as bad as they get and you've gotten it to the point most people only dream of. Nice job sir! Keep up the great work. This Jimmy looked as bad as they get and you've gotten it to the point most people only dream of. Nice job sir!
__________________
Ryan 1972 Chevy Longhorn K30 Cheyenne Super, 359 Inline 6 cylinder, Auto Trans, Tilt, Diesel Tach/Vach, Buckets, Rare Rear 4-link and air ride option Build Thread 1972 GMC Sierra Grande Longhorn 4x4 1972 Chevy Cheyenne Super K20 Long Step side tilt, tach, tow hooks, AC, 350 4 speed 1972 C10 Suburban Custom Deluxe 1969 Chevy milk truck 1971 Camaro RS 5.3 BTR STG3 Cam Super T10 1940 Ford 354 Hemi 46RH Ford 9" on air ride huge project Tired of spark plugs? Check this out. |
|
|
|
|
11-26-2012, 10:10 PM
|
#13 | |
|
GEARHEAD
Join Date: Aug 2003
Location: MN
Posts: 6,122
|
Re: Junkyard Jimmy Super Low Buck Build Thread
Quote:
 Wife is video chatting so I slunk back out to the garage. Just kept working my way around the front tacking the 67 hood skin on. Still need to do the rear, but might change directions on how I have that since I have the new sheet going over the top and flush with the rear. Anyway, it fit up surprisingly well. Just lengthened a couple of the relief cuts, a few taps with a hammer, clamp, tack, clamp, tack, etc. I'll keep welding as time permits and should be able to get the top sheet on soon enough. 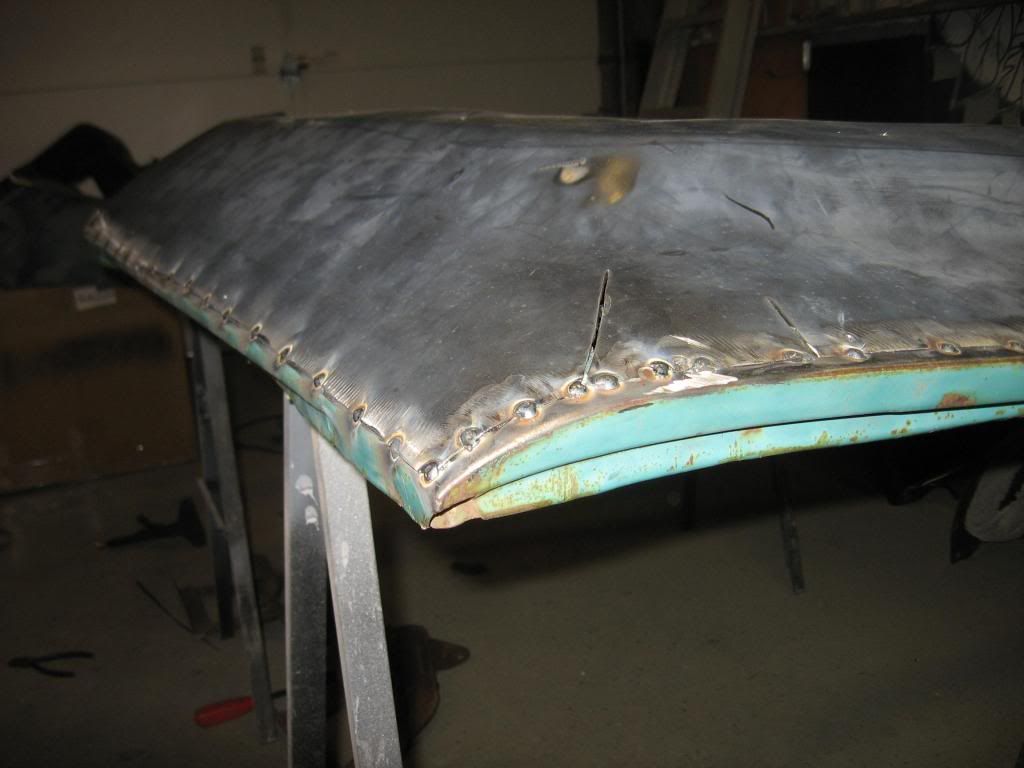  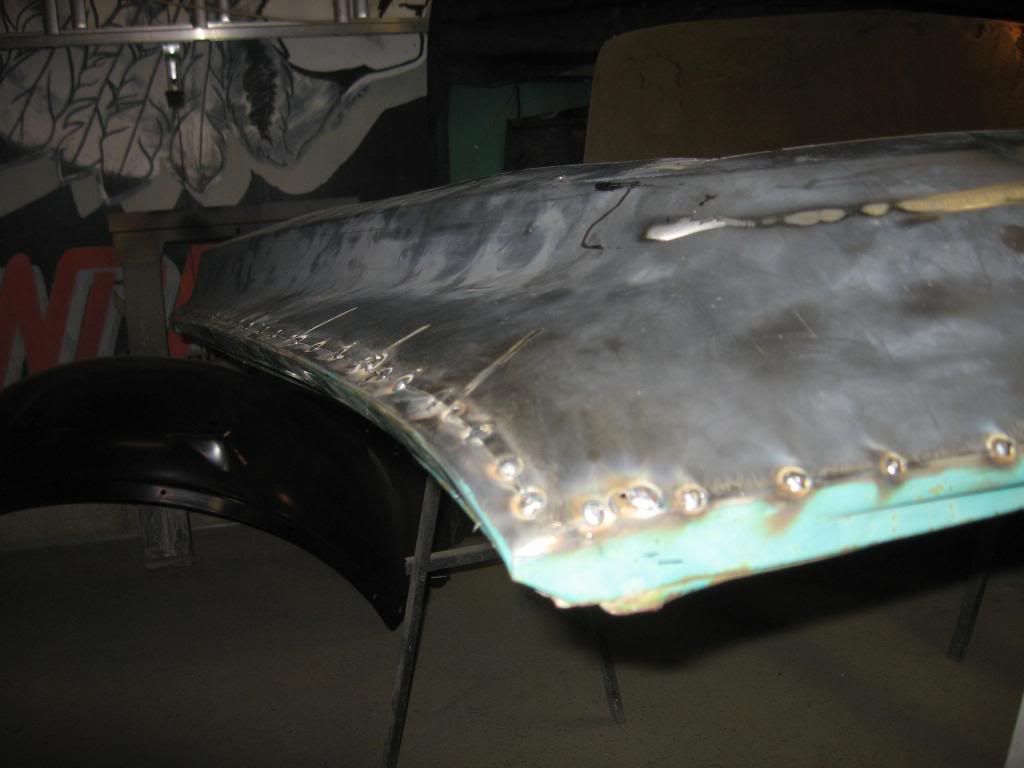 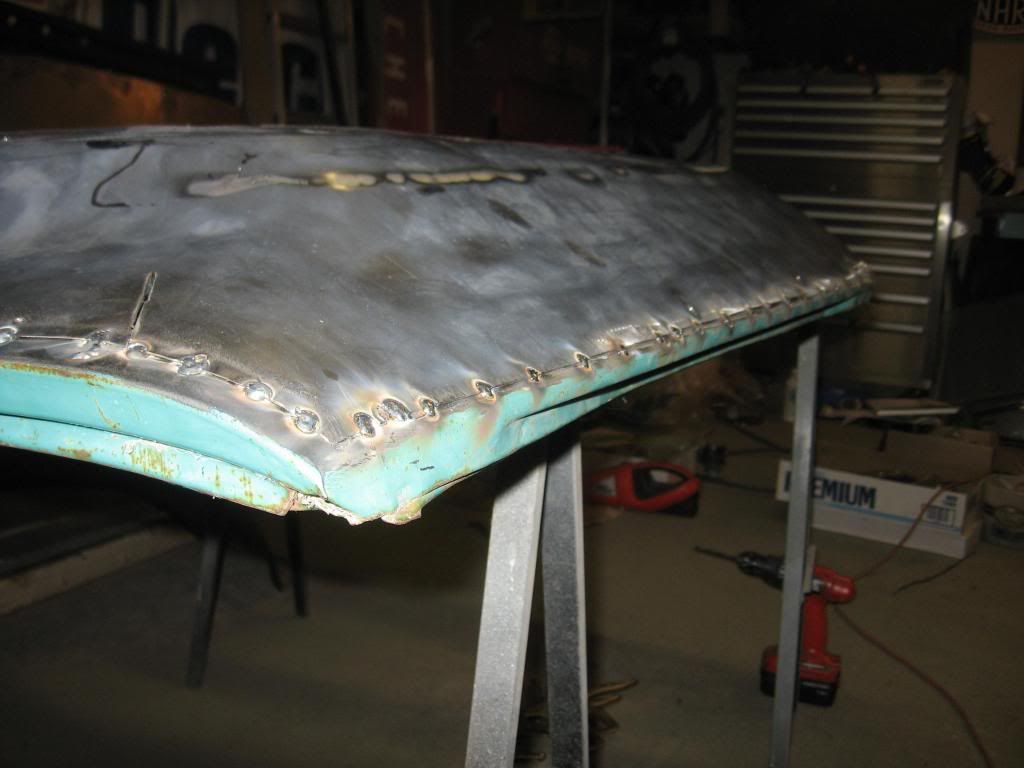
__________________
If no one knows what you're doing, they can't tell you you're doing it wrong HG's Dream Car Build - Shelby Cobra Kit Build your own adjustable track bar 71 Long Fleet C/10 72 Jimmy 4x4 (Junkyard Jimmy)HG's Plow Truck '78 K35 DuallyBigass Farm Truck HG's thread of miscellaneous stuff |
|
|
|
|
|
11-27-2012, 04:59 PM
|
#15 |
|
6>8 Plugless........
Join Date: Sep 2007
Location: Prairie City, Ia
Posts: 17,140
|
Re: Junkyard Jimmy Super Low Buck Build Thread
The hood will be sweet when it's done. But I foresee a lot of blocking in your future.
__________________
Ryan 1972 Chevy Longhorn K30 Cheyenne Super, 359 Inline 6 cylinder, Auto Trans, Tilt, Diesel Tach/Vach, Buckets, Rare Rear 4-link and air ride option Build Thread 1972 GMC Sierra Grande Longhorn 4x4 1972 Chevy Cheyenne Super K20 Long Step side tilt, tach, tow hooks, AC, 350 4 speed 1972 C10 Suburban Custom Deluxe 1969 Chevy milk truck 1971 Camaro RS 5.3 BTR STG3 Cam Super T10 1940 Ford 354 Hemi 46RH Ford 9" on air ride huge project Tired of spark plugs? Check this out. |
|
|
|
|
11-28-2012, 12:38 AM
|
#16 | ||
|
GEARHEAD
Join Date: Aug 2003
Location: MN
Posts: 6,122
|
Re: Junkyard Jimmy Super Low Buck Build Thread
Quote:
Quote:
Didn't work on it today, but picked up the glovebox and heater hoses from daburb for $37. And my order from summit came to $121 for a carb rebuild kit, black vinyl paint and other paint supplies. Total spent now up to $4257. There really shouldn't be much I have left to buy.
__________________
If no one knows what you're doing, they can't tell you you're doing it wrong HG's Dream Car Build - Shelby Cobra Kit Build your own adjustable track bar 71 Long Fleet C/10 72 Jimmy 4x4 (Junkyard Jimmy)HG's Plow Truck '78 K35 DuallyBigass Farm Truck HG's thread of miscellaneous stuff |
||
|
|
|
|
11-28-2012, 04:21 PM
|
#17 |
|
6>8 Plugless........
Join Date: Sep 2007
Location: Prairie City, Ia
Posts: 17,140
|
Re: Junkyard Jimmy Super Low Buck Build Thread
I really did keep a good job keeping track of how much I dumped into my 72. But once I got to $8500 with out the powertrain being done, I just quit keeping track.
__________________
Ryan 1972 Chevy Longhorn K30 Cheyenne Super, 359 Inline 6 cylinder, Auto Trans, Tilt, Diesel Tach/Vach, Buckets, Rare Rear 4-link and air ride option Build Thread 1972 GMC Sierra Grande Longhorn 4x4 1972 Chevy Cheyenne Super K20 Long Step side tilt, tach, tow hooks, AC, 350 4 speed 1972 C10 Suburban Custom Deluxe 1969 Chevy milk truck 1971 Camaro RS 5.3 BTR STG3 Cam Super T10 1940 Ford 354 Hemi 46RH Ford 9" on air ride huge project Tired of spark plugs? Check this out. |
|
|
|
|
11-28-2012, 07:00 PM
|
#18 | |
|
GEARHEAD
Join Date: Aug 2003
Location: MN
Posts: 6,122
|
Re: Junkyard Jimmy Super Low Buck Build Thread
Quote:
__________________
If no one knows what you're doing, they can't tell you you're doing it wrong HG's Dream Car Build - Shelby Cobra Kit Build your own adjustable track bar 71 Long Fleet C/10 72 Jimmy 4x4 (Junkyard Jimmy)HG's Plow Truck '78 K35 DuallyBigass Farm Truck HG's thread of miscellaneous stuff |
|
|
|
|
|
11-29-2012, 09:55 AM
|
#19 |
|
GEARHEAD
Join Date: Aug 2003
Location: MN
Posts: 6,122
|
Re: Junkyard Jimmy Super Low Buck Build Thread
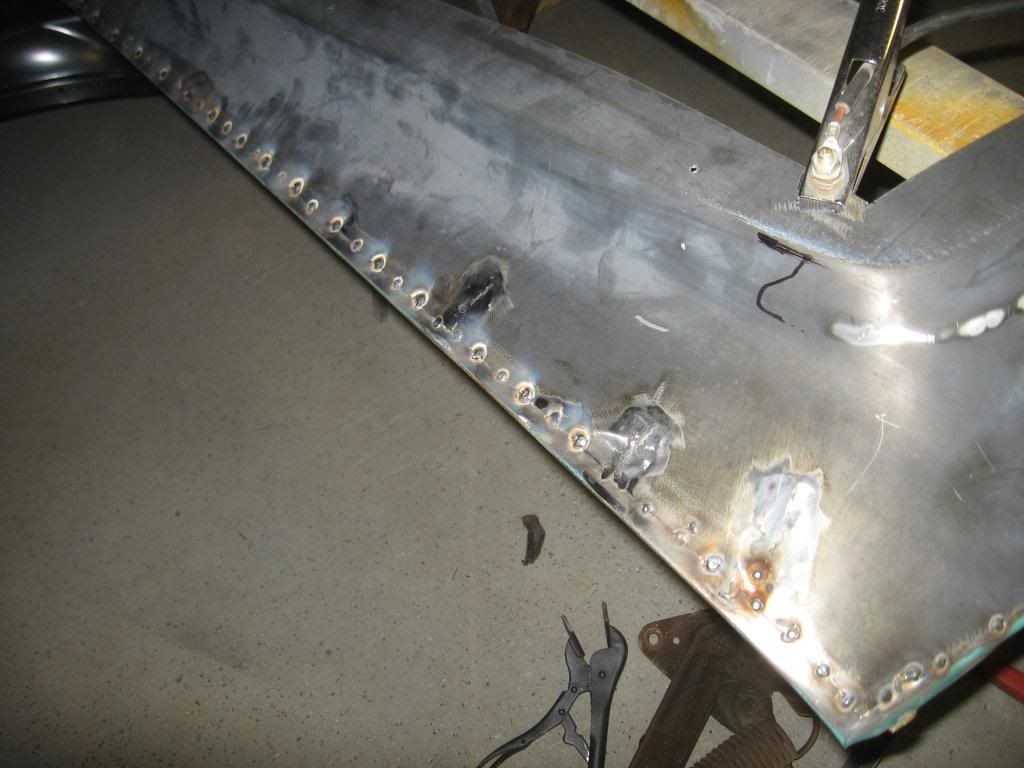
Woke up early so I figured I would weld some more. I got the relief cuts welded up and ground down. And the little holes from the self tapping screws along the sides also. I also added tack welds between each of the existing tacks on both sides. They are about an inch apart now and I'm wondering if that is enough. I don't think I should have to weld the whole thing solid. Opinions?
__________________
If no one knows what you're doing, they can't tell you you're doing it wrong HG's Dream Car Build - Shelby Cobra Kit Build your own adjustable track bar 71 Long Fleet C/10 72 Jimmy 4x4 (Junkyard Jimmy)HG's Plow Truck '78 K35 DuallyBigass Farm Truck HG's thread of miscellaneous stuff |
|
|
|
|
11-29-2012, 10:35 AM
|
#20 |
|
Registered User
Join Date: Aug 2007
Location: Kentucky
Posts: 828
|
Re: Junkyard Jimmy Super Low Buck Build Thread
I think it is really preference. I like mine to be welded solid, but i also flap wheel mine down until the weld is almost completely flush. I know it makes the metal very thin, but i usually add a skim coat of body filler (just enough so a magnet will still stick to the metal) to help with strength. I know i have seen many patch panels done the way you were talking about though
|
|
|
|
|
11-29-2012, 08:17 PM
|
#21 |
|
Registered User
Join Date: Oct 2012
Location: LaGrangeville, NY
Posts: 51
|
Re: Junkyard Jimmy Super Low Buck Build Thread
I would go one more round....its amazing what a tiny bit of flex will do later after its painted...all that work and your paint develops little cracks later.....or maybe it wont?
I would rather have the peace of mind. this hood looks great. cant wait to see the final transformation.... JP |
|
|
|
|
11-29-2012, 09:07 PM
|
#22 | ||
|
GEARHEAD
Join Date: Aug 2003
Location: MN
Posts: 6,122
|
Re: Junkyard Jimmy Super Low Buck Build Thread
Quote:
Quote:
So who will be the tie breaker? I kind of expected this. It seems there are more opinions on the right way to do body work than there are cars to work on. I would say the best way is welded 100% or close to it. I think I could get by doubling up what I have now and I already started that on one side. I'll probably just keep tacking away until its pretty much 100%. I ran into welder issues today though. Got a snarl at the wire drive, not unusual, but when I looked at it there wasn't much wire left on the roll. I finished it out anyway, about 10 more tacks. So I change the roll out but the new roll is a different mfr and it is spooled like crap and I have to tighten down the drive wheels to get it to feed steady, which means its a snarl waiting to happen, which came about 5 minutes later. I need a new roll of wire cause this will drive me nutz. I got the black vinyl paint today and sprayed the dash pad. It looks great, pics to follow later. And I'm going in circles deciding how I'm going to do the main flat sheet attachment, and just thought of another option there. 
__________________
If no one knows what you're doing, they can't tell you you're doing it wrong HG's Dream Car Build - Shelby Cobra Kit Build your own adjustable track bar 71 Long Fleet C/10 72 Jimmy 4x4 (Junkyard Jimmy)HG's Plow Truck '78 K35 DuallyBigass Farm Truck HG's thread of miscellaneous stuff |
||
|
|
|
|
11-29-2012, 09:38 PM
|
#23 | |
|
6>8 Plugless........
Join Date: Sep 2007
Location: Prairie City, Ia
Posts: 17,140
|
Re: Junkyard Jimmy Super Low Buck Build Thread
Quote:
On edit..... I posted this before going to the next page so I didn't see your post about the tie breaker. Another option would be to use an epoxy and fill it in with that. I know a lot of body shops that do this. Usually never on vertical joints, but always on horizontal. They tack the corners and here and there and then glue it together.
__________________
Ryan 1972 Chevy Longhorn K30 Cheyenne Super, 359 Inline 6 cylinder, Auto Trans, Tilt, Diesel Tach/Vach, Buckets, Rare Rear 4-link and air ride option Build Thread 1972 GMC Sierra Grande Longhorn 4x4 1972 Chevy Cheyenne Super K20 Long Step side tilt, tach, tow hooks, AC, 350 4 speed 1972 C10 Suburban Custom Deluxe 1969 Chevy milk truck 1971 Camaro RS 5.3 BTR STG3 Cam Super T10 1940 Ford 354 Hemi 46RH Ford 9" on air ride huge project Tired of spark plugs? Check this out. |
|
|
|
|
|
11-29-2012, 10:20 PM
|
#24 |
|
Registered User
Join Date: May 2007
Location: Rapid City South Dakota
Posts: 2,359
|
Re: Junkyard Jimmy Super Low Buck Build Thread
Back in the 80's, it was common practice to weld it that way, and then break out the Duraglass. I personally would weld it solid, and try to get the weld seam as smooth, consistent and invisible as possible, before applying any mud. Just my 2 cents.
__________________
Turp Mcspray New life for an old 2wd, farm blazer http://67-72chevytrucks.com/vboard/s...d.php?t=505987 My Blazer build http://67-72chevytrucks.com/vboard/s...d.php?t=342299 |
|
|
|
|
11-29-2012, 11:06 PM
|
#25 |
|
GEARHEAD
Join Date: Aug 2003
Location: MN
Posts: 6,122
|
Re: Junkyard Jimmy Super Low Buck Build Thread
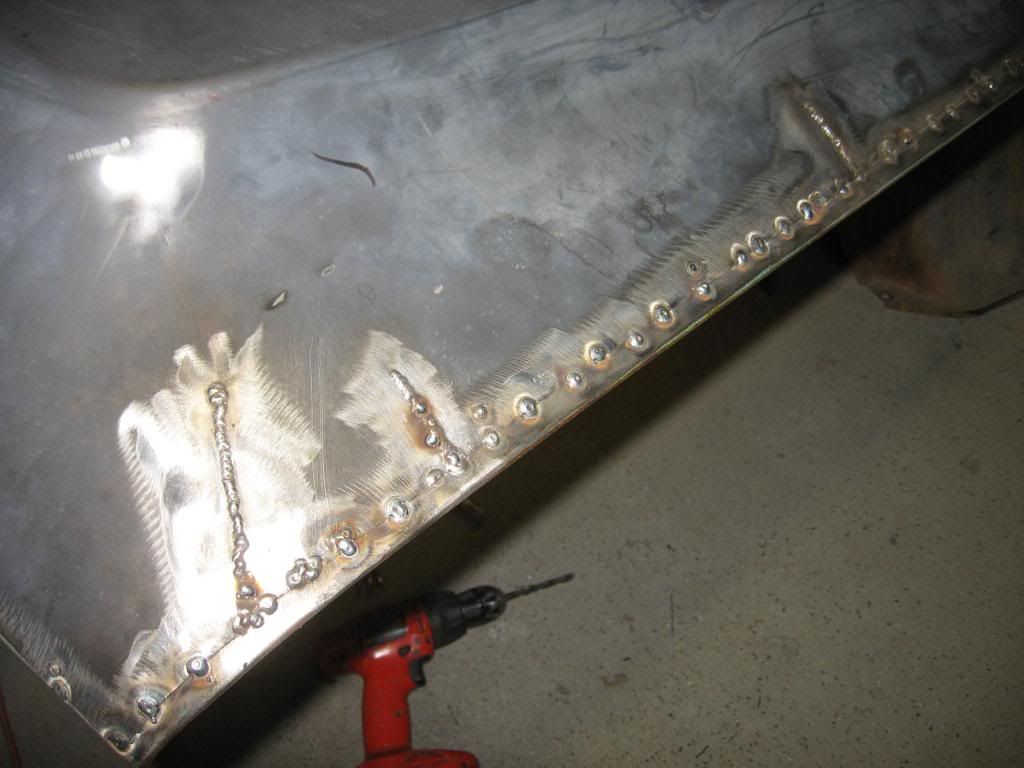
Alright, the votes have been tallied and the weld-it-outs have got their mandate passed.
Here is my painted dash pad. It's a reproduction and fits like crap. None of the screws or bolts are done because they are not lining up very well. But I'll persuade it into place eventually. But I'm happy with the how the color turned out. Before...  After... 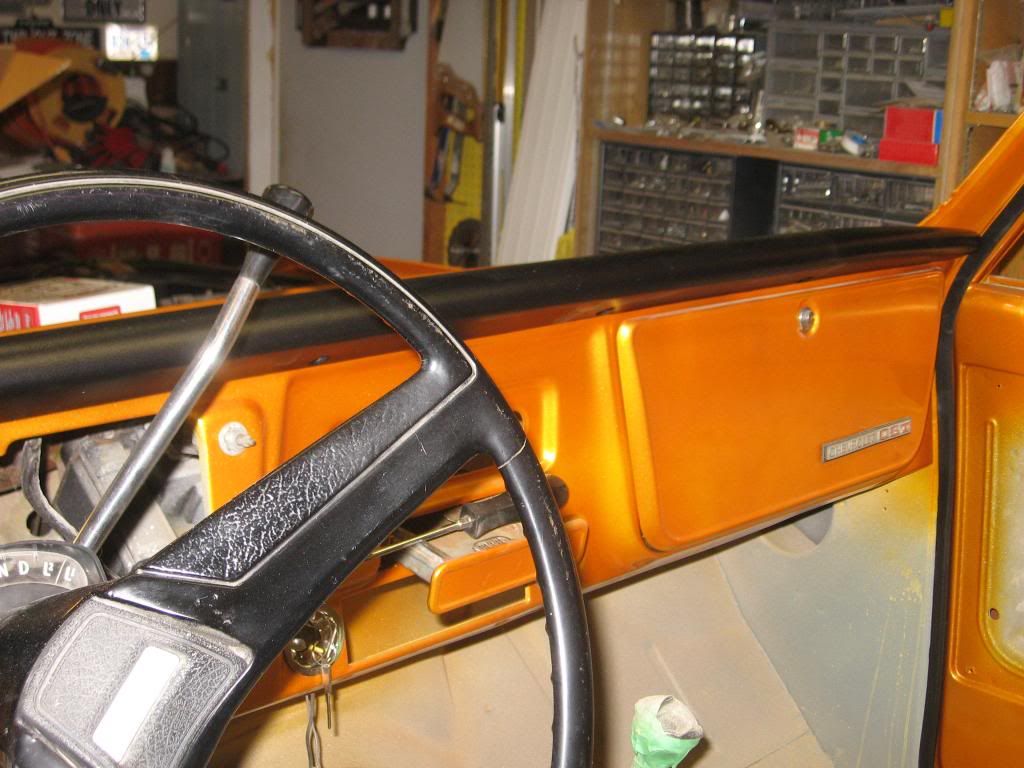 And my tack progress... 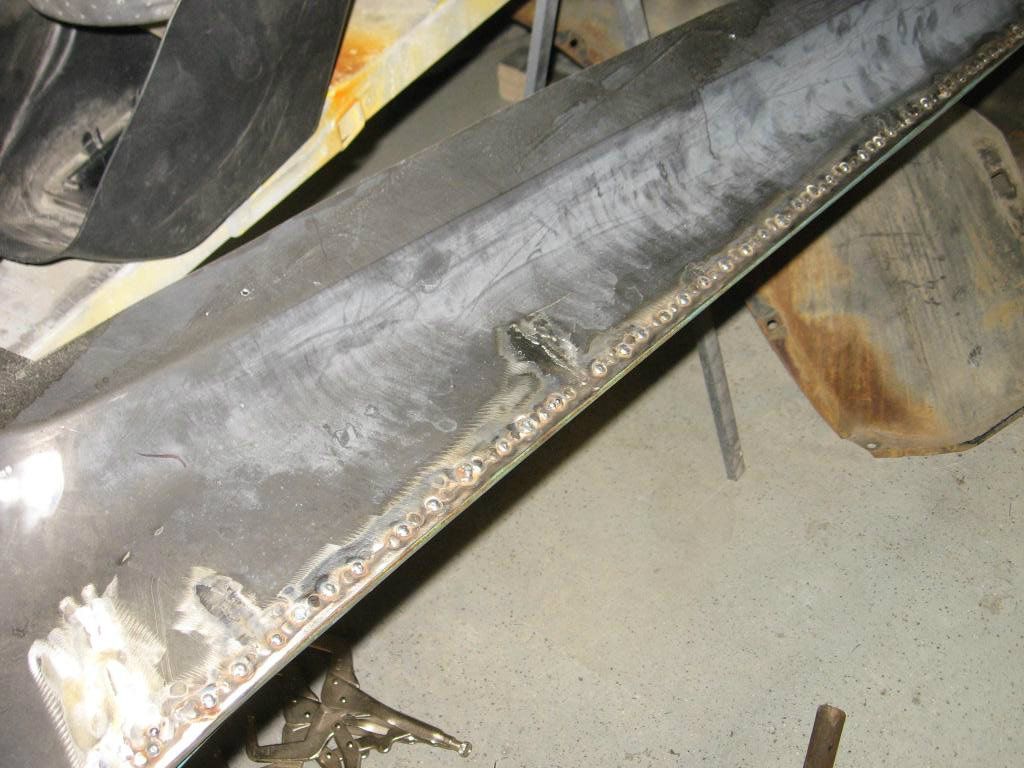
__________________
If no one knows what you're doing, they can't tell you you're doing it wrong HG's Dream Car Build - Shelby Cobra Kit Build your own adjustable track bar 71 Long Fleet C/10 72 Jimmy 4x4 (Junkyard Jimmy)HG's Plow Truck '78 K35 DuallyBigass Farm Truck HG's thread of miscellaneous stuff Last edited by hgs_notes; 11-30-2012 at 09:24 AM. |
|
|
|
 |
| Bookmarks |
|
|


 Semper Fi


 Hybrid Mode
