
|
|
|
 07-29-2017, 08:37 PM
|
#1 |
|
Registered User
Join Date: Jan 2013
Location: Leonardtown, MD
Posts: 1,637
|
Re: 55 Wagon Progress
Thanks for the props Andy!
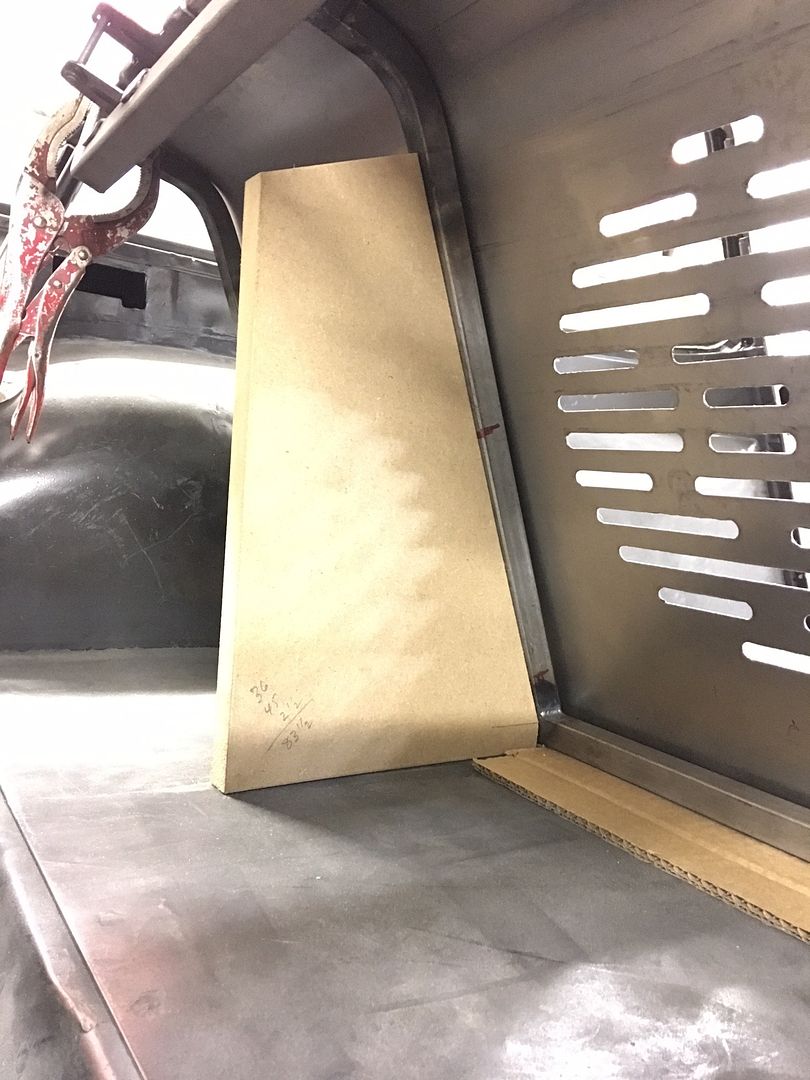
More back seat work on the 55. Mike is trimming up our brackets to give us a bit more clearance around the wheel wells so the upholstery can wrap around our panel... 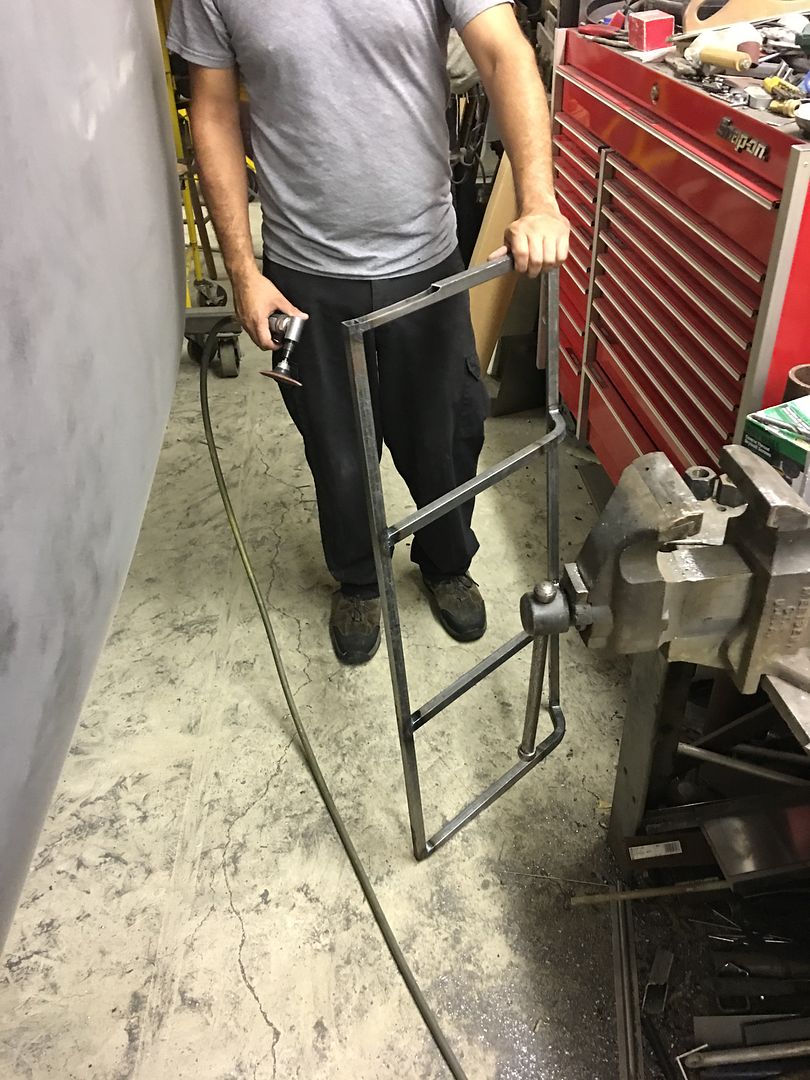 ....and I worked on taking some patterns of the rear corners... 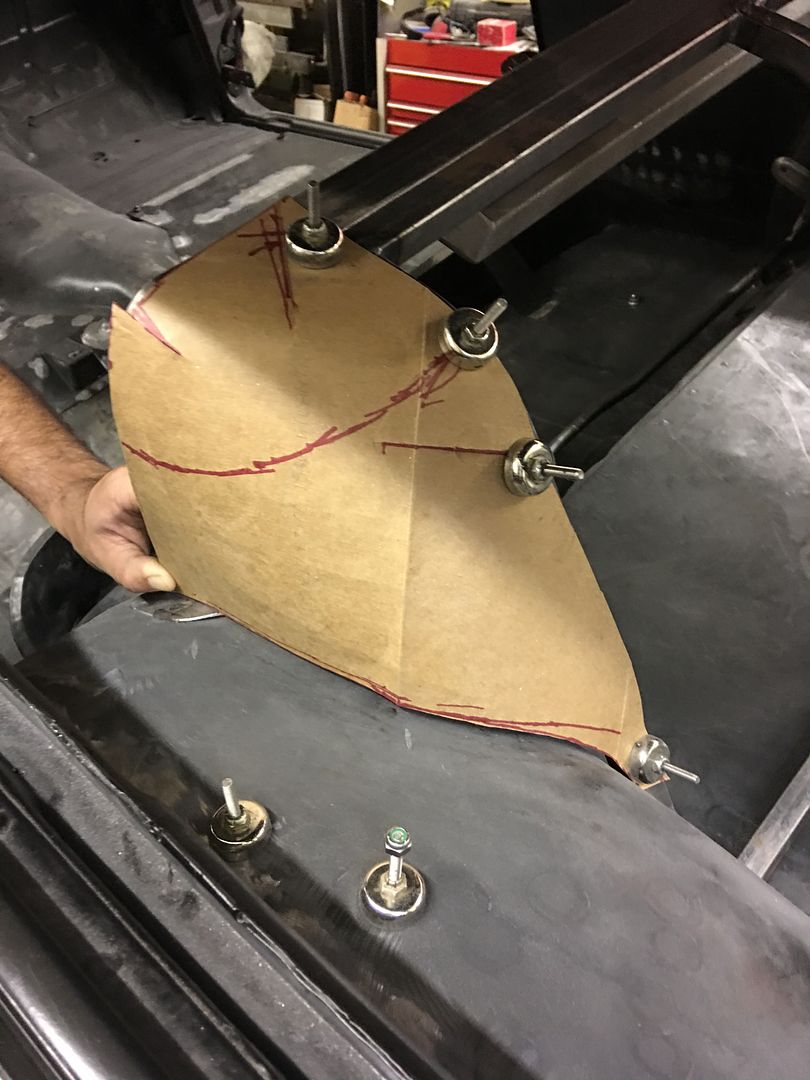 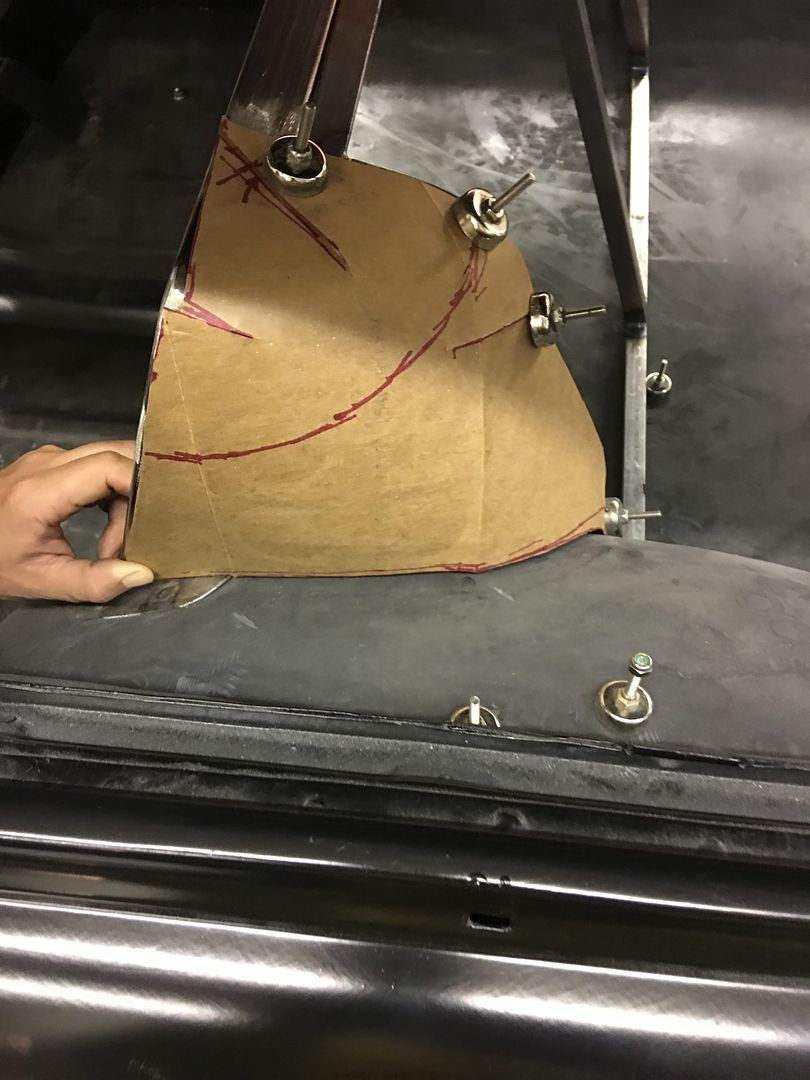 Transferred the pattern to some 18 gauge cold rolled steel and started some shrinking on the Baileigh power hammer.. https://www.youtube.com/watch?v=DII2zSpYT5A Test fit.... 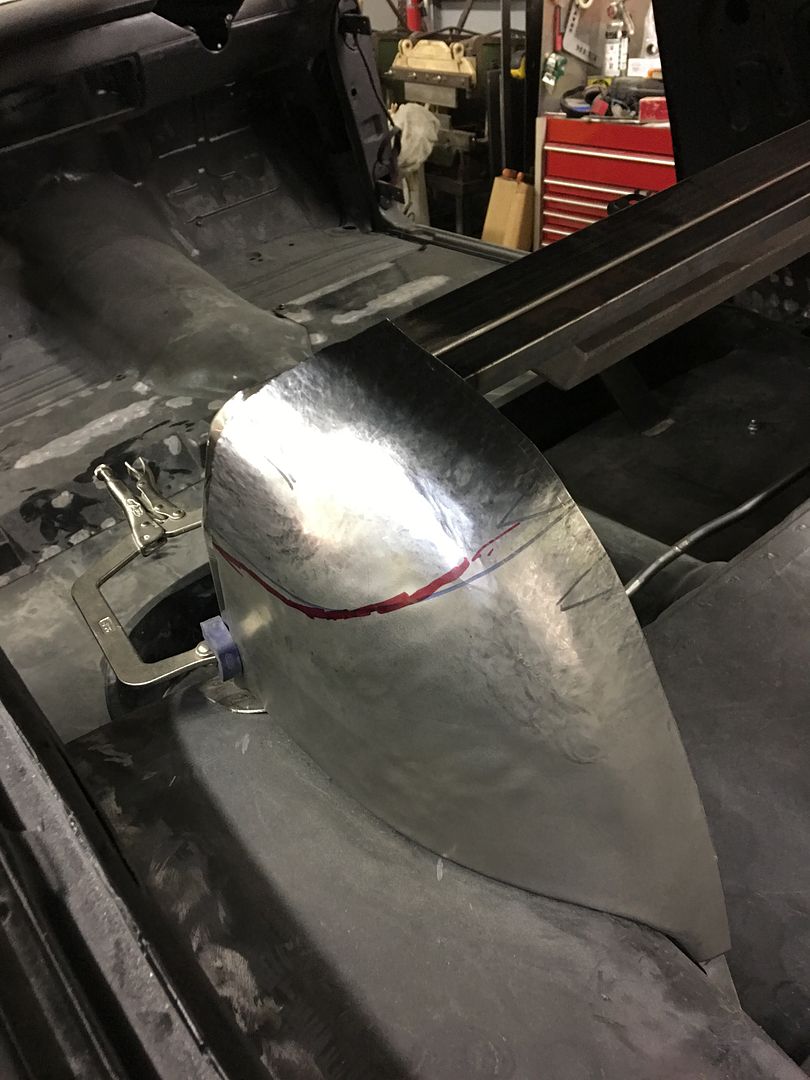 Bottom edge gets hemmed so the upholstery cloth has less chance of cuts... 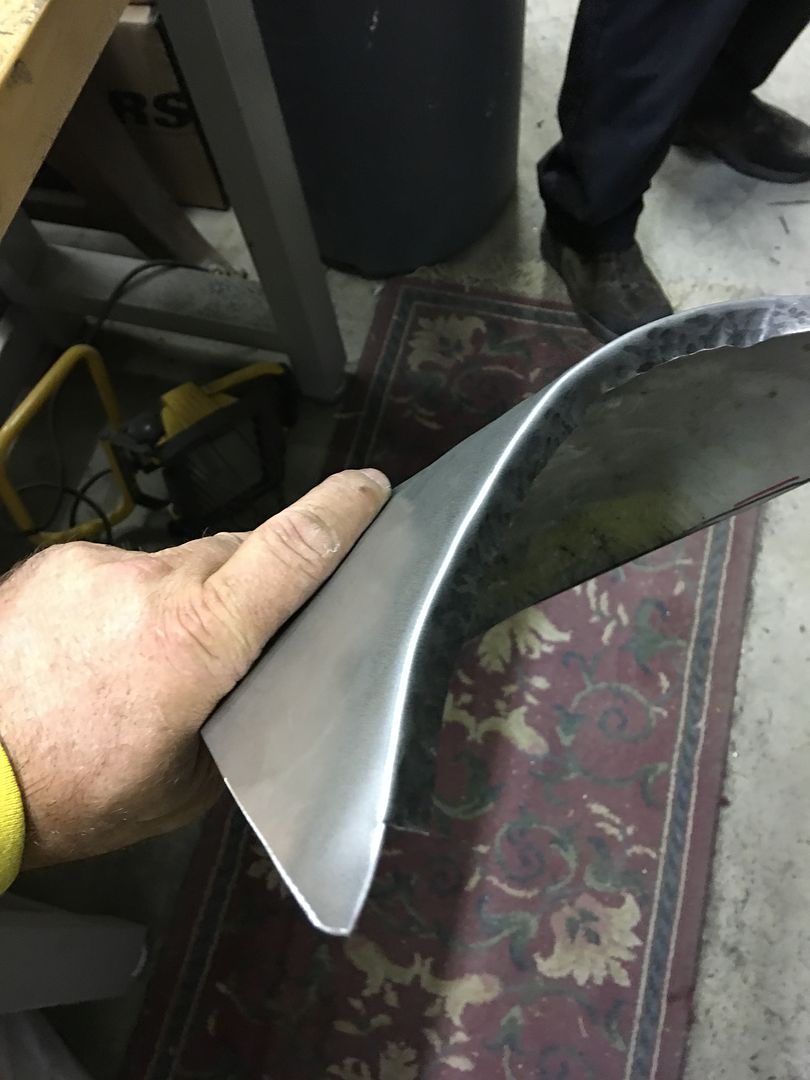 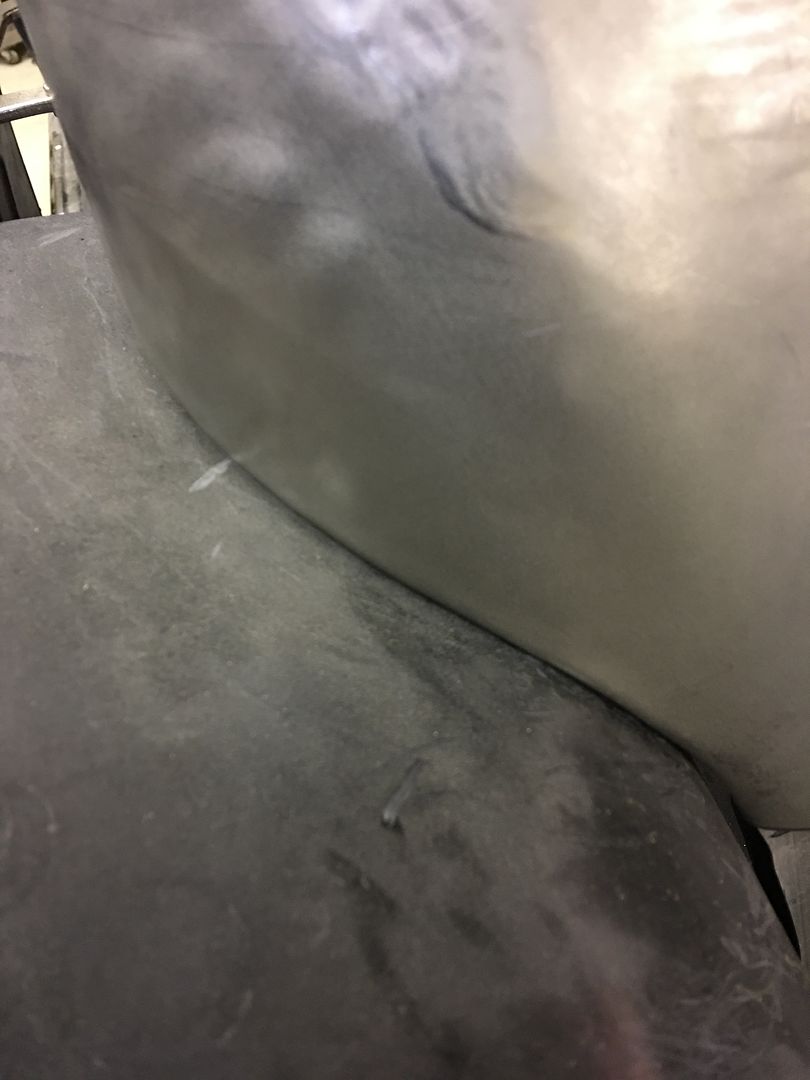  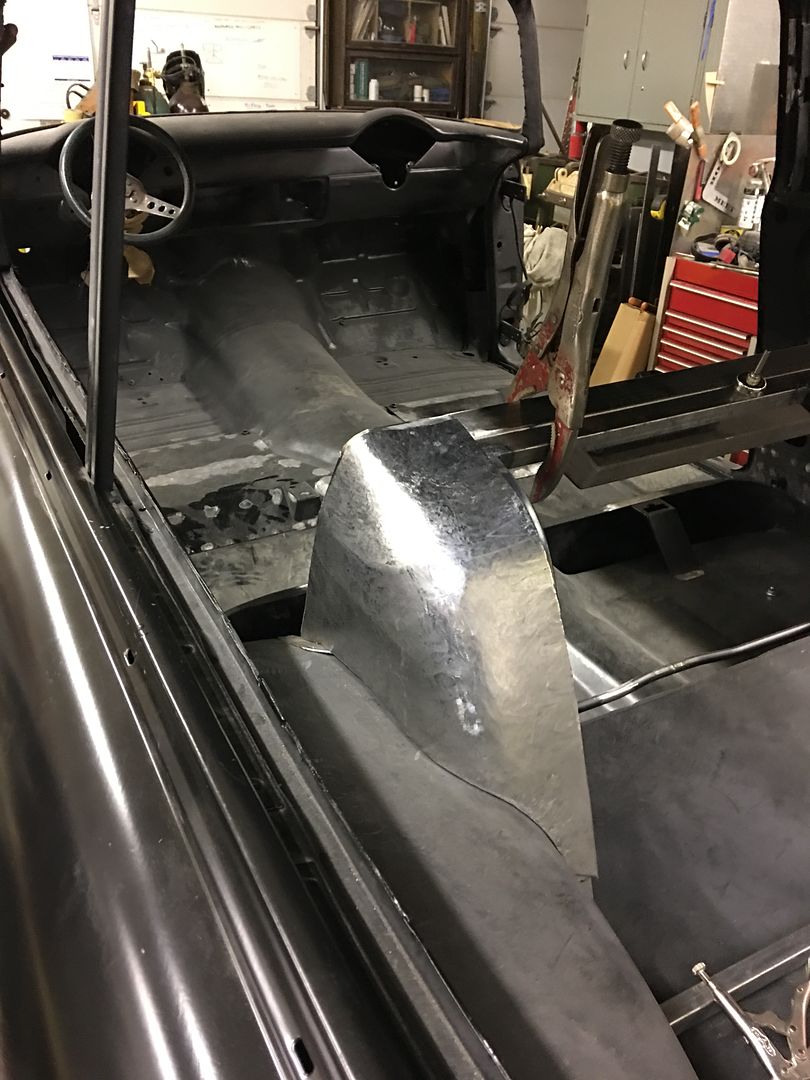 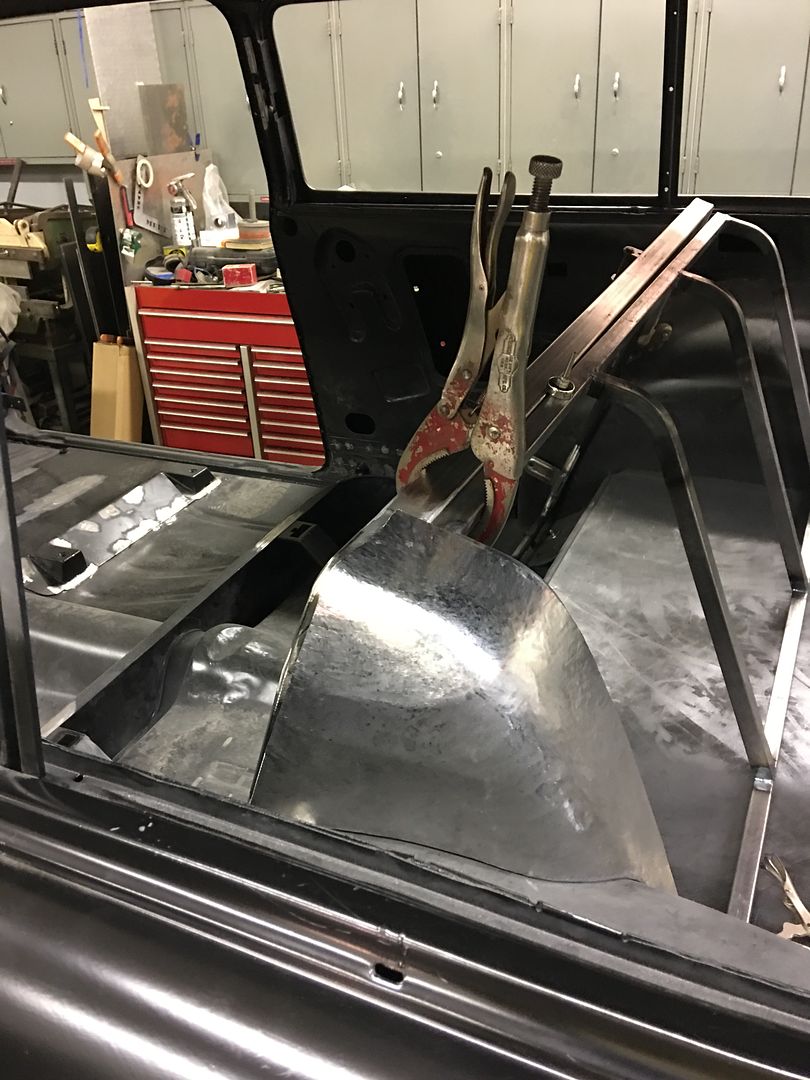 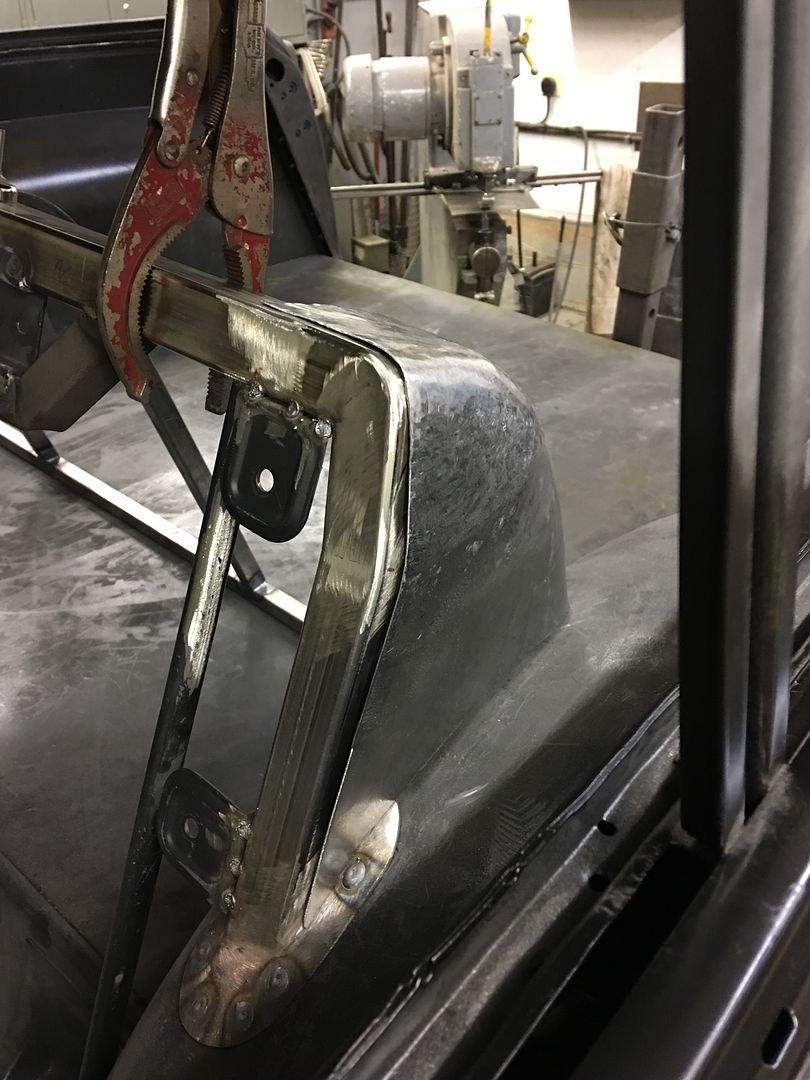 A bit more cleanup work, but I'm real pleased with how this is turning out.. https://www.youtube.com/watch?v=1-S5g5g5J6k .
__________________
Robert |

|

|
|
07-29-2017, 09:06 PM
|
#2 |
|
Senior Member
 Join Date: Mar 2011
Location: West Plains, Missouri
Posts: 7,555
|
Re: 55 Wagon Progress
Robert, excellent work as always, looks great...Jim
__________________
my build thread: http://67-72chevytrucks.com/vboard/s...d.php?t=459839 Jimbo's long bed step build:http://67-72chevytrucks.com/vboard/s...t=464626<br /> |
|
|
|
|
07-30-2017, 06:33 AM
|
#3 |
|
Registered User
Join Date: Apr 2008
Location: Md
Posts: 2,456
|
Re: 55 Wagon Progress
I don't always comment, but I tune in with the hopes that some of this skill will be absorbed. Always top notch impressive work, Thanks for sharing ...Ed
__________________
http://67-72chevytrucks.com/vboard/s...d.php?t=635605 |
|
|
|
|
08-05-2017, 10:51 PM
|
#4 |
|
Registered User
Join Date: Jan 2013
Location: Leonardtown, MD
Posts: 1,637
|
Re: 55 Wagon Progress
Thanks for the comments guys!
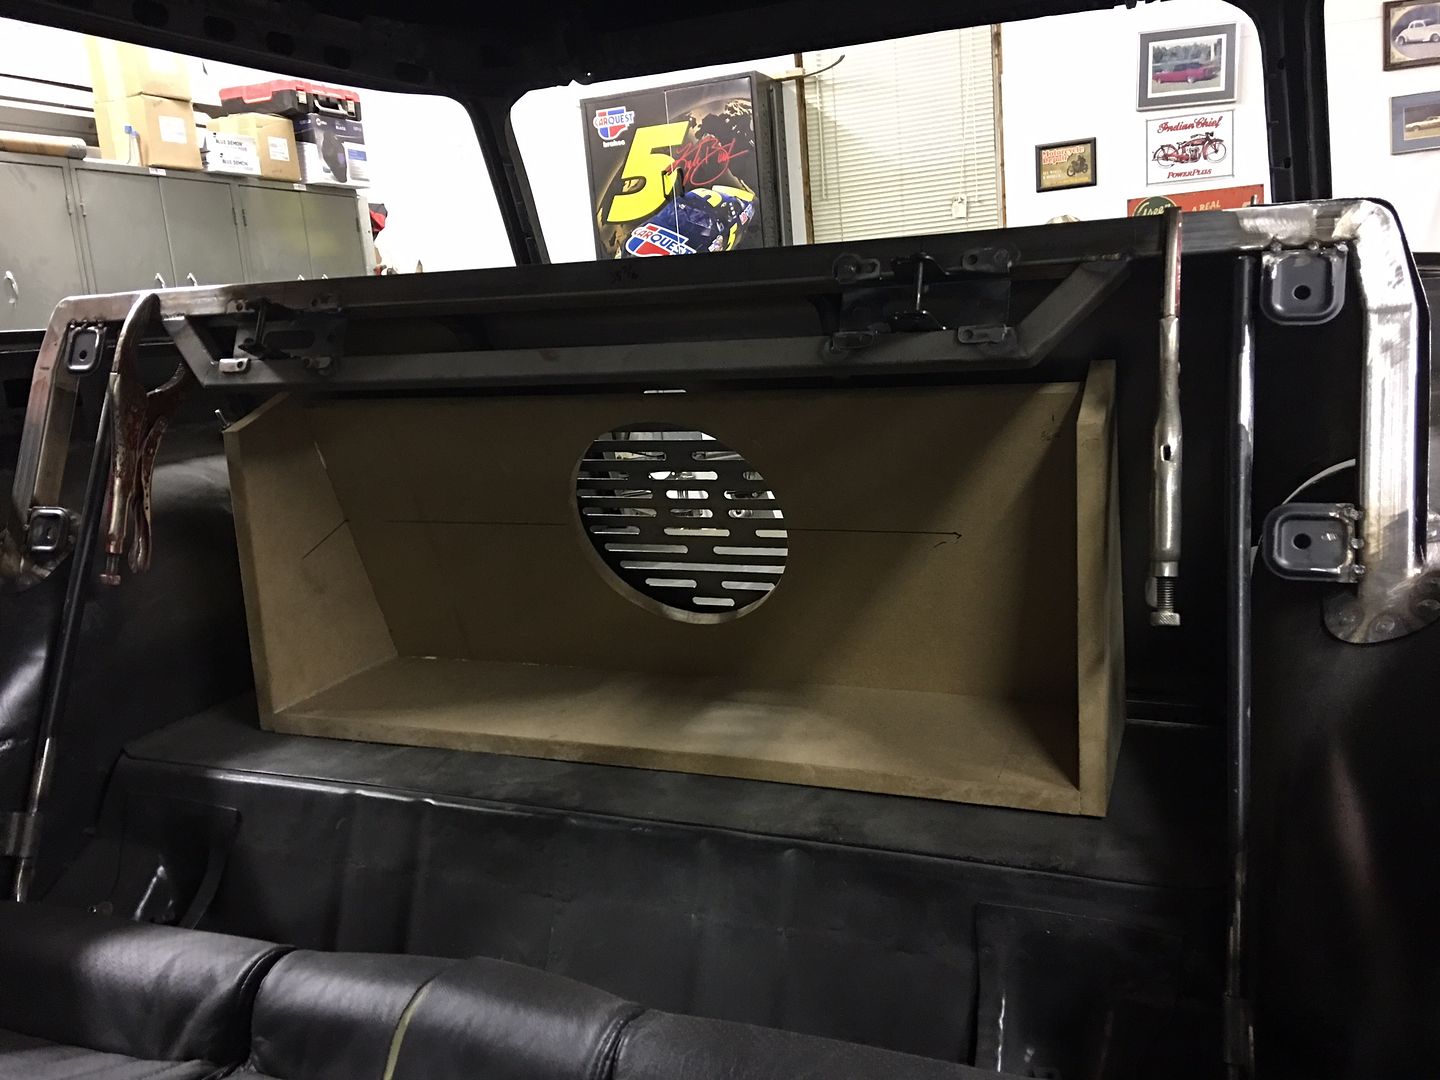
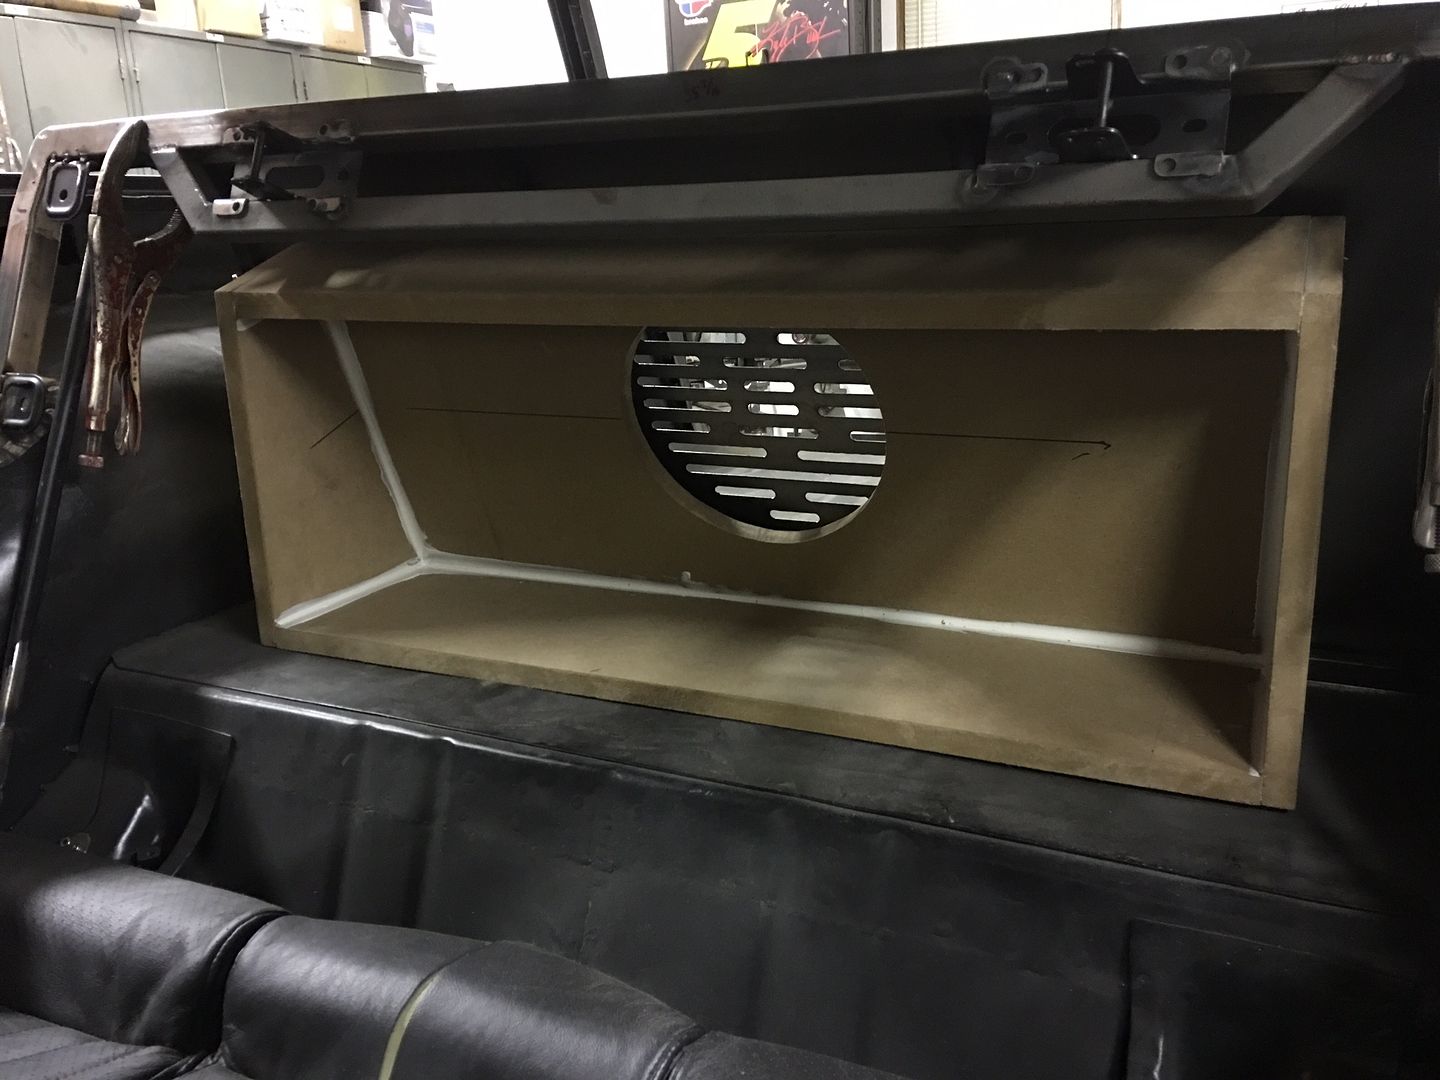
More work on the seat back, a test bend to see how well it matches our corner.... 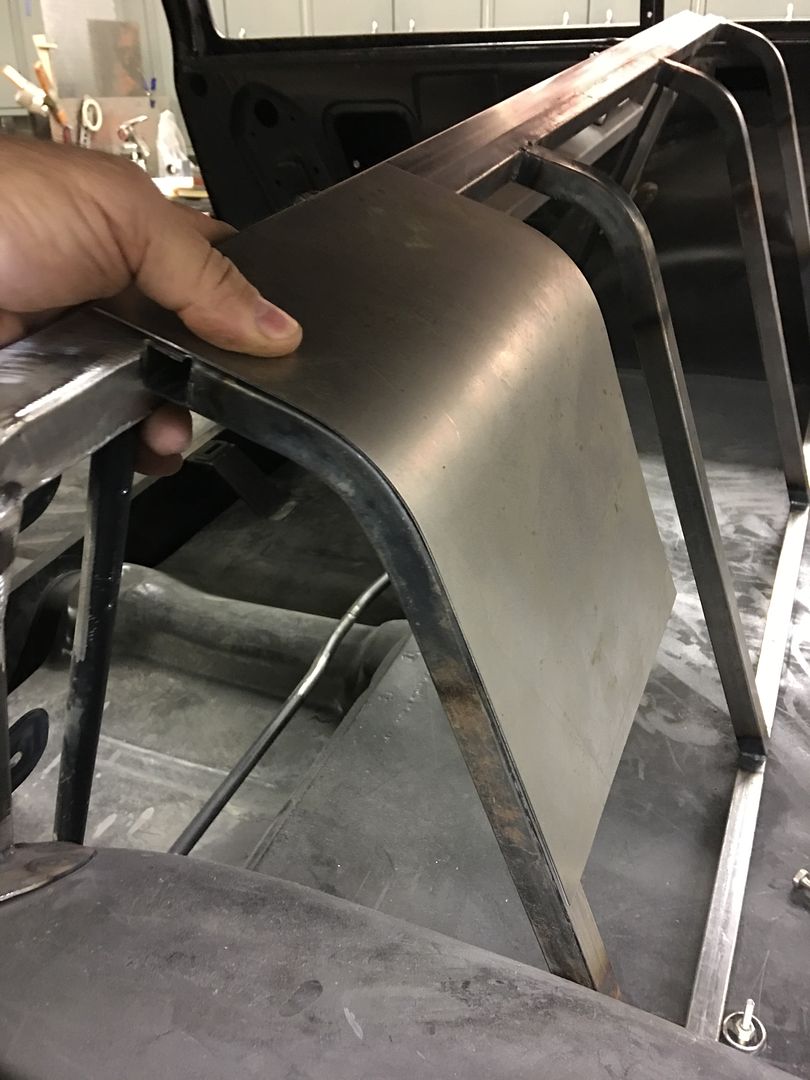 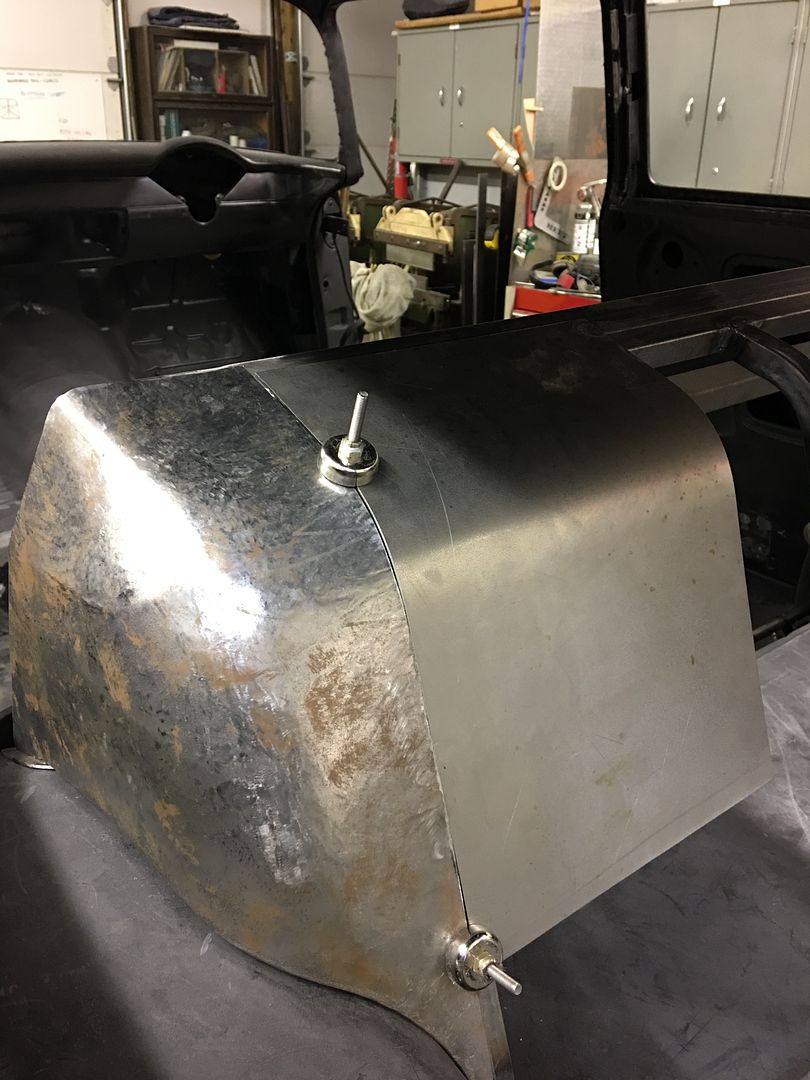 Then to bend the radius on a piece of 19 gauge for the full width... 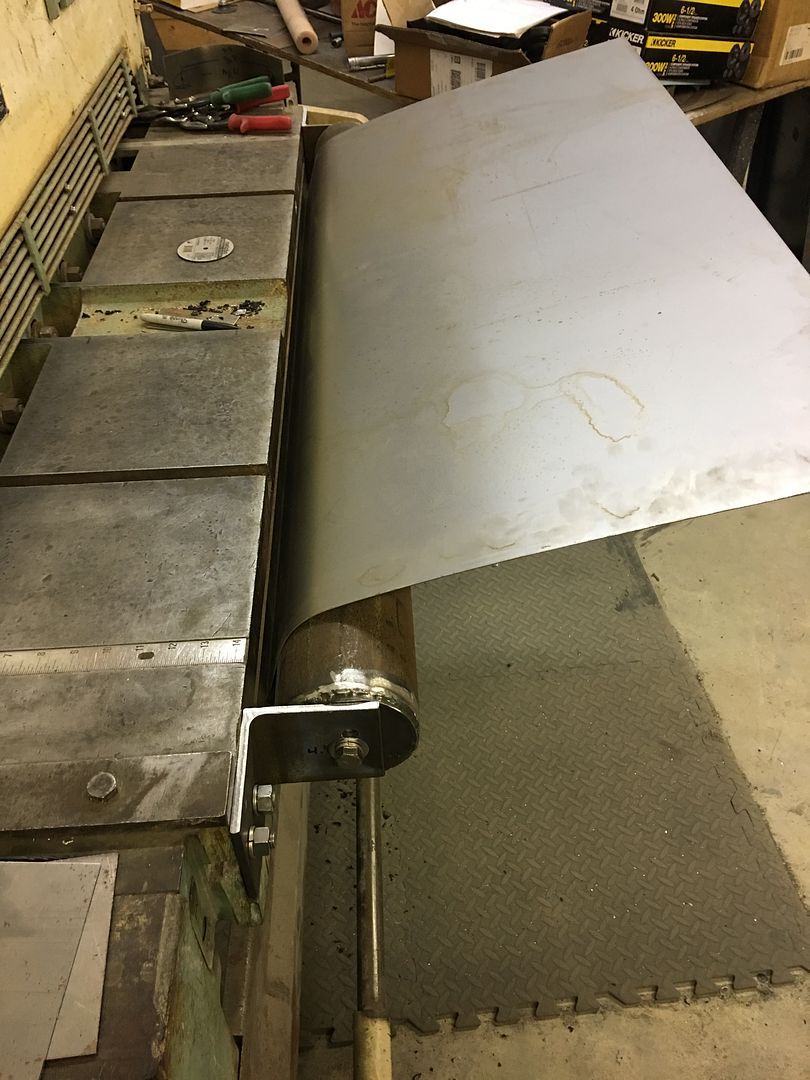 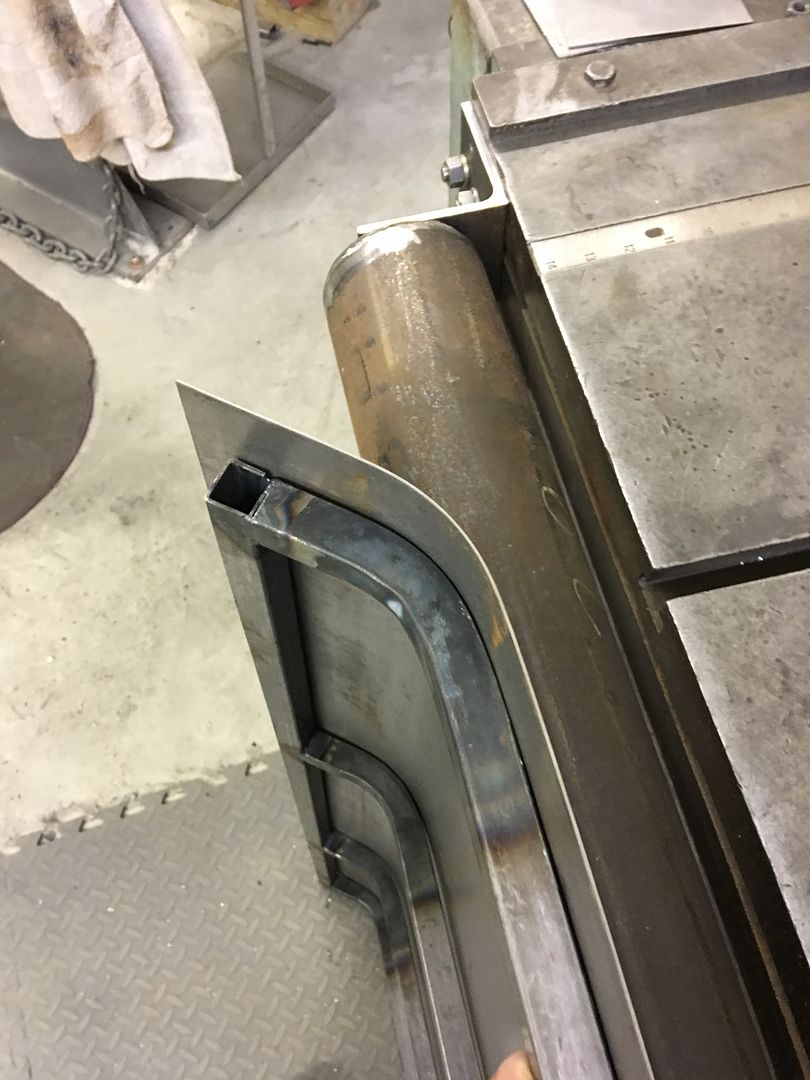 Then to bend down a flange to "hook" the frame.... 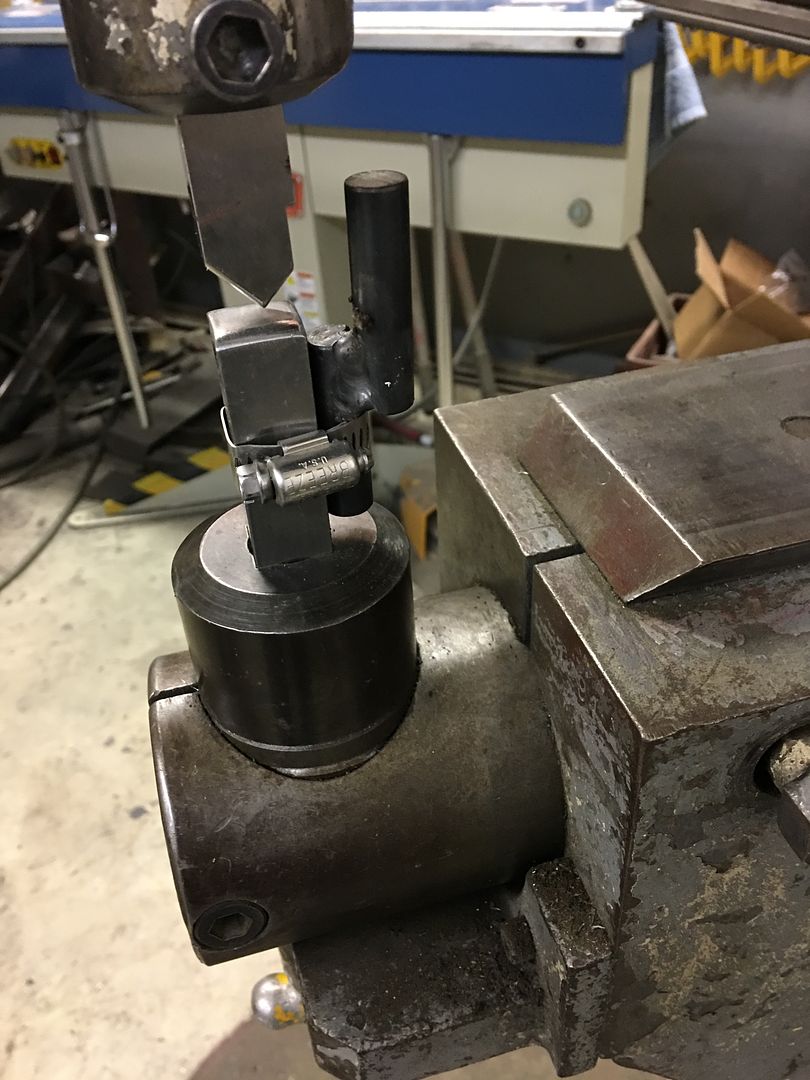 The metal is thinned at the bend line using a tipping die to give us a more crisp bend... 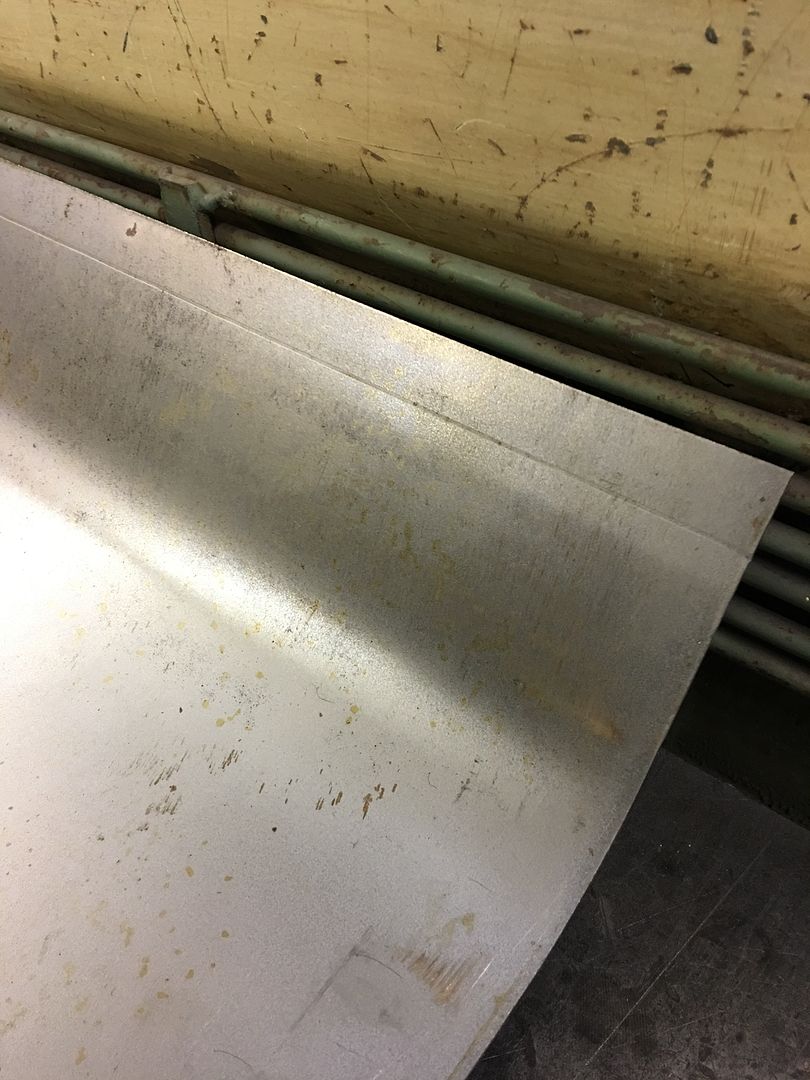 Bent at 90* in the magnetic brake.. 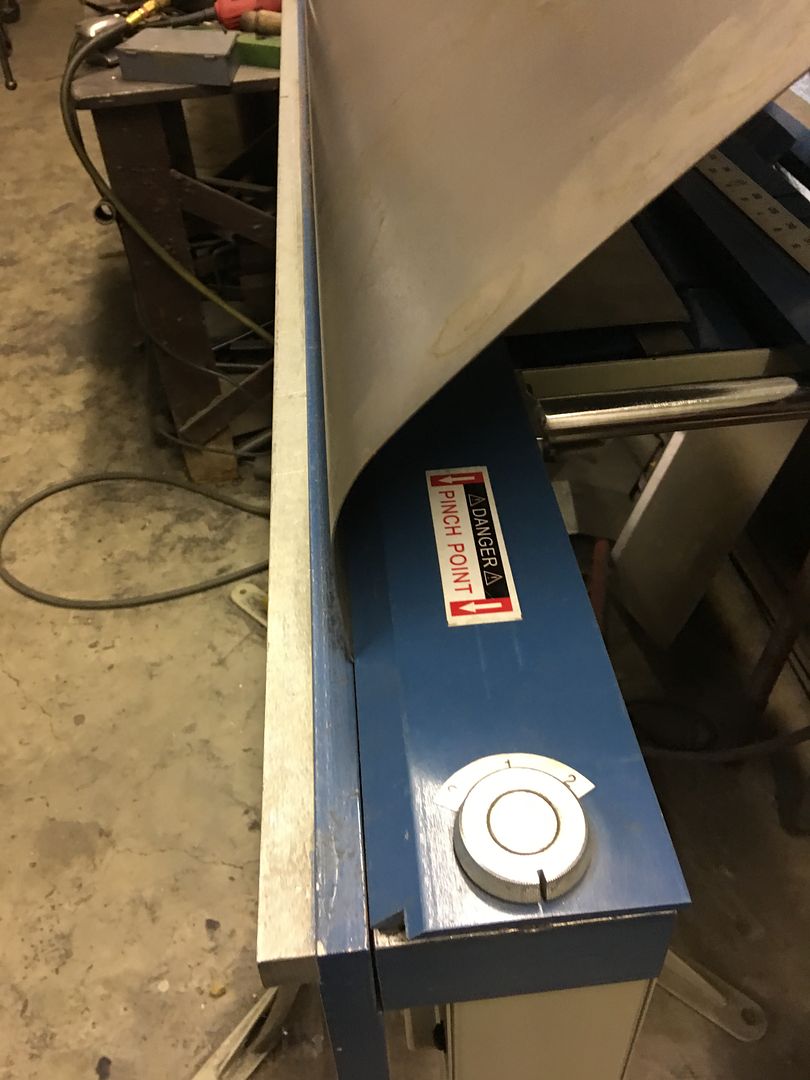 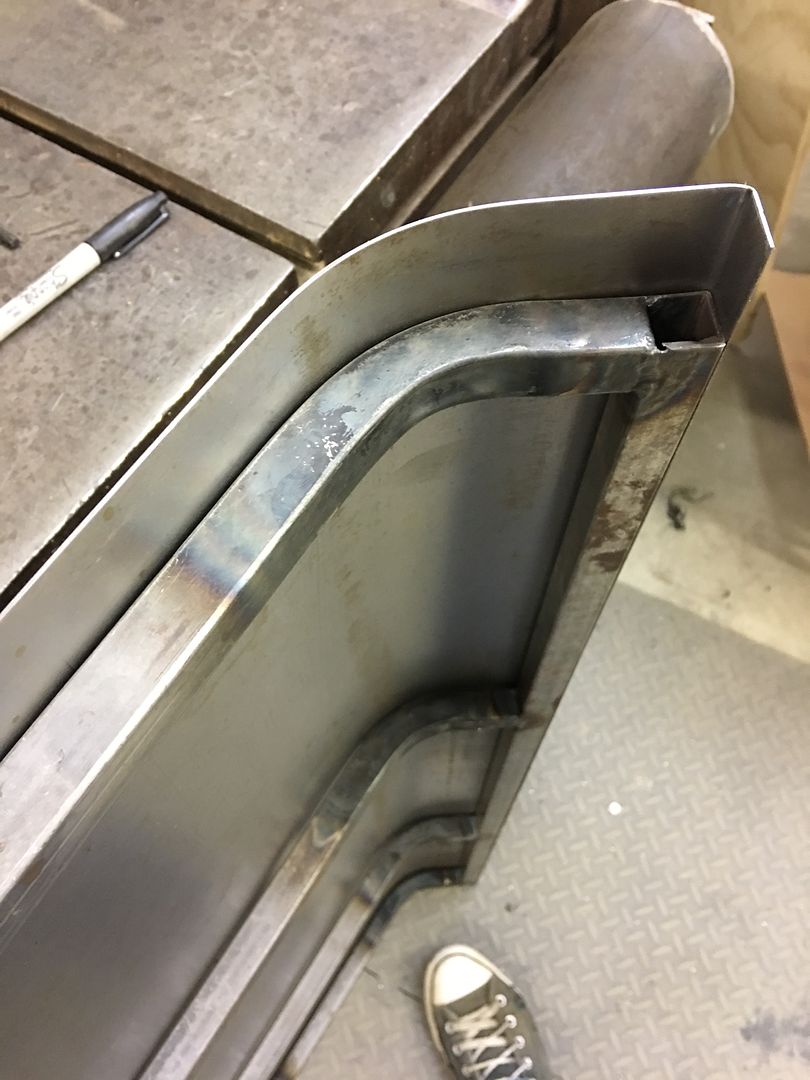 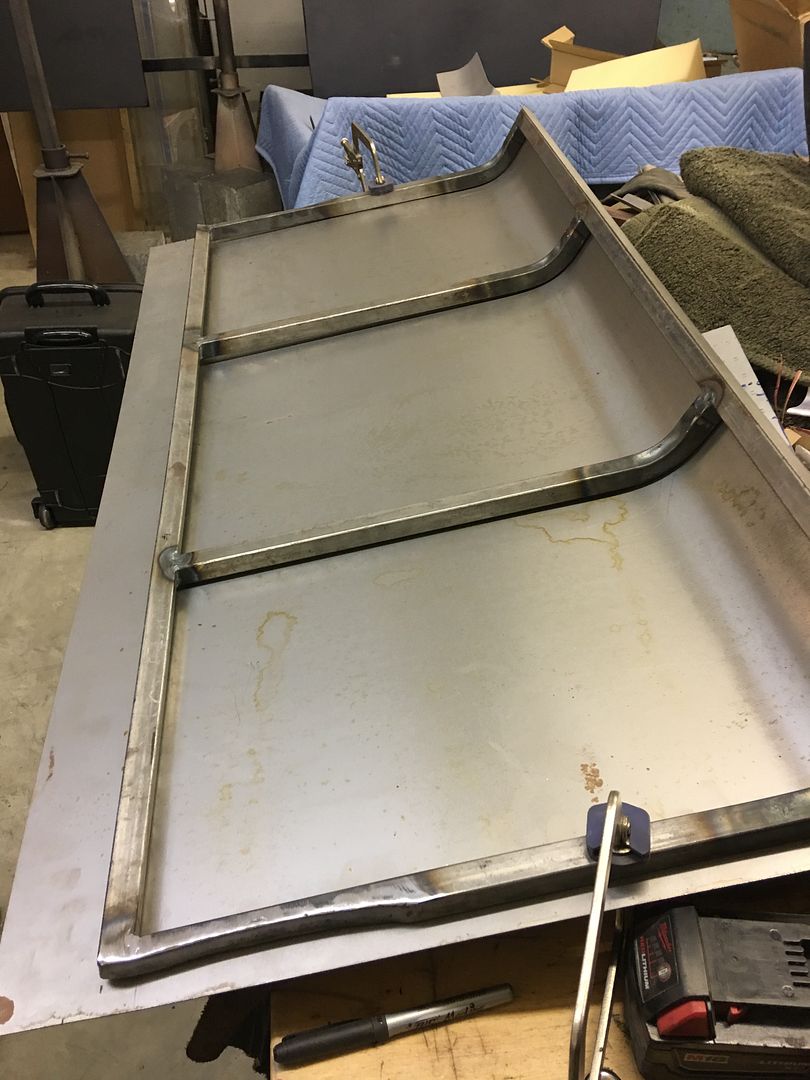 Next we slotted the panel for our 10" bass speaker. This should let out the sound but still support our upholstery material for a more subtle look..  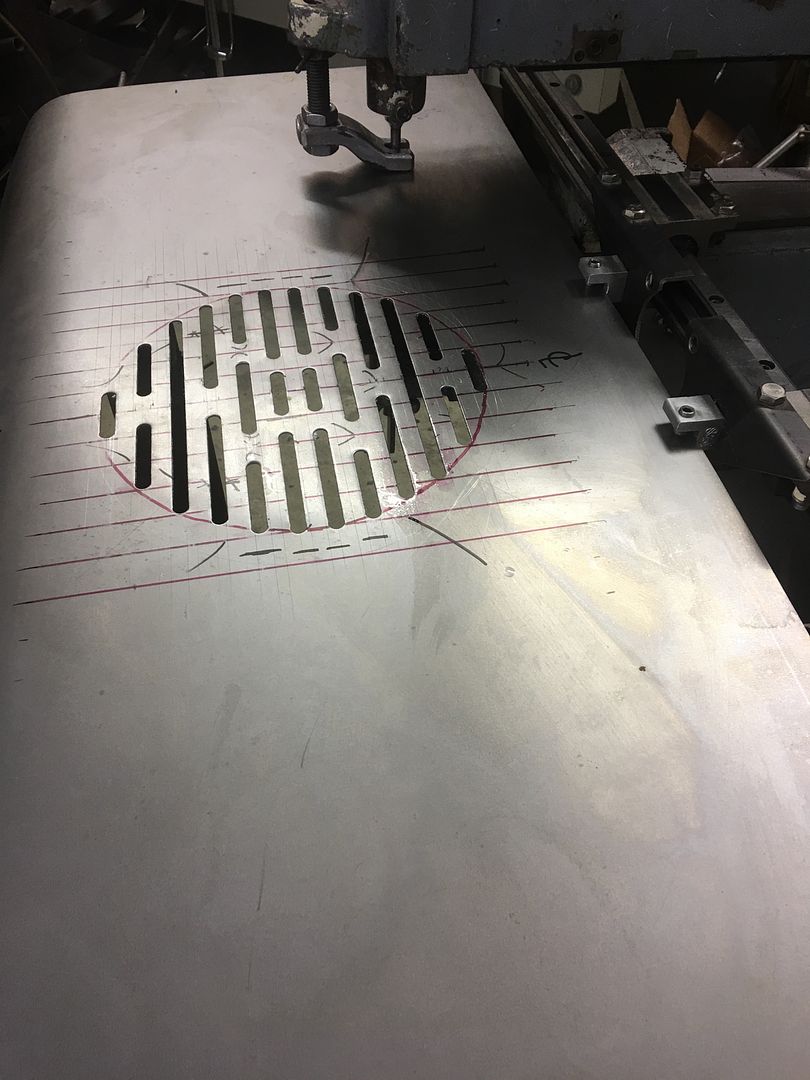 Then the bottom flange is also thinned at the bend and bent on the magnetic brake.. https://youtu.be/krzfbvw9DV8 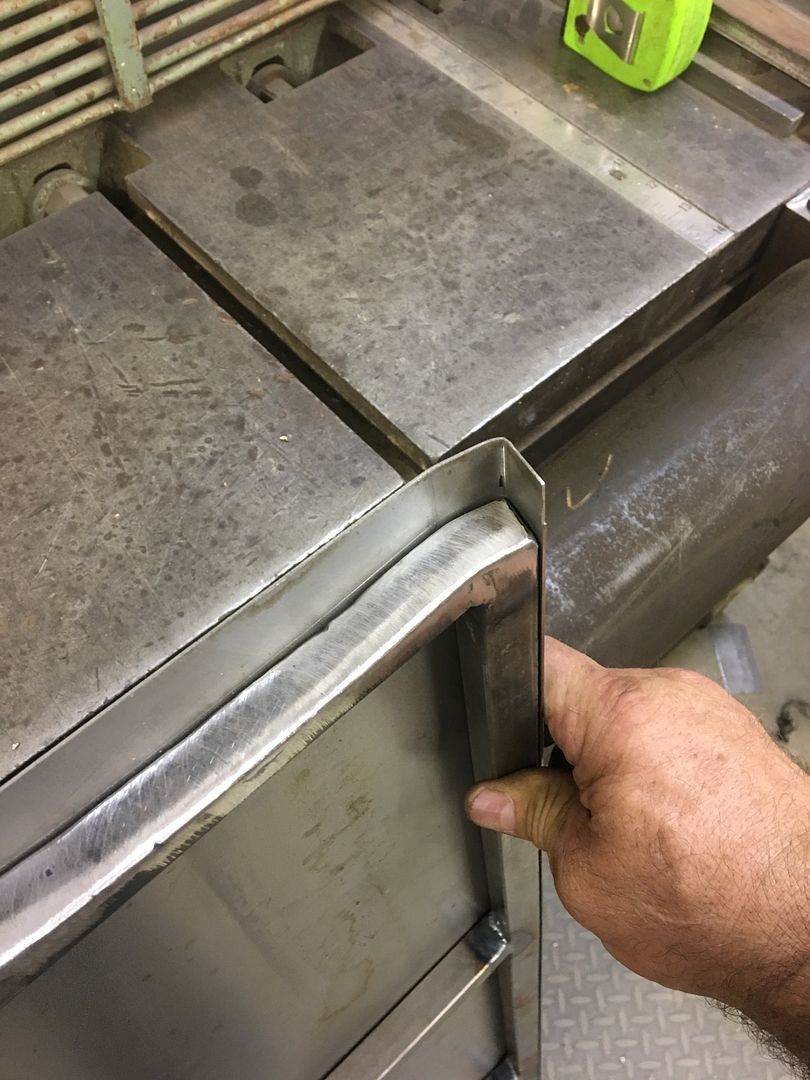 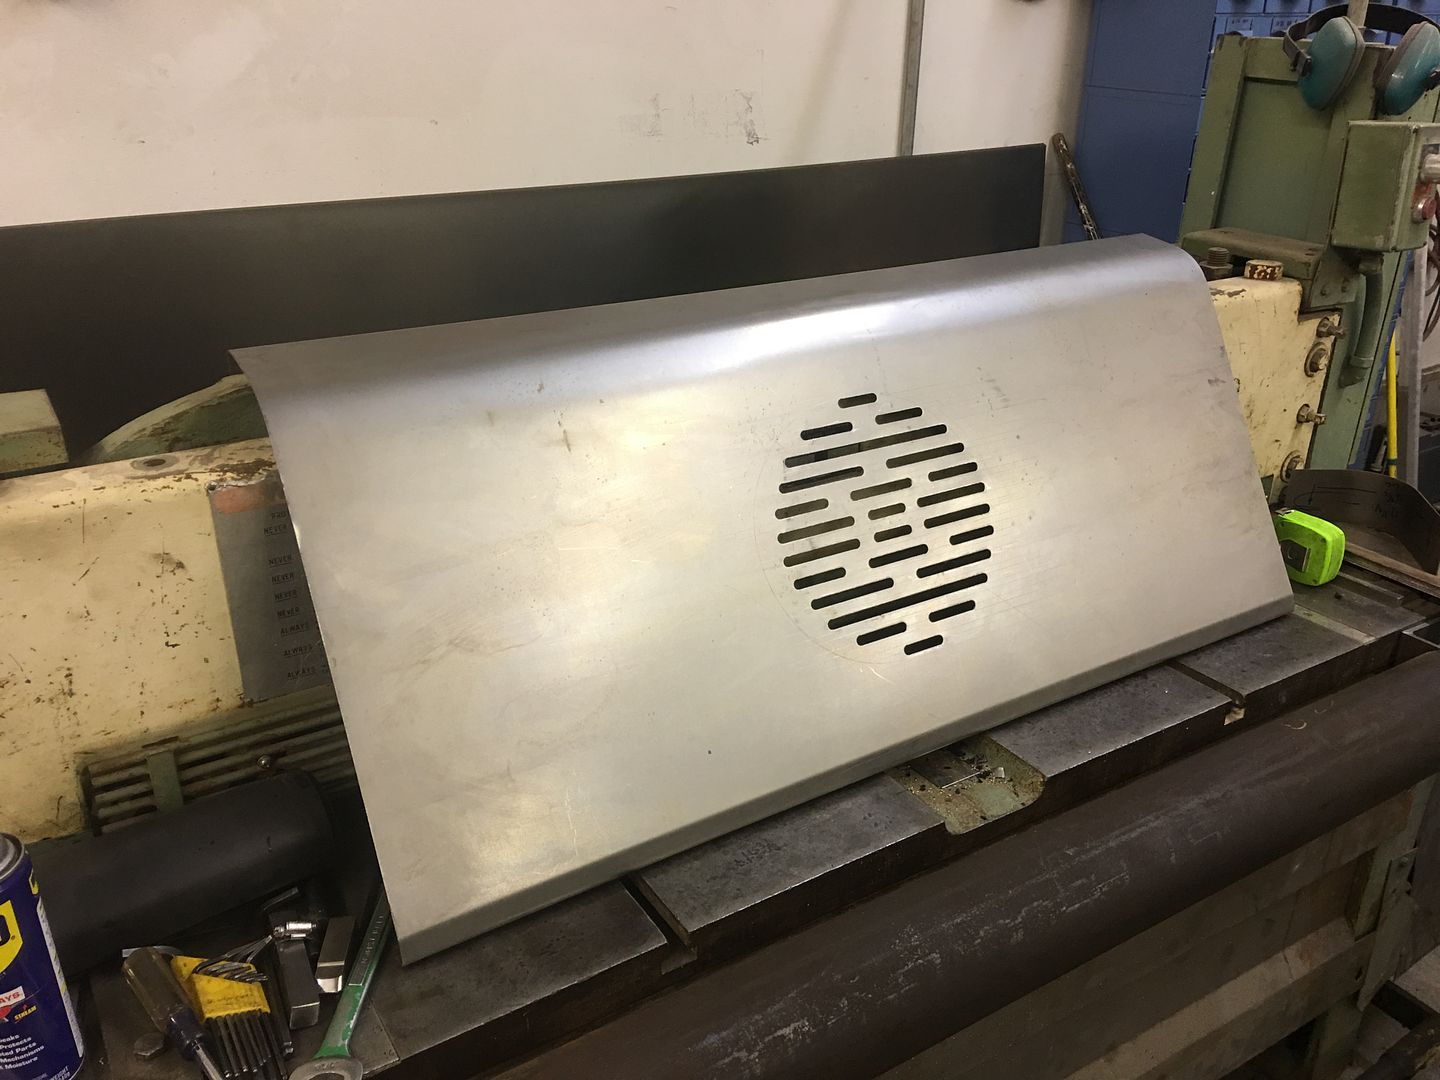 .....and our test fit into the car... 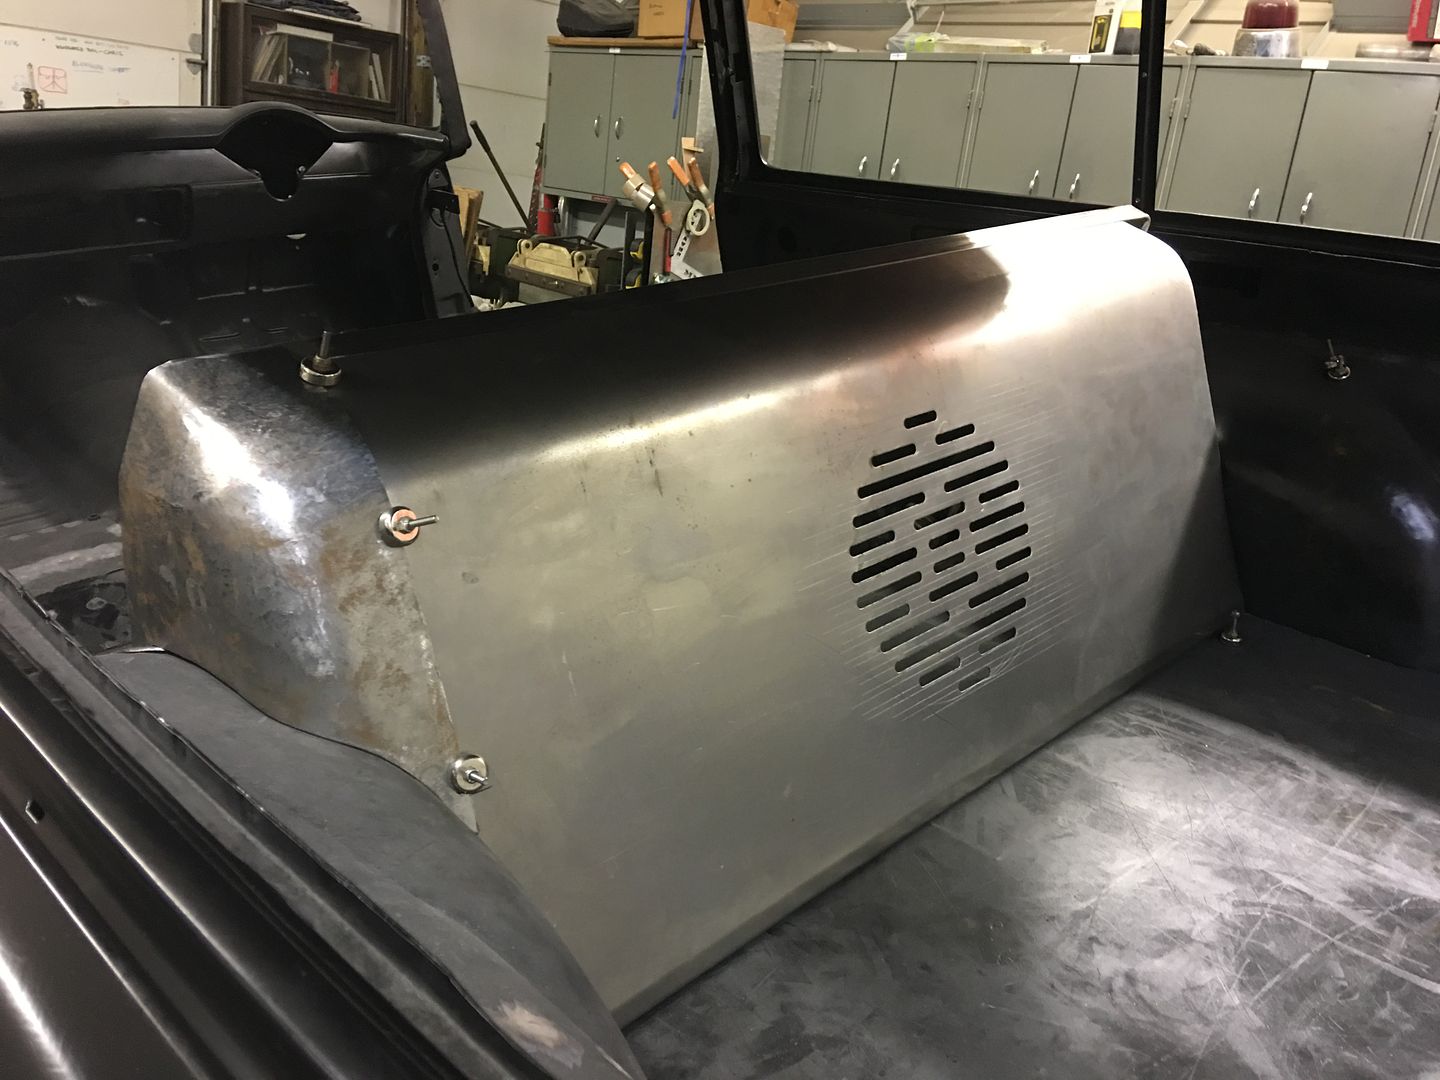
__________________
Robert |
|
|
|
|
08-05-2017, 11:15 PM
|
#5 |
|
Senior Member
Join Date: Mar 2011
Location: West Plains, Missouri
Posts: 7,555
|
Re: 55 Wagon Progress
Very nice...Jim
__________________
my build thread: http://67-72chevytrucks.com/vboard/s...d.php?t=459839 Jimbo's long bed step build:http://67-72chevytrucks.com/vboard/s...t=464626<br /> |
|
|
|
|
08-06-2017, 12:12 PM
|
#6 |
|
Registered User
Join Date: Mar 2006
Location: Pittsburgh
Posts: 1,694
|
Re: 55 Wagon Progress
Hey Robert, very nice fabrication Thanks for taking the time and posting as I enjoy learning techniques from you, Nate
__________________
Nate 1967 short fleet Project Blue Goose 'If it don't bounce back... heeheehee you go hungry!" Blues Brothers Last edited by nds1968; 08-06-2017 at 08:02 PM. |
|
|
|
|
08-07-2017, 06:45 AM
|
#7 |
|
Registered User
Join Date: Jan 2013
Location: Leonardtown, MD
Posts: 1,637
|
Re: 55 Wagon Progress
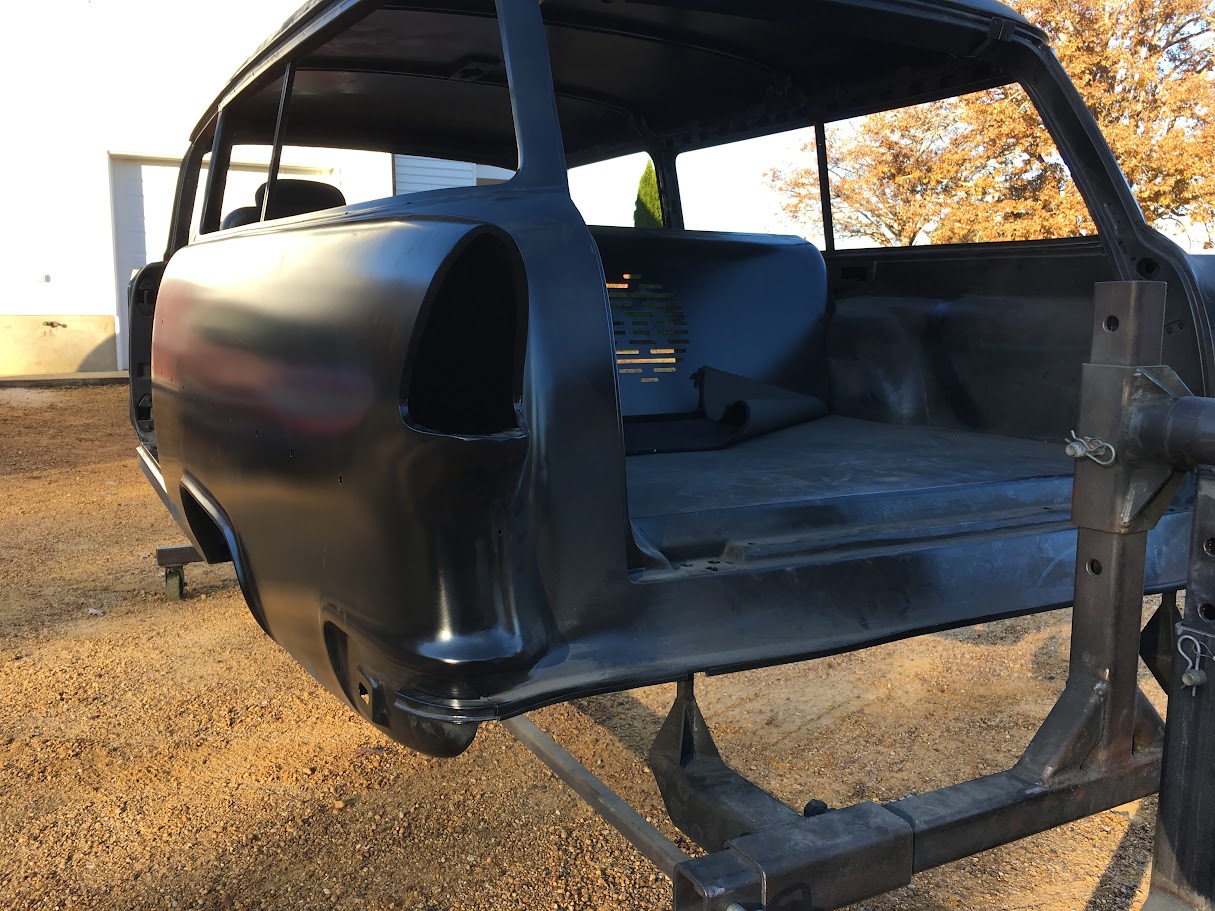
Thanks for the comments guys. Nate, didn't get a chance to respond to your comments the other day and now I see they've changed, so let me go on memory here.
I appreciate you guys giving feedback, even if you don't care for something. Sometimes a person gets tunnel vision, so outside suggestions come in handy. I'm not sure I even like it, but this needs to be a utilitarian of sorts back seat. The owner has it in her mind she needs a bumping stereo, and also needed a location for amp and speaker. The wagon doesn't give much option for hiding such things without risking tire spray, so behind the seat it was. The original rear seat folded in such a way to give a flat loading area all the way to the back side of the front seats. She would rather use the comfort of the newer seat that came with the buckets over the original, and this was also easier to fit to the mini-tub, so much for hauling plywood  The newer seat does fold toward the front, so this would allow for access to anything inside the void. We are also trying to leave room for the cleaning supplies, out of sight, out of mind. We didn't want to extend the sides into the window area and affect the interior garnish moldings that surround the windows, hence the transition corner pieces that blend into the wheel wells.. In the end, I think the upholstery design is going to make or break it. The newer seat does fold toward the front, so this would allow for access to anything inside the void. We are also trying to leave room for the cleaning supplies, out of sight, out of mind. We didn't want to extend the sides into the window area and affect the interior garnish moldings that surround the windows, hence the transition corner pieces that blend into the wheel wells.. In the end, I think the upholstery design is going to make or break it. Myself, I tried to talk her out of a stereo. A stroker motor with 40 series flowmasters, there will be plenty to listen to. If you don't like the station, roll down the window!
__________________
Robert |
|
|
|
|
08-10-2017, 10:28 PM
|
#8 |
|
Registered User
Join Date: Jan 2013
Location: Leonardtown, MD
Posts: 1,637
|
Re: 55 Wagon Progress
Today was paint day for the remaining bus parts. One hood, three rear skirts, and attaching hardware.. After a sealer coat of SPI Epoxy..
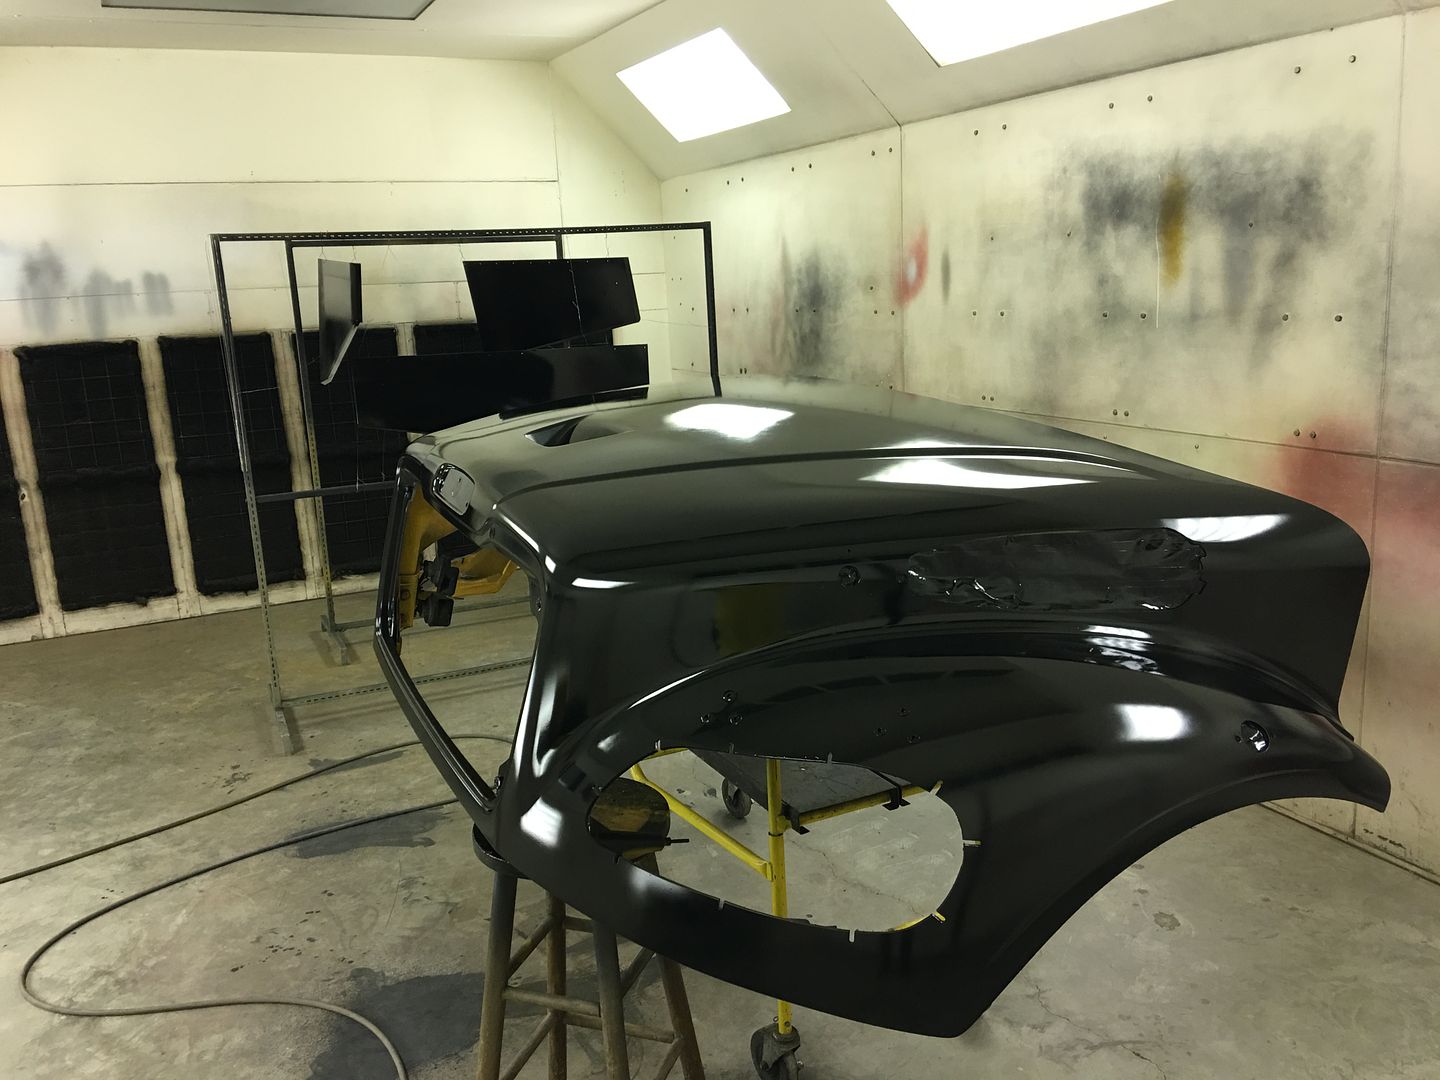 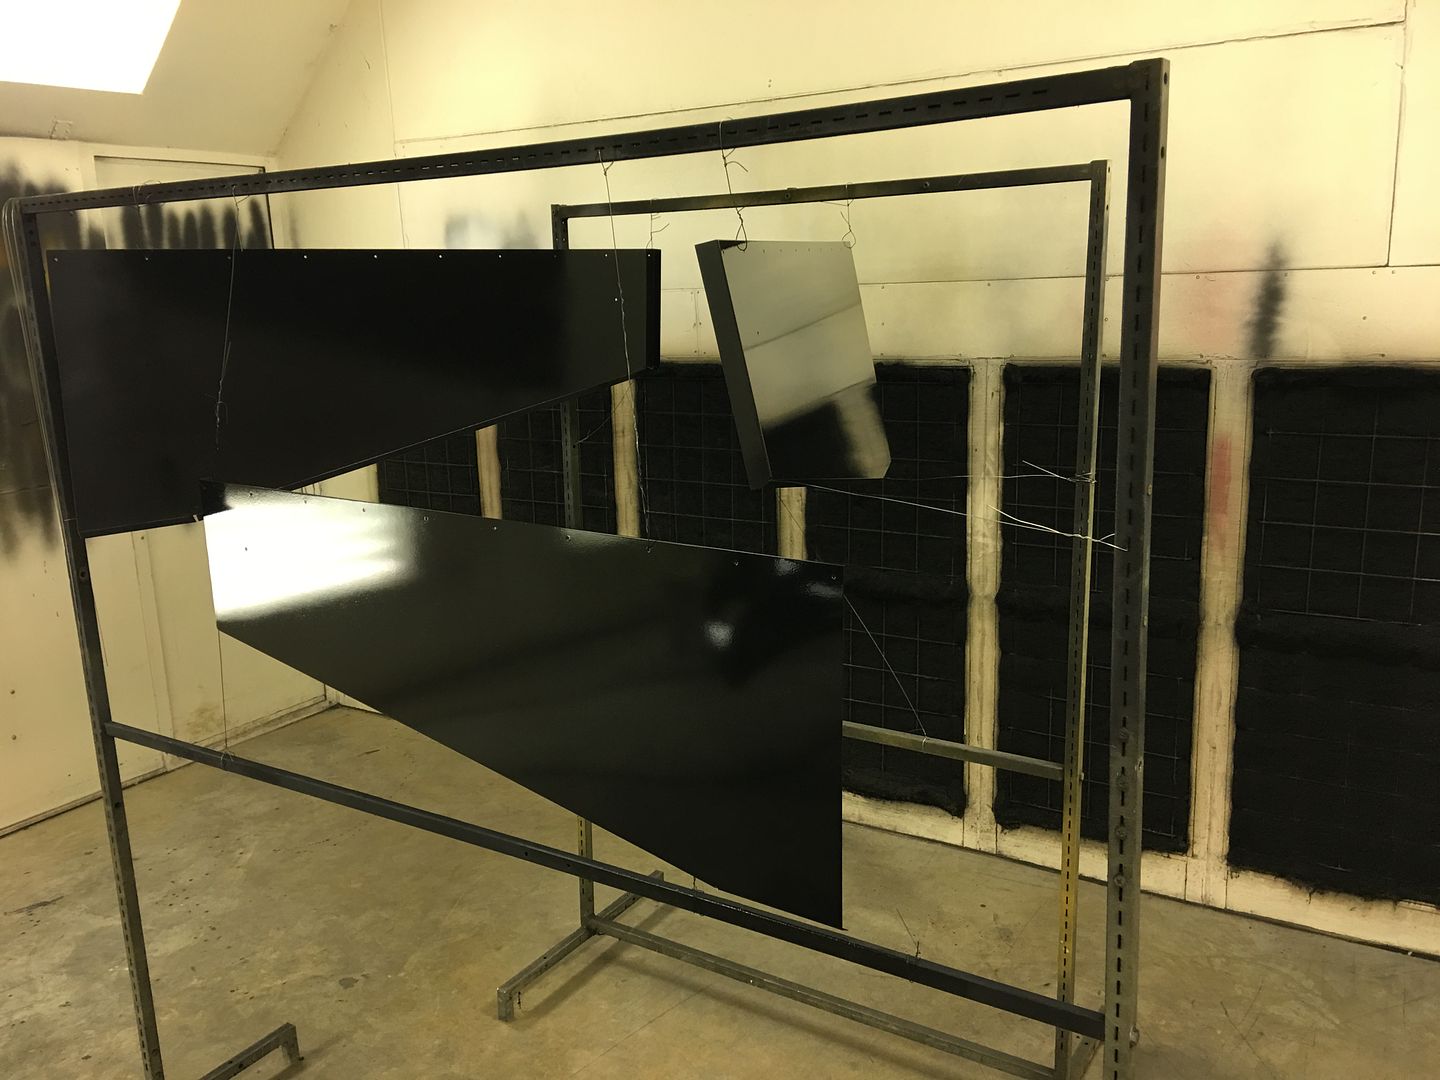 And our yellow...  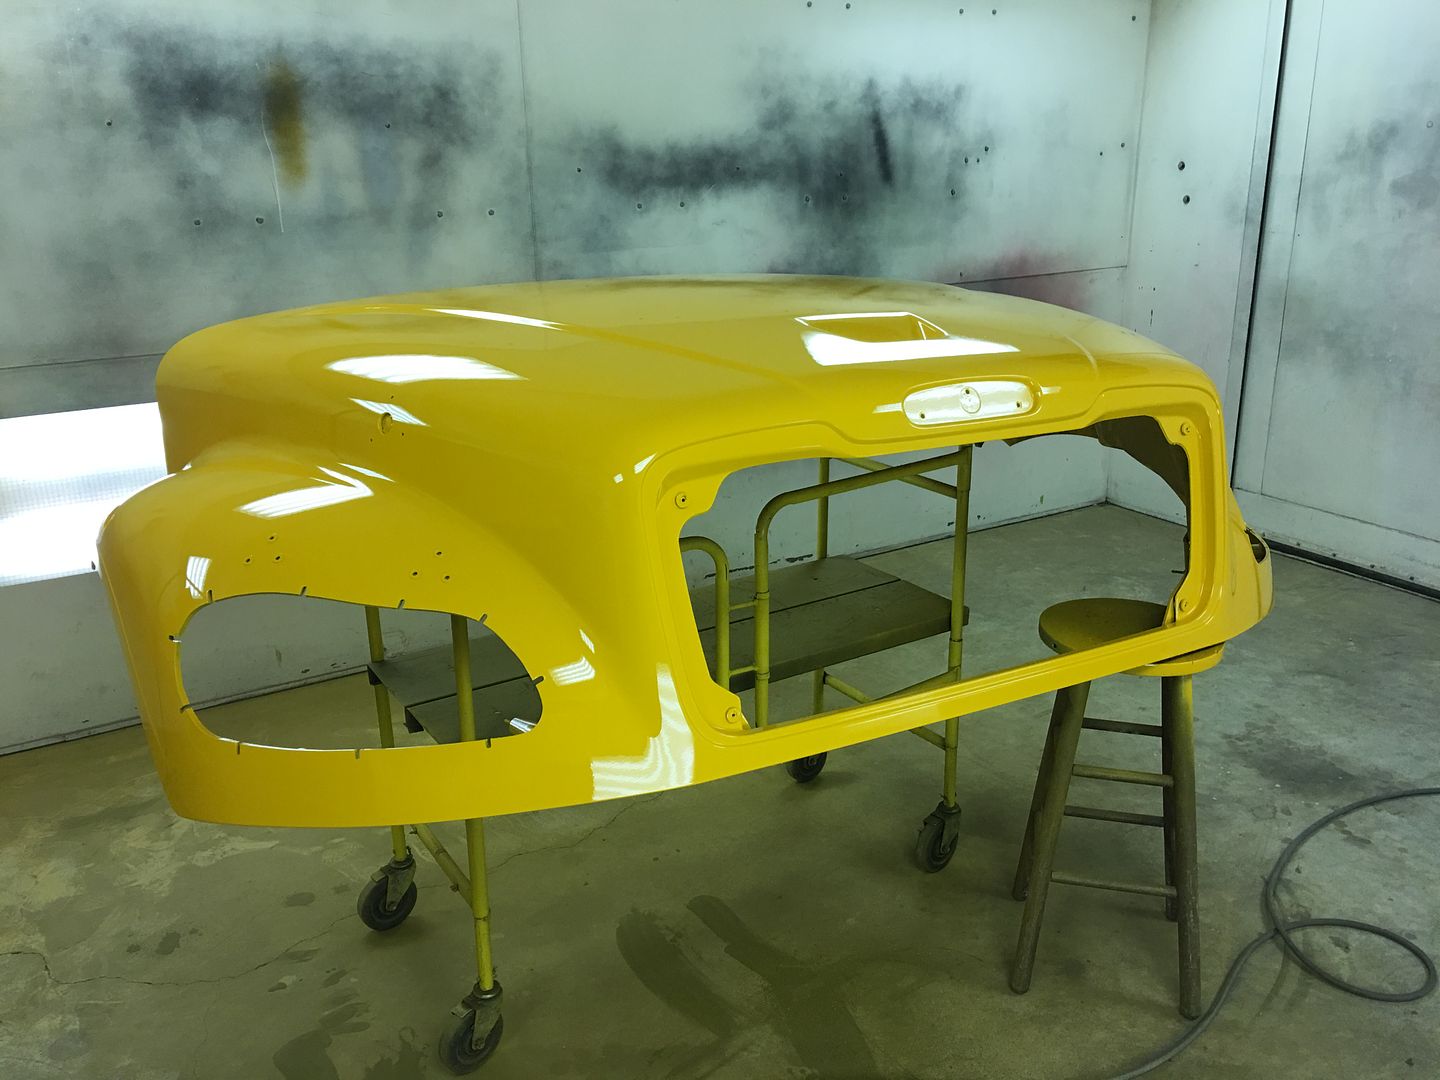 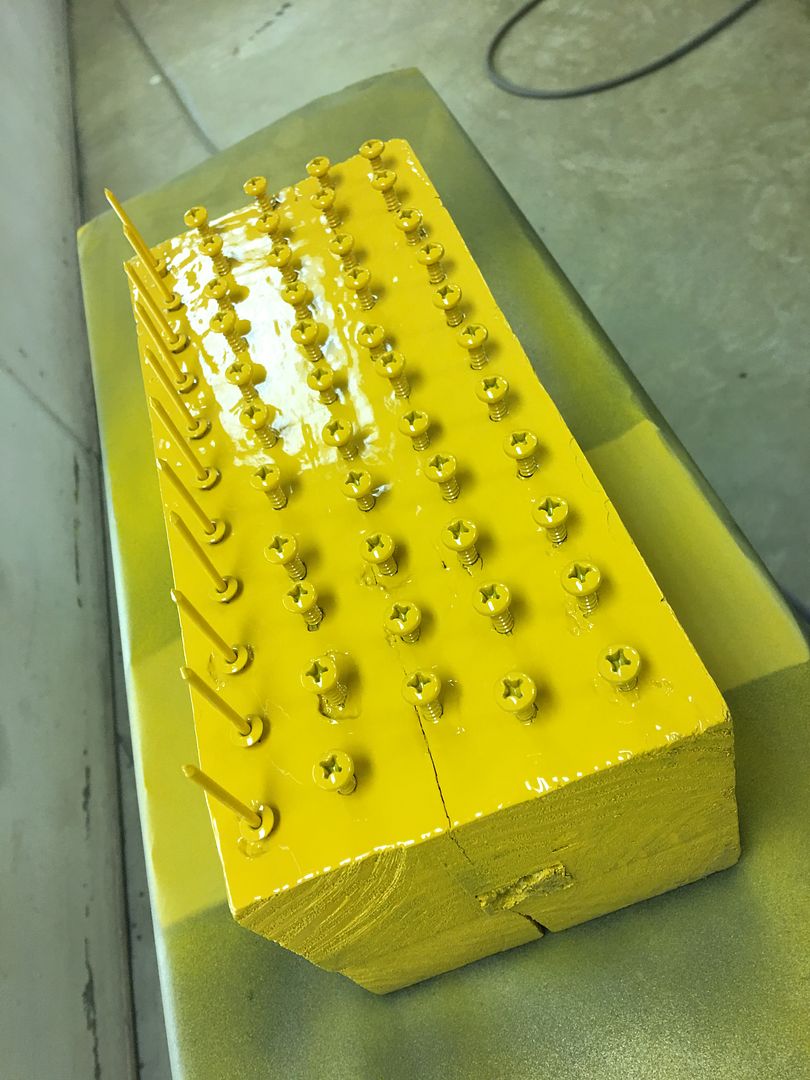 We'll let these cure a bit and get 580 put back together this weekend..
__________________
Robert |
|
|
|
|
08-11-2017, 10:56 PM
|
#9 |
|
Registered User
Join Date: Jan 2013
Location: Leonardtown, MD
Posts: 1,637
|
Re: 55 Wagon Progress
Today the hood was reinstalled, all the bits bolted back together, and the rear skirt replaced..
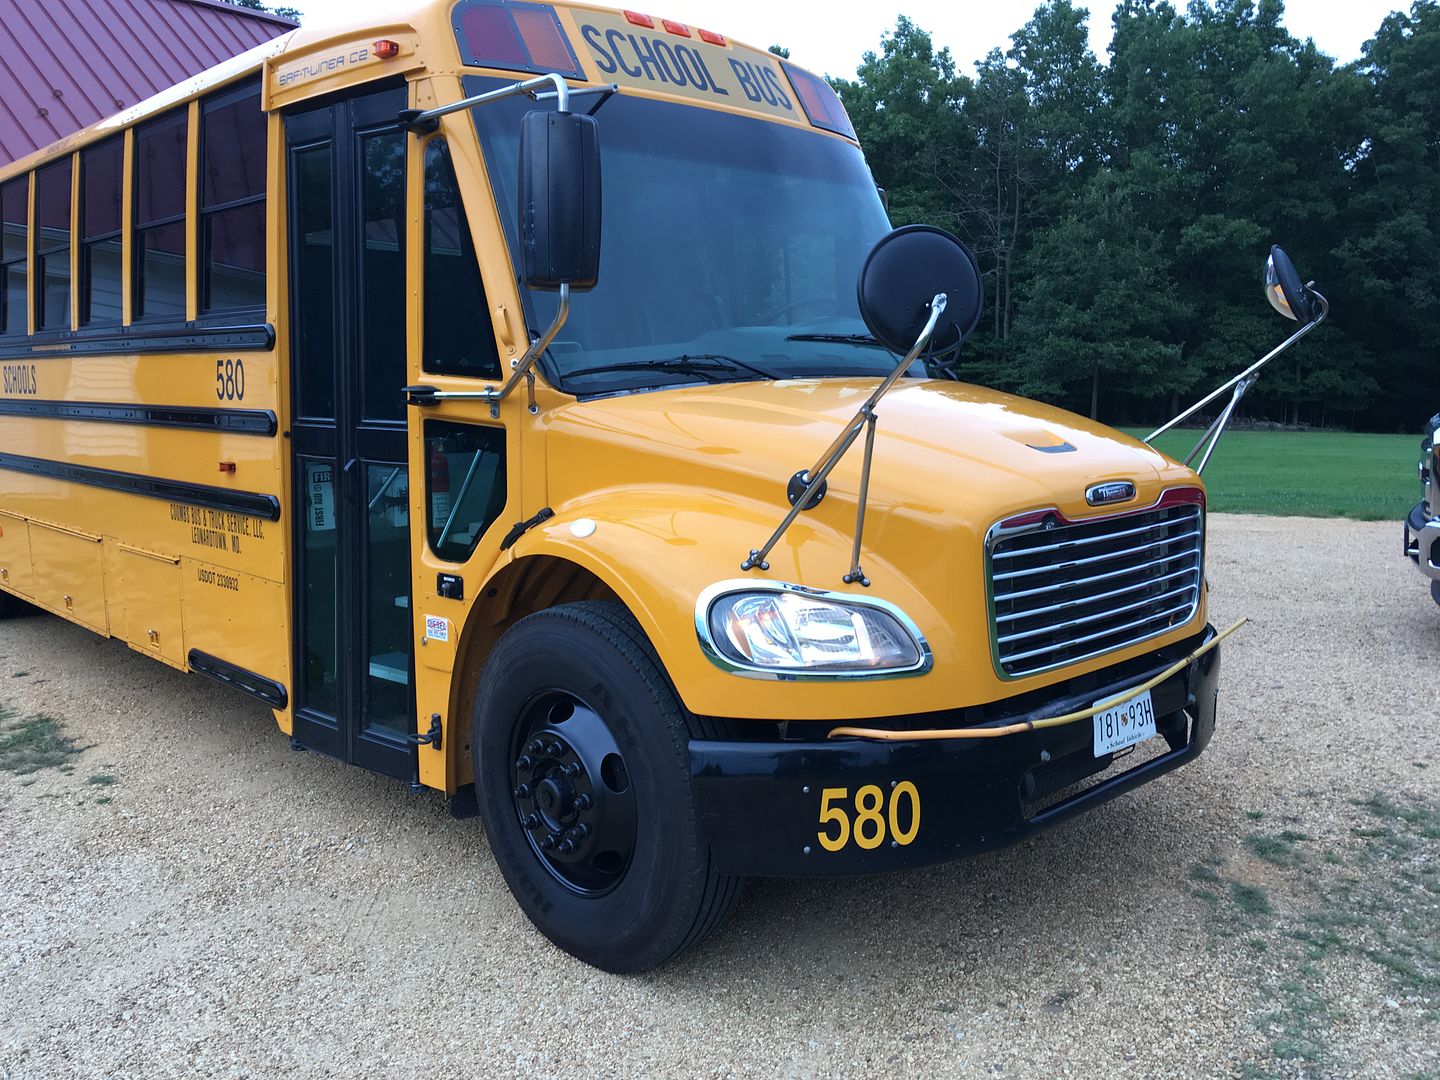 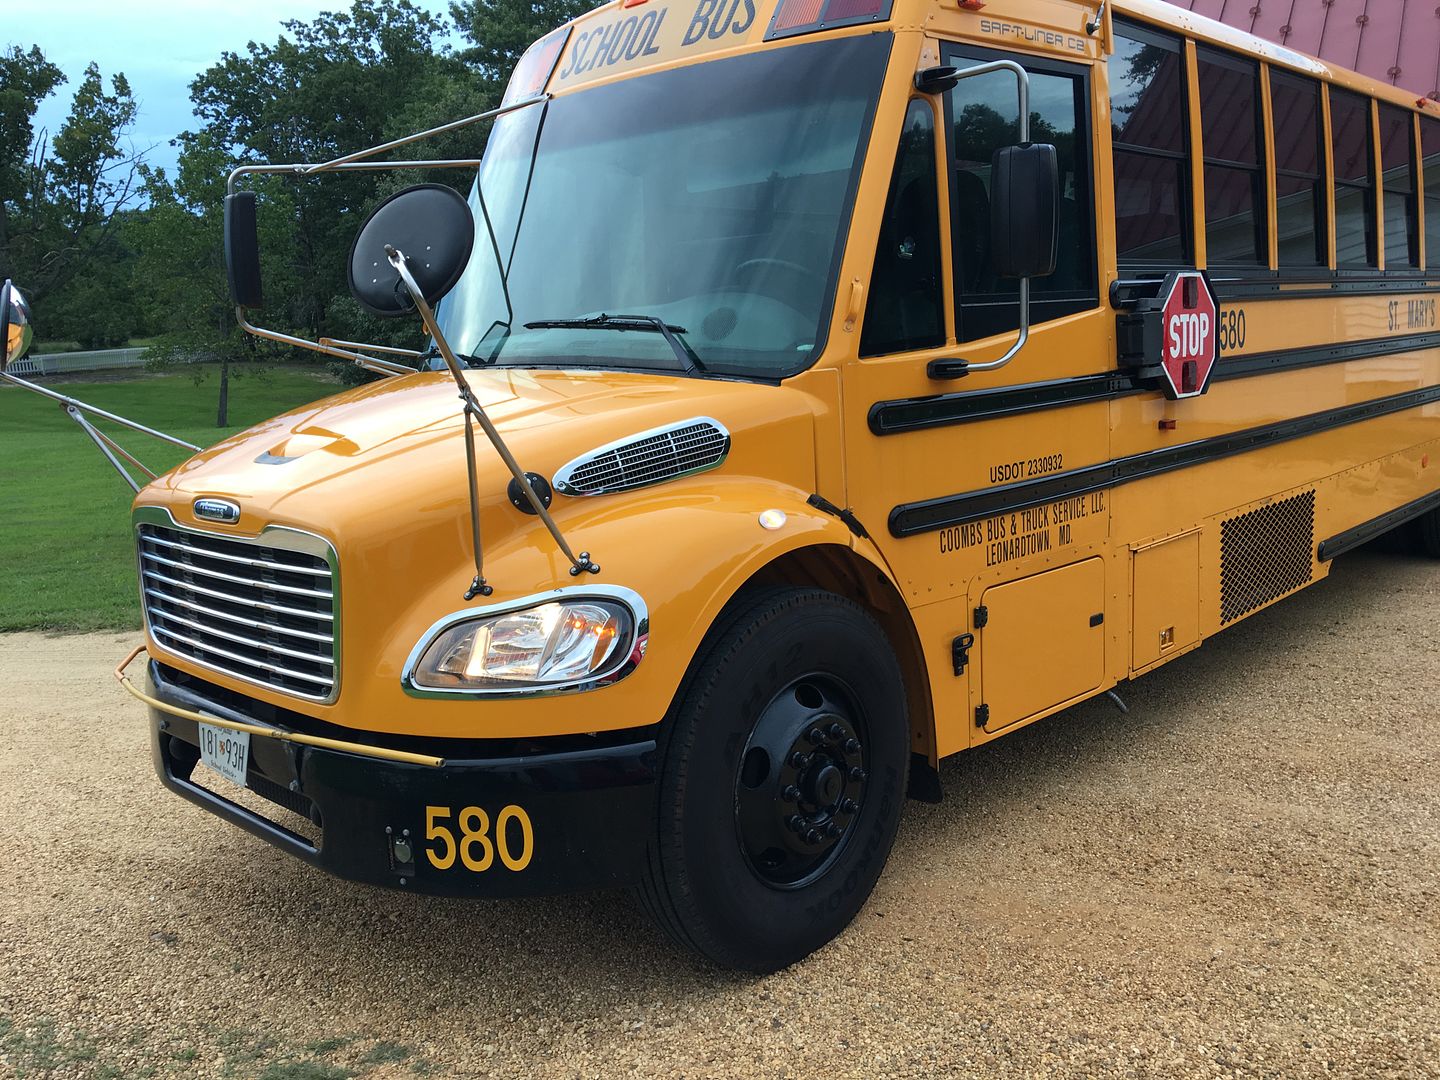 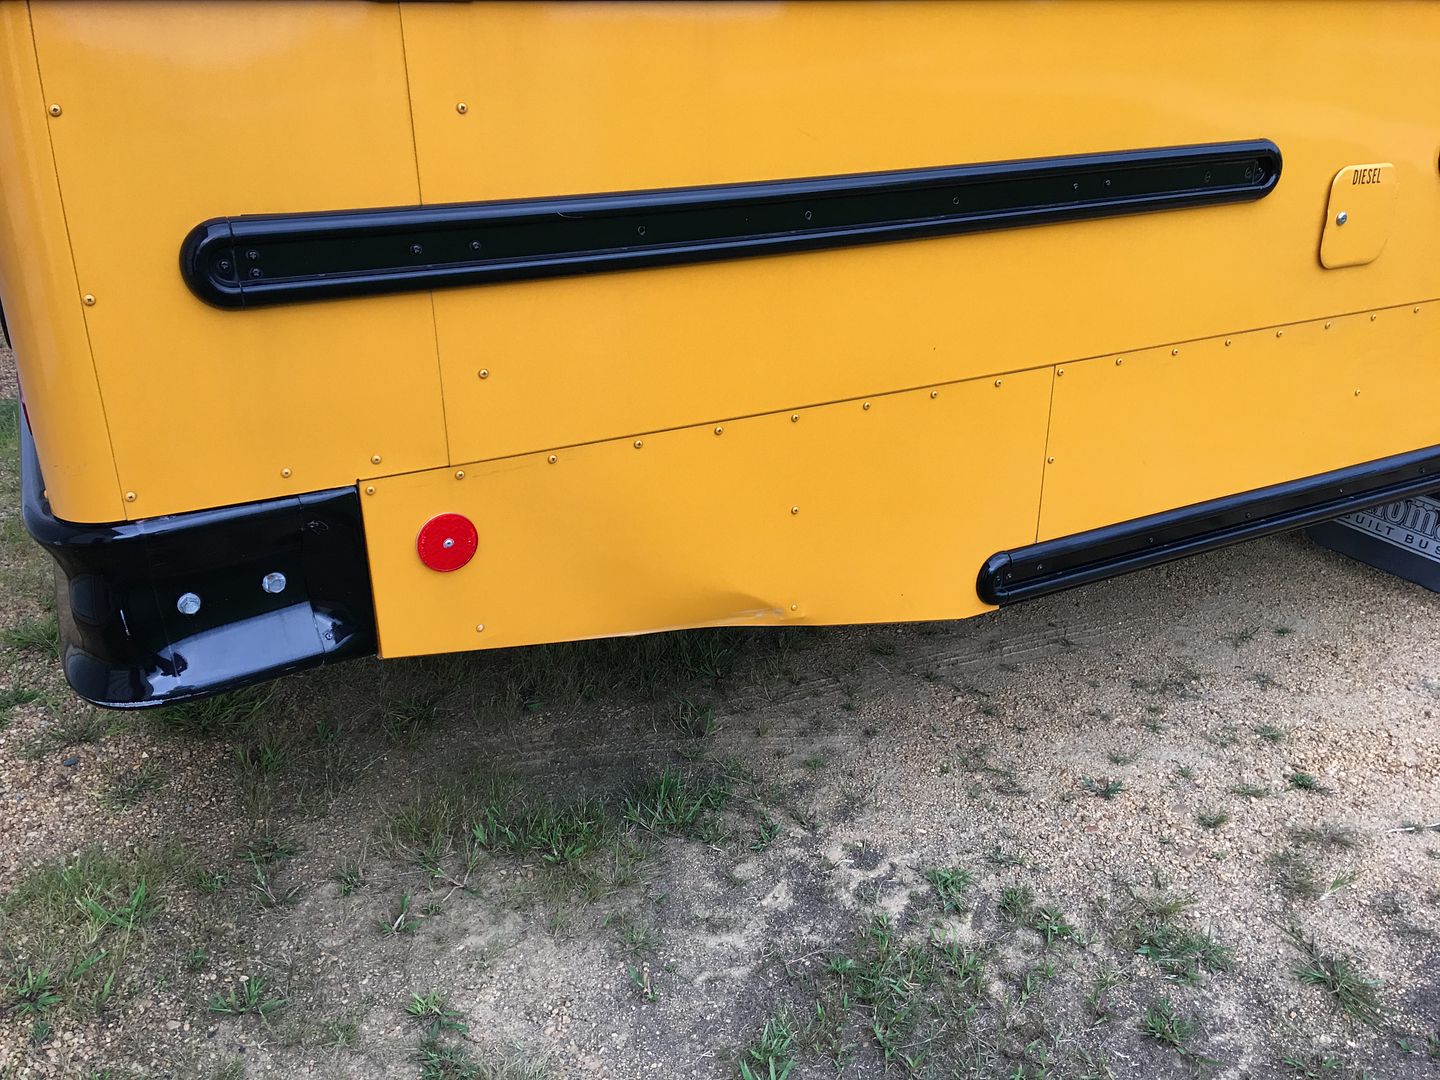 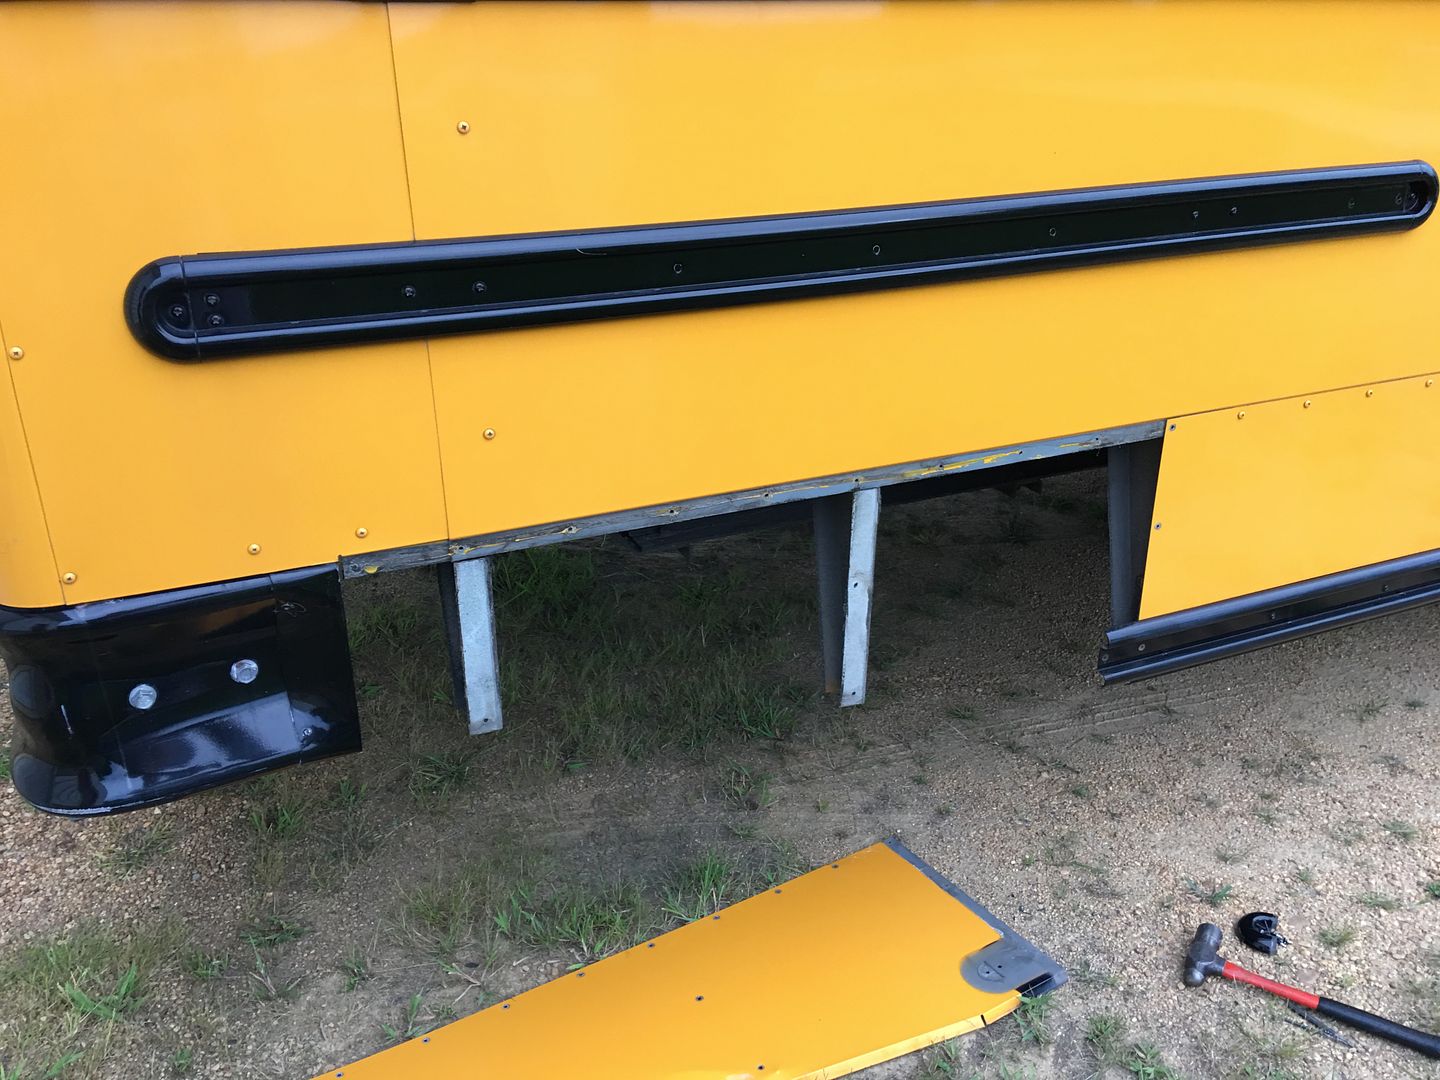 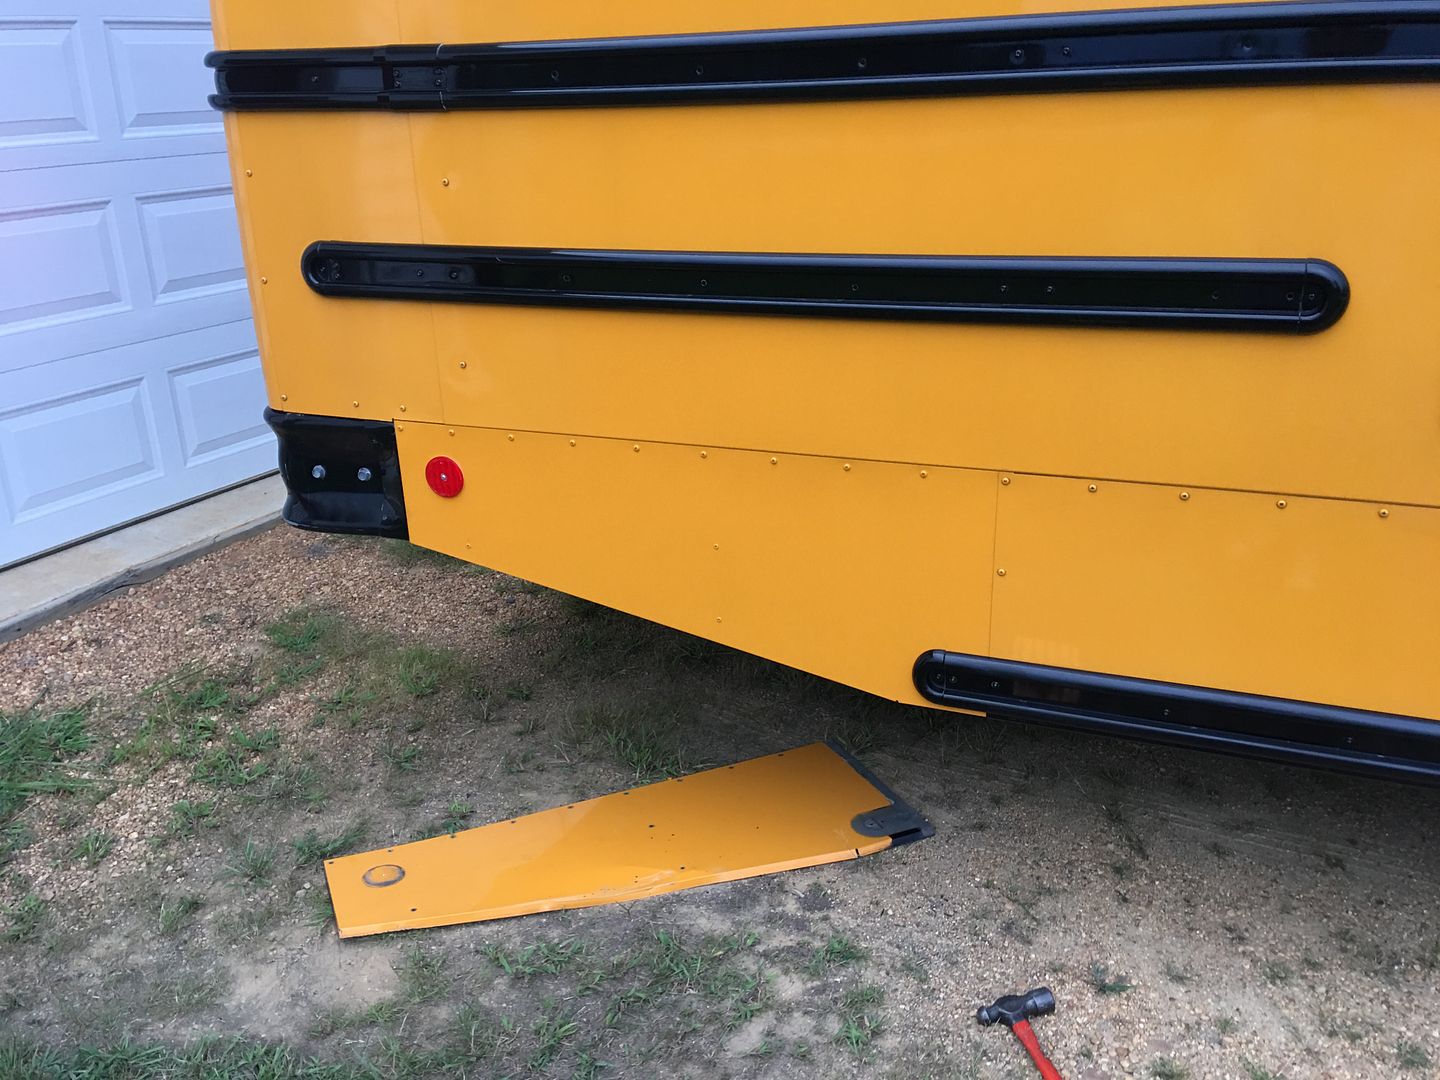 All together and ready for pick up tomorrow.. 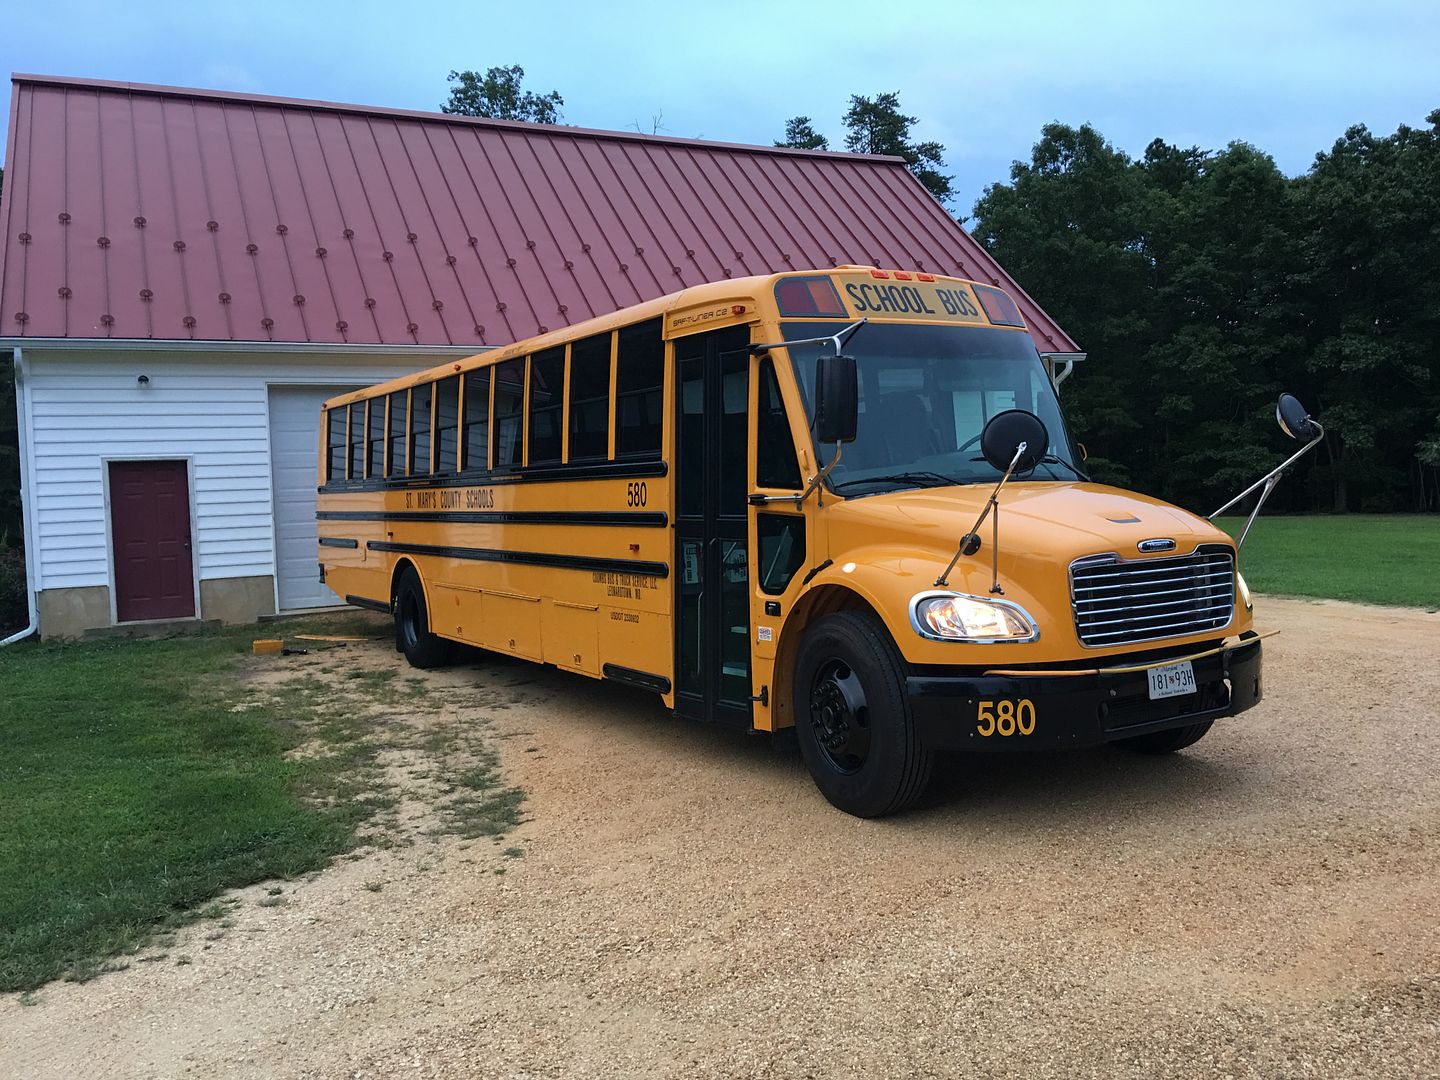 So we can get back to the 55 tomorrow...
__________________
Robert |
|
|
|
|
08-16-2017, 02:45 PM
|
#10 |
|
Registered User
Join Date: Jan 2013
Location: Leonardtown, MD
Posts: 1,637
|
Re: 55 Wagon Progress
Well last night found us carpenterin.... using some 3/4 MDF and some construction adhesive...
  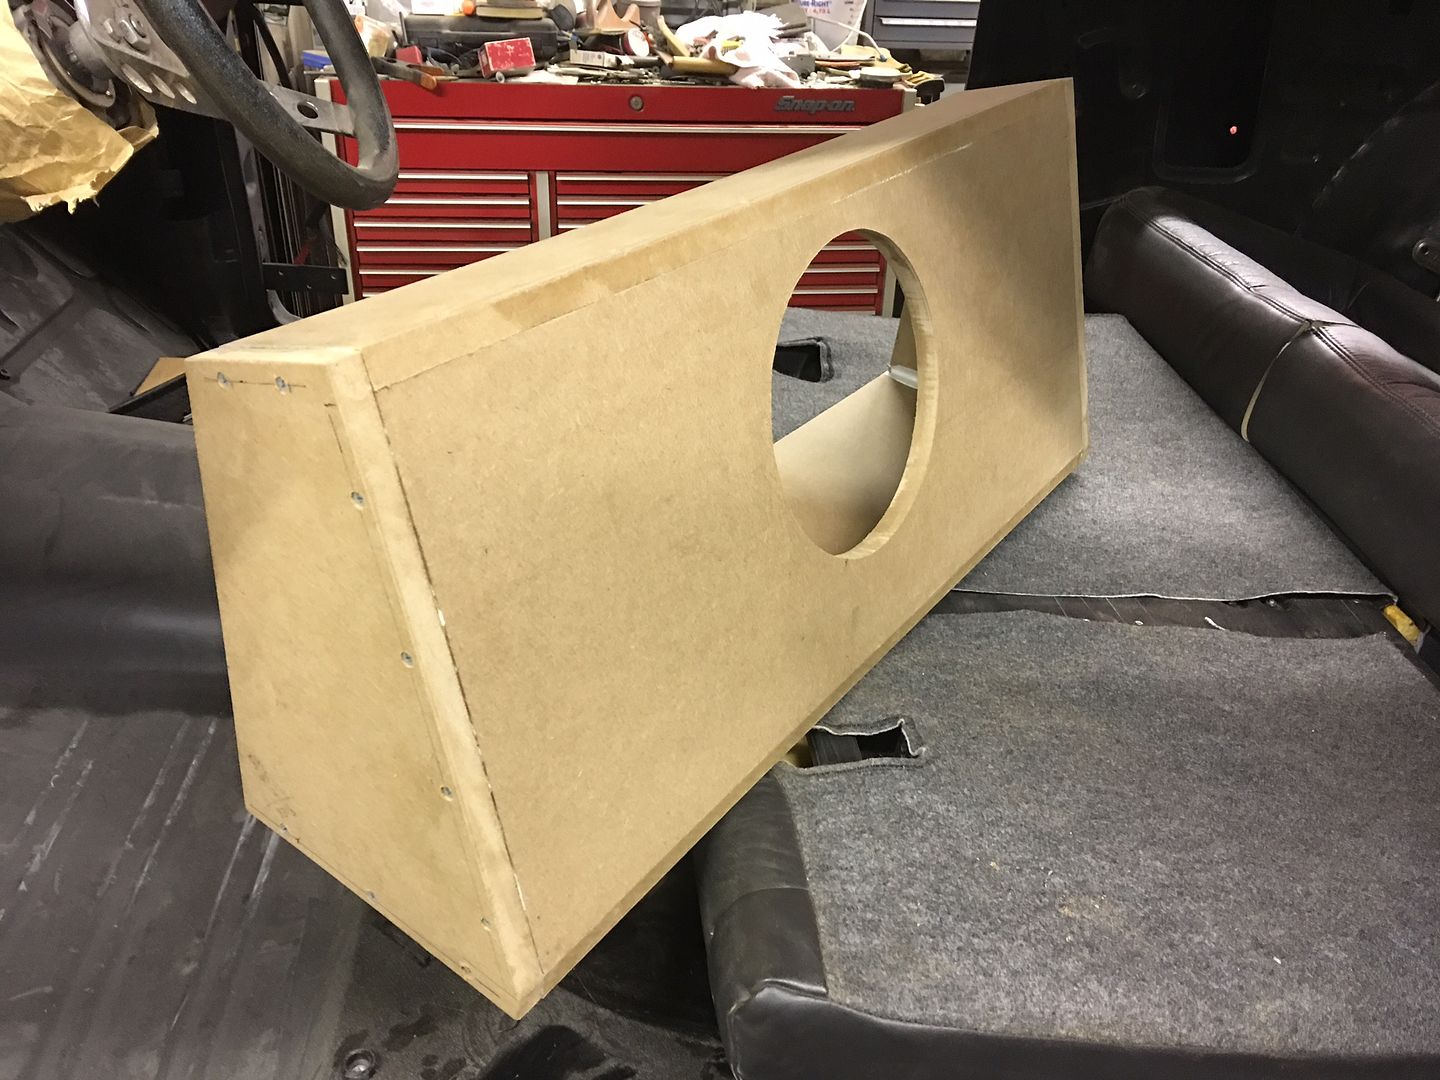    The amp will get mounted on the access cover.
__________________
Robert |
|
|
|
|
08-28-2017, 09:25 PM
|
#11 |
|
Registered User
Join Date: Jan 2013
Location: Leonardtown, MD
Posts: 1,637
|
Re: 55 Wagon Progress
Got the drivers corner for the rear seat back tig welded in place and flange folded. Now for the passenger side.
https://www.youtube.com/watch?v=Z-61G1Q1EWo On a side note, officially gave Photobucket the boot as my subscription expired last Friday. Robert isn't paying their extortion fees. Surprised the pictures are still showing...
__________________
Robert |
|
|
|
|
08-28-2017, 11:24 PM
|
#12 |
|
Senior Member
Join Date: Mar 2011
Location: West Plains, Missouri
Posts: 7,555
|
Re: 55 Wagon Progress
Robert, this photobucket crap stinks, would hate to lose all your great work shown here...Jim
__________________
my build thread: http://67-72chevytrucks.com/vboard/s...d.php?t=459839 Jimbo's long bed step build:http://67-72chevytrucks.com/vboard/s...t=464626<br /> |
|
|
|
|
09-01-2017, 08:01 PM
|
#13 | |
|
Registered User
Join Date: May 2015
Location: texas
Posts: 253
|
Re: 55 Wagon Progress
PB has made itself into the most hated site of this decade. wish there was a hack to correct it. i started using imgur. real easy to upload.
__________________
Black 93 CCLB 3500 6.5 diesel, GV OD, TCI Ez-TCU controlled 4L80E, back on road 10/25/16 after sitting 4 years. 96 ECLB 2500, 6.5 diesel, auto, gone. Quote:
|
|
|
|
|
|
09-04-2017, 12:23 PM
|
#14 |
|
Registered User
Join Date: Jan 2013
Location: Leonardtown, MD
Posts: 1,637
|
Re: 55 Wagon Progress
Still haven't set up the new photo hosting, so todays update via youtube. Got the passenger corner all formed up and Tig welded in place for the rear seat back enclosure..
https://www.youtube.com/watch?v=VsZ1zktynes
__________________
Robert |
|
|
|
|
11-02-2017, 12:38 AM
|
#15 |
|
Registered User
Join Date: Jan 2013
Location: Leonardtown, MD
Posts: 1,637
|
Re: 55 Wagon Progress
Well I think I have google images figured out now, so lets try an update on the wagon.
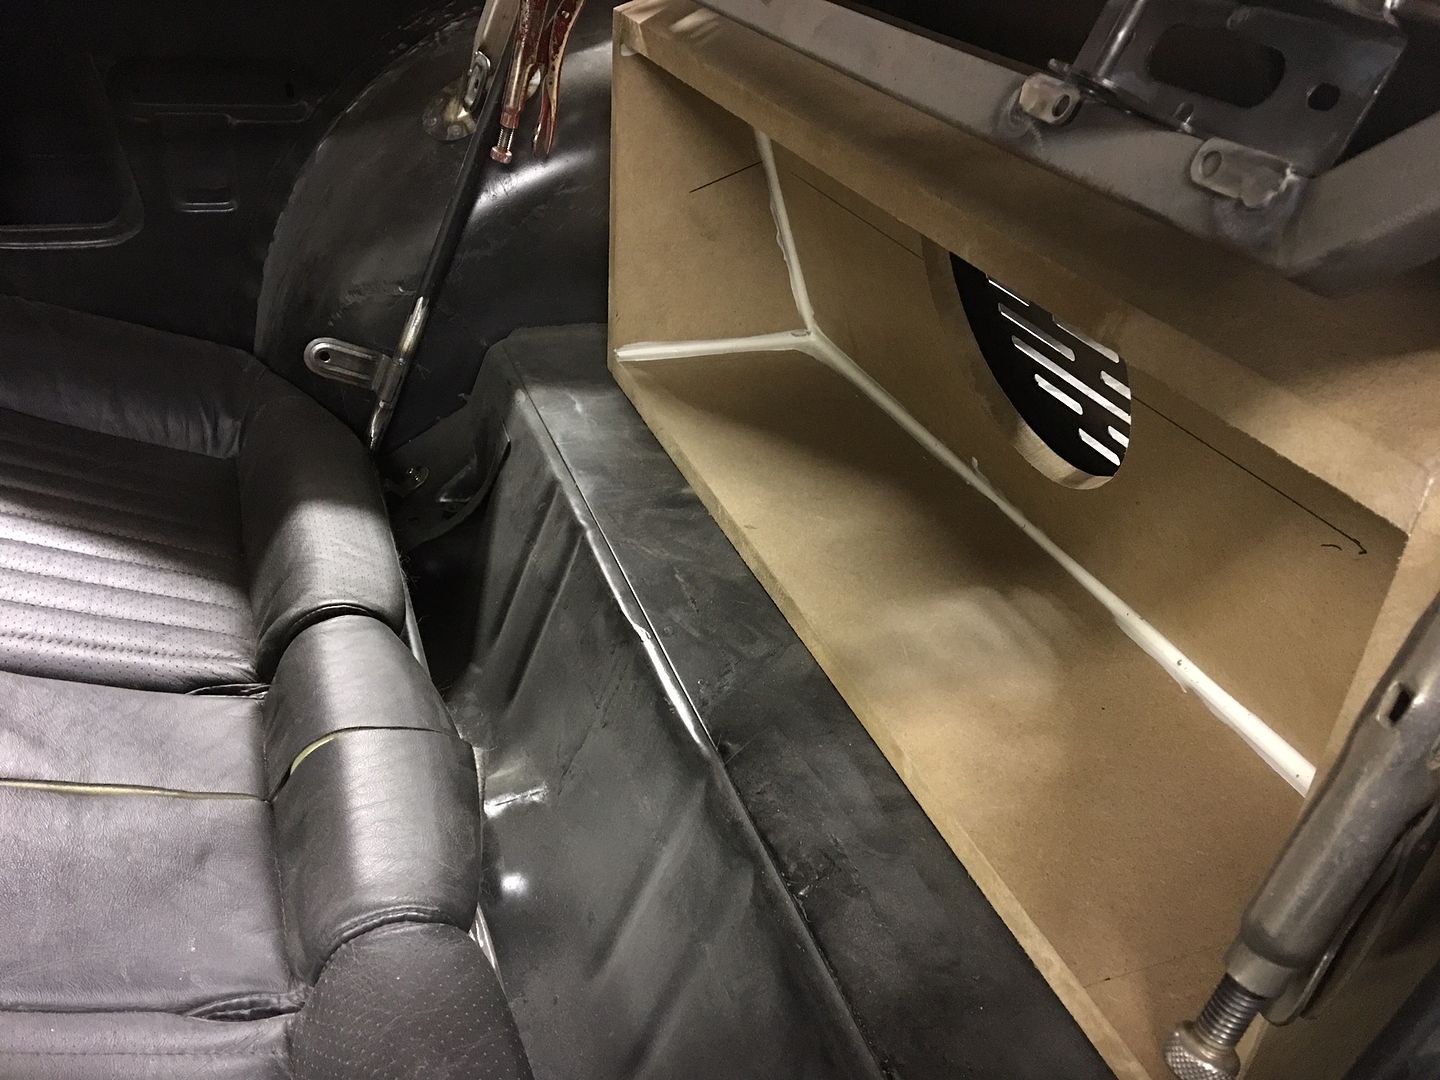
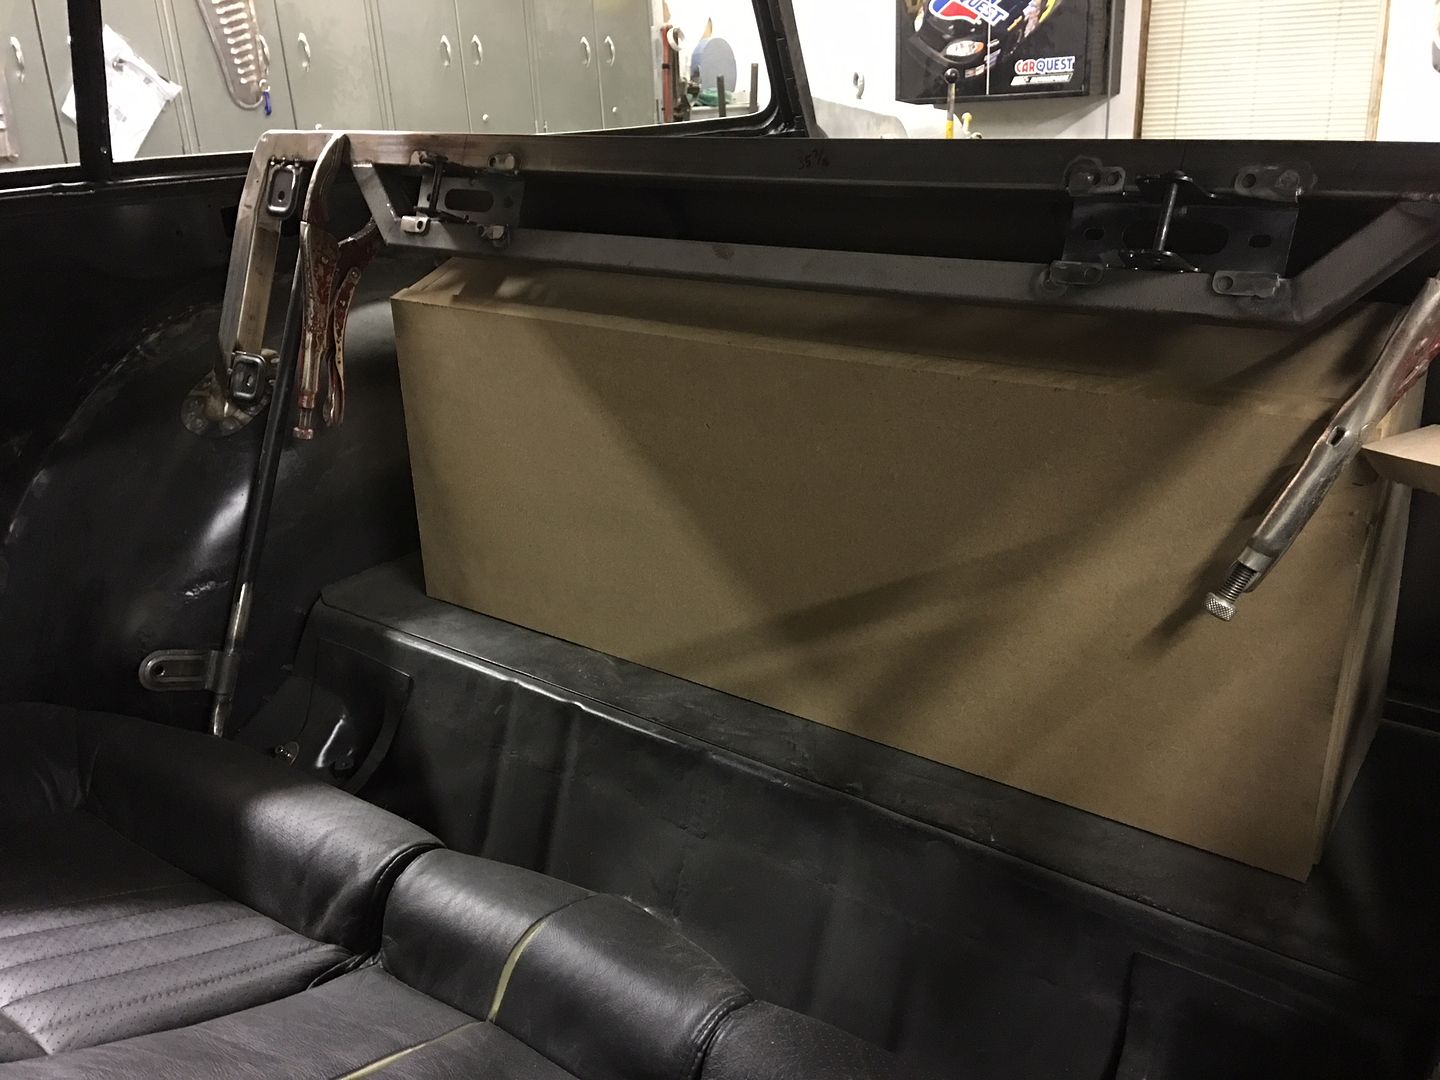
With the back seat rear enclosure and it's frame both sprayed in epoxy, time to assemble the two together. I didn't want to use hardware/rivets on the skin as I thought it would stay flatter under the upholstery without. Also, with the amp and bass speaker inside the enclosure, we needed something to limit vibration of the adjacent pieces. Our choice is to use some body molding adhesive tape to join the two together.  The tape is applied to the frame, and then the skin attached on top of that..   Next, we need to work on our console and the shifter inside of it. We have the console that came with the 2002 Monte Carlo interior, but it has far too much plastic that it didn't belong. In looking at other options, we decided on the horse shoe shifter used on the Chevelle. In conducting a test fit of the cable, we found it's trajectory path was much too straight where it either lifted the front of the shifter, or pulled the bulkhead fitting out of the "tunnel" mockup. 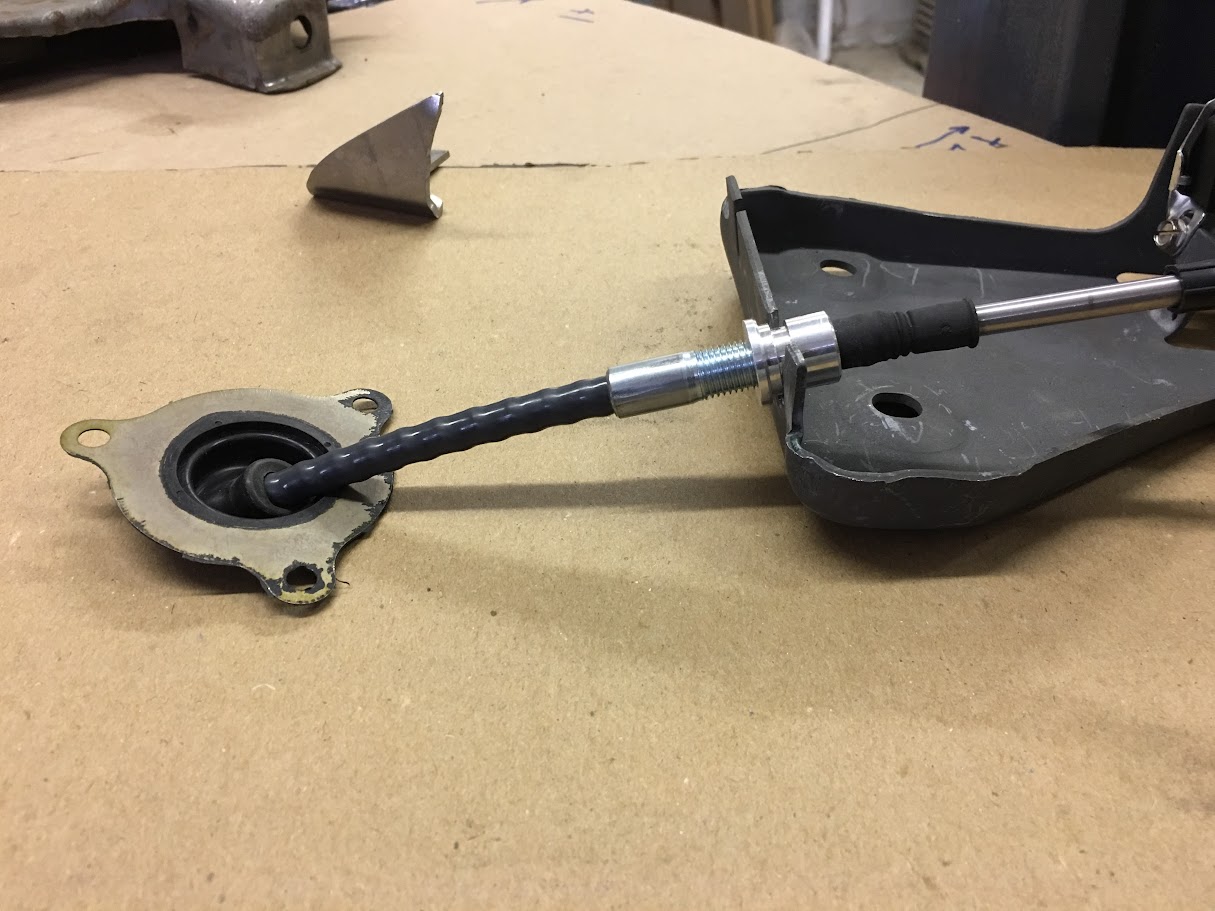 Shifter lift: https://www.youtube.com/watch?v=b9-HXW7oNYg Our solution was to raise the cable exit from the shifter housing higher in order to have a better arc of the cable for entry through the floor. Here a "relocation bracket" has been added:  Bracket all welded in place, looks like this will work for our shifter, return policy officially void now, but cable path fits much better through the floor: https://www.youtube.com/watch?v=LySdi8tifvQ We also needed to finalize seat belts for the rear seats. These are 12 gauge CRS pieces that are plug welded to the floor pan, 1/2" diameter bolt holding the anchor points for inner seat belts.  The outer belts needed to be all the way out to the wheel well, and to better "anchor" we made similar 12 ga brackets, this one with a hemmed end to "hook" the pinch weld seam of the floor pan/wheel well, then plug welded in place to the wheel well. Again, a 1/2" bolt will anchor the seat belt: 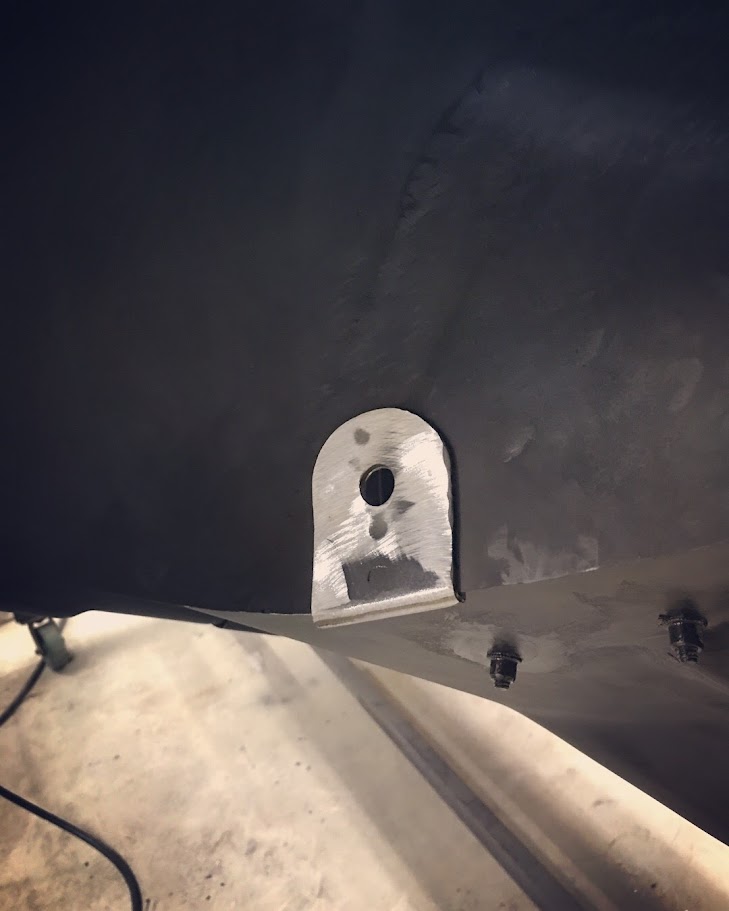 While Mike and Jake started the layout of the console.........  ......I fabbed up some bucket seat brackets out of 16 ga CRS for a 37 Ford. These had to be 3" high and only 1-1/2" wide, which was too high for my gooseneck die in the press brake. Chose to make them in two pieces and fusion tacked together using the TIG. 
__________________
Robert Last edited by MP&C; 11-02-2017 at 07:18 AM. |
|
|
|
|
11-02-2017, 02:59 AM
|
#16 |
|
Registered User
Join Date: Jun 2016
Location: Leatherhead, Surrey
Posts: 15
|
Re: 55 Wagon Progress
Great to see you back. Looking forward to seeing the progress and excellent fabbing.
__________________
My latest ride: https://bit.ly/2LOIoCZ SWMBO's surprise: https://bit.ly/2ouIJBD What to buy when you love old Chevy's and need an MPV: https://bit.ly/2wCobuV The daily: Now a Ford Ranger Double Cab - First road trip here: https://bit.ly/2owS24d GRIZZ, CRAIG and DENNIS 2018 Humdinger of a USA Road Trip: https://bit.ly/2Ca3jB4 |
|
|
|
|
11-02-2017, 08:54 AM
|
#17 |
|
Senior Member
Join Date: Mar 2011
Location: West Plains, Missouri
Posts: 7,555
|
Re: 55 Wagon Progress
Robert, I agree glad to see you back, always enjoy your post...Jim
__________________
my build thread: http://67-72chevytrucks.com/vboard/s...d.php?t=459839 Jimbo's long bed step build:http://67-72chevytrucks.com/vboard/s...t=464626<br /> |
|
|
|
|
11-06-2017, 11:01 AM
|
#18 |
|
Registered User
Join Date: Jan 2013
Location: Leonardtown, MD
Posts: 1,637
|
Re: 55 Wagon Progress
Thanks guys!
Console fabrication  Bottom and under dash edges are hemmed, folded flanges will support the filler panel between each side.. https://www.youtube.com/watch?v=pV1yiaFoUfQ Fitting up the corner radius https://www.youtube.com/watch?v=1NdR3c_S8nE
__________________
Robert |
|
|
|
|
11-11-2017, 01:13 AM
|
#19 |
|
Registered User
Join Date: Jan 2013
Location: Leonardtown, MD
Posts: 1,637
|
Re: 55 Wagon Progress
Some sprayouts done this evening to see if we can nail down a color for the green.
https://www.youtube.com/watch?v=PFxz8aMOzI0 Will take another video tomorrow in the Sunlight for the true test. Color 1: Corvette Limerock Green Color 2: Land Rover Kosrae Green Color 3: Audi Azores Green Color 4: H/K Organic Green Kandy Basecoat
__________________
Robert |
|
|
|
|
11-12-2017, 11:55 PM
|
#20 |
|
Registered User
Join Date: Jan 2013
Location: Leonardtown, MD
Posts: 1,637
|
Re: 55 Wagon Progress
Sunlight views in same order,
Color 1: Corvette Limerock Green Color 2: Land Rover Kosrae Green Color 3: Audi Azores Green Color 4: H/K Organic Green Kandy Basecoat https://www.youtube.com/watch?v=5DoEQZkZJpc Didn't get pictures in overcast, but these help to show, 1-3 don't show color well at all in overcast or dim/indirect light conditions. As we'd like the car to look green regardless, we're leaning toward the H/K 
__________________
Robert |
|
|
|
|
11-29-2017, 11:20 PM
|
#21 |
|
Registered User
Join Date: Jan 2013
Location: Leonardtown, MD
Posts: 1,637
|
Re: 55 Wagon Progress
Had a short break from the wagon as we were cleaning up for this years metalshaping class at the shop that was held a couple weeks ago.
Our guest instructor this year was Pat Brubaker of Custom Rides in Hastings Nebraska. We focused on minimal tools this year. A largely forgotten tool that is (was) seen in many shops is the arbor press. Pat has developed a die set to use in the arbor press that makes it an invaluable tool to have in your metalshaping arsenal.  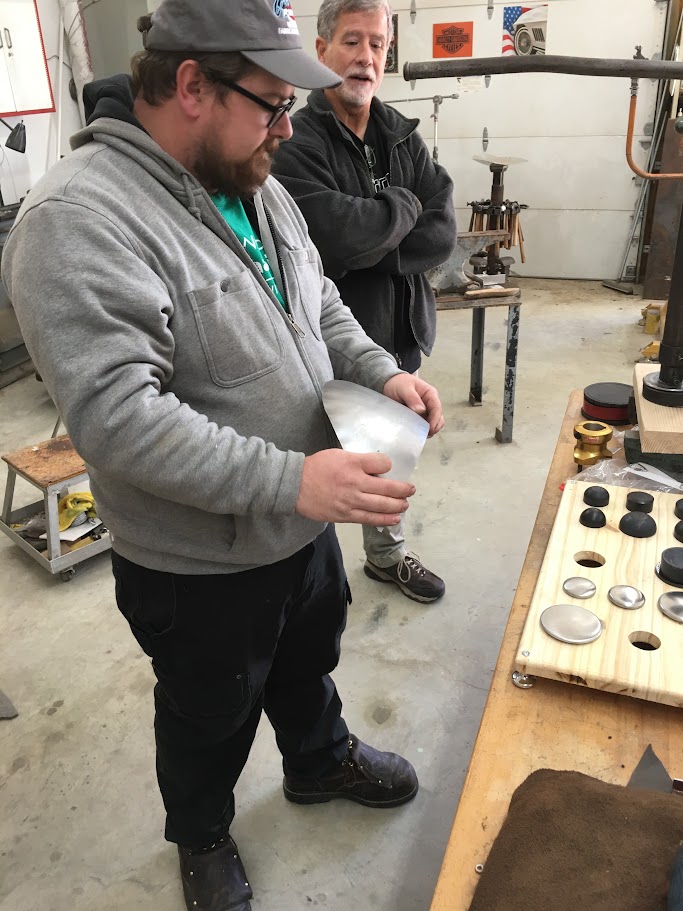 This video shows tuck shrinking, much the same as using the stump, but here using less impact for less stress added to the panel.. https://www.youtube.com/watch?v=MUQghpUVohU Pete Hagan brought some 2002 BMW front fenders to practice with, one having a noticeable dent in the front..  Here we match up one of the dies to match the crown of the rear of the fender, and try our hand at removing a dent using the arbor press. https://www.youtube.com/watch?v=0oI9U0YJS9E It did a good job of removing the majority of the damage, and more importantly, without adding any more stretch. Minimal work at this point would have this ready for paint. We also discussed various pattern techniques, and the benefits realized with each one. One of the class participants, Laser with a Z, had brought a 1961 Impala front valance to duplicate, as it had many rust issues.  Some of the rust issues were filled with clay in order to get a more accurate pattern. Flexible shape patterns show better the amount of shape in the panel, and paper patterns were used to get an accurate read on panel material size.   The replacement panel was made in two pieces and welded together. Laser did a nice job of welding, note the consistent width in the HAZ for minimal distortion..  Comparison:  Jake's project for the class was a replacement for our practice fan shroud from last month.. The rear edge was unfinished, so we aimed to fix that, and also make it out of aluminum to better match the radiator.  To finish off the rear edge, we chose to add a bead to the edge and a hemmed flange to close it off, keeping the hem flat so as not to interfere with the fan.  The beads were added, flanges tipped to attach to the baffle panel, and the linear stretch dies in the Lennox used to stretch the correct outer radius.   We attempted various welding methods to attach the shroud to the baffle plates. The spot welder lacked the balls to make the welds, and TIG spot welds or weld passes seemed to add more distortion to our practice pieces than the precise circle we had rolled would tolerate. So we used some stainless hardware and nylock nuts to hold the parts together..  Here are some videos of the installed shroud.. https://www.youtube.com/watch?v=vSQf_V4Jyi8 https://www.youtube.com/watch?v=AZQBxsxkorQ Some of the tips and tricks shared at the class, here is a table "extension" for a band saw to permit cutting of crowned panels SAFELY.. https://www.youtube.com/watch?v=qNjxTbD4VrQ Charlie has been to our class three years in a row, and he is a pretty sharp cookie. Like some of us and getting older, he has the unfortunate issue of arthritis in his hands, and finds difficulty in using hand snips. In much the same fashion as the Beverly shears, Charlie modified a pair of right angle Midwest shears to use a handle for easier operation..   Action video: https://www.youtube.com/watch?v=MLr76hsdIxM Material capacity stays the same, operation just becomes a bit easier, especially for those with arthritis conditions..
__________________
Robert |
|
|
|
|
12-03-2017, 02:04 PM
|
#22 |
|
Registered User
Join Date: Jan 2013
Location: Leonardtown, MD
Posts: 1,637
|
Re: 55 Wagon Progress
We got the wagon parts pulled out of the booth this past weekend where we had them stored during the metalshaping class.
 Getting back to tying up some loose ends.. Mike cuts out the driver side of the console..   All ready for thinning the bend lines..  .....while Jake and I worked on tipping the edge on the second seat bolster..  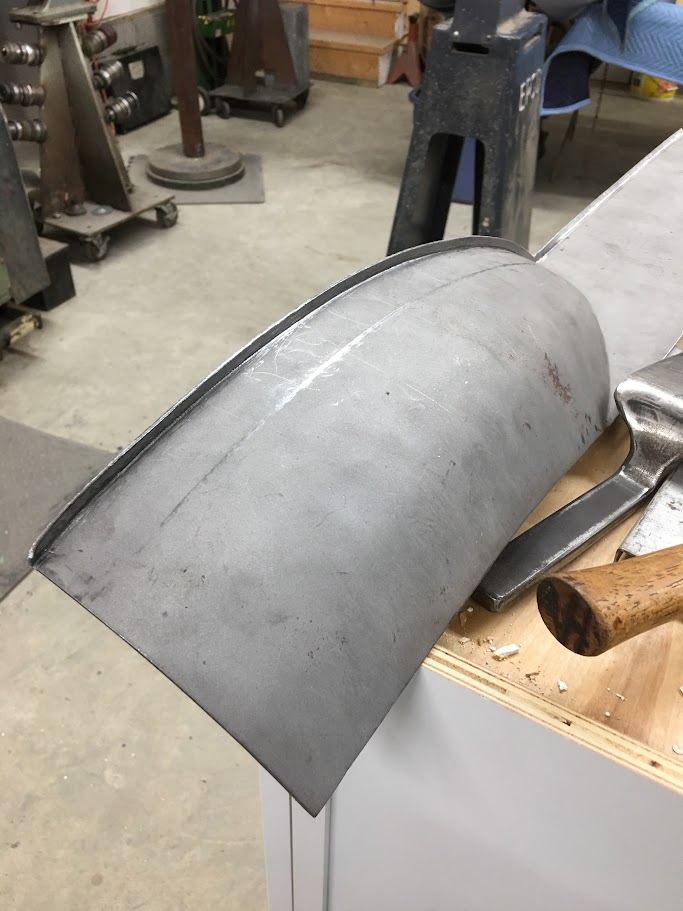
__________________
Robert |
|
|
|
|
12-03-2017, 02:10 PM
|
#23 |
|
Registered User
Join Date: Apr 2011
Location: .
Posts: 3,104
|
Re: 55 Wagon Progress
Looking great as always.
|
|
|
|
|
12-04-2017, 12:15 PM
|
#24 |
|
Registered User
Join Date: Apr 2012
Location: CT
Posts: 265
|
Re: 55 Wagon Progress
Awesome work! Thank you for sharing all the details
__________________
http://67-72chevytrucks.com/vboard/s...d.php?t=742865 66 SWB, C4 Dropmember timmytimm3 on IG "If you don't have time to do it right the first time, when will you?" -Dad |
|
|
|
|
12-04-2017, 02:45 PM
|
#25 |
|
Senior Member
Join Date: Jul 2012
Location: Oblong, Illinois
Posts: 7,017
|
Re: 55 Wagon Progress
Looks like you had another nice event. Pat was at MM in Oblong and has become very skilled over the years since he was the newbie.
|
|
|
|
 |
| Bookmarks |
|
|


 Hybrid Mode
