
|
|
|
 01-01-2013, 01:50 AM
|
#1 |
|
2wd FTW!!!!
Join Date: Jan 2007
Location: SLC UTAH
Posts: 673
|
Re: Junkyard Jimmy Super Low Buck Build Thread
I'm not going to lie I really had my doubts about the hood when you first started on it, but now seeing it all welded up and in primer I've got to say that I really like how it turned. Excellent job!
|

|

|
|
01-01-2013, 10:11 AM
|
#2 | |
|
GEARHEAD
Join Date: Aug 2003
Location: MN
Posts: 6,122
|
Re: Junkyard Jimmy Super Low Buck Build Thread
Quote:
__________________
If no one knows what you're doing, they can't tell you you're doing it wrong HG's Dream Car Build - Shelby Cobra Kit Build your own adjustable track bar 71  Long Fleet C/10 Long Fleet C/10 72  Jimmy 4x4 (Junkyard Jimmy) Jimmy 4x4 (Junkyard Jimmy)HG's Plow Truck '78  K35 Dually K35 DuallyBigass Farm Truck HG's thread of miscellaneous stuff |
|
|
|
|
|
01-01-2013, 11:49 AM
|
#3 |
|
Registered User
 Join Date: Nov 2007
Location: NLR, AR
Posts: 1,387
|
Re: Junkyard Jimmy Super Low Buck Build Thread
I'm wondering if the lines down the sides are sharper then original?
I cant wait to see it on and see how it looks. |
|
|
|
|
01-01-2013, 03:05 PM
|
#4 | |
|
GEARHEAD
Join Date: Aug 2003
Location: MN
Posts: 6,122
|
Re: Junkyard Jimmy Super Low Buck Build Thread
Quote:
I decided this morning to start doing the body work on the top side of the hood. The body shop is closed today so I don't have access to the sealer/adhesive and special caulking gun for it. So I started laying filler on all of my welded seams and other known low spots. I got that knocked down, found some high spots to tap on a bit. Stopped sanding there though because the epoxy primer loads up the sandpaper too much. So before the next layer of filler goes on I sprayed some high build primer. More filler and sanding to come. Pics... 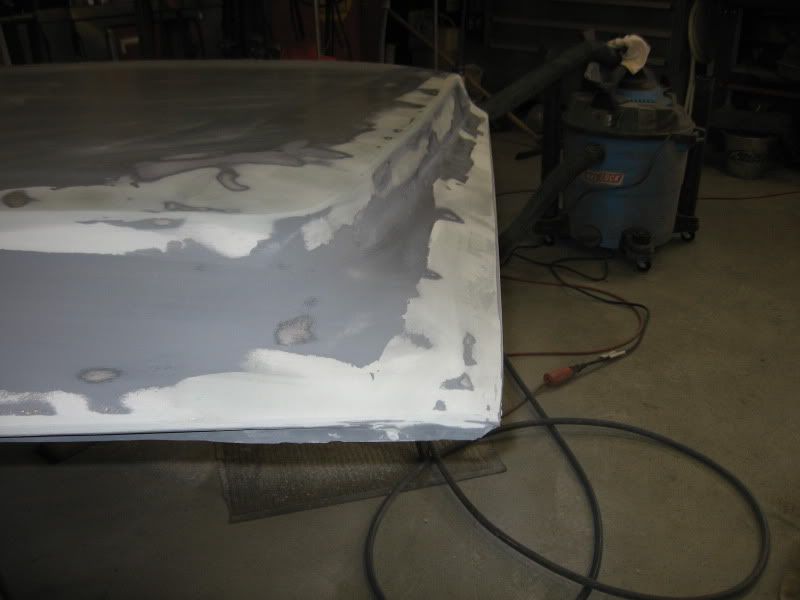 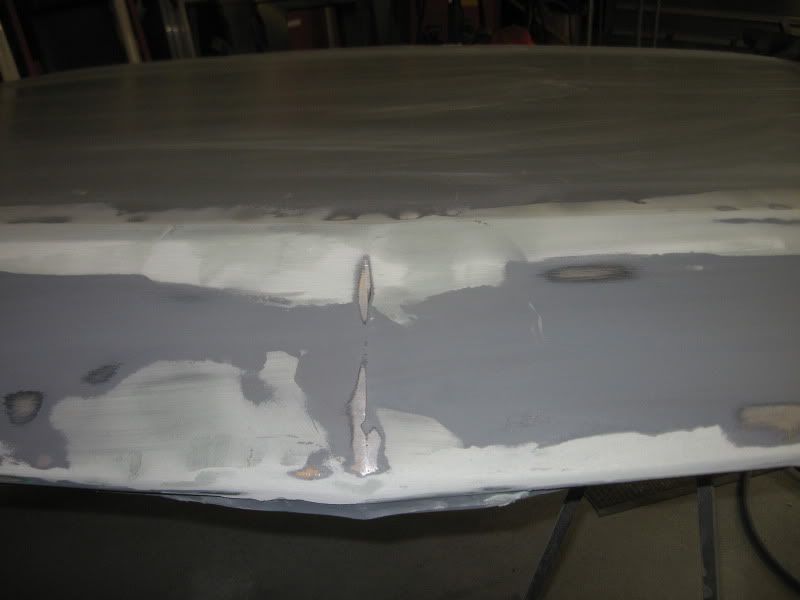 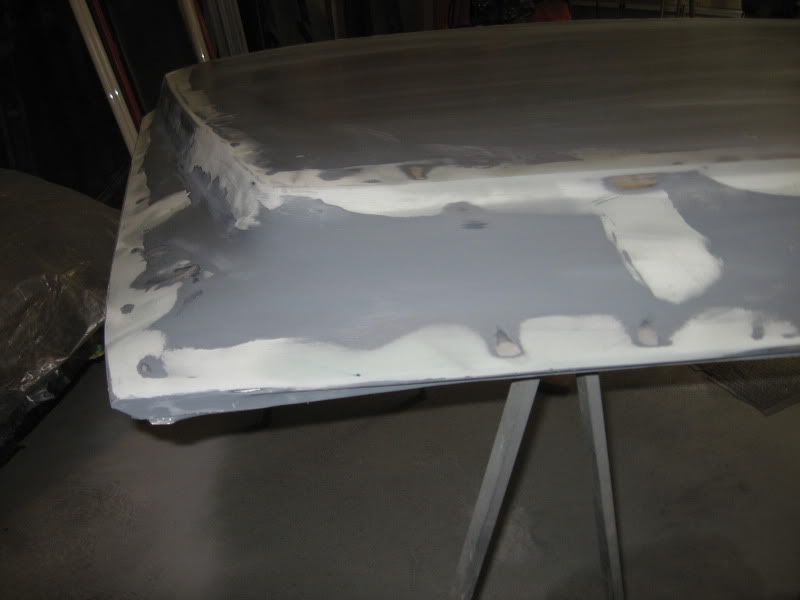 Primed again... 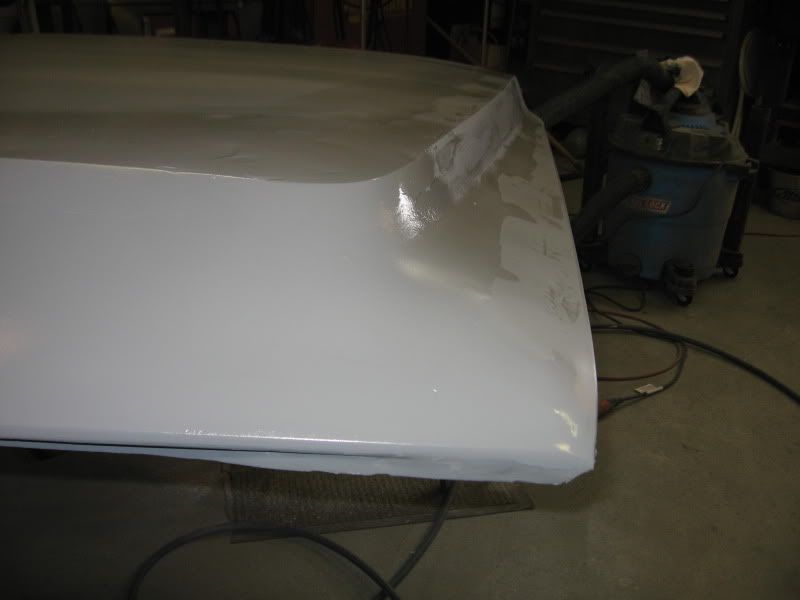 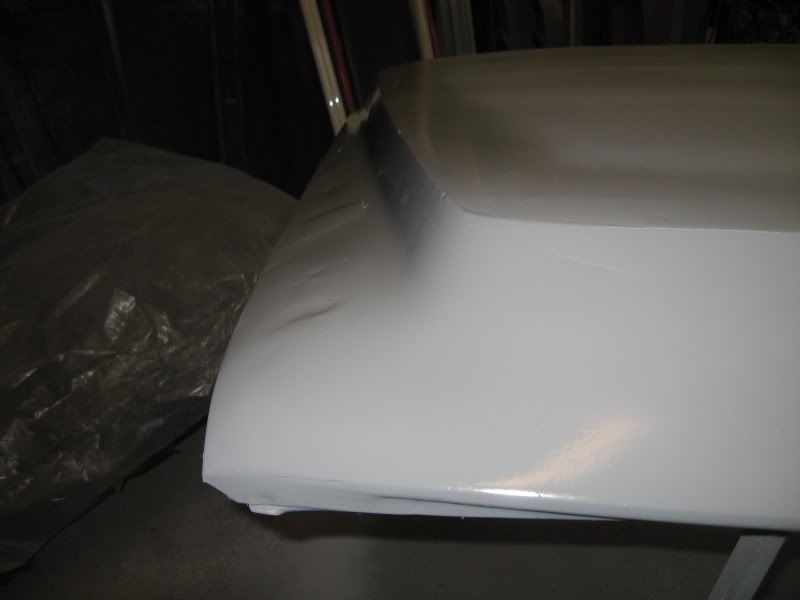
__________________
If no one knows what you're doing, they can't tell you you're doing it wrong HG's Dream Car Build - Shelby Cobra Kit Build your own adjustable track bar 71 Long Fleet C/10 72 Jimmy 4x4 (Junkyard Jimmy)HG's Plow Truck '78 K35 DuallyBigass Farm Truck HG's thread of miscellaneous stuff |
|
|
|
|
|
01-01-2013, 03:56 PM
|
#5 |
|
Registered User
Join Date: Dec 2004
Location: Gypsum Kansas 67448
Posts: 1,681
|
Re: Junkyard Jimmy Super Low Buck Build Thread
i do like the hood,,,good job
__________________
21 2500hd duramax 58 apache HILLJOB GRAPHIX--for all your graphic needs My build thread http://67-72chevytrucks.com/vboard/s...d.php?t=542497 LS ENGINE SWAP INFORMATION THREAD http://67-72chevytrucks.com/vboard/s...d.php?t=377348 4l60 to an NP205 http://67-72chevytrucks.com/vboard/s...43#post3697343 |
|
|
|
|
01-05-2013, 05:27 PM
|
#6 | |
|
GEARHEAD
Join Date: Aug 2003
Location: MN
Posts: 6,122
|
Re: Junkyard Jimmy Super Low Buck Build Thread
Quote:
Progress today looks much like the past. More sanding and filling. To change it up a bit I stripped the paint from the cowl and sprayed it with epoxy primer. It hardly needs any body work, so thats a plus. Stripped... 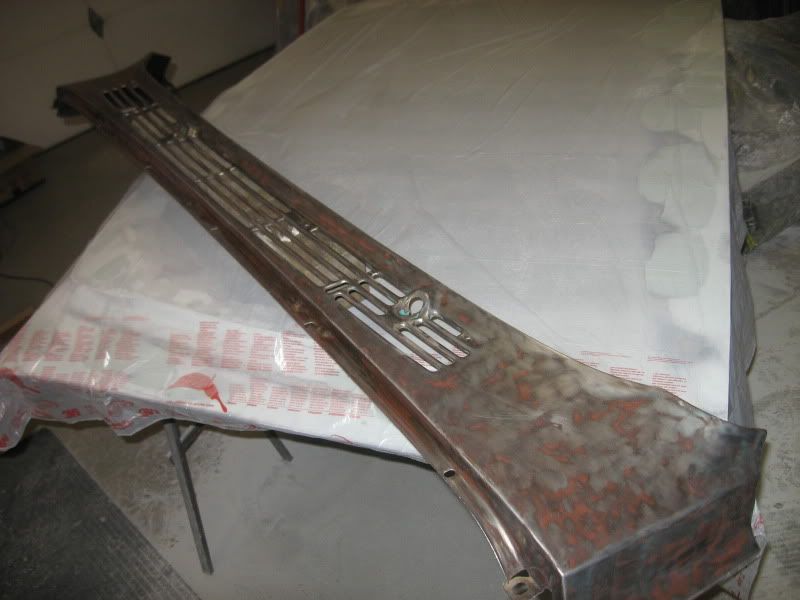 Primered... 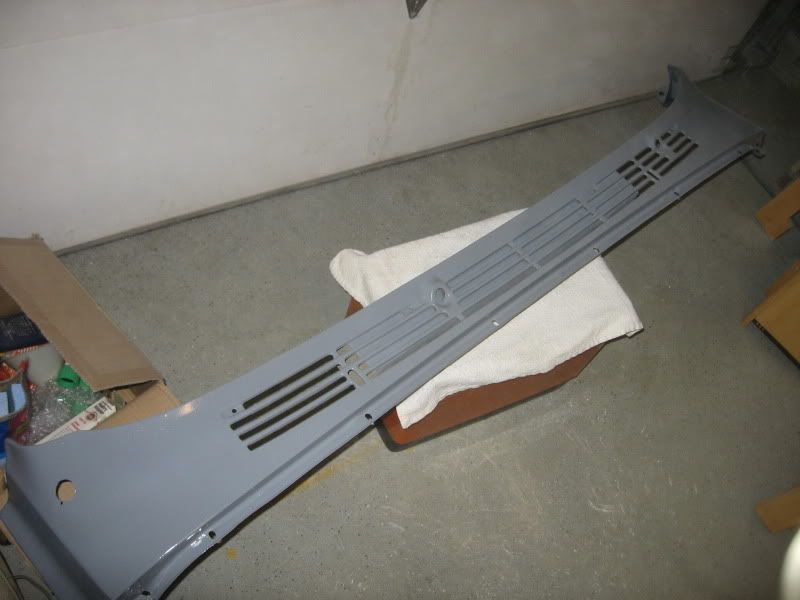 Before i did that though I checked out the fitment to the hood. Looks straight enough for me... 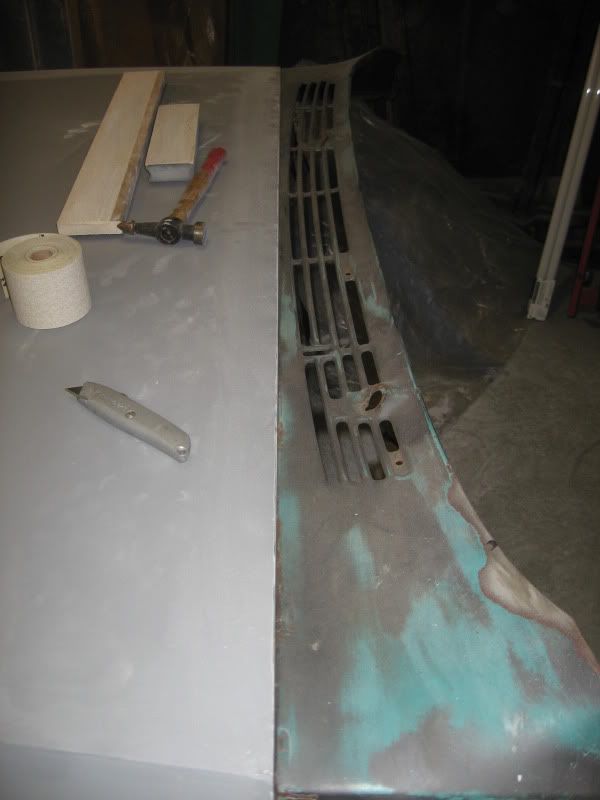 And I have the hood bodywork pretty much roughed in. I still have a couple small low spots to fill, maybe tap down a couple highs, but really it's close. Just a coat of glaze should finish it up. Then just more primer and blocking until it's smooth enough for paint. This is really the hardest part. Once you are at the blocking stage it goes pretty fast. So here's where I left it for the day... 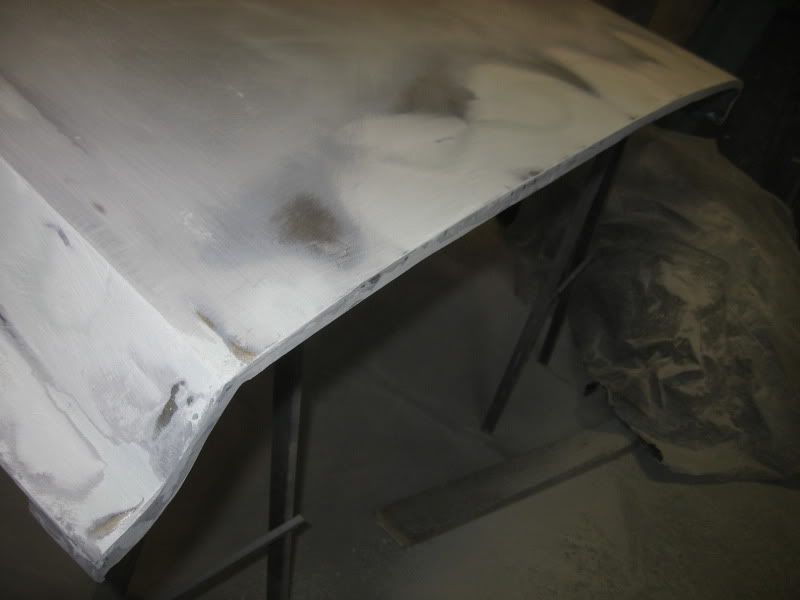 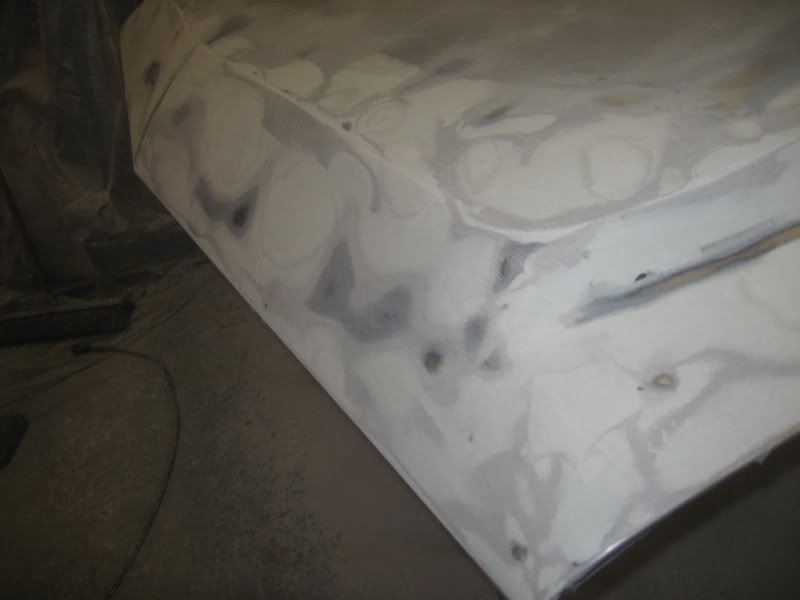 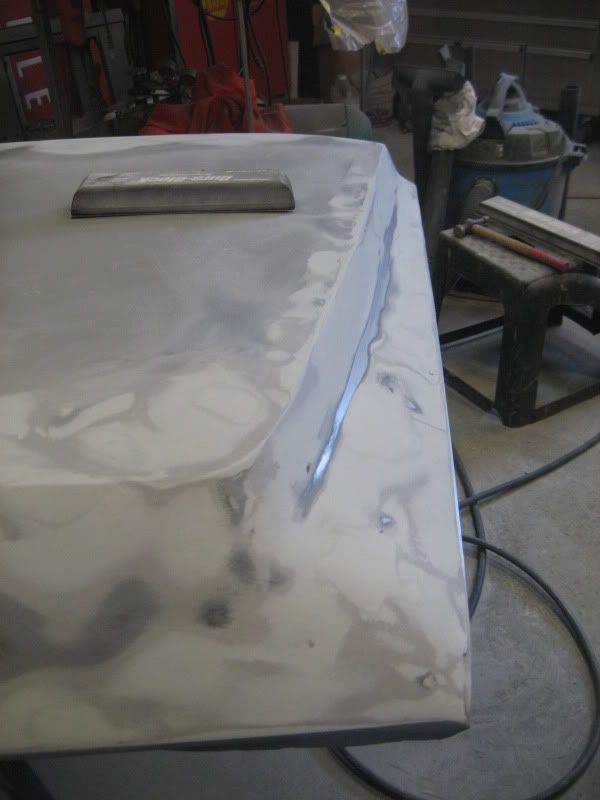 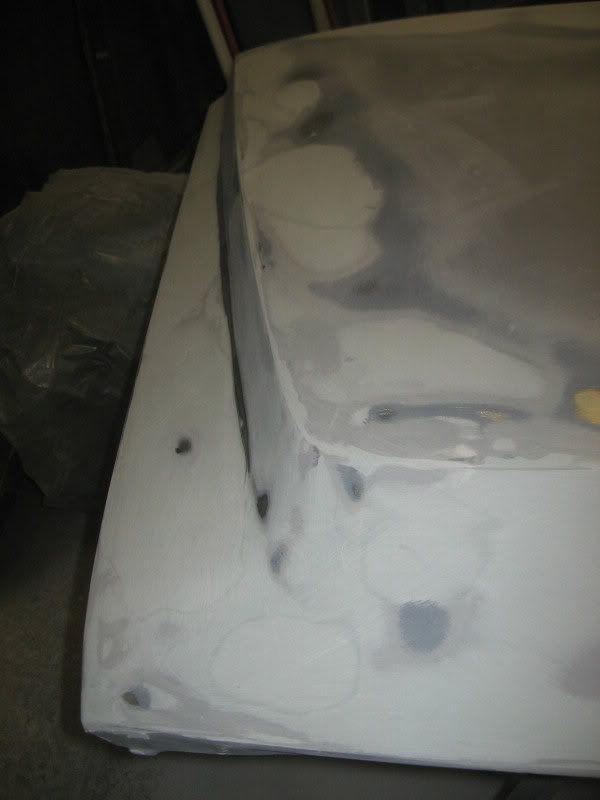 Go Vikings!
__________________
If no one knows what you're doing, they can't tell you you're doing it wrong HG's Dream Car Build - Shelby Cobra Kit Build your own adjustable track bar 71 Long Fleet C/10 72 Jimmy 4x4 (Junkyard Jimmy)HG's Plow Truck '78 K35 DuallyBigass Farm Truck HG's thread of miscellaneous stuff |
|
|
|
|
|
01-07-2013, 10:17 PM
|
#7 |
|
GEARHEAD
Join Date: Aug 2003
Location: MN
Posts: 6,122
|
Re: Junkyard Jimmy Super Low Buck Build Thread
Yesterday a put a coat of glaze filler over the front and back of the hood and a couple spots on the sides. I would have done all of the sides but I ran out and that was with the bottle of glaze I bought (the only one the parts store had). That sanded out real nice, but I didn't take a pic before I flipped the hood over to start putting in the sealer/adhesive which is used for the padding between the hood skin and bracing.
I used cardboard as a spacer to give the skin tension. I slide it over so it is on one side of the brace and fill the other side with the sealer. I let that set up until tonight, then slide the cardboard out or to a different spot and fill in the other side. This stuff sets up as firm but not hard. It acts like a glue between the skin and the braces. It also seals. Its paintable like the regular seam sealer. Now once this sets up good over the next couple days, I'll take out the cardboard and it'll be ready to spray with some fresh primer, and paint. There should be very little movement with the hood skin. It also helps that I used a heavier thickness of steel there that I believe is a harder grade and stiffer. I know it made the hood a bit heavier. I plan on weighing it and comparing the weight to my OEM hood. 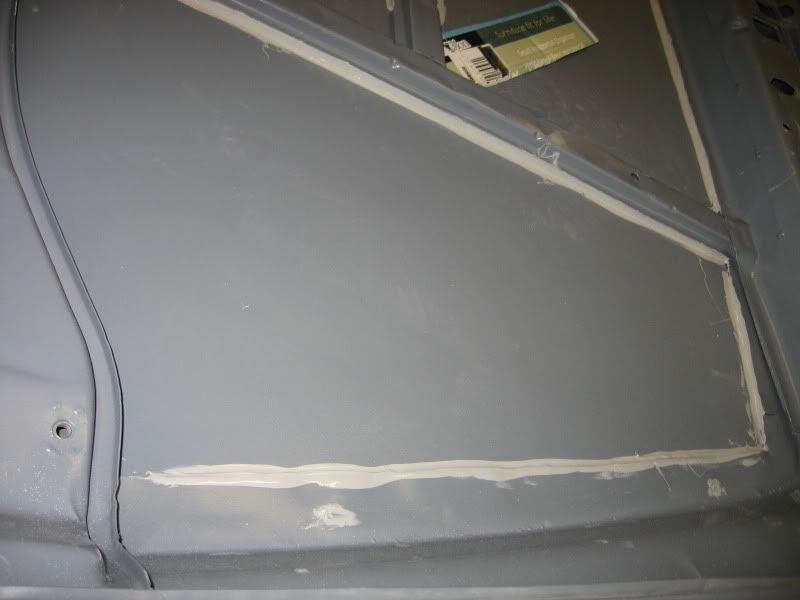 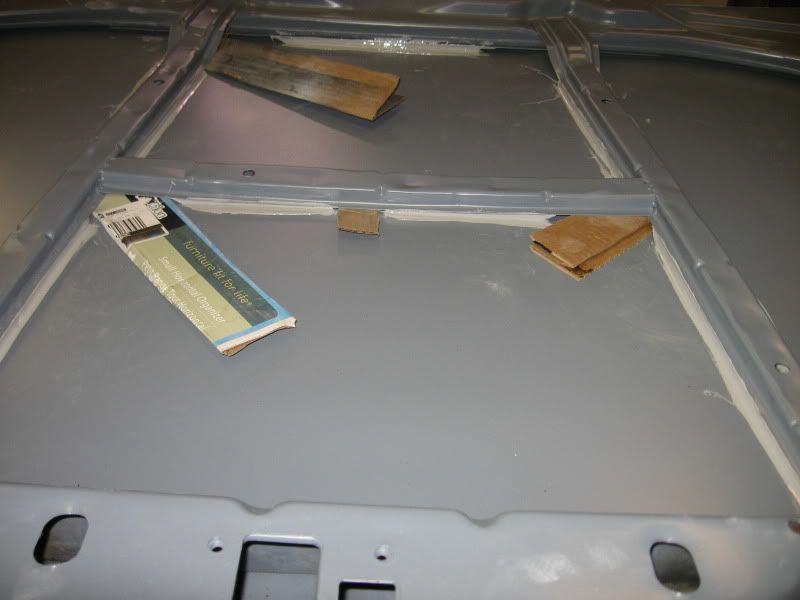 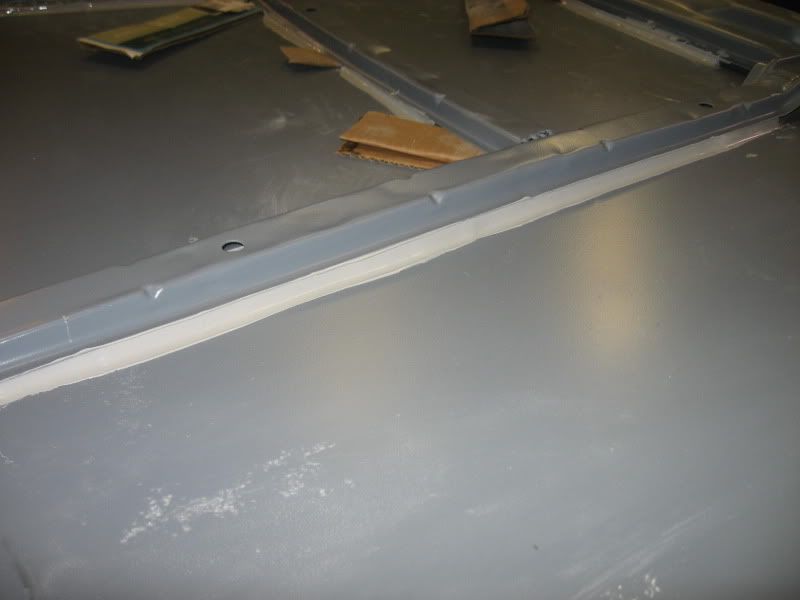
__________________
If no one knows what you're doing, they can't tell you you're doing it wrong HG's Dream Car Build - Shelby Cobra Kit Build your own adjustable track bar 71 Long Fleet C/10 72 Jimmy 4x4 (Junkyard Jimmy)HG's Plow Truck '78 K35 DuallyBigass Farm Truck HG's thread of miscellaneous stuff |
|
|
|
|
01-13-2013, 06:06 PM
|
#8 |
|
GEARHEAD
Join Date: Aug 2003
Location: MN
Posts: 6,122
|
Re: Junkyard Jimmy Super Low Buck Build Thread
More of the same, filling and sanding, filling and sanding...
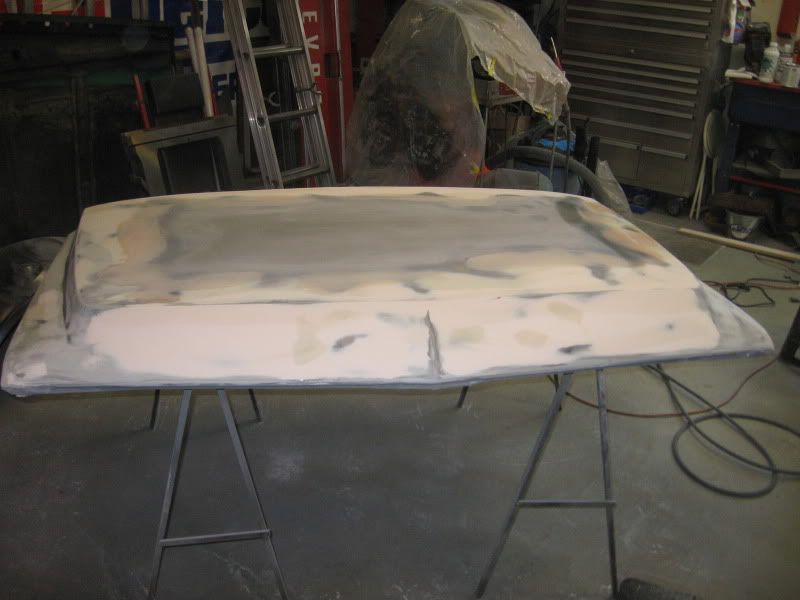 Couple of things I should comment on. That last pic is probably the 4th or 5th time I had added filler/glaze and sanded it out. I had some old metal glaze on the shelf that turned out to be unusable. Trashed that and made a quick run to the parts store. Now they have a very limited selection of glaze, which is basically a filler that is thinner and used for just leveling out some very shallow areas. Almost like a super thick high build primer. Napa had 2 kinds. One was the Bondo brand at about $25 for the small tub (finishing glaze 391). The other was an evercoat and was over $50 for a similar amount. This being a budget build and all I gave the bondo a shot. I actually really liked it. It spread well, set up well and was the easiest filler to sand I have ever had. Unfortunately they only had the one tub and it was gone after just 3 mixes on my board and about 20 minutes, and it wasn't enough to finish the job (hoods with welds all around the perimeter need a LOT of body work). So I was at walmart the other day and looking at their meager selection, and saw another bondo product, professional gold. At about $8 a qt (1/3 the price of the glaze) I figured I'd give it a shot. There is no requirement to use a glaze type product, it's just easier to spread a thin coat and sand than the typical poly filler. I tried that out yesterday and it worked just fine as a glaze substitute. Bondo is a 3m brand BTW, and I've had good luck with their stuff (and its a MN company, so I'm being provincial). Anyway, no matter how much sanding you do and how smooth you think you got your filler, etc. Once you spray over it with primer again it reveals all the little spots you missed with the sanding. This is not unexpected for me, just a word of warning for you guys that haven't been through this process. I also cleaned up the cowl panel and sprayed that with the high build primer. I ran out of primer, so that's it for today. I need to sand a few small spots, fill a few little divots, sand some more, keep spraying high build and eventually I'll have a sweet looking smooth and flat paint surface on my hood!  Then I get to do it all over again on the rest of the body panels...  End of the days progress pics... 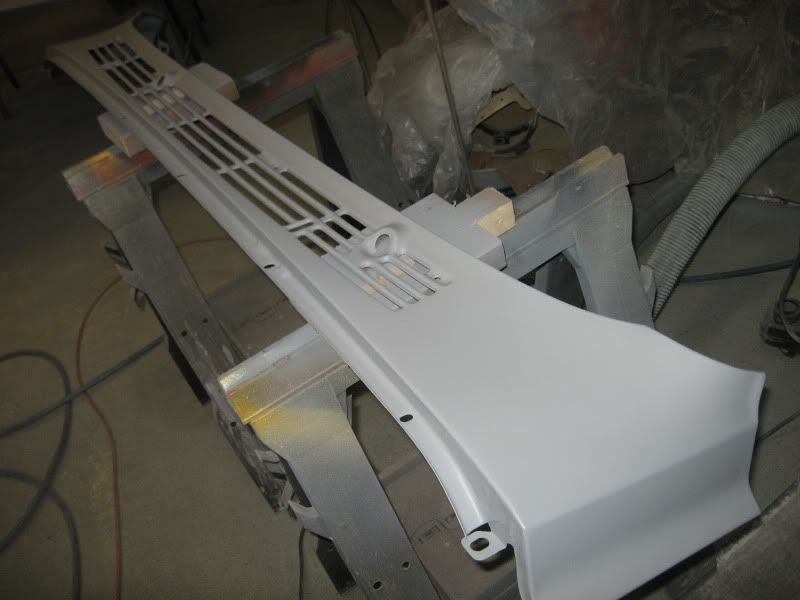 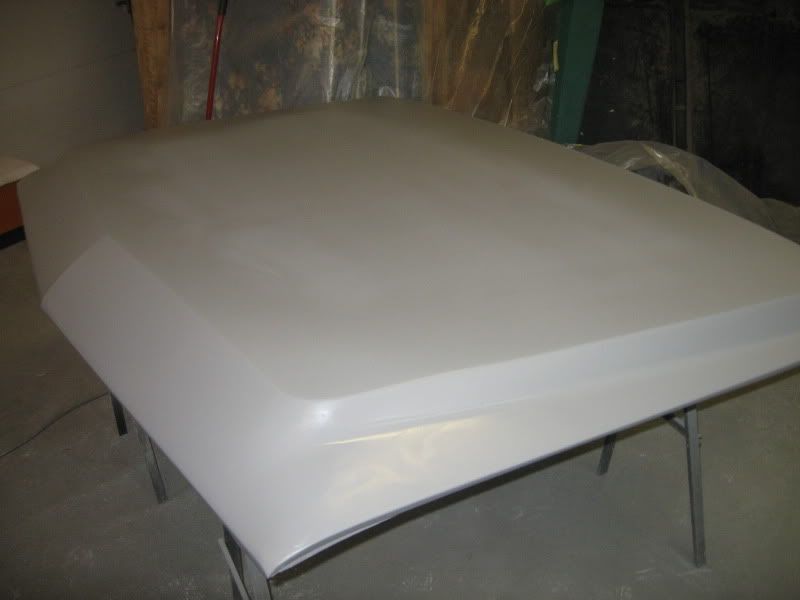 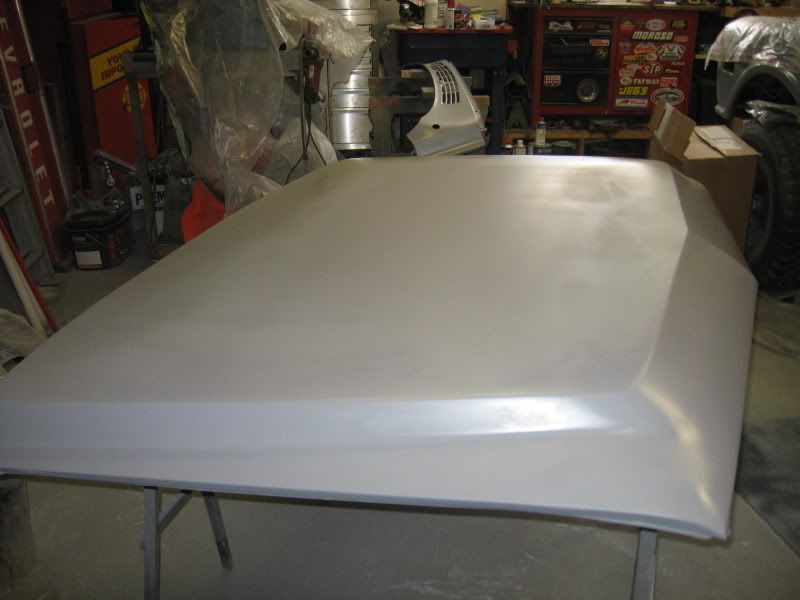
__________________
If no one knows what you're doing, they can't tell you you're doing it wrong HG's Dream Car Build - Shelby Cobra Kit Build your own adjustable track bar 71 Long Fleet C/10 72 Jimmy 4x4 (Junkyard Jimmy)HG's Plow Truck '78 K35 DuallyBigass Farm Truck HG's thread of miscellaneous stuff |
|
|
|
|
01-14-2013, 07:45 AM
|
#9 |
|
Registered User
Join Date: Nov 2007
Location: NLR, AR
Posts: 1,387
|
Re: Junkyard Jimmy Super Low Buck Build Thread
I would have never guessed you needed that much bondo.
|
|
|
|
|
01-14-2013, 09:08 AM
|
#10 |
|
Registered User
Join Date: Apr 2003
Location: Indep, MO
Posts: 5,893
|
Re: Junkyard Jimmy Super Low Buck Build Thread
Aaaaaaah! Flashbacks! Gray everywhere!
Looks great, keep pluggin'! Posted via Mobile Device
__________________
Boppa's Old Yeller Truck Build, Old Yeller's New Heart! Project Buzz Bomb Flyin' Low! |
|
|
|
|
01-14-2013, 09:25 AM
|
#11 | ||
|
GEARHEAD
Join Date: Aug 2003
Location: MN
Posts: 6,122
|
Re: Junkyard Jimmy Super Low Buck Build Thread
Quote:
Quote:
__________________
If no one knows what you're doing, they can't tell you you're doing it wrong HG's Dream Car Build - Shelby Cobra Kit Build your own adjustable track bar 71 Long Fleet C/10 72 Jimmy 4x4 (Junkyard Jimmy)HG's Plow Truck '78 K35 DuallyBigass Farm Truck HG's thread of miscellaneous stuff Last edited by hgs_notes; 02-23-2013 at 11:25 PM. |
||
|
|
|
|
01-14-2013, 09:35 AM
|
#12 | |
|
Registered User
Join Date: Apr 2003
Location: Indep, MO
Posts: 5,893
|
Re: Junkyard Jimmy Super Low Buck Build Thread
Quote:
Posted via Mobile Device
__________________
Boppa's Old Yeller Truck Build, Old Yeller's New Heart! Project Buzz Bomb Flyin' Low! |
|
|
|
|
|
01-14-2013, 01:12 PM
|
#14 |
|
Registered User
Join Date: Apr 2003
Location: Indep, MO
Posts: 5,893
|
Re: Junkyard Jimmy Super Low Buck Build Thread
Feather fill G2 primer. High build, low shrink. Great stuff!
Posted via Mobile Device
__________________
Boppa's Old Yeller Truck Build, Old Yeller's New Heart! Project Buzz Bomb Flyin' Low! |
|
|
|
|
01-14-2013, 02:23 PM
|
#15 |
|
Registered User
Join Date: Jun 2007
Location: Saskatoon, Saskatchewan,:
Posts: 2,901
|
Re: Junkyard Jimmy Super Low Buck Build Thread
Looking really good bud! I like the looks of the hood. Different but subtle. On a secondary note. Glad you cleaned up a bit. Must have been from looking at my shop. Sorry if I made you jealous.
 . Kidding. Mine is usually like yours too. Now I must try to keep it clean. I am gonna start on my 72 chev here real soon. Get the bodywork done and painted then sell it. Two tone red and white. I have to get some grime yet thou. . Kidding. Mine is usually like yours too. Now I must try to keep it clean. I am gonna start on my 72 chev here real soon. Get the bodywork done and painted then sell it. Two tone red and white. I have to get some grime yet thou.Posted via Mobile Device
__________________
James 1968 GMC "HAVOC" 1986 GMC "Frank" J.J.R.H. Design & Consulting My 68`Rebuild "HAVOC": http://67-72chevytrucks.com/vboard/s...d.php?t=316300 A 58' chev build thread: http://www.67-72chevytrucks.com/vboa...d.php?t=311238 1969 Camaro Pro Touring http://67-72chevytrucks.com/vboard/s...61#post3513361 Swiss Cheese: http://67-72chevytrucks.com/vboard/s...d.php?t=384390 Adjustable Trailing Arm How-To: http://67-72chevytrucks.com/vboard/s...d.php?t=321100 1968 Ford Farm Truck: http://67-72chevytrucks.com/vboard/s...=1#post6555587 |
|
|
|
|
01-14-2013, 08:38 PM
|
#16 | ||
|
GEARHEAD
Join Date: Aug 2003
Location: MN
Posts: 6,122
|
Re: Junkyard Jimmy Super Low Buck Build Thread
Quote:
Quote:
 I opened both garage doors yesterday and started blowing dust out. Even at 10 F it was needed. I opened both garage doors yesterday and started blowing dust out. Even at 10 F it was needed.Didn't know you had a 72, but did see pics of your cousins/nephews/? earlier 60's truck going into your garage I think. And you have the Chevelle, but I don't think you would do that in red/white 2 tone and sell it. Pics? As for budget, just spent $163 in more body work supplies. Spent another $65 or so the past week or 2 on more of the same. But sold my old console for $125, so that puts me up $103 to $4322.
__________________
If no one knows what you're doing, they can't tell you you're doing it wrong HG's Dream Car Build - Shelby Cobra Kit Build your own adjustable track bar 71 Long Fleet C/10 72 Jimmy 4x4 (Junkyard Jimmy)HG's Plow Truck '78 K35 DuallyBigass Farm Truck HG's thread of miscellaneous stuff |
||
|
|
|
|
01-15-2013, 12:19 AM
|
#17 | |
|
Registered User
Join Date: Apr 2003
Location: Indep, MO
Posts: 5,893
|
Re: Junkyard Jimmy Super Low Buck Build Thread
Quote:
Posted via Mobile Device
__________________
Boppa's Old Yeller Truck Build, Old Yeller's New Heart! Project Buzz Bomb Flyin' Low! |
|
|
|
|
|
01-15-2013, 12:42 AM
|
#18 |
|
Registered User
Join Date: Dec 2012
Location: North Carolina
Posts: 4,989
|
Re: Junkyard Jimmy Super Low Buck Build Thread
Great progress man
__________________
1971 GMC Sierra 1959 GMC 100 |
|
|
|
|
01-15-2013, 07:54 PM
|
#19 | |
|
GEARHEAD
Join Date: Aug 2003
Location: MN
Posts: 6,122
|
Re: Junkyard Jimmy Super Low Buck Build Thread
Quote:
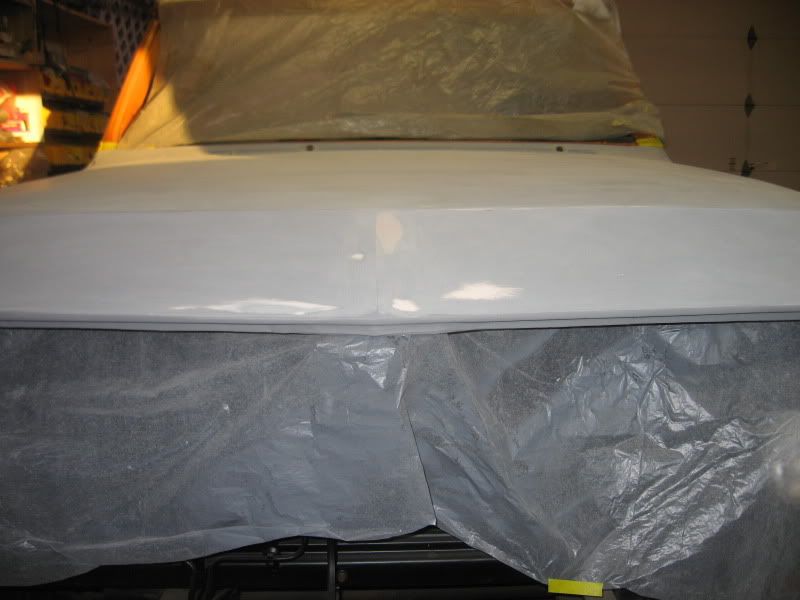
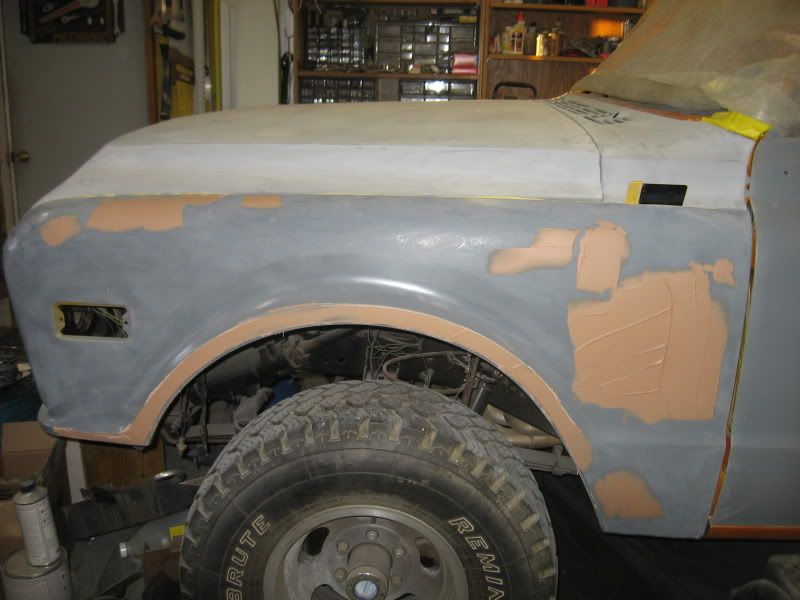
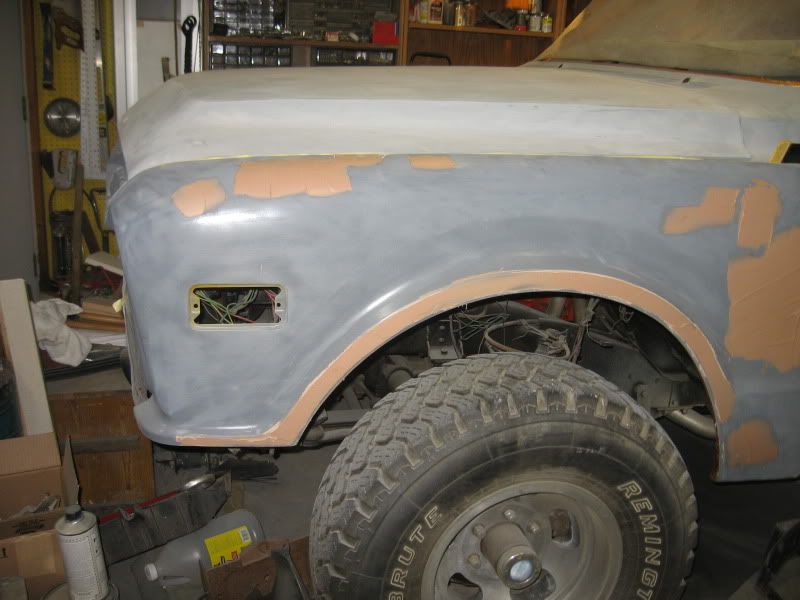
Finished with my work a little early today so I went out and sanded some more. After spraying the primer the other day I thought the hood kinda looked like crap. But after looking again today, to decide whether or not I needed to fill some spots before I moved forward, I decided it wasn't as bad as I thought. So I got the roll of 180 grit and moved on. Most of the spots I was concerned with sanded out. I ended up just using a tiny bit of filler in a few spots. I just finished sanding those out and it's ready for the next coat of primer and the next grit. It's actually looking real good. 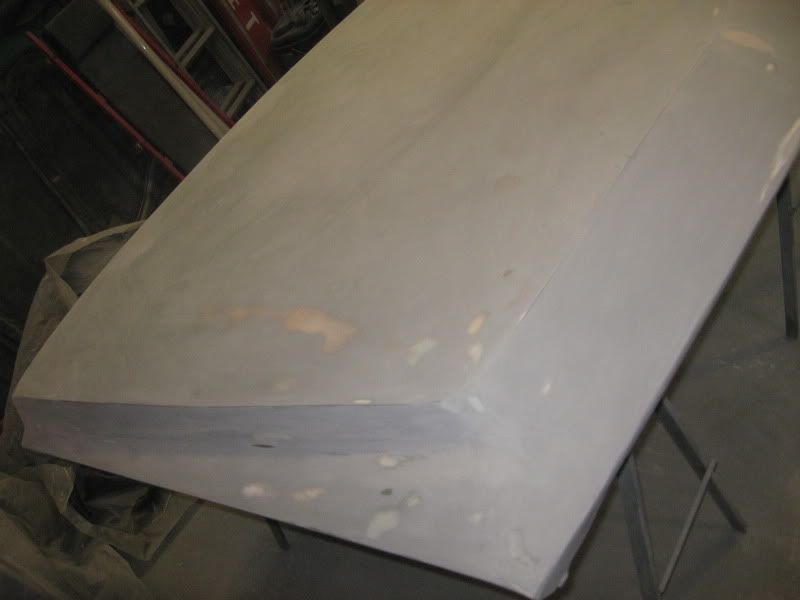  I also sanded the cowl with the 180. I really just sanded the ends with a flexible block, then did along the front and rear by hand, then just used a scuff pad on the vent bars. Then used it on the rest of it too. I could probably paint it as it is, but I'll probably spray a coat of primer and smooth it out the same as the rest of the truck. 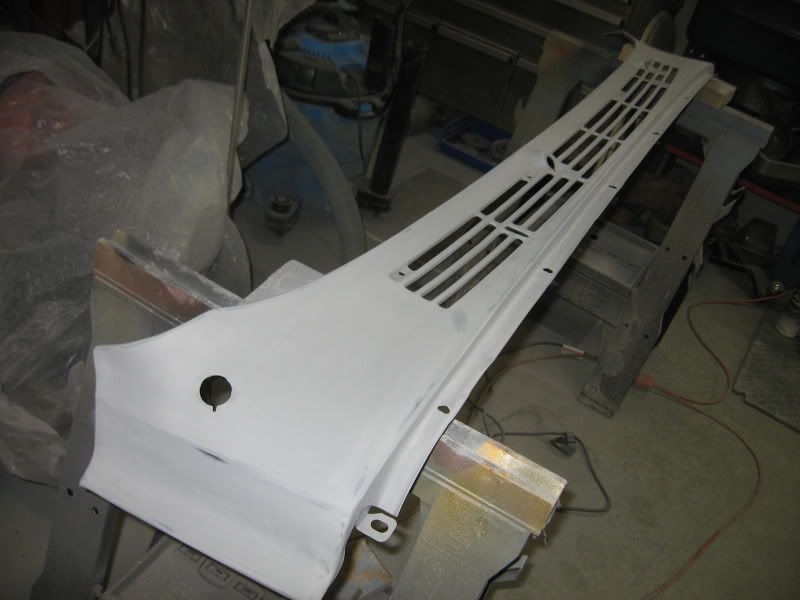 I scuffed the drivers fender with a short block just to find the obvious highs and lows. Smacked the highs down a bit, then I mixed up some filler and got the first layer of that on. (no pic) I'll sand it down another time. 4 hours of sanding is enough.
__________________
If no one knows what you're doing, they can't tell you you're doing it wrong HG's Dream Car Build - Shelby Cobra Kit Build your own adjustable track bar 71 Long Fleet C/10 72 Jimmy 4x4 (Junkyard Jimmy)HG's Plow Truck '78 K35 DuallyBigass Farm Truck HG's thread of miscellaneous stuff |
|
|
|
|
|
01-15-2013, 07:55 PM
|
#20 |
|
Registered User
Join Date: Dec 2012
Location: North Carolina
Posts: 4,989
|
Re: Junkyard Jimmy Super Low Buck Build Thread
Never get discouraged though !!!
Your doing great
__________________
1971 GMC Sierra 1959 GMC 100 |
|
|
|
|
01-18-2013, 06:54 PM
|
#21 |
|
GEARHEAD
Join Date: Aug 2003
Location: MN
Posts: 6,122
|
Re: Junkyard Jimmy Super Low Buck Build Thread
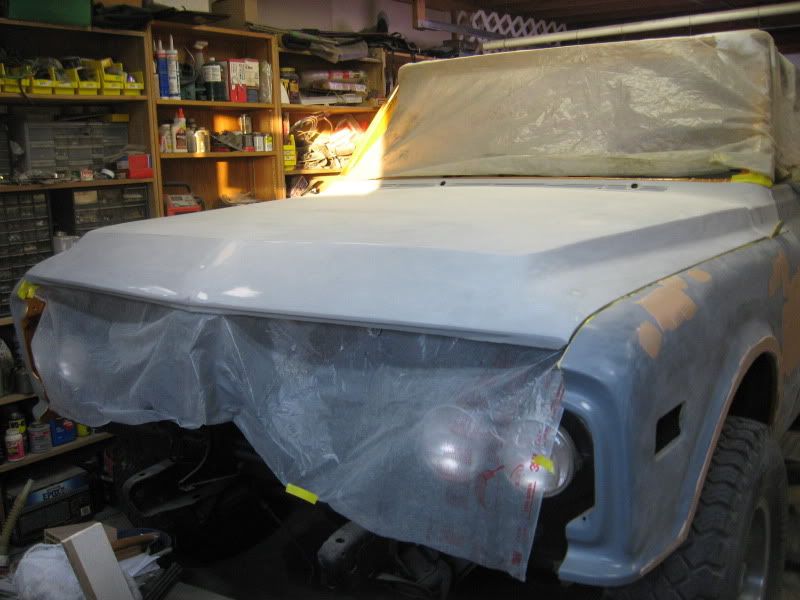
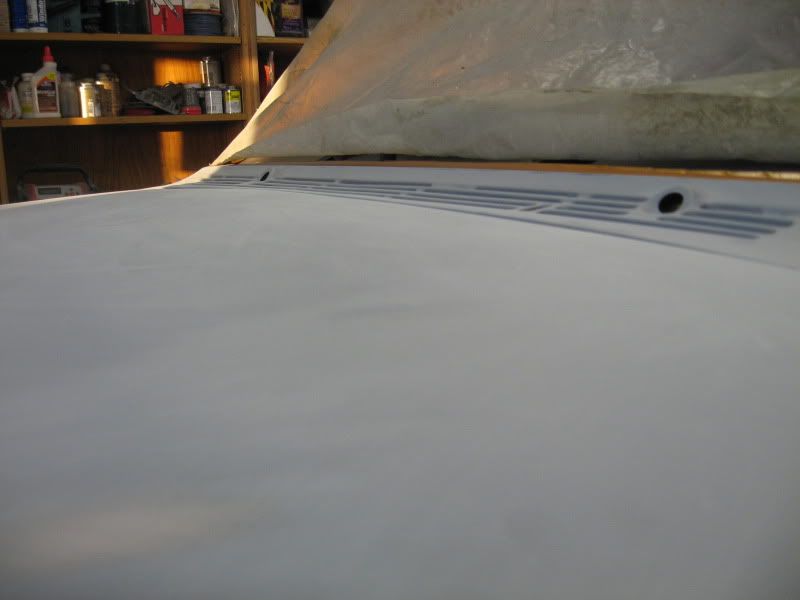
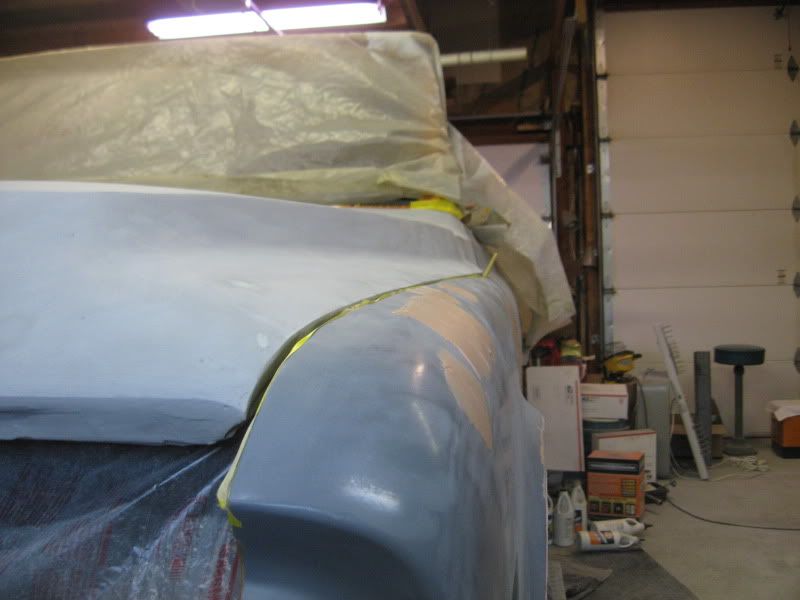
Took a few minutes and set the cowl and hood on the jimmy. Nothing is bolted down or really adjusted. I need to shift the radiator support to the left a smidge to square it up so the hood will settle in properly, but the initial fit looks pretty good. I was kinda worried more about the fit of the hood crown side to side to the cowl, but it was good.
__________________
If no one knows what you're doing, they can't tell you you're doing it wrong HG's Dream Car Build - Shelby Cobra Kit Build your own adjustable track bar 71 Long Fleet C/10 72 Jimmy 4x4 (Junkyard Jimmy)HG's Plow Truck '78 K35 DuallyBigass Farm Truck HG's thread of miscellaneous stuff |
|
|
|
|
01-18-2013, 07:18 PM
|
#22 |
|
6>8 Plugless........
 Join Date: Sep 2007
Location: Prairie City, Ia
Posts: 17,140
|
Re: Junkyard Jimmy Super Low Buck Build Thread
Your hood project turned out awesome! I know what you mean about putting it on and sanding it back off. It drives me nuts! But the end result is always worth it. Plus you save your self big bucks. Keep at it, it is looking great!
__________________
Ryan 1972 Chevy Longhorn K30 Cheyenne Super, 359 Inline 6 cylinder, Auto Trans, Tilt, Diesel Tach/Vach, Buckets, Rare Rear 4-link and air ride option Build Thread 1972 GMC Sierra Grande Longhorn 4x4 1972 Chevy Cheyenne Super K20 Long Step side tilt, tach, tow hooks, AC, 350 4 speed 1972 C10 Suburban Custom Deluxe 1969 Chevy milk truck 1971 Camaro RS 5.3 BTR STG3 Cam Super T10 1940 Ford 354 Hemi 46RH Ford 9" on air ride huge project Tired of spark plugs? Check this out. |
|
|
|
|
01-19-2013, 03:54 PM
|
#23 | |
|
GEARHEAD
Join Date: Aug 2003
Location: MN
Posts: 6,122
|
Re: Junkyard Jimmy Super Low Buck Build Thread
Quote:
As for sanding it back off, yeah, doing some more of that. Sanded the fender this morning, then sprayed a few more coats of primer on that and the door. The door will be next. Another body work chore I'm not fond of is taping. All the stuff that I already painted needs protection from the new coats of primer. PITA. Any way. Pic for the day. Might get back out there tomorrow for more of the same. 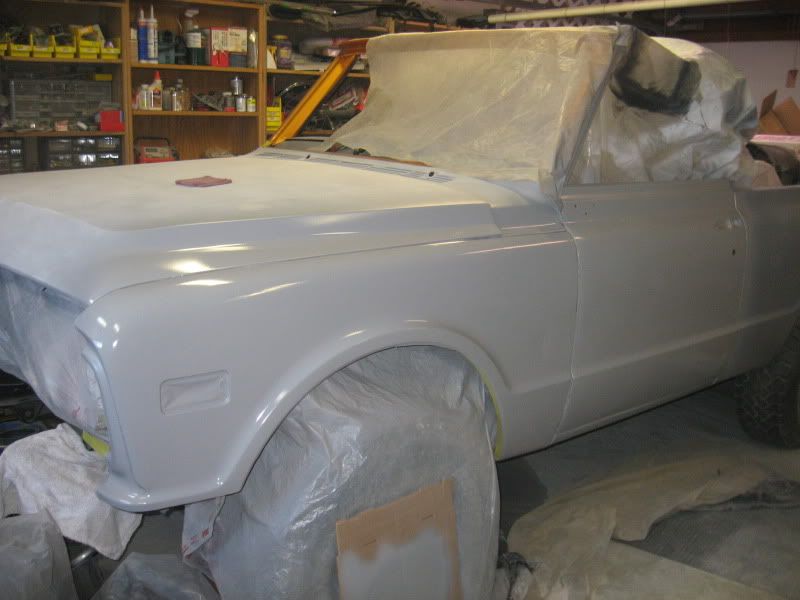
__________________
If no one knows what you're doing, they can't tell you you're doing it wrong HG's Dream Car Build - Shelby Cobra Kit Build your own adjustable track bar 71 Long Fleet C/10 72 Jimmy 4x4 (Junkyard Jimmy)HG's Plow Truck '78 K35 DuallyBigass Farm Truck HG's thread of miscellaneous stuff |
|
|
|
|
|
01-20-2013, 07:07 PM
|
#24 |
|
GEARHEAD
Join Date: Aug 2003
Location: MN
Posts: 6,122
|
Re: Junkyard Jimmy Super Low Buck Build Thread
More progress. Any guesses as to what I did?
Got the door and fender sanded again. I missed a couple very small spots I need to fill, but other than that they are both ready for primer and the final blocking. 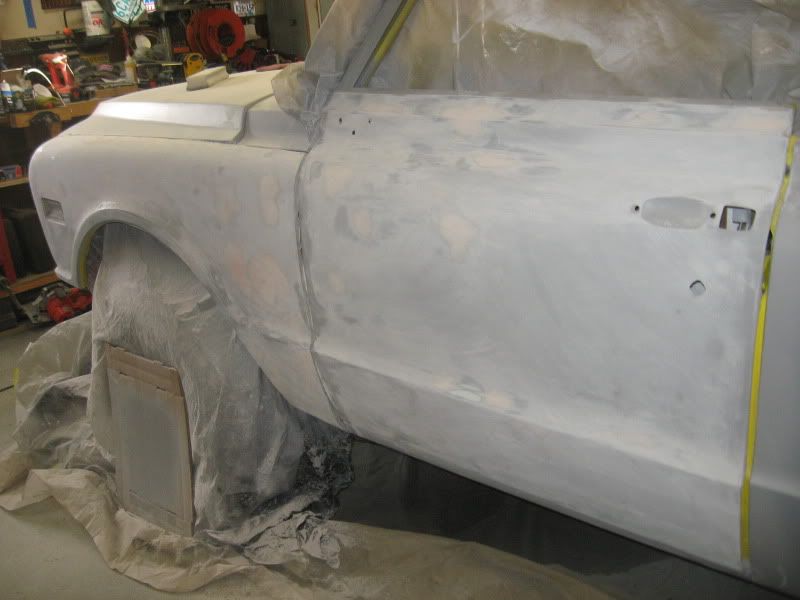 I was sick of sanding after that. My grill was sitting on the saw horses. I am getting ahead of my work flow here a bit. Won't be needing a grill for a while yet, but I've had a plan for a long time to try out some black chrome. After reading the reviews about the kit that is available I decided to go a different route based on some things I've read and learned from other members projects and elsewhere online. I took off one of the headlight bezels and cleaned it up with steel wool and some wax/grease remover (not at the same time). I had a little clear coat in a small can to use up, so I mixed that up like normal, then added a few drops of black tint. At first I thought oh crap, it turned completely black from just a few drops. Then I pulled out the mixer I was using which is shiny stainless steel and I could still see through the paint and see the steel. I have extra bezels around, so I decided to go for it and find out what happens. 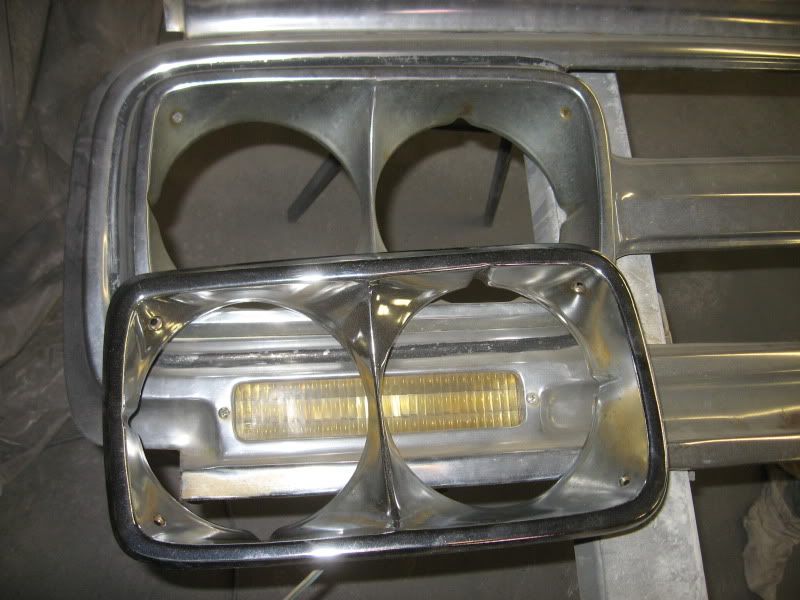 Not bad. In fact its about perfect. Just what I was going for. The pic doesn't really show it well because the flash made the black go away on the inner part, but you can see the grey around the edge, which is what the whole thing actually looks like. Better pics below. Note the nasty looking grill I'm starting with. While that was drying I started cleaning up the rest of the grill parts. Then the real test came. I needed to show the wife. She liked it, so time to move onward and keep cleaning parts. This pic is showing the bezel by the unpainted fender eyebrows. 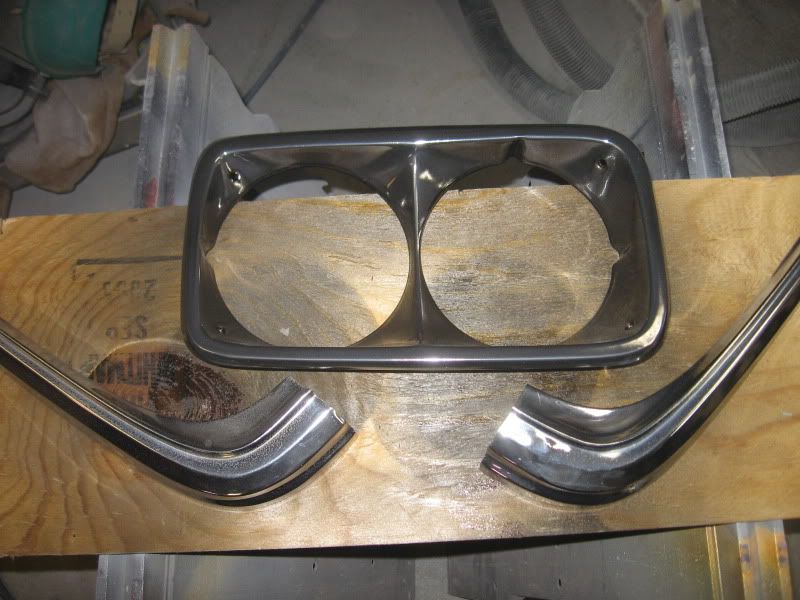 The rest of it... 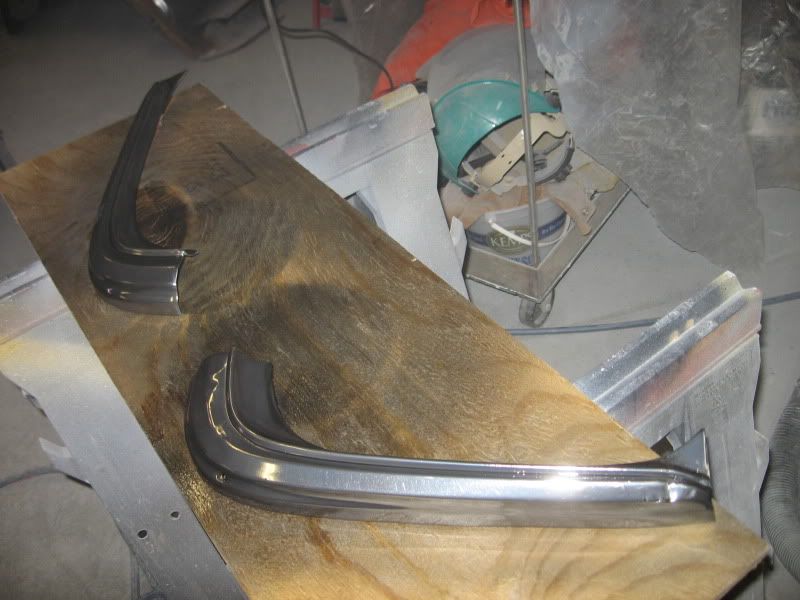 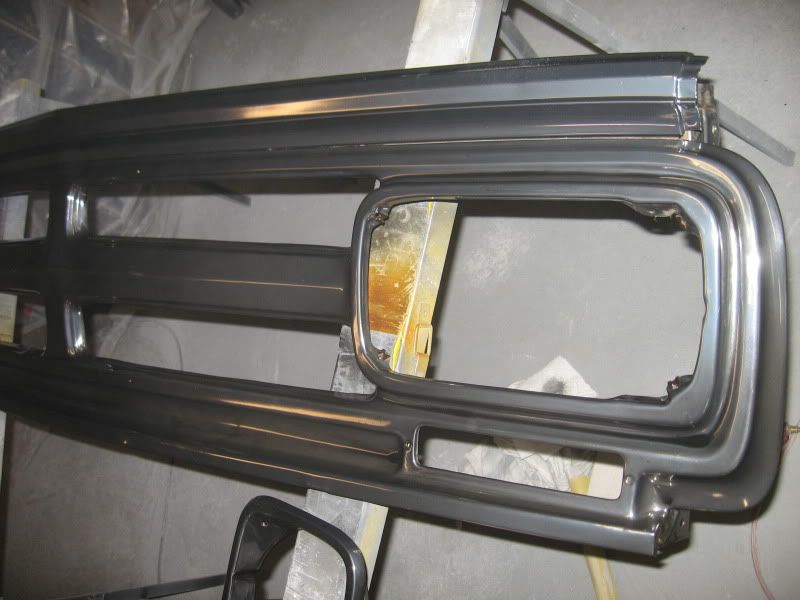 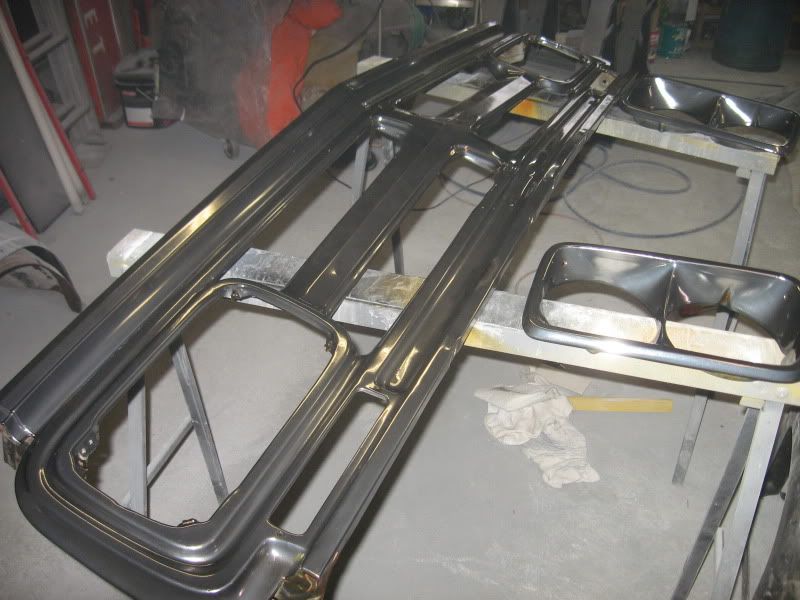
__________________
If no one knows what you're doing, they can't tell you you're doing it wrong HG's Dream Car Build - Shelby Cobra Kit Build your own adjustable track bar 71 Long Fleet C/10 72 Jimmy 4x4 (Junkyard Jimmy)HG's Plow Truck '78 K35 DuallyBigass Farm Truck HG's thread of miscellaneous stuff Last edited by hgs_notes; 01-20-2013 at 07:24 PM. |
|
|
|
|
01-20-2013, 09:12 PM
|
#25 |
|
Registered User
Join Date: Dec 2004
Location: Gypsum Kansas 67448
Posts: 1,681
|
Re: Junkyard Jimmy Super Low Buck Build Thread
thats pretty cool
__________________
21 2500hd duramax 58 apache HILLJOB GRAPHIX--for all your graphic needs My build thread http://67-72chevytrucks.com/vboard/s...d.php?t=542497 LS ENGINE SWAP INFORMATION THREAD http://67-72chevytrucks.com/vboard/s...d.php?t=377348 4l60 to an NP205 http://67-72chevytrucks.com/vboard/s...43#post3697343 |
|
|
|
 |
| Bookmarks |
|
|


 Semper Fi


 Hybrid Mode
