
|
|
|
 01-29-2012, 05:59 PM
|
#1 | ||
|
GEARHEAD
Join Date: Aug 2003
Location: MN
Posts: 6,121
|
Re: Over 25 Years Later, Finally My 71 C-10 Truck Build
Quote:
Quote:
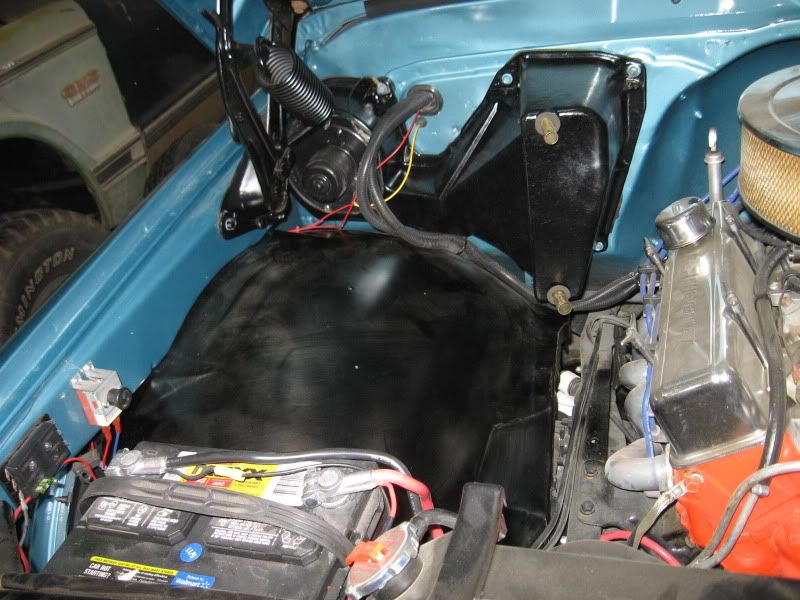 Now I just need to tidy up the wiring and clean it up. See the dust? The hazards of storing in the same garage where I'm stripping paint and sanding on my other project. Just saw signs of a small oil leak from the front of the intake manifold. Not bad, I'll just keep an eye on it for now. Here's a few glamour shots... Ignore the snowblower, hazards of living up north. 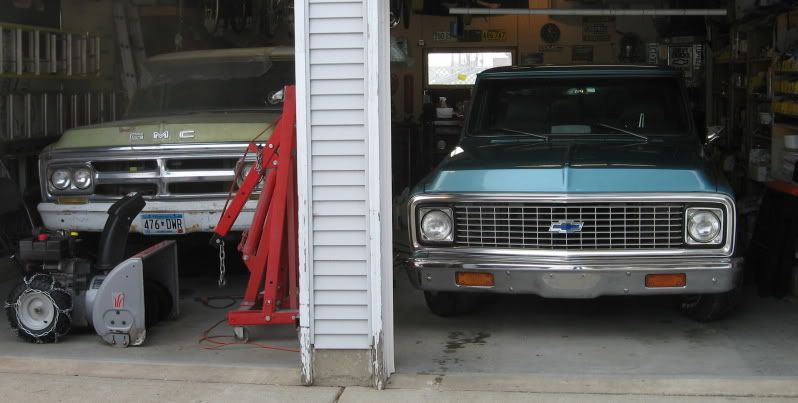 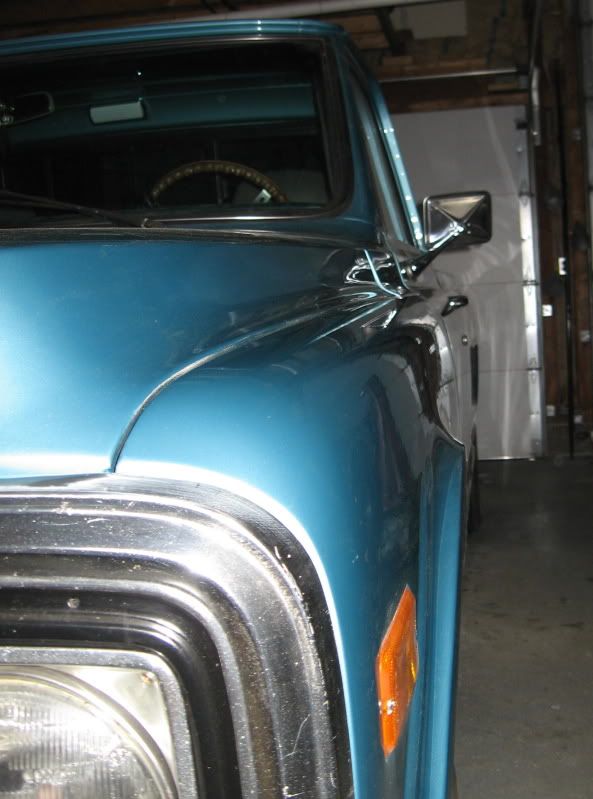 
__________________
If no one knows what you're doing, they can't tell you you're doing it wrong HG's Dream Car Build - Shelby Cobra Kit Build your own adjustable track bar 71  Long Fleet C/10 Long Fleet C/10 72  Jimmy 4x4 (Junkyard Jimmy) Jimmy 4x4 (Junkyard Jimmy)HG's Plow Truck '78  K35 Dually K35 DuallyBigass Farm Truck HG's thread of miscellaneous stuff |
||

|

|
|
01-29-2012, 06:06 PM
|
#2 |
|
VA72C10
 Join Date: Mar 2008
Location: Midlothian, VA
Posts: 25,269
|
Re: Over 25 Years Later, Finally My 71 C-10 Truck Build
The dust is a real pain, isn't it? I remember when finishing my blazer how annoyed I'd get with the sanding dust....even after putting plastic and taping off the finished engine bay it was covered by the time I un-taped it....and it's not like pollen or normal dust...it sticks to it and smears...fun stuff
 Nice looking pair of vehicles 
__________________
Looking for a 67-72 swb or blazer project in or around VA.
|
|
|
|
|
01-29-2012, 06:16 PM
|
#3 |
|
GEARHEAD
Join Date: Aug 2003
Location: MN
Posts: 6,121
|
Re: Over 25 Years Later, Finally My 71 C-10 Truck Build
It is a nice pair isn't it? I'm very fortunate, beyond this pair of projects.
I'm thinking swiffer for dusting.
__________________
If no one knows what you're doing, they can't tell you you're doing it wrong HG's Dream Car Build - Shelby Cobra Kit Build your own adjustable track bar 71 Long Fleet C/10 72 Jimmy 4x4 (Junkyard Jimmy)HG's Plow Truck '78 K35 DuallyBigass Farm Truck HG's thread of miscellaneous stuff |
|
|
|
|
01-29-2012, 06:38 PM
|
#4 |
|
VA72C10
Join Date: Mar 2008
Location: Midlothian, VA
Posts: 25,269
|
Re: Over 25 Years Later, Finally My 71 C-10 Truck Build
swifter will help. I actually used a cheap version of those california car duster wand things on mine in between thorough cleanings and it did fairly well and never scratched the paint or chrome...
__________________
Looking for a 67-72 swb or blazer project in or around VA.
|
|
|
|
|
01-29-2012, 06:56 PM
|
#5 |
|
Registered User
Join Date: Jul 2011
Location: Des Moines, Iowa
Posts: 3,016
|
Re: Over 25 Years Later, Finally My 71 C-10 Truck Build
In between segments - an air hose w/gun works nice too.
__________________
project: "my happy mess" |
|
|
|
|
02-04-2012, 11:44 AM
|
#6 |
|
GEARHEAD
Join Date: Aug 2003
Location: MN
Posts: 6,121
|
Re: Over 25 Years Later, Finally My 71 C-10 Truck Build
No major update, just details. Replaced the spark plug wires on the driver side so I could route them through the loom properly and around the back like the other side is.
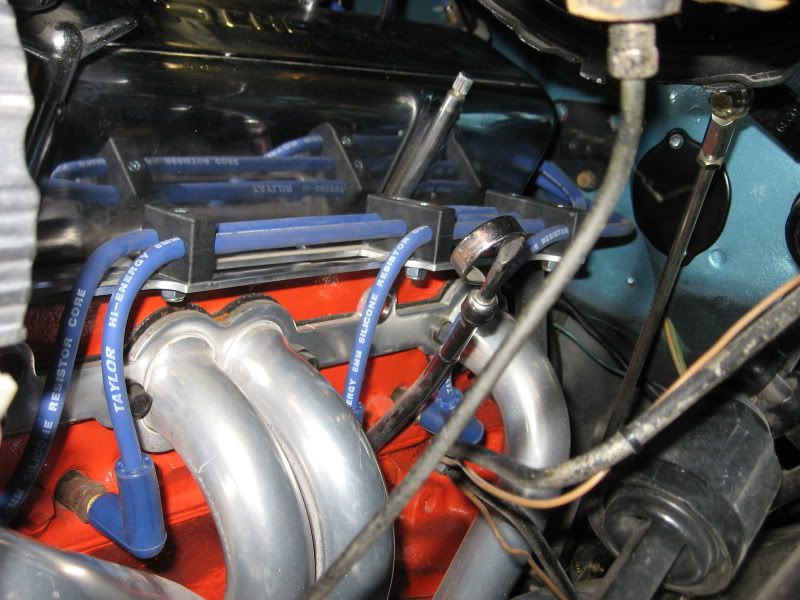 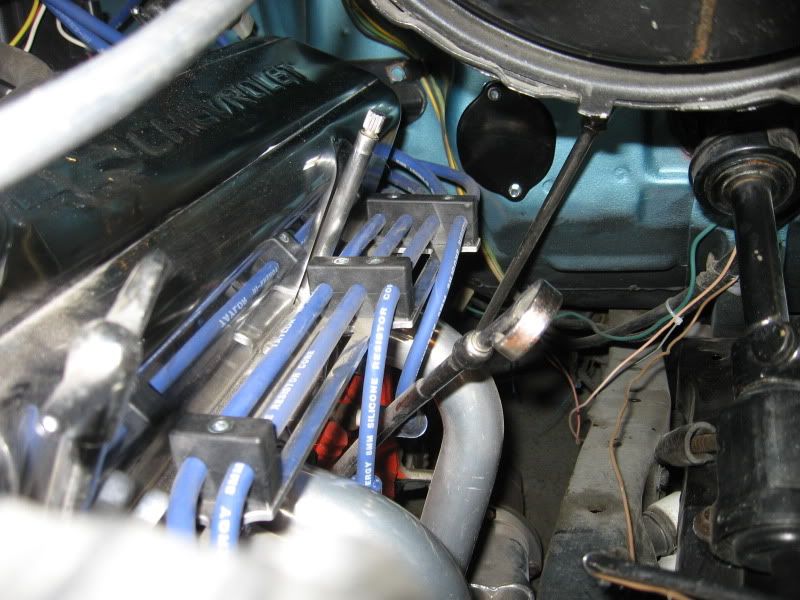 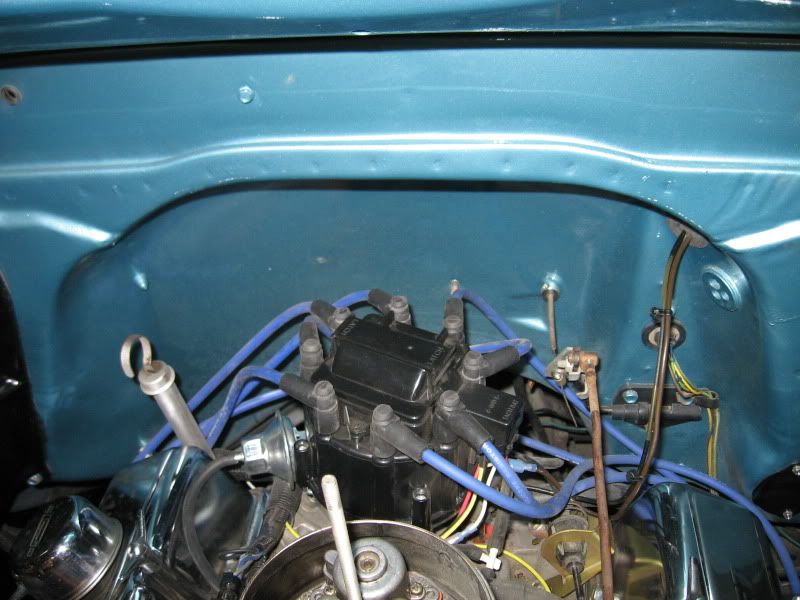 The swiffer worked pretty good picking up the dust where ever I could fit it. Under the hood I have some details to take care of yet. Need to paint the bolt ends and scratches in the black paint, wrap some wires, paint the throttle linkage rod, get a nicer looking air cleaner, etc. The biggest projects there are building/buying a good fan mount and rewire the headlights and fans with relays. I'm going to upgrade the headlights to the newer style like this or one similar... http://www.summitracing.com/parts/HLA-002395301/ Punch list: Polish other wheels headlight upgrade fan/headlight wiring upgrade adjust e-brake cable horn Cowl shims Washer pump finish exhaust install closed loop sensor upholstory recovered alignment air cleaner touch up paint under hood replace grill and front bumper stereo (eventually)
__________________
If no one knows what you're doing, they can't tell you you're doing it wrong HG's Dream Car Build - Shelby Cobra Kit Build your own adjustable track bar 71 Long Fleet C/10 72 Jimmy 4x4 (Junkyard Jimmy)HG's Plow Truck '78 K35 DuallyBigass Farm Truck HG's thread of miscellaneous stuff Last edited by hgs_notes; 02-04-2012 at 11:49 AM. |
|
|
|
|
02-04-2012, 06:28 PM
|
#7 |
|
Registered User
Join Date: Dec 2011
Location: Germanton, NC
Posts: 61
|
Re: Over 25 Years Later, Finally My 71 C-10 Truck Build
I like the headlights! Do you have to run a relay or will the factory wiring suffice? Your truck is coming together fast and its sweet!!!
__________________
Link to my 69 Camaro 6.0/T56 swap: http://ls1tech.com/forums/conversion...69-camaro.html |
|
|
|
|
02-06-2012, 12:48 PM
|
#8 | |
|
PITbut
Join Date: Sep 2007
Location: monroe washington
Posts: 3,042
|
Re: Over 25 Years Later, Finally My 71 C-10 Truck Build
Quote:
I know its not a requirement, but it should be. Adding the relays is very easy and the light difference is pretty significant.
__________________
New project. 1971 Twin Turbo blazer http://67-72chevytrucks.com/vboard/s...d.php?t=676047 My new YOUTUBE channel.. Videos of my truck and a current walk around. Lyrikz74 Youtube channel DONE! SOLD!  My 1971 stepside build thread My Build Thread UPDATED 6/11. DONE and sold. |
|
|
|
|
|
02-04-2012, 06:54 PM
|
#9 |
|
Registered User
Join Date: Mar 2006
Location: massachusetts
Posts: 180
|
Re: Over 25 Years Later, Finally My 71 C-10 Truck Build
I just came across your restoration. Nice work. Your story is not much different than mine. My father bought my truck new in 72 and gave it to me when I was 16. He is gone now but I was determined to bring it back the way he bought it. Here is my build. It is not quite complete but plan on finishing it this spring.
http://www.flickr.com/photos/waltsprojects/
__________________
I know I can! I know i can! 72 K20 Restoration |
|
|
|
|
02-04-2012, 09:51 PM
|
#10 | ||
|
GEARHEAD
Join Date: Aug 2003
Location: MN
Posts: 6,121
|
Re: Over 25 Years Later, Finally My 71 C-10 Truck Build
Quote:
Quote:
__________________
If no one knows what you're doing, they can't tell you you're doing it wrong HG's Dream Car Build - Shelby Cobra Kit Build your own adjustable track bar 71 Long Fleet C/10 72 Jimmy 4x4 (Junkyard Jimmy)HG's Plow Truck '78 K35 DuallyBigass Farm Truck HG's thread of miscellaneous stuff |
||
|
|
|
|
02-05-2012, 06:33 AM
|
#11 |
|
Registered User
Join Date: Mar 2006
Location: massachusetts
Posts: 180
|
Re: Over 25 Years Later, Finally My 71 C-10 Truck Build
I was wondering since you have put it back together was there an order of operations that worked in the restoration. What I mean is that My truck is basically naked besides the engine and trans, body work is done,what should I do next or does it matter?
__________________
I know I can! I know i can! 72 K20 Restoration |
|
|
|
|
02-05-2012, 10:04 AM
|
#12 | |
|
GEARHEAD
Join Date: Aug 2003
Location: MN
Posts: 6,121
|
Re: Over 25 Years Later, Finally My 71 C-10 Truck Build
Quote:
One of the biggest things to remember is painting the hardware. Basically every part you put back on has to have the bolts and screws found, cleaned and possibly painted. If I had it to do over again I would get a large piece of cardboard, pop holes in it to hold every bolt I was going to need painted and clean and spray them all at once. Don't use rustoleum if you plan on assembling the part that day, it takes too long to cure. I used another brand that had a faster set time. I ususally started by cleaning every bolt on the wire wheel of my bench grinder holding them with a vise grips, then put them in a cup or bowl and sprayed with brake cleaner. Then put them on the cardboard and sprayed them. Wait a couple hours and then I could assemble. Tedious work no matter how you do it. I considered getting a rock tumbler from harbor freight for cleaning the bolts and I still ight do that for a future build. In the cab I worked from the firewall outward. Sound deadener, then the heater, wiper motor wire, wire harness and heater hoses, then the rest of the dash. Remember the radio goes in before the ash tray and heater controls. The dash pad is easier to bolt down with the glove box and gauge cluster out. Steering column is hanging loose until the end. Then you do the shifter linkage if column mounted. Glass is last. The doors are kind of a pain, the wing window is the hard part. Getting it in without scratching the new paint. Use tape on the edges, layers of it. I have the steps listed back in the thread somewhere. I think the hardest part of the build for me was panel alignment. I did the doors before paint and was happy with the fit. It took a day or so to get it right. I didn't take them off for painting. The front fenders I punched small alignment marks on the cowl before I pulled them off for paint. I kept the radiator support loose on the frame until I was fitting the hood. The cowl was a pain for alignment, but needs to be on for the hood to reference from. Then the grill and the bumpers last. These trucks are pretty simple and its not that hard to go back and drop something out to get to another part. Many days I just did what I could where I wouldn't get too dirty, or because I just wanted to finish a particular area up. Another tip on the wiring, you need good grounds and everything is painted, so don't forget to scratch some off where the grounds go. It took me a weekend to dismantle it and I'm still working on assembly since August.
__________________
If no one knows what you're doing, they can't tell you you're doing it wrong HG's Dream Car Build - Shelby Cobra Kit Build your own adjustable track bar 71 Long Fleet C/10 72 Jimmy 4x4 (Junkyard Jimmy)HG's Plow Truck '78 K35 DuallyBigass Farm Truck HG's thread of miscellaneous stuff |
|
|
|
|
|
02-05-2012, 11:28 AM
|
#13 | |
|
Registered User
Join Date: Mar 2006
Location: massachusetts
Posts: 180
|
Re: Over 25 Years Later, Finally My 71 C-10 Truck Build
Quote:
Walt
__________________
I know I can! I know i can! 72 K20 Restoration |
|
|
|
|
|
02-05-2012, 02:31 PM
|
#14 | |
|
GEARHEAD
Join Date: Aug 2003
Location: MN
Posts: 6,121
|
Re: Over 25 Years Later, Finally My 71 C-10 Truck Build
Quote:
__________________
If no one knows what you're doing, they can't tell you you're doing it wrong HG's Dream Car Build - Shelby Cobra Kit Build your own adjustable track bar 71 Long Fleet C/10 72 Jimmy 4x4 (Junkyard Jimmy)HG's Plow Truck '78 K35 DuallyBigass Farm Truck HG's thread of miscellaneous stuff |
|
|
|
|
|
02-10-2012, 08:22 AM
|
#15 | |
|
Registered User
Join Date: Mar 2006
Location: massachusetts
Posts: 180
|
Re: Over 25 Years Later, Finally My 71 C-10 Truck Build
Quote:
__________________
I know I can! I know i can! 72 K20 Restoration |
|
|
|
|
|
03-07-2012, 02:04 PM
|
#16 |
|
GEARHEAD
Join Date: Aug 2003
Location: MN
Posts: 6,121
|
Re: Over 25 Years Later, Finally My 71 C-10 Truck Build
Been a while since I updated here. Mostly been working on the Jimmy, but spring is coming and I want to work on finishing up some of my loose threads on this one. I ordered some Als Liner for the bed and just received a pair of these from Summit.
 2.5" mandrel bent stainless universal tailpipes. I really have no idea yet how they will fit, but at just over $50 each and free shipping it was worth it just to get prebent stainless tubing. I decided that I would try welding up the exhaust system myself. I have a Pypes universal cross pipe on it now with some flowmasters hanging on that I have used just for driving around on. I know I need to modify that to fit the way I want, then get the tailpipes situated, then I can determine what I'll need to connect the front to the back pipes to finish it up. So there should be more progress posted here in the next month or so. Sure wish I had a lift right now. Jack stands will have to do.
__________________
If no one knows what you're doing, they can't tell you you're doing it wrong HG's Dream Car Build - Shelby Cobra Kit Build your own adjustable track bar 71 Long Fleet C/10 72 Jimmy 4x4 (Junkyard Jimmy)HG's Plow Truck '78 K35 DuallyBigass Farm Truck HG's thread of miscellaneous stuff |
|
|
|
|
03-07-2012, 02:15 PM
|
#17 |
|
PITbut
Join Date: Sep 2007
Location: monroe washington
Posts: 3,042
|
Re: Over 25 Years Later, Finally My 71 C-10 Truck Build
You have a tig welder? I dont think you can mig weld stainless. At least i couldnt.
__________________
New project. 1971 Twin Turbo blazer http://67-72chevytrucks.com/vboard/s...d.php?t=676047 My new YOUTUBE channel.. Videos of my truck and a current walk around. Lyrikz74 Youtube channel DONE! SOLD! My 1971 stepside build thread My Build Thread UPDATED 6/11. DONE and sold. |
|
|
|
|
03-07-2012, 02:36 PM
|
#18 |
|
GEARHEAD
Join Date: Aug 2003
Location: MN
Posts: 6,121
|
Re: Over 25 Years Later, Finally My 71 C-10 Truck Build
Stainless will weld in a MIG welder. In fact the Pypes kit instructions had that method listed in them. As a back up plan I know a couple guys with TIG welders. Back in the day I was qualified to do nuclear pipe on stainless, inconel, monel, and a few other alloys using TIG or SMAW (stick on steel pipe only). I once qualified as an ASME TIG welder for a code shop I was inspecting for. There's not much I haven't tried for welding methods myself, just didn't make a living at it so I don't have the 1000's of hours experience. I have a pretty good idea of what I'm doing, just not as pretty as the guys that do it all the time.
That being said, I will have a TIG welder someday. Just haven't found one I want that I can afford yet.
__________________
If no one knows what you're doing, they can't tell you you're doing it wrong HG's Dream Car Build - Shelby Cobra Kit Build your own adjustable track bar 71 Long Fleet C/10 72 Jimmy 4x4 (Junkyard Jimmy)HG's Plow Truck '78 K35 DuallyBigass Farm Truck HG's thread of miscellaneous stuff Last edited by hgs_notes; 04-27-2012 at 09:12 PM. |
|
|
|
|
03-07-2012, 02:55 PM
|
#19 | |
|
PITbut
Join Date: Sep 2007
Location: monroe washington
Posts: 3,042
|
Re: Over 25 Years Later, Finally My 71 C-10 Truck Build
Quote:
__________________
New project. 1971 Twin Turbo blazer http://67-72chevytrucks.com/vboard/s...d.php?t=676047 My new YOUTUBE channel.. Videos of my truck and a current walk around. Lyrikz74 Youtube channel DONE! SOLD! My 1971 stepside build thread My Build Thread UPDATED 6/11. DONE and sold. |
|
|
|
|
|
03-07-2012, 03:10 PM
|
#20 |
|
GEARHEAD
Join Date: Aug 2003
Location: MN
Posts: 6,121
|
Re: Over 25 Years Later, Finally My 71 C-10 Truck Build
Found this on the Miller site.
GMAW Electrode and Shielding Gas Selection For welding 304 stainless steel, ER308, ER308L and ER308LSI wires are compatible. Use a "tri-mix" shielding gas consisting of 90 percent helium/8 percent argon/2 percent CO2. Note: Do not attempt to weld thin metal with flux cored wires. These wires use more heat because they require globular transfer. Unlike short arc, where the weld puddle cools every time the wire touches the base metal, the arc remains "on" constantly with globular transfer. I'll definitely post what adjustments I have to do on mine when I give it a try. If I fail, I'll post that too. I'm not too proud to hide my warts.
__________________
If no one knows what you're doing, they can't tell you you're doing it wrong HG's Dream Car Build - Shelby Cobra Kit Build your own adjustable track bar 71 Long Fleet C/10 72 Jimmy 4x4 (Junkyard Jimmy)HG's Plow Truck '78 K35 DuallyBigass Farm Truck HG's thread of miscellaneous stuff Last edited by hgs_notes; 04-27-2012 at 09:11 PM. |
|
|
|
|
03-07-2012, 03:27 PM
|
#21 | |
|
PITbut
Join Date: Sep 2007
Location: monroe washington
Posts: 3,042
|
Re: Over 25 Years Later, Finally My 71 C-10 Truck Build
Quote:
Im happy i can do stainless now with some mild adjustments.
__________________
New project. 1971 Twin Turbo blazer http://67-72chevytrucks.com/vboard/s...d.php?t=676047 My new YOUTUBE channel.. Videos of my truck and a current walk around. Lyrikz74 Youtube channel DONE! SOLD! My 1971 stepside build thread My Build Thread UPDATED 6/11. DONE and sold. |
|
|
|
|
|
03-07-2012, 03:40 PM
|
#22 |
|
GEARHEAD
Join Date: Aug 2003
Location: MN
Posts: 6,121
|
Re: Over 25 Years Later, Finally My 71 C-10 Truck Build
The thing is, it can be done using the basic mild steel set up for a small job that is not critical, but there are better methods. I'll buy a small spool of stainless wire and maybe rent a small bottle of tri-mix gas. I looked for stainless wire locally but had no luck. Friday I'll be in Minneapolis and can go to a real weld supply store that should have it in stock.
__________________
If no one knows what you're doing, they can't tell you you're doing it wrong HG's Dream Car Build - Shelby Cobra Kit Build your own adjustable track bar 71 Long Fleet C/10 72 Jimmy 4x4 (Junkyard Jimmy)HG's Plow Truck '78 K35 DuallyBigass Farm Truck HG's thread of miscellaneous stuff Last edited by hgs_notes; 04-27-2012 at 09:13 PM. |
|
|
|
|
03-07-2012, 05:15 PM
|
#23 |
|
GEARHEAD
Join Date: Aug 2003
Location: MN
Posts: 6,121
|
Re: Over 25 Years Later, Finally My 71 C-10 Truck Build
Did a little research, talked to the local welding supply store and he said I should be able to get a good weld using the 75/25 mix I have now and a .030 stainless wire. He said if it was for show car and it was butt welds then the tri-mix would be the way to go. He also said the main problem using the steel wire is that the wire tends to melt too fast and that by the time you get a puddle going in the stainless base metal it can blow through, but that I might be able to put the arc over the outer layer of the joint and use that as part of the fill metal since most of the welding will be slip fit joints rather than butt welds. I think I'll just pick up the stainless wire, use my current gas mix and try it out on a small piece. The problem for me and getting tri-mix is that they only carry the large bottles of it, which I can't afford and is not worth the cost for a small job like this.
__________________
If no one knows what you're doing, they can't tell you you're doing it wrong HG's Dream Car Build - Shelby Cobra Kit Build your own adjustable track bar 71 Long Fleet C/10 72 Jimmy 4x4 (Junkyard Jimmy)HG's Plow Truck '78 K35 DuallyBigass Farm Truck HG's thread of miscellaneous stuff |
|
|
|
|
04-17-2012, 01:29 AM
|
#24 | |
|
Registered User
 Join Date: Apr 2008
Location: San Diego California
Posts: 1,316
|
Re: Over 25 Years Later, Finally My 71 C-10 Truck Build
Quote:
__________________
I'd rather attempt something great and fail.. than try something ordinary and succeed. Norman Vincent Peale Project: Barn Raising http://67-72chevytrucks.com/vboard/s...d.php?t=414961 Project: 30 Be Low https://67-72chevytrucks.com/vboard/...d.php?t=830583 |
|
|
|
|
|
03-07-2012, 05:47 PM
|
#25 |
|
GEARHEAD
Join Date: Aug 2003
Location: MN
Posts: 6,121
|
Re: Over 25 Years Later, Finally My 71 C-10 Truck Build
Just ordered some stainless weld wire through amazon because it was quite a bit cheaper than what I can get locally and both places I called were out of stock anyway. Also ordered my headlight conversion kit from there and an electric fan control for my Jimmy. If you didn't know already, amazon carries a ton of car parts and tools and the prices are either competitive with or flat out cheaper than any online retailer.
__________________
If no one knows what you're doing, they can't tell you you're doing it wrong HG's Dream Car Build - Shelby Cobra Kit Build your own adjustable track bar 71 Long Fleet C/10 72 Jimmy 4x4 (Junkyard Jimmy)HG's Plow Truck '78 K35 DuallyBigass Farm Truck HG's thread of miscellaneous stuff |
|
|
|
 |
| Bookmarks |
|
|


 Hybrid Mode
