
|
|
|
 12-05-2017, 10:21 AM
|
#1 |
|
Registered User
Join Date: Dec 2012
Location: Pendleton, Indiana
Posts: 235
|
Re: 55 Wagon Progress
Like the work being done, always able to learn something from your posts. Does Pat sell the arbor press die kits?
Rick |

|

|
|
12-05-2017, 10:28 PM
|
#2 |
|
Registered User
Join Date: Jan 2013
Location: Leonardtown, MD
Posts: 1,637
|
Re: 55 Wagon Progress
__________________
Robert |
|
|
|
|
12-11-2017, 12:16 AM
|
#3 |
|
Registered User
Join Date: Jan 2013
Location: Leonardtown, MD
Posts: 1,637
|
Re: 55 Wagon Progress
Been in Florida the past couple weeks for the day job, got back in time for Saturday's shop day. Jake worked on the rear seat bolster, the top profile was traced from the one we made for the driver's side but this mark needs to be on the opposite side for us to tip the flange. Easy transfer is to use a punch on the line to transfer the mark's location through the panel and then trace..
   ....and then he used various round anvils for hammer forming the corners.  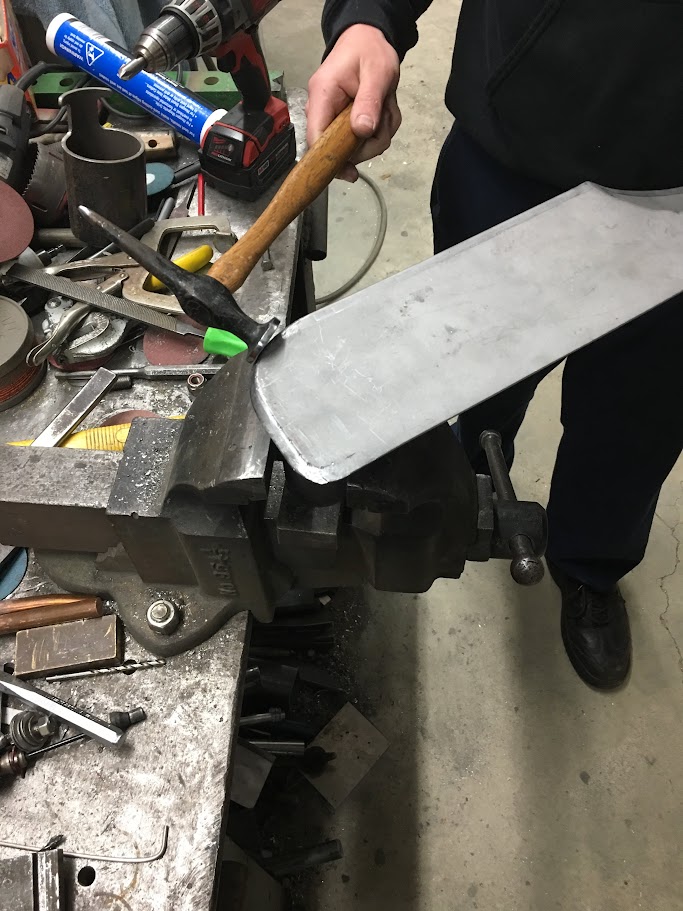 I got started on welding in the corners of the passenger console side...  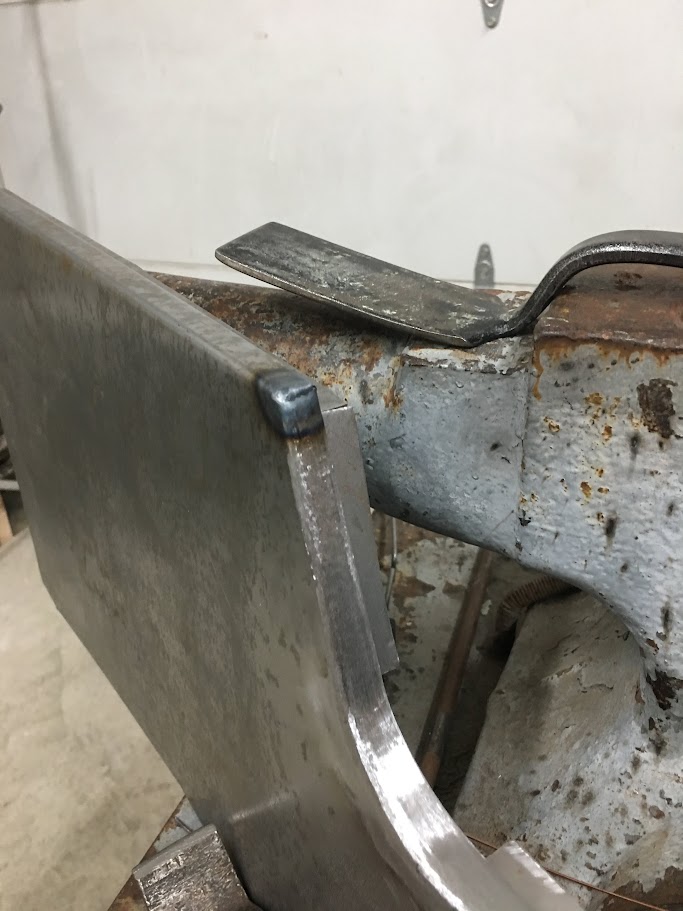   This might work yet... https://www.youtube.com/watch?v=Vt8wdVuMI-I While Jake was tipping flanges he needed some stretch in the crowned area. Looking at the too many pieces that came out of the Erco, it's possible that Jake has too much kick. We made some new spring plates out of 1/16 stainless sheet..   Back in business... 
__________________
Robert |
|
|
|
|
12-18-2017, 12:40 AM
|
#4 |
|
Registered User
Join Date: Jan 2013
Location: Leonardtown, MD
Posts: 1,637
|
Re: 55 Wagon Progress
This weekend's progress... Jake finishing up on the seat bolsters.
 We don't always have the right tools to use, so on occasion we make them. This corner of the panel needed a sharper shape on the anvil    With both bolsters done and fitted to the rear seat, Jake media blasted both and hung them up in the booth where he applied some SPI Epoxy primer. Meanwhile Mike and I worked on getting the driver's side of the console folded up..  We started by using the tipping die in the Lennox for thinning the bend lines. This both gives a sharper bend and also gives a "feel" for when the press brake's upper die is located in the proper bend location. https://www.youtube.com/watch?v=I87VWj-Qetc Here's the highly technical back stop used to set the fold distance. We have a growing collection of these starting as the dimensional requirements change..  With two sides now, a spacer was made to clamp in the middle to hold our proper width..  Seats above are all the way forward, compare front location to next picture where they have been moved back to normal location, as well as mocking up the Chevelle shifter..  Next we'll get the radius pieces added and start on the internal structures of the console.
__________________
Robert |
|
|
|
|
12-18-2017, 10:33 AM
|
#5 |
|
Senior Member
 Join Date: Mar 2011
Location: West Plains, Missouri
Posts: 7,555
|
Re: 55 Wagon Progress
Great update, and great work...Jim
__________________
my build thread: http://67-72chevytrucks.com/vboard/s...d.php?t=459839 Jimbo's long bed step build:http://67-72chevytrucks.com/vboard/s...t=464626<br /> |
|
|
|
|
12-22-2017, 10:01 AM
|
#6 |
|
Registered User
Join Date: Jan 2013
Location: Leonardtown, MD
Posts: 1,637
|
Re: 55 Wagon Progress
Thanks Jim!
Progress last night on the console, as I was welding the remaining bits in the drivers console side (sorry, no pics) Jake was using the GoKart slick in the Wheeling machine to add the correct contour to the rear panel for the console... https://www.youtube.com/watch?v=DMFuDumaXo0 Matches up well.....  Then he made some practice side pieces so we could test the fitment to the rear panel after using the tank roll die in the Lennox. There's quite a bit of work in the console sides at this point, and we didn't want them to be the guinea pigs..   View of them clamped: https://www.youtube.com/watch?v=33LE8EXzt4E  We can use this rear panel on the console, and this weekend we'll use the tank roll die on the console sides and get them welded together..  
__________________
Robert |
|
|
|
|
12-23-2017, 10:59 PM
|
#7 |
|
Registered User
Join Date: Jan 2013
Location: Leonardtown, MD
Posts: 1,637
|
Re: 55 Wagon Progress
Merry Christmas and Happy Holidays to everyone!
More progress today on the console, time to weld in the back section.. We had it clamped like so:  But on second thought, it should be clamped on the upper portion...  ....and to keep the bottoms from sliding out from under, some spacers were made out of scrap wood.... 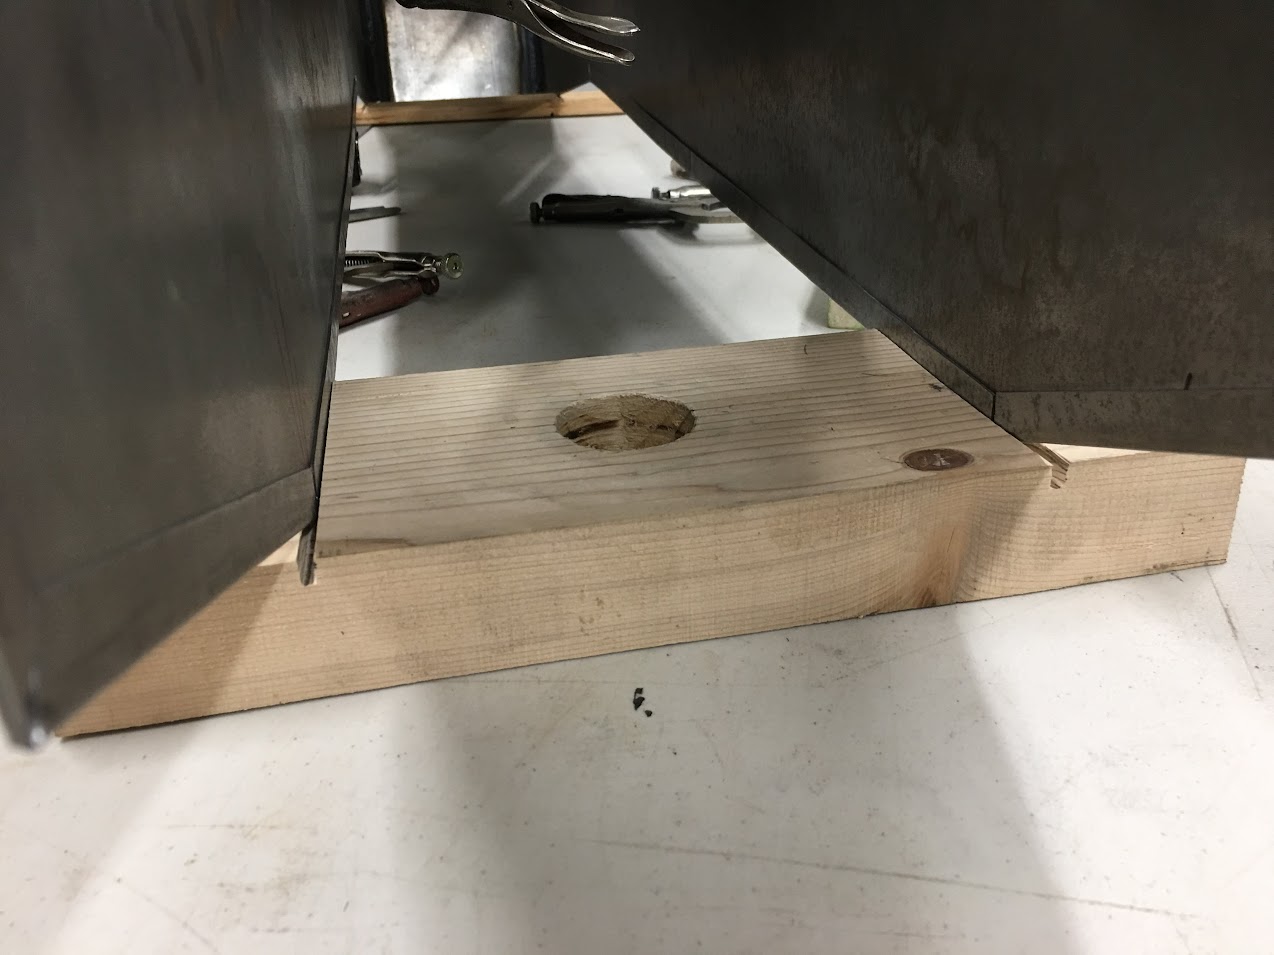 Tacked and welded with the TIG....    Jake cut out some corners, tipped some flanges, and used the Vise Grip tucking tool to gather up some of the excess metal. A torch heats up the tucks for an easy flattening.    Trimmed and test fit...     Inner corner finished in the same fashion...  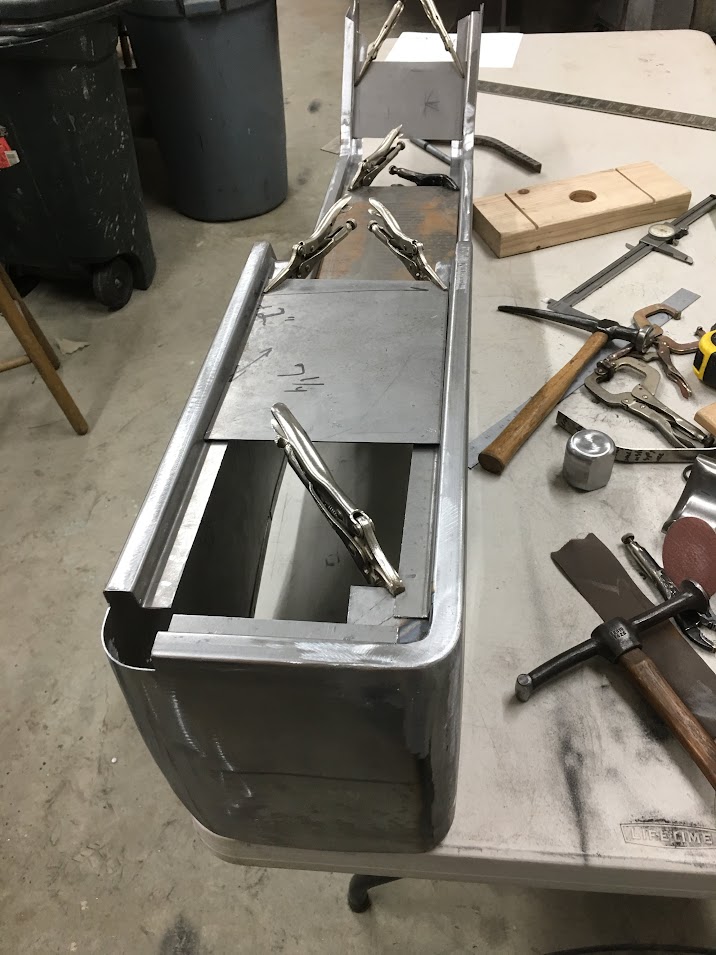
__________________
Robert |
|
|
|
|
12-24-2017, 12:28 AM
|
#8 |
|
Senior Member
Join Date: Mar 2011
Location: West Plains, Missouri
Posts: 7,555
|
Re: 55 Wagon Progress
Just some beautiful work...Jim
__________________
my build thread: http://67-72chevytrucks.com/vboard/s...d.php?t=459839 Jimbo's long bed step build:http://67-72chevytrucks.com/vboard/s...t=464626<br /> |
|
|
|
|
01-01-2018, 01:28 AM
|
#9 |
|
Registered User
Join Date: Jan 2013
Location: Leonardtown, MD
Posts: 1,637
|
Re: 55 Wagon Progress
Thanks Jim!
Happy New Year to everybody! Had a visit by the shop this week from cousin JB, who works at Interiors by Shannon in Alabama. He was up for the holidays. They have recently picked up a bead roller so we did some practice runs on pre-stretched and non-stretched beads, and then some beads using the Lennox Nibbler. Finished up with some shrinking on the MH-19. We ran out of time to punch louvers. Great to see him again, nice to spend time "playing" in the shop. 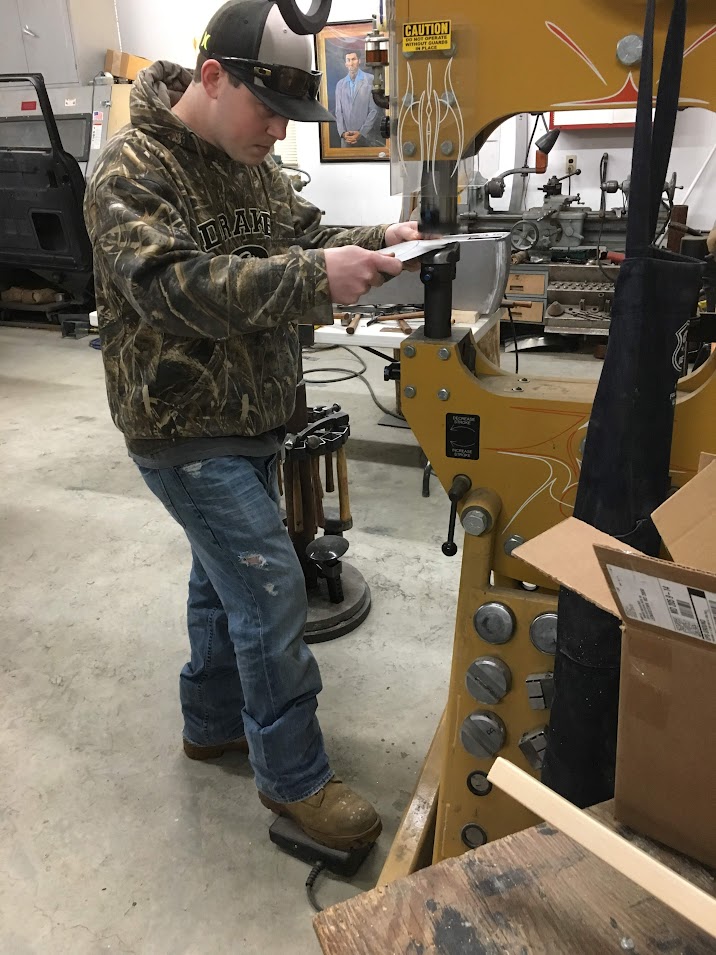  Progress on the console this weekend... Mike is still in California visiting family, so Jake and I have been texting pics to him of what he's missing haha.. Corner number two, we've already shown some shrinking, so no we'll show stretching the inside corner..   Placing the part on a suitable flat anvil, a barrel roll hammer is used to provide stretch the inner corner...  You get to a point where flat is no longer useful, so then we use another anvil, this one in the form of a square tube. Works well for what we're doing here...   Fitted and welded....     Next, a pattern made of the rear hump for trimming the console.. we'll keep it snug for now for placing anchors and then trim later for carpet and sound deadening space.   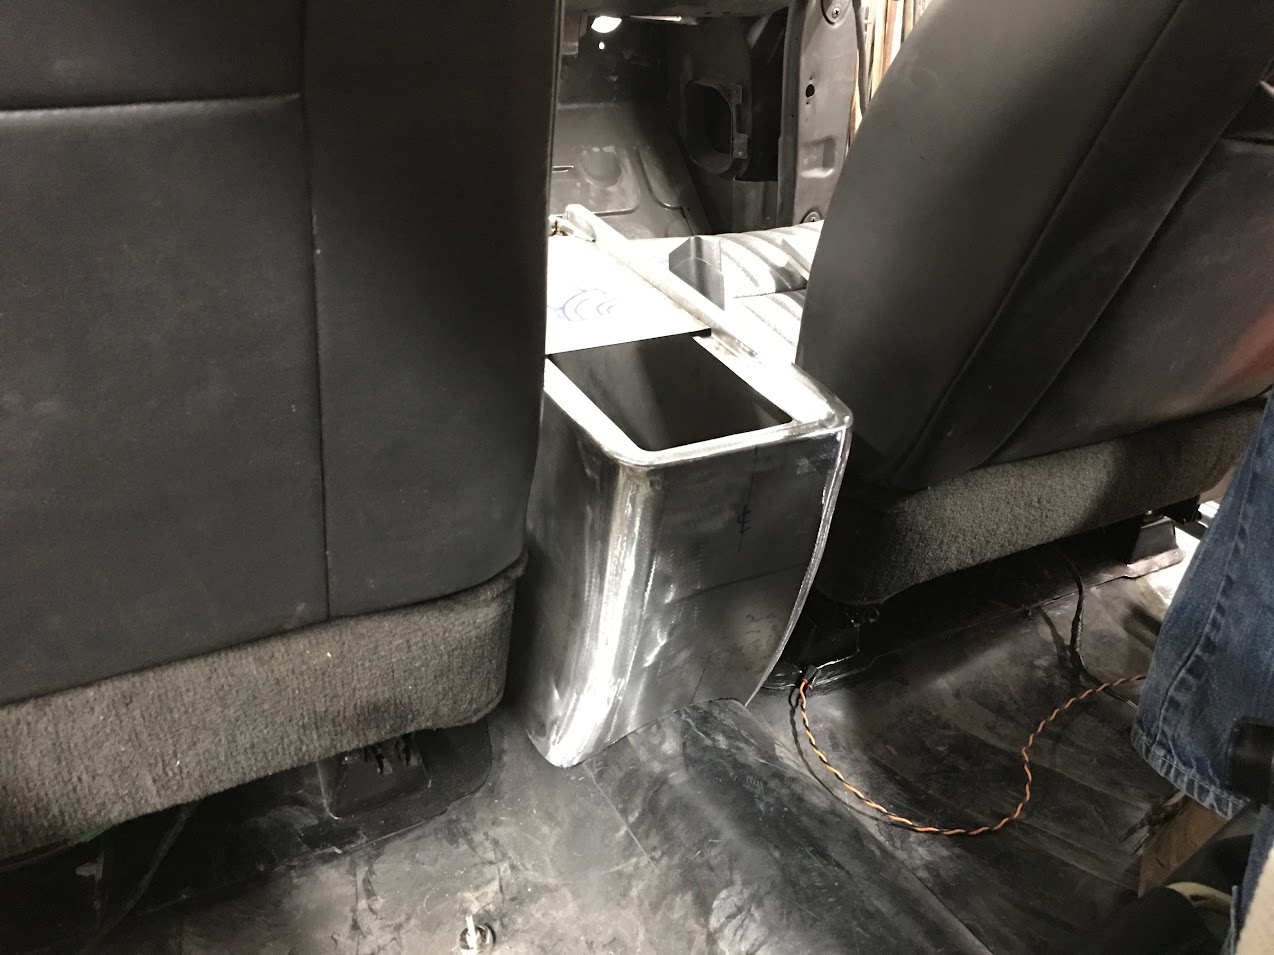 Standoffs used for anchors, trimmed to fit angle of the hump... and welded in place. Crossmember made for inside the console and spot welded in.   
__________________
Robert |
|
|
|
|
01-01-2018, 01:56 AM
|
#10 |
|
Post Whore
 Join Date: May 2015
Location: Alabama
Posts: 14,616
|
Re: 55 Wagon Progress
constantly amazed at the level of fab work yall do...very nice..
__________________
Mongo...aka Greg RIP Dad RIP Jesse 1981 C30 LQ9 NV4500..http://67-72chevytrucks.com/vboard/s...d.php?t=753598 Mongos AD- LS3 TR6060...http://67-72chevytrucks.com/vboard/s...34#post8522334 Columbus..the 1957 IH 4x4...http://67-72chevytrucks.com/vboard/s...63#post8082563 2023 Chevy Z71..daily driver |
|
|
|
|
01-06-2018, 11:31 PM
|
#11 |
|
Registered User
Join Date: Jan 2013
Location: Leonardtown, MD
Posts: 1,637
|
Re: 55 Wagon Progress
Thanks!
More console progress today, started off using Rotacutter to put a hole in the transmission tunnel for the shifter cable. The bulkhead seal that came with the cable has some mounting holes, we'll use some AVK style rivet nuts for ease of installation/replacement. 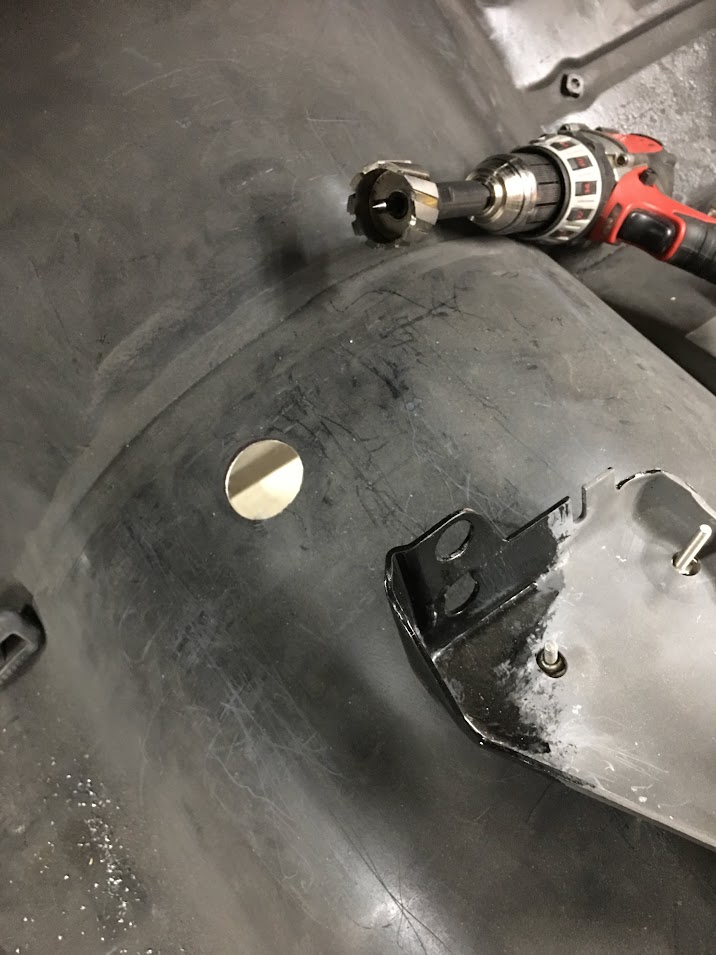 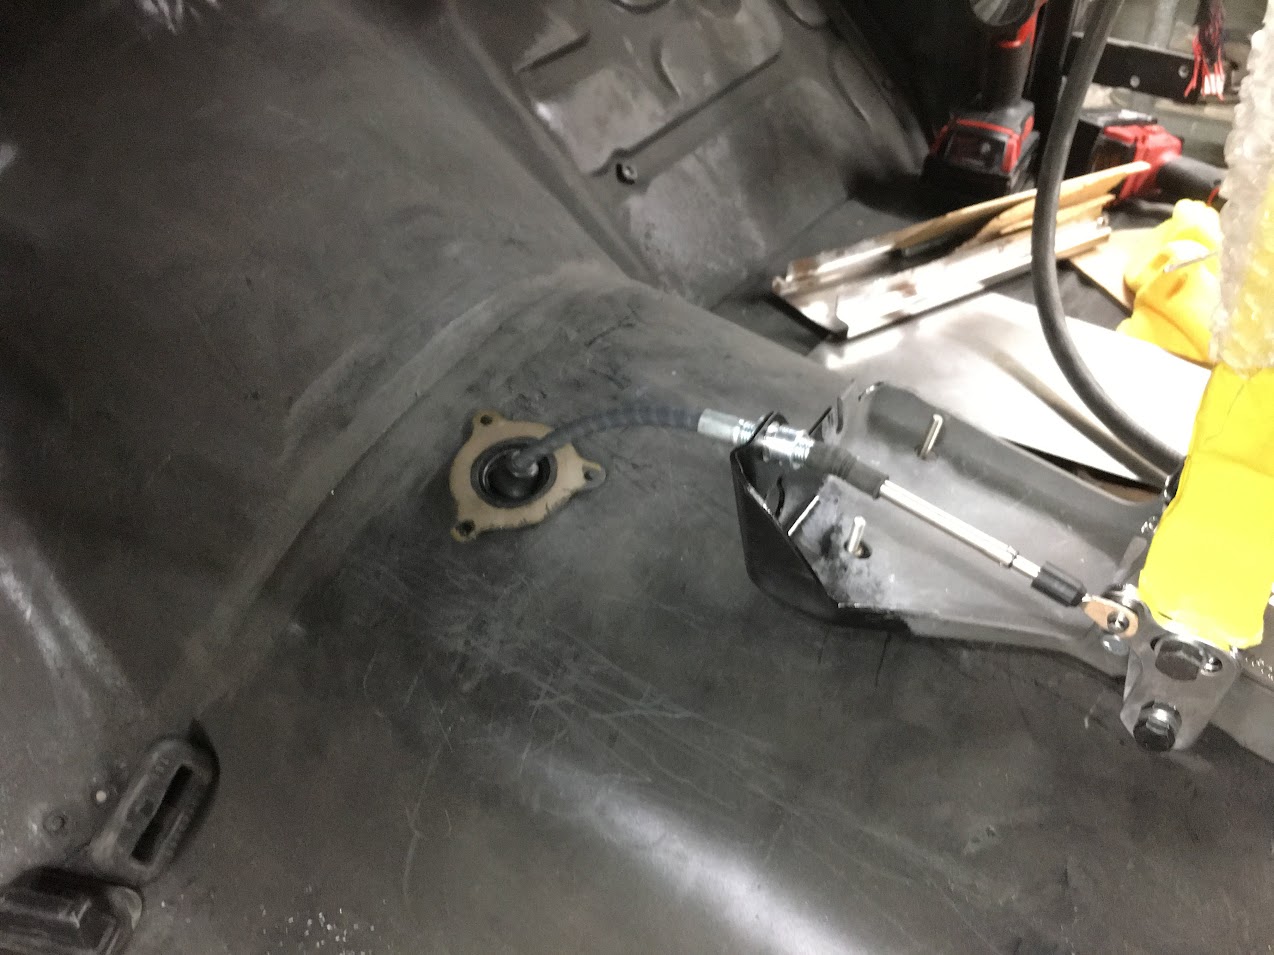  More anchors welded to the floor, some "crossmembers" fabricated, and welded into the console.   To locate the holes in the crossmembers, some spotters are set in the anchors, console placed, and crossmember tapped from above to mark. 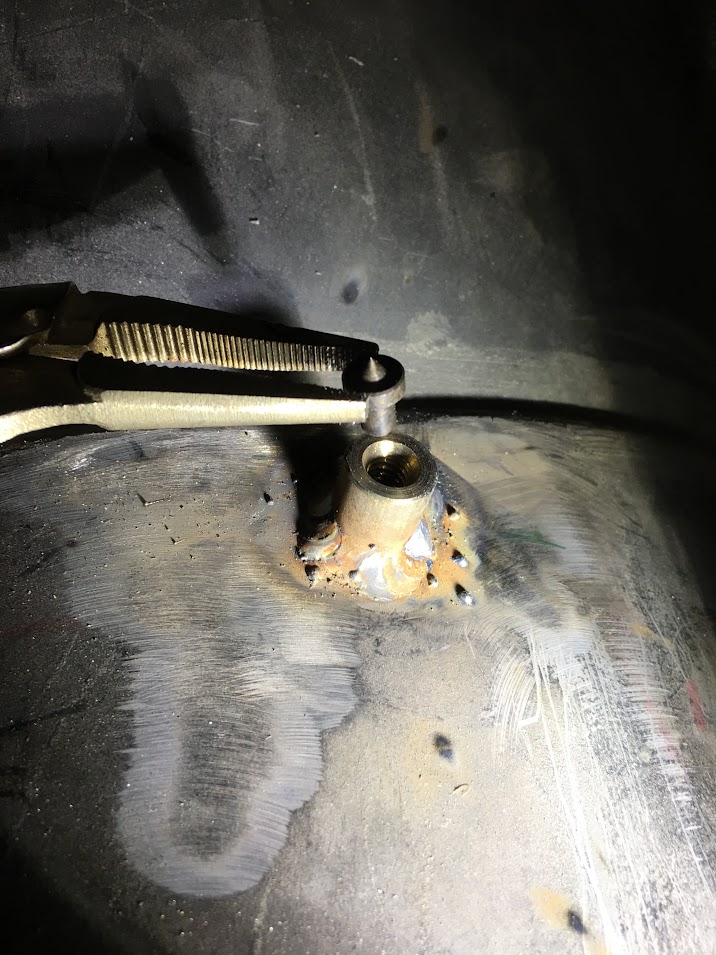 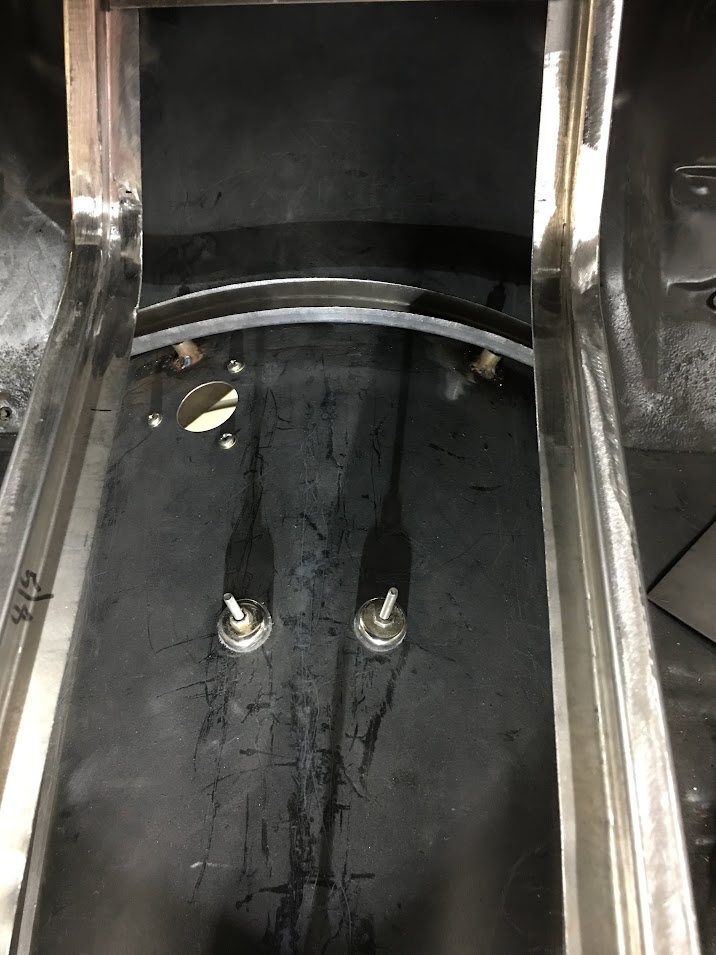 Next we need to close off the front of the storage cavity to give us an anchor point for the latch. So we started the fabrication but found some limitations in our acute dies for the press brake.  Not quite enough bend, so we opted for a piece of sharpened 12 ga cold rolled to give us a bit more....   Trimmed and welded in place...    Video version: https://www.youtube.com/watch?v=qiOet_0AwO0 .
__________________
Robert |
|
|
|
|
01-07-2018, 11:27 AM
|
#12 |
|
Registered User
Join Date: Sep 2006
Location: Riverton KS
Posts: 832
|
Re: 55 Wagon Progress
I love that you have the Kramer painting in the shop. "He is a loathsome, offensive brute, yet I can't look away"

__________________
1970 SWB Build |
|
|
|
|
01-13-2018, 10:37 PM
|
#13 |
|
Registered User
Join Date: Jan 2013
Location: Leonardtown, MD
Posts: 1,637
|
Re: 55 Wagon Progress
"We'll take the Kramer..."
We were originally going to hinge the console lid along the passenger side, but thought it would be better accessible from either front seat if it was hinged at the rear. We're using the same hinge as we used for the widened glove box door. In our attempt to add a torsion spring to keep the lid upright in the open position, we couldn't find the size to fit our 1/8" diameter hinge pin with enough torsion to hold the lid open. (Yes, even McMaster failed us) So we decided to wrap our own. Here's a fixture we made for the Aloris tool holder on the South Bend to act as a guide for the 1/16" music wire.  We also installed the older 3 jaw chuck, but not before adding a "wire catch" 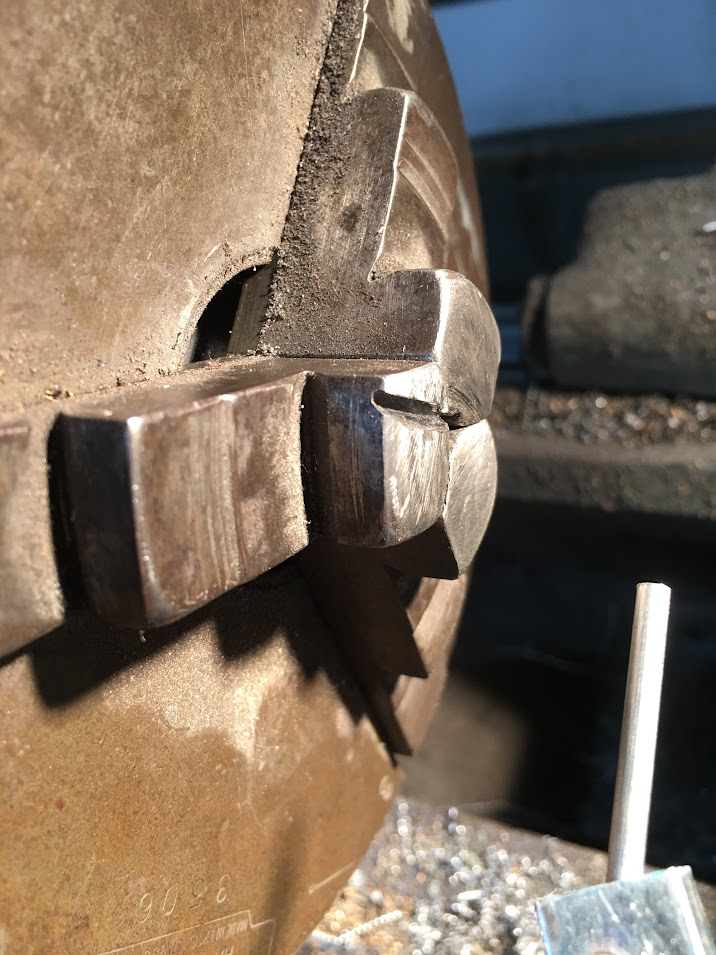 Here's a video of us wrapping the spring... As my South Bend lacks slow enough speed for such a task, we opted for manual rotation.. https://www.youtube.com/watch?v=OvJAIk1-Cs4 Here's the positioning and function of the hinge with torsion spring installed... https://www.youtube.com/watch?v=QPPY2dVOzmQ With our hinge now positioned, we also found we needed to move the hinge closer to the rear edge for better lid clearance while open. Back up and punt you say? 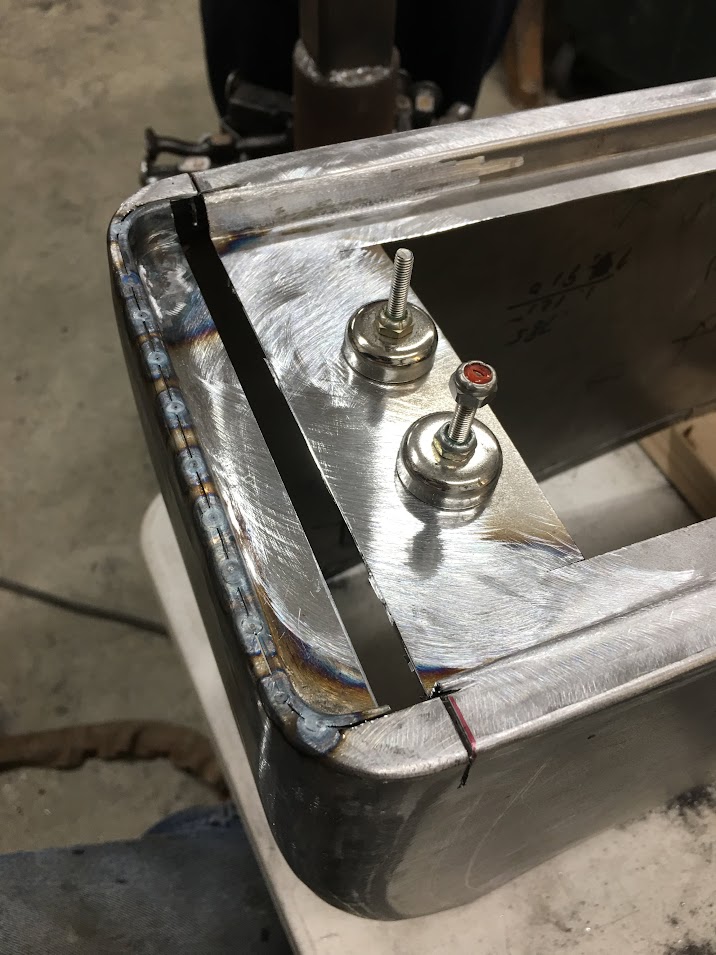
__________________
Robert |
|
|
|
|
01-29-2018, 01:24 AM
|
#14 |
|
Registered User
Join Date: Jan 2013
Location: Leonardtown, MD
Posts: 1,637
|
Re: 55 Wagon Progress
Didn't get as many pictures this weekend as I'd have liked. While I worked on some final details on the console, Jake made some cardboard templates of our rear armrests. These will also serve to hide the seat belt retractors for the front buckets, as well as the rear speakers.
 Here Jake transferring the pattern to some 19 gauge cold rolled, cleaning up some of the lines as well...  I was welding in the front cross piece that Jake made to the console and had some underside welds to do. Sometimes we make it easier on ourselves, especially if we can't weld upside-down all too well..  Suspended from the door track...  The hinge at the rear now moved rearward, metal added for mounting the hinge and securing the "storage recess".  
__________________
Robert |
|
|
|
|
01-29-2018, 09:40 AM
|
#15 |
|
Senior Member
Join Date: Mar 2011
Location: West Plains, Missouri
Posts: 7,555
|
Re: 55 Wagon Progress
Looks good...Jim
__________________
my build thread: http://67-72chevytrucks.com/vboard/s...d.php?t=459839 Jimbo's long bed step build:http://67-72chevytrucks.com/vboard/s...t=464626<br /> |
|
|
|
|
02-04-2018, 12:47 PM
|
#16 |
|
Registered User
Join Date: Apr 2011
Location: .
Posts: 3,104
|
Re: 55 Wagon Progress
Can't say it enough. Learn something every time I check in. Thanks for posting and showing how to do things right.
|
|
|
|
|
02-20-2018, 11:24 PM
|
#17 |
|
Registered User
Join Date: Jan 2013
Location: Leonardtown, MD
Posts: 1,637
|
Re: 55 Wagon Progress
Thanks Guys!
OK, here's our update for the past couple weeks.. We're working on getting the seats ready to go to the upholsterer, and these 2002 Monte Carlo seat belts just aren't cutting it...  This these belts are riveted to a bracket that stands off from the seat, and we'll need to stand off our replacement as well. So the rivets are removed and the new seat belt gets bolted to the same bracket using 1/2" bolt, grade 8. The "new" seat belts look much more vintage correct. 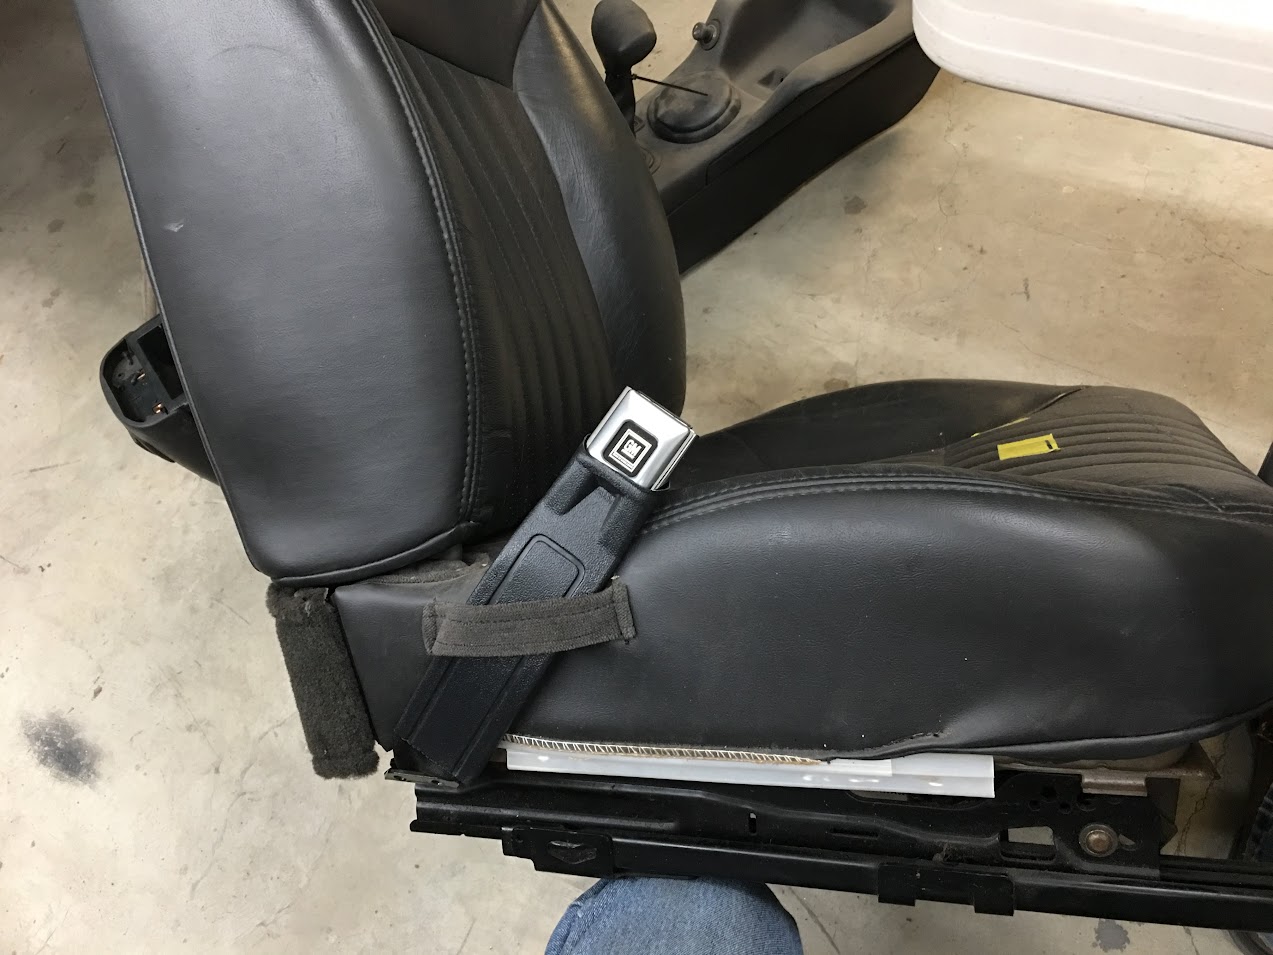  With console in place and bezel checked to proper height, anchors are set in place for welding to the floor pan. Bolted to shifter plate for proper alignment and standoffs used to provide space to get in there and weld...    Next, our replacement for the parking brake pull handle didn't fit just right so an extension was added that will use factory holes, we do need to drill the firewall for the studs out the front end..   Jake's progress on the rear seat kick panel...   Tipping wheel on the Fasti folds over the top flange that will hold our arm rest.. 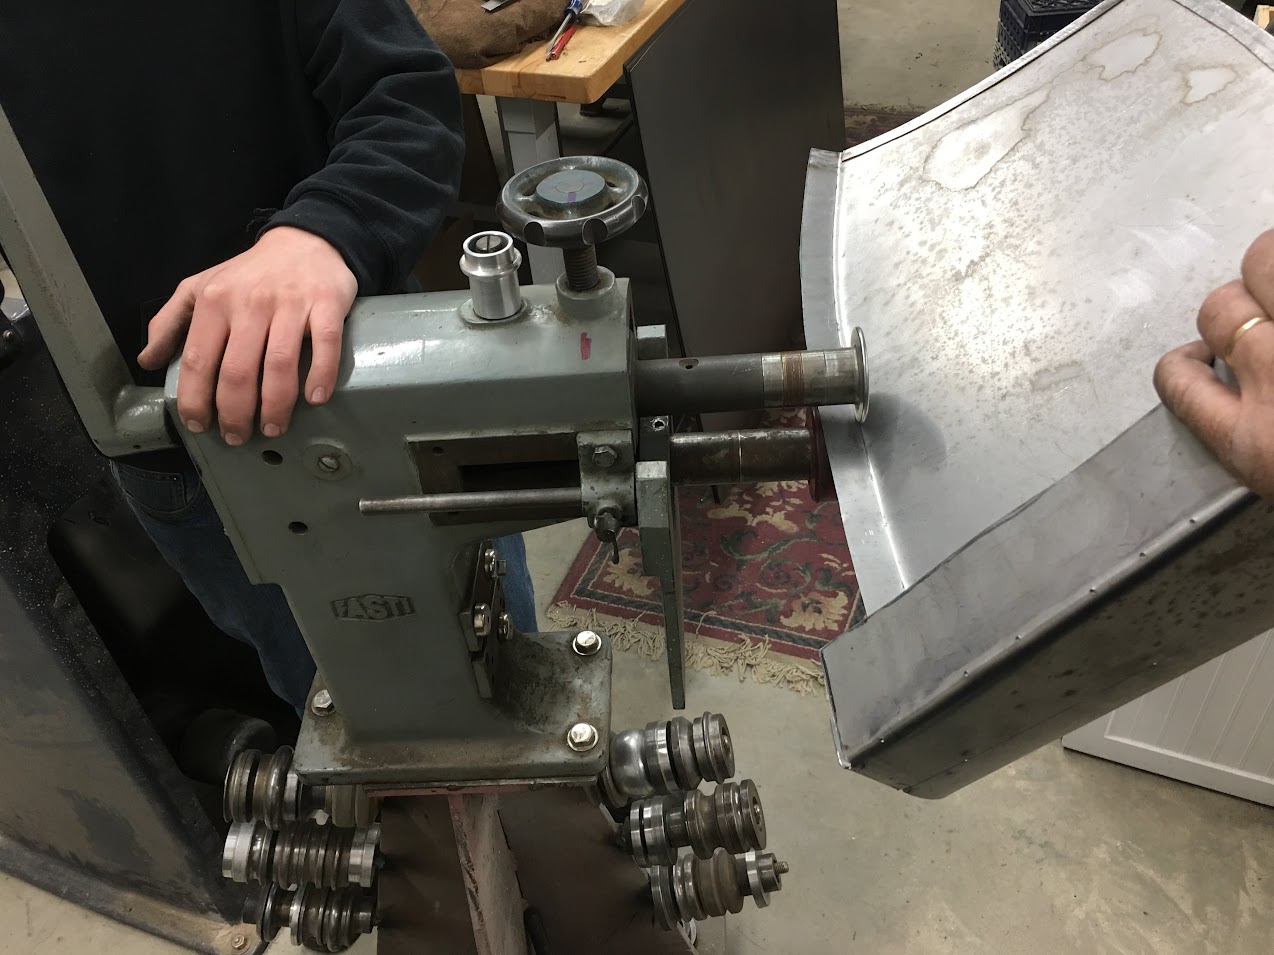 Bolting bracket that will secure the kick panel to the inner quarter.. 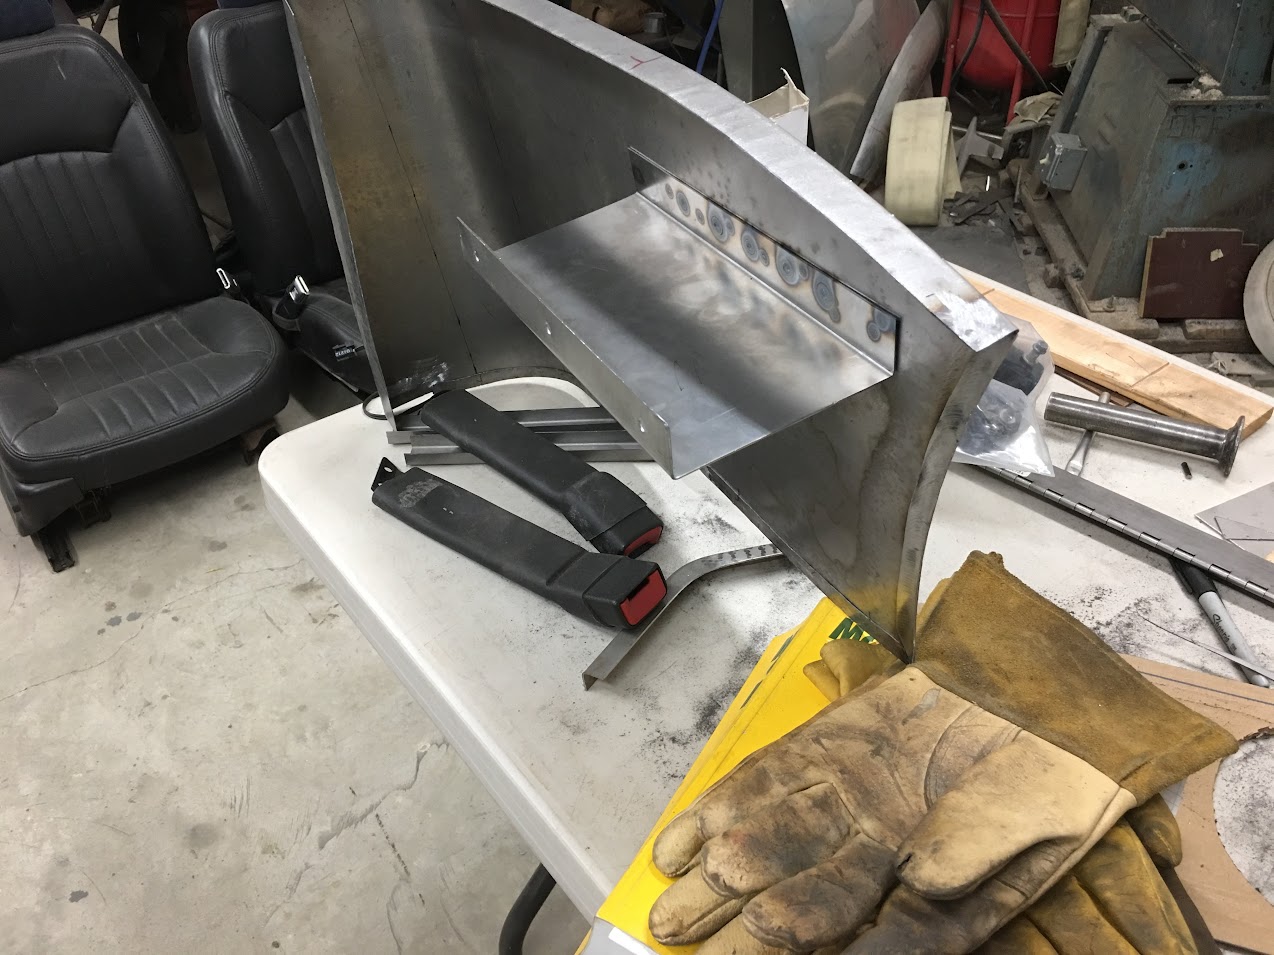  And here we're cutting out our console lid... 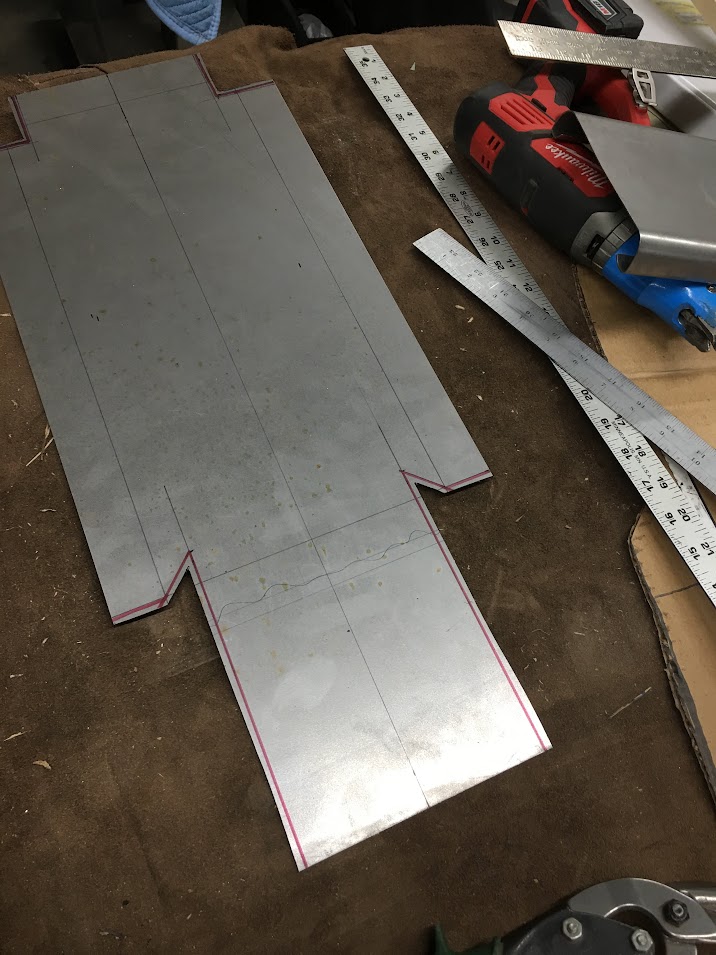 Thinning bend lines for a more crisp bend...  A piece of round rod in our magnetic brake gives us radius-ed corners...  A few passes in the Tommasini Wheeling Machine gives a bit of crown for better support  Corner details TIG welded in...  Corner detail test fit...  There we go, all caught up!
__________________
Robert |
|
|
|
|
02-20-2018, 11:45 PM
|
#18 |
|
Post Whore
Join Date: May 2015
Location: Alabama
Posts: 14,616
|
Re: 55 Wagon Progress
as usual....great work...that lid turned out great...I like the way you did the radius bend....
__________________
Mongo...aka Greg RIP Dad RIP Jesse 1981 C30 LQ9 NV4500..http://67-72chevytrucks.com/vboard/s...d.php?t=753598 Mongos AD- LS3 TR6060...http://67-72chevytrucks.com/vboard/s...34#post8522334 Columbus..the 1957 IH 4x4...http://67-72chevytrucks.com/vboard/s...63#post8082563 2023 Chevy Z71..daily driver |
|
|
|
|
02-21-2018, 12:37 AM
|
#19 |
|
Senior Member
Join Date: Mar 2011
Location: West Plains, Missouri
Posts: 7,555
|
Re: 55 Wagon Progress
Beautiful work...Jim
__________________
my build thread: http://67-72chevytrucks.com/vboard/s...d.php?t=459839 Jimbo's long bed step build:http://67-72chevytrucks.com/vboard/s...t=464626<br /> |
|
|
|
|
02-21-2018, 01:20 PM
|
#20 |
|
Registered User
Join Date: Apr 2011
Location: .
Posts: 3,104
|
Re: 55 Wagon Progress
Phenomenal craftsmanship.
Learn something, a new/better way, every time I check in. Anchors and standoffs to make space for proper height. Round rod in the brake in making round'ed corners. Seat belt change out hits the mark. |
|
|
|
|
02-25-2018, 09:44 PM
|
#21 |
|
Registered User
Join Date: Jan 2013
Location: Leonardtown, MD
Posts: 1,637
|
Re: 55 Wagon Progress
Thanks Guys!
More work on the lid... 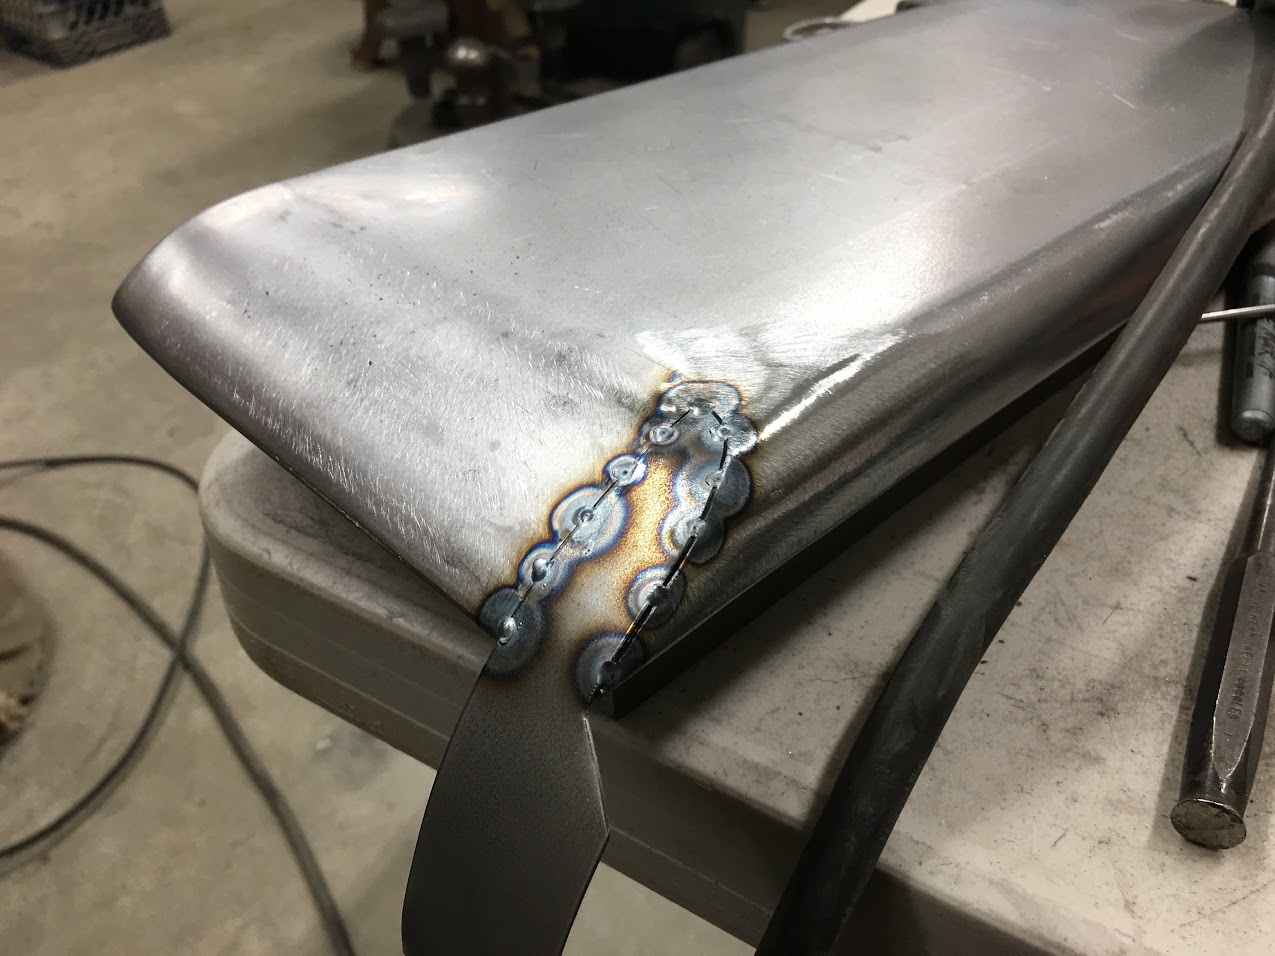 Lid hangs over slightly in the front to serve as our only pull/lift for opening the lid, nice and tidy. It will be held closed using rare earth magnets.  Video version: https://www.youtube.com/watch?v=e3cAFzk8Zfc Our kick panels for the rear seat also need some support against the inner quarter panel to help hold the arm rest.  Jake bent up a 1 x 1 angle out of 19 gauge and used the Erco to match the contour of the kick panel. In order to not block off the window mechanism access panel, we'll bolt it to that panel.. As we have yet to install all of our interior/carpet/upholstery, we made the support adjustable so we can match the kick panel height at installation.. Video version: https://www.youtube.com/watch?v=wicUAwkqvAI 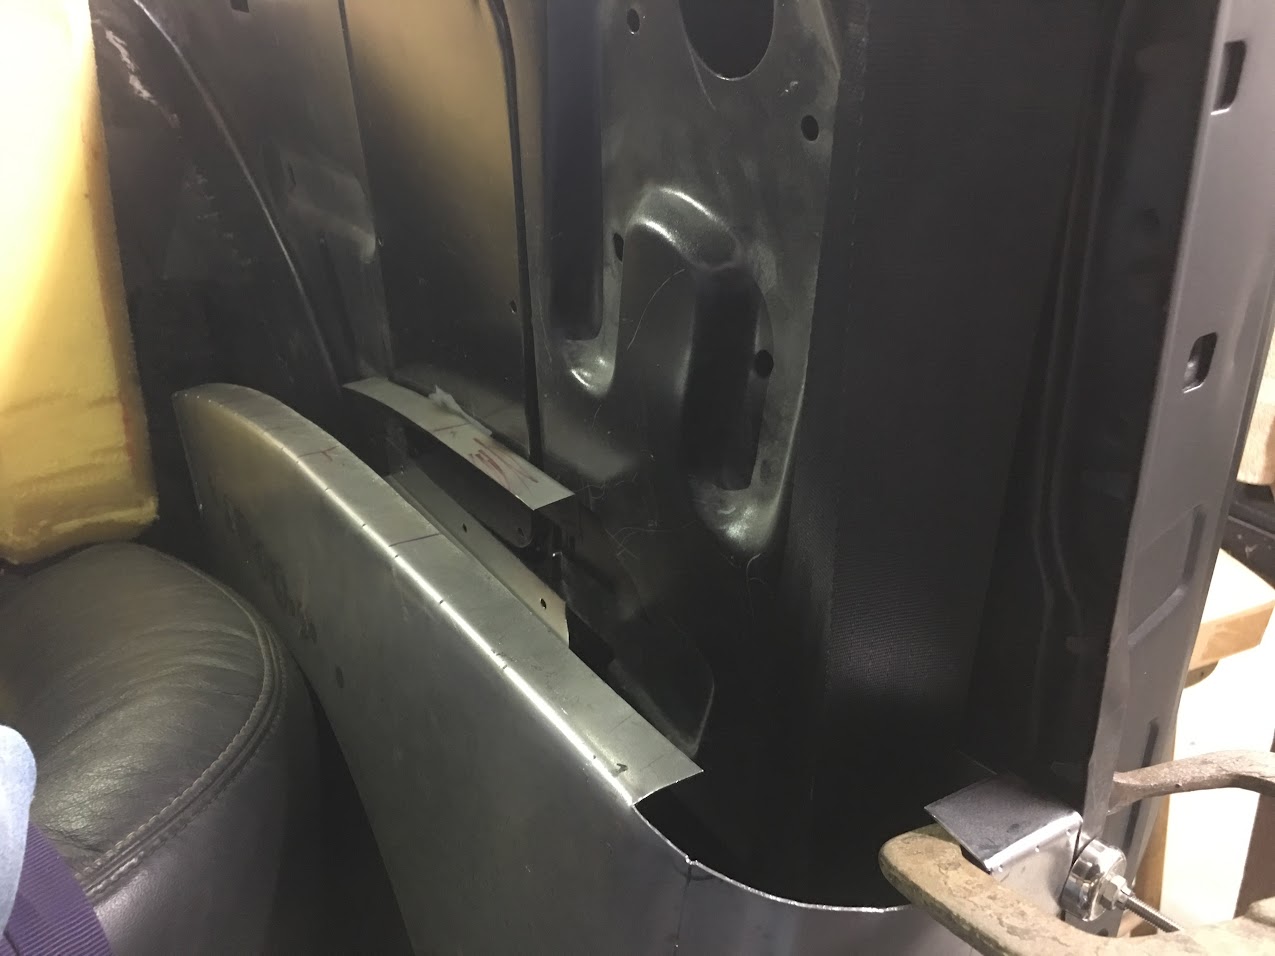 More details on the console, we had hemmed all the edges to help protect the upholstery when it gets wrapped, but the tunnel cutout at the rear still needed an "added" hem. Then our hem is tacked in place, edges adjusted with a drum sander, and the two edges fusion welded together using the TIG.   ....and sanded smooth..  Next, layout and folding the insert for the console. Some parts needed to fill in voids will be added later..    Test fit....  Video: https://www.youtube.com/watch?v=J20U5oIL8vw
__________________
Robert |
|
|
|
|
03-02-2018, 08:02 AM
|
#22 |
|
Registered User
Join Date: Jan 2013
Location: Leonardtown, MD
Posts: 1,637
|
Re: 55 Wagon Progress
More progress on the wagon, making our insert for the console whole...
 Clamped up for tacking with the TIG welder...  Video of fusion tacks: https://www.youtube.com/watch?v=BO2a915SAuk   https://www.youtube.com/watch?v=wr69SZk7YXI  Adding in the corner for the rear kick panel...    .....getting closer all the time..
__________________
Robert |
|
|
|
|
03-02-2018, 09:50 AM
|
#23 |
|
Senior Member
Join Date: Mar 2011
Location: West Plains, Missouri
Posts: 7,555
|
Re: 55 Wagon Progress
Beautiful detail work...Jim
__________________
my build thread: http://67-72chevytrucks.com/vboard/s...d.php?t=459839 Jimbo's long bed step build:http://67-72chevytrucks.com/vboard/s...t=464626<br /> |
|
|
|
|
03-02-2018, 10:00 AM
|
#24 |
|
Post Whore
Join Date: May 2015
Location: Alabama
Posts: 14,616
|
Re: 55 Wagon Progress
that looks great...just curious about the holes drilled in your bend lines on the kick panel...are those just for a guide to bend?
__________________
Mongo...aka Greg RIP Dad RIP Jesse 1981 C30 LQ9 NV4500..http://67-72chevytrucks.com/vboard/s...d.php?t=753598 Mongos AD- LS3 TR6060...http://67-72chevytrucks.com/vboard/s...34#post8522334 Columbus..the 1957 IH 4x4...http://67-72chevytrucks.com/vboard/s...63#post8082563 2023 Chevy Z71..daily driver |
|
|
|
|
03-02-2018, 10:49 AM
|
#25 |
|
Registered User
Join Date: Jan 2013
Location: Leonardtown, MD
Posts: 1,637
|
Re: 55 Wagon Progress
To help lay out two identical parts (more identical?), and we used this also on console sides, we used a through hole at key locations/intersections on the bend lines to be able to use cleco's to hold the pattern together while transferring the pattern. Then used a punch to make marks on the first line drawn to transpose same line through and to the second piece. Note all the punch marks on the bend lines in kick panel pictures above. Foam underlay beneath the upholstery will hide those well..
__________________
Robert |
|
|
|
 |
| Bookmarks |
|
|


 Hybrid Mode
