
|
|
|
 06-23-2012, 10:34 PM
|
#1 |
|
GEARHEAD
Join Date: Aug 2003
Location: MN
Posts: 6,122
|
Re: Over 25 Years Later, Finally My 71 C-10 Truck Build
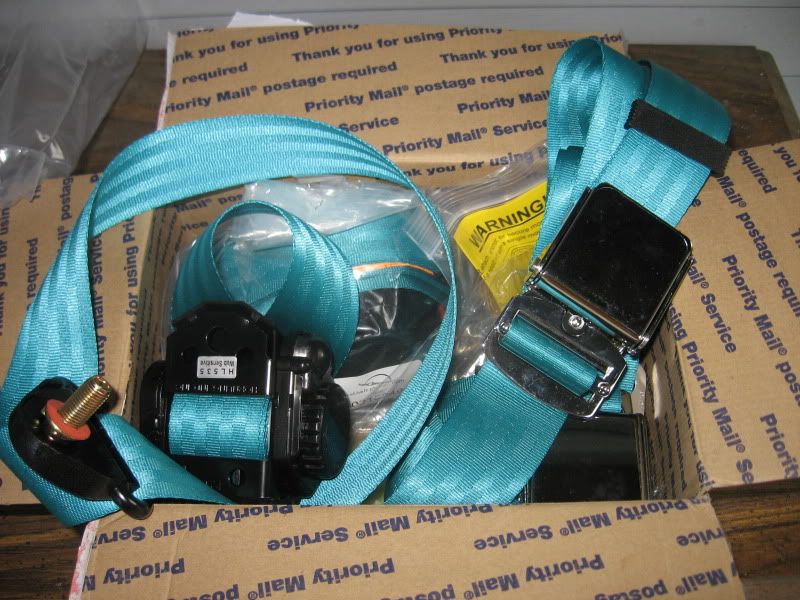
My new seat belts came today. Might be a few days before I can get them in. They look real nice though. Hopefully I can get the brackets to work for the install and don't have to fab to much. Whatever extra work it takes I'll be sure to post.
 This is the start of my new fan shroud. I need to remove the fans from the radiator, cut the circles out in the shroud for mounting, cut the top flange narrower to fit (or see if the radiator mount pads can be installed in this), drill some holes and hopefully bolt it in without too much trouble. (after painting) 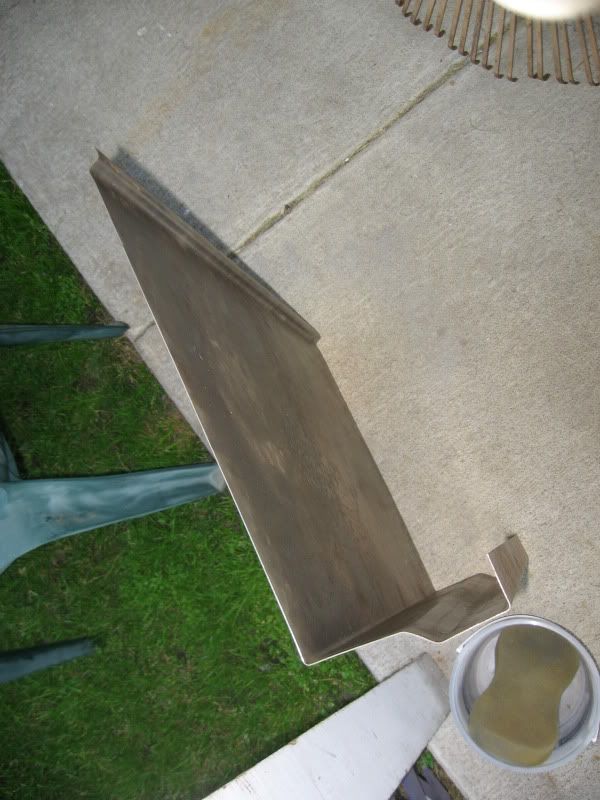 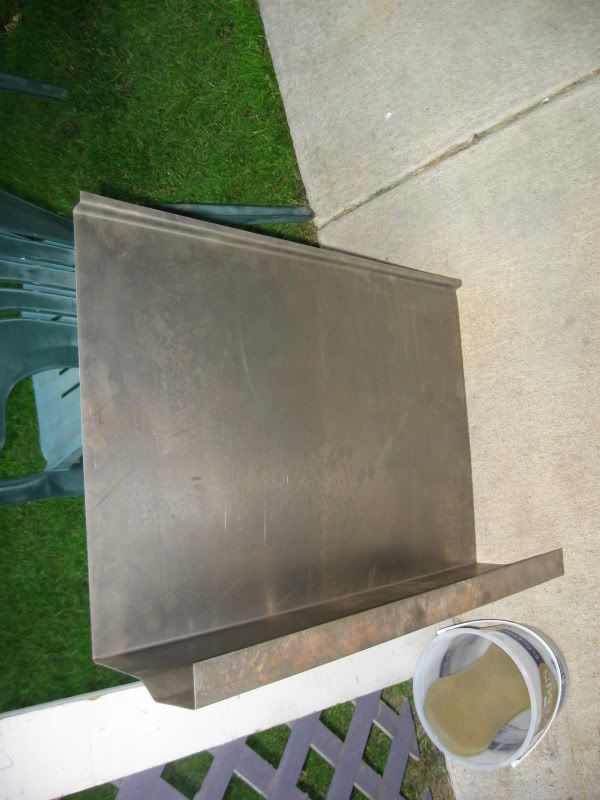
__________________
If no one knows what you're doing, they can't tell you you're doing it wrong HG's Dream Car Build - Shelby Cobra Kit Build your own adjustable track bar 71  Long Fleet C/10 Long Fleet C/10 72  Jimmy 4x4 (Junkyard Jimmy) Jimmy 4x4 (Junkyard Jimmy)HG's Plow Truck '78  K35 Dually K35 DuallyBigass Farm Truck HG's thread of miscellaneous stuff |

|

|
|
06-25-2012, 10:29 PM
|
#2 |
|
GEARHEAD
Join Date: Aug 2003
Location: MN
Posts: 6,122
|
Re: Over 25 Years Later, Finally My 71 C-10 Truck Build
I got my new seat belts installed this evening and I'm going to try to write it up in detail.
I started with the middle belt and the inboard belt for the retractable set. The instructions say not to put 2 belts on the same bolt, but they also say to use the OEM mounting points if you have them. GM commonly installed the belts this way and that's how I did it also. I bought new grade 8 1/2" coarse bolts for all 4 of the OEM mount points. The bolts that come in the hardware kit from seat belt planet are used to mount the belts to brackets or if you have to drill new mounting holes in the floor. They are 7/16" fine thread. The inboard bolt went through a small hole I cut in the carpet. The inboard belts went through either a hole in the split bench for that purpose or through the side of the seat where they put an extra layer for the belts to slide through. 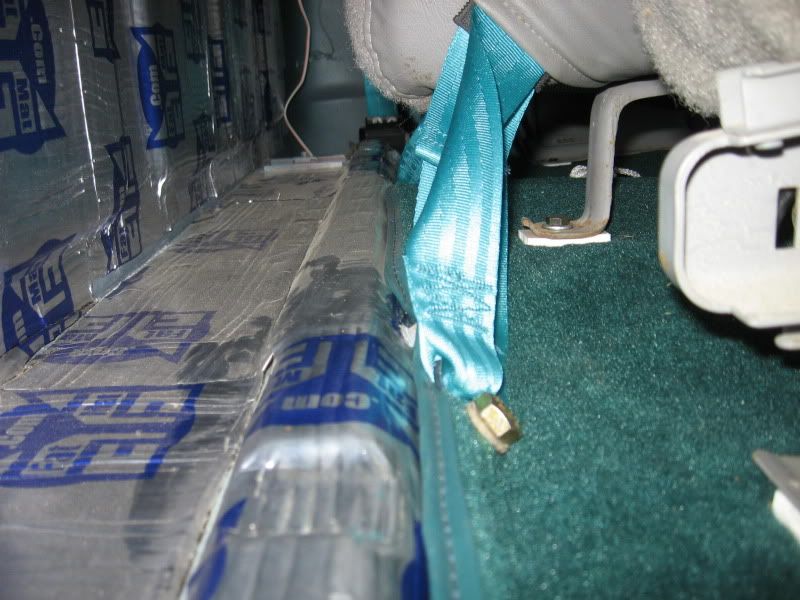 Then I pulled the plug out of the hole in the cab corner for the shoulder strap. I chased the threads with a tap to clean them out. The cover just snaps open on the strap holder. 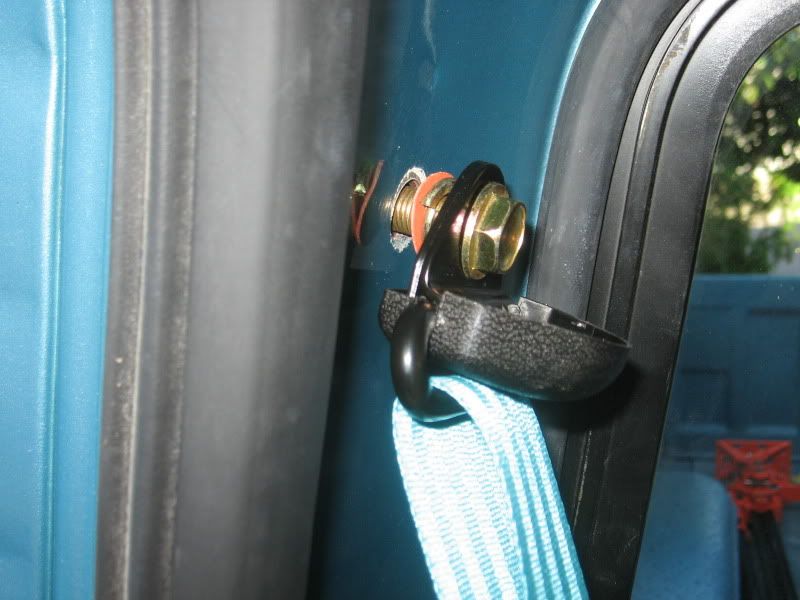 Just tighten it down. It's a special bolt that keeps that holder loose. Then snap the cover shut. 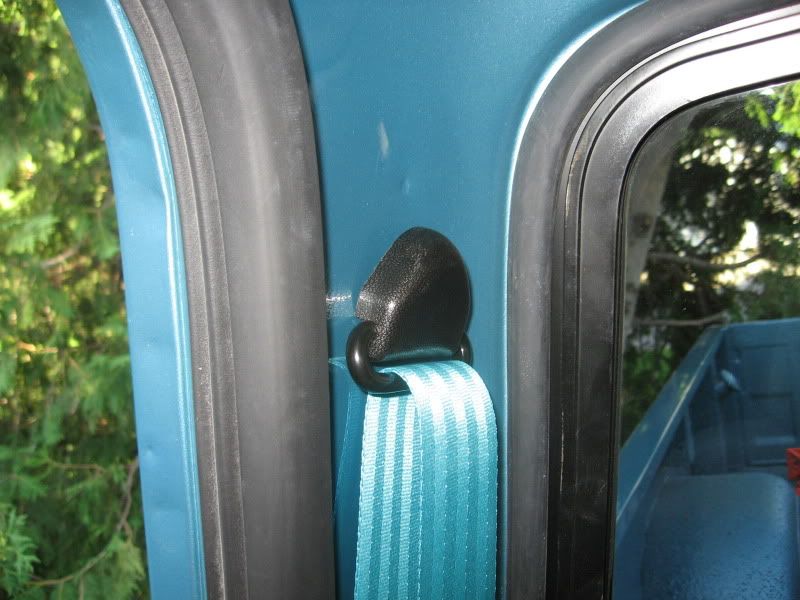 Then on the floor I marked a spot for the forward belt mount point. After sitting in the seat normally and strapping in I found a spot where it would fit comfortably. For me and my particular seat I went in about 2-1/2" from the door seal and just a bit back from the rear edge of the sill plate. I drilled a 29/64" hole (just over 7/16" for the bolt). This is the only holes I had to drill. 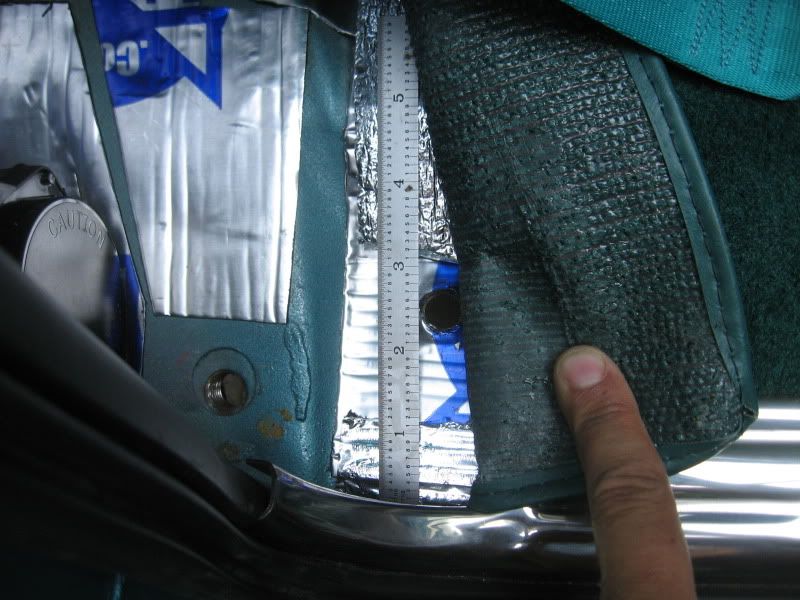 Then just bolted the L bracket in place with the 7/16" bolt and large fender washer for the back side. 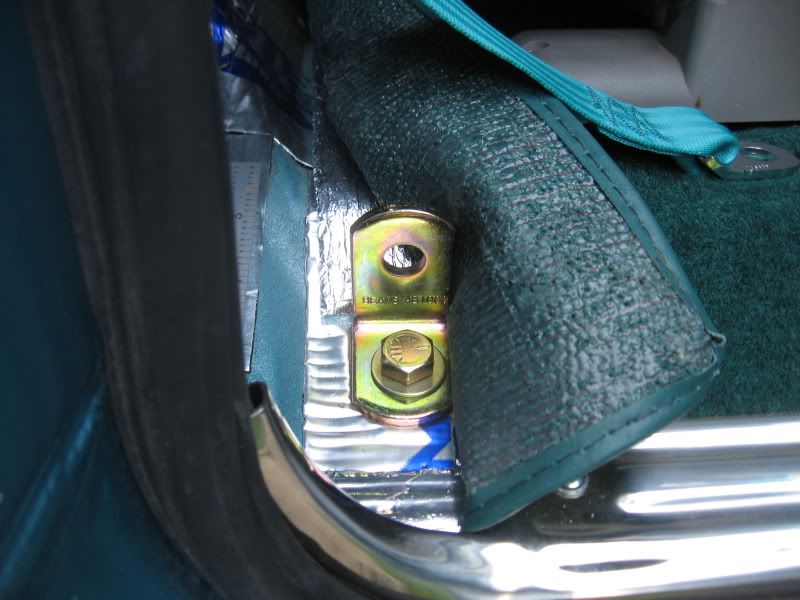 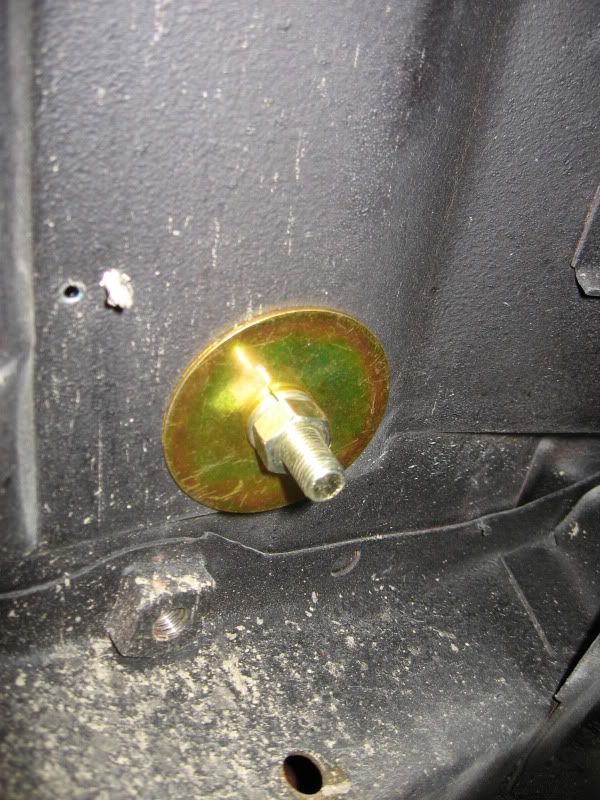 I didn't bolt the belt to that bracket yet so it would not be in the way while I was mounting the retractor. The only modification to the hardware I made was on the L bracket for the retractor. This may not be required but it makes it look like a better install and might help the retractor function properly. All I had to do was bend it a bit to match the angle of the floor where the OEM mount point is. 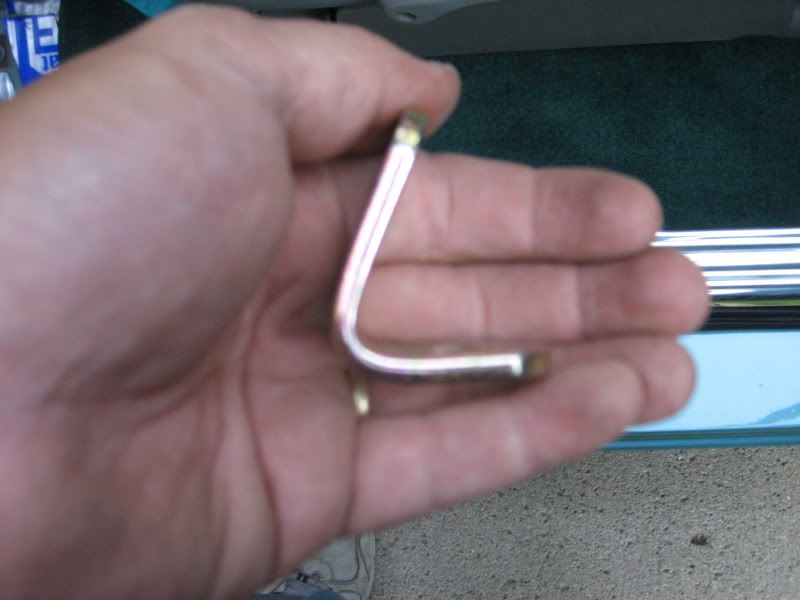 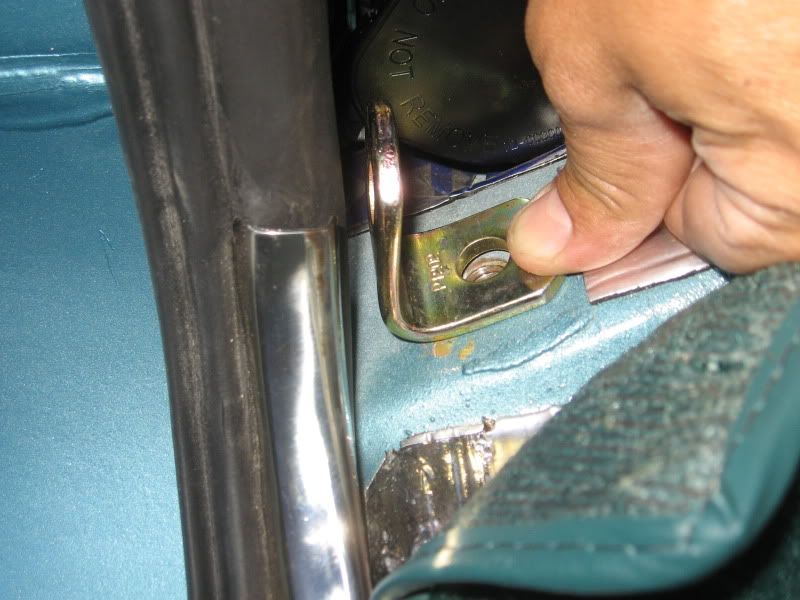 I did also drill the hole a bit after the bending because the 1/2" bolts don't want to slide in with the tighter angle. The holes were very tight for the 1/2" bolt even before I bent the bracket. This just gave it enough room to fit in, barely. 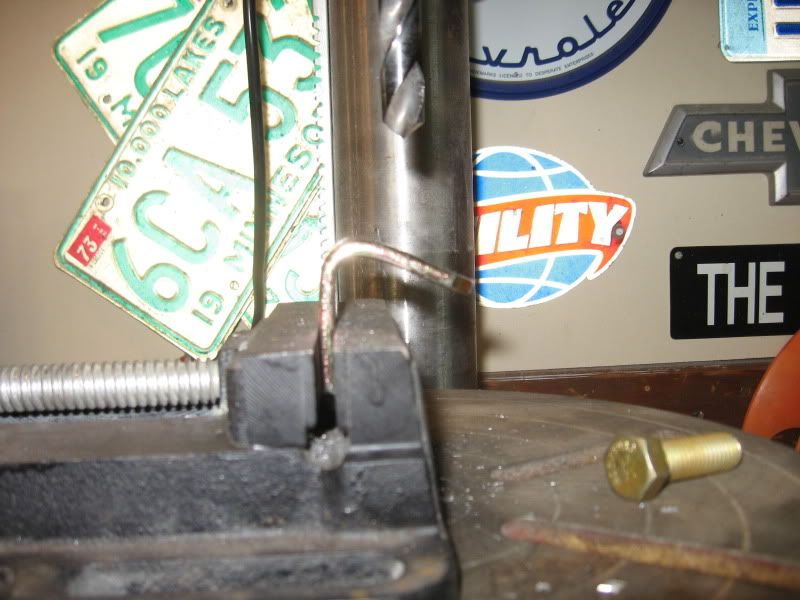 Then I bolted the bracket to the floor like so... 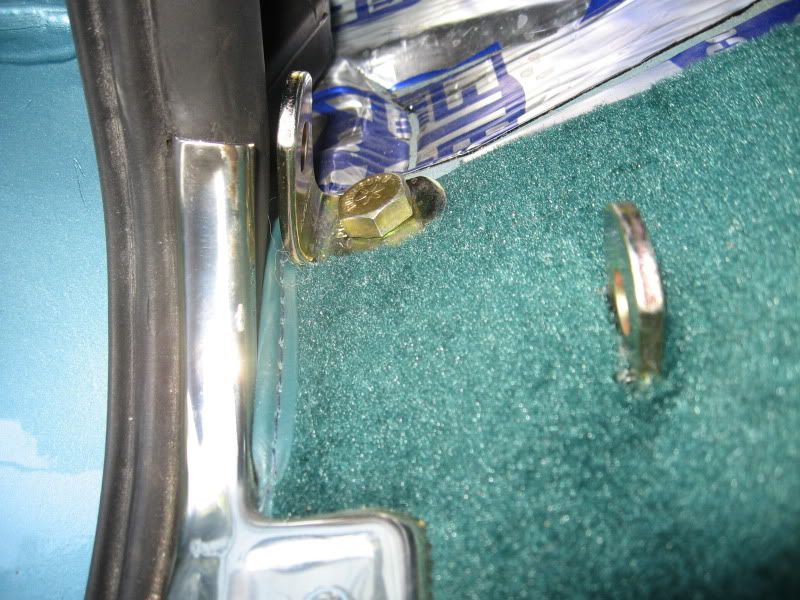 Then the retractor is bolted to the bracket using a 7/16" bolt from the kit. It's very snug in there with the bracket angle bent tighter, so I used a swivel on the socket. 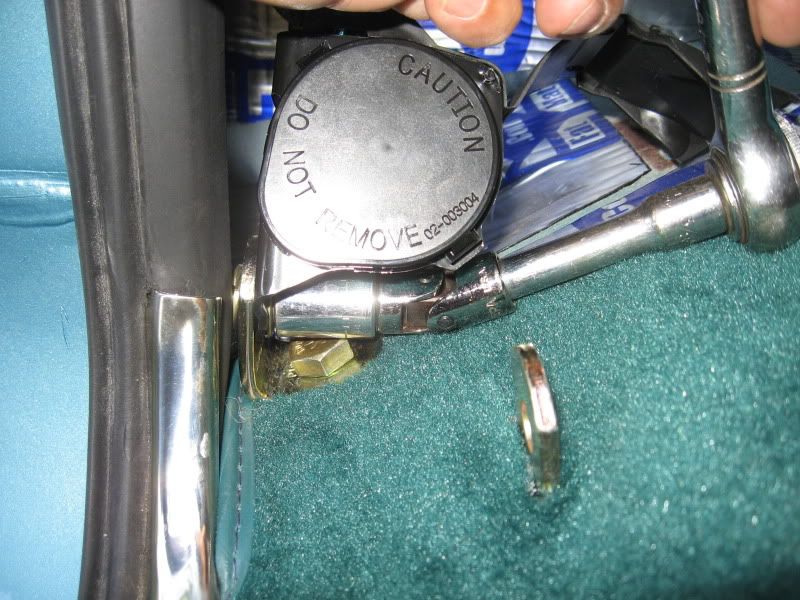 Once that is bolted down tight, just put the plasic cover back in place on the retractor, then bolt down the other end of the belt to the front bracket. 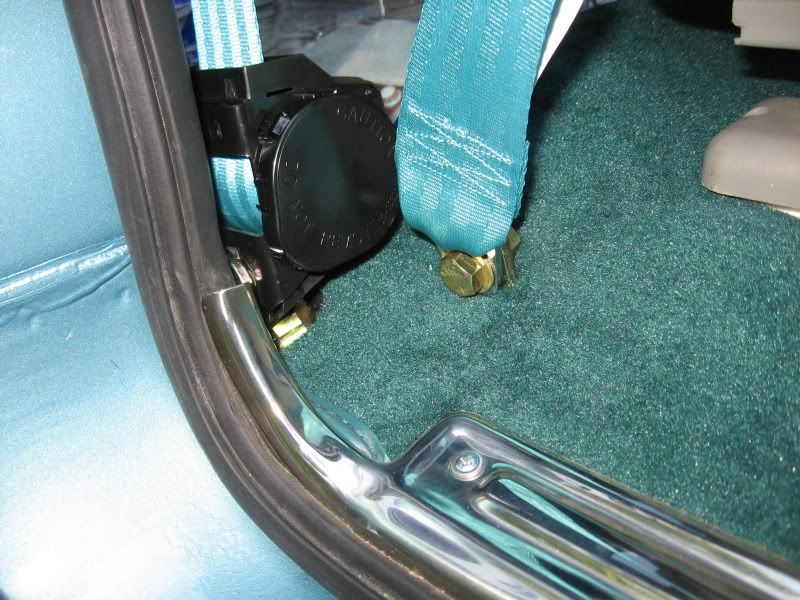 And it's done. 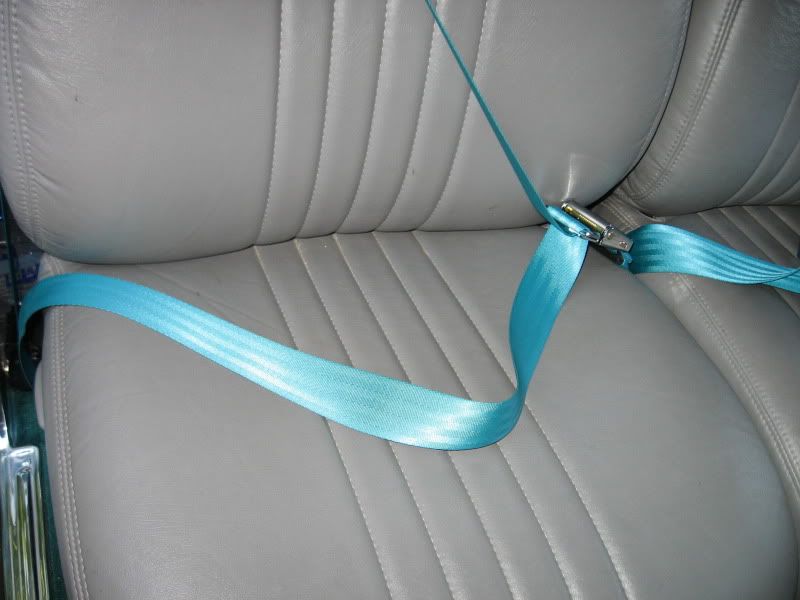 The belts work great. Nice smooth action. Nice buckles, the color of the webbing is perfect, nice heavy hardware in the kits (have to pay a few bucks more for the hardware, but totally worth it). Overall I'm very glad I went this route. During ordering I went out to measure everything and paid a bit extra for the extra length of the belts. I think they were 144" long, and also got the 20" length for the buckle end of the belts. They offer a shoulder extension but it's not needed on our cabs unless you happen to be quite short and sit with the seat pulled forward, then it might be handy. I also ordered the hardware kit for the middle lap belt, but never opened the package. It's not needed when installed as I did it. My total cost with shipping was $182 plus another $6 for the new 1/2" bolts I bought and that was for 2 sets of extra long retractable belts in a matching color, a lap belt for the middle seat, and all the new hardware. That's cheaper than what I found on ebay for just a set of 2 retractables belts in standard colors and length. I hope this helps some of you out when it comes time to hit the road with your family.
__________________
If no one knows what you're doing, they can't tell you you're doing it wrong HG's Dream Car Build - Shelby Cobra Kit Build your own adjustable track bar 71 Long Fleet C/10 72 Jimmy 4x4 (Junkyard Jimmy)HG's Plow Truck '78 K35 DuallyBigass Farm Truck HG's thread of miscellaneous stuff |
|
|
|
|
06-25-2012, 11:07 PM
|
#3 |
|
VA72C10
 Join Date: Mar 2008
Location: Midlothian, VA
Posts: 25,269
|
Re: Over 25 Years Later, Finally My 71 C-10 Truck Build
Looks good and nice writeup!
__________________
Looking for a 67-72 swb or blazer project in or around VA. 
|
|
|
|
|
06-26-2012, 09:14 PM
|
#4 | |
|
GEARHEAD
Join Date: Aug 2003
Location: MN
Posts: 6,122
|
Re: Over 25 Years Later, Finally My 71 C-10 Truck Build
Quote:
Today I started working on my fan shroud. I have it all fit up and holes drilled, etc. Once I cut the holes out for the fans it lost a lot of stiffness across the middle. I know the fans will tighten it up when they are bolted on, but I think I am going to add a small bend od the sides to get the stiffness back. That will just take a minute or 2 on my buddies brake. Then it will be ready for paint and final install. 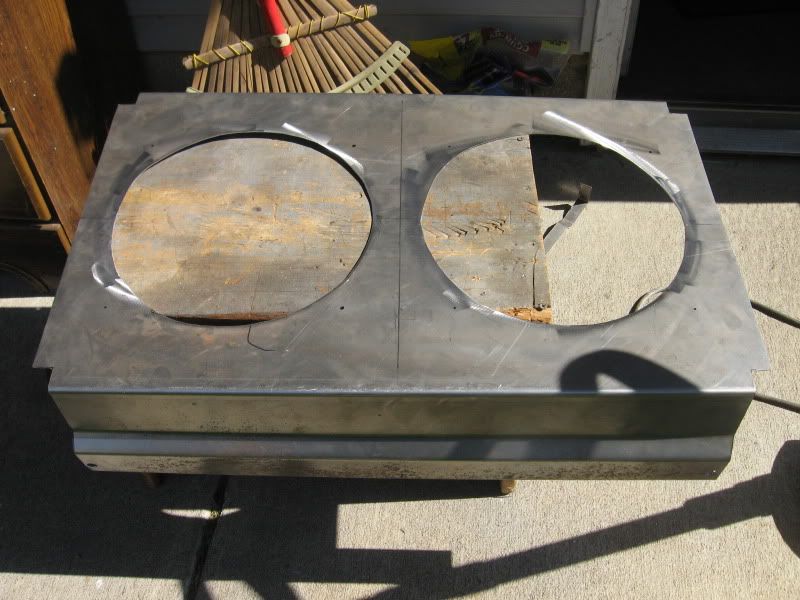 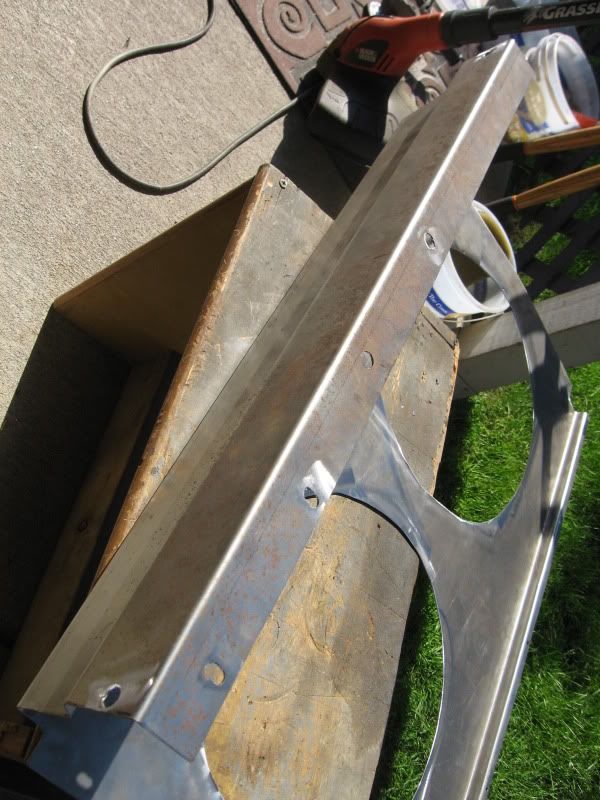 Punch list: Polish other wheels (half way there) fan/headlight wiring upgrade adjust e-brake cable horn Cowl shims Washer pump finish exhaust install closed loop sensor upholstory recovered alignment air cleaner touch up paint under hood stereo (eventually) fan shroud route fuel return to gas tank floor mats
__________________
If no one knows what you're doing, they can't tell you you're doing it wrong HG's Dream Car Build - Shelby Cobra Kit Build your own adjustable track bar 71 Long Fleet C/10 72 Jimmy 4x4 (Junkyard Jimmy)HG's Plow Truck '78 K35 DuallyBigass Farm Truck HG's thread of miscellaneous stuff |
|
|
|
|
|
06-29-2012, 09:48 PM
|
#5 |
|
GEARHEAD
Join Date: Aug 2003
Location: MN
Posts: 6,122
|
Re: Over 25 Years Later, Finally My 71 C-10 Truck Build
Back home after a few days on the road. I did the final mock up of the shroud, with a fan installed to make sure it was stable enough and had no rubbing issues with the bolts holding the fans in place, etc.
 Everything was cool after clearancing a couple bolt holes, so I wiped it down with some cleaner, etch primered and painted. Should be ready to go back together by morning. 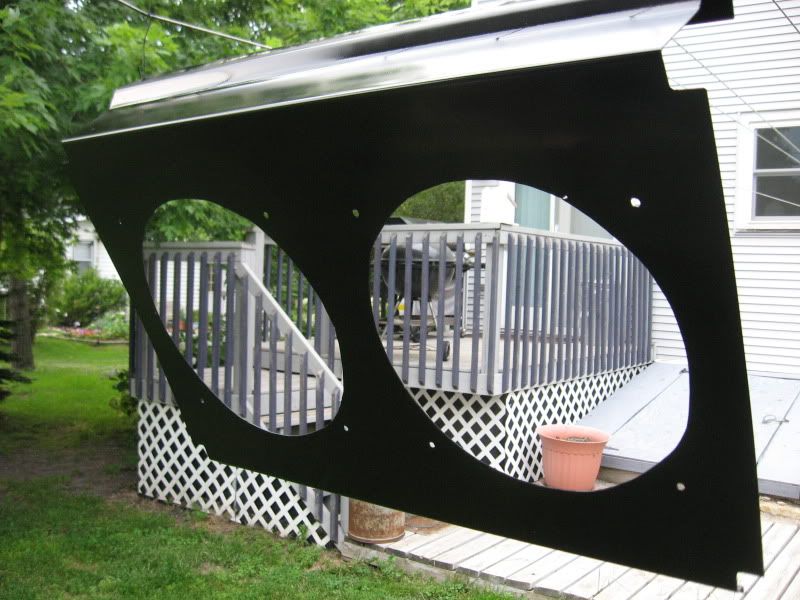 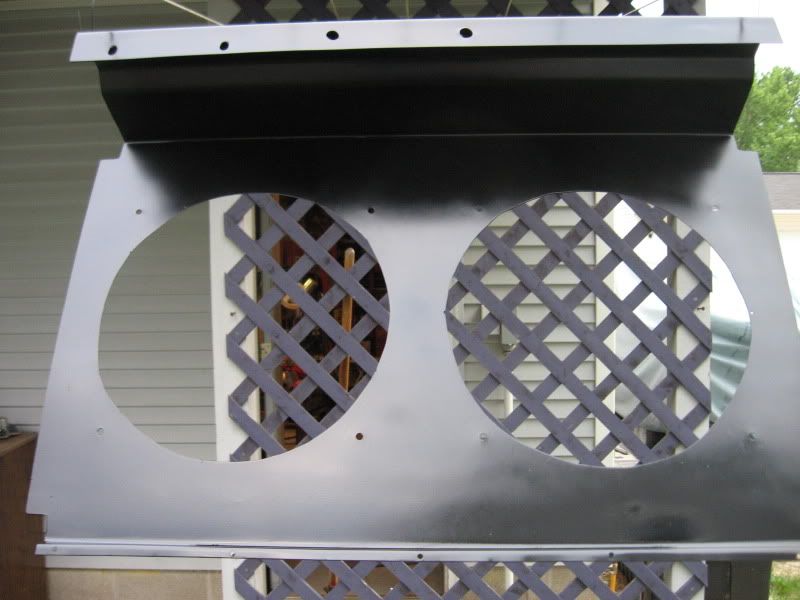
__________________
If no one knows what you're doing, they can't tell you you're doing it wrong HG's Dream Car Build - Shelby Cobra Kit Build your own adjustable track bar 71 Long Fleet C/10 72 Jimmy 4x4 (Junkyard Jimmy)HG's Plow Truck '78 K35 DuallyBigass Farm Truck HG's thread of miscellaneous stuff |
|
|
|
|
06-30-2012, 12:48 AM
|
#6 |
|
VA72C10
Join Date: Mar 2008
Location: Midlothian, VA
Posts: 25,269
|
Re: Over 25 Years Later, Finally My 71 C-10 Truck Build
very nice!
__________________
Looking for a 67-72 swb or blazer project in or around VA.
|
|
|
|
|
06-30-2012, 11:16 AM
|
#7 | |
|
GEARHEAD
Join Date: Aug 2003
Location: MN
Posts: 6,122
|
Re: Over 25 Years Later, Finally My 71 C-10 Truck Build
Quote:
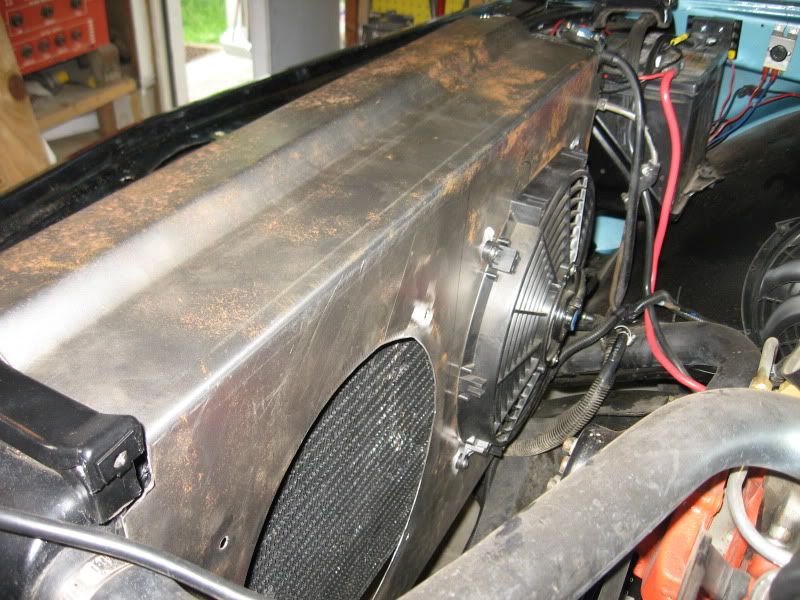
Fans installed... 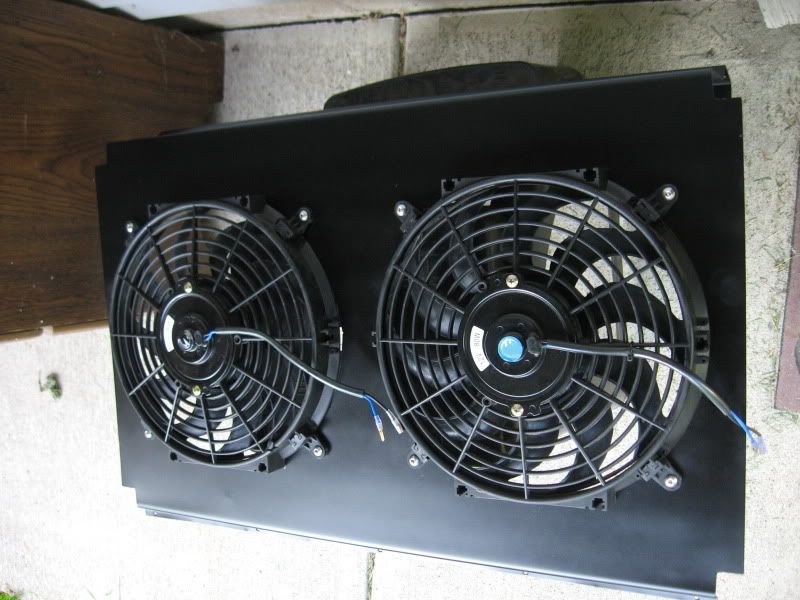 Rear/side view... 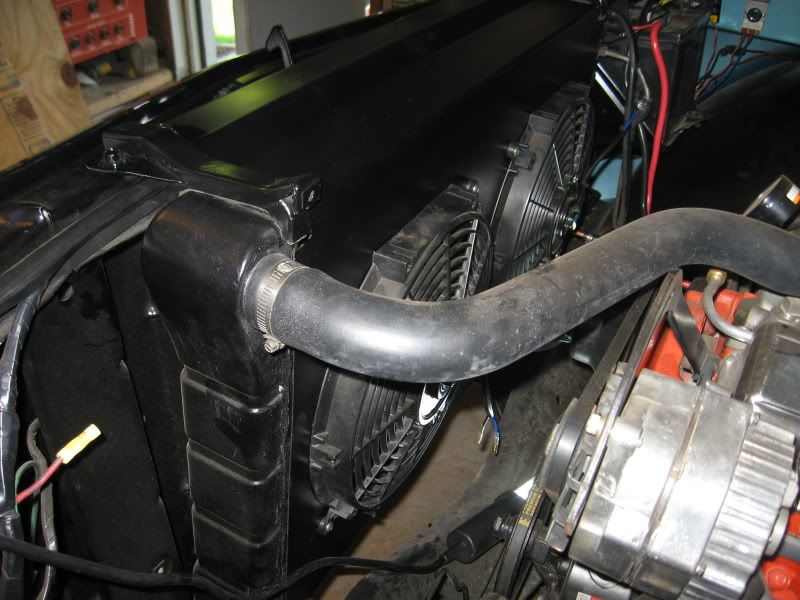 Side... 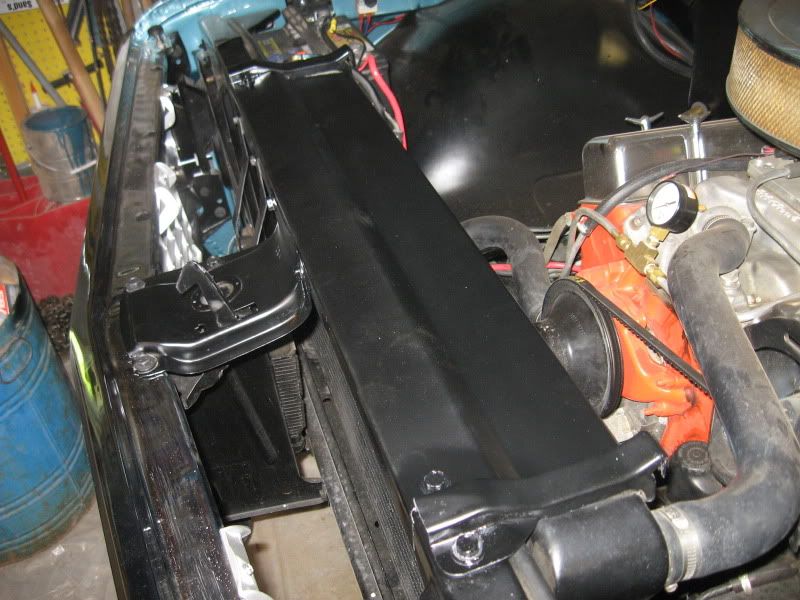 Front view, shows how it combines with the OEM radiator hold down bracket. 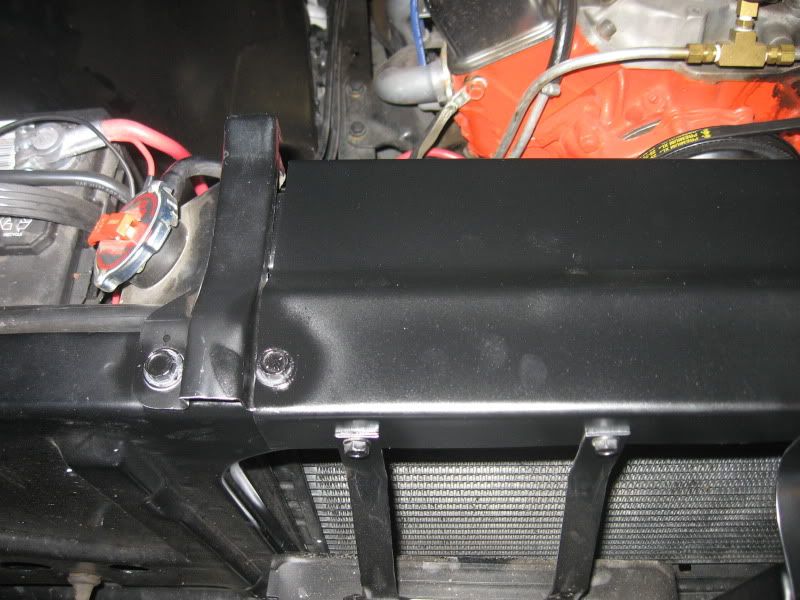 Not sure what I'll tackle next off the list. Too hot this weekend to sit outside and polish wheels. Not really ready to jack it up to do exhaust right now and I think I'm going to change mufflers to something a bit less dramatic. Don't like the drone of the flowmasters. Hmmm, maybe I'll just drive it for a while. The next driveability issue to tackle is the fuel return line. My bypass of the tank causes the fuel to heat up recirculating and at idle it will loose fuel pressure and stall. I either route it back to the tank with a bulkhead fitting, or add a fuel cooler or both. I need to work on that and exhaust before mid August because my daughters softball team wants my truck in the local town parade then. I'm not committed on that yet. Punch list: Polish other wheels (half way there) fan/headlight wiring upgrade adjust e-brake cable horn Cowl shims Washer pump finish exhaust install closed loop sensor upholstory recovered alignment air cleaner touch up paint under hood stereo (eventually) floor mats
__________________
If no one knows what you're doing, they can't tell you you're doing it wrong HG's Dream Car Build - Shelby Cobra Kit Build your own adjustable track bar 71 Long Fleet C/10 72 Jimmy 4x4 (Junkyard Jimmy)HG's Plow Truck '78 K35 DuallyBigass Farm Truck HG's thread of miscellaneous stuff Last edited by hgs_notes; 07-19-2012 at 10:57 PM. |
|
|
|
|
|
06-30-2012, 11:37 AM
|
#8 |
|
67cheby
 Join Date: Sep 2008
Location: siloam springs ar 72761
Posts: 17,890
|
Re: Over 25 Years Later, Finally My 71 C-10 Truck Build
nice job on the shroud !
|
|
|
|
|
06-30-2012, 03:07 PM
|
#9 |
|
VA72C10
Join Date: Mar 2008
Location: Midlothian, VA
Posts: 25,269
|
Re: Over 25 Years Later, Finally My 71 C-10 Truck Build
 and that punch list is getting very short! and that punch list is getting very short!
__________________
Looking for a 67-72 swb or blazer project in or around VA.
|
|
|
|
|
06-30-2012, 05:24 PM
|
#10 | ||
|
GEARHEAD
Join Date: Aug 2003
Location: MN
Posts: 6,122
|
Re: Over 25 Years Later, Finally My 71 C-10 Truck Build
Quote:
Quote:
__________________
If no one knows what you're doing, they can't tell you you're doing it wrong HG's Dream Car Build - Shelby Cobra Kit Build your own adjustable track bar 71 Long Fleet C/10 72 Jimmy 4x4 (Junkyard Jimmy)HG's Plow Truck '78 K35 DuallyBigass Farm Truck HG's thread of miscellaneous stuff Last edited by hgs_notes; 07-17-2012 at 10:08 PM. |
||
|
|
|
|
07-17-2012, 10:32 PM
|
#11 |
|
GEARHEAD
Join Date: Aug 2003
Location: MN
Posts: 6,122
|
Re: Over 25 Years Later, Finally My 71 C-10 Truck Build
One nagging problem I've had with the drivability of my truck is that the fuel has been heating up and then the pressure drops and it stalls. Here's the background for those out there that have not been following along the past few years, or just don't remember what the heck I'm talking about...
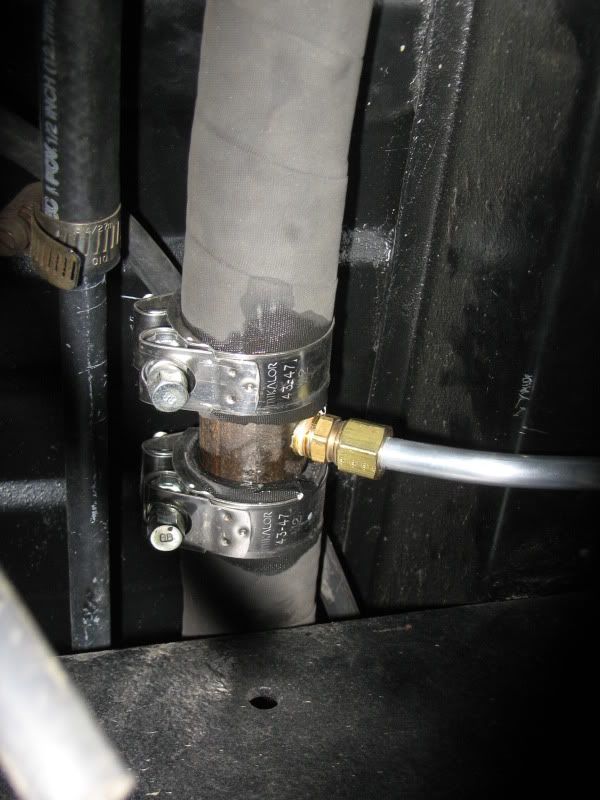
During the truck rebuild I installed a holley pro-jection throttle body fuel injection set up. Bought it used, then rebuilt it, new harnesses, etc. I used the original fuel pump. Last year when I was starting the engine for the first time it was pushing fuel in like crazy. I got a pressure gage on the inlet to the throttle body and it was pegged high at 30 psi. This system has a pressure regulator in the throttle body and even with all new parts I could not get the pressure down to 15 where it should be. What I ended up finding was that the return line was not flowing to the gas tank and so the regulator was useless. Since I didn't have much of a choice, I cut the return line off a few inches behind the pump inlet. Then I put a Tee in the fuel line before the pump and had the return line tie in there. There was no other line to tie back to the tank with. Here's the pic from when I did it. 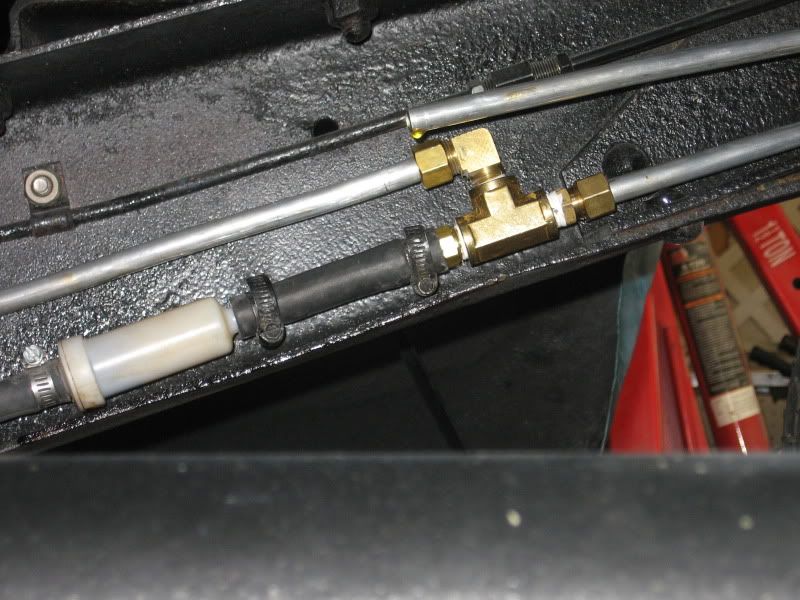 Now the problem is that the fuel is getting hot. I have all new 3/8" aluminum fuel lines, to and from the tank. After running for about 10-15 minutes the engine starts to stumble. The pressure gage starts showing around 10 psi and jumps around. The fuel lines are all hot. All the way back to the pump. Real hot, like hard to hold hot. Today I tried pushing air into the line back to the tank that was cut off. It flows and comes out another vent. Last year when I disconnected it, it would not flow air at all. So Sunday I hooked the return line back up like I originally had it and tried again. The fuel pressure jumps back up to 28 psi. There is just not enough flow (too much back pressure), back to the tank. I am using a blazer tank from a 73-75 truck. It's more square but flatter, doesn't hang down as much as a 72 blazer tank. (ps. won't work on a short bed) The pump is mounted just forward of the point in the frame rail where it turns up to go over the rear axle. So it is fairly close to the tank and as low as I can get it and not have it hanging under the frame. There is a small vent line from the sending unit, and a larger vent line there also, which is for the fuel filler vent. Then the gas out let and another vent, which I'm trying to use as the return line. No other connections on it. From what I have learned, these electric pumps will generate a lot of heat and that's one of the main reasons they are mounted inside the tanks, to help cool them. My recirculating system was not going to work. Here's what I came up with... 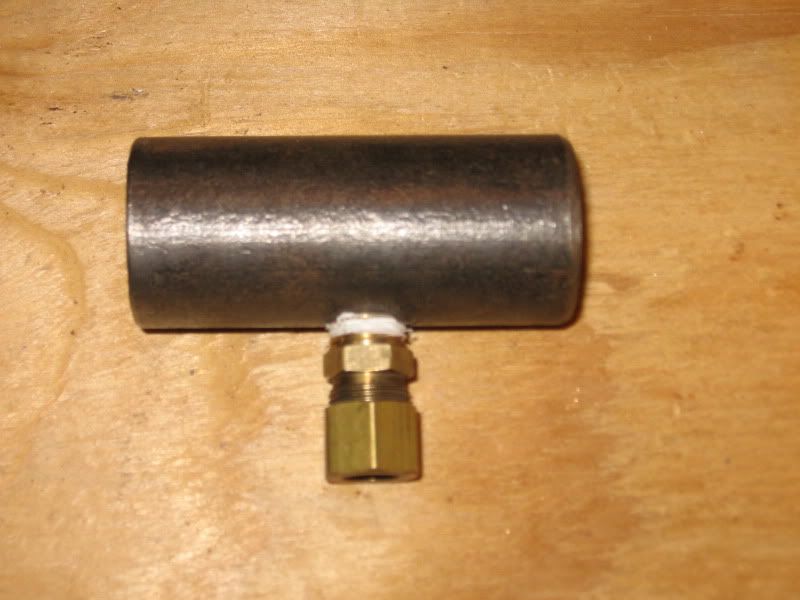 Since I don't have any other connections to the tank, I'm going to install this in the gas filler hose, then plumb the return line to it using the compression fitting. Something like this... 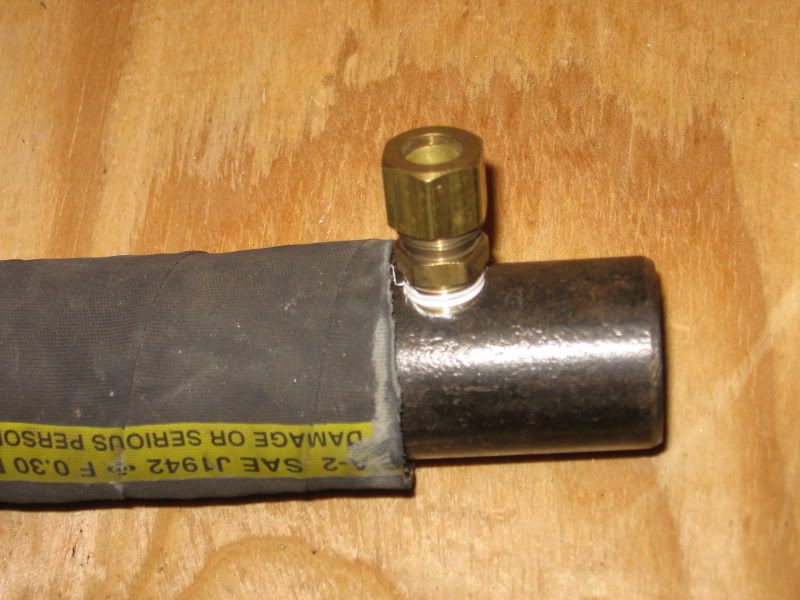 All it is is a piece of pipe, drilled and tapped for a 1/4" pipe thread and a brass 3/8" compression to 1/4" pipe fitting. In a couple days, when it cools off a bit and I'm back from a work trip, I'll be able to install it and test it out. My youngest girl asked me if we could use my truck to pull the float for her fast pitch softball team at the town parade this year. Until I can run this thing at idle for an hour or more without problems, I can't promise anything. So hopefully this works.
__________________
If no one knows what you're doing, they can't tell you you're doing it wrong HG's Dream Car Build - Shelby Cobra Kit Build your own adjustable track bar 71 Long Fleet C/10 72 Jimmy 4x4 (Junkyard Jimmy)HG's Plow Truck '78 K35 DuallyBigass Farm Truck HG's thread of miscellaneous stuff |
|
|
|
|
07-19-2012, 10:56 PM
|
#12 |
|
GEARHEAD
Join Date: Aug 2003
Location: MN
Posts: 6,122
|
Re: Over 25 Years Later, Finally My 71 C-10 Truck Build
I got my part installed and tested it out. It seems to be working just fine. I let it warm up for a while, then drove it around, came back and everything seems alright. Fuel lines are at ambient temp, the pump isn't making that growling noise after a few minutes like it used to. All I need to do now is see if it fills the tank ok without backing up in the fill tube. And maybe tighten the clamps and fittings a bit, looks like some minor leakage there.
__________________
If no one knows what you're doing, they can't tell you you're doing it wrong HG's Dream Car Build - Shelby Cobra Kit Build your own adjustable track bar 71 Long Fleet C/10 72 Jimmy 4x4 (Junkyard Jimmy)HG's Plow Truck '78 K35 DuallyBigass Farm Truck HG's thread of miscellaneous stuff |
|
|
|
|
07-19-2012, 11:17 PM
|
#13 |
|
Still Learning
Join Date: Jul 2009
Location: Central Oklahoma
Posts: 10,108
|
Re: Over 25 Years Later, Finally My 71 C-10 Truck Build
Looks like a clever return setup. Nice work
Posted via Mobile Device |
|
|
|
|
07-20-2012, 01:48 PM
|
#14 | |
|
GEARHEAD
Join Date: Aug 2003
Location: MN
Posts: 6,122
|
Re: Over 25 Years Later, Finally My 71 C-10 Truck Build
Quote:
Punch list: Polish other wheels (half way there) fan/headlight wiring upgrade adjust e-brake cable horn Cowl shims Washer pump finish exhaust install closed loop sensor upholstory recovered alignment air cleaner touch up paint under hood stereo (eventually) fan shroud route fuel return to gas tank floor mats
__________________
If no one knows what you're doing, they can't tell you you're doing it wrong HG's Dream Car Build - Shelby Cobra Kit Build your own adjustable track bar 71 Long Fleet C/10 72 Jimmy 4x4 (Junkyard Jimmy)HG's Plow Truck '78 K35 DuallyBigass Farm Truck HG's thread of miscellaneous stuff |
|
|
|
|
|
08-05-2012, 09:40 PM
|
#15 |
|
GEARHEAD
Join Date: Aug 2003
Location: MN
Posts: 6,122
|
Re: Over 25 Years Later, Finally My 71 C-10 Truck Build
I got one more wheel polished, just one more to go. On another note, last night the wife and I went for a cruise. We put about 35 miles on it and had no problems whatsoever. On the way back home I told her that after all of the hours and money I've put into it, all I ever wanted was for that moment right then. The two of us enjoying the sounds, the smells, the ride, the scenery and just a little reminder of where we started all those years ago. It was fantastic.
__________________
If no one knows what you're doing, they can't tell you you're doing it wrong HG's Dream Car Build - Shelby Cobra Kit Build your own adjustable track bar 71 Long Fleet C/10 72 Jimmy 4x4 (Junkyard Jimmy)HG's Plow Truck '78 K35 DuallyBigass Farm Truck HG's thread of miscellaneous stuff |
|
|
|
|
08-05-2012, 10:38 PM
|
#16 |
|
67cheby
Join Date: Sep 2008
Location: siloam springs ar 72761
Posts: 17,890
|
Re: Over 25 Years Later, Finally My 71 C-10 Truck Build
Well said , can't wait to be able to say the same thing !
Posted via Mobile Device |
|
|
|
|
08-05-2012, 10:42 PM
|
#17 |
|
Registered User
Join Date: Apr 2003
Location: Indep, MO
Posts: 5,893
|
Re: Over 25 Years Later, Finally My 71 C-10 Truck Build
Great when it all's finally worth it!
Posted via Mobile Device
__________________
Boppa's Old Yeller Truck Build, Old Yeller's New Heart! Project Buzz Bomb Flyin' Low! |
|
|
|
|
08-06-2012, 12:44 AM
|
#18 |
|
VA72C10
Join Date: Mar 2008
Location: Midlothian, VA
Posts: 25,269
|
Re: Over 25 Years Later, Finally My 71 C-10 Truck Build
That's awesome man! Congrats!!!
__________________
Looking for a 67-72 swb or blazer project in or around VA.
|
|
|
|
|
08-06-2012, 09:21 AM
|
#19 | |||
|
GEARHEAD
Join Date: Aug 2003
Location: MN
Posts: 6,122
|
Re: Over 25 Years Later, Finally My 71 C-10 Truck Build
Quote:
Quote:
Quote:
Saw this ad while reading a news story...
__________________
If no one knows what you're doing, they can't tell you you're doing it wrong HG's Dream Car Build - Shelby Cobra Kit Build your own adjustable track bar 71 Long Fleet C/10 72 Jimmy 4x4 (Junkyard Jimmy)HG's Plow Truck '78 K35 DuallyBigass Farm Truck HG's thread of miscellaneous stuff |
|||
|
|
|
|
08-07-2012, 02:07 PM
|
#20 |
|
GEARHEAD
Join Date: Aug 2003
Location: MN
Posts: 6,122
|
Re: Over 25 Years Later, Finally My 71 C-10 Truck Build
I started sanding the last wheel yesterday, but didn't get it finished. Hows that for an underwhelming update?
So to make this post at least a bit worthy of a glance I'll post some pics of my next truck project... 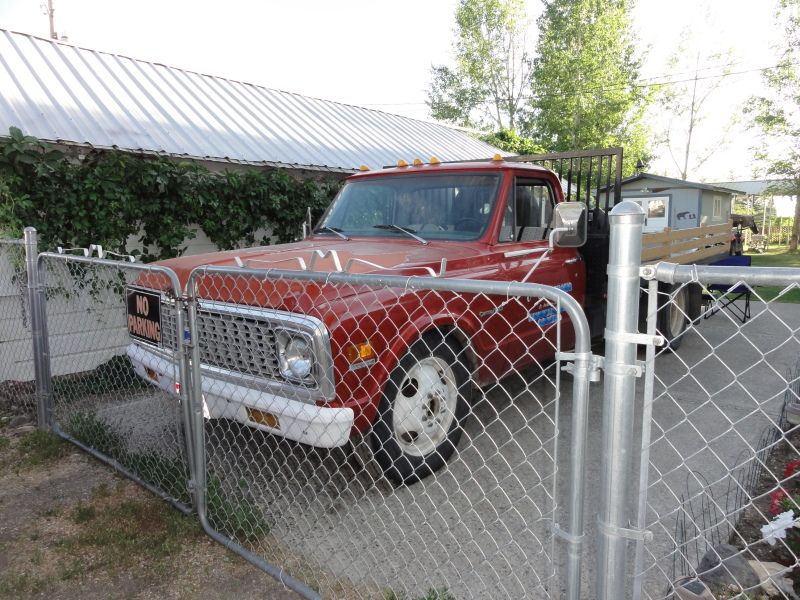 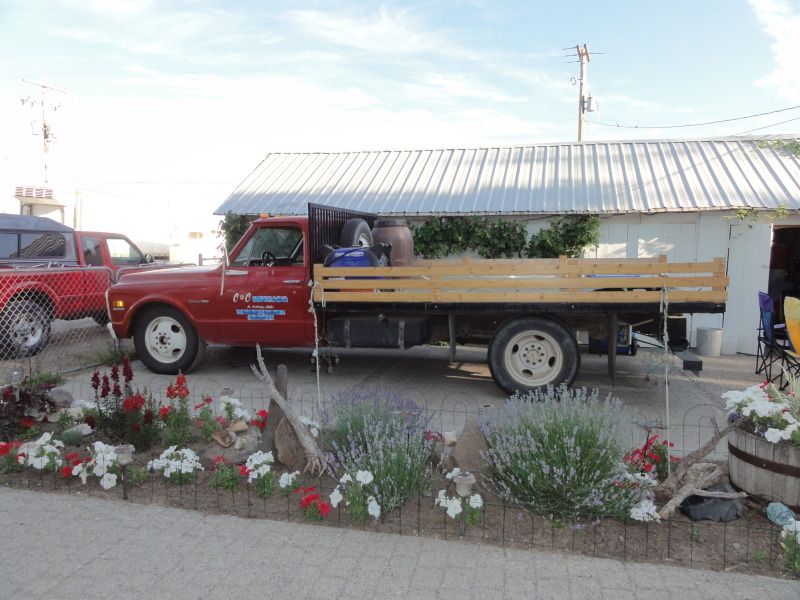 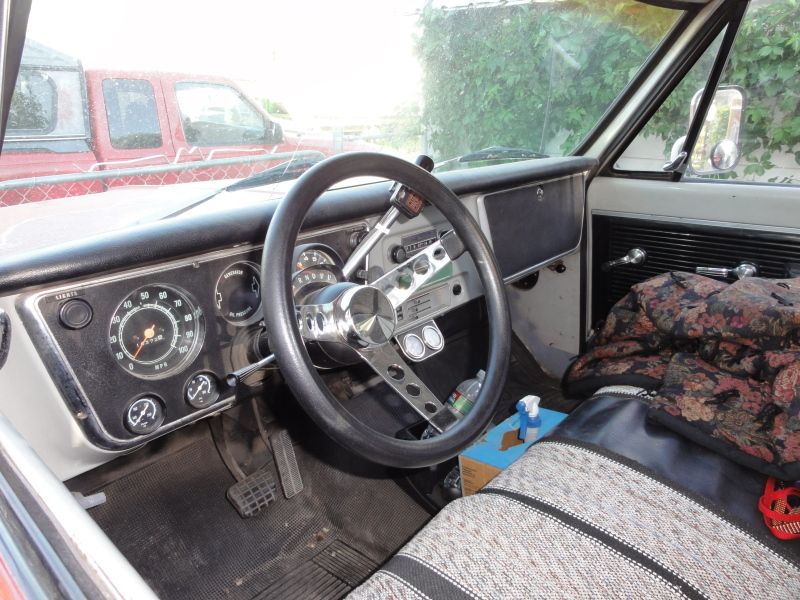 It belongs to my MIL and her husband at the moment, but they are adding my name to the title. They use it to pull a camper and haul a rhino occasionally. Now they are selling the camper and have a trailer to haul the rhino, so this truck they won't need. I told them last year that I wanted it, but made my intentions clear this visit, so there is no miscommunication. I want it. For the time being it will remain with them until they don't want it around anymore or until I decide to bring it home. Its a 71 C-30 with a 12' flatbed, 427 bus big block and automatic (probably a TH-400). It was used by a local lumbar yard there in St Anthony, ID for many years and is pretty much rust free. The clear coat is peeling a bit but it is near perfectly straight. I runs and drives perfect. I'm not sure what plans I have for it right now but will repaint it and maybe do a hydraulic tilt bed. It might be my last truck build and even that might wait until after I do some other car projects once my Jimmy is built. No rush for me.
__________________
If no one knows what you're doing, they can't tell you you're doing it wrong HG's Dream Car Build - Shelby Cobra Kit Build your own adjustable track bar 71 Long Fleet C/10 72 Jimmy 4x4 (Junkyard Jimmy)HG's Plow Truck '78 K35 DuallyBigass Farm Truck HG's thread of miscellaneous stuff |
|
|
|
|
07-23-2017, 04:33 PM
|
#21 | |
|
Registered User
Join Date: Mar 2010
Location: ID
Posts: 262
|
Re: Over 25 Years Later, Finally My 71 C-10 Truck Build
Quote:
|
|
|
|
|
|
08-07-2012, 02:24 PM
|
#22 |
|
Registered User
Join Date: Feb 2011
Location: Pittsfield, Ma
Posts: 497
|
Re: Over 25 Years Later, Finally My 71 C-10 Truck Build
cool!
__________________
Cam 1972 Chevy C/10 "Custom Cruiser Project" Build Thread 1961 Olds Super 88 (Daily) 1966 Chevy Corvair 500, "Marigold" SOLD 2005 Subaru Outback Wagon DEAD 2008 Pontiac G8, New Winter/Daily |
|
|
|
|
08-07-2012, 03:21 PM
|
#23 |
|
VA72C10
Join Date: Mar 2008
Location: Midlothian, VA
Posts: 25,269
|
Re: Over 25 Years Later, Finally My 71 C-10 Truck Build
Very cool!!!
__________________
Looking for a 67-72 swb or blazer project in or around VA.
|
|
|
|
|
08-07-2012, 05:22 PM
|
#24 |
|
State of Confusion!
  Join Date: Jul 2002
Location: Gulfport, MS USA
Posts: 46,767
|
Re: Over 25 Years Later, Finally My 71 C-10 Truck Build
That is a great looking truck!
__________________
Bill 1970 Chevy Custom/10 LWB Fleetside 2010 Toyota Tacoma PreRunner SR5 Double Cab - DD Member of Louisiana Classic Truck Club (LCTC) Bill's Gallery Life isn't tied with a bow, but it's still a gift. Live simply. Love generously. Care deeply. Speak kindly. Leave the rest to God! |
|
|
|
|
08-08-2012, 04:22 PM
|
#25 | |||
|
GEARHEAD
Join Date: Aug 2003
Location: MN
Posts: 6,122
|
Re: Over 25 Years Later, Finally My 71 C-10 Truck Build
Quote:
Quote:
Quote:

__________________
If no one knows what you're doing, they can't tell you you're doing it wrong HG's Dream Car Build - Shelby Cobra Kit Build your own adjustable track bar 71 Long Fleet C/10 72 Jimmy 4x4 (Junkyard Jimmy)HG's Plow Truck '78 K35 DuallyBigass Farm Truck HG's thread of miscellaneous stuff |
|||
|
|
|
 |
| Bookmarks |
|
|


 Hybrid Mode
