
 |
|
|
#926 | |
|
Rollin' Old Skool
Join Date: Jun 2007
Location: Hattiesburg, MS
Posts: 5,371
|
Re: Markeb01 Build Thread
Quote:
__________________
_____________________________________________ Phillip My Build threads: 1966 Chevy C-10 "Black Betty" shortbed, fleetside, BBW, 327 V8/ Powerglide (under construction) http://67-72chevytrucks.com/vboard/s...ighlight=betty 1997 Chevy Tahoe, 2dr/2wd, mild custom (Daily driver) http://67-72chevytrucks.com/vboard/s...d.php?t=601142 Pics: '66 C-10 https://flic.kr/s/aHsjHWD4h9 '97 Tahoe https://flic.kr/s/aHsjGZ7wKP '93 C-1500 https://flic.kr/s/aHskxdpdnQ '88 S-10 Blazer https://flic.kr/s/aHsjYGx4Md Previous Rides: 1993 Chevy S-10 ext. cab, 4.3L, 4/5 drop (Sold) 1993 Chevy C-1500 short/step Retro-Rod (Sold) 1988 S-10 Blazer 2dr/2wd mild custom (Sold) |
|
|
|

|
|
|
#927 |
|
Registered User
Join Date: Apr 2011
Location: .
Posts: 3,104
|
Re: Markeb01 Build Thread
Glad I got to meet you and the other Fellas in person.
Your Truck is Sweet. Sounds Killer in person too. |
|
|

|
|
|
#928 | |
|
Senior Enthusiast
Join Date: Feb 2007
Location: Spokane Valley, WA
Posts: 8,356
|
Re: Markeb01 Build Thread
Quote:
__________________
My Build Thread: http://67-72chevytrucks.com/vboard/s...d.php?t=444502 |
|
|
|

|
|
|
#929 | |
|
Rollin' Old Skool
Join Date: Jun 2007
Location: Hattiesburg, MS
Posts: 5,371
|
Re: Markeb01 Build Thread
Quote:

__________________
_____________________________________________ Phillip My Build threads: 1966 Chevy C-10 "Black Betty" shortbed, fleetside, BBW, 327 V8/ Powerglide (under construction) http://67-72chevytrucks.com/vboard/s...ighlight=betty 1997 Chevy Tahoe, 2dr/2wd, mild custom (Daily driver) http://67-72chevytrucks.com/vboard/s...d.php?t=601142 Pics: '66 C-10 https://flic.kr/s/aHsjHWD4h9 '97 Tahoe https://flic.kr/s/aHsjGZ7wKP '93 C-1500 https://flic.kr/s/aHskxdpdnQ '88 S-10 Blazer https://flic.kr/s/aHsjYGx4Md Previous Rides: 1993 Chevy S-10 ext. cab, 4.3L, 4/5 drop (Sold) 1993 Chevy C-1500 short/step Retro-Rod (Sold) 1988 S-10 Blazer 2dr/2wd mild custom (Sold) |
|
|
|

|
|
|
#930 |
|
Registered User
Join Date: Jun 2012
Location: Selkirk Ontario Canada
Posts: 1,141
|
Re: Markeb01 Build Thread
great pics thanks for sharing
__________________
My 63 GMC Panel Slow Build http://67-72chevytrucks.com/vboard/s...=1#post5457281 63 
|
|
|

|
|
|
#931 |
|
Registered User
 Join Date: May 2009
Location: Rathdrum, Idaho
Posts: 1,135
|
Re: Markeb01 Build Thread
Hi mark thanks for the Goodguys pic's cool as always, I liked the video around the parade route that motor sure sounds good. Hey I run across this web site you might like it has lots of neat stuff even some mooneyes decals and things.
https://www.koolrides.com/catalog/in...3abbf988e9de3a If you haven't already seen this enjoy..Vernski 
|
|
|

|
|
|
#932 |
|
Senior Member
 Join Date: Oct 2009
Location: Fayetteville, Arkansas
Posts: 1,923
|
Re: Markeb01 Build Thread
your trucks paint continues to look so smooth. i got the blitz black from john deere and should be throwing it on some test panels soon. appreciate all the tips you offered up.
looks like you and the boys had a great time at the show... jealous i am.  you got it right Mark, enjoying your truck is what its all about.......... |
|
|

|
|
|
#933 |
|
Senior Enthusiast
Join Date: Feb 2007
Location: Spokane Valley, WA
Posts: 8,356
|
Re: Markeb01 Build Thread
So my squeeze and I are out cruising last night confirming times for a car show on Sunday. Heading back towards home what zips by us but a shortbed stepside Chevy. At first it appeared to be gloss black but my wife said it was a real deep maroon. The rear bumper was chrome, it was lowered a tad, and had new style polished aluminum or chrome wheels. It also had high back bucket seats, and may have been a 60-61 with the early hood. It was really striking, so I quickly grabbed the dash cam and turned it to the left so I could get some coverage. At the next light we pulled up one car behind it in the next lane and got some really good footage. As he went straight we turned right and got quite a bit to share with the forum.
So today I’m downloading the files, saw the stuff about the car show, then jumped forward to the next interesting segment and deleted everything in between. Looking at the next piece I noticed the camera was turned to the left and immediately remembered the dark colored truck. It was too late. I was hoping the deleted files were in the recycle bin but no such luck. They were just gone. Bummer. I’ve never seen the truck before. I’m hoping it’s local so it may turn up again. A few minutes later I filled the tank and headed for home. Woke up this morning to a garage full of gas fumes (again)! Damn if the hard line connecting to the fuel tank fitting isn’t leaking. I’m going to replace my flaring set tomorrow, but I’m honestly baffled. I’ve been bending and forming flares since the late 1950’s and I’ve never replaced anything I’ve ever created. Once done they stay perfect for decades. That is up until the last 6 months. I’ve replaced almost all of the hard lines and fittings from the engine to the tank twice because one by one they started leaking. Same thing happened with the hard lines from the fuel pump to the carburetor. I’m not even convinced it’s the flaring tool as I can find absolutely nothing wrong with the flares, other than they start leaking several weeks or months after being formed. Now I’m wondering if it’s the newer galvanized tubing that’s been available since the “green” or “black” stuff came along. Whatever is wrong I’m certainly beyond frustrated. I hate dealing with gasoline and putting up with the smell in the house, and replacing all these lines and fittings is getting expensive and feels just like repairing someone else’s shoddy work because my stuff never needs to be replaced! On a more positive note there’s a free car show on South Sullivan tomorrow from noon to 3:00. I’d like to attend if I can get the truck back together in time. 
__________________
My Build Thread: http://67-72chevytrucks.com/vboard/s...d.php?t=444502 |
|
|

|
|
|
#934 |
|
The 60-66 GMC/Pontiac guy....
Join Date: Oct 2010
Location: Apache Junction, Arizona
Posts: 1,306
|
Re: Markeb01 Build Thread
just a question... double flare?

__________________
 Building Genuine Pontiac Firepowered cars and trucks for several decades.  Why Pontiac?? That's just me daring to be different.  Projects.. 63 C10 Short Wheel Base fleetside (The Pro-Street) currently under reconstruction. 440CID 2X4 Pontiac 
|
|
|

|
|
|
#935 |
|
Senior Enthusiast
Join Date: Feb 2007
Location: Spokane Valley, WA
Posts: 8,356
|
Re: Markeb01 Build Thread
Yes.
__________________
My Build Thread: http://67-72chevytrucks.com/vboard/s...d.php?t=444502 |
|
|

|
|
|
#936 |
|
Senior Member
 Join Date: Oct 2009
Location: Fayetteville, Arkansas
Posts: 1,923
|
Re: Markeb01 Build Thread
i've noticed problems flaring the new lines that are available. seems they crack or split where the tool stretches the metal the most. maybe i made the flares too deep or too much vibration where they were, not sure. i thought the lines must be aluminum but were advertised as steel and a magnet did stick, must be some cheaper manufactured stuff. i've had some success with the green lines and they do bend easier. just don't like the color so i have to paint them. the stainless stuff is tough but pricey and difficult to work with.
when you solve this problem, and i'm sure you will, it will be good info for all. thanks Mark, you are the encyclopedia of problem solving. and by the way, blitz black is killer... |
|
|

|
|
|
#937 |
|
Registered User
Join Date: Apr 2012
Location: Searcy, AR
Posts: 4,203
|
Re: Markeb01 Build Thread
Bummer about the deleted portion of the video... I recently had deletion issues of my own, somehow I managed to delete my photo managing program on my laptop, and the original discs have gone AWOL. Luckily the pics themselves were not lost, so now to re-install the program along with OS upgrading... Oh the joys of technology.
  Posted via Mobile Device Posted via Mobile Device
__________________
DON Proverbs 27:17  US Air Force Retarded errr Retired My '65 Stepper Build:http://67-72chevytrucks.com/vboard/s...d.php?t=533920 My '60 Rusty Patina Build:http://67-72chevytrucks.com/vboard/s...66#post7402266 My '72 http://67-72chevytrucks.com/vboard/s...59#post7204359 SOLD |
|
|

|
|
|
#938 |
|
Registered User
Join Date: Jun 2012
Location: Selkirk Ontario Canada
Posts: 1,141
|
Re: Markeb01 Build Thread
that blows on losing the video ...dam cheap china steel lines lol
__________________
My 63 GMC Panel Slow Build http://67-72chevytrucks.com/vboard/s...=1#post5457281 63 
|
|
|

|
|
|
#939 | ||
|
Senior Enthusiast
Join Date: Feb 2007
Location: Spokane Valley, WA
Posts: 8,356
|
Re: Markeb01 Build Thread
So did you finally shoot some test panels or the truck itself?
Quote:
Quote:
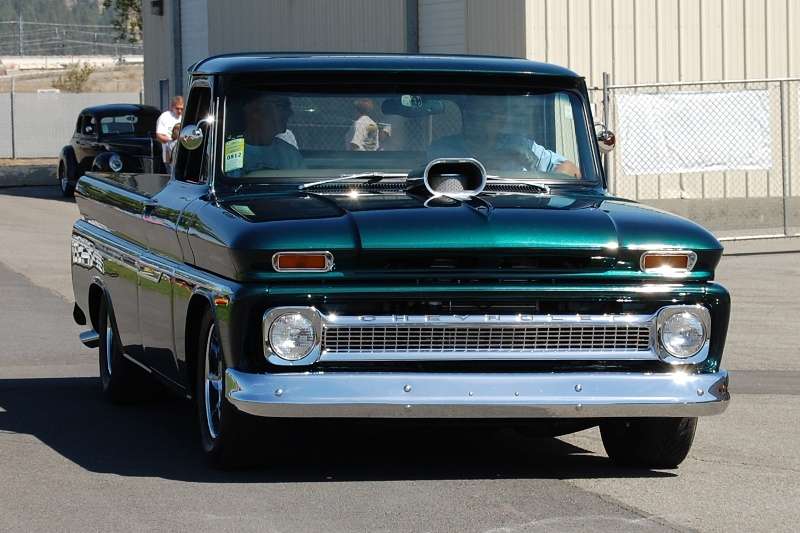
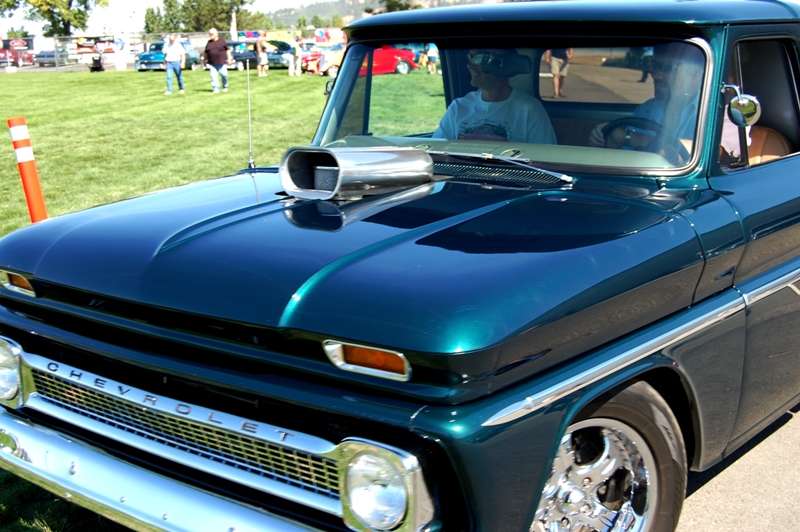
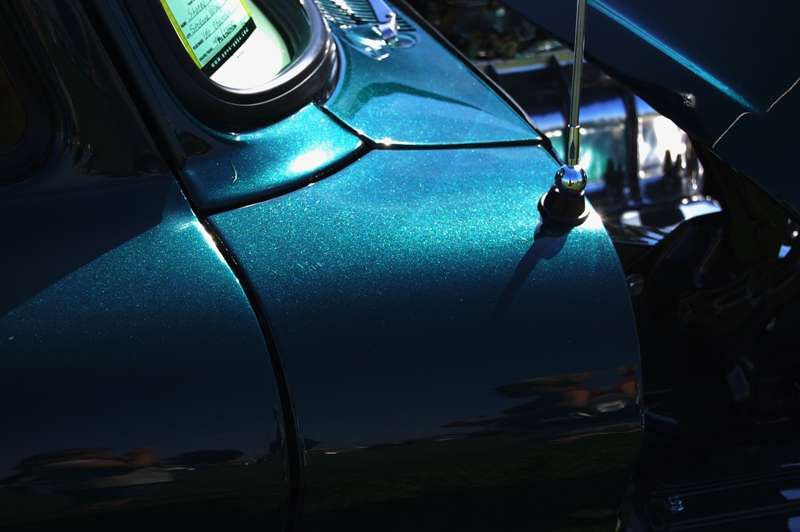
This turned out to be a pretty nice day. The more I thought about the leaking fuel lines the more I came to accept the problem must be the Napa galvanized tubing itself. So I went back through my tubing supply and came up with an unused length of the same tubing shown here:  Best guess this particular Napa tubing was purchased somewhere between 2005 and 2007, and is clearly different than the material currently being sold. One end had a perfect factory flare. By comparison several of the flared ends on the new tubing had to be removed because of excessive flash or being formed off center. After a few minutes of forming the angle and opposite flared end, the new piece was installed resulting in a leak free connection (hopefully permanent). One thing I’ve learned is I’m done forming steel tubing unless I can obtain more of the obsolete product. Fortunately we have a local specialty shop that can form custom lengths of tubing for little more than the stuff at Napa. If I need any more in the future I’ll just have them make it to length and form the bends myself. With the truck down off the jack stands I hopped in and headed to a local free car show. I showed up 20 minutes early and discovered the place was already full to capacity so I was shunted to the overflow parking out front. This was a real blessing as I wanted to be able to leave when I wanted and this made it real easy. Being part of the show at least got me in the parking lot. There was no other parking available within blocks of the place. 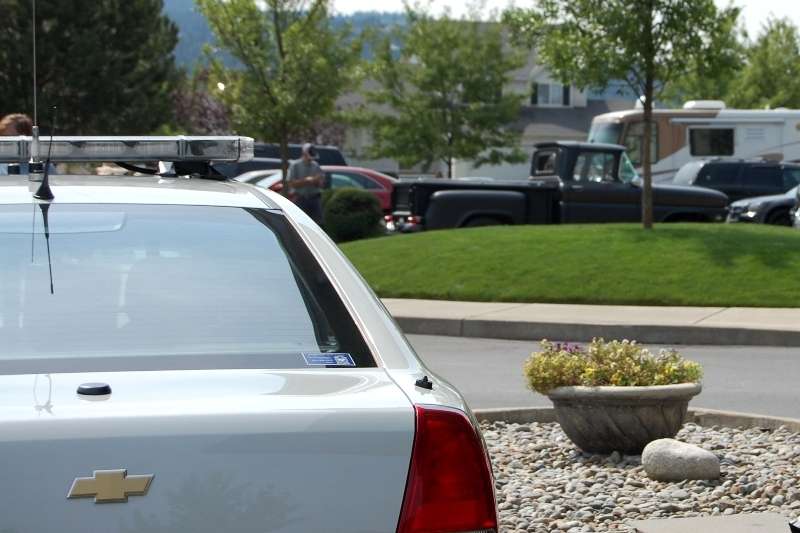 This was the only other 60-66 in attendance. I was really hoping the dark maroon shortbed stepside would show up, but no luck this time:  It had a hand made flat bed with some type of crane mounted behind the driver’s door. They even had a guy there doing custom pinstriping. I’ve never seen that at a Goodguys show because they charge so much, the striper has to work all weekend basically just to make up the fee for being there: 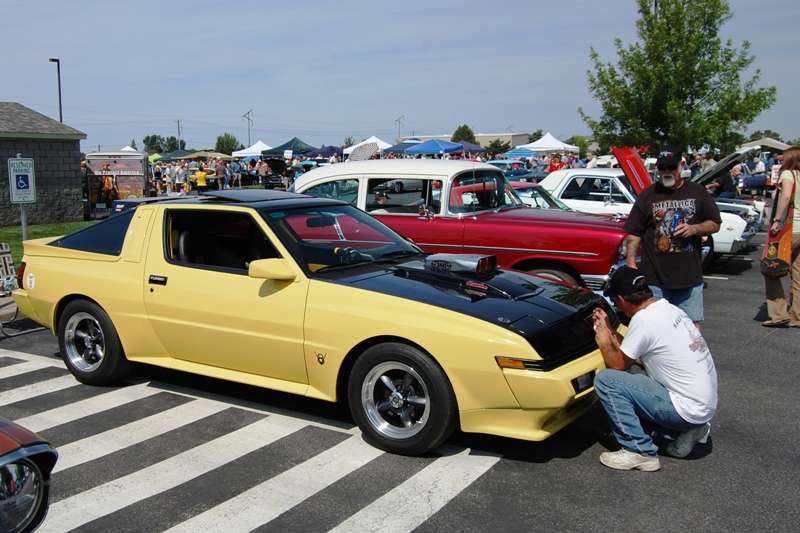 And here are some samples of the other types of vehicles that showed up. There was something for every automotive taste:  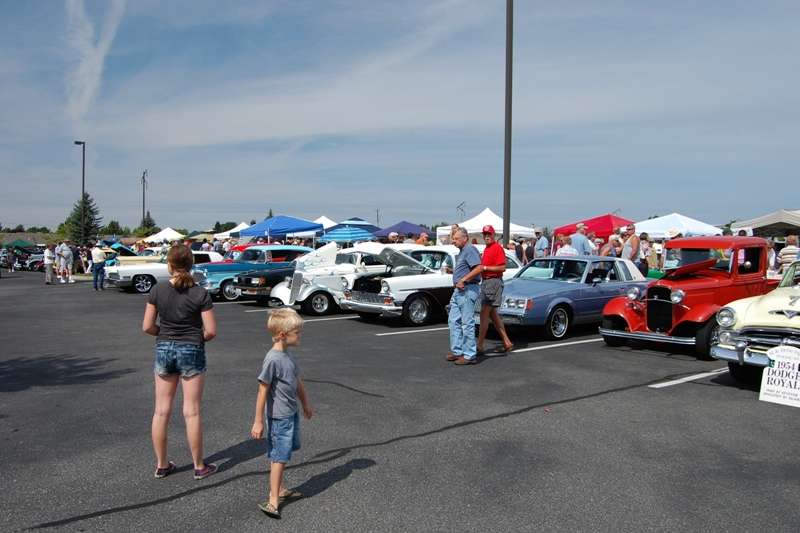 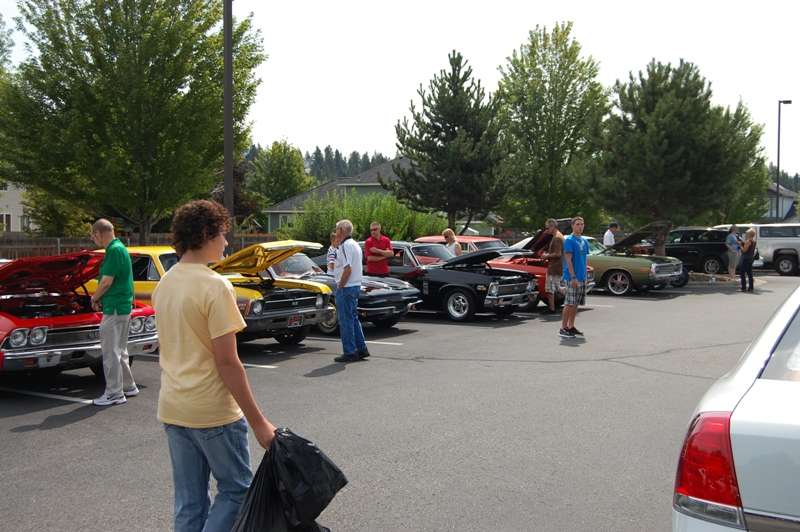 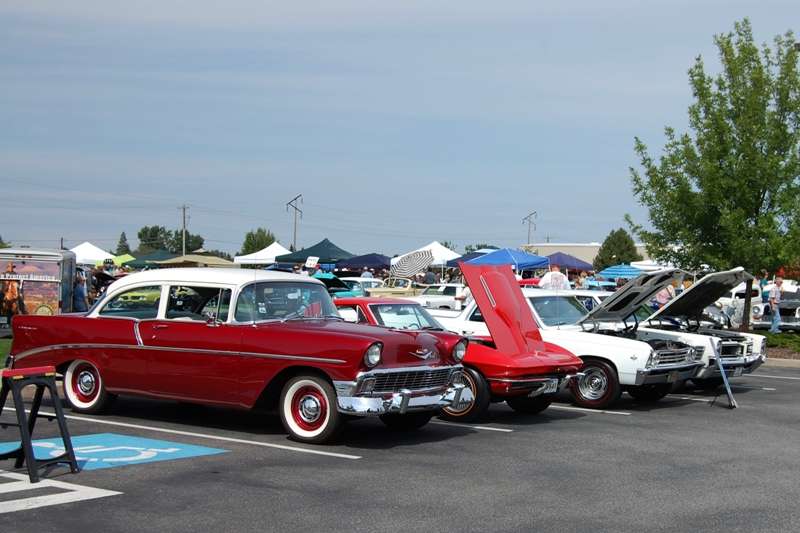 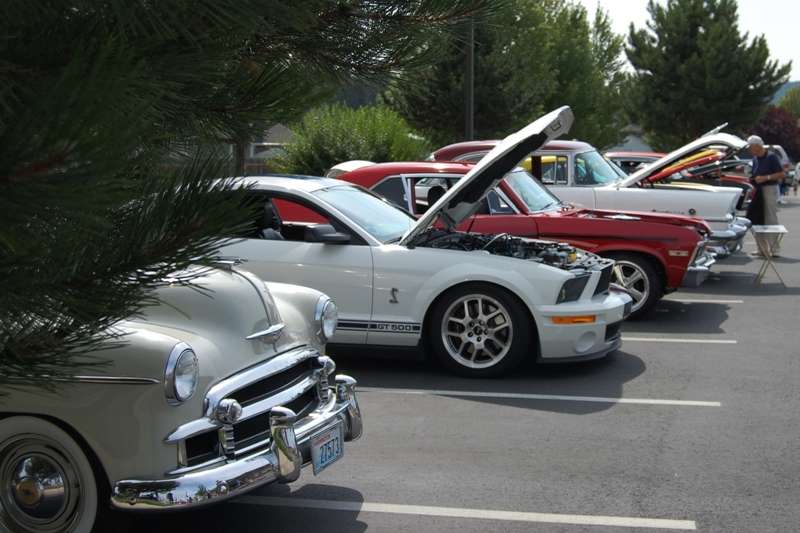 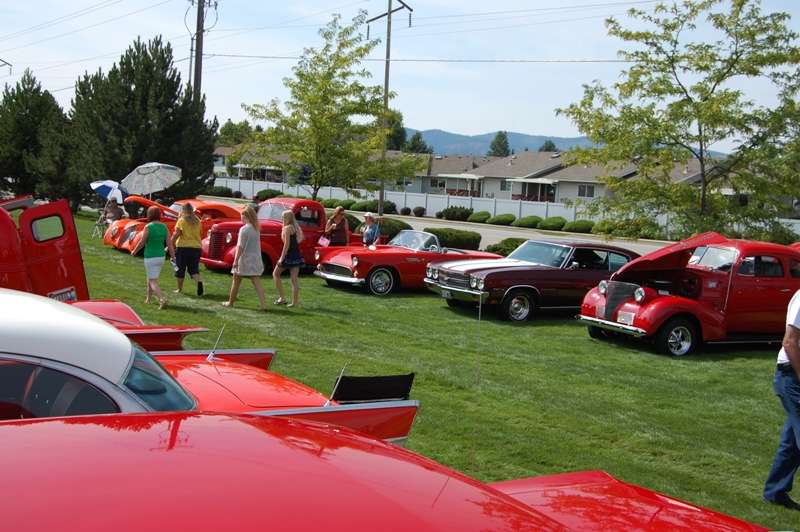 There may have been 100 cars, and literally hundreds and hundreds of spectators. It was nice having a car event to go to that didn’t take any effort. If everything goes well we might make it to Newport next weekend for the Bob’s annual car show at the park.
__________________
My Build Thread: http://67-72chevytrucks.com/vboard/s...d.php?t=444502 |
||
|
|

|
|
|
#940 |
|
Registered User
Join Date: Jun 2012
Location: Selkirk Ontario Canada
Posts: 1,141
|
Re: Markeb01 Build Thread
great pics
__________________
My 63 GMC Panel Slow Build http://67-72chevytrucks.com/vboard/s...=1#post5457281 63 
|
|
|

|
|
|
#941 |
|
Senior Member
 Join Date: Oct 2009
Location: Fayetteville, Arkansas
Posts: 1,923
|
Re: Markeb01 Build Thread
[QUOTE=markeb01;6238777]So did you finally shoot some test panels or the truck itself?
shot a test panel... laid out smooth. it was 92 degrees and 90% humidity when i tried it out and i want to try again in dryer and cooler weather to see if theres a difference in sheen or texture. thats important because i want to paint panels at different times of the year... will definitely keep you posted. |
|
|

|
|
|
#942 |
|
Senior Enthusiast
Join Date: Feb 2007
Location: Spokane Valley, WA
Posts: 8,356
|
Re: Markeb01 Build Thread
Today I relocated the fuel tank vent in another attempt to resolve one of two annoying bugs that developed after the recent engine swap. The cruise control continues to randomly disengage for no apparent reason. I thought it was fixed a few times only to reappear again today. And there is a similar problem either in the fuel or ignition systems. In stop and go traffic at normal speeds the engine works perfectly.
However when cruising at 50-60 mph for 10-15 minutes, the engine stalls as if it’s out of gas. Disengaging the clutch and allowing the engine to drop to idle speed, half the time it drops to idle and will accelerate back to speed without interruption. The rest of the time the vacuum and rpm’s drop to zero and I have to restart the engine. It starts right up with either clutch engagement at speed, or by using the starter. I don’t have to pull over and stop, but having the engine fail is very irritating and potentially dangerous. I’m almost certain the problem is fuel related, because I also discovered that when the engine shuts down, a short toggle on the electric fuel pump, also brings the engine right back to life. I’ve already replaced the mechanical fuel pump twice, rebuilt and reset the carburetor twice, replaced the large frame mounted factory fuel filter, and replaced all the lines back to the tank. And the tank itself is a custom 33 gallon stainless model built by Rock Valley Tanks. It fills with an aircraft cap, so it is easy to look inside and see the interior of the tank is spotless. I’m just about out of ideas, and got to wondering if there was any chance the gas tank vent could be clogged, causing vacuum to build up in the tank cutting off the flow of fuel. When I first installed the tank, it seemed like a good idea to mount the vent/roll over valve as high as possible above the tank to prevent excess fumes, so it was installed at the top under the driver side rear fender: 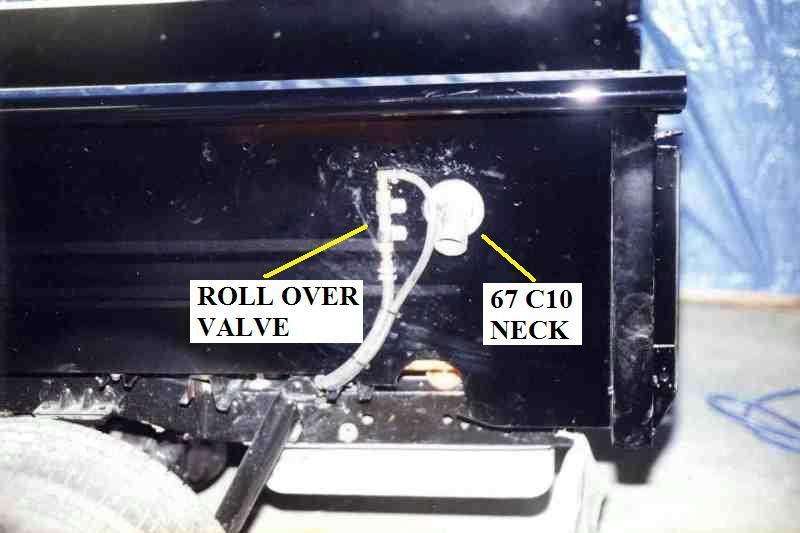 The arrow shows where it connects to top driver side of the tank: 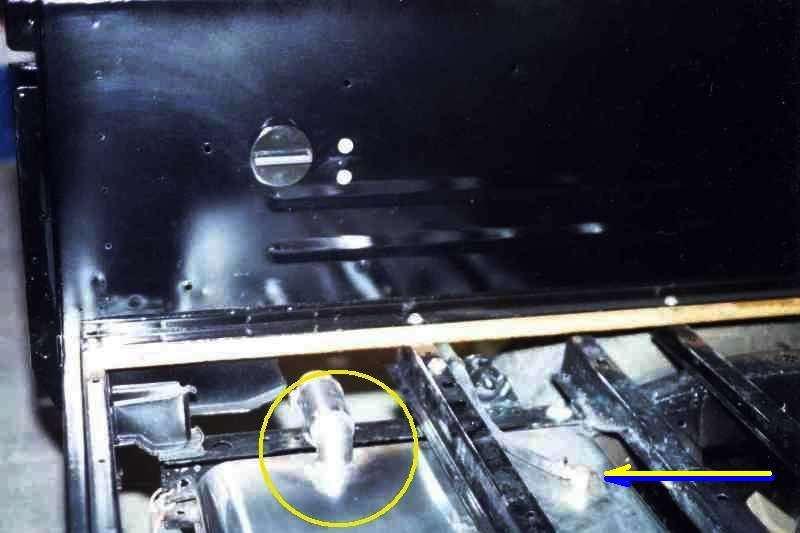 This method involves about 3 to 4 feet of rubber fuel line. Perhaps after 15 years of road crud and hose deterioration from ethanol fuel it has debris restricting the fresh air flow into the tank. So the entire vent system was removed, and the vent/rollover valve itself was installed directly into the tank, after being extracted from the external mount housing:  There did appear to be a minor amount of material in the housing, so the vent valve was thoroughly rinsed out with WD40 and compressed air. Tomorrow I’ll pick up a short piece of hose and a standard aftermarket fuel filter to keep anything from entering the vent in the future. Don’t know yet if this is the cure, but there aren’t many things left that haven’t been checked so I’m hoping it’s fixed.
__________________
My Build Thread: http://67-72chevytrucks.com/vboard/s...d.php?t=444502 Last edited by markeb01; 09-01-2013 at 12:18 PM. |
|
|

|
|
|
#943 |
|
Registered User
Join Date: Apr 2012
Location: Searcy, AR
Posts: 4,203
|
Re: Markeb01 Build Thread
The never-ending Saga continues...
 I know you will fix it!  Great job on documenting everything Mark... That is the reason I visit your build often. So many little details that I can look back on once I get into the Assembly portion of my build, Thanks Again for the Amazing Attention to Detail!  And, Thanks for the Car Show Pics... 
__________________
DON Proverbs 27:17  US Air Force Retarded errr Retired My '65 Stepper Build:http://67-72chevytrucks.com/vboard/s...d.php?t=533920 My '60 Rusty Patina Build:http://67-72chevytrucks.com/vboard/s...66#post7402266 My '72 http://67-72chevytrucks.com/vboard/s...59#post7204359 SOLD |
|
|

|
|
|
#944 |
|
Senior Enthusiast
Join Date: Feb 2007
Location: Spokane Valley, WA
Posts: 8,356
|
Re: Markeb01 Build Thread
Thanks for the comments and ongoing interest Don. I’m always hopeful something I stick in here will help someone avoid making mistakes I’ve already paid for.
I should have more show pics next weekend. If all goes well we’ll be attending another local church sponsored car show that supports military appreciation. Today I finished the gas tank vent project by picking up a Napa metal fuel filter (part number 3032) to protect the vent inlet from ingesting any crud.  To back up just a bit - with 30+ gallons of gas the loaded tank weighs somewhere around 300 pounds so I had no interest in trying to remove it. The much easier option was to cut a hole in the bed directly over the vent outlet to provide enough clearance to install the roll over valve directly into the tank. The bed floor consists of ¾” marine plywood coated on both sides with fiberglass resin, and covered with a sheet of aluminum diamond plate. The aluminum was cut with a 3.25” hole saw. The wood was cut with a 2 ½” hole saw, leaving a lip to reattach the aluminum. 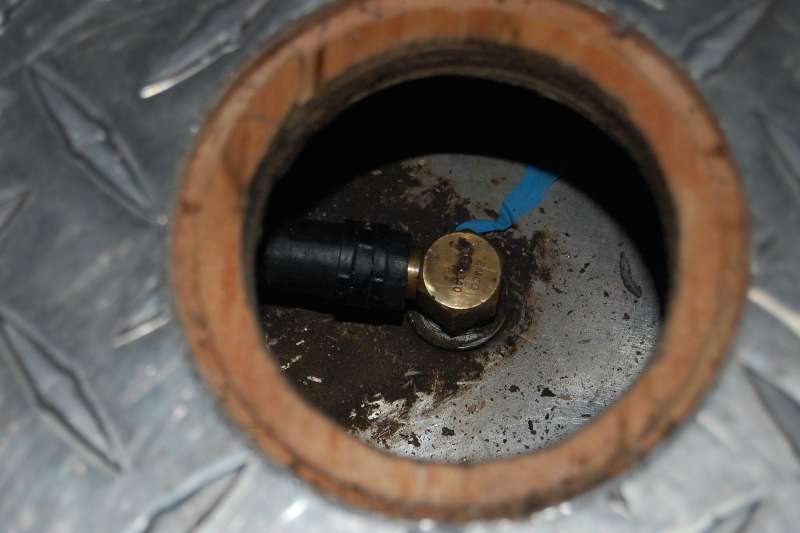 I did the best I could to clean the area with the fitting and later the vent in place. I wasn’t willing to do any cleaning with the port open at the risk of spilling junk into the tank. I see in the photo I also left a chunk of blue Nitrile glove behind. The wood was saturated with silver Rustoleum to prevent swelling of the cut edges. 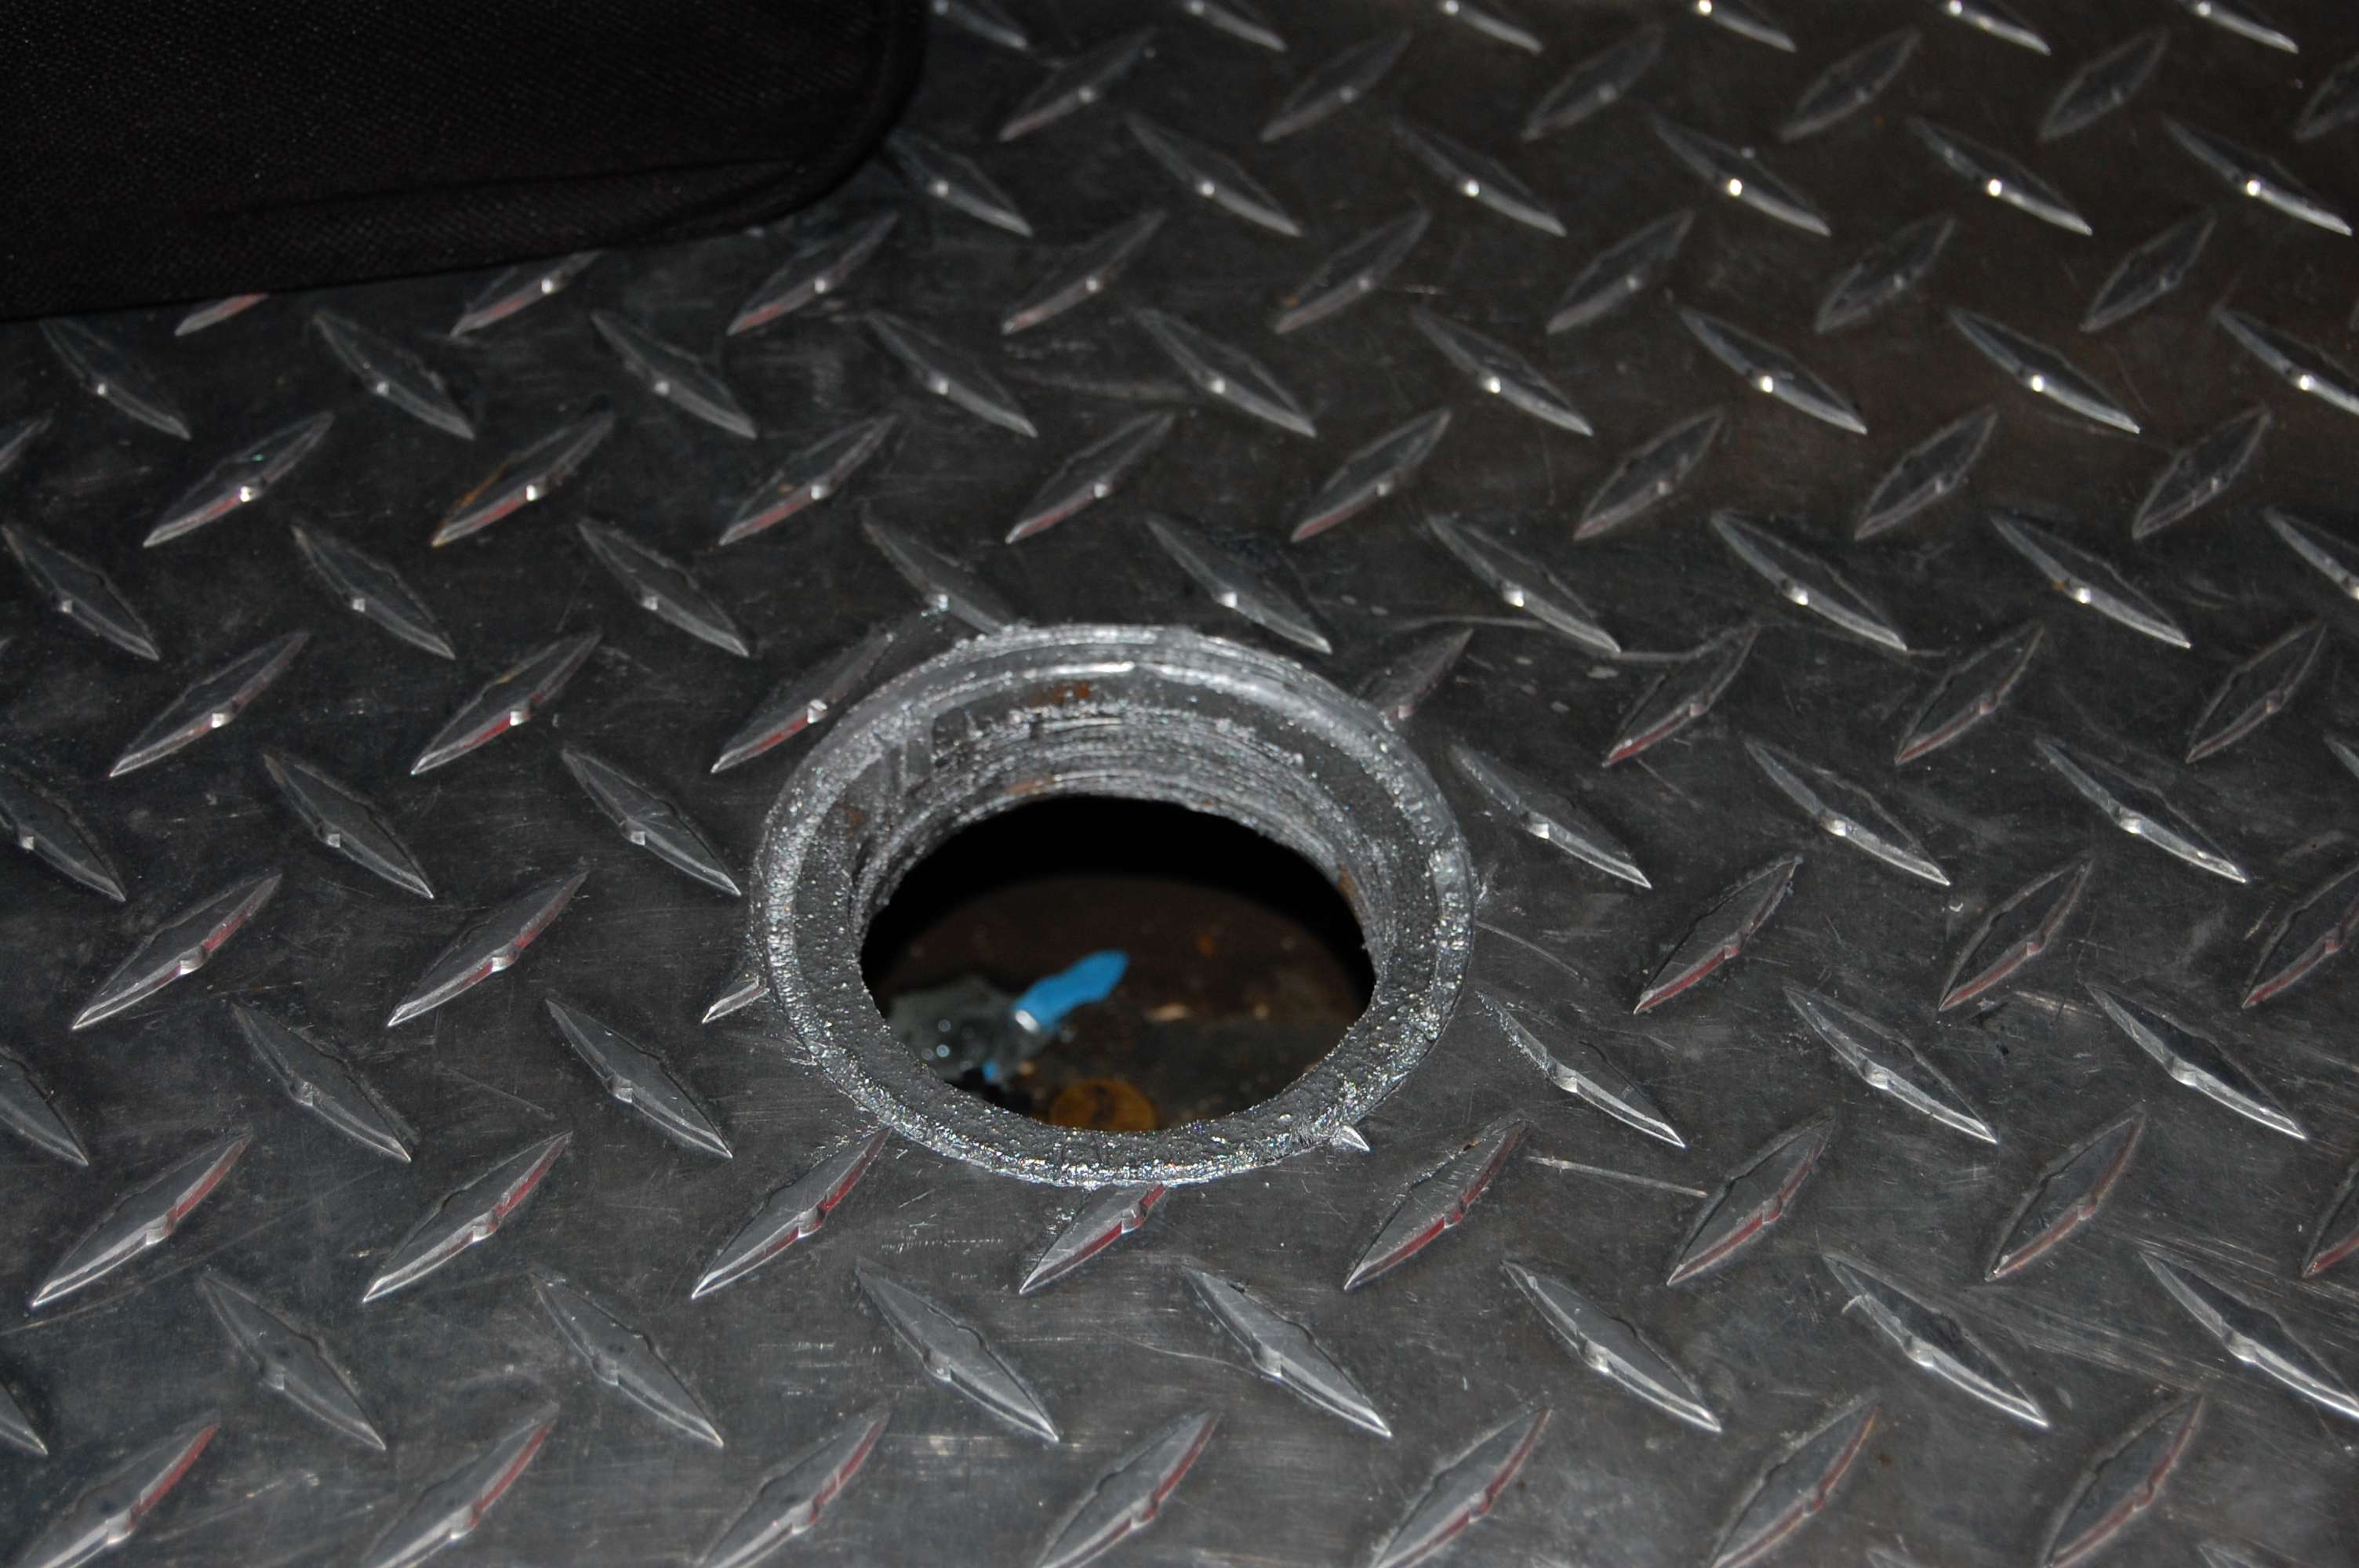 The holes in the lid were plugged with JB Kwik and the plate was glued to the floor with clear epoxy: 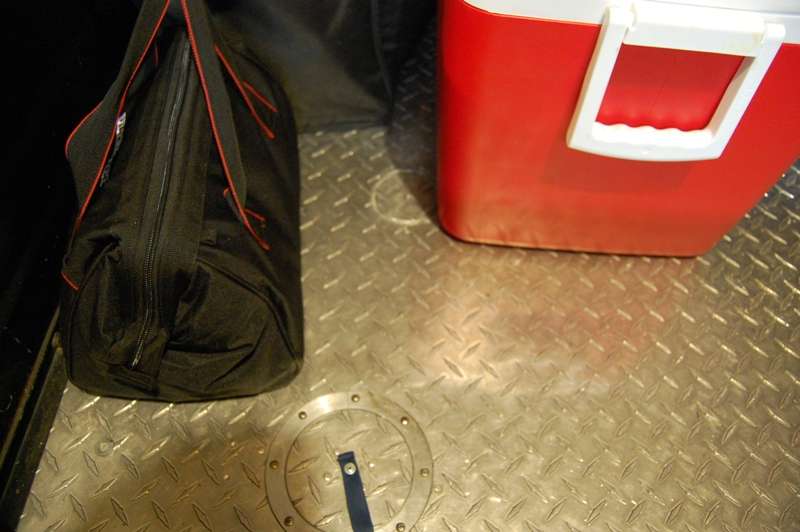 With the bed fully outfitted with the normal compliment of stuff we keep handy (shade tent, folding chairs, tool kit, ice chest, spare tire and jack – the access hole is barely noticeable. The large hole at the bottom of the photo is the fuel filler. The aircraft cap is under the diamond plate cover. I also recently replaced the knob on the cover with a piece of dog lease, so nothing protrudes to potentially damage the bottom of the ice chest: 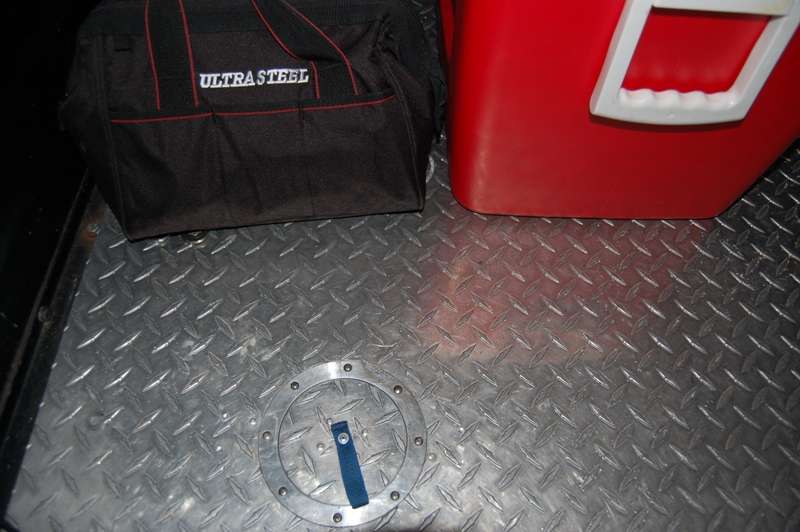 Since this truck was always intended to perform work, it doesn’t really matter what it looks like as the hard bed cover hides all the ugly. The inlet barb on the vent is ¼”, but I wanted the biggest filter opening that would work. The Napa 3032 filter has 5/16” inlets and outlets, but I managed to force fresh heavy wall ¼” fuel tubing over it. That insured a nice tight seal at the vent nipple. Because the filter rests on top of the tank under the bed floor, I also wrapped the filter can with a chunk of non-porous rubber door seal. I glued it in place with gorilla snot and a tie wrap to keep it in place permanently. Here’s what can be seen between the tire and the upper rear corner of the fender opening: 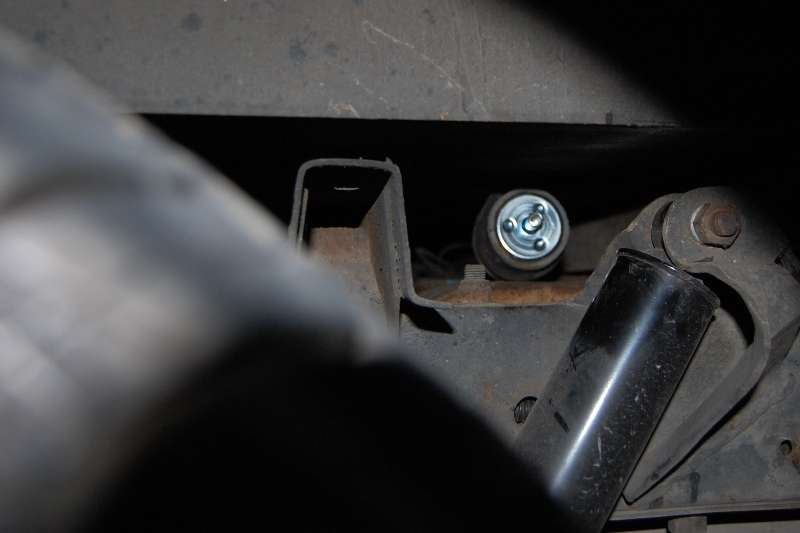 Hopefully tomorrow will be something less than 92 degrees and I can take it out for a test run and see if the stalling problem is cured.
__________________
My Build Thread: http://67-72chevytrucks.com/vboard/s...d.php?t=444502 |
|
|

|
|
|
#945 |
|
Registered User
Join Date: Aug 2013
Location: Ma.
Posts: 169
|
Re: Markeb01 Build Thread
Hey Mark I just wanted to say GREAT job on your truck! Murph turned me on to your build ,mainly because I too have severe back issues, though I had seen the truck in the sideposts and was heading for you anyway. I love the truck ! Top to Bottom! Front to Back! How does the Blitz Black paint hold up and where do you get the bedliner type paint you used for the engine compartment?
__________________
Nice EASY project, no problem....until I get home  why is that? My build: http://67-72chevytrucks.com/vboard/s...d.php?t=595078 why is that? My build: http://67-72chevytrucks.com/vboard/s...d.php?t=595078
|
|
|

|
|
|
#946 |
|
Registered User
Join Date: Apr 2012
Location: Searcy, AR
Posts: 4,203
|
Re: Markeb01 Build Thread

__________________
DON Proverbs 27:17  US Air Force Retarded errr Retired My '65 Stepper Build:http://67-72chevytrucks.com/vboard/s...d.php?t=533920 My '60 Rusty Patina Build:http://67-72chevytrucks.com/vboard/s...66#post7402266 My '72 http://67-72chevytrucks.com/vboard/s...59#post7204359 SOLD |
|
|

|
|
|
#947 | |
|
Senior Enthusiast
Join Date: Feb 2007
Location: Spokane Valley, WA
Posts: 8,356
|
Re: Markeb01 Build Thread
Quote:
I’m really impressed with the durability of the Blitz Black paint. Admittedly my truck lives in a garage at night, but it has suffered subfreezing temperatures, 100+ degree baking sunlight, and only gets washed a few times a year. It’s dirty most of the time, but when cleaned up it looks essentially like it did the day it was sprayed. I did not use hardener, and it receives no special attention like wax or polish. It can be scratched, but not by casual contact. And bird crap washes right off without injury to the paint. I’ve had numerous compliments on the paint, some from owners of other vehicles with expensive flattened urethane paint jobs that didn’t turn out as nice. There were two primary reasons I chose Blitz Black. First it could be applied directly over the old gloss black lacquer finish without stripping the entire truck. Second I was recently unemployed and air dry enamel is dirt cheap. The entire paint job set me back around $200. The firewall coating actually is bedliner produced by U-Pol. It is branded as Raptor Bedliner. I purchased mine at a local auto paint store and I paid too much for it because I was in a hurry. I believe the best value can be found at TCP Global: http://www.tcpglobal.com/detailsupplydepot/dsd18.aspx It is super easy to apply, produces very little overspray, and is relatively inexpensive compared to commercial applications. And because you do it yourself, the finish turns out exactly how you want it unlike many indifferently applied professional finishes that can end up with runs or thin spots. What is left of my inner fenders serve as “wrench trays” every time I work on the engine, and they don’t show any indication of abuse. Good luck on your project!
__________________
My Build Thread: http://67-72chevytrucks.com/vboard/s...d.php?t=444502 |
|
|
|

|
|
|
#948 |
|
Registered User
Join Date: Feb 2013
Location: Genoa, IL
Posts: 387
|
Re: Markeb01 Build Thread
Thanks for the details on venting the gas tank and the Napa part number. Been looking at my gas tank wondering the best approach to the vents. Now I have my answer!
__________________
Jeff Simplify Life! My build thread: http://67-72chevytrucks.com/vboard/s...d.php?t=566533 |
|
|

|
|
|
#949 | |
|
Registered User
Join Date: Aug 2013
Location: Ma.
Posts: 169
|
Quote:
__________________
Nice EASY project, no problem....until I get home  why is that? My build: http://67-72chevytrucks.com/vboard/s...d.php?t=595078 why is that? My build: http://67-72chevytrucks.com/vboard/s...d.php?t=595078
|
|
|
|

|
|
|
#950 | |
|
Senior Enthusiast
Join Date: Feb 2007
Location: Spokane Valley, WA
Posts: 8,356
|
Re: Markeb01 Build Thread
Quote:
Global is the best bargain source I've found for the Raptor bedliner. To the best of my knowledge the Blitz Black paint can only be purchased from a John Deere Dealer. It is available in gallons and spray cans. I found mine at a local heavy equipment supplier named Rowand Machinery. They sell, service, and repair John Deere and other brands of earth moving hardware. I'm pretty sure any JD or local heavy equipment supplier can order it for you if they don't carry it in stock. The only exception being if you live in California. I understand it cannot be purchased in that state.
__________________
My Build Thread: http://67-72chevytrucks.com/vboard/s...d.php?t=444502 |
|
|
|

|
 |
| Bookmarks |
|
|