
|
|
|
 09-12-2018, 10:18 AM
|
#1 |
|
Registered User
Join Date: Jan 2013
Location: Leonardtown, MD
Posts: 1,643
|
Re: 55 Wagon Progress
Yes, I think they refer to it as a roloc type R holder..
__________________
Robert |

|

|
|
09-23-2018, 10:58 PM
|
#2 |
|
Registered User
Join Date: Jan 2013
Location: Leonardtown, MD
Posts: 1,643
|
Re: 55 Wagon Progress
So this weekend the core support was mocked up and some "sample" radiator hoses bent out of 3/4" EMT. Once bent to fit, these samples were taken to the local NAPA store, where they have become used to me sizing up radiator hoses in the store room. The lower hose was from an S10 pickup or Blazer, but with the battery bracket in place, there was interference to the hose.
  So our battery bracket is modified to provide clearance for the hose, and a "hem" added to the inside.   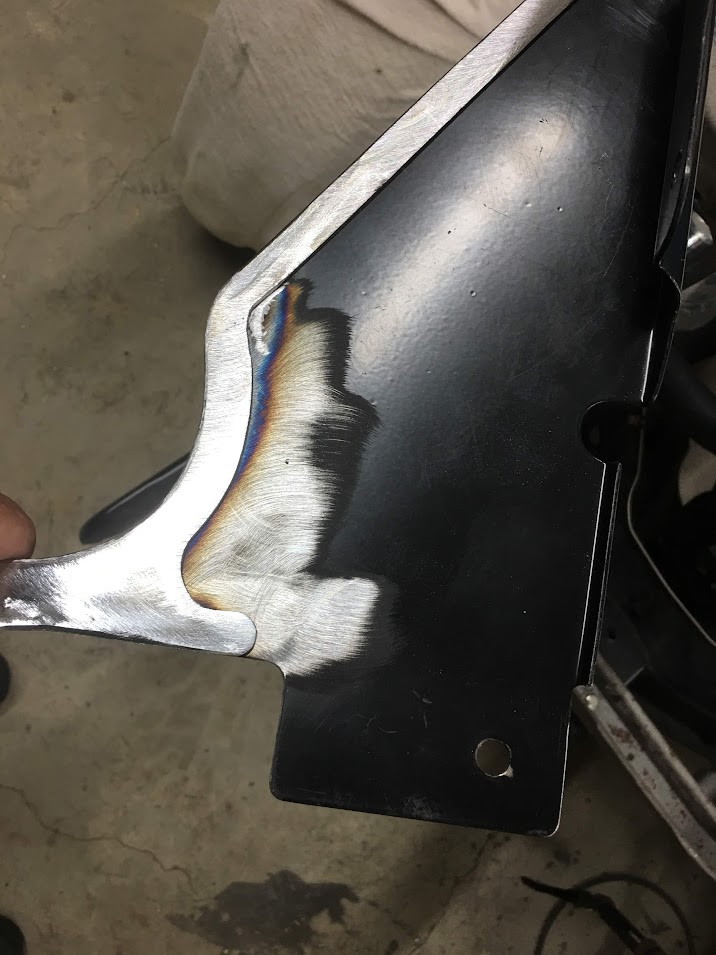    The upper hose has no such obstacles, so we should have smooth sailing there.
__________________
Robert Last edited by MP&C; 09-24-2018 at 06:29 AM. |
|
|
|
|
09-23-2018, 11:25 PM
|
#3 |
|
Senior Member
 Join Date: Mar 2011
Location: West Plains, Missouri
Posts: 7,559
|
Re: 55 Wagon Progress
Looks good...Jim
__________________
my build thread: http://67-72chevytrucks.com/vboard/s...d.php?t=459839 Jimbo's long bed step build:http://67-72chevytrucks.com/vboard/s...t=464626<br /> |

|
|
|
09-23-2018, 11:49 PM
|
#4 |
|
Post Whore
 Join Date: May 2015
Location: Alabama
Posts: 14,658
|
Re: 55 Wagon Progress
Using the emt is a great idea...much better than the coathangers I use...
__________________
Mongo...aka Greg RIP Dad RIP Jesse 1981 C30 LQ9 NV4500..http://67-72chevytrucks.com/vboard/s...d.php?t=753598 Mongos AD- LS3 TR6060...http://67-72chevytrucks.com/vboard/s...34#post8522334 Columbus..the 1957 IH 4x4...http://67-72chevytrucks.com/vboard/s...63#post8082563 2023 Chevy Z71..daily driver |
|
|
|
|
10-05-2018, 10:39 PM
|
#5 |
|
Registered User
Join Date: Jan 2013
Location: Leonardtown, MD
Posts: 1,643
|
Re: 55 Wagon Progress
Well the past few scheduled shop nights (and days) have been a bust, between college open houses and extracurricular activities...
  Back in the shop we needed to finalize our console lid design as some parts are getting ready to go for upholstery. Our piano hinge showed to have clearance issues when using it in "hidden" mode..  ....as shown here... https://www.youtube.com/watch?v=puZl_3KBzMg We could notch the rear of the console and lid and move the hinge flush with the rear, but that would leave the hinge visible when closed, and now require and lanyard to keep it from flopping all the way over.. https://www.youtube.com/watch?v=H2AKHWuSlyY We started looking at hidden hinges at one of our local cabinet maker. Although this one looks plenty stout, it was far to wide for our present design, and would require quite a bit of rework.. https://www.youtube.com/watch?v=LBqo7m20H34 With the new options, we narrowed our search to a cabinet hinge that was narrow enough to fit within our side confines, and found this one online.. 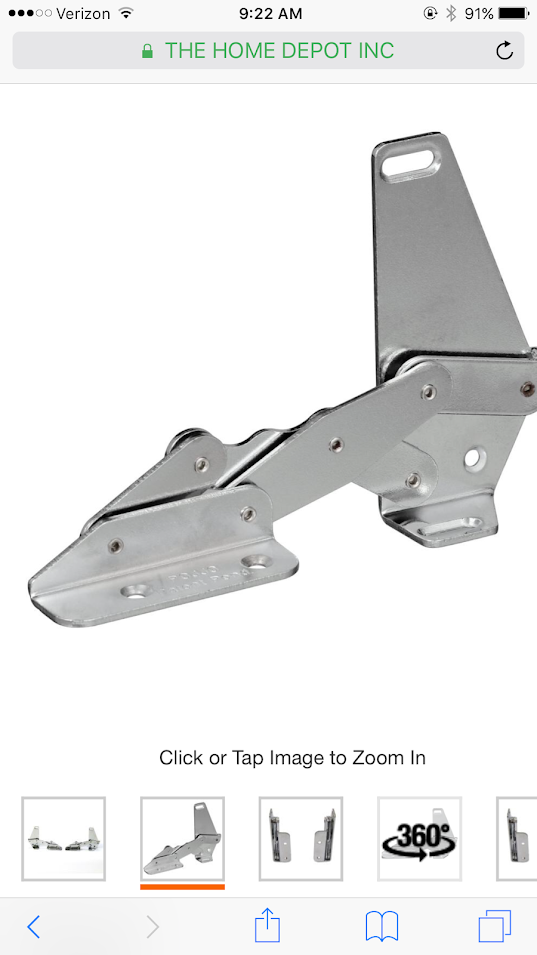 Test fit, a straightedge is clamped to the hinge, aligned with the rear edge to see what interference this may have. Looks like this is the one.. https://www.youtube.com/watch?v=IV4lPQKqBC8 Hope to finish the hinge details up tomorrow. We also took delivery on our stainless mesh samples to make a decision on our speaker grilles.. 
__________________
Robert |
|
|
|
|
10-06-2018, 07:37 AM
|
#6 |
|
Post Whore
Join Date: May 2015
Location: Alabama
Posts: 14,658
|
Re: 55 Wagon Progress
Very nice solution on the hinge problem......
__________________
Mongo...aka Greg RIP Dad RIP Jesse 1981 C30 LQ9 NV4500..http://67-72chevytrucks.com/vboard/s...d.php?t=753598 Mongos AD- LS3 TR6060...http://67-72chevytrucks.com/vboard/s...34#post8522334 Columbus..the 1957 IH 4x4...http://67-72chevytrucks.com/vboard/s...63#post8082563 2023 Chevy Z71..daily driver |
|
|
|
|
10-09-2018, 10:57 PM
|
#7 |
|
Registered User
Join Date: Jan 2013
Location: Leonardtown, MD
Posts: 1,643
|
Re: 55 Wagon Progress
More progress on our console, with the new hinges we got for the console lid being such an afterthought, the room provided in our void openings was going to drag the sides of the angle bracket once upholstery was wrapped inside the slot.
 Better to make changes (and weld) before the upholstery goes on. So we made some new rear corners that bump us out slightly more than a 16th and use a slightly larger inside radius for a bit extra strength.     This is much better clearance than we had before, one more corner to go and we can fit up the lid. 
__________________
Robert |
|
|
|
|
10-09-2018, 11:29 PM
|
#8 |
|
Senior Member
Join Date: Mar 2011
Location: West Plains, Missouri
Posts: 7,559
|
Re: 55 Wagon Progress
Nice job...Jim
__________________
my build thread: http://67-72chevytrucks.com/vboard/s...d.php?t=459839 Jimbo's long bed step build:http://67-72chevytrucks.com/vboard/s...t=464626<br /> |
|
|
|
|
10-11-2018, 10:58 PM
|
#9 |
|
Registered User
Join Date: Jan 2013
Location: Leonardtown, MD
Posts: 1,643
|
Re: 55 Wagon Progress
Thanks Jim!
More progress on the console, the rear corner is opened up for hinge clearance..    8-32 machine screws cut off and sharpened to serve as spotters for our hardware location in the lid..  8-32 rivet nuts installed in our match drilled holes for attaching the lid to the hinges..    video version: https://www.youtube.com/watch?v=tkk9KTbdjJ0 .
__________________
Robert |
|
|
|
|
10-12-2018, 12:58 AM
|
#10 |
|
Post Whore
Join Date: May 2015
Location: Alabama
Posts: 14,658
|
Re: 55 Wagon Progress
Very nice fix!!...it turned out great!!
__________________
Mongo...aka Greg RIP Dad RIP Jesse 1981 C30 LQ9 NV4500..http://67-72chevytrucks.com/vboard/s...d.php?t=753598 Mongos AD- LS3 TR6060...http://67-72chevytrucks.com/vboard/s...34#post8522334 Columbus..the 1957 IH 4x4...http://67-72chevytrucks.com/vboard/s...63#post8082563 2023 Chevy Z71..daily driver |
|
|
|
|
10-12-2018, 09:37 AM
|
#11 |
|
Senior Member
Join Date: Mar 2011
Location: West Plains, Missouri
Posts: 7,559
|
Re: 55 Wagon Progress
Beautiful work...Jim
__________________
my build thread: http://67-72chevytrucks.com/vboard/s...d.php?t=459839 Jimbo's long bed step build:http://67-72chevytrucks.com/vboard/s...t=464626<br /> |
|
|
|
|
10-12-2018, 10:07 AM
|
#12 |
|
Registered User
Join Date: Oct 2014
Location: somewhere . . .
Posts: 968
|
Re: 55 Wagon Progress
nice work
__________________
dont want to hear excuses, i want to hear solution(s) |
|
|
|
|
10-17-2018, 07:35 AM
|
#13 |
|
Registered User
Join Date: Jan 2013
Location: Leonardtown, MD
Posts: 1,643
|
Re: 55 Wagon Progress
Thanks for checking out the thread guys!
My wife's cousin JB, who works at Interiors by Shannon, contacted me the other day about making him a dimpling punch and die for installing door panel fasteners.. 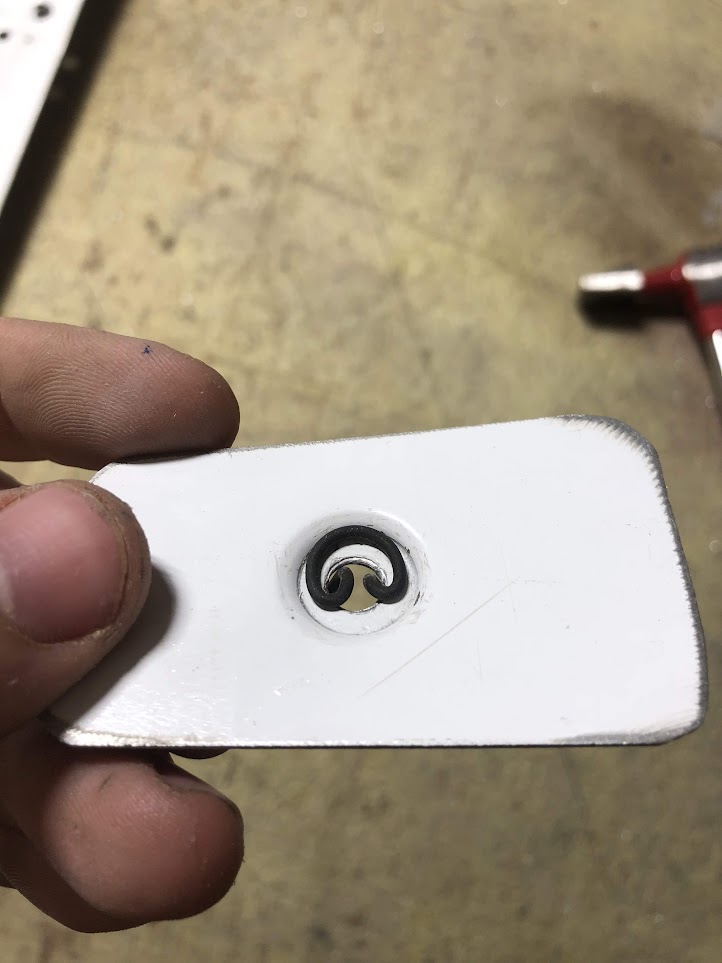 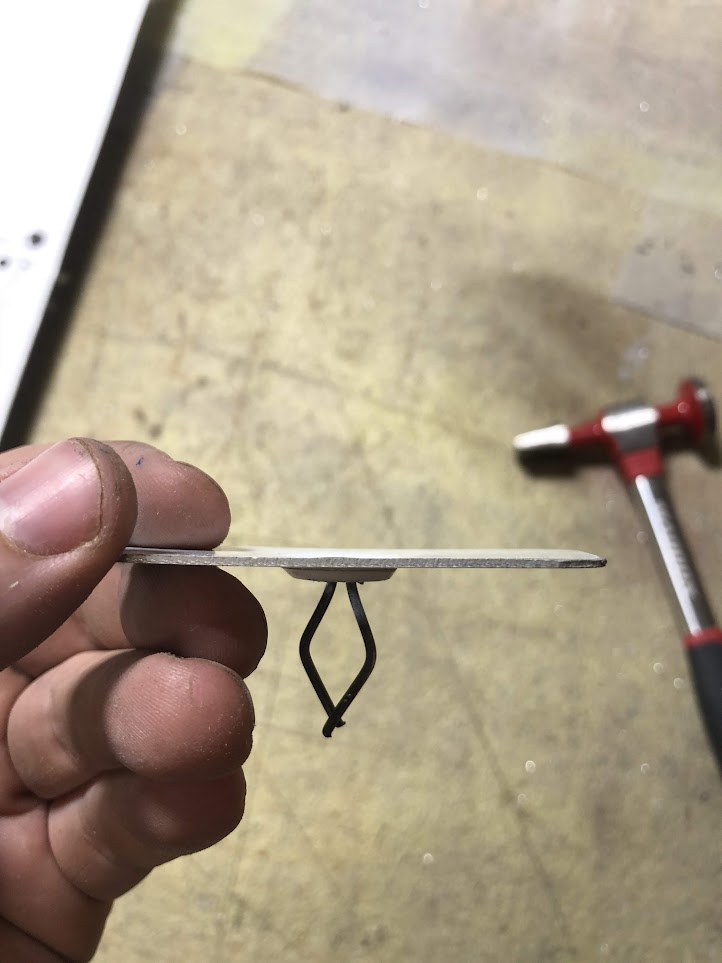 There's always room for improvement, so I thought I'd add a flat to one side of the lower die so it could be clamped in a vise for more stability. A short piece of V-block was installed in the Aloris tool holder and viola! We have a Southbend Milling Machine!  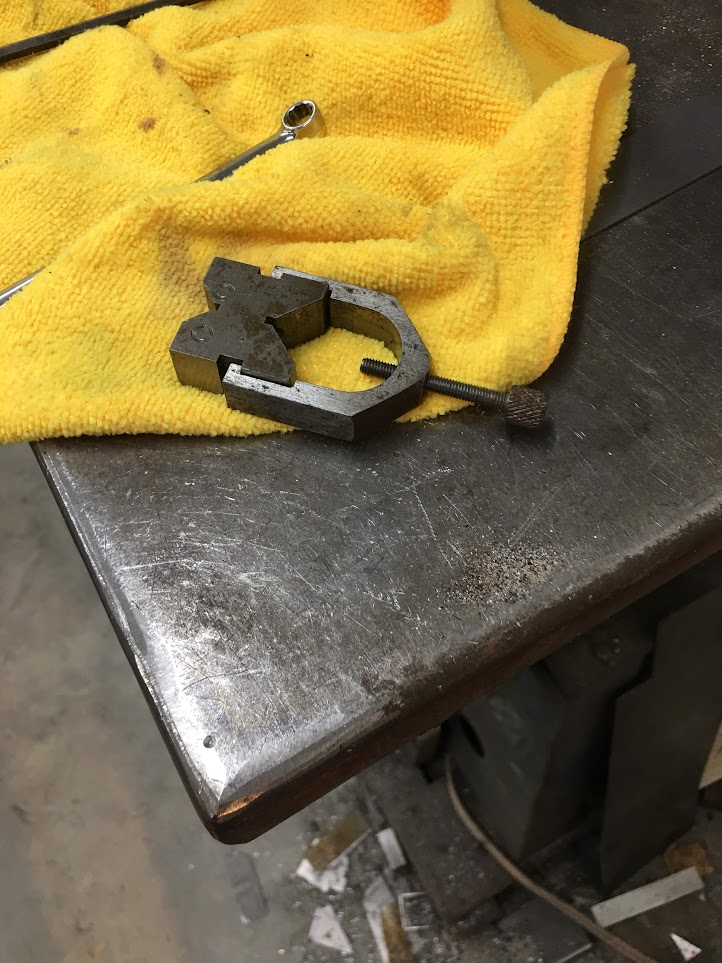 The alignment pin was added to the bottom die to help keep the panel aligned during the punching process, a 1/4" hole will be added to the panel where fasteners are needed. 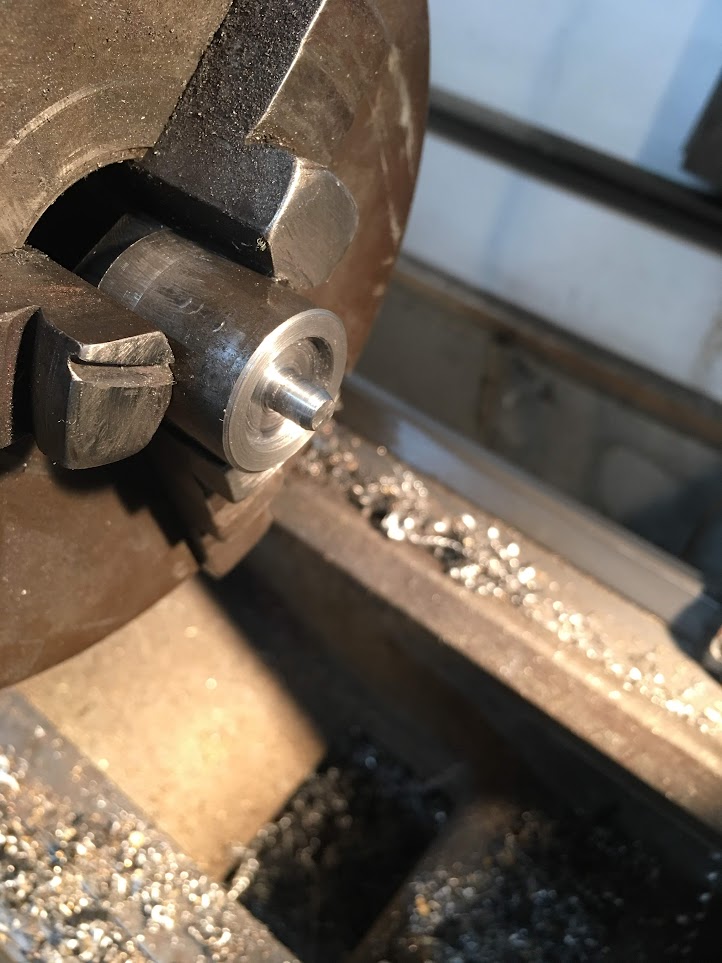 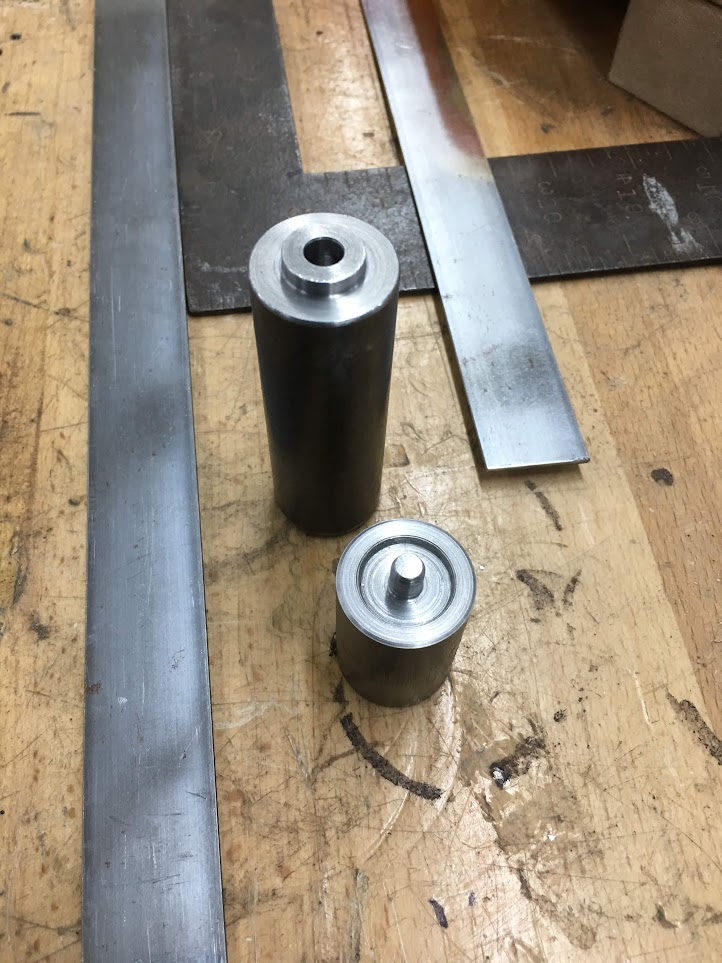 Installing into the vise... 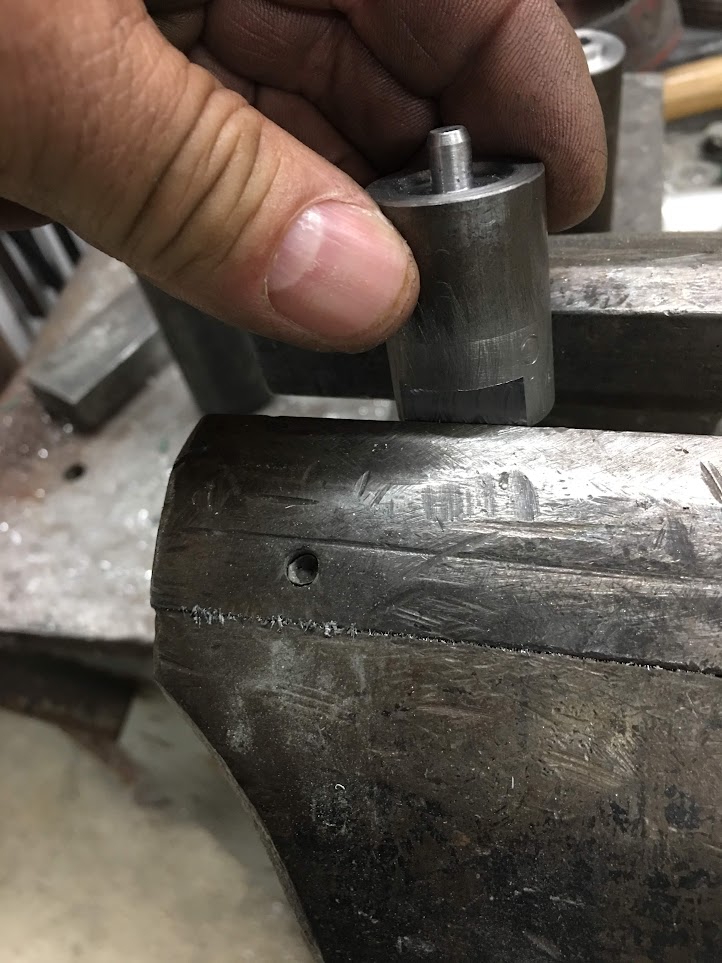 Our .06 aluminum test panel... 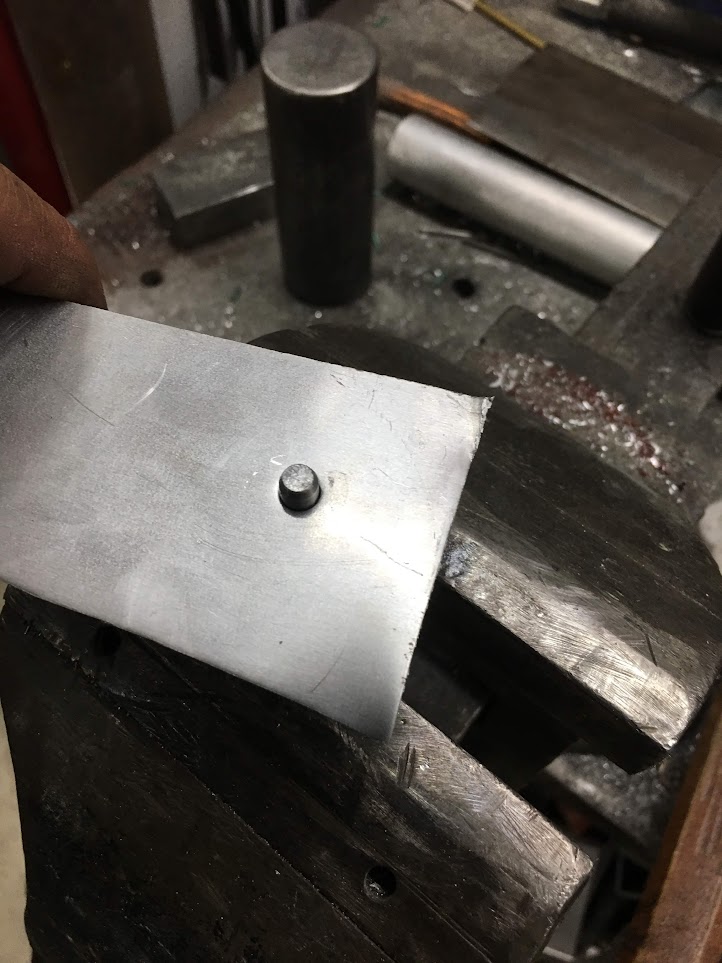 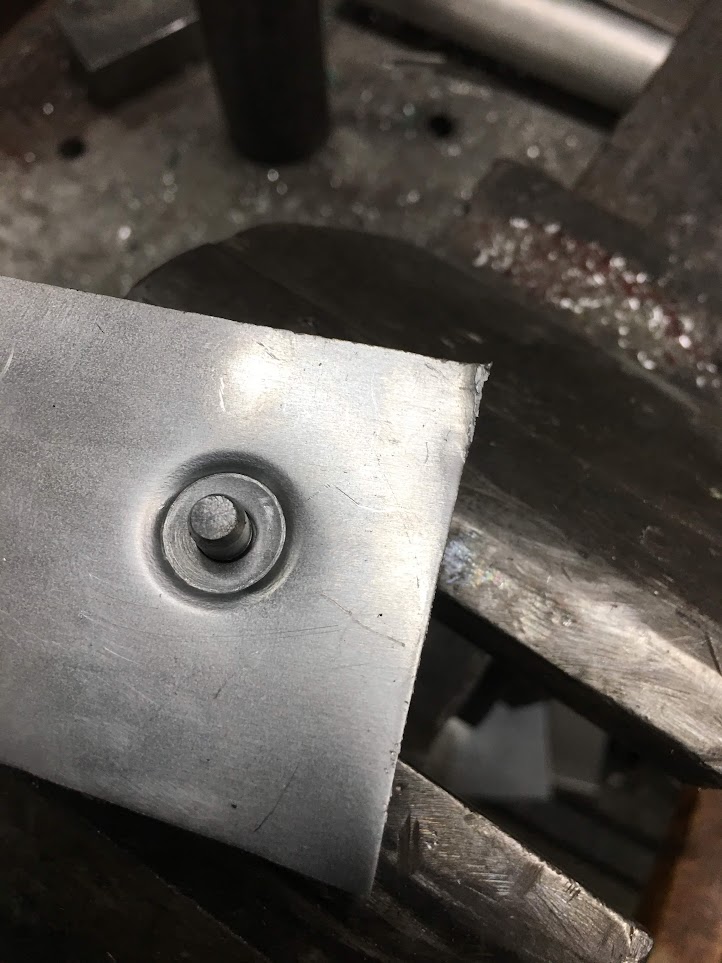 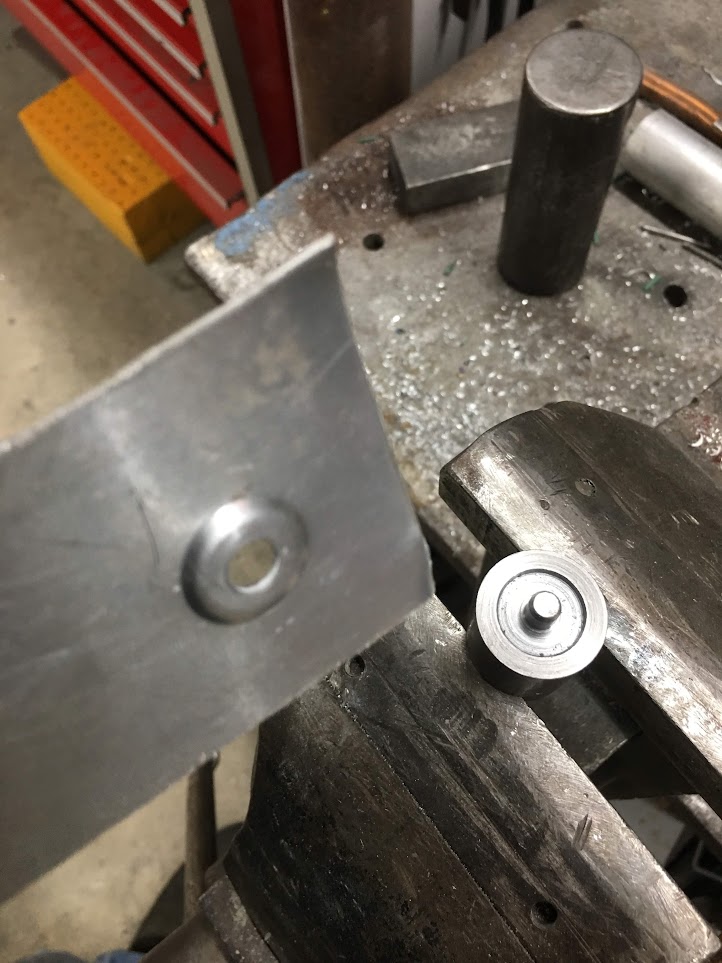 ….that should work...
__________________
Robert |
|
|
|
|
10-17-2018, 08:56 AM
|
#14 |
|
Senior Member
Join Date: Mar 2011
Location: West Plains, Missouri
Posts: 7,559
|
Re: 55 Wagon Progress
Nice...Jim
__________________
my build thread: http://67-72chevytrucks.com/vboard/s...d.php?t=459839 Jimbo's long bed step build:http://67-72chevytrucks.com/vboard/s...t=464626<br /> |
|
|
|
|
10-19-2018, 07:21 AM
|
#15 |
|
Registered User
Join Date: Jan 2013
Location: Leonardtown, MD
Posts: 1,643
|
Re: 55 Wagon Progress
Some days I can't leave well enough alone. I thought I'd see how stout my fancy hinges were before we get too far along in the upholstery stage of the console. I guess I had a gut feeling on these, but some slight side to side deflection rendered the hinges loosened, and the swage of the semi-tubular rivets showed some cracks...
 We're a bit too far down this rabbit hole to change directions again, so I checked my inventory of semi-tubular rivets and found these HD items.   These are used in securing latches and hinges to the HD saddle bags and tour packs. When I paint the Harleys, I break these things down to nothing to get fresh paint everywhere, then reinstall the hardware with new rivets. These are stainless and have shown in the past to be rather robust, so we'll drill out all the off shore rivets and install these..  Comparison...  One set done, one to go.. 
__________________
Robert |
|
|
|
|
10-19-2018, 11:35 AM
|
#16 |
|
Post Whore
Join Date: May 2015
Location: Alabama
Posts: 14,658
|
Re: 55 Wagon Progress
looks stout now!!! nice rivet tool
__________________
Mongo...aka Greg RIP Dad RIP Jesse 1981 C30 LQ9 NV4500..http://67-72chevytrucks.com/vboard/s...d.php?t=753598 Mongos AD- LS3 TR6060...http://67-72chevytrucks.com/vboard/s...34#post8522334 Columbus..the 1957 IH 4x4...http://67-72chevytrucks.com/vboard/s...63#post8082563 2023 Chevy Z71..daily driver |
|
|
|
|
10-24-2018, 09:19 AM
|
#17 |
|
Registered User
Join Date: Jan 2013
Location: Leonardtown, MD
Posts: 1,643
|
Re: 55 Wagon Progress
Saturday morning Mike and I went to look at a 39 Ford that needs a complete new wiring harness. What a rats nest the under-dash was, with far too many splices. When people run wires with no regard to movement and function of things like the cowl vent handle or parking brake, when three separate wires are spliced to go from one point to another, you just shake your head. For me I guess it validates what I do in sharing the various tips and methods in this thread. If it helps one person to get some ideas to better improve their own build, or it keeps hack work like we saw Saturday from happening, then mission accomplished.
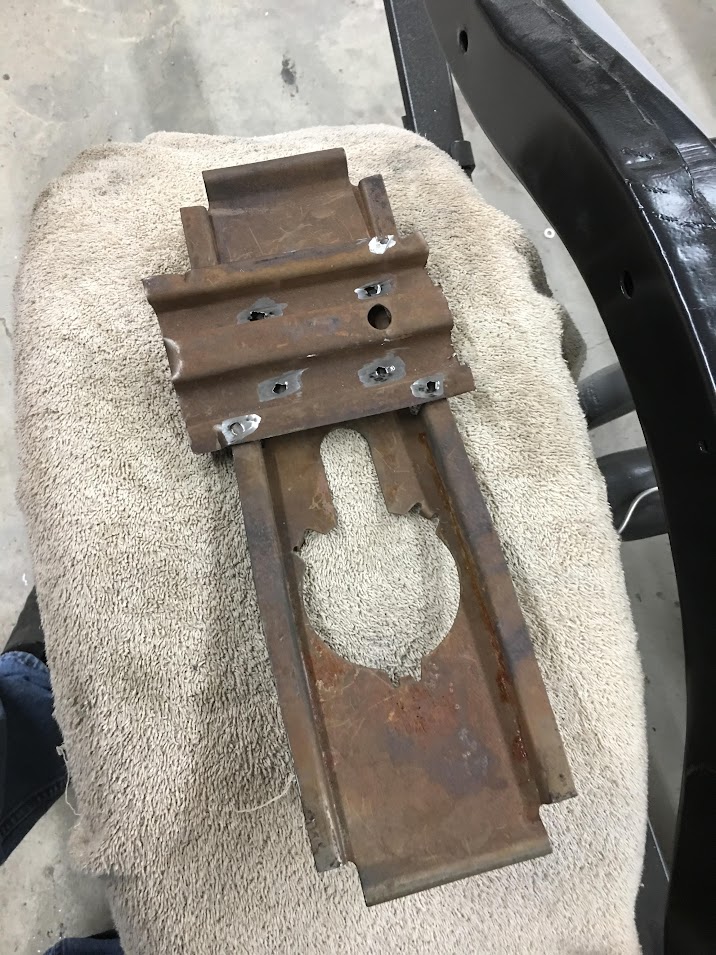
When we returned from that, I finished up the remaining hinge conversion, and Mike cut out some 18 GA cold rolled and made some bolting angles for some inner fenders we have planned in dressing up the blah engine compartment. Undoubtedly there will be some components bolted onto the original inner fenders and these "covers", and this bolting angle will allow us to remove them for access without having to remove fender bolts. 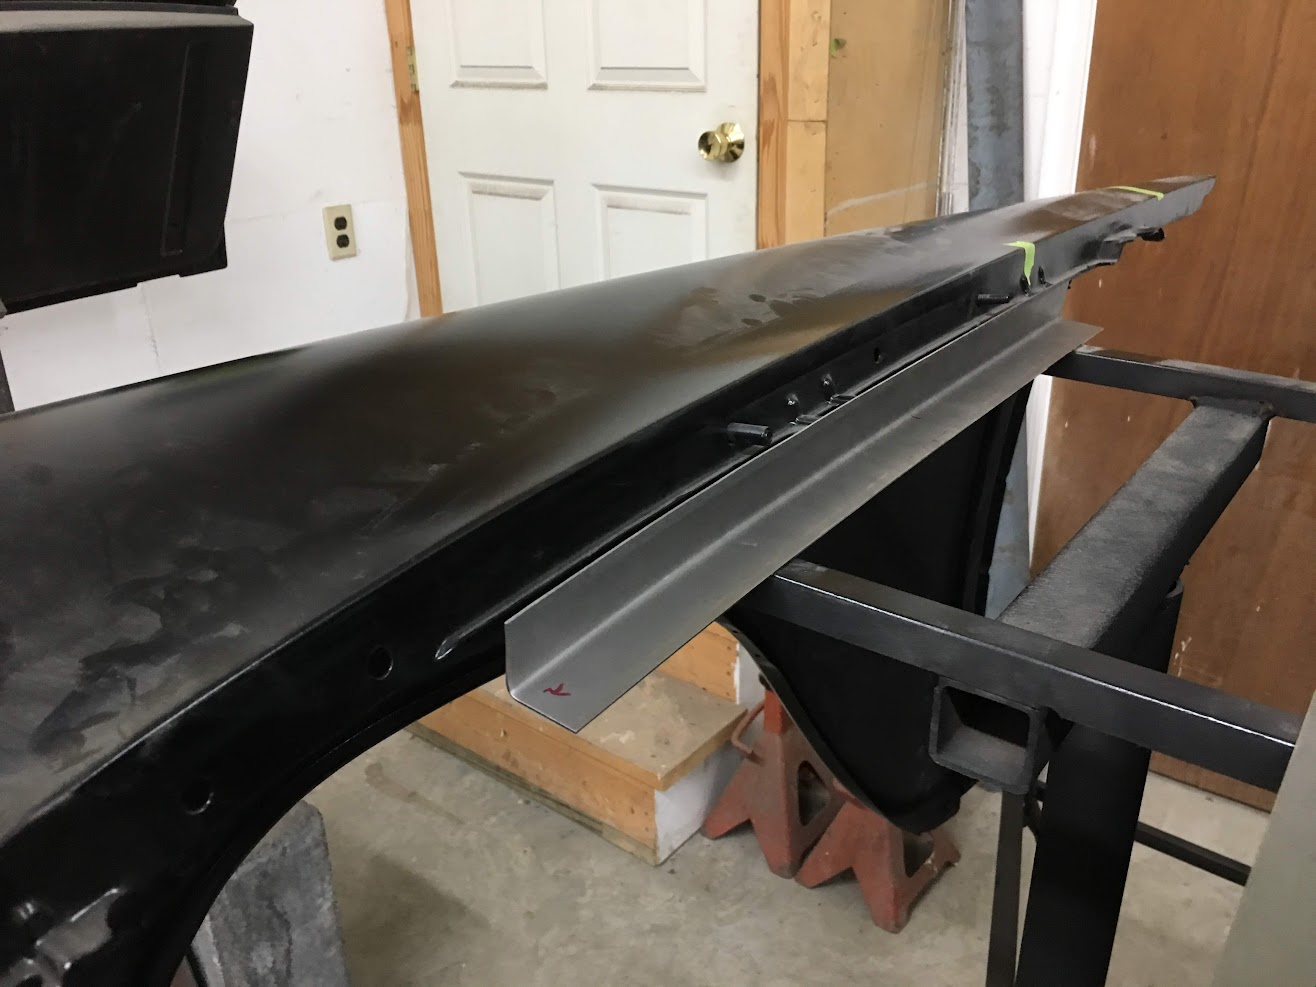  Monday evening we had a departure, the upholstery has left the building! Well, most of it, we still have door panels, arm rests, etc, etc.... to address. 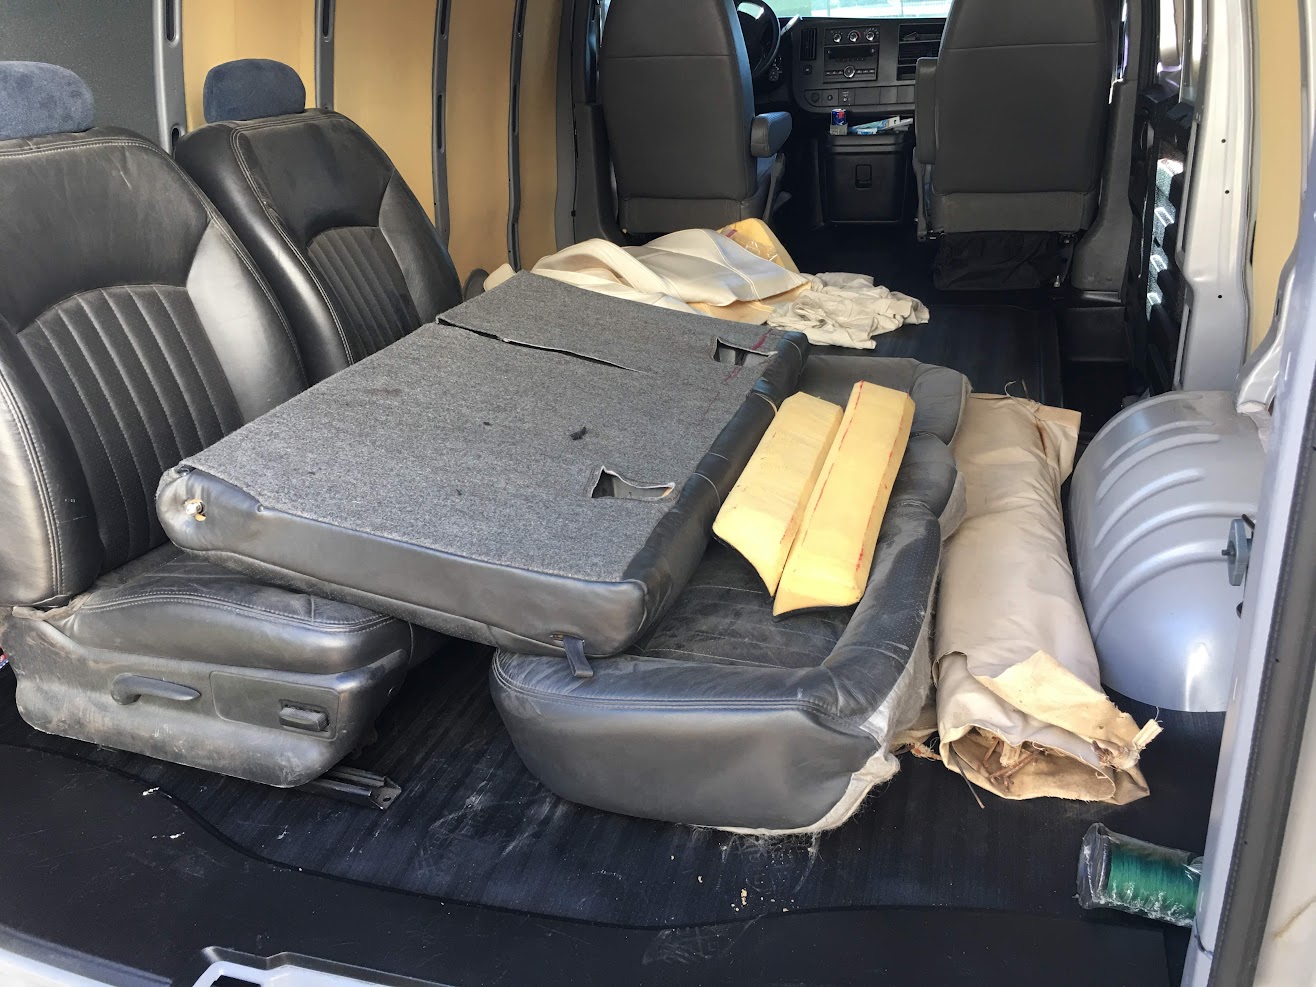 Thanks Gary!  Last night we cut out some bend sample strips to nail down our console lid insert, should get the final version cut out and fabricated Thursday night. Meanwhile, E and I worked on locating attachment holes on the mounting angles Mike had made. The original inner fenders were attached to the fender, and noticed we needed a mounting hole up front of our angles for better stability, so we added those holes and installed some rivnuts in the inner fenders. This will allow assembly without the need to hold washers and nuts on the opposite side.  E gaining some rivnut installing skills.... 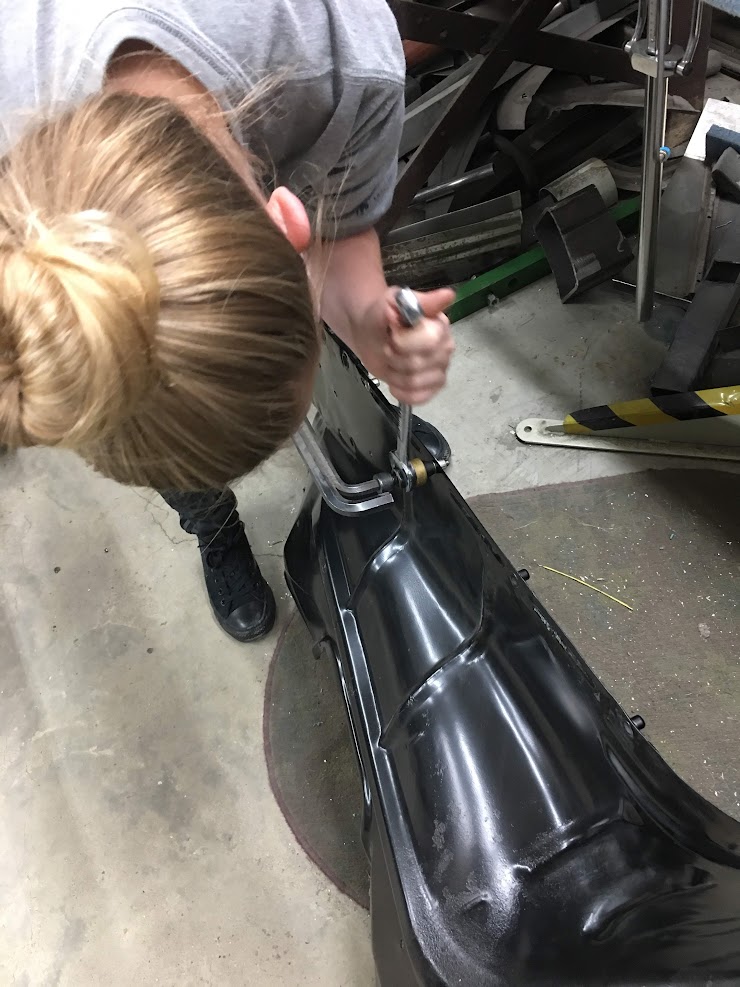  This shows the side by side with the angles installed. https://www.youtube.com/watch?v=qePepMuDThE Thursday we'll get the attachment holes for the new inner inner fenders located, drilled, and rivnuts installed. Then these parts can get sent off for powder coating.
__________________
Robert |
|
|
|
|
10-27-2018, 11:36 PM
|
#18 |
|
Registered User
Join Date: Jan 2013
Location: Leonardtown, MD
Posts: 1,643
|
Re: 55 Wagon Progress
E worked Thurday evening on drilling holes and installing rivet nuts for the inner inner fender mounts.
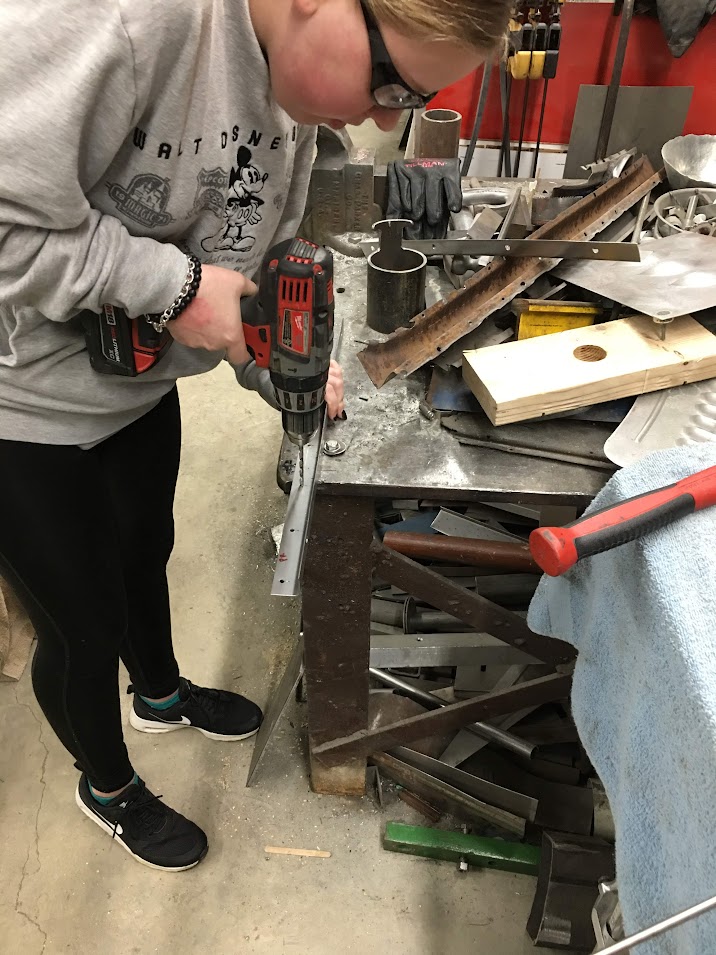 Oops, I think she chipped a nail..  Meanwhile, I fabricated the console lid insert...     Today, Mike and I worked on the lower radiator mount. We tossed around various ideas, and settled on one that would keep the lower condensor mount a separate isolated part. We decided to use the same dies used to for the J-channel detail on the back of the 52 Chevy tailpan that we made up a couple years ago. Here the J-channel detail is added on a piece of 16 gauge cold rolled steel.. https://www.youtube.com/watch?v=52tz0CWvRHM    Radiator test fit: https://www.youtube.com/watch?v=XEQFMLnb4z4 .
__________________
Robert |
|
|
|
|
11-04-2018, 12:38 PM
|
#19 |
|
Registered User
Join Date: Jan 2013
Location: Leonardtown, MD
Posts: 1,643
|
Re: 55 Wagon Progress
Another part we're adding due to the length of this car is a second interior light. We chose to go with the original version, so here's a factory mount, spot welds ground out from the back side of the included section of roof crossmember. Then it will get media blasted, epoxy primed, and plug welded in place.
 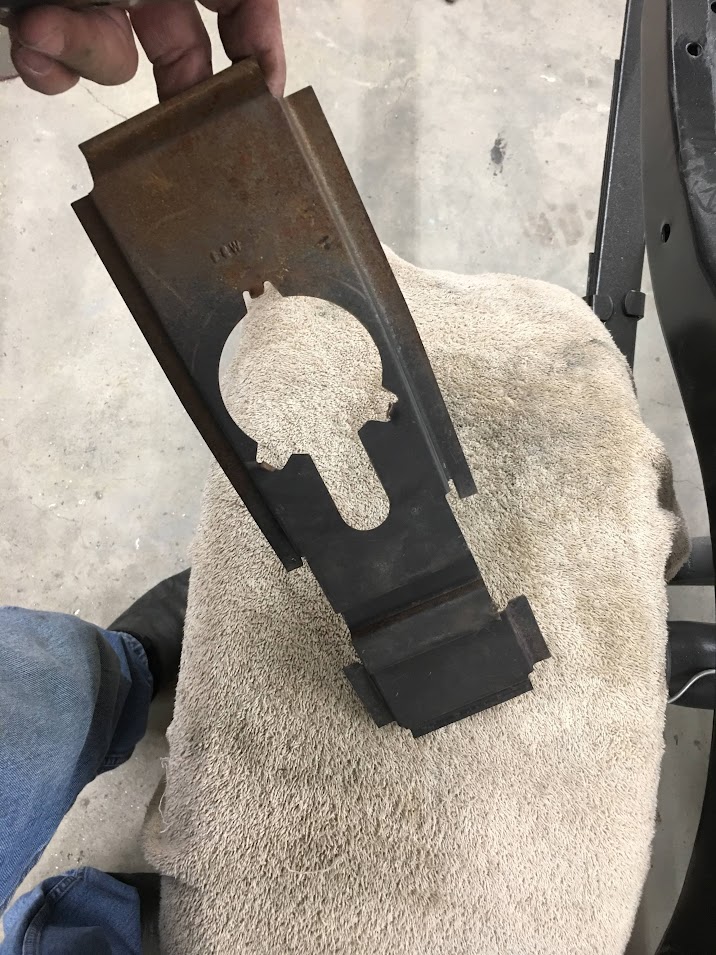 We got the baffle/lower radiator mount plug welded in place... 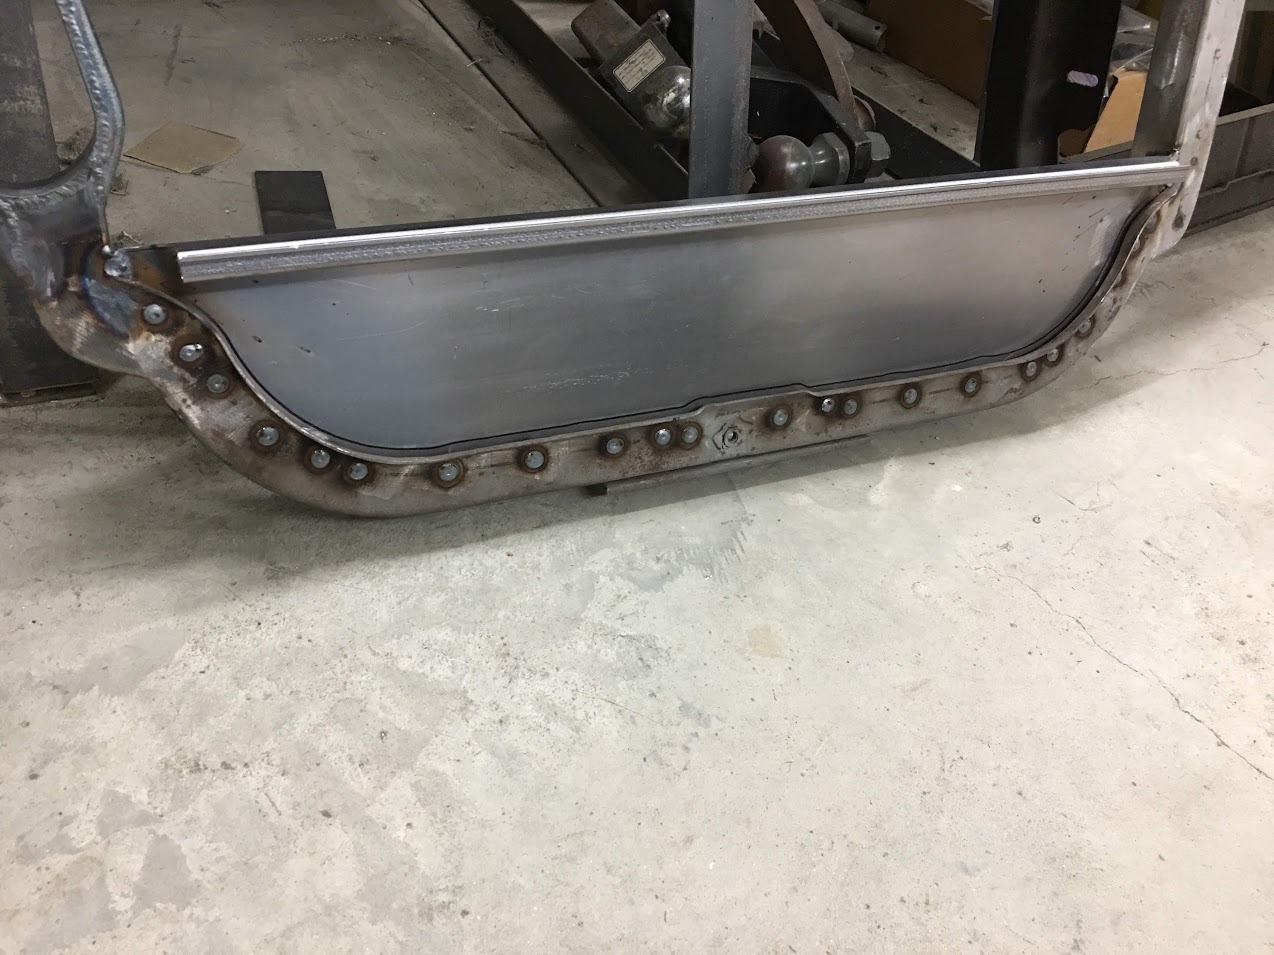 ...and the rubber edge trim for our lower radiator mount added.. The "final" version will include weather strip adhesive to keep it locked in place on the radiator. 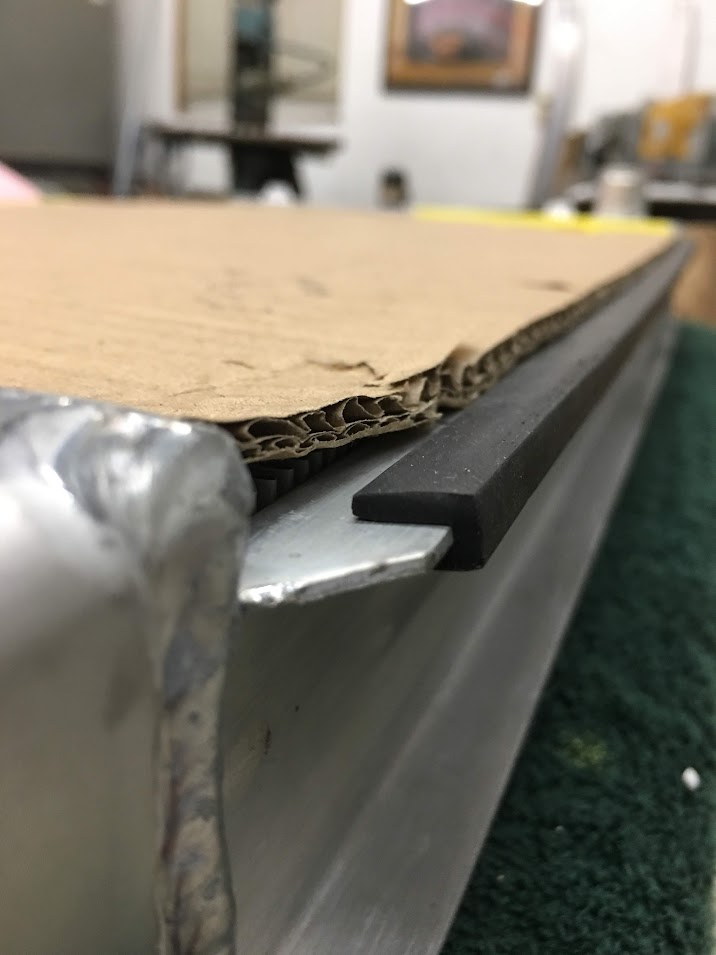 Needs to be pressed in a little more but this is the idea... 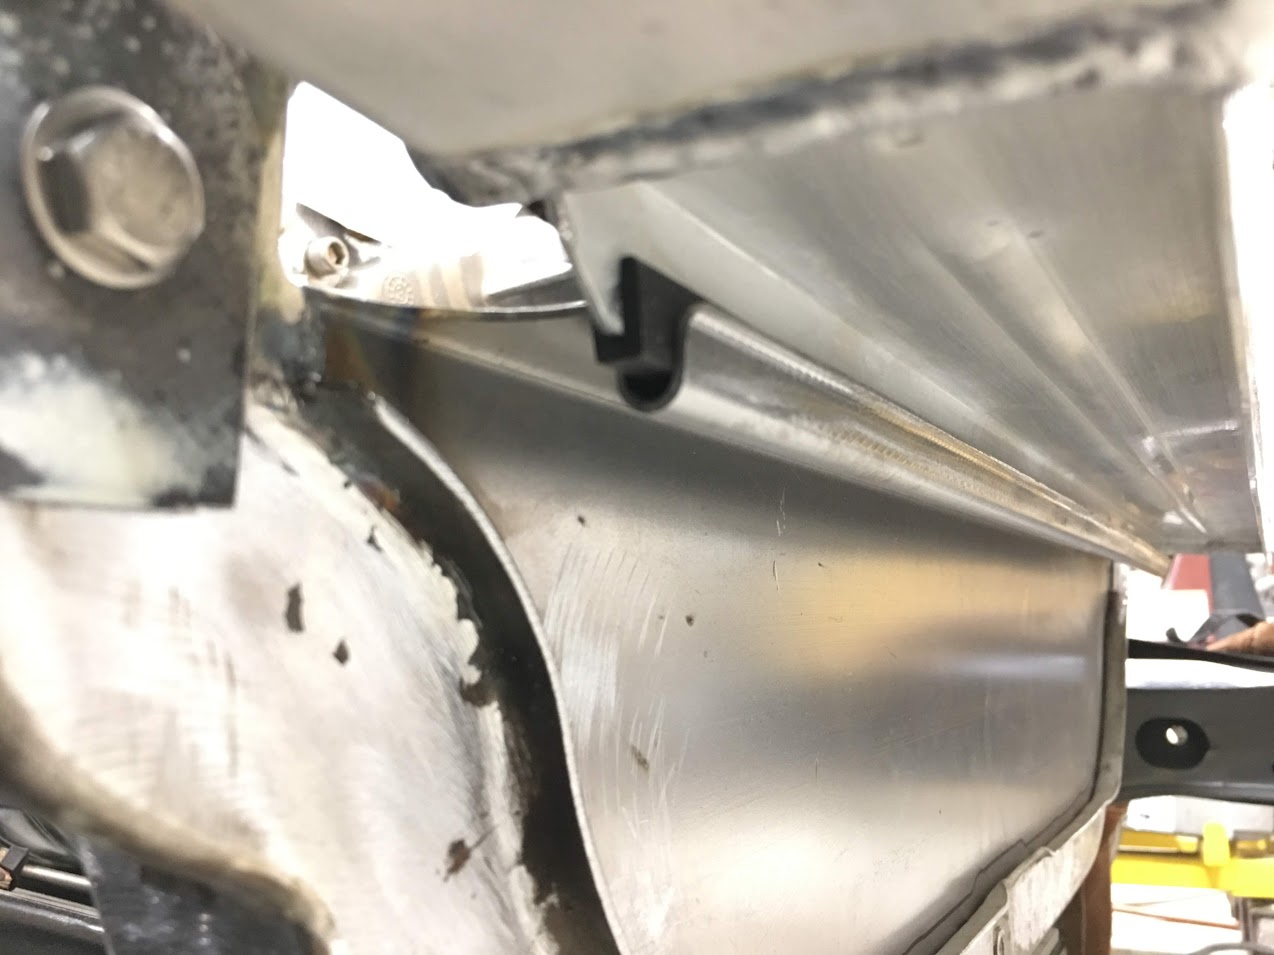 Side baffles for the core support were trimmed on the inside (for our larger opening) , new mounting slots added, and access holes opened up.. 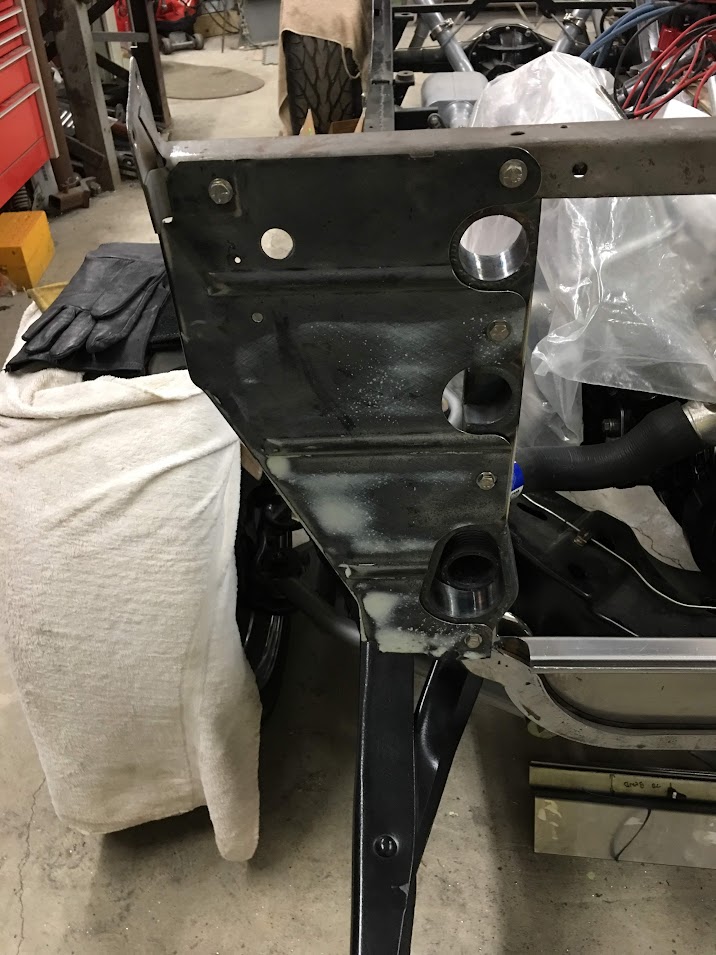 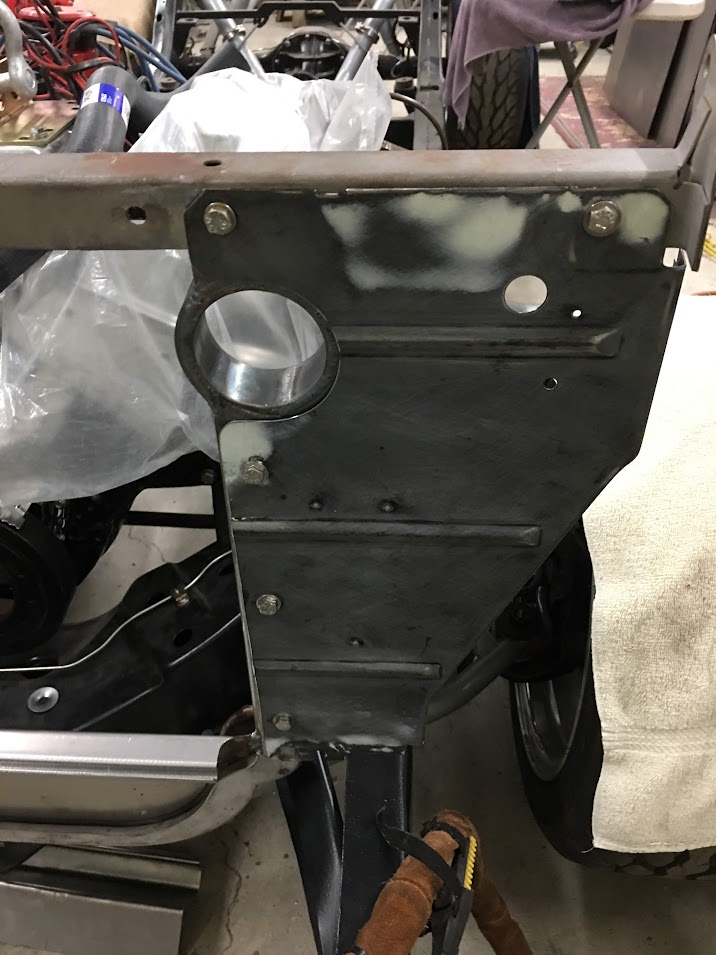 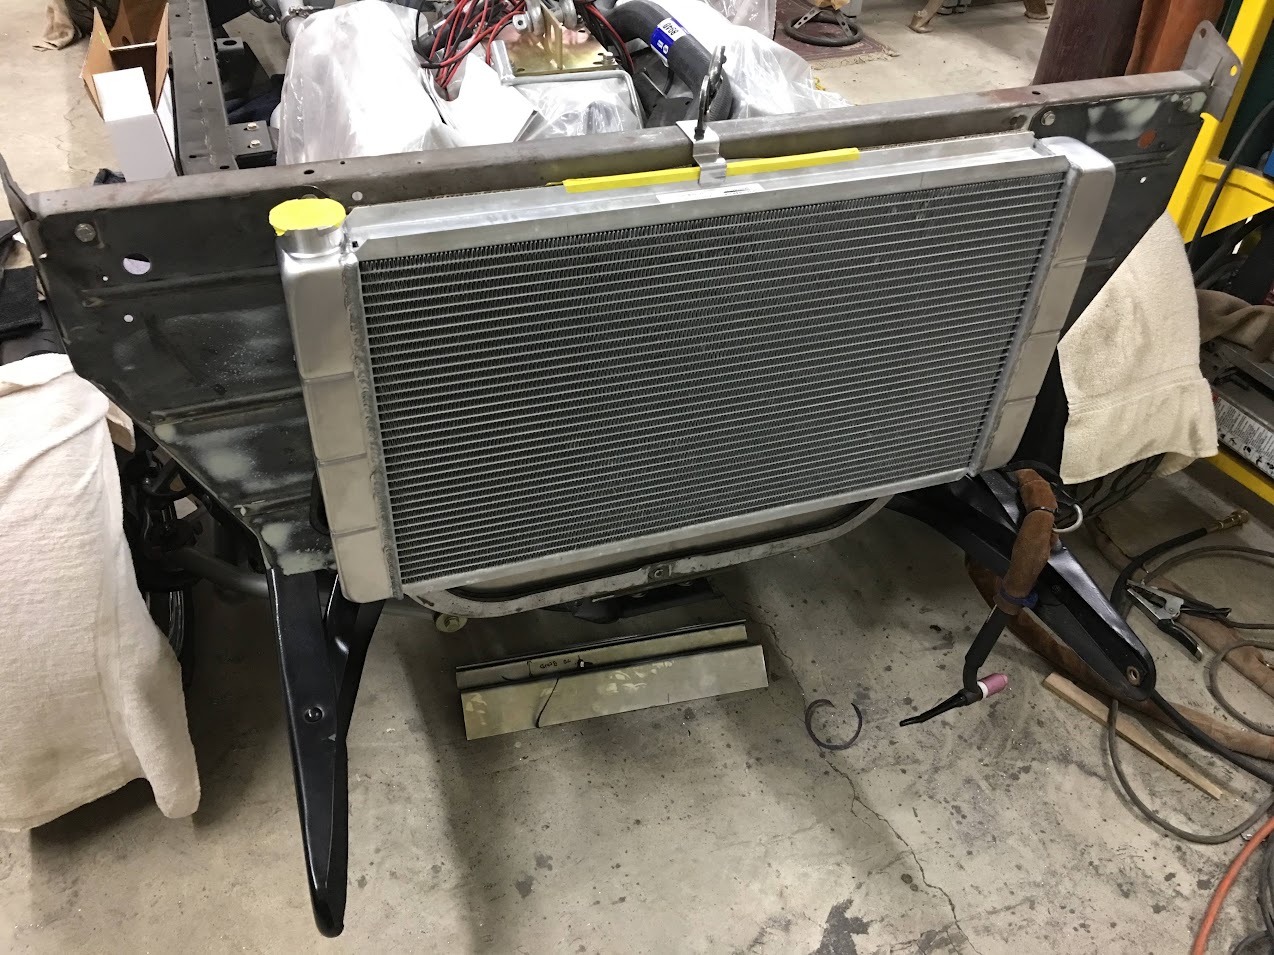 Lower radiator hose clearance to the battery support bracket... 
__________________
Robert |
|
|
|
|
11-05-2018, 12:24 AM
|
#20 |
|
Senior Member
Join Date: Mar 2011
Location: West Plains, Missouri
Posts: 7,559
|
Re: 55 Wagon Progress
Robert, looking good...Jim
__________________
my build thread: http://67-72chevytrucks.com/vboard/s...d.php?t=459839 Jimbo's long bed step build:http://67-72chevytrucks.com/vboard/s...t=464626<br /> |
|
|
|
|
11-15-2018, 10:45 PM
|
#21 |
|
Registered User
Join Date: Jan 2013
Location: Leonardtown, MD
Posts: 1,643
|
Re: 55 Wagon Progress
Thanks Jim!
I have a couple radius bends to do on the AC condenser bracket, so a piece of 1/2" 4130 was added to the Magnetic Brake die.. This will help keep things from moving, and it is welded on what is usually the back side, so no interference otherwise... 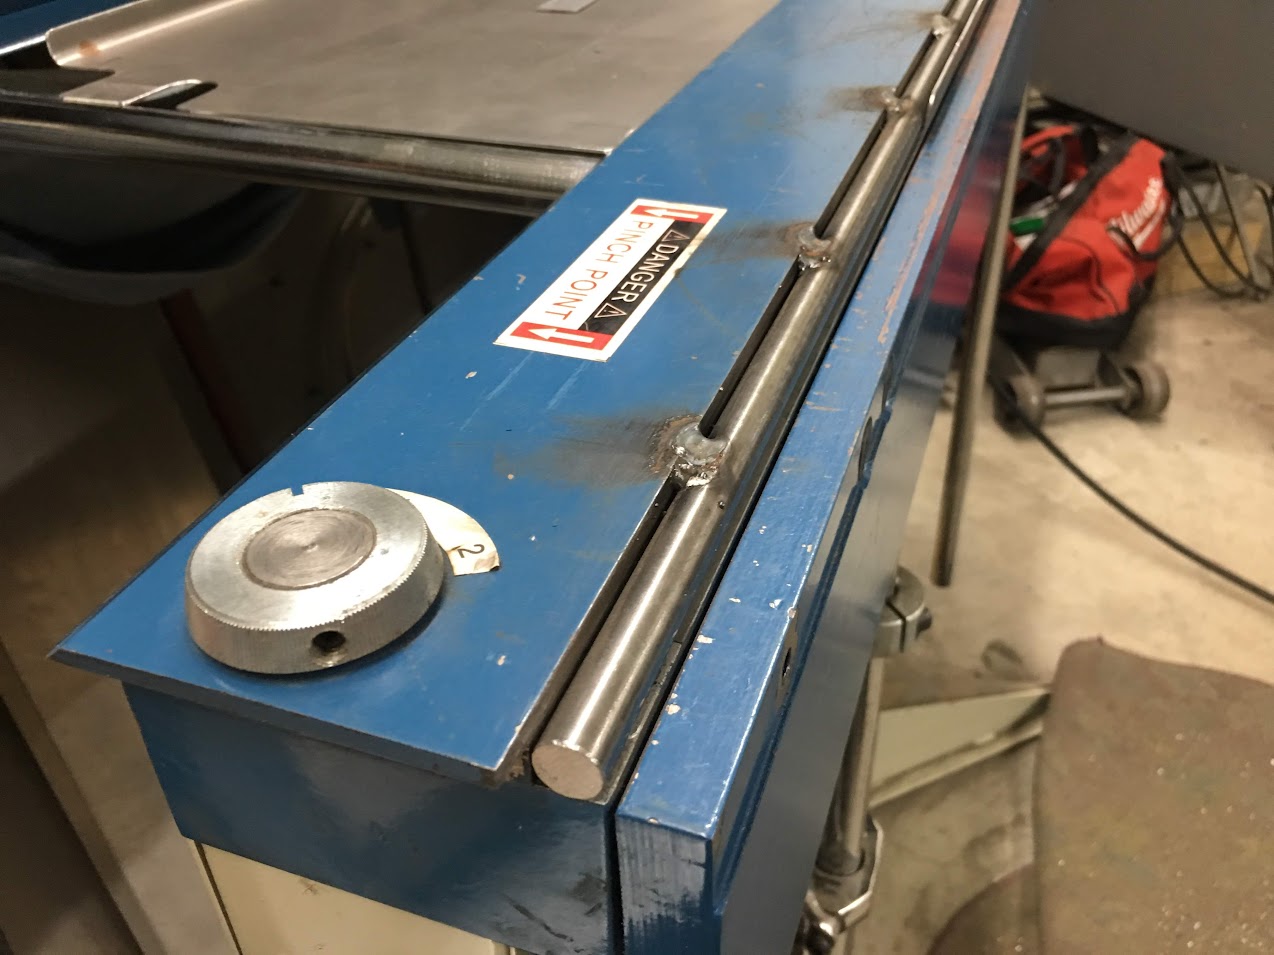 This will be the mounting flange to the radiator..   1" rod is used to form the radius on the side "covers"  A test fit before we cut out the gaping hole for air flow.... https://www.youtube.com/watch?v=YbIW...ature=youtu.be The center hole is cut out and a flange tipped for wrapping a 3/16" rod for wire edge. This should add plenty of strength, if the 16 GA wasn't enough..  Our anvil we made up for stretching the metal in the corners for tipping..   Where we left off....to be continued..  .
__________________
Robert |
|
|
|
|
11-15-2018, 11:44 PM
|
#22 |
|
Post Whore
Join Date: May 2015
Location: Alabama
Posts: 14,658
|
Re: 55 Wagon Progress
Man that's slick....looks awesome ...
__________________
Mongo...aka Greg RIP Dad RIP Jesse 1981 C30 LQ9 NV4500..http://67-72chevytrucks.com/vboard/s...d.php?t=753598 Mongos AD- LS3 TR6060...http://67-72chevytrucks.com/vboard/s...34#post8522334 Columbus..the 1957 IH 4x4...http://67-72chevytrucks.com/vboard/s...63#post8082563 2023 Chevy Z71..daily driver |
|
|
|
|
11-16-2018, 12:09 AM
|
#23 |
|
Senior Member
Join Date: Mar 2011
Location: West Plains, Missouri
Posts: 7,559
|
Re: 55 Wagon Progress
Very nice...Jim
__________________
my build thread: http://67-72chevytrucks.com/vboard/s...d.php?t=459839 Jimbo's long bed step build:http://67-72chevytrucks.com/vboard/s...t=464626<br /> |
|
|
|
|
11-16-2018, 09:02 AM
|
#24 |
|
Registered User
Join Date: Apr 2003
Location: Indep, MO
Posts: 5,893
|
Re: 55 Wagon Progress
Awesome work as always!
__________________
Boppa's Old Yeller Truck Build, Old Yeller's New Heart! Project Buzz Bomb Flyin' Low! |
|
|
|
|
11-16-2018, 12:20 PM
|
#25 |
|
Registered User
Join Date: Jan 2013
Location: Leonardtown, MD
Posts: 1,643
|
Re: 55 Wagon Progress
Thanks for checking out the progress fellas!
Wire edged the opening this morning.. https://www.youtube.com/watch?v=w8Ay...ature=youtu.be
__________________
Robert |
|
|
|
 |
| Bookmarks |
|
|


 Hybrid Mode
