
 |
|
|
#951 |
|
Certified Car Nut
Join Date: Jan 2005
Location: Inglewood, California
Posts: 3,118
|
Re: Kabwe's aka Bam's build
Well I decided to start getting the rear fenders ready for primer. I wanted to use these for the truck because they were giving to me by a buddy who bought new ones and he has passed away (He knew they were rough but did not want to throw them away). So I wanted something of his on the truck, so I went to through the trouble of saving them.
My question is do you know what evils lives under your primer?  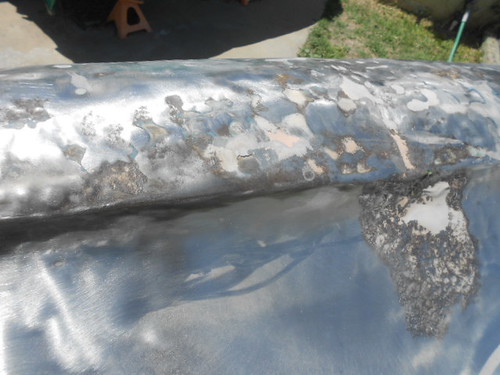 This is what I had to cut away. Yikes  Remember those repop fenders that I told you I like keeping just incase? Well they provided the majority of the patch panel. A little tweaking and they worked fine. That little rust spot that was left I just formed my hand. 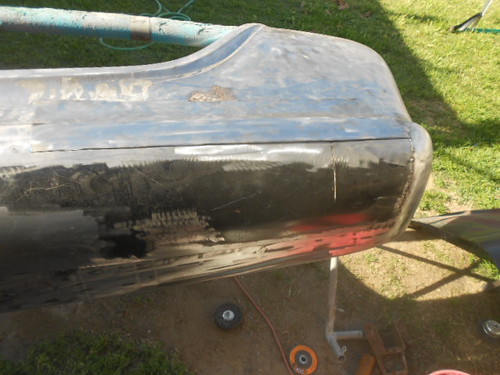 And here it is, almost ready for primer a little more welding and hammer and dolly work to do and very little filler will be needed now.lol 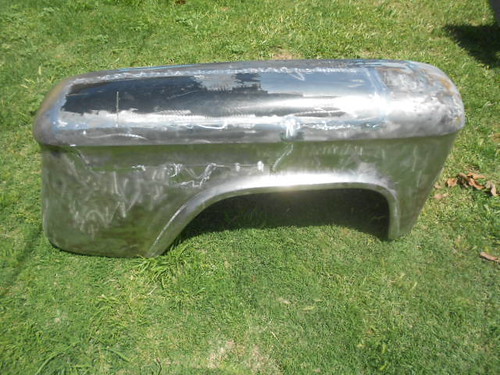 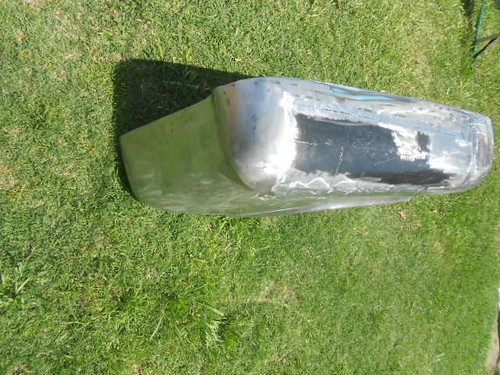
Last edited by Kabwe; 04-30-2012 at 12:59 PM. |
|
|

|
|
|
#952 |
|
Registered User
Join Date: Nov 2011
Location: Langley, BC
Posts: 702
|
Re: Kabwe's aka Bam's build
Remember......................it's Sunday. No "hammer and dolly work" before 11:00 am. That neighbor thing.
|
|
|

|
|
|
#953 | |
|
Registered User
Join Date: Dec 2011
Location: Mobile, Alabama
Posts: 996
|
Re: Kabwe's aka Bam's build
Quote:
__________________
My Build - http://67-72chevytrucks.com/vboard/s...d.php?t=515876 |
|
|
|

|
|
|
#954 |
|
Registered User
Join Date: Mar 2011
Location: Queensland, Australia
Posts: 120
|
Re: Kabwe's aka Bam's build
nice work on incorporating your mate's panels, well worth the effort for the memories
|
|
|

|
|
|
#955 | ||
|
Certified Car Nut
Join Date: Jan 2005
Location: Inglewood, California
Posts: 3,118
|
Re: Kabwe's aka Bam's build
Quote:
Quote:
Yeah man I had to do it. He was a nice man. The sad thing is he was on his way over to my house the day he got sick. I had just spoken to him and after we got off the phone he had a stroke and never recovered. Last edited by Kabwe; 05-03-2012 at 12:00 PM. |
||
|
|

|
|
|
#956 |
|
Registered User
Join Date: Aug 2007
Location: Corona, California
Posts: 7,998
|
Re: Kabwe's aka Bam's build
As always Bam very nice work.
Kim |
|
|

|
|
|
#957 |
|
Registered User
Join Date: Jan 2012
Location: Motown
Posts: 7,680
|
Re: Kabwe's aka Bam's build
looking good kabwe
at least they attempted to (poorly) hammer that out there was a full inch of filler over this, the whole left side was a mess i'm not sure they even tried to hammer anything out boy that metal is thick, took a 5lb hammer to get the worst of it out.  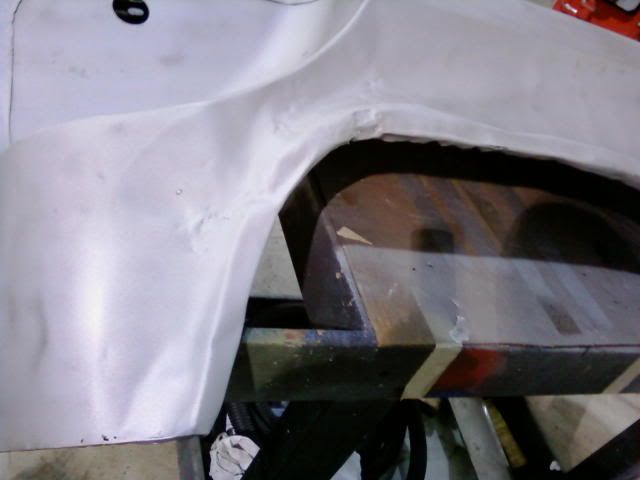
__________________
cool, an ogre smiley  Ogre's 58 Truk build Ogre's 58 Truk buildhow to put your truck year and build thread into your signature shop air compressor timer |
|
|

|
|
|
#958 |
|
Senior Member
 Join Date: Mar 2011
Location: West Plains, Missouri
Posts: 7,559
|
Re: Kabwe's aka Bam's build
Very nice work on the fender, looks great.....Jim
__________________
my build thread: http://67-72chevytrucks.com/vboard/s...d.php?t=459839 Jimbo's long bed step build:http://67-72chevytrucks.com/vboard/s...t=464626<br /> |
|
|

|
|
|
#959 |
|
Certified Car Nut
Join Date: Jan 2005
Location: Inglewood, California
Posts: 3,118
|
Re: Kabwe's aka Bam's build
Thanks Ogre and oldman3
|
|
|

|
|
|
#960 |
|
Senior Member
 Join Date: Jul 2011
Location: Hawthorne, CA
Posts: 458
|
Re: Kabwe's aka Bam's build
Well Kabwe, looks like your moving now. Keep Going the finish line is there so where.
|
|
|

|
|
|
#961 |
|
Certified Car Nut
Join Date: Jan 2005
Location: Inglewood, California
Posts: 3,118
|
Re: Kabwe's aka Bam's build
|
|
|

|
|
|
#962 |
|
Registered User
Join Date: Oct 2010
Location: mt vernon, oh
Posts: 867
|
Re: Kabwe's aka Bam's build
I'm all caught up now.....looks great!
|
|
|

|
|
|
#963 |
|
Registered User
Join Date: Oct 2009
Location: Broken Arrow, OK
Posts: 1,234
|
Re: Kabwe's aka Bam's build
Are we there yet?
I HAVE to get mine finished or I might never get to start the next one!
__________________
56 GMC BUILD THREAD: http://67-72chevytrucks.com/vboard/s...d.php?t=368649 69 long bed Chevy turned 67 gmc jimmy roadster: https://67-72chevytrucks.com/vboard/...d.php?t=851167 |
|
|

|
|
|
#964 |
|
Certified Car Nut
Join Date: Jan 2005
Location: Inglewood, California
Posts: 3,118
|
Re: Kabwe's aka Bam's build
Hey xpickup aka Shannon
I remember we were talking a talking sheetmetal so I snapped this pics for you. I used a 3/32 2% ceriated tungsten and 1/16 filler rod and tried to keep the smallest HAZ I could. Tig sheetmetal is great you can see how low the bead profile is and some of the metal finishing I started. Man you can hammer and dolly that HAZ to your hearts desire. 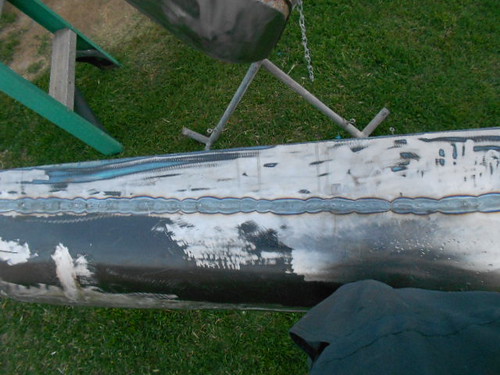 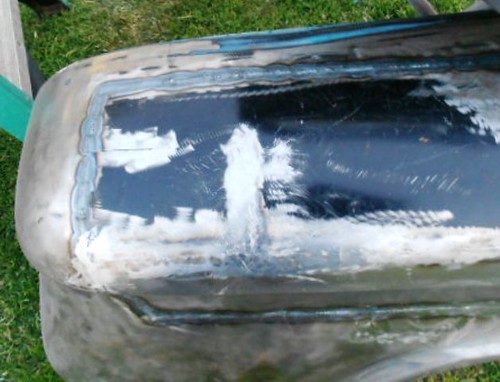 
Last edited by Kabwe; 05-06-2012 at 08:42 PM. |
|
|

|
|
|
#965 |
|
56 - autocross
Join Date: Apr 2010
Location: Camarillo, Ca
Posts: 1,121
|
Re: Kabwe's aka Bam's build
what is the purpose to hammer haz? Is it done a certain way?
|
|
|

|
|
|
#966 | |
|
Certified Car Nut
Join Date: Jan 2005
Location: Inglewood, California
Posts: 3,118
|
Re: Kabwe's aka Bam's build
Quote:
Over this years this truck was really used. Man this fender has dents and digs all alone the top area. I used a big red marker to color in the top which I will block sand to see the highs and lows. 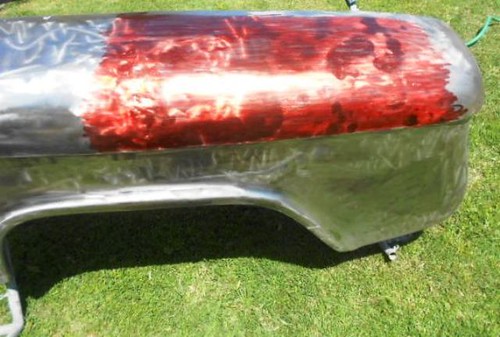 Weapons of choice 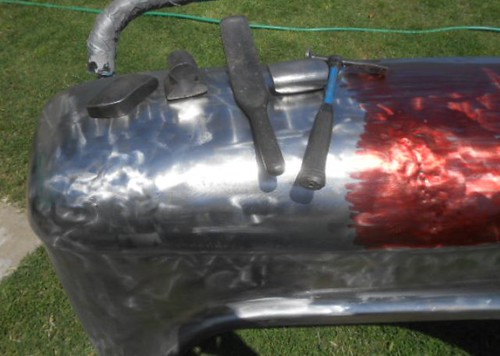 I also made this slapper and find it does a great job.  On the back side you must choose a dolly that is very close to the contour of the sheet metal. 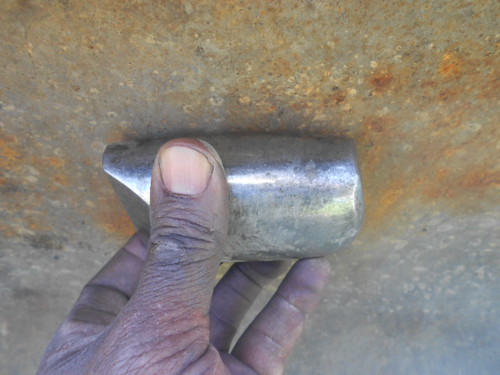 After sanding here is what I had  After the first use of my slapper and dolly I sanded again and here what I have. As you can see the low area is getting smaller. Sanding between hammer and dolly work shows me were I need to concentrate. 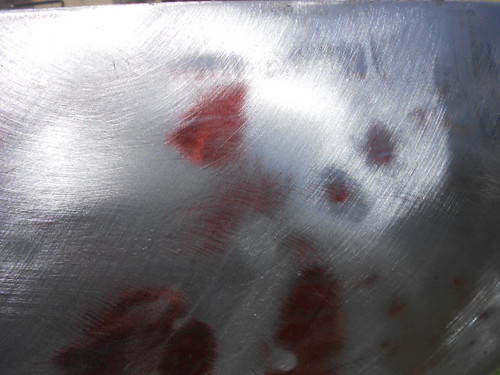 Worked some more and sanded and had this.  Here what I accomplished the first day, still a lot of work to do but a fender that most would have trashed or covered with way too much filler will be used with very little filler when done. After I remove all the major of the dents I will red marker again and try to fix all the imperfections. All the red markets that are left need to be worked but as you can see there is already a world of difference. 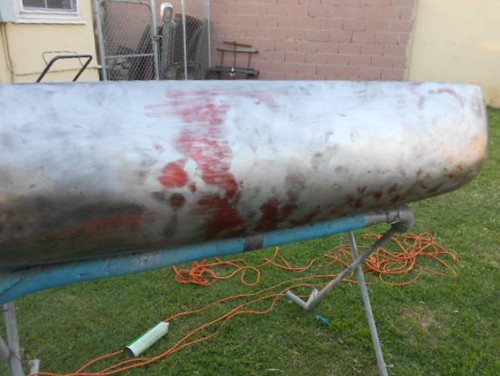 It just takes patience and work. Last edited by Kabwe; 05-06-2012 at 08:52 PM. |
|
|
|

|
|
|
#967 |
|
Certified Car Nut
Join Date: Jan 2005
Location: Inglewood, California
Posts: 3,118
|
Re: Kabwe's aka Bam's build
The HAZ is the Heat Affected Zone. So lets say after you finished welding in a patch panel the panel was warped. When the heat from welding pulled or shrink the metal it could have affected other areas of the panel. Do not start your hammering on the warped area only hammer the HAZ because it will put metal back in its proper place. You will find the area that was warped is not warp anymore because it stretch the metal back to where it was orginally. I hope that makes since.
Last edited by Kabwe; 05-06-2012 at 08:54 PM. |
|
|

|
|
|
#968 |
|
56 - autocross
Join Date: Apr 2010
Location: Camarillo, Ca
Posts: 1,121
|
Re: Kabwe's aka Bam's build
Thanks. Do you do this with all haz areas after welding sheetmetal as a general rule? Also, what did u make the slapper from?
|
|
|

|
|
|
#969 | |
|
Certified Car Nut
Join Date: Jan 2005
Location: Inglewood, California
Posts: 3,118
|
Re: Kabwe's aka Bam's build
Quote:
I made that slapper from some 1/4 thick metal you can also make them from old leaf springs. I have several slappers but I wanted one that was flat. Last edited by Kabwe; 05-06-2012 at 08:58 PM. |
|
|
|

|
|
|
#970 |
|
Senior Member
 Join Date: Mar 2011
Location: West Plains, Missouri
Posts: 7,559
|
Re: Kabwe's aka Bam's build
Kabwe, thanks for the lesson on sheet metal work. You do a great job and its good to see you pass along your knowledge....Jim
__________________
my build thread: http://67-72chevytrucks.com/vboard/s...d.php?t=459839 Jimbo's long bed step build:http://67-72chevytrucks.com/vboard/s...t=464626<br /> |
|
|

|
|
|
#971 | |
|
Registered User
 Join Date: May 2007
Location: Deale Md
Posts: 4,663
|
Re: Kabwe's aka Bam's build
Quote:
__________________
James 63 GMC V6 4speed carryall 65 chevy swb bbw V8 auto 68 K20 327/4 speed, buddy buckets 2002 GMC CC Dually Duramax 64 GMC lwb 3/4 V6 4speed SOLD 66 GMC swb bbw buddy buckets SOLD IG duallyjams The only thing that stays the same is constant change! |
|
|
|

|
|
|
#972 |
|
Certified Car Nut
Join Date: Jan 2005
Location: Inglewood, California
Posts: 3,118
|
Re: Kabwe's aka Bam's build
|
|
|

|
|
|
#973 |
|
Registered User
Join Date: Aug 2007
Location: Corona, California
Posts: 7,998
|
Re: Kabwe's aka Bam's build
Great info Bam.
Kim |
|
|

|
|
|
#974 |
|
Registered User
Join Date: Feb 2011
Location: Boise, Idaho
Posts: 610
|
Re: Kabwe's aka Bam's build
Nice work, that's going to come out excellent.
|
|
|

|
|
|
#975 |
|
Registered User
Join Date: Sep 2009
Location: Albuquerque, NM
Posts: 540
|
Re: Kabwe's aka Bam's build
Thanks for the tutorial. Every bit of info helps. Also I am sorry to hear about your friend and know that he would be happy to see the progress you have made on the fenders he gave you.
__________________
FAT MIKE My 59 http://67-72chevytrucks.com/vboard/s...d.php?t=400201 My 47 http://67-72chevytrucks.com/vboard/s...d.php?t=386848 |
|
|

|
 |
| Bookmarks |
|
|