
|
 02-09-2013, 01:55 PM
|
#951 | |
|
GEARHEAD
Join Date: Aug 2003
Location: MN
Posts: 6,121
|
Re: Junkyard Jimmy Super Low Buck Build Thread
Quote:
This morning I worked on getting the side molding holes filled. I wasn't gonna weld up 3/8" holes because I don't think I'm good enough to do it without too much heat and warpage. Plan B is my old friend panel adhesive. I did the same thing to holes in the floor of my truck cab. I cleaned up the back side with some 40 grit and wiped it down with wax/grease remover. I cut some 1" squares from some scrap and cleaned them up the same way. A rough grit helps scratch the surface for the adhesive to grip to. Then just apply the adhesive with a little brush and stick on my patches to the back side. All I have to do is clean up the outside a bit, a touch of filler and sand smooth. No weld hole patches. 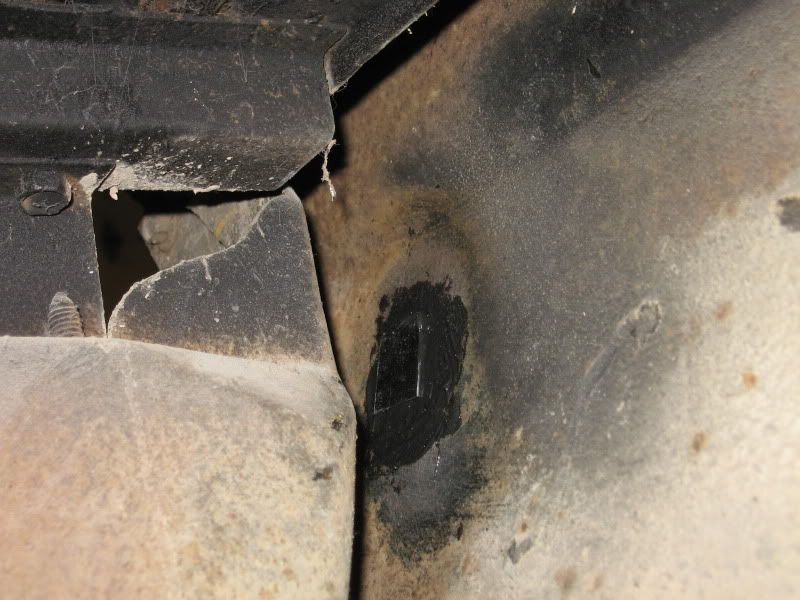 Then I finished stripping paint from the bed rail, cleaned that off and sprayed the remaining bare metal with epoxy primer. Not without complications though. Got everything ready, poured the primer into the gun and pulled the trigger. Nothing but air. Turns out I suck at cleaning my spray gun.  Pour the primer back out, disassemble, completely this time, and get some brushes through it. It was a pain, but I fixed it and learned another lesson. 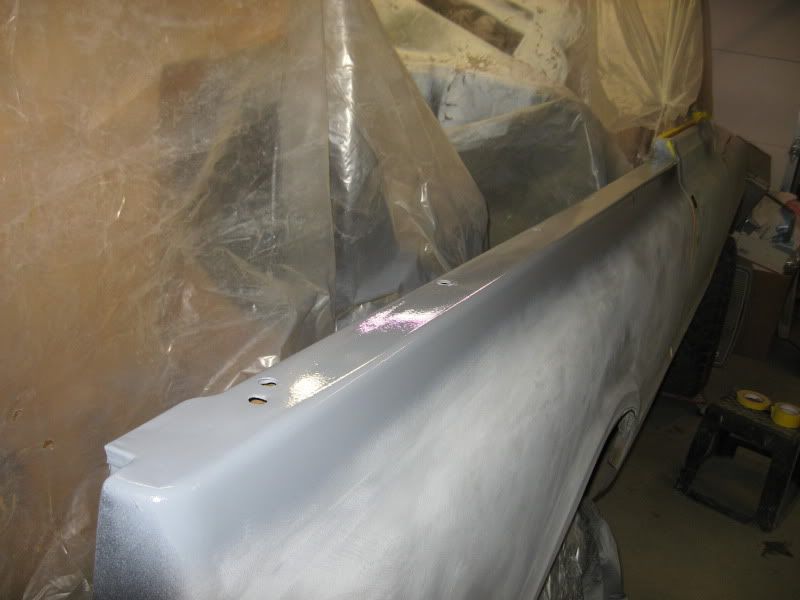 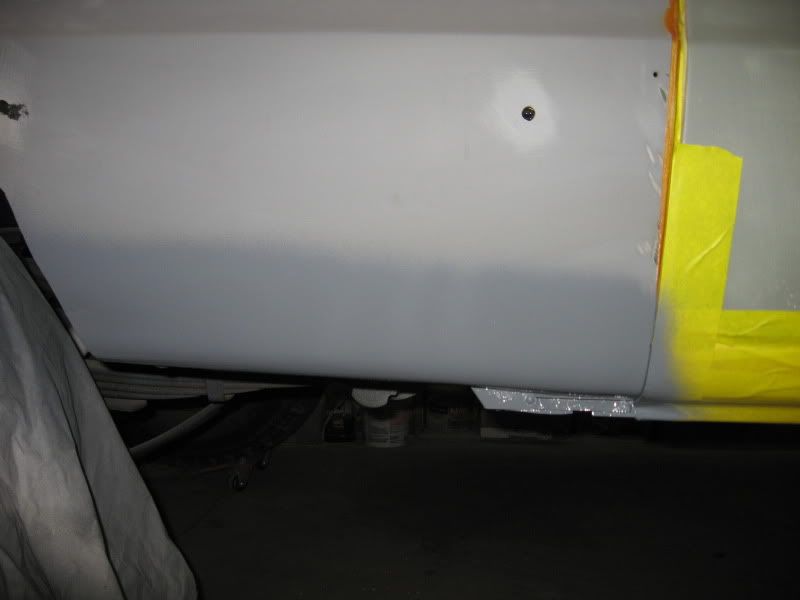 Maybe later today I'll go back out and do some filler work. I'd like to get that done and spray the G2 primer over this side before the weekend is done. Oh yeah, I also pulled the roll bar out. It was in the way, but I want to cut off the feet and redo those to fit the floor better. On another note... My wife has been working out a lot, trying to get back her girlish figure (it's working, daddy is happy). This morning she had a workout class that was based on MMA/kick boxing and came home smiling and happy, she loved it. Then said she was going to do another one at 5 am tuesday, to which I responded in a negative way. (guess who is a light sleeper) So tip of the day, to you fellas, young and old alike that haven't learned this lesson yet. If your first response is not encouraging and supportive, shut the hell up.  That is all. 
__________________
If no one knows what you're doing, they can't tell you you're doing it wrong HG's Dream Car Build - Shelby Cobra Kit Build your own adjustable track bar 71  Long Fleet C/10 Long Fleet C/10 72  Jimmy 4x4 (Junkyard Jimmy) Jimmy 4x4 (Junkyard Jimmy)HG's Plow Truck '78  K35 Dually K35 DuallyBigass Farm Truck HG's thread of miscellaneous stuff |
|

|

|
|
02-10-2013, 06:57 PM
|
#952 |
|
GEARHEAD
Join Date: Aug 2003
Location: MN
Posts: 6,121
|
Re: Junkyard Jimmy Super Low Buck Build Thread
Didn't get back out there yesterday afternoon enough to make significant progress. What I did get done was basically taping and masking and wiping it down and ready to spray. Then when I went out today and looked at it more critically I decided maybe I should get some of the filler work done first. So I slathered (good word ain't it, slathered) on some mud and sanded. saw a few more areas and slathered some more on and sanded some more.
  This is the area that still needed the most work. If you don't remember, go back a ways and see how screwed up this bed side was. I left it then with a wheel arch that just wasn't quite right. It still was in at the top of the arch about 1/8" or so. The little radius right in the inner part of the arch was not good. So I spent some extra time there today to try and improve it as much as my meager skills would allow. 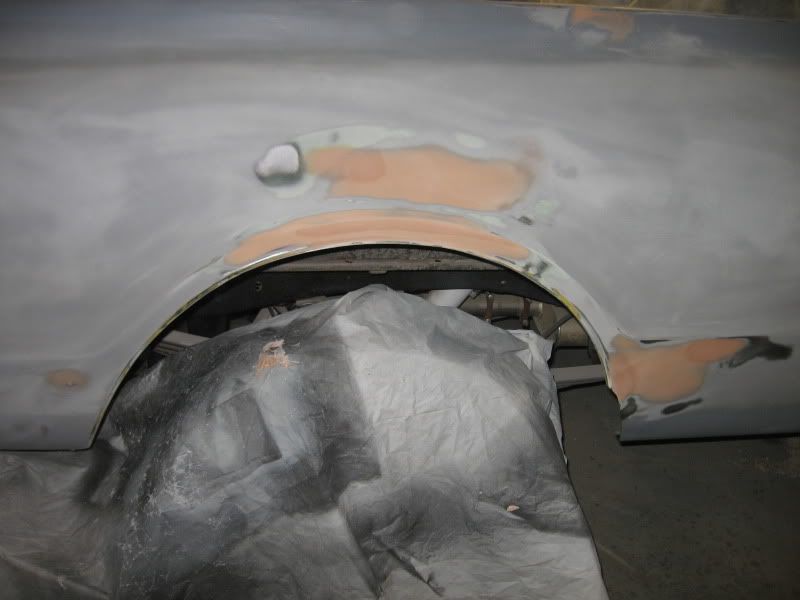 Then I sprayed the bare metal spots with some etch primer and mixed up about a qt of 2k high build primer and started spraying. For some reason, the last 2 times I used this primer, I've had serious fish eyes in the primer. I'm using a wax/grease remover and letting it flash off before I spray(maybe not long enough), but for some reason it's still acting like its contaminated with oil. Adding reducer to the primer helps it spray better and it only seems to do it on the first coat. I think it finishes flashing off during that first coat and is ok after, but it's still frustrating. Anyway, after about 3 good coats of 2k, its ready to sand again  Yeah! Yeah!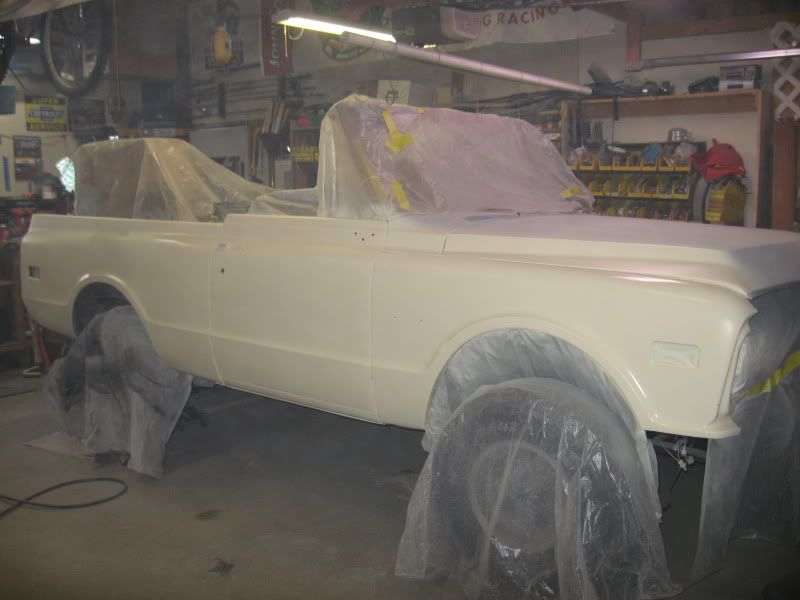 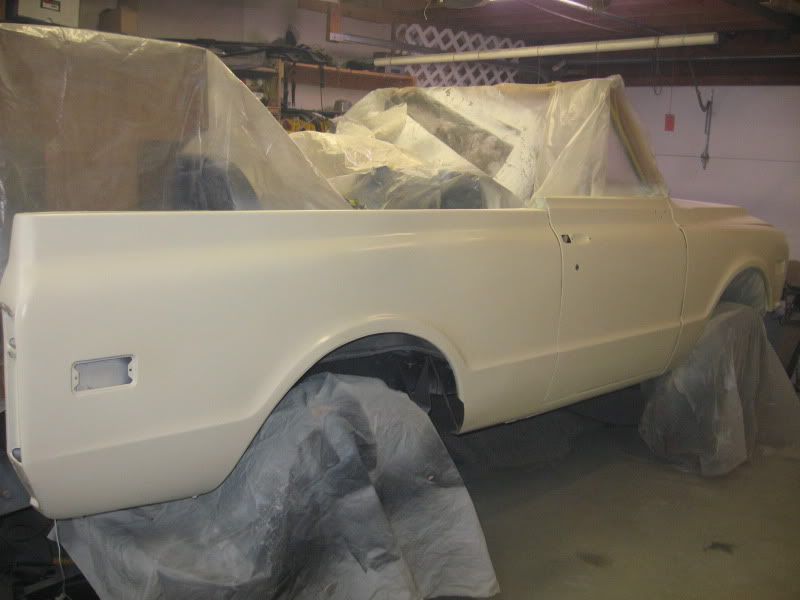 Hopefully this blocks out fairly well and the featherfill primer can finish it off. I plan on spraying the hood and cowl with that also on the next go around with the featherfill. Then one last sanding session and it'll be ready for paint. I really believe I'll have it painted before the end of this month.
__________________
If no one knows what you're doing, they can't tell you you're doing it wrong HG's Dream Car Build - Shelby Cobra Kit Build your own adjustable track bar 71 Long Fleet C/10 72 Jimmy 4x4 (Junkyard Jimmy)HG's Plow Truck '78 K35 DuallyBigass Farm Truck HG's thread of miscellaneous stuff |
|
|
|
|
02-10-2013, 09:51 PM
|
#953 |
|
Registered User
Join Date: Apr 2008
Location: Md
Posts: 2,457
|
Slathering or not your hard work is showing, looking great, can't wait to see the eye popping orange and black.
|
|
|
|
|
02-10-2013, 09:54 PM
|
#954 |
|
Registered User
Join Date: Apr 2011
Location: .
Posts: 3,104
|
Re: Junkyard Jimmy Super Low Buck Build Thread
Wow, that body work sure turned out great.
|
|
|
|
|
02-11-2013, 11:12 AM
|
#955 |
|
Registered User
 Join Date: Nov 2007
Location: NLR, AR
Posts: 1,387
|
Re: Junkyard Jimmy Super Low Buck Build Thread
I wished mine looked that good. Maybe some year.........
|
|
|
|
|
02-11-2013, 03:52 PM
|
#956 | |||
|
GEARHEAD
Join Date: Aug 2003
Location: MN
Posts: 6,121
|
Re: Junkyard Jimmy Super Low Buck Build Thread
Quote:
Quote:
Quote:
Taking a snow day today. 35 mph winds with gusts in the 40's and a layer of fresh snow yesterday. I live on the prairie, nothing stops the snow from messing up the roads and I drive a lot for a living. Anywho, back to the build. I started out with some guide coat. 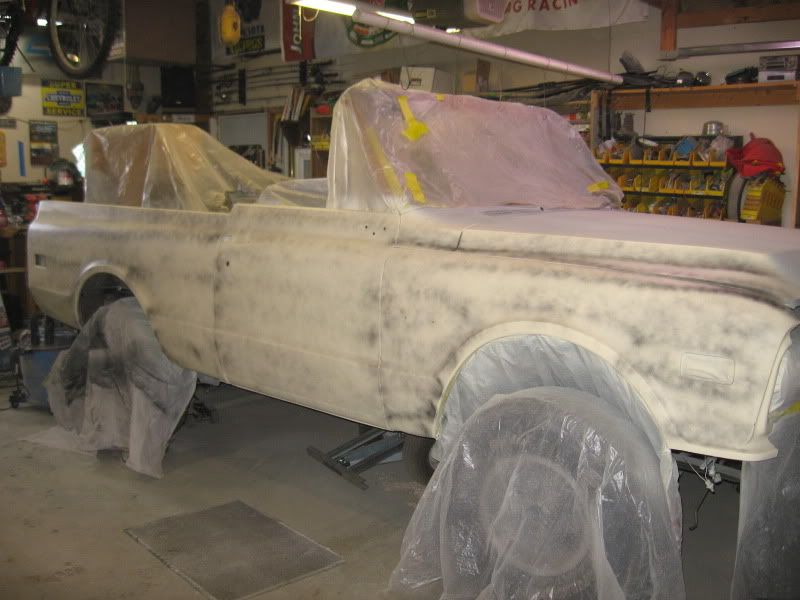 The rough texture of the primer was a real PITA to sand through. 4 hours later with 180 grit on a 12" block... 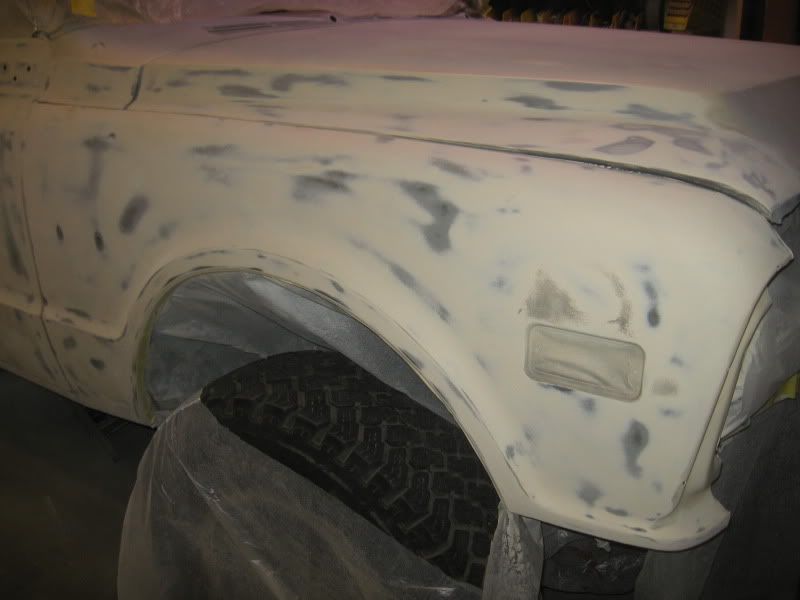 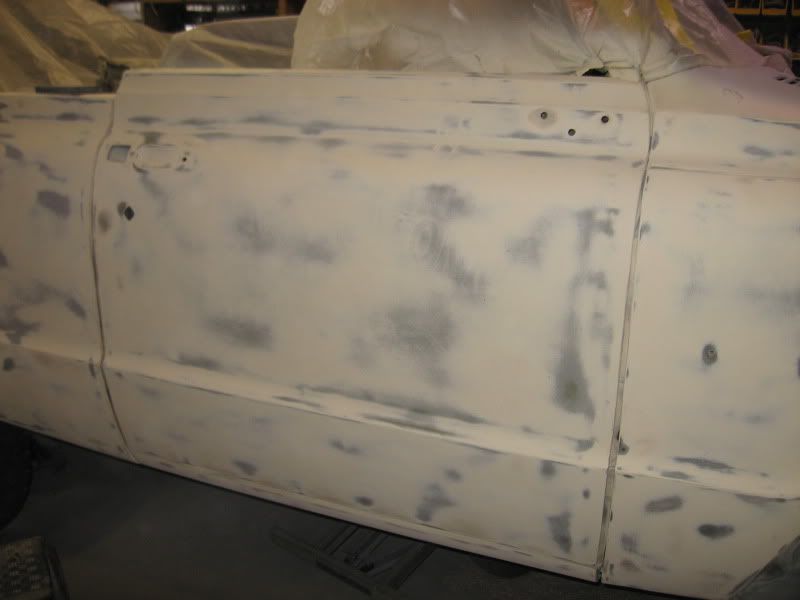 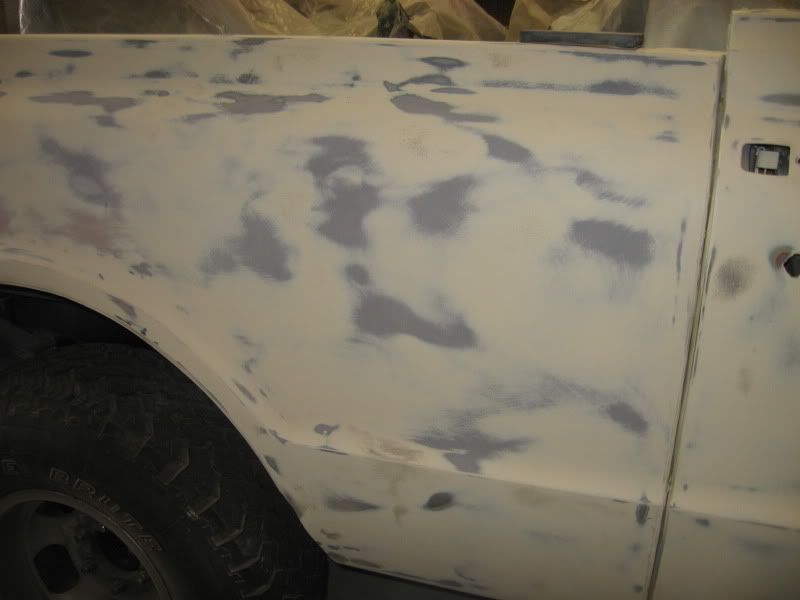 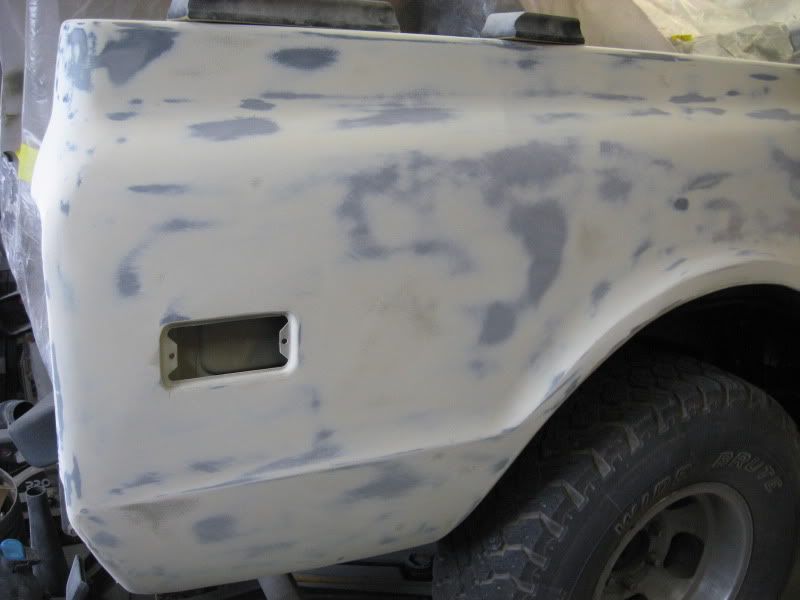 All the gray spots were high spots (not anymore). Not sure if it'll show in these pics, but the blacker spots are lows where the guide coat remains. Really not too bad. I think the featherfill should finish it off and I'll use a 220 and/or 320 grit on my 18" block to finish off the dry sanding. So, what looked pretty sweet in yesterdays pics is not so great once you hit it with a good block. Here's a pic of my rear wheel arch. Not great, but acceptable to me. 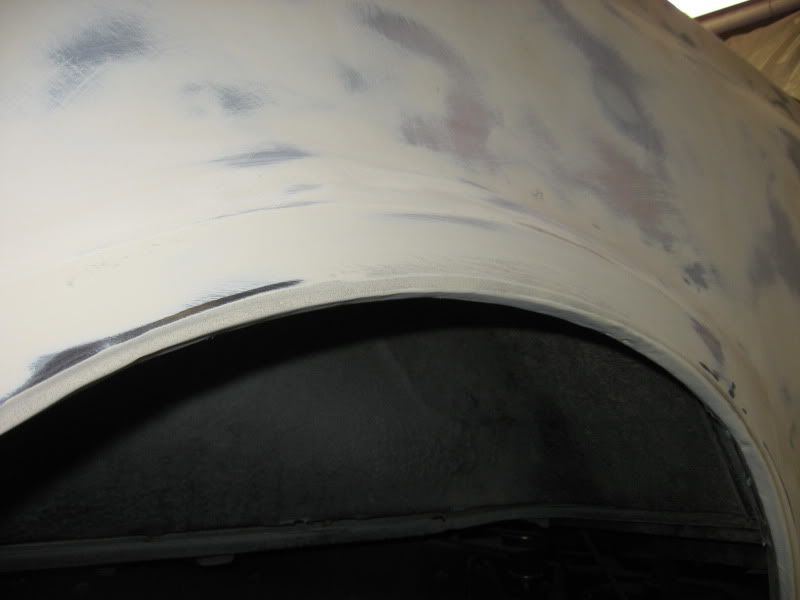 And what does a person look like after blowing dust around the garage for 4 hours? Ignore the stupid look on my stupid face. The wife snapped it while I was talking. I did have a dust mask on. Not sure it helped. 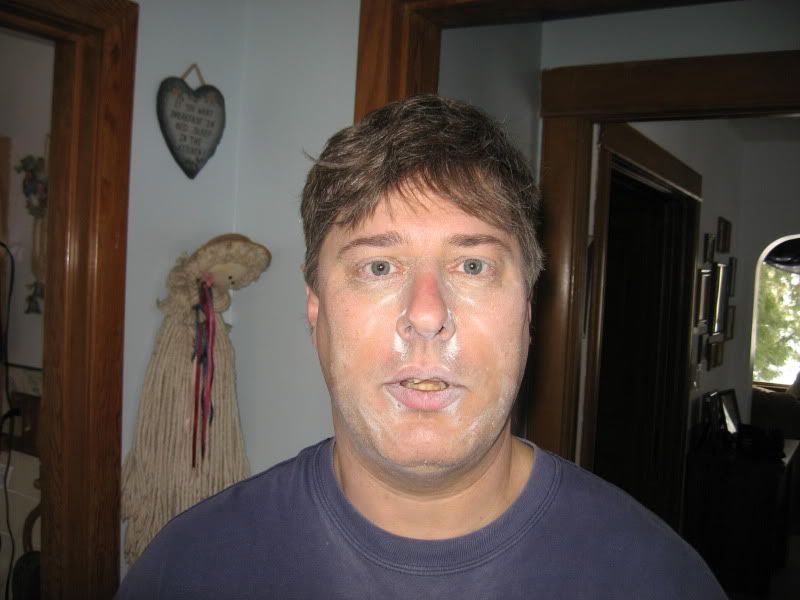 Next step is to wipe it all down again and spray with the featherfill. And I get to sand some more. Awesome. 
__________________
If no one knows what you're doing, they can't tell you you're doing it wrong HG's Dream Car Build - Shelby Cobra Kit Build your own adjustable track bar 71 Long Fleet C/10 72 Jimmy 4x4 (Junkyard Jimmy)HG's Plow Truck '78 K35 DuallyBigass Farm Truck HG's thread of miscellaneous stuff |
|||
|
|
|
|
02-11-2013, 05:28 PM
|
#957 |
|
Registered User
Join Date: Oct 2012
Location: LaGrangeville, NY
Posts: 51
|
Re: Junkyard Jimmy Super Low Buck Build Thread
awesome progress!....
Nice model too...great job on that.....I can definitely see an accent stripe either along the fender lips and lower door areas, or maybe something thinner where a pin stripe would go....I am a fan of those flame styled pinstripe blocks...the flames run on the underside or top side of the stripe...the stripe is maybe 3" wide max..... The Mustang color scheme would work well with the satin black...you could even get a vinyl guy to tastefully include simple lettering in the stripe on the rear quarter.....Ill try to post what Im talking about later..... great job! JP |
|
|
|
|
02-11-2013, 06:14 PM
|
#958 |
|
Registered User
Join Date: Oct 2012
Location: LaGrangeville, NY
Posts: 51
|
Re: Junkyard Jimmy Super Low Buck Build Thread
maybe something along the lines of this:
 See if any of these graphics inspire some more thought....I love the gold paint, but breaking it up a little might be a nice touch... JP |
|
|
|
|
02-11-2013, 06:24 PM
|
#959 |
|
GEARHEAD
Join Date: Aug 2003
Location: MN
Posts: 6,121
|
Re: Junkyard Jimmy Super Low Buck Build Thread
JP, that looks pretty cool, but in keeping with the 70's theme, I would probably go with just a double line stripe along the belt line rather than flame style. Don't suppose you could show me what the mustang style black hood would look like on one of the model pics?
__________________
If no one knows what you're doing, they can't tell you you're doing it wrong HG's Dream Car Build - Shelby Cobra Kit Build your own adjustable track bar 71 Long Fleet C/10 72 Jimmy 4x4 (Junkyard Jimmy)HG's Plow Truck '78 K35 DuallyBigass Farm Truck HG's thread of miscellaneous stuff |
|
|
|
|
02-12-2013, 12:15 AM
|
#960 |
|
Registered User
Join Date: Oct 2012
Location: LaGrangeville, NY
Posts: 51
|
Re: Junkyard Jimmy Super Low Buck Build Thread
Like this?
  JP |
|
|
|
|
02-12-2013, 01:46 AM
|
#961 |
|
GEARHEAD
Join Date: Aug 2003
Location: MN
Posts: 6,121
|
Re: Junkyard Jimmy Super Low Buck Build Thread
Nice! Thanks a lot.
__________________
If no one knows what you're doing, they can't tell you you're doing it wrong HG's Dream Car Build - Shelby Cobra Kit Build your own adjustable track bar 71 Long Fleet C/10 72 Jimmy 4x4 (Junkyard Jimmy)HG's Plow Truck '78 K35 DuallyBigass Farm Truck HG's thread of miscellaneous stuff |
|
|
|
|
02-12-2013, 08:44 PM
|
#962 |
|
Registered User
Join Date: Apr 2008
Location: Angleton, TX
Posts: 2,219
|
Re: Junkyard Jimmy Super Low Buck Build Thread
The progress looks good. Those dust masks are worthless. Where I work they aren't allowed to be used unless you want to use them when no mask is needed at all (so whats the point).
__________________
I don't always drive trucks; but when I do I prefer Chevy's. Stay driving my friends. '72 blazer 2wd build 67-72 Factory Big Block Registry |
|
|
|
|
02-12-2013, 09:08 PM
|
#963 |
|
6>8 Plugless........
 Join Date: Sep 2007
Location: Prairie City, Ia
Posts: 17,140
|
Re: Junkyard Jimmy Super Low Buck Build Thread
Nice work on the Blazer! It is looking awesome! You're getting really good at that body work stuff! I've had the same problem with grease and wax remover and my thought was the same as yours. Now I try to let that stuff flash for a while before I spray. Pretty annoying.

__________________
Ryan 1972 Chevy Longhorn K30 Cheyenne Super, 359 Inline 6 cylinder, Auto Trans, Tilt, Diesel Tach/Vach, Buckets, Rare Rear 4-link and air ride option Build Thread 1972 GMC Sierra Grande Longhorn 4x4 1972 Chevy Cheyenne Super K20 Long Step side tilt, tach, tow hooks, AC, 350 4 speed 1972 C10 Suburban Custom Deluxe 1969 Chevy milk truck 1971 Camaro RS 5.3 BTR STG3 Cam Super T10 1940 Ford 354 Hemi 46RH Ford 9" on air ride huge project Tired of spark plugs? Check this out. |
|
|
|
|
02-12-2013, 09:58 PM
|
#964 |
|
Registered User
Join Date: Apr 2011
Location: .
Posts: 3,104
|
Re: Junkyard Jimmy Super Low Buck Build Thread
Nice body work. Your gonna be done in no time at all.
 I use a respirator. When I set up a temporary blast booth I use a positive pressure full face. Having a shovel full of dirt in your lungs isn't any fun. Can't wait for the spray fest! |
|
|
|
|
02-13-2013, 01:49 AM
|
#965 | |||
|
GEARHEAD
Join Date: Aug 2003
Location: MN
Posts: 6,121
|
Re: Junkyard Jimmy Super Low Buck Build Thread
Quote:
Quote:
Quote:
A positive pressure mask? Got a pic? Does that keep the lens from fogging up? Thats my biggest problem when I sandblast.
__________________
If no one knows what you're doing, they can't tell you you're doing it wrong HG's Dream Car Build - Shelby Cobra Kit Build your own adjustable track bar 71 Long Fleet C/10 72 Jimmy 4x4 (Junkyard Jimmy)HG's Plow Truck '78 K35 DuallyBigass Farm Truck HG's thread of miscellaneous stuff |
|||
|
|
|
|
02-13-2013, 01:46 PM
|
#966 |
|
Registered User
Join Date: Apr 2003
Location: Indep, MO
Posts: 5,893
|
Re: Junkyard Jimmy Super Low Buck Build Thread
x5 on the respirator. I've done so much dusty stuff over the years, I lock up anymore at the first smell of dust, esp. grinding Alum. I keep my old paint respirators and wear them. Yeah, it sucks, but I can breathe tomorrow, and actually, they stay in place a lot better than those dust mask things, and do a hell of a lot better job, if you want the particulates gone. Lookin' good!
__________________
Boppa's Old Yeller Truck Build, Old Yeller's New Heart! Project Buzz Bomb Flyin' Low! |
|
|
|
|
02-13-2013, 01:48 PM
|
#967 |
|
Registered User
Join Date: Apr 2011
Location: .
Posts: 3,104
|
Re: Junkyard Jimmy Super Low Buck Build Thread
I use one of these or something really similar. I also use tear aways so I can always have a clear view of what I'm working on.
It doesn't fog up and I don't end up with dirt filled lungs or paint spray in the eyes. Nothing like hackin up dirt clods in the shower and feelin like you still have half a lung full. I modified mine a little bit cause their fresh air pump and stuff is a little bit more $$$ than what I could afford. I use a different fresh air system and hose but it works great.   The initial cost is more but in the long run it saves money and your respiratory system doesn't get so hammered. Diggin' your build! |
|
|
|
|
02-13-2013, 05:14 PM
|
#968 |
|
Registered User
Join Date: Apr 2008
Location: Md
Posts: 2,457
|
Re: Junkyard Jimmy Super Low Buck Build Thread
This is what I use, (Also retro fitted full face mask on it instead of the crappy hood)www.turbineproducts.com/servlet/Detail?no=5
|
|
|
|
|
02-14-2013, 12:03 AM
|
#969 |
|
GEARHEAD
Join Date: Aug 2003
Location: MN
Posts: 6,121
|
Re: Junkyard Jimmy Super Low Buck Build Thread
I'll think about using my respirator then. See how it goes.
 This thread has now gone over the 100,000 views mark. Pretty awesome for a rebuild of a beater. This thread has now gone over the 100,000 views mark. Pretty awesome for a rebuild of a beater.                  
__________________
If no one knows what you're doing, they can't tell you you're doing it wrong HG's Dream Car Build - Shelby Cobra Kit Build your own adjustable track bar 71 Long Fleet C/10 72 Jimmy 4x4 (Junkyard Jimmy)HG's Plow Truck '78 K35 DuallyBigass Farm Truck HG's thread of miscellaneous stuff |
|
|
|
|
02-14-2013, 01:21 AM
|
#970 |
|
Registered User
Join Date: Apr 2011
Location: .
Posts: 3,104
|
Re: Junkyard Jimmy Super Low Buck Build Thread
100,000 Congrats Man
Posted via Mobile Device |
|
|
|
|
02-14-2013, 03:41 PM
|
#971 | |
|
Registered User
Join Date: Mar 2012
Location: Main Street, USA
Posts: 87
|
Re: Junkyard Jimmy Super Low Buck Build Thread
Quote:
Your truck sure has come along way since this 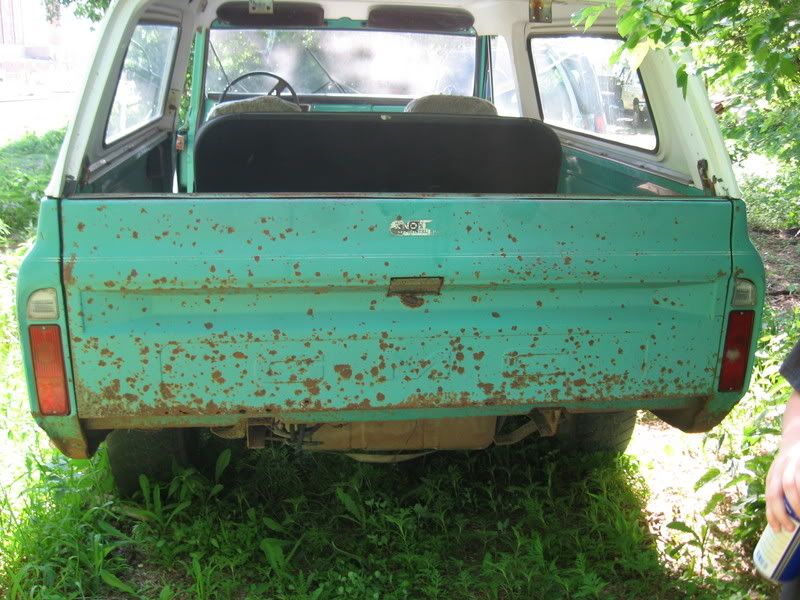 Most sane ppl would have passed on that kind of work.... awesome job so far. |
|
|
|
|
|
02-14-2013, 04:43 PM
|
#972 |
|
Registered User
Join Date: Apr 2003
Location: Indep, MO
Posts: 5,893
|
Re: Junkyard Jimmy Super Low Buck Build Thread
Quality attracts quantity! Congrats on the views.
Posted via Mobile Device
__________________
Boppa's Old Yeller Truck Build, Old Yeller's New Heart! Project Buzz Bomb Flyin' Low! |
|
|
|
|
02-15-2013, 12:29 AM
|
#973 | ||
|
GEARHEAD
Join Date: Aug 2003
Location: MN
Posts: 6,121
|
Re: Junkyard Jimmy Super Low Buck Build Thread
Quote:
Here's what I wear during spraying, 3M I think... 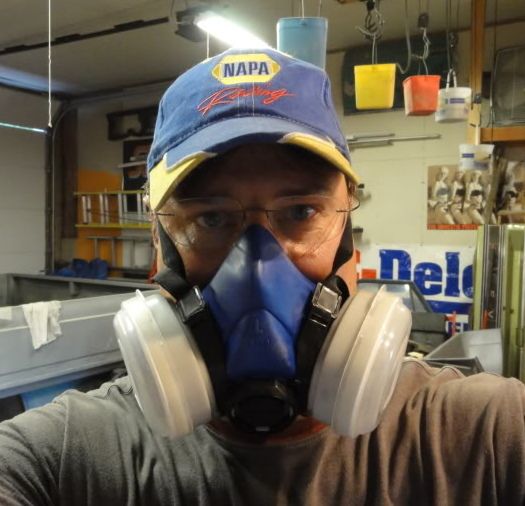 Quote:
__________________
If no one knows what you're doing, they can't tell you you're doing it wrong HG's Dream Car Build - Shelby Cobra Kit Build your own adjustable track bar 71 Long Fleet C/10 72 Jimmy 4x4 (Junkyard Jimmy)HG's Plow Truck '78 K35 DuallyBigass Farm Truck HG's thread of miscellaneous stuff |
||
|
|
|
|
02-17-2013, 05:58 PM
|
#974 |
|
GEARHEAD
Join Date: Aug 2003
Location: MN
Posts: 6,121
|
Re: Junkyard Jimmy Super Low Buck Build Thread
Finally got back out to the garage to make some progress. Been a rough week. Not looking like paint by end of the month right now, but soon enough anyway.
Took the hood off, and the cowl cover, wiped everything down and sprayed with a qt of feather fill. Even with some acetone added that stuff can be a bear to flow. At the end, I had about half an ounce in the cup and it wouldn't spray. The screen at the button of the cup was clogged. Went past the pot life, which is relatively short for this product (55 min). Most other primers and paints I've used have like a 2-3 hour pot life or more. Everything is now in black except the tailgate, which doesn't need anything but a scuff to prep it. So now its time to start sanding again and see where I'm at. Hopefully its good enough, but won't surprise me if it needs more work in some spots. The sanding blocks will show it eventually. 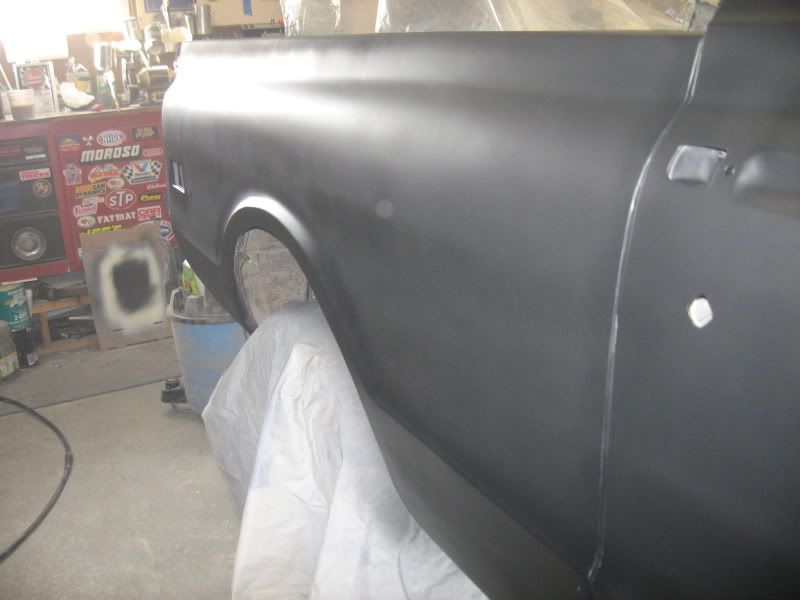   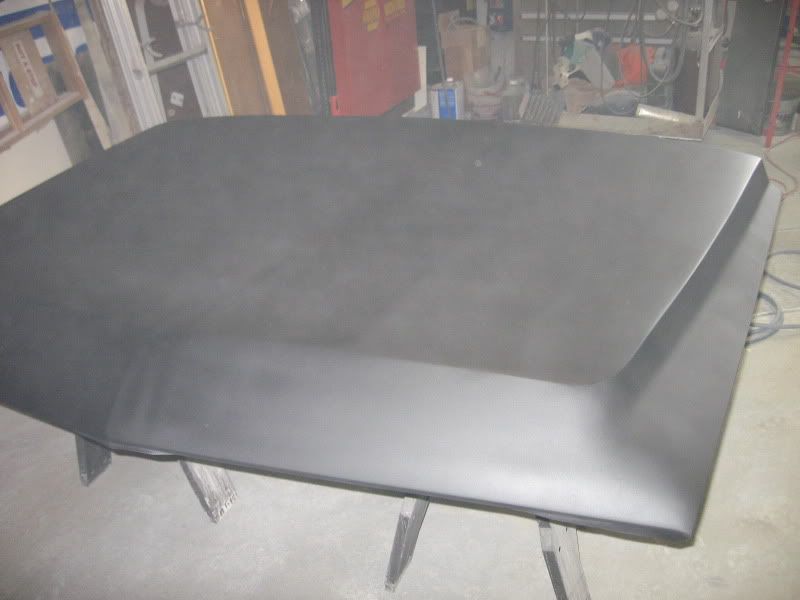 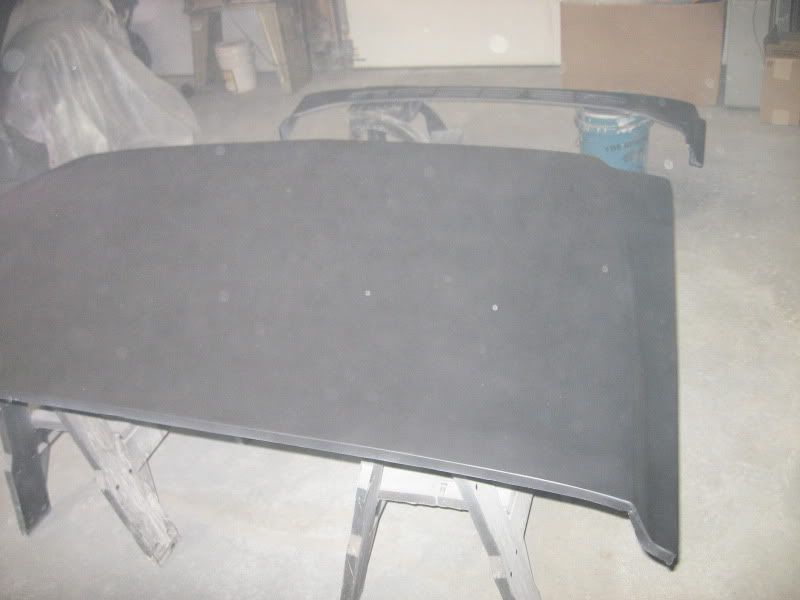 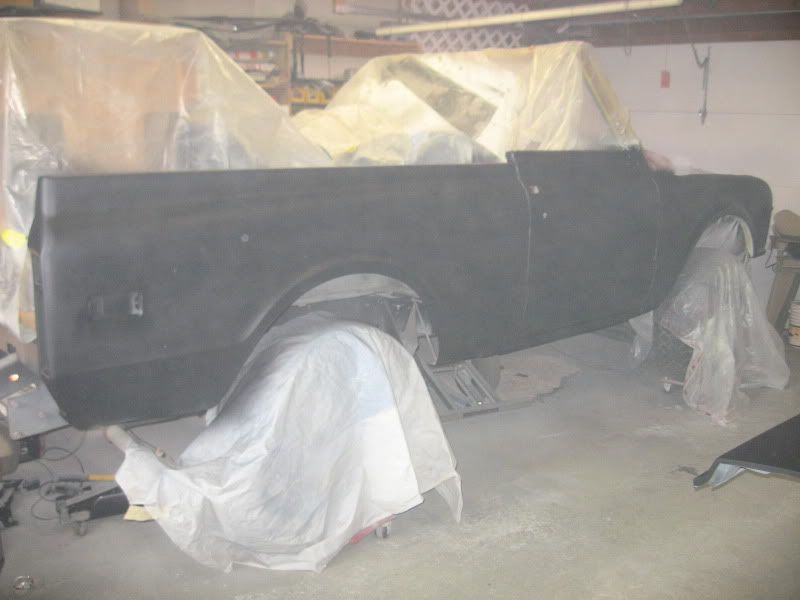
__________________
If no one knows what you're doing, they can't tell you you're doing it wrong HG's Dream Car Build - Shelby Cobra Kit Build your own adjustable track bar 71 Long Fleet C/10 72 Jimmy 4x4 (Junkyard Jimmy)HG's Plow Truck '78 K35 DuallyBigass Farm Truck HG's thread of miscellaneous stuff |
|
|
|
|
02-22-2013, 12:26 AM
|
#975 |
|
GEARHEAD
Join Date: Aug 2003
Location: MN
Posts: 6,121
|
Re: Junkyard Jimmy Super Low Buck Build Thread
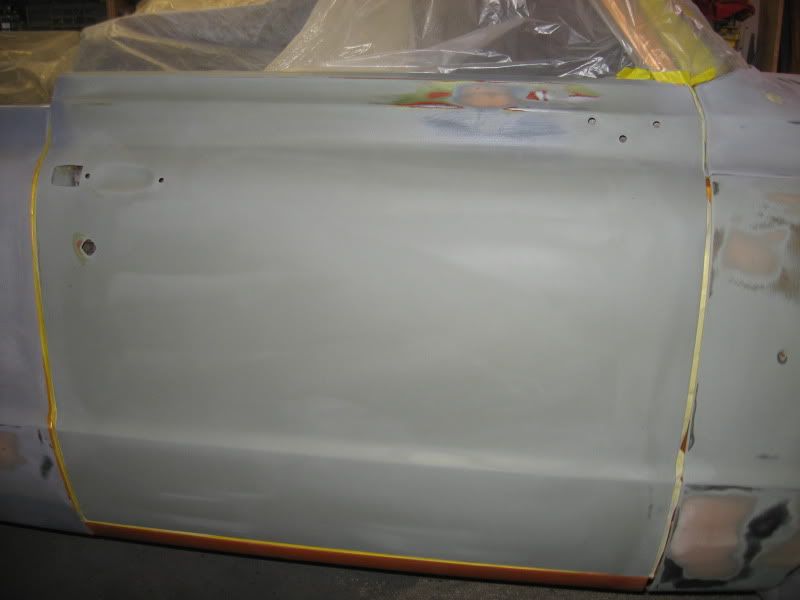
Got a couple hours in the garage to start sanding again. Figured I'd start with the hood. I used 180-220 grit on a 16" long block. The biggest hurdle was the sandpaper getting clogged up super fast, like 20 seconds fast. Went to the body shop to see if I could get some tips. I was told to use less pressure, constantly blow off the paper with the air nozzle, and given a softer block to try out. What I think is happening is the start of sanding a new area clogs the paper, but as you get through it, that problem went away. PITA, but anyway, the hood is blocked out. Came out pretty flat eventually, but will need another coat of primer and resanded. Too many high spots showed up.
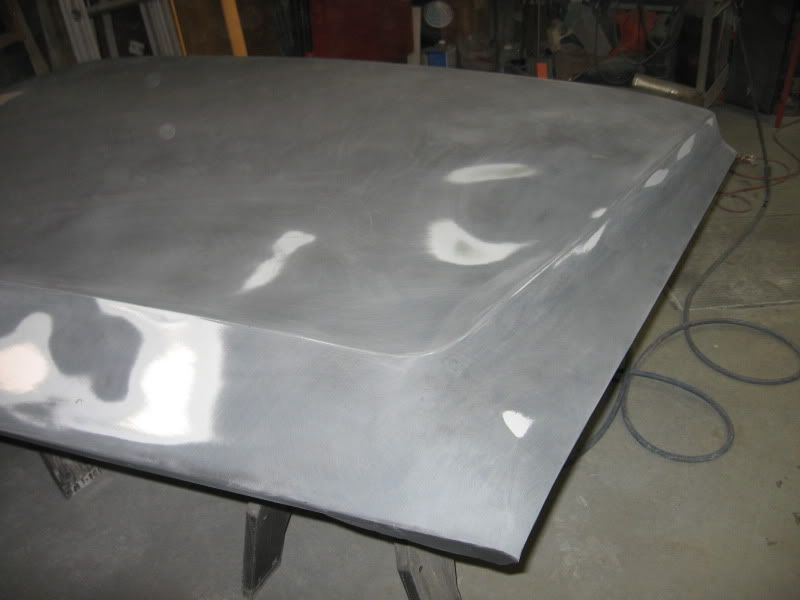 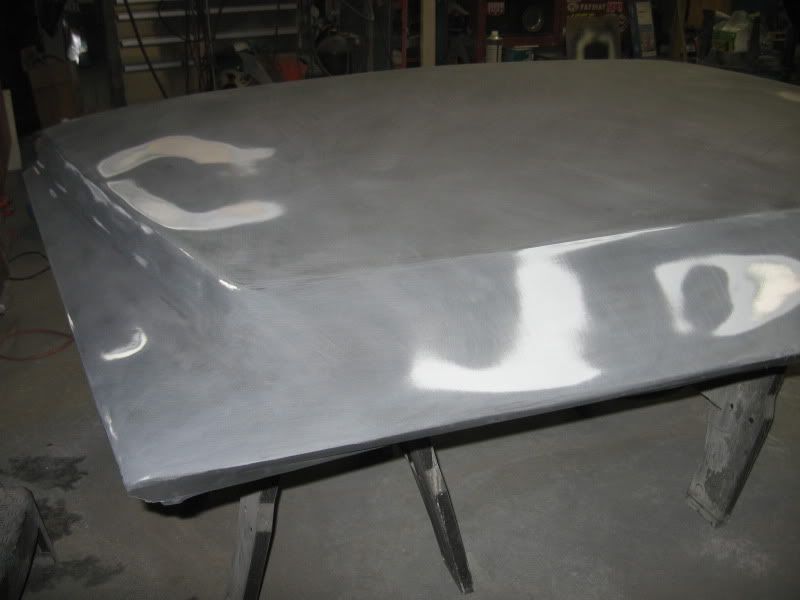 Thats it for tonight. Got a little snow storm rolling in and wanted to get the wifes truck in the garage. Should get more sanding done over the weekend. Yeah for me! Took this pic yesterday. It just caught my eye as looking kinda cool. 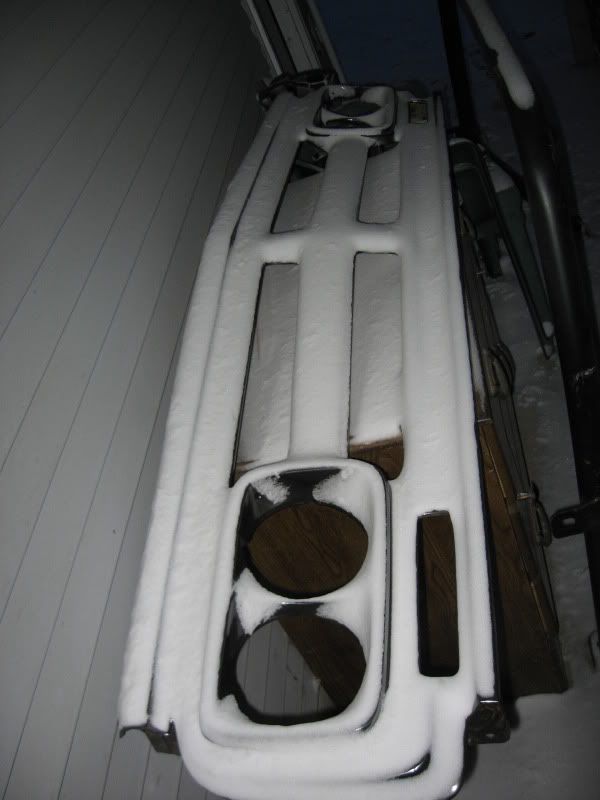
__________________
If no one knows what you're doing, they can't tell you you're doing it wrong HG's Dream Car Build - Shelby Cobra Kit Build your own adjustable track bar 71 Long Fleet C/10 72 Jimmy 4x4 (Junkyard Jimmy)HG's Plow Truck '78 K35 DuallyBigass Farm Truck HG's thread of miscellaneous stuff |
|
|
|
 |
| Bookmarks |
|
|


 Linear Mode

