
 |
Register or Log In To remove these advertisements. |
|
|
|
|||||||
 |
|
|
Thread Tools | Display Modes |
|
|
#76 |
|
Still Learning
Join Date: Jul 2009
Location: Central Oklahoma
Posts: 10,108
|
Re: Project: "ResuWrecktion" '71 Custom Deluxe C-10
Awesome progress on the cab! I'm digging all the PBfab parts too!

|
|
|

|
|
|
#77 |
|
Registered User
Join Date: Aug 2012
Location: Topeka Kansas
Posts: 2,655
|
Re: Project: "ResuWrecktion" '71 Custom Deluxe C-10
Nice work and nice parts!
|
|
|

|
|
|
#78 |
|
Sofa King Crazy!!
Join Date: Oct 2008
Location: Houston, TX
Posts: 3,090
|
Re: Project: "ResuWrecktion" '71 Custom Deluxe C-10
Ur killin it!!! I am dreading the rockers, hope you make it by on the weekend I decide to do it!! Too bad you aren't closer I could stop by and give you grief.
 
__________________
You found the Tater.  My Blazer Build (New) - http://67-72chevytrucks.com/vboard/s...d.php?t=654650 My 67 Build - http://67-72chevytrucks.com/vboard/s...d.php?t=335650 67 Chevy LWB big window a/c AKA TOTALLED BY A JACKASS.  1972 2wd Blazer "Porterbuilt and Sloshed" 
|
|
|

|
|
|
#79 | ||
|
Registered User
 Join Date: Oct 2012
Location: Burnet, Tx
Posts: 332
|
Re: Project: "ResuWrecktion" '71 Custom Deluxe C-10
Quote:
Thank you sir. Quote:

|
||
|
|

|
|
|
#80 |
|
Registered User
Join Date: May 2012
Location: DeKalb, MO
Posts: 508
|
Re: Project: "ResuWrecktion" '71 Custom Deluxe C-10
Looking good man. I feel your pain, waiting for my porterbuilt stuff was hard. But definitely worth the wait. Now I'm waiting for my Bonneville G's to show up.
Keep up the great work! Looks like you're getting the hang of metal work |
|
|

|
|
|
#81 |
|
Registered User
 Join Date: Oct 2012
Location: Burnet, Tx
Posts: 332
|
Re: Project: "ResuWrecktion" '71 Custom Deluxe C-10
Small update:
Finished the right cab corner, right kick panel patch and lower A pillar patch. Got the right rocker panel fit and welded on. Seems like all I've been doing is weld and grind, weld and grind!  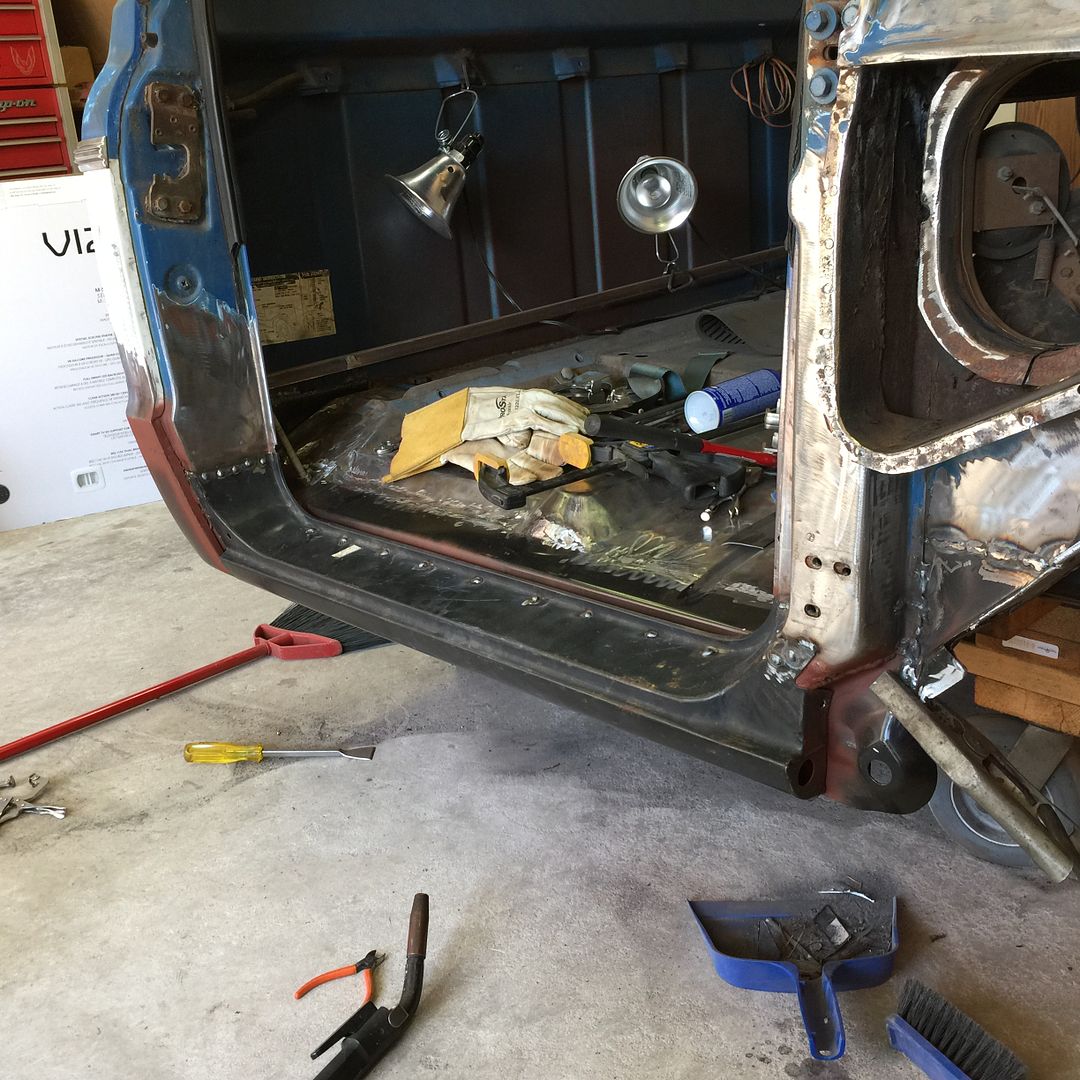 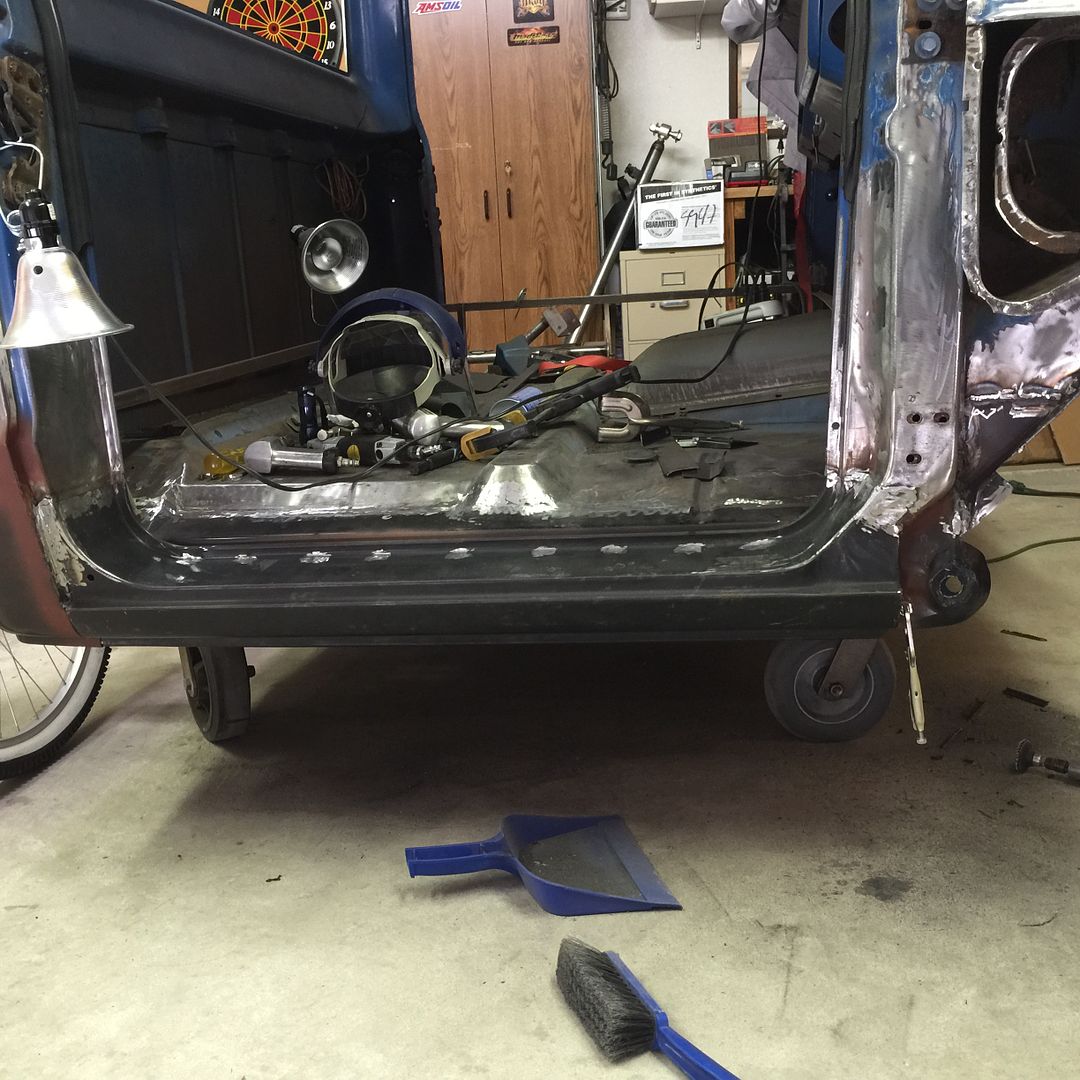 I had noticed that I could see daylight through the floor pinch weld. All of the seam sealer in there has dried up, plus a couple of little rusted areas. So I decided to go ahead and begin shaving it off. A couple of areas were going to have to get shaved anyway for the body drop so this should make it a little more consistent looking. Not done, but getting there. Welding the inside, grinding off the pinch and planning to weld up the outside. 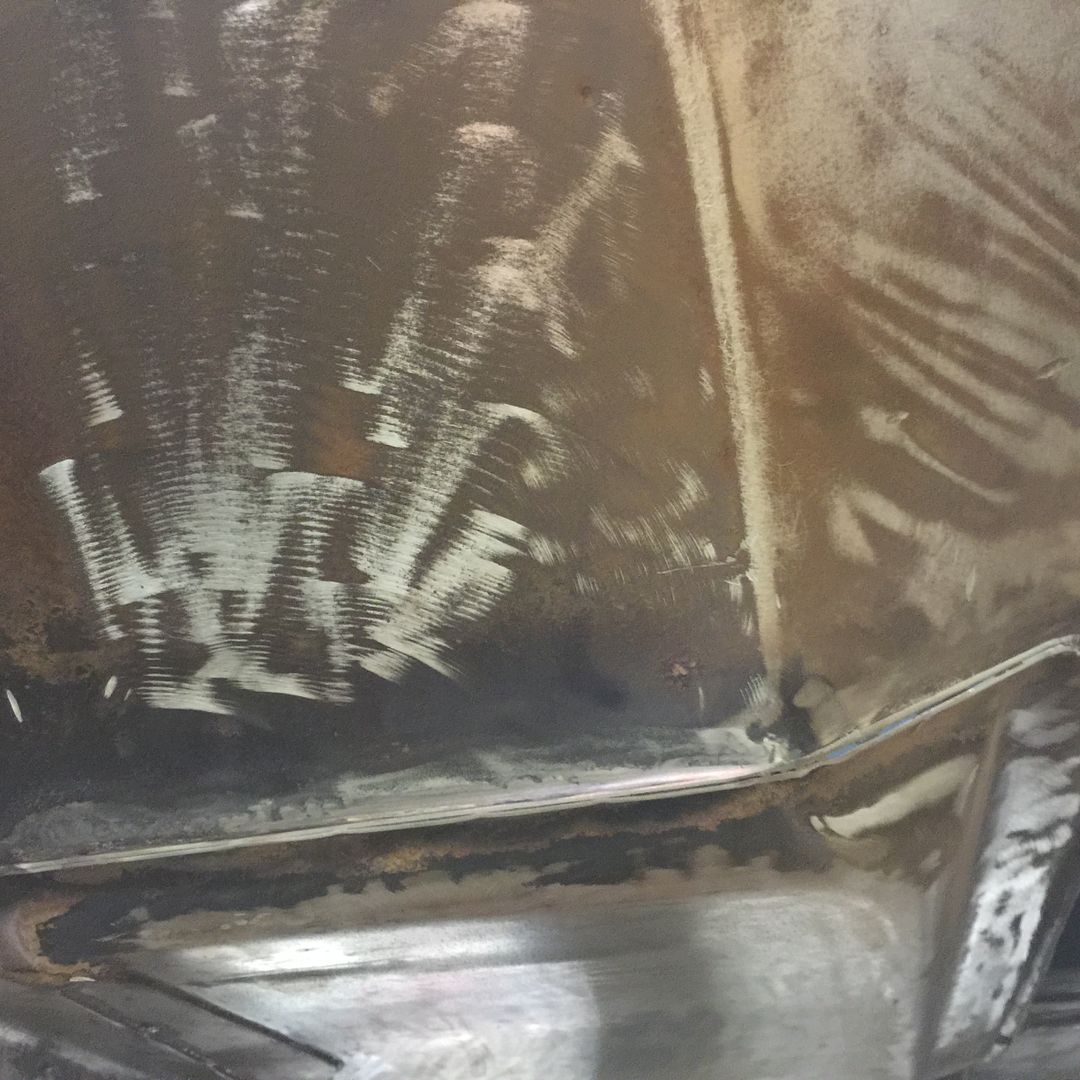 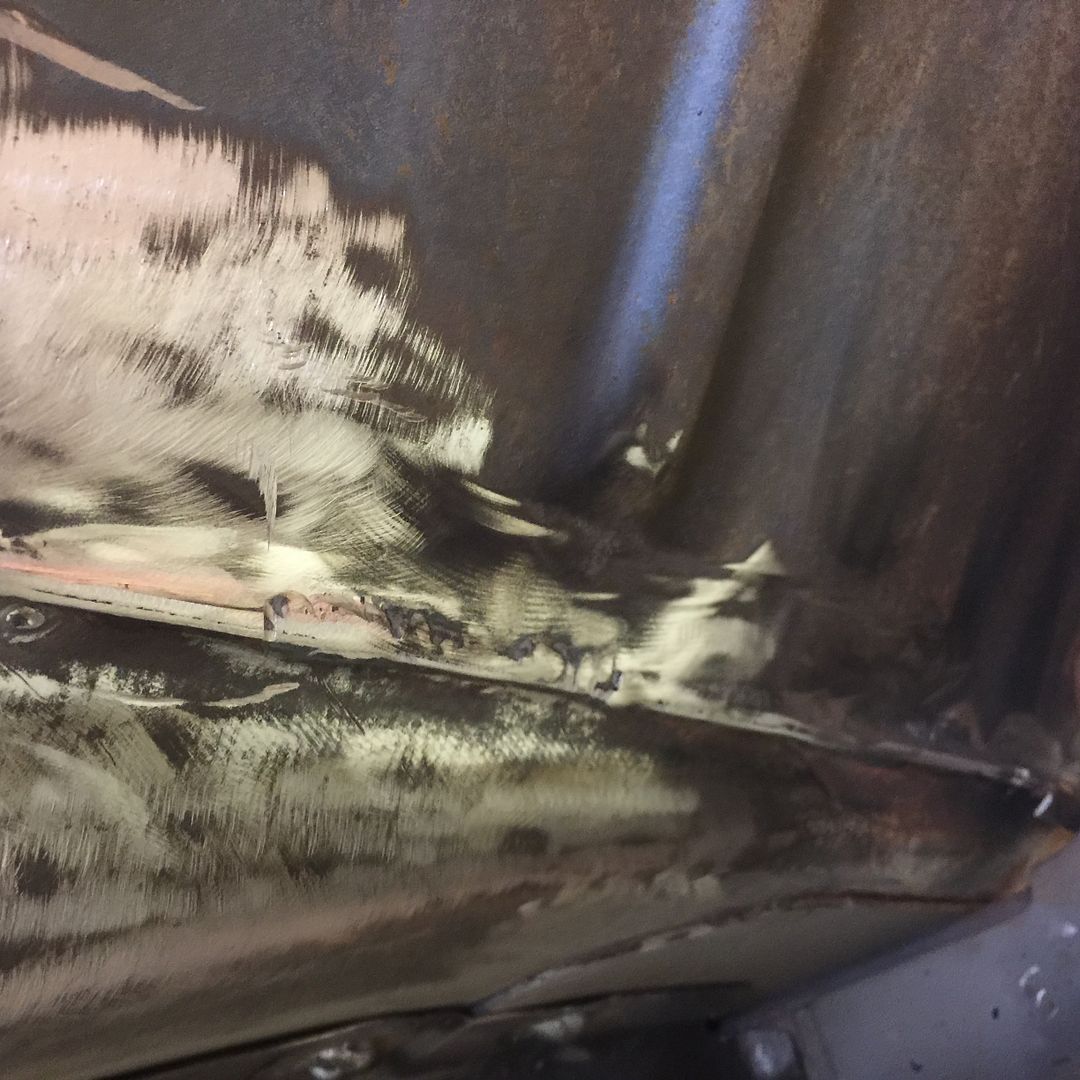
|
|
|

|
|
|
#82 |
|
Sofa King Crazy!!
Join Date: Oct 2008
Location: Houston, TX
Posts: 3,090
|
Re: Project: "ResuWrecktion" '71 Custom Deluxe C-10
Oh yeah, lots of work happenin and it looks great! Like I said, swing by when I am doing mine I could use some pointers!!

__________________
You found the Tater.  My Blazer Build (New) - http://67-72chevytrucks.com/vboard/s...d.php?t=654650 My 67 Build - http://67-72chevytrucks.com/vboard/s...d.php?t=335650 67 Chevy LWB big window a/c AKA TOTALLED BY A JACKASS.  1972 2wd Blazer "Porterbuilt and Sloshed" 
|
|
|

|
|
|
#83 |
|
Registered User
Join Date: Dec 2014
Location: pharr tx
Posts: 32
|
Re: Project: "ResuWrecktion" '71 Custom Deluxe C-10
|
|
|

|
|
|
#84 |
|
Registered User
Join Date: Dec 2014
Location: pharr tx
Posts: 32
|
Re: Project: "ResuWrecktion" '71 Custom Deluxe C-10
They are new on the boxes still
|
|
|

|
|
|
#85 | |
|
Registered User
 Join Date: Oct 2012
Location: Burnet, Tx
Posts: 332
|
Re: Project: "ResuWrecktion" '71 Custom Deluxe C-10
Quote:
 Sure thing, I can tell you what NOT to do. Sure thing, I can tell you what NOT to do. Man that's an awesome deal on some good looking wheels. I just don't have the cash laying around at the moment. 
|
|
|
|

|
|
|
#86 |
|
Registered User
 Join Date: Oct 2012
Location: Burnet, Tx
Posts: 332
|
Re: Project: "ResuWrecktion" '71 Custom Deluxe C-10
Got a little more done this weekend, sometimes I feel like I have ADD.
 There are so many things to do to the cab that I bounce around like crazy! Oh well it all has to get done one way or another! I took out my cross braces that I had installed prior to cutting the rocker, floor sections and cab supports out. That led me to the High hump install and trimming out the floor for that. I decided to weld it in, I know "what if you need to get to the transmission?". My reply would be that for a truck that's 44 years old there has never been a removable hump there. So with my hole trimmed and a few tweaks with a hammer and dolly I got it fit well enough and welded it up. Still have a couple of bolt holes to fill but it's getting there. 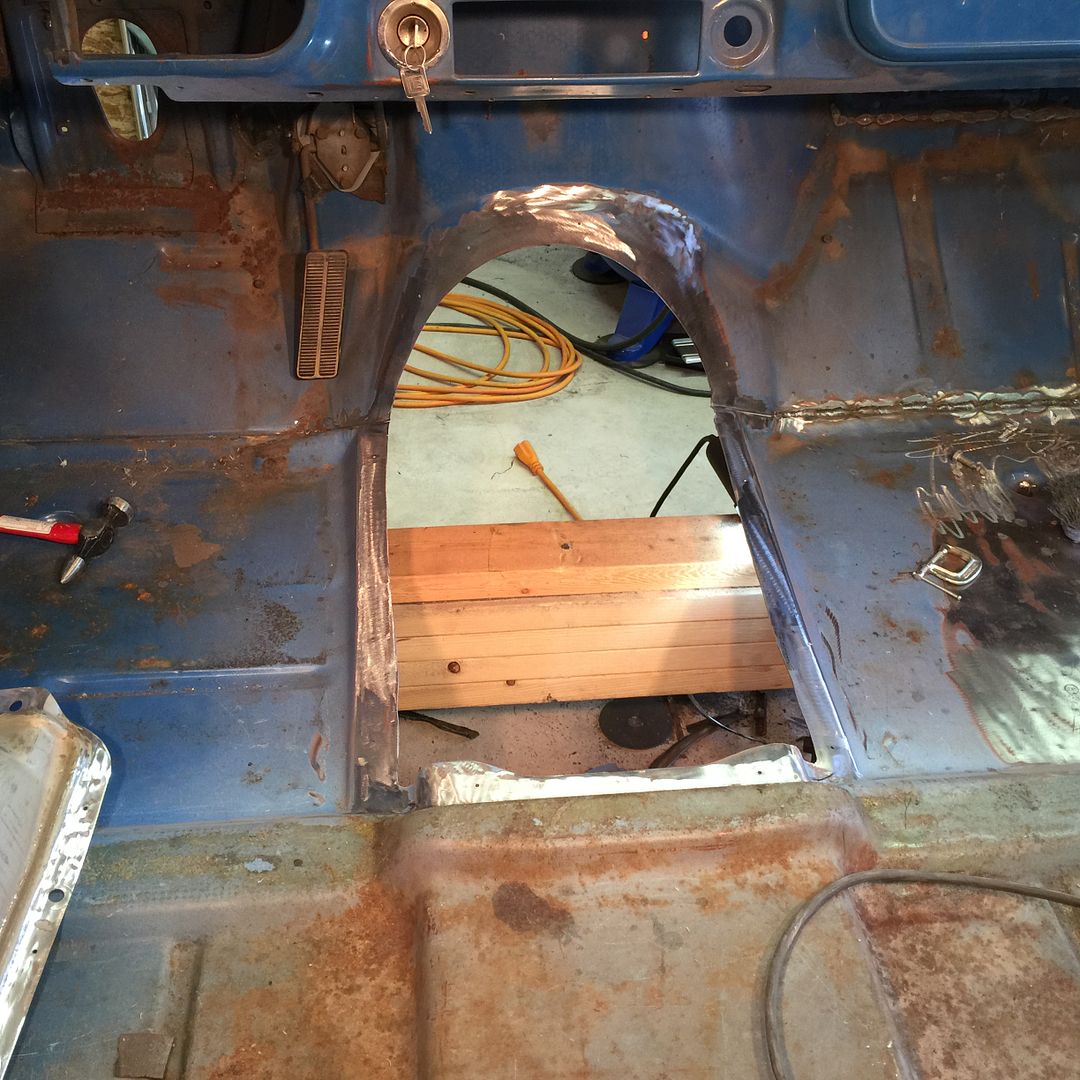 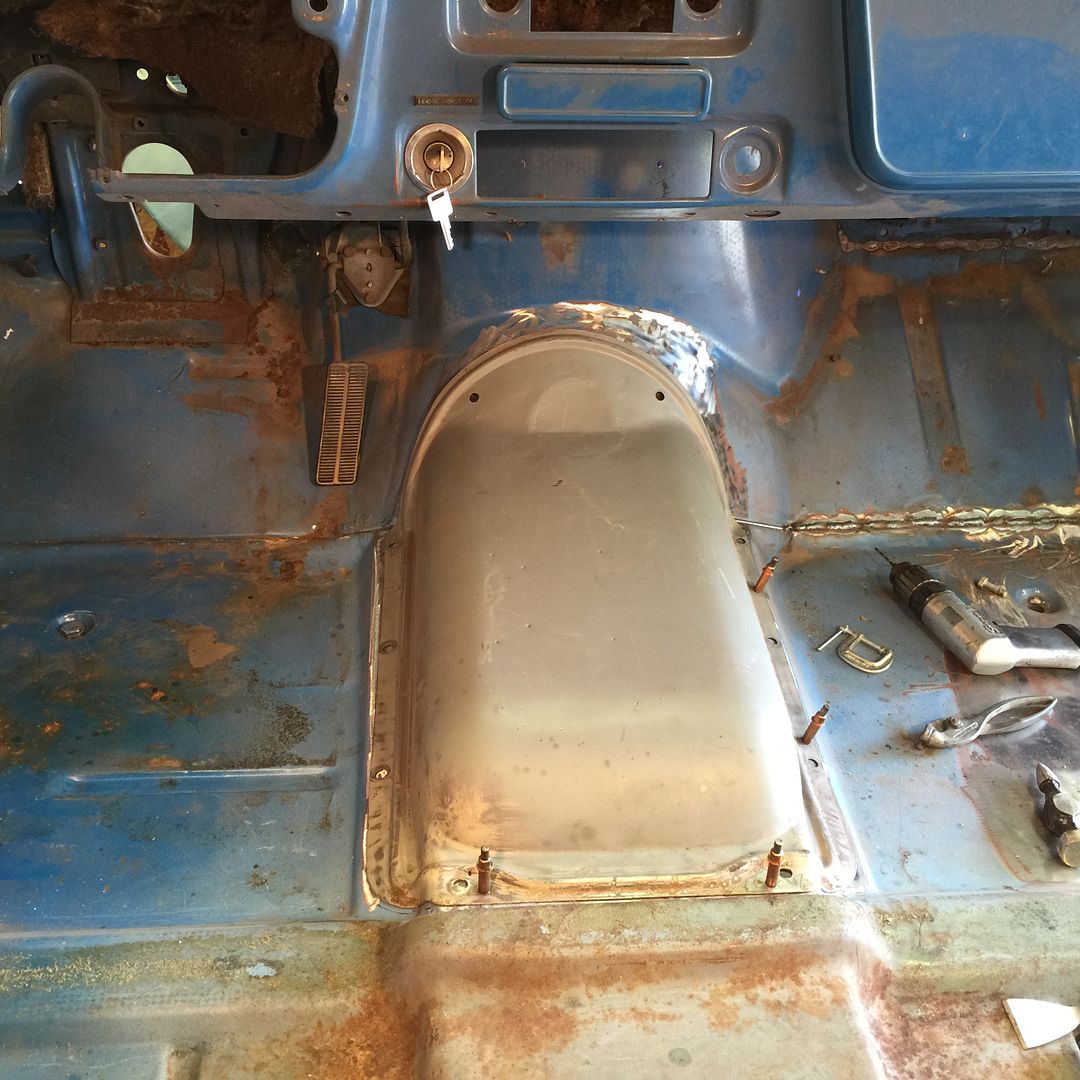 I think I've had that oil can with Cleco's for a while. Been a long time since I've seen Gulf Oil or a round plastic can. 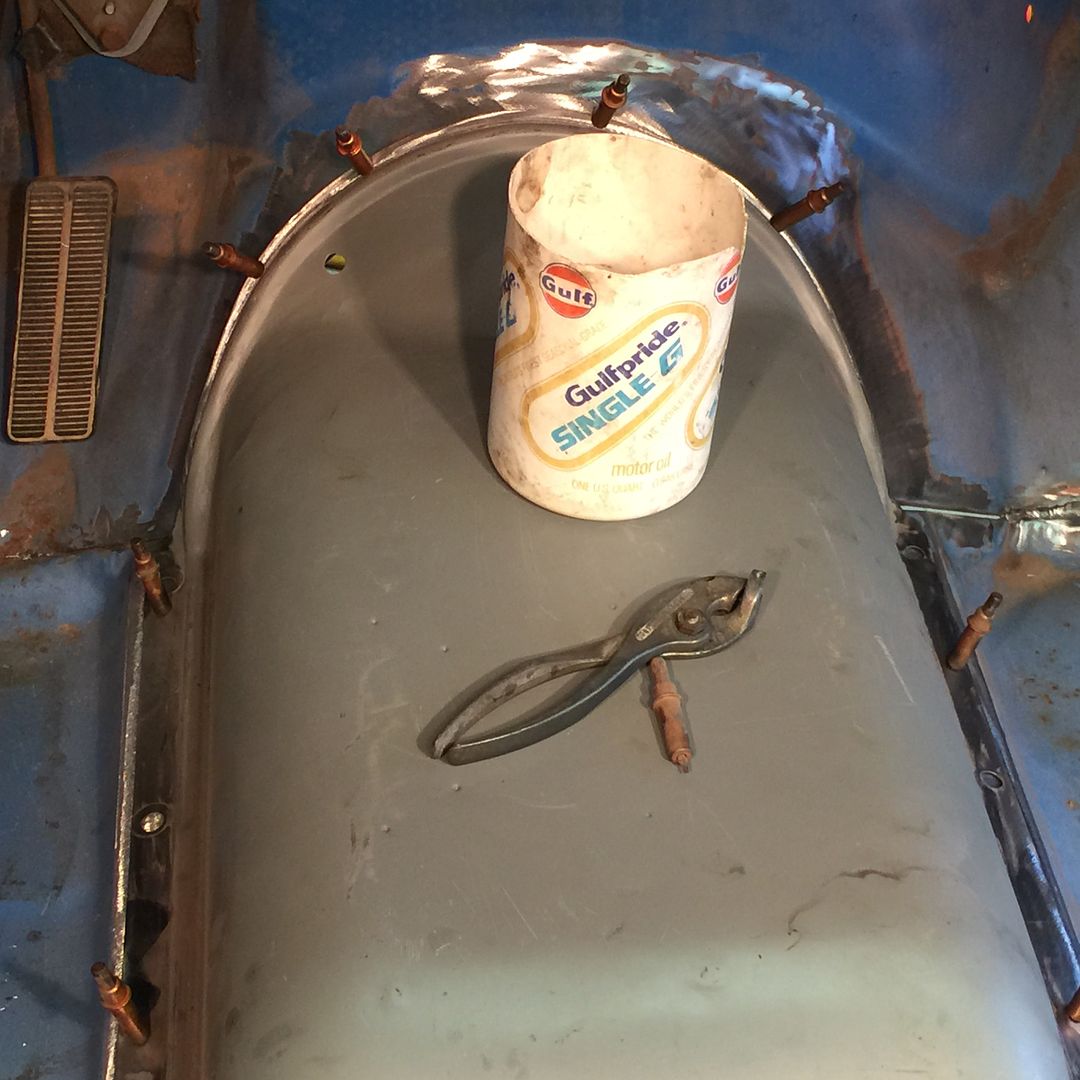 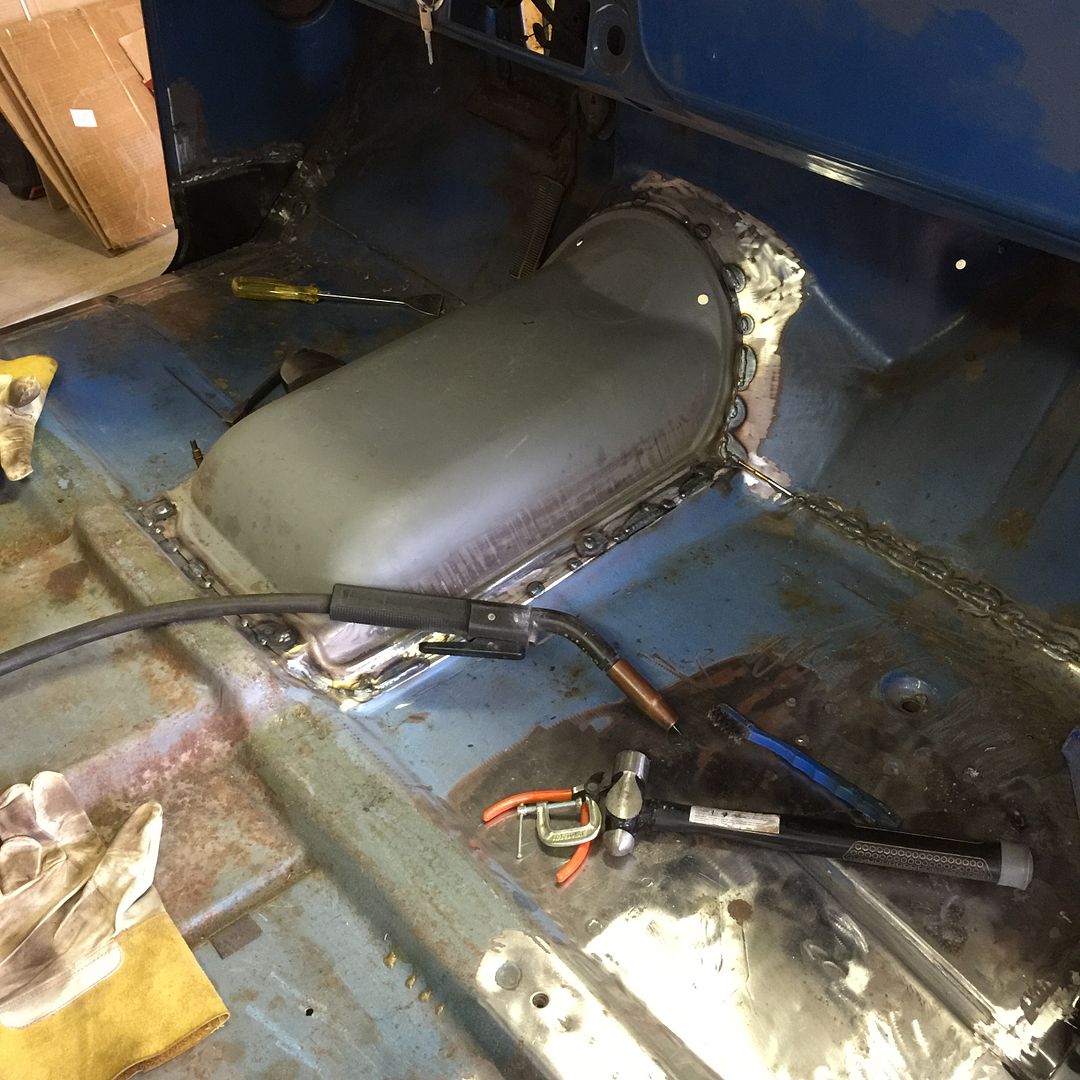 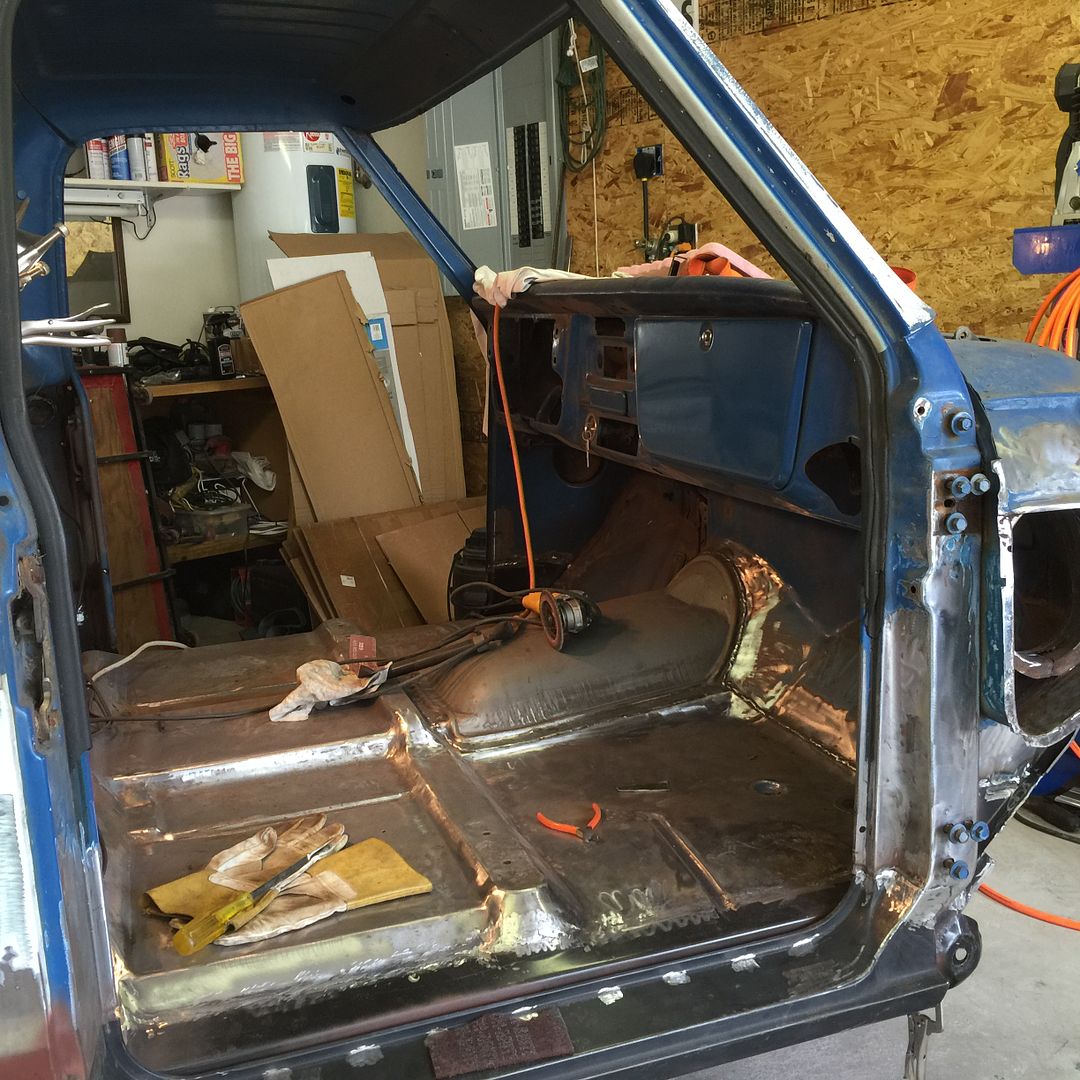 Started cleaning the rust out of the windshield seam and coming up with a plan for fixing it. 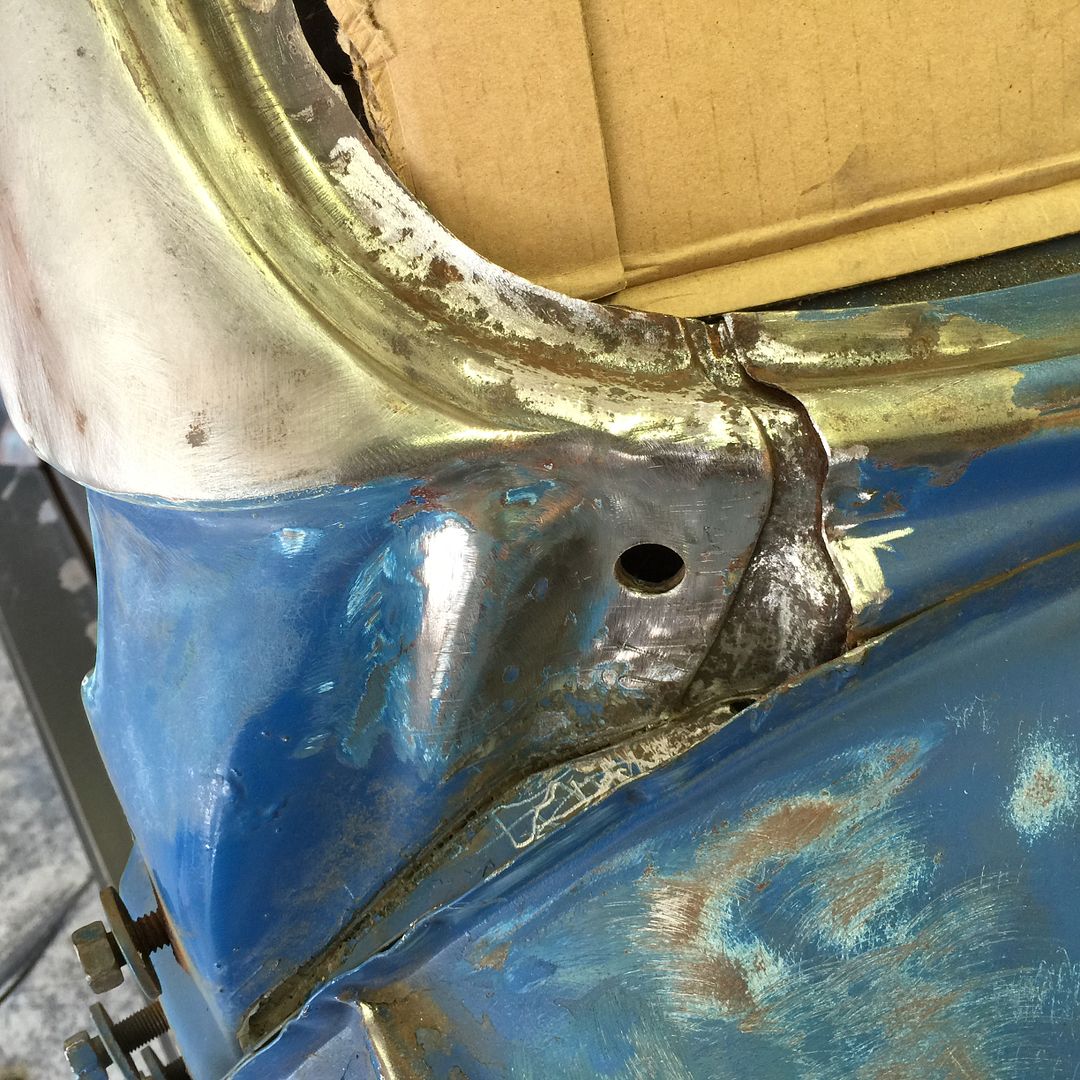 Decided I didn't want the rear cargo lamp anymore, so I plugged that hole with a patch from behind. Not perfect but a little mud will make it invisible. 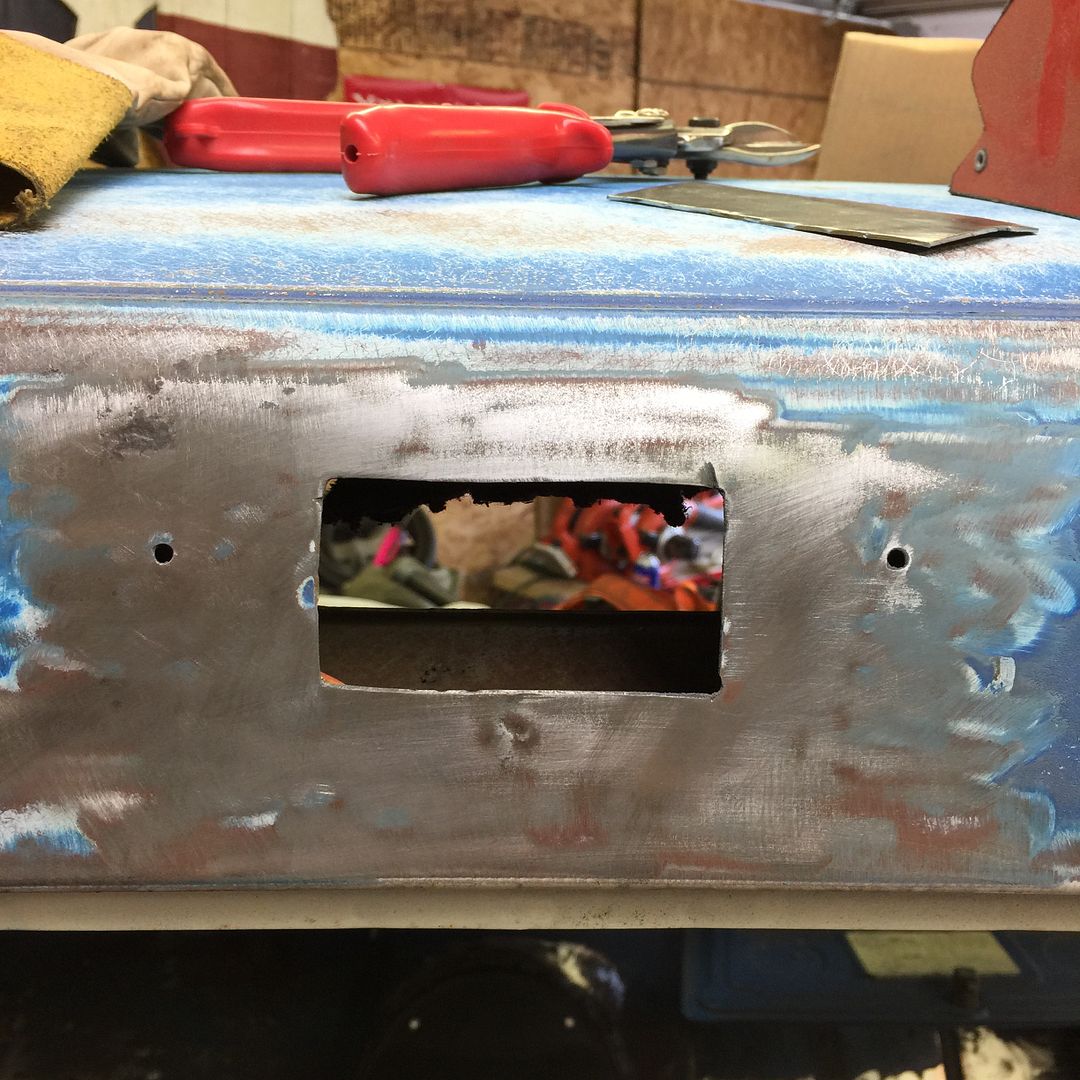 All of the old paint is removed from the back now but this was the last pic I took after grinding down the weld. 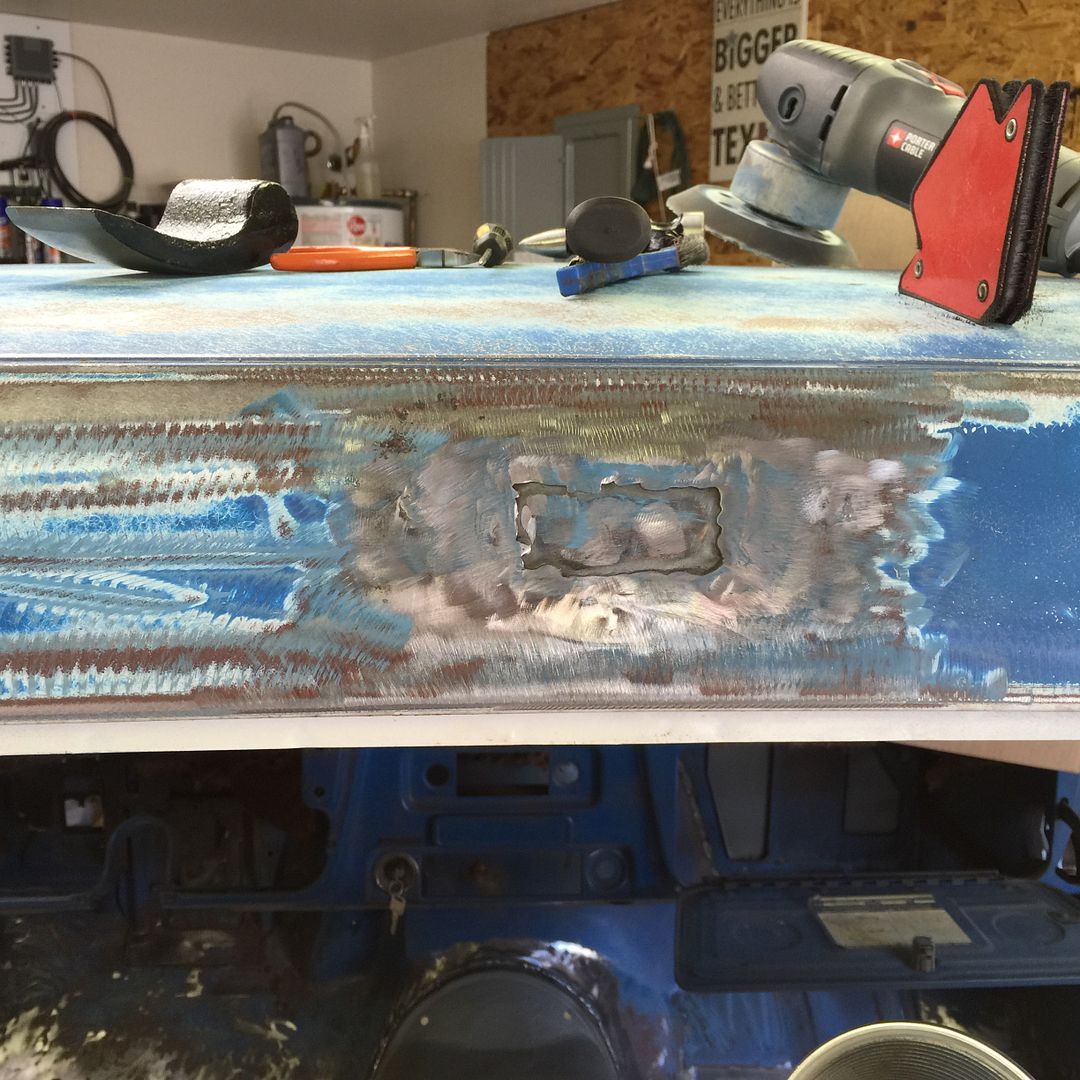
|
|
|

|
|
|
#87 |
|
Registered User
Join Date: Jul 2011
Location: Phenix City, AL
Posts: 993
|
Re: Project: "ResuWrecktion" '71 Custom Deluxe C-10
There is no way I would attempt the repairs on that cab. Your metal skills are truly showing. Great work! I agree with welding the high hump I will be doing the same thing to mine when I make it that far.
__________________
71 Ol' Blue: http://67-72chevytrucks.com/vboard/s...d.php?t=474752 Carving the Jake-olantern: http://67-72chevytrucks.com/vboard/s...d.php?t=679537 |
|
|

|
|
|
#88 | |
|
Registered User
 Join Date: Oct 2012
Location: Burnet, Tx
Posts: 332
|
Re: Project: "ResuWrecktion" '71 Custom Deluxe C-10
Quote:

|
|
|
|

|
|
|
#89 |
|
Registered User
Join Date: Apr 2015
Location: Ayr Ontario
Posts: 1,122
|
Re: Project: "ResuWrecktion" '71 Custom Deluxe C-10
nice work lots of metal work and wearing by-focals to weld is just to hard, single lens glasses. I've been doing the same, I had a cheater in my helmet but it's still to hard to see. Good on ya and keep up the progress
Derek |
|
|

|
|
|
#90 | |
|
Registered User
 Join Date: Oct 2012
Location: Burnet, Tx
Posts: 332
|
Re: Project: "ResuWrecktion" '71 Custom Deluxe C-10
Quote:
I've been thinking about trying the cheater lenses but haven't had time to go get any. My mind still thinks I'm 18 but my body is saying otherwise. 
|
|
|
|

|
|
|
#91 |
|
Sofa King Crazy!!
Join Date: Oct 2008
Location: Houston, TX
Posts: 3,090
|
Re: Project: "ResuWrecktion" '71 Custom Deluxe C-10
I am following your lead on the hump, weld it in. Not sure if there is any benefits to not welding it in. Your metal fab skills are really good to learning as you go. Keep up the great work!!!

__________________
You found the Tater.  My Blazer Build (New) - http://67-72chevytrucks.com/vboard/s...d.php?t=654650 My 67 Build - http://67-72chevytrucks.com/vboard/s...d.php?t=335650 67 Chevy LWB big window a/c AKA TOTALLED BY A JACKASS.  1972 2wd Blazer "Porterbuilt and Sloshed" 
|
|
|

|
|
|
#92 | |
|
Registered User
 Join Date: Oct 2012
Location: Burnet, Tx
Posts: 332
|
Re: Project: "ResuWrecktion" '71 Custom Deluxe C-10
Quote:
When I flip the cab over I plan to weld the under side too while I'm eliminating the rocker panel pinch! 
|
|
|
|

|
|
|
#93 |
|
Registered User
 Join Date: Oct 2012
Location: Burnet, Tx
Posts: 332
|
Re: Project: "ResuWrecktion" '71 Custom Deluxe C-10
Cowl rust and fresh air intake delete was my plan this weekend. I had the idea of also deleting the blower pocket in the firewall. I spent a lot of hours searching and reading but only found a few photos of " Project Cod Fish" where EBfabman did his amazing work on the cab. There wasn't many pics and my skills are nowhere near what EB's are but I decided to tackle the job.
It's just metal, right?  So here's what I started with, I had already welded up the blower hole and put the other PB filler panels in during the fall. 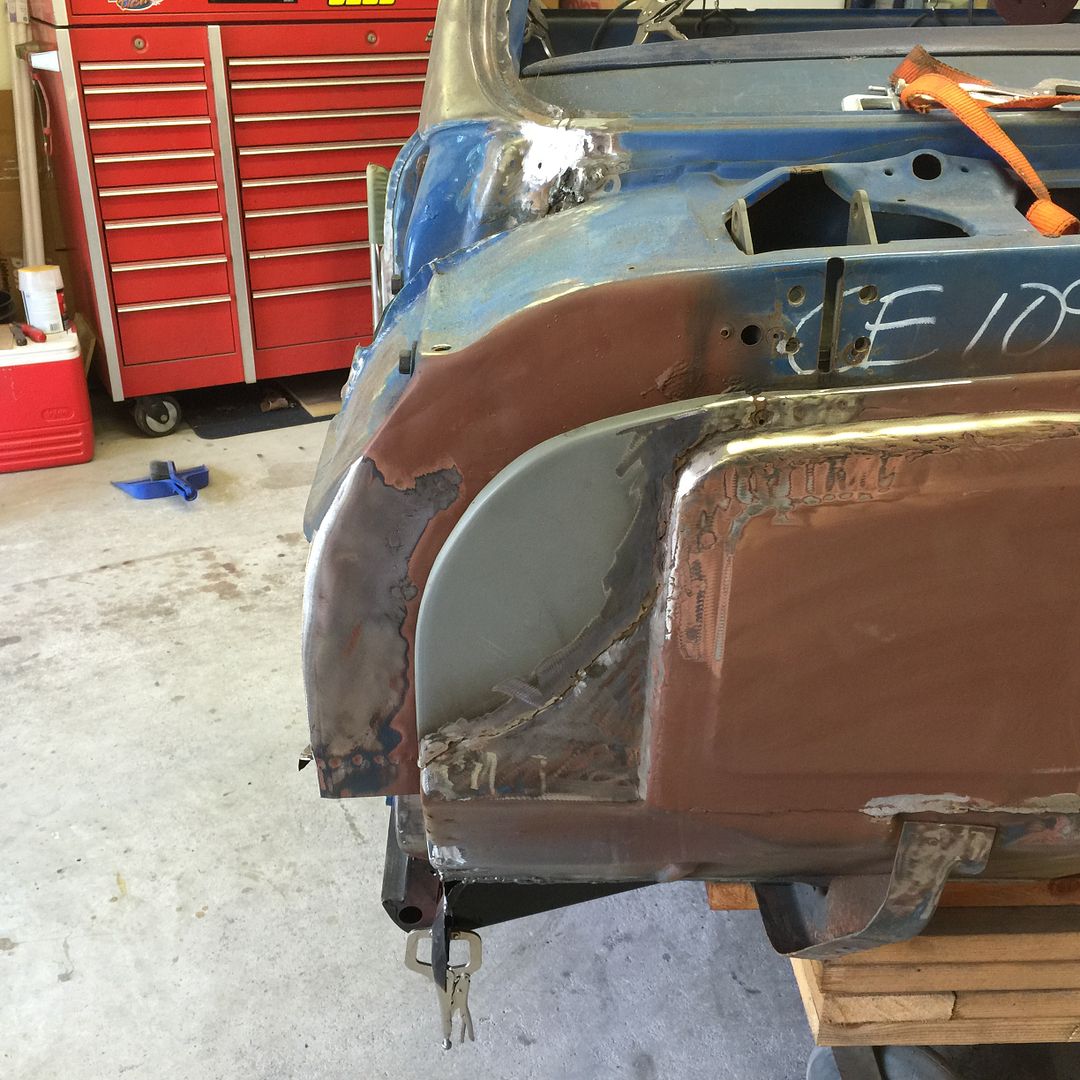 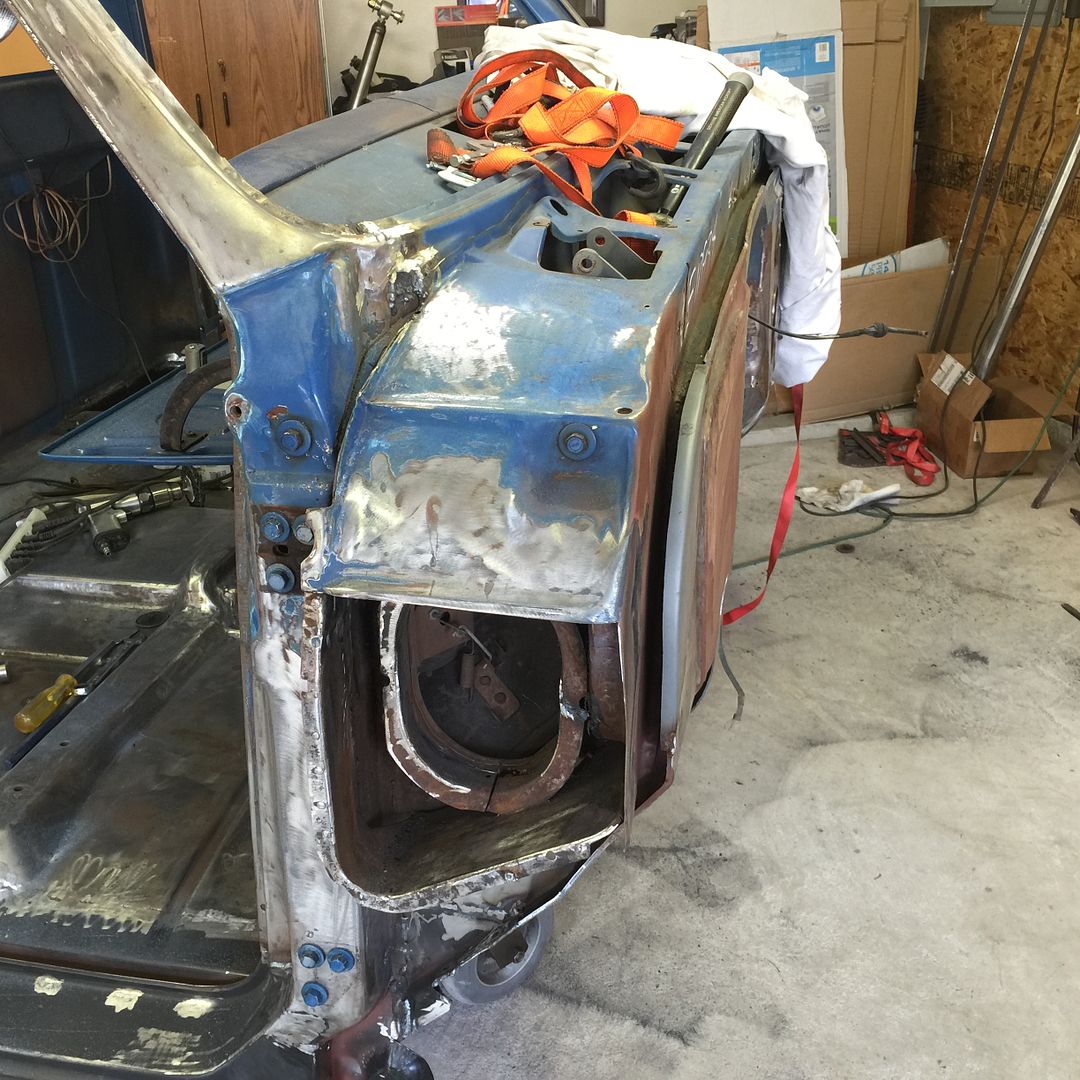 I'm going to post a bunch of pics because I didn't find very many that showed all the brackets and stuff inside the cowl, so bare with me. 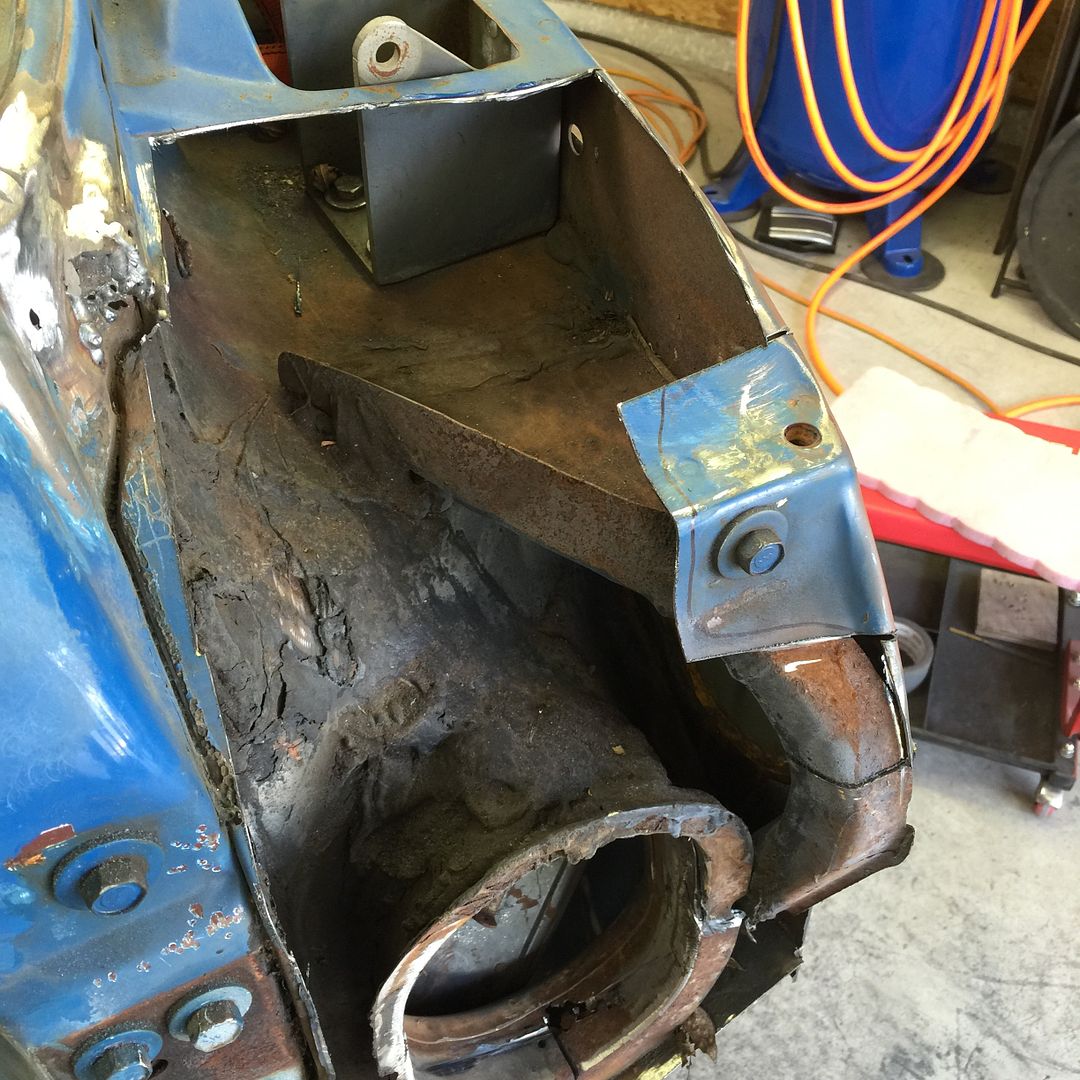 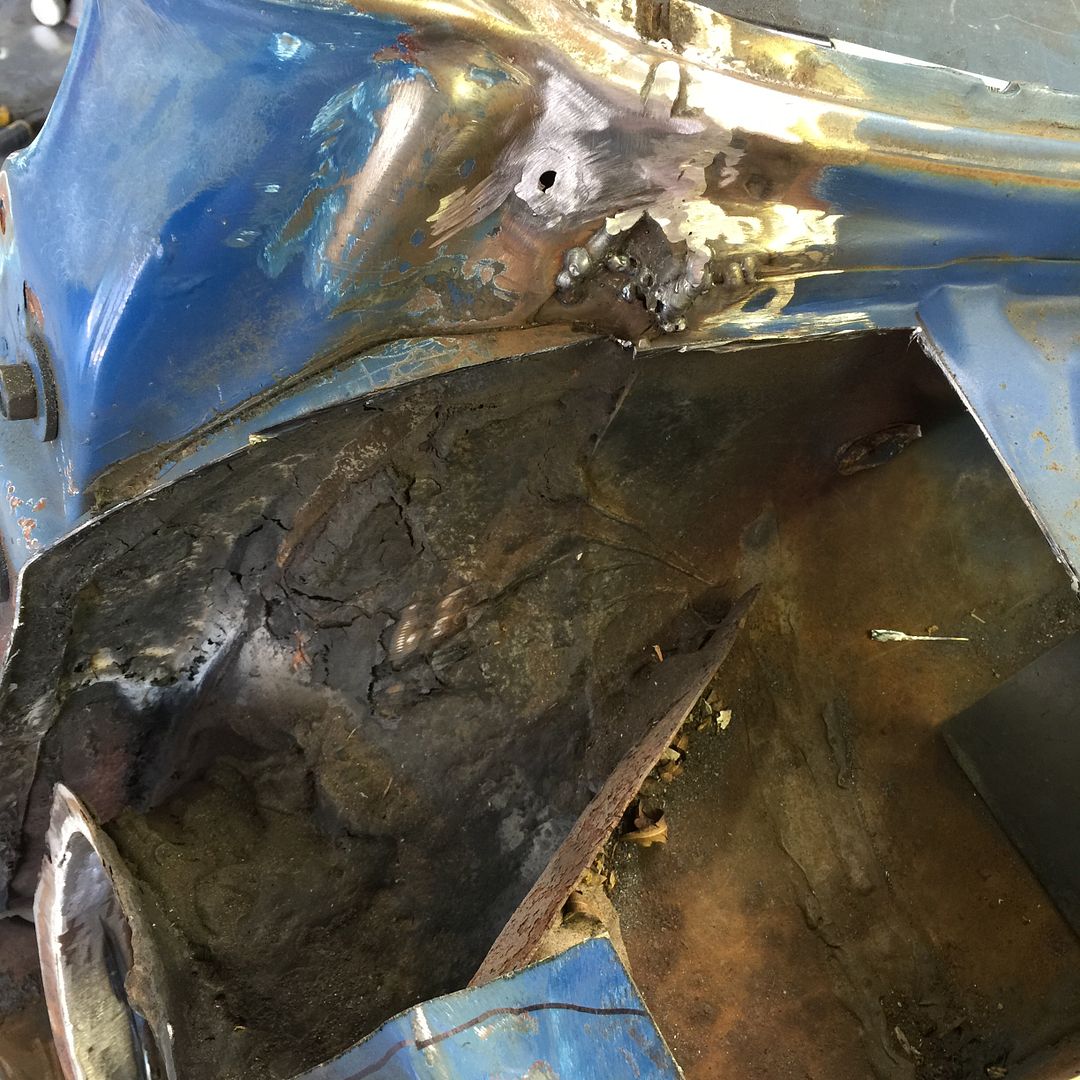 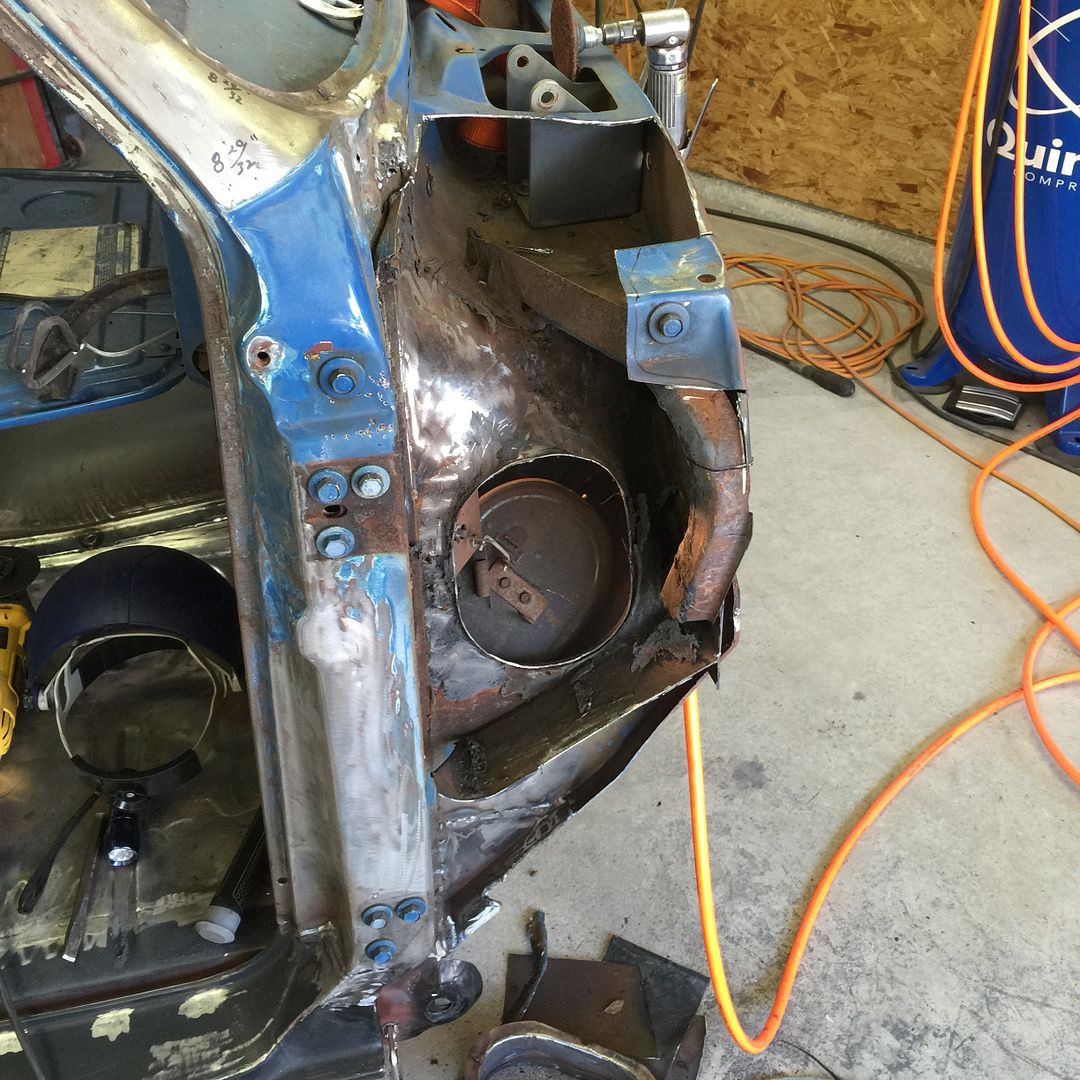 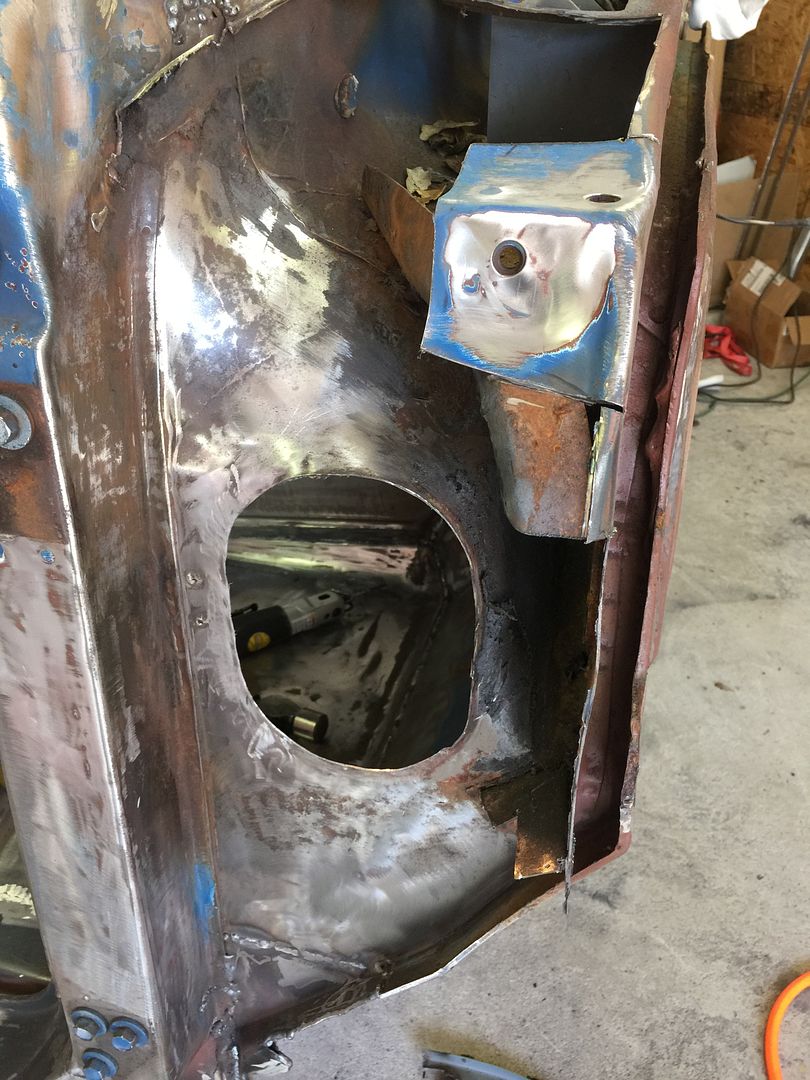 The bracket that holds the front fender and cowl panel in place has to go back in the correct position. 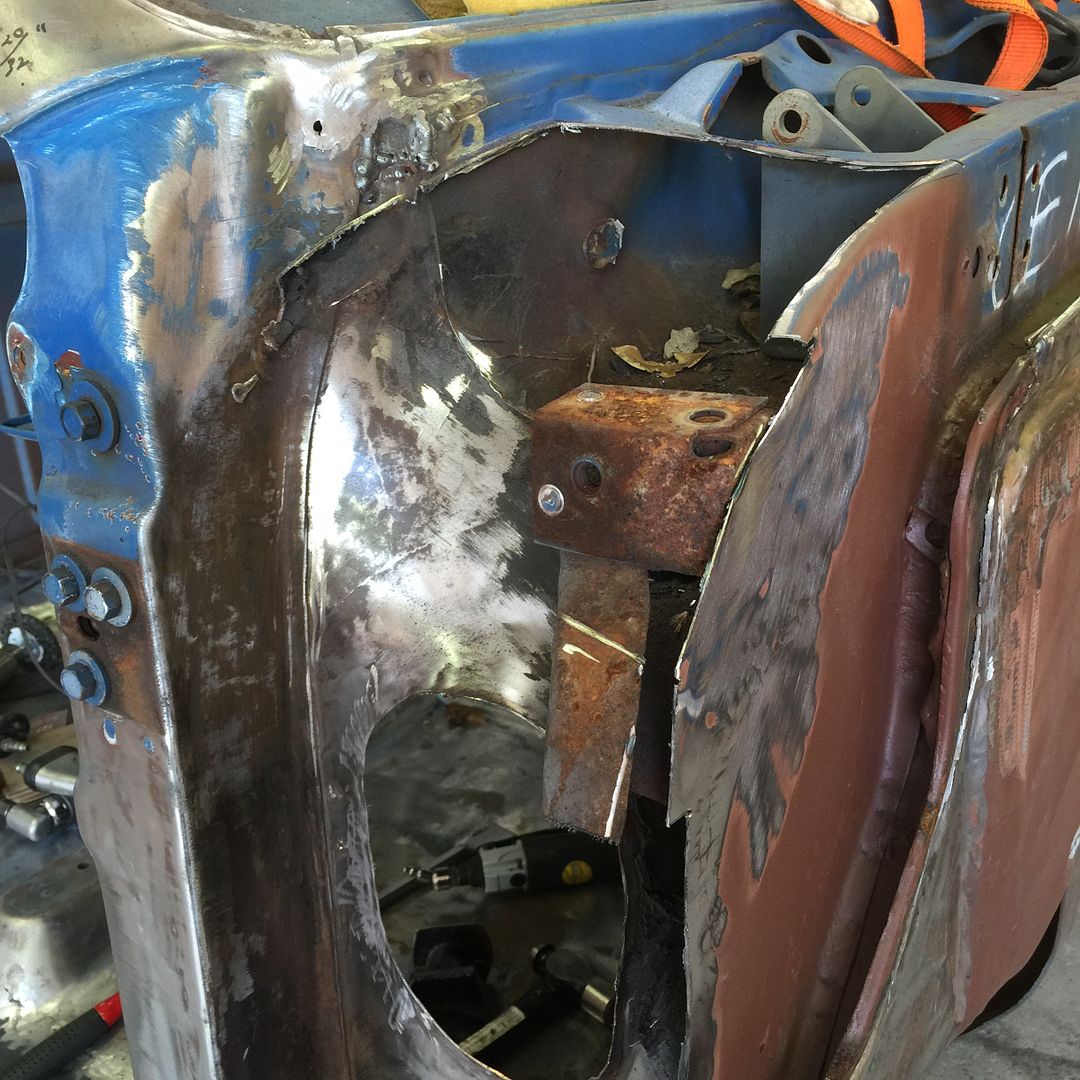 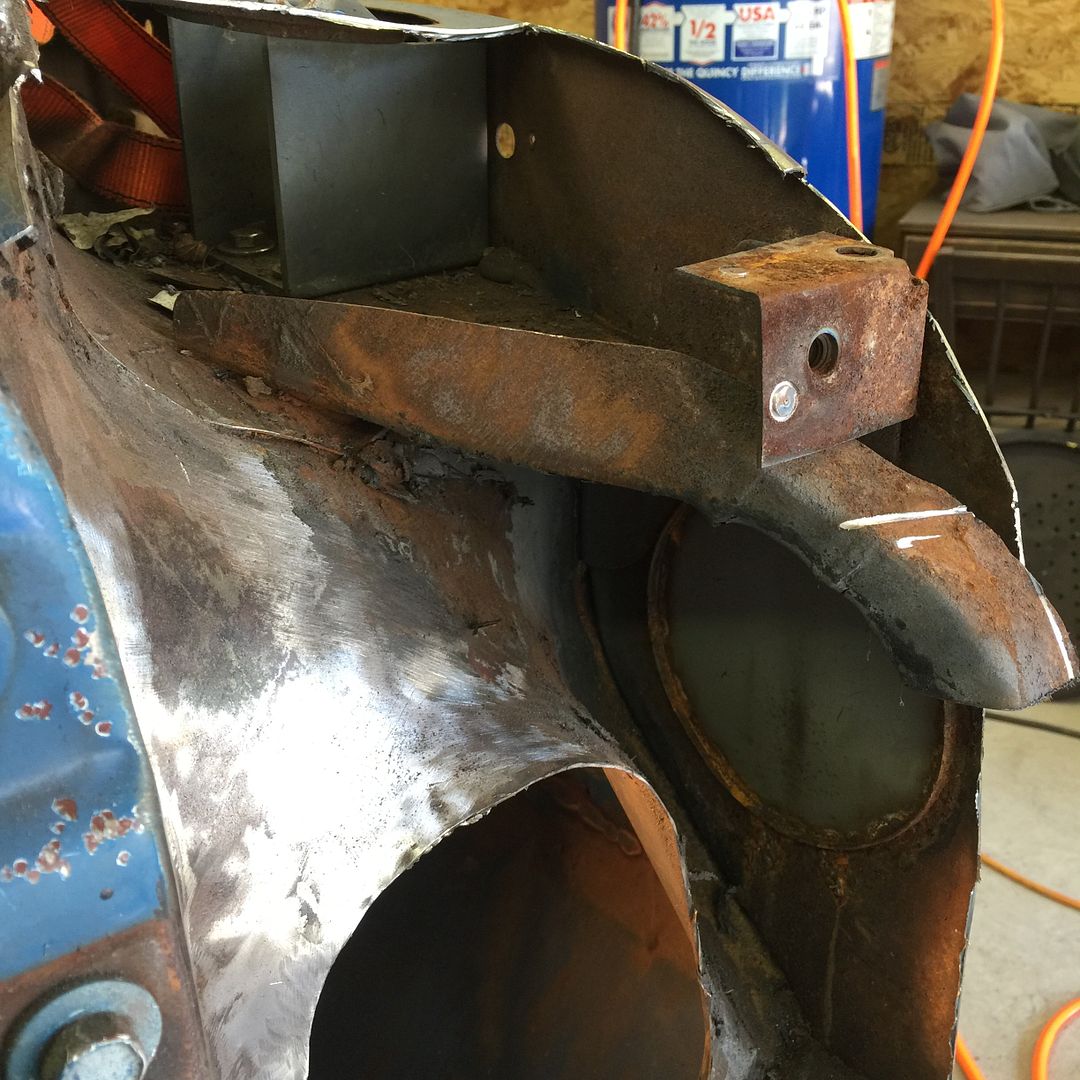 So I used some scrap metal and fabricated a jig to locate the exact position of the bracket. This way I can cut it out of the way and ensure that I get it back where it belongs. 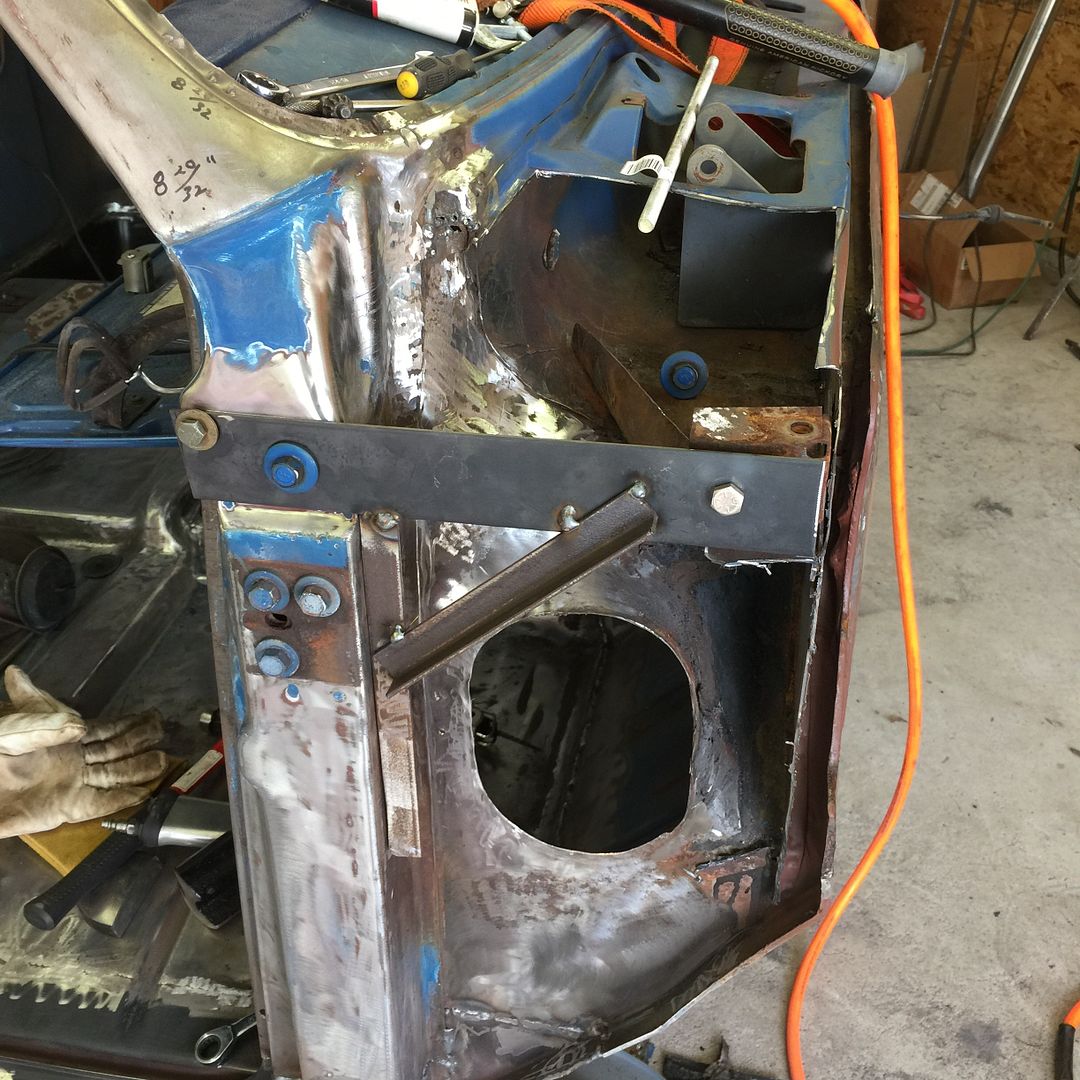 No turning back now. 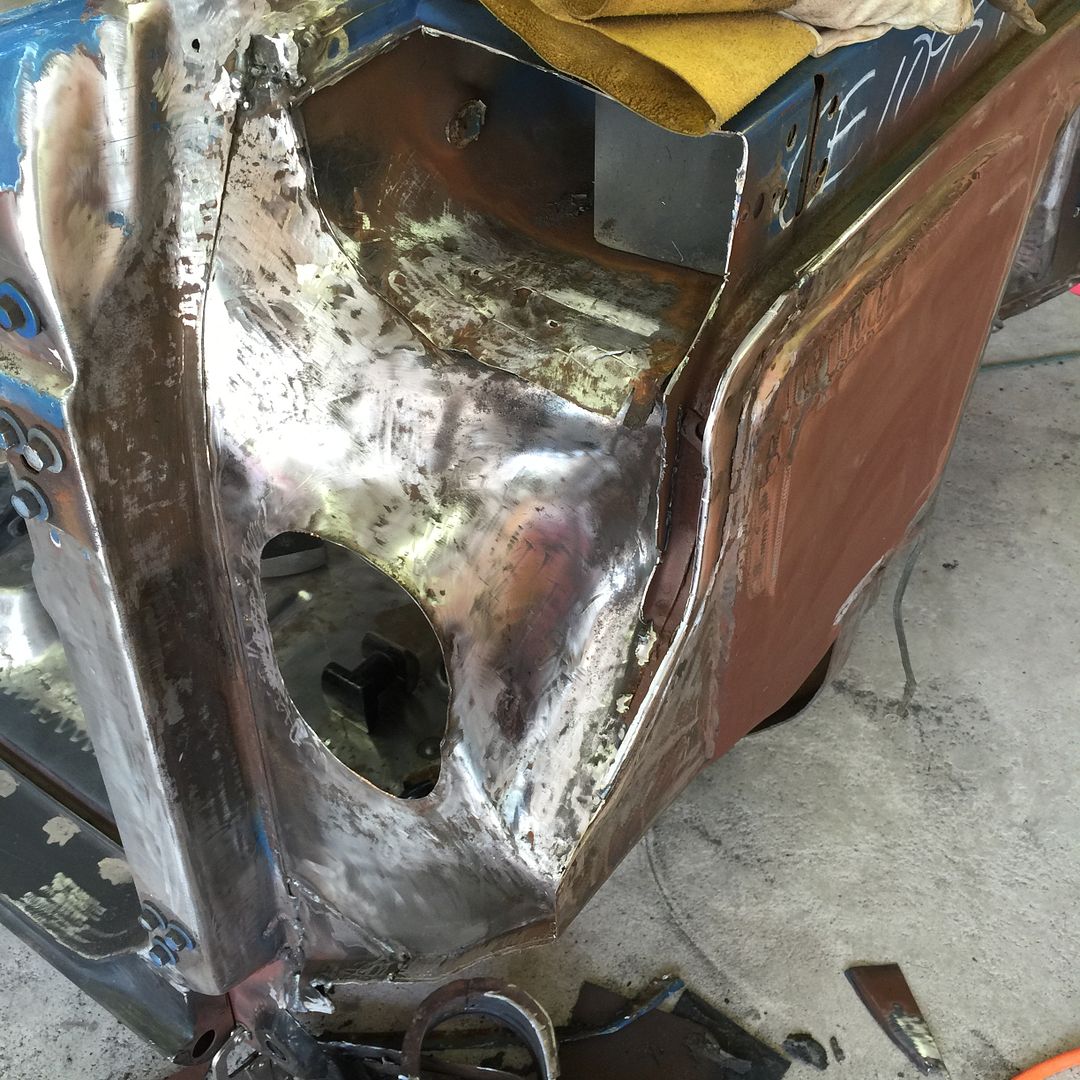 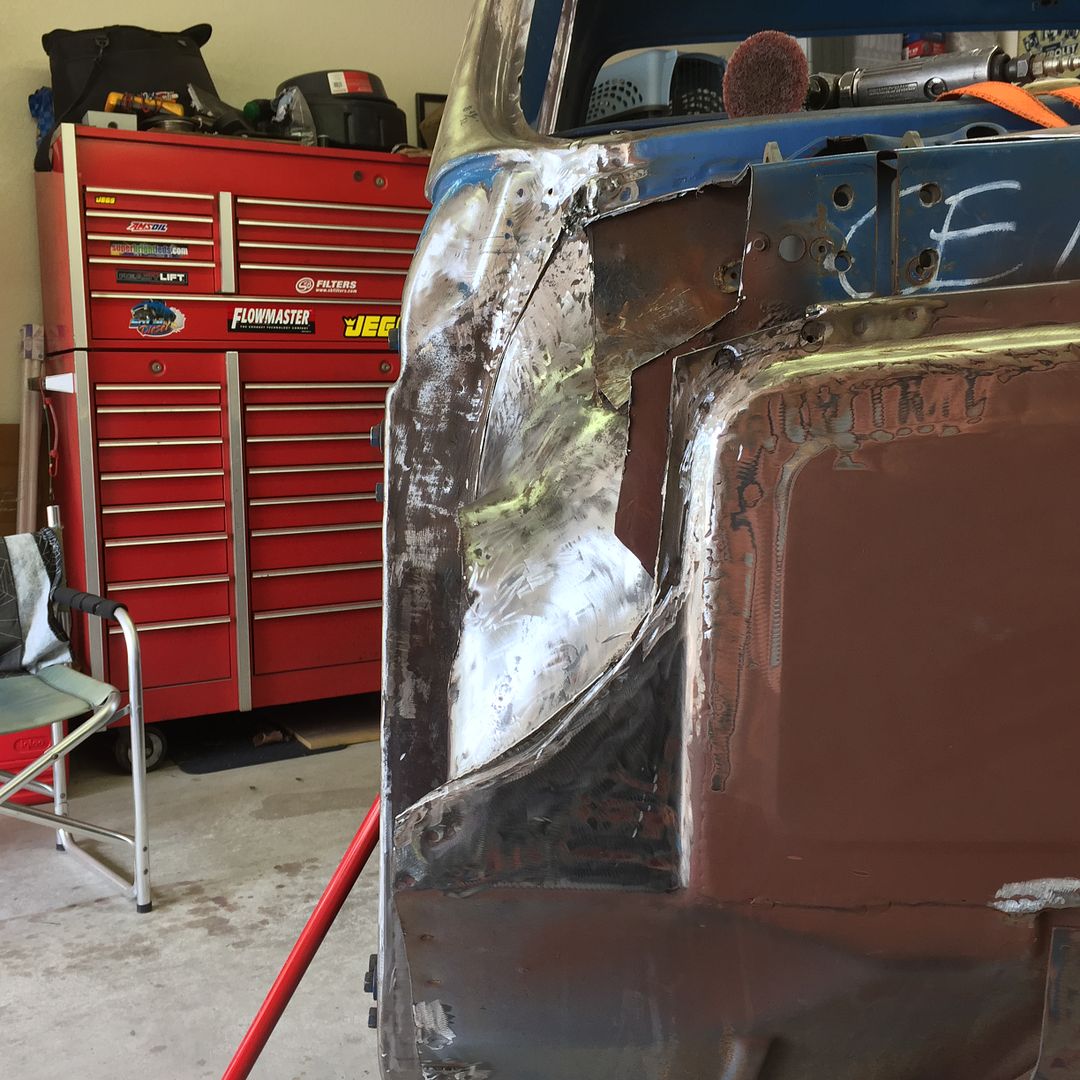 I don't have any fancy skills or equipment so I just used hammers and dollies to shape it the best I could. Figured I could accomplish it with two pieces and get the shape I was after. 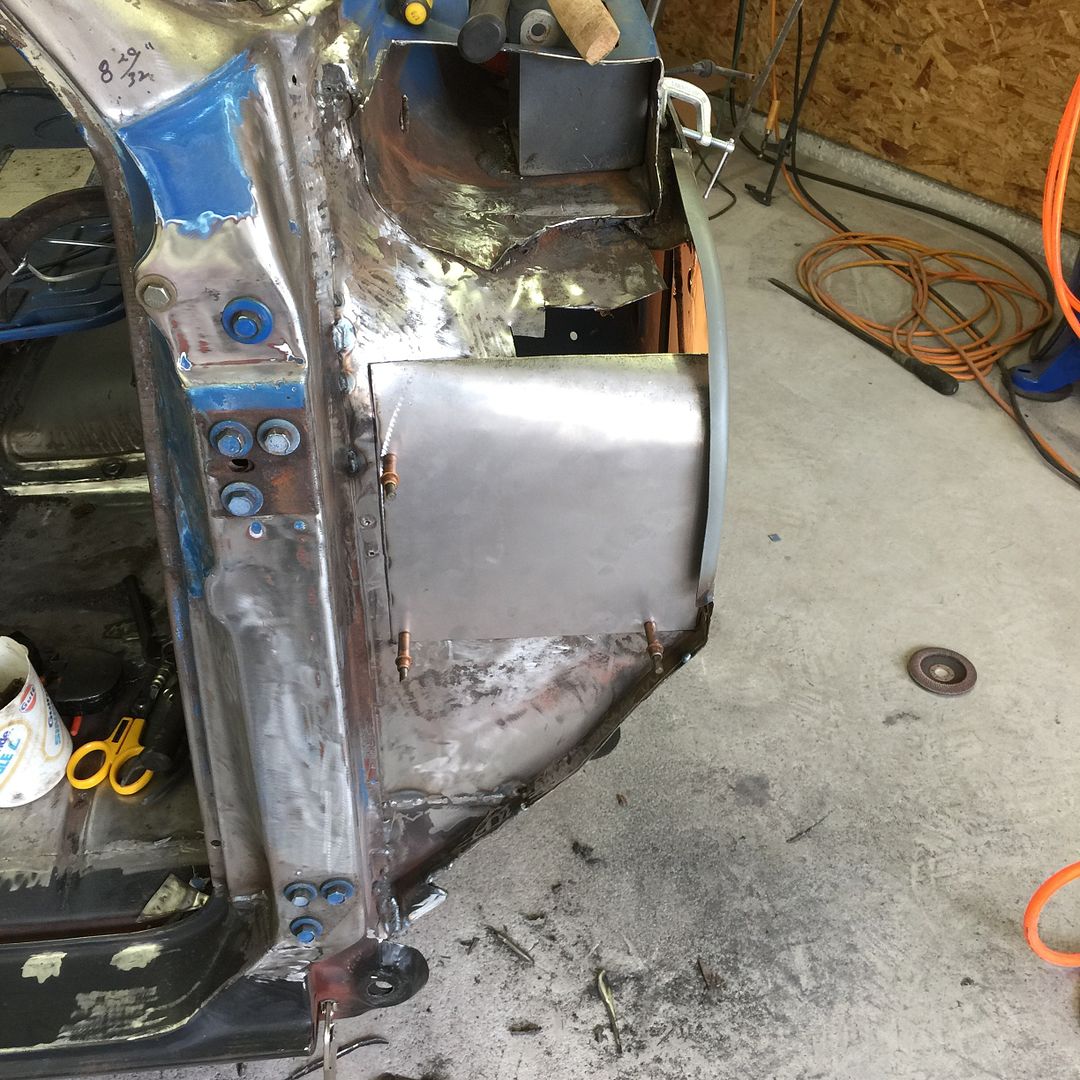 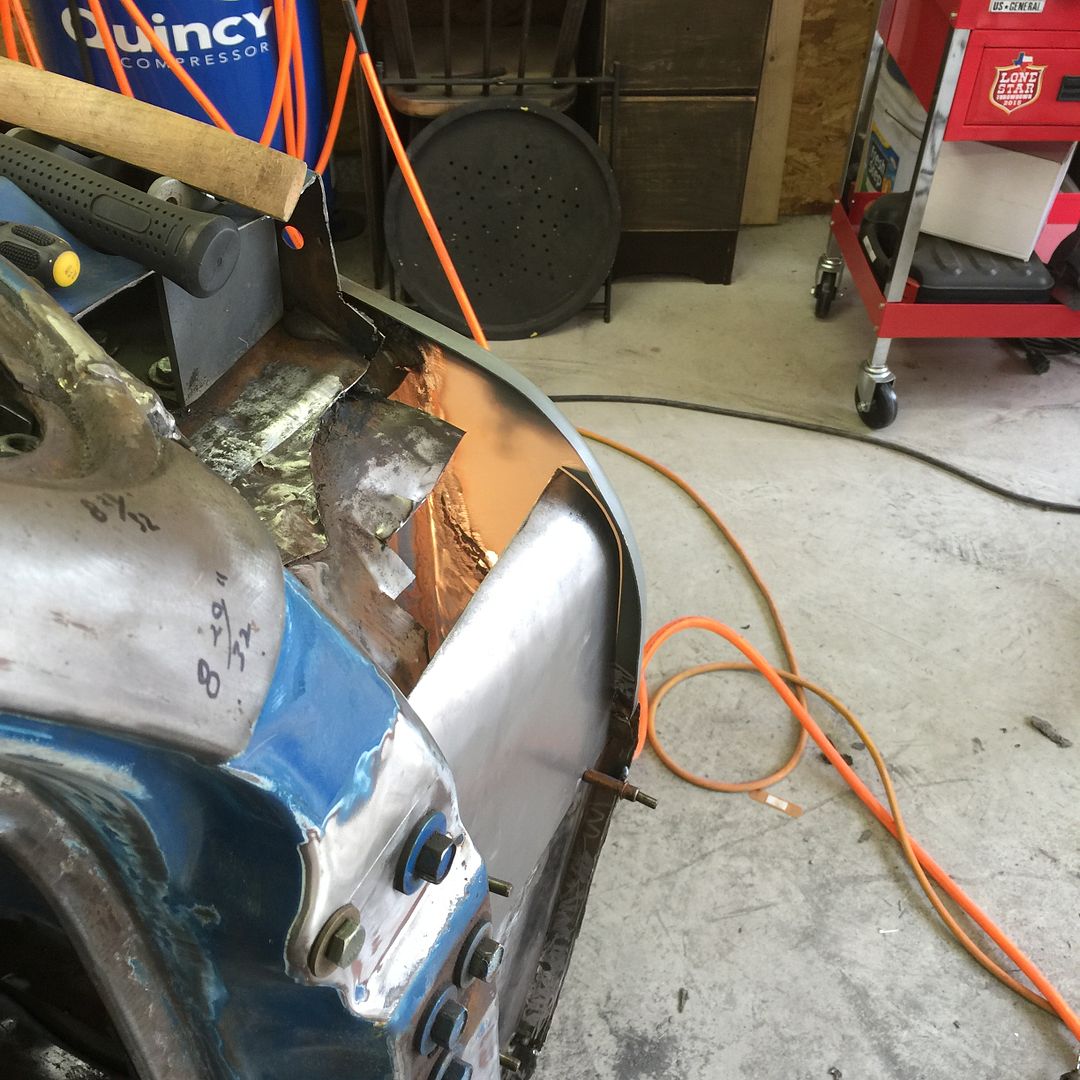 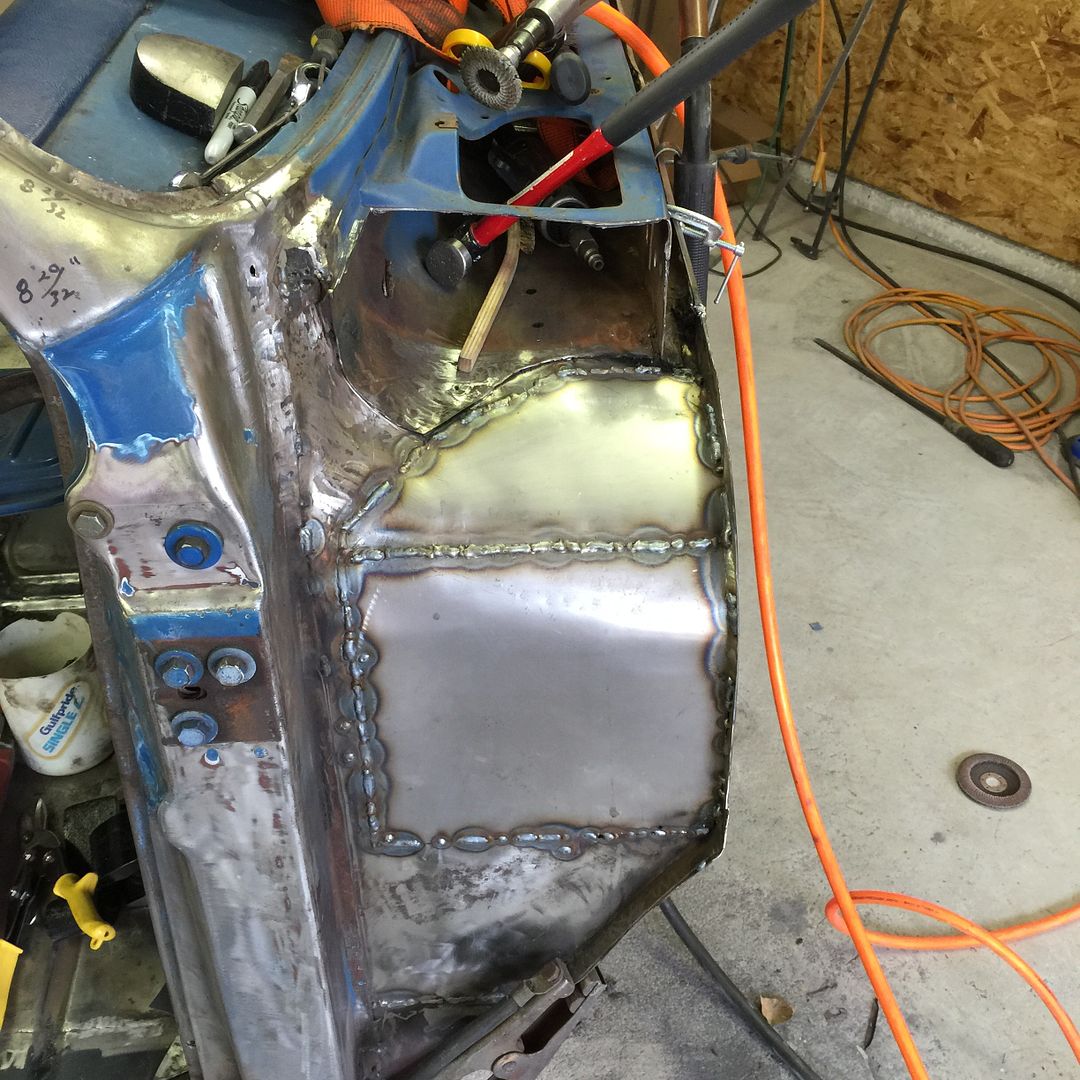 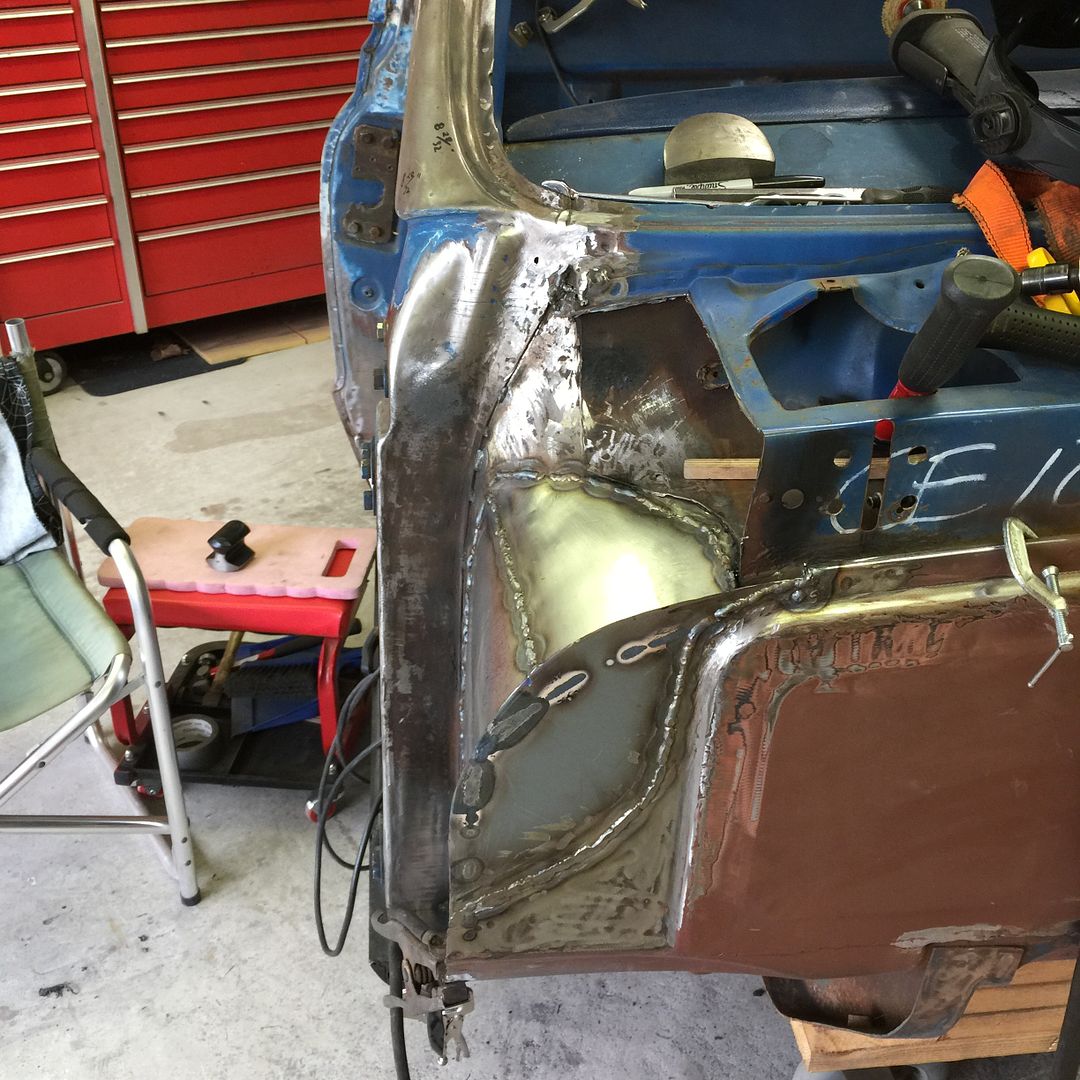 I still have a bunch to do but that's a decent update, I have the day off tomorrow and have to go get full bottle of Argon. Almost completely out.  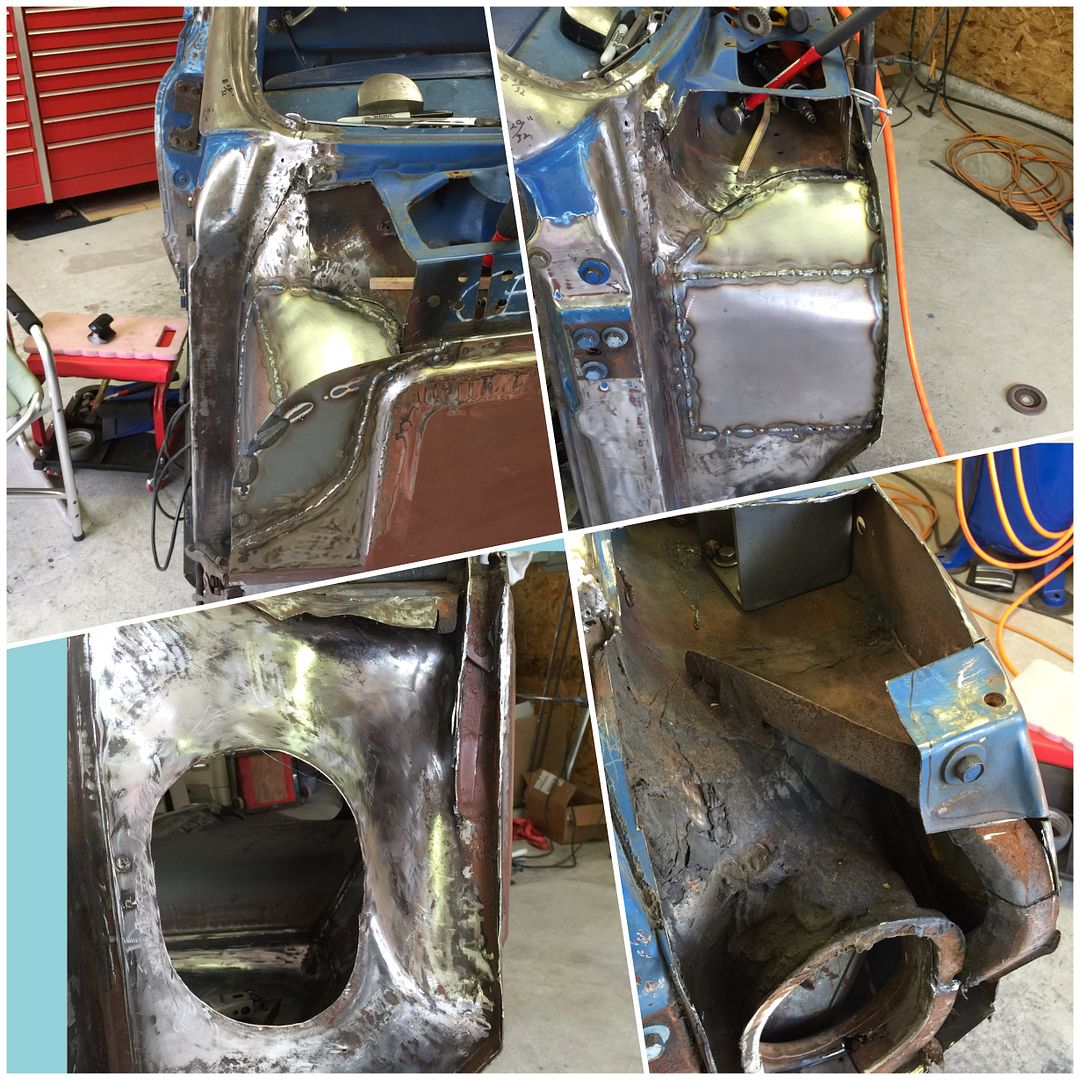
|
|
|

|
|
|
#94 |
|
Registered User
 Join Date: Oct 2012
Location: Burnet, Tx
Posts: 332
|
Re: Project: "ResuWrecktion" '71 Custom Deluxe C-10
More metal work continues in the cowl area and blanking the fresh air inlets.
Cut a patch from a leftover piece of patch panel to add in the cowl area. 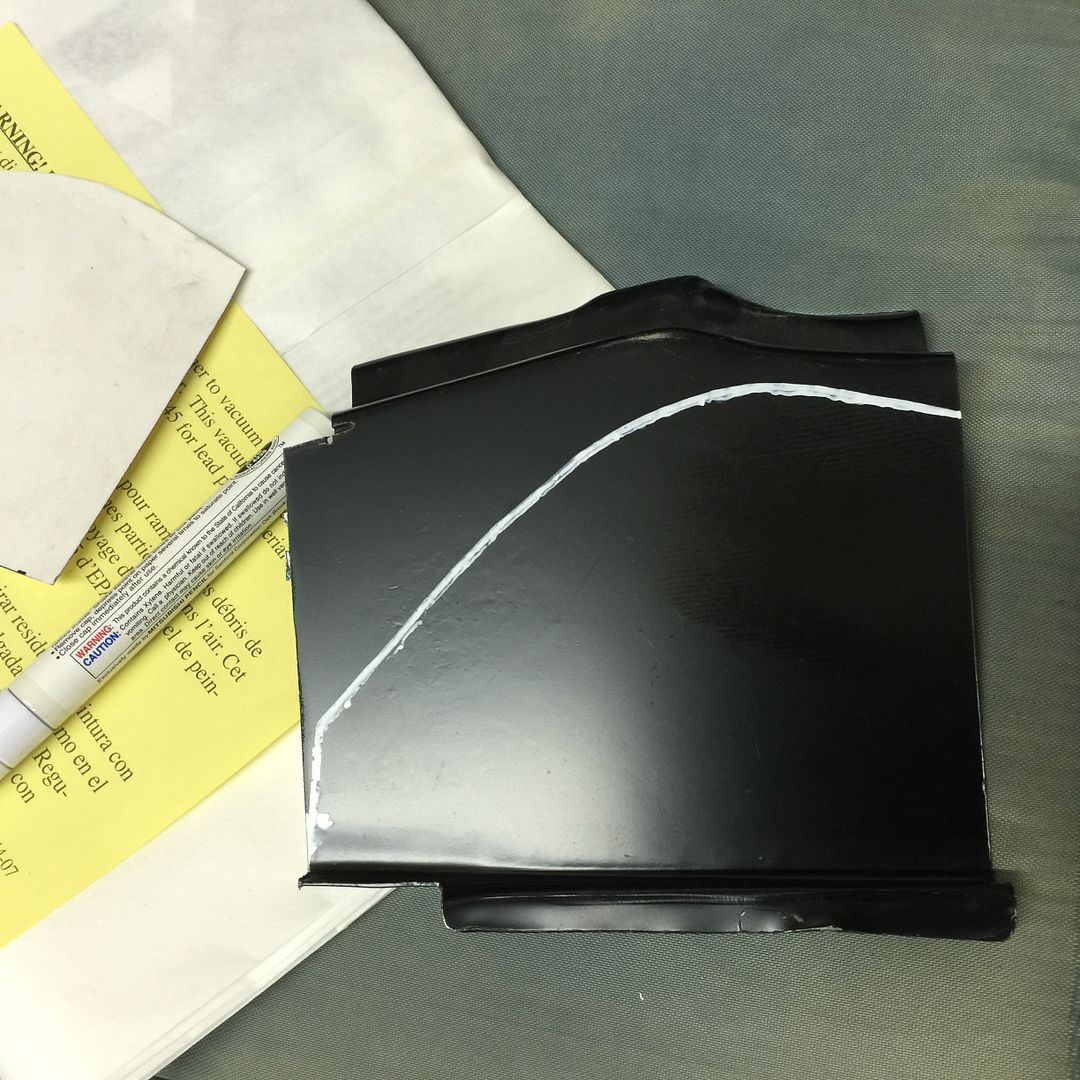 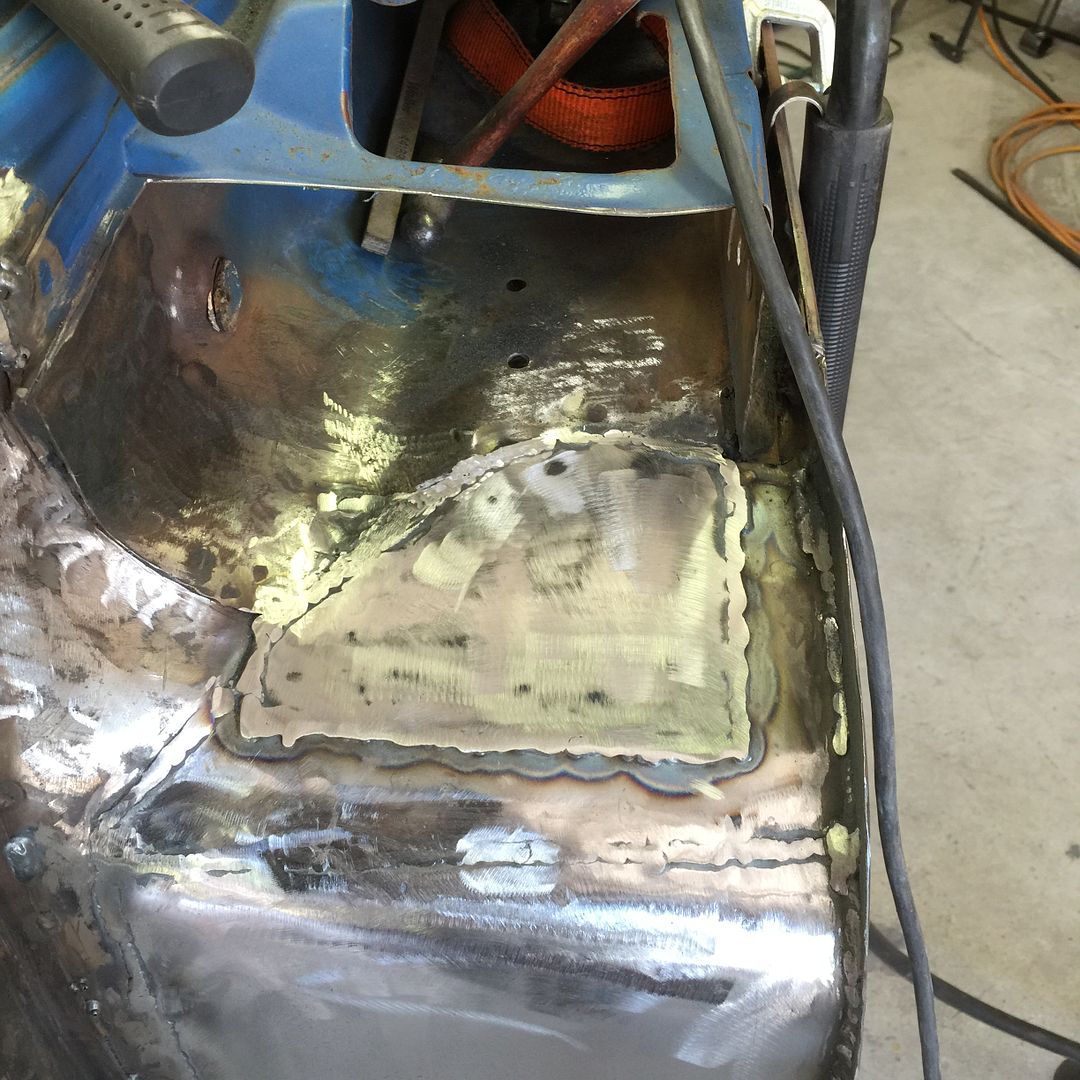 Made up a template of the cowl that I cut away, I don't plan on boxing the whole thing just enough so that it appears boxed when the wiper cowl and fender is in place. 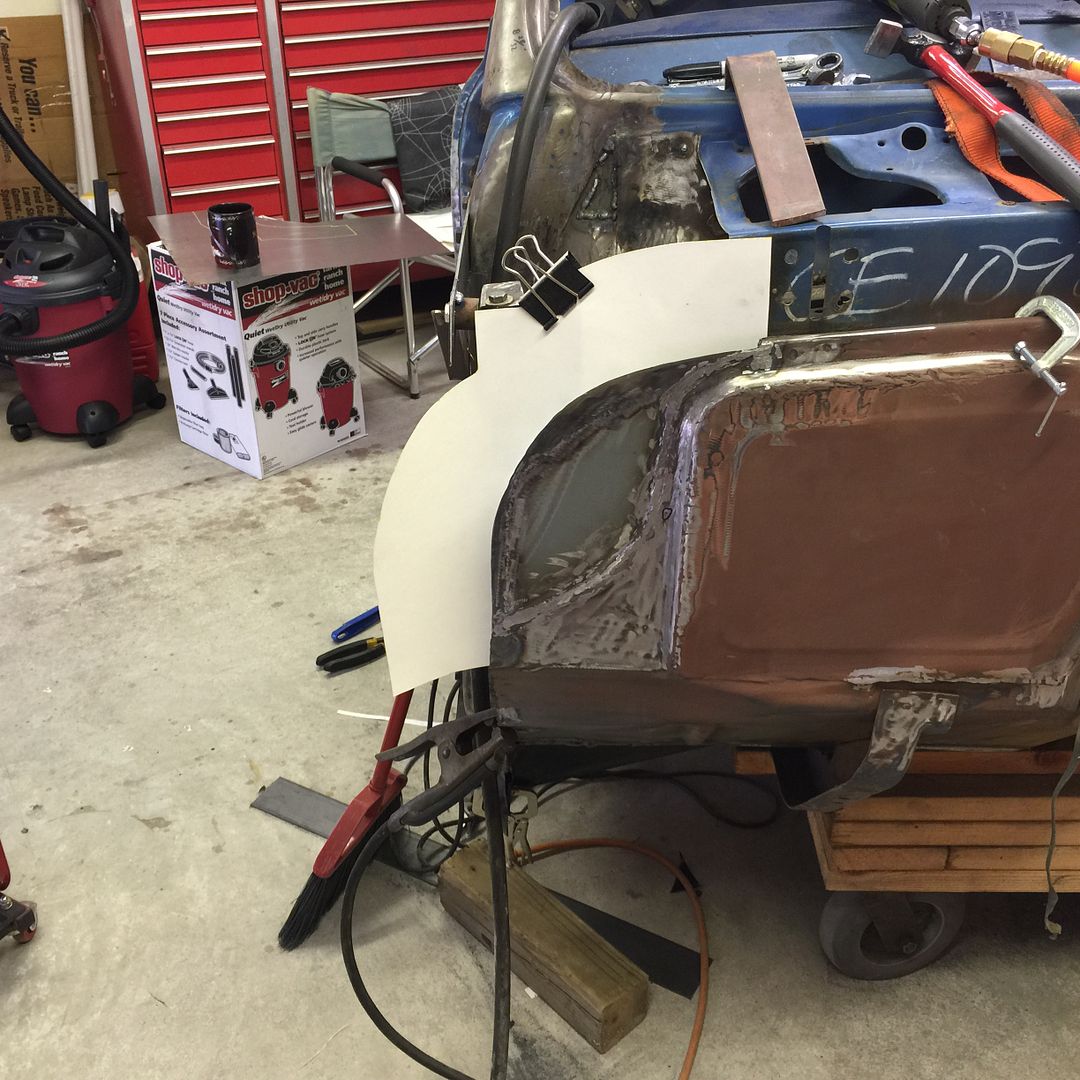 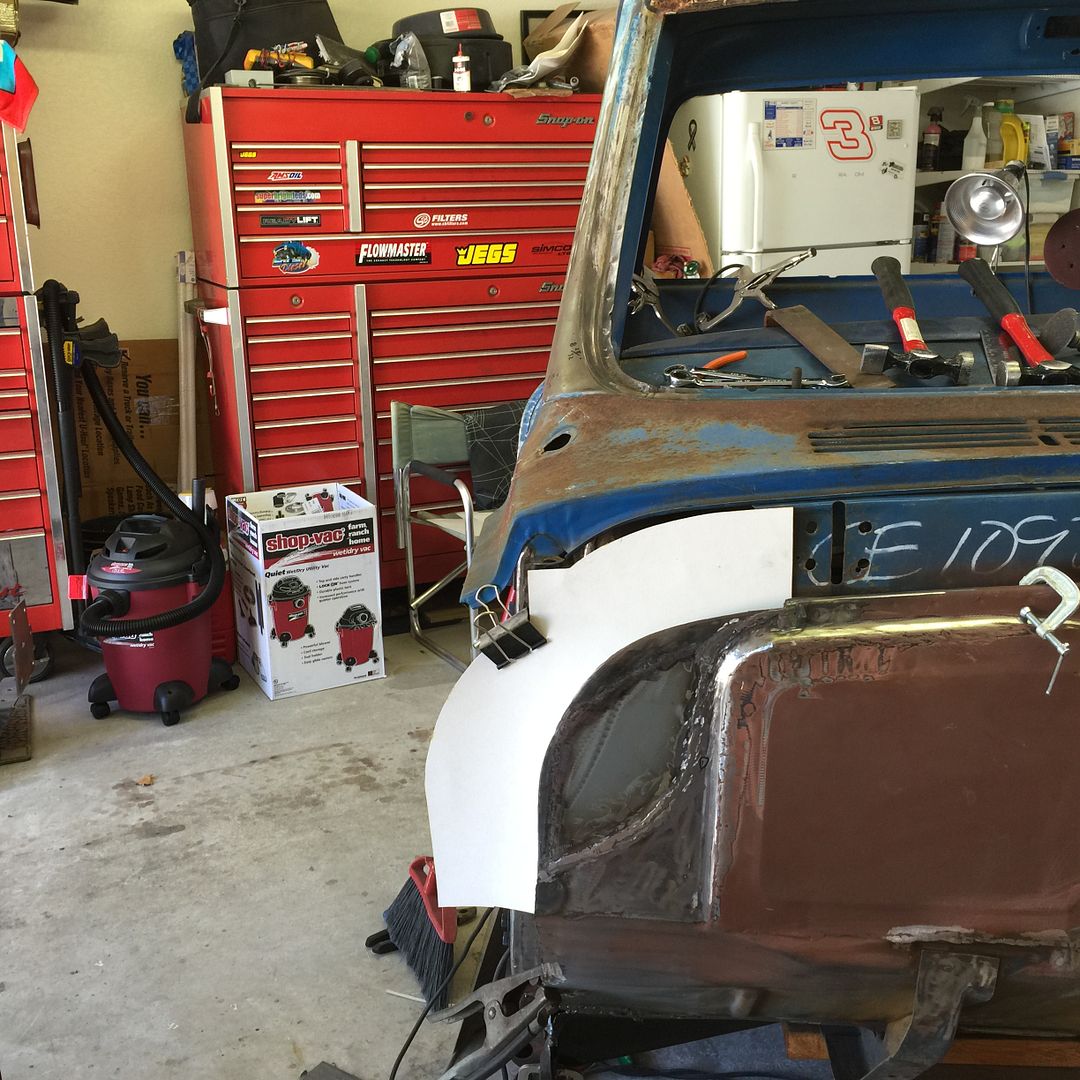 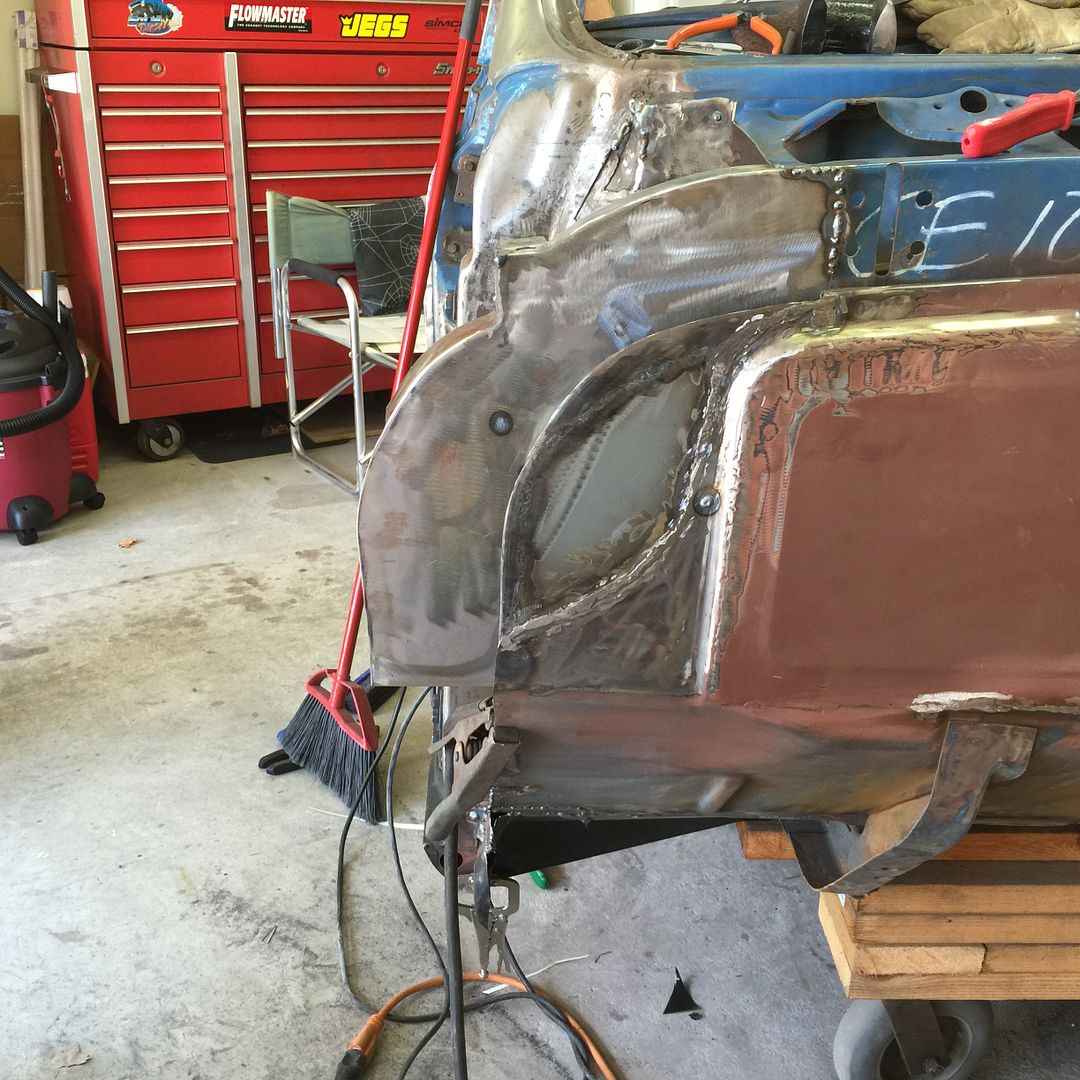 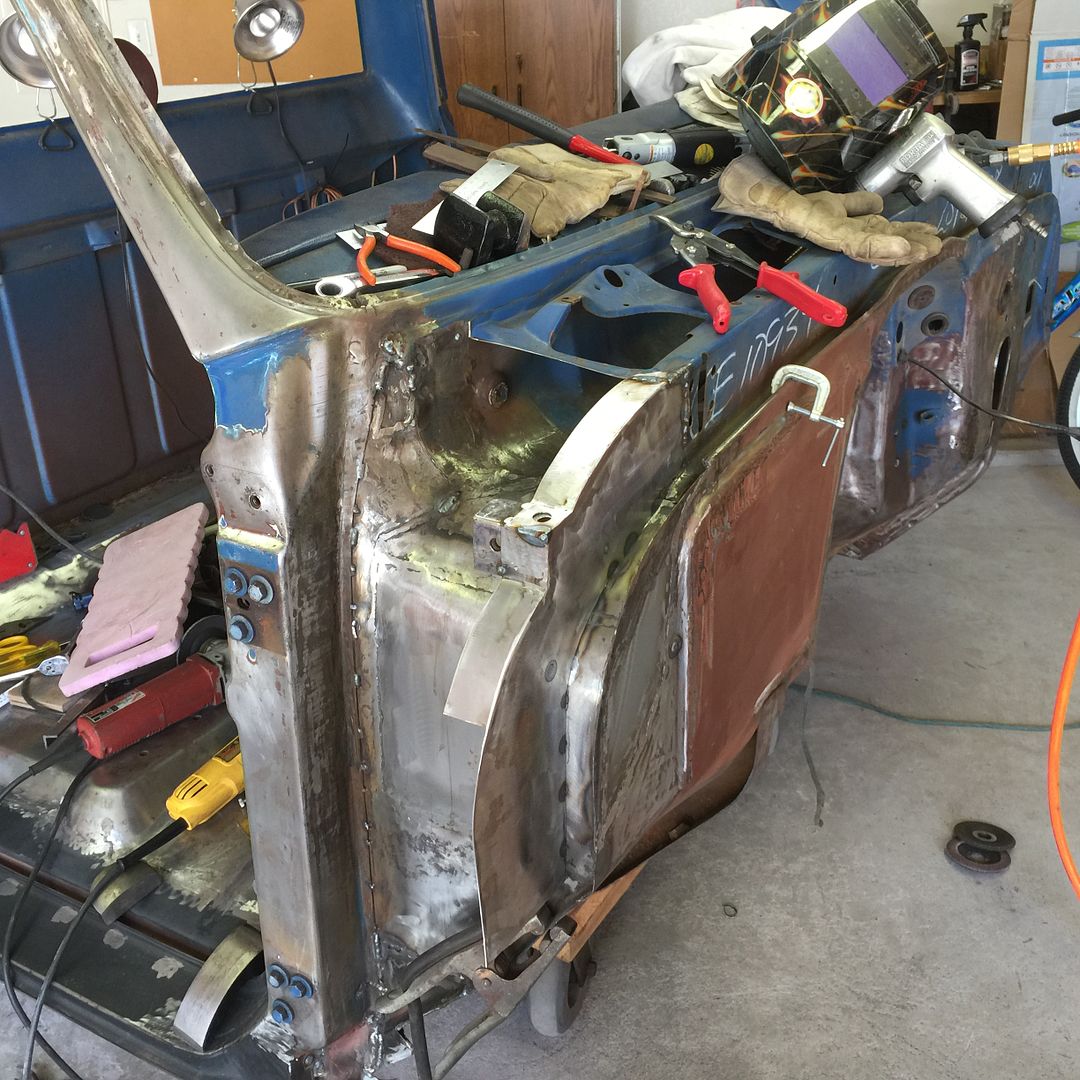 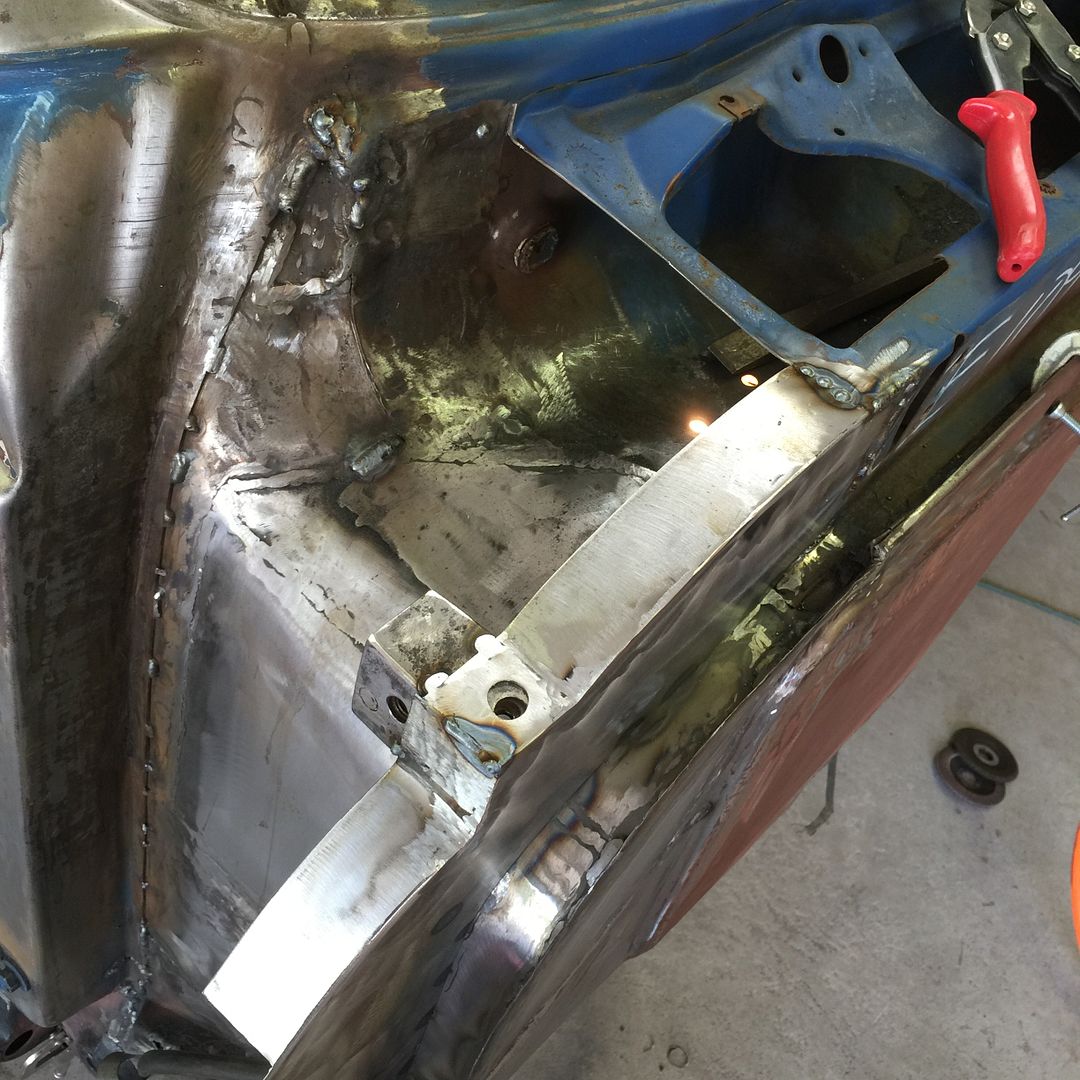 Started capping off the wire gutter working my way to the driver side. 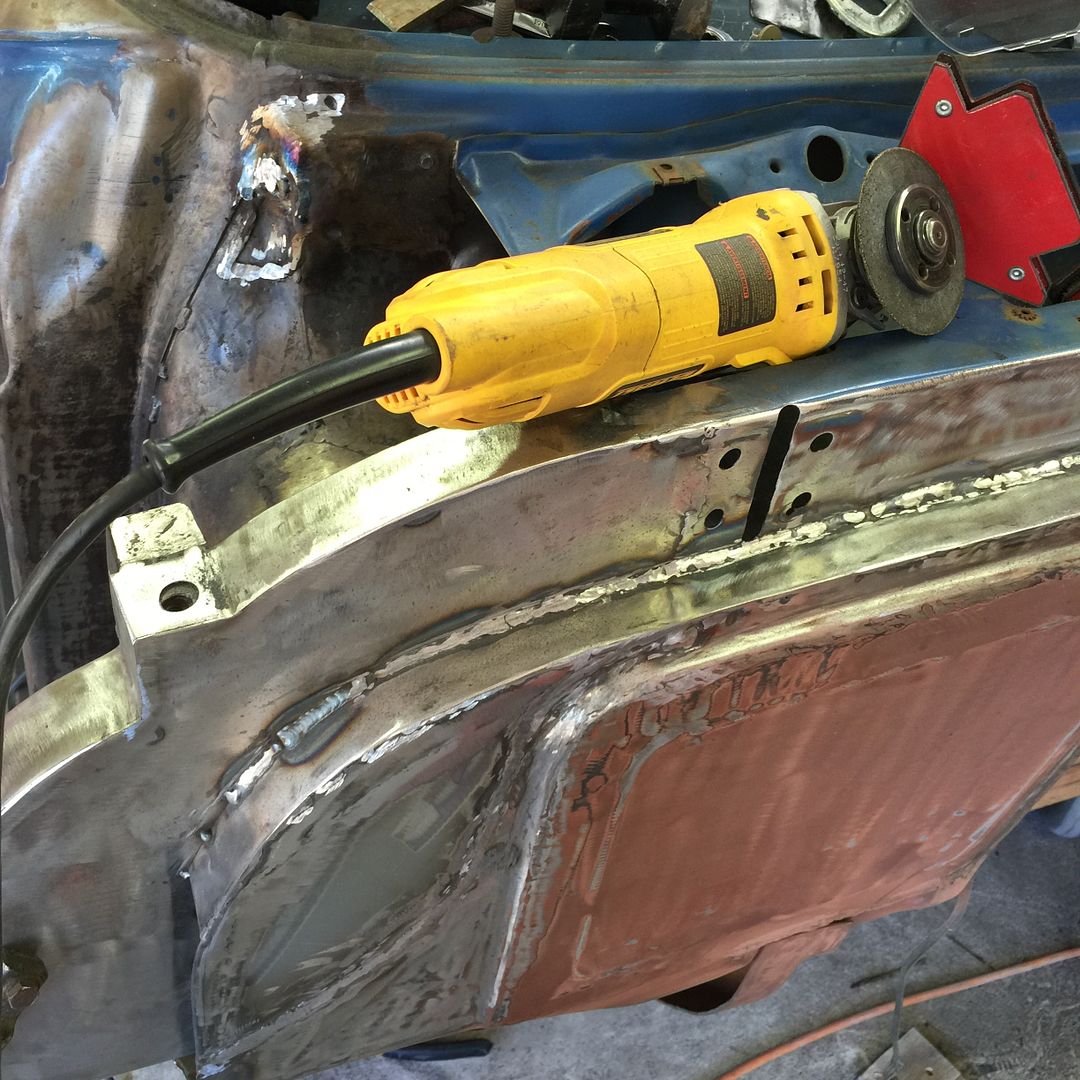 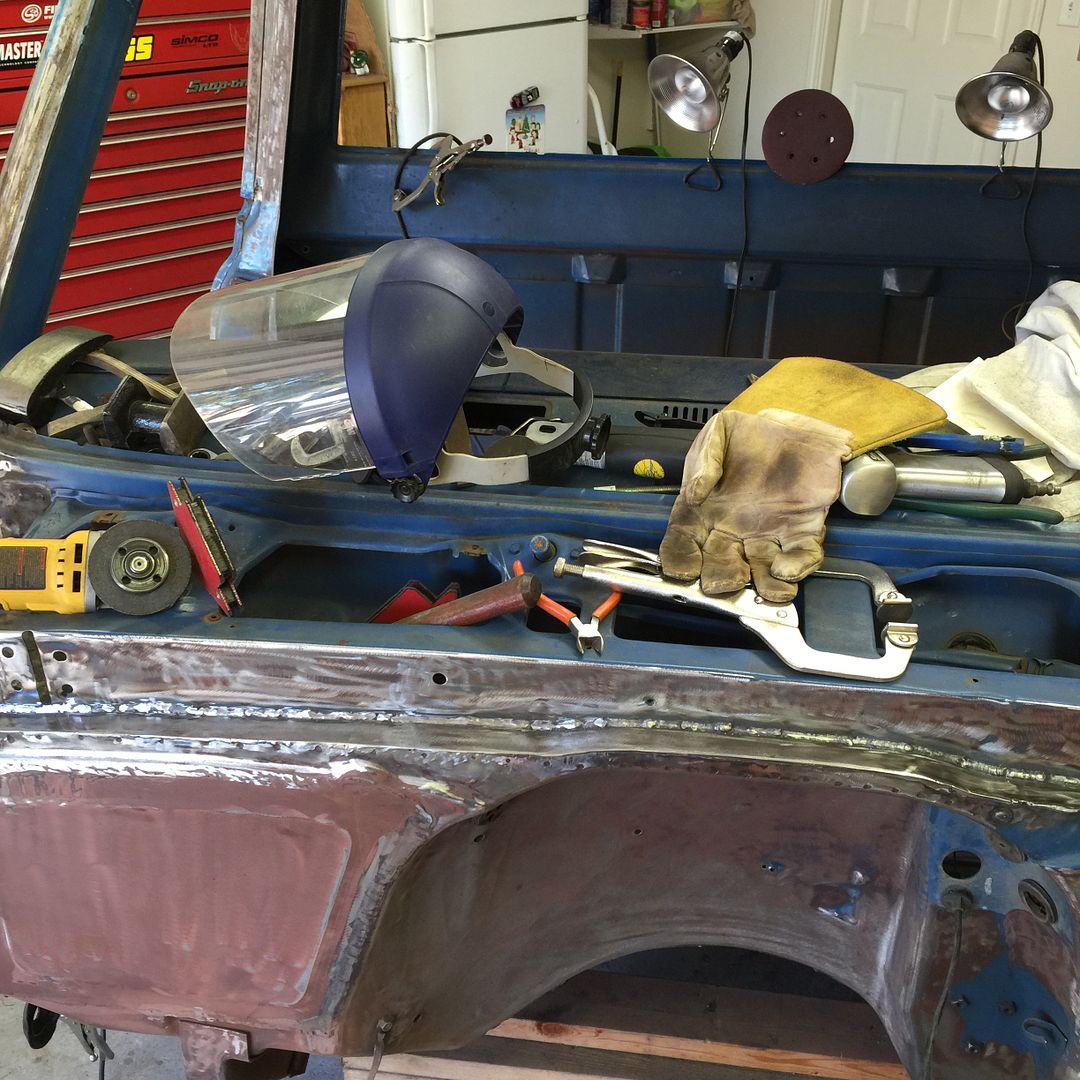 I have to cut open the air box to blank the fresh air inlet. Expect the worst, hope for the best!  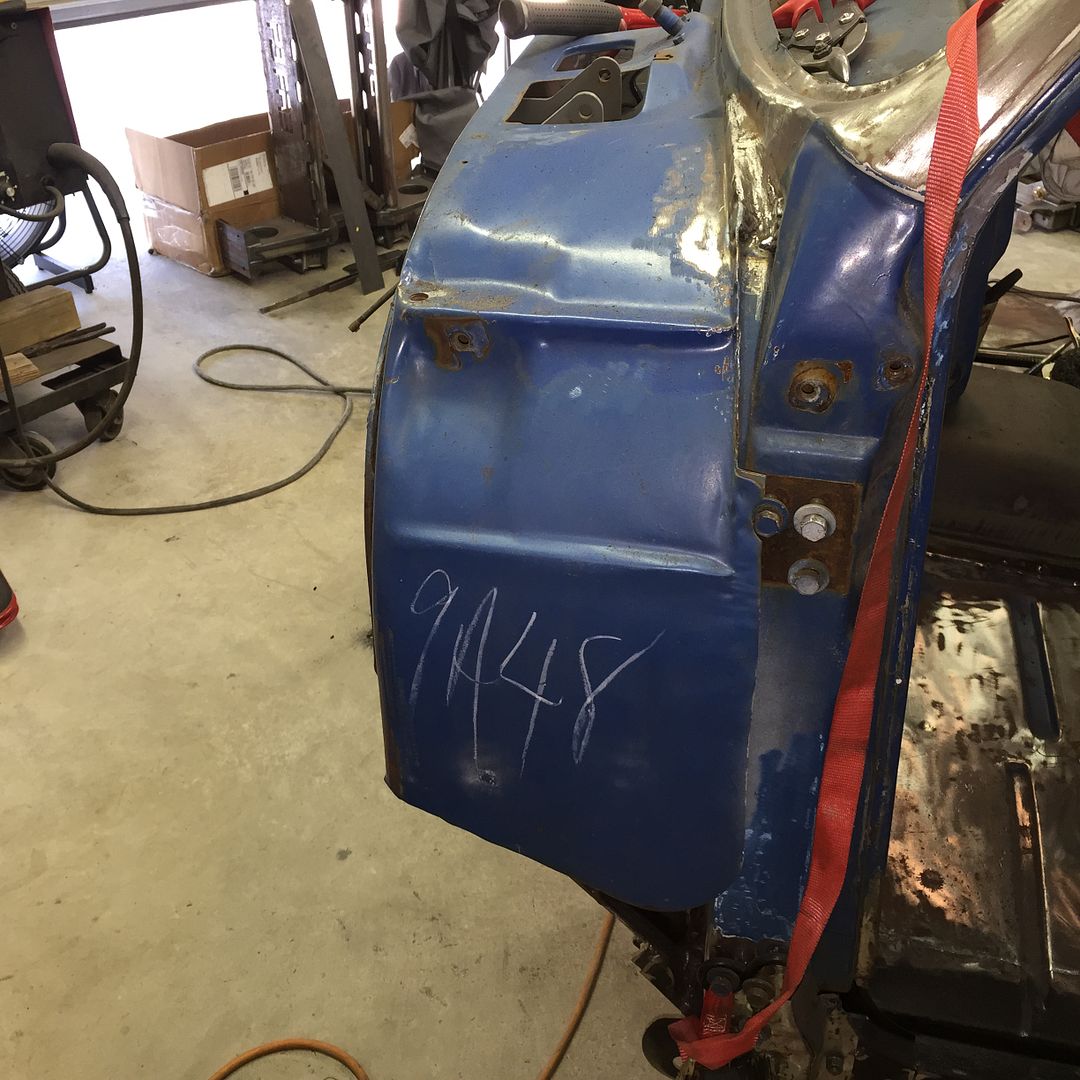 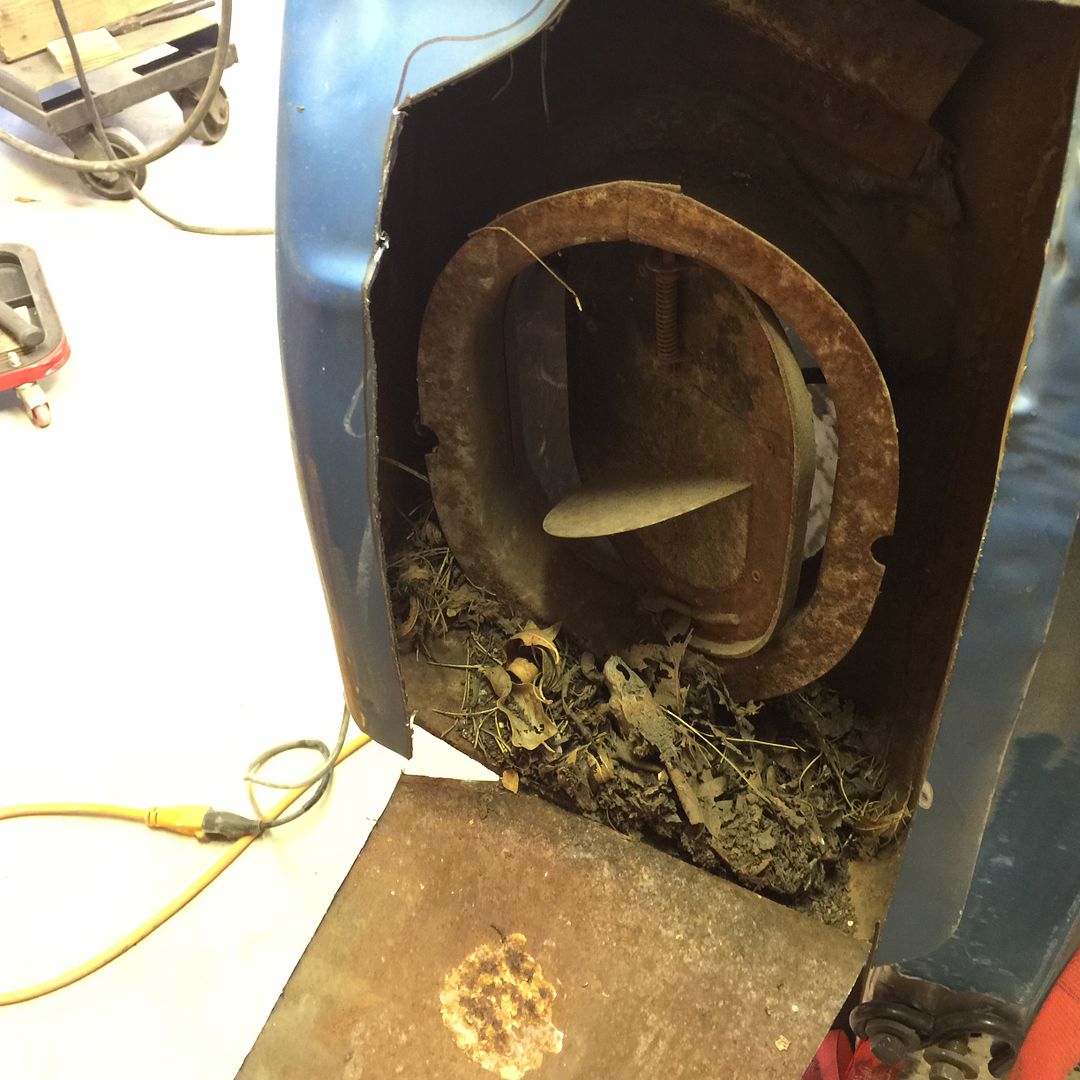 Template time. 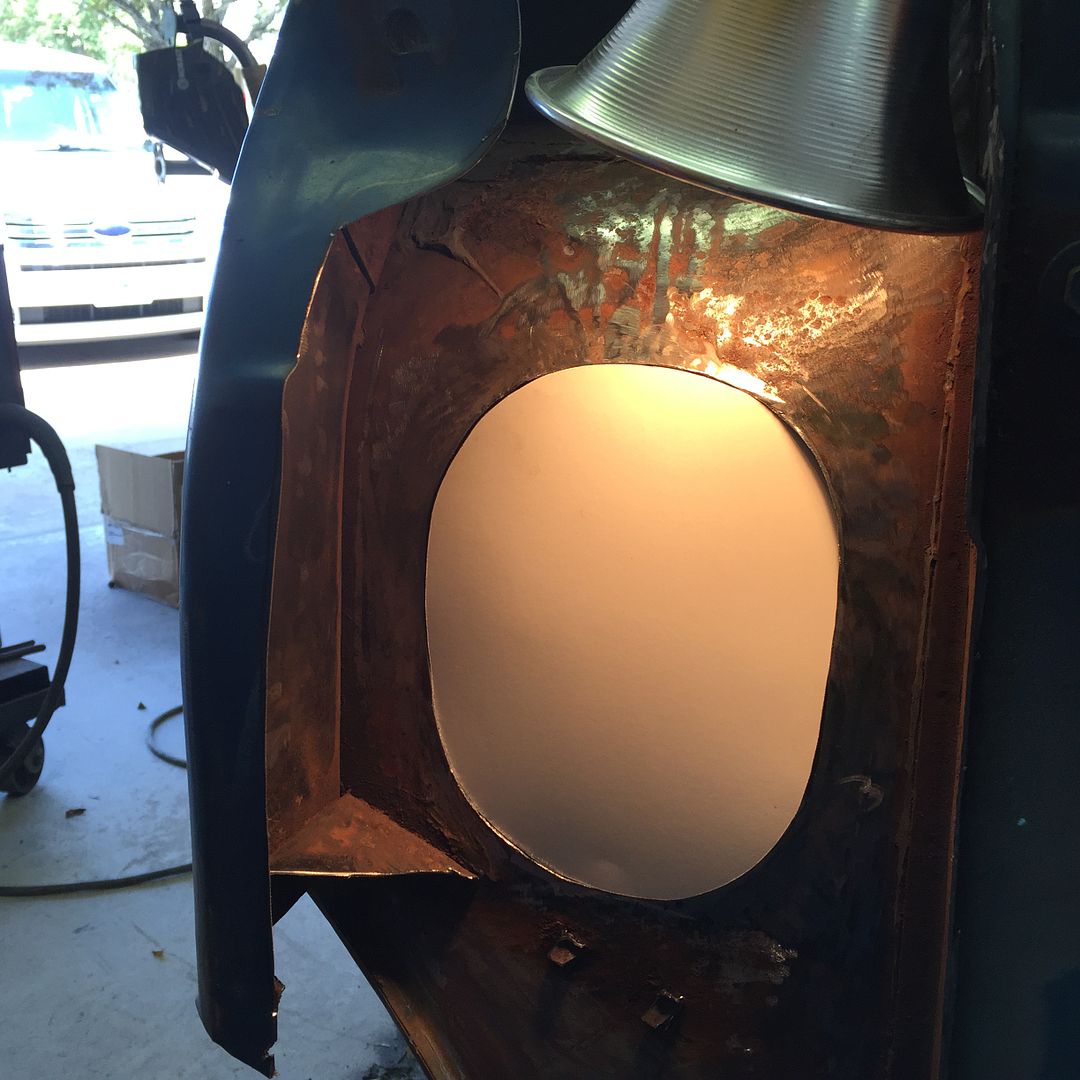 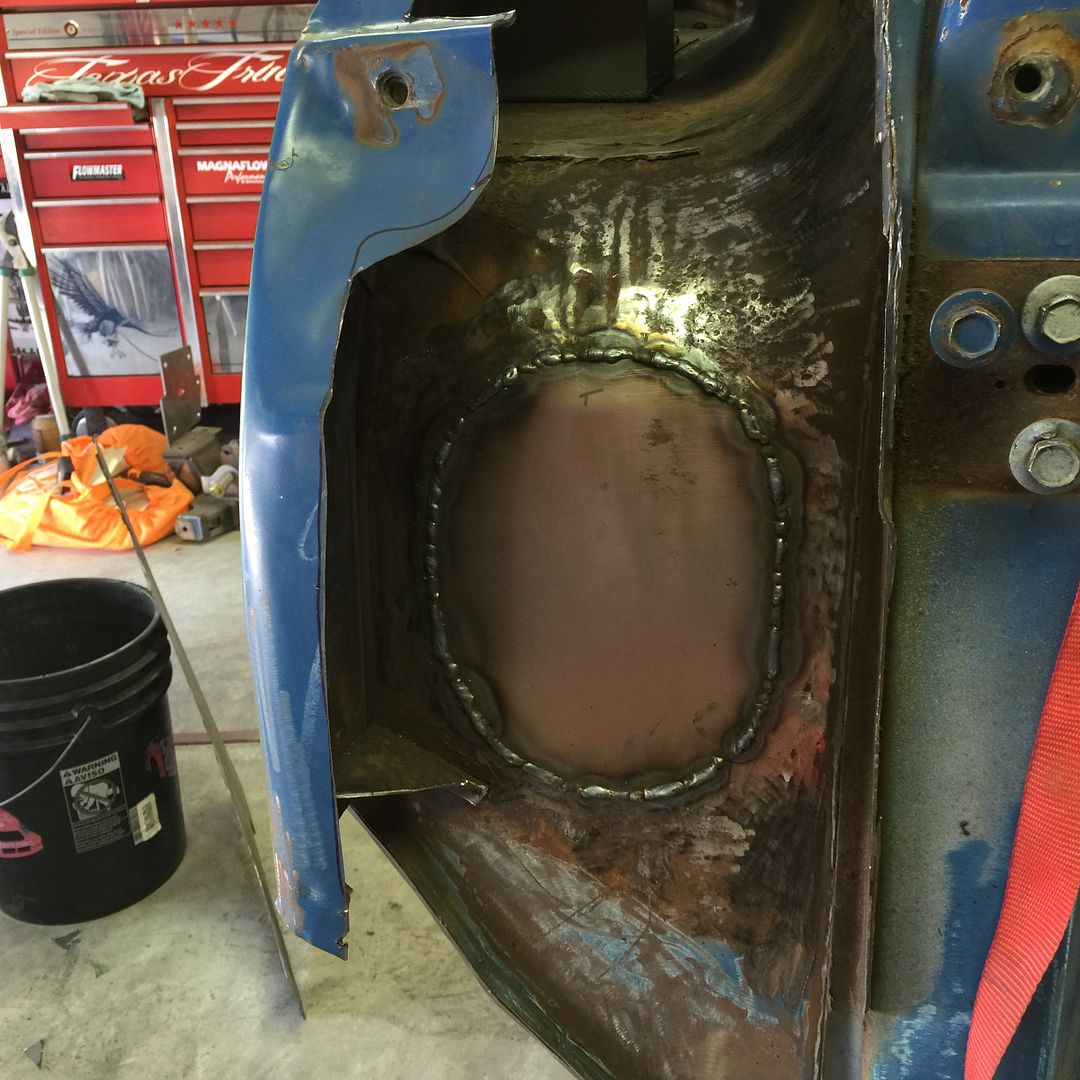 More rust between the cowl and fender mounting tab, so I decided to just start cutting out the bad stuff. 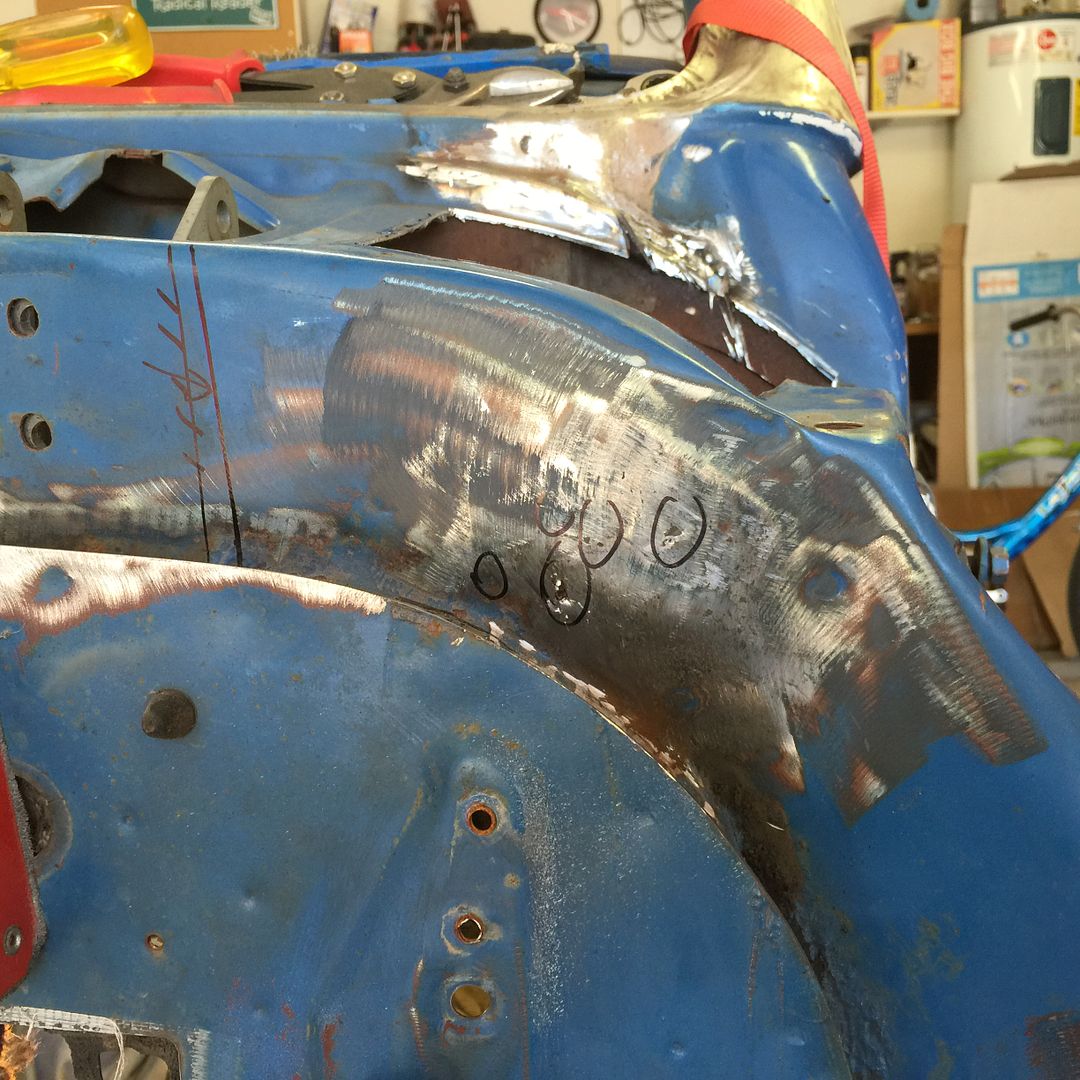 And this is where I stopped for the day, I have a bunch to do but I need to go buy more metal tomorrow. 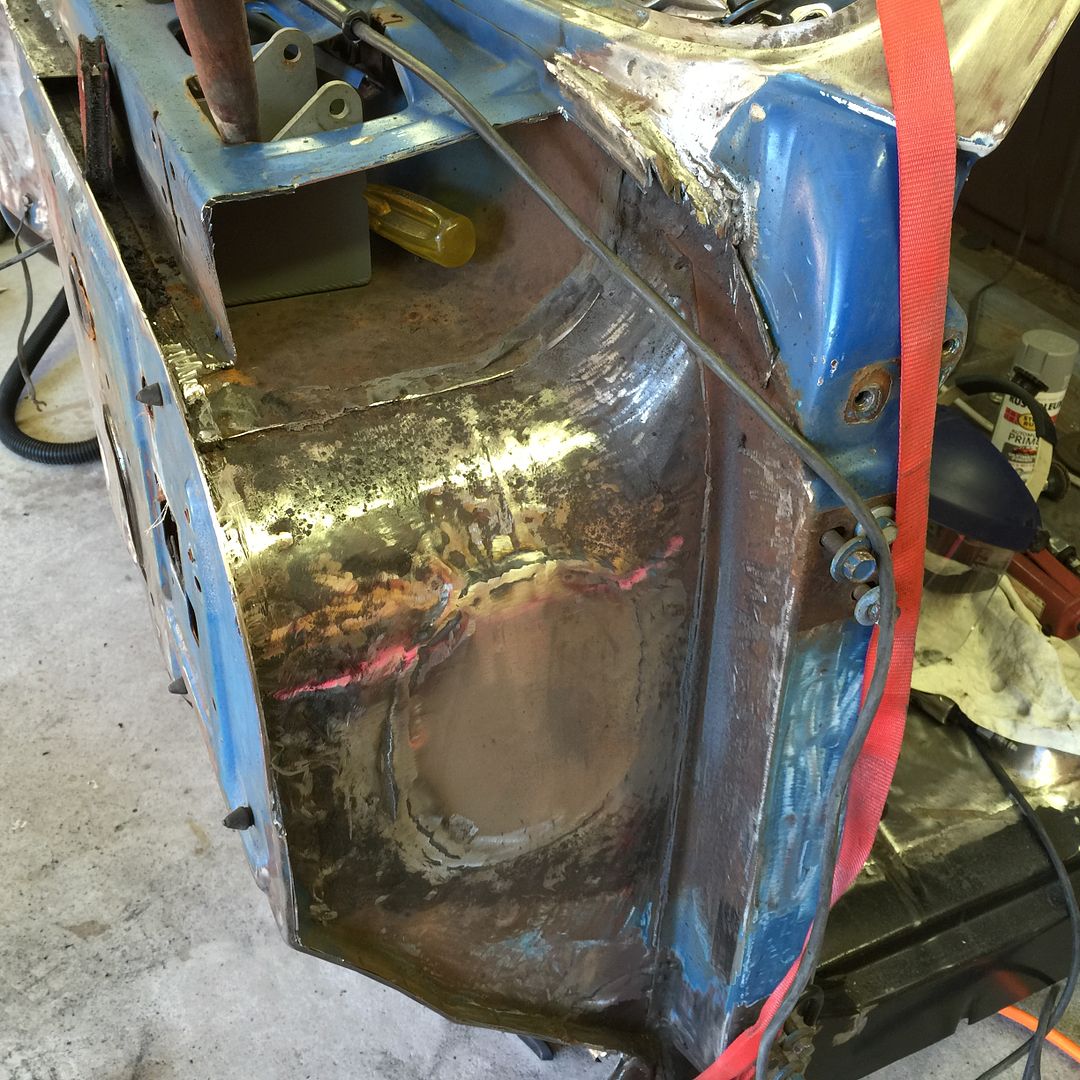
|
|
|

|
|
|
#95 |
|
Senior Member
 Join Date: Jul 2009
Location: Hayden, Al.
Posts: 4,148
|
Re: Project: "ResuWrecktion" '71 Custom Deluxe C-10
Dude, you are not afraid to do some cutting, fixin' & welding. I'm super impressed!

|
|
|

|
|
|
#96 |
|
Registered User
Join Date: Jan 2015
Location: Ventura, CA
Posts: 818
|
Re: Project: "ResuWrecktion" '71 Custom Deluxe C-10
great work so far. I'm really diggin this build. Cant wait to see all the PB stuff put together with the wheels on her.
__________________
..................... ____ .........________//__{\_____ ,,,,,,,/__(O)___//___/__(O)_/ 1970 C20 -_--_--_- ______ _--_--_- /___|__\____ -_--_-_ |_(0)|__|_(0)] 1972 K5 |
|
|

|
|
|
#97 | ||
|
Registered User
 Join Date: Oct 2012
Location: Burnet, Tx
Posts: 332
|
Re: Project: "ResuWrecktion" '71 Custom Deluxe C-10
Quote:
Quote:
 I'm a mechanic and not a body man so this metal work isn't really that much fun. |
||
|
|

|
|
|
#98 |
|
Registered User
 Join Date: Oct 2012
Location: Burnet, Tx
Posts: 332
|
Re: Project: "ResuWrecktion" '71 Custom Deluxe C-10
Friday night when I got home from work my wife was on my butt to mow the grass around the area where I have truck parts in the backyard. Mainly the grass under the saw horses where the frame rails are sitting. I've been putting it off but since she asked nicely I took the time to move everything and mow the grass.
 That's when everything changed! I have been trying to continue working on the cab before I start on the frame even though I really dislike body work. After moving the frame around I just couldn't help myself, moved stuff around in the garage and brought the frame rails inside to start assembling the chassis.  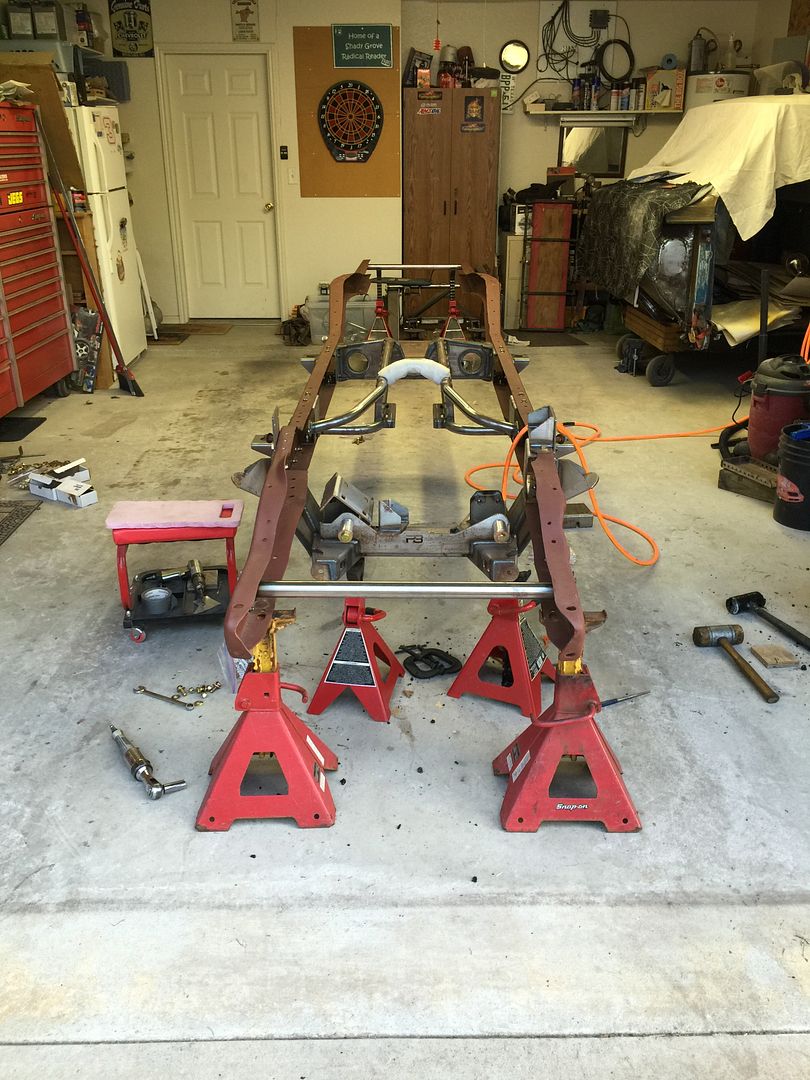 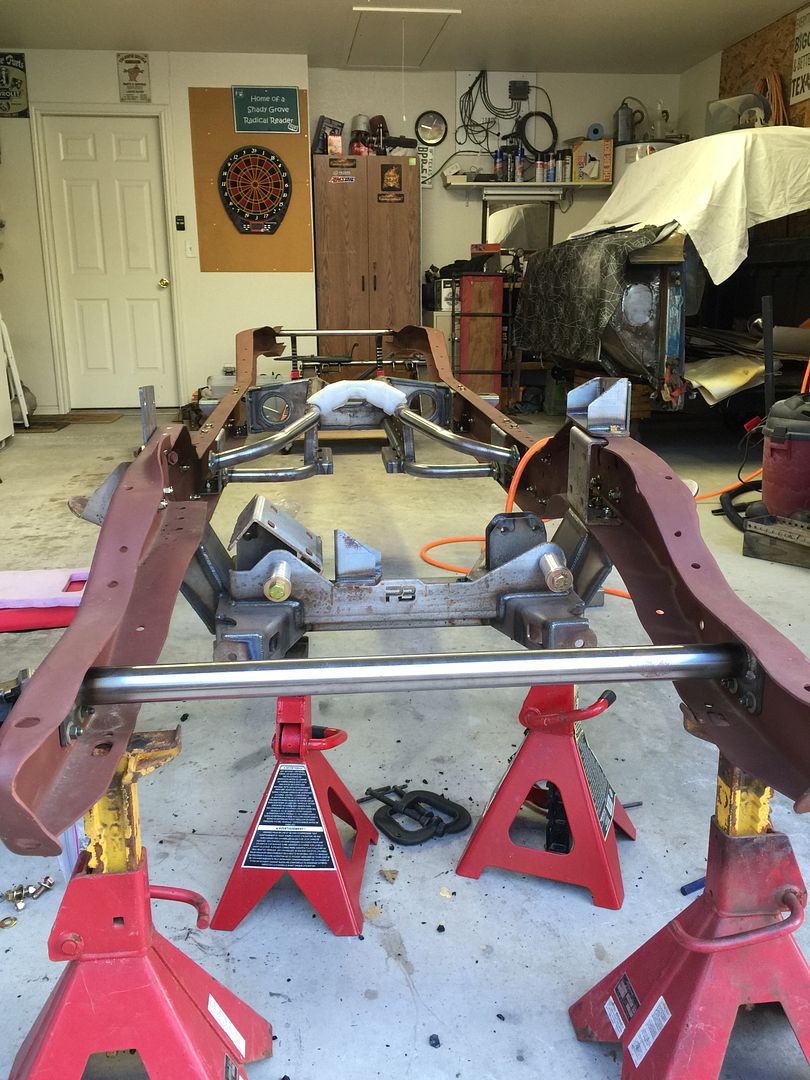 Rear bed mount from Porterbuilt requires cutting the frame rail and installing their drop bracket, this is part of the bolt on body drop kit. I measured 9" to be removed from the original rail and made an 18" reference mark prior to cutting. 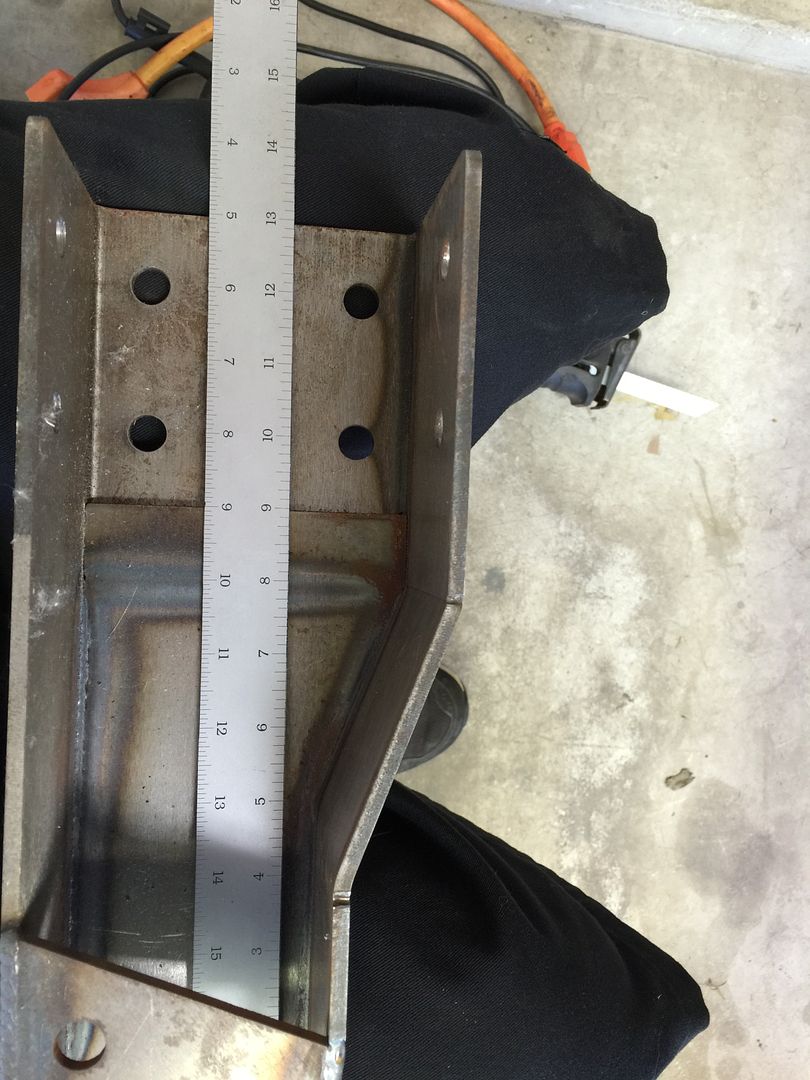 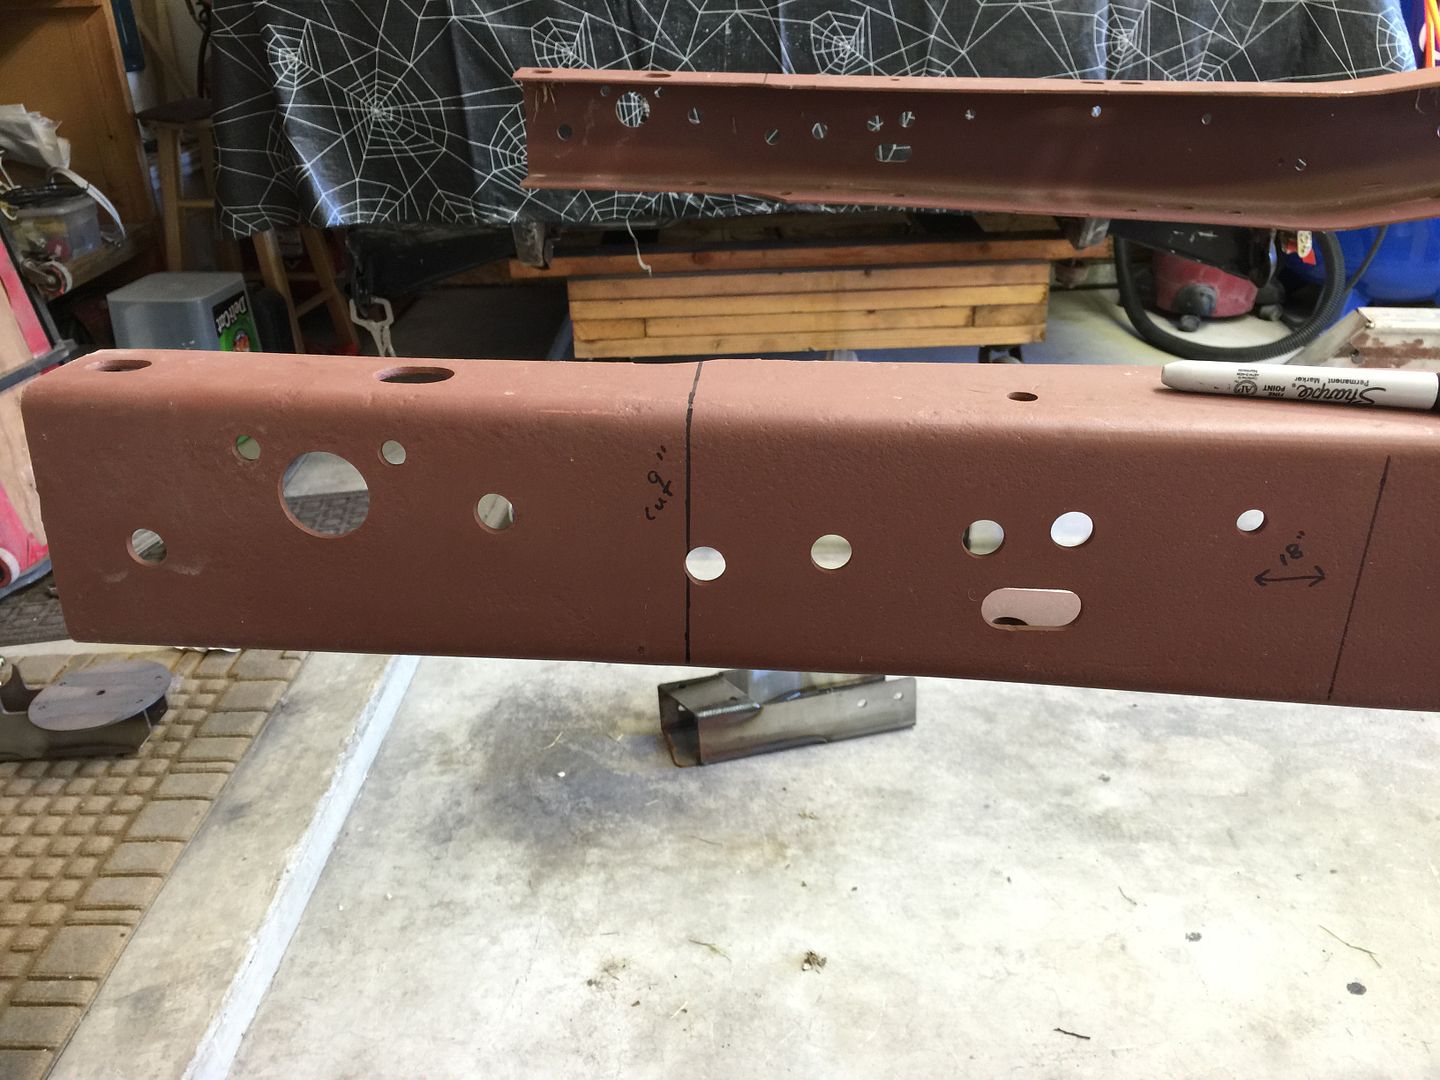 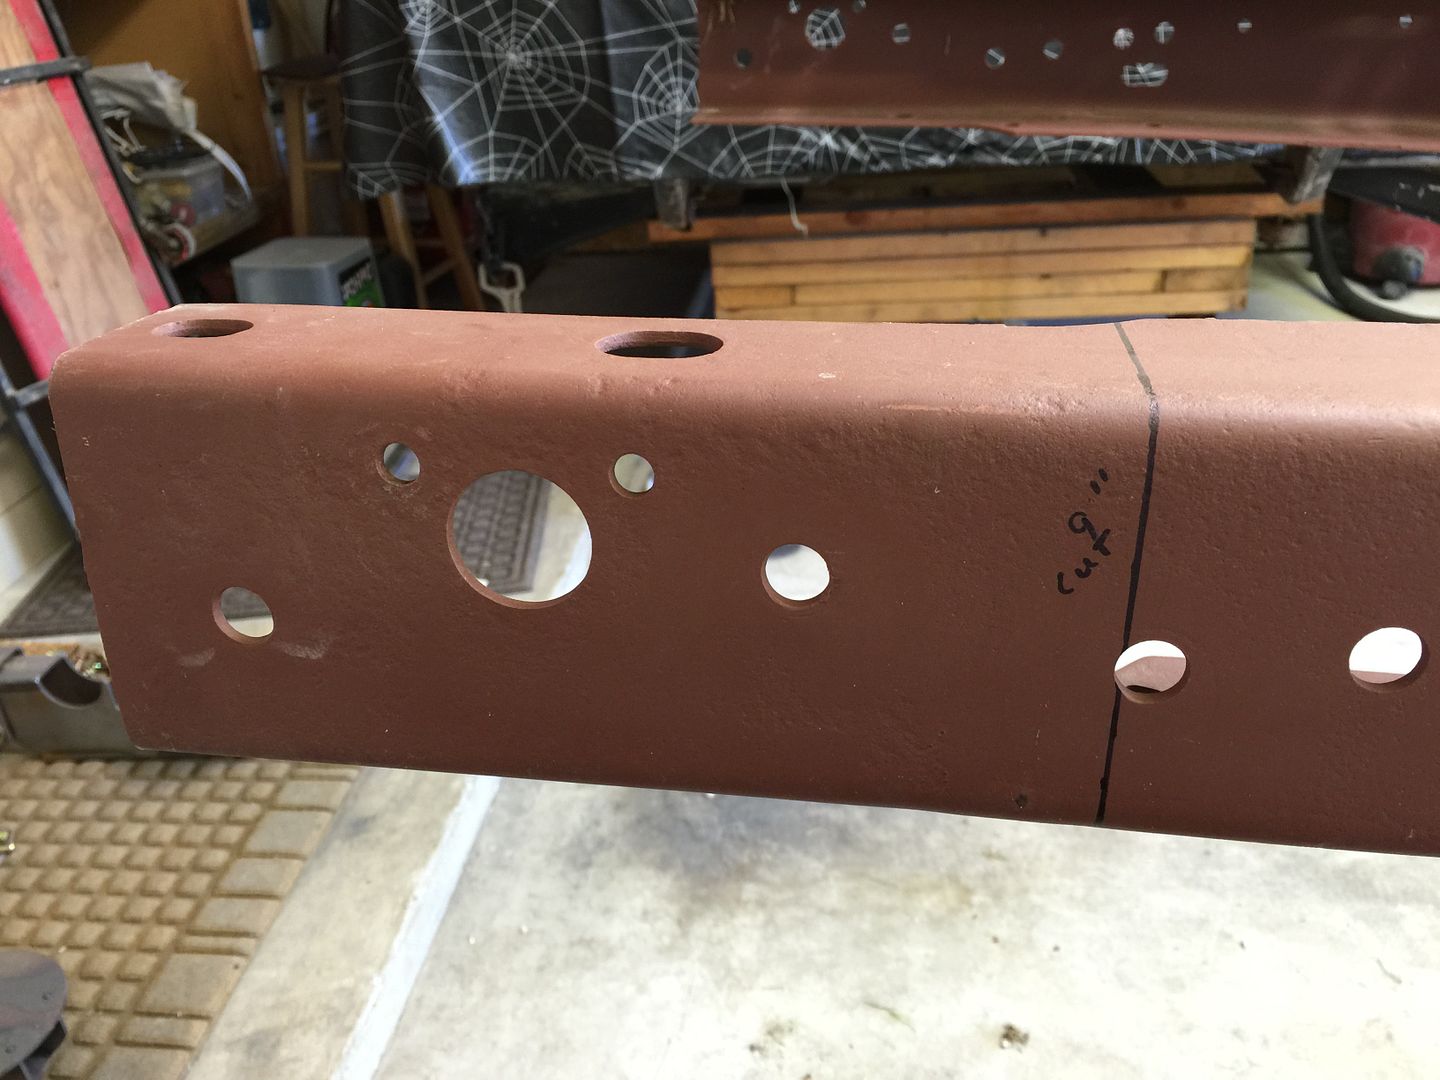 Short wheelbase frames probably wouldn't have this gap at the bottom of the bracket. I sliced the frame rail in the corner and bent the lower lip down to meet the bracket, then welded it back up. None of my pics turned out very good of that but I'll try to get one in a few days. I also decided to weld the brackets on instead of bolting them, I liked how Pinky6772 did his so I swiped his idea and hope my execution comes close to his. 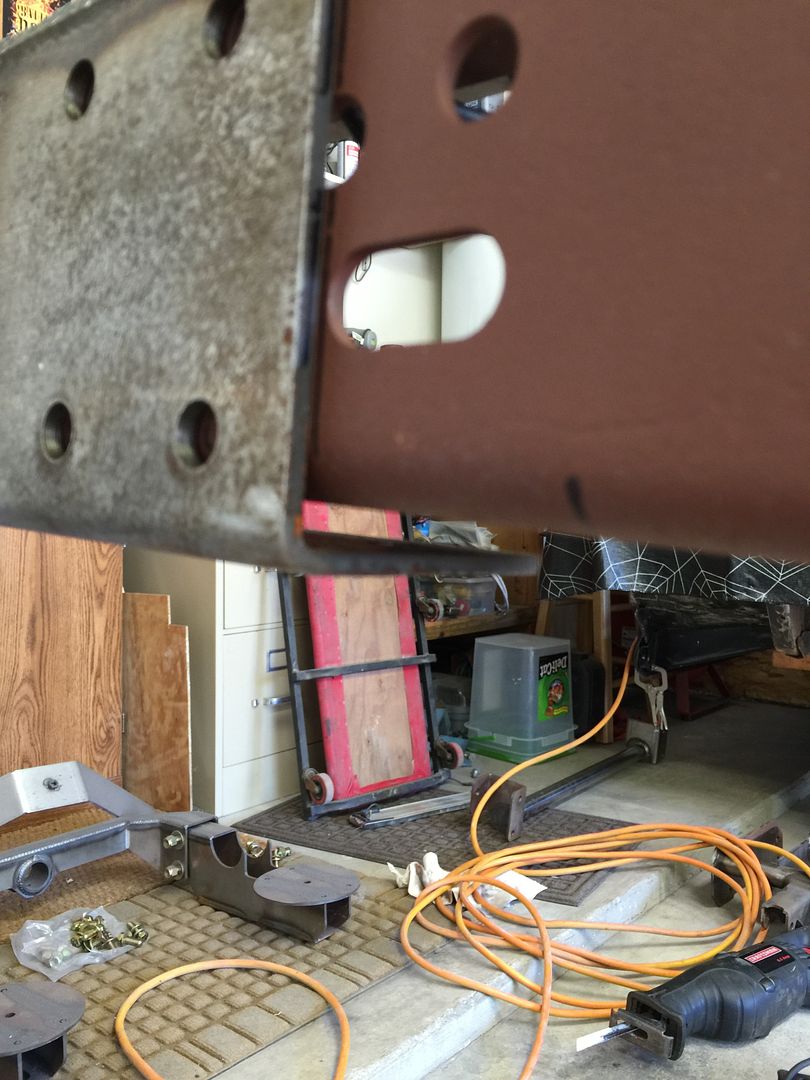 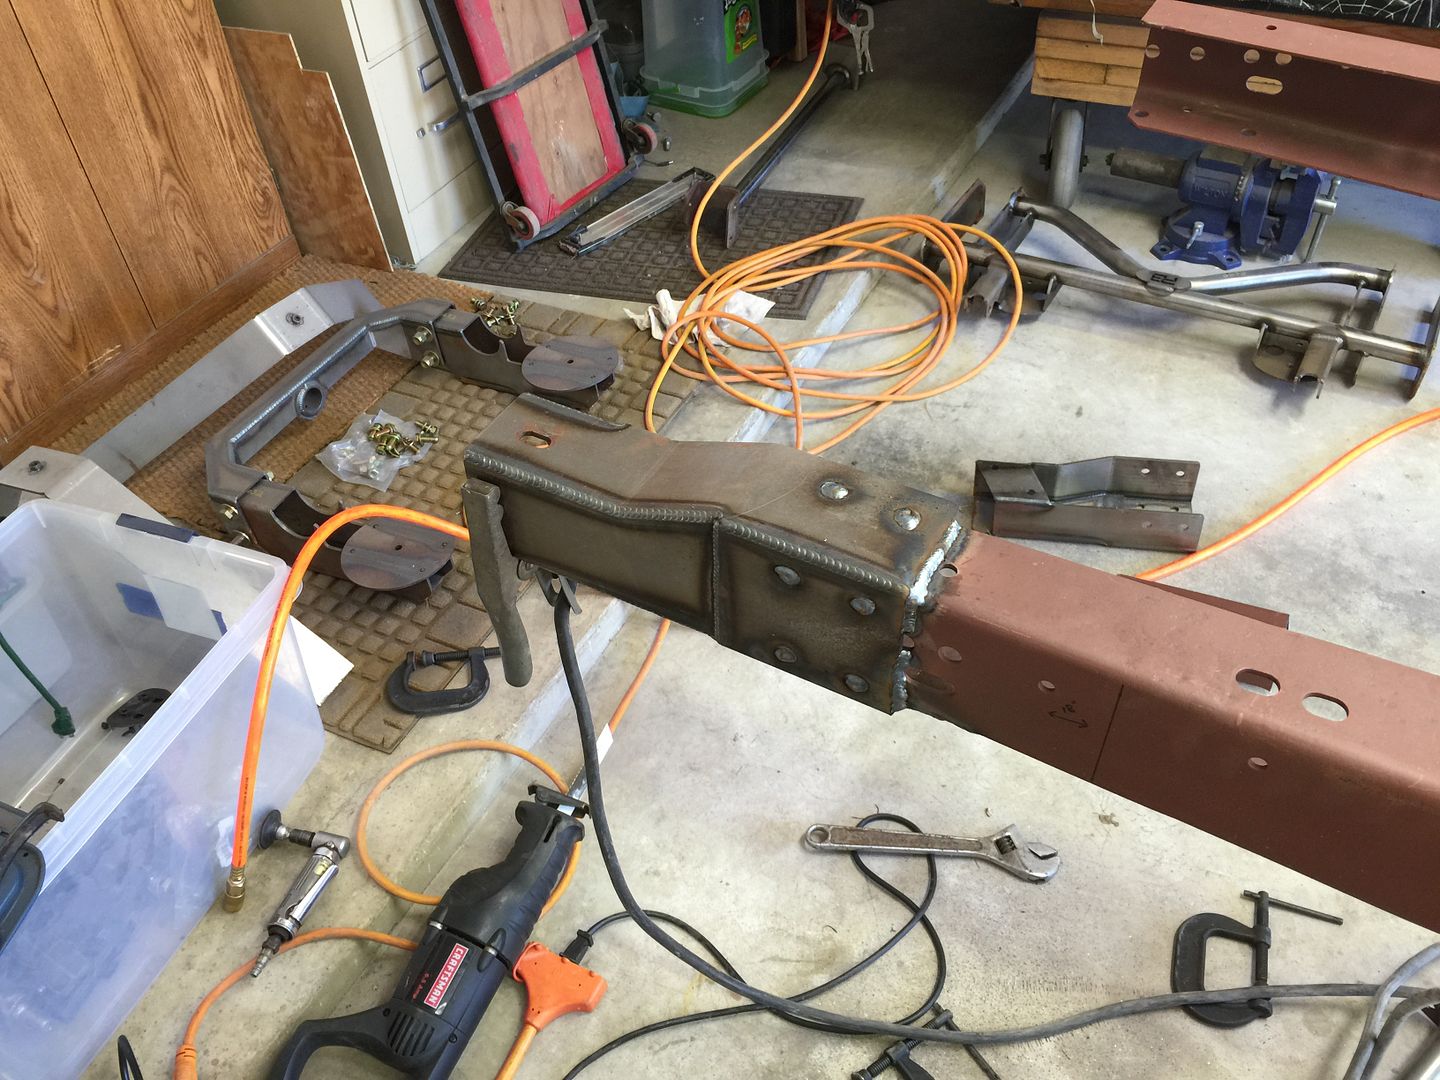 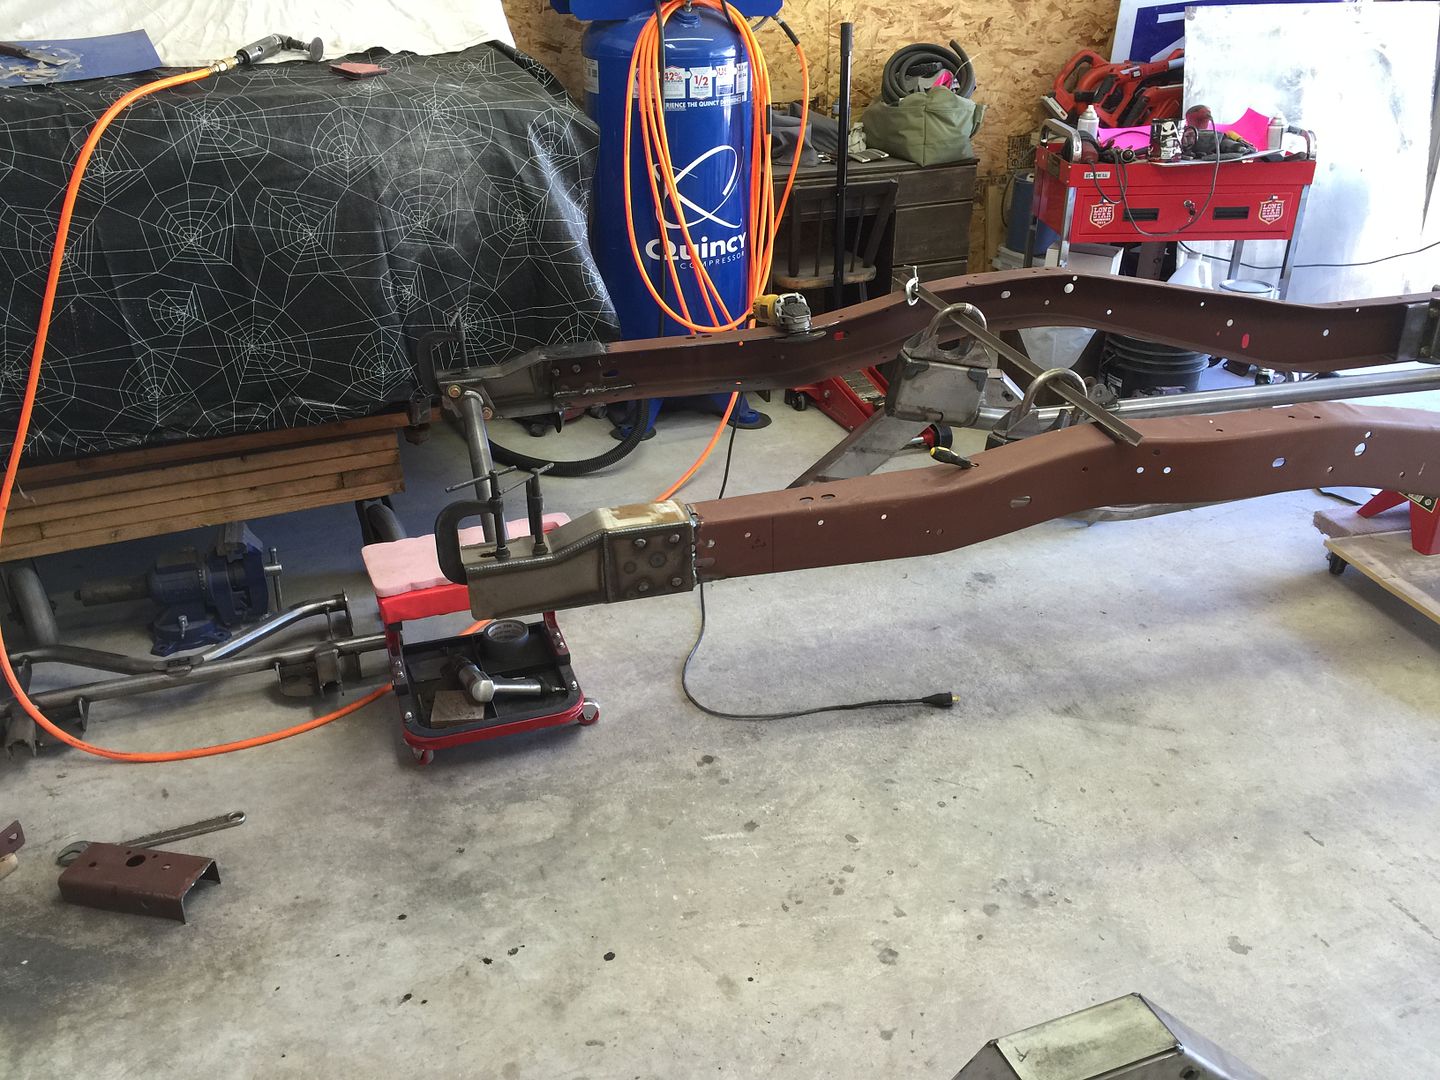 The inner frame structure is in with 2/3 of the frame brackets, the front brackets aren't lining up the way I had hoped for bolting them in so I've decided to weld them in and just bolt the IFS to them. I should be able to do away with a bunch of visible hardware going that route. Got the frame on rollers, haha I would have never thought of using furniture dollies and jackstands to move car parts but I've seen several members doing it on here and liked the idea. Plus I had dollies in the storage building. 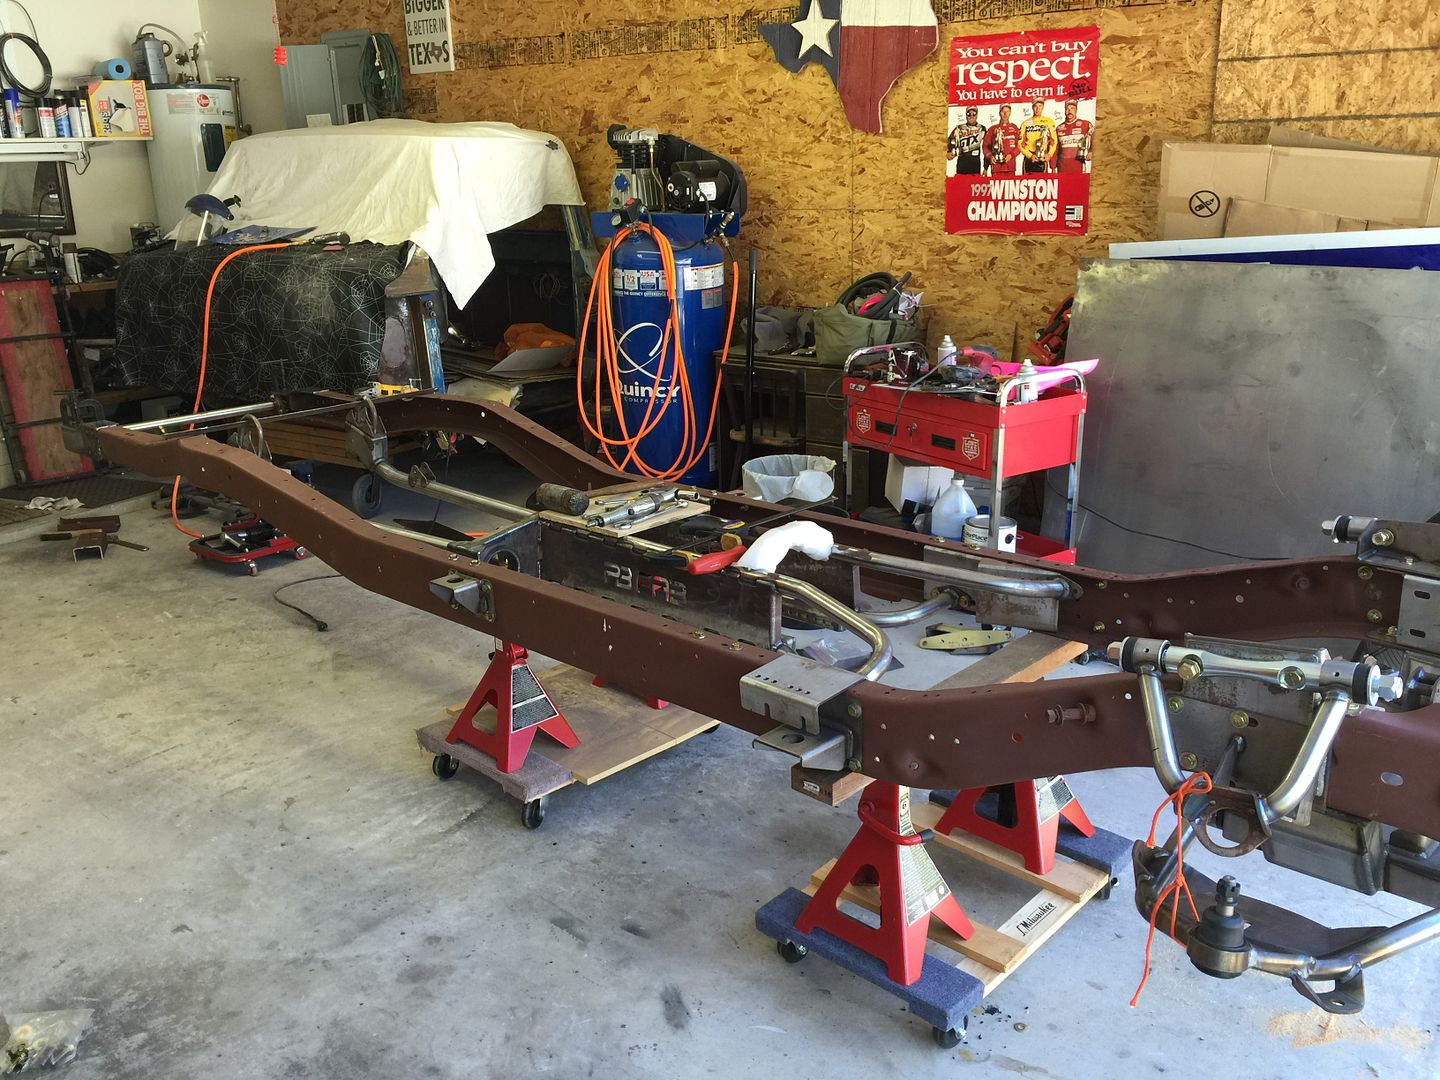 At least this way I can move it around now and sweep under it as I go. 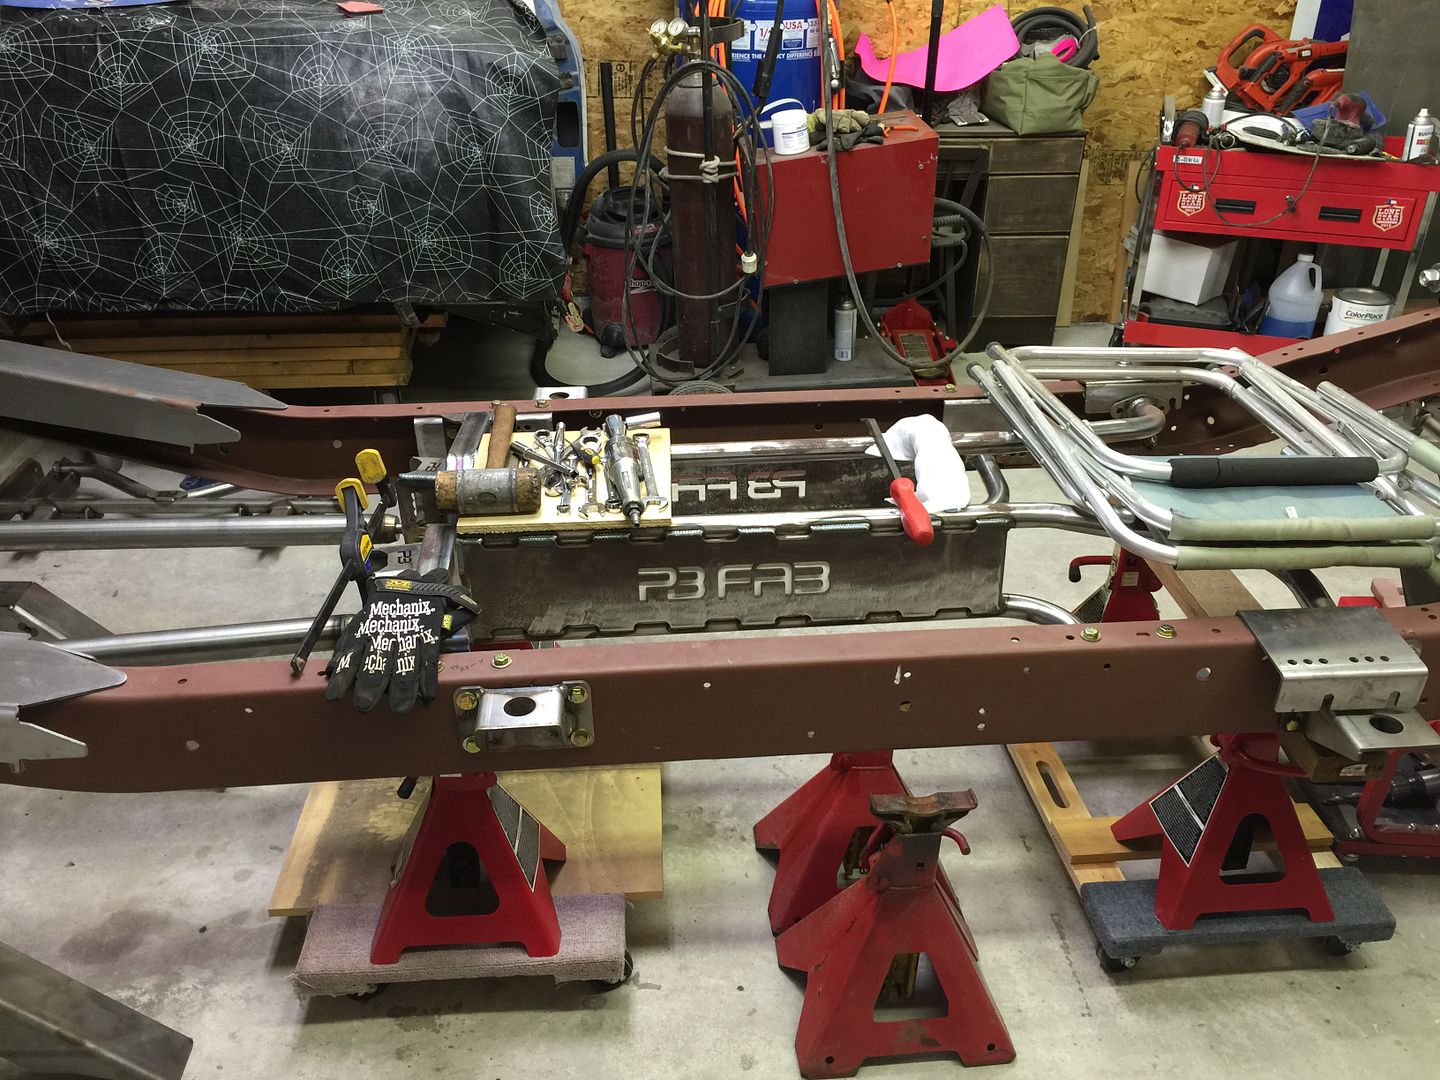
|
|
|

|
|
|
#99 |
|
Registered User
 Join Date: Oct 2012
Location: Burnet, Tx
Posts: 332
|
Re: Project: "ResuWrecktion" '71 Custom Deluxe C-10
Back on it after getting called out to sea for a few days.
Time to install the rack notches, marked my centerline and started chopping. 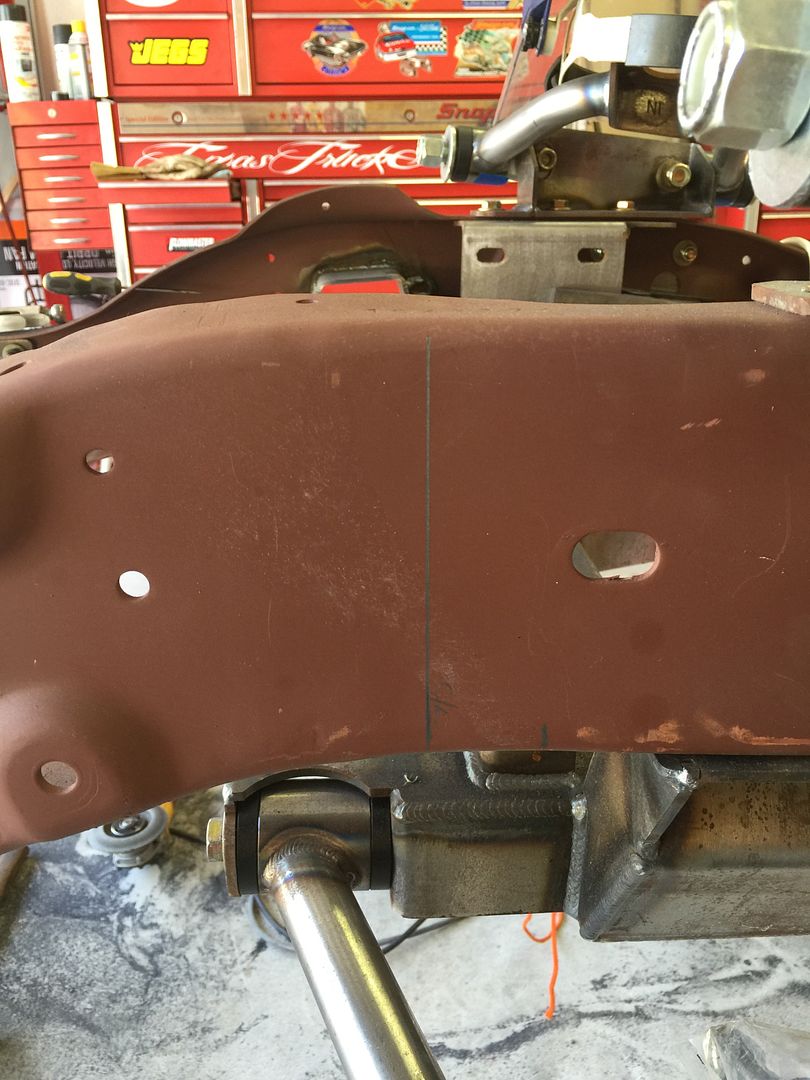 I flushed the edge of the notch with the frame rails and filled some holes and removed some factory bumps. 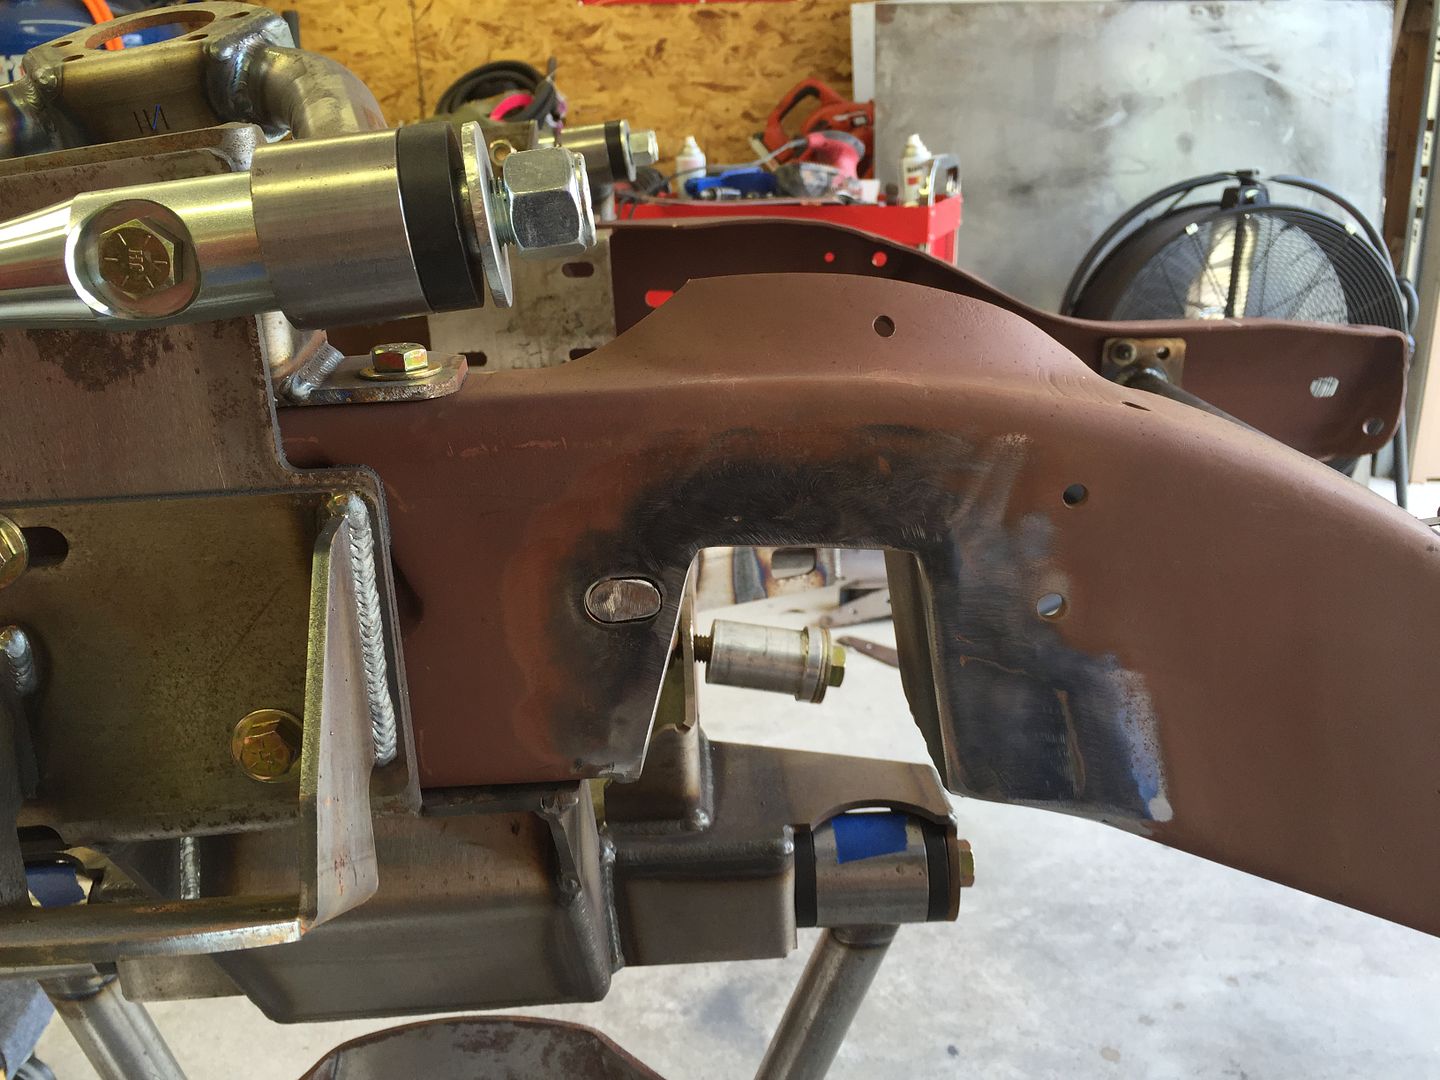 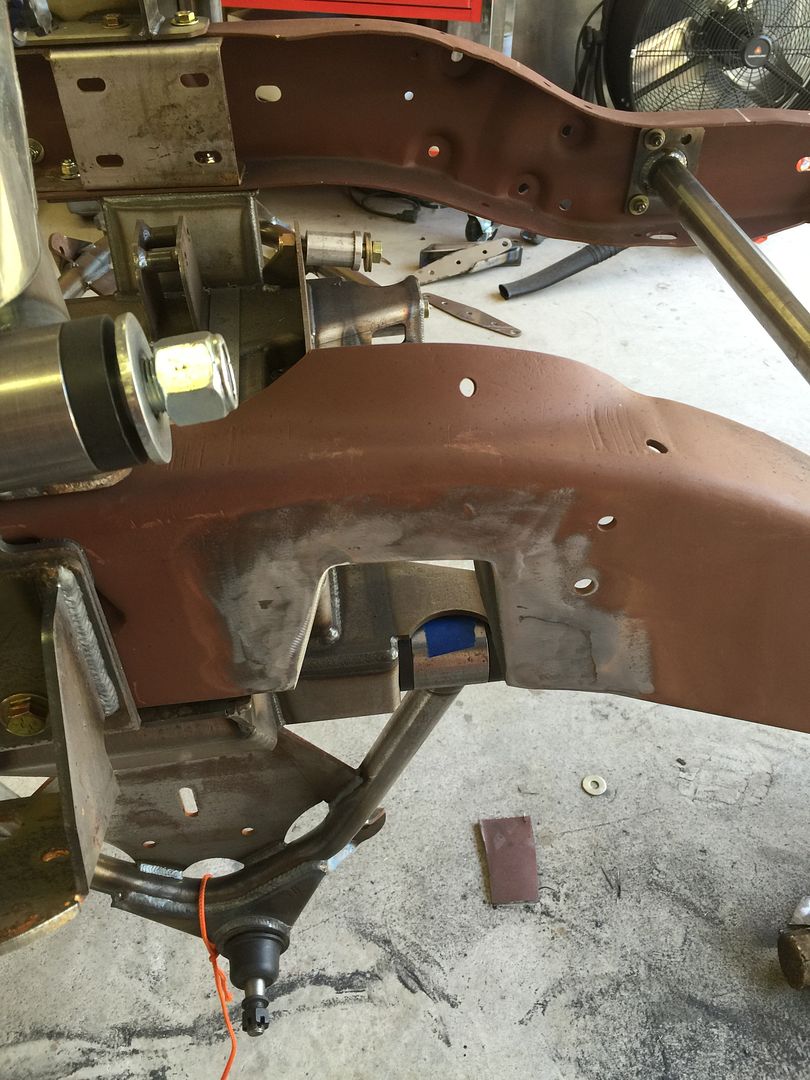 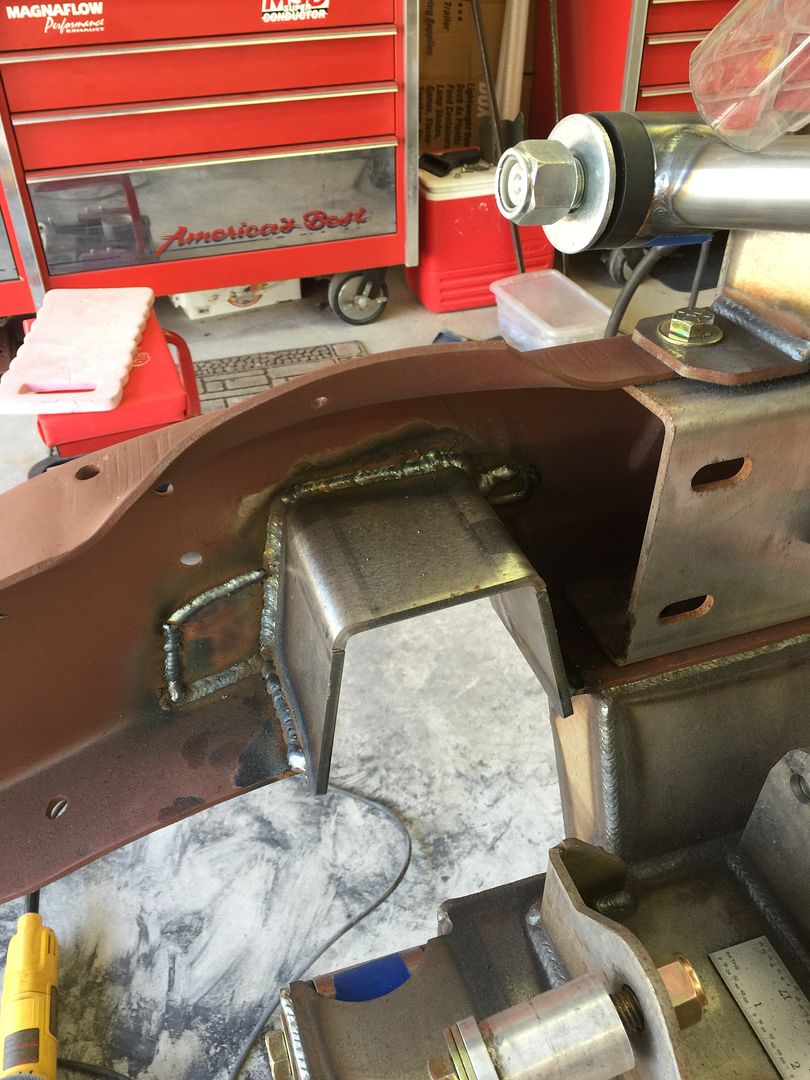 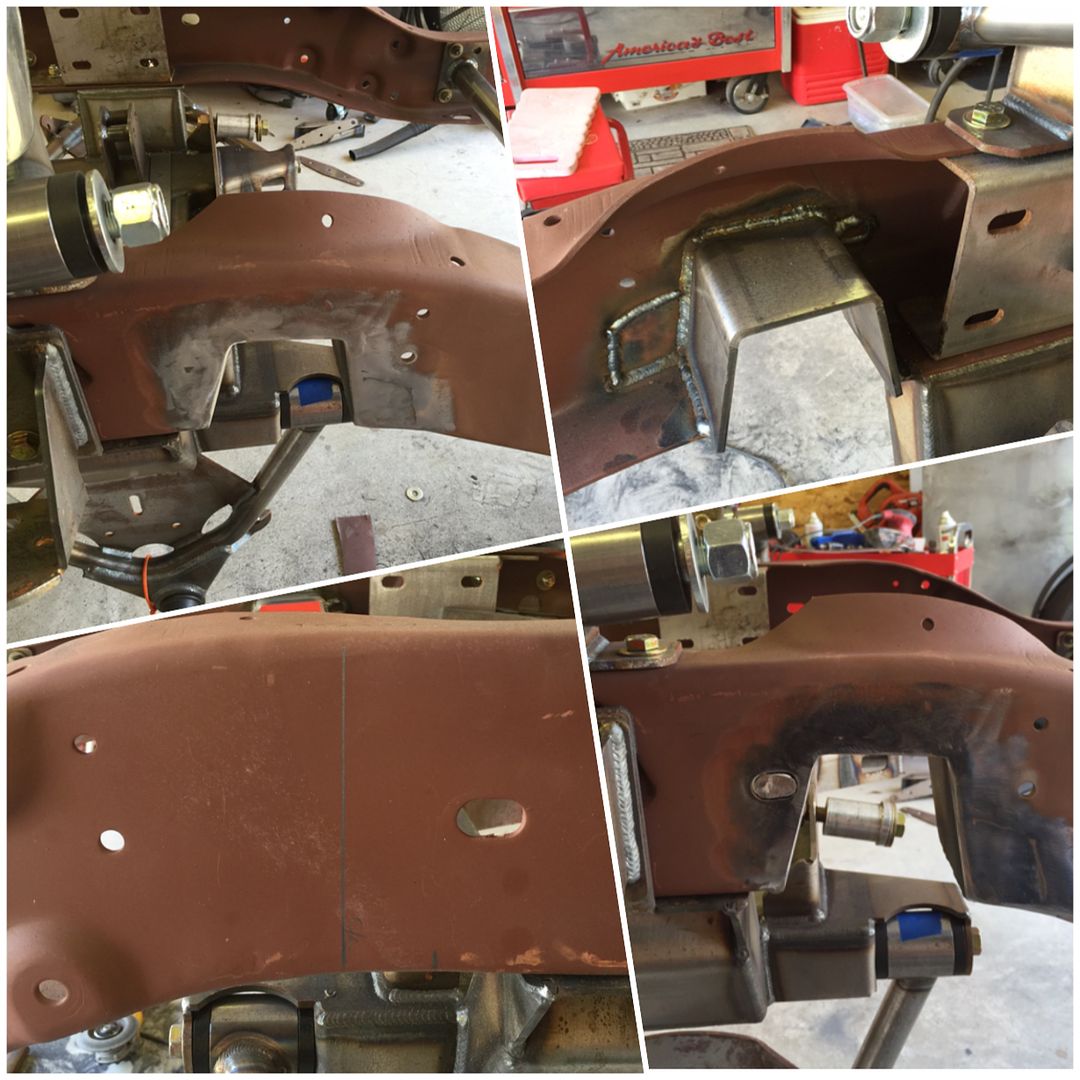 Dropped in the CPP rack and checked clearances. 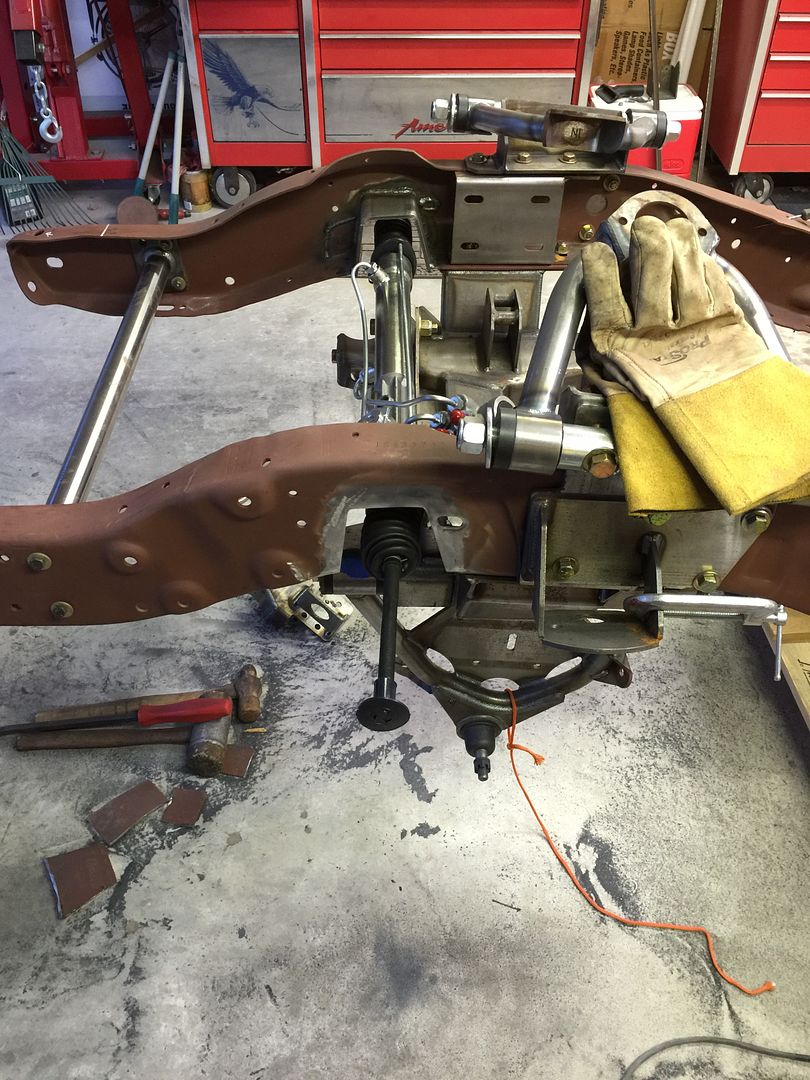 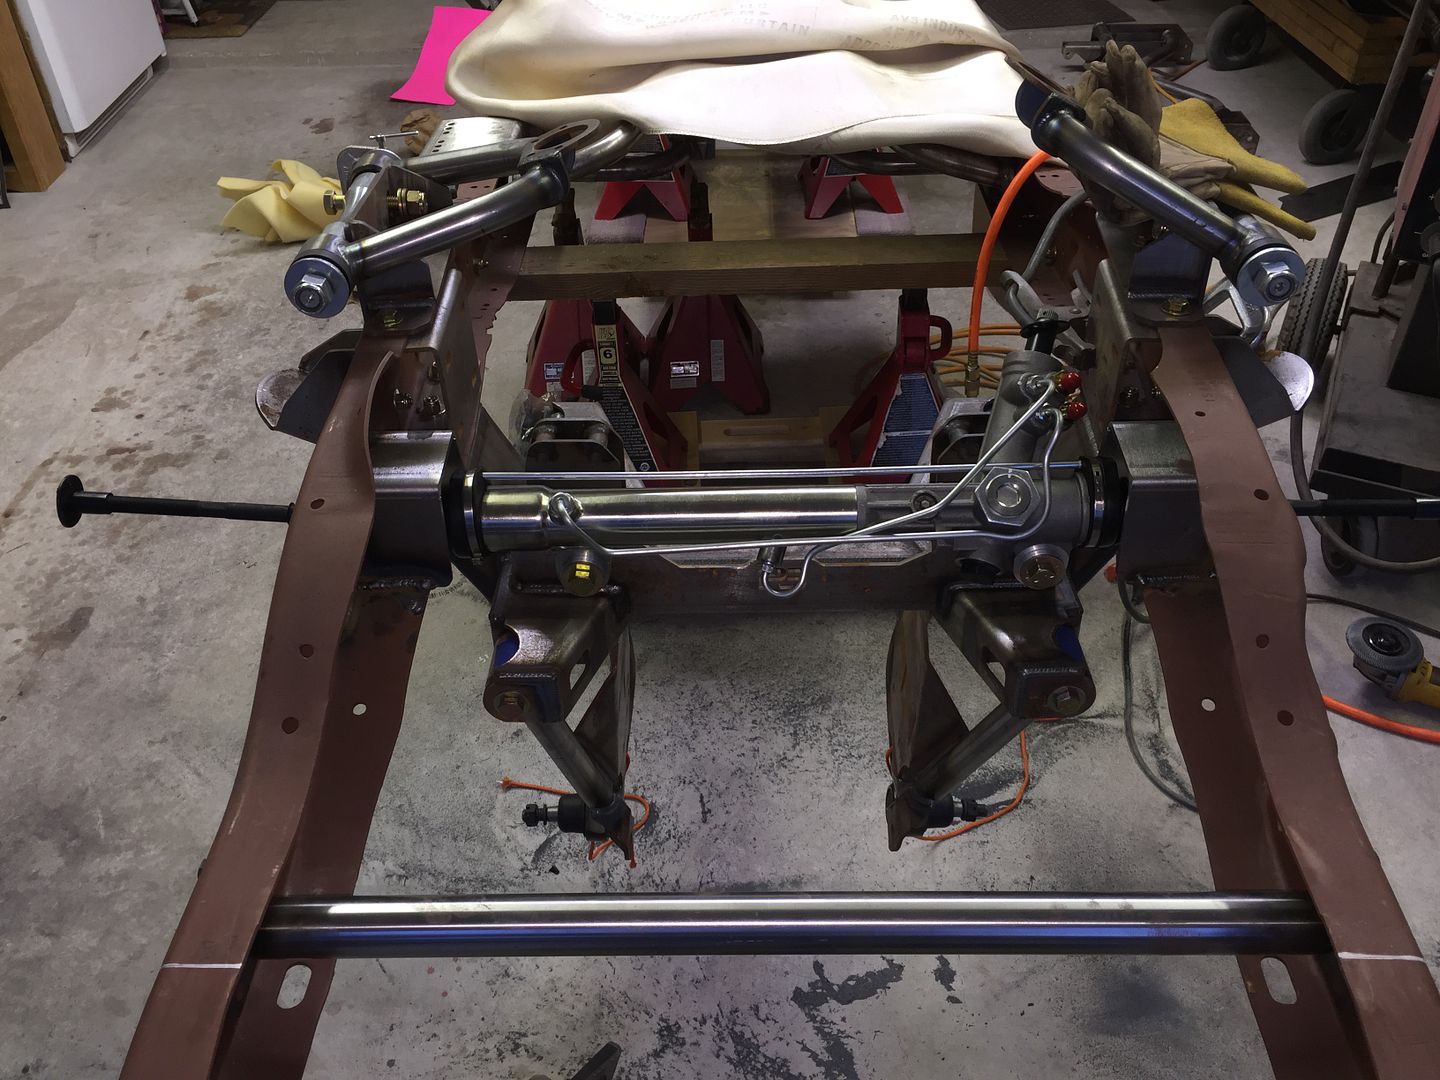 Installed the spindles, hubs and tie rod ends and began the process of cutting off the steering rods and roughing in the suspension geometry. 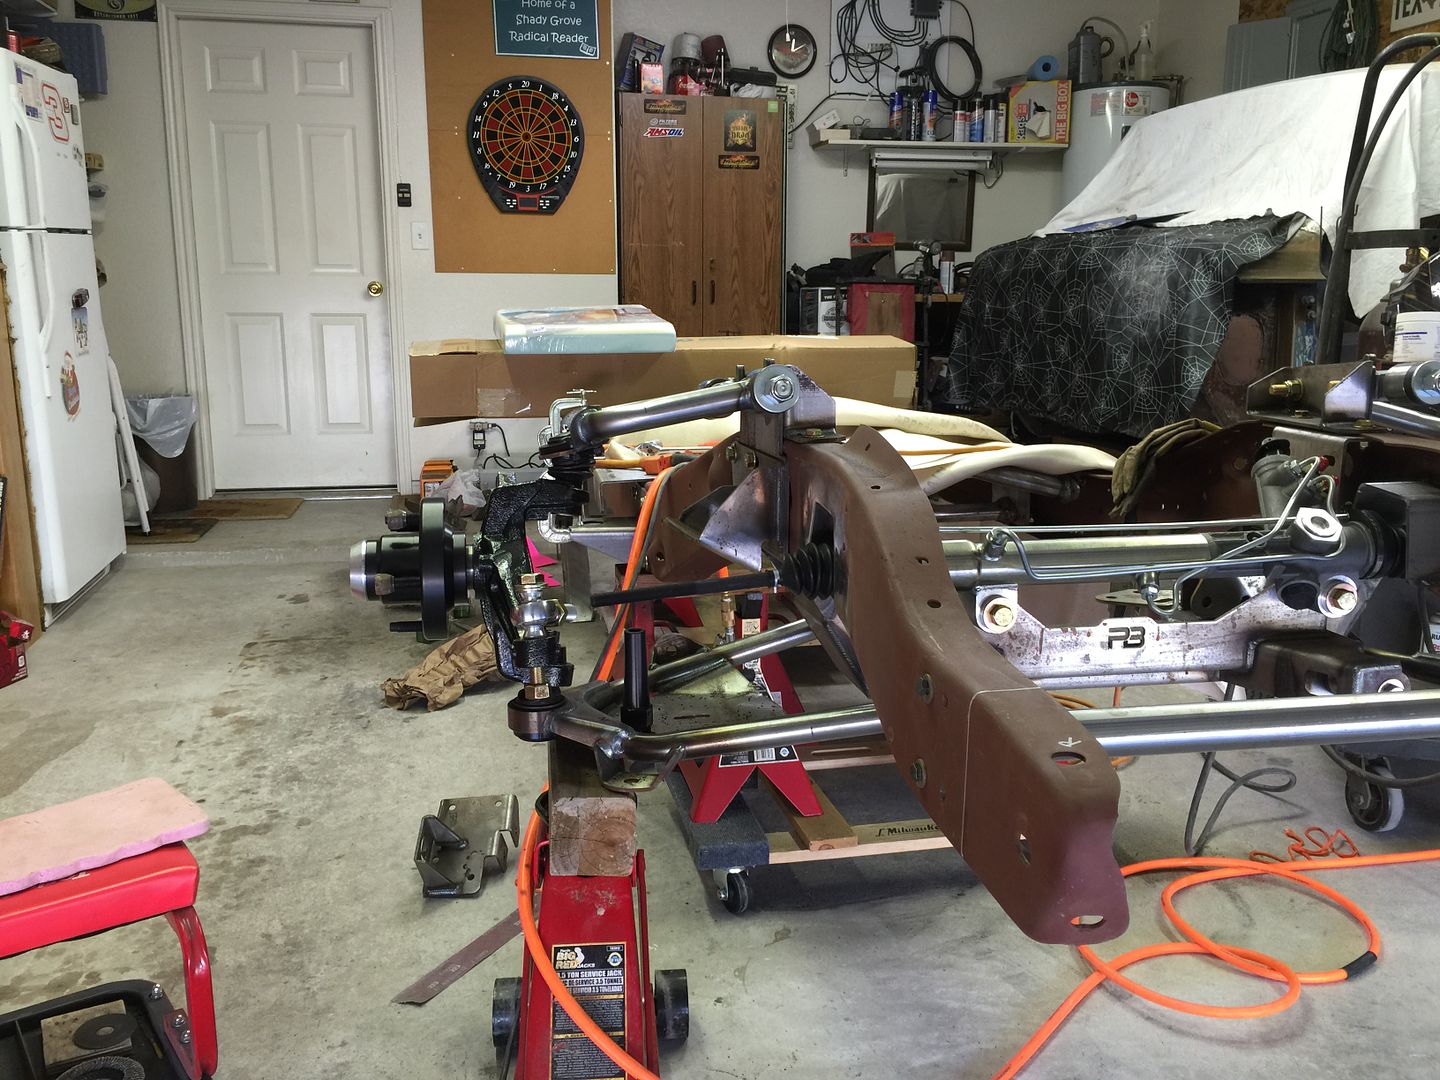 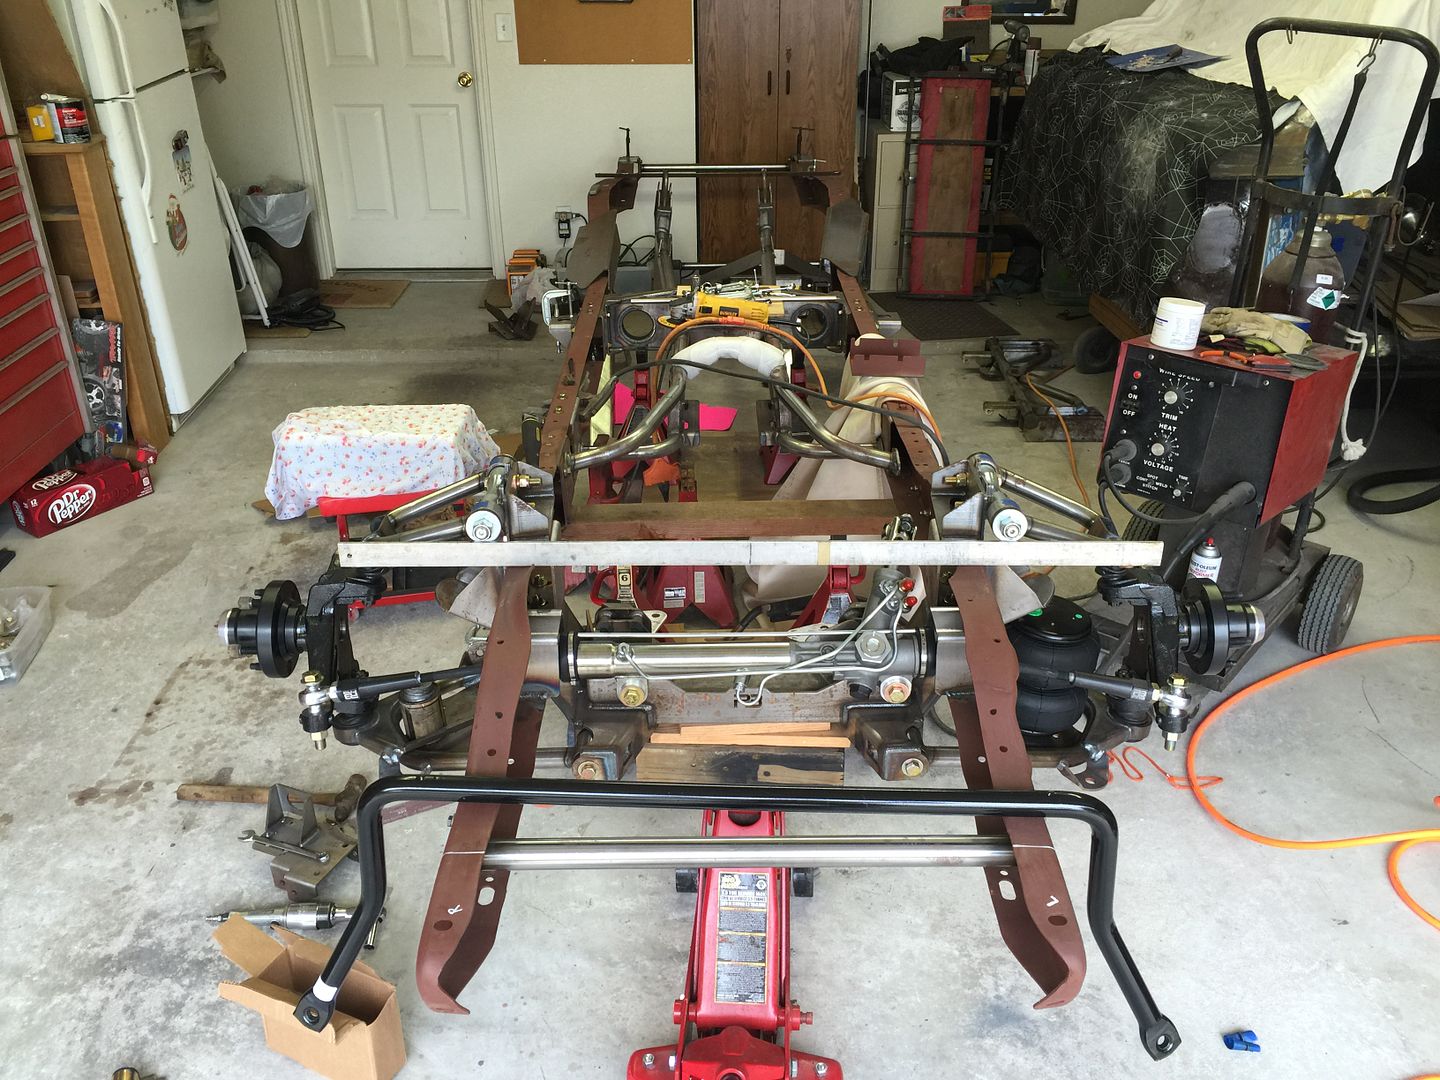 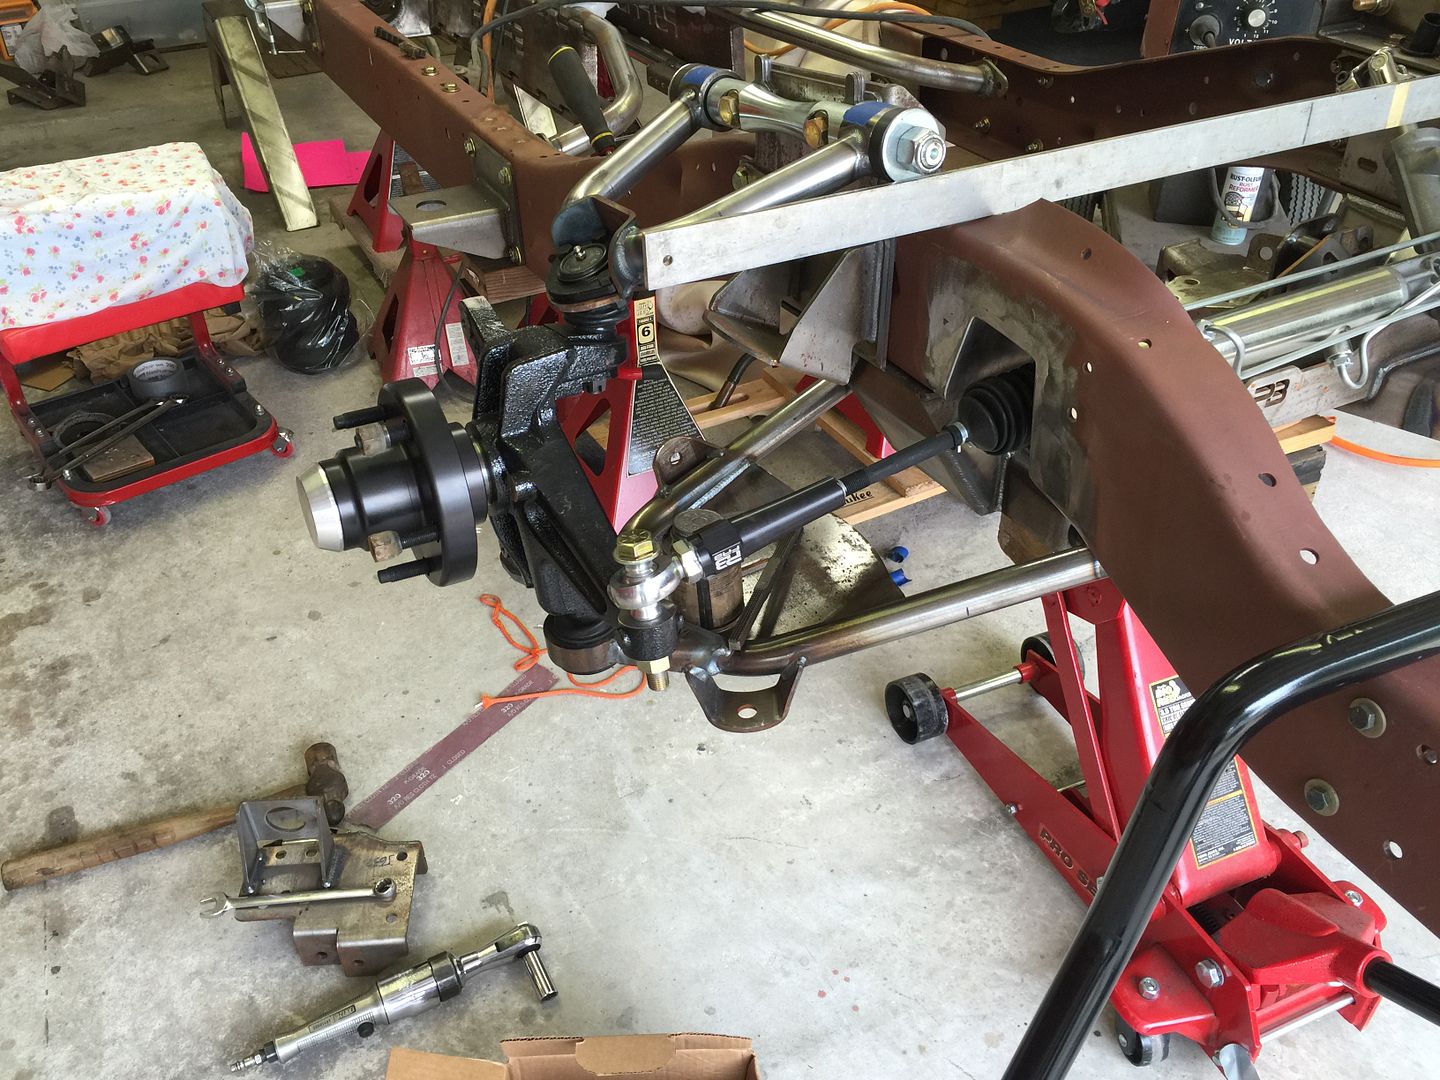 Worked on installing the core support drop mounts, measured and cut the frame horns and installed the mounts. I will leave the front portions loose for now, I will be running a front roll pan so I'm not sure how much modifying I will need to do up front yet. C-clamped in place so I don't lose them. 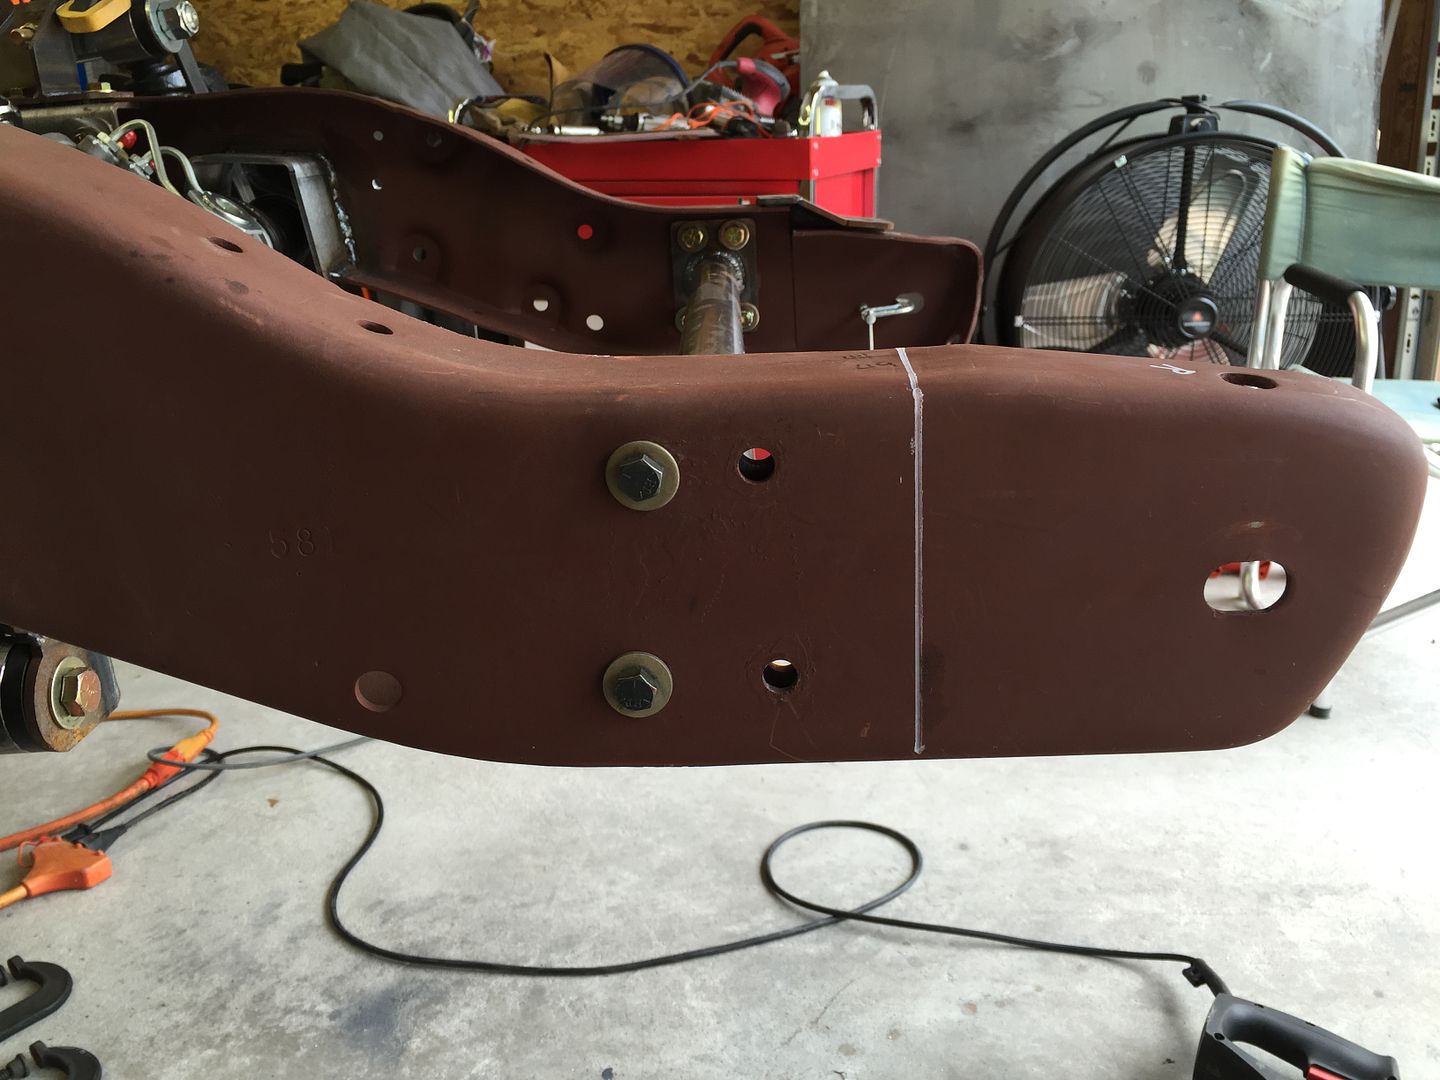 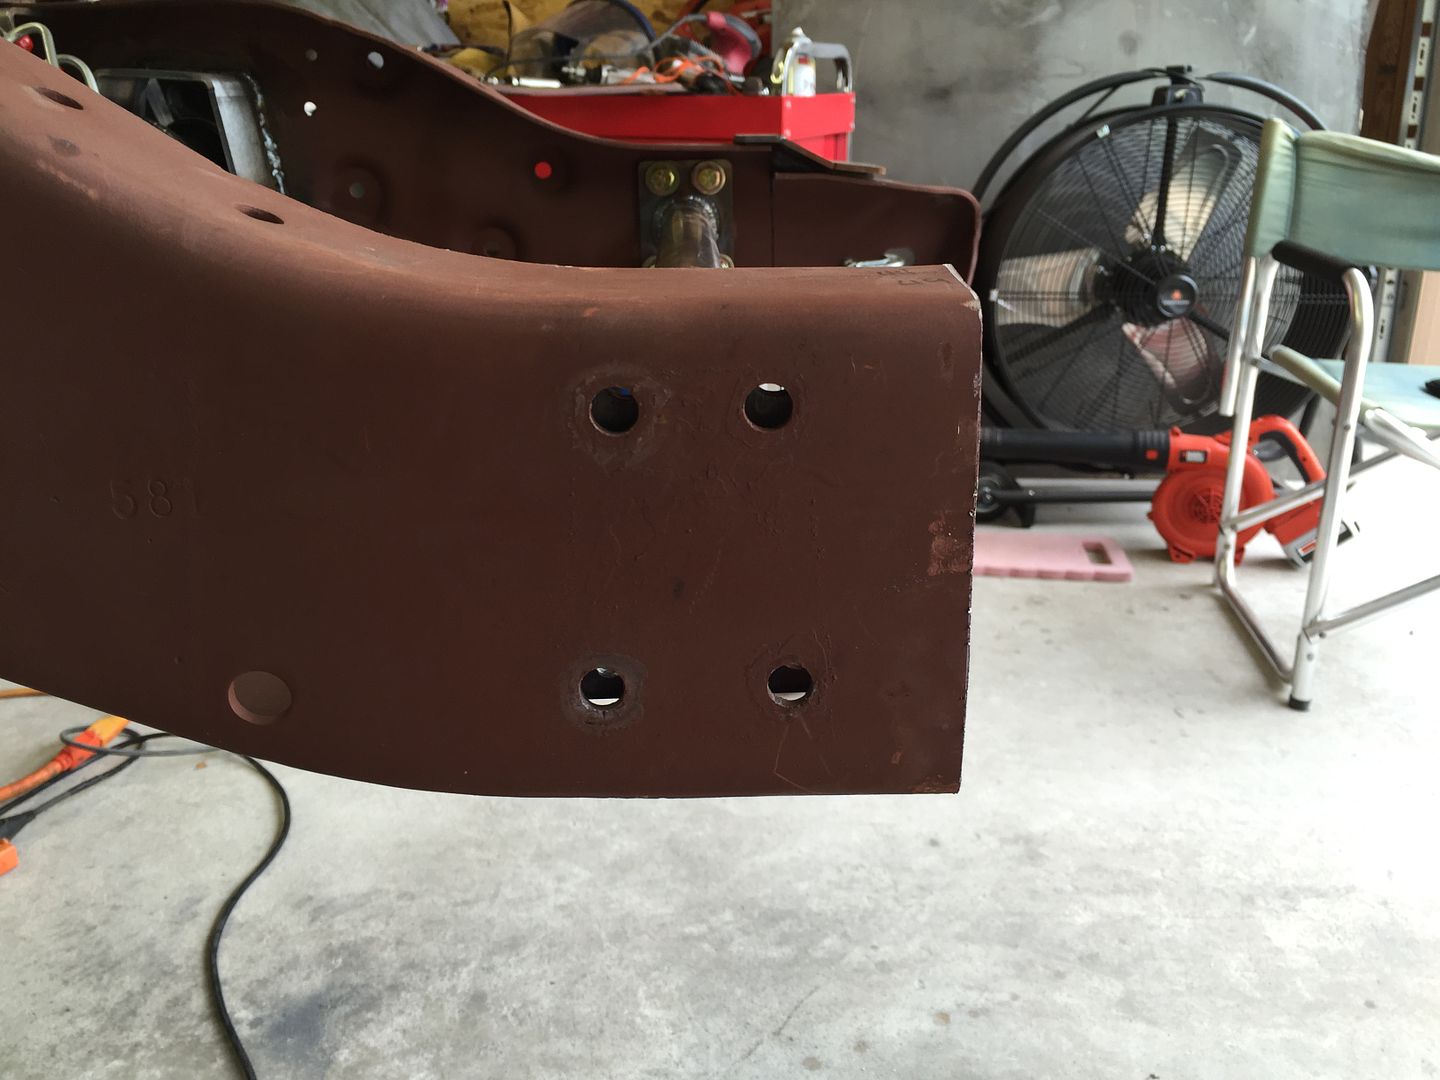 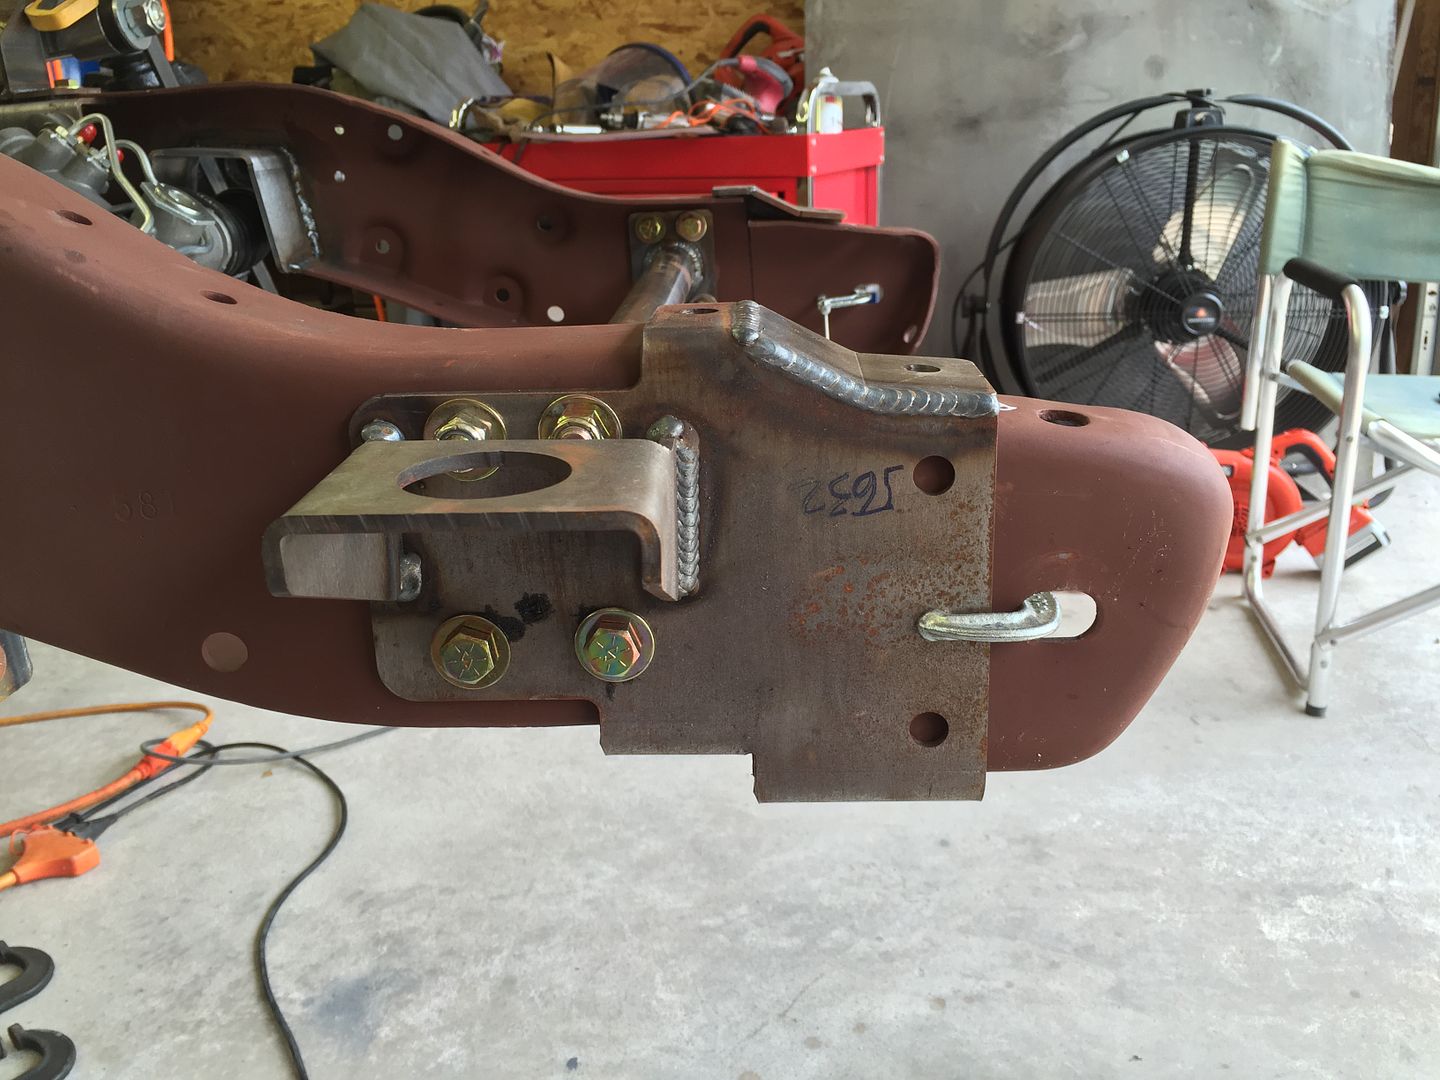 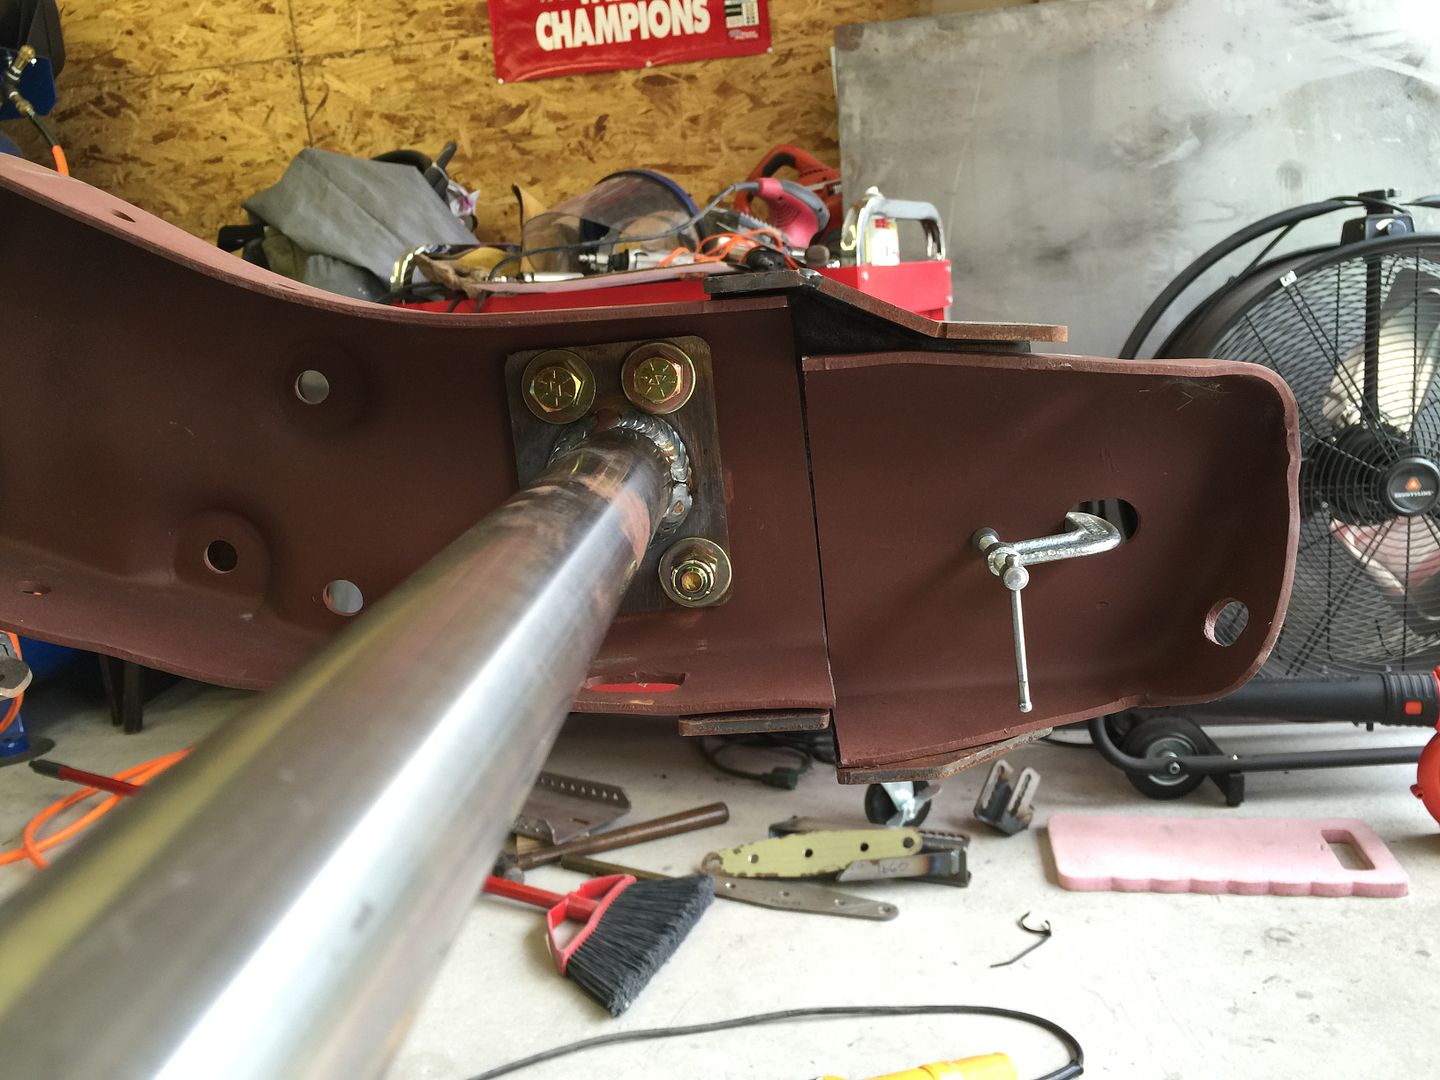 It's looking more like a chassis now, disregard the bar clamps on the control arms. I used them to keep the pressure off the air bags while I moved the frame around to sweep up. 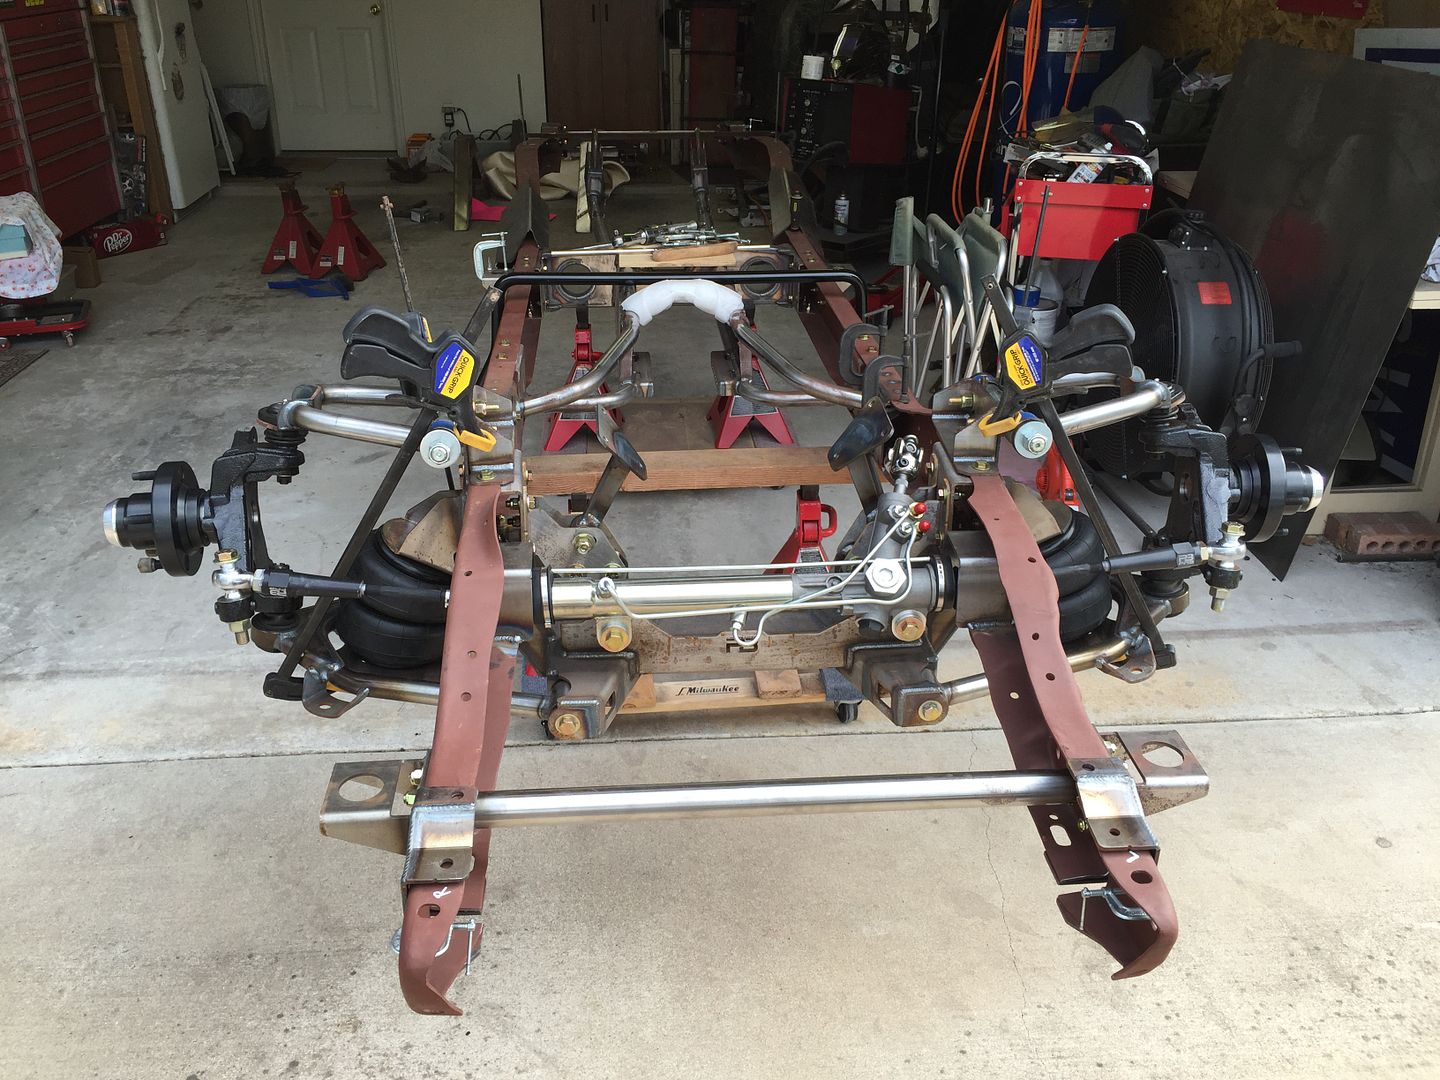 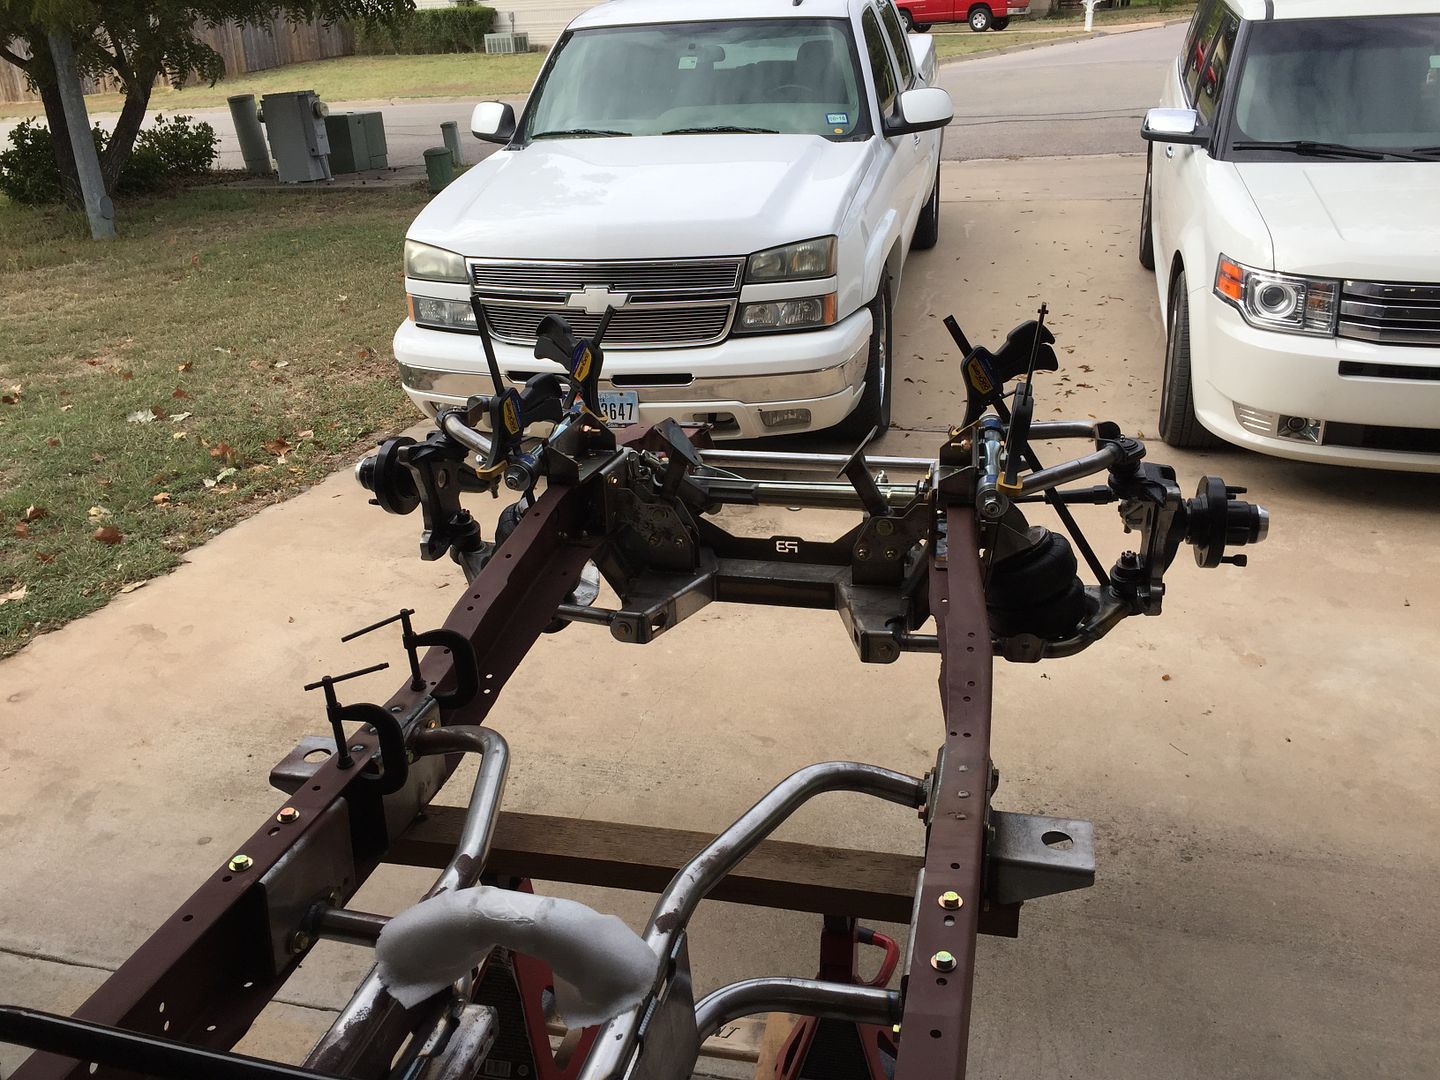 I have some small parts on order for little things. My sway bar came with 1 1/8" bushings and hardware so I have ordered 1 1/4" stuff. Also shock mounting studs are on order, them I can mount the shocks and shock relocators. Hopefully this weekend all that is done. |
|
|

|
|
|
#100 |
|
Registered User
Join Date: Jan 2015
Location: Ventura, CA
Posts: 818
|
Re: Project: "ResuWrecktion" '71 Custom Deluxe C-10
frame is great looking. Your work is top notch
__________________
..................... ____ .........________//__{\_____ ,,,,,,,/__(O)___//___/__(O)_/ 1970 C20 -_--_--_- ______ _--_--_- /___|__\____ -_--_-_ |_(0)|__|_(0)] 1972 K5 |
|
|

|
 |
| Bookmarks |
| Tags |
| az pro, baer, cpp, porterbuilt, porterbuilt 24x15 |
|
|