
|
|
|
 02-22-2013, 09:02 PM
|
#1 |
|
Registered User
Join Date: Aug 2010
Location: Hoofddorp, the Netherlands
Posts: 582
|
Re: 1969 Custom/10 clean up
Time for a major update: the eagle has landed!
first I cleaned of the frame part where the cabin sits and sprayed it with Hammerite. hard-as-nails stuff you can use for anything from autobodies to old rusted fences. no primer, no de-rusting. I don't think it's sold in the US? 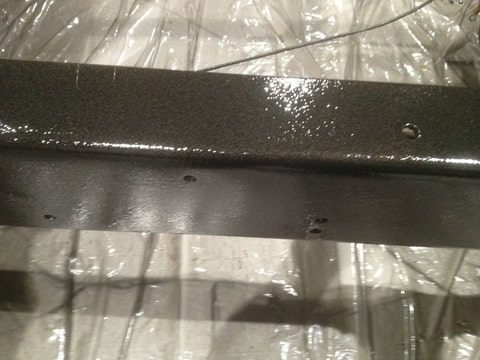 also did the backside of the bed 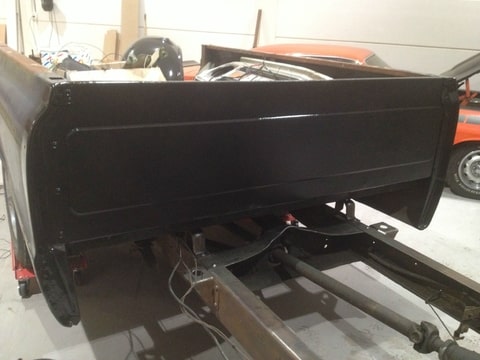 getting it set up under the winch 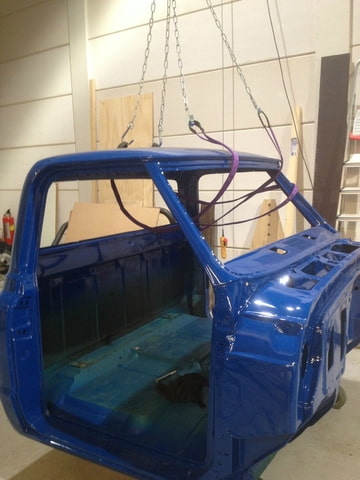 "Housten, we have lift off" 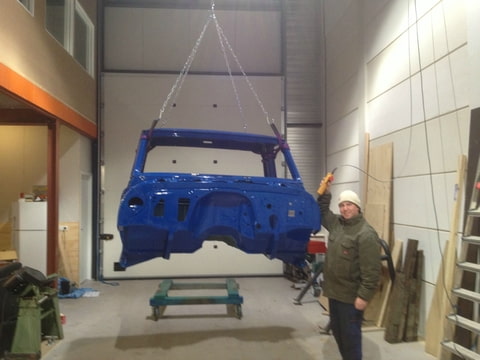 Like a glove  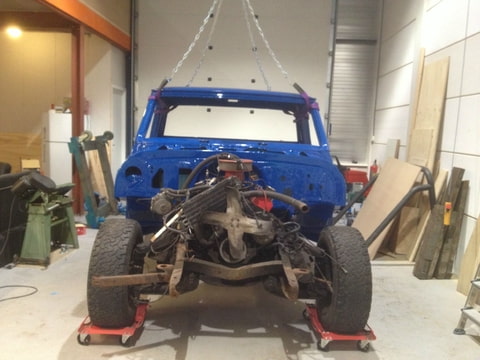 Instead of the standard 3/8" bolts I went for 3/4" because the fit nices in the bushing 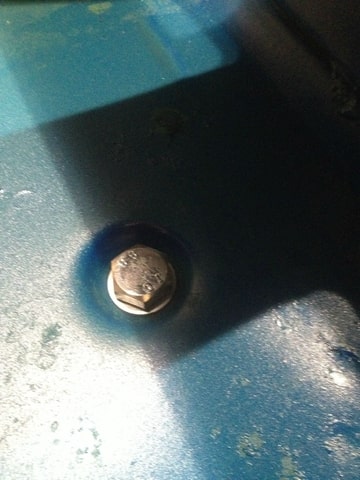 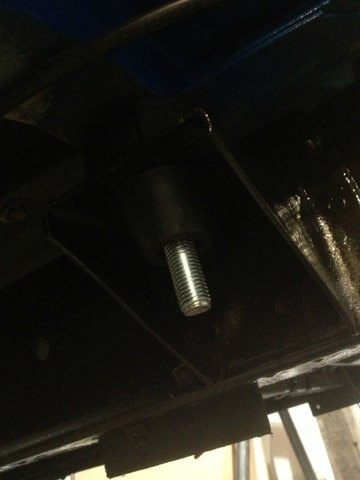 looking good  I think I'll paint the bed in this color.....hammerite  so what's the smartest do do next? the wiring I guess right?
__________________
Feedback is always welcome! projects: 1969 Chevy C10 1950 GMC 100 1958 Chevy C60 Viking ratrod |

|

|
|
02-23-2013, 08:07 PM
|
#2 | |
|
Registered User
 Join Date: Aug 2012
Location: Homosassa, Fl.
Posts: 2,965
|
Re: 1969 Custom/10 clean up
Quote:
|
|
|
|
|
|
02-24-2013, 10:02 AM
|
#3 | ||
|
Registered User
Join Date: Aug 2010
Location: Hoofddorp, the Netherlands
Posts: 582
|
Re: 1969 Custom/10 clean up
Quote:
nevermind, it's bolted down and I'll see how the rest lines up  Quote:
__________________
Feedback is always welcome! projects: 1969 Chevy C10 1950 GMC 100 1958 Chevy C60 Viking ratrod |
||
|
|
|
|
02-24-2013, 12:17 AM
|
#4 |
|
Registered User
Join Date: Jan 2013
Location: mexico city
Posts: 6
|
Re: 1969 Custom/10 clean up
its a wonderfull work man! i like it!!!
|
|
|
|
|
04-28-2013, 10:20 PM
|
#5 |
|
Registered User
Join Date: Apr 2012
Location: Denver, CO
Posts: 232
|
Re: 1969 Custom/10 clean up
My steering column has a spring on both top and bottom, the one at the steering wheel is only about 3/4" long if I remember right. That's 18mm or so to you! The weatherstrip does need to be glued, 3m weatherstrip adhesive is the best, available at most parts stores in the states, maybe you could find some easily too? As for the brakes someone else will need to chime in on that one.
__________________
Another 71 My truck In tank fuel pump how to LS factory gauges wiring how to-post 18 |
|
|
|
|
05-06-2013, 06:23 PM
|
#6 |
|
Registered User
Join Date: Aug 2010
Location: Hoofddorp, the Netherlands
Posts: 582
|
Re: 1969 Custom/10 clean up
I'm going to leave the brakelines as they are, if it gives me any trouble it's not that hard to re-do. thanks for confirming the spring part, now I just have to find one..
speaking of which, I've got some parts I'm looking for and perhaps someone can help me out (I'll also open up a seperate thread for this) I need, the E-brake unit (or is it called the park brake?) 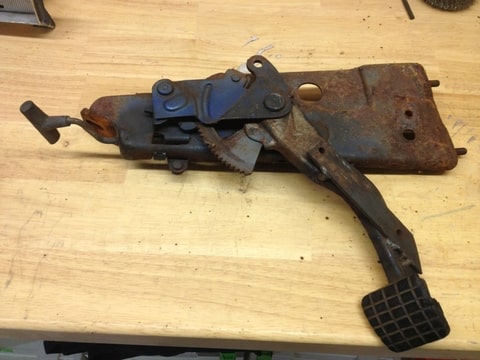 I need the heating adjustment sliding arm holder thingy 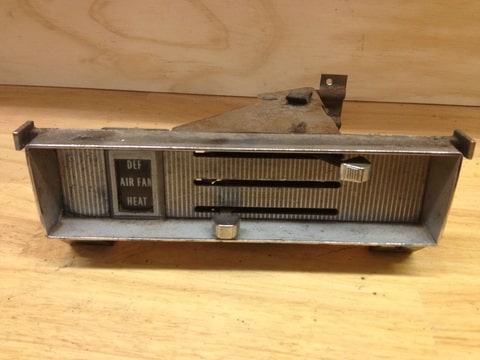 and I need the plug that goes on the ignition, preferable with some wires attached 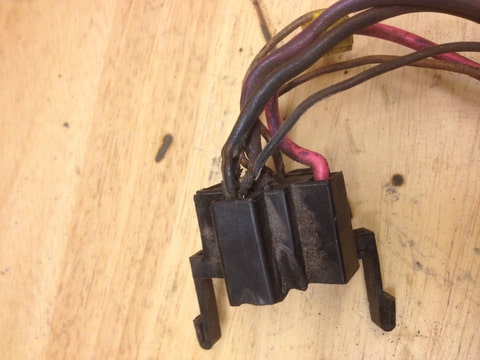
__________________
Feedback is always welcome! projects: 1969 Chevy C10 1950 GMC 100 1958 Chevy C60 Viking ratrod |
|
|
|
|
11-11-2013, 07:57 PM
|
#7 |
|
Registered User
Join Date: Aug 2010
Location: Hoofddorp, the Netherlands
Posts: 582
|
Re: 1969 Custom/10 clean up
So .. is about time for an update
In the summer I have done very little because of other things that required more attention , but we're back full on and I have a new deadline : April 2014 the heap must be able to drive . What did I do in the meantime? E -brake pedal mounted and connected, brake lines connected , filled and bled ... do not laugh when you see the pictures of the brake lines , it was my first time and its good for now, but I'll redo them some other time. it works and there is room enough .. to be sure I have bought a new brake force distribution , because the Original one was on was not suitable for power-assisted disc brakes . rear window mounted , I opted for the standard window that was in the new cab and not the slider because I just don't like it welded all the holes in my doors , primed and painted ... unfortunately we did rush spraying the doors...because you don't see it in the pictures , but they are not, how shall i put this..nice. Anyway, something more for a future winter project. here is my to do list : Make the columnshift work , because I have various brackets and rods but just doesn't line up the way I would like . In conjunction with this I think my steering column also is not 100% , but it will be in due course . Wiring up the truck. I bought a new tree EZ -wiring set and it is easy because on each cable it says what it is ... but then again .. I could use some help , so if anyone is good with wiring and wants a holiday in the Netherlands to help me ..mi casa su casa. Heater repair and installation , no idea what I 'm going to come across here. front Windshield mount, I just ordered it , and still have to pick it up. Doors are painted and now everything can go back together , window mechanism , door handles , rubbers etc etc. Mount the exhaust, there were two side pipes on it , not my taste, so I want one thick pipe to the back, or two regular sized pipes adjacent to the rear . Will buy some loose bends and pipes and then weld, weld and weld some more. upholstery, including the seat .. needs to be re-done..gosh I'm sure I'm leaving out a tone of stuff..but we'll start with this and then see what **** can hit the fan. What do I still have to buy .. Or new headlights or brackets / holder things if they can be bought seperatly?(where do you buy that ? ) Exhaust silencer ( s ) Steering column ? ( .. parts .. ? ) heater parts Soundproofing mat , door / floor / dashboard trim And probably tons of small junk that I forget to mention Here some pictures : the doors in color 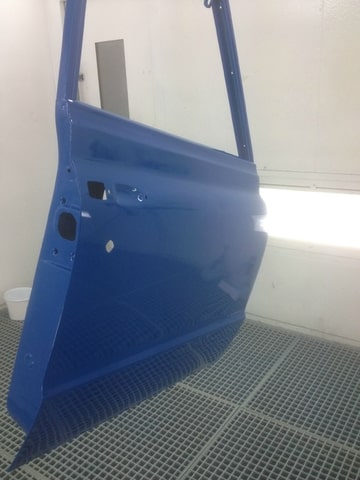 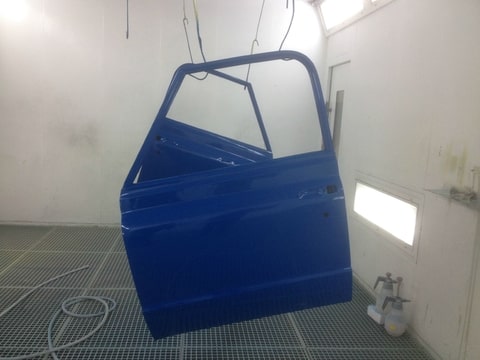 Wooden steeringwheel sand blasted 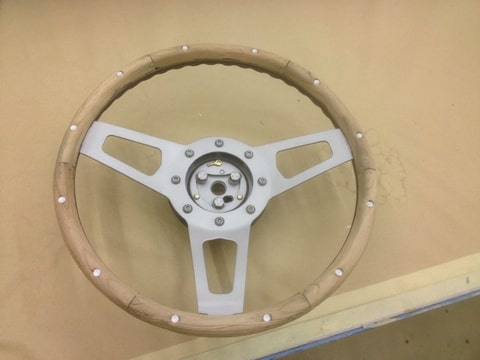 puzzle pieces , called gear selector rods and the like 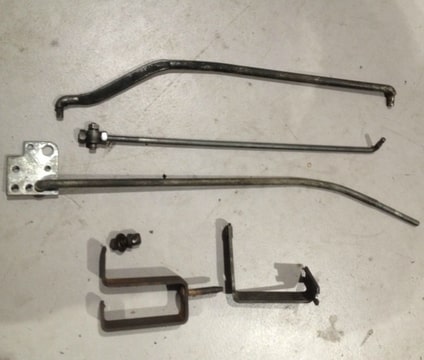 the better brake spaghetti work 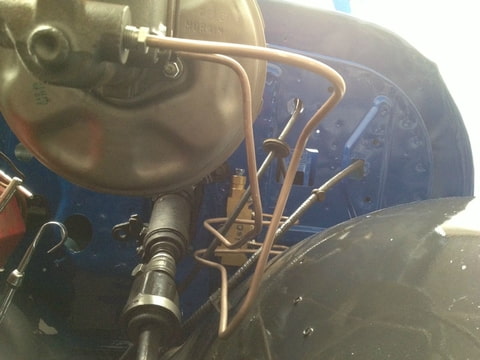 there is indeed a new resident in the workshop 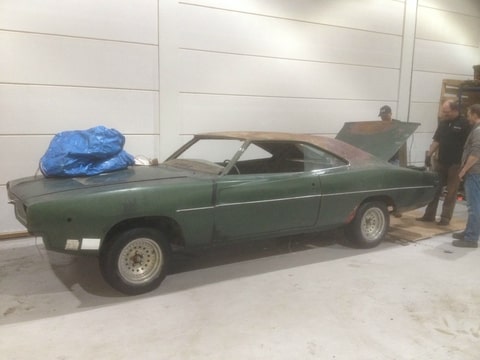
__________________
Feedback is always welcome! projects: 1969 Chevy C10 1950 GMC 100 1958 Chevy C60 Viking ratrod Last edited by Steve-W; 11-11-2013 at 08:08 PM. |
|
|
|
|
11-26-2013, 09:05 PM
|
#8 |
|
Registered User
Join Date: Aug 2010
Location: Hoofddorp, the Netherlands
Posts: 582
|
Re: 1969 Custom/10 clean up
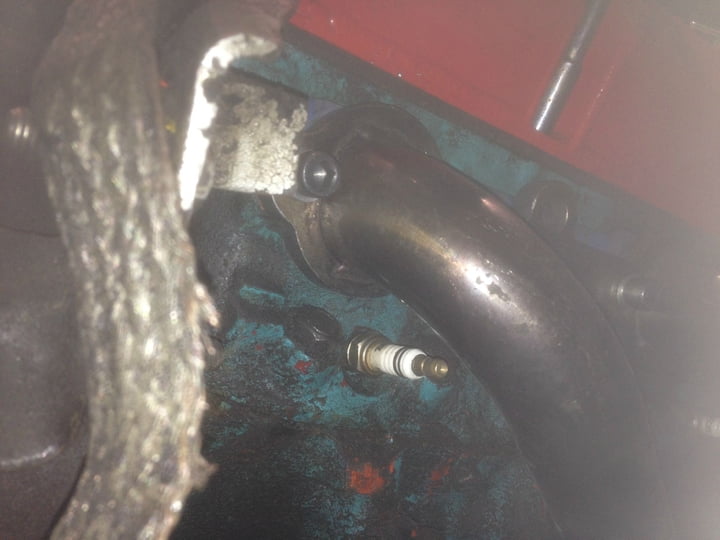
Since I started refurbishing the truck, the headers have been bugging me . while dismanteling I found out the headers where only bolted down with 5 of the 8 bolts per side . This was because the previous owner used standard 6-point bolts, so the bolts where rubbing against the tubes. By using allen bolts and grinding out some of the holes I could get the headers properly fitted . But I was still not a 100% happy because I had to grind off a small piece of my left upper control arm too to get it properly fitted and two spark plugs sit directly below the outlet pipe ( see photo )
 A while ago I bought some stock manifolds , but it wouldn’t fit because of a strange looking power steering hose .. which seemed much too long to me, but at that point I didn’t feel like I replacing it. So I kept the headers on. 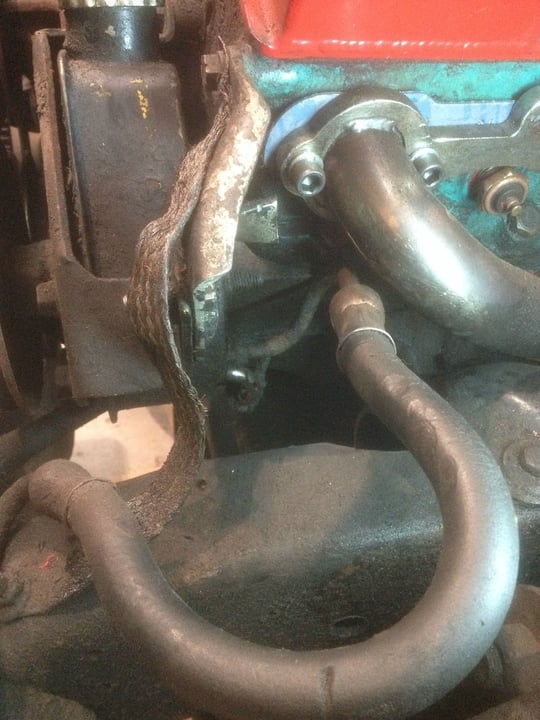 Last week I did decided to replace the hose and while I was at it, I thought I might as well mount the standard manifolds… Guess what? They still didn’t fit! The left sided hits the engine mount and then too many holes won’t lign up. 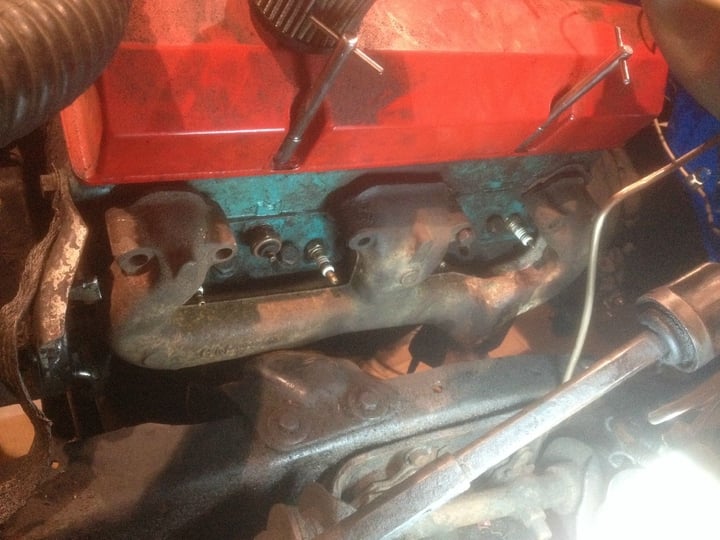 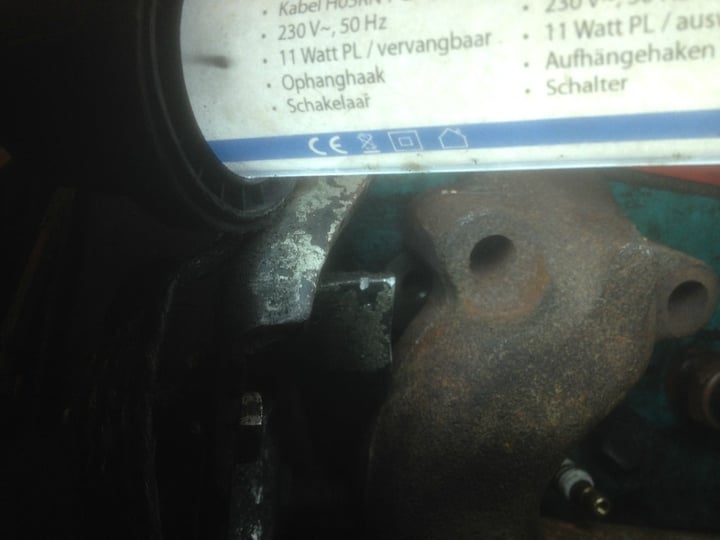 So now are the headers back on..again Then I got busy with my HEI ignition.. because I was smart enough to remove all the spark plug wires, assuming that there would be a mark on the distributor showing cylinder 1 .... But unfortunately I was wrong 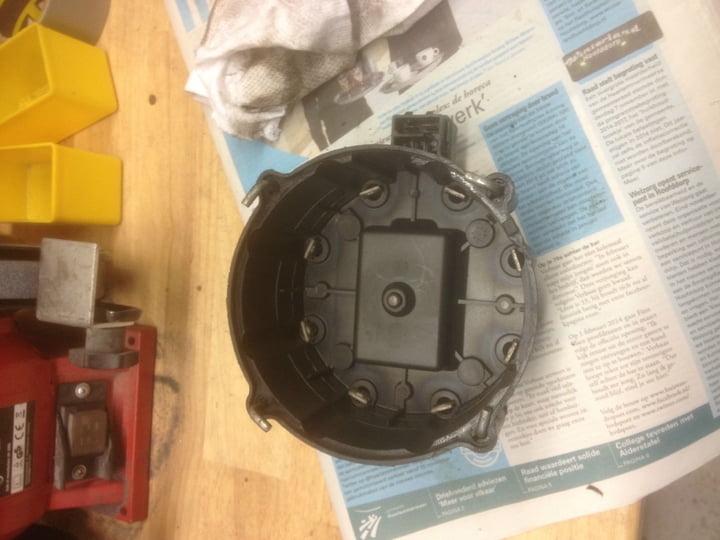 So after some contemplating I realized that if the engine is at TDC ( top dead center ) that the rotor of the ignition should point to the first spark plug .. TDC can be seen on the harmonic balancer when the line Lines up with the 0 degrees mark. 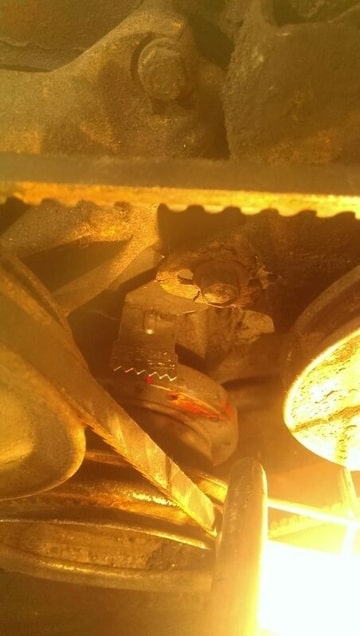 1 cylinder must then be on the compression stroke , this I checked by taking off the valve cover and checking whether the rockers of cylinder 1 both had clearance . the annoying part is that when the engine is at tdc , the rotor of the ignition is directly between two points on the distributor ... so I assume I take the one before the rotor as cylinder 1?, or after .. suggestions are welcome
__________________
Feedback is always welcome! projects: 1969 Chevy C10 1950 GMC 100 1958 Chevy C60 Viking ratrod |
|
|
|
|
11-27-2013, 12:02 PM
|
#9 | |
|
Registered User
Join Date: Apr 2012
Location: Denver, CO
Posts: 232
|
Re: 1969 Custom/10 clean up
Quote:
__________________
Another 71 My truck In tank fuel pump how to LS factory gauges wiring how to-post 18 |
|
|
|
|
|
11-27-2013, 12:35 AM
|
#10 | |
|
Registered User
Join Date: Jul 2011
Location: Des Moines, Iowa
Posts: 3,016
|
Re: 1969 Custom/10 clean up
Quote:
I didn't sandblast mine though, just sanded down the wood. Any idea what brand/model? I've enjoyed reading your build thread. I like seeing how it's done overseas.  Keep up the good work. Keep up the good work.Mine 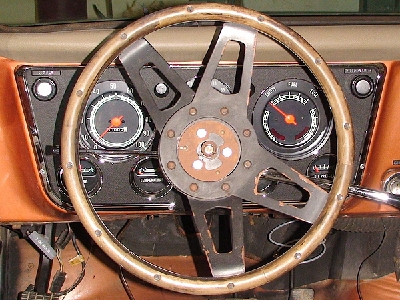
__________________
project: "my happy mess" |
|
|
|
|
|
11-27-2013, 05:33 AM
|
#11 | |
|
Registered User
Join Date: Aug 2010
Location: Hoofddorp, the Netherlands
Posts: 582
|
Re: 1969 Custom/10 clean up
Quote:
and thanks for the support!
__________________
Feedback is always welcome! projects: 1969 Chevy C10 1950 GMC 100 1958 Chevy C60 Viking ratrod |
|
|
|
|
|
12-05-2013, 09:28 AM
|
#12 |
|
Registered User
Join Date: Jan 2011
Location: Gilberts IL.
Posts: 2,488
|
Re: 1969 Custom/10 clean up
Steve hope all is good Figured I would chime in here I would imagine you got most of your questions answered but headers are a real pain if you don't get the right ones and keeping the bolts tight are another thing also. Do you ever go to Summitracing.com, they have a few choices for the header bolts, the alien head s are good but they also sell bolts with a 12 point head and other locking type bolts. Hope this helps.
http://www.summitracing.com/search?S...header%20bolts The stock headers are also a pain on my 95 K2500 we had to use a pry bar to get the holes to align. Here are a couple of pix of the cermac coated headers I bought from Summit    
__________________
94 k2500 EXCab Long Bed 350ci New Toy 95 K2500 Suburban New PlowTruck 454ci Support our Troops @ http://anyairman.com http://www.woundedwarriorproject.org/ |
|
|
|
|
12-05-2013, 04:09 PM
|
#13 | ||
|
Registered User
Join Date: Aug 2010
Location: Hoofddorp, the Netherlands
Posts: 582
|
Re: 1969 Custom/10 clean up
Quote:
Quote:
__________________
Feedback is always welcome! projects: 1969 Chevy C10 1950 GMC 100 1958 Chevy C60 Viking ratrod |
||
|
|
|
|
12-05-2013, 04:26 PM
|
#14 |
|
Registered User
Join Date: Aug 2010
Location: Hoofddorp, the Netherlands
Posts: 582
|
Re: 1969 Custom/10 clean up
Just googled "Header Bouten" (Bouten are Bolts in Dutch) and look what I found
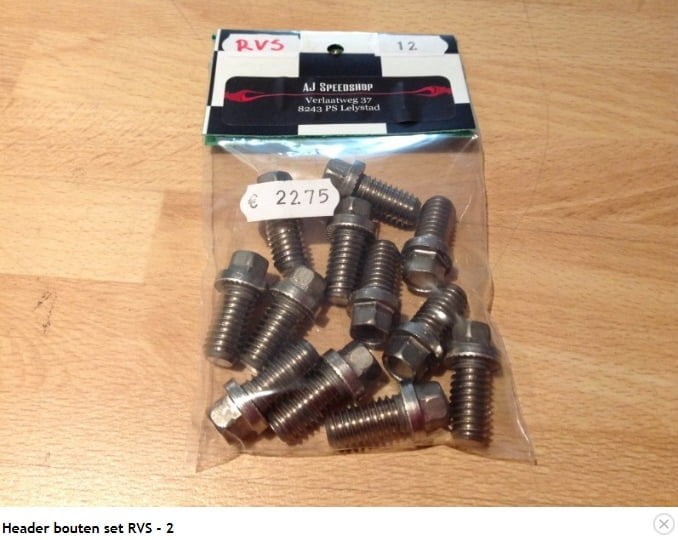 So we do sell them in the Netherlands, but for now I'll stick with the allen bolts and TDC (which is called BDP in Dutch...Bovenste Dode Punt) finders we have as well! never occurred to me to look for that: 
__________________
Feedback is always welcome! projects: 1969 Chevy C10 1950 GMC 100 1958 Chevy C60 Viking ratrod Last edited by Steve-W; 12-05-2013 at 05:54 PM. |
|
|
|
|
12-08-2013, 07:06 PM
|
#15 |
|
Registered User
Join Date: Aug 2010
Location: Hoofddorp, the Netherlands
Posts: 582
|
Re: 1969 Custom/10 clean up
I was back working on the wiring and discovered that my 3 year old son helped me with color coding the wiring diagram
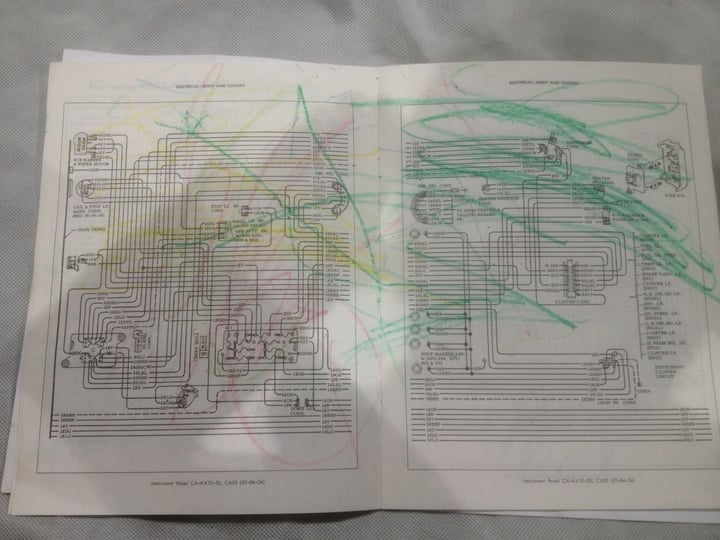 and can anybody tell me the purpose of the 8 black wire in the middle? 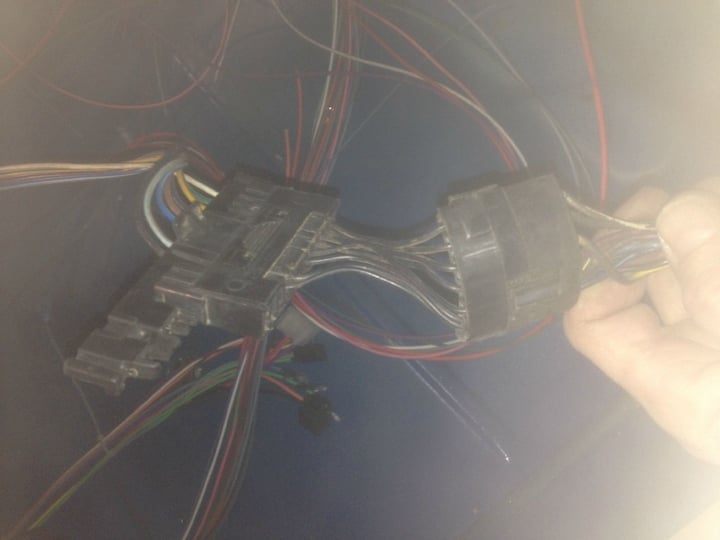 last question; does anybody agree that the position of my indicator arm looks odd? 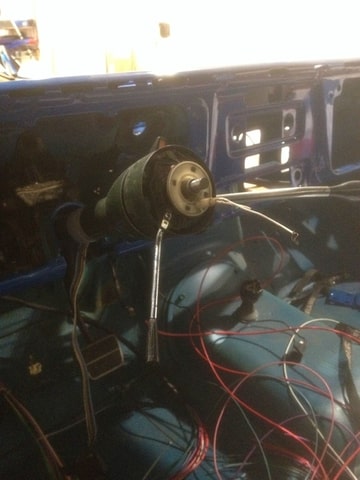
__________________
Feedback is always welcome! projects: 1969 Chevy C10 1950 GMC 100 1958 Chevy C60 Viking ratrod Last edited by Steve-W; 12-08-2013 at 07:12 PM. Reason: added text |
|
|
|
|
12-05-2013, 09:45 AM
|
#16 |
|
Registered User
Join Date: Feb 2012
Location: Mission Viejo, CA
Posts: 1,856
|
Re: 1969 Custom/10 clean up
Your timing mark may not be accurate. Mine was way off. I could never find TDC using all the tricks on the forums like a piece of cotton or finger or a chop stick.
so I got one of these. makes it so easy I could do it!! Cool build! |
|
|
|
|
12-09-2013, 01:08 AM
|
#17 |
|
Registered User
Join Date: Jan 2000
Location: The Netherlands
Posts: 1,062
|
Re: 1969 Custom/10 clean up
I believe that's the converter for if you put in a later style steering column.
And it looks like that is the case with yours.
__________________
1971 Chevy C/20 Longhorn, 350/TH400, Edelbrock Performer, IMPCO 425 LPG Carb 1974 Chevy Camaro Z28 (Original) ------------------------- Capelle a/d IJssel, The Netherlands |
|
|
|
|
12-09-2013, 07:31 AM
|
#18 | |
|
Registered User
Join Date: Aug 2010
Location: Hoofddorp, the Netherlands
Posts: 582
|
Re: 1969 Custom/10 clean up
Quote:
__________________
Feedback is always welcome! projects: 1969 Chevy C10 1950 GMC 100 1958 Chevy C60 Viking ratrod |
|
|
|
|
|
12-11-2013, 09:23 AM
|
#19 |
|
Registered User
Join Date: Jan 2011
Location: Gilberts IL.
Posts: 2,488
|
Re: 1969 Custom/10 clean up
Steve I just got this today in my Summit email it might help you out on shipping
http://www.summitracing.com/customer...faqs/?aid=4265
__________________
94 k2500 EXCab Long Bed 350ci New Toy 95 K2500 Suburban New PlowTruck 454ci Support our Troops @ http://anyairman.com http://www.woundedwarriorproject.org/ |
|
|
|
|
12-11-2013, 09:54 PM
|
#20 | |
|
Registered User
Join Date: Aug 2010
Location: Hoofddorp, the Netherlands
Posts: 582
|
Re: 1969 Custom/10 clean up
Quote:
I posted a new thread regarding my wiring headache:http://67-72chevytrucks.com/vboard/s...d.php?t=607688
__________________
Feedback is always welcome! projects: 1969 Chevy C10 1950 GMC 100 1958 Chevy C60 Viking ratrod |
|
|
|
|
|
12-13-2013, 08:08 AM
|
#21 |
|
Registered User
Join Date: Aug 2010
Location: Hoofddorp, the Netherlands
Posts: 582
|
Re: 1969 Custom/10 clean up
Yeah!! got my new front window in today (sorry for the lousy picture)
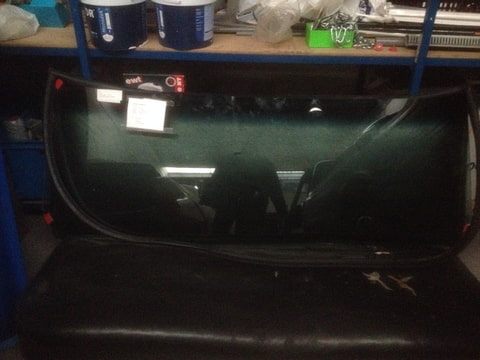 and thanks to all your help I'm and going to attack the wiring this weekend and finally make some progress I'll be off for two weeks with no reason to come online so:  I'm signing off, Happy holidays and don't drink and drive. see y'all in January! I'm signing off, Happy holidays and don't drink and drive. see y'all in January!
__________________
Feedback is always welcome! projects: 1969 Chevy C10 1950 GMC 100 1958 Chevy C60 Viking ratrod Last edited by Steve-W; 12-17-2013 at 08:21 AM. |
|
|
|
|
01-03-2014, 06:47 PM
|
#22 |
|
Registered User
Join Date: Aug 2010
Location: Hoofddorp, the Netherlands
Posts: 582
|
Re: 1969 Custom/10 clean up
So back from the holiday's, hope y'all had great days with family and friends.
Poland had no snow, so no white xmas this year  but driving back from Wroclaw to Berlin the roads where empty, so I could do 450 miles in just under 5 hours. (yes indeed almost a 100MPH average, thanks to lack of police in Poland and no speedlimit on the German Interstate) but driving back from Wroclaw to Berlin the roads where empty, so I could do 450 miles in just under 5 hours. (yes indeed almost a 100MPH average, thanks to lack of police in Poland and no speedlimit on the German Interstate)went to work on the truck yesterday and didn't feel like attacking the wiring, so I decided to change the ignition lock cylinder. I discovered that the previous owner had bought new door and ignition locks going through a box with miscelanious parts. having no idea how to change it I turned to google and ended up at this great movie on Youtube:you gotta love youtube! didn't get much more done, my mate was there working on his '69 Charger, so it was all talk and no show
__________________
Feedback is always welcome! projects: 1969 Chevy C10 1950 GMC 100 1958 Chevy C60 Viking ratrod |
|
|
|
|
01-11-2014, 04:44 PM
|
#23 |
|
Registered User
Join Date: Aug 2010
Location: Hoofddorp, the Netherlands
Posts: 582
|
Re: 1969 Custom/10 clean up
I have another thread going only for the wiring stuff: http://67-72chevytrucks.com/vboard/s...82#post6465482
and as I describe there, we got the wiring figured out! I didn't get everything hooked up yet, but atleast I now know where everything should go. (I couldn't figure out the ignition switch and gauge cluster wiring) hopefully I'll have some time tomorrow to get is mocked up and see if everything works, the I'll cust the wires to length and tidy them up. and then...I'll still have plenty to do
__________________
Feedback is always welcome! projects: 1969 Chevy C10 1950 GMC 100 1958 Chevy C60 Viking ratrod |
|
|
|
|
02-17-2014, 08:21 PM
|
#24 |
|
Registered User
Join Date: Aug 2010
Location: Hoofddorp, the Netherlands
Posts: 582
|
Re: 1969 Custom/10 clean up
Another month has passed since I posted in this thread. I got some good tips in my other one regarding the wiring, so thats'all figured out!
I also had a thread regarding the wiring of the propane tanks and the mixer and although I didn't get any responds I worked it out, so I felt it was about time to test it! filled up the engine and tranny with oil, put some water in it and guess what? check the video!! https://vimeo.com/86941619 
__________________
Feedback is always welcome! projects: 1969 Chevy C10 1950 GMC 100 1958 Chevy C60 Viking ratrod |
|
|
|
|
02-20-2014, 04:49 PM
|
#25 |
|
Registered User
Join Date: Aug 2010
Location: Hoofddorp, the Netherlands
Posts: 582
|
Re: 1969 Custom/10 clean up
__________________
Feedback is always welcome! projects: 1969 Chevy C10 1950 GMC 100 1958 Chevy C60 Viking ratrod |
|
|
|
 |
| Bookmarks |
| Tags |
| c10, europe, netherlands, rebuild, swapped |
|
|


 Hybrid Mode
