
|
|
|
 03-16-2013, 11:01 AM
|
#1 |
|
Registered User
Join Date: May 2000
Location: Flin Flon, Manitoba, Canada
Posts: 8,855
|
Re: 56 shop truck build
With my wife working night shift the past couple nights, I spent the majority of my time in the shop working on the truck. After seeing how ****ty the inner fenders looked in the above pictures, I had to get them stripped and painted, so I got that done.
I also welded in a couple patched on the floor. The previous owner cut a section out of the tranny hump spot so I cut a piece of sheet metal and welded it in. Then I turned my attention to the wiring. I gutted out all the old wiring and man am I glad I did. I found over 12 splices from previous owners, trying to chase anything would have been a complete night mare. I have a new Rebel wiring harness that should be here Monday. While I was under he dash I removed the heater box and fax so they can get checked out and painted to match the interior.
__________________
My name's Tim and I'm a truckaholic My 56 Chevy shop truck build http://67-72chevytrucks.com/vboard/s...d.php?t=562795 |

|

|
|
03-16-2013, 11:05 AM
|
#2 |
|
Registered User
Join Date: May 2000
Location: Flin Flon, Manitoba, Canada
Posts: 8,855
|
Re: 56 shop truck build
Oh, I also got the under side of the bed coating in the satin black POR 15. Here's a shot of the under side of the step all done and dry
__________________
My name's Tim and I'm a truckaholic My 56 Chevy shop truck build http://67-72chevytrucks.com/vboard/s...d.php?t=562795 |
|
|
|
|
03-16-2013, 11:12 AM
|
#3 |
|
Registered User
Join Date: Aug 2007
Location: Corona, California
Posts: 7,998
|
Re: 56 shop truck build
Looking good.
Kim |
|
|
|
|
03-24-2013, 12:13 AM
|
#4 |
|
Registered User
Join Date: May 2000
Location: Flin Flon, Manitoba, Canada
Posts: 8,855
|
Re: 56 shop truck build
Spent a little more time with the 56 this weekend. Cut out a couple spots of rot in the rear step side fender and welded in some new. Then pounded out a 30" long crease below the body line. I figured while I was there, I'd get the under side cleaned up and under coated. Last night I sanded down and painted the heater box and blower motor housing so tonight I started laying down some simple stripes. And then sprayed the base coat for the steering wheel adapter cone. This was my first look at the base color sprayed out. It's Diamond Blue Metallic from Hot Rods Flatz.
__________________
My name's Tim and I'm a truckaholic My 56 Chevy shop truck build http://67-72chevytrucks.com/vboard/s...d.php?t=562795 |
|
|
|
|
03-24-2013, 12:23 AM
|
#5 |
|
Registered User
Join Date: May 2000
Location: Flin Flon, Manitoba, Canada
Posts: 8,855
|
Re: 56 shop truck build
Here's a shot of the brutal wiring harness that was in this thing. I can count 14 splices under the dash alone. And check out the back of the ignition switch. Looks like a telephone operators board. I finished up with the welding on the floor so I cleaned it up with a wire wheel and sprayed the bed liner in there as well. I'm going to be picking up some sound deadener this weekend so It's going to get covered in that and then have a rubber floor to top it off. I came up with an idea to personalize the interior a bit. I have saved all the license plates from every vehicle i've owned. So I thought about making the upper part of the wind shield frame with a more personal touch. I bend 3 license plates to the save curve as the roof and marked them for holes to be drilled so I can rivet them to the liner. But first, I'm going to use a thin foam membrane as a gasket between the metals. The same stuff you use under the bottom plate of the walls for your new home or shop
That's it so far for this weekend. This week I hope to get the headers fit and do the welding on the other step side fender so the entire box can be bolted back together and mounted. Then I can start with all new wiring by the weekend. But I'm taking a few days off to go watch Volbeat in Saskatoon. Gotta enjoy the little things while we can
__________________
My name's Tim and I'm a truckaholic My 56 Chevy shop truck build http://67-72chevytrucks.com/vboard/s...d.php?t=562795 |
|
|
|
|
03-26-2013, 01:28 PM
|
#6 | |
|
Registered User
 Join Date: Oct 2012
Location: Sumner, IA
Posts: 213
|
Re: 56 shop truck build
Quote:
__________________
James "Bierkan" Vierkant 1950 3100 on a 1972 C10 Chassis Truck Blog Motorcycle Blog |
|
|
|
|
|
03-24-2013, 11:00 AM
|
#7 |
|
Registered User
Join Date: Aug 2007
Location: Corona, California
Posts: 7,998
|
Re: 56 shop truck build
I like the color.
Cool idea with the plates. Kim |
|
|
|
|
03-24-2013, 12:02 PM
|
#8 |
|
Registered User
Join Date: May 2000
Location: Flin Flon, Manitoba, Canada
Posts: 8,855
|
Re: 56 shop truck build
this color was as close to the original blue I could find but gives it that extra sparkle, yet the finish will be suede
__________________
My name's Tim and I'm a truckaholic My 56 Chevy shop truck build http://67-72chevytrucks.com/vboard/s...d.php?t=562795 |
|
|
|
|
03-24-2013, 11:10 PM
|
#9 |
|
Registered User
Join Date: Apr 2009
Location: Chandler AZ
Posts: 750
|
Re: 56 shop truck build
Looking good Dubie! Can't wait to see her finished.
|
|
|
|
|
03-25-2013, 11:23 AM
|
#10 |
|
Registered User
Join Date: May 2000
Location: Flin Flon, Manitoba, Canada
Posts: 8,855
|
Re: 56 shop truck build
you and me both bud. I'm trying to bust my ass as much as I can to get this thing put together and running. I don't care about getting it painted this year, I just need to get it done and on the road
__________________
My name's Tim and I'm a truckaholic My 56 Chevy shop truck build http://67-72chevytrucks.com/vboard/s...d.php?t=562795 |
|
|
|
|
03-25-2013, 11:37 PM
|
#11 |
|
Registered User
Join Date: Apr 2009
Location: Chandler AZ
Posts: 750
|
Re: 56 shop truck build
That was my exact motto, paint will probably come next year for me. Keep it up it will be done in no time.
|
|
|
|
|
03-26-2013, 09:58 AM
|
#12 |
|
Registered User
Join Date: May 2000
Location: Flin Flon, Manitoba, Canada
Posts: 8,855
|
Re: 56 shop truck build
I ended up getting the same shifter as your truck bud, how do you like it?
__________________
My name's Tim and I'm a truckaholic My 56 Chevy shop truck build http://67-72chevytrucks.com/vboard/s...d.php?t=562795 |
|
|
|
|
03-26-2013, 10:31 AM
|
#13 |
|
Registered User
Join Date: Apr 2009
Location: Chandler AZ
Posts: 750
|
Re: 56 shop truck build
Mine works just fine. I purchased the shifter, and cable together off of ebay. The bracket for the trans was from B&M. I think the cable is for a B&M as well which caused some adjustment issues. I finally have it dialed in. I would prefer a column shifter on the original column but not really sure why? I guess my thinking is it would clean up the floor area a bit. But as far as functionality the shifter works great, you will like it if you plan to drag your truck.
|
|
|
|
|
03-26-2013, 10:42 AM
|
#14 |
|
Registered User
Join Date: May 2000
Location: Flin Flon, Manitoba, Canada
Posts: 8,855
|
Re: 56 shop truck build
A buddy of mine gave me a full B&M kit the other day as an early birthday gift. What better gift than lightly used truck parts right? I always planned on having a floor shift automatic, Id just like a longer shifter. I made a plan on how to extend this one but for this year, it's all about getting it mounted and functional. I can always extend everything next year. I don't plan on racing this truck, but if the challenge does arise.........

__________________
My name's Tim and I'm a truckaholic My 56 Chevy shop truck build http://67-72chevytrucks.com/vboard/s...d.php?t=562795 |
|
|
|
|
03-26-2013, 01:36 PM
|
#15 |
|
Registered User
Join Date: May 2000
Location: Flin Flon, Manitoba, Canada
Posts: 8,855
|
Re: 56 shop truck build
I used POR 15, let it set up then sanded it with 80 grit and sprayed it with a 3M rubberized undercoating for the fenders. The cab floor I cleaned up with a wire wheel on a grinder, wiped it clean and shot 3 coats of the same under coating.
__________________
My name's Tim and I'm a truckaholic My 56 Chevy shop truck build http://67-72chevytrucks.com/vboard/s...d.php?t=562795 |
|
|
|
|
03-26-2013, 01:42 PM
|
#16 | |
|
Registered User
Join Date: Oct 2012
Location: Sumner, IA
Posts: 213
|
Re: 56 shop truck build
Quote:
__________________
James "Bierkan" Vierkant 1950 3100 on a 1972 C10 Chassis Truck Blog Motorcycle Blog |
|
|
|
|
|
03-26-2013, 02:48 PM
|
#17 |
|
Registered User
Join Date: May 2000
Location: Flin Flon, Manitoba, Canada
Posts: 8,855
|
Re: 56 shop truck build
I'll be using some peel and seal on the floor and then a rubber truck mat over top of that. I ran a steel floor in my last truck and it sounded like a tin can. So on this build I'm going to sound deaden it as much as I can
__________________
My name's Tim and I'm a truckaholic My 56 Chevy shop truck build http://67-72chevytrucks.com/vboard/s...d.php?t=562795 |
|
|
|
|
03-28-2013, 06:35 AM
|
#18 |
|
Registered User
Join Date: May 2000
Location: Flin Flon, Manitoba, Canada
Posts: 8,855
|
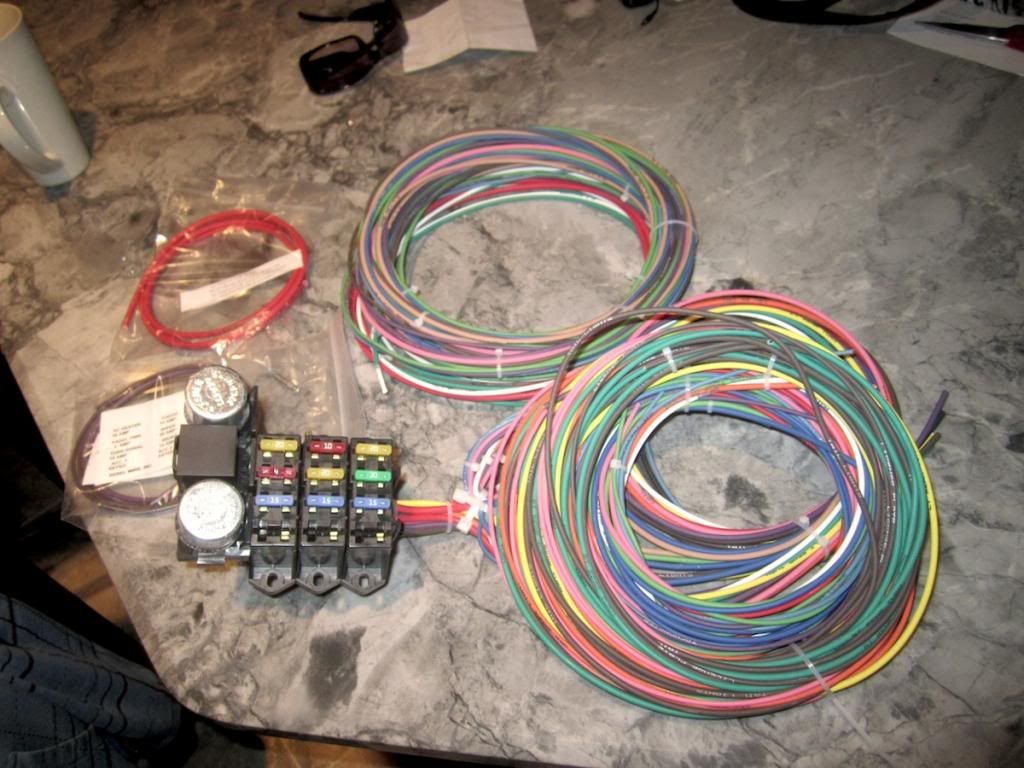
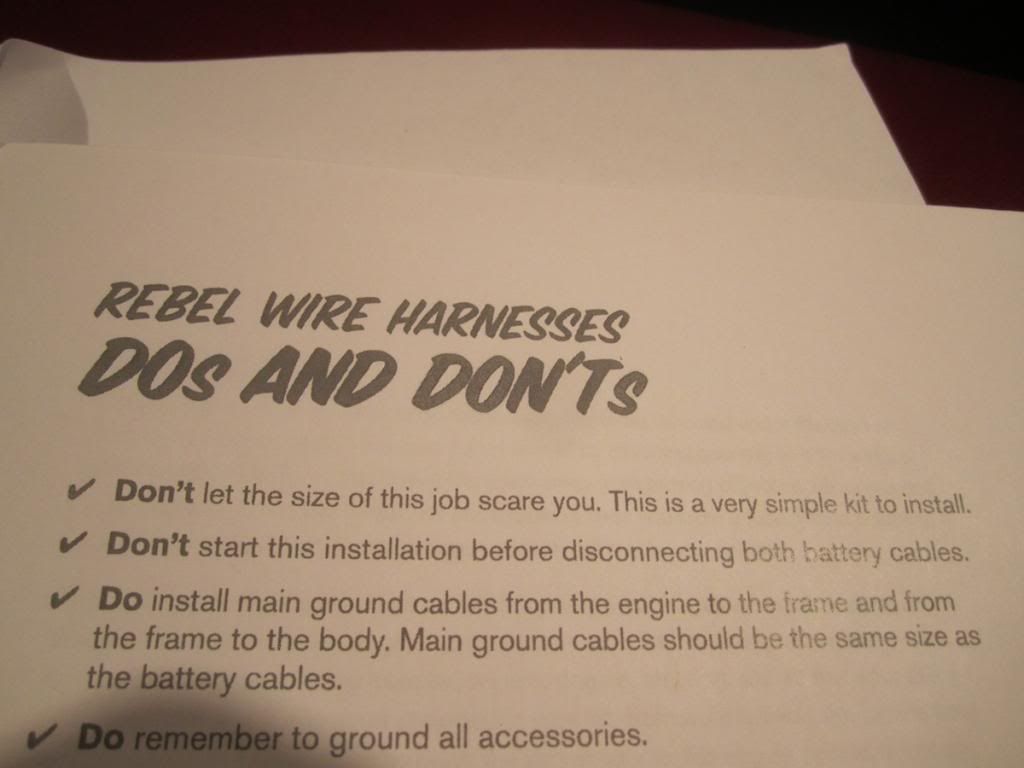
Re: 56 shop truck build
Got my Rebel 9 + 3 circuit wiring kit in the mail yesterday. I damn near pooped when I saw how many wires there are in the kit, but after reading the #1 rule in their instructions, I am feeling up to the challenge. Every wire is labelled on where it goes and the instructions are VERY detailed. I want to make it as clean of a job as I can so I'll take my time and get er done while I'm off work next week.
__________________
My name's Tim and I'm a truckaholic My 56 Chevy shop truck build http://67-72chevytrucks.com/vboard/s...d.php?t=562795 |
|
|
|
|
03-28-2013, 09:32 AM
|
#19 |
|
Registered User
Join Date: Aug 2012
Location: Salem Mo
Posts: 652
|
Re: 56 shop truck build
In the list of do's and don'ts, they should have also included
Do not "poop'. Ha ha, I crack me up.  Go get 'em dubie. |
|
|
|
|
04-03-2013, 09:32 PM
|
#20 | |
|
Registered User
Join Date: Dec 2012
Location: Coldwater On. Canada
Posts: 551
|
Re: 56 shop truck build
Quote:
__________________
56 gmc 4X4 Cummins 5 spd 60F 70R 2005 Ram 3500 DRW cummins 4X4. 2006 Conolift 9/15. 2011 F 350 winter beater New 2018 ram 3500 drw 4x4. Makes my 2005 Look as if it's been running on 4 cyl since new ! My Build http://67-72chevytrucks.com/vboard/s...d.php?t=556908 |
|
|
|
|
|
04-04-2013, 09:38 AM
|
#21 |
|
Registered User
Join Date: May 2000
Location: Flin Flon, Manitoba, Canada
Posts: 8,855
|
Re: 56 shop truck build
Here's a few shots from yesterday. I even got the wife tacking away on a patch in the fender. After she mastered the welding, she torn down the gauge cluster and re furbished it all. And gave the backing plate a little color to match the rest of the truck. We got the can bolted i place, the fuse panel is hung and wires are ready to be cut and the ends crimped. Today we'll hang body panels and get the front and rear section of the wiring strung out. I have to swap out my rear tires before we can mount the bed, the 275 60' are a bit to wide for the fenders
__________________
My name's Tim and I'm a truckaholic My 56 Chevy shop truck build http://67-72chevytrucks.com/vboard/s...d.php?t=562795 |
|
|
|
|
03-28-2013, 09:32 AM
|
#22 |
|
Registered User
Join Date: Aug 2007
Location: Corona, California
Posts: 7,998
|
Re: 56 shop truck build
Looks like a nice kit.
Good luck with the install. Kim |
|
|
|
|
03-28-2013, 12:17 PM
|
#23 |
|
Registered User
Join Date: Apr 2009
Location: Chandler AZ
Posts: 750
|
Re: 56 shop truck build
You got this MAN! Mine was a 18 circuit, and it looked daunting laying on the garage floor. You will find that once your start sorting front, cab and rear wires it goes pretty quick.
|
|
|
|
|
03-28-2013, 12:27 PM
|
#24 |
|
Registered User
Join Date: May 2000
Location: Flin Flon, Manitoba, Canada
Posts: 8,855
|
Re: 56 shop truck build
My wife heard me GASP as I opened the box last night, but after looking through the install manual, anyone should be able to wire this thing. Thanks for the boost in confidence guys!!
__________________
My name's Tim and I'm a truckaholic My 56 Chevy shop truck build http://67-72chevytrucks.com/vboard/s...d.php?t=562795 |
|
|
|
|
03-31-2013, 08:59 PM
|
#25 |
|
Registered User
Join Date: May 2000
Location: Flin Flon, Manitoba, Canada
Posts: 8,855
|
Re: 56 shop truck build
this weekend was all about the rust repair. The step side fender both had some rust in the same place, right where it meets the step up. Someone had body filled the holes previously so I wanted to make sure that all came out and new metal went in. Also, both fenders were split in the same place on the back end. Obviously it hot something at some point in it's life time and nobody could be bothered to fix it. The passenger side fender had a crease just under the upper body line that ran into the wheel well edge. After some work with a mallet and a couple pieces of 2x6 spruce, it's all straightened out.
With having this entire week off of work, I anticipate a lot of progress happening. But now I can at least bolt the fenders back on and get the bed mounted. The one big patch that was welded in was done with flux core wire. I ran out of gas shielded after my 2nd tack. SO I pounded the edges in by 1/16" just in case my welding was a bit sloppy. It gives me a little room to work the body filler afterwards. The front fender is is where I found the bondo abuse. Lots and lots of filler 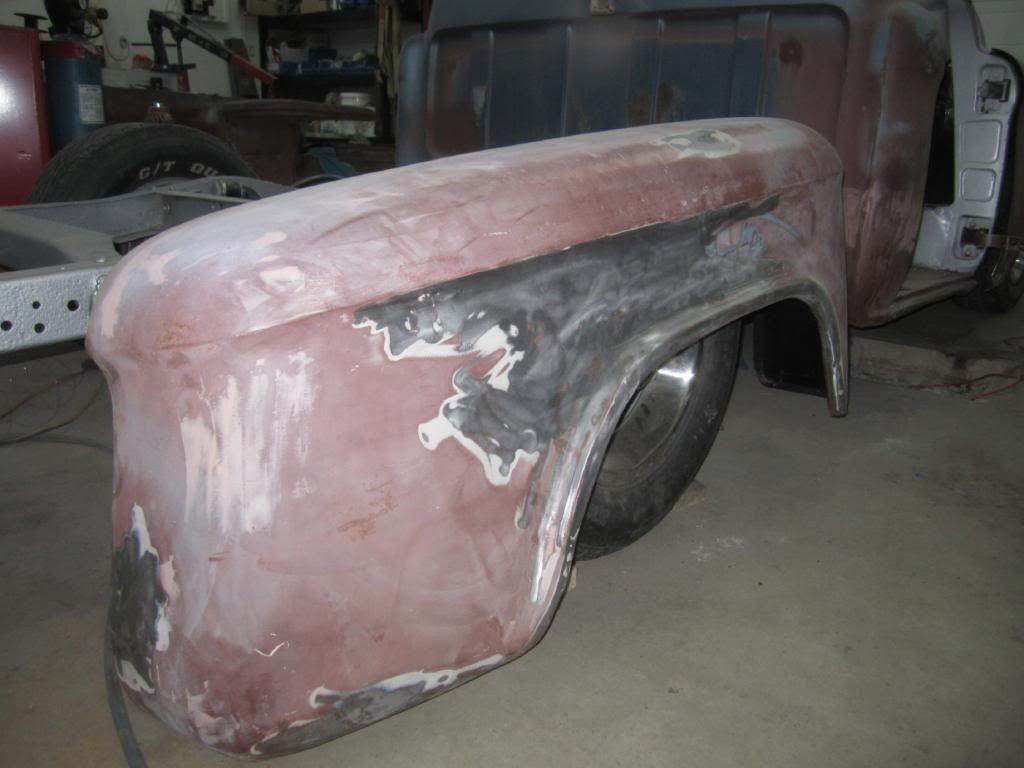  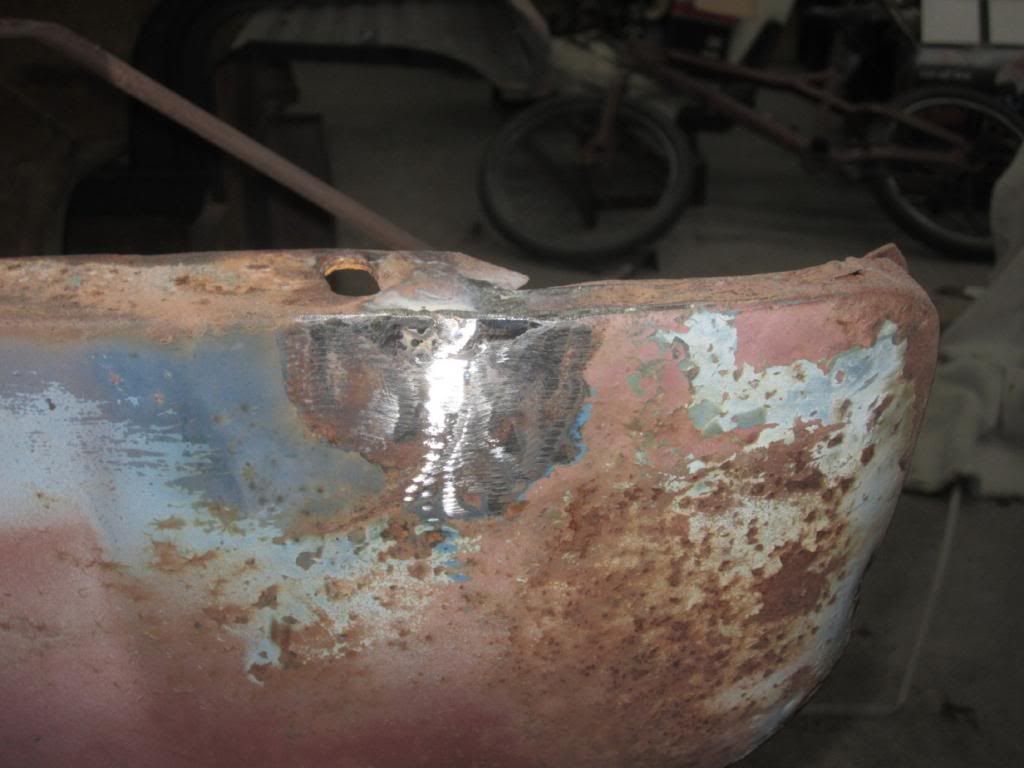 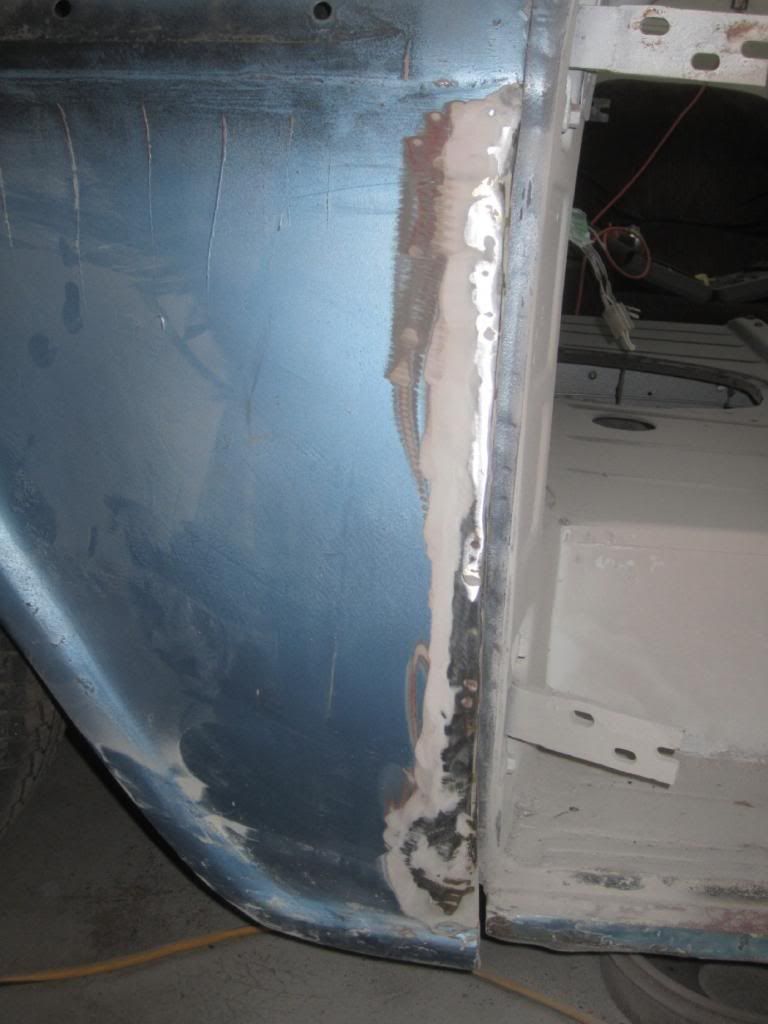
__________________
My name's Tim and I'm a truckaholic My 56 Chevy shop truck build http://67-72chevytrucks.com/vboard/s...d.php?t=562795 |
|
|
|
 |
| Bookmarks |
|
|


 Hybrid Mode
