
|
 03-06-2009, 12:27 AM
|
#76 | |
|
Registered User
Join Date: Feb 2009
Location: Milwaukie, Oregon
Posts: 204
|
Re: Another Crewcab build
Quote:

|
|

|

|
|
03-06-2009, 12:28 AM
|
#77 | |
|
Registered User
Join Date: Feb 2009
Location: Milwaukie, Oregon
Posts: 204
|
Re: Another Crewcab build
Quote:

|
|
|
|
|
|
03-06-2009, 12:34 AM
|
#78 |
|
Registered User
Join Date: Dec 2007
Location: Palmer, Alaska
Posts: 13,821
|
Re: Another Crewcab build
that is WAY cool!!!!
__________________
 CHEVY ONLY CHEVY ONLY
|
|
|
|
|
03-06-2009, 12:35 AM
|
#79 |
|
Resistance is Futile
Join Date: Dec 2006
Location: Mesa,Arizona
Posts: 3,520
|
Re: Another Crewcab build
Nice work. That appears to be turning out really well...

__________________
64 CHEVY PICK-UP > http://67-72chevytrucks.com/vboard/s...otrash+re-hash 64 CARRYALL >http://67-72chevytrucks.com/vboard/s...=1964+suburban 66 LB >http://67-72chevytrucks.com/vboard/s...d.php?t=427852 STRENGTH/DETERMINATION/MERCILESS/FOREVER .......posted via stationary device |
|
|
|
|
03-06-2009, 12:42 AM
|
#80 |
|
Registered User
Join Date: Feb 2009
Location: Milwaukie, Oregon
Posts: 204
|
Re: Another Crewcab build
Obviously both doors are somewhat done, and the drivers side rocker is in place. But nothing is finished. I'll break this up into a couple of posts to try and keep it from getting too hard to follow.
First is the rear door. The factory put a lot of metal inside that thing near the hinges to keep it from twisting. I don't see how I'm going to make a window that rolls down. I think I've seen pictures of pickups with solid side glass, but I need to find some more details. Anyhow, I cut out as much support as I thought I could without compromising the structure of the door. I'm going to need a little room to at least install the glass. Even if it doesn't roll down. Here it is with the inside front opened up like a book. 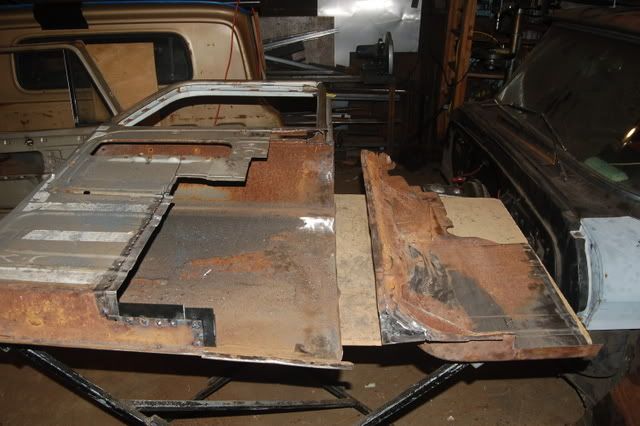 Here is what it looked like before and after I made some room for a window. 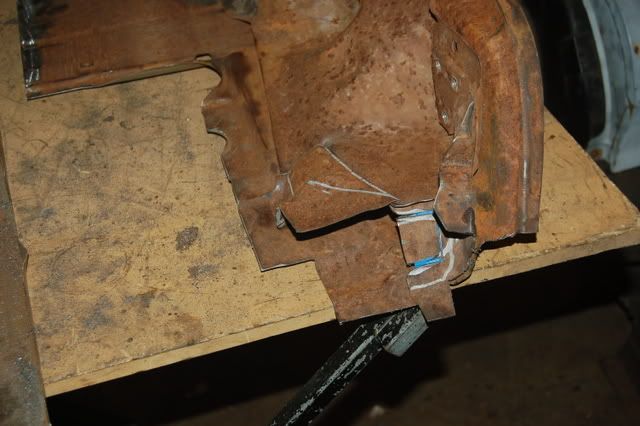 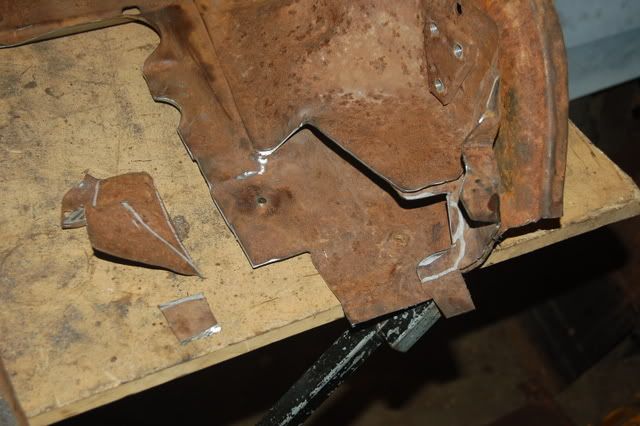 Here's the door sitting together. I couldn't see how I was going to get inside to hold it while I welded, so I gave in, and lapped it instead of butt welding. If it doesn't stay flat I will cover it with a full door panel. I saw that on another truck, and it looked nice. 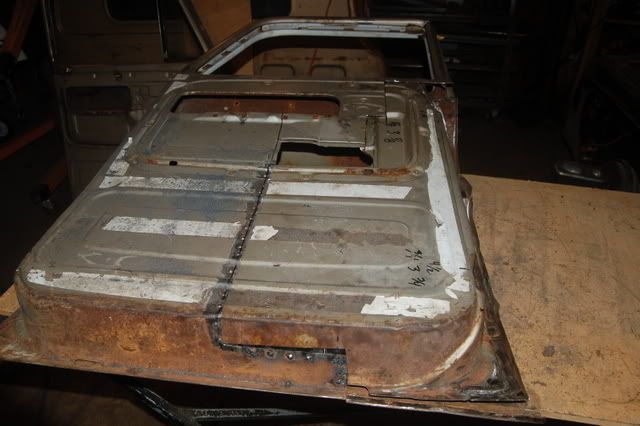 I don't really know what to do with this area yet, but I'm going to move forward, and try to get it hung, and see what develops with the B pillar from inside. 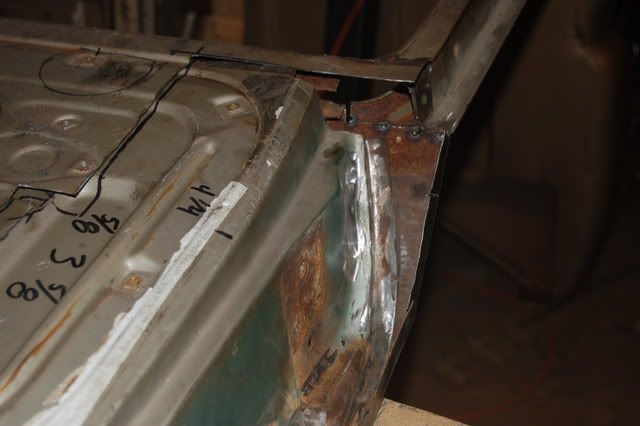  I folded most of the doorskin back over the inner frame. I left the top unfolded until I decide what to do with it. 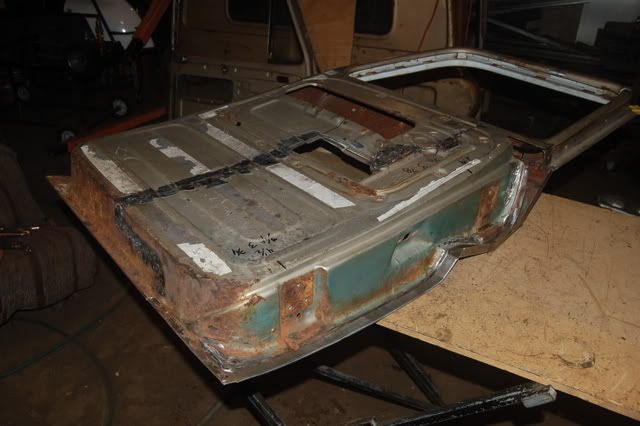 I wanted to make sure things didn't move around while I was fitting it up, so I did weld some of it up pretty solid. I left the door lock attached to the rear part of the door, and overlaped it onto the front. It'll all fit behind the upper bolt on panel anyhow, and I thought it should stay the same distance from the back of the door/seat, so someone in the back seat could reach it comfortably. It kind of screws me on where to put the window crank if I can get the window to roll down, but I think it will be electric anyhow if I can get it to work. 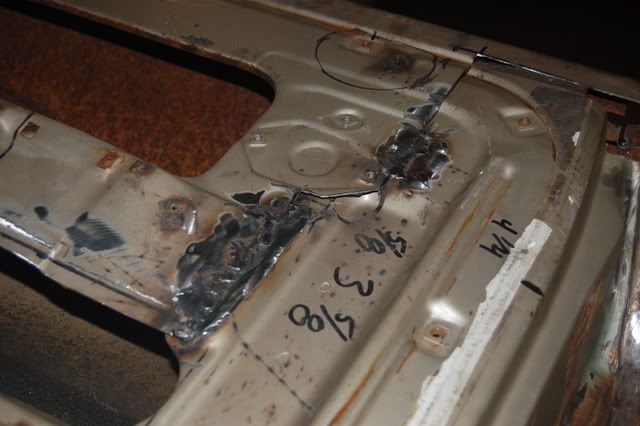 Gotta set them up and get some inspiration every once in a while. 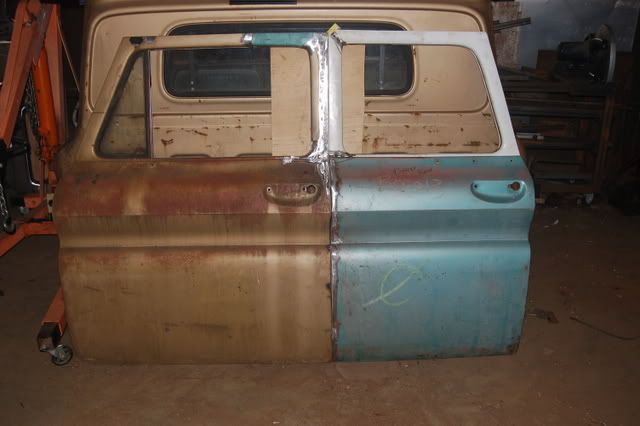 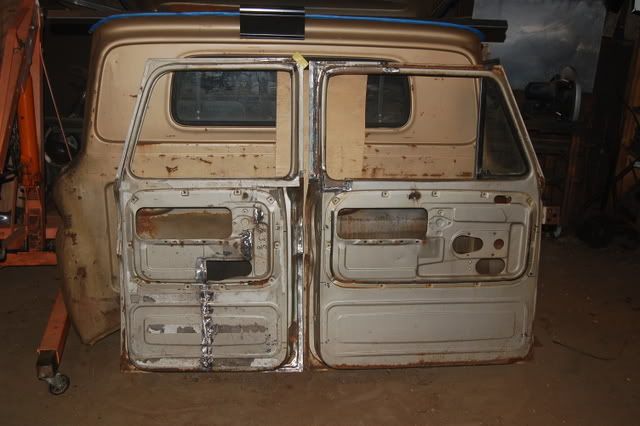
|
|
|
|
|
03-06-2009, 12:45 AM
|
#81 |
|
Registered User
Join Date: Feb 2009
Location: Milwaukie, Oregon
Posts: 204
|
Re: Another Crewcab build
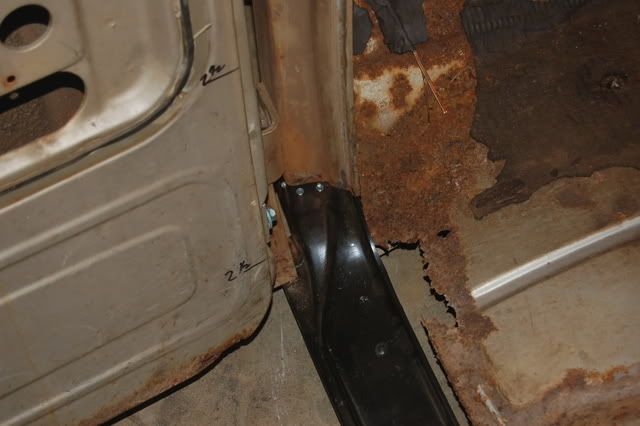
Here's the rear door clamped to the B pillar (a 3x3 1/8 wall piece of tube). I'll go back later, and form some sheetmetal to fill in the gaps, but this should a strong base to build on. Since the rockers flexed so badly I decided to put a piece of 1-1/2 x 1-1/2 1/8 wall tube full length inside them. It's welded directly to the B pillar, and I'll tie it into the A & C pillar when its all done. I want some kind of side protection, and strength for the long cab.
 Here's the extra 1/2 inch that I need to take out of the rear rocker. Originally I was going to shorten the rear door 10", but after I started measuring it, I decided 10-1/2" made for less work. Luckily I just tacked the seam in the middle of the door opening, so I can cut it back apart and re-shorten it. 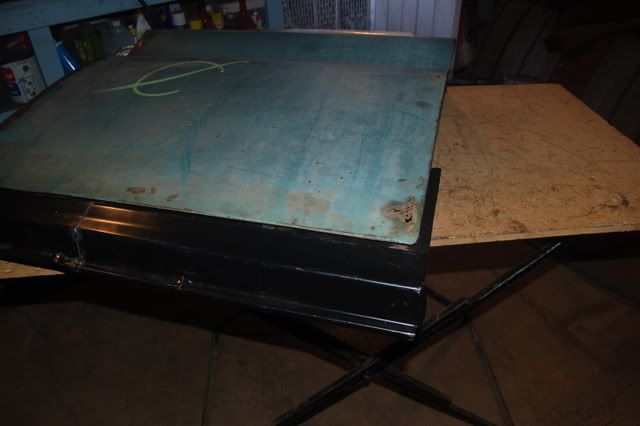 First chance to see if it will support the door. I'm startin to get excited now. 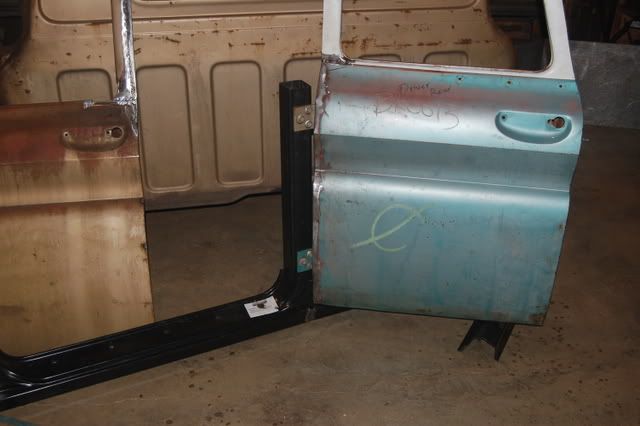 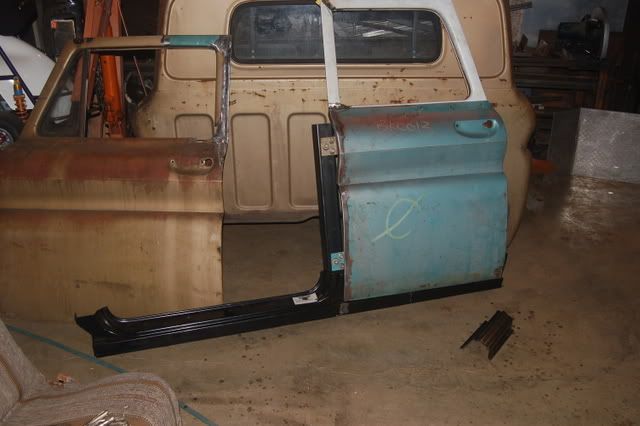
|
|
|
|
|
03-06-2009, 12:45 AM
|
#82 |
|
Registered User
Join Date: Feb 2009
Location: Milwaukie, Oregon
Posts: 204
|
Re: Another Crewcab build
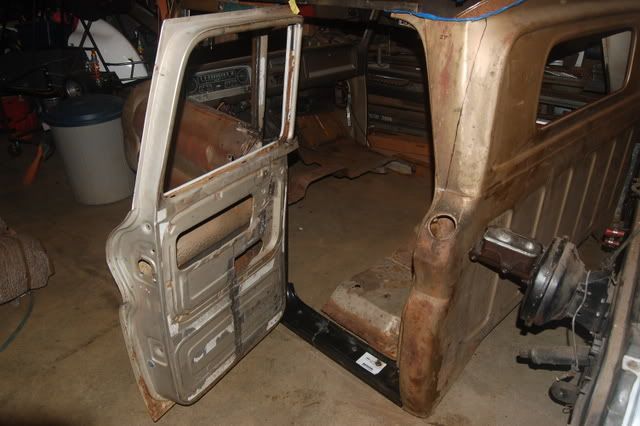
So what's next? I really wish there was an instruction book with this thing. It took a while to decide what to do. I decided to clean out the rear half of the cab, and get ready to attach the new rocker to it.
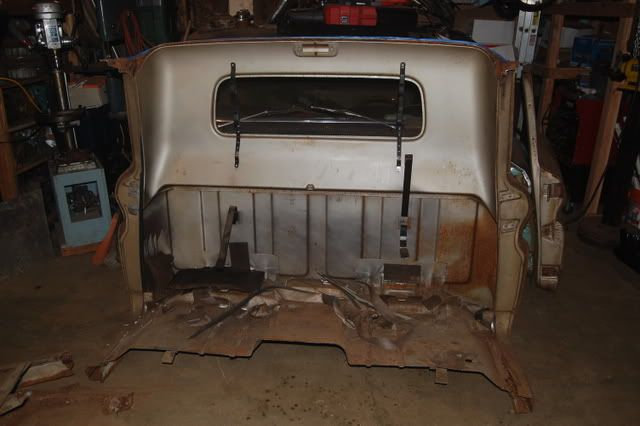 Doesn't everyone wish they could clean theirs out as easily? LOL 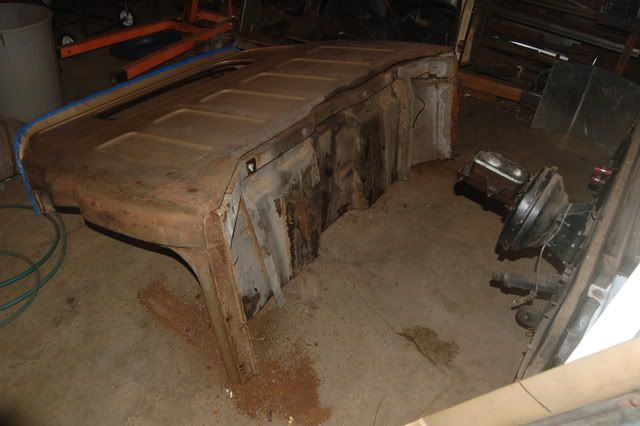 You can't accuse me of ruining a good truck. I gotta start a list of patch panels I need yet. 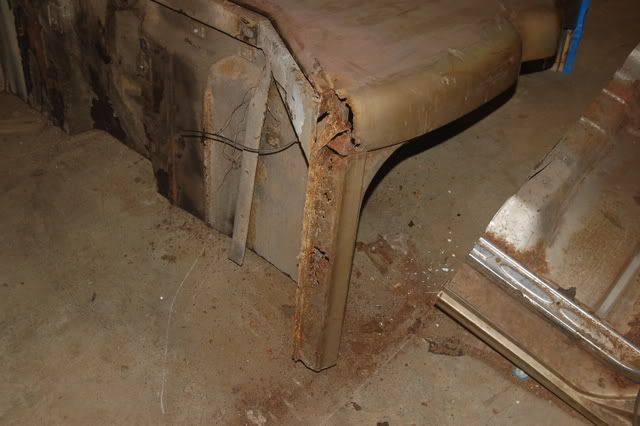 Look at all that rust. Not to mention what had already come out of it. 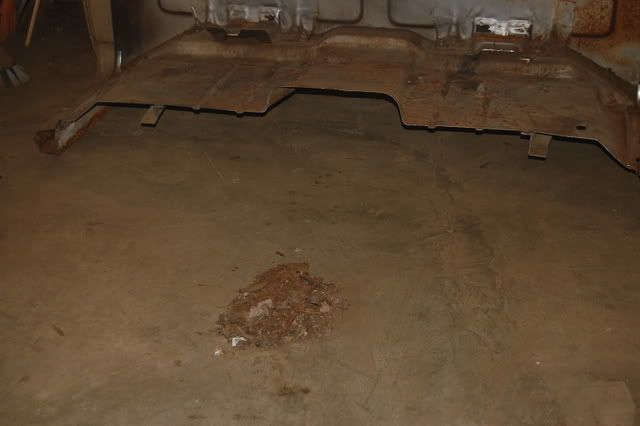 One rocker removed. Things look pretty solid under there. 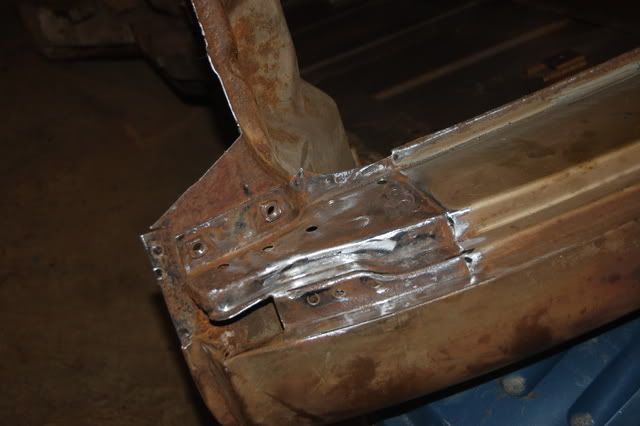 Don't you wish it were always so easy to get to what you need to do? 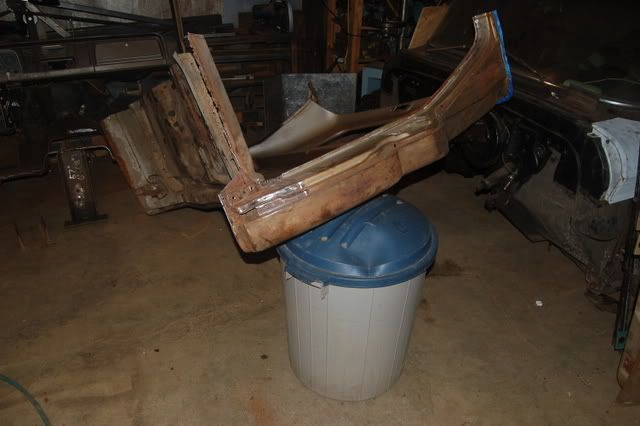 There she is all clamped in place. 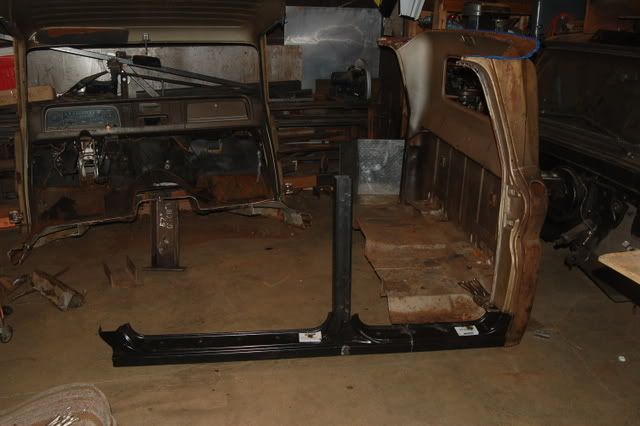 I guess I was on a roll. I didn't get any pics of the front rocker. I'm gonna have to get another patch panel. The bottom of the front post is terrible. For now I just used some sheet metal screws to hold the rocker in place since I know it will be coming back out a few times. 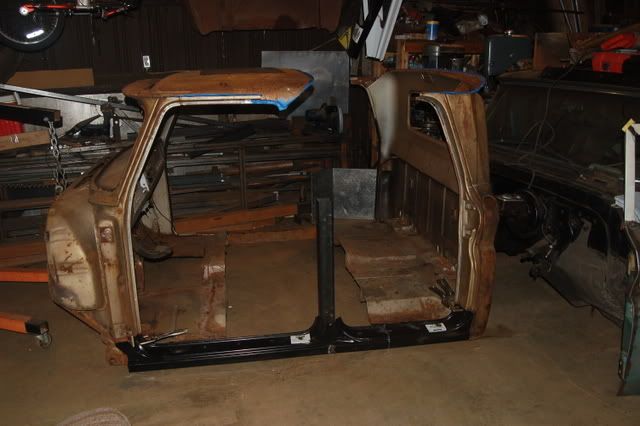 Some blood was let in the name of progress, the gods should be appeased 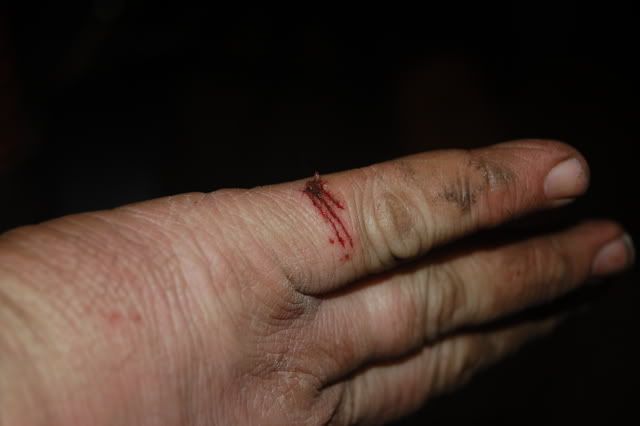
|
|
|
|
|
03-06-2009, 12:46 AM
|
#83 |
|
Registered User
Join Date: Feb 2009
Location: Milwaukie, Oregon
Posts: 204
|
Re: Another Crewcab build
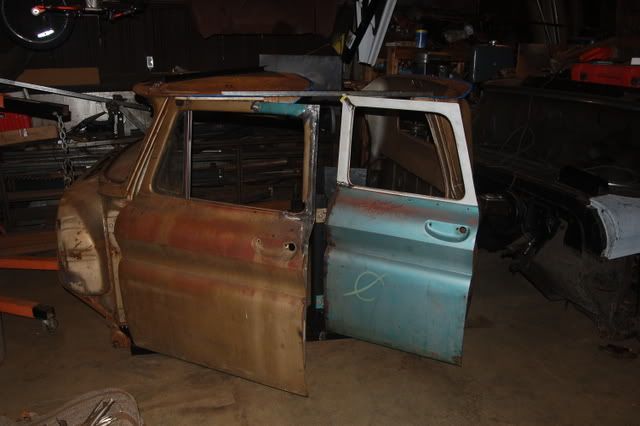
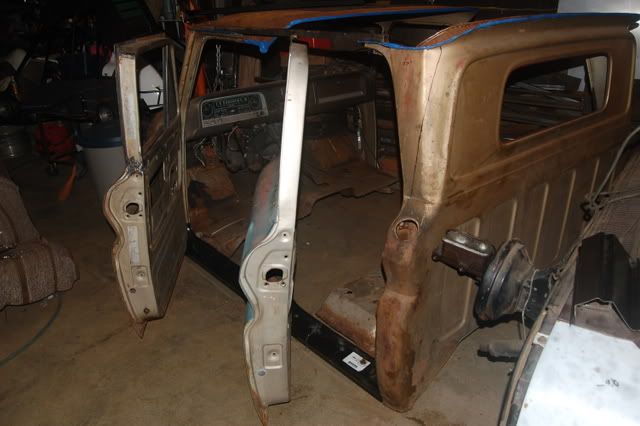
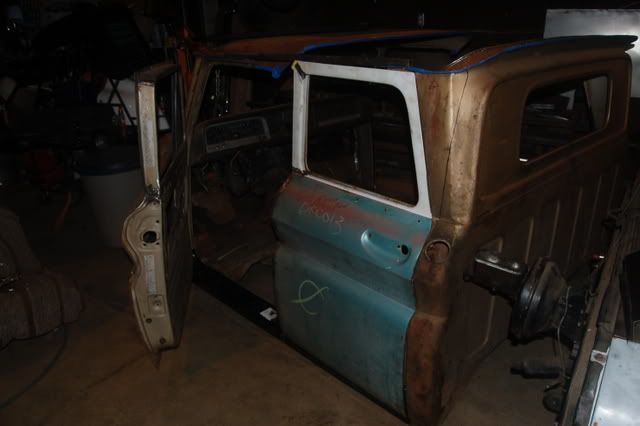
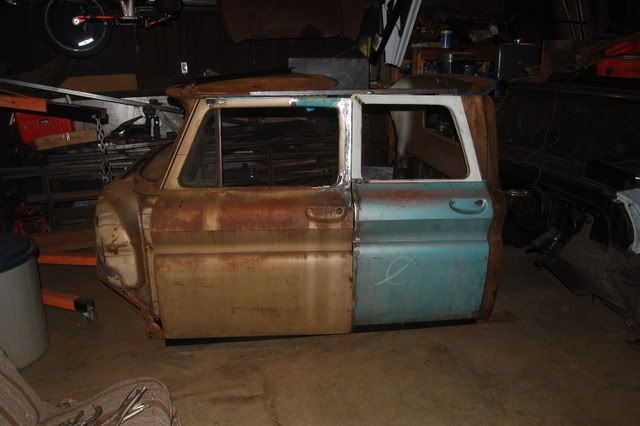
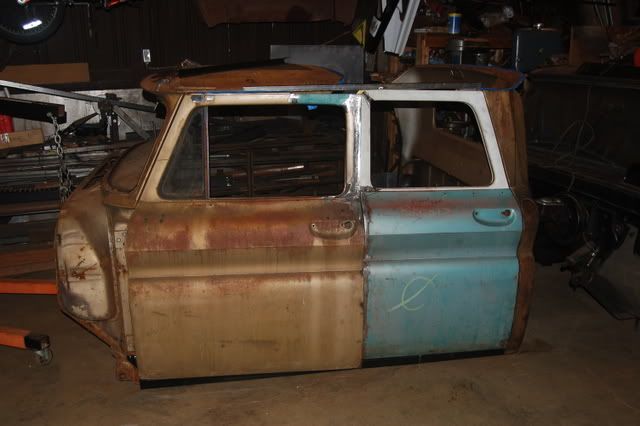
Here's some pics of the doors hanging. I knew the post was going to have to be narrowed on the top front. That's why the front door won't close all the way. I wanted to see the doors in relation to the body to make sure it really had a chance of working before I did anything more to it.
|
|
|
|
|
03-06-2009, 12:46 AM
|
#84 |
|
Registered User
Join Date: Feb 2009
Location: Milwaukie, Oregon
Posts: 204
|
Re: Another Crewcab build
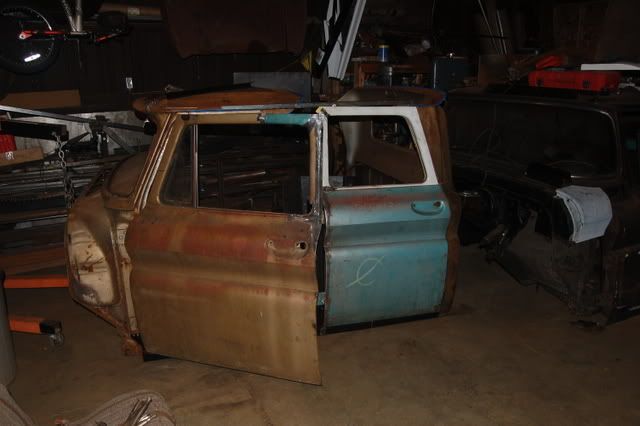
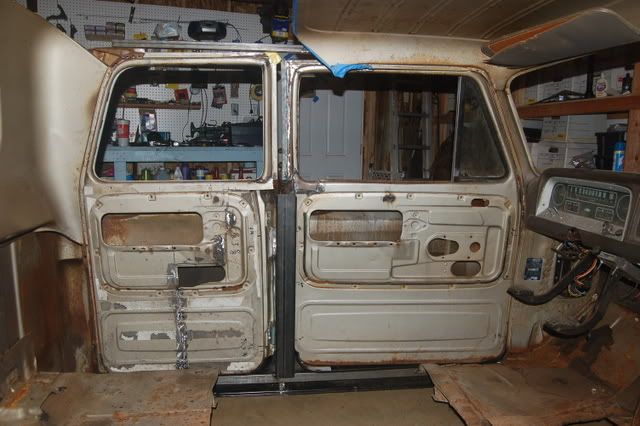
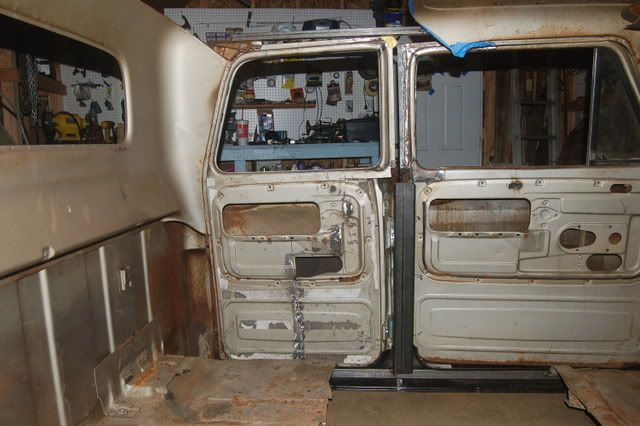
Here are some more.
|
|
|
|
|
03-06-2009, 12:47 AM
|
#85 |
|
Registered User
Join Date: Feb 2009
Location: Milwaukie, Oregon
Posts: 204
|
Re: Another Crewcab build
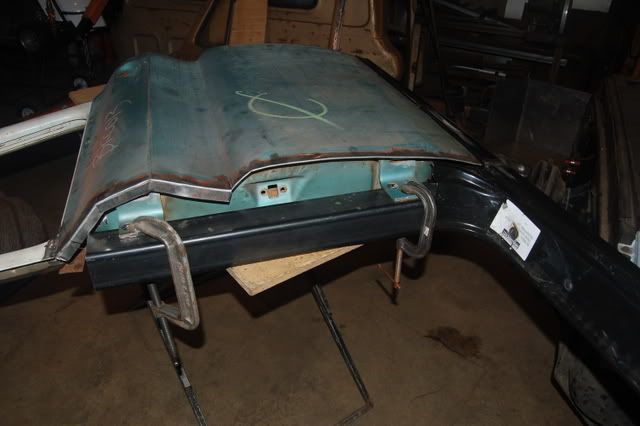
Now that it sorta works, I think the next step will be to trim the B pillar so the front door will close, then tie it in to the roof, and mount the door latches.
If it stops raining long enough I'll go out and look at the 'burbon roof. I'm still undecided about how I'm going to close in the top. I see several possible ways to go. 1 - split the pickup roof, and splice in a piece of metal from the 'burbon. Both outside, and inside. There would be a 30" section inside that would have no pattern in it, but it would look most pickup like. 2 - drill out the spot welds in the rain gutter of the 'burbon, and use the roof skin. Could still do the same thing for the inner skin. Apparantly the roof would be a little taller than the pickup roof. I'm not sure how that would look, but it would only require one seam on the outside instead of two. That's a big plus. 3 - cut the pickup roof off thru the windshield pillars and splice the burbon roof on. No problem with the inner skin as there is none. But how do I attach the rear inner cab panel? I still have to do something about the upper door jambs for the rear doors. 4 - kind of like #3, but splice the pickup inner roof into the 'burbon inner header. Any guesses on how the original coach builders did it? If I use the 'burbon roof, would it be easier to cut a section out of it, or re-form the rear of the roof into the flat sheetmetal? I'm thinking I could make a hammer form, and cut, clamp, and pound the roof into submission easier than welding it. I guess I'll start by getting some metal formed into a long piece of upper door jamb channel, and maybe a bit of rain gutter forming. I'm open to any ideas ya'll might have. |
|
|
|
|
03-06-2009, 01:28 AM
|
#86 |
|
chevy only
 Join Date: Sep 2006
Location: Phoenix, AZ
Posts: 6,619
|
Re: Another Crewcab build
nice work,

__________________
CHEVY ONLY... Nothin Else ! |
|
|
|
|
03-06-2009, 01:44 AM
|
#87 |
|
60-66 Nut
 Join Date: Mar 2007
Location: Coeur d'Alene, Idaho
Posts: 23,252
|
Re: Another Crewcab build
I would do something like #3, except don't cut the A pillars. Cut above and slightly behind them and drill out the roof skin spot welds across the top of the windshield. Then to make the transition at the rear to the pickup rear cab panel, graft in the rear upper inner Burb panel. I think that would work.
__________________
Power Steering Box Adapter Plates For Sale HERE Power Brake Booster Adapter Brackets For Sale '63-'66 HERE and '67-'72 HERE and '60-'62 HERE and "60-'62 with clutch HERE Rear Disc Brake Brackets For Sale. Impala SS calipers HERE Camaro Calipers HERE D52 Calipers HERE 6 Lug HERE Hydroboost Mounting Plates HERE Last edited by Captainfab; 03-06-2009 at 01:44 AM. |
|
|
|
|
03-06-2009, 01:57 AM
|
#88 |
|
Registered User
Join Date: Jun 2008
Location: North SD County
Posts: 631
|
Re: Another Crewcab build
this is comin along nicely! cant wait to see more!
__________________
..............................._________ ......___________//___[[___{\ _____ ...../__(_(O)_)___/____/____/_(O)_/ 1964 C20 Long Stepside 3 Door Crew Cab - Armbruster-Stageway Conversion Y2K INDN Chief "ONE OF A KIND, NOT ONE OF THE CROWD" Aug 2010 - Front end frame cleanup & engine swap done!!! June 2011 - Rear end bagged Sept 2011 - Rebuild motor top end Sept 2012 - Parked and slowly working on it. Aug 2013 - Front end bagged - finally! Aug 2014 - Stepside swap conversion done. Finally ready to start bodywork! Have a few KEWL ideas... Here is my build thread: http://www.67-72chevytrucks.com/vboa...d.php?t=335427 |
|
|
|
|
03-06-2009, 02:45 AM
|
#89 |
|
Registered User
Join Date: Jun 2007
Location: Saskatoon, Saskatchewan,:
Posts: 2,901
|
Re: Another Crewcab build
wowzzers, that is just too cool, congrats on tackling that, sure gives me some inspiration.
__________________
James 1968 GMC "HAVOC" 1986 GMC "Frank" J.J.R.H. Design & Consulting My 68`Rebuild "HAVOC": http://67-72chevytrucks.com/vboard/s...d.php?t=316300 A 58' chev build thread: http://www.67-72chevytrucks.com/vboa...d.php?t=311238 1969 Camaro Pro Touring http://67-72chevytrucks.com/vboard/s...61#post3513361 Swiss Cheese: http://67-72chevytrucks.com/vboard/s...d.php?t=384390 Adjustable Trailing Arm How-To: http://67-72chevytrucks.com/vboard/s...d.php?t=321100 1968 Ford Farm Truck: http://67-72chevytrucks.com/vboard/s...=1#post6555587 |
|
|
|
|
03-06-2009, 08:48 AM
|
#90 |
|
Registerd User
Join Date: Sep 2008
Location: Oklahoma
Posts: 2,118
|
Re: Another Crewcab build
Awsome skills. If I could do that I wouldn't be workin for the state any more.
|
|
|
|
|
03-06-2009, 09:50 AM
|
#91 |
|
1961 crewcab
Join Date: Dec 2007
Location: missoula, mt
Posts: 6,164
|
Re: Another Crewcab build
I go with capt. fabs idea...
also, you might think about turning the bottom of your new center pillar into a cab support to the frame, that should help strengthen things up a bit. |
|
|
|
|
03-06-2009, 11:56 AM
|
#92 |
|
Daring to be Different
Join Date: Aug 2008
Location: Hesperia, Ca
Posts: 4,499
|
Re: Another Crewcab build
I'm still blown away. Scary stuff to cut up the whole truck, and get it back together as a 4 door. Nice work.v
__________________
Dennis Check out my 65/73 Cheap Build Thread. http://www.67-72chevytrucks.com/vboa...d.php?t=327644 KUSTOM RIDES FACE BOOK PAGE: https://www.facebook.com/groups/291198124258863/ 1965 C-10 Short Bed 350/700r4 2012 Silverado 1500 Crew Cab 2016 Honda Accord w/ 18" rims 2007 Honda Goldwing Trike w/ NAVI 2001 Yamaha Roadstar Indian look alike "Life's journey is not to arrive at the grave safely in a well preserved body, but rather to skid in sideways, totally worn out, shouting "...WOW!...what an amazing ride!" Live Life Passionately!!! [/COLOR]  I AM WE TODD IT, I AM SOFA KING WE TODD IT |
|
|
|
|
03-06-2009, 12:33 PM
|
#93 |
|
Registered User
Join Date: Aug 2005
Location: Hillsboro Oregon
Posts: 6,449
|
Re: Another Crewcab build
You already have the piece you need to tie into the inner/rear roof. It's still attached to the front piece. I'd use 10-12" of that plus the Burb roof grafted in at the drip rails. As for the headliner you can just trim out the rear section to match the burb inner panel then use a headliner similar to the burb's.
|
|
|
|
|
03-06-2009, 03:43 PM
|
#94 |
|
1961 crewcab
Join Date: Dec 2007
Location: missoula, mt
Posts: 6,164
|
Re: Another Crewcab build
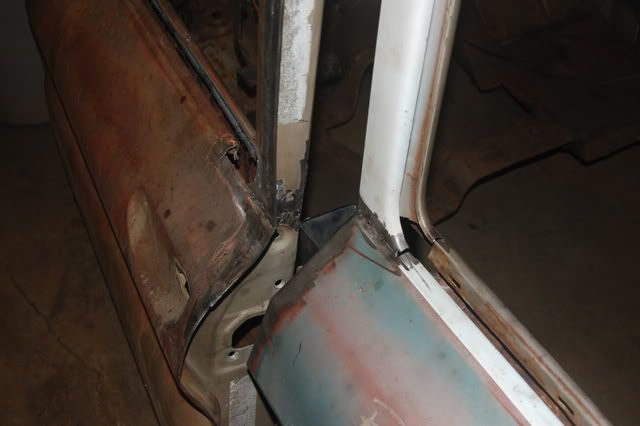
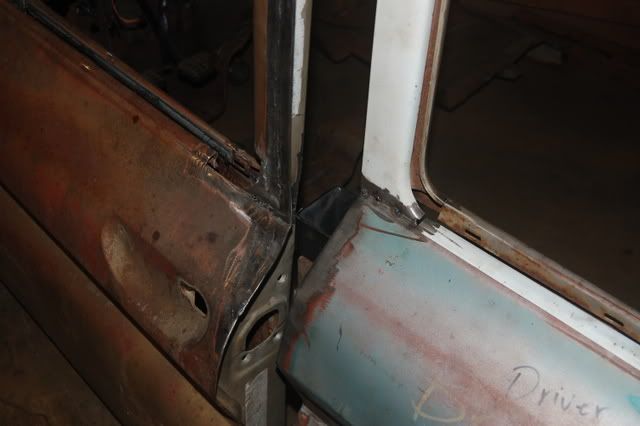
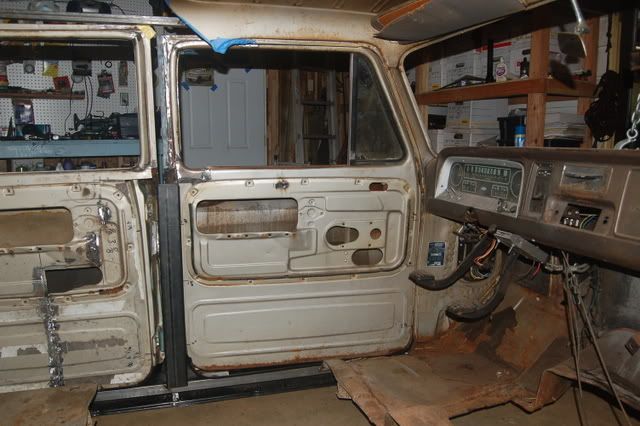
in the inside shot I can see the difference in why you might have problems with the rear window rolling down..
the front of the door comes in a bit to make room for the internal hinges... this is probably why the coach builders went with the external/flat hinges. maybe a small vent window, or a stationary piece of glass like a 73 - 87 suburban might work. |
|
|
|
|
03-06-2009, 04:03 PM
|
#95 |
|
Daring to be Different
Join Date: Aug 2008
Location: Hesperia, Ca
Posts: 4,499
|
Re: Another Crewcab build
What if you suicide the back doors? Just a thought.
__________________
Dennis Check out my 65/73 Cheap Build Thread. http://www.67-72chevytrucks.com/vboa...d.php?t=327644 KUSTOM RIDES FACE BOOK PAGE: https://www.facebook.com/groups/291198124258863/ 1965 C-10 Short Bed 350/700r4 2012 Silverado 1500 Crew Cab 2016 Honda Accord w/ 18" rims 2007 Honda Goldwing Trike w/ NAVI 2001 Yamaha Roadstar Indian look alike "Life's journey is not to arrive at the grave safely in a well preserved body, but rather to skid in sideways, totally worn out, shouting "...WOW!...what an amazing ride!" Live Life Passionately!!! [/COLOR] I AM WE TODD IT, I AM SOFA KING WE TODD IT |
|
|
|
|
03-07-2009, 10:17 PM
|
#96 |
|
I like turtles...
Join Date: May 2008
Location: Kansas
Posts: 993
|
Re: Another Crewcab build
wow thats impressive, nice work
__________________
1979 Silverado- lowered 5/7, 20 inch Boss rims, everything shaved, caddy lights, billet interior, UP FOR SALE! 1983 Scottsdale-on the back burner...SOLD!!! 1992 Silverado- extended cab, stock for now, but no promises SOLD!!! 2006 Chevy Cobalt-college car, staying stock  Whatever can't get fixed with a hammer, a roll of duct tape, a clothes hanger, a tube of glue, and a case of beer, can wait until tomorrow. |
|
|
|
|
03-07-2009, 10:50 PM
|
#97 | |
|
Luv the Crewcabs
Join Date: Aug 2006
Location: Andrews, In. 46702
Posts: 4,097
|
Re: Another Crewcab build
Quote:
Thanks, Rick
__________________
55 Nomad 52 Willys Truck 67 Stepper 67 Fleet 68 Wrecker 68 Suburban 76 Crewcab 79 Gmc Dumptruck 84 Blazer 86 Crewcab Stepside 87 Iroc 89 GMC Plow Truck 91 Camaro Vert 96 Z71 Stepsde |
|
|
|
|
|
03-07-2009, 10:54 PM
|
#98 | |
|
Daring to be Different
Join Date: Aug 2008
Location: Hesperia, Ca
Posts: 4,499
|
Re: Another Crewcab build
Quote:

__________________
Dennis Check out my 65/73 Cheap Build Thread. http://www.67-72chevytrucks.com/vboa...d.php?t=327644 KUSTOM RIDES FACE BOOK PAGE: https://www.facebook.com/groups/291198124258863/ 1965 C-10 Short Bed 350/700r4 2012 Silverado 1500 Crew Cab 2016 Honda Accord w/ 18" rims 2007 Honda Goldwing Trike w/ NAVI 2001 Yamaha Roadstar Indian look alike "Life's journey is not to arrive at the grave safely in a well preserved body, but rather to skid in sideways, totally worn out, shouting "...WOW!...what an amazing ride!" Live Life Passionately!!! [/COLOR] I AM WE TODD IT, I AM SOFA KING WE TODD IT |
|
|
|
|
|
03-08-2009, 12:16 AM
|
#99 |
|
Registered User
Join Date: Feb 2009
Location: Milwaukie, Oregon
Posts: 204
|
Re: Another Crewcab build
Thanks for the coments guys. It might take me a day or two to get caught up on them.
I fixed the link to the pics. Here's the latest from yesterday. I spent some time tapering the center post to fit the front door. Now, I'm going to step back and finish the rear door a little more now that I can see how it will fit into the jamb. Here's the piece I cut out of the tube I used for the main part of the B pillar. Look at how much it curled up just cutting it free. 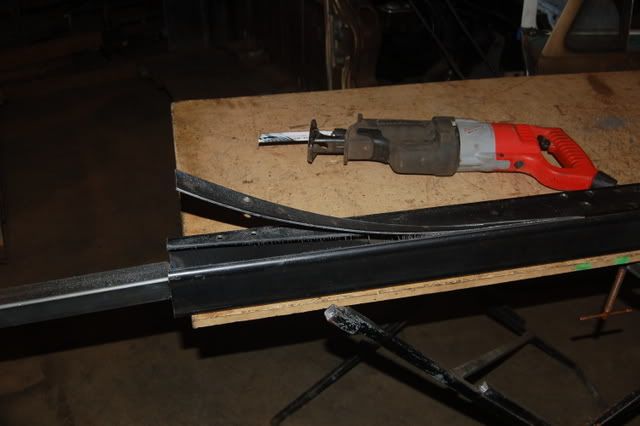 Here's a picture of it after I welded it back together. 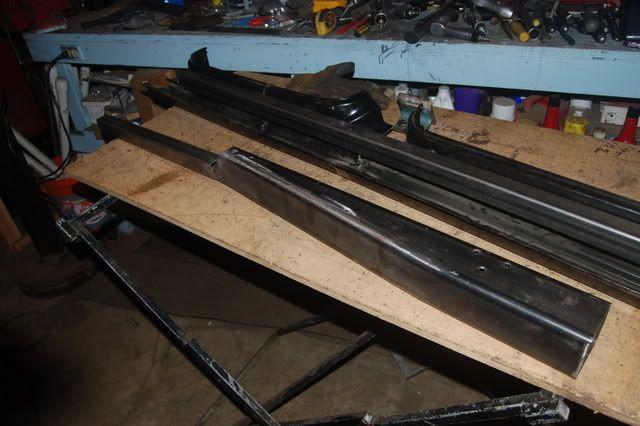 and another showing the B pillar and the inside of the rocker 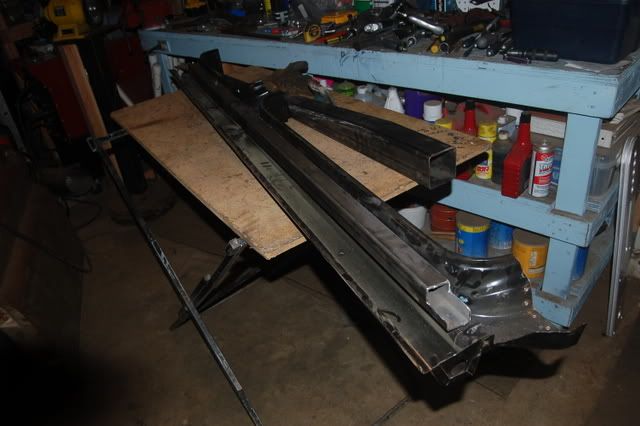 I took today off, and went to the roadster show. Hey I'm famous. That's my intake in the Portland Roadster Show. My car and motor are still at the shop, but they saw fit to steal the intake for the show motor. LOL 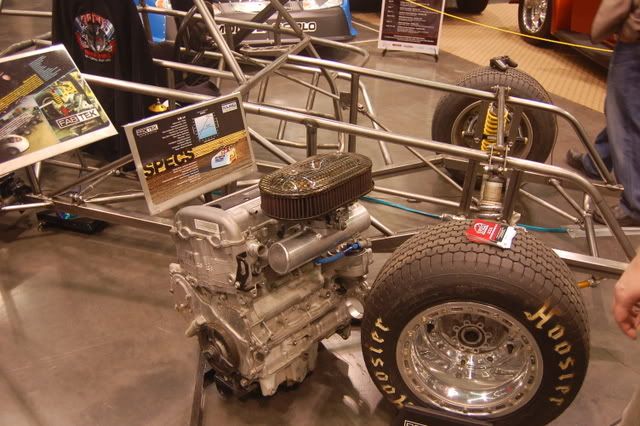
|
|
|
|
|
03-08-2009, 06:47 PM
|
#100 |
|
Registered User
Join Date: Feb 2009
Location: Christmas Valley, OR
Posts: 17
|
Re: Another Crewcab build
Now that you got the body lined up, if you still want a big back window my neighbor has one on a '63 with a rusted out floor that I can bring in to you. That is if you're bored.

Last edited by jalopy45; 03-08-2009 at 06:53 PM. Reason: spellink |
|
|
|
 |
| Bookmarks |
|
|


 Linear Mode

