
 |
Register or Log In To remove these advertisements. |
|
|
|
|||||||
 |
|
|
Thread Tools | Display Modes |
|
|
#76 |
|
Registered User
Join Date: Jun 2015
Location: shreveport, la.
Posts: 160
|
Re: Tucker69 "Project No-Name"
|
|
|

|
|
|
#77 |
|
Registered User
Join Date: Jun 2015
Location: shreveport, la.
Posts: 160
|
Re: Tucker69 "Project No-Name"
Well I got a little more bed repair done over the weekend. Done some sandblasting, some patchs put in & some POR-15 treatment. I also got my drive shaft painted and installed which led to another issue. The original center crossmember was going to come in contact with the driveshaft with a load in the bed or hitting bump...etc..... so I just cut the top of the crossmember and will fabricate a taller bolt in strap for safety, this will allow me to gain about 1 1/2" of clearance.. I will post updates soon. I also just placed a couple of "LMC" & "MAR-K" orders. Thanks and GOD Bless....Casey
|
|
|

|
|
|
#78 |
|
Registered User
Join Date: Jun 2015
Location: shreveport, la.
Posts: 160
|
Re: Tucker69 "Project No-Name"
|
|
|

|
|
|
#79 |
|
Registered User
Join Date: Sep 2009
Location: ottawa,canada
Posts: 4,550
|
Re: Tucker69 "Project No-Name"
sweet intake! I don't know why you're shouting tho..
__________________
my build threads '86 C10 http://67-72chevytrucks.com/vboard/s...d.php?t=415628 '67 C10 http://67-72chevytrucks.com/vboard/s...d.php?t=635078 '63 GMC http://67-72chevytrucks.com/vboard/s...d.php?t=674682 |
|
|

|
|
|
#80 |
|
Registered User
Join Date: Jun 2015
Location: shreveport, la.
Posts: 160
|
Re: Tucker69 "Project No-Name"
Shouting about what???? What you talking about? Heck, like everybody tells me.. I am not happy if i'm not gripping.. Ha. Ha.. Casey
|
|
|

|
|
|
#81 | |
|
Registered User
Join Date: Oct 2015
Location: Plainfield, Indiana
Posts: 12
|
Quote:
On another note, I like your build and I am subscribing. Keep up the good work. |
|
|
|

|
|
|
#82 | |
|
Registered User
Join Date: Jun 2015
Location: shreveport, la.
Posts: 160
|
Re: Tucker69 "Project No-Name"
Quote:
|
|
|
|

|
|
|
#83 |
|
Registered User
Join Date: Jun 2015
Location: shreveport, la.
Posts: 160
|
Re: Tucker69 "Project No-Name"
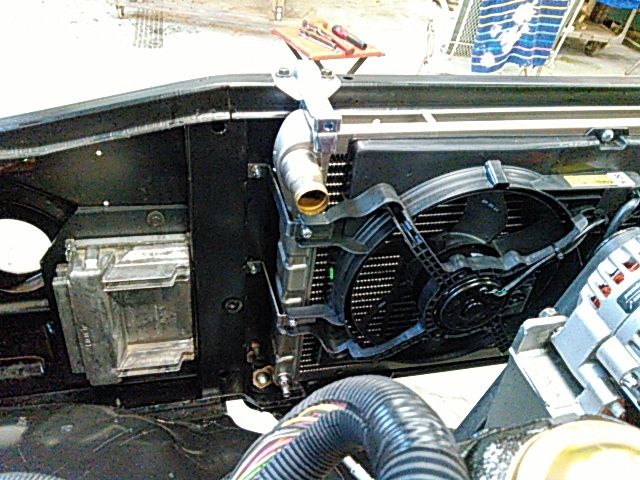
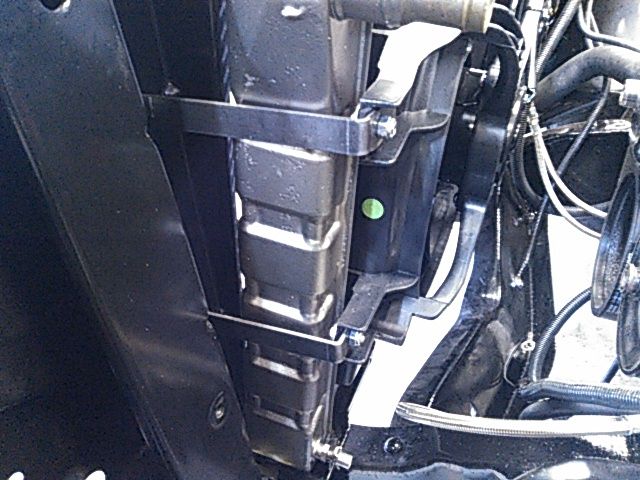
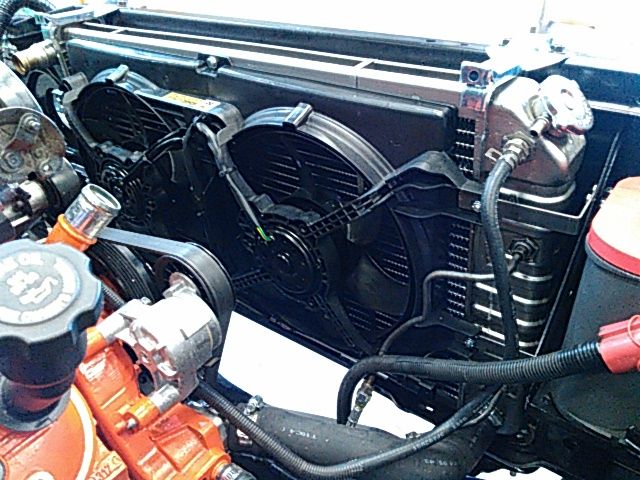
I decided to go ahead and install a electric cooling fan setup while I had apart with intake installation. I decided to go with the fan setup off of 1998 Dodge Intrepid. I had seen several guys on this forum running this setup. I toke some measurements and felt it would work well. The only fabrication needed was to make some brackets to hold the fan/shroud to the radiator. Here is a couple of pics...
|
|
|

|
|
|
#84 |
|
Registered User
Join Date: Jun 2015
Location: shreveport, la.
Posts: 160
|
Re: Tucker69 "Project No-Name"
If you notice in the last picture I have the pcm mounted on the d/s of the core support. this had been my plan, I was going to run the harness over the back of the d/s inner fender and under the cab and up the back of the bell housing. from there I would have all harness connections. Trying to have as little amount of harness clutter out of the engine bay. Well, would not work to my satisfaction. some of the harness was too short, some way too long. Since this was not going to work to my satisfaction I decided to mount the "pcm" inside the cab along the trans tunnel. I found my location for my hole in firewall for the harness to pass thru, I removed all of the tape & conduit from harness si I could separate the individual harness runs. this way I could pull ant excess wire thru the firewall and would also be able to see which legs were to short. I did not finish this prior to my weekend running out of time. I will be headed for a swap meet in Decatur, Tx. this weekend so that's all on the truck for a couple weeks. I will update when I have some more to report. Casey
|
|
|

|
|
|
#85 |
|
Registered User
Join Date: Jun 2015
Location: shreveport, la.
Posts: 160
|
Re: Tucker69 "Project No-Name"
|
|
|

|
|
|
#86 |
|
Registered User
Join Date: Jun 2015
Location: shreveport, la.
Posts: 160
|
Re: Tucker69 "Project No-Name"
Sorry its been a bit since updates. we got pounded with about 20 inches of rain this past week and had lots of flooding. I came out alright but, lots of others didn't. I made more progress than the few pics will show. I will get some more catchup pics this weekend and get yall up to date. Thanks, Casey
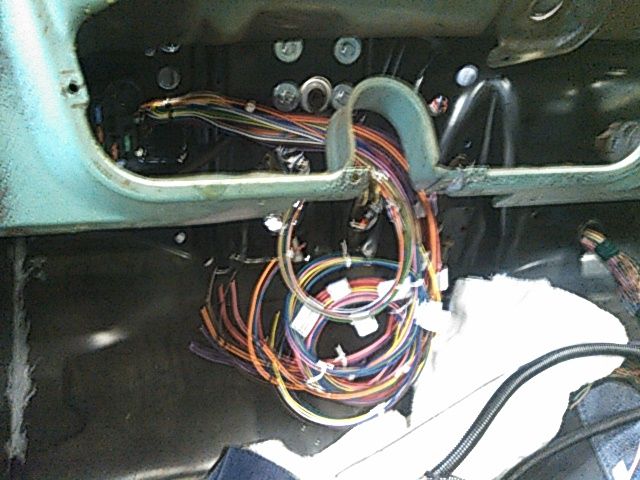 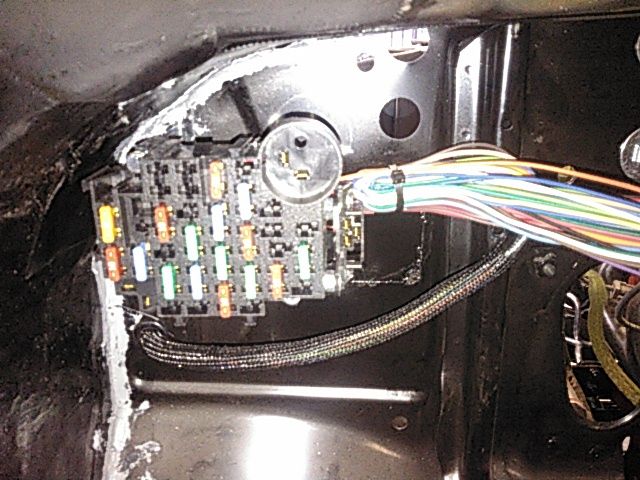 You will notice in this picture the shiney area on the firewall. This was a square cut-out for the factory harness/block to pass thru. I had no need since I was using a different harness/fusebox. so I welded this hole up. There will be a few other holes in the firewall I will fill when I take the truck back apart for final painting and assembly.... 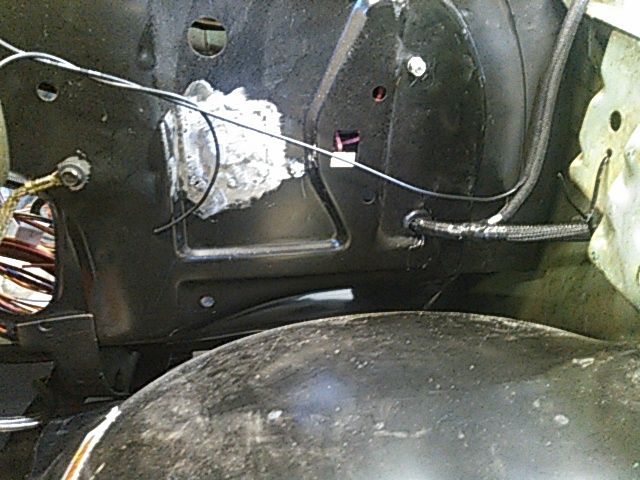
|
|
|

|
|
|
#87 |
|
Registered User
Join Date: Jun 2015
Location: shreveport, la.
Posts: 160
|
Re: Tucker69 "Project No-Name"
I will try to get everyone caught up to date. I finished my harness and got pcm somewhat located where I want it to live. also have the cooling fans working the way I wanted. so I started on my steering column. I purchased the "retro" unit from Iditit. This is the column "Rob @ No Limit" uses with their rack & pinion suspensions.Here is a couple pics of my progress..... The shaft is not angled or as close as it appears..
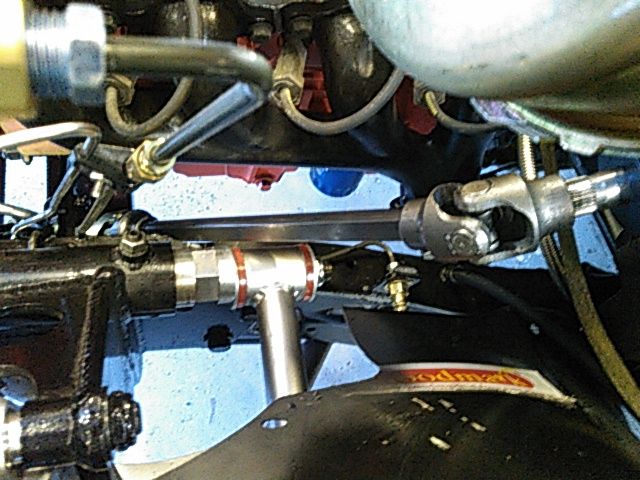 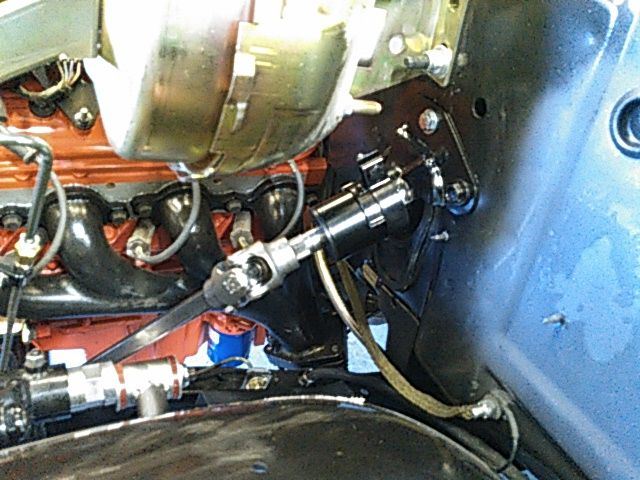
|
|
|

|
|
|
#88 |
|
Registered User
Join Date: Jun 2015
Location: shreveport, la.
Posts: 160
|
Re: Tucker69 "Project No-Name"
next I started adapting a gas pedal to my floor, I started with my donor truck pedal assembly and after cutting/welding/bending and much look & relook I was somewhat pleased with outcome.....
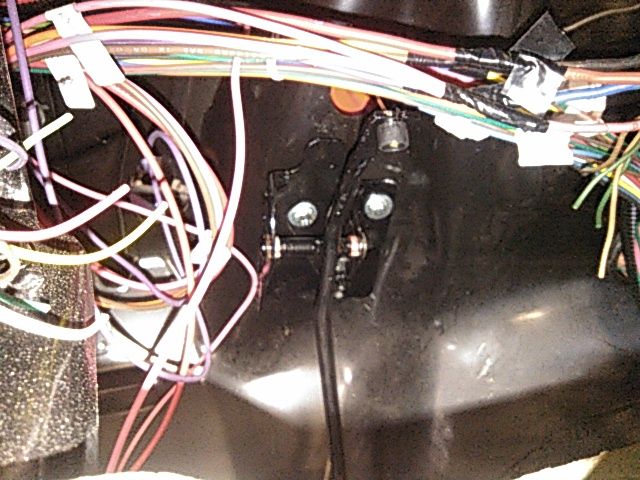 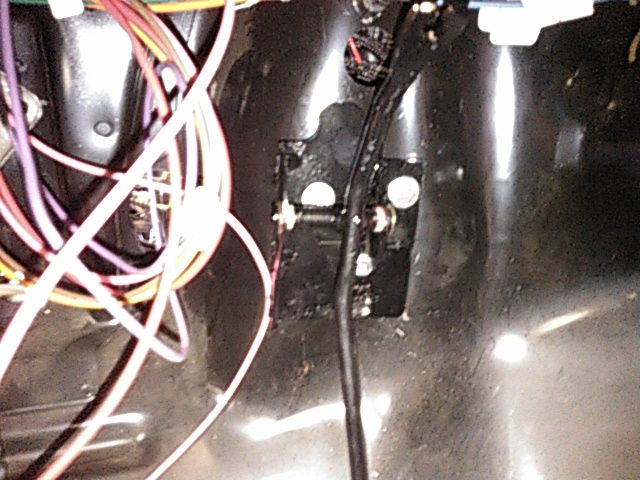 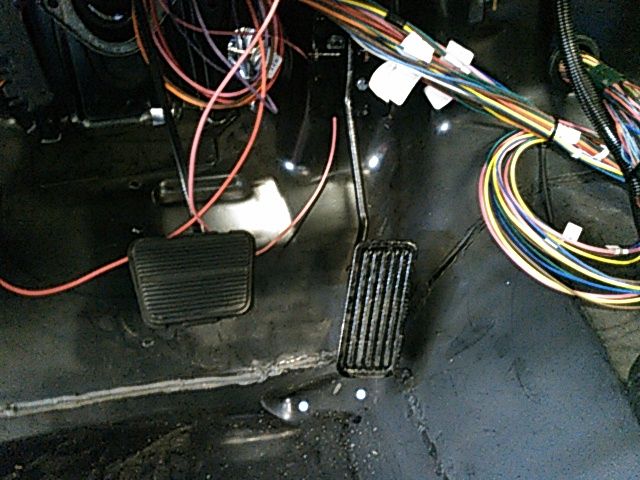 Next I was on to the cable bracket at the intake. due to the height of the FAST intake it made so the cable was to short to reach throttle body, so I fabricated the bracket to free up some slack with the factory accel. cable. once all was done the gas pedal worked the throttle..... 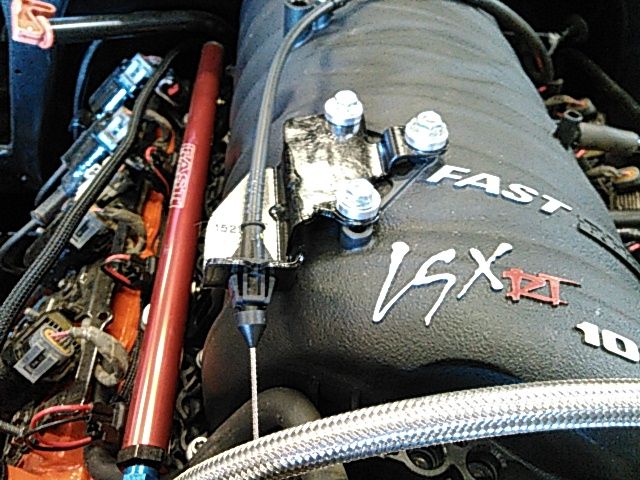 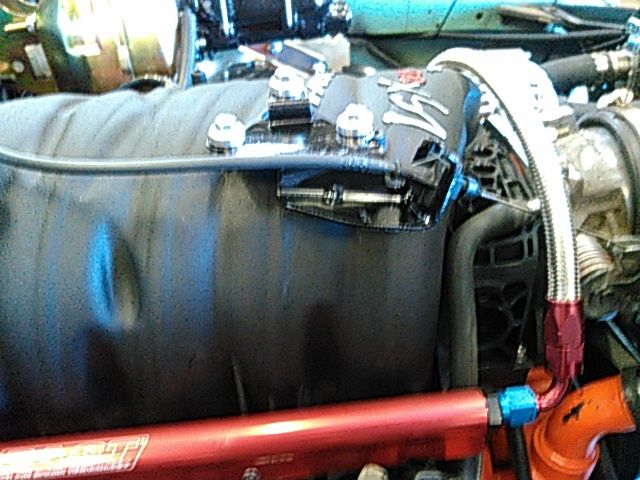
|
|
|

|
|
|
#89 |
|
Registered User
Join Date: Jun 2015
Location: shreveport, la.
Posts: 160
|
Re: Tucker69 "Project No-Name"
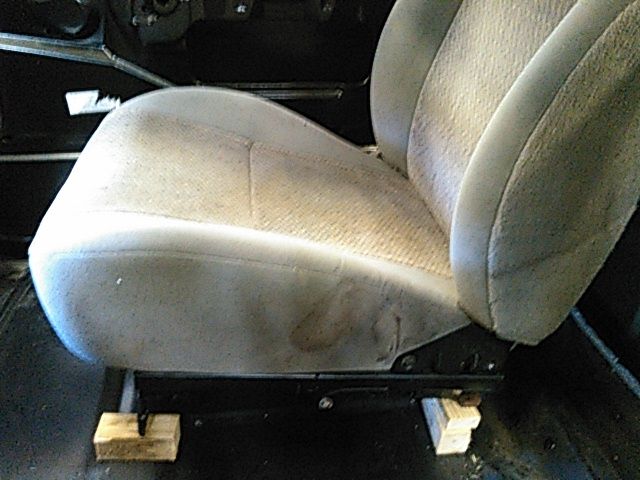
Next I began mock-up of seat brackets for the seats I chose to use fro now. here is a pic of mock-up....
 This is the shifter I decided on. this was one of the few shifters that are designed to work with the 4l80 transmission(without modifications to shifter) It is made by "Winters". I chose the one designed to use with a console. I will adapt this into my console I will fabricate later on.... 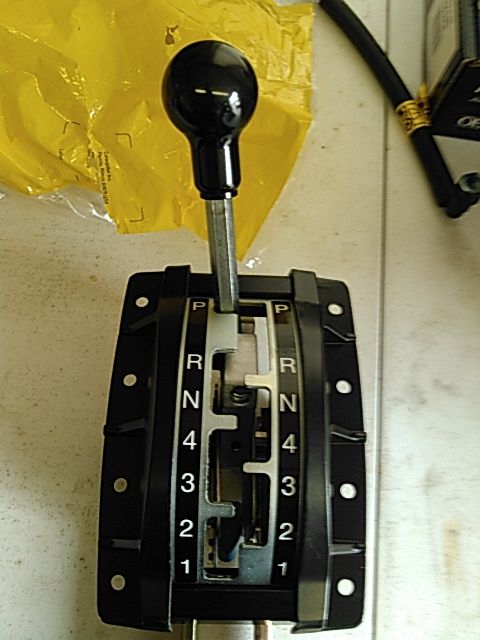 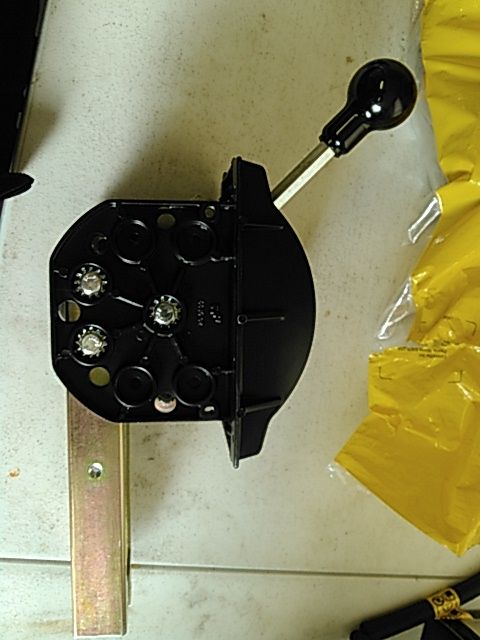 That's all for now, will keep ya'll posted as I make progress. Thanks for your kind words and hope you enjoy... GOD BLESS, casey |
|
|

|
|
|
#90 |
|
Registered User
Join Date: Jun 2015
Location: shreveport, la.
Posts: 160
|
Re: Tucker69 "Project No-Name"
Let me fill ya'll in on this weekends progress, finished seat brackets, installed shifter, installed rr disc brakes, bleed brake system, installed door handles, installed tail gate and most importantlt, took her out for her first shake down since 1986. Here is a couple pics of my progress this past weekend....
These are the rr disc conversion brackets made by "CaptainFab", may I add this is the 2 purchase I have made from him and his products are excellent. Fit is perfect. Everything went together as it should. Product was shipped when he said it would and arrived well boxed and was even vacuum sealed with all nuts/bolts.... 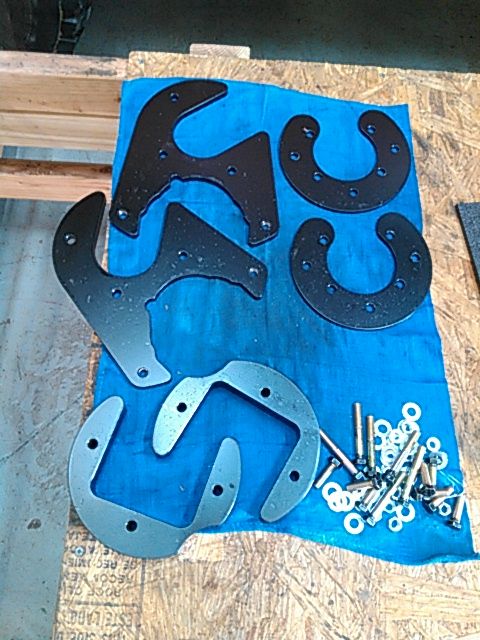 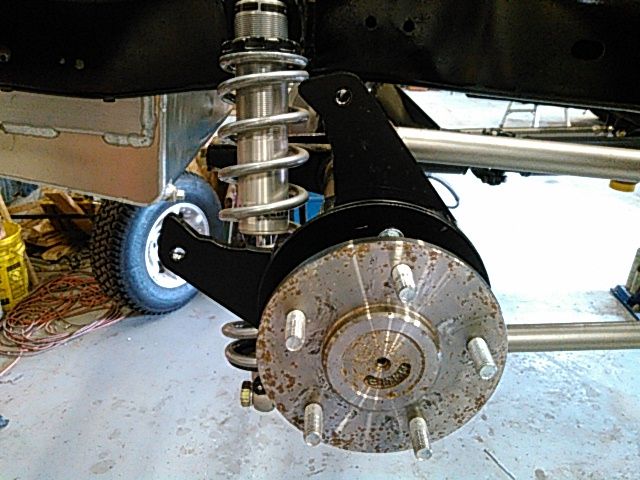 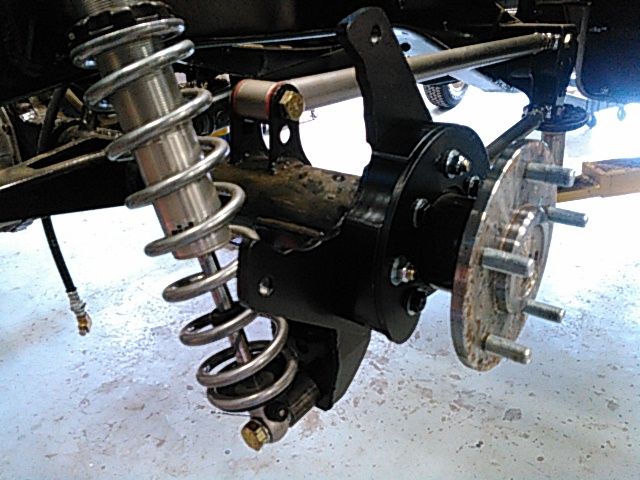 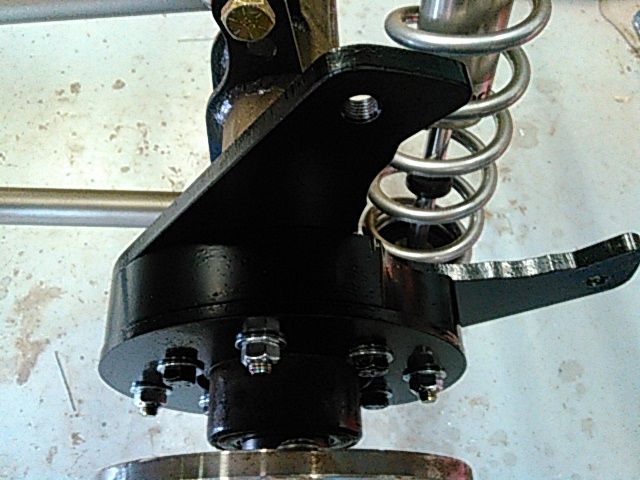 Here they are complete with "Astro AWD rotors" 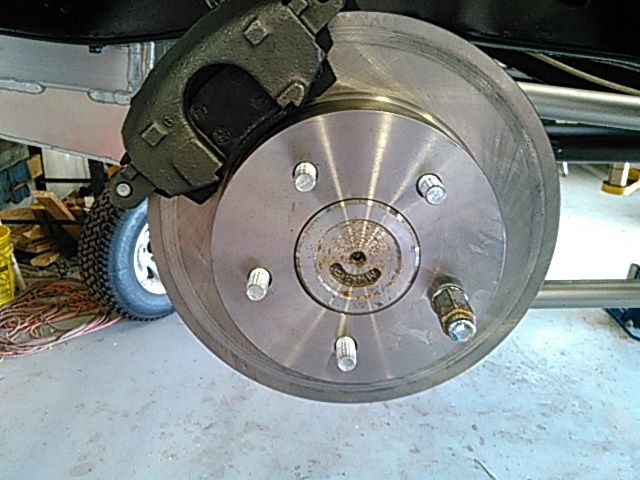 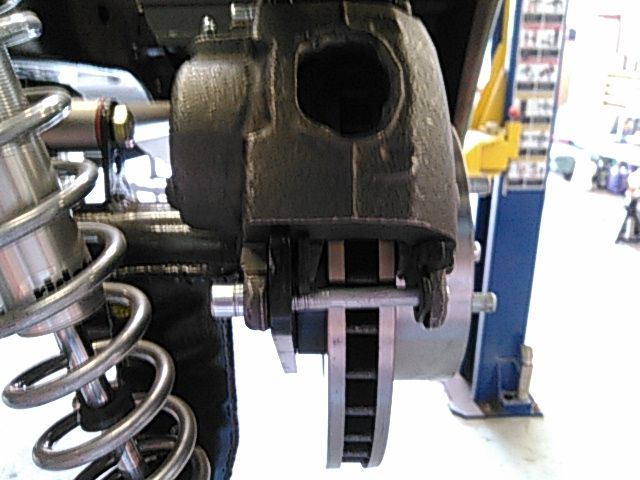
|
|
|

|
|
|
#91 |
|
Registered User
Join Date: Jun 2015
Location: shreveport, la.
Posts: 160
|
Re: Tucker69 "Project No-Name"
Let me take a moment to praise where it is deserved. as mentioned earlier I purchased a complete suspension kit from Rob@NoLimit Engineering. I cannot say enough good things about Rob and all the folks working with him. In 35 years and over 20 vehicles I have never had a product give me as much pleasure and perform above my expectations as this suspensions has. From the time I placed the order until the last time I phoned with a question, they have always handled my issue with speed and professionalism. On one occasion, one of the techs even stayed late on a Friday to help me with an issue I was having with my steering column. Keep in mind that most of these issues were my fault, either my mistake on a lack of knowledge on my part( I have never installed a complete suspension overhaul such as this). In the end the truck rode great, handled like a corvette with no vibrations or rattles. Isnt that what we all are wanting(a Playboy bunny that can cook, for a wife) Maybe that's not a good analogy, but you get the picture. My hats off to Rob and all his crew.. Thanks, Casey
|
|
|

|
|
|
#92 |
|
Registered User
Join Date: Sep 2010
Location: South Jordan, UT
Posts: 162
|
Re: Tucker69 "Project No-Name"
Looking good. Nice work!
|
|
|

|
|
|
#93 |
|
Registered User
Join Date: Jun 2015
Location: shreveport, la.
Posts: 160
|
Re: Tucker69 "Project No-Name"
|
|
|

|
|
|
#94 |
|
Registered User
 Join Date: Oct 2012
Location: Burnet, Tx
Posts: 332
|
Re: Tucker69 "Project No-Name"
Man you're kicking it, I wish my progress was coming along as quick as yours. Seeing that LS sitting in there sure makes me want one in mine. Keep at it and keep the updates coming.
|
|
|

|
|
|
#95 |
|
Registered User
Join Date: Jun 2015
Location: shreveport, la.
Posts: 160
|
Re: Tucker69 "Project No-Name"
Thanks buddy, Man that 1st test drive made the long weekends for the last year all worth it. And we won't even talk about the $money$..... Casey
|
|
|

|
|
|
#96 |
|
Registered User
Join Date: Jun 2015
Location: shreveport, la.
Posts: 160
|
Re: Tucker69 "Project No-Name"
|
|
|

|
|
|
#97 |
|
Registered User
Join Date: Jun 2015
Location: shreveport, la.
Posts: 160
|
Re: Tucker69 "Project No-Name"
|
|
|

|
|
|
#98 |
|
Registered User
Join Date: Jun 2015
Location: shreveport, la.
Posts: 160
|
Re: Tucker69 "Project No-Name"
Well its been a while since any updates. even though she's not completely back together I have been putting a few miles on her. Giving her a shake down run(as they say). Man I love this suspension. I have a few issues to address that I have found. I am ready to order my wheel/tires but I need to bring my front ride height up before measuring. I jusr got some different front springs from "No Limit". hoping these will give me enough inner fender clearance as well as get me the rake I am looking for. More on that as I get a chance to install springs. I ordered my gage cluster from Summit. Its a Dakota Digital set-up. Install went easy enough and set-up was simple. I am really pleased with the outcome. here is a couple pics of finished installation of gages.....
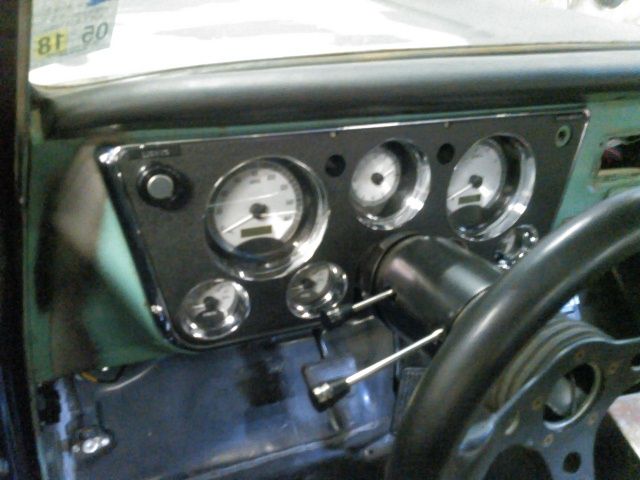 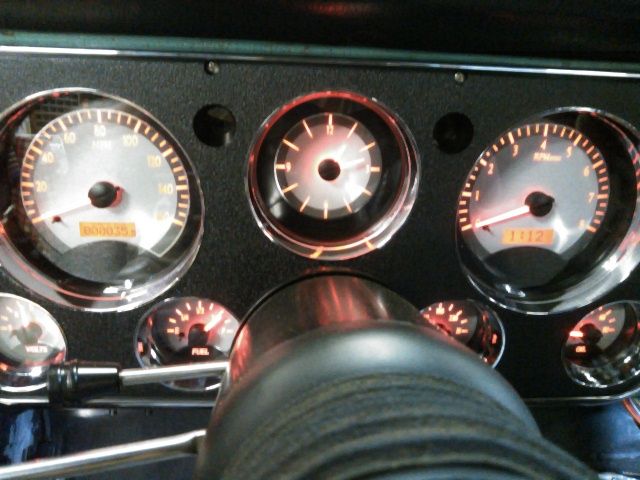 Pictures don't do gages justice. really nice. |
|
|

|
|
|
#99 |
|
Registered User
Join Date: Jun 2015
Location: shreveport, la.
Posts: 160
|
Re: Tucker69 "Project No-Name"
Also got my bed wood kit from "MAR-K". I went with the oak wood and the hidden fasteners on stainless strips....
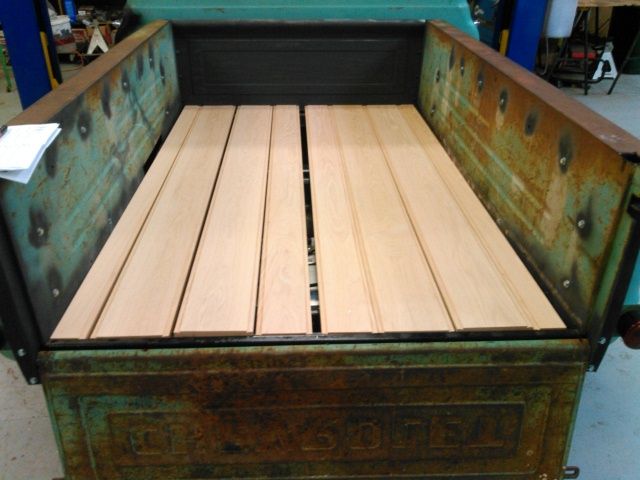 while I was on the bed floor I started on my mini tubs. I had already had the tubs fabricated, si it was just a matter of cutting bedsides & first 2 bed boards.... 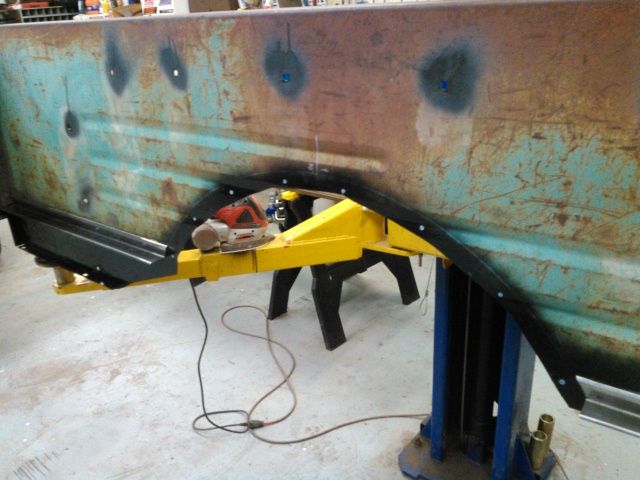 you can see in this picture I have already cut the angle strips and spot welded in place.... 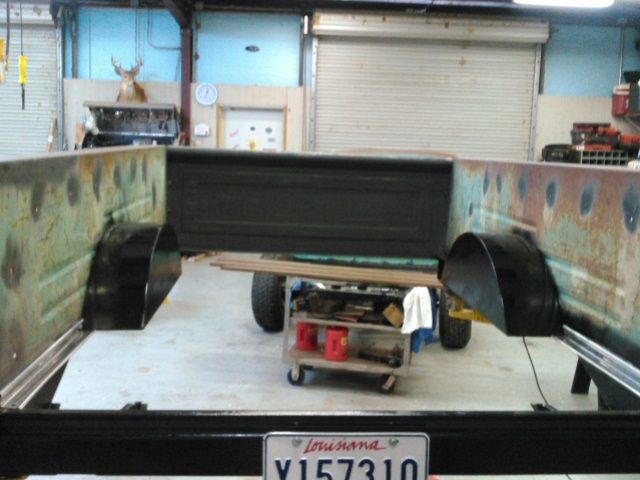 bed boards with 1st coat of stain.. I am staining, sealing & marine varnish... 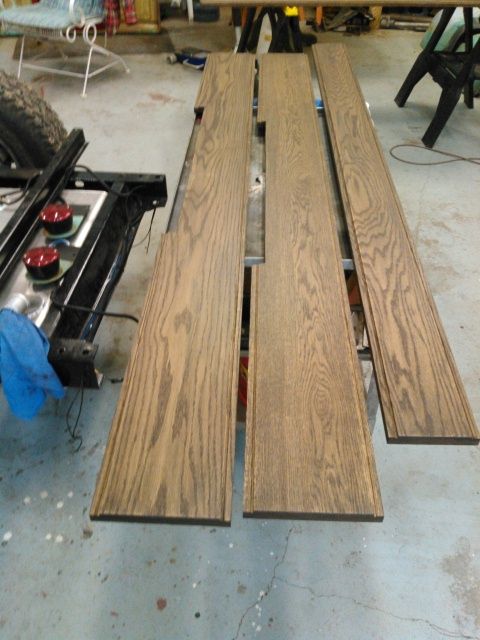
|
|
|

|
|
|
#100 |
|
Registered User
Join Date: Jun 2015
Location: shreveport, la.
Posts: 160
|
Re: Tucker69 "Project No-Name"
|
|
|

|
 |
| Bookmarks |
|
|