
|
Register or Log In To remove these advertisements. |
|
|
|
|||||||
 |
|
|
Thread Tools | Display Modes |
 10-11-2016, 06:51 PM
|
#76 |
|
Registered User
Join Date: Jun 2015
Location: Winnipeg, Mb
Posts: 137
|
Re: Run Away's '69 C10 LWB Project Log
Its comin together eh?! Really nice work man
__________________
My 68 Build http://67-72chevytrucks.com/vboard/s...=1#post7272324 Herb! My C30 build http://67-72chevytrucks.com/vboard/s...80#post7304180 |

|

|
|
10-12-2016, 11:20 AM
|
#77 |
|
Still Learning
Join Date: Jul 2009
Location: Central Oklahoma
Posts: 10,108
|
Re: Run Away's '69 C10 LWB Project Log
Holy cow! I'm out of breathe from that series of pictures.....I thought I had a tough battle with rust repair. Not even close to what you have going.... HERE.
We don't have anything on you Canadian brothers.. Keep up the good work. |
|
|
|
|
10-14-2016, 11:37 PM
|
#78 |
|
Registered User
Join Date: Feb 2009
Location: Winnipeg, Manitoba
Posts: 68
|
Re: Run Away's '69 C10 LWB Project Log
Thanks for the comments. mcbassin, your thread was one of the ones I read when trying to convince myself I could do this, so thanks for the inspiration.
Seam sealer the inner panels that will be no longer accessible once the outer cowl is on. 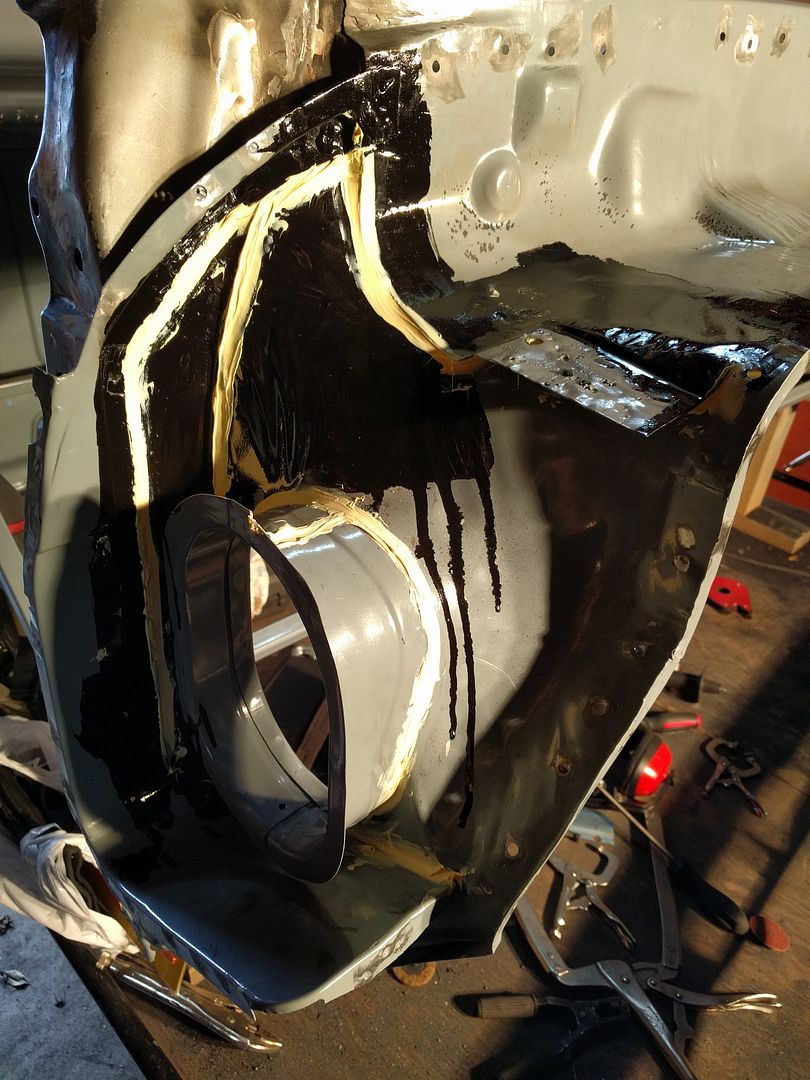  I'm planning on getting the cab blasted and powerdercoated again once it's all together and done before paint. So leaving the rest for now. POR15 on the outer cowl support pieces, which are also what the front fenders bolt to. 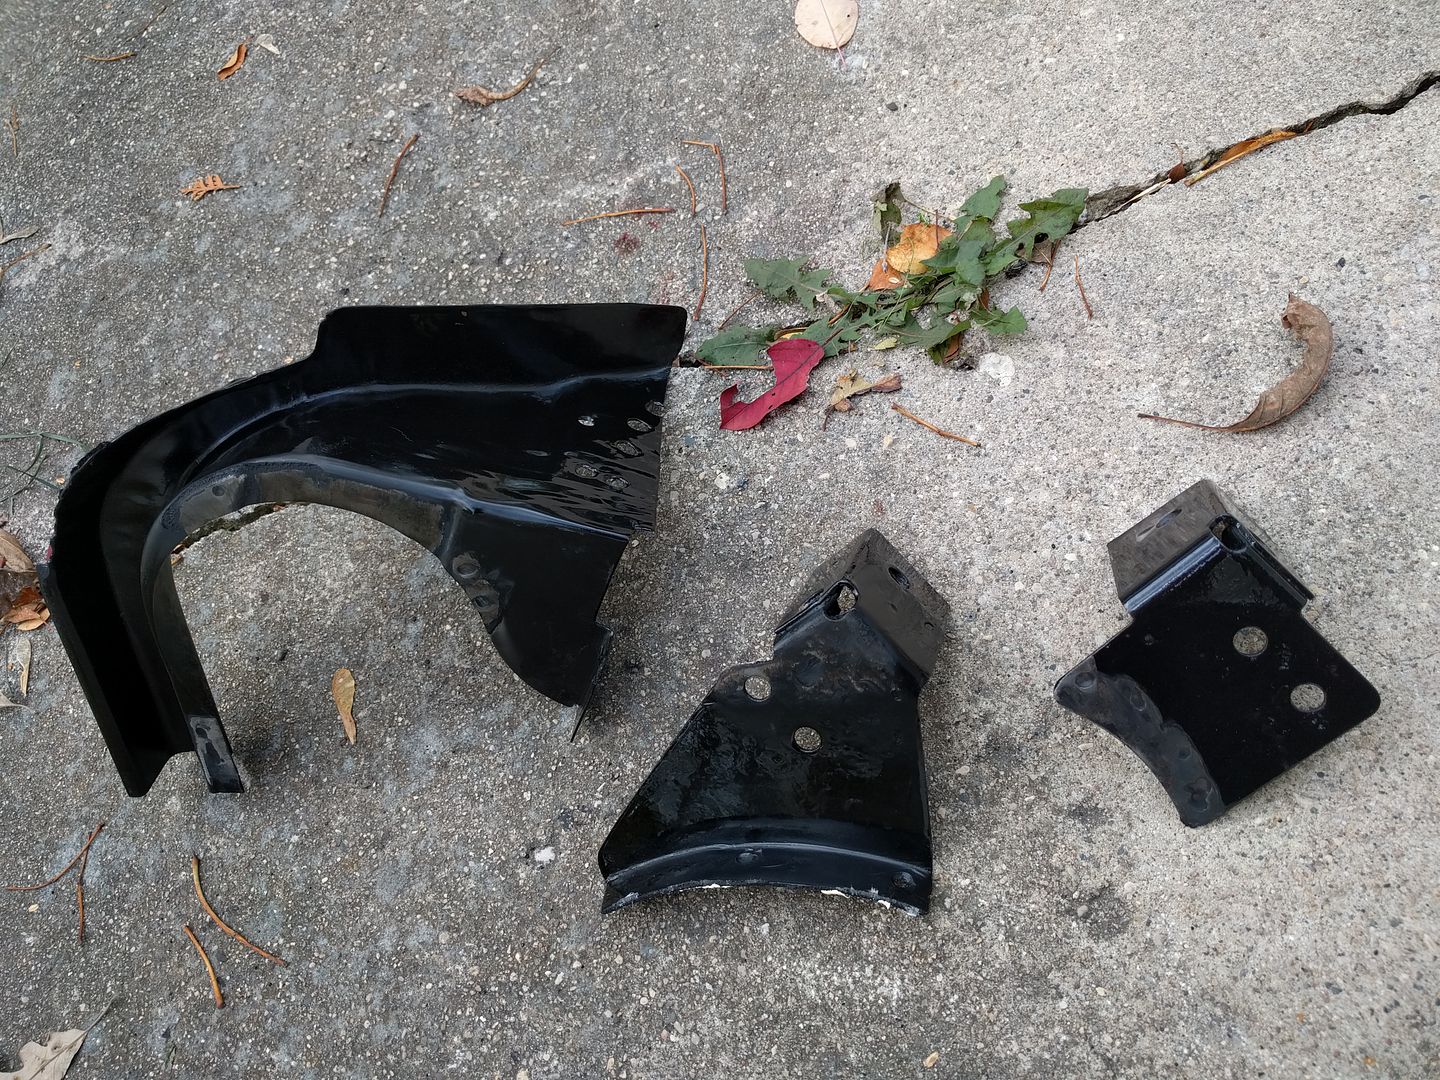 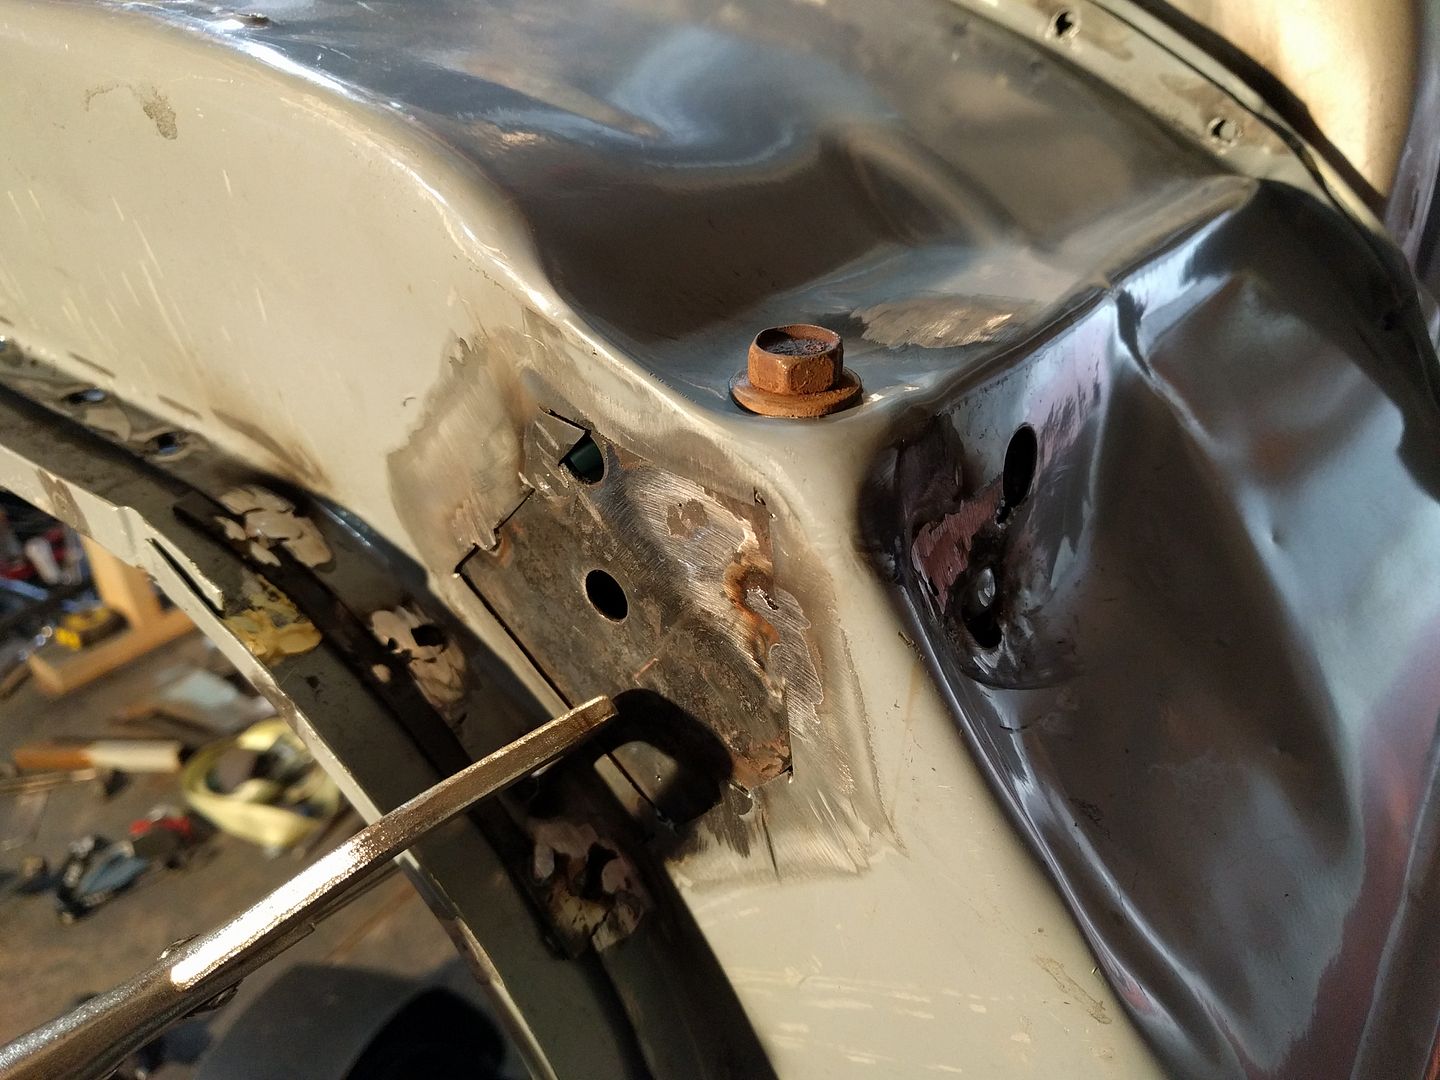 Stretched the inner cowl. Made a cut. 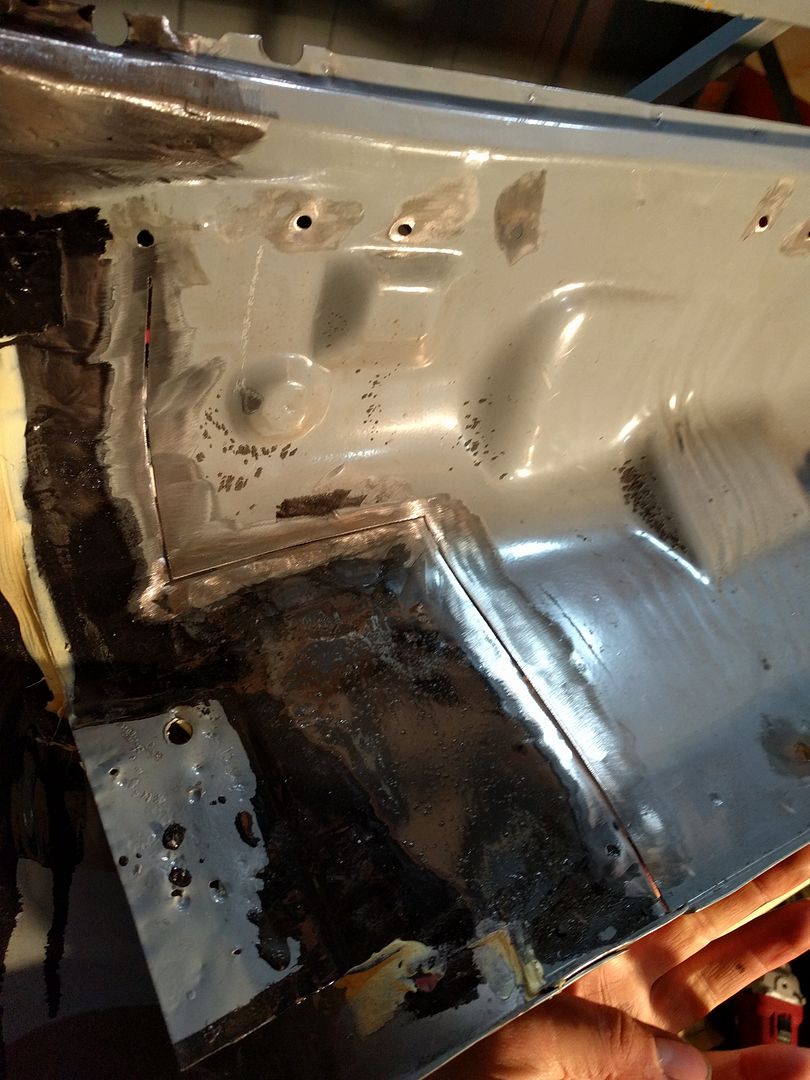 My stretching rig. Piece of 2x4 laying around, already cut to close. Random Honda jack screwed to the end of the 2x4. Screw through the drivers wing panel into the bottom of the 2x4 to hold it in place. Another chunk of 2x4 to prop the jack end up. 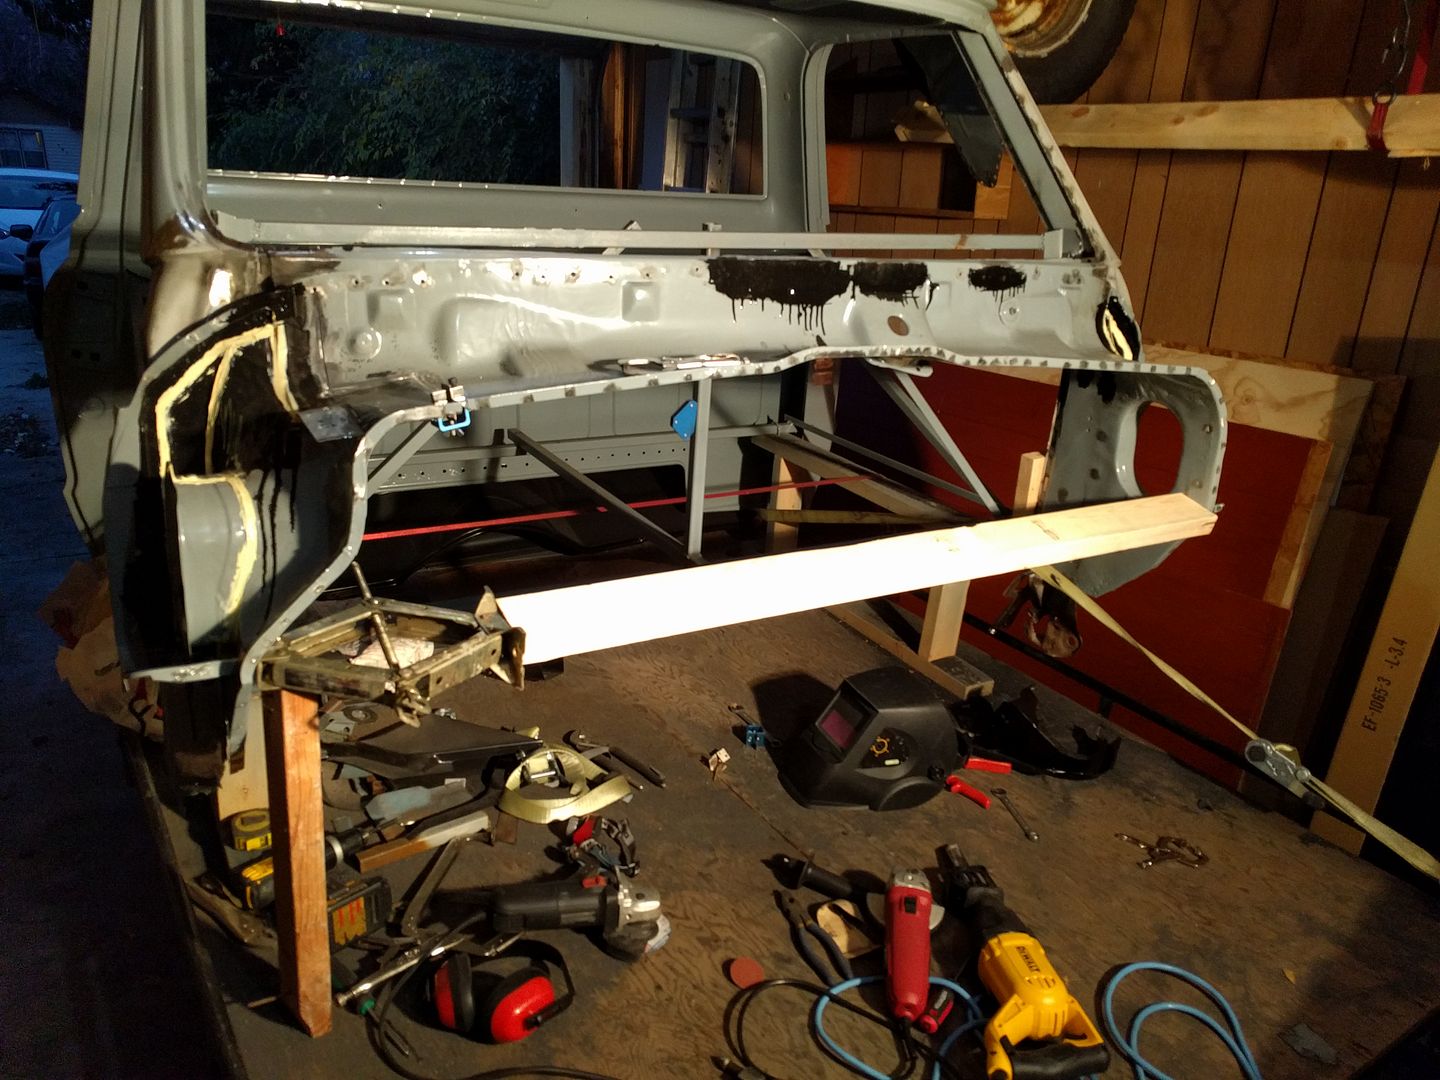 This is about where I wanted it to be. Doesn't take much force to get here, I can do it by hand the stretching rig just holds it for me. 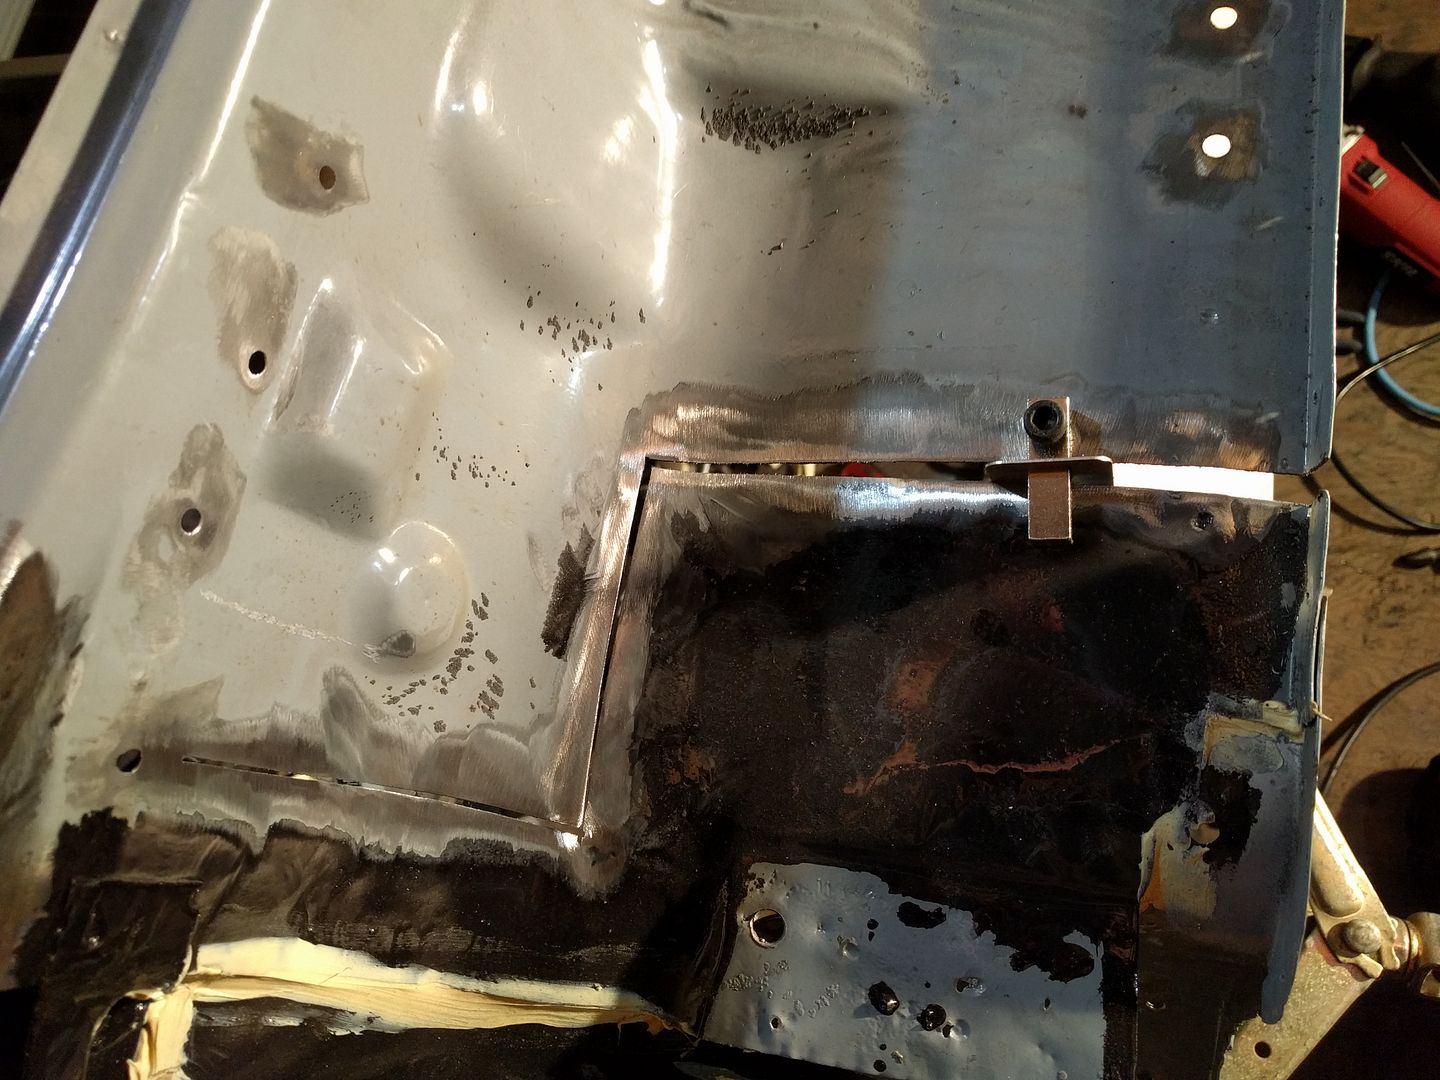
|
|
|
|
|
10-14-2016, 11:38 PM
|
#79 |
|
Registered User
Join Date: Feb 2009
Location: Winnipeg, Manitoba
Posts: 68
|
Re: Run Away's '69 C10 LWB Project Log
Outer cowl now fits like a glove
 Note the spot weld holes in the wing all line up perfect and tight. 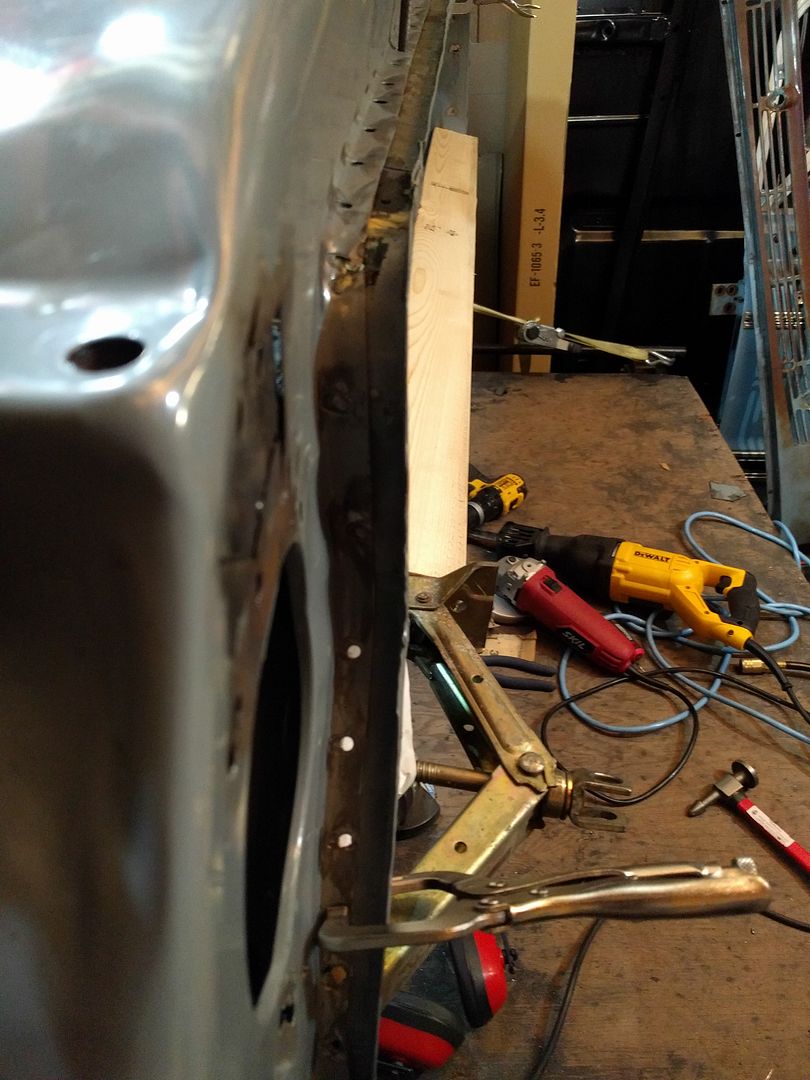 Stuck some pieces of scrap on the backside. Holes in the cowl to plug weld. 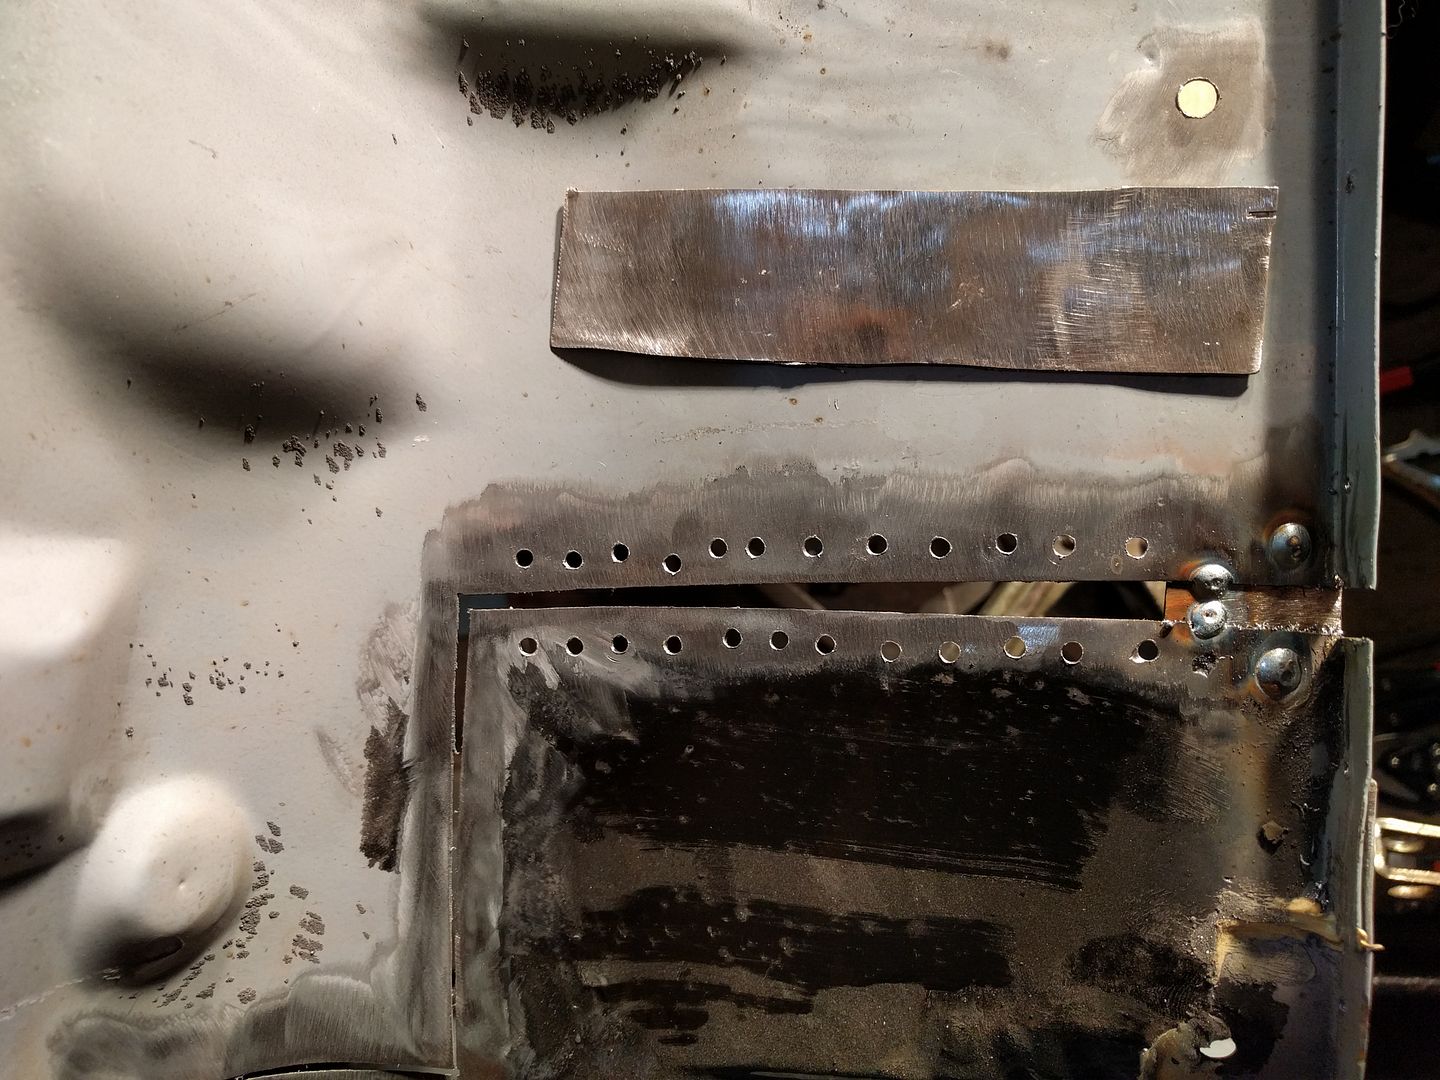 Stitching it together. Kept blowing through the part closer to the windshield where I didn't put anything on the backside. 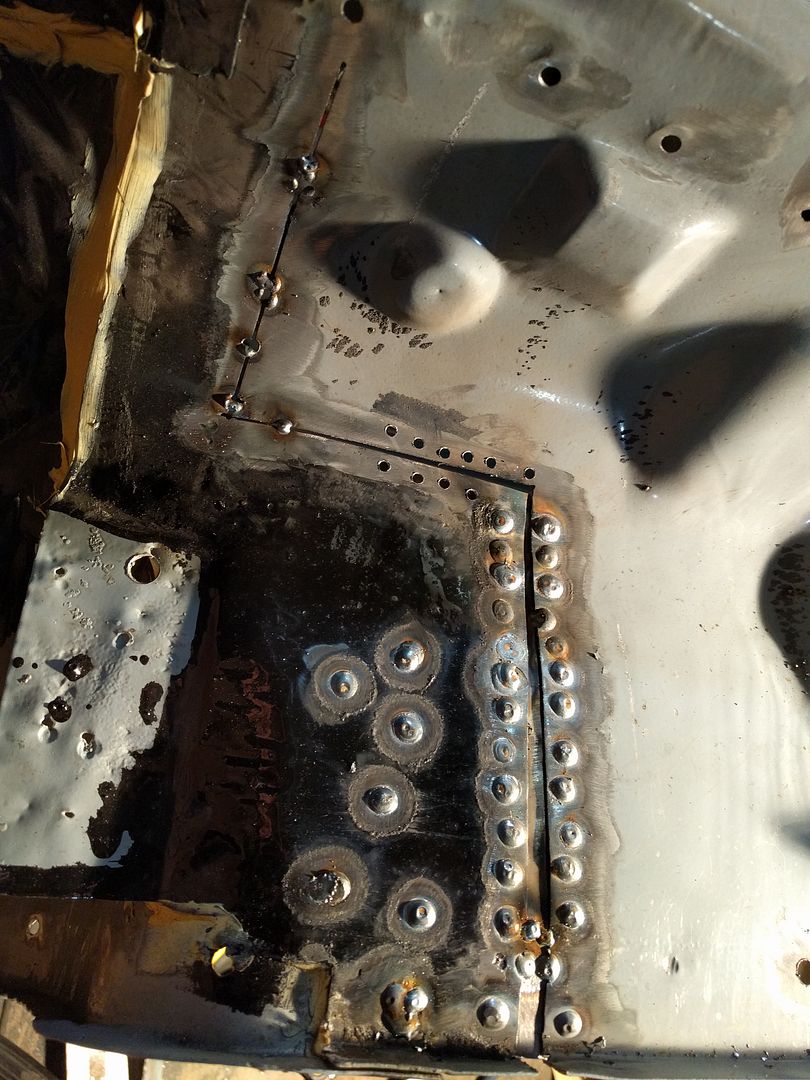 All welded 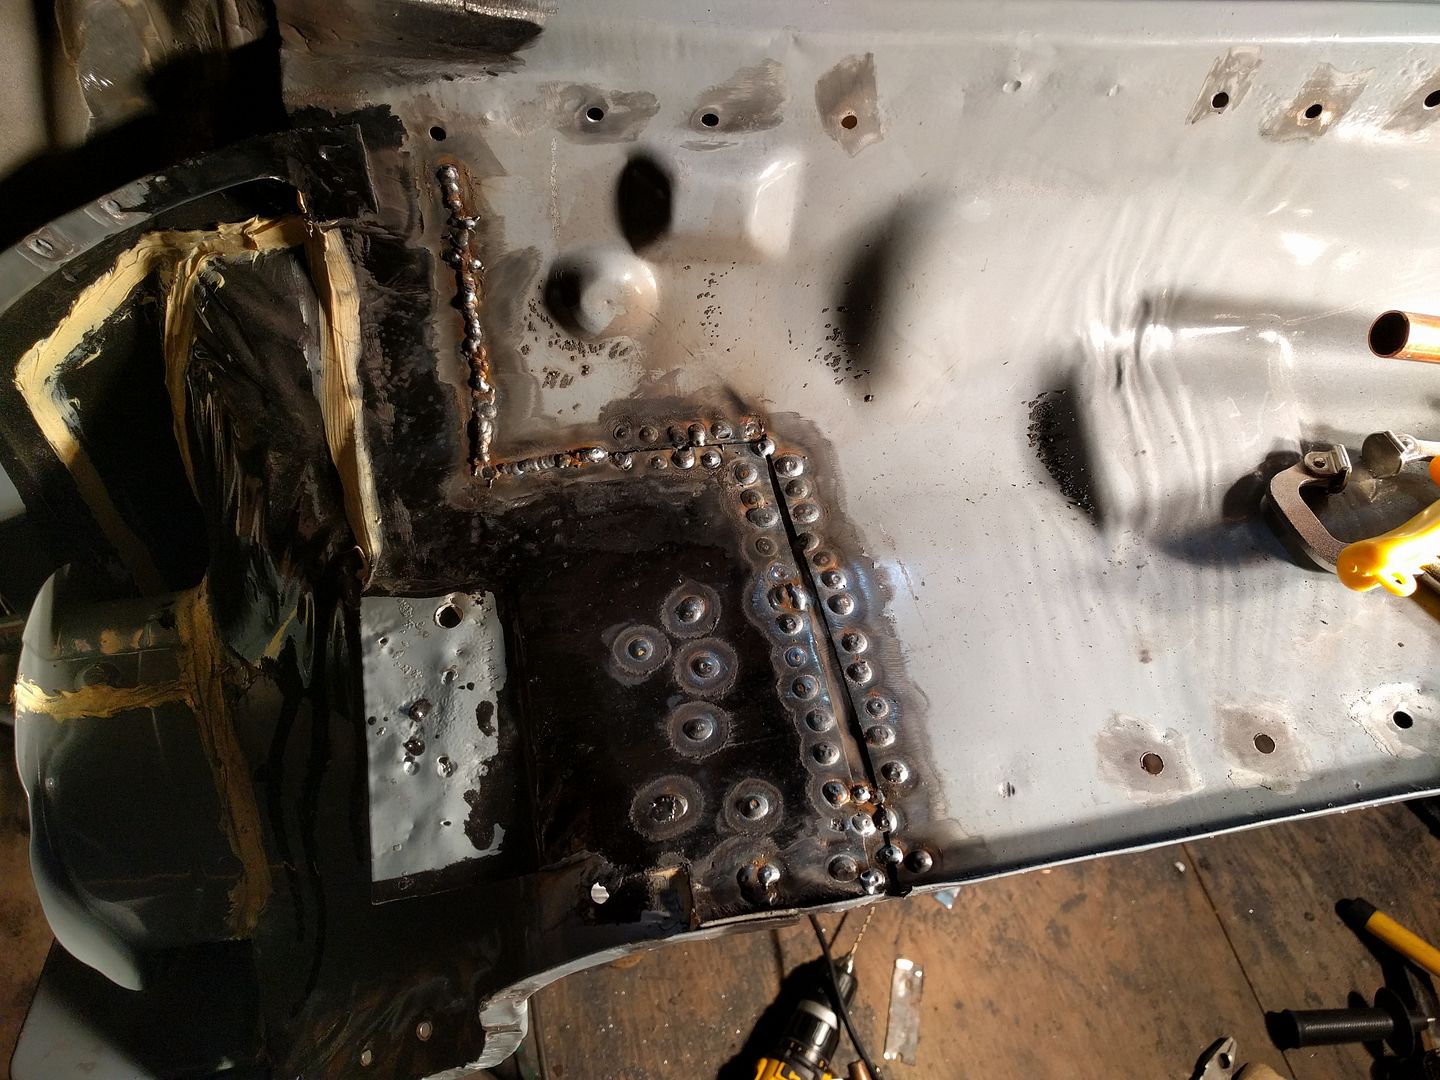 Ground. 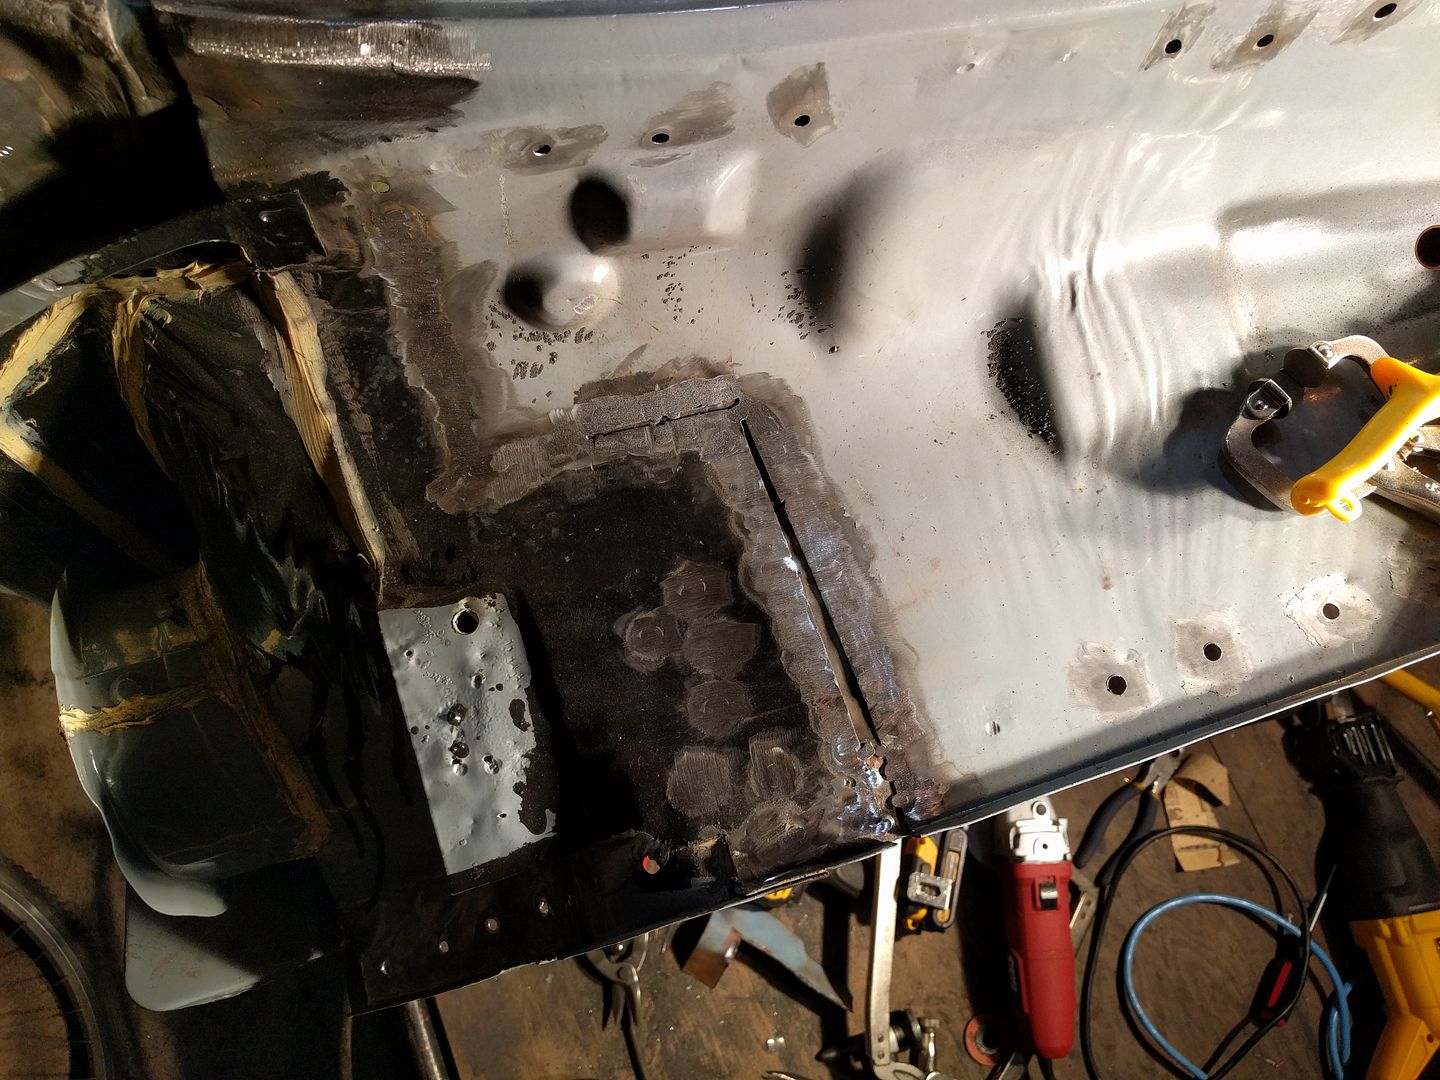 Still some touch up to do, especially before the cowl can go on. Not the prettiest repair, especially from the underside. But that's what I get for my mistake, and it's not like it'll be visible way up under the dash. |
|
|
|
|
10-16-2016, 02:55 AM
|
#80 |
|
Registered User
Join Date: Oct 2007
Location: Spanaway
Posts: 8,451
|
Re: Run Away's '69 C10 LWB Project Log
Looks great, Keep up the good work!
One thing I question, you mentioned having the cab powdercoated when your done, I think the heat may affect the seam sealer, and possibly the rust treatment that's under the cowl? Just more things to think about, I could be wrong.... Maybe just stick with a quick sand then some body work and more K2 primer? Also, not sure what that hole is for just left of the split? Cant tell if its in a tab or if it go's thru to the inside? I'd also seam seal up the split as well, then prep and primer everything you can before welding in the outer cowl.
__________________
Mike. Swamp Rat build thread : http://67-72chevytrucks.com/vboard/s...d.php?t=595019 72 3/4T 4X4 4" BDS Lift 33" BFG's |
|
|
|
|
10-16-2016, 04:36 PM
|
#81 |
|
Registered User
Join Date: Feb 2009
Location: Winnipeg, Manitoba
Posts: 68
|
Re: Run Away's '69 C10 LWB Project Log
That's a really good point, I had just assumed it would survive okay but looking at temperatures looks like it won't. Maybe I have to abandon that plan and pay someone to epoxy primer it when I'm done. Did a bit of googling and there's a product called Thermobond 3 that's used for this, but too late for that I think. Some people also report using JB weld with success, but that's more for fabricated bike frames and stuff like that.
The hole there is just on a tab used to support the rain gutter thing that goes inside. I put seam sealer on the under side. Here's an older picture 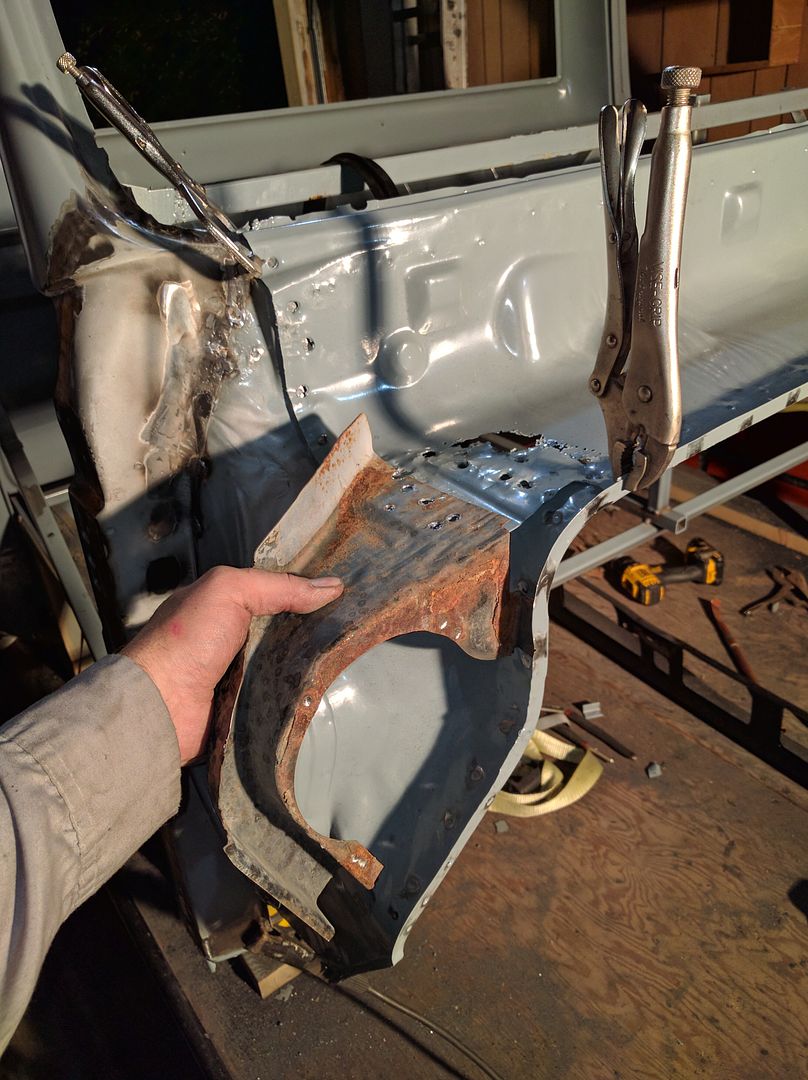 Not sure if I want to weld it to the cab and try to line the outer cowl over top of it, or weld it to the outer cowl and weld it to the cab through the holes in the cowl. The aftermarket cowl I have has it already welded to the cowl, I'm leaning that way. |
|
|
|
|
10-17-2016, 08:09 AM
|
#82 |
|
Still Learning
Join Date: Jul 2009
Location: Central Oklahoma
Posts: 10,108
|
Re: Run Away's '69 C10 LWB Project Log
Thanks for checking out my build thread. It's long read but if it helps anyone that was the goal.
I wouldn't bother with powder coat either. You should be able to shoot epoxy primer yourself. It's really easy and you can pick up primer quality paint gun at harbor freight for like $20. Once you get confident with primer, you can move on to paint. 
|
|
|
|
|
11-07-2016, 08:14 AM
|
#83 |
|
Senior Member
 Join Date: Jun 2009
Location: Belews Creek , NC
Posts: 4,220
|
Re: Run Away's '69 C10 LWB Project Log
Wow !! What an inspiration you are to never give up. You are doing some great work

__________________
Larry It is easily overlooked that what is now called vintage was once brand new. "Project 68" paypal.me/ldgrant |
|
|
|
|
11-11-2016, 03:50 PM
|
#84 |
|
Registered User
Join Date: Feb 2009
Location: Winnipeg, Manitoba
Posts: 68
|
Re: Run Away's '69 C10 LWB Project Log
Wow it's been a long time since I updated. I've been so busy rushing to get ready for winter whenever I had spare time I didn't feel like doing anything, never mind update this thread.
Picking up where I left off... Filled the gap I made in the inner cowl 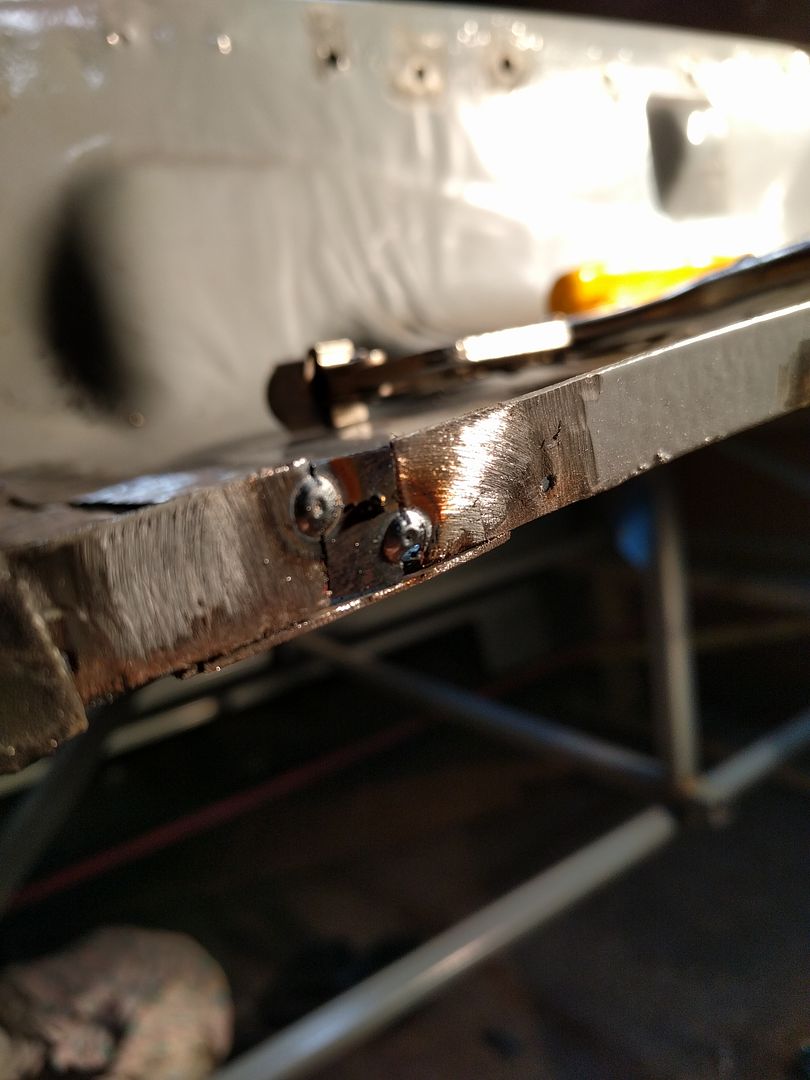 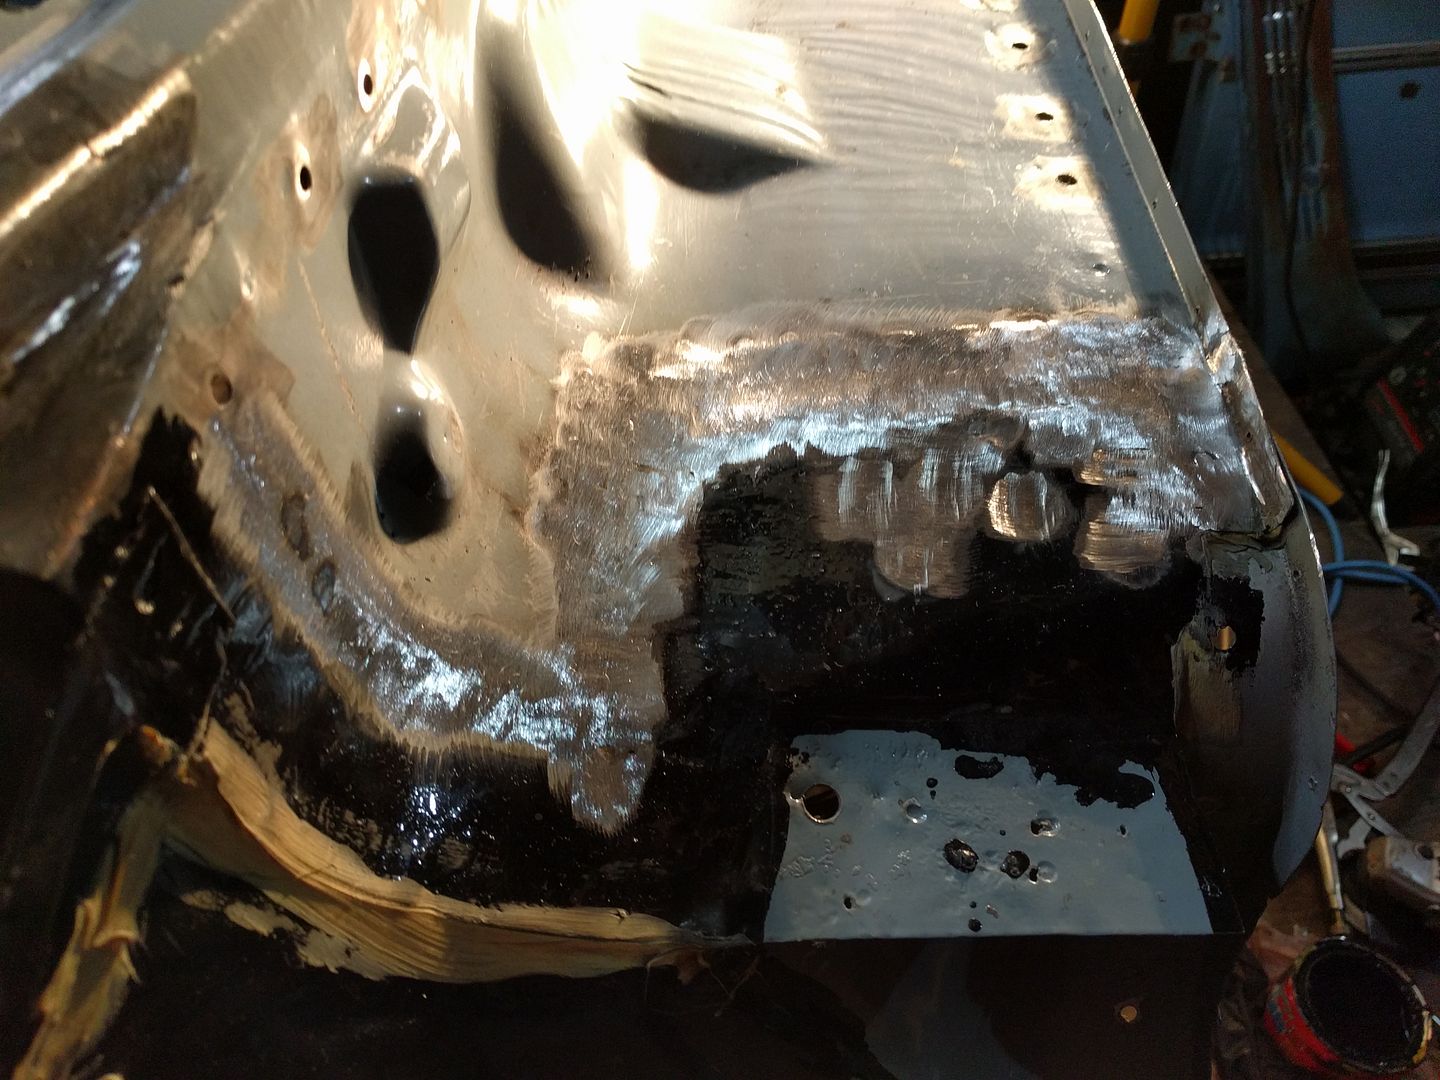 Patched the sections of outer cowl that were full of pinholes. Both were areas where layers of metal sat next to each other. 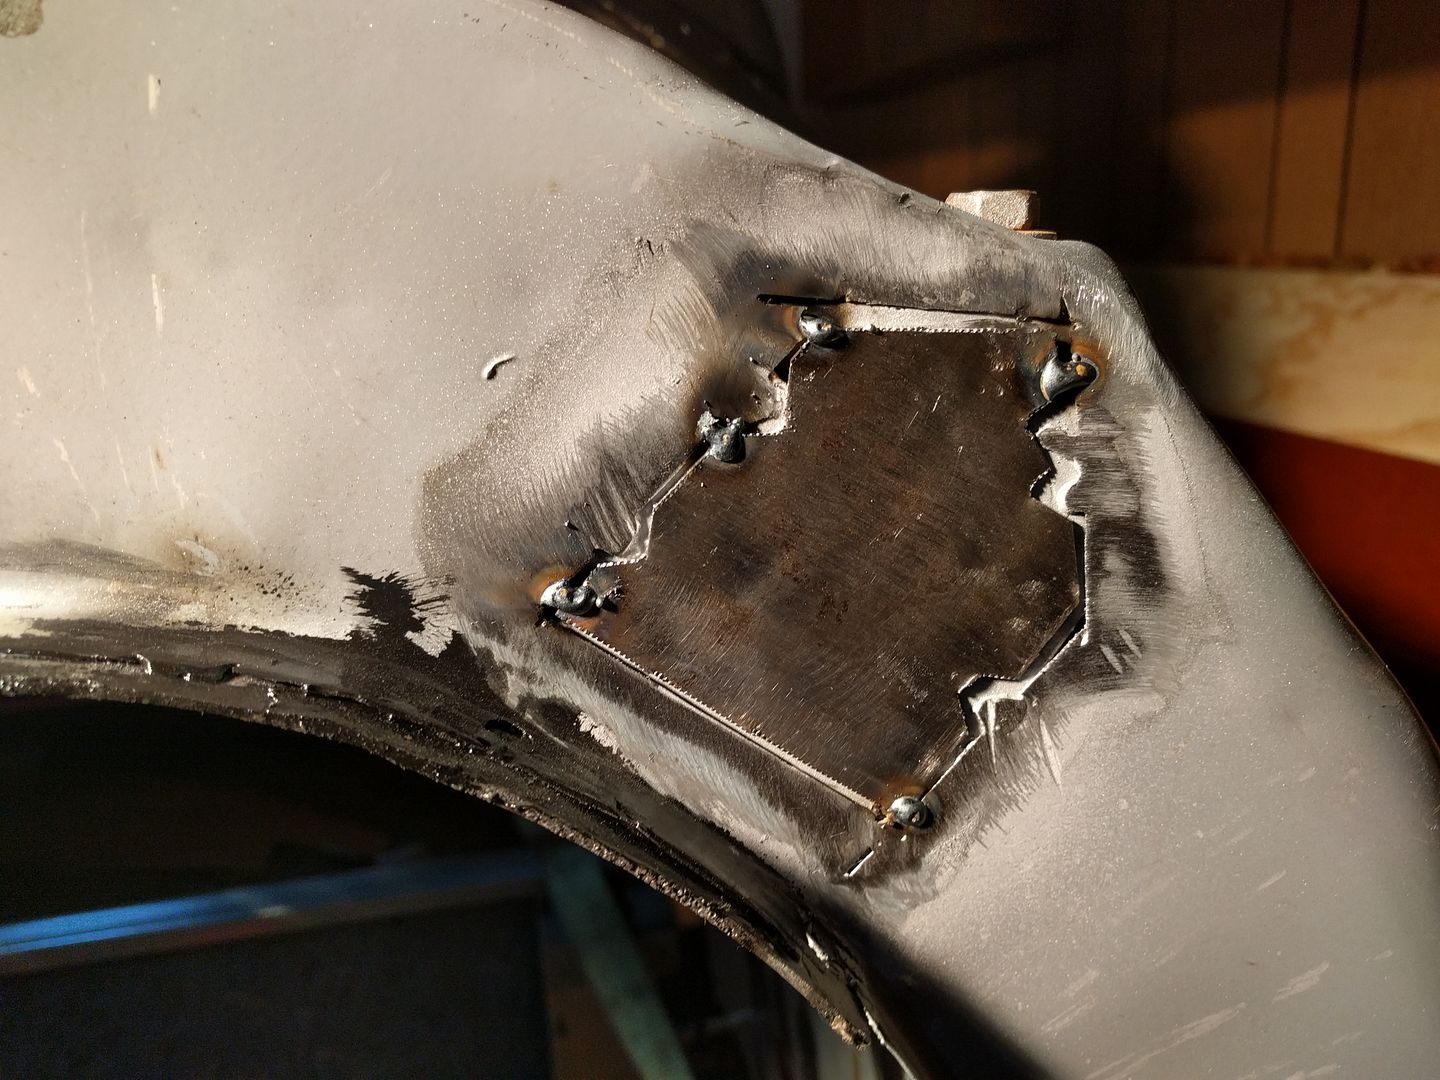 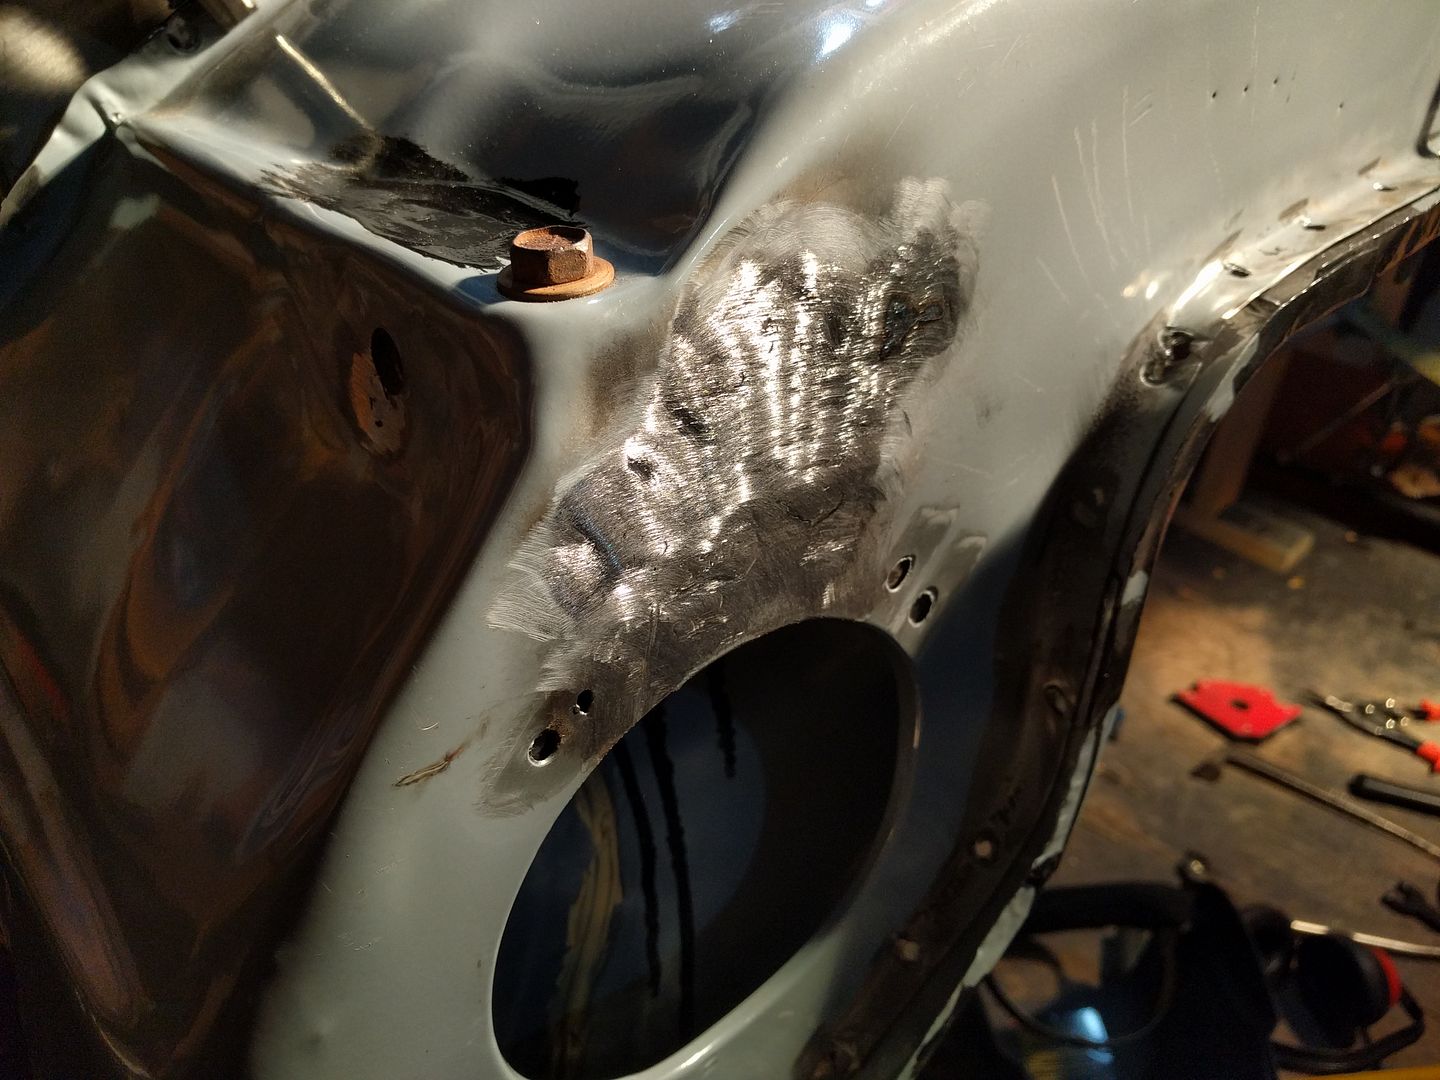 After that patching the outer cowl didn't want to sit as nice any more. Maybe I shrunk the area above the blower motor with heat, I'm not sure. 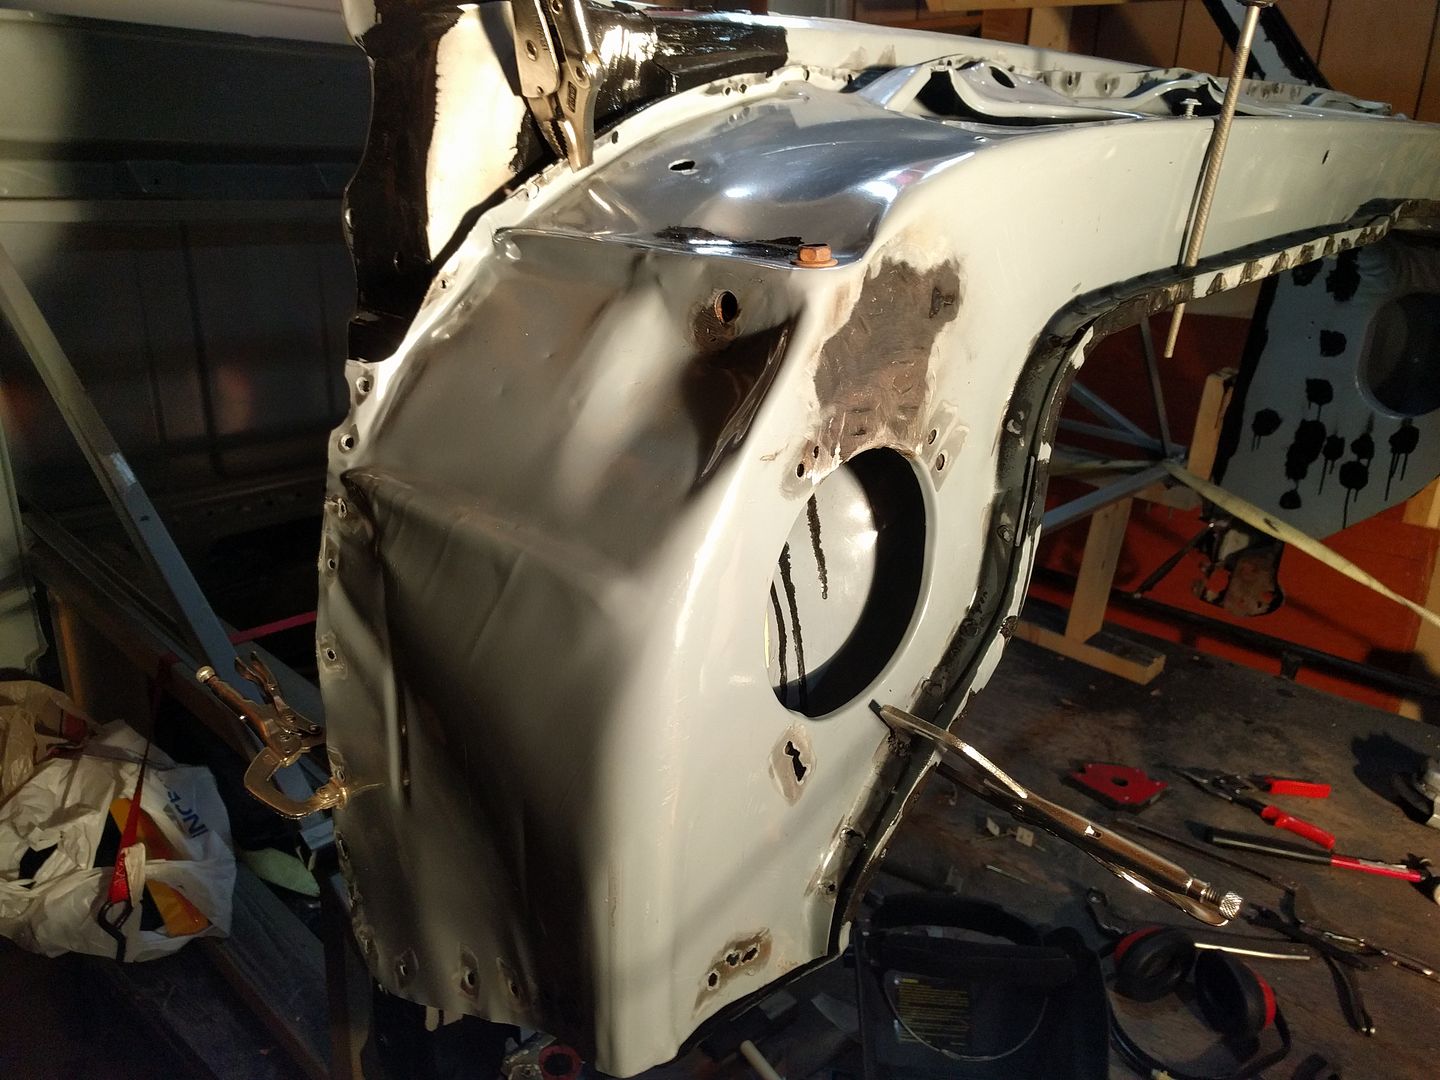 Welded in the rain gutter around the blower motor, starting with two plug welds on the little tab. Never noticed the indent in the cowl for this piece until I was fitting it.  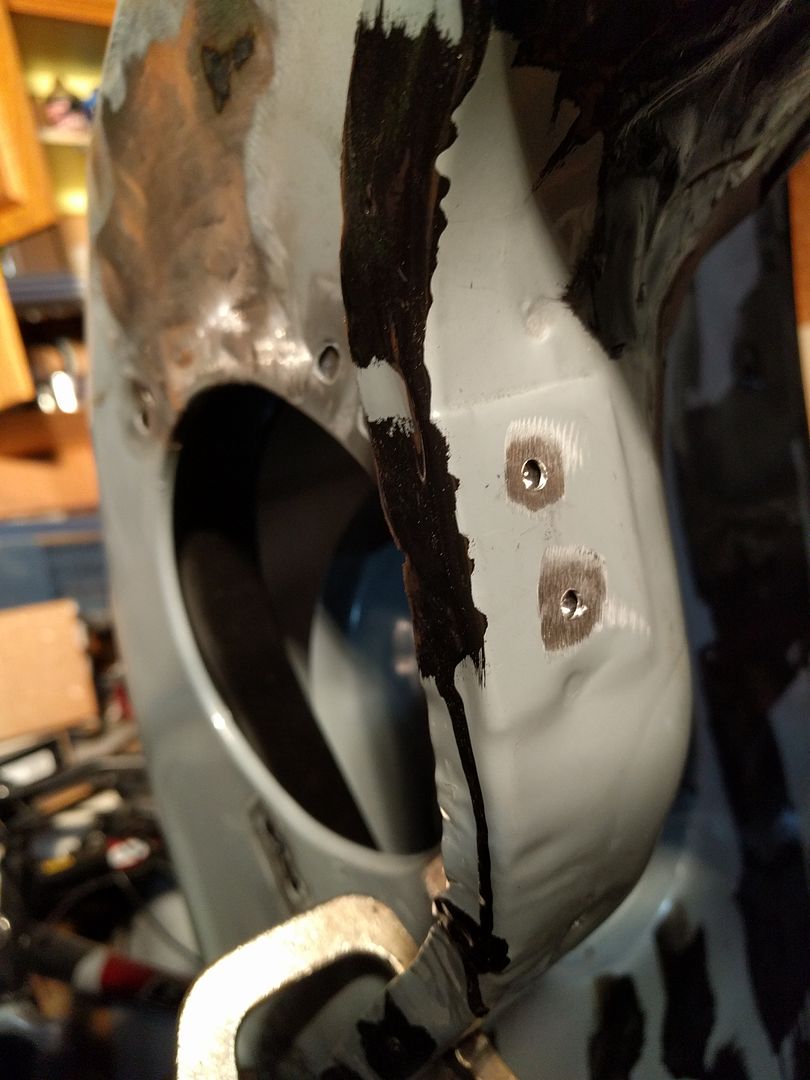 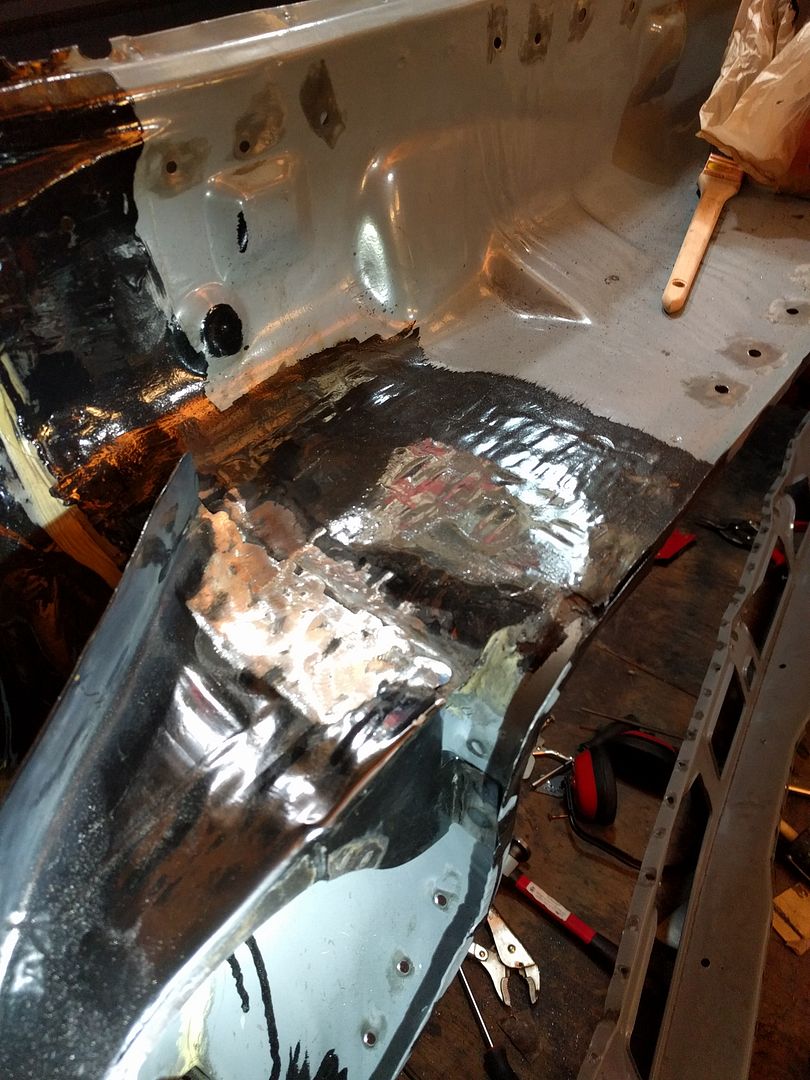 Seam sealed 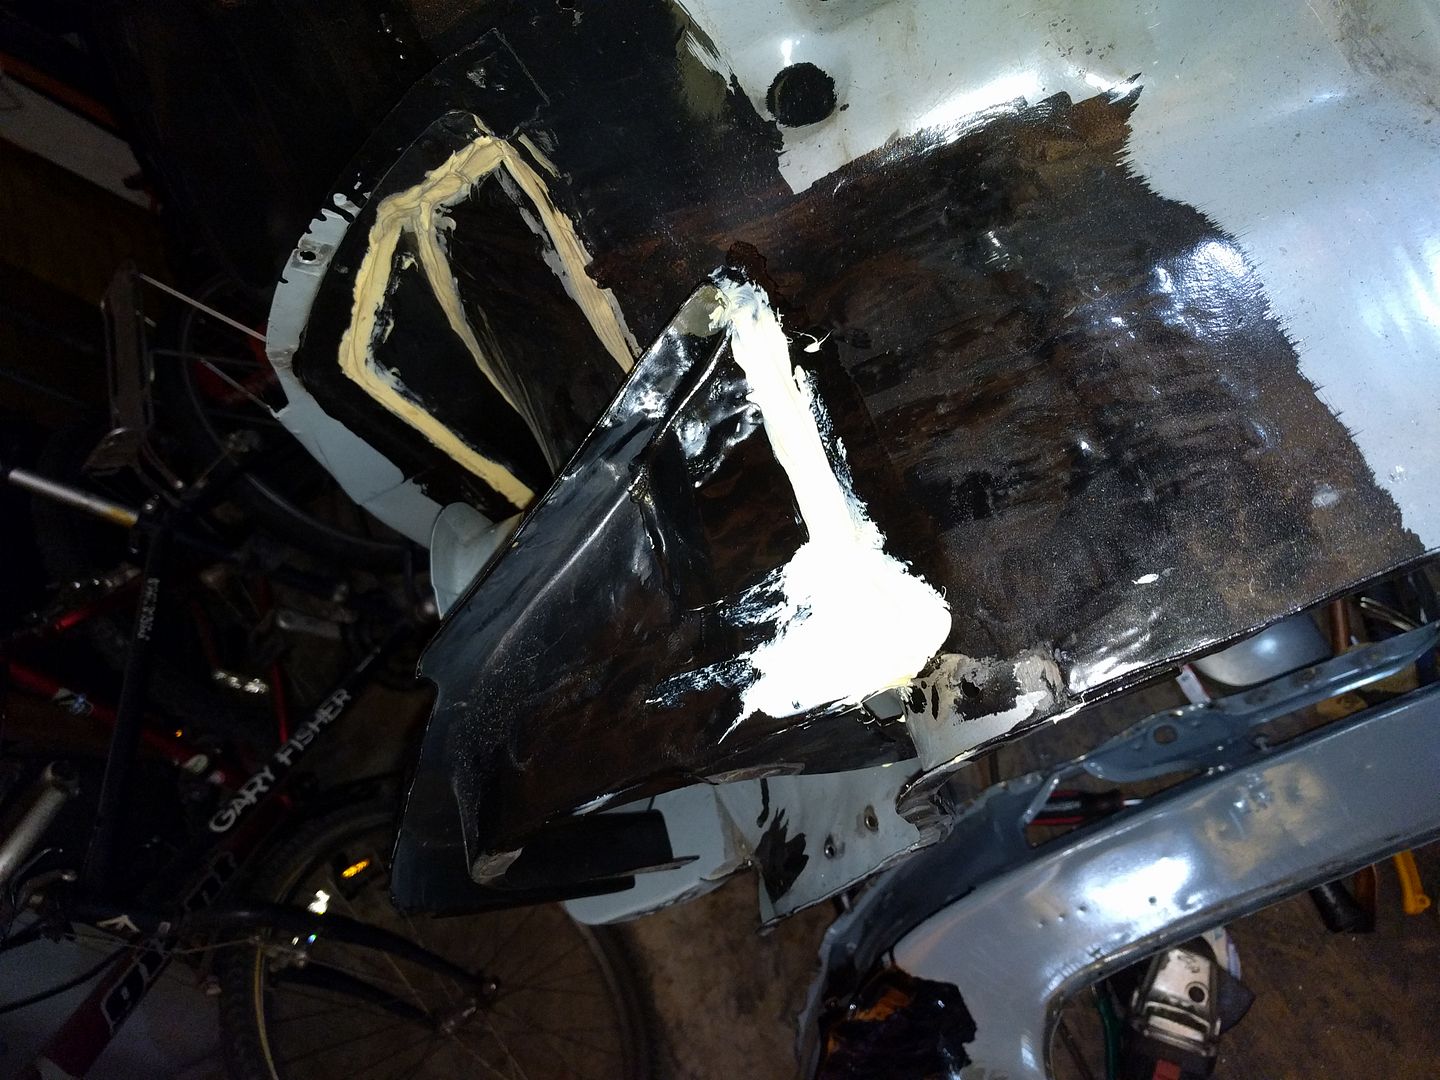
|
|
|
|
|
11-11-2016, 03:51 PM
|
#85 |
|
Registered User
Join Date: Feb 2009
Location: Winnipeg, Manitoba
Posts: 68
|
Re: Run Away's '69 C10 LWB Project Log
Welded the front fender mounting plates to the outer cowl
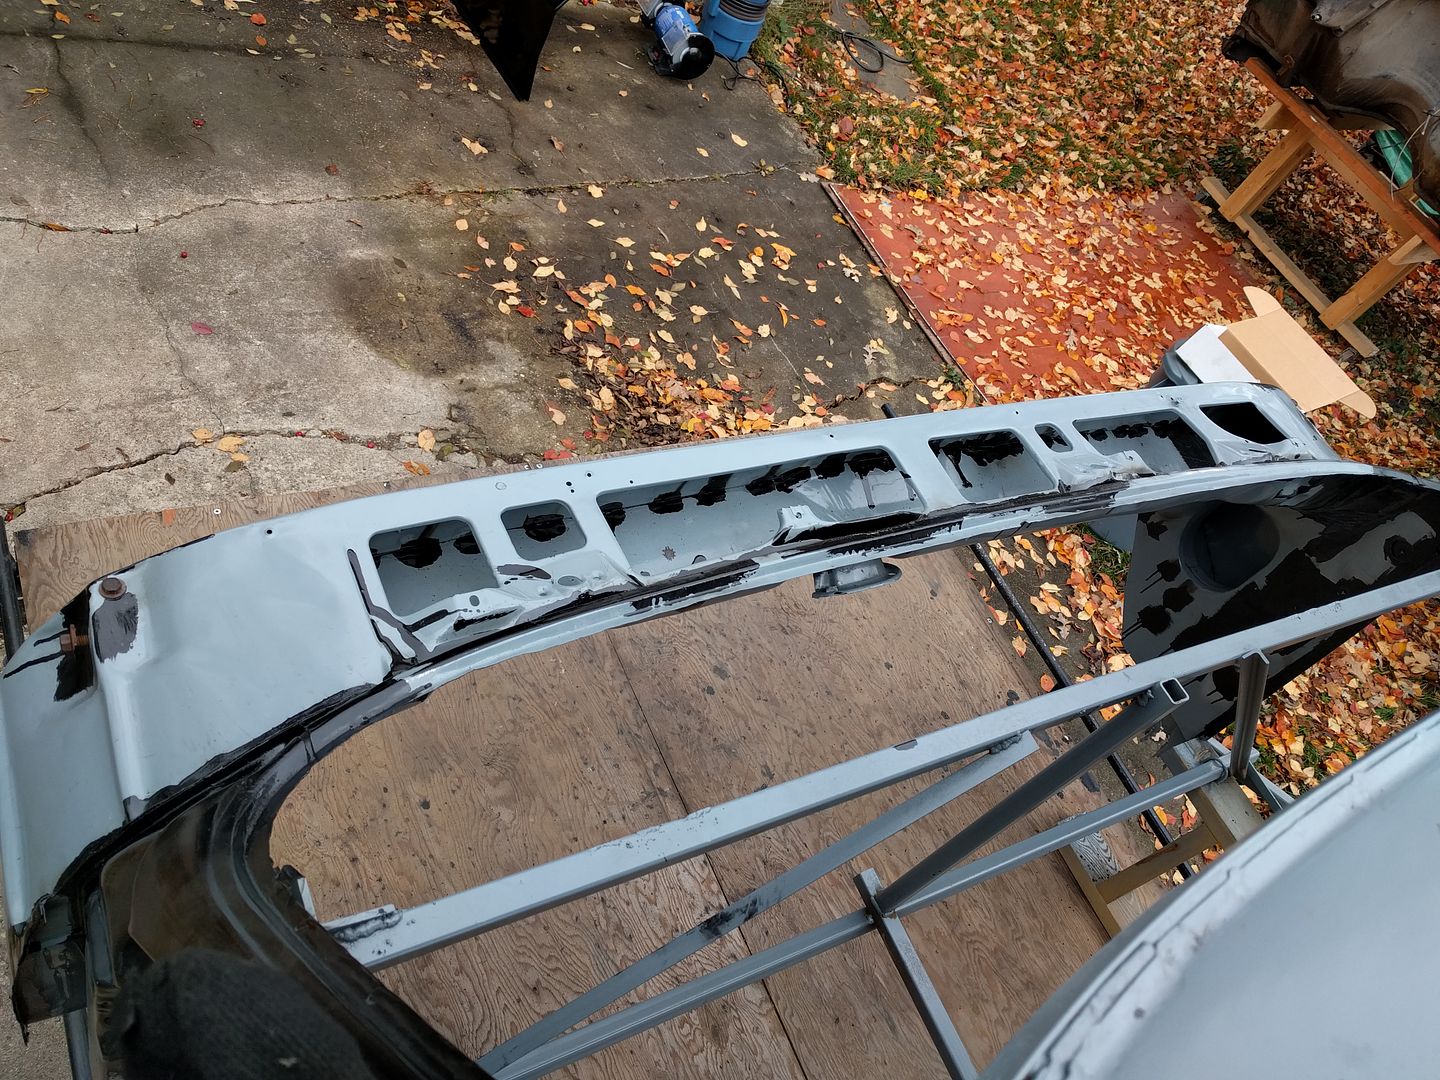
  Time to put the cowl on. This was probably the hardest part I've done so far. 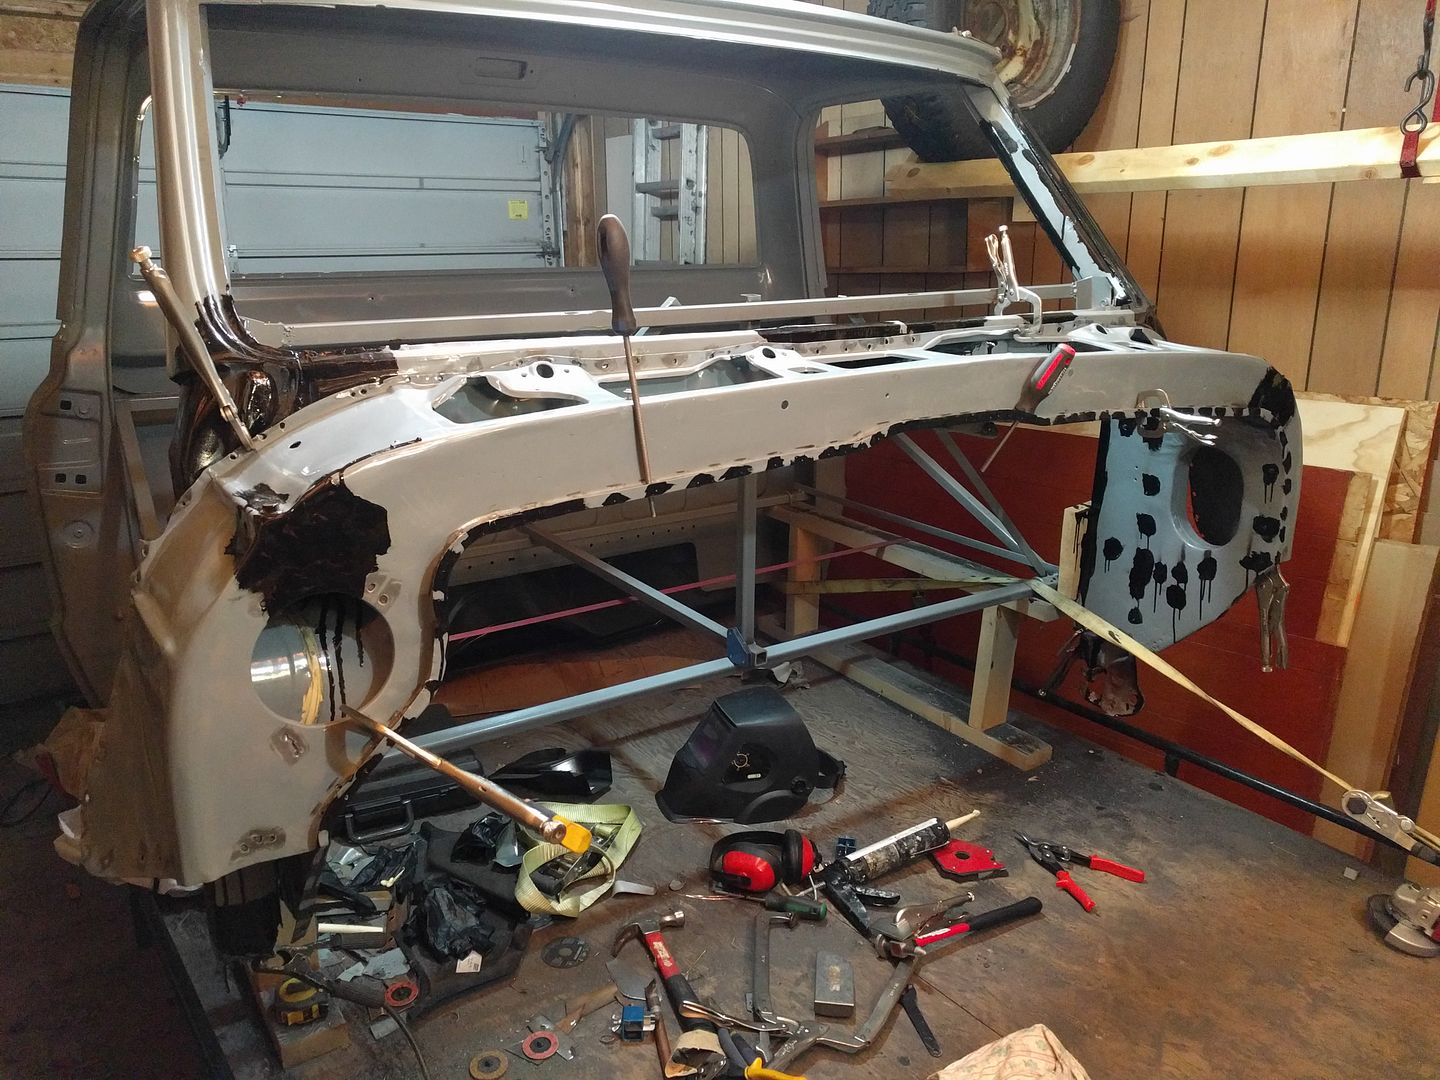 Line the holes up, fill with weld. Repeat. 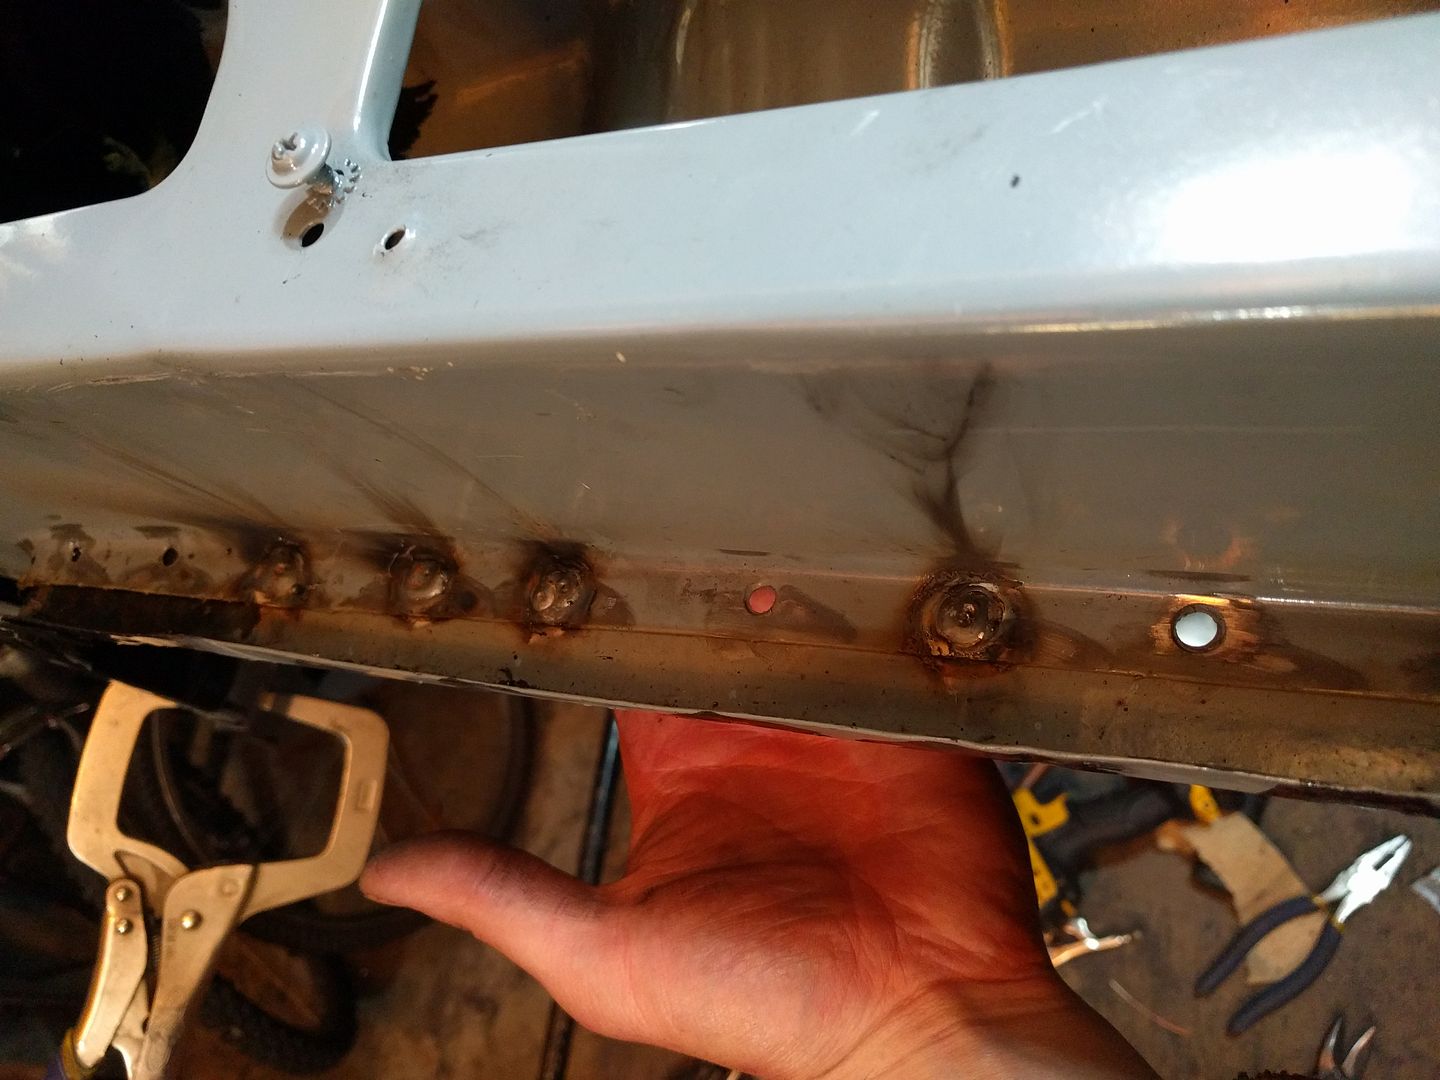 This is the bottom of the cowl on the passenger side. Even clamped down and stretched as much as I could, it doesn't sit very nice. 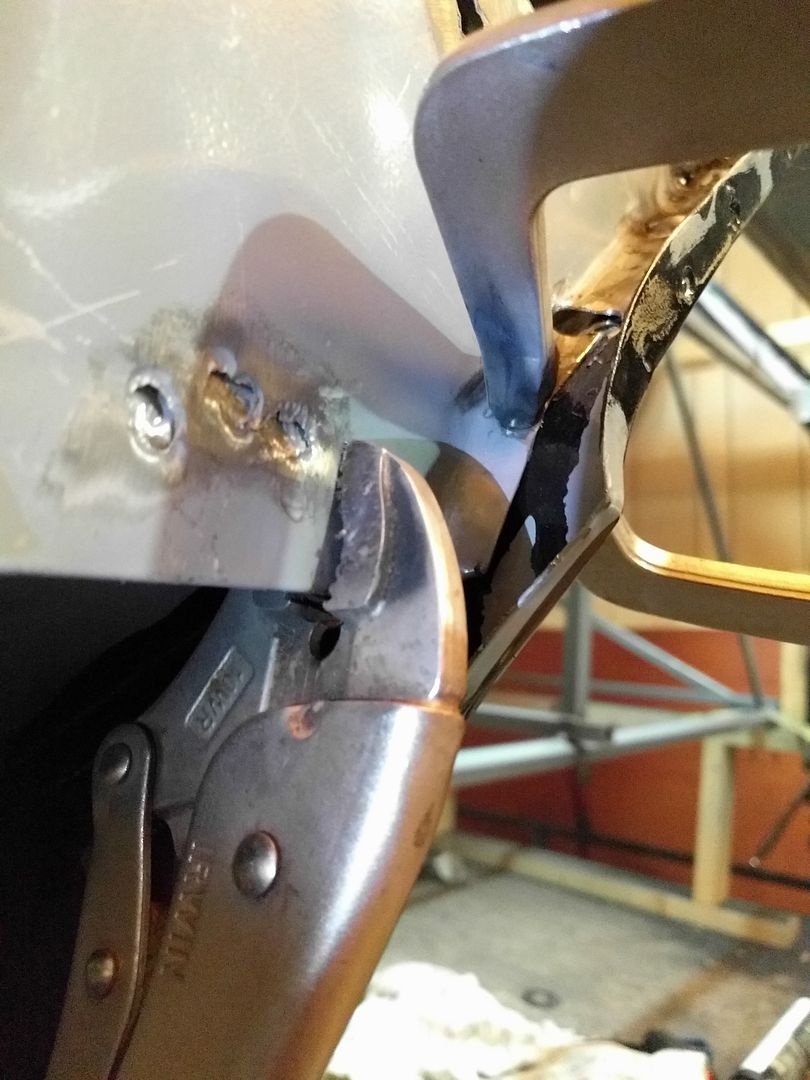 I regret not stopping here and making a relief cut, but I was in a time crunch and just keep pushing ahead. 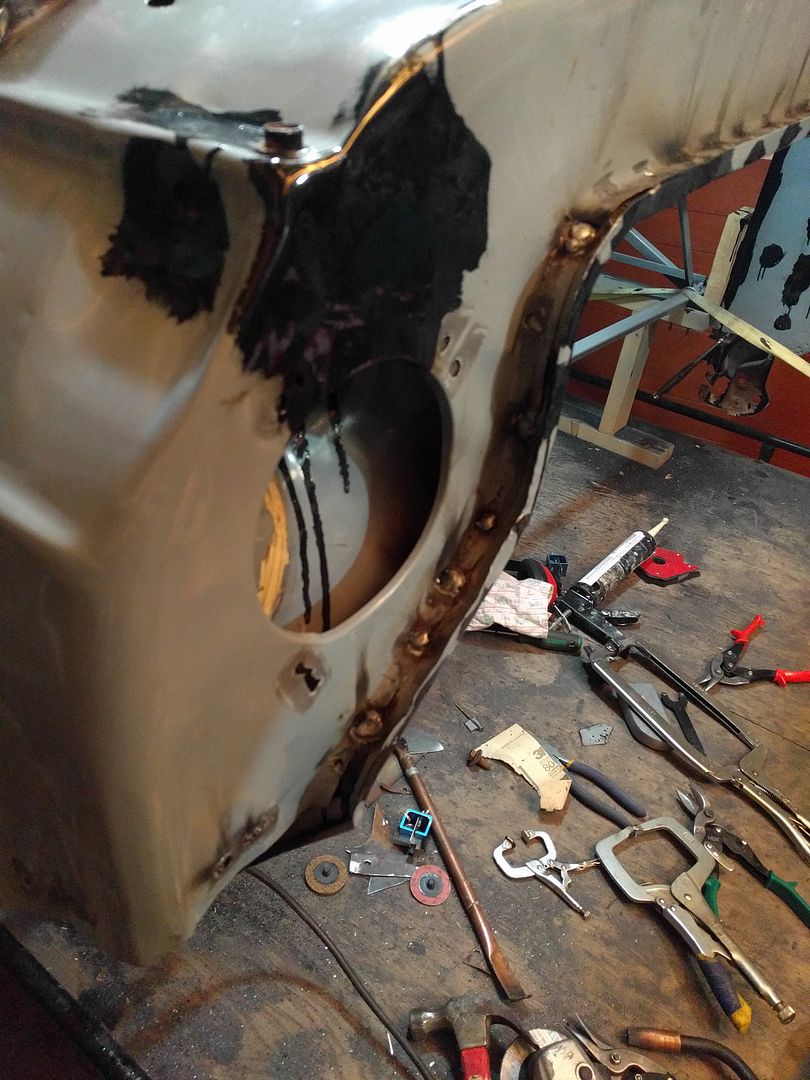 Top view shows how wavy it is 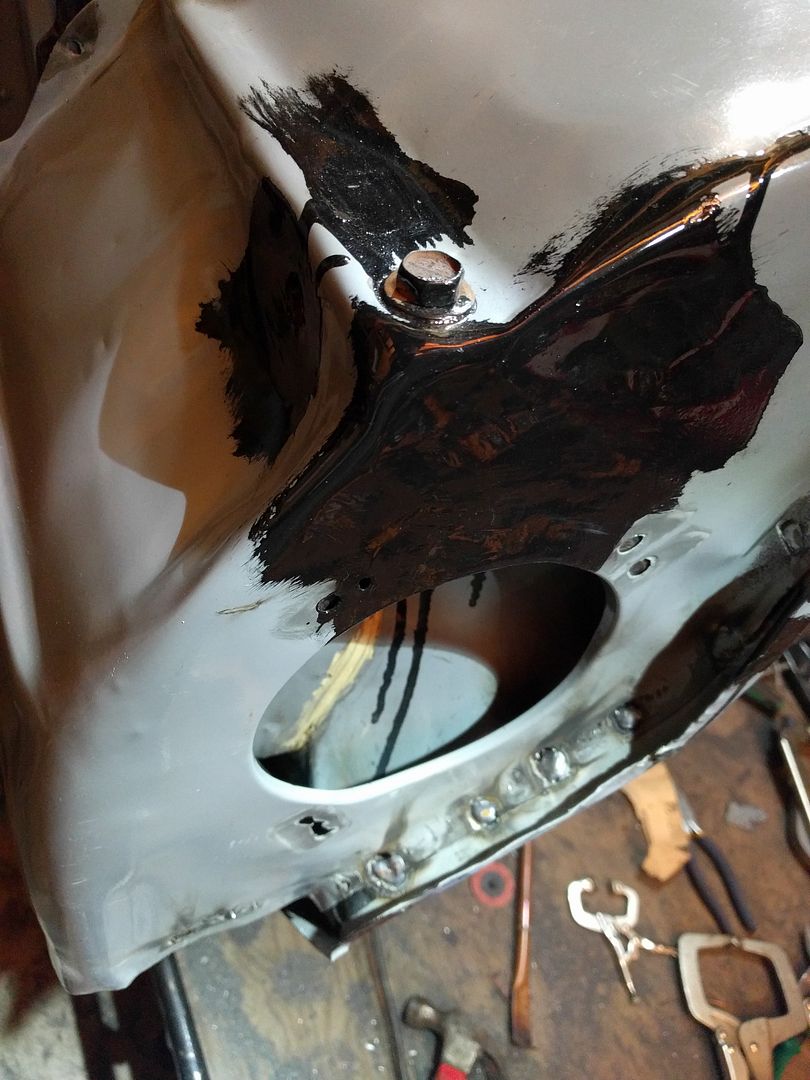 At least the drives side fit nice. 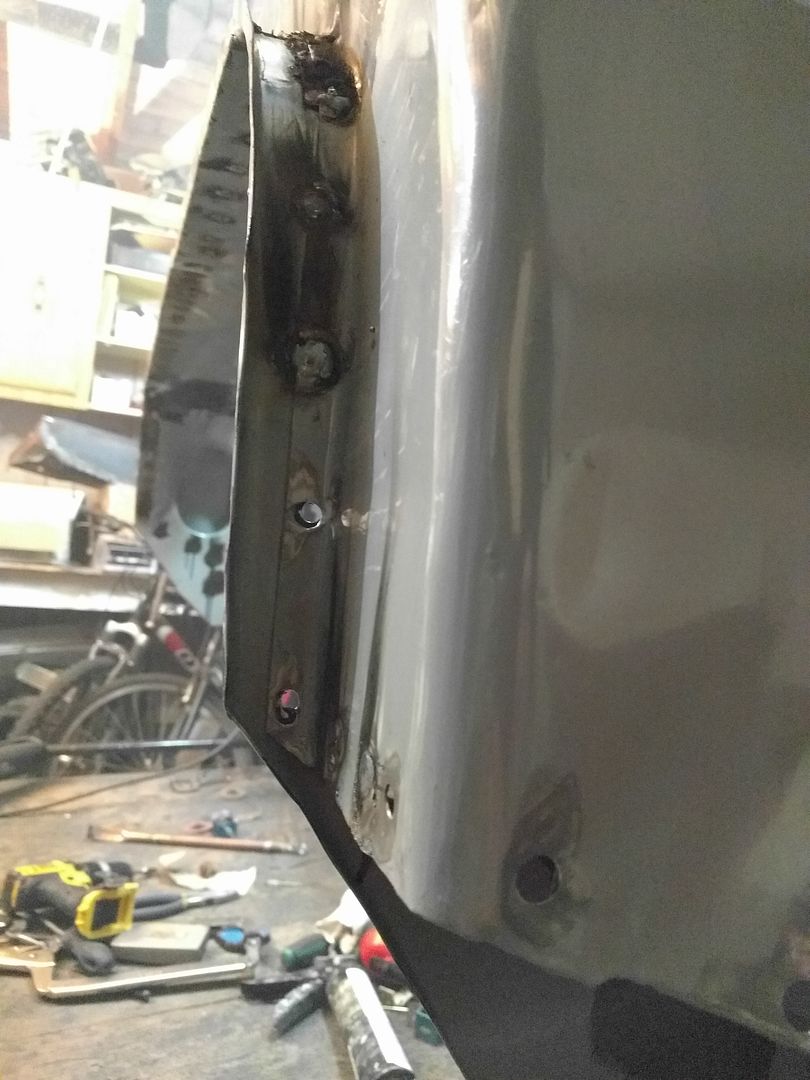 More welding, now the rain gutter around the blower motor is fully tied into the cowl. 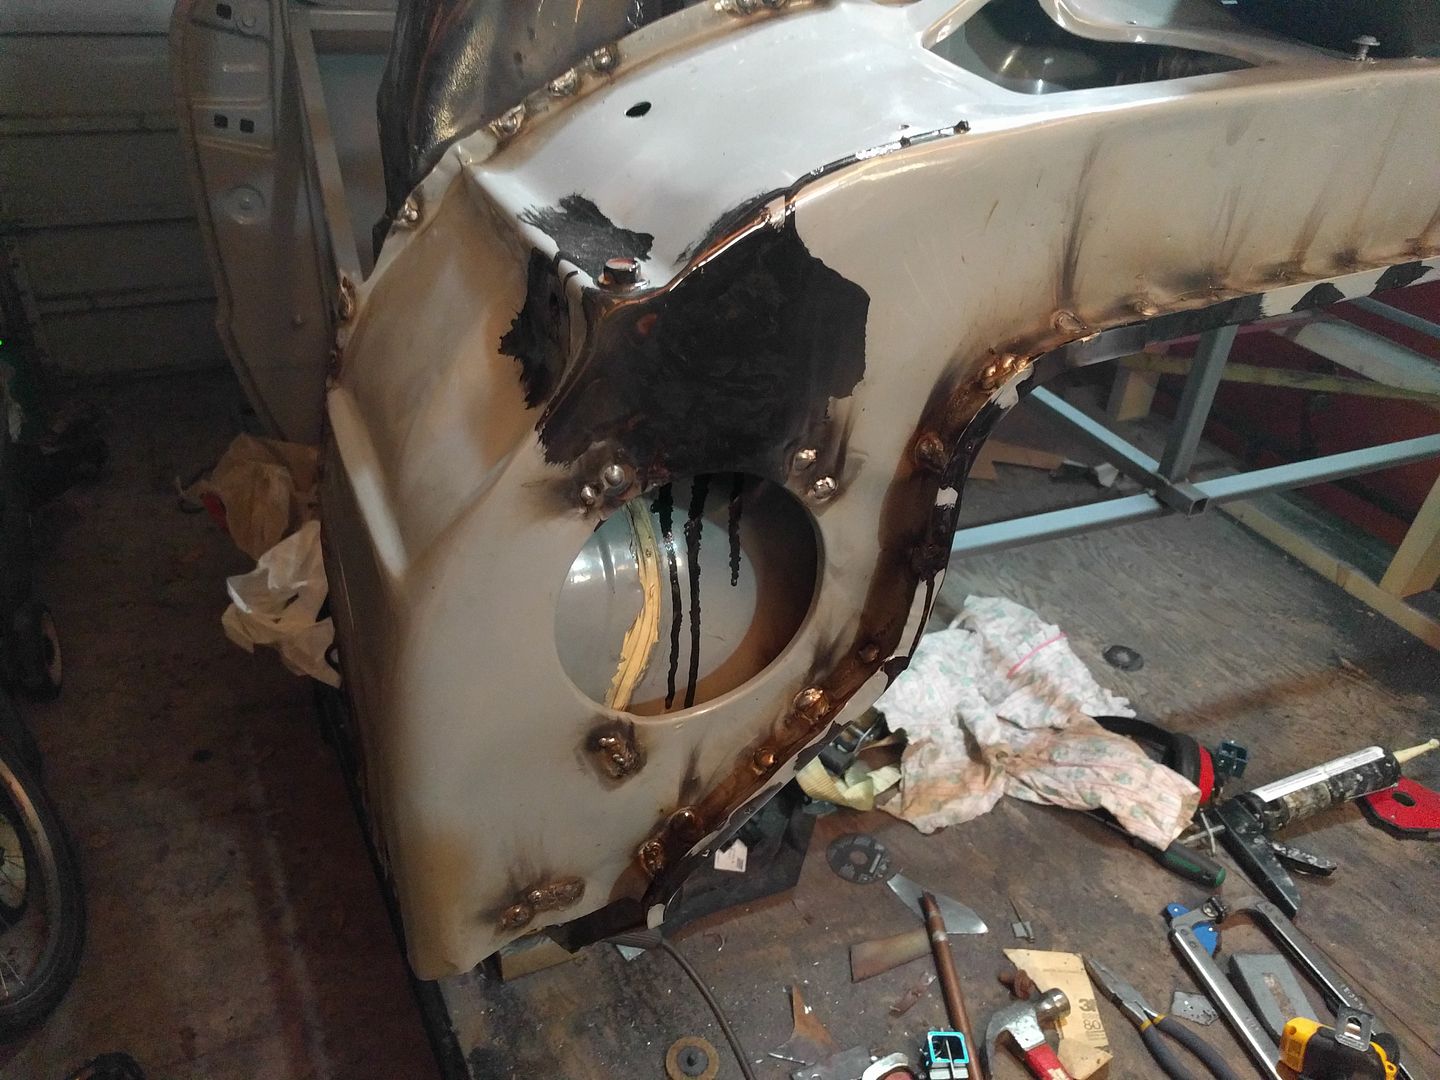
|
|
|
|
|
11-11-2016, 03:52 PM
|
#86 |
|
Registered User
Join Date: Feb 2009
Location: Winnipeg, Manitoba
Posts: 68
|
Re: Run Away's '69 C10 LWB Project Log
More welding, now the rain gutter around the blower motor is fully tied into the cowl.
Keep telling myself it's just cosmetic, doesn't affect anything and it's buried in the engine bay behind the fender and inner fender anyways. 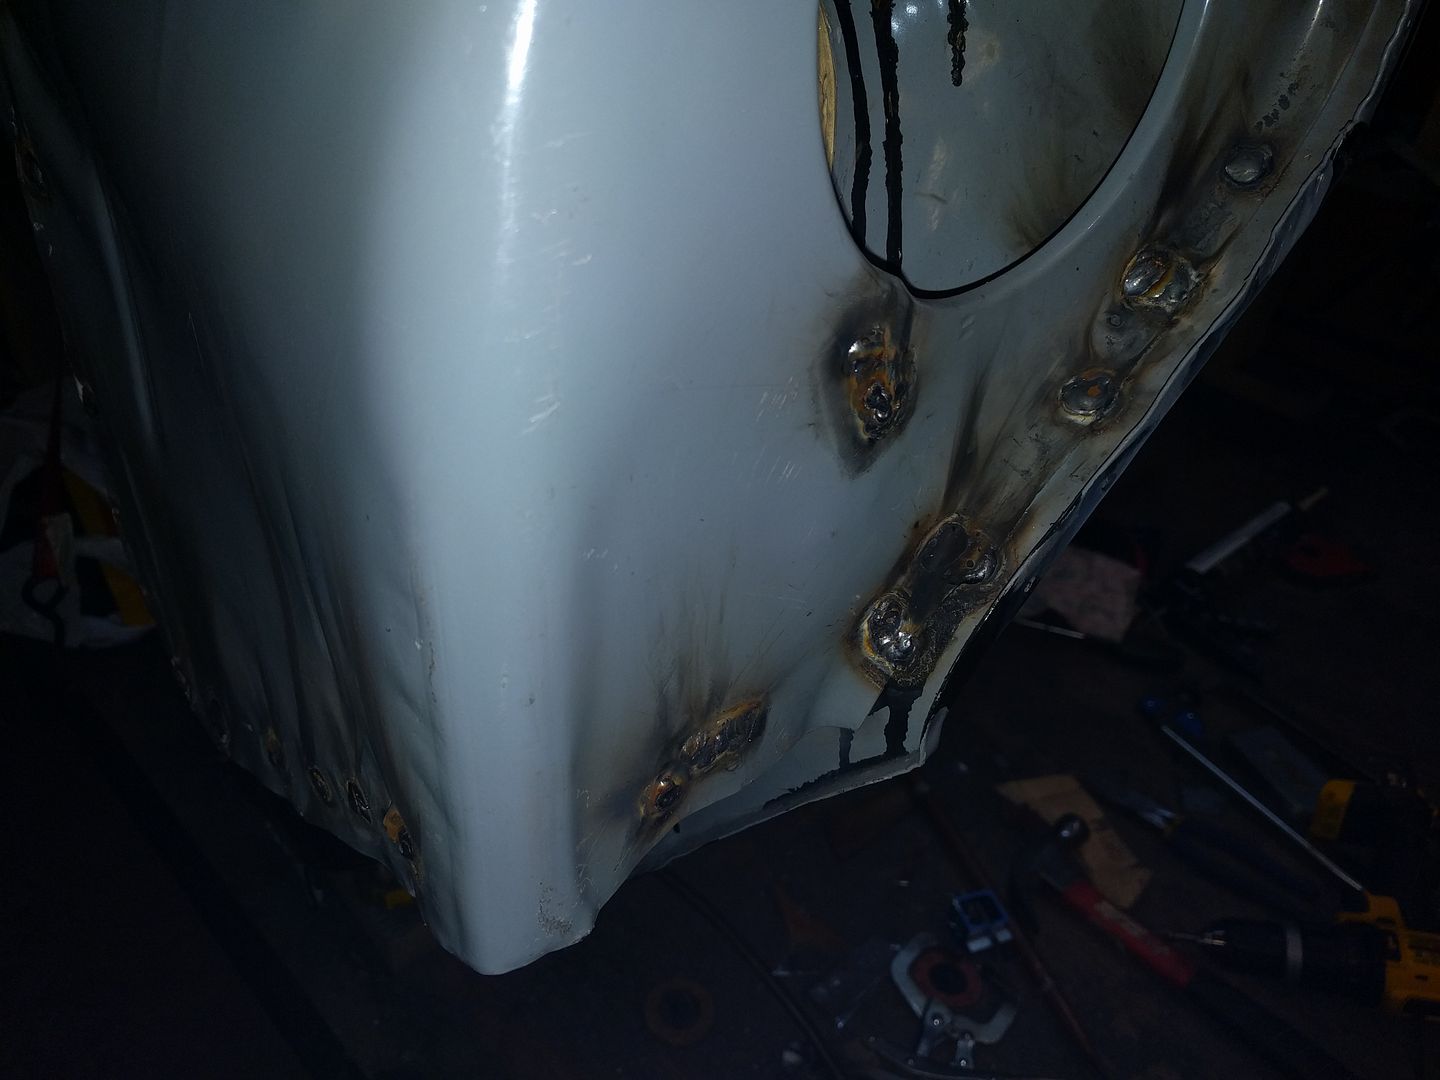 All welded 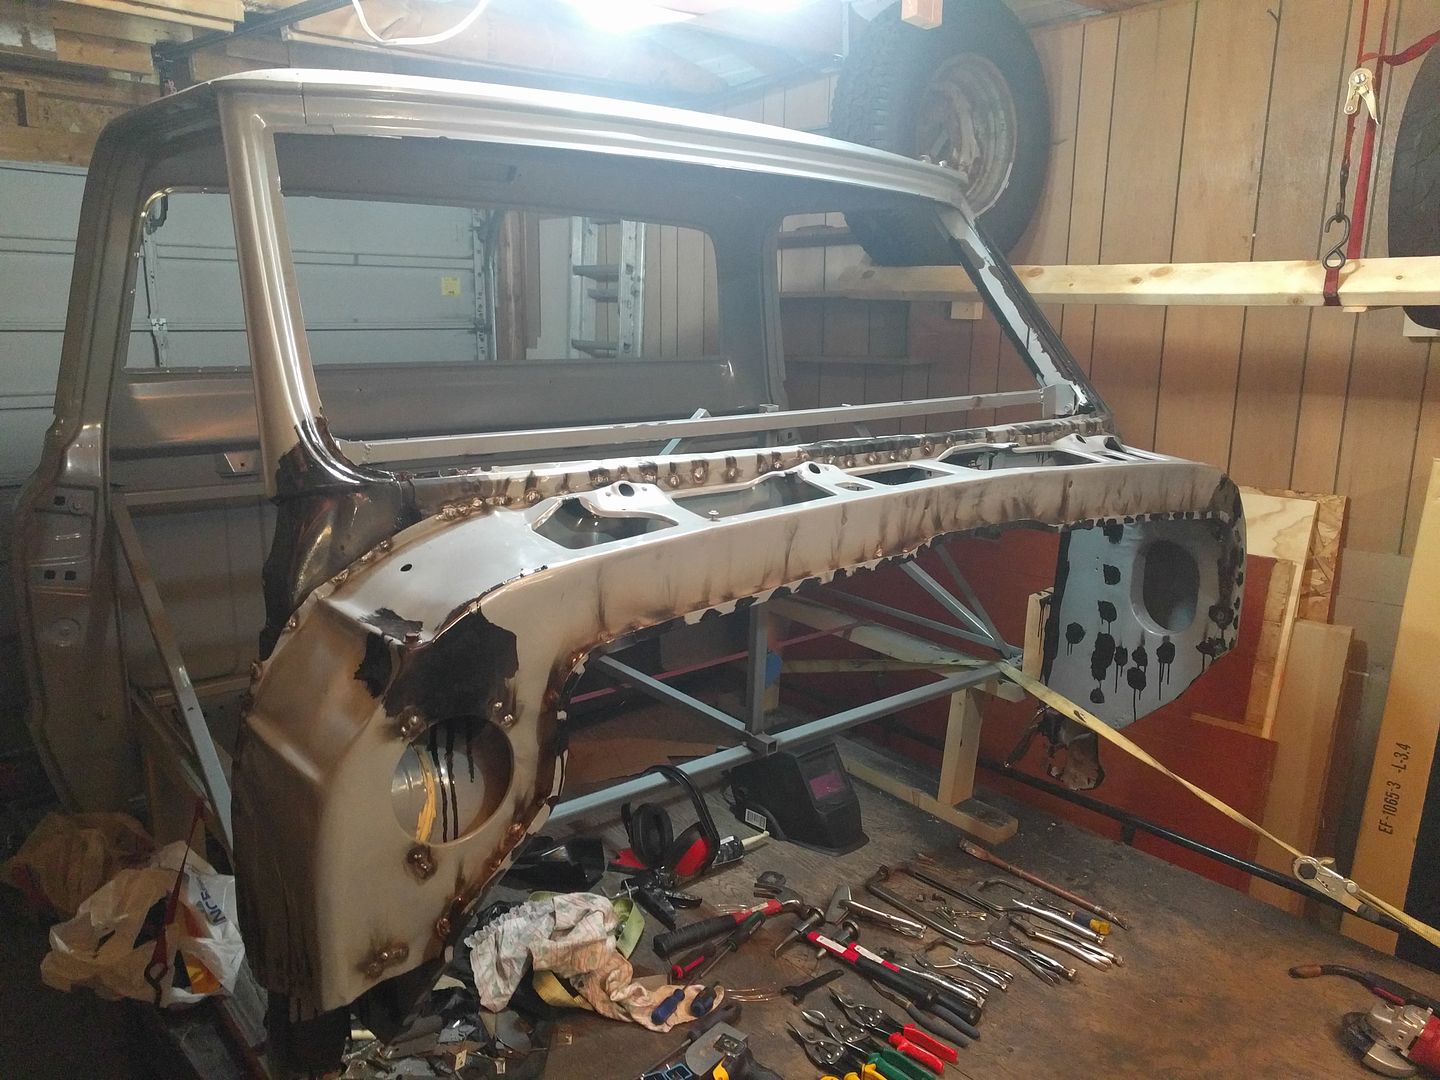 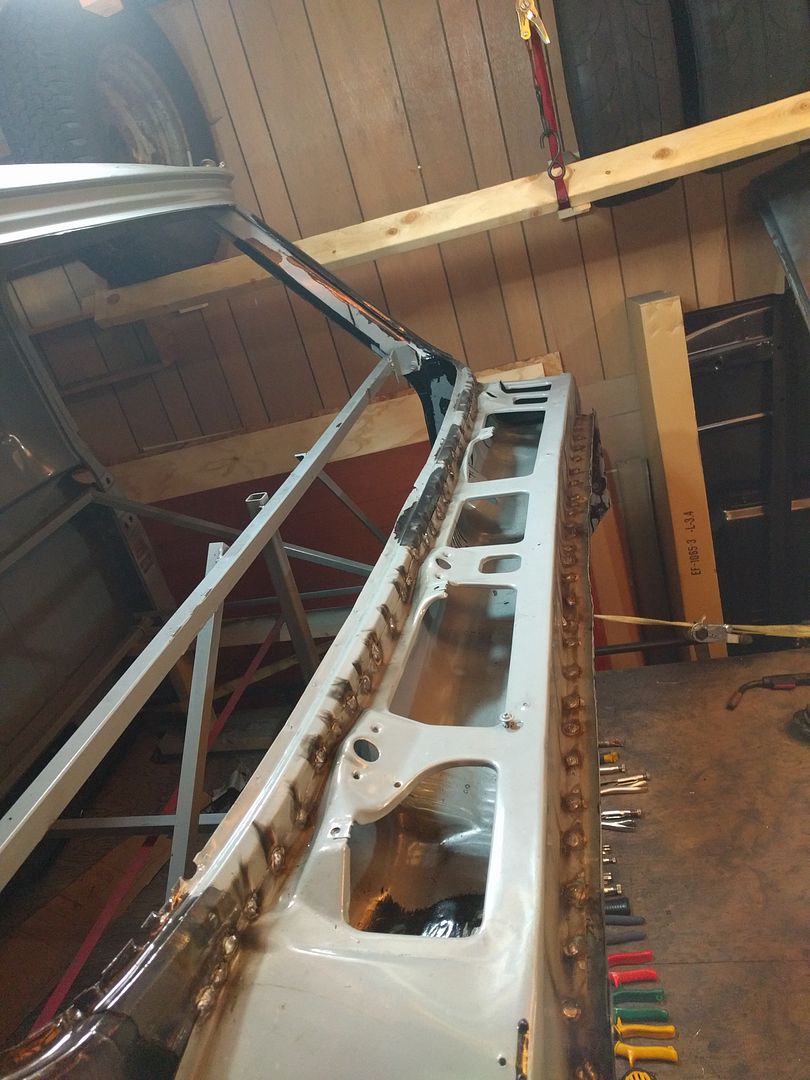 Followed by lots of grinding. Do you guys fill in stuff like this, or just leave it and cover it with seam sealer after? 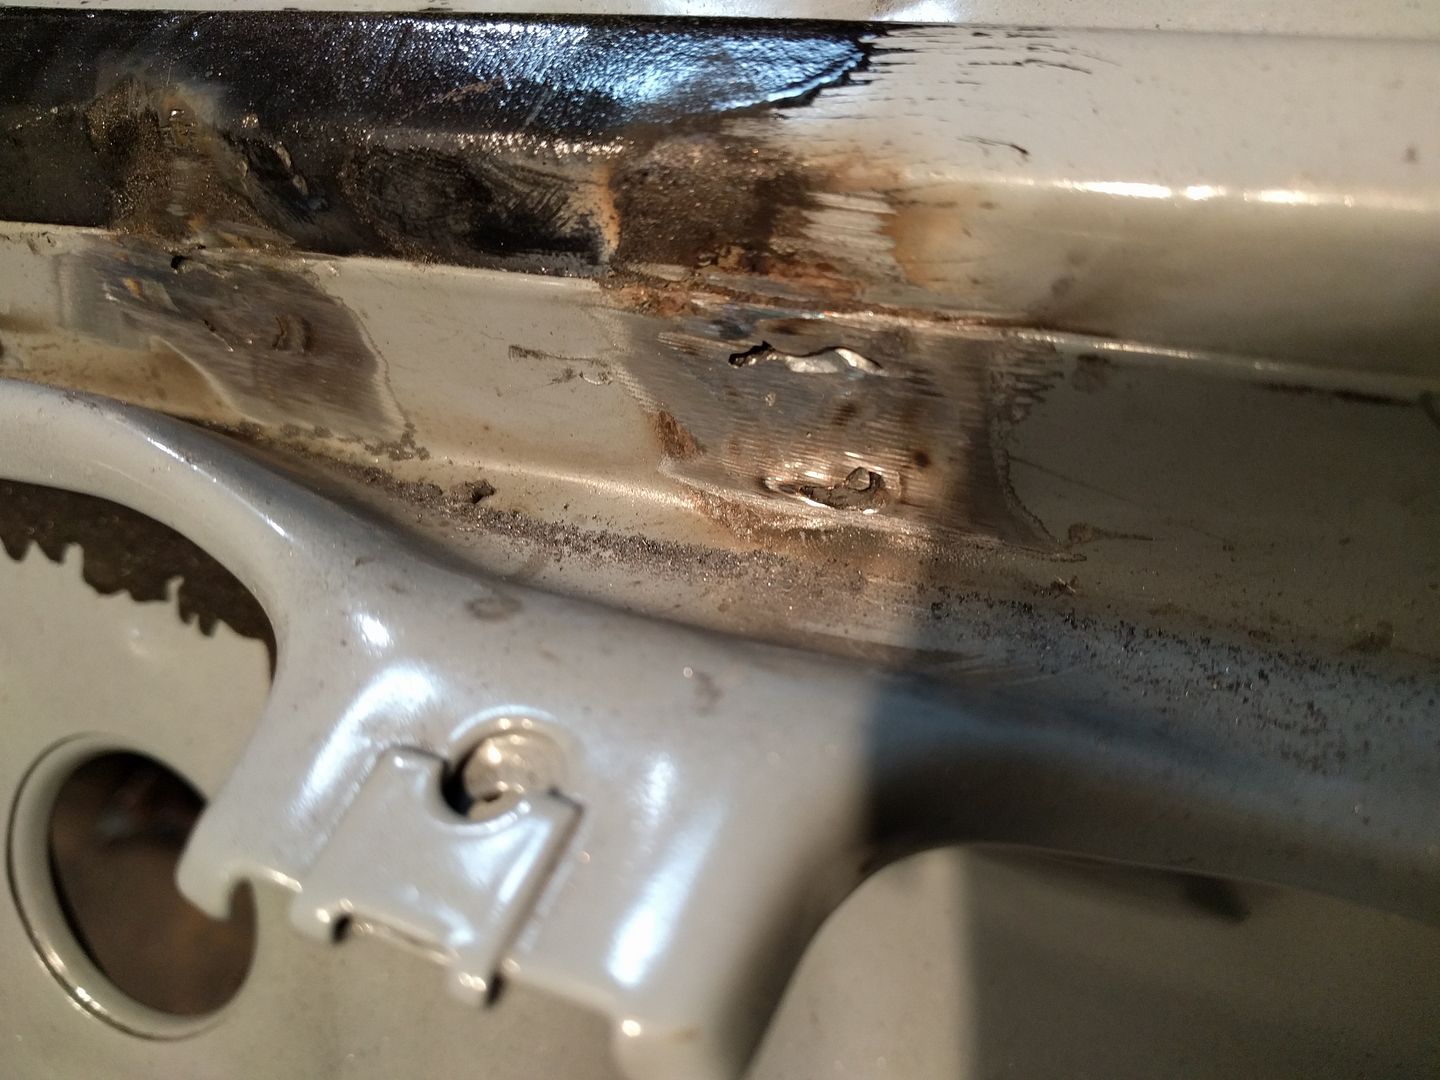 All ground 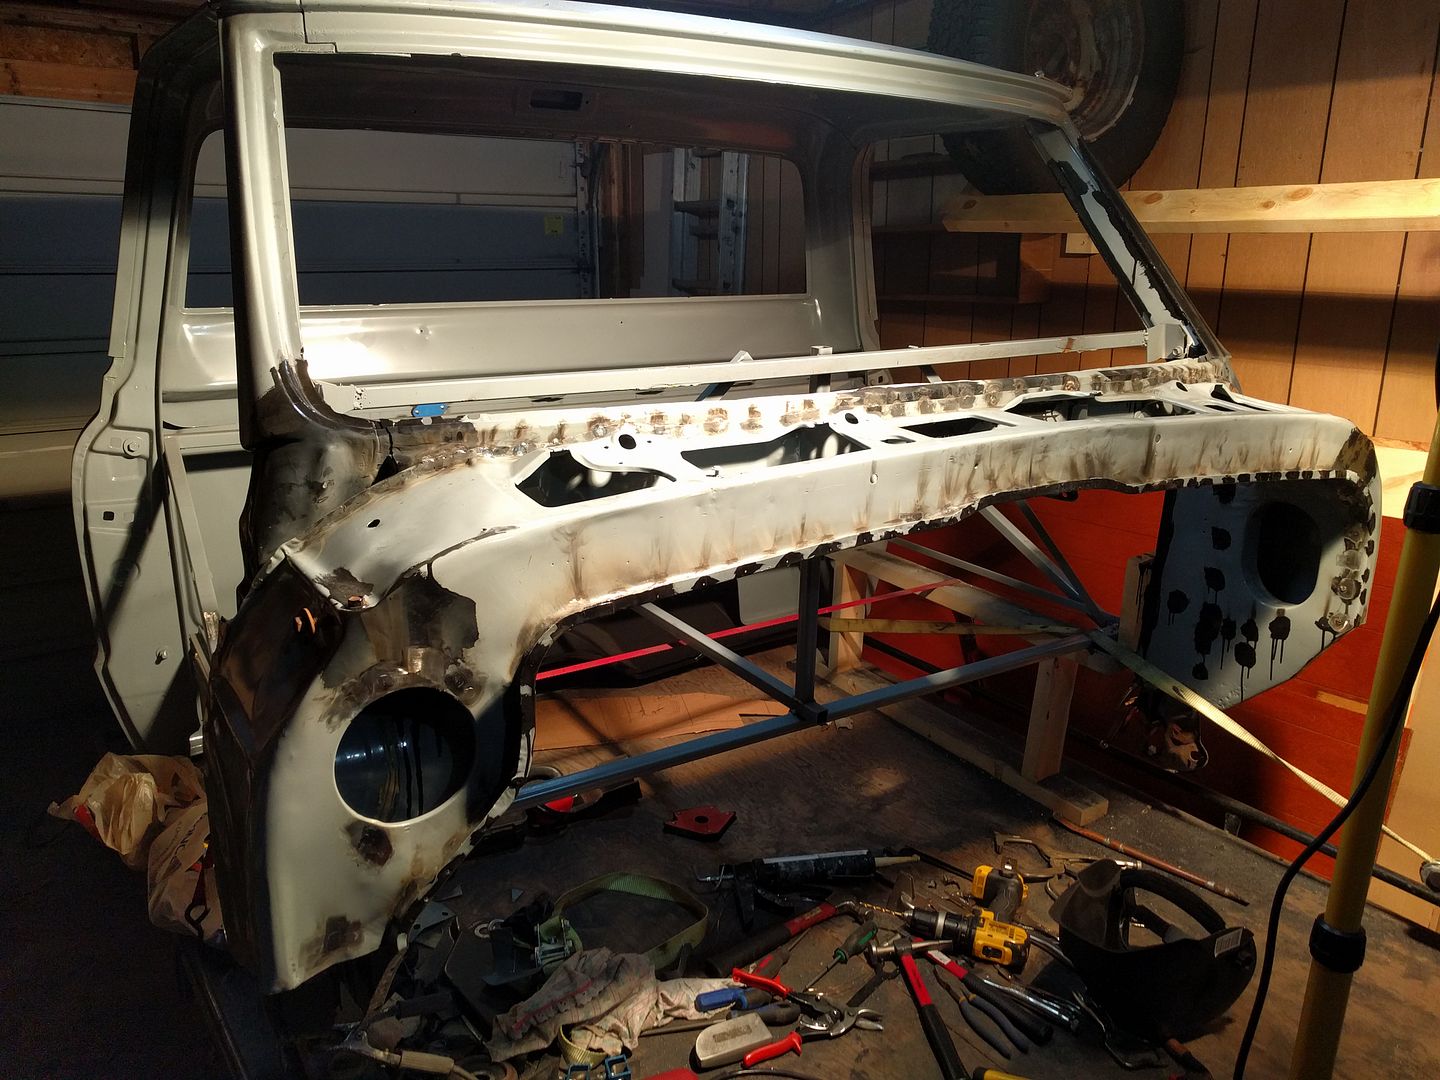 Painted and rolled outside. 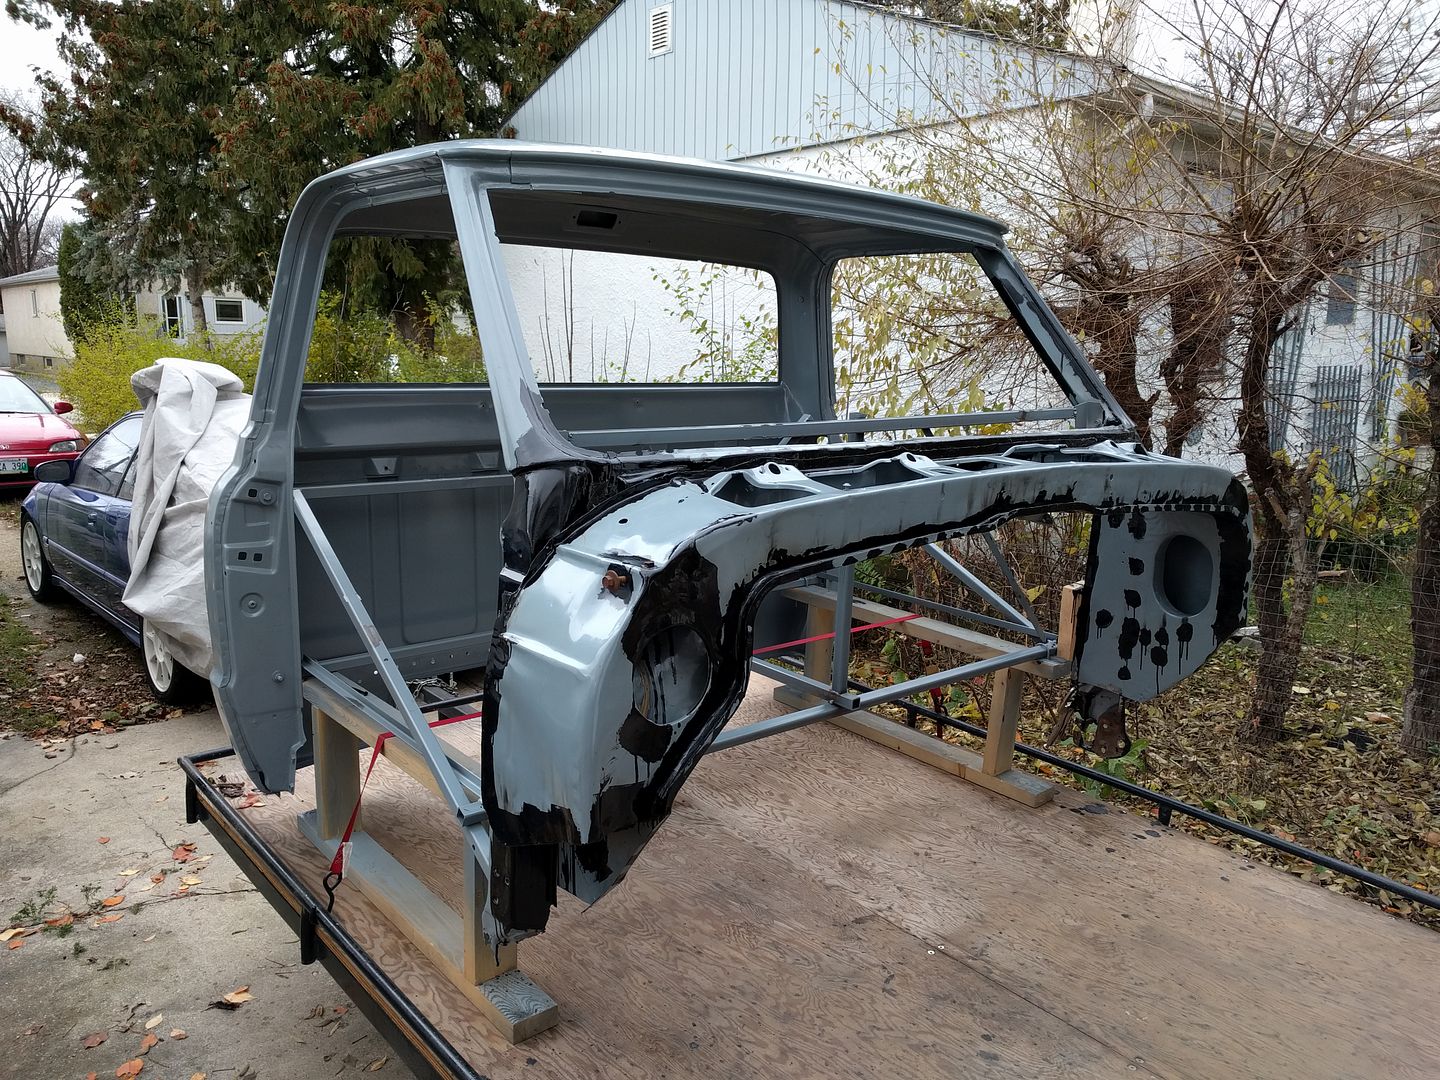
|
|
|
|
|
11-11-2016, 03:53 PM
|
#87 |
|
Registered User
Join Date: Feb 2009
Location: Winnipeg, Manitoba
Posts: 68
|
Re: Run Away's '69 C10 LWB Project Log
Major clean up of the garage happened after this.
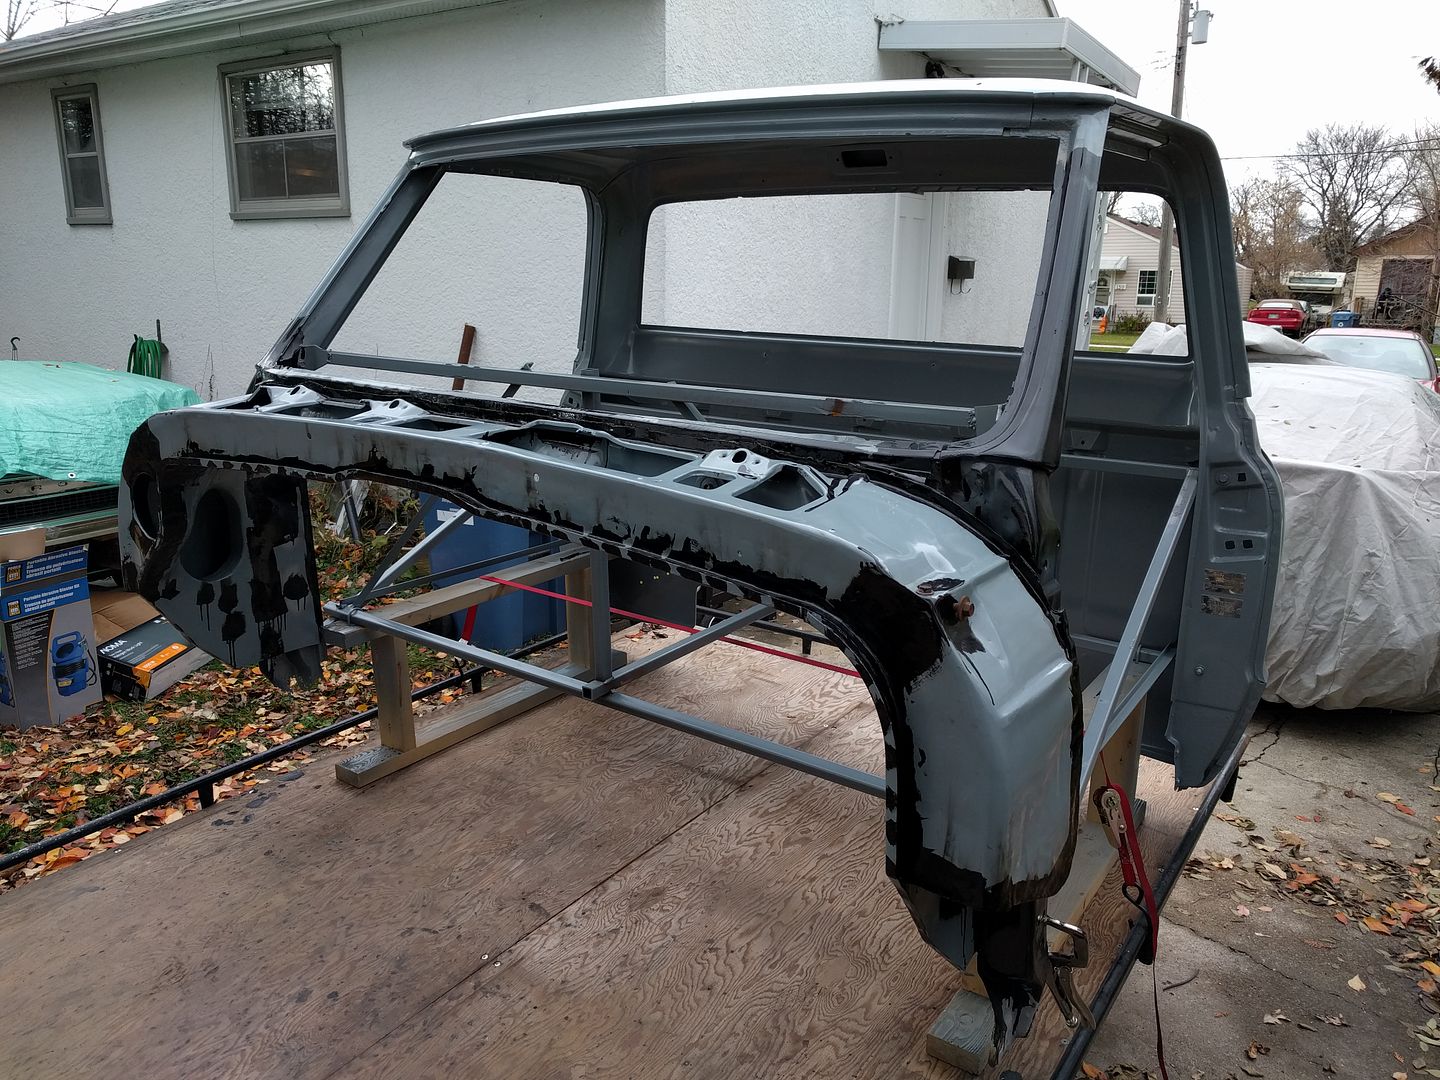   The bit I'm not happy with. Not sure if I'm going to leave it. Tossing around the idea of shaving the firewall, the cowl, and filling the "wire gutter" between the firewall and cowl. We'll see. 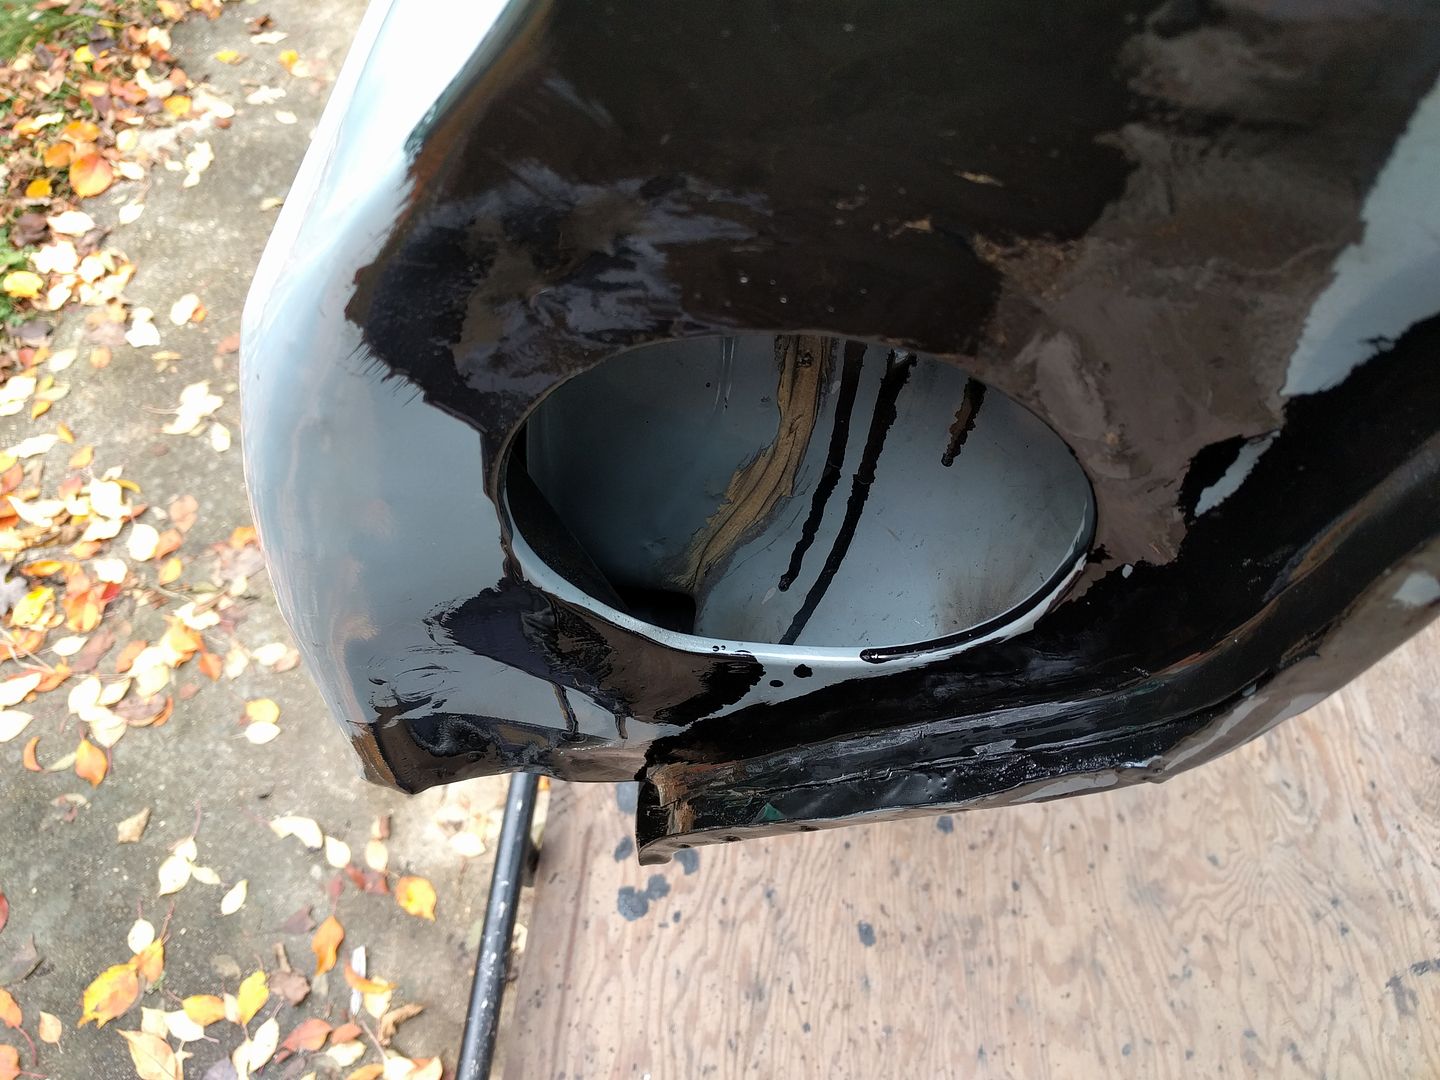 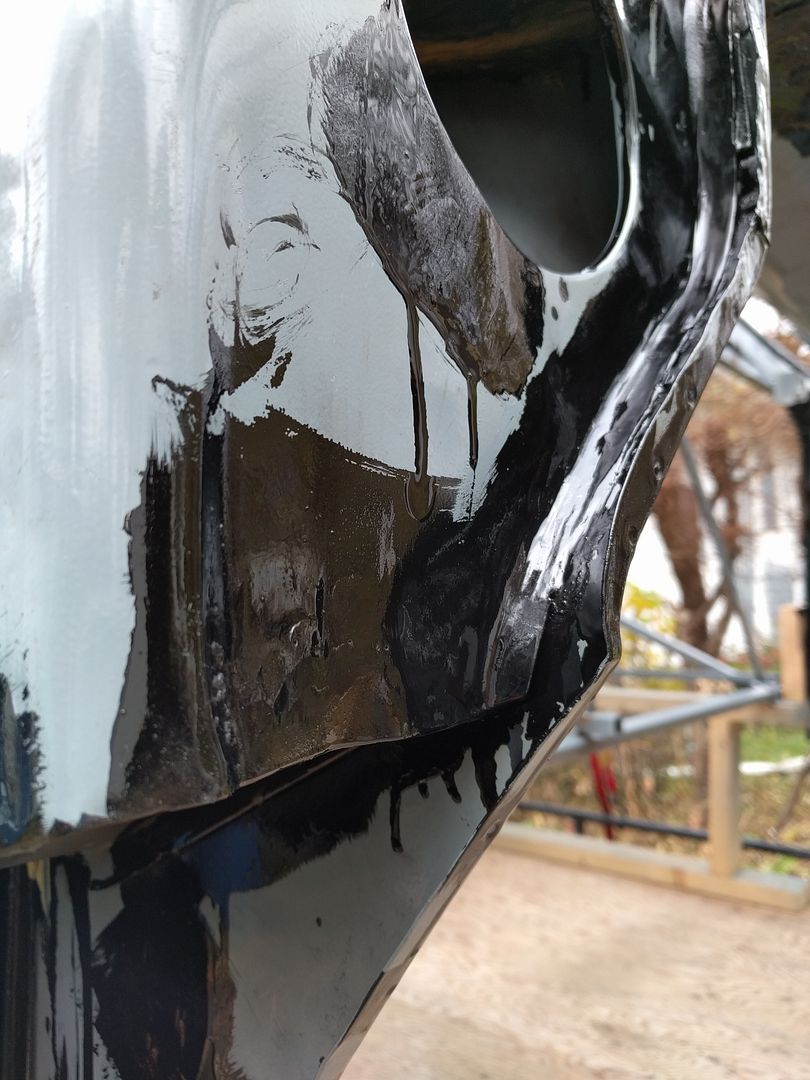 All wrapped up for winter. Probably won't see much in updates until spring now, maybe just parts collecting. 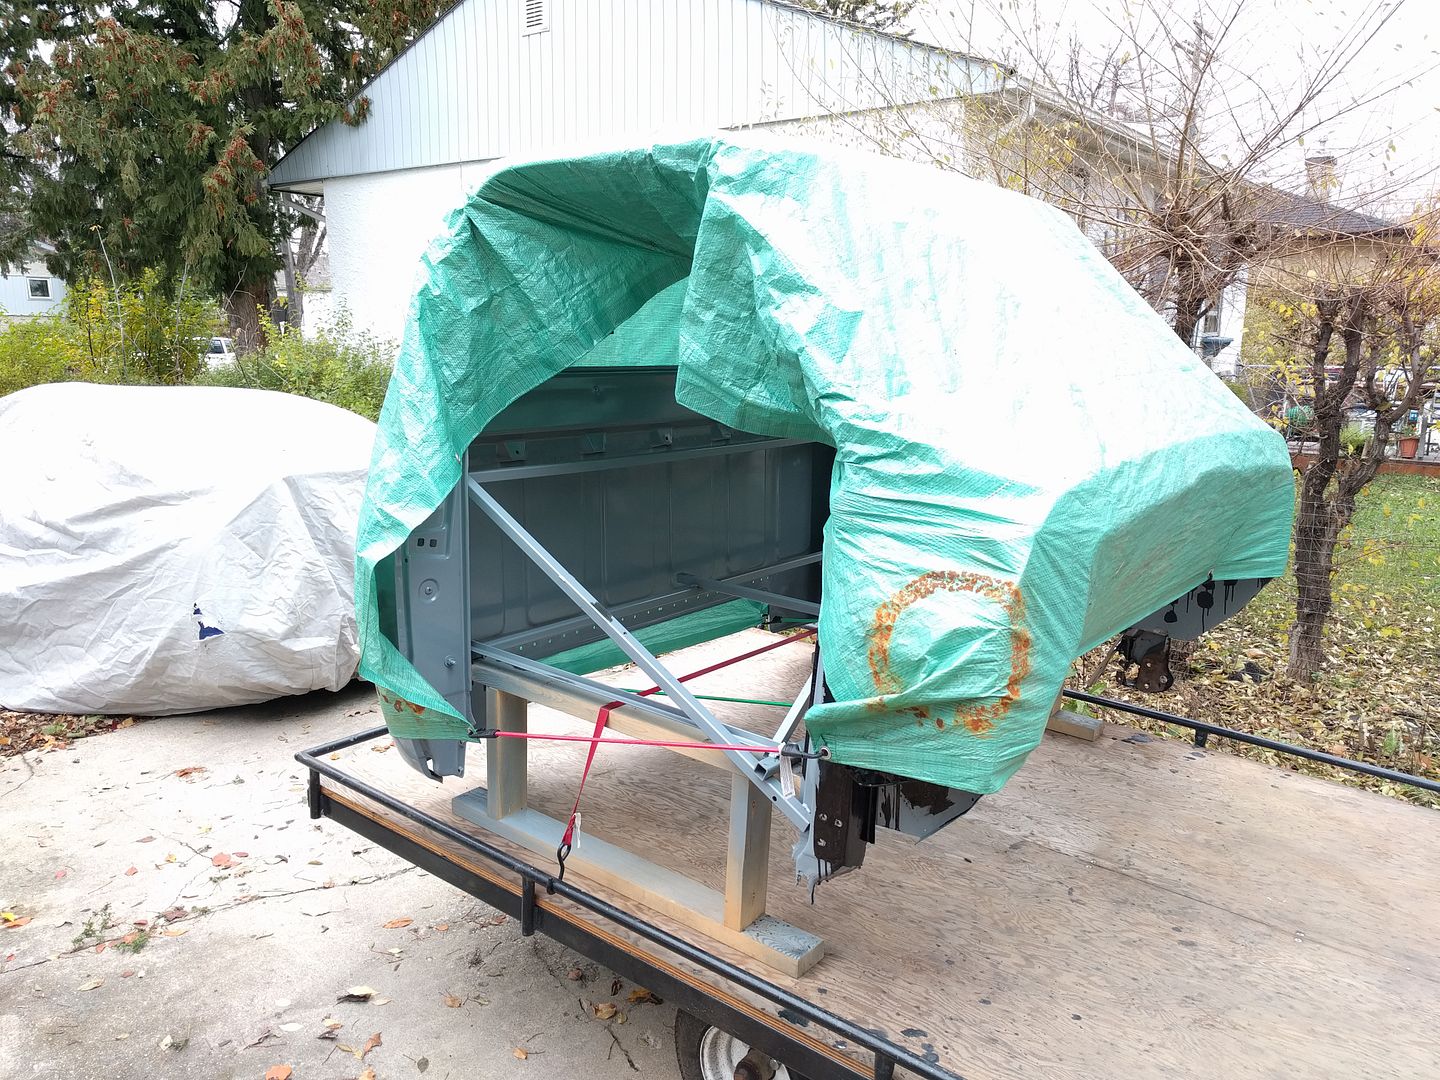 In the spring I'll bolt the floor to the chassis with new mounts, place the cab on top, and line things up with the front clip. Then I'll make a few tacks to join the floor with the cab, pull the two off and weld together. The firewall goes in next, then once the floor and firewall are fully installed I'll cut out the bracing, hang the doors and fit the rockers and cab corners. |
|
|
|
|
11-11-2016, 11:28 PM
|
#88 |
|
Registered User
Join Date: Oct 2007
Location: Spanaway
Posts: 8,451
|
Re: Run Away's '69 C10 LWB Project Log
Nice to read some updates! If that side of the cowl buggs ya that much you could always round up a doner and patch it, if ya haven't I'd try and get some K2 primer on all then spots, I went as far as draping a big tarp over my truck and using a space heater to get temps to 68-72.
__________________
Mike. Swamp Rat build thread : http://67-72chevytrucks.com/vboard/s...d.php?t=595019 72 3/4T 4X4 4" BDS Lift 33" BFG's |
|
|
|
|
11-12-2016, 04:52 PM
|
#89 |
|
Registered User
Join Date: Dec 2011
Location: somerset ky
Posts: 63
|
Re: Run Away's '69 C10 LWB Project Log
Wow! That's some great work! Can't wait till spring now to see you finish up that cab!
|
|
|
|
|
11-12-2016, 05:32 PM
|
#90 |
|
Registered User
Join Date: Jun 2015
Location: Melbourne, Australia
Posts: 231
|
Re: Run Away's '69 C10 LWB Project Log
Coming along. Great work
__________________
John 69 c20, 396, th400, dana60, ps, ac |
|
|
|
|
11-12-2016, 10:27 PM
|
#91 | |||
|
Registered User
Join Date: Feb 2009
Location: Winnipeg, Manitoba
Posts: 68
|
Re: Run Away's '69 C10 LWB Project Log
Quote:
Don't have the equipment to do epoxy primer, that's partially why I wanted to powdercoat it all again. Only cost me $280 last time for sandblasting and powdercoat, hell of a deal. I'm just borrowing a 6 gallon pancake compressor rated at 2.6 cfm from my dad, and I might have killed it already. Need a proper compressor to run a paint gun, and I don't have the electrical to support one. Basically, I would need a new house electrical box, run a cable underground to the garage, and buy a compressor before I can paint anything myself. Quote:
Quote:
|
|||
|
|
|
|
11-29-2016, 12:59 AM
|
#92 |
|
Registered User
Join Date: Feb 2012
Location: So. Cali.
Posts: 2,673
|
Subscribed .
__________________
-Nate Geezer '49 3100 235 W/ Muncie SM420 SOLD '69 C/10 shortbed sidemount survivor 250 L6 W/ 350TH
|
|
|
|
|
12-22-2016, 05:47 AM
|
#93 |
|
Registered User
Join Date: Aug 2010
Location: Grande Prairie Alberta
Posts: 105
|
Re: Run Away's '69 C10 LWB Project Log
Subscibed
|
|
|
|
|
02-04-2017, 08:40 AM
|
#94 |
|
Registered User
Join Date: Oct 2006
Location: Orland Park Il
Posts: 2,041
|
Re: Run Away's '69 C10 LWB Project Log
Great work so far! Search for a used gas compressor to run outside while you spray the epoxy.
__________________
68 GMC C3500 Longhorn DRW 67 Chevy C10 LWB 90 Mustang Gt 90 Mustang Notchback |
|
|
|
|
02-11-2017, 01:23 PM
|
#95 |
|
Registered User
Join Date: Dec 2003
Location: Thomasville, NC
Posts: 1,877
|
Re: Run Away's '69 C10 LWB Project Log
Nice build,keep the pictures coming & the progress going forward.Keep on Truckin.

__________________
My Truck: 2.5 drop front, 4 & 5/8 in rear, 350cubic in. been bored .60 over, 700r4 (soon), 3 speed (on tree for now).rims & tires size,15x8 ralleys 5 on 5,P275/60R15. Members I have met: Pickupman, 1972 Super Cheyenne, Stepside,Chis Mc Bride. tsnow67,joel.e,
|
|
|
|
|
05-09-2017, 11:16 PM
|
#96 |
|
Registered User
Join Date: Feb 2009
Location: Winnipeg, Manitoba
Posts: 68
|
Re: Run Away's '69 C10 LWB Project Log
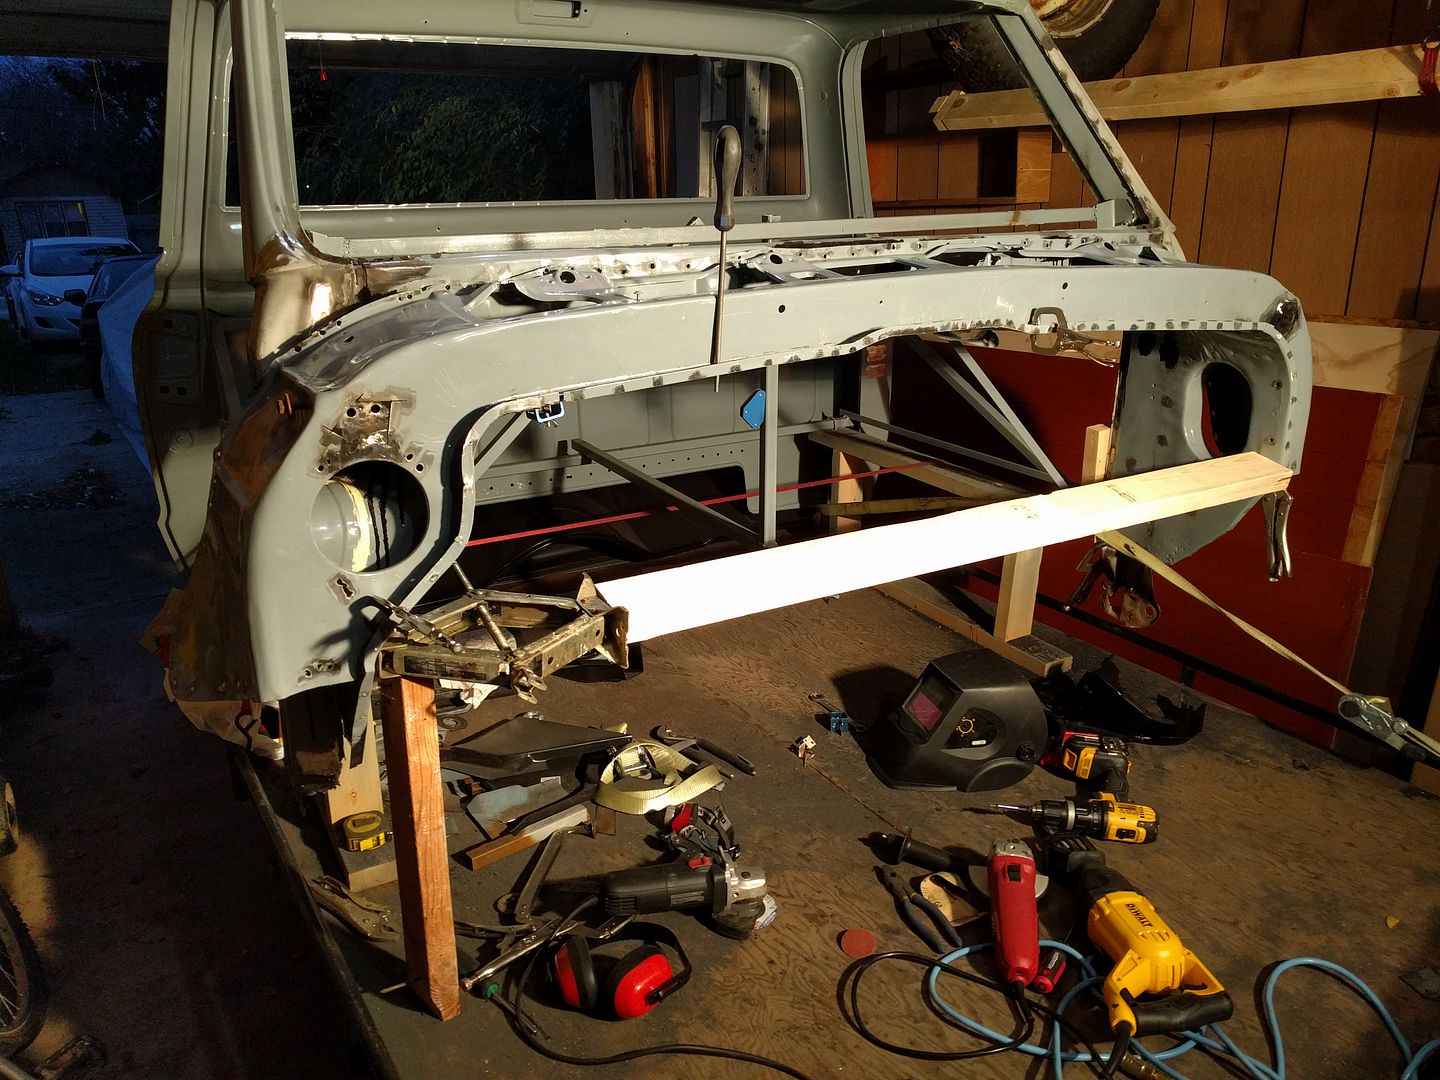
Spring is here, back to work!
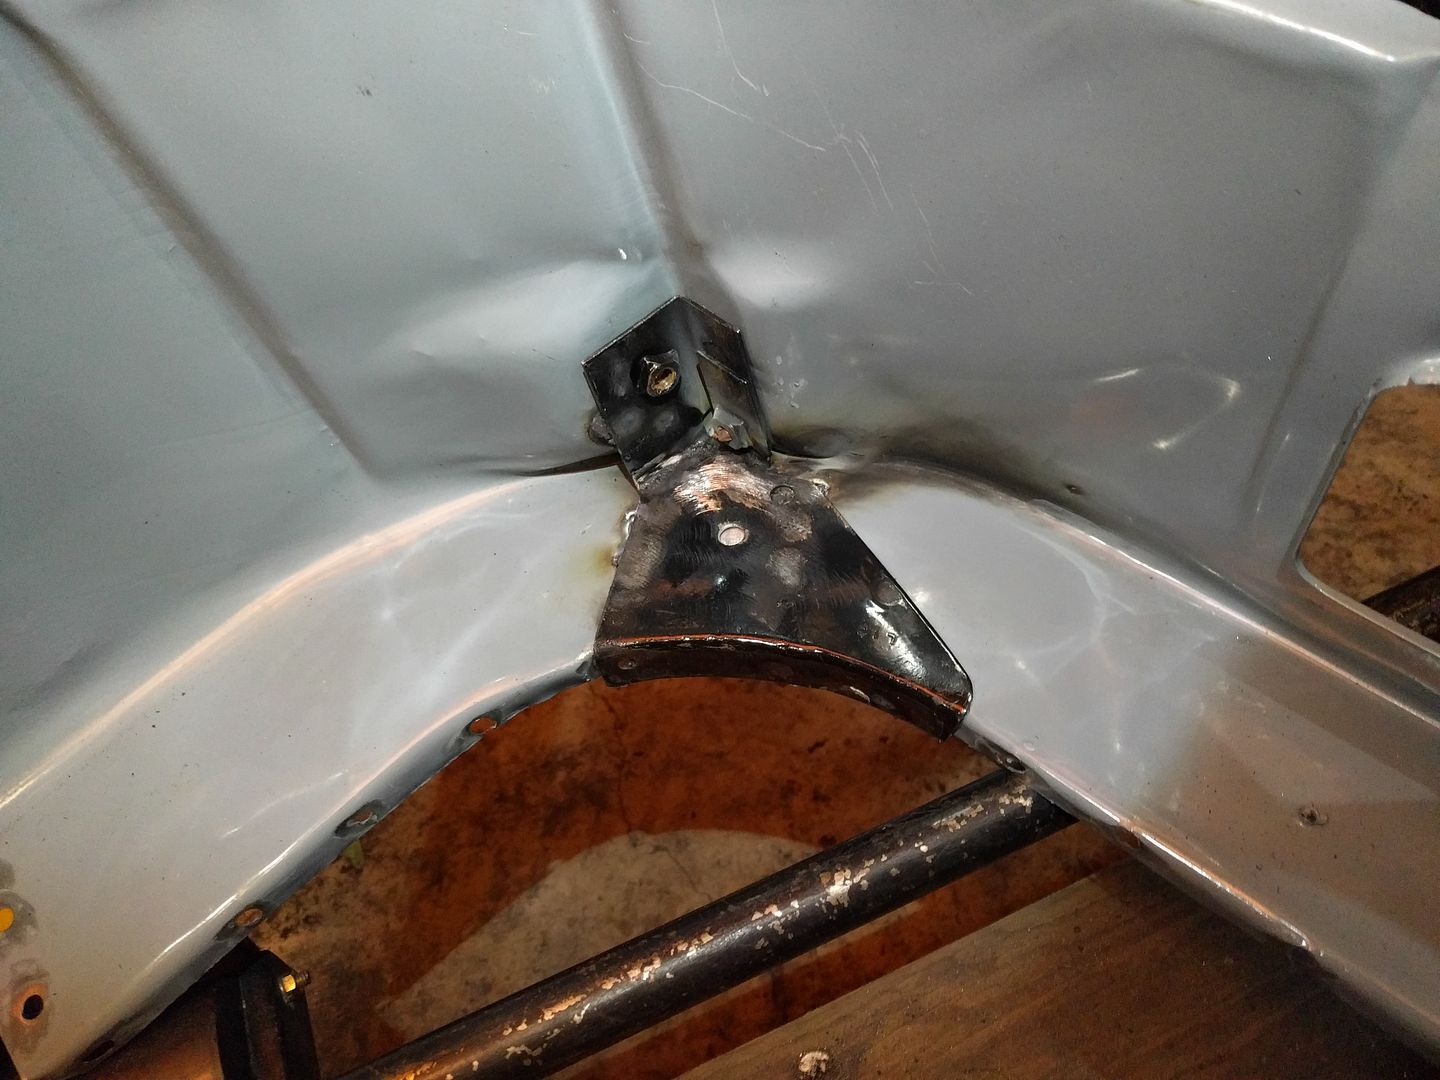
Here's what I started with Sunday evening. 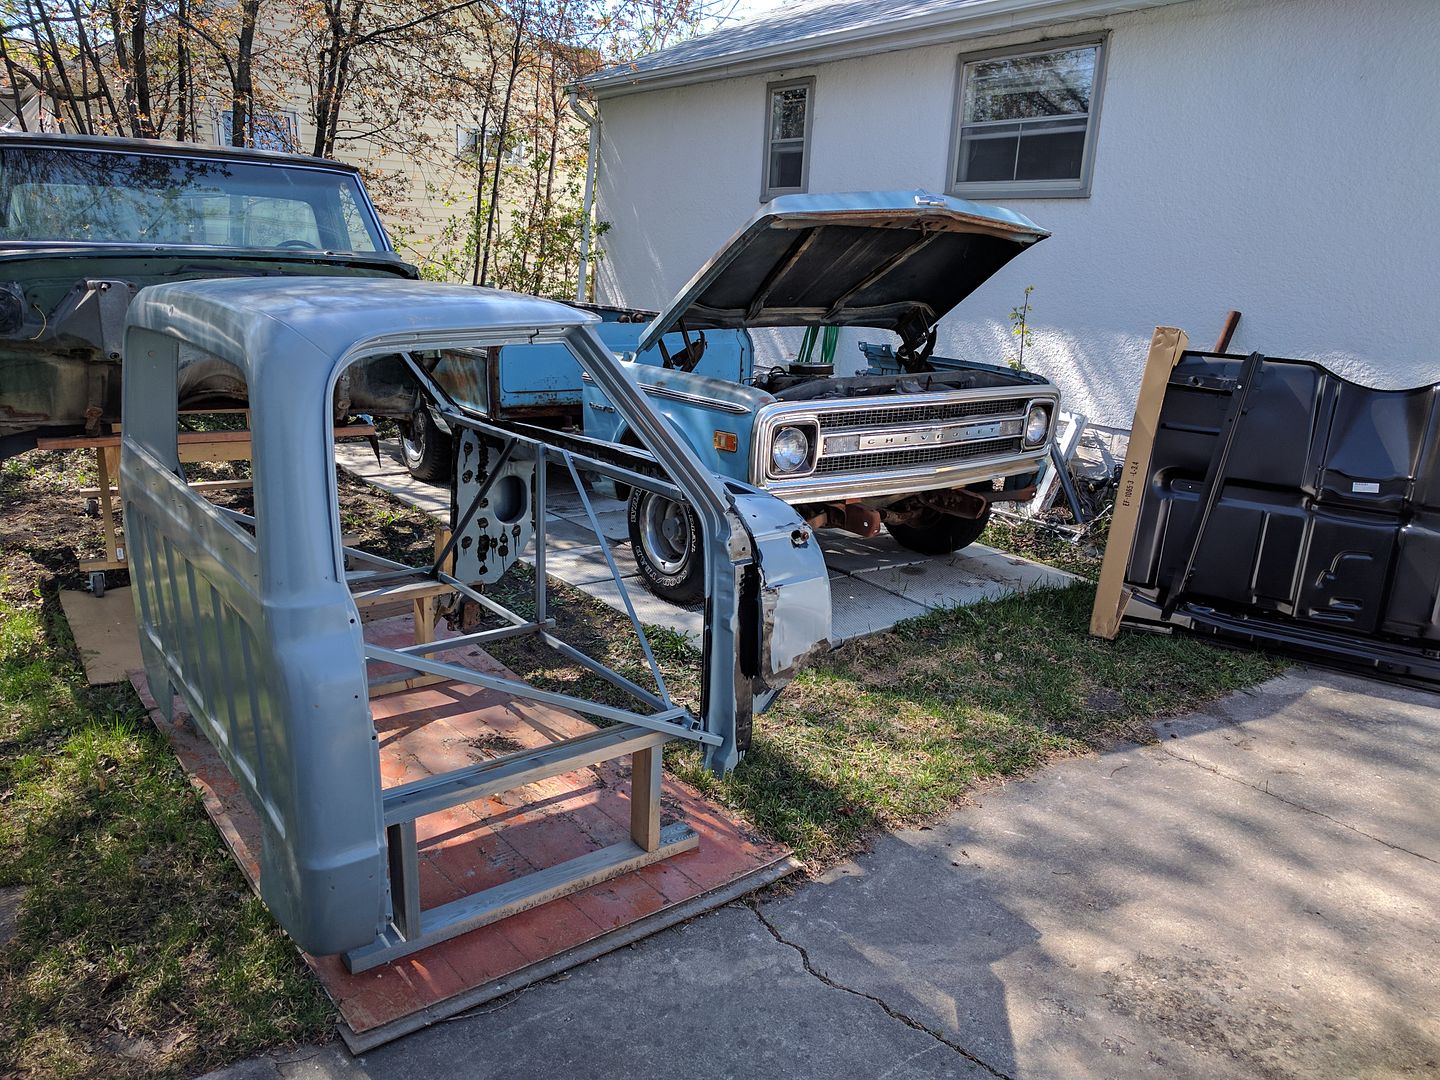 First order of business is to replace the smashed out cab mounts. I think I got the order correct, can anyone weigh in? 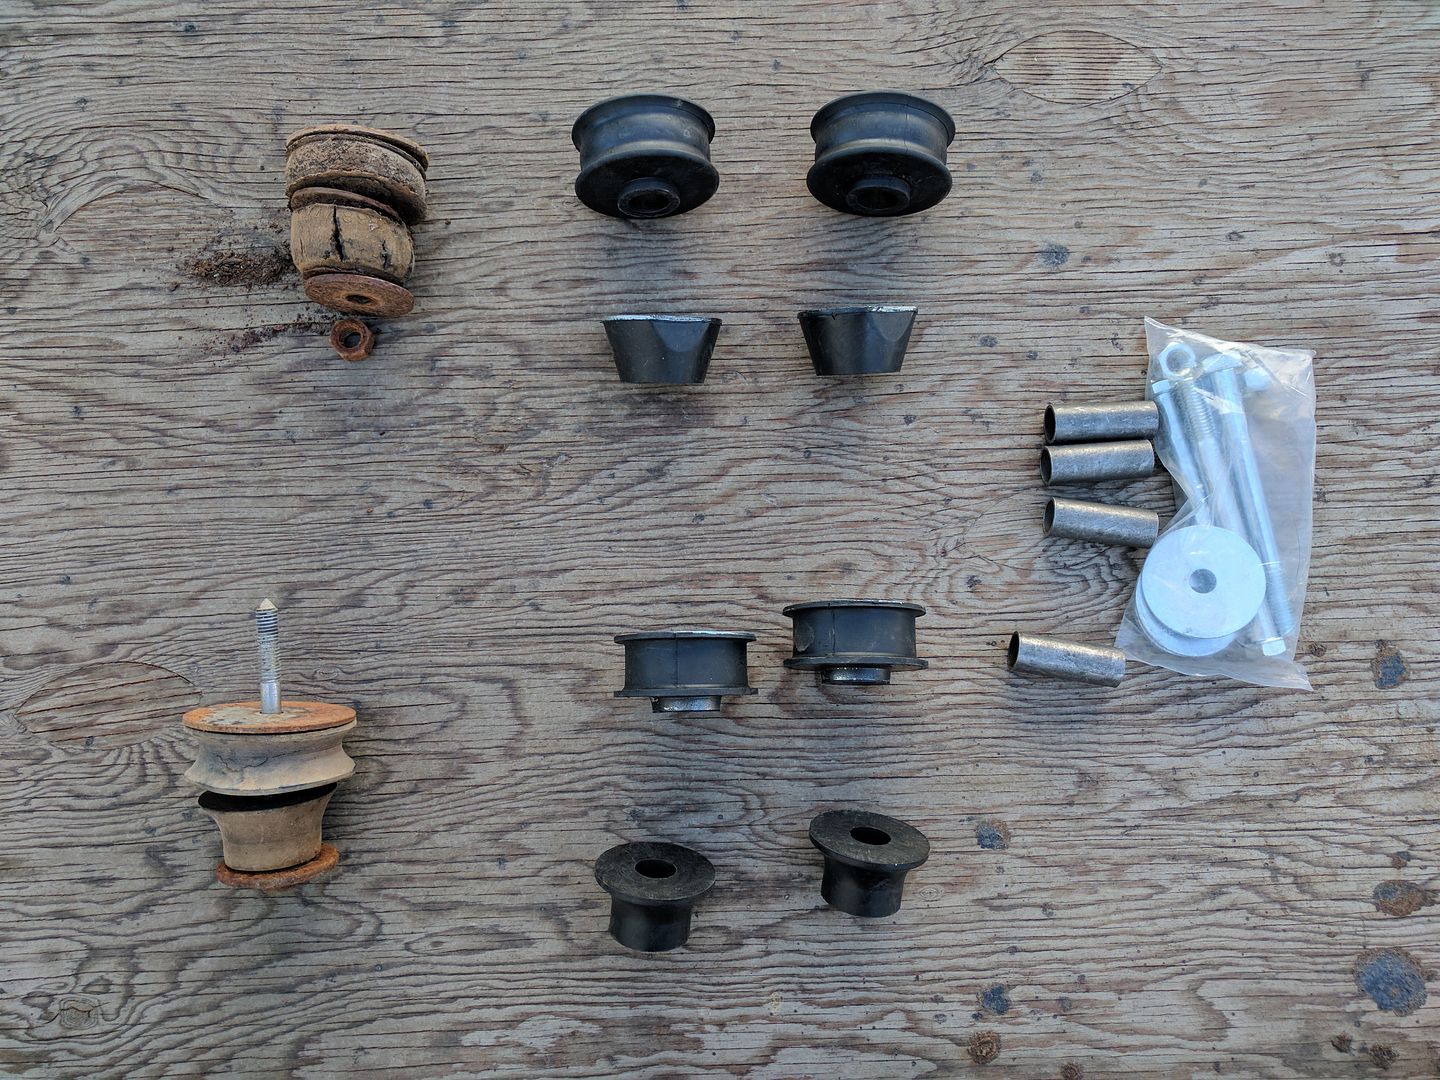 Floor placed on frame with new mounts, and the top half of the cab is squeezed over the new floor.  The back of the floor pretty well locates itself nicely, the hard part will be getting the relationship between the front A pillars and the floor correct. I'm really grateful I have a mostly complete cab beside the truck to compare.  And front clip thrown on. 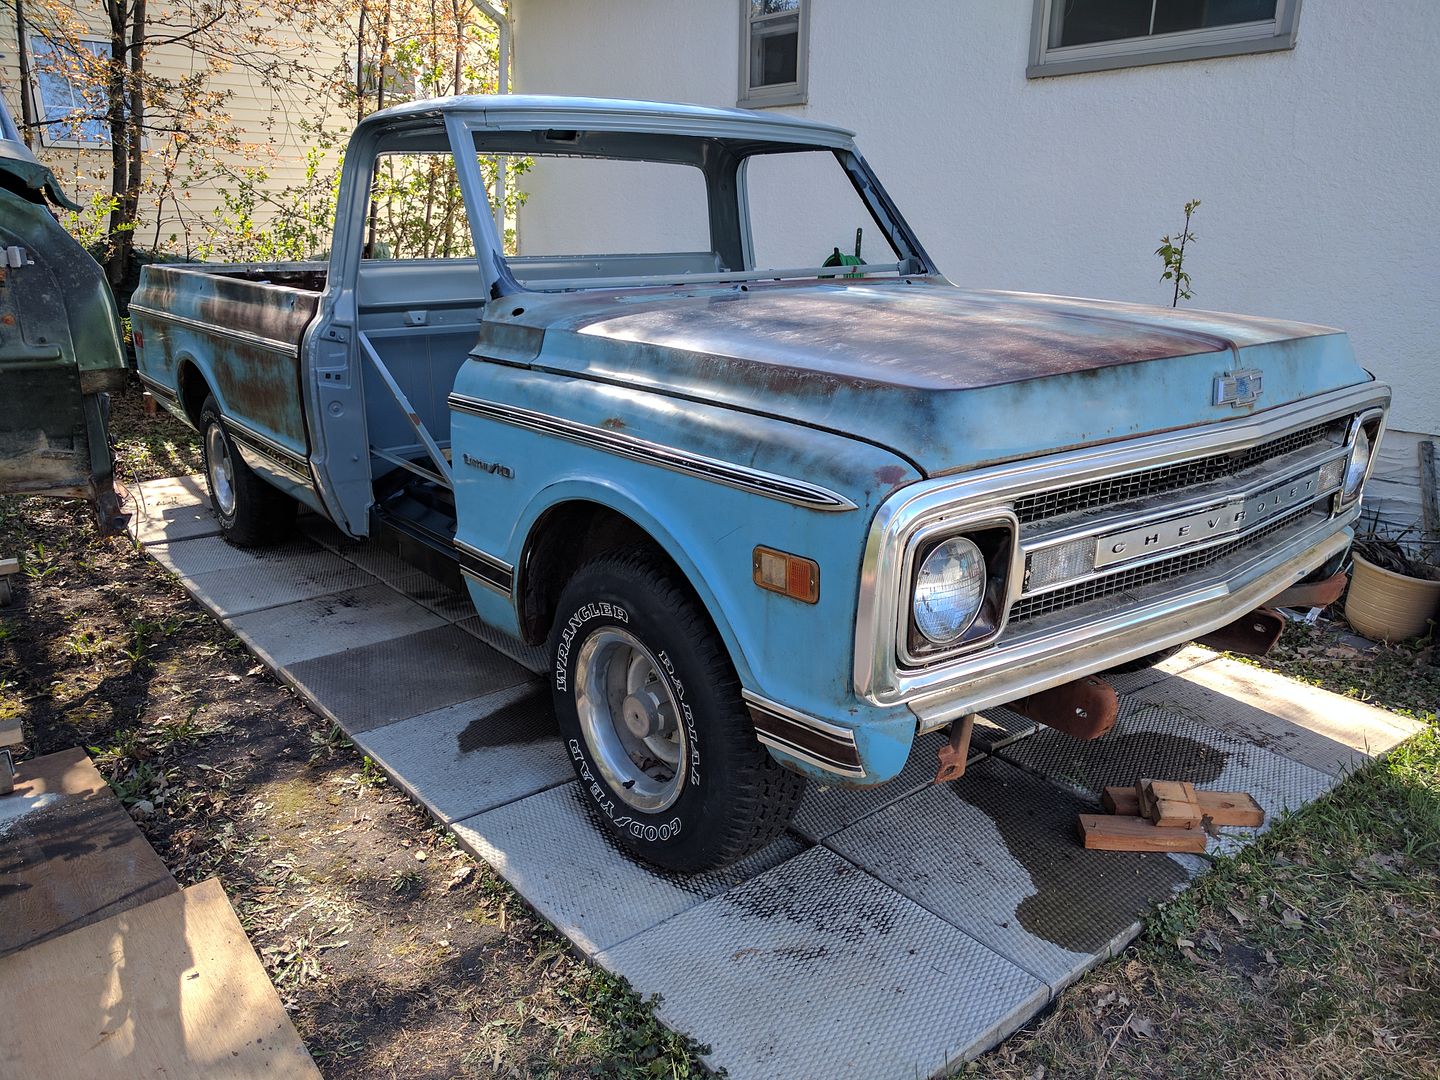 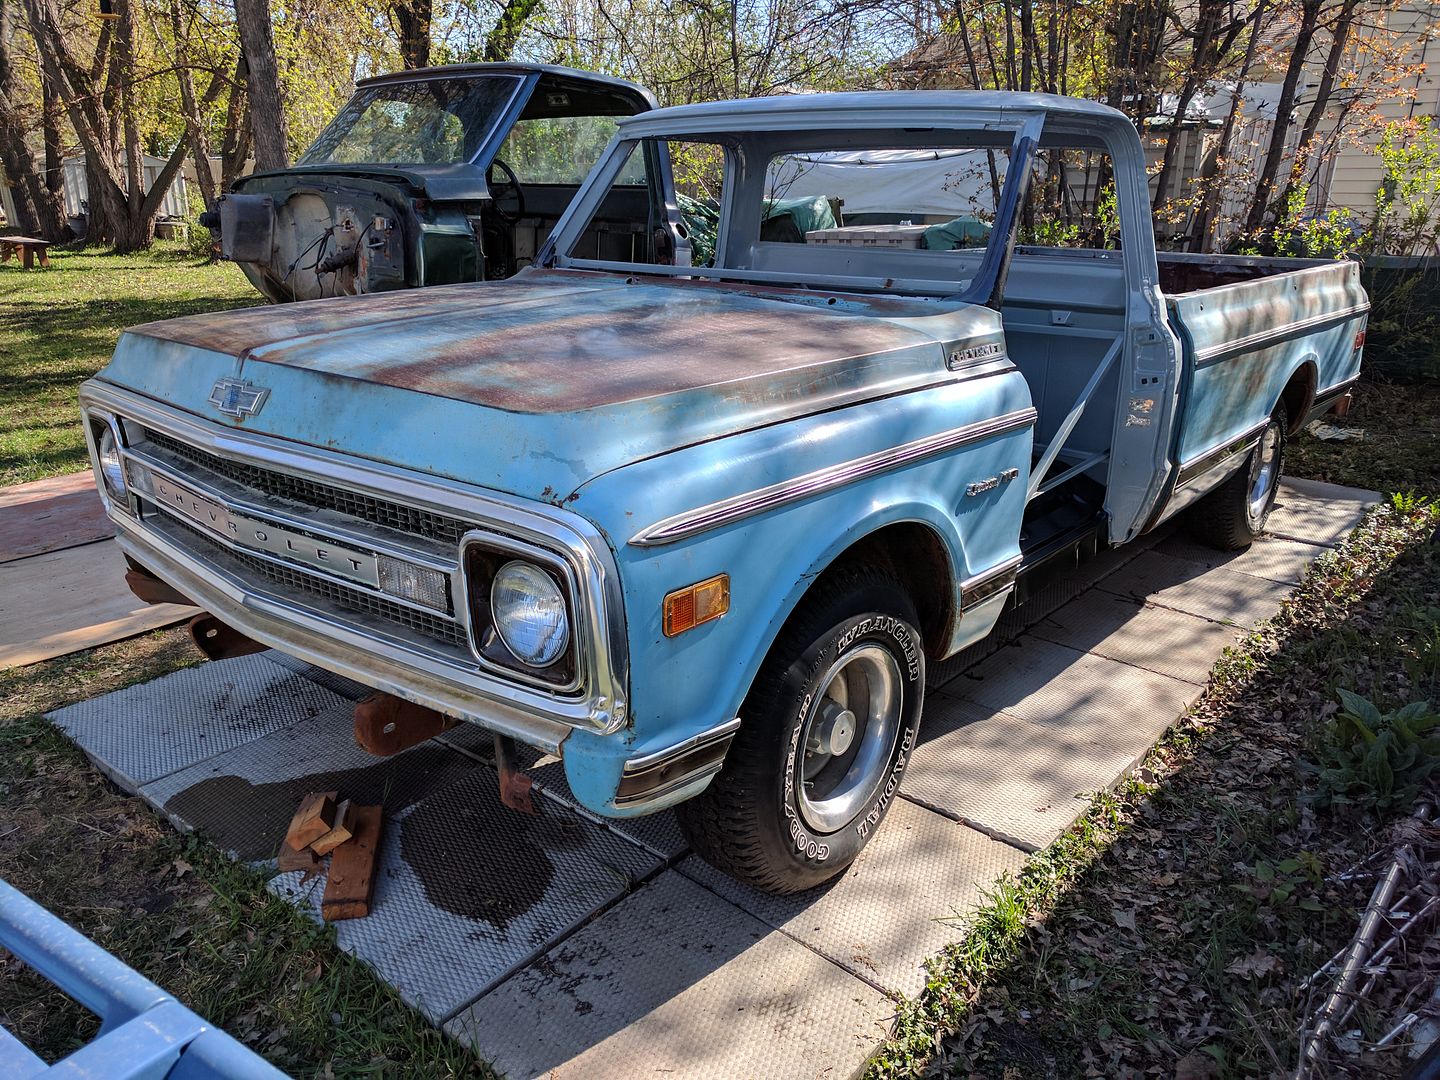
|
|
|
|
|
05-09-2017, 11:24 PM
|
#97 |
|
Registered User
Join Date: Feb 2009
Location: Winnipeg, Manitoba
Posts: 68
|
Re: Run Away's '69 C10 LWB Project Log
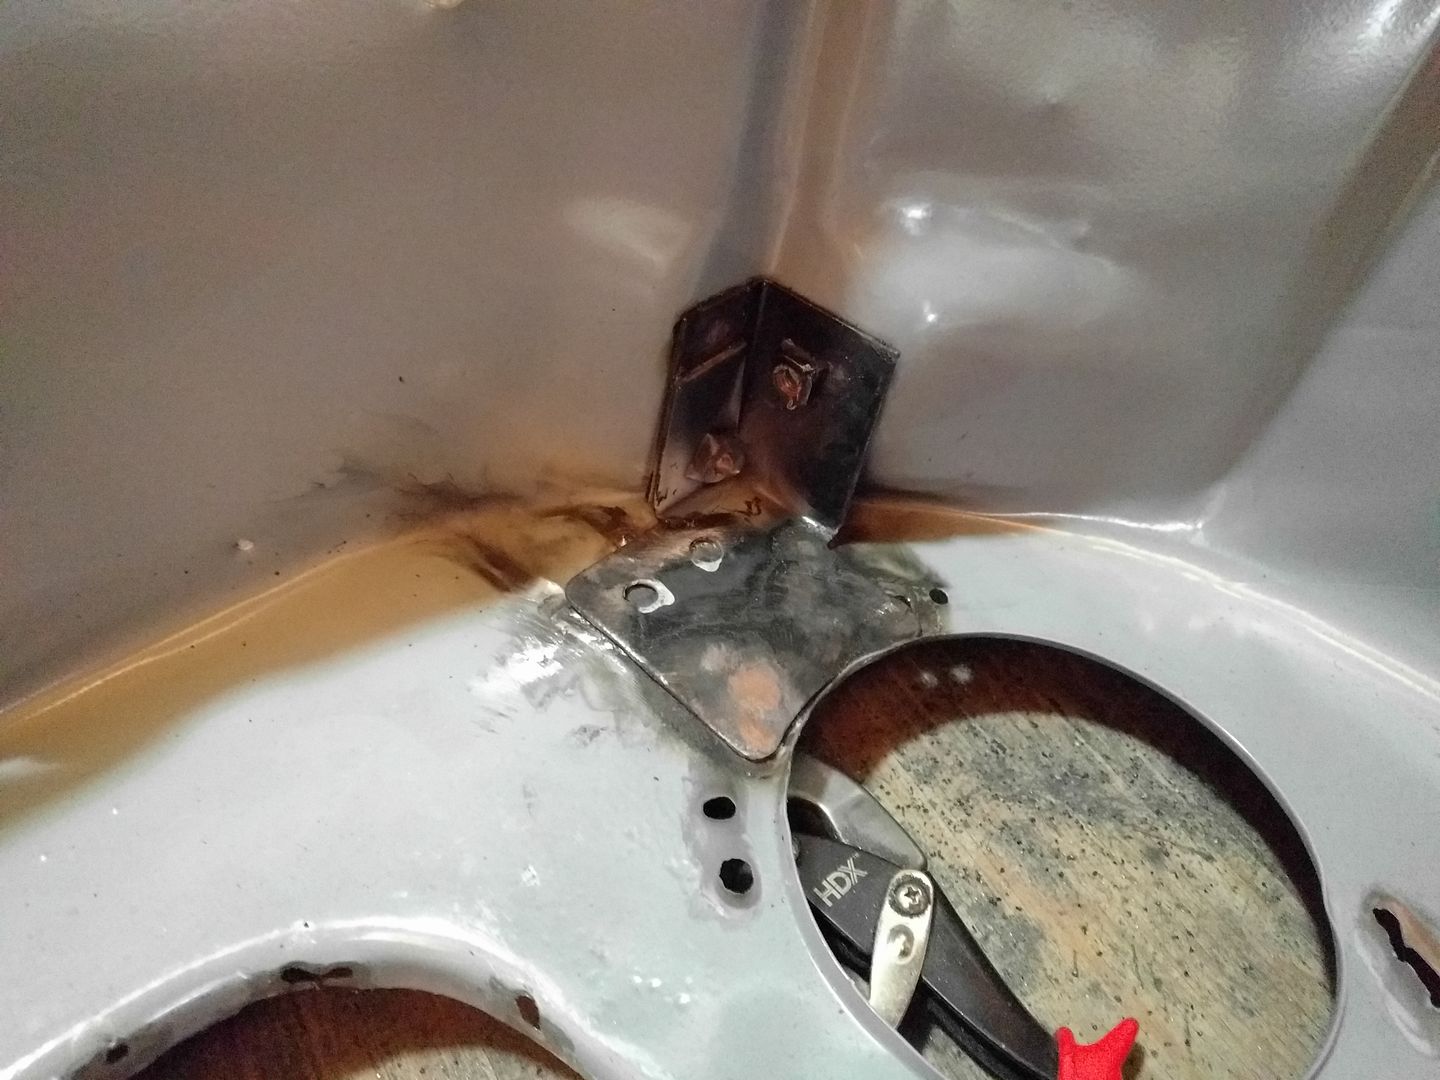
So here's how I have the mounts. They're from GMCPauls.
Front cab mount: 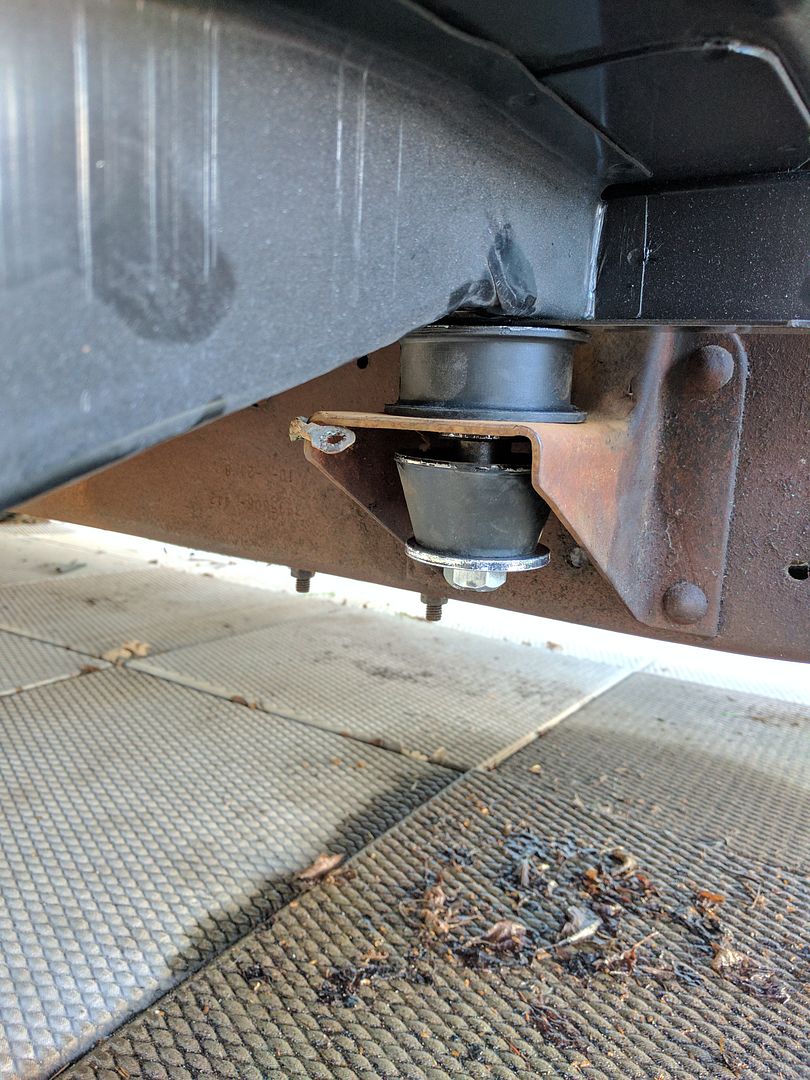 Rear cab mount: 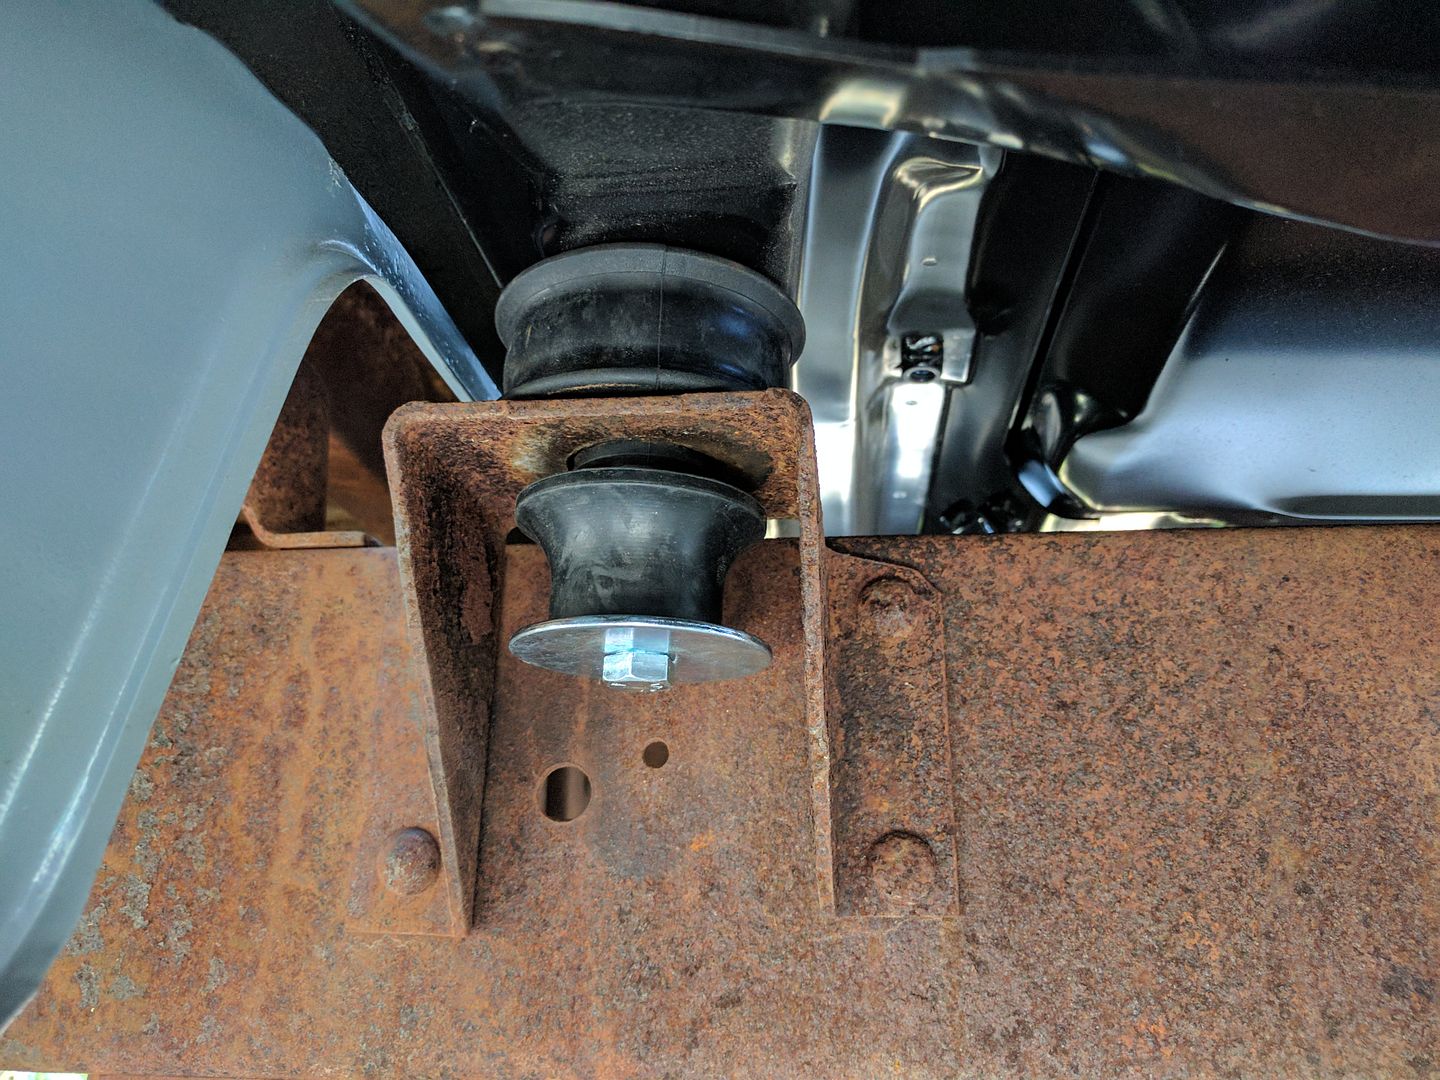 Front clip mount compared to the originals. This one I'm worried about, I may start a new thread because it really doesn't look close to the original.  Here's a couple threads I found that helped a bit, but not completely as their mounts are not the same in appearance as mine. http://67-72chevytrucks.com/vboard/s...d.php?t=211356 http://67-72chevytrucks.com/vboard/s....php?p=1636290 http://67-72chevytrucks.com/vboard/s...d.php?t=510819 And this one from Bruce88: http://67-72chevytrucks.com/vboard/s...318544&page=18 Image credits go to him. His front clip mount looks like my new one. Mine also didn't have the 1/8" shims his has. I have to go back and measure mine now. |
|
|
|
|
05-09-2017, 11:34 PM
|
#98 |
|
Registered User
Join Date: Jun 2015
Location: Melbourne, Australia
Posts: 231
|
Re: Run Away's '69 C10 LWB Project Log
I might be wrong. But it looks as though your truck has the earlier core support mounts.
I have a 69 too and it also runs the earlier mounts. You can buy the bushes alone and reuse your original bolts, washers etc. Or you can buy the complete kit.
__________________
John 69 c20, 396, th400, dana60, ps, ac |
|
|
|
|
05-10-2017, 12:15 AM
|
#99 |
|
Registered User
Join Date: Feb 2009
Location: Winnipeg, Manitoba
Posts: 68
|
Re: Run Away's '69 C10 LWB Project Log
Thank you for the post, that makes sense and I will look into that!
|
|
|
|
|
05-10-2017, 02:39 AM
|
#100 |
|
Registered User
Join Date: Feb 2012
Location: So. Cali.
Posts: 2,673
|
Looking good, impressive work and attention to detail here .
__________________
-Nate Geezer '49 3100 235 W/ Muncie SM420 SOLD '69 C/10 shortbed sidemount survivor 250 L6 W/ 350TH
|
|
|
|
|
| Bookmarks |
|
|


 Linear Mode

