
 |
|
|
#1126 |
|
Registered User
Join Date: Apr 2012
Location: Searcy, AR
Posts: 4,203
|
Re: Markeb01 Build Thread
Mark, that interior is just

__________________
DON Proverbs 27:17  US Air Force Retarded errr Retired My '65 Stepper Build:http://67-72chevytrucks.com/vboard/s...d.php?t=533920 My '60 Rusty Patina Build:http://67-72chevytrucks.com/vboard/s...66#post7402266 My '72 http://67-72chevytrucks.com/vboard/s...59#post7204359 SOLD |
|
|

|
|
|
#1127 |
|
Registered User
Join Date: Sep 2011
Location: Tacoma, WA
Posts: 2,425
|
Re: Markeb01 Build Thread

__________________
Michael McMurphy My 66 Stepside My 64 Tow Truck My 66 Tempest Table Of Contents Added to Page1 |
|
|

|
|
|
#1128 |
|
Senior Enthusiast
Join Date: Feb 2007
Location: Spokane Valley, WA
Posts: 8,356
|
Re: Markeb01 Build Thread
Thanks guys! Can't wait for the new seat covers to show up. They should really tie everything together. In addition to being a similar style, the color and texture will also match.
Looking forward to a little warmer weather to go for a drive. Currently it's down to 2-5 degrees overnight with highs in the teens -low 20's. Yesterday I went to Harbor Freight and bought one of these tank mounted heaters for the garage: 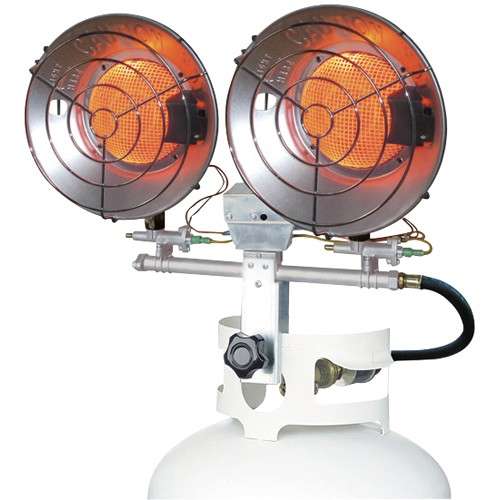 My old little heater could go through a couple of bottles and only raise the temp in the garage 5-6 degrees. The new one looks a little scary but is simple and easy to operate. This thing brought it up from 40 degrees to 60 degrees in about an hour, on medium! Man that was nice. And a big thank you to forum member 1966chevy for giving me the idea to attempt this project: 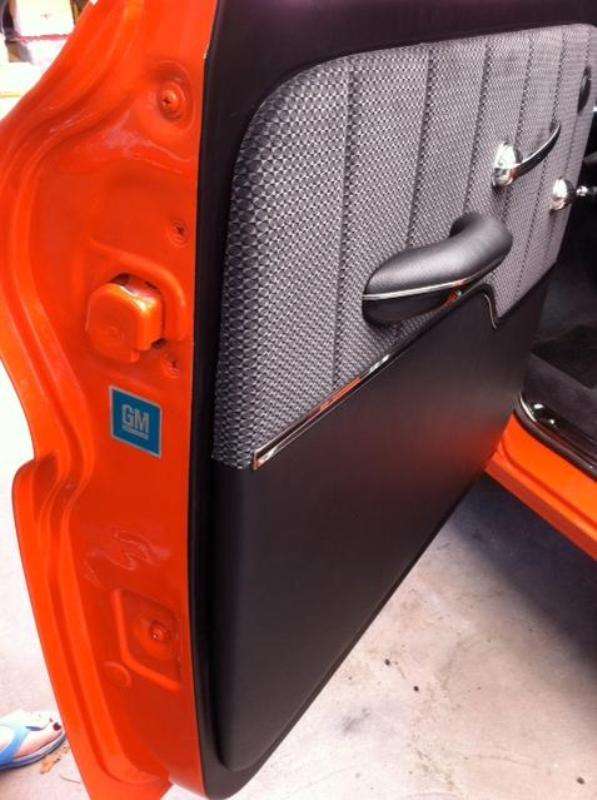 One note for anyone else with interest in full size door panels – the 64-66 doors aren’t anything like the 60-63 versions in the door panel area. The 60-63’s require much more spacing in the upper rear and along the top than the 64-66’s. Full size door panels on a 64-66 would be a much simpler task.
__________________
My Build Thread: http://67-72chevytrucks.com/vboard/s...d.php?t=444502 Last edited by markeb01; 12-07-2013 at 05:39 PM. |
|
|

|
|
|
#1129 |
|
Registered User
Join Date: Jun 2012
Location: Selkirk Ontario Canada
Posts: 1,141
|
Re: Markeb01 Build Thread
that looks cool mark
__________________
My 63 GMC Panel Slow Build http://67-72chevytrucks.com/vboard/s...=1#post5457281 63 
|
|
|

|
|
|
#1130 |
|
Senior Enthusiast
Join Date: Feb 2007
Location: Spokane Valley, WA
Posts: 8,356
|
Re: Markeb01 Build Thread
I forgot the upholstery over the transmission tunnel, so that was completed today. I was never happy with the previous droopy shape, so the backing was modified to provide a straight line across the bottom. The previous shape was created to cover all the bare spots not covered by the factory floor mat. The new MIP vinyl floor mat covers everything so the dips were no longer needed. Hereís the previous rendition:
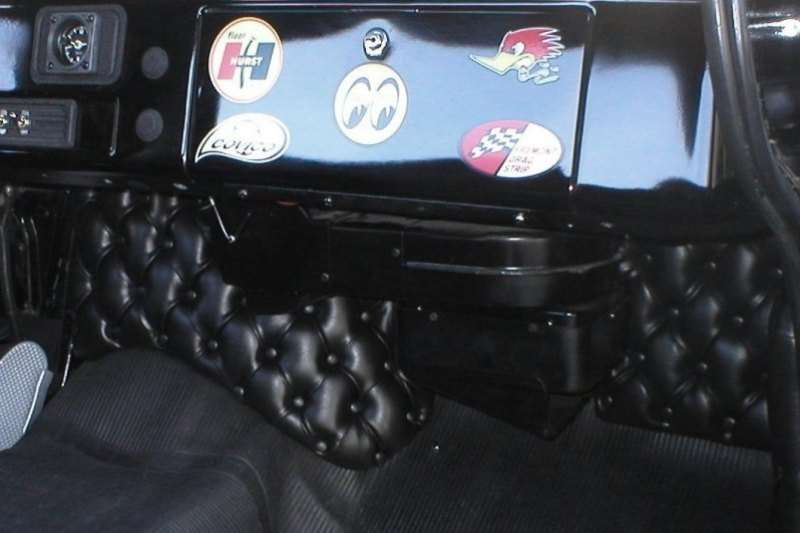 And hereís how it looks as of today: 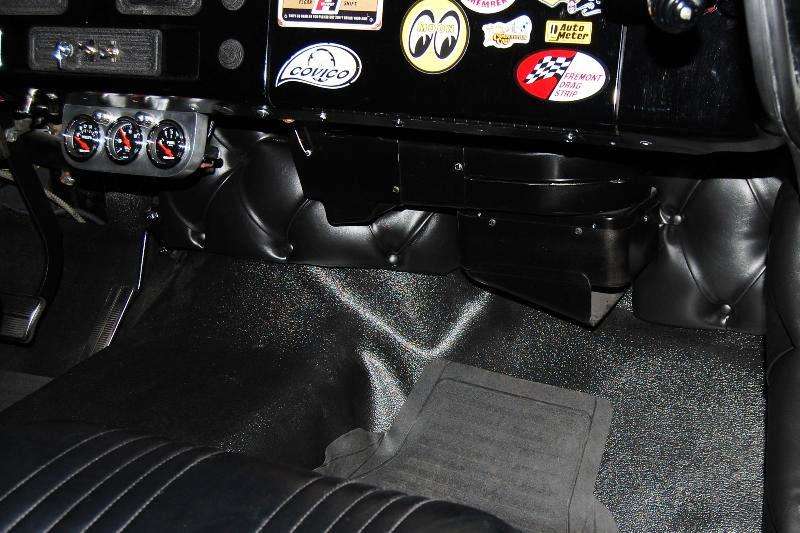 Ruthann really wanted to go for a ride in spite of the 15 degree temperatures, so we bundled up and hit the road. Conditions were clear and dry with light traffic so I opened the pipes half way and captured a short video. Every time Iíve tried with the cutouts wide open the deep sound overwhelms the microphone and just sounds like the engine is cutting out. This time it came out pretty decent and sounds great on the stereo. Interestingly the new door panels dampened the sound level in the cab significantly. The engine sounds like I added a closed element air cleaner, and the half open cutouts were barely detectable at idle on the video camera unless under acceleration. Also conversations are now easy without needing to yell to be understood. I didnít really expect any change at all since the only real change was the full height upholstered door panels. Everything else is the same Ė the thickness and density of the foam padding, brand and type of Naugahyde, etc. Now it sounds like a Buick (well sort of) cruising down the street. The gear drive still sings right along though. Hereís a link to the latest video. I think the sound is the most realistic Iíve been able to capture so far. Iím hoping a GoPro (on the list for next year) will allow recording full throttle open cutouts. http://www.youtube.com/watch?v=7z4cO...ature=youtu.be
__________________
My Build Thread: http://67-72chevytrucks.com/vboard/s...d.php?t=444502 |
|
|

|
|
|
#1131 |
|
Rollin' Old Skool
Join Date: Jun 2007
Location: Hattiesburg, MS
Posts: 5,371
|
Re: Markeb01 Build Thread
Sounds really nice & healthy, Mark! I'm sure it felt good to take it for a spin, even if it was cold. Interesting thing about the added sound deadening you got, courtesy of the new upholstery.
__________________
_____________________________________________ Phillip My Build threads: 1966 Chevy C-10 "Black Betty" shortbed, fleetside, BBW, 327 V8/ Powerglide (under construction) http://67-72chevytrucks.com/vboard/s...ighlight=betty 1997 Chevy Tahoe, 2dr/2wd, mild custom (Daily driver) http://67-72chevytrucks.com/vboard/s...d.php?t=601142 Pics: '66 C-10 https://flic.kr/s/aHsjHWD4h9 '97 Tahoe https://flic.kr/s/aHsjGZ7wKP '93 C-1500 https://flic.kr/s/aHskxdpdnQ '88 S-10 Blazer https://flic.kr/s/aHsjYGx4Md Previous Rides: 1993 Chevy S-10 ext. cab, 4.3L, 4/5 drop (Sold) 1993 Chevy C-1500 short/step Retro-Rod (Sold) 1988 S-10 Blazer 2dr/2wd mild custom (Sold) |
|
|

|
|
|
#1132 |
|
Registered User
Join Date: Aug 2012
Location: Lisle Illinois
Posts: 602
|
Re: Markeb01 Build Thread
I like straight line over transmission tunnel better. Acoustics on the youtube video are great, looks like a fun truck to drive. Surprising results, never thought that sound deadening the doors would make that much difference as it is mostly overlooked or even mentioned.
__________________
1963 Fleet Side cab, Converted Fleet Side Barden bumper, Step Side in the middle. |
|
|

|
|
|
#1133 |
|
Old and crusty
 Join Date: Jan 2009
Location: Surprise, AZ
Posts: 462
|
Re: Markeb01 Build Thread
Great job on the interior, Mark. I can't wait to see it in person. Maybe by next summer my '64' will be done and driveable again. Spokane is always a nice day or weekend trip for us. Keep warm!
__________________
65 Chevy long wide daily driver - SOLD! 64 Chevy Short Step LS |
|
|

|
|
|
#1134 |
|
Registered User
Join Date: Sep 2012
Location: Leander, TX
Posts: 969
|
Re: Markeb01 Build Thread
Mark always love your videos. Makes me want to put a manual in my truck someday.
Bret
__________________
64' Build Thread http://67-72chevytrucks.com/vboard/s...d.php?t=586955 |
|
|

|
|
|
#1135 |
|
Registered User
Join Date: Apr 2012
Location: Searcy, AR
Posts: 4,203
|
Re: Markeb01 Build Thread
Awesome Sound!!!
 Thanks for the ride-along...  Really like the take-off after the left turn... 
__________________
DON Proverbs 27:17  US Air Force Retarded errr Retired My '65 Stepper Build:http://67-72chevytrucks.com/vboard/s...d.php?t=533920 My '60 Rusty Patina Build:http://67-72chevytrucks.com/vboard/s...66#post7402266 My '72 http://67-72chevytrucks.com/vboard/s...59#post7204359 SOLD |
|
|

|
|
|
#1136 |
|
Senior Enthusiast
Join Date: Feb 2007
Location: Spokane Valley, WA
Posts: 8,356
|
Re: Markeb01 Build Thread
Thanks for all the feedback guys. It's getting so cold (0-10 degrees) I'm losing my enthusiasm for being in the garage. So while thinking about getting back to modeling, I stopped by the toy section of Walmart this morning. I was surprised to find a pile of these and had to have one. Theyíve never carried this series at the local store before. Must be loading up for Christmas:
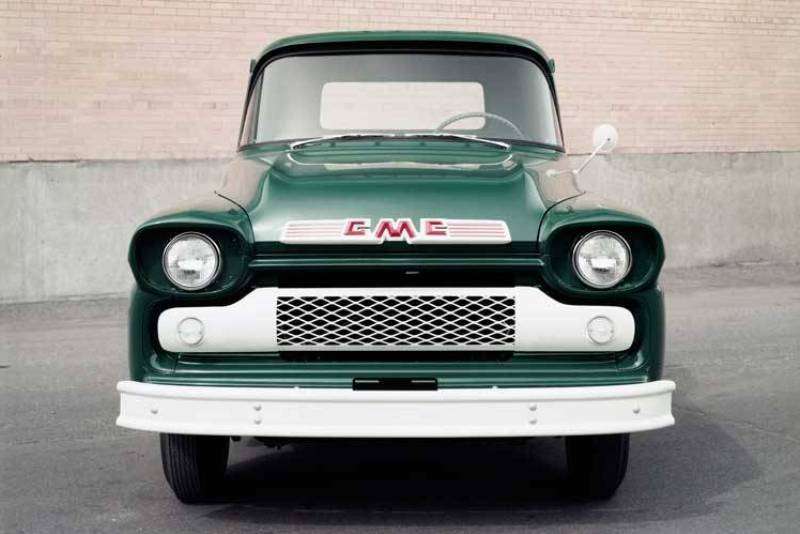
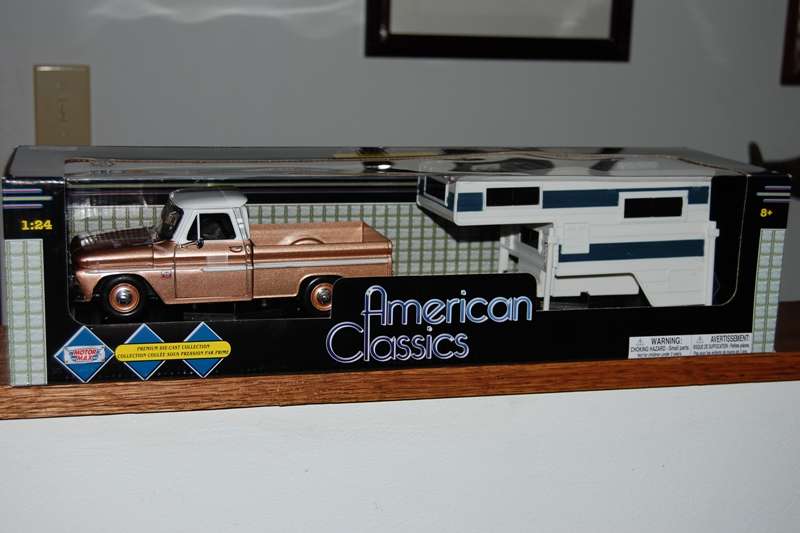 I also picked this one up at a different Walmart a couple of weeks ago. Itís Hot Wheel size and claimed to be a 1958 GMC, but it has single headlights, a funky plastic grille that doesnít look like anything and an odd front bumper that looks similar to the one found on a 1950 Dodge. It also has wheel tubs! I havenít decided yet whether to leave it alone or cut it up and turn it into a 1960-66 short step: 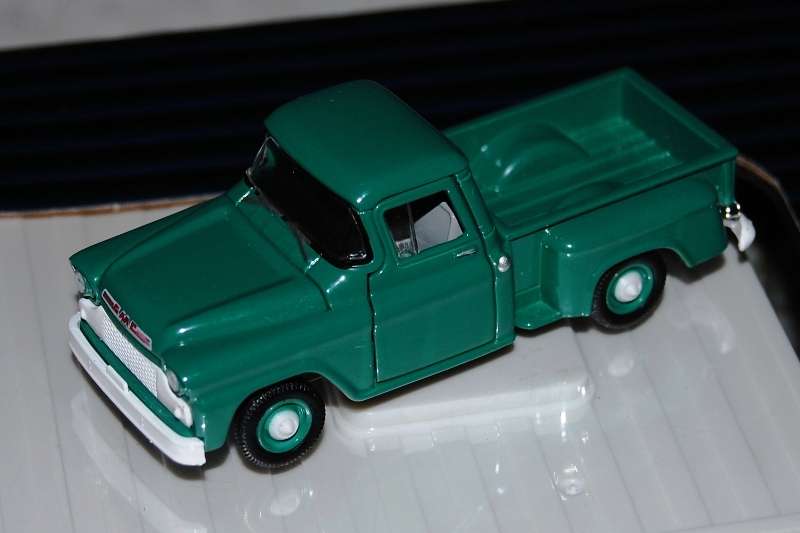 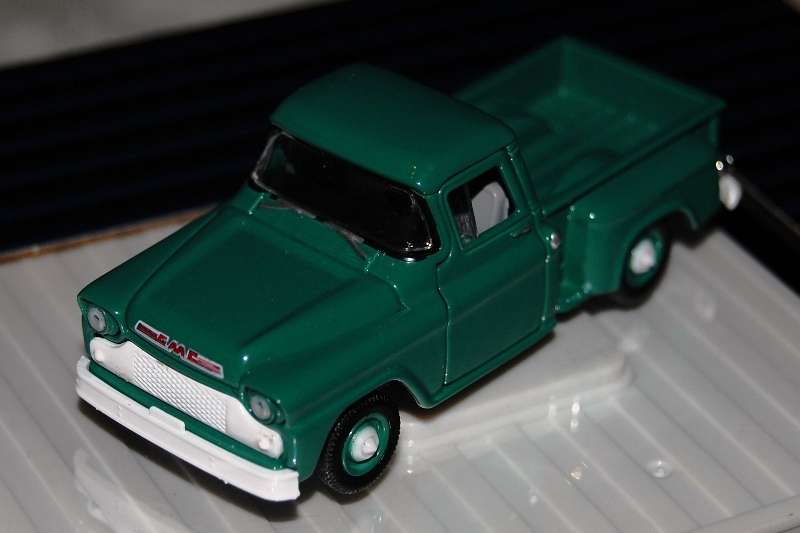 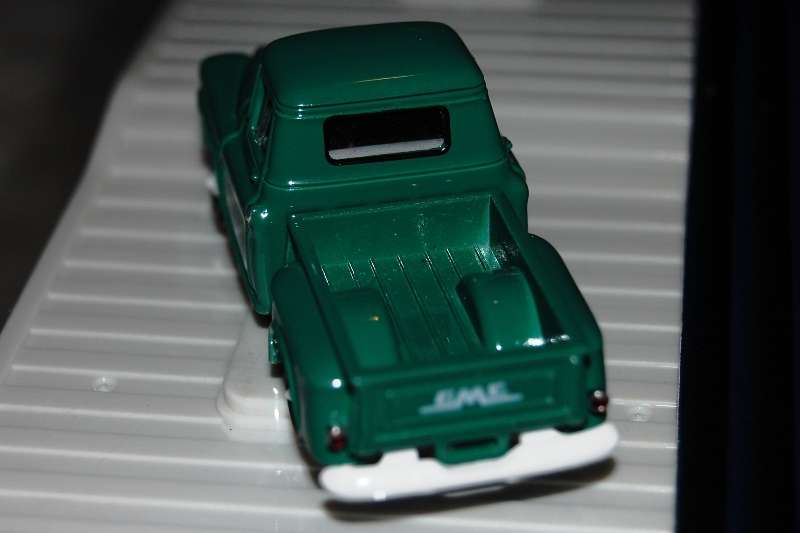
__________________
My Build Thread: http://67-72chevytrucks.com/vboard/s...d.php?t=444502 |
|
|

|
|
|
#1137 |
|
Registered User
 Join Date: Mar 2013
Location: Southern Oregon
Posts: 10,384
|
Re: Markeb01 Build Thread
Actually a certain type of GMC had that grill and bumper and single headlights...I'll take a picture of the ones in my book. here is a picture...they were produced in that style...guess not many were made. lol! Dang thing!!! Sorry the picture came out sideways, but you get the idea.
__________________
1966 Chevy C10 "Project Two Tone" http://67-72chevytrucks.com/vboard/s...d.php?t=596643 1964 GMC "Crustine" semi-build:http://67-72chevytrucks.com/vboard/s...d.php?t=665056 My youtube channel. Username "Military Chevy": https://www.youtube.com/channel/UC_h...fzpcUXyK_5-uiw Last edited by TJ's Chevy; 12-09-2013 at 04:27 PM. |
|
|

|
|
|
#1138 |
|
Senior Enthusiast
Join Date: Feb 2007
Location: Spokane Valley, WA
Posts: 8,356
|
Re: Markeb01 Build Thread
Wow great call! In all my years Iíve never seen a GMC with that appearance. However seeing is believing:
 Thanks for sharing that input.
__________________
My Build Thread: http://67-72chevytrucks.com/vboard/s...d.php?t=444502 |
|
|

|
|
|
#1139 |
|
Registered User
 Join Date: Mar 2013
Location: Southern Oregon
Posts: 10,384
|
Re: Markeb01 Build Thread
These were made in 1958-1959(?). Known as the Series 101 6.5 footers. Gmc had a billion names for their trucks. Even a different color had a different number! LOL!
__________________
1966 Chevy C10 "Project Two Tone" http://67-72chevytrucks.com/vboard/s...d.php?t=596643 1964 GMC "Crustine" semi-build:http://67-72chevytrucks.com/vboard/s...d.php?t=665056 My youtube channel. Username "Military Chevy": https://www.youtube.com/channel/UC_h...fzpcUXyK_5-uiw |
|
|

|
|
|
#1140 |
|
Rollin' Old Skool
Join Date: Jun 2007
Location: Hattiesburg, MS
Posts: 5,371
|
Re: Markeb01 Build Thread
Cool score on the die cast '66. My dad got one at Walmart as well & showed me when I was home in Sept. I think he got a blue one. Guess I should look for one for myself.

__________________
_____________________________________________ Phillip My Build threads: 1966 Chevy C-10 "Black Betty" shortbed, fleetside, BBW, 327 V8/ Powerglide (under construction) http://67-72chevytrucks.com/vboard/s...ighlight=betty 1997 Chevy Tahoe, 2dr/2wd, mild custom (Daily driver) http://67-72chevytrucks.com/vboard/s...d.php?t=601142 Pics: '66 C-10 https://flic.kr/s/aHsjHWD4h9 '97 Tahoe https://flic.kr/s/aHsjGZ7wKP '93 C-1500 https://flic.kr/s/aHskxdpdnQ '88 S-10 Blazer https://flic.kr/s/aHsjYGx4Md Previous Rides: 1993 Chevy S-10 ext. cab, 4.3L, 4/5 drop (Sold) 1993 Chevy C-1500 short/step Retro-Rod (Sold) 1988 S-10 Blazer 2dr/2wd mild custom (Sold) |
|
|

|
|
|
#1141 | |
|
Registered User
Join Date: Apr 2012
Location: Searcy, AR
Posts: 4,203
|
Re: Markeb01 Build Thread
Quote:
 Hey Mark... do you buy any scale lumber for buildimg dioramas? If so, where is a good source? Thanks in advance! 
__________________
DON Proverbs 27:17  US Air Force Retarded errr Retired My '65 Stepper Build:http://67-72chevytrucks.com/vboard/s...d.php?t=533920 My '60 Rusty Patina Build:http://67-72chevytrucks.com/vboard/s...66#post7402266 My '72 http://67-72chevytrucks.com/vboard/s...59#post7204359 SOLD |
|
|
|

|
|
|
#1142 |
|
Senior Enthusiast
Join Date: Feb 2007
Location: Spokane Valley, WA
Posts: 8,356
|
Re: Markeb01 Build Thread
Hi Don, hereís a long answer to a short question. The only wood in my dioramas is in the cabinet, floor/street, and the sidewalks. All of that was purchased at Loweís or Home Depot. 99% of all of the construction materials used to produce the buildings are styrene plastic.
Itís all sheet, strip, and rod stock. The other 1% is machined aluminum, and the finials on top of the right hand building are wood. Iíll refer to some photos of my Universal Set diorama to explain where the different materials were used. I find plastic is easier to work with than wood, can be finished to exact dimensions, and holds up much better to handling and can survive in outdoor applications. Structures can be made very heavy, and remain strong enough for repeated handling. I include a built in handle in most of my buildings as they sometimes need to be removed to replace light bulbs, change wiring layouts, or perform upgrades. Styrene tube glue can be used, but for structures itís easiest to use liquid cement. Buying the first bottle at a hobby shop is a good idea to obtain the small bottle with a brush in the cap. The truth is, the contents of the bottle are nothing but Acetone. So for the cost of the hobby bottle, just pick up a quart of Acetone at the hardware store and youíll have a lifetime supply for very little investment. Generally I start out with an exact size two dimensional drawing on foam filled paper found at art stores like Michaels. It is the material photo framing outfits use to support the photograph to be framed. Hereís an example of building #1 at stage 1:  Once everything fits and looks accurate, I transfer the drawings to ĹĒ styrene foam filled sheet. Hereís one of the earliest photos I have showing the openings for the toy and camera stores cut out: 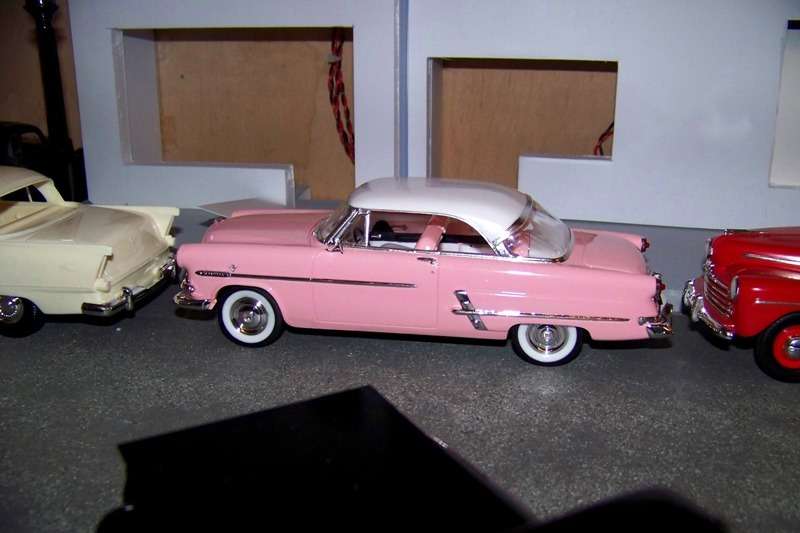 This is a one piece product that is actually two thin sheets of styrene held together with styrene foam. It works great for substructures, minimizing the need for framing as on a real building. I bought this material and most of the plastic supplies online from Plastruct or Evergreen: http://www.plastruct.com/Pages/Catalog.html http://www.evergreenscalemodels.com/ If you choose to work with plastics, do yourself a favor and get their catalogs. It makes it much easier to find what youíre looking for online. Once the structure has been glued together, I simply apply surface materials on top. For example the bricks are imprinted sheet, but the bay window was built like full size construction. Itís all mitered 2x4ís, plywood & moulding (to scale). The small window next to the bay window has yet to be cut and installed:  To show the full scope of the set, here are all 3 buildings early in the project. The partially completed building on the right was a model railroad kit that turned out too small for accuracy. It was replaced with a custom build to match the real set: 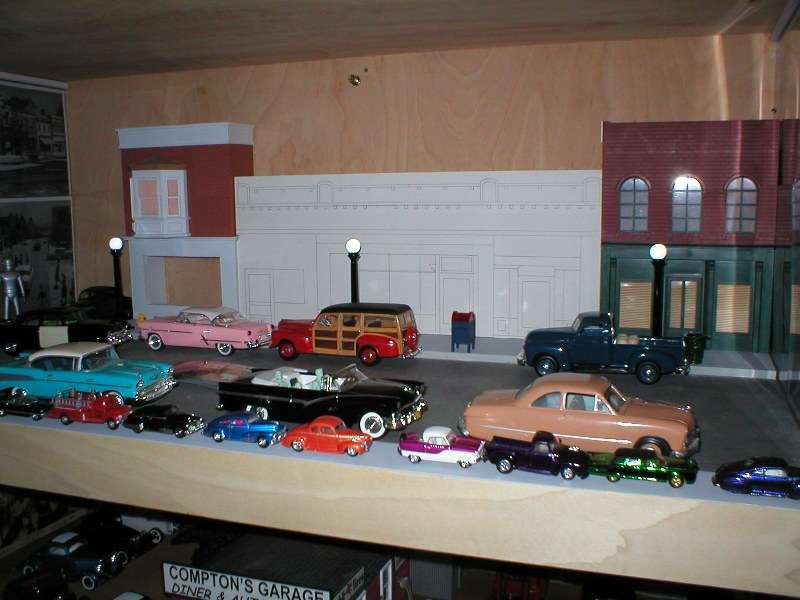 This shows the upper works installed on the styrene structure. The lower portion is the paper drawing which kept getting cut down as production progressed:  With most of building #1 & #2 completed, building 3 started over:  Hereís building #3 completed. 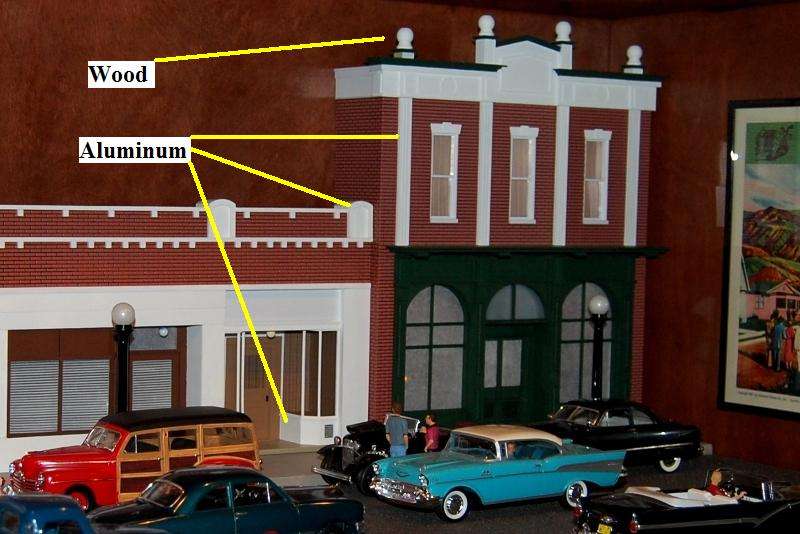 The 4 vertical columns have flutes cut into them, so these were machined for accuracy. Same thing with the bases for the pharmacy. They were sliced from aluminum which allowed hogging out the front creating a cavity for the screened air vents. The four roof turrets were each formed from two pieces to adjust the depth of the face recess. After a year of trying to come up with a solution, the domed window openings were finally created by slicing ABS sewer pipe in half. And finally the awning over the camera store was created by building a conventional frame with plastic (similar to a real awning), and was covered with tissue paper coated with thinned white glue. The street lamps are genuine Lionel train parts with pearl painted clear plastic balls on top: 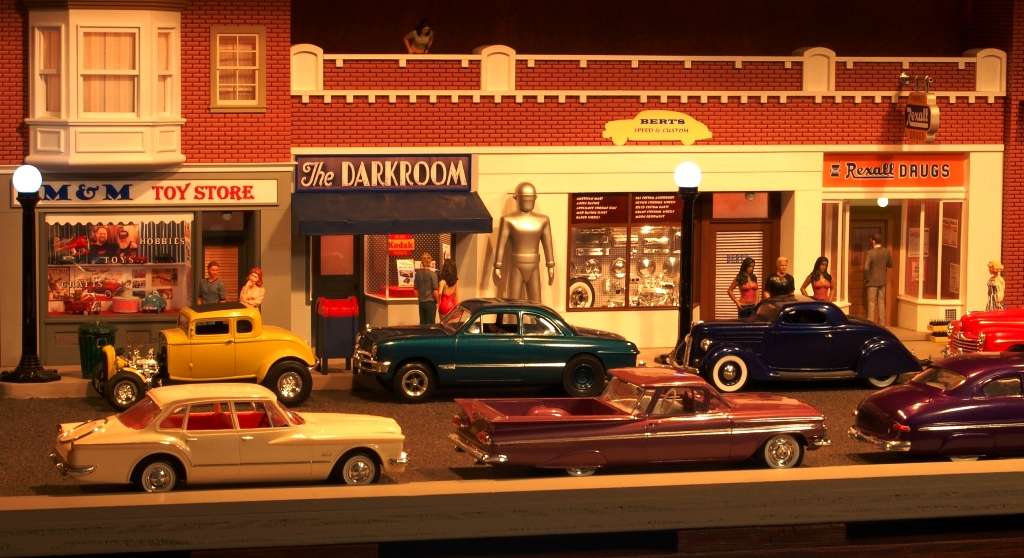 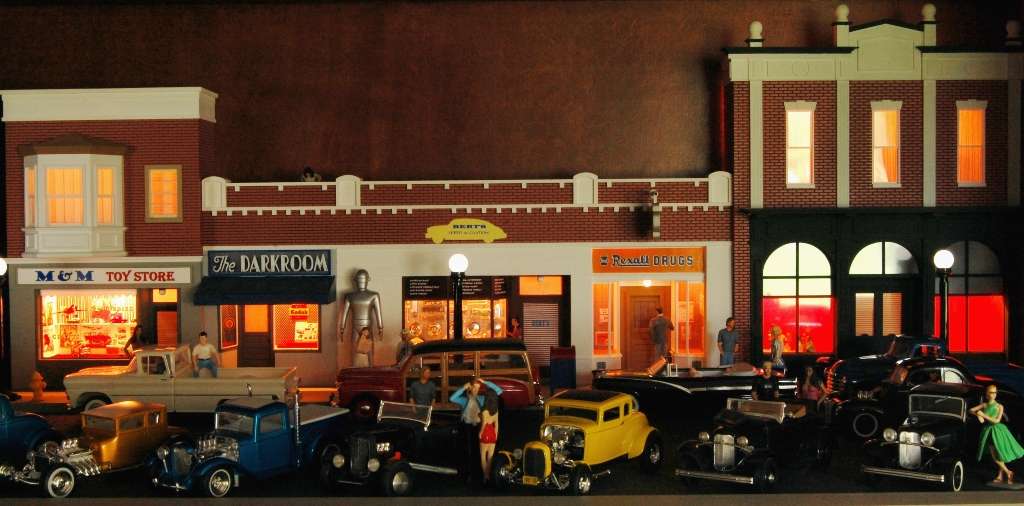
__________________
My Build Thread: http://67-72chevytrucks.com/vboard/s...d.php?t=444502 |
|
|

|
|
|
#1143 |
|
Registered User
Join Date: Apr 2012
Location: Searcy, AR
Posts: 4,203
|
Re: Markeb01 Build Thread
Thanks for the infoÖ
 Just now getting into the planning stages for one I want to do...  Merry Christmas to You and the Missus!!! 
__________________
DON Proverbs 27:17  US Air Force Retarded errr Retired My '65 Stepper Build:http://67-72chevytrucks.com/vboard/s...d.php?t=533920 My '60 Rusty Patina Build:http://67-72chevytrucks.com/vboard/s...66#post7402266 My '72 http://67-72chevytrucks.com/vboard/s...59#post7204359 SOLD |
|
|

|
|
|
#1144 |
|
Senior Enthusiast
Join Date: Feb 2007
Location: Spokane Valley, WA
Posts: 8,356
|
Re: Markeb01 Build Thread
Thanks and return wishes to you & those close to you. Our oldest daughter will be visiting for a week. Her career has turned her into a world traveler, so this is a rare treat for us. We're both looking forward to some quality 1 on 1 time.
__________________
My Build Thread: http://67-72chevytrucks.com/vboard/s...d.php?t=444502 |
|
|

|
|
|
#1145 |
|
Registered User
Join Date: Dec 2012
Location: Rochester, KENT
Posts: 10,565
|
Re: Markeb01 Build Thread
Now I am wondering if I should build a diorama too....
Your work really is inspiring Mark. Thanks for sharing.
__________________
MY BUILD LINK: http://67-72chevytrucks.com/vboard/s...585901]Redneck Express - 1966 C10 Short Fleetside MY USA ROADTRIPS http://forum.retro-rides.org/thread/...2018-humdinger IF YOU CAN'T FIX IT WITH A HAMMER, YOU'VE GOT AN ELECTRICAL PROBLEM MATE. |
|
|

|
|
|
#1146 |
|
Registered User
Join Date: Sep 2012
Location: Leander, TX
Posts: 969
|
Re: Markeb01 Build Thread
Awesome Diorama Mark. You have mad skills. Love the 59' El Camino. What model kit is the white truck in the last pic? Makes me want to build some of my 60's pickup kits.
Bret
__________________
64' Build Thread http://67-72chevytrucks.com/vboard/s...d.php?t=586955 |
|
|

|
|
|
#1147 |
|
Senior Enthusiast
Join Date: Feb 2007
Location: Spokane Valley, WA
Posts: 8,356
|
Re: Markeb01 Build Thread
Thanks guys for the comments and stopping by.
Bret, the Chevy truck is a 1961 annual. It was either made by AMT or SMP and is a long bed fleetside. It is very similar to the ďpromoĒ trucks that were offered by dealers. The annuals were unassembled in kit form with a few extra pieces thrown in and sold through hobby shops and toy stores. The biggest difference was the early promotional cars and trucks were produced of some type of acetate material which normally warped badly over time. The kit versions were produced in styrene plastic which did not warp. Hereís what mine looked like when I found it on Ebay: 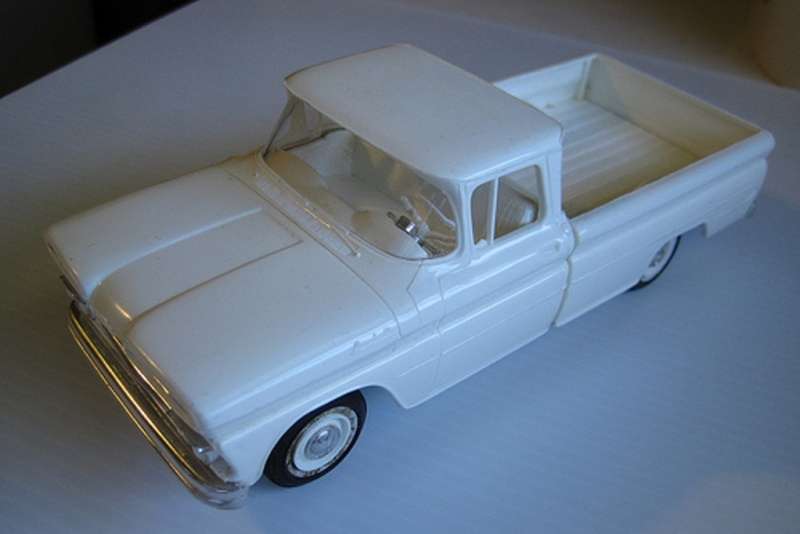 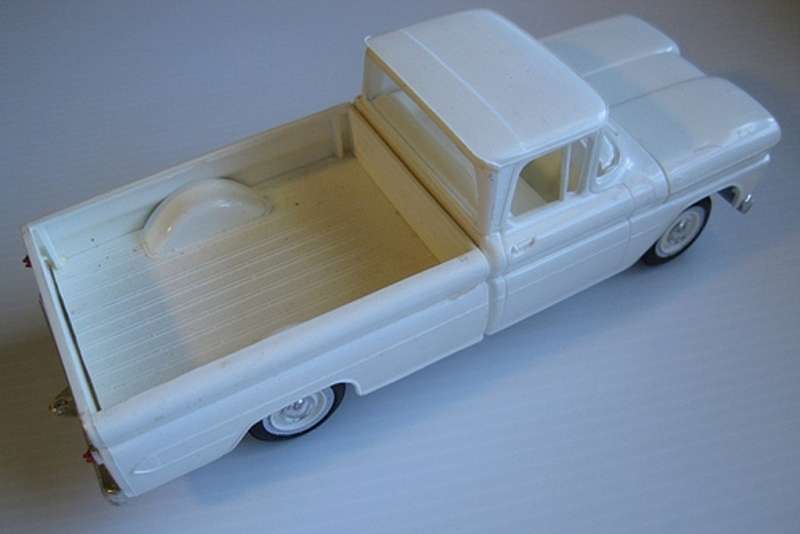 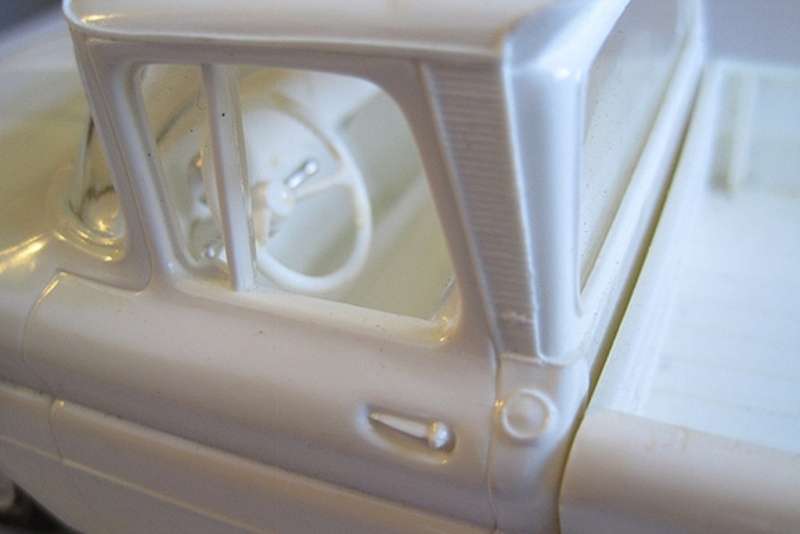 And hereís what it looks like after some Bare Foil trim, 55 Chevy wheel covers and a new set of whitewalls:  The original 60-66 trucks are frequently listed on Ebay, but itís hard to find a decent example at a reasonable price. They seem to be in one of two conditions Ė new old stock unbuilt in the box, or something that looks like these: 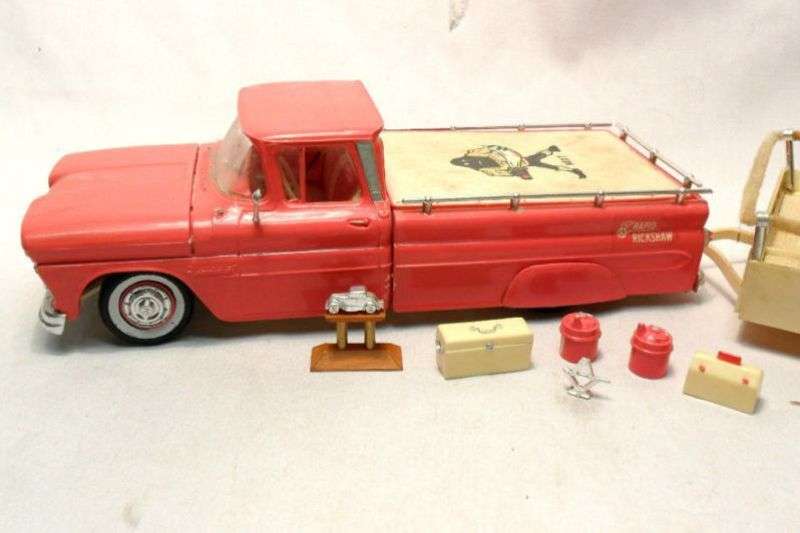  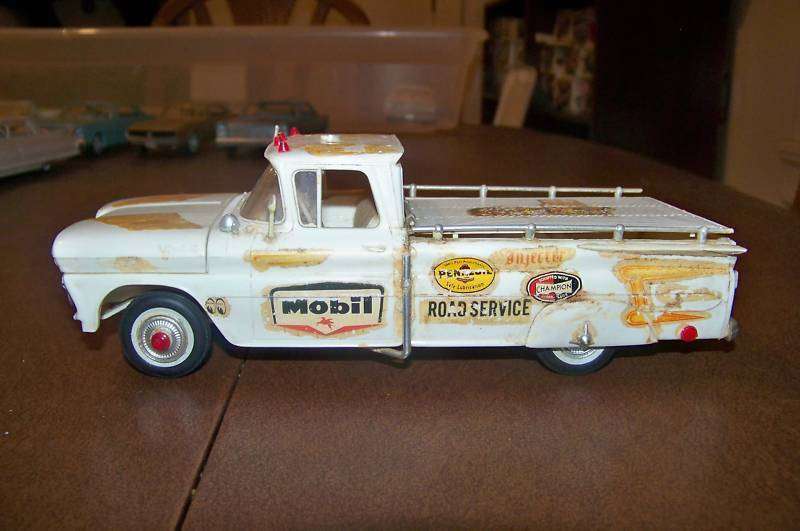 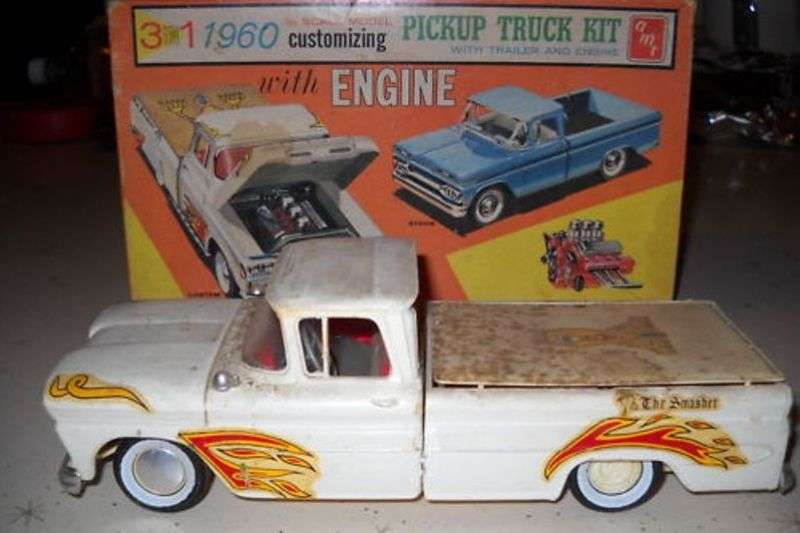 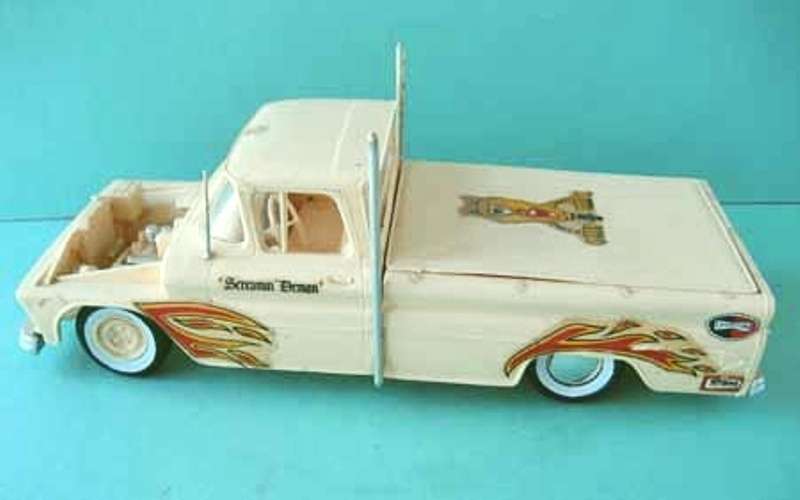 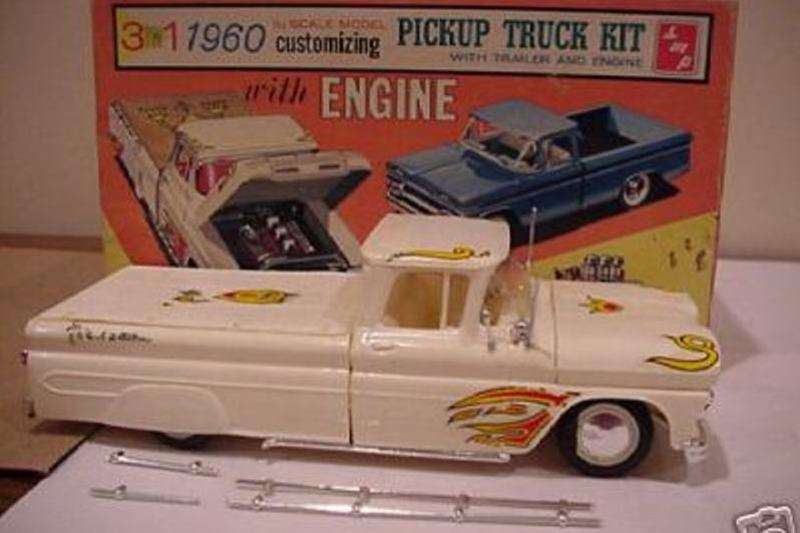 Itís easy to understand why so many were built in nearly identical fashion. Most were assembled by 10-12 year old male baby boomers (like me) that didnít know anything about real car/truck styling. There was no understanding that all the extra parts were included for ďpersonalizationĒ, so most kids slapped on every part that came in the kit. I was extremely lucky and found one that was adult built as bone stock. The only defects were the driver side tires and one of the valve covers was missing. There was no damage or glue marks. I was also fortunate it was a holiday weekend or something and nobody else bothered to bid on it, so I picked it up for something like $50. Unbuilt in an original box these normally go for $75-$150 or more. So it just takes persistence to find one. I am not aware of any currently produced kits that offer a long bed in the 60-66 series. Several years ago Modelhaus offered full resin replicas of these kits, but the tools wore out and they arenít interested in building new ones. They do however offer many of the pieces like bumpers, grilles, dashboards, hoods, glass, etc. http://www.modelhaus.com/
__________________
My Build Thread: http://67-72chevytrucks.com/vboard/s...d.php?t=444502 |
|
|

|
|
|
#1148 |
|
Registered User
Join Date: Apr 2012
Location: Searcy, AR
Posts: 4,203
|
Re: Markeb01 Build Thread
Thanks again for the info, was re-reading and realized I had somehow overlooked the Links... Thanks Mark, and I must agree with the above statements pertaining to the Amazing work you do!

__________________
DON Proverbs 27:17  US Air Force Retarded errr Retired My '65 Stepper Build:http://67-72chevytrucks.com/vboard/s...d.php?t=533920 My '60 Rusty Patina Build:http://67-72chevytrucks.com/vboard/s...66#post7402266 My '72 http://67-72chevytrucks.com/vboard/s...59#post7204359 SOLD |
|
|

|
|
|
#1149 |
|
Senior Enthusiast
Join Date: Feb 2007
Location: Spokane Valley, WA
Posts: 8,356
|
Re: Markeb01 Build Thread
Thanks again for the compliments. I’ve never seen my skills or abilities anything special, but I do have a Jarhead mentality and I never give up just because something is impossible!
This being the first winter with my new engine, I’ve discovered it dislikes cold weather even more than my old engine. With the old engine, adding an electric fuel pump to fill the lines and carburetor bowls before cranking really helped get it started. With the new engine, as the ambient dropped to near zero I actually ran the battery dead a few times and never got the engine started. And this is inside a reasonably warm garage. I can’t tolerate undependable vehicles. It frustrates me beyond reason because it could result in a life threatening situation if a vehicle can’t be started when needed. So I resorted to good old starting fluid and it fired up instantly. Remembering the Ether Start kits I bought for new Peterbilts back in the 70’s, I considered installing one on the truck for easy winter start ups. Problem being they cost anywhere from $100-200 (or more) with the ether bottle. They are also ugly and need to be mounted vertically which would be a problem in my open engine compartment. A lot of guys just spray starting fluid through their open element air cleaners, but I’m concerned what effect this might have on the filter element over time, and what problems might occur if too much explosive vapor collects above the throttle plates. So this afternoon I developed my own “Poor Man’s Ether Start Kit”. I simply added a conveniently shaped pipe to the front of my carburetor with a cap on top: 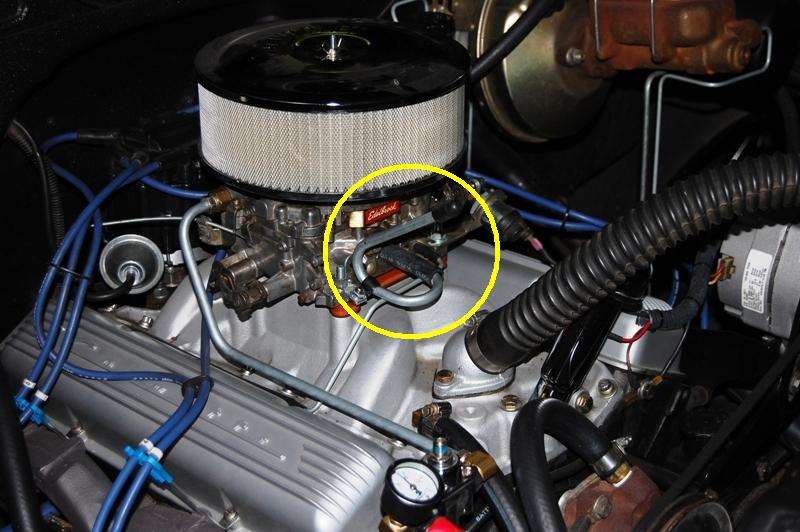 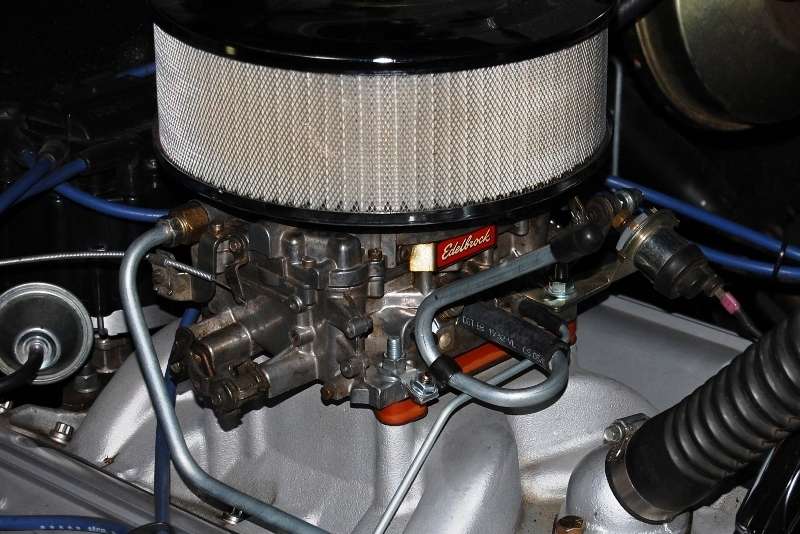  I also modified the can of starting fluid I had by removing the conventional spray nozzle and replacing it with one that has a “straw” attached. So now I have a new routine – pull the cheap float battery charger (it keeps the battery topped off), pull the cap off the new pipe and inject the starter fluid, replace the cap, climb in, set the choke per usual and fire it up! It seems like the engine doesn’t even get to fully turn over before it jumps to life. This small project cost exactly nothing and eliminates pulling the air cleaner to squirt the juice directly into the carb, and the ether enters the manifold below the throttle plates. Once the engine has come up to operating temperature, I don’t need any of this as long as it’s driven every day. But over the winter seasons, it sometimes sits for weeks without being used. The pipe is ugly and looks stupid so it will probably come off during the car show months, but in the meantime it sure is handy and effective.
__________________
My Build Thread: http://67-72chevytrucks.com/vboard/s...d.php?t=444502 Last edited by markeb01; 12-17-2013 at 12:50 AM. |
|
|

|
|
|
#1150 |
|
Registered User
Join Date: Sep 2011
Location: Tacoma, WA
Posts: 2,425
|
Re: Markeb01 Build Thread
Not sure I would pull it off....certainly a conversation starter with someone sharp enough to spot it, and ask its purpose.
See, I learned something totally unexpected today. Thems is the best kind a lernin.... 
__________________
Michael McMurphy My 66 Stepside My 64 Tow Truck My 66 Tempest Table Of Contents Added to Page1 |
|
|

|
 |
| Bookmarks |
|
|