
 |
|
|
#1201 |
|
Registered User
Join Date: Jan 2012
Location: Saint Louis
Posts: 69
|
Re: Junkyard Jimmy Super Low Buck Build Thread
|
|
|

|
|
|
#1202 |
|
Vintage 4x4s
Join Date: Sep 2010
Location: Prior Lake, MN
Posts: 4,305
|
Re: Junkyard Jimmy Super Low Buck Build Thread
Looks great! love the black bumpers on there. Did you say they were chrome and then you painted over them? How did you prep them? Sorry didn't have time to search for the original posts on them. Getting hot again, but releif expected Sunday!
__________________
67 GMC K1500 Custom- 305V6 SM420, PTO, Ram Assist, yellow (the outcast) (project period correct upgrades) 67 GMC C2500 351V6 TH400, AC, PS, PB (can't decide what to do with. Update, decided to keep and will restore  ) )86 CHV K30 502 th400, apple red NEW 71 CHV K20 350 SM465, ochre (saved work truck) 71 CHV K20 292 SM465, white, tach, PTO, (future project) 72 CHV K20 350 350th, medium blue (project stocker) 01 CHV K2500hd crew, indigo blue ^3 dont run and the others don't see winter either '86 K30 Cummins "Fireside" thread: http://67-72chevytrucks.com/vboard/s...d.php?t=649649 '71 K20 "get driveable" thread: http://67-72chevytrucks.com/vboard/s...d.php?t=590642 '72 K20 Build Thread: http://67-72chevytrucks.com/vboard/s...=493477&page=6 |
|
|

|
|
|
#1203 | ||
|
GEARHEAD
Join Date: Aug 2003
Location: MN
Posts: 6,126
|
Re: Junkyard Jimmy Super Low Buck Build Thread
Quote:
Quote:
When I did the black stripe on the grill of my C-10, it was on a chrome steel replacement grill. I taped off the area to be painted, scuffed it with a red 3m pad, etch primered it, then sprayed with black. It's been on for over a year without any problems. The Jimmy bumpers just need to look ok until I build the ones I want.
__________________
If no one knows what you're doing, they can't tell you you're doing it wrong HG's Dream Car Build - Shelby Cobra Kit Build your own adjustable track bar 71  Long Fleet C/10 Long Fleet C/10 72  Jimmy 4x4 (Junkyard Jimmy) Jimmy 4x4 (Junkyard Jimmy)HG's Plow Truck '78  K35 Dually K35 DuallyBigass Farm Truck HG's thread of miscellaneous stuff |
||
|
|

|
|
|
#1204 |
|
GEARHEAD
Join Date: Aug 2003
Location: MN
Posts: 6,126
|
Re: Junkyard Jimmy Super Low Buck Build Thread
Just a quick update before I hit the road for the day. Night before last I adjusted the idle mixture screws, one side was plugged. Once I did that it was running much better on the low end and the dieseling went away. I have the driver side mirror mounted, but the head isn't painted yet. I will post pics this weekend sometime hopefully with both mirrors on, both door windows in, and maybe more.
The only reason so far to bother with the door glass is to get rid of the rattles from the regulator hanging loose in there. I don't plan on driving it much with a top on and windows up. Mainly just for storage purposes if I have to move it outside. Driving topless rocks.   
__________________
If no one knows what you're doing, they can't tell you you're doing it wrong HG's Dream Car Build - Shelby Cobra Kit Build your own adjustable track bar 71  Long Fleet C/10 Long Fleet C/10 72  Jimmy 4x4 (Junkyard Jimmy) Jimmy 4x4 (Junkyard Jimmy)HG's Plow Truck '78  K35 Dually K35 DuallyBigass Farm Truck HG's thread of miscellaneous stuff |
|
|

|
|
|
#1205 |
|
GEARHEAD
Join Date: Aug 2003
Location: MN
Posts: 6,126
|
Re: Junkyard Jimmy Super Low Buck Build Thread
Tonight I was working on getting the door glass in, but ran into a snag with the driver side. The plastic roller that rides in the track inside the door was broken. I didn't know it and hadn't ever pulled the regulator out of the door. Will probably get a new one tomorrow. I shifted over to the passenger side. I got the mirror on and door glass installed with all the felts, etc. A few less rattles.
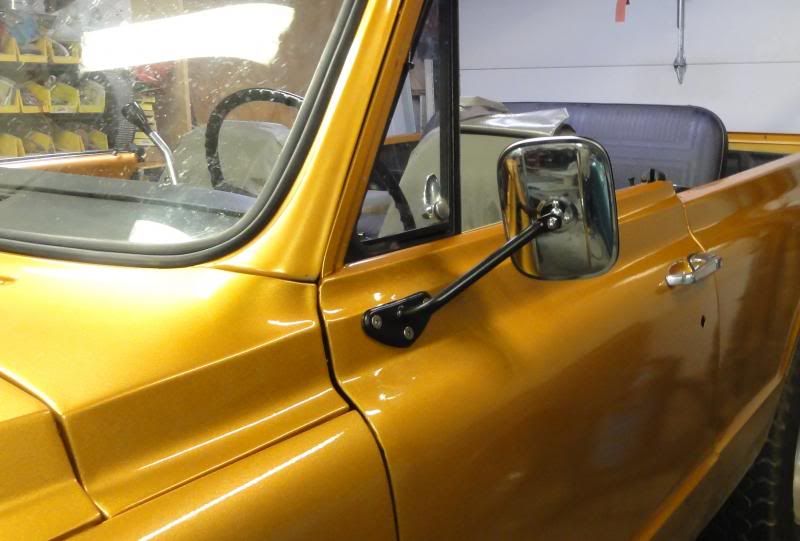  After that I took a late evening cruise down the highway after sunset. It was another hot day and this was a good time to get out except for the danger of deer at that time, but no such problem reared up. On my way out of town I drove up on the truck scale and it weighed 4220 with me in it. I weigh 230 (minus clothes  ) so with the top off I'm at less than 4000 lbs. Find a new SUV even close to that. I think my fusion weighs about that much. Anyway, it's running great, cruises nice, even up to 70 mph, though it feels a little squirrelly at that speed. ) so with the top off I'm at less than 4000 lbs. Find a new SUV even close to that. I think my fusion weighs about that much. Anyway, it's running great, cruises nice, even up to 70 mph, though it feels a little squirrelly at that speed.
__________________
If no one knows what you're doing, they can't tell you you're doing it wrong HG's Dream Car Build - Shelby Cobra Kit Build your own adjustable track bar 71  Long Fleet C/10 Long Fleet C/10 72  Jimmy 4x4 (Junkyard Jimmy) Jimmy 4x4 (Junkyard Jimmy)HG's Plow Truck '78  K35 Dually K35 DuallyBigass Farm Truck HG's thread of miscellaneous stuff |
|
|

|
|
|
#1206 |
|
GEARHEAD
Join Date: Aug 2003
Location: MN
Posts: 6,126
|
Re: Junkyard Jimmy Super Low Buck Build Thread
Both doors are now back together with all the glass and working parts. (except door locks) I painted the door panels and the trim pieces black. Pulled some arm rests out of the attic. Had to buy a new window regulator and another door panel trim piece. Somehow I came up short one of those. $41 for those parts.
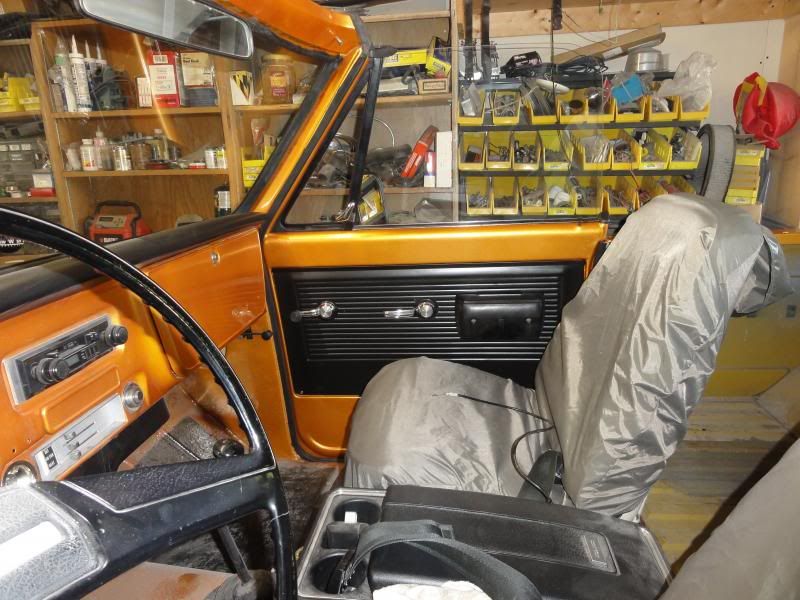 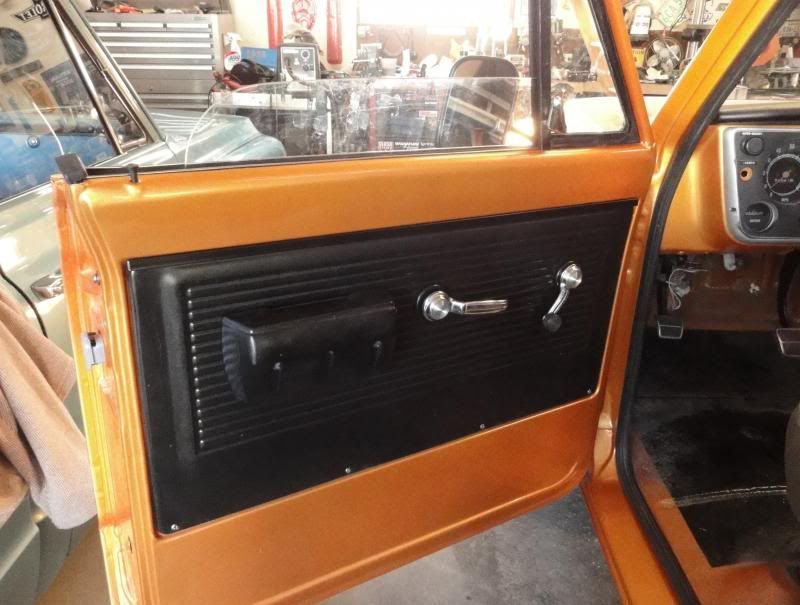 And since I had the Jimmy out at the junkyard where I started this entire project for the first time, I parked it as near to the original spot as I could remember for a pic.  And I hooked up the oil pressure gauge. And I ordered a new coolant temp sending unit so I have at least 3 working gauges. I need a hose barb for the vacuum gauge yet. And I need to wire up the tach to see if that even works or not. And I really need to get the gas gauge working. Ran out of gas today and needed to get my kid to bring the gas can. Cripes.
__________________
If no one knows what you're doing, they can't tell you you're doing it wrong HG's Dream Car Build - Shelby Cobra Kit Build your own adjustable track bar 71  Long Fleet C/10 Long Fleet C/10 72  Jimmy 4x4 (Junkyard Jimmy) Jimmy 4x4 (Junkyard Jimmy)HG's Plow Truck '78  K35 Dually K35 DuallyBigass Farm Truck HG's thread of miscellaneous stuff |
|
|

|
|
|
#1207 |
|
Registered User
Join Date: Apr 2003
Location: Indep, MO
Posts: 5,893
|
Re: Junkyard Jimmy Super Low Buck Build Thread
Looking good! I like the shot in the yard.
Posted via Mobile Device
__________________
Boppa's Old Yeller Truck Build, Old Yeller's New Heart! Project Buzz Bomb Flyin' Low! |
|
|

|
|
|
#1208 |
|
GEARHEAD
Join Date: Aug 2003
Location: MN
Posts: 6,126
|
Re: Junkyard Jimmy Super Low Buck Build Thread
I've been messing around with this off and on the past couple days. Wanted to get the gauges working so I ordered a temp sending unit. I did not realise the holes in the heads were a different size being vortec heads so now I need to find a sending unit that will work with the OEM gauge and fit the smaller probably metric head holes.
I hooked up the oil press gauge. Only issues with that is even my 80 psi gauge isn't a high enough range and I sprung a leak at the engine fitting. I fixed that and can live with the gauge burrying the needle at higher revs. Then I got the fittings and hose to hook up the vacuum gauge. No problems there. Then I looked at the gas gauge wiring. I got the wire plugged into the fuse block. And it looks like its hooked to the sending unit. But no movement on the needle. I got the ground wire under the dash on. Still nothing. Have to keep working on it. Lastly was the tach. If u remember I adapted a camaro tach into it. I got the wires all connected and fired it up. The needle tracked up and up only. Wouldn't come back down to idle. Might just be sticking from lack of use. Might need lubricated. Might be junk. It sorta worked so I did something right. If anyone knows how to get the temp gauge working please let me know. Posted via Mobile Device
__________________
If no one knows what you're doing, they can't tell you you're doing it wrong HG's Dream Car Build - Shelby Cobra Kit Build your own adjustable track bar 71  Long Fleet C/10 Long Fleet C/10 72  Jimmy 4x4 (Junkyard Jimmy) Jimmy 4x4 (Junkyard Jimmy)HG's Plow Truck '78  K35 Dually K35 DuallyBigass Farm Truck HG's thread of miscellaneous stuff |
|
|

|
|
|
#1209 |
|
Registered User
Join Date: Apr 2003
Location: Indep, MO
Posts: 5,893
|
Re: Junkyard Jimmy Super Low Buck Build Thread
Not a very elegant solution, but we've done a later model thermostat housing with inputs. How does the ohm count compare on a metric sender? Can it be tapped out?
Posted via Mobile Device
__________________
Boppa's Old Yeller Truck Build, Old Yeller's New Heart! Project Buzz Bomb Flyin' Low! |
|
|

|
|
|
#1210 | |
|
GEARHEAD
Join Date: Aug 2003
Location: MN
Posts: 6,126
|
Re: Junkyard Jimmy Super Low Buck Build Thread
Quote:
And I need to share some tunes.
__________________
If no one knows what you're doing, they can't tell you you're doing it wrong HG's Dream Car Build - Shelby Cobra Kit Build your own adjustable track bar 71  Long Fleet C/10 Long Fleet C/10 72  Jimmy 4x4 (Junkyard Jimmy) Jimmy 4x4 (Junkyard Jimmy)HG's Plow Truck '78  K35 Dually K35 DuallyBigass Farm Truck HG's thread of miscellaneous stuff Last edited by hgs_notes; 09-25-2013 at 09:13 AM. |
|
|
|

|
|
|
#1211 |
|
GEARHEAD
Join Date: Aug 2003
Location: MN
Posts: 6,126
|
Re: Junkyard Jimmy Super Low Buck Build Thread
One more. This is for Bomp.
She rides like a 67 Chevy.
__________________
If no one knows what you're doing, they can't tell you you're doing it wrong HG's Dream Car Build - Shelby Cobra Kit Build your own adjustable track bar 71  Long Fleet C/10 Long Fleet C/10 72  Jimmy 4x4 (Junkyard Jimmy) Jimmy 4x4 (Junkyard Jimmy)HG's Plow Truck '78  K35 Dually K35 DuallyBigass Farm Truck HG's thread of miscellaneous stuff |
|
|

|
|
|
#1212 |
|
GEARHEAD
Join Date: Aug 2003
Location: MN
Posts: 6,126
|
Re: Junkyard Jimmy Super Low Buck Build Thread
I figured out the temperature gauge issue. Much simpler to fix than I had hoped. I looked up the OEM part number and what it fit, which was several GM products up to about 1978. Then looked up the 1980 part number and it was a 3/8" NPT fitting rather than the OEM 1/2" NPT. I took a chance that it would work for the older gauge, which it did. So for you guys that swap engines with something thats 1978 or newer and want your temp gauge to work, just get the engine temp sensor for the 1980 or so truck.
And my camaro tach is slowly coming to life. Getting more movement on it now. I'm just gonna let it go and see what happens. The tranny leakage is getting worse though and I finally found the source. It's not the dipstick tube like I thought or any of the other obvious things you'd think about checking. Its that little round cover on the passenger side. 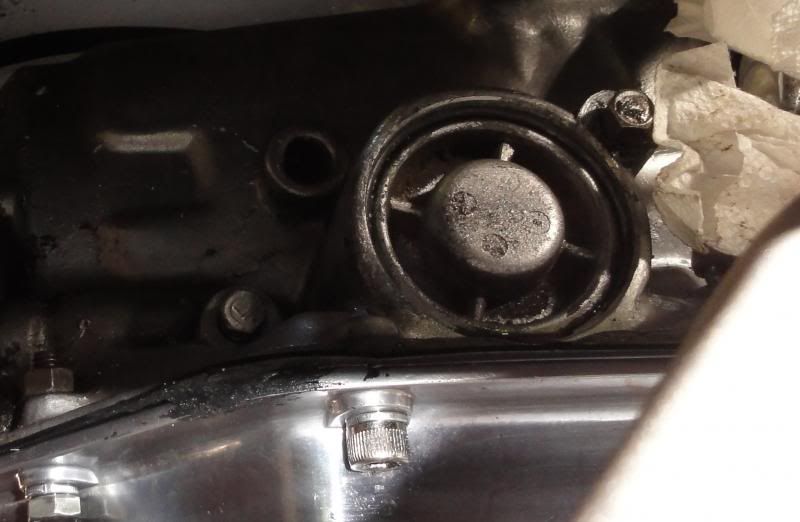 So I'm looking through my TH350 manual to learn how to fix that. I verified it by eliminating the other possible sources on it by tying papertowels around those, then driving it a bit and rechecking them. They were clean but the leak was still bad. I got a mirror and flashlight out and saw oil on the bottom edge of that cover, but didn't know for sure if that was the source or if it had just spread and creeped there since its right at that flange for the pan. I cleaned it up and started the engine and looked again with the mirror and sure enough it started seeping. While hooking up the temp sensor I cleaned up the engine compartment wire harness routing a bit. I found a wire gutter part for the firewall in my parts stash. I used the driver side head for the sensor rather than the passenger side like the original. Just makes more sense to me and its easier to get to. 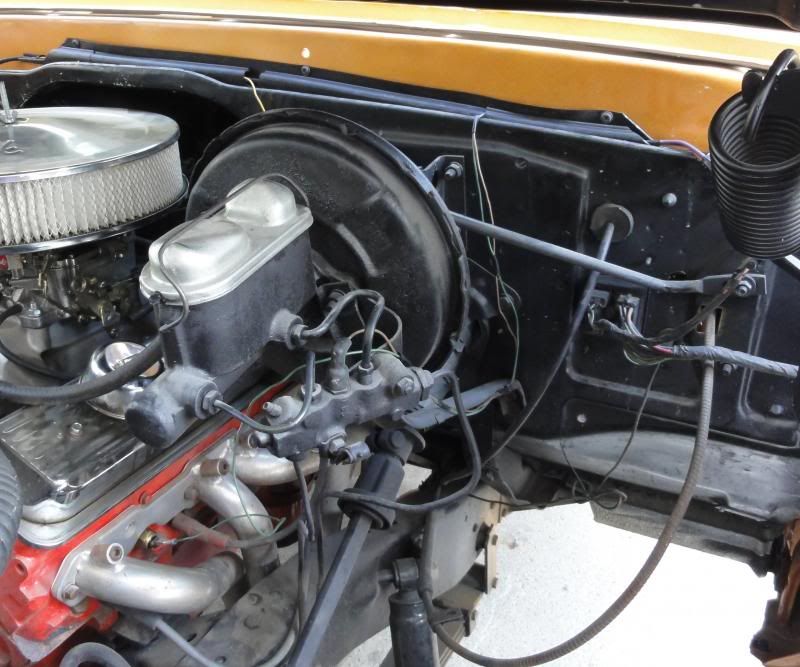 And I got my visors bolted in. Still need to do the clips that hold the inner part, but whatever, they're in. 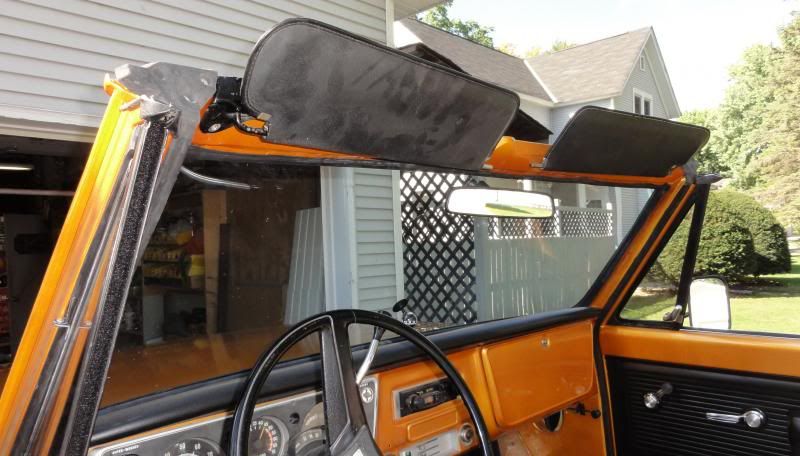 And they need wiped off. 
__________________
If no one knows what you're doing, they can't tell you you're doing it wrong HG's Dream Car Build - Shelby Cobra Kit Build your own adjustable track bar 71  Long Fleet C/10 Long Fleet C/10 72  Jimmy 4x4 (Junkyard Jimmy) Jimmy 4x4 (Junkyard Jimmy)HG's Plow Truck '78  K35 Dually K35 DuallyBigass Farm Truck HG's thread of miscellaneous stuff |
|
|

|
|
|
#1213 |
|
Countdown Survivor
Join Date: Aug 2007
Location: Bean Station, East Tennessee
Posts: 9,676
|
Re: Junkyard Jimmy Super Low Buck Build Thread
Clean it up with a wirebrush or something, push in on the center of the cover, pry out the keeper ring, replace the O-ring, reassemble. There's a spring under the cover IIRC.
__________________
93 Yukon 89 Silverado Z71 SWB Sport 91 K 2500 Silverado "Lobuk-Worktruk" A MAN OF HONOR DOES NOT LIE, CHEAT, OR STEAL, NOR TOLERATE THOSE WHO DO. Gettin' old ain't for sissies. |
|
|

|
|
|
#1214 | |
|
GEARHEAD
Join Date: Aug 2003
Location: MN
Posts: 6,126
|
Re: Junkyard Jimmy Super Low Buck Build Thread
Quote:
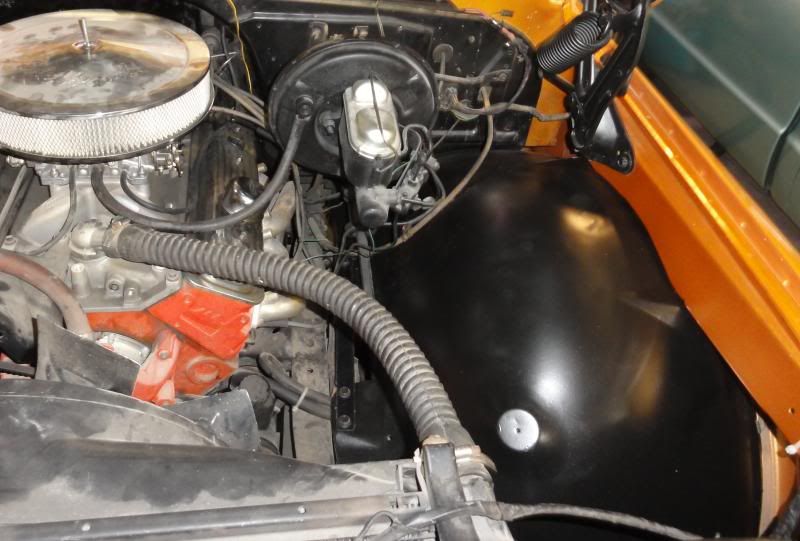
I managed to get the driver side inner fender in this afternoon. One less large body part wandering around the garage. The next several days are pretty busy though so I might not get back to it until next week.
__________________
If no one knows what you're doing, they can't tell you you're doing it wrong HG's Dream Car Build - Shelby Cobra Kit Build your own adjustable track bar 71  Long Fleet C/10 Long Fleet C/10 72  Jimmy 4x4 (Junkyard Jimmy) Jimmy 4x4 (Junkyard Jimmy)HG's Plow Truck '78  K35 Dually K35 DuallyBigass Farm Truck HG's thread of miscellaneous stuff |
|
|
|

|
|
|
#1215 |
|
GEARHEAD
Join Date: Aug 2003
Location: MN
Posts: 6,126
|
Re: Junkyard Jimmy Super Low Buck Build Thread
Just a pic of my 1 installed inner fender.
 I stopped at a junkyard yesterday and was trying to get a good heater core case for under the hood, but didn't have any luck. The one I have was messed up. Previous owner sealed it up with silicone. The damper that moves was welded shut. Maybe I can fix it. I did get the brake peddle rest though that goes under the steering column, which I couldn't find in my stash. And I got a driver door handle latch thingy. That was also pretty well worn out. This one isn't perfect, but it's got way less wear than my current one. Both pieces for $5.
__________________
If no one knows what you're doing, they can't tell you you're doing it wrong HG's Dream Car Build - Shelby Cobra Kit Build your own adjustable track bar 71  Long Fleet C/10 Long Fleet C/10 72  Jimmy 4x4 (Junkyard Jimmy) Jimmy 4x4 (Junkyard Jimmy)HG's Plow Truck '78  K35 Dually K35 DuallyBigass Farm Truck HG's thread of miscellaneous stuff |
|
|

|
|
|
#1216 | |
|
Registered User
Join Date: Jun 2006
Location: Indiana
Posts: 4,859
|
Re: Junkyard Jimmy Super Low Buck Build Thread
Quote:
__________________
'70 GMC C1500 LWB Power disc brakes. WooHoo! Posi 6 Lug Dana 60 |
|
|
|

|
|
|
#1217 |
|
Registered User
Join Date: Apr 2003
Location: Indep, MO
Posts: 5,893
|
Re: Junkyard Jimmy Super Low Buck Build Thread
Comin' right along! It's gonna be funny when you're out bombin' in it and some dude offers you a pile o'cash for it.
__________________
Boppa's Old Yeller Truck Build, Old Yeller's New Heart! Project Buzz Bomb Flyin' Low! |
|
|

|
|
|
#1218 | ||
|
GEARHEAD
Join Date: Aug 2003
Location: MN
Posts: 6,126
|
Re: Junkyard Jimmy Super Low Buck Build Thread
Quote:
Quote:
   As I said above, getting the cover pushed inward wasn't an issue. I could do it with my fingers, at least after the initial push. The hard part, and it took me a half hour to do, was getting that damn ring out of there. The ends on the ring were flat and the groove it fits into is rounded, so there is no little corner to dig into under it to get it started. And the gap was positioned at the bottom, where I can't see it and was doing it by feel. After about 10-15 minutes of fruitless effort I got a small punch and hammer and started working the ring around so I could see the gap better. Eventually I got a scribe hooked under it and once that happened it was just a few seconds later to pop it out. Just in case I have to go back into it I ground a taper into the ring ends to make it easy to hook out of there next time. Sometimes I actually think ahead. I just don't make a habit of it.  So here are the parts... 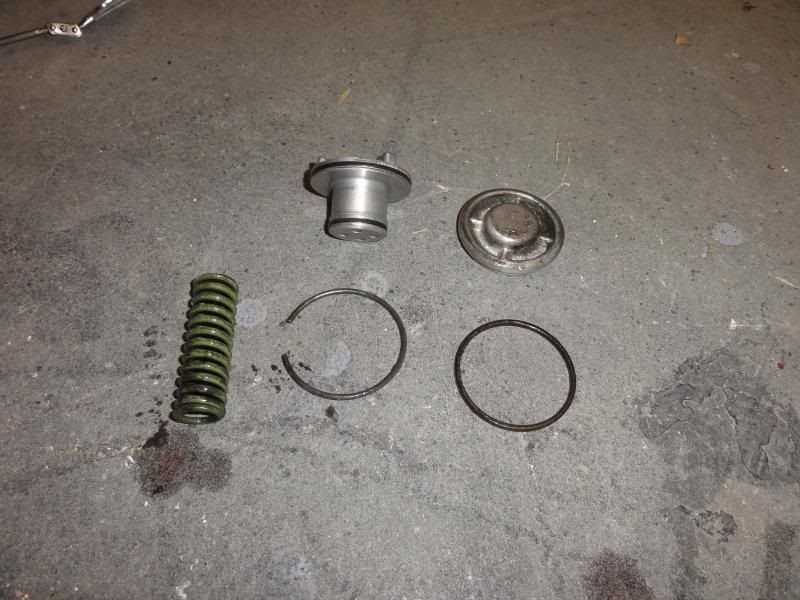 There is the cover, the retaining ring that holds it in, the cover O-ring, the spring and the piston. Hole the parts came out of...  The piston edges are a little rough. The O-ring kit came with new rings or seals for the piston, so I swapped those out and I cleaned up the edges of the piston with some fine grit paper. 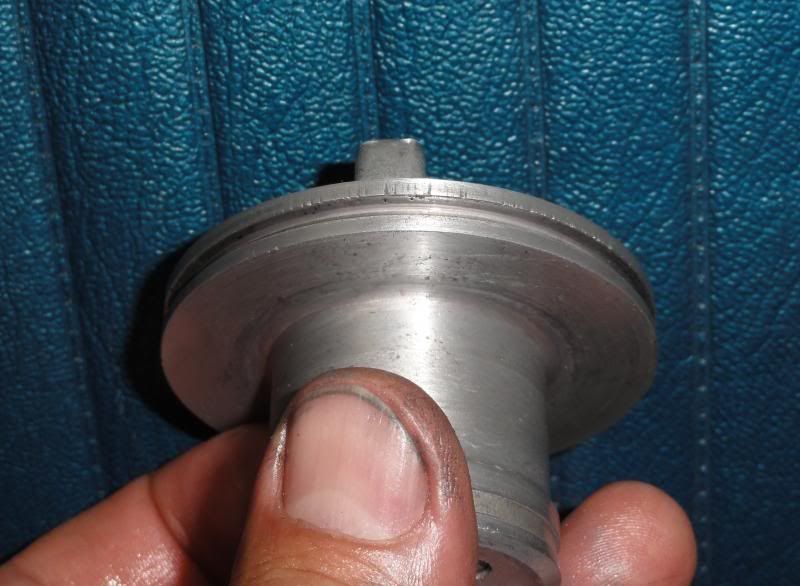 The tranny book I have (Turbo Hydra-Matic 350 Handbook, by Ron Sessions) is one of those ones that tells you how to rebuild it, how to modify it, how to fix the more common problems (leaks) in the vehicle, etc. In my reading I find the little section that says how to fix this particular leak. And I'm thinking I should into what this thing does since I'm cracking it open. In the part of the book that talks about inspecting the parts it mentions that hot rodders (me) will leave the spring out to have a more abrupt shift to 2nd. Then in the modification area of the book it talks about shift improvement kits and how they work, and again talks about eliminating the spring (the kits will basically block oil flow to it essentially doing the same thing). So thats what I do. This piece is on the workbench.  It went back together easier than it came apart. How often does that happen right? I wiped everything off again. Oh, a LOT oil tranny fluid comes out when you take that cover off. I now have 1 less t-shirt and 1 more oil rag. And when you pull the piston out, even more oil comes out. And it keeps coming out. Have a pan handy. I added some tranny fluid, started it up and so far, so good. So it was test drive time and I beat the snot out of it. Must have half a dozen fresh black streaks on the local roads and may have frightened a couple other drivers with some sideways drifts down hwy 14 with smoke rolling out behind me.  This thing is a burnout machine. This thing is a burnout machine.And the teams warming up for the homecoming game tonight (my son included) got a little show past the west end of the football field.  So back to the garage. When I first started it and there was no gushing oil spewing out in all directions, I backed it onto the driveway so I could clean up my mess (my pan was not so handy), and the accumulated puddle stains from the past several months. So when I returned from my joyride I parked it back on the now clean(er) floor. Went to the game, came back and no fresh red puddles.         There was a little brown oil puddle though.        I think it's the oil line to the pressure gauge. I cut a few inches off and put a new compression sleeve on it, but I think the plastic tubing is just done in. I looked at a hard line kit at the parts store but holy crap they want more for that little kit than I spent on my hole cluster. So I will be looking for a new line, or some 1/8" copper tubing. Almost forgot to talk about the shifting thing. I honestly didn't feel much difference after removing the spring from the accumulator. My C-10 shifts a lot harder than the jimmy but it has a shift kit installed, and it's just a 2wd, and it's probably a much fresher tranny (probably about 10-15,000 miles on it). It's not any worse. May be slightly better. Maybe I will try to install a shift kit some time down the road.
__________________
If no one knows what you're doing, they can't tell you you're doing it wrong HG's Dream Car Build - Shelby Cobra Kit Build your own adjustable track bar 71  Long Fleet C/10 Long Fleet C/10 72  Jimmy 4x4 (Junkyard Jimmy) Jimmy 4x4 (Junkyard Jimmy)HG's Plow Truck '78  K35 Dually K35 DuallyBigass Farm Truck HG's thread of miscellaneous stuff Last edited by hgs_notes; 09-27-2013 at 11:17 PM. |
||
|
|

|
|
|
#1219 |
|
GEARHEAD
Join Date: Aug 2003
Location: MN
Posts: 6,126
|
Re: Junkyard Jimmy Super Low Buck Build Thread
I need to install the heater box before I do the passenger side inner fender. Two of the bolts underneath can't be reached with the inner fender in. Anyway, I pull out the one I have and start looking it over and its crap. Broken tabs, welded shut flapper, rusted metal. Crap.
Didn't have any luck at the junkyard either. They were in comparable condition and I wasted an hour of my time to find that out. So I call Kevin, cuz he has everything. And I was planning on going to the swap meet today in St Paul and he was setting up there also. He says sure, I should have something around here. Well he did, but I think he's taking my motivation to recycle used parts a bit too far.  To be fair, he did provide me what I asked for at a good price. Instead of giving me a unit to clean up and bolt in though, he gave me most of one and some parts scrounged from another 1 or 2 units that I could build into 1 good unit. To be fair, he did provide me what I asked for at a good price. Instead of giving me a unit to clean up and bolt in though, he gave me most of one and some parts scrounged from another 1 or 2 units that I could build into 1 good unit. I forgot to take a pic of what I started with, but it was basically the box with these 2 rusty pieces still on it. Seal partially gone from the flapper. 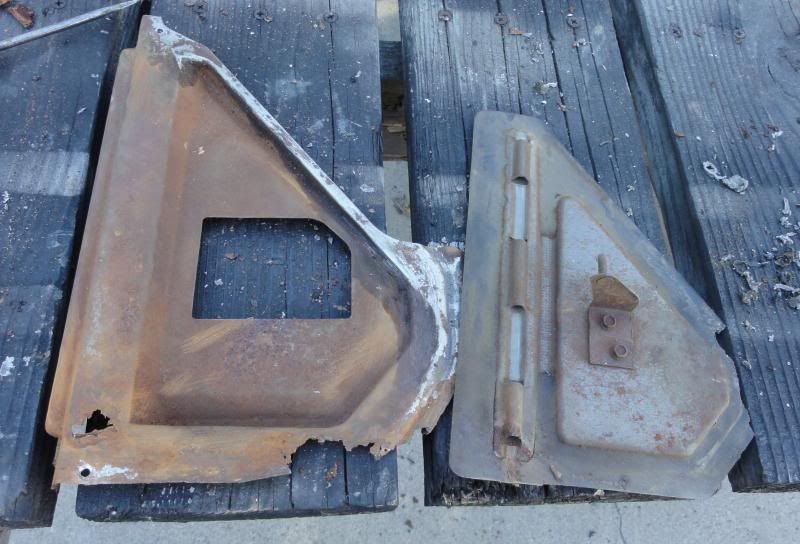 After pulling those off I finished cleaning up the fiberglass shell. 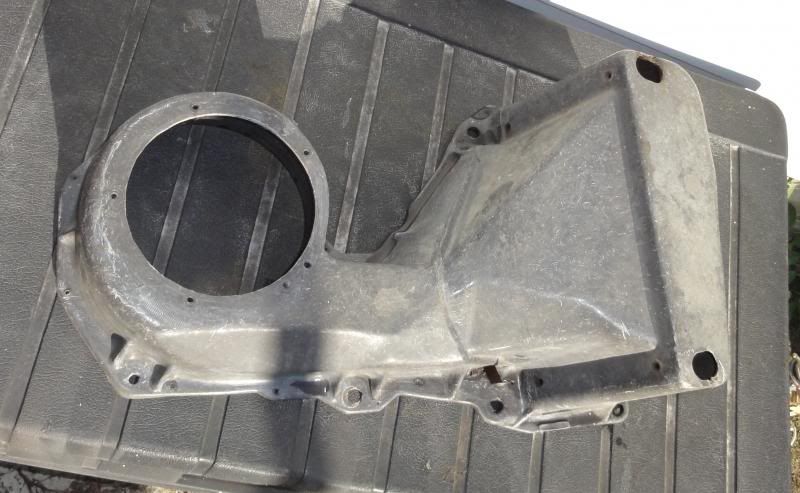 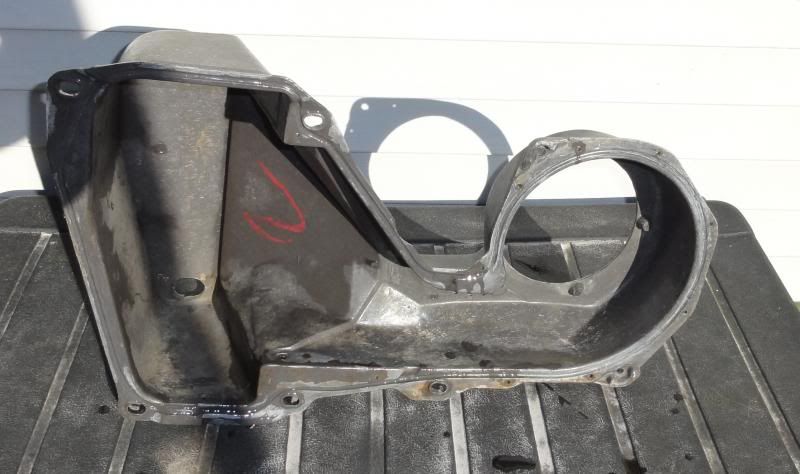 Upon further inspection, 2 of the tabs were cracked, but hadn't broke yet. 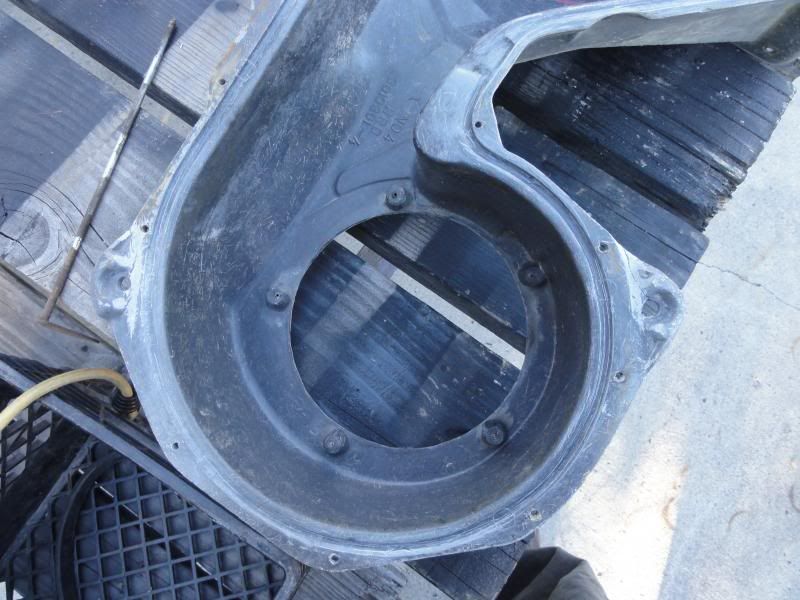 Closer look. 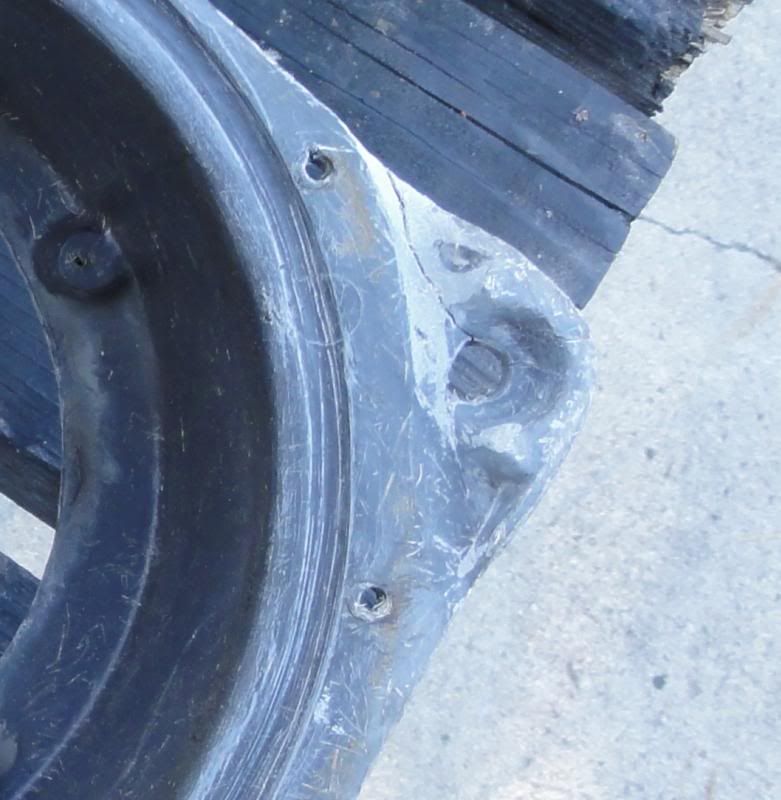  I mixed up a little epoxy after cleaning then out with a wire wheel on an angle grinder and just put that on the cracks. Don't know if it's enough to really add strength, but figured it was better than nothing. 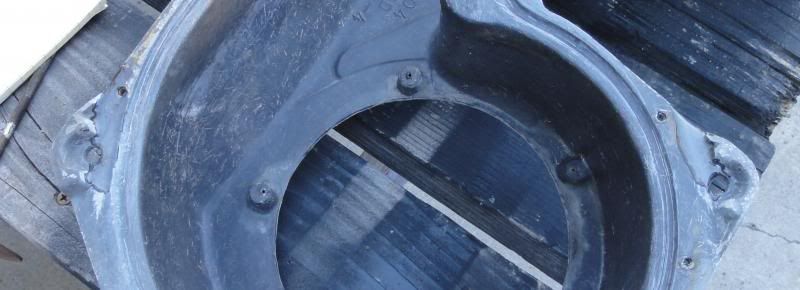 The replacement parts Kevin gave me...  I got those cleaned up a bit and painted. The flapper and that piece rivited to the box in the middle section were never painted from the factory which probably is the reason the rust out when the mice move in and pee all over the thing. Since I had it apart I figured I might as well add something to prevent that.  After dinner I went out and put it back together. 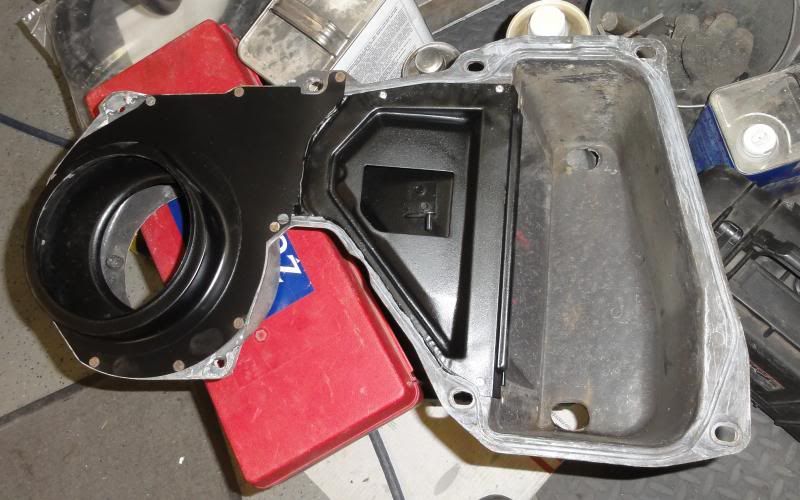 Tomorrow after work I will pull out the heater core (hope thats good), get it installed and paint the box outside to look a little spiffier. Never rebuilt one of these before cuz I never had a need to, but it wasn't hard. Thanks Kevin for adding to my depth of knowledge on rebuilding these rusty old trucks. 
__________________
If no one knows what you're doing, they can't tell you you're doing it wrong HG's Dream Car Build - Shelby Cobra Kit Build your own adjustable track bar 71  Long Fleet C/10 Long Fleet C/10 72  Jimmy 4x4 (Junkyard Jimmy) Jimmy 4x4 (Junkyard Jimmy)HG's Plow Truck '78  K35 Dually K35 DuallyBigass Farm Truck HG's thread of miscellaneous stuff |
|
|

|
|
|
#1220 |
|
Registered User
Join Date: Apr 2011
Location: .
Posts: 3,104
|
Re: Junkyard Jimmy Super Low Buck Build Thread
Glad to see you got and are getting things all figured out. Way to stick with it.
That '67 video. Nice song but its a '66 Chevelle. A '66. Bomp knows them there cars. he he he |
|
|

|
|
|
#1221 | |
|
GEARHEAD
Join Date: Aug 2003
Location: MN
Posts: 6,126
|
Re: Junkyard Jimmy Super Low Buck Build Thread
Quote:
 Do you think the ride is different between a 66 and 67?
__________________
If no one knows what you're doing, they can't tell you you're doing it wrong HG's Dream Car Build - Shelby Cobra Kit Build your own adjustable track bar 71  Long Fleet C/10 Long Fleet C/10 72  Jimmy 4x4 (Junkyard Jimmy) Jimmy 4x4 (Junkyard Jimmy)HG's Plow Truck '78  K35 Dually K35 DuallyBigass Farm Truck HG's thread of miscellaneous stuff |
|
|
|

|
|
|
#1222 |
|
GEARHEAD
Join Date: Aug 2003
Location: MN
Posts: 6,126
|
Re: Junkyard Jimmy Super Low Buck Build Thread
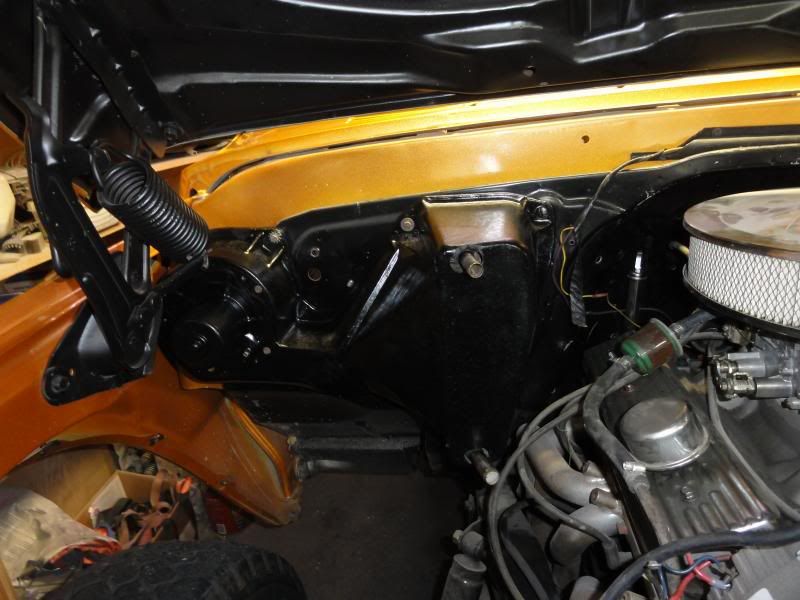
Nothing major, just finished getting the heater box installed. Will probably get the other inner fender in tomorrow.
__________________
If no one knows what you're doing, they can't tell you you're doing it wrong HG's Dream Car Build - Shelby Cobra Kit Build your own adjustable track bar 71  Long Fleet C/10 Long Fleet C/10 72  Jimmy 4x4 (Junkyard Jimmy) Jimmy 4x4 (Junkyard Jimmy)HG's Plow Truck '78  K35 Dually K35 DuallyBigass Farm Truck HG's thread of miscellaneous stuff |
|
|

|
|
|
#1223 |
|
Registered User
Join Date: Apr 2003
Location: Indep, MO
Posts: 5,893
|
Re: Junkyard Jimmy Super Low Buck Build Thread
You're fixin ta need it up there in Frostbite Falls! Looks nice!
__________________
Boppa's Old Yeller Truck Build, Old Yeller's New Heart! Project Buzz Bomb Flyin' Low! |
|
|

|
|
|
#1224 | |
|
GEARHEAD
Join Date: Aug 2003
Location: MN
Posts: 6,126
|
Re: Junkyard Jimmy Super Low Buck Build Thread
Quote:

__________________
If no one knows what you're doing, they can't tell you you're doing it wrong HG's Dream Car Build - Shelby Cobra Kit Build your own adjustable track bar 71  Long Fleet C/10 Long Fleet C/10 72  Jimmy 4x4 (Junkyard Jimmy) Jimmy 4x4 (Junkyard Jimmy)HG's Plow Truck '78  K35 Dually K35 DuallyBigass Farm Truck HG's thread of miscellaneous stuff |
|
|
|

|
|
|
#1225 |
|
Registered User
Join Date: Apr 2003
Location: Indep, MO
Posts: 5,893
|
Re: Junkyard Jimmy Super Low Buck Build Thread
Suck it up- Those drifts aren't gonna bust themselves. Time to make the doughnuts!
Besides, I thought you wound up with like 2 tops in all this horsetrading. PS- as a former 71 Blazer owner, I can tell you that when it's down in the 40's and dropping and you got stuck 20 miles from home (in a bar) without the top, That heater comes in a LOT handier than you'd think!
__________________
Boppa's Old Yeller Truck Build, Old Yeller's New Heart! Project Buzz Bomb Flyin' Low! |
|
|

|
 |
| Bookmarks |
|
|