
 |
|
|
#101 |
|
Registered User
Join Date: Nov 2014
Location: Yuba City, CA.
Posts: 678
|
Re: Jans 53
Thanks guys I have been following both of your builds since they began. I find it keeps me motivated to keep plugging away at mine. So thanks for the inspiration!
Today's plan is to get out in the garage and continue to figure out where to run the wiring in the cab.
__________________
Jan's 53 |
|
|

|
|
|
#102 |
|
Registered User
Join Date: Dec 2002
Location: Cactus Patch So. Az
Posts: 4,749
|
Re: Jans 53
How many options do you have ?
__________________
53 TuTone Extended Cab 350 4-Spd 3:08 (SOLD) 53 Chevy Moldy pearl green ZZ-4 4L60E 9" 3:25 55 GMC 1st Black Mll (ZZ4) ZZ6 TKO 600 5 sp 3:73 62 Solidaxle Corvette Roman Red (327 340hp 4spd 3:36) C4 & C5 suspension tube chassis LS 3 4L70E 65 Corvette Coupe 327 350hp 4spd 4:11 78 Black Silverado SWB (350/350) 5.3 & 4L60E 3:42 2000 S-Type 3.0 (wife cruiser) 2003 GMC SCSB 5.3 4L60E 3:42 |
|
|

|
|
|
#104 | |
|
Registered User
Join Date: Mar 2015
Location: Castle Rock, CO
Posts: 534
|
Re: Jans 53
Quote:
I also welded studs at the very front of the wheel well to mount my PCM (LS Swap) inside the wheel well and get it out of the engine compartment.
__________________
Scott ______________ my '51 build: http://67-72chevytrucks.com/vboard/s...d.php?t=677979 |
|
|
|

|
|
|
#105 |
|
Registered User
Join Date: Dec 2002
Location: Cactus Patch So. Az
Posts: 4,749
|
Re: Jans 53
That is where I run my front harness on the drivers' side wheel well
For the HVAC hosed I do the same and run them in the pass side wheel well Haven't found a way to hide the spark plug wires yet !!
__________________
53 TuTone Extended Cab 350 4-Spd 3:08 (SOLD) 53 Chevy Moldy pearl green ZZ-4 4L60E 9" 3:25 55 GMC 1st Black Mll (ZZ4) ZZ6 TKO 600 5 sp 3:73 62 Solidaxle Corvette Roman Red (327 340hp 4spd 3:36) C4 & C5 suspension tube chassis LS 3 4L70E 65 Corvette Coupe 327 350hp 4spd 4:11 78 Black Silverado SWB (350/350) 5.3 & 4L60E 3:42 2000 S-Type 3.0 (wife cruiser) 2003 GMC SCSB 5.3 4L60E 3:42 |
|
|

|
|
|
#106 |
|
Registered User
Join Date: Nov 2014
Location: Yuba City, CA.
Posts: 678
|
Re: Jans 53
I'm going to use the drivers side wheel well for my headlight harness also, I'll hang my wires from the bolts that mate the inner and outer fender.
My a/c is hurricane air and the bulk head comes directly thru the original fan motor hole so I'll just go ahead and run them under the hood.
__________________
Jan's 53 |
|
|

|
|
|
#107 | |
|
Registered User
Join Date: Mar 2015
Location: Castle Rock, CO
Posts: 534
|
Re: Jans 53
Quote:
__________________
Scott ______________ my '51 build: http://67-72chevytrucks.com/vboard/s...d.php?t=677979 |
|
|
|

|
|
|
#108 |
|
Registered User
Join Date: Mar 2015
Location: Morada, CA --- (Near Lodi)
Posts: 1,443
|
Re: Jans 53
I used 1/4-20 rod couplings that you can find at HD or Lowes. and then I welded them to the inside firewall so I didnt have any bolt heads on the engine side. Make your plate first to fit all your stuff and then do the mounting holes to the firewall. Just tack them first and remove the plate and then weld em tight!
 I put my main fuse box and CDI ignition box on one plate there in the upper drivers corner. 
__________________
My Build: 57 Chevy Pro-Street |
|
|

|
|
|
#111 |
|
Senior Member
 Join Date: Sep 2016
Location: Hershey, PA
Posts: 1,005
|
Re: Jans 53
That's pretty slick! Mine didn't come with a manual so I had to figure out what each wire did and how to connect that to the existing harness. Are you going to use the control panel thing? Seems kind of new for these old trucks compared to hooking it up to the old needle gauge.
__________________
Current Build Thread 1930 Ford Model A Modern Twist: Ford Model A Rat Rod With a Modern Twist Build Thread Phase 1 "The Swap": 1949 3100 with S10 swap. Beginner build with ambition! Build Thread Phase 2 "The Drop": Beginner Build with Ambition gets Air Ride |
|
|

|
|
|
#112 |
|
Registered User
Join Date: Nov 2014
Location: Yuba City, CA.
Posts: 678
|
Re: Jans 53
No, I will only use the control panel for programming purposes. I like the old school look.The hubby is a loose cannon,lol. I was trying to keep things simple but he reads about all this cool stuff and next thing I know I come home to gear vendors over drive and brushless programmable fans, now he keeps talking about the aftermarket EFI. I can't complain he buys I do the work, WEIRD RIGHT!
__________________
Jan's 53 |
|
|

|
|
|
#114 |
|
Registered User
Join Date: Nov 2014
Location: Yuba City, CA.
Posts: 678
|
Re: Jans 53
Spent the weekend making running board supports (used Hussey's idea). Still need to blow it apart and do the final welding, but glad to get one more thing done.
Next is to rethink my bed support. I would like to be able to lift the bed wood to have access to fuel tank and battery. Anyone have any slick ideas? Here's the pictures of today's progress.
__________________
Jan's 53 |
|
|

|
|
|
#115 |
|
Senior Member
 Join Date: Mar 2011
Location: West Plains, Missouri
Posts: 7,559
|
Re: Jans 53
nice job...Jim
__________________
my build thread: http://67-72chevytrucks.com/vboard/s...d.php?t=459839 Jimbo's long bed step build:http://67-72chevytrucks.com/vboard/s...t=464626<br /> |
|
|

|
|
|
#116 | |
|
Senior Member
 Join Date: Sep 2016
Location: Hershey, PA
Posts: 1,005
|
Re: Jans 53
Quote:
 Here are some poor sketchup designs of what I've been noodling around in my head... Bed down flat: 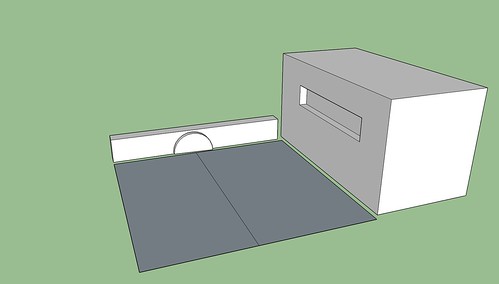 A. Traditional lift of the whole bed towards the cab: 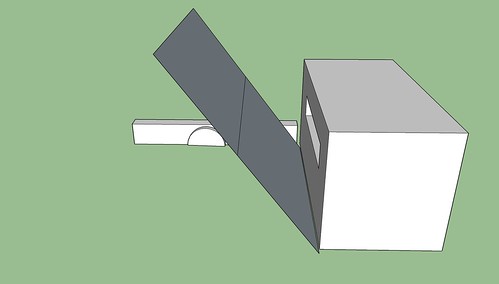 B. Split lift of the traditional towards the cab. Like a concertina: 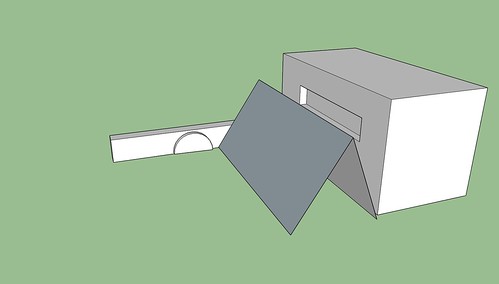 C. The one I think I want is a split down the center with either side opening towards the wheel wells. Allows me to open just one side at a time and I can open either from the rear of the truck. 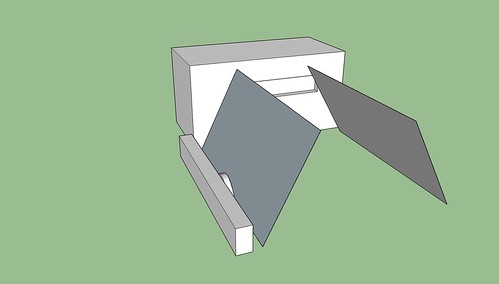 My current bed floor has a space in the center I'll use for the lift areas. I have given myself 6" on either side as a space for wheel tubs, if needed, and for somewhere to attach hinges to. 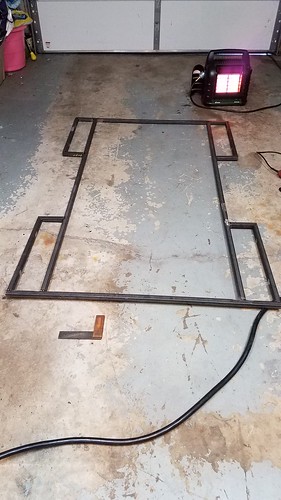 Something like a trunk hinge to help lift them  https://www.speedwaymotors.com/Unive...20(Dec26_2017)
__________________
Current Build Thread 1930 Ford Model A Modern Twist: Ford Model A Rat Rod With a Modern Twist Build Thread Phase 1 "The Swap": 1949 3100 with S10 swap. Beginner build with ambition! Build Thread Phase 2 "The Drop": Beginner Build with Ambition gets Air Ride |
|
|
|

|
|
|
#118 |
|
Senior Member
 Join Date: Sep 2016
Location: Hershey, PA
Posts: 1,005
|
Re: Jans 53
I'm still mulling it over in my head to make sure I'm not missing anything obvious in the execution of it. e.g. is there space for two trunk hinges with the gas tank and an air tank in the way? How does the center of the bed not bend inward when I throw things in the truck? Where do I put air shocks as helpers to lift each side? When lifting, is the length an issue with it warping? How will I latch it closed so the sides don't fly open?
I think all those issues can be figured out in the ole noodle.
__________________
Current Build Thread 1930 Ford Model A Modern Twist: Ford Model A Rat Rod With a Modern Twist Build Thread Phase 1 "The Swap": 1949 3100 with S10 swap. Beginner build with ambition! Build Thread Phase 2 "The Drop": Beginner Build with Ambition gets Air Ride |
|
|

|
|
|
#119 | |
|
Registered User
Join Date: Mar 2015
Location: Morada, CA --- (Near Lodi)
Posts: 1,443
|
Re: Jans 53
Quote:

__________________
My Build: 57 Chevy Pro-Street |
|
|
|

|
|
|
#120 |
|
Senior Member
 Join Date: May 2007
Location: Doodah Kansas
Posts: 7,774
|
Re: Jans 53
mock up is the most important. I know a lot of guys who built tilting bed floors "for access" and with the floor tilted couldnt access anything. mock up a sheet of plywood in the position you will have the floor tilt to and see how much room you have for access. even the center split, will you be able to get to anything at the front of the bed? how often will you need to even get under there?
I had my airride and fuel tank under the bed of my 65. I was going to tilt the bed floor till I realized that there was no way to change a tire with a flat. so we tilted the whole bed. I never got to motorize it but it worked perfectly, access to all the airride, fuel system, and able to change tires. 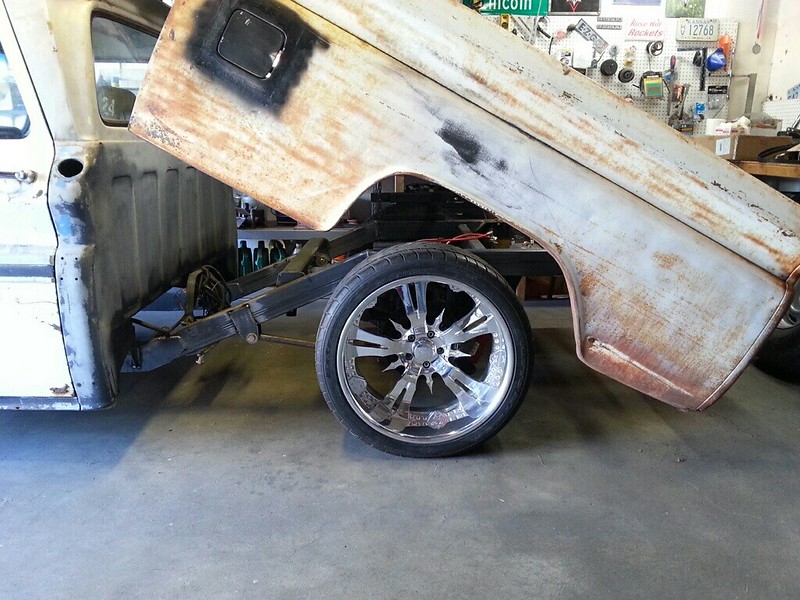 IMG_8305 by Joe Doh, on Flickr IMG_8305 by Joe Doh, on Flickr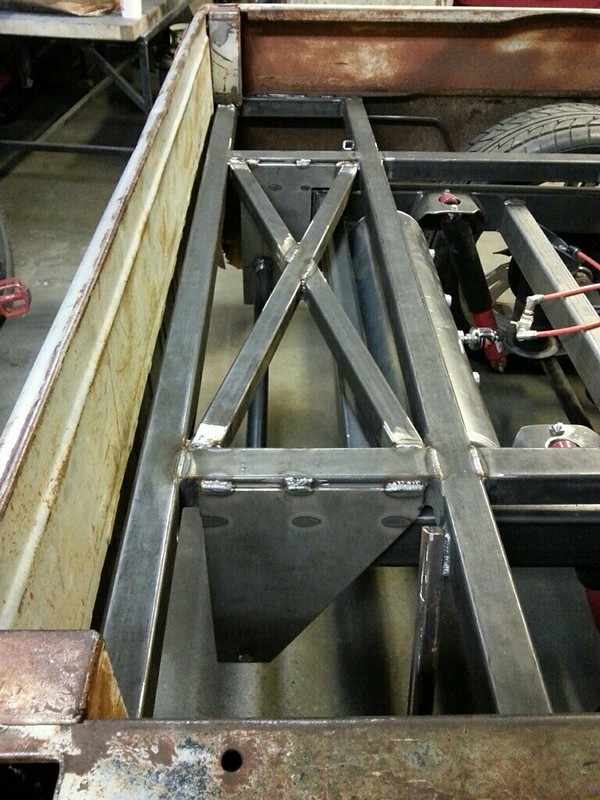 IMG_8304 by Joe Doh, on Flickr IMG_8304 by Joe Doh, on Flickr
__________________
the mass of men live lives of quiet desperation if there is a problem, I can have it. new project WAYNE http://67-72chevytrucks.com/vboard/s...d.php?t=844393 |
|
|

|
|
|
#122 |
|
Registered User
Join Date: Aug 2015
Location: St-Hyacinthe, Quebec, Canada
Posts: 34
|
Re: Jans 53
Like having the spare on the exterior side of the bed. One on each side would balance the look though only one on the driver side looks good too.
Simple idea from a simple mind (mine). 
|
|
|

|
|
|
#123 |
|
Registered User
Join Date: Nov 2014
Location: Yuba City, CA.
Posts: 678
|
Re: Jans 53
So after tacking the running board bracket together I found it was kind of a pain to reach under the truck with it sitting on the ground. I decided to separate the running board bracket from the mounts coming off of the frame, now I can remove the runnng board with 3 bolts and just slide off. In the pictures I haven't drilled a tapped the upper forked end yet but you get the idea.
__________________
Jan's 53 |
|
|

|
|
|
#124 |
|
Senior Member
 Join Date: May 2007
Location: Doodah Kansas
Posts: 7,774
|
Re: Jans 53
hey thats a neat idea, nice thinking
__________________
the mass of men live lives of quiet desperation if there is a problem, I can have it. new project WAYNE http://67-72chevytrucks.com/vboard/s...d.php?t=844393 |
|
|

|
|
|
#125 | |
|
Senior Member
 Join Date: Sep 2016
Location: Hershey, PA
Posts: 1,005
|
Re: Jans 53
Quote:

__________________
Current Build Thread 1930 Ford Model A Modern Twist: Ford Model A Rat Rod With a Modern Twist Build Thread Phase 1 "The Swap": 1949 3100 with S10 swap. Beginner build with ambition! Build Thread Phase 2 "The Drop": Beginner Build with Ambition gets Air Ride |
|
|
|

|
 |
| Bookmarks |
|
|