
 |
|
|
#101 |
|
Registered User
 Join Date: Dec 2012
Location: Rochester, IL
Posts: 537
|
Re: Introduction, nostalgia, and '68 build, oh my
I love the transformation
__________________
__________________ Mike 70 Med Olive build http://67-72chevytrucks.com/vboard/s...d.php?t=714804 Instagram- protouring66 |
|
|

|
|
|
#102 |
|
Registered User
Join Date: Feb 2017
Location: Puyallup
Posts: 77
|
Re: Introduction, nostalgia, and '68 build, oh my
one of the better threads on this site
|
|
|

|
|
|
#103 |
|
Registered User
Join Date: Jun 2014
Location: Mocksville, NC
Posts: 1,760
|
Re: Introduction, nostalgia, and '68 build, oh my
I finally got around to painting and mounting my original caps. At first, I had repainted my caps in the '67 red/white scheme, but after testing them with the white wheels I decided it was too much white. So, I stripped the caps again and repainted them in the original '68 black/argent silver scheme. I also tried to age them a bit so they don't look so new.
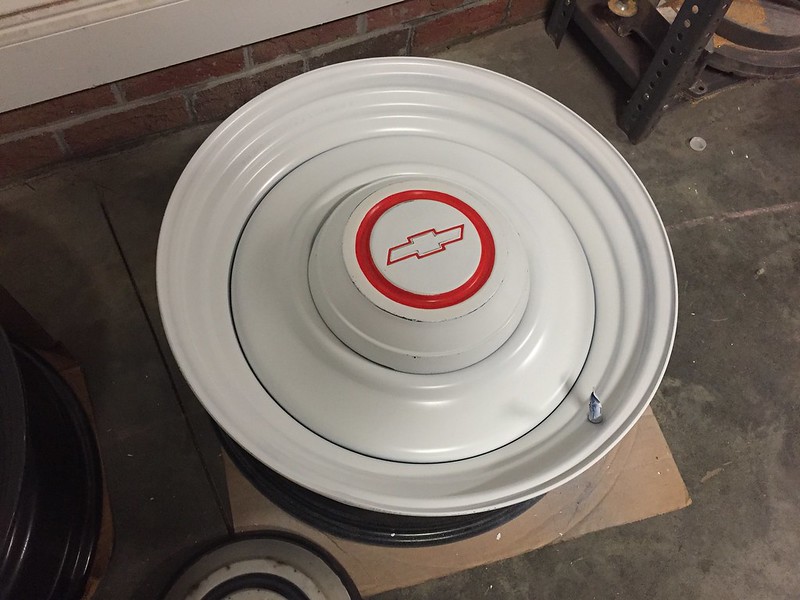 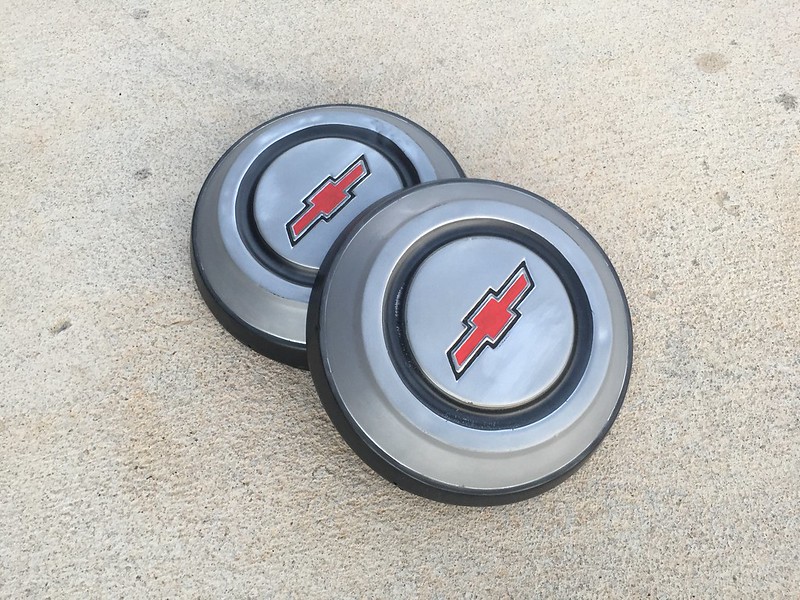 To mount the caps, I ended up using the MobSteel cap clips that I got from prsgtrman. I drilled/tapped the wheels to mount the clips. So far I have not lost a cap, but to be honest I'm not thrilled with how loose the cap seats. I've tried readjusting the clips but there's only so much spring tension you can get out of these before they just start bending. I also used a trick found on old VW caps and added a small hole to the cap and made a cap removal tool. With the ridge on the transit wheels, it makes it difficult to remove the cap without this tool. 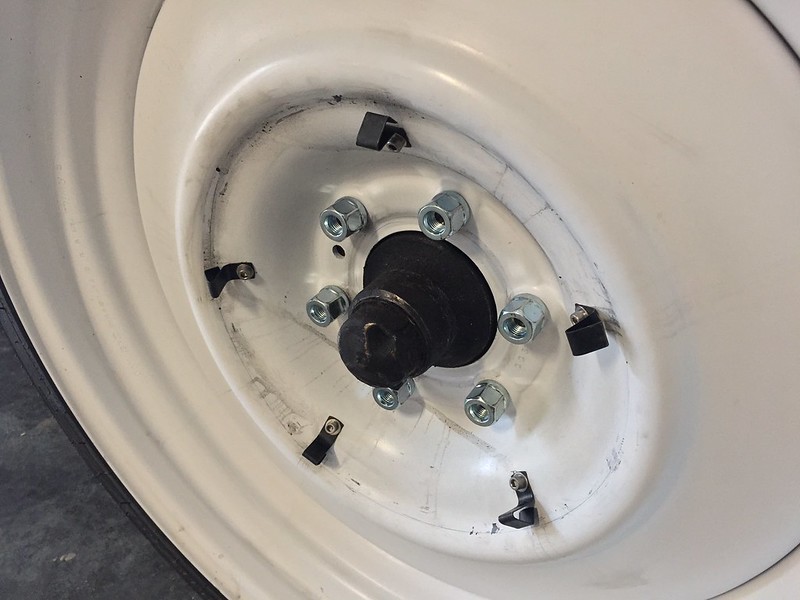 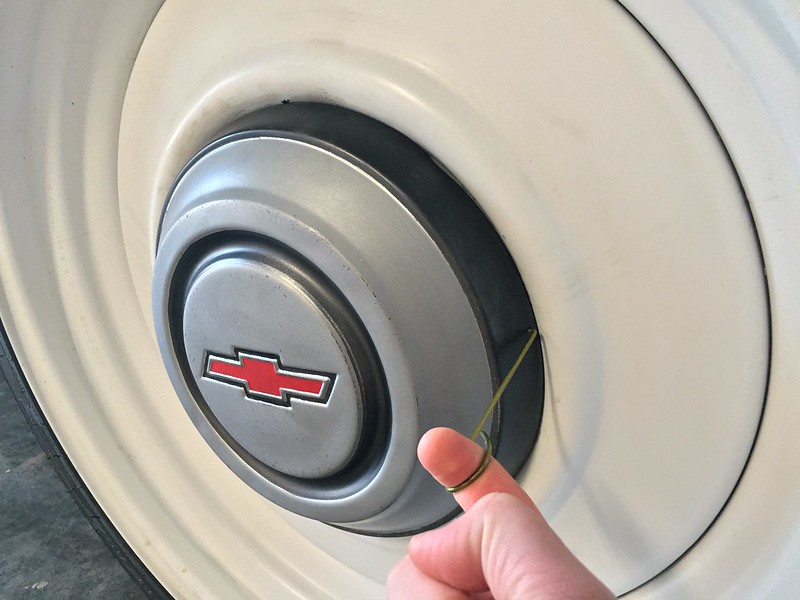 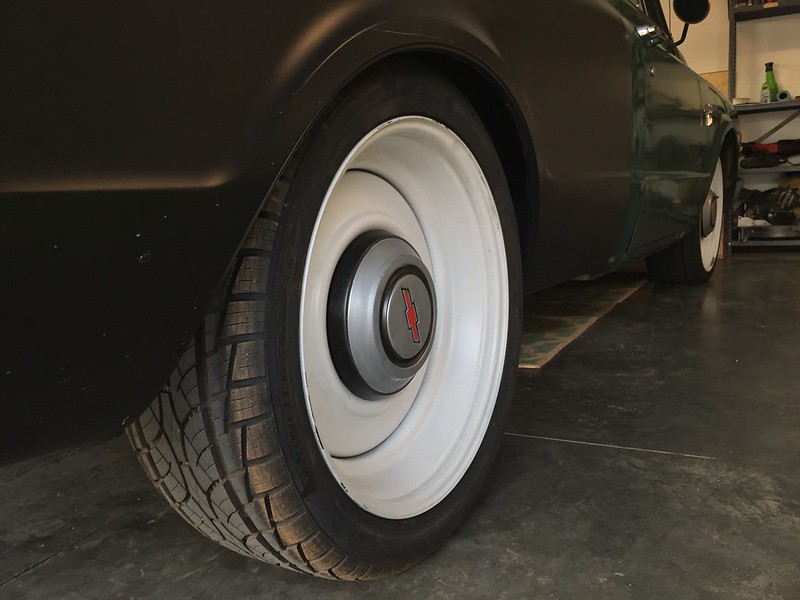 After getting the caps mounted, I took the truck out for a test drive and a "truck party". All through winter, my son was talking about having a truck party, so with the freakishly warm weather, we loaded up all my son's trucks in the bed and found some dead end gravel road to play in. 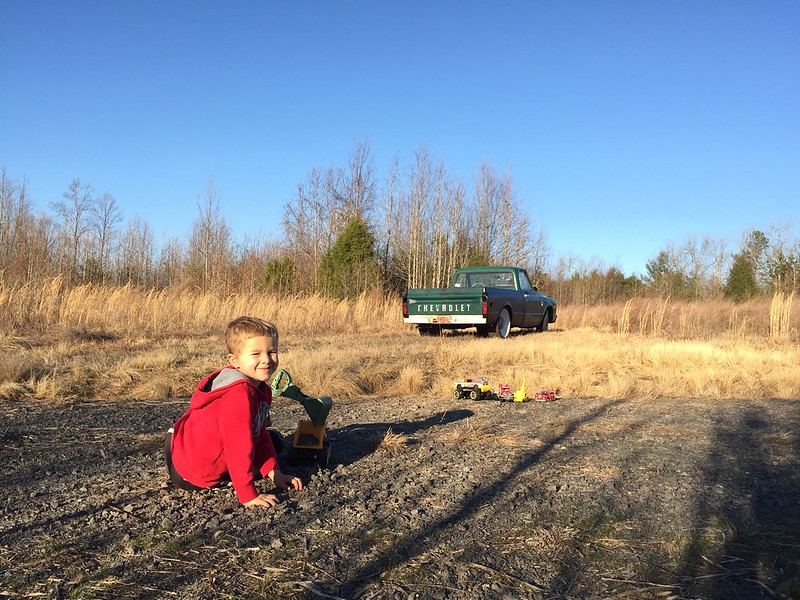 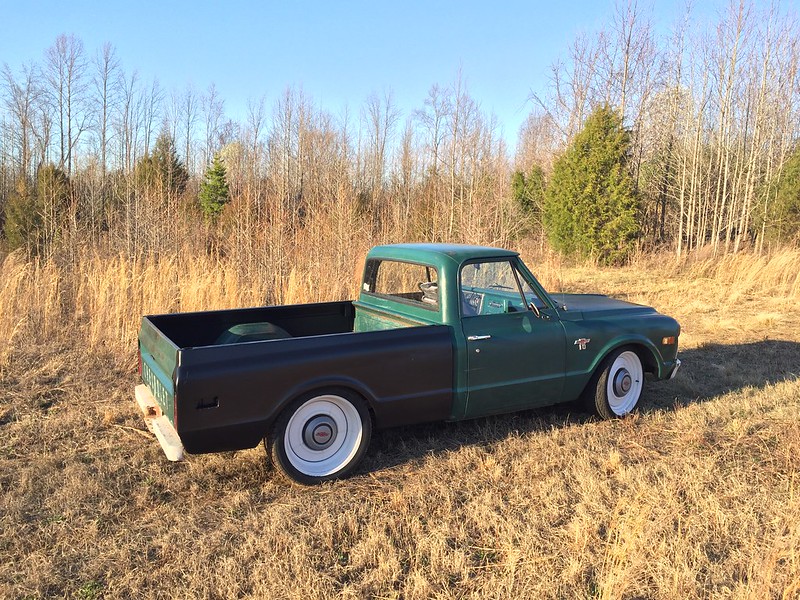 At this point, I actually started doubting the transit wheel look. I'm not in love with how they look on the truck at the current ride height. I do plan on lowering it several more inches, but that's not going to happen for at least a year. So, I decided to throw on the spare original wheel I have and see if it was worth picking up an old set of 15x6s to mount until I can get the suspension where I want it. 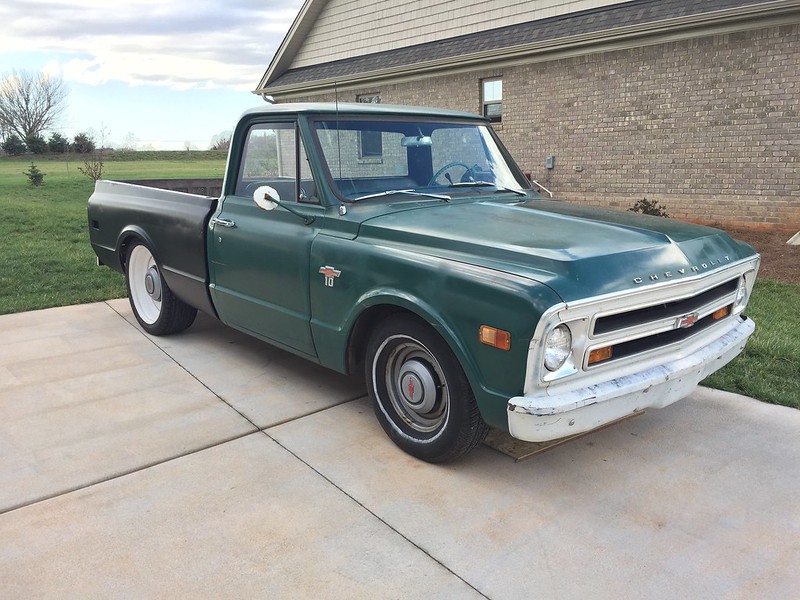 Although I do really like the look of the 15x6 at this height, I decided to just save my $ and stick with the transits for now after doing yet another photoshop of my end goal (I should have included "photoshops" in my original title). I did, however, discover that I like the original argent silver wheel color over the white, so I plan on eventually repainting my wheels. This really should be the final look of my truck. Photoshopped here is the painted bed, argent silver wheels, and about ~3" more drop. 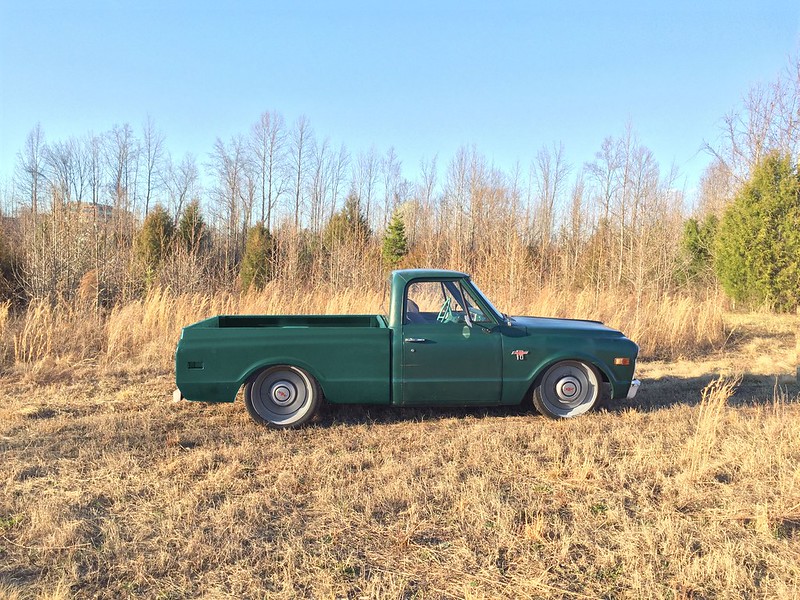
__________________
Builds: Green Gus the 68 C10 | Bluey the 72 1500 | Lowly the 70 C10 - Instagram: @dr.hewitt - C10 Concept/Development Photos: Master Thread |
|
|

|
|
|
#104 | |
|
Senior Member
 Join Date: Aug 2010
Location: Asheville, North Carolina
Posts: 1,856
|
Re: Introduction, nostalgia, and '68 build, oh my
Quote:
 good call on the silver caps, looks way better with the green. You're getting close man good call on the silver caps, looks way better with the green. You're getting close man
__________________
ANDREW 1972 Chevy SWB Cheyenne Super JANE http://67-72chevytrucks.com/vboard/s...d.php?t=462072 1972 GMC Jimmy PENNY http://67-72chevytrucks.com/vboard/s...d.php?t=735827 1968 GMC patina swb PEARL http://67-72chevytrucks.com/vboard/s...d.php?t=731315 1972 Chevy K20 BRUCE http://67-72chevytrucks.com/vboard/s...d.php?t=805788 |
|
|
|

|
|
|
#105 |
|
Senior Member
 Join Date: Jun 2009
Location: Belews Creek , NC
Posts: 4,220
|
Re: Introduction, nostalgia, and '68 build, oh my
Looking good Corey, I also like the silver much better.

__________________
Larry It is easily overlooked that what is now called vintage was once brand new. "Project 68" paypal.me/ldgrant |
|
|

|
|
|
#106 |
|
Registered User
Join Date: Sep 2012
Location: Midway, NC
Posts: 3,275
|
Re: Introduction, nostalgia, and '68 build, oh my
I agree. The silver looks better.
__________________
http://67-72chevytrucks.com/vboard/s...d.php?t=581873 The low buck build threads. Check'em out! http://67-72chevytrucks.com/vboard/s...d.php?t=666022 My build thread Crossmembers CC |
|
|

|
|
|
#107 |
|
Registered User
Join Date: Jun 2014
Location: Mocksville, NC
Posts: 1,760
|
Re: Introduction, nostalgia, and '68 build, oh my
This past week I've been working on a few mundane tasks that needed to be done. My starter was going out so I replaced that. While I was under there with the starter out, I decided it was a good time to investigate my oil leak issue that I've been putting off. In the last week it was starting to get worse, so it was time. Turns out, the front two oil pan bolts were completely missing! After replacing those my truck no longer marks its territory. I was pleasantly surprised to find such a simple fix.
The other thing I did was replace the shocks and relocate the mounting positions. I used the typical KYB 344068 fronts and 344055 rears. The fronts only had 1" of travel left and the rears were leaned over more than 45 degrees so I knew I had to relocate them. For the fronts, I did not like the available relocation bracket so I made my own out of 1 3/4" square tube so that the shock is close to its original angle and travel range. For the rears, I was initially going to use the No Limits kit that puts the shocks outboard and behind the rearend, but after studying photos of the kit installed I realized that the geometry is fundamentally incorrect. Essentially, the shock does not pivot in the same plane as the trailing arm which puts a lot of stress on the mounting points. Several users have raved about how the kit "improves" stability, but what is really happening is the whole system is binding up as you go through your suspension travel. Anyway, I instead decided to use a modified version of lakeroadster's method (here) for the upper mounts, and SCOTI's method (here) for flipping the lower mounts. There was a significant improvement after doing this mod. The truck now handles as good, if not better, than it did stock (which is all I was looking for). 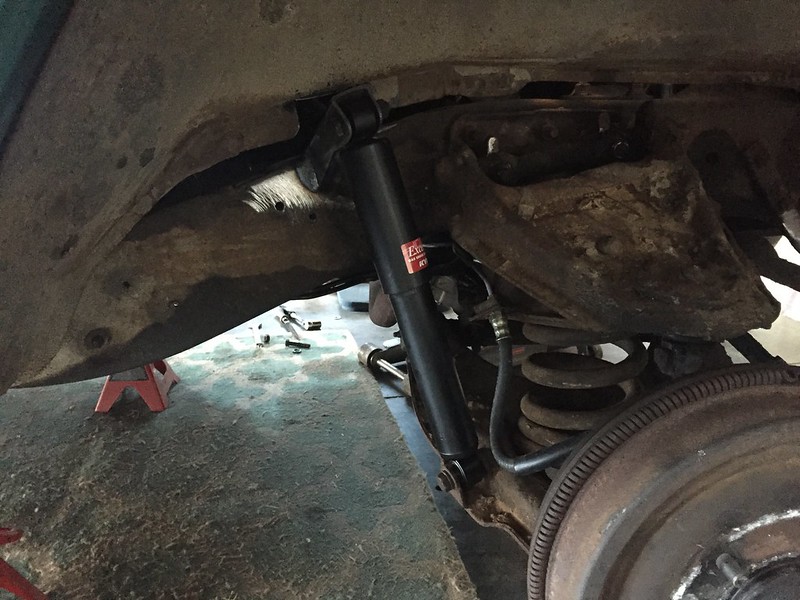 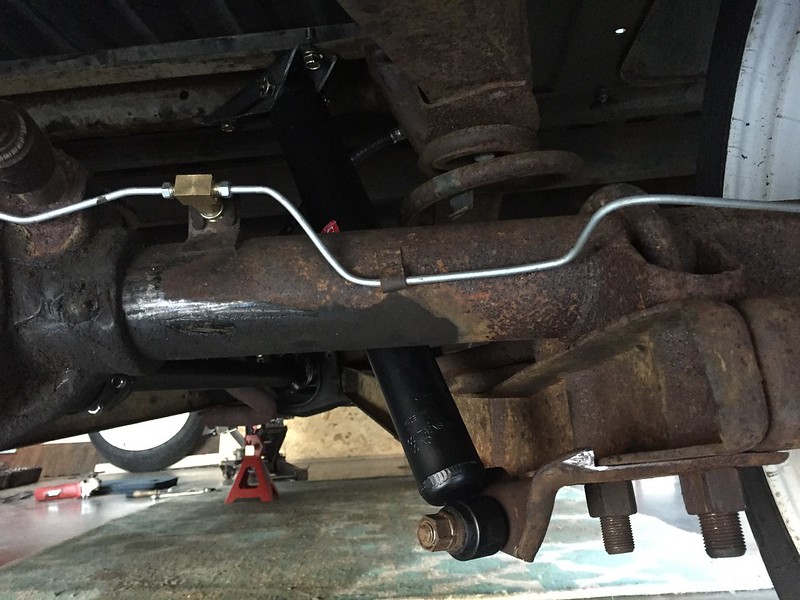 Since I had the wheels off while doing the shocks, I figured I might as well knock out repainting the wheels. I liked the white but it was a bit too bright for me and was difficult to take a good photo against the dark green. I ended up painting them "dull aluminum" by Plasti-kote which is a near identical match to the original argent silver color. So far, I'm pleased with the color. 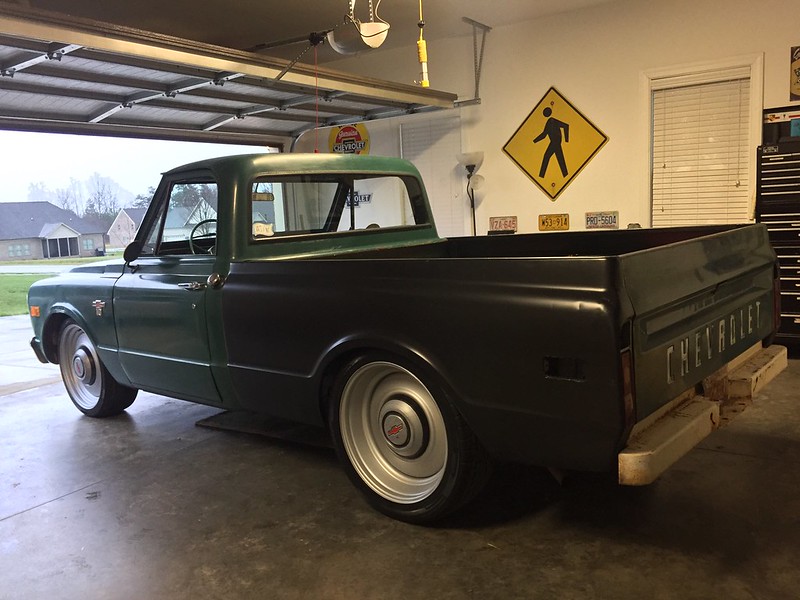 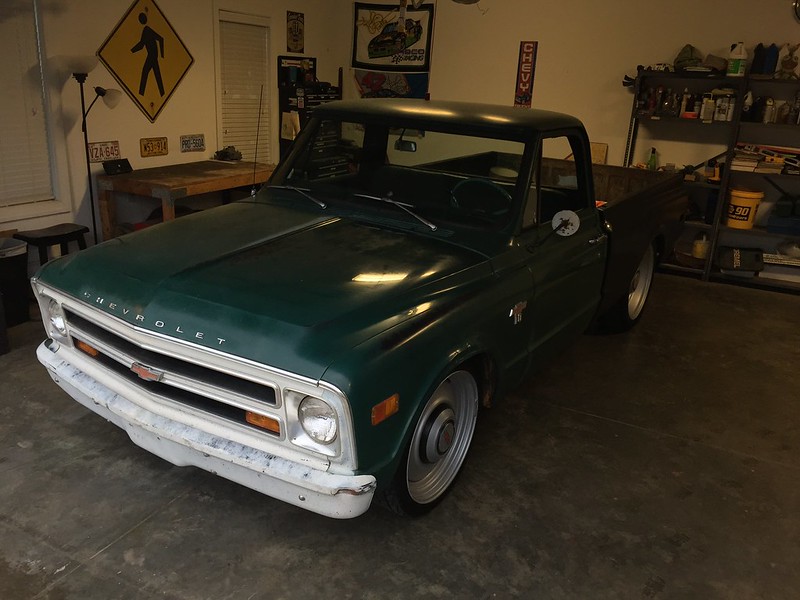 I'm really trying to get this thing ready for the start of cruise in season. We have a couple excellent ones in my area and they are always a lot of fun to attend. The last time I actually brought a vehicle to one, though, was about 5 years ago when I had my Malibu. I'm looking forward to being able to bring the truck out this year.
__________________
Builds: Green Gus the 68 C10 | Bluey the 72 1500 | Lowly the 70 C10 - Instagram: @dr.hewitt - C10 Concept/Development Photos: Master Thread |
|
|

|
|
|
#108 |
|
Registered User
Join Date: Sep 2012
Location: Midway, NC
Posts: 3,275
|
Re: Introduction, nostalgia, and '68 build, oh my
You'll be ready in no time.
__________________
http://67-72chevytrucks.com/vboard/s...d.php?t=581873 The low buck build threads. Check'em out! http://67-72chevytrucks.com/vboard/s...d.php?t=666022 My build thread Crossmembers CC |
|
|

|
|
|
#109 |
|
Senior Member
 Join Date: Apr 2008
Location: Berne IN
Posts: 3,238
|
Re: Introduction, nostalgia, and '68 build, oh my
Nice project! Been about a year now- right?
|
|
|

|
|
|
#110 |
|
Senior Member
 Join Date: Jun 2009
Location: Belews Creek , NC
Posts: 4,220
|
Re: Introduction, nostalgia, and '68 build, oh my
I look forward to seeing it out and about

__________________
Larry It is easily overlooked that what is now called vintage was once brand new. "Project 68" paypal.me/ldgrant |
|
|

|
|
|
#111 |
|
Registered User
Join Date: Jun 2014
Location: Mocksville, NC
Posts: 1,760
|
Re: Introduction, nostalgia, and '68 build, oh my
It sure has! One year exactly today, and I'm still loving it. Here's a comparison between how it looked the day I bought it compared to today.
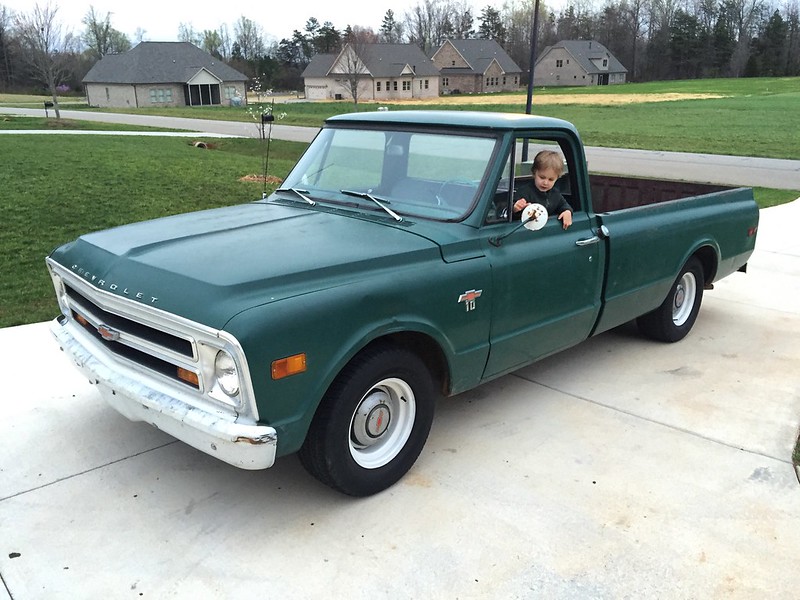 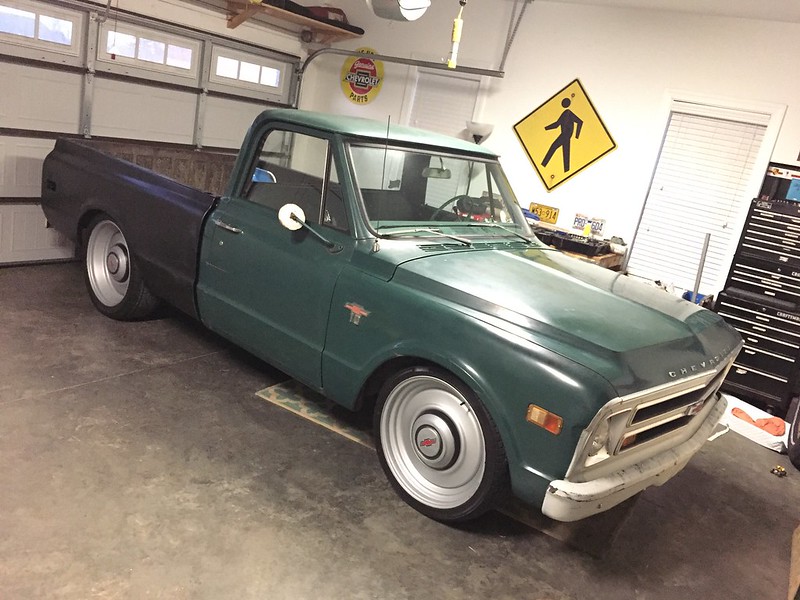 For my own record, here's everything I've done in the first year: -shortbed conversion -2.5" stepped rear frame, 2.5" bed raise -rebuilt drum brakes (new drums, wheel cylinders, shoes, brake lines, master cylinder) -HEI distributor conversion, new wires/plugs -new exhaust manifolds -rebuilt stock carb, new fuel lines, fuel tank -new starter, battery cables -22x9 GM transit wheels In the next year I hope to complete: -paint bed sides -drop spindles, front disk brake conversion -4" drop HD rear springs plus 2" drop blocks -new rear wheel studs plus 1/2" spacers
__________________
Builds: Green Gus the 68 C10 | Bluey the 72 1500 | Lowly the 70 C10 - Instagram: @dr.hewitt - C10 Concept/Development Photos: Master Thread |
|
|

|
|
|
#112 |
|
Registered User
Join Date: Sep 2012
Location: Midway, NC
Posts: 3,275
|
Re: Introduction, nostalgia, and '68 build, oh my
Truck is really looking awesome.
__________________
http://67-72chevytrucks.com/vboard/s...d.php?t=581873 The low buck build threads. Check'em out! http://67-72chevytrucks.com/vboard/s...d.php?t=666022 My build thread Crossmembers CC |
|
|

|
|
|
#113 |
|
Senior Member
 Join Date: Jun 2009
Location: Belews Creek , NC
Posts: 4,220
|
Re: Introduction, nostalgia, and '68 build, oh my
You bought it on my mothers b-day.
 Happy one year anniversary Happy one year anniversary 
__________________
Larry It is easily overlooked that what is now called vintage was once brand new. "Project 68" paypal.me/ldgrant |
|
|

|
|
|
#114 |
|
Registered User
 Join Date: Dec 2006
Location: Toms River, NJ
Posts: 5,518
|
Re: Introduction, nostalgia, and '68 build, oh my
You should be proud, you got a lot done in a year and it shows on the truck.
__________________
Keith 66 Suburban Burb Build Thread: http://67-72chevytrucks.com/vboard/s...d.php?t=751361 IG: bennett68c10 |
|
|

|
|
|
#115 |
|
Registered User
Join Date: Aug 2012
Location: San Luis Obispo
Posts: 62
|
Re: Introduction, nostalgia, and '68 build, oh my
Great job on this thing so far!
I'm in for the rest of the build!
__________________
BUILD IT! DRIVE IT! My Build Thread - http://67-72chevytrucks.com/vboard/s...d.php?t=734098 |
|
|

|
|
|
#116 |
|
Registered User
Join Date: Jun 2014
Location: Mocksville, NC
Posts: 1,760
|
Re: Introduction, nostalgia, and '68 build, oh my
Thanks everyone! Most of you have builds that are way cooler than mine, I'm just trying to keep up!
It's been a few weeks since I've posted an update, and it will be a few weeks before I get a chance to do any more significant work to the truck, so I figured I'd post this update even though it's somewhat mundane. Over the past three weeks I've been getting the bedsides ready for some paint. The sides were in overall great shape, except for some pitting on the bed rails from a camper top in their past life. Also, somewhere along the way, someone thought it would be cool to fill in the stake pockets and marker lights. Since I'm trying to make these look like they are original to the truck, I had to open those holes back up. Then it was on to "selective" repair. I know it seems ridiculous to pick and choose what I was going to fix and/or fill on the sides, but they couldn't be perfect or else they would not match the rest of the truck. Ultimately, I decided to fill all the pitting while leaving all the small dents and dings. After the sides are painted, I will go back and basically damage the new paint in those areas to make it look more authentic, instead of just a painted dent. I also have a plan to match the overall look and sheen of the new paint to the original paint, but I will save that process for the next update. I promise, it will look consistent when it's done and I'm sorry to any of you who prefer shiny new paint since what I'm doing is sacrilege. 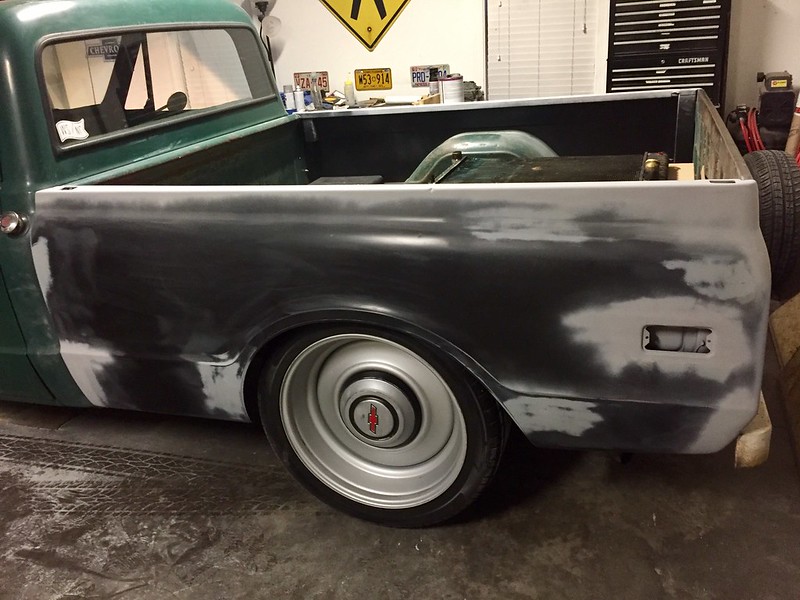 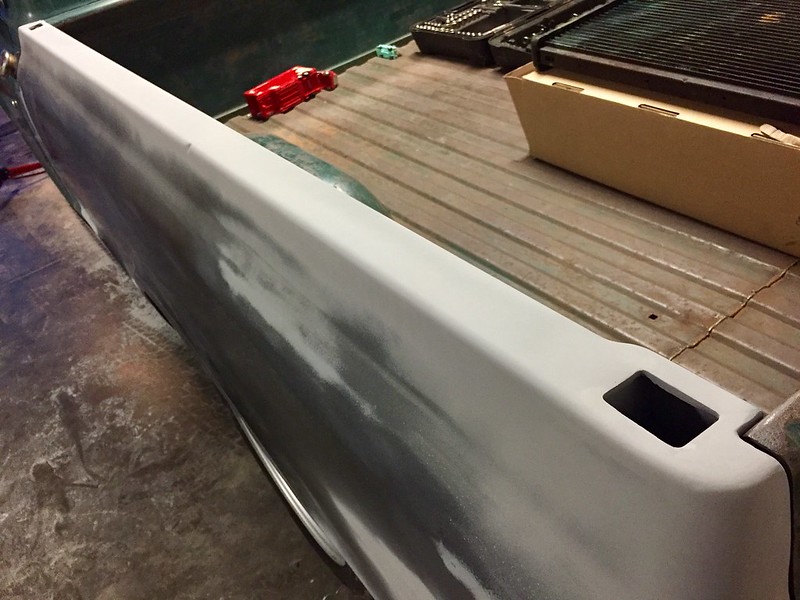 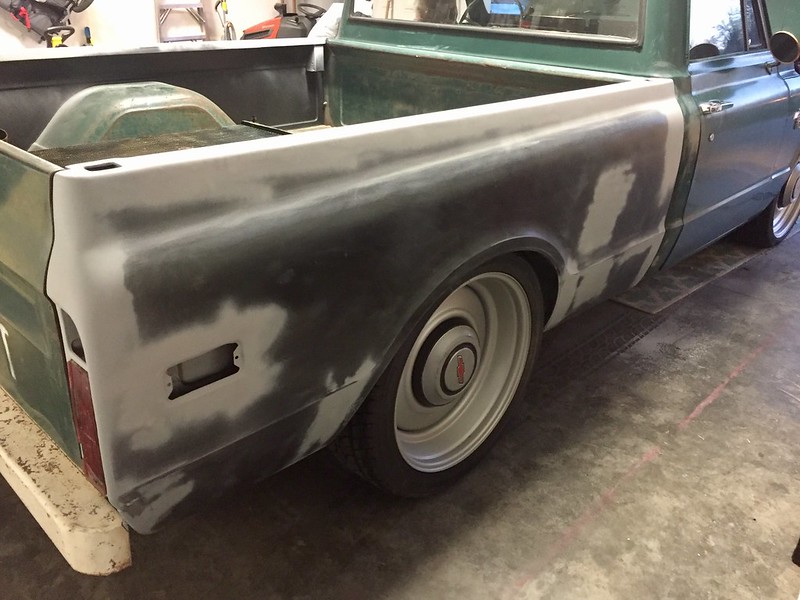 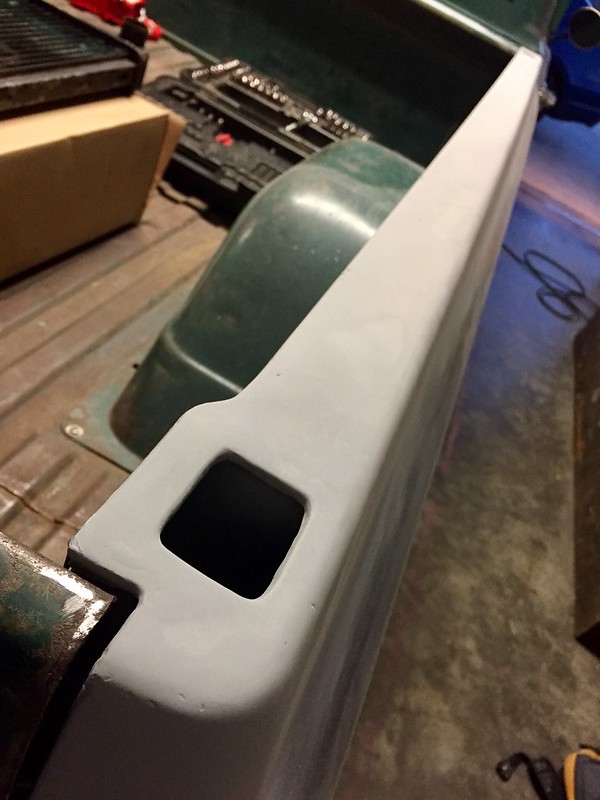 I also ran into my first bit of trouble with the truck after one year of ownership. As you may recall from my original post, when I originally went to go look at and test drive the truck it was exactly what I wanted, except the radiator cracked while I was testing the truck and was leaking everywhere. Well, the owner JD was kind enough to put in a replacement for me right then and there and I was on my way. Well, that radiator finally decided to join the original in the scrap pile. I was on my way to our local dragstrip this past weekend and started smelling coolant, so I had to ditch that plan and head back home. 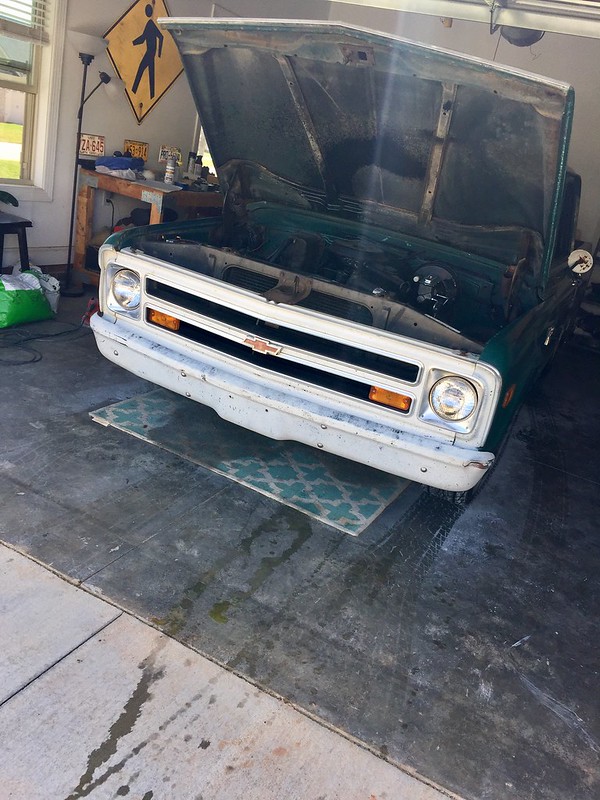 After searching around, I decided to try out a Spectra CU369 radiator. It's pretty much the only "direct fit" replacement radiator you can find these days at the parts stores. It's aluminum with plastic side tanks which I was hesitant about, but I was desperate enough to try it. If it doesn't work out, I will take it as a loss and find a brass/copper replacement. The only thing I don't like about it so far is that it's not really a "direct" replacement. The mounting brackets and rubber mounts need to be modified slightly to fit the frame of this radiator and the overall fitment is very snug, so hopefully there are no issues with vibrations. Anyway, now I get extra cool points for having an aluminum radiator right? I'm going to paint it black eventually... My daughter wanted to help by eating her snack and honking the horn at me while I worked. 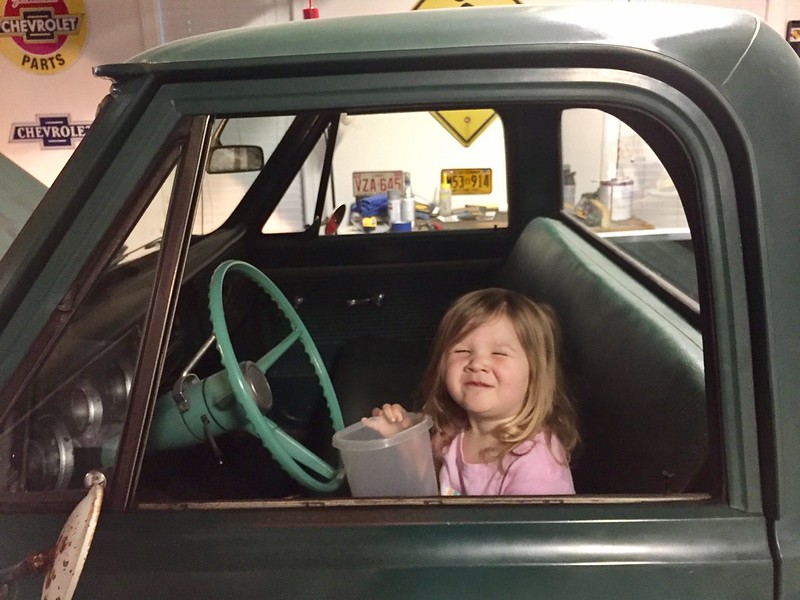 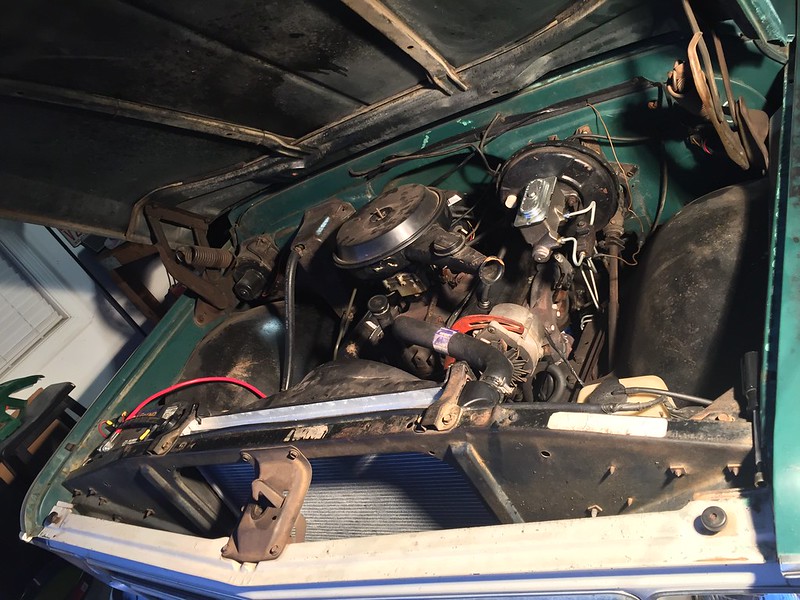 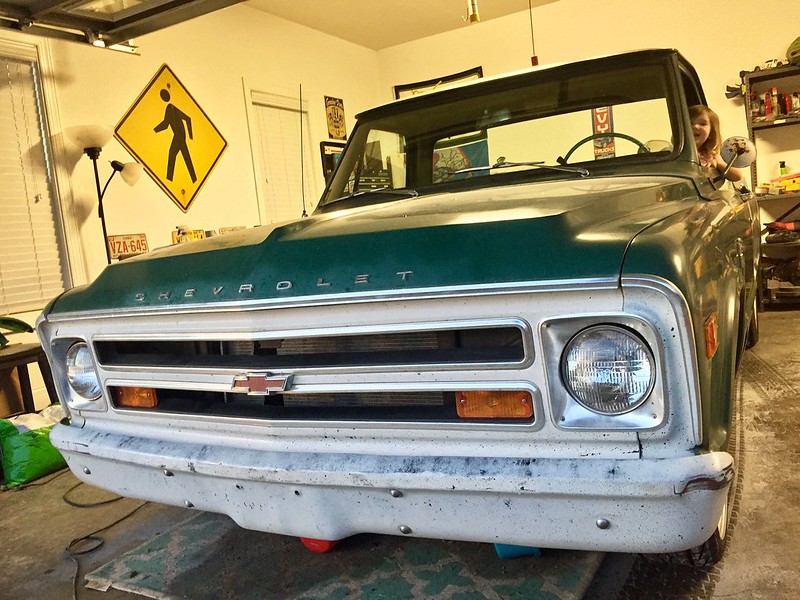 My next update should include painted bedsides. That's it for now!
__________________
Builds: Green Gus the 68 C10 | Bluey the 72 1500 | Lowly the 70 C10 - Instagram: @dr.hewitt - C10 Concept/Development Photos: Master Thread |
|
|

|
|
|
#117 |
|
Registered User
Join Date: Sep 2012
Location: Midway, NC
Posts: 3,275
|
Re: Introduction, nostalgia, and '68 build, oh my
Fun with old trucks. Ain't it great.
__________________
http://67-72chevytrucks.com/vboard/s...d.php?t=581873 The low buck build threads. Check'em out! http://67-72chevytrucks.com/vboard/s...d.php?t=666022 My build thread Crossmembers CC |
|
|

|
|
|
#118 |
|
Registered User
 Join Date: Jan 2010
Location: Randleman, NC
Posts: 785
|
Re: Introduction, nostalgia, and '68 build, oh my
Just ran across your build thread, I've been following along on Instagram for a little while. Nice truck and nice work! I never realized I had so many cool trucks around my neck of the woods.
|
|
|

|
|
|
#119 |
|
Senior Member
 Join Date: Jun 2009
Location: Belews Creek , NC
Posts: 4,220
|
Re: Introduction, nostalgia, and '68 build, oh my
Hello there another local in NC
 Corey does have a bad looking ride Corey does have a bad looking ride 
__________________
Larry It is easily overlooked that what is now called vintage was once brand new. "Project 68" paypal.me/ldgrant |
|
|

|
|
|
#120 |
|
Registered User
 Join Date: Jan 2010
Location: Randleman, NC
Posts: 785
|
Re: Introduction, nostalgia, and '68 build, oh my
|
|
|

|
|
|
#121 |
|
Registered User
Join Date: Jun 2014
Location: Mocksville, NC
Posts: 1,760
|
Re: Introduction, nostalgia, and '68 build, oh my
Thank you, thank you. We've been tossing around having a get together for the growing group of NC members here, but nothing official yet. There's always some of us at the local cruise ins too. Once I get my sides painted, I will be out at the Kannapolis and Kernersville cruise ins a few times.
__________________
Builds: Green Gus the 68 C10 | Bluey the 72 1500 | Lowly the 70 C10 - Instagram: @dr.hewitt - C10 Concept/Development Photos: Master Thread |
|
|

|
|
|
#122 |
|
Registered User
 Join Date: Feb 2010
Location: Dodge city Ks
Posts: 618
|
Re: Introduction, nostalgia, and '68 build, oh my
Sweet build, are those the original 68 caps? I've got 68 caps and transit wheels but can't for the life of me figure out these springs. What's the inside diameter measurement of your caps? Any details are appreciated
__________________
My Build Thread Here http://67-72chevytrucks.com/vboard/s...d.php?t=457417 |
|
|

|
|
|
#123 | |
|
Registered User
Join Date: Jun 2014
Location: Mocksville, NC
Posts: 1,760
|
Re: Introduction, nostalgia, and '68 build, oh my
Quote:

__________________
Builds: Green Gus the 68 C10 | Bluey the 72 1500 | Lowly the 70 C10 - Instagram: @dr.hewitt - C10 Concept/Development Photos: Master Thread |
|
|
|

|
|
|
#124 |
|
Registered User
Join Date: Jul 2013
Location: Pembroke NC
Posts: 323
|
Re: Introduction, nostalgia, and '68 build, oh my
I read your post/thread today. I really enjoyed it. I come to Winston quite often, my granddaughter lives there. I go to see her plays sports, sometimes once a week. May try to contact you when I'm there and have some time. I may try to locate a long bed myself and duplicate what you have done.
|
|
|

|
|
|
#125 | |
|
Registered User
Join Date: Jun 2014
Location: Mocksville, NC
Posts: 1,760
|
Re: Introduction, nostalgia, and '68 build, oh my
Quote:
__________________
Builds: Green Gus the 68 C10 | Bluey the 72 1500 | Lowly the 70 C10 - Instagram: @dr.hewitt - C10 Concept/Development Photos: Master Thread |
|
|
|

|
 |
| Bookmarks |
|
|