
 |
|
|
|
|
#1 |
|
Registered User
Join Date: Jul 2005
Location: AL
Posts: 1,828
|
Re: 46 pickemup in NJ "the Rebuild"
Lucky
__________________
" |
|
|

|
|
|
#2 |
|
Registered User
Join Date: Dec 2010
Location: washington NJ
Posts: 766
|
Re: 46 pickemup in NJ "the Rebuild"
And the answer is.......A Trip to Larry's Power to drop off the 292 for a total makeover. These are the same guys that did the infamous 292, spliced V8 hybrid head, for Leo Santucci's drag car.
 Here's a pic of the team that will give the ole girl a face lift. On the far left is the owner Gary who bought the business from his former boss. And standing next to him is the guy (Steve? I think) who did most of the work on the spliced head for Santucci. And of course the rest of the team on the right. Some how a big dopey looking guy got his ugly mug in the pic on the far right. 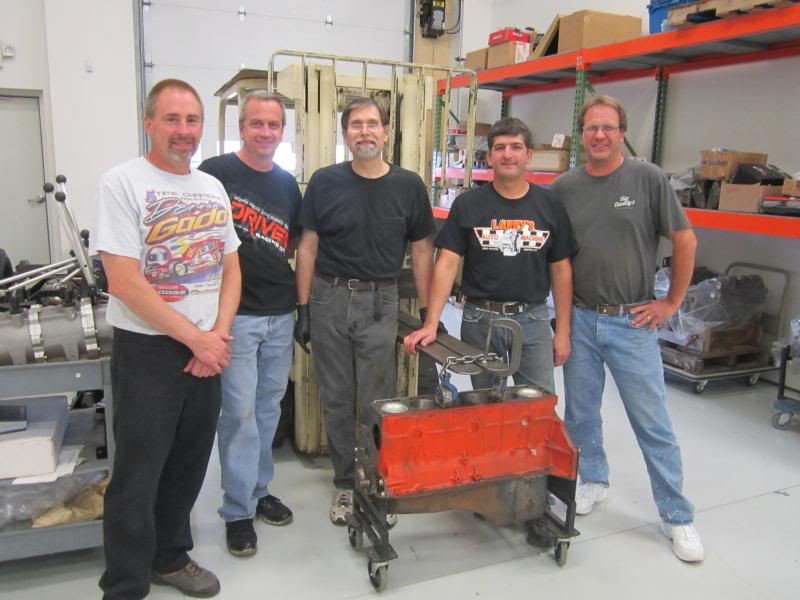
|
|
|

|
|
|
#3 |
|
Registered User
Join Date: Dec 2010
Location: washington NJ
Posts: 766
|
Re: 46 pickemup in NJ "the Rebuild"
Ok, so another major piece of the puzzle arrived today in a Big Brown truck. As I mentioned earlier, I don't have a lot of the major fabrication tools for this kind of job, and that was causing me to have troubles closing in the firewall. To do it properly and not look like a total hack job would have meant either buying, borrowing, or renting a sheet metal break.
Fortunately for me Justin and the guys out at Scott's Hot rods were nice enough to put a box together for me exactly the way i wanted it. There's no way I could have put something like this together even if I had the right equipment. The damn thing is first class quality. So the first thing I had to do was cut the opening in the firewall to accept the box portion. The plan is once I have that where it needs to be I will then trace around the flange portion so I know where the final cuts needs to be. Then it's just a matter of connecting it to the floor boards and stitching it to the firewall. 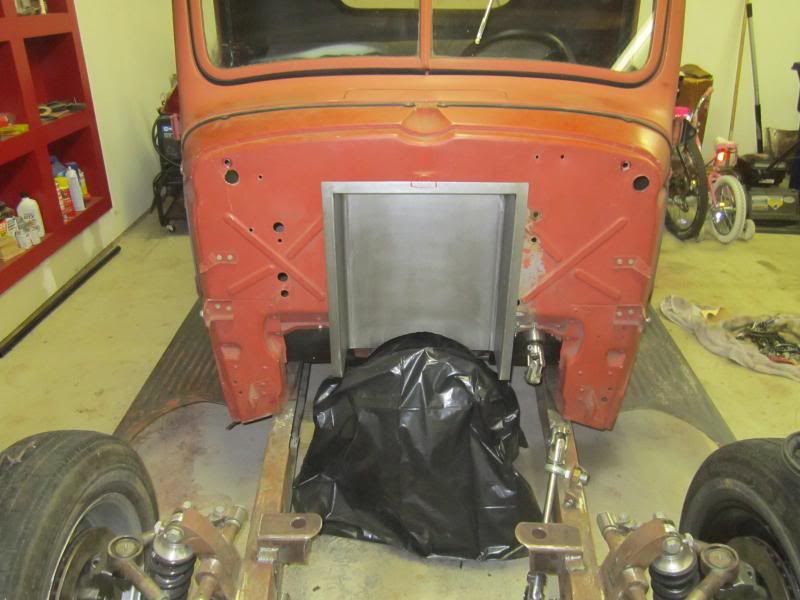 Anybody know what this thing is mounted on the firewall? For the life of me I can't figure out what the hell its for. On the inside of the cab it has a small steel tube coming out of it. I am trying to decide if I should grind it off or just notch the flange and work around it. 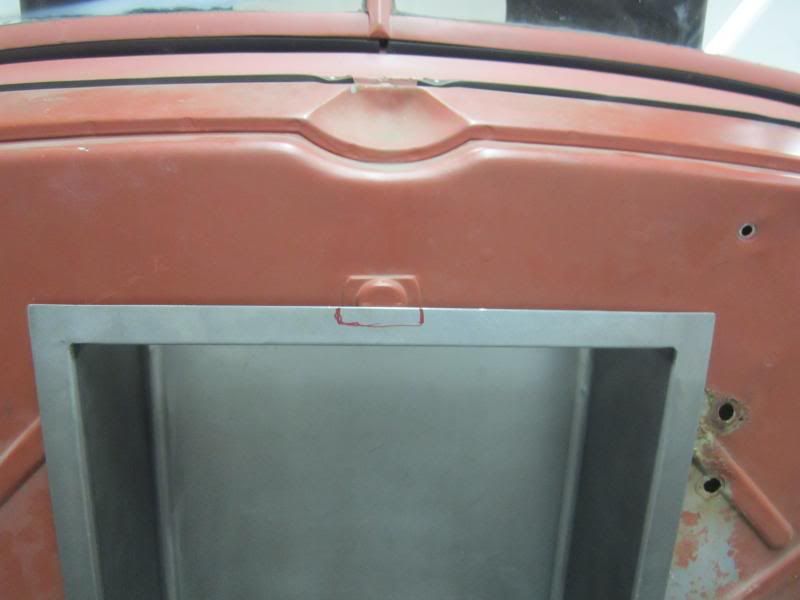
|
|
|

|
|
|
#4 |
|
Registered User
Join Date: Nov 2011
Location: Winnipeg, Manitoba
Posts: 164
|
Re: 46 pickemup in NJ "the Rebuild"
That part you're wondering about is where the water that gets past the cowl vent would drain. I diverts the water back to the outside of the cab. If you don't plan on having that vent functional you could probably get rid of it.
|
|
|

|
|
|
#5 |
|
SAVING ONE TRUCK AT A TIME
 Join Date: Feb 2010
Location: sherwood oregon
Posts: 1,141
|
Re: 46 pickemup in NJ "the Rebuild"
lookin good paintman. also worked all summer on my property.but did have a chance to enjoy some car shows and family time.lookin forward to more pics.chizzler
__________________
53-suburban (99% done) 40-pick up (99.9% done) 12-cc lb dually D-max (dd) 61-crew cab D-max "PAY LESS FOR WHAT YOU NEED PAY MORE FOR WHAT YOU WANT" 53 BURBAN BARN FIND:http://67-72chevytrucks.com/vboard/s...d.php?t=404091 1940 PROJECT MOON SHINE:http://67-72chevytrucks.com/vboard/s...d.php?t=551088 1961 CREW MAX: http://67-72chevytrucks.com/vboard/s....php?p=6957999 |
|
|

|
|
|
#6 |
|
Registered User
Join Date: Dec 2010
Location: washington NJ
Posts: 766
|
Re: 46 pickemup in NJ "the Rebuild"
|
|
|

|
|
|
#7 |
|
Registered User
Join Date: Dec 2010
Location: washington NJ
Posts: 766
|
Re: 46 pickemup in NJ "the Rebuild"
On some of the smaller holes, instead of trying to make small plugs, I just shoved a sheet rock screw into the hole as a backer and burner her shut.
 Once I got my holes filled in, I fit and stitched the recess box in. I originally had planned on cutting the opening for the box to fit flush into the firewall and then weld the flange all the way around. But upon further review i realized to do it that way would have meant cutting into the ribs that were stamped into the firewall at the factory for re-reinforcement. That just seemed like it would cause more trouble then it was worth so I mounted the flange to the back side of the firewall. I now have it stitched and ground down on the front side, and plan on stitching on the backside as well. Hope that made sense. Maybe the pics will help. 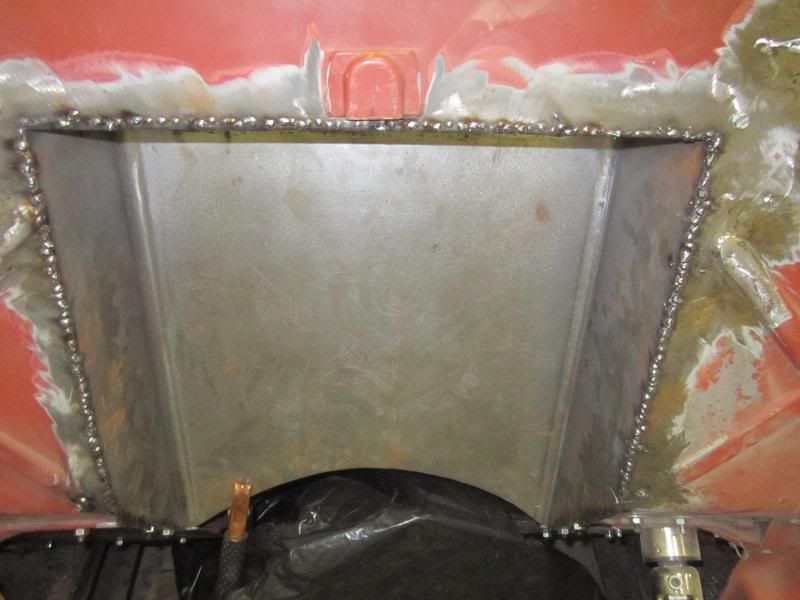 I was able fold over some the extra material on the recess box and create a flange to add more support for the floor boards. 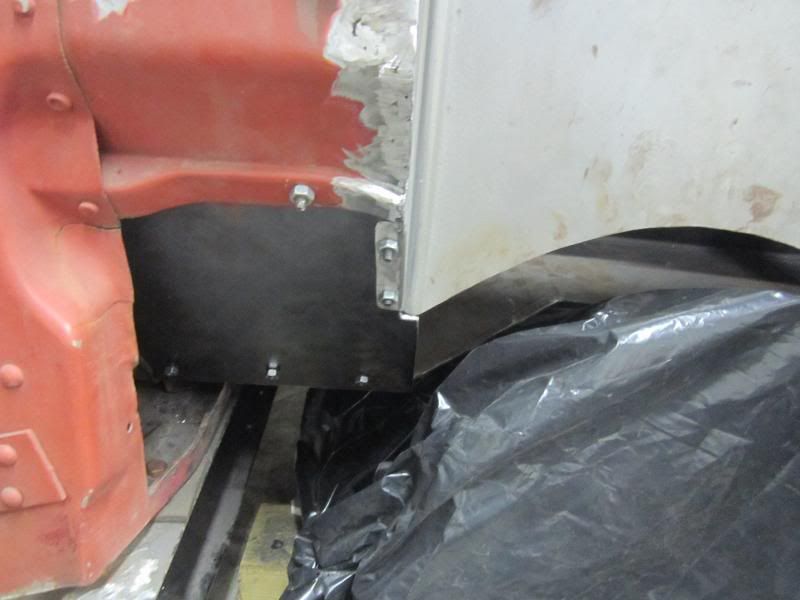 So at the end of a few long days this what the firewall looks like. I still have alot of clean up to do yet but i'm gettin there. Did I do it right????????? I don't have a clue. But I know a painter that's good working with spackle  
|
|
|

|
|
|
#8 |
|
Registered User
Join Date: Oct 2008
Location: oxnard ca
Posts: 2,201
|
Re: 46 pickemup in NJ "the Rebuild"
looking good
Justin |
|
|

|
|
|
#9 |
|
Registered User
Join Date: May 2013
Location: Centerville,Ma.
Posts: 1,223
|
Re: 46 pickemup in NJ "the Rebuild"
Looking good ,I think mounting it from the inside was a good idea. looks better without fooling with the ribs. In the future to fill a small hole just hold or clamp a piece of brass or aluminum behind the hole and weld it up. A chunk of aluminum will absorb the heat and will not stick to the weld.
|
|
|

|
|
|
#10 |
|
Registered User
Join Date: Dec 2010
Location: washington NJ
Posts: 766
|
Re: 46 pickemup in NJ "the Rebuild"
Ok, so the last few days have been all about brakeology 101. When I bought the truck it had some kind of 1/2 a@% brake pedal assembly bolted up under the dash, with the master cylinder mounted to the firewall. Well that was fine when the truck had the small block in it. Unfortunately when I decided to switch over to the inline motor, I soon realized the brake booster, master cylinder, and carburetor, wanted to occupy the same space in the engine compartment. Soooo that meant moving the brake booster to under the cab. Of course I have already covered what troubles moving the brake booster to under the cab would cause with my exhaust
 So any ways here is a pic of the butched up pedal assembly that I took out from under the dash. I only wish I had kept the brake pedal to show how boogered up it was, but unfortunately I have already taken it to the local scrapper. You can kind of see the shaft the pedal swung on and the brake light switch.  So with that gone I mounted your typical TCI frame mount booster and pedal assembly. I'm sure most all of you have seen this 1000 times. Only thing I did different was to not use the plate that bolted to the frame that came with the unit. Instead I opted to weld a piece of plate to the frame and bolt the pedal assembly in that way. 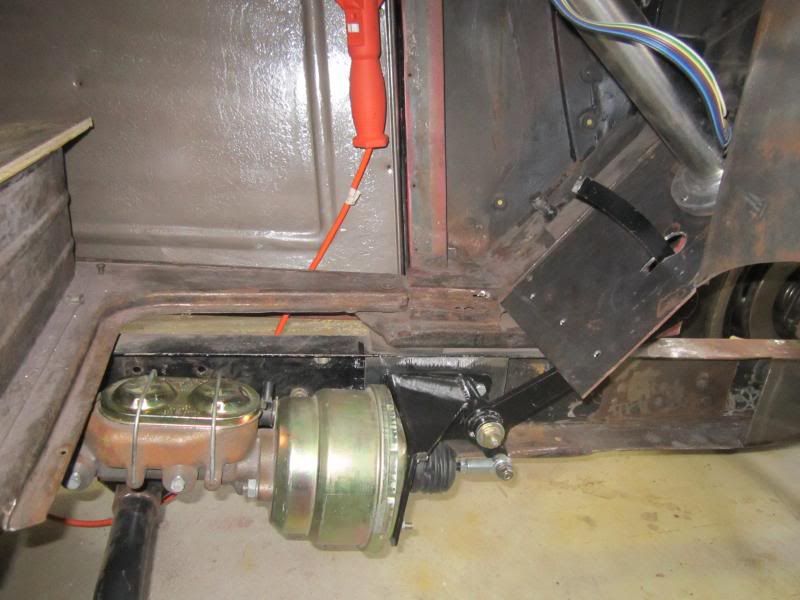 From the front. 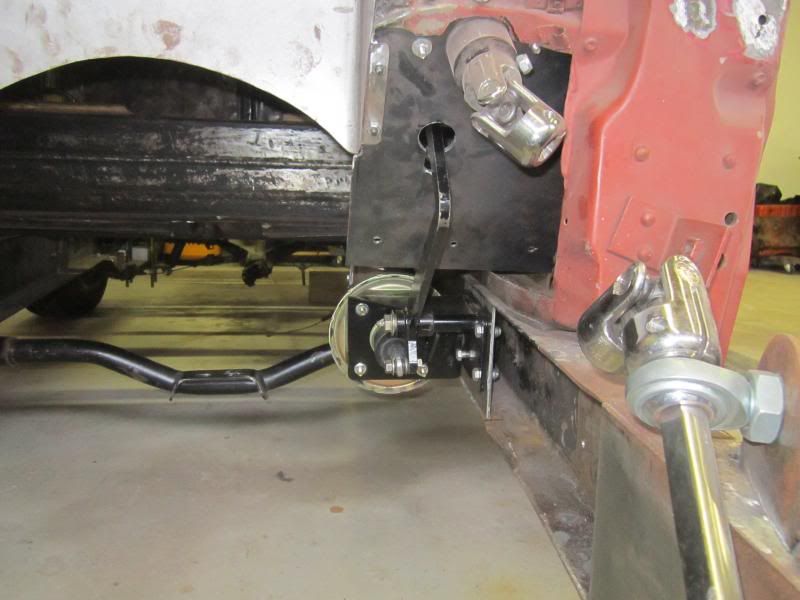 So of course as most of you know having the brake cylinder under the cab poses the problem of how do you fill the master cylinder. Well, I didn't want to cut a trap door in the floor and have to peel back the carpet all the time so a quick call out to Justin at Scott's Hot Rods solved the problem. All you need is one of his trick remote fill canisters and a lid tapped for fittings on your master cylinder. 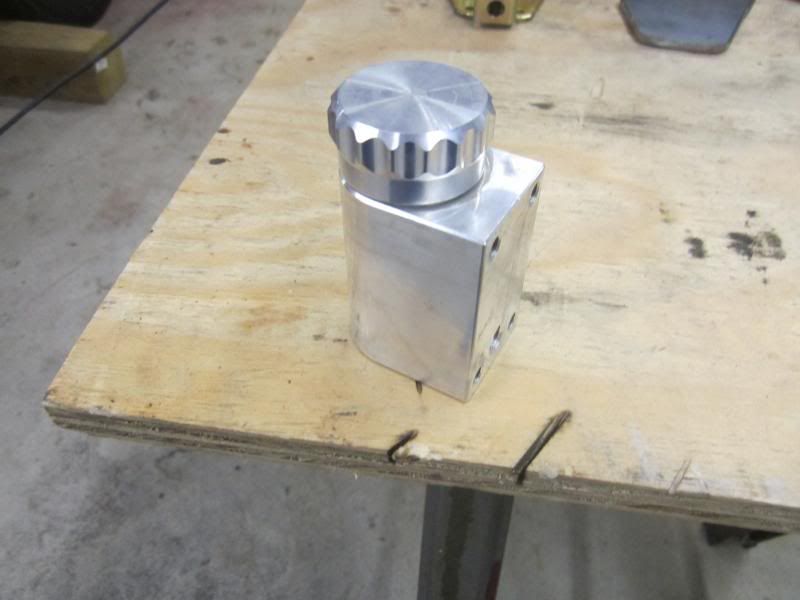 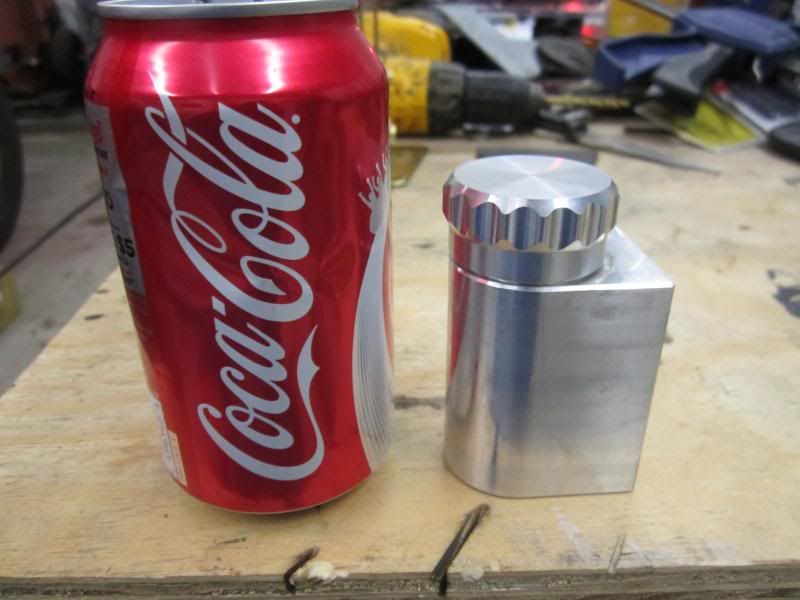 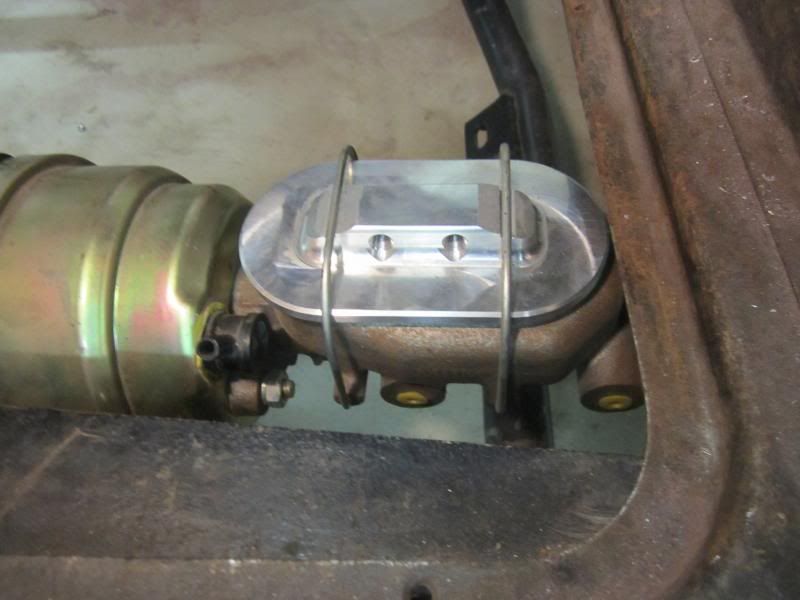 This trick little unit is drilled and tapped for fittings on the back and bottom so mounting possibilities are just about endless. Decisions decisions...., I kind of like the look of it mounted to the firewall with no signs of any hoses. 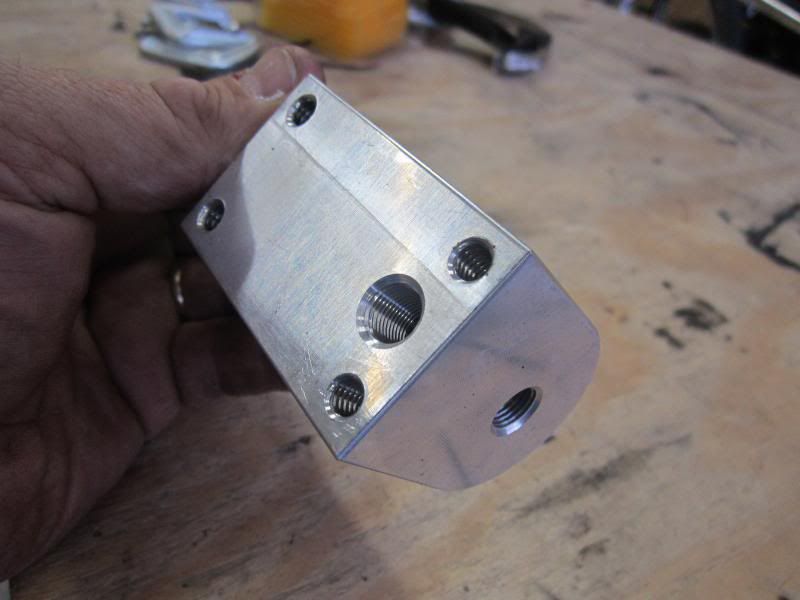 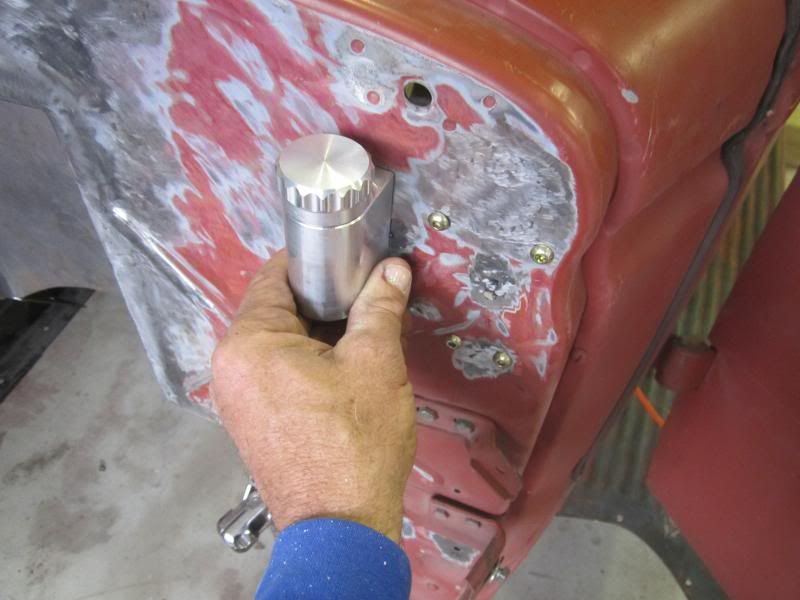 But hidden under the seat is pretty cool too....Hmmmmm what do you guys think?  With that done it was on to some kind of E-brake. I have been pondering where I wanted to put my handle for quite awhile and finally decided to do under dash. Reason being, the 46 cab is pretty narrow and I didn't want to clutter up the floor anymore then I already have by putting it next to the shifter. So again, most all you guys have seen this before, but I used a Lokar set up. Installation was pretty straight forward. In fact I was able to use it just as it came out of the box. No cutting of the bracket at all. The only thing I had to do was make a small spacer out of some plate steel to make up about a 1/8 in length I needed. The bracket comes 15" long and can be cut down in 1" increments to fit what ever distance you have between your dash and firewall. Here's a pic showing the spacer plate I made to take up some slack. 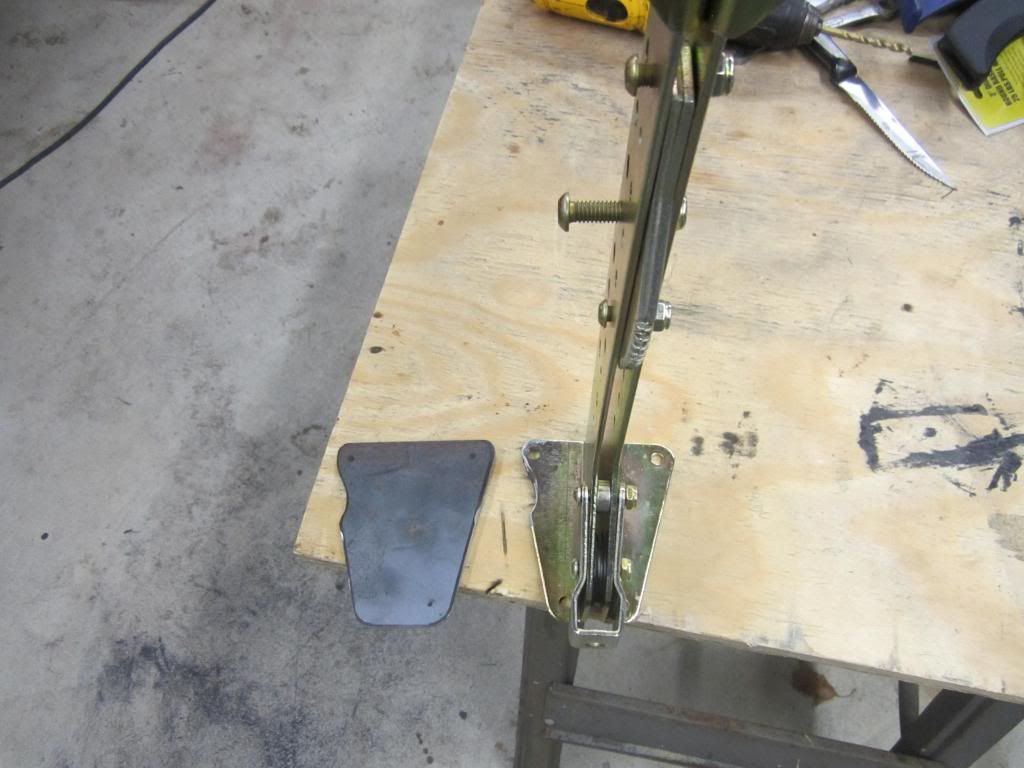 Here's a couple of different shots showing how its mounted. If you look close you can see the spacer plate between the bracket and firewall. Once I do the final assembly on the truck I will move the handle and ratchet mechanism more forward towards the firewall to get it tucked further up under the dash. 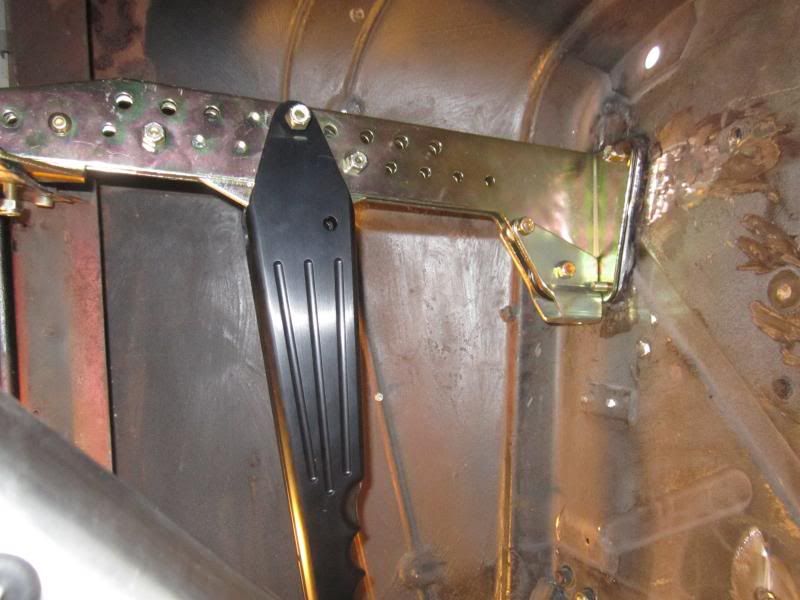 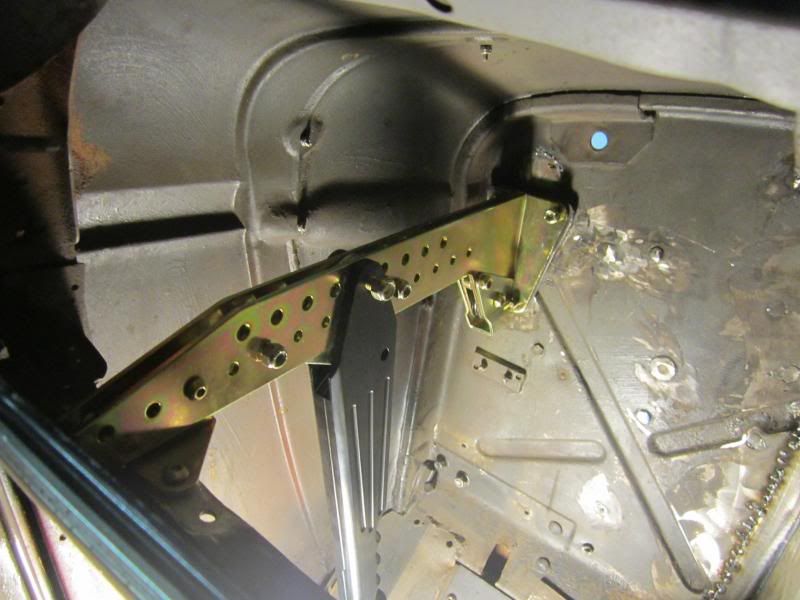 So that is where i'm at as of now. Tonight it's take the girls out trick or treating and over the weekend start patching up the gas filler hole and the holes in the cab floor to keep the Queen Mary from sinking! 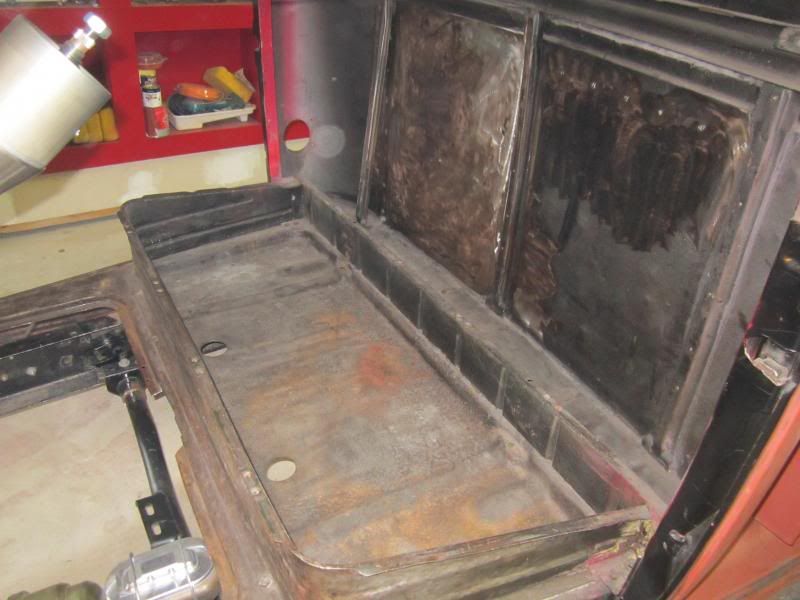
|
|
|

|
|
|
#11 |
|
SAVING ONE TRUCK AT A TIME
 Join Date: Feb 2010
Location: sherwood oregon
Posts: 1,141
|
Re: 46 pickemup in NJ "the Rebuild"
progress is looking good.
__________________
53-suburban (99% done) 40-pick up (99.9% done) 12-cc lb dually D-max (dd) 61-crew cab D-max "PAY LESS FOR WHAT YOU NEED PAY MORE FOR WHAT YOU WANT" 53 BURBAN BARN FIND:http://67-72chevytrucks.com/vboard/s...d.php?t=404091 1940 PROJECT MOON SHINE:http://67-72chevytrucks.com/vboard/s...d.php?t=551088 1961 CREW MAX: http://67-72chevytrucks.com/vboard/s....php?p=6957999 |
|
|

|
|
|
#12 |
|
Registered User
Join Date: Dec 2010
Location: washington NJ
Posts: 766
|
Re: 46 pickemup in NJ "the Rebuild"
Ok some good news............I just got word from the engine shop that all is well with my block, head and crank! For those that have not read my whole build thread. I was able to find a 292 on the cheap that supposedly had the bottom end completely rebuilt. Not being a person very trusting of others, I told the engine shop to do a complete tear down of the motor and check the other shops work. Well, after a thorough cleaning, shot peening and magnaflux, it turns out everything is perfectly fine.
The only thing is the motor just had a standard rebuild. So that will be addressed with a complete blueprint of the block and balancing of the bottom end. Next up for Larry's Power is doing all the head work including installation of the lumps, bigger valves, springs, push rods, port matching, and a mild polishing of the ports, roller rockers.    As far as work on the truck itself......I have been putting off one big problem that has been staring at me since I lowered the truck a bit with the drop spindles and 2" lowering blocks. That's the fact that now my fenders are a bit to close to the rear tires. Typical story of change one thing and then realize you now have 3-4 other things to change. Well I had a few different solutions. 1. Find a smaller rear end 2. Larger wheel offset 3. Widen the fenders 4. Ding Ding Ding.........Raise the fenders! So that's what I am in the process of doing. That is after I finish blowing the mountains of leaves I have off my property  . .
|
|
|

|
|
|
#13 |
|
Registered User
Join Date: May 2007
Location: Southern, Saskatchewan
Posts: 640
|
Re: 46 pickemup in NJ "the Rebuild"
Really like how this truck is coming along, enjoyed reading this build.
__________________
Kerry My build thread. http://67-72chevytrucks.com/vboard/s....php?p=3657823 1971 Chev SWB with 68 nose, 6.2 diesel th350, and 3.73 rear gears 1988 Chev Extendacab 2010 Honda VT1300CS Sabre 2005 Buick Rendezvous wife's ride |
|
|

|
|
|
#14 |
|
Registered User
Join Date: Dec 2010
Location: washington NJ
Posts: 766
|
Re: 46 pickemup in NJ "the Rebuild"
OK so after blowing enough leaves to fill 100 dump trucks, I finally got some extra time to get my fenders remounted. I didn't need to move them a lot, only about 1 1/2", but i think that should be enough.
Here's how she sits now, Probably the last time she will see the outside for awhile. 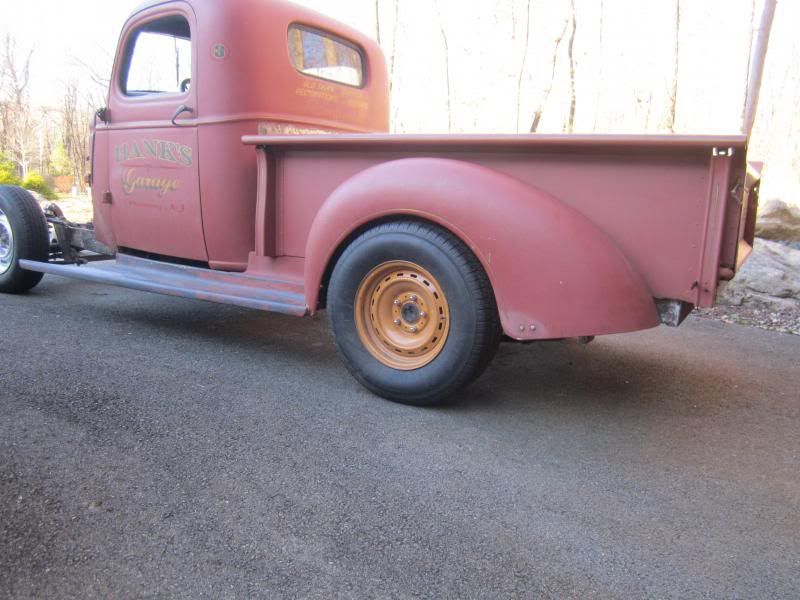 Here's a pic showing how much I raised the holes. 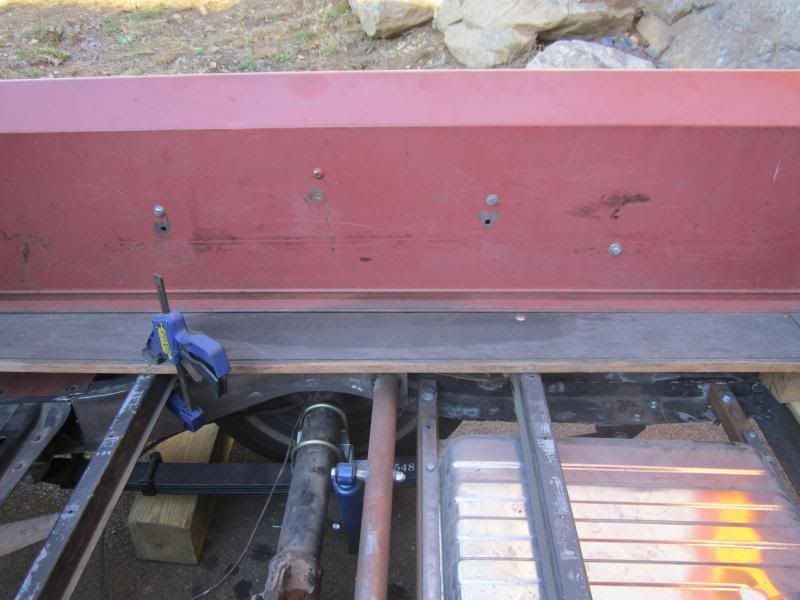 So I think that is it as far as the mock up goes. Next up its off to Home Repot for some wood and wheels to build a dolly for the cab. So I guess the next pics you will see is a bare frame headed off to the sand blasters. |
|
|

|
|
|
#15 |
|
Registered User
Join Date: May 2013
Location: Centerville,Ma.
Posts: 1,223
|
Re: 46 pickemup in NJ "the Rebuild"
I like the way the truck sits as I am a little to old school for the dropped to the ground look. I am a little concerned about the distance between your axle and the frame. Have you jumped up and down the in the back to see if it's gonna hit? Love the truck and really like the 6 in a row.
|
|
|

|
|
|
#16 | |
|
Registered User
Join Date: Dec 2010
Location: washington NJ
Posts: 766
|
Re: 46 pickemup in NJ "the Rebuild"
Quote:
Once I put everything back as planned it should be fine, This is just a truck for running slow for coffee and breakfast with the wife, my racing days are over. I like the look of a lowered truck but not with the wheels and tires tucked real tight up under the fenders. My cup of tea is to have the fender opening filled just out to the lip of the fender. Plus I didn't want to spend the cash on a different rear. |
|
|
|

|
|
|
#17 |
|
Registered User
Join Date: Dec 2010
Location: washington NJ
Posts: 766
|
Re: 46 pickemup in NJ "the Rebuild"
|
|
|

|
|
|
#18 |
|
Registered User
Join Date: Dec 2010
Location: washington NJ
Posts: 766
|
Re: 46 pickemup in NJ "the Rebuild"
|
|
|

|
|
|
#19 | |
|
Registered User
Join Date: Feb 2010
Location: Cruzeville
Posts: 219
|
Re: 46 pickemup in NJ "the Rebuild"
Quote:
I lkes them ole 250's -- the 292 is a hawg, yesterday I tried to get an ole buddy to swap his locked up gmc 270 for spare stuff I had. I also like 181 merc's (mercruiser 4 cyls) |
|
|
|

|
|
|
#20 |
|
Registered User
Join Date: May 2013
Location: Centerville,Ma.
Posts: 1,223
|
Re: 46 pickemup in NJ "the Rebuild"
The easiest way is with a resistor to drop the voltage, such as a ballast resister used in the old Chryslers. I changed to a 12 volt motor years ago in a 50 Olds only to find I had opposite rotation when done. I ended up drilling the rivits out of the motor and swapping polarity inside the motor. I know you used to be able to buy some nice small round voltage resistors at part stores as the Chrysler ones are about 4 " long.
|
|
|

|
|
|
#21 |
|
Registered User
Join Date: Dec 2010
Location: washington NJ
Posts: 766
|
Re: 46 pickemup in NJ "the Rebuild"
OK so it looks as if the purchase of an old truck just to tinker around with on weekends has turned into a complete frame off semi-resto/rebuild
 . . I figured if the Egyptians could build trillion ton pyramids without a hoist then the Paintman could certainly get his cab off just as easily. After a little bit of trial and error this is what I came up with...............I just jacked up each corner a little at a time and blocked up the jack stands until I got it high enough to slide the cradle under. Keep it simple stupid. 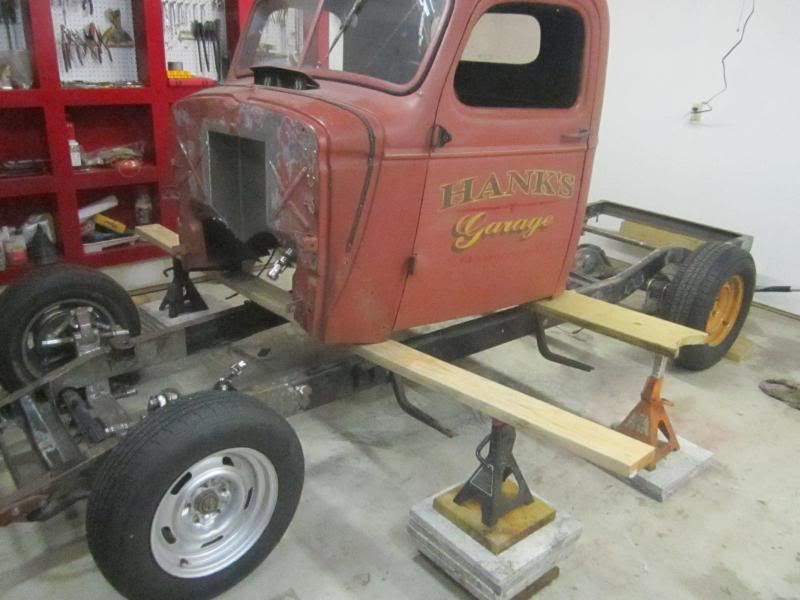 This is when you start drinking    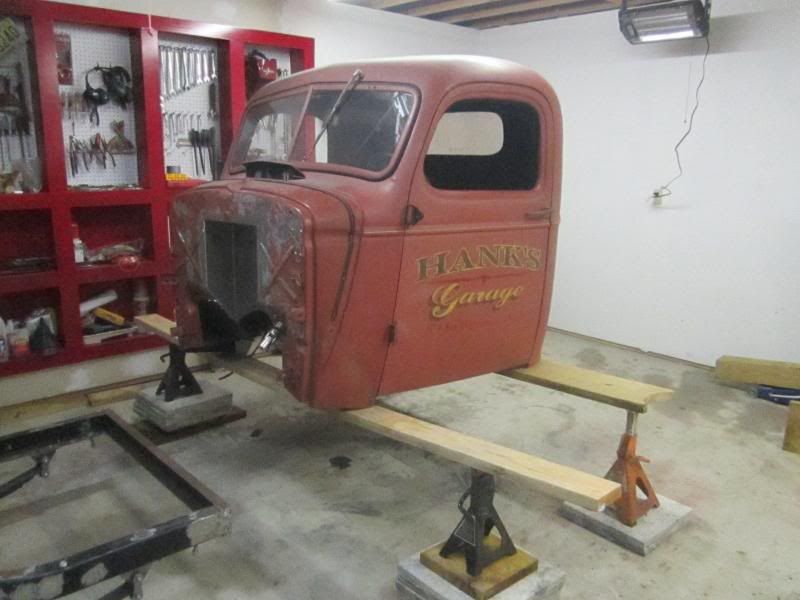 Sucess!!!!!!!!!!!!! 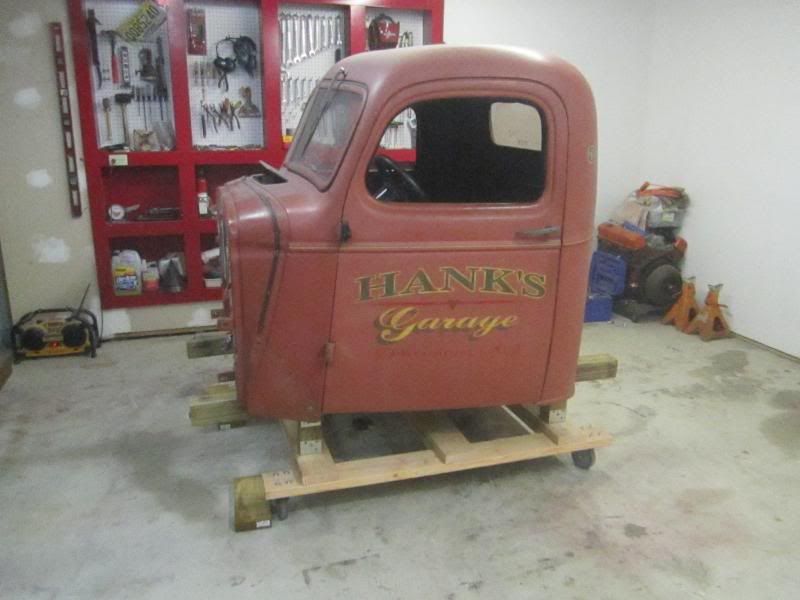 Now it's just a matter of welding up all the extra holes in the frame, disassemble, and then off to the sand blaster. I guess there's no turning back now. 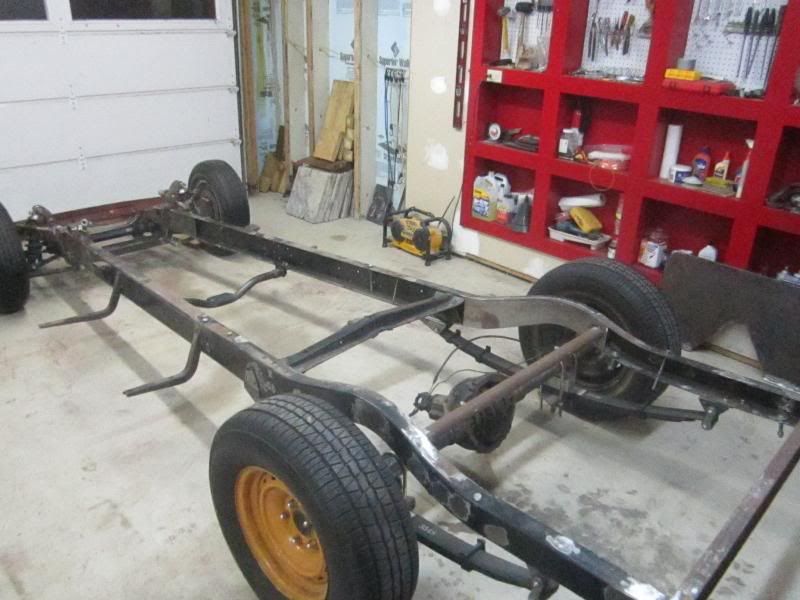
|
|
|

|
|
|
#22 |
|
Registered User
Join Date: May 2012
Location: Lancaster, PA
Posts: 42
|
Re: 46 pickemup in NJ "the Rebuild"
Love the build! I'd say you're doing great for a guy that claims to not know what he's doing! Lol, keep up the good work. I can't wait to see it go down the road.
|
|
|

|
|
|
#23 |
|
Registered User
Join Date: Dec 2010
Location: washington NJ
Posts: 766
|
Re: 46 pickemup in NJ "the Rebuild"
Ok guys just a small update to keep my build thread from falling into the internet abyss. I finally finished welding up all the holes in the frame that had accumulated over the years from previous owners. At last count I think I patched 42 holes that I didn't need. This of course took me some time because New Jersey has been under a deep freeze as of late and I just couldn't get myself up to going out to the garage when it was 2 below. I guess I should get some heat out there.
Any way my sandblaster friend finally got off his but and picked up my frame after promising me for 3 weeks he would do it for me. 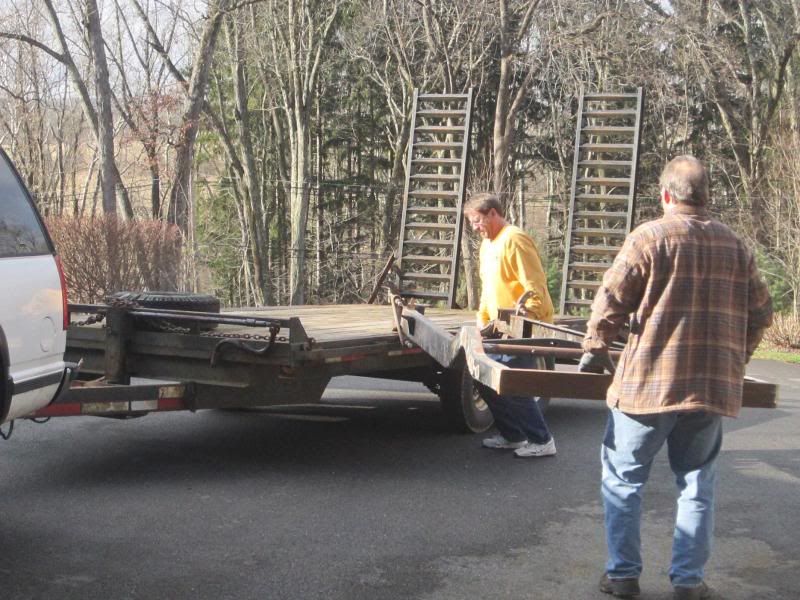 Should have it back by the end of the week!  Only other news to report is the engine shop continues to gather parts for the motor and has finished up the machine work on the head and installed the lumps in the intake ports. Things are moving kind of slow on my motor because this is the busy season for Larry's Power rebuilding race engines for the local circle track guys. For those of you not familiar with lump ports.......The inline six head was designed from the factory with the head bolt passing directly through the center of the intake port, thus restricting air flow. What the hell were the engineers at GM thinking when they designed that????? Soooo the fix is to cut the bolt boss out of the port and recess new shorter bolts into the lumps mounted to the floor of the port. Then insert a pipe plug in the hole at the top of the port where the old head bolt was. Here's a pic of my head showing the center divider removed and the lump installed. Supposedly all the dyno tests show a 20-30% increase in airflow through the port. We'll see as dyno day for this engine will be sometime in the spring. 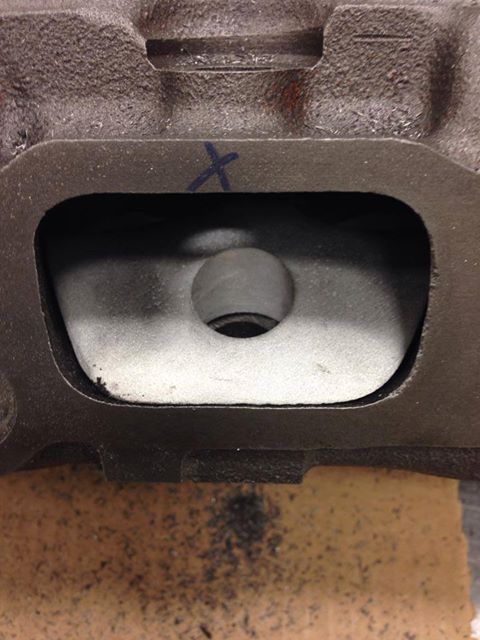 Here's the facebook link to Larry's Power if anyone in interested in a lot of cool pics and videos. https://www.facebook.com/pages/Larry...68904043122881 |
|
|

|
|
|
#24 |
|
Registered User
Join Date: Dec 2010
Location: washington NJ
Posts: 766
|
Re: 46 pickemup in NJ "the Rebuild"
Ok lets see if this works...................A little eye candy for all you machinists
https://www.facebook.com/photo.php?v=736140556399224 |
|
|

|
|
|
#25 |
|
Registered User
Join Date: Dec 2010
Location: washington NJ
Posts: 766
|
Re: 46 pickemup in NJ "the Rebuild"
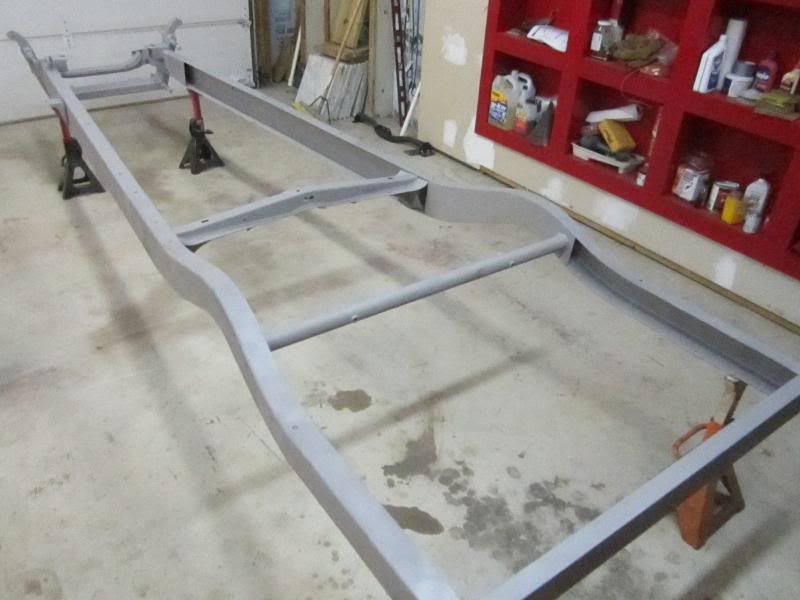
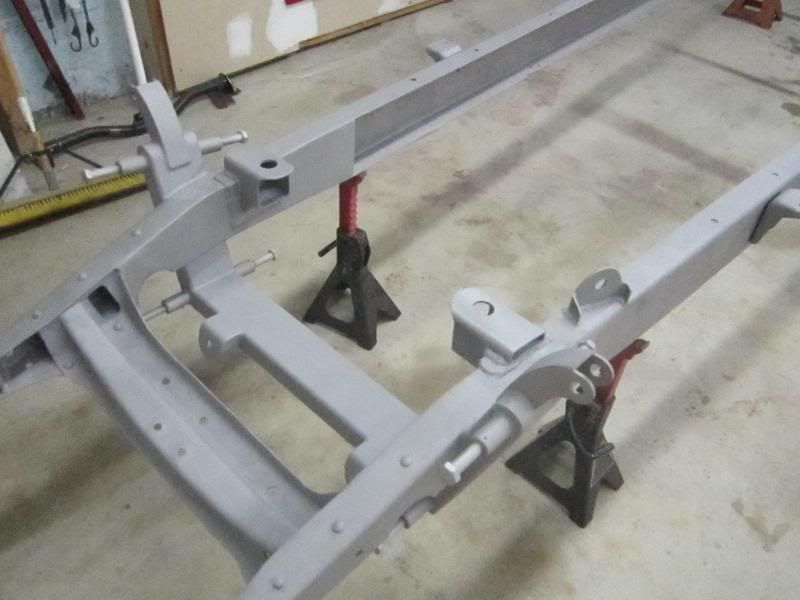
So I got the frame, brackets, bumpers, and floor board back from blasting. The frame has some minor pitting in spots, but it looks pretty good for something that is nearly 70 years old. I just have to go around and weld up some pin holes that I missed. Now I f I can only figure out a way to heat my garage I could move forward with painting before all the rust returns.
|
|
|

|
 |
| Bookmarks |
|
|