
 |
|
|
|
|
#1 |
|
Registered User
Join Date: Oct 2017
Location: Calgary, Alberta
Posts: 210
|
Re: 66 GMC Long to Short LS Swap
Thanks Notch! For a while there I kept thinking "what am I doing here, just find a new cab". Was a little overwhelming at first but I have learned a lot as I go. I just keep plugging away, little by little. I feel like have the worst of it behind me. Drivers side should go a lot smoother. Glad I put in the work to save this old truck.
|
|
|

|
|
|
#2 |
|
Registered User
Join Date: Oct 2017
Location: Calgary, Alberta
Posts: 210
|
Re: 66 GMC Long to Short LS Swap
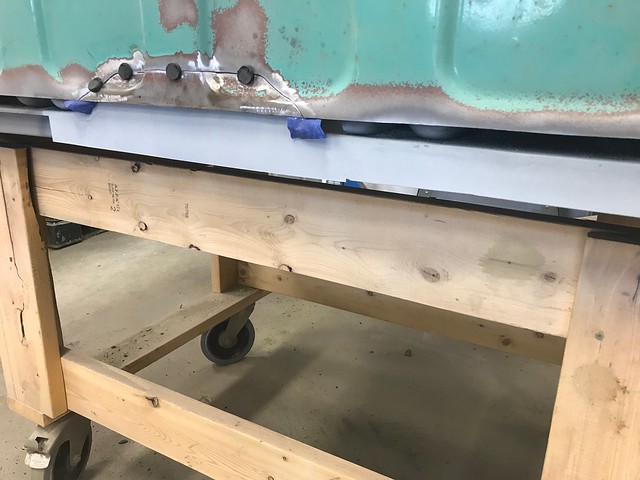
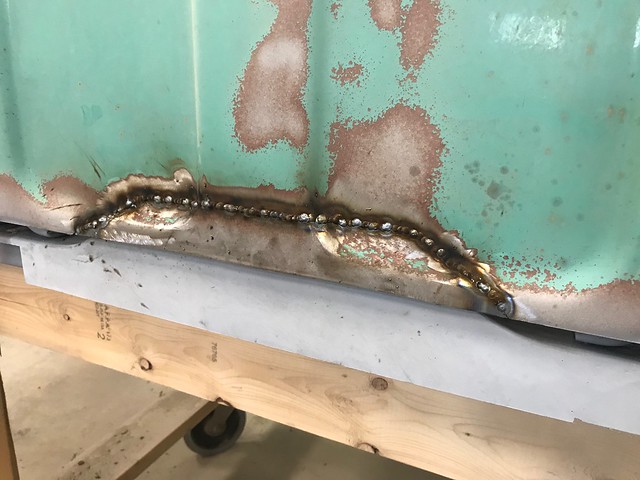
Replaced a bit more of the back of the floor pan. Had to cut another section off the back to get access to make the repair, then weld it back in
  Sliced the bottom back off the donor cab. Drivers cab corner is pretty good, but not so much for the passenger side. 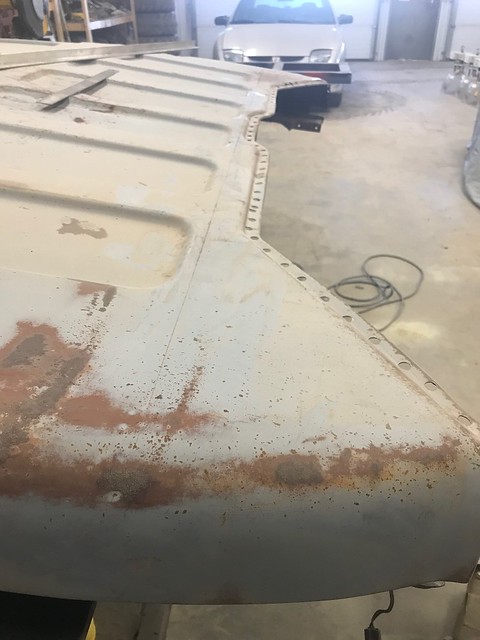  My original plan was to use a whole replacement cab corner, but after comparing it with the original I could see it was going to be a lot of work to reshape the replacement. I decided to use the one from my donor. I knocked out a bunch of dents and used a small piece from the patch panel 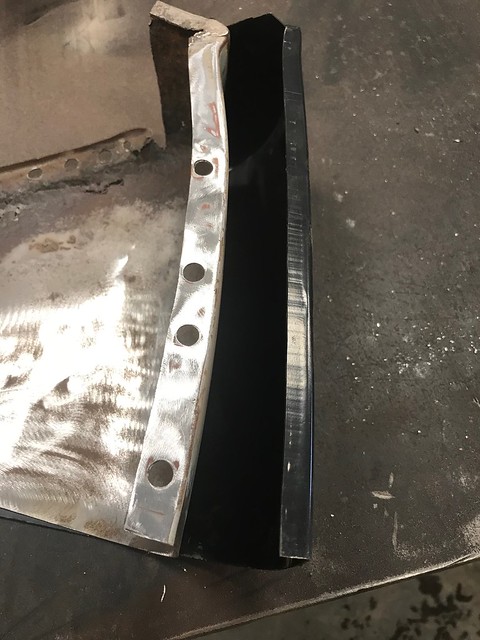    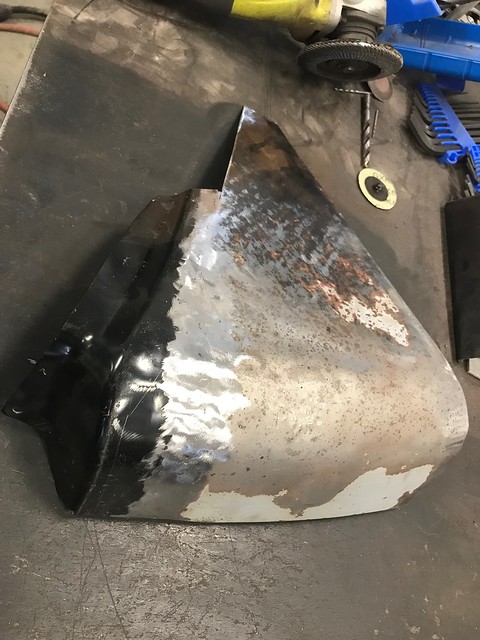 Hung the door and fit up the rocker. Started fitting the cab corner. Have to drill some holes for the spot welds and it will be ready to weld in.   Fit up the drivers side cab corner and the rest of the back. Looks like it will work well. Have to wait until I have all the drivers side floor and braces done before I weld this stuff in 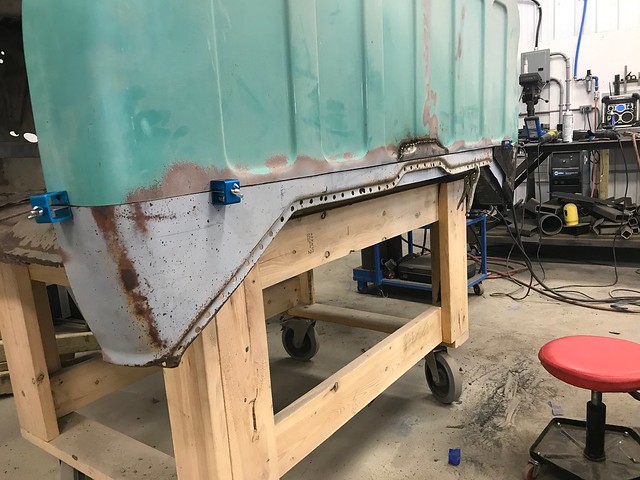
|
|
|

|
|
|
#3 |
|
Registered User
Join Date: Apr 2001
Location: DALLAS,TX
Posts: 22,031
|
Re: 66 GMC Long to Short LS Swap
Sucks the re-popped stuff is that far off. Lots of extra work sometimes....
Impressive effort on your part for sure!
__________________
67SWB-B.B.RetroRod 64SWB-Recycle 89CCDually-Driver/Tow Truck 99CCSWB Driver All Fleetsides @rattlecankustoms in IG Building a small, high rpm engine with the perfect bore, stroke and rod ratio is very impressive. It's like a highly skilled Morrocan sword fighter with a Damascus Steel Scimitar..... Cubic inches is like Indiana Jones with a cheap pistol. |
|
|

|
|
|
#4 |
|
Registered User
Join Date: Jul 2018
Location: Hollister, California
Posts: 230
|
Re: 66 GMC Long to Short LS Swap
Great progress Duncan.. keep up the great work
__________________
Check out my build here http://67-72chevytrucks.com/vboard/s...d.php?t=768039 She may not be the prom queen but at least she puts out.. |
|
|

|
|
|
#5 |
|
Registered User
Join Date: Oct 2017
Location: Calgary, Alberta
Posts: 210
|
Re: 66 GMC Long to Short LS Swap
Cab corner is welded in. Started working my way across the back of the cab. There is one small section that I couldn't salvage from the donor that I will have to fab.
 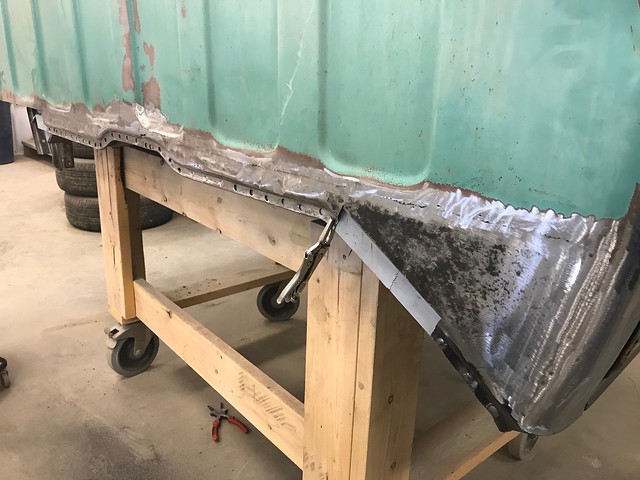  While I was welding along the back of the cab I ran into a pocket of aluminum which instantly melted and made a mess. No idea how or why it was there? 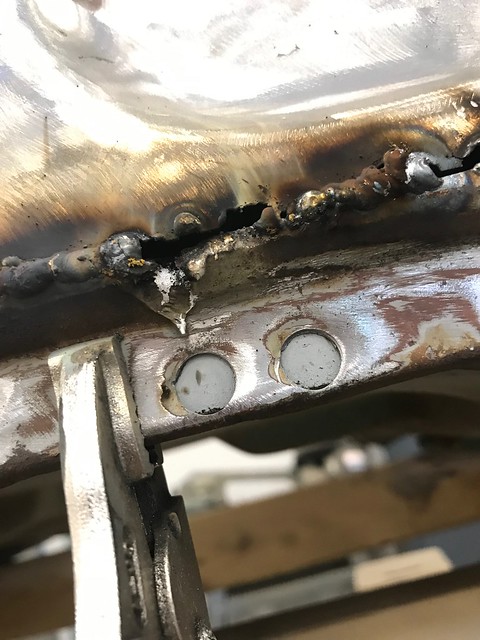 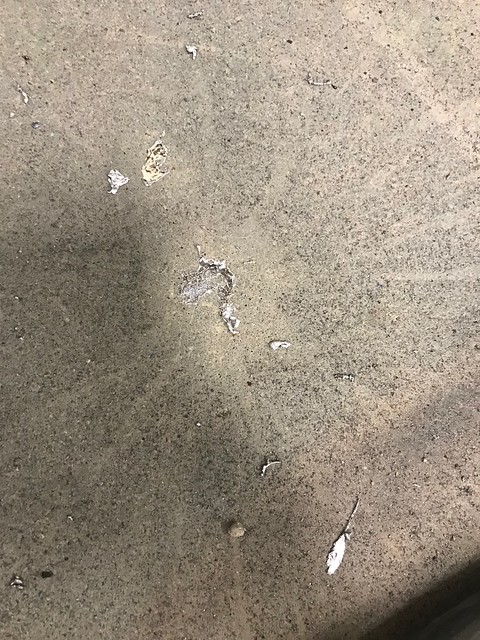
|
|
|

|
|
|
#6 |
|
60-66 Nut
  Join Date: Mar 2007
Location: Coeur d'Alene, Idaho
Posts: 23,250
|
Re: 66 GMC Long to Short LS Swap
That was most likely lead from an old repair back when lead was used. Nice work on the panel replacement and welding

__________________
Power Steering Box Adapter Plates For Sale HERE Power Brake Booster Adapter Brackets For Sale '63-'66 HERE and '67-'72 HERE and '60-'62 HERE and "60-'62 with clutch HERE Rear Disc Brake Brackets For Sale. Impala SS calipers HERE Camaro Calipers HERE D52 Calipers HERE 6 Lug HERE Hydroboost Mounting Plates HERE |
|
|

|
|
|
#7 |
|
Registered User
Join Date: Jan 2014
Location: Zenia , CA
Posts: 12
|
Re: 66 GMC Long to Short LS Swap
wow great job but that led is a bummer it will be another education for us to learn how many ways to fix that? what's your choice. cut it out past the led? won't the led contaminate the steel where it's tined to weld or the steel to thin if you grind to far. iv seen led .25" to 10" wide depending on who did the work not the work needed. Thanks for the story,the pictures,and the time.
|
|
|

|
|
|
#8 |
|
Registered User
Join Date: Oct 2017
Location: Calgary, Alberta
Posts: 210
|
Re: 66 GMC Long to Short LS Swap
Well I ordered all the patch panels to start working on the drivers side floor, pillar, kick panel, fire wall. After waiting three and a half weeks they finally show up and the floor pan is wrong, so back it goes and I'm waiting again. In the mean time I finished up the last piece on the back of the cab.
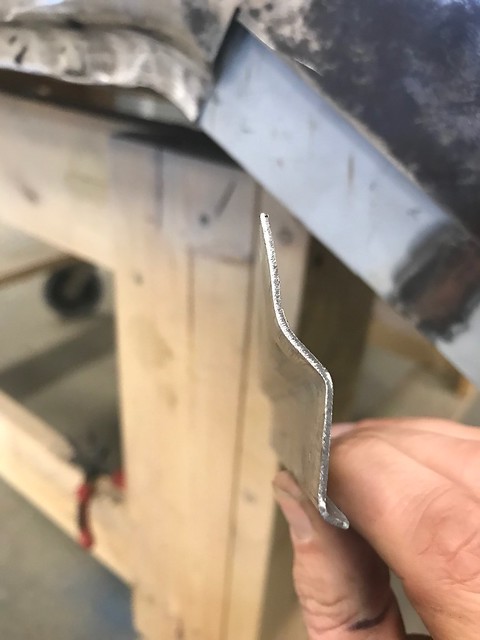  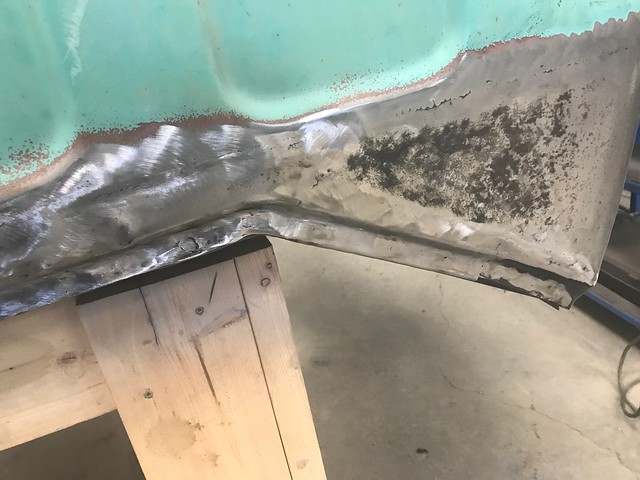 The area above the windshield where the seal sits is rotten on my cab. I've been searching for good deal on a cab to cut up and use to repair that area. Finally found one suitable for the repair, ended up getting a set of fenders as well. My fenders were beyond repair. Didn't really want to use repop's so I was happy to find this set. Small patch panels on the bottom and they will be good to go.   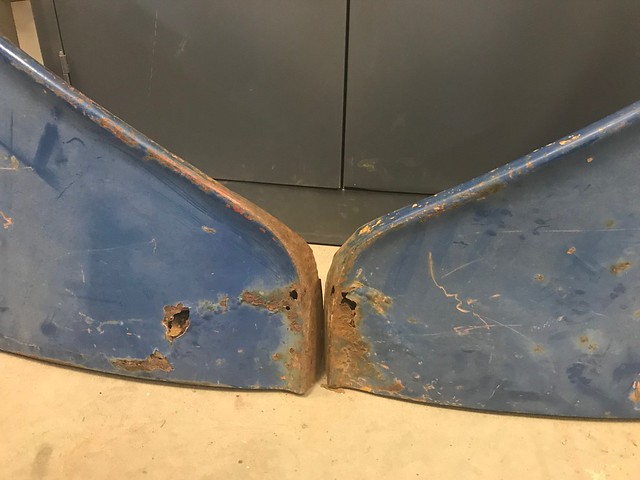 I've never been a fan of the GMC gauges, and since the donor cab is a chevy I decided to swap dashes. This will let me use the Dakota Digital set up. Got the GMC dash removed, will be able to take care of some rust that would have been impossible to get to with the dash in.  My cab hasn't been in good enough shape to move since I installed the LS into the chassis so I haven't been able to check that the cab fit. I dropped the donor cab on the chassis to save space in the shop. Motor has tons of clearance to the firewall, probably 2 1/2 inches plus. I think it looks kinda funny, would look better tucked back into the firewall a bit more. What do you guys think? 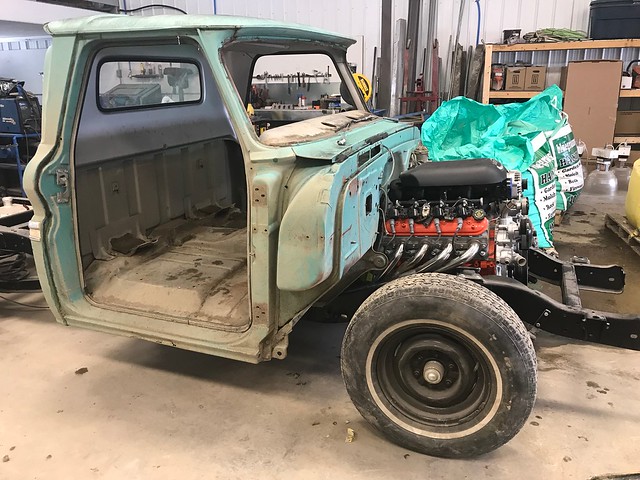 
|
|
|

|
|
|
#9 |
|
60-66 Nut
  Join Date: Mar 2007
Location: Coeur d'Alene, Idaho
Posts: 23,250
|
Re: 66 GMC Long to Short LS Swap
The farther back with the engine as you can is better for weight distribution.
__________________
Power Steering Box Adapter Plates For Sale HERE Power Brake Booster Adapter Brackets For Sale '63-'66 HERE and '67-'72 HERE and '60-'62 HERE and "60-'62 with clutch HERE Rear Disc Brake Brackets For Sale. Impala SS calipers HERE Camaro Calipers HERE D52 Calipers HERE 6 Lug HERE Hydroboost Mounting Plates HERE |
|
|

|
|
|
#10 |
|
I'm just glad to be here!
Join Date: Jan 2008
Location: Longview, TX
Posts: 4,788
|
Re: 66 GMC Long to Short LS Swap
While I agree with Captain, yours looks to be the same place as mine. Truck drives fine, but I have not driven it much and not at all over about 40 mph...
You can see it here in Post #67, not the best picture but looks about the same distance as yours. http://67-72chevytrucks.com/vboard/s...=726351&page=3
__________________
Karl  1965 Chevy Stepside(Grandpa's Old Blue) and (July 2015 Shop Build!)(2020, the Saga Continues) http://67-72chevytrucks.com/vboard/s...d.php?t=372424 The LST Challenge: http://67-72chevytrucks.com/vboard/s...=1#post7812257 Korbin's 1st Square: "Sunburn" http://67-72chevytrucks.com/vboard/s...d.php?t=418618 1985 GMC Sierra: "White Trash", Korbin's 2nd now... http://67-72chevytrucks.com/vboard/s...d.php?t=632305 Henry - 1984 Chevrolet, Owen's 1st Square |
|
|

|
|
|
#11 |
|
Registered User
Join Date: Oct 2017
Location: Calgary, Alberta
Posts: 210
|
Re: 66 GMC Long to Short LS Swap
Got to work on the drivers side after receiving the correct floor pan. Fit up and welded in the front lower pillar and kick panel pieces. Had to replace a section of the front to rear brace.
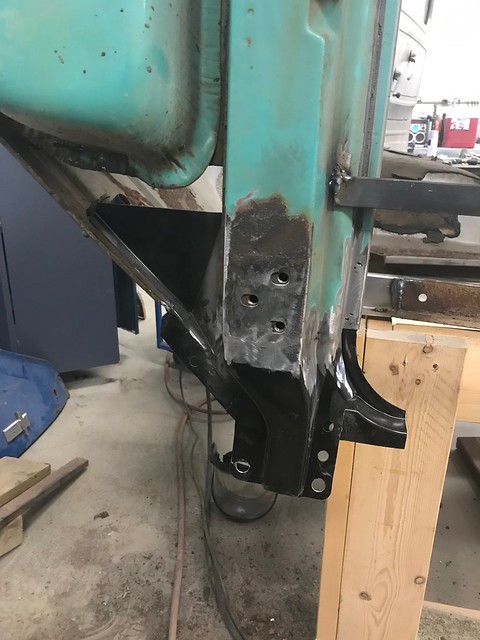 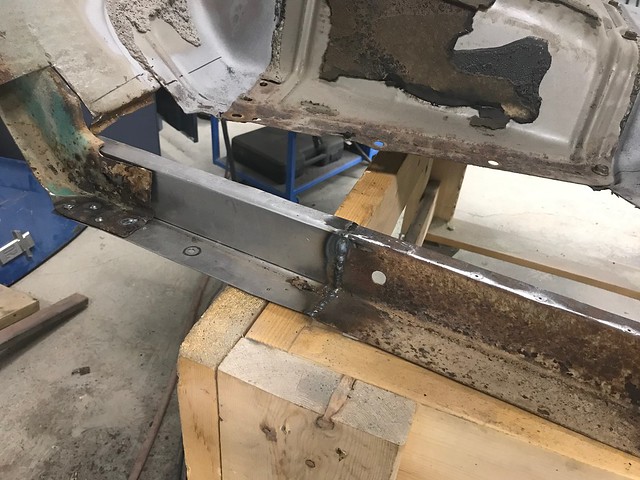 Started fitting up the floor pieces and ran into alignment issues. Had to take a section out of the outer floor piece on one end to get the depressed groove to line up. Then had to add it back in on the other side. What a pain in the butt!! 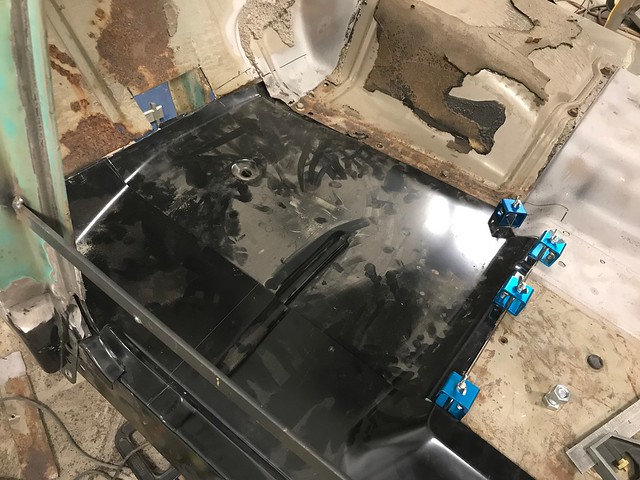 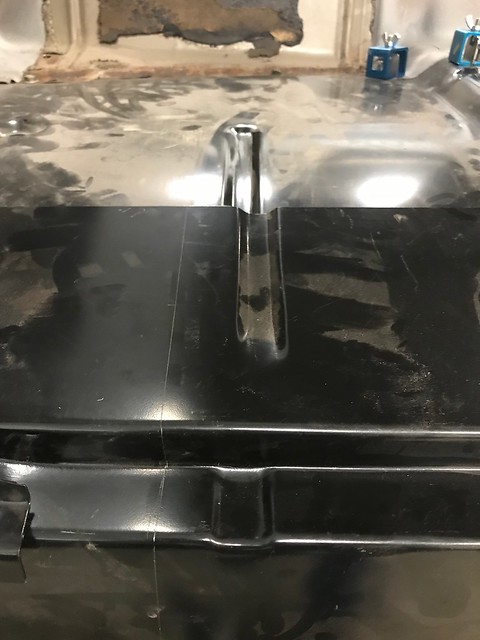  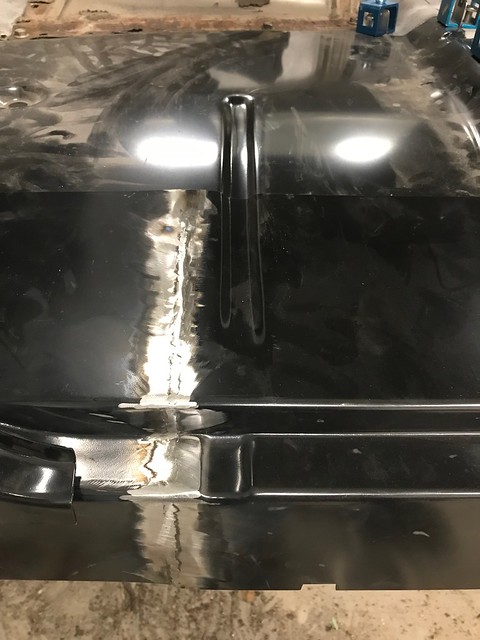 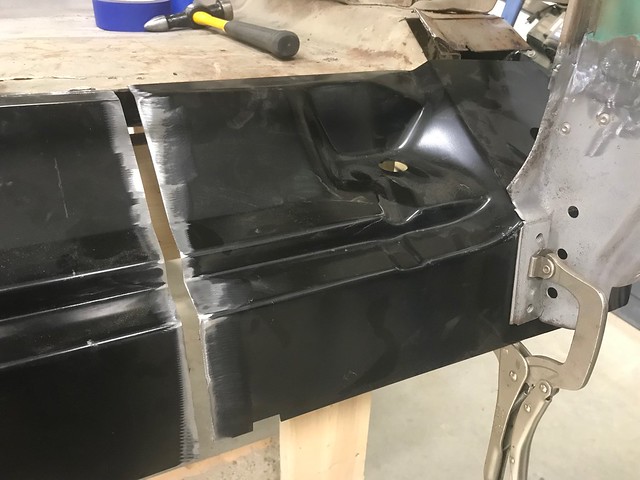 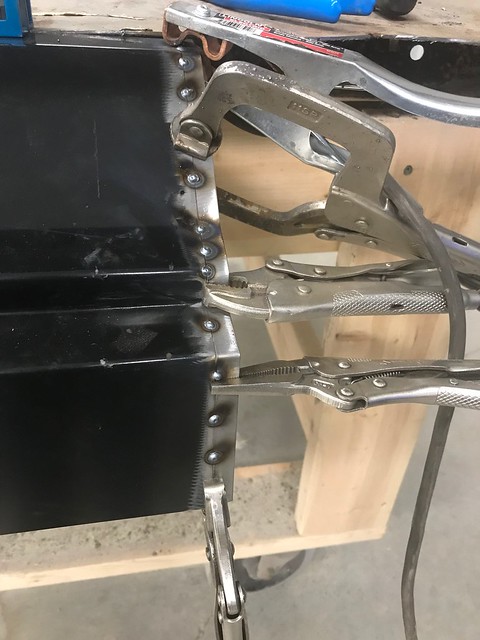 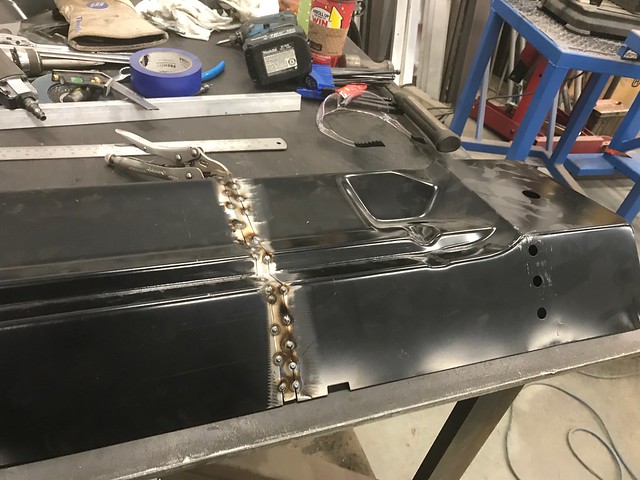 Finished up slicing and got the outer floor welded in. Got the front brace fit up and ready for welding as well. 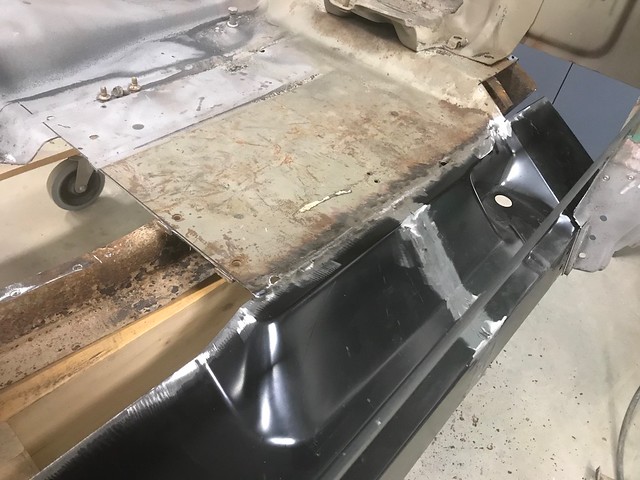 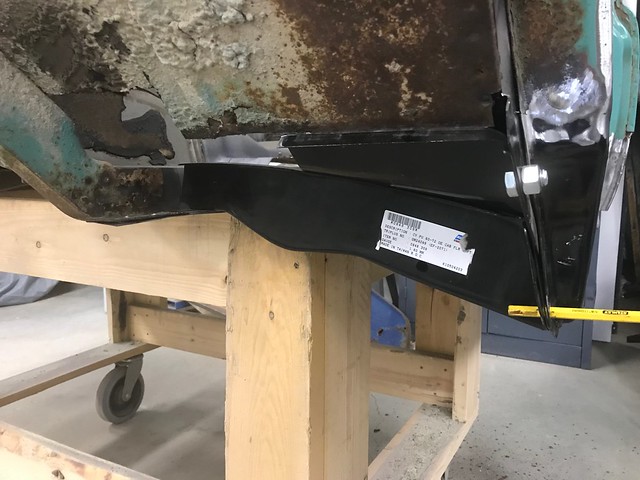 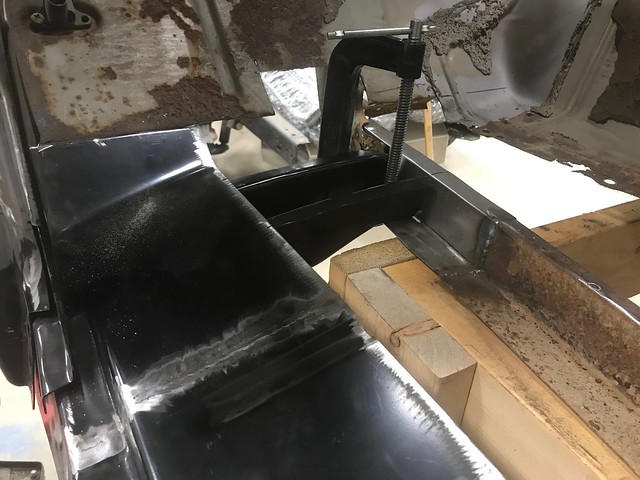
|
|
|

|
|
|
#12 |
|
Registered User
Join Date: Jan 2014
Location: Zenia , CA
Posts: 12
|
Re: 66 GMC Long to Short LS Swap
I like your commitment to what should be.
|
|
|

|
|
|
#13 |
|
Registered User
Join Date: Oct 2017
Location: Calgary, Alberta
Posts: 210
|
Re: 66 GMC Long to Short LS Swap
Truck time has been pretty limited lately but I keep plugging away bit by bit. Finished up the rest of the drivers floor and the cab braces. Had to remove the gas tank bracket to fix some rust underneath. Coated inside the existing braces with rust encapsulator.
[IMG]  [IMG] [IMG] [IMG] [IMG] [IMG] [IMG] [IMG] [IMG] Drilled out all the spot welds and removed the dash from my chevy donor cab to swap into my GMC. Also cut out the area above the windshield to be used as a patch panel for my cab. [IMG]  [IMG] [IMG] [IMG] [IMG] [IMG] [IMG] [IMG] [IMG] [IMG] [IMG]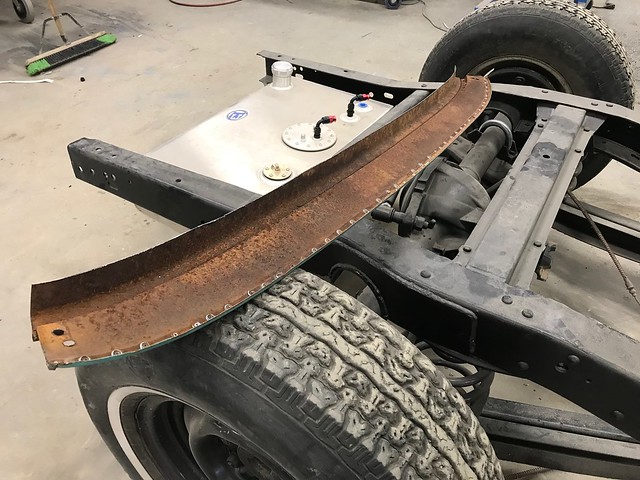 All this rust repair is starting to get discouraging so I am going to take a break from it for a while and work on some mechanical stuff. Going to rebuild the rear end with a posi carrier, new ring and pinion, and all new bearings. Adding a rear disk brake kit from CPP. |
|
|

|
|
|
#14 |
|
But Found Her 25yrs Later!
Join Date: Oct 2010
Location: Oregon City, Oregon
Posts: 10,528
|
Re: 66 GMC Long to Short LS Swap
Quote:
. I feel you on getting burned out on certain tasks. You're doing beautiful work.
__________________
I lost my 65 - Found it 25 years later: http://67-72chevytrucks.com/vboard/s...d.php?t=426650 66 C20 Service Truck: http://67-72chevytrucks.com/vboard/s...d.php?t=428035 |
|
|

|
|
|
#15 |
|
Registered User
Join Date: Oct 2017
Location: Calgary, Alberta
Posts: 210
|
Re: 66 GMC Long to Short LS Swap
More so the Chevy gauges, but this was the easiest way to make the swap
|
|
|

|
|
|
#16 |
|
Registered User
Join Date: Oct 2017
Location: Calgary, Alberta
Posts: 210
|
Re: 66 GMC Long to Short LS Swap
Moving along with the rear end rebuild. Made myself a drift out of some parts that were laying around, knocked out the old axle bearings and replaced them.
  Installed a rear disk brake kit from CPP. Everything fit pretty well except the brake pads on one side. They are too thick to fit over the rotor, will have to machine off a bit of the pad to fit.    New pinion gear installed, had to fab up a tool to hold the yoke so i could torque the nut.   Got the new posi carrier and 3:73 gears installed and set the back lash  Got the driveline angles sorted out. Needed to raise the trans up an inch and a half to match the pinion angle at 5 degrees. Had a new one piece drive shaft built, had to modify the cross member to provide clearance. Still have to finish welding it up   Waiting on a radiator that I ordered months ago from RnD. Took 6 weeks to ship, and now UPS has lost it. |
|
|

|
|
|
#17 |
|
Registered User
Join Date: Aug 2009
Location: Lacombe, Alberta
Posts: 335
|
Re: 66 GMC Long to Short LS Swap
Great progress. What are you using for drilling the spot welds?
|
|
|

|
|
|
#18 |
|
Registered User
Join Date: Oct 2017
Location: Calgary, Alberta
Posts: 210
|
Re: 66 GMC Long to Short LS Swap
Thanks Notch, using this set i bought off Amazon. Still on the first cutter. Must have drilled at least 150 spot welded so far.
https://www.amazon.ca/gp/product/B07...?ie=UTF8&psc=1 |
|
|

|
|
|
#19 |
|
Registered User
Join Date: Oct 2017
Location: Calgary, Alberta
Posts: 210
|
Re: 66 GMC Long to Short LS Swap
Picked up a set of GM transit wheels along with some cheap take off tires to mount on them for now. Needed a bigger wheel to clear the disc brakes. I wanted to use wide white wall tires, but they are so limited in sizes. Saw this done on another build by 19SIKtySix and loved the idea. Painted outside of the wheel to mimic the wide white look with a low profile tire. I will eventually get them powder coated.
   
|
|
|

|
|
|
#20 |
|
Registered User
Join Date: Oct 2017
Location: Calgary, Alberta
Posts: 210
|
Re: 66 GMC Long to Short LS Swap
Got some time to work on the truck today. Plumbed in the fuel system with stainless braided PTFE lines and AN fittings from a local company called Hot Rod Fuel Hose.Really nice stuff!
     Found someone local to reflash my ECU  Pulled the rear end and started tearing it down. Was hoping to find 3.73 gears but they were 4.10. Ordered a 3.73 set to go with the Yukon Duragrip carrier and master rebuild kit. Removed the drum brakes to make way for the new CPP rear brake kit. The passenger side rear drum was worn all the way through, nothing left!   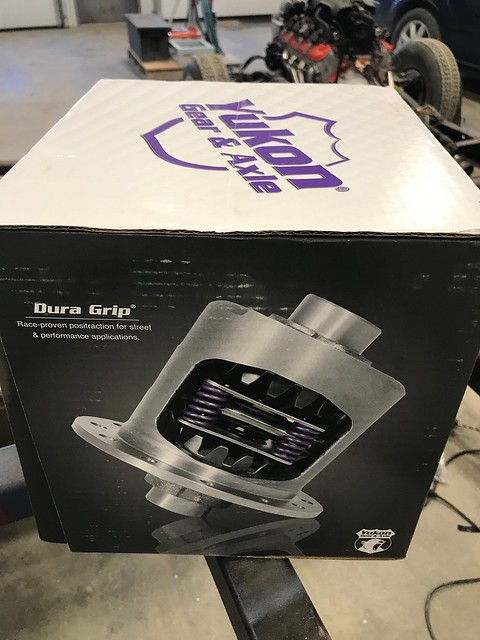 
Last edited by Duncan K; 06-16-2019 at 04:45 PM. |
|
|

|
|
|
#21 |
|
Moderator
  Join Date: Aug 2011
Location: China Spring, TX
Posts: 7,280
|
Re: 66 GMC Long to Short LS Swap
That's some great work your doing, you got talent.

__________________
Master Chief, US Navy, Retired 1964 C10 Step-side Short Bed - In Progress 2009 2500HD Duramax LTZ 1948 GMC Panel 1956 Big Window Stepside 1953 5 Window Chevy Stepside 1932 Coupe New Seat Foam for Bench Seats? |
|
|

|
|
|
#22 |
|
Registered User
Join Date: Aug 2009
Location: Lacombe, Alberta
Posts: 335
|
Re: 66 GMC Long to Short LS Swap
Sorry about the rad. Why so long for RnD to ship?
|
|
|

|
|
|
#23 |
|
Registered User
Join Date: Oct 2017
Location: Calgary, Alberta
Posts: 210
|
Re: 66 GMC Long to Short LS Swap
Busy I guess, was told it would be around 3 weeks, ended up being 6. Who knows how long it will be now?
|
|
|

|
|
|
#24 |
|
Registered User
Join Date: Mar 2015
Location: Washington State
Posts: 1,651
|
Re: 66 GMC Long to Short LS Swap
Love the build! I am starting my "66 build this weekend. I just completed my full rebuild LS motor "69 C10, now "66 with 383 stroker and M20 4-Speed. Thanks for all the updates! I appreciate your work and helps me with mine.
|
|
|

|
|
|
#25 |
|
Registered User
Join Date: Oct 2017
Location: Calgary, Alberta
Posts: 210
|
Re: 66 GMC Long to Short LS Swap
Not a whole lot of progress in the last few months. I finished welding up the hoop over the drive shaft. Also chopped an inch and a half out of the trans crossmember to get my angle right.
I've been hoping to get the motor fired up so I started to tackle the last little loose ends, battery, air intake, plugged off the extra return port on the power steering pump(hydroboost), got all the fluids filled. I built a temporary pod for a power switch, push button start, a fuse block and an oil pressure gauge. Powered everything up, pushed the start button, it cranked but not even a sputter. Hooked up a scanner and it was throwing a code because my ECT wasn't hooked up. The harness from the donor is very strange and doesn't match with any pin out or wiring diagram that I could find. I couldn't figure out how or where the ECT sensor wiring got to the ECU (have a whole other thread on this). Decided this harness and ECU had to get replaced. Only one I could find locally was drive by wire so I had to get the pedal, tac module, and a DBW throttle body to match it. Round 2 on the harness rework.   I paid a guy to reflash the first ECU, but after reading a great thread by Gregski in the LS Swap section I decided to take the plunge and buy HPTuners and reflash this one myself. I made a trip to the junk yard and picked up a OBD2 port and some ECU plugs to make a bench harness so I could make changes to the ECU out of the truck. Plugged in and fired up HPTuners, did the simple stuff like removing Vats and all the emissions stuff.    Installed the new harness and ECU, pushed the button, still cranks and no start. Did some trouble shooting, injectors getting signal, but no spark. Ended up finding a ground for the coils that I forgot to hook up. Grounded that to the block, now I have spark but still doesn't even sputter. Checked for fuel, have pressure before the regulator but not a drop on the other side. Stopped by a few parts places today but couldn't find a replacement. Getting one from a friend so fingers crossed I'll be firing it up tomorrow!! I figured that if the regulator is plugged solid I should probably clean the injectors. They are getting a bath in my ultrasonic cleaner and some seafoam.  After almost 5 months I finally got my radiator from RnD. Took 6 weeks to ship, then UPS lost it, then found it but the fan was damaged, shipped it back to RnD to be replaced and took over a month to finish the claim so it could be shipped out again. FedEx had it at my door a week later! Long wait but its a very good looking product. 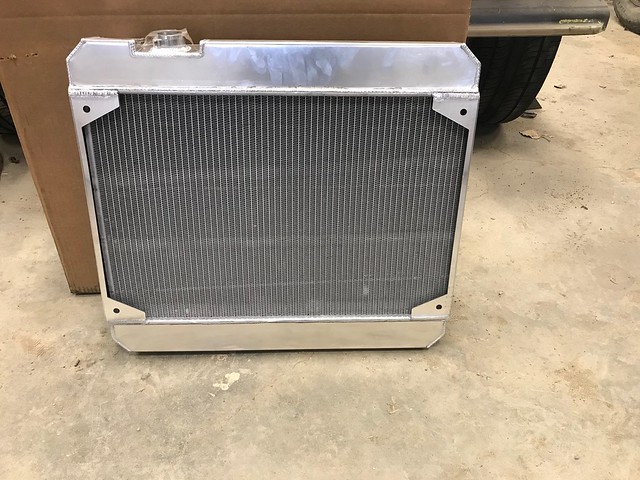 
|
|
|

|
 |
| Bookmarks |
|
|