
 |
|
|
#101 |
|
Registered User
Join Date: Mar 2012
Location: Hooper Ut
Posts: 466
|
Re: My own build thread
Thanks coulter!
Ok, so I've been staying busy. I made all the supports for the bed and welded then on. We mounted the bed and got it to sit exactly where we wanted it. We also mounted the rear bumper and tacked on the bumper supports. I still have no clue what bumper this came off of. I'm thinking its a 70s C10 bumper but whatever it is it fits the truck really well. It took me awhile to cut off all the crap the PO tried to weld. These welds were horrible, I have no idea how this bumper didn't fall off. Here's the old brackets 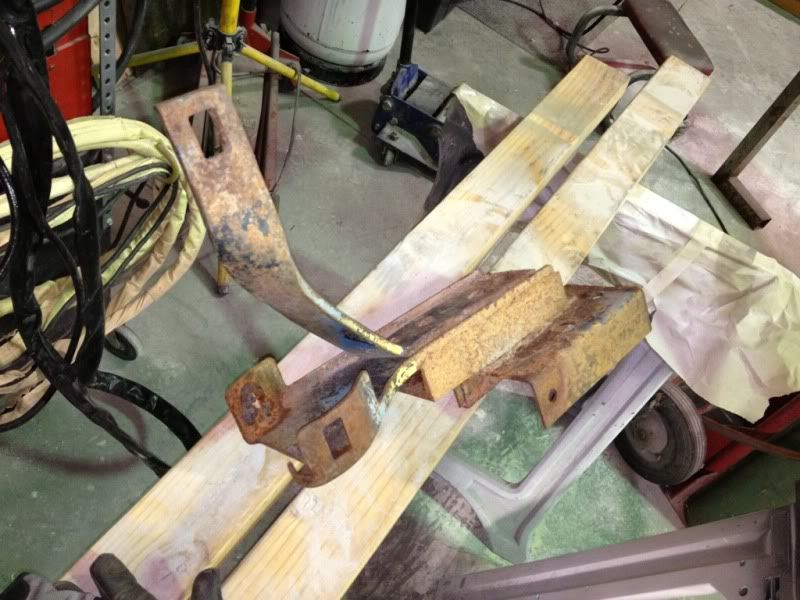 Another shot, this type of stuff scares me 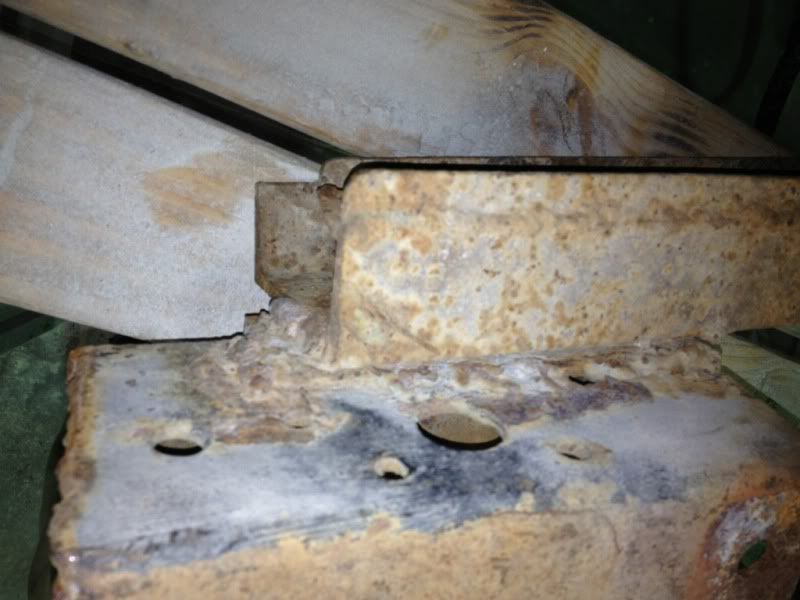 Here's the bumper mounted, fits the truck well I think 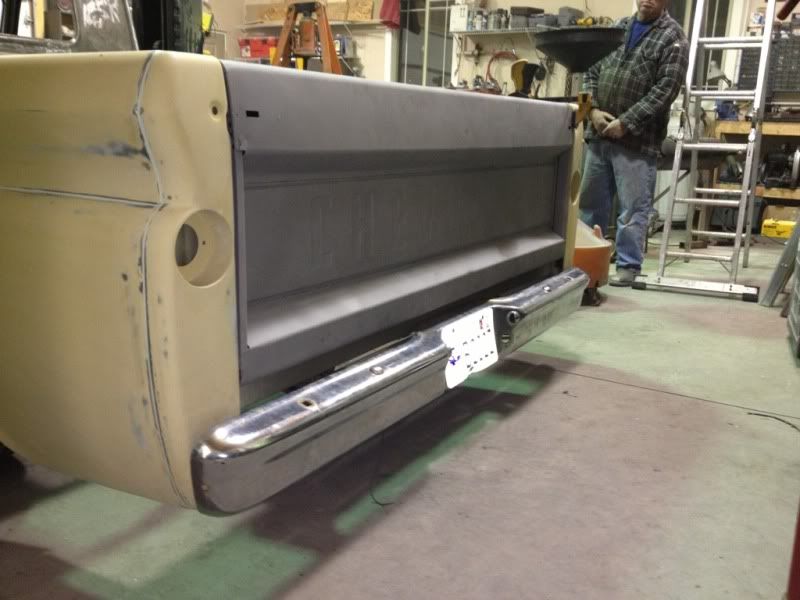 Here's another shot 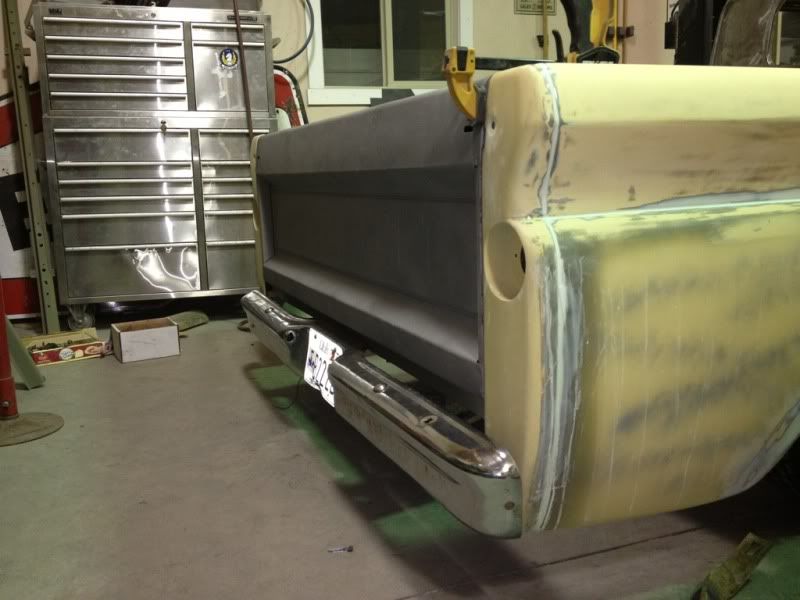 Tonight I'm going to finish welding up the bumper brackets, I cut off most of the crap the PO welded together and re-welded everything to make it safe. Then I need to bolt up the front bumper and make sure it fits nicely. Once that is complete we are going to tear the truck back apart so I can paint the frame with POR 15. Once that is complete then we can finish the few spots of body work left and start blocking everything out so I can finally paint this damn thing!  Posted via Mobile Device |
|
|

|
|
|
#102 |
|
Registered User
Join Date: Mar 2012
Location: Hooper Ut
Posts: 466
|
Re: My own build thread
After searching for hours I figured out that the bumper is 64-72 Ford F100 style side rear bumper. Not too sure I'm happy about putting a Ford part on this but I guess I'm putting pontiac tail lights in it so... whatever haha! I think it fits the truck well.
|
|
|

|
|
|
#103 |
|
Registered User
Join Date: Feb 2012
Location: Friendswood, TX
Posts: 45
|
Re: My own build thread
Hey zipp, I just read through your build and I gotta say, your fab skills are very impressive. I had a question about your steering set up. It looks like the steering shaft is awfully close to the upper arm with the truck aired up. Does it hit when you lower the truck? I'm using a 90 burb as a donor to do a 350/700R4 swap and am trying to figure out how I am going to do the steering. I can switch over the burb steering or try and make my manual rack work. Your input is appreciated.
My truck is bagged and has pancaked crossmember. Keep up the awesome work man. Truck is gonna kick a$$ when it's done. |
|
|

|
|
|
#104 |
|
Registered User
Join Date: Mar 2012
Location: Hooper Ut
Posts: 466
|
Re: My own build thread
Yes the steering clears by about 1/2 inch. I made sure that when I welded the universals in I made sure not to weld them above the uppers. If I would have put the universals there it wouldn't have cleared but honestly it only would hit with the truck aired out anyway and you can't drive like that anyway. I'm not sure but it could be a problem if you put large wheels on and did the same things that I did but I doubt it.
Thank you for the compliments also! Sometimes I don't feel like I'm doing things well enough and it's nice to know people think your doing nice work sometimes! Posted via Mobile Device |
|
|

|
|
|
#105 |
|
Registered User
Join Date: Mar 2012
Location: Hooper Ut
Posts: 466
|
Re: My own build thread
I haven't posted in awhile because the progress I've made is mostly just tying up loose ends etc. I've done quite a bit I just haven't taken many pictures like I should have. I ended up wiping off all the spray balm I painted the front end with and repainting it with POR15. I found out real quick that it sucks getting that crap in your eyes... I was wearing safety glasses but I walked under the frame "the trucks on my Dads lift" and some of it dripped down inbetween my glasses and into my eye... I got it out but it looks like I have eye liner on... haha!
I also welded in the L angle to move the bed floor up to cover the C notch. It's going slowly but we are making progress. I ran into some problems, I never tried to take the rear wheels off with the bed on until last week and found out that I couldn't get them out without taking the rear shocks and the bags out... So I ended up having to bend the tops of the wheel well lip up to make enough room. It's still really tight be at least I can get the wheels out now. I'm assuming that is why most of you guys put the bags on the trailing arms to get more extension, you live and you learn right? I will try and take more pictures tonight, I also finished welding up the bumper brackets. This week I plan on finishing painting the frame and my old man is going to finish the body work so we can get this damn thing finished some time this year... "I hope" haha. |
|
|

|
|
|
#106 |
|
Registered User
Join Date: Feb 2011
Location: muskogee, ok
Posts: 1,091
|
Re: My own build thread
nice man glad you getting some work done.. even though there are no pics...keep it up.. and ya my truck has to be all the way up to be able to get my wheels off the rear.. its still a really tight fit
__________________
 bagged 66 longbed build http://67-72chevytrucks.com/vboard/s...d.php?t=449548 my favorite colors.. black, rust, and shiny!!!! instagram: @coulter918 |
|
|

|
|
|
#107 |
|
Registered User
Join Date: Aug 2012
Location: Tooele, Utah
Posts: 327
|
Re: My own build thread
Flat tire= call AAA and have them take it home for you! Glad your getting stuff done in this warm spell we are having....
__________________
1936 Chevrolet 1/2t 1964 Chevrolet C10 1964 Chevrolet C10 (sons) 1965 Chevrolet K10 Suburban 1969 Chevrolet C10 1937 Plymouth P4 |
|
|

|
|
|
#108 |
|
Registered User
Join Date: Mar 2012
Location: Hooper Ut
Posts: 466
|
Re: My own build thread
Ok, so here's my update... I need to stop screwing off and going snow mobiling every weekend, lmao!
Here is the frame with the POR15 on it, nice stuff 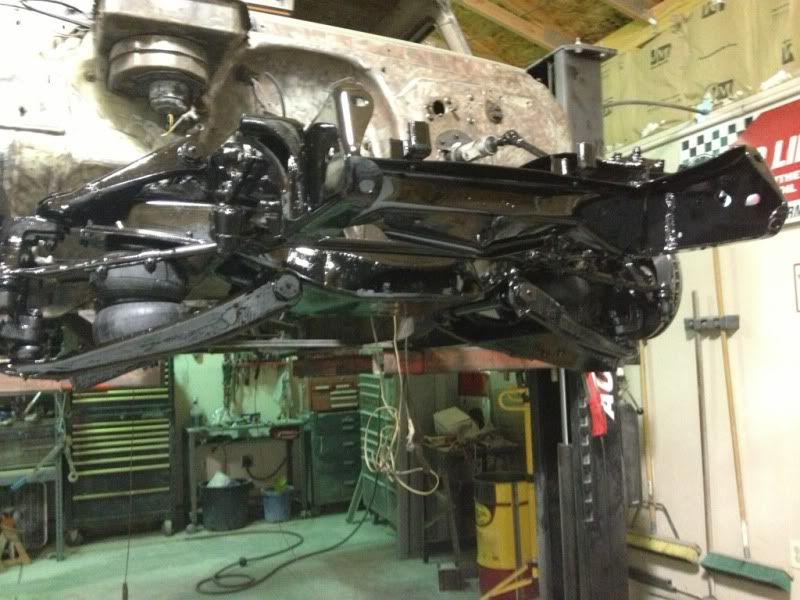 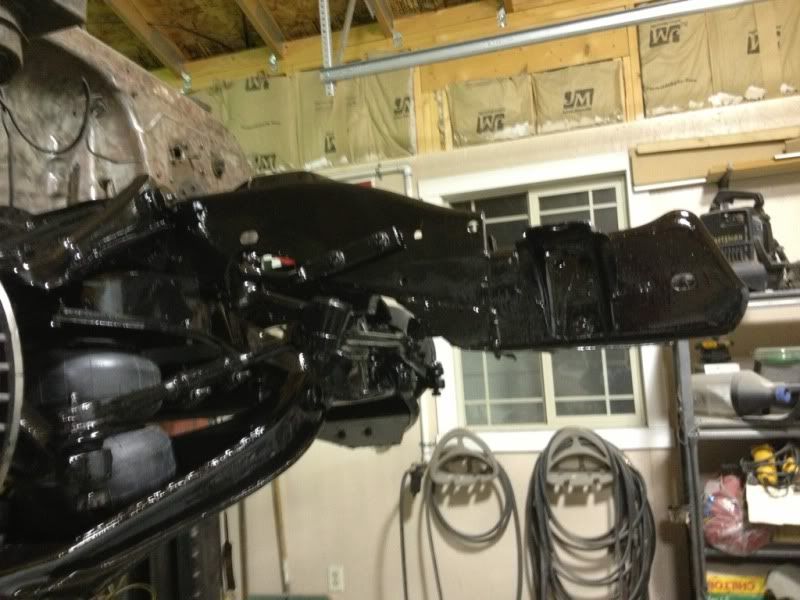 Here's a crappy one of the rear bumper brackets, I wish I had the right metal to make them look better but once I get paint on it and the truck is on the road no one will see it. I was more concearned with making it safe because the PO was no welder... lol 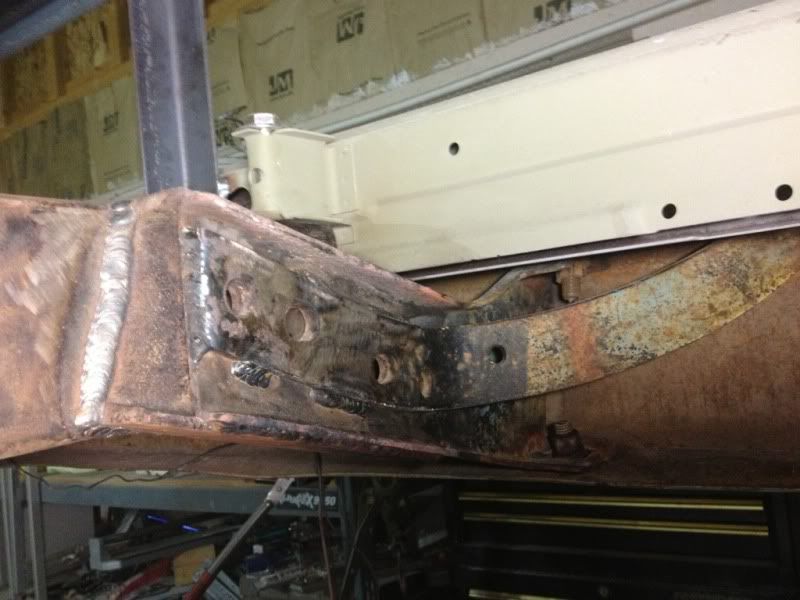 Hopefully this weekend we make some real progress, the old man is getting pissed because his car is out in the snow... lol Now, if I can just talk him into chopping the top on his! 
|
|
|

|
|
|
#109 |
|
Registered User
Join Date: Mar 2012
Location: Hooper Ut
Posts: 466
|
Re: My own build thread
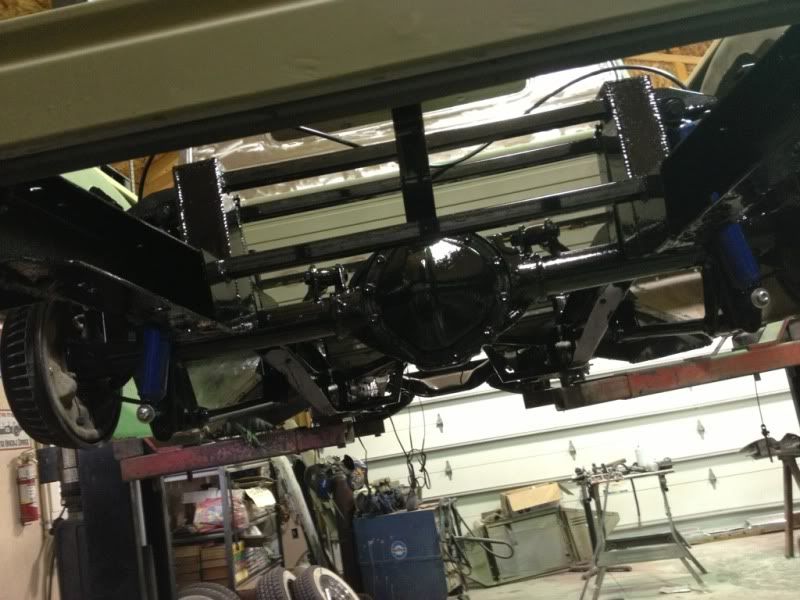
Got the frame painted today! Feels good to make this progress finally.
 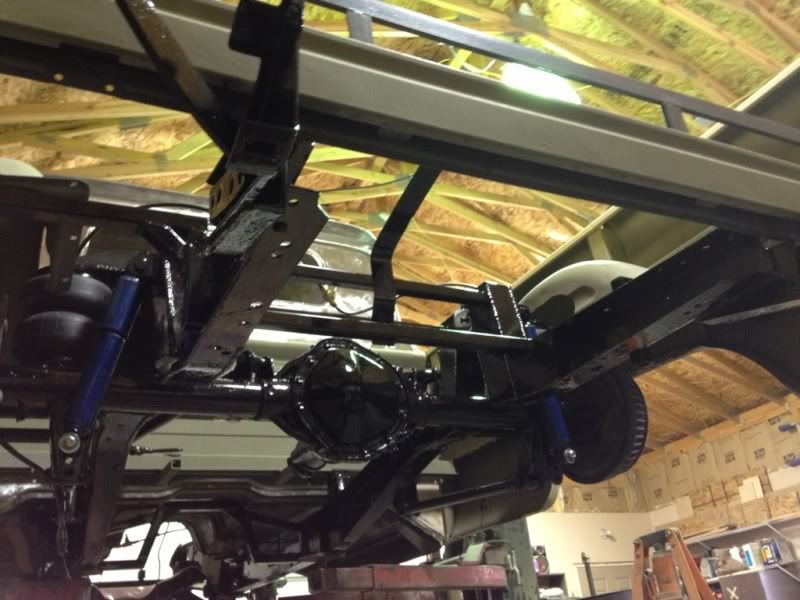 Posted via Mobile Device |
|
|

|
|
|
#110 |
|
Registered User
Join Date: Aug 2012
Location: Smithfield rhode island
Posts: 722
|
Re: My own build thread
Looking good! Sure it feels good to have that frame all painted. Getting mine all ready as we speak can't wait. I have a hard time getting out to work on my truck with one kid never mind 6, more power to ya l
Posted via Mobile Device
__________________
My frame Layin 63 short bed project  http://67-72chevytrucks.com/vboard/s...d.php?t=551353 |
|
|

|
|
|
#111 |
|
Registered User
Join Date: Mar 2012
Location: Hooper Ut
Posts: 466
|
Re: My own build thread
To be fair we usually don't have them all. The oldest is 20 and just moved out and the youngest is 9 so they usually keep themselves busy. My wife is a saint, she puts up with me spending a lot of time building stuff.
I spent the majority of the day yesterday stripping all the old paint out of the door jam on one of the doors and treating the surface rust on the bottom of the door. The PO decided to put the door panel on with an entire tube of white bathroom caulk... That was fun too... Sigh lmao. I understand that not everyone is a mechanic but seriously??? A whole tube of caulk? I should have taken pictures, it was a mess and it took hours to get it all off... I just hope I don't have a lot of issues when I paint it now, silicone and paint = no bueno! Posted via Mobile Device |
|
|

|
|
|
#112 |
|
Registered User
Join Date: Mar 2012
Location: Hooper Ut
Posts: 466
|
Re: My own build thread
I'm trying like hell to get this thing in paint by next weekend but its not looking like that's Gonna happen. Here's what I've done the last few weeks
Finished final sanding the Pontiac tail lights. 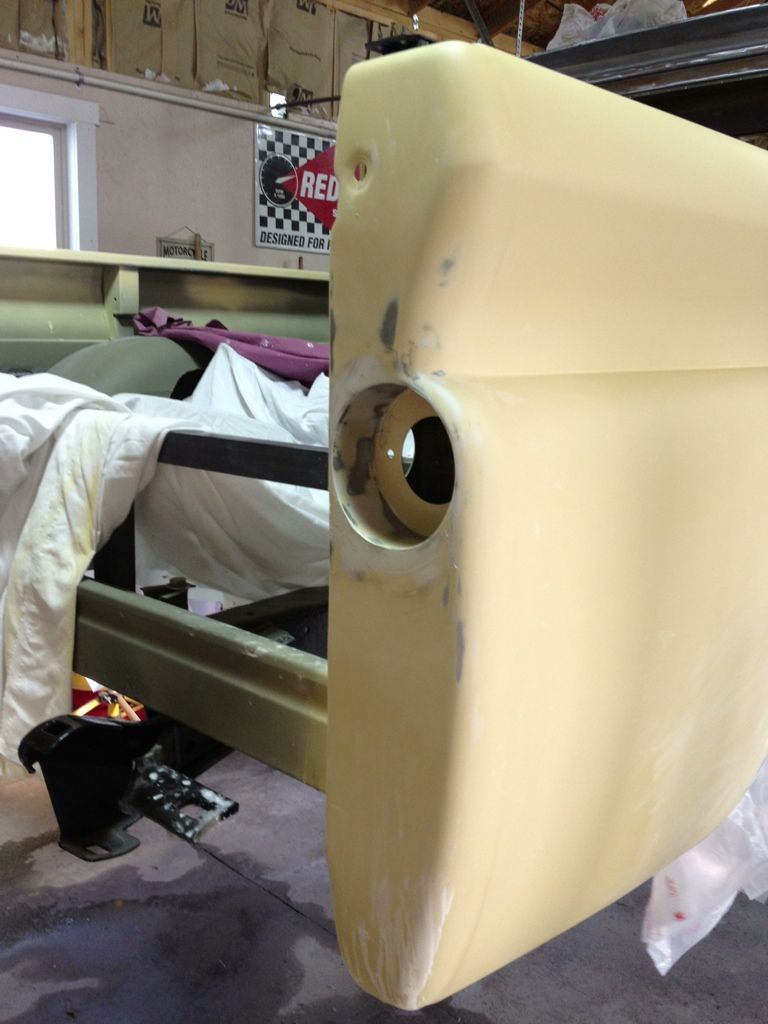 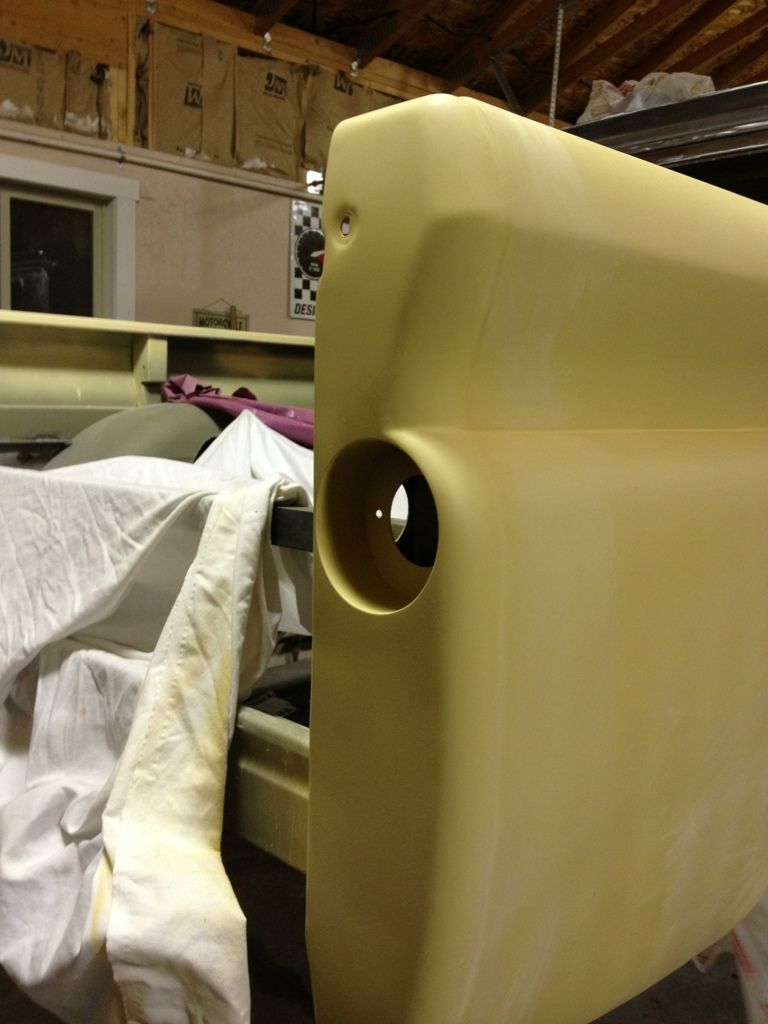 I made the panel to hide under the raised floor 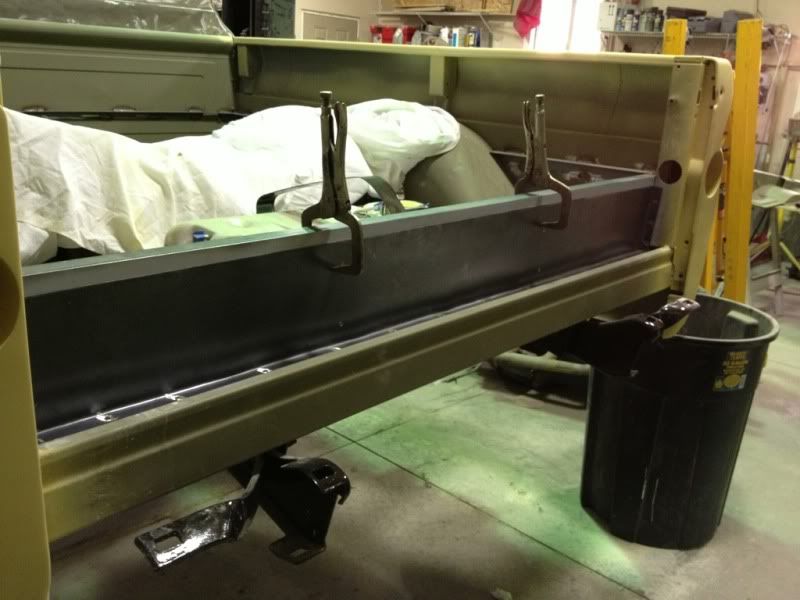 My metal brake is only 3 feet long so I had to use this... Not how I wanted to do it but this worked and it actually bent it really nice. 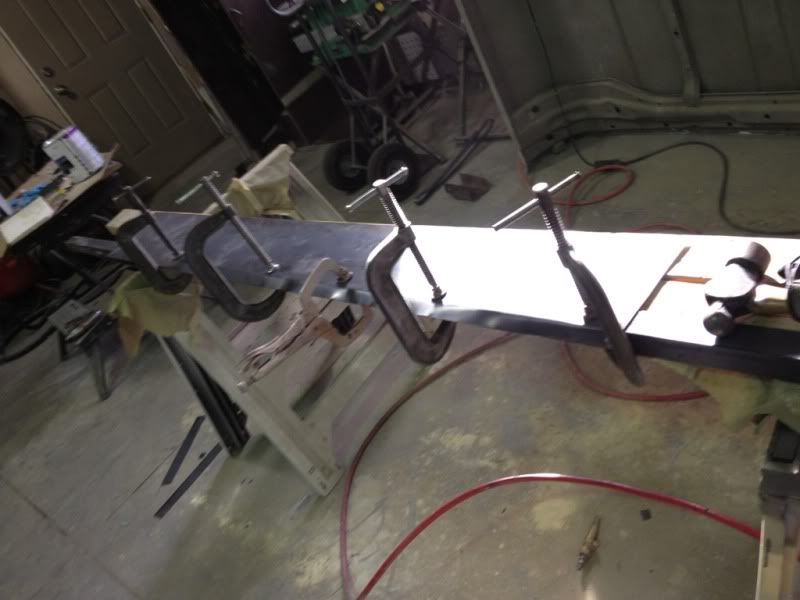 Here's the panel welded in. 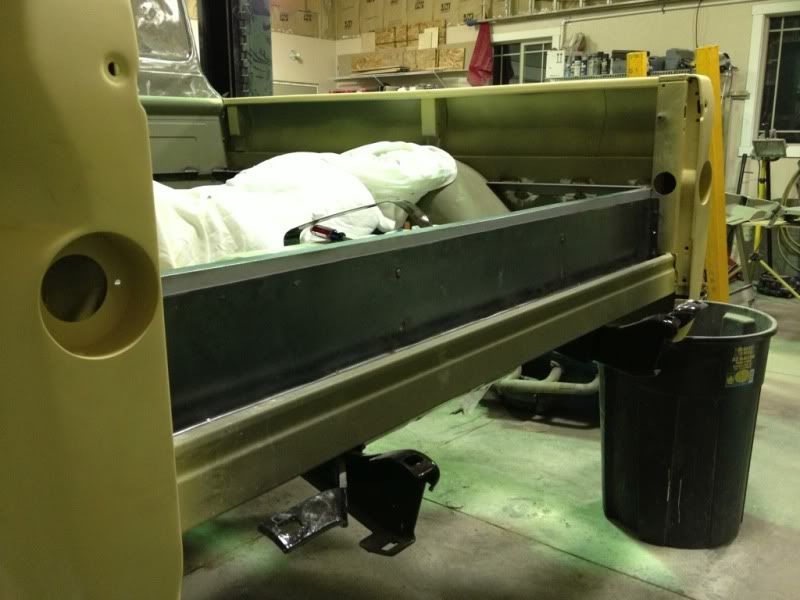 We are getting there, the bed is almost finished and the body work is done on it, the doors are ready for paint. The inner fenders, hood, and front cowl are all ready for paint too. 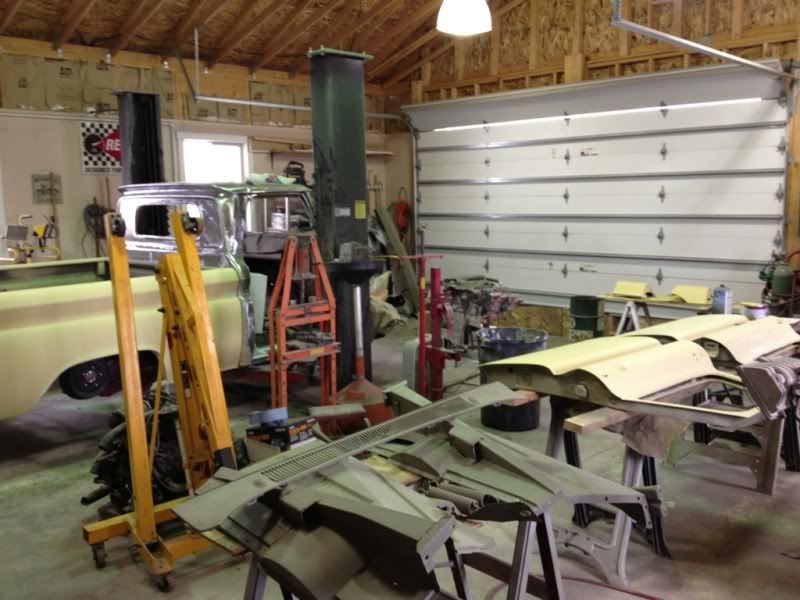 Hopefully this week we finish all the body work and get everything blocked out. Made a lot of progress. Should have this baby on the road by spring for sure! Posted via Mobile Device |
|
|

|
|
|
#113 |
|
Registered User
Join Date: Dec 2011
Location: Houston, Texas
Posts: 229
|
Re: My own build thread
Looking good!
|
|
|

|
|
|
#114 |
|
Registered User
Join Date: Mar 2012
Location: Hooper Ut
Posts: 466
|
Re: My own build thread
|
|
|

|
|
|
#115 |
|
Registered User
Join Date: Aug 2012
Location: Smithfield rhode island
Posts: 722
|
Re: My own build thread
You are getting close. Truck has come a long way! Don't want to rush it now, most important part of the job. your doing great work so far! :
Posted via Mobile Device
__________________
My frame Layin 63 short bed project  http://67-72chevytrucks.com/vboard/s...d.php?t=551353 |
|
|

|
|
|
#116 |
|
Registered User
Join Date: Mar 2012
Location: Hooper Ut
Posts: 466
|
Re: My own build thread
Oh I forgot to mention that I bought all my paint supplies. I bought bought both colors, clear, seam sealer, primer, and various other supplies. I about had a damn heart attack when they rang everything up. I've already spent close to $500 on supplies before this and this time it was almost 1500 bucks...
I can't believe paint is this expensive now, I did want to go with House of Kolor paint but they are changing up their paint line and I was worried I wouldn't be able to get a color match in the future should I have to do any touch ups. So I ended up choosing 2 colors close to what I wanted out of the color book. I bought DuPont chroma base because I've always liked their stuff but man... I wasn't thinking it would be almost 1k just for base and clear... That's just stupid... It better turn out awesome or I'm going to be one pissed off little man! Posted via Mobile Device |
|
|

|
|
|
#117 |
|
Registered User
Join Date: Mar 2012
Location: Hooper Ut
Posts: 466
|
Re: My own build thread
I spent most of the day yesterday stripping the paint off the inside of the cab. Man... What a pain! I finished 90% of it yesterday, hopefully I can get it finished today and get it primed tonight.
Here some pictures I think the PO had an old camper shell on this, I filled all the holes they drilled. 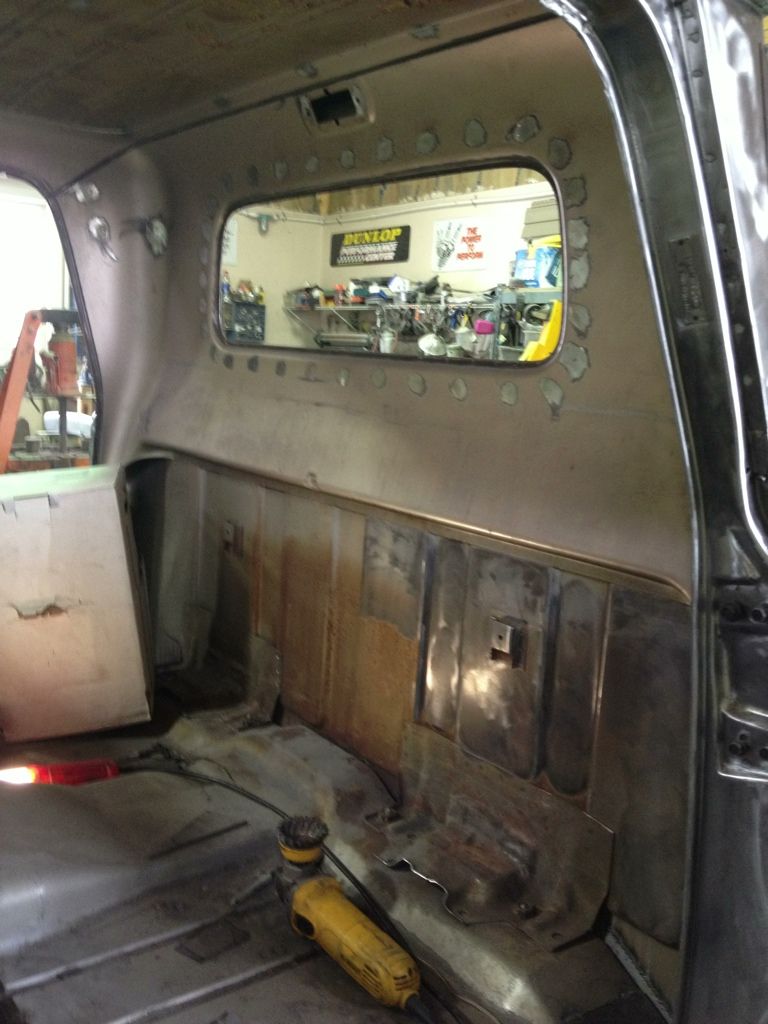 The PO also had a corduroy pleated headliner in this... That he held up with dresser brackets, mirror hardware, and liquid nails... This was not fun to grind off... 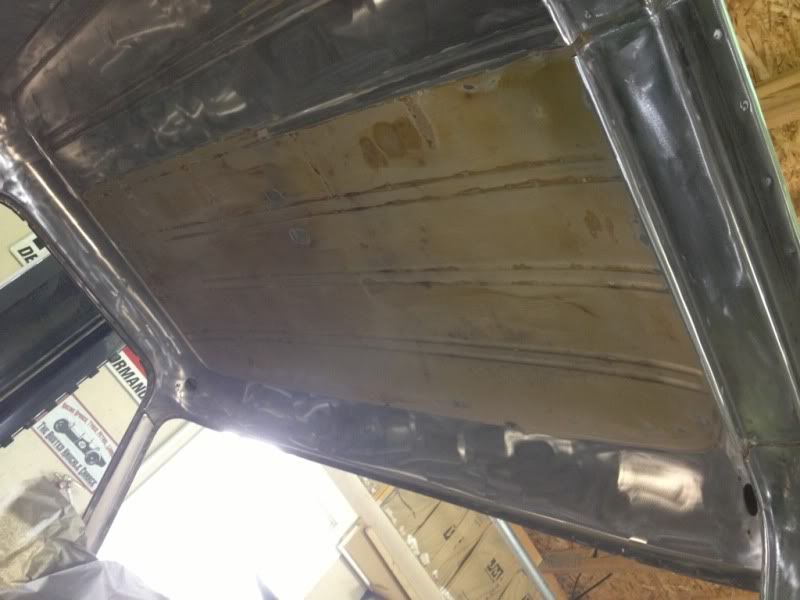 Here's the final product! I still need to strip the dash and fill some holes in the firewall but its almost finished! 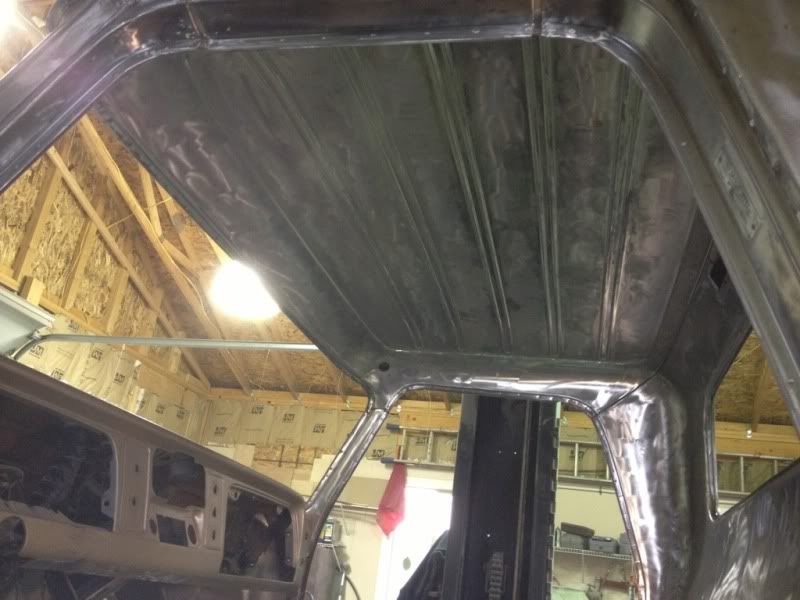 We also made the fuel filler hole, I wanted to do it a little fancier but most people will never see it so I what the heck.... 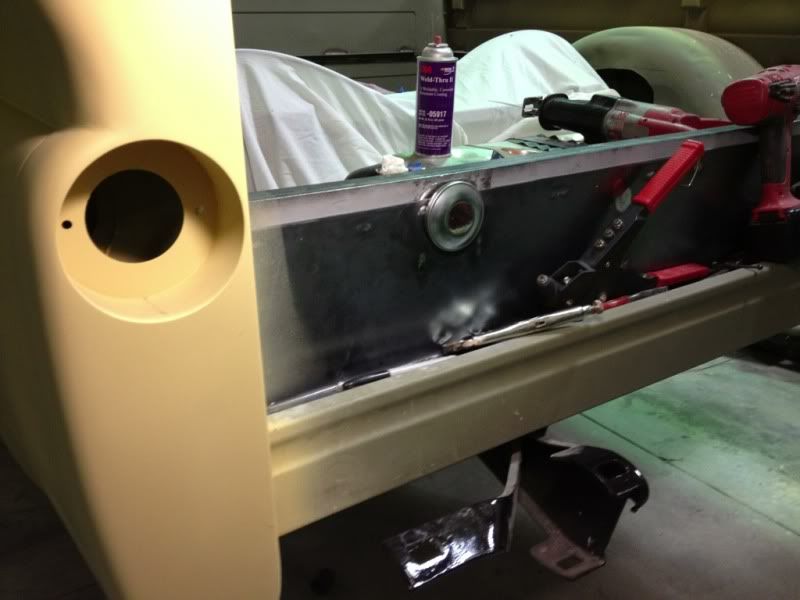 I also stripped all the old primer off the fenders fixed the small dents in them and re primed everything. Now I just need to high build prime it and block it out 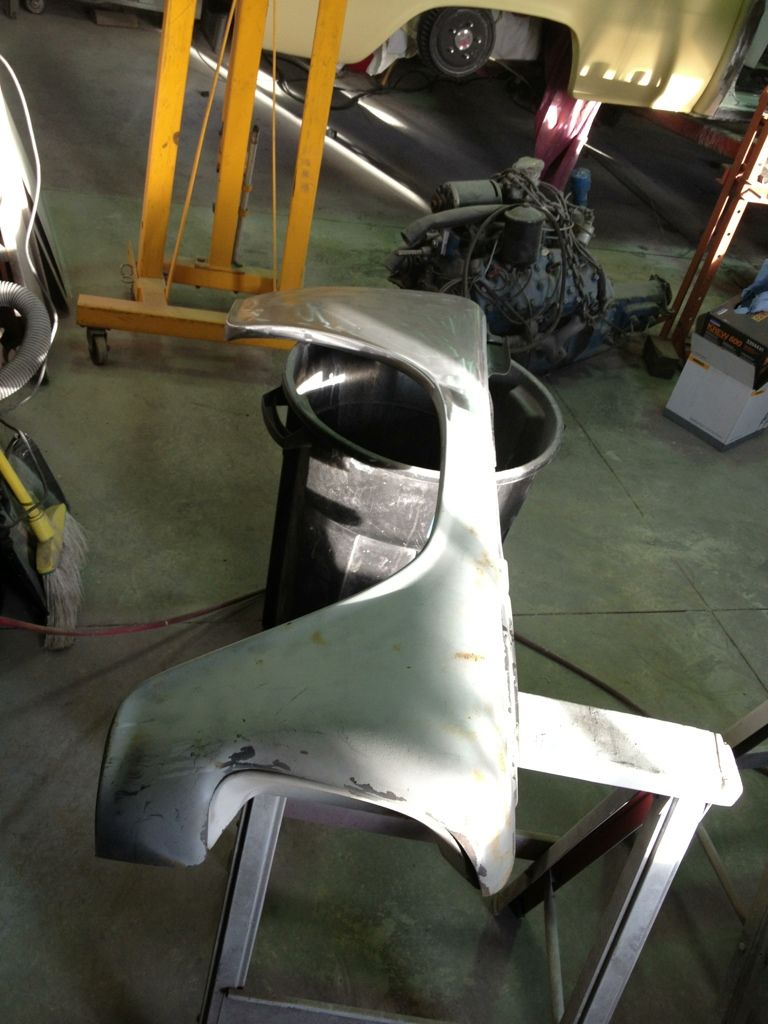 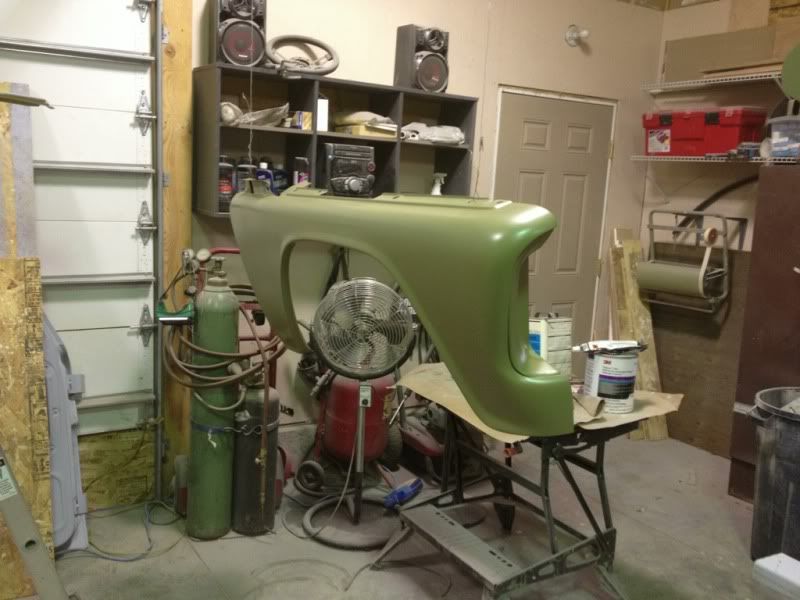 Posted via Mobile Device |
|
|

|
|
|
#118 |
|
Registered User
Join Date: Mar 2012
Location: San Diego CA
Posts: 223
|
Re: My own build thread
Looks good! Cant wait to see it all painted up.
Posted via Mobile Device |
|
|

|
|
|
#119 |
|
Registered User
Join Date: Aug 2012
Location: Tooele, Utah
Posts: 327
|
Re: My own build thread
You know when the PO did that headliner he was like "damn that thing looks good!!". Looking good man.
__________________
1936 Chevrolet 1/2t 1964 Chevrolet C10 1964 Chevrolet C10 (sons) 1965 Chevrolet K10 Suburban 1969 Chevrolet C10 1937 Plymouth P4 |
|
|

|
|
|
#120 | ||
|
Registered User
Join Date: Mar 2012
Location: Hooper Ut
Posts: 466
|
Re: My own build thread
Quote:
 Quote:
Half of one of my hands is partially paralized, my old man help with the things I have trouble with, otherwise I would paint it while he's gone. |
||
|
|

|
|
|
#121 |
|
Registered User
Join Date: Mar 2012
Location: Hooper Ut
Posts: 466
|
Re: My own build thread
These are the color's I chose for my truck. I was going to go with House of Kolor paint but I guess HOK is changing the way they sell their paints. In the past they sold their paint by the quart but now they want to go with a mixing bank system where paint supply places will mix the paint in their store.
The bad thing is most paint supply places aren't planning on buying that system and the colors I wanted for this project I was having a hard time finding enough to paint my whole truck because they are phasing out their old stock. I was also worried that if I ever had to touch up the paint in the future that I would run into problems finding more paint. So, I ended up picking some colors that are very close to the original colors I wanted. Here are some pictures of the colors. This is 2012 BMW Marrakesha braun  This is 2012 BMW Milano Beige matallic  I think it should look nice and clean when its finished. I'm not sure if I'm going to do the scallops like I planned on. If I don't do the scallops I'm going to paint the top of the roof with some cool designs using lace or something. |
|
|

|
|
|
#122 |
|
Registered User
Join Date: Apr 2011
Location: .
Posts: 3,104
|
Re: My own build thread
Lookin' good. Like the lace idea.
|
|
|

|
|
|
#123 |
|
Registered User
Join Date: Mar 2012
Location: Hooper Ut
Posts: 466
|
Re: My own build thread
Here's my update for the week. I got most of the inside cab stripped, now I just have to weld up the 50 hole saw holes the PO decided to put in the firewall and smooth out the other holes I welded up from them also.
Then I can prime and paint. I was hoping to do that all this weekend but I promised my family I would take them snow mobilling before the snow melts and we are going all day tomorrow and part of Sunday. So I doubt I will get much done this weekend unfortunately. Here are the pictures Still need to figure out if I'm going to take those gas tank brackets out, sure wish they didn't have 50 spot welds in them... Lol 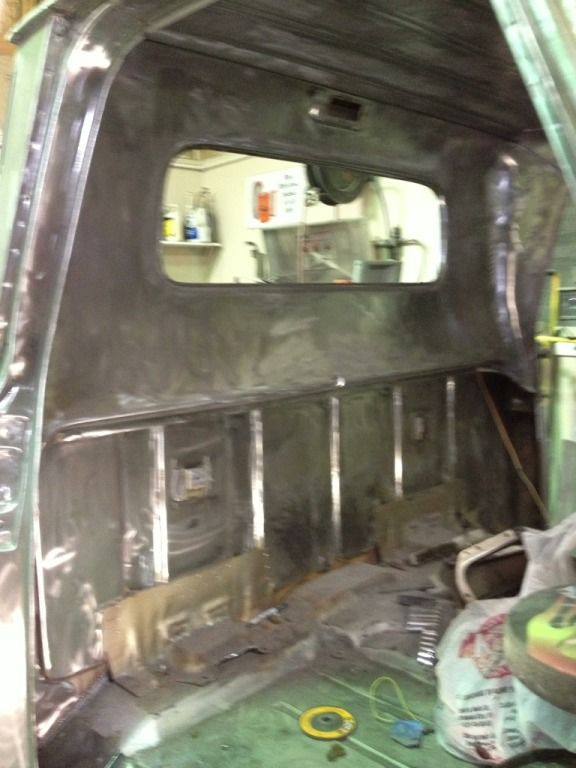 The dash is 99% stripped, still need to hand sand where I could get to with the high speed  Here is the three deuce setup I'm going with on my sbc, should look cool 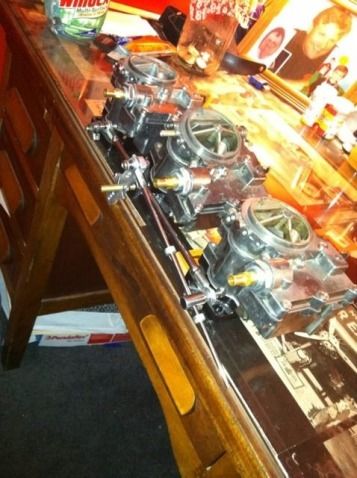 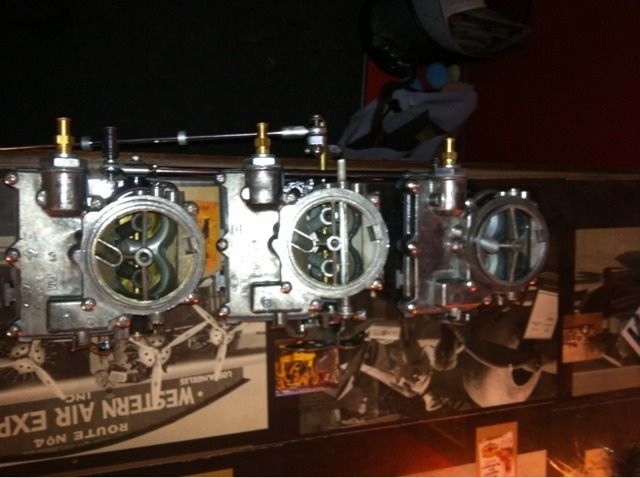 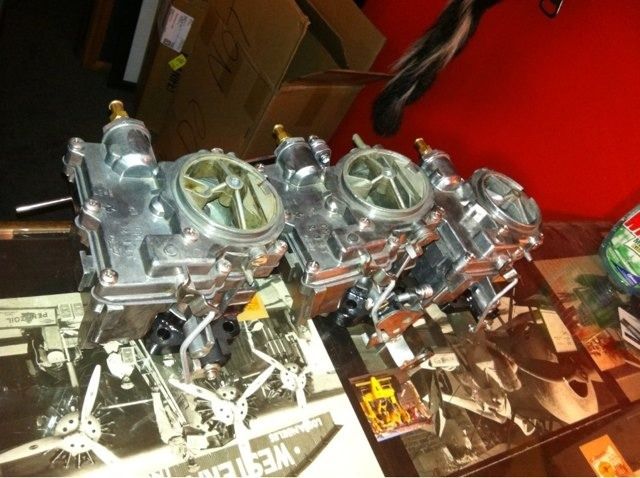 Hopefully tonight I can make it back over and weld up those holes so if I get back early enough on Sunday I can prime. Posted via Mobile Device |
|
|

|
|
|
#124 |
|
Registered User
Join Date: Mar 2012
Location: San Diego CA
Posts: 223
|
Re: My own build thread
Damn triple duec set up nice man. Great work
Posted via Mobile Device |
|
|

|
|
|
#125 |
|
Registered User
Join Date: Feb 2012
Location: Grand Rapids, Michigan, otherwise known as Beer City U.S.A.
Posts: 1,081
|
Re: My own build thread
Just a kinda dumb question, but why did you spend all of the time making the awesome tail-light change & retain the factory tailgate chains....Won't the chains interfere with the look of the lights?....IMO
You are really doing some quality work! Keep it up!
__________________
My Build: http://67-72chevytrucks.com/vboard/s...d.php?t=512904 |
|
|

|
 |
| Bookmarks |
|
|