
|
 10-10-2012, 12:13 AM
|
#101 | |
|
Registered User
 Join Date: Jan 2012
Location: Antioch, IL
Posts: 418
|
Re: 1965 Suburban Resto-Rebuild
Quote:
Posted via Mobile Device Last edited by hemifalcon; 10-10-2012 at 11:44 AM. |
|

|

|
|
10-10-2012, 11:29 AM
|
#102 | |
|
Registered User
Join Date: Jun 2012
Location: Selkirk Ontario Canada
Posts: 1,141
|
Re: 1965 Suburban Resto-Rebuild
Quote:
__________________
My 63 GMC Panel Slow Build http://67-72chevytrucks.com/vboard/s...=1#post5457281 63 
|
|
|
|
|
|
10-10-2012, 10:49 PM
|
#103 |
|
Registered User
Join Date: Jan 2012
Location: Antioch, IL
Posts: 418
|
Re: 1965 Suburban Resto-Rebuild
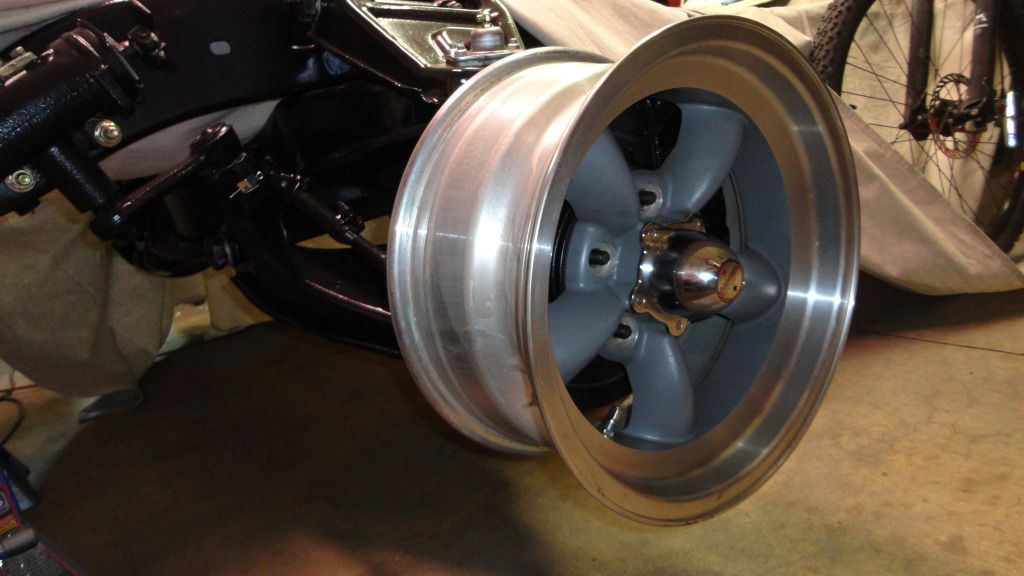
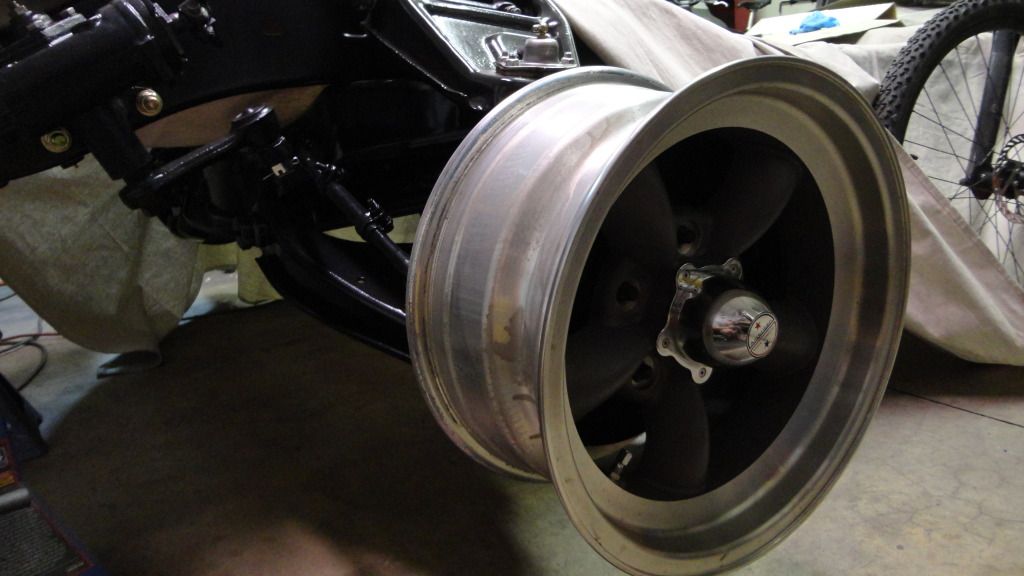
Well, I opted to NOT do the drilling in these drums as I had done in the 6-lug--sorry for the 'psych' on initial plans to do so.. I was not too crazy about the varied thickness in the wear portion of the chinese drums--one was 2x as thick as the other--could swear I could sense the difference in weight in my hands...
Anywho--here are some pics from today of the chassis-- 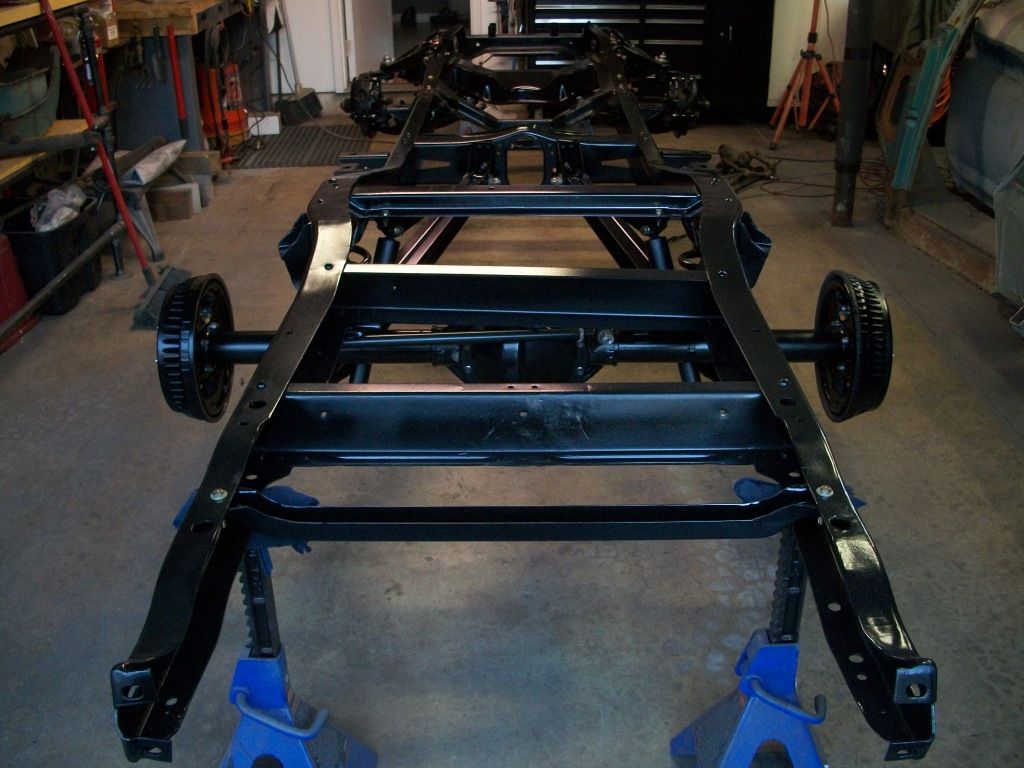 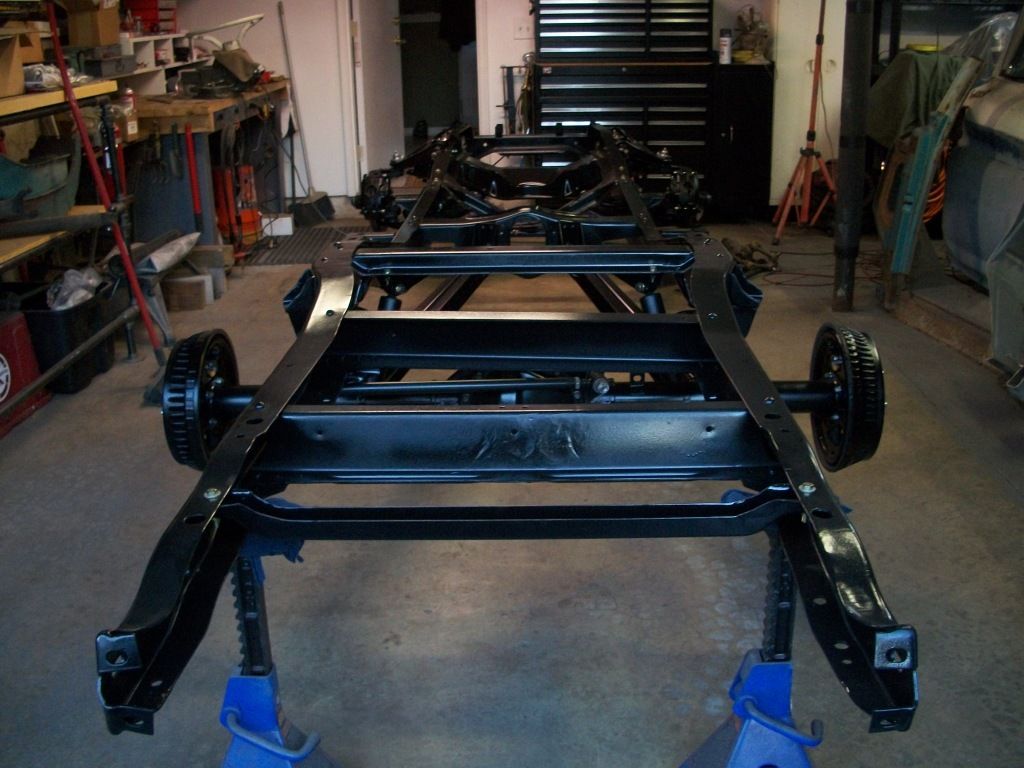 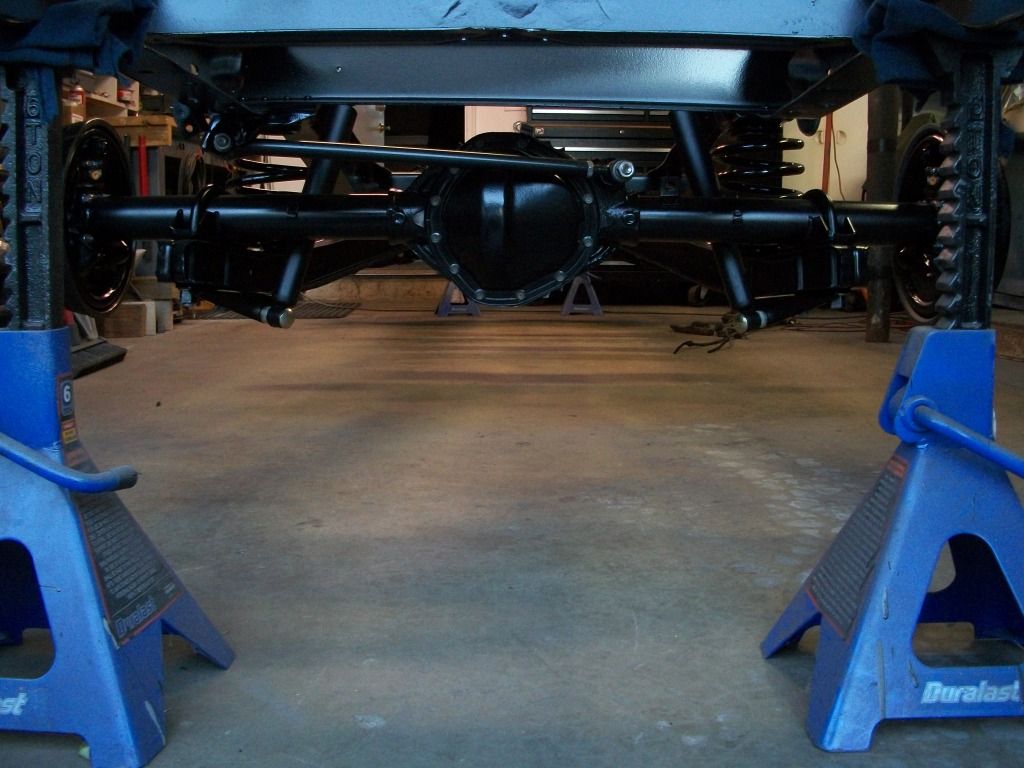 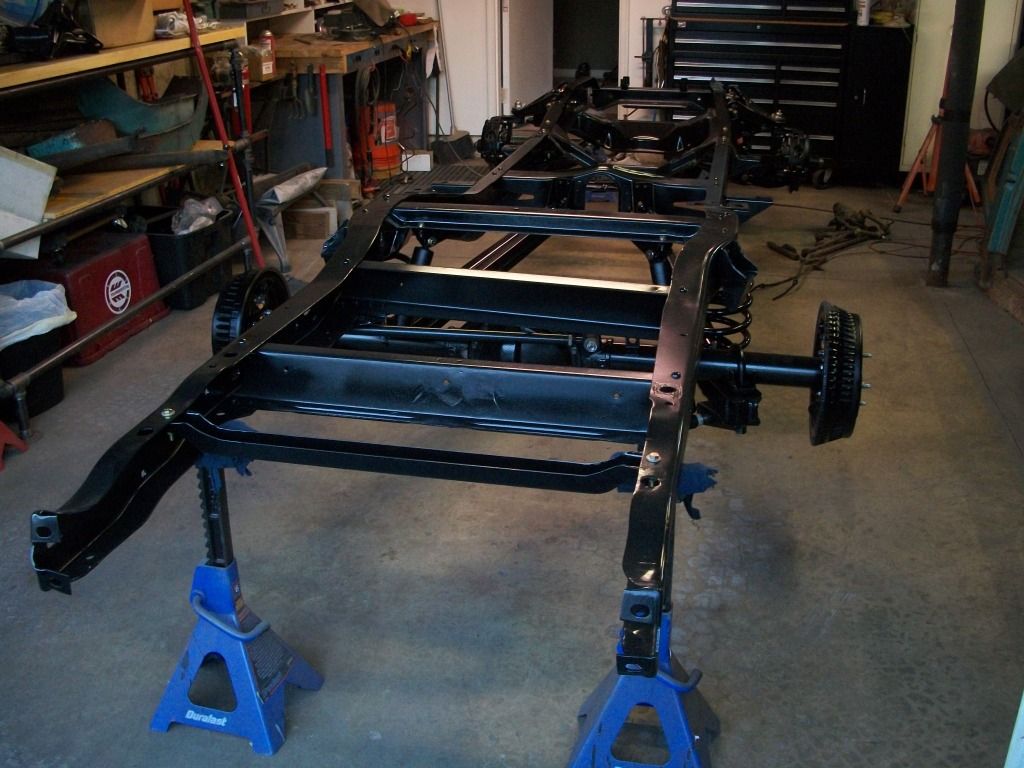 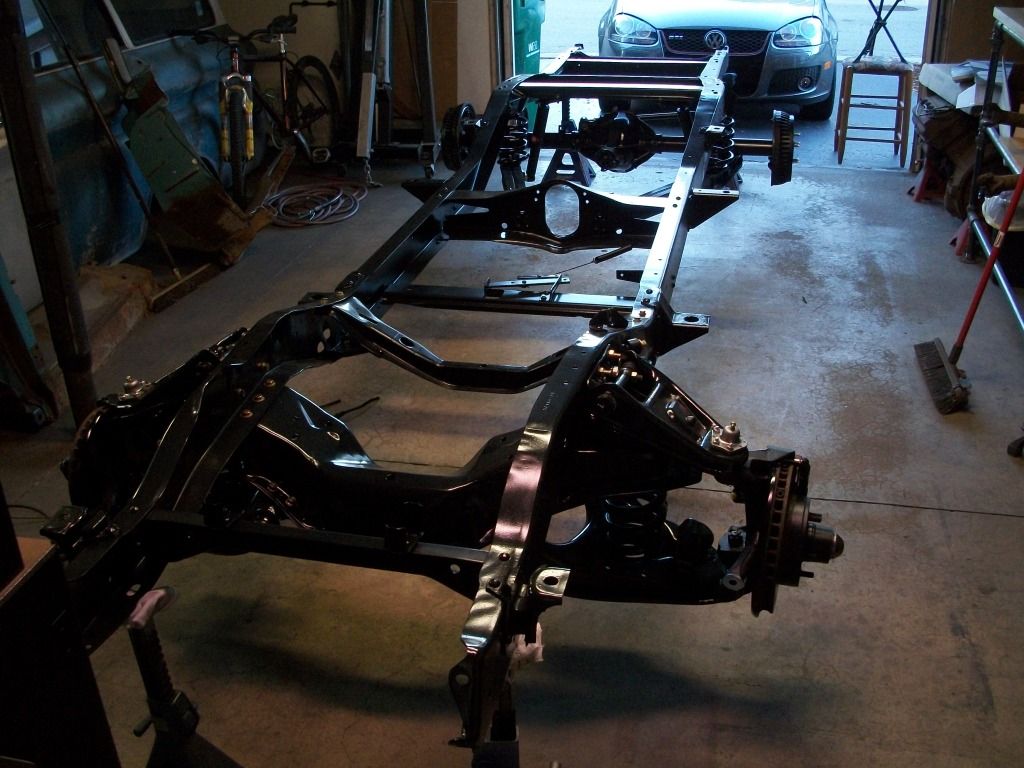 and, here is my 'test' VW wheel that i'm practing my repair work on.. I cleaned up everything pretty good with a variety of files and my Dremel--and then added some extra epoxy in an area around the center ring area which needed additional build-up.. I'll hopefully apply some primer tomorrow.. 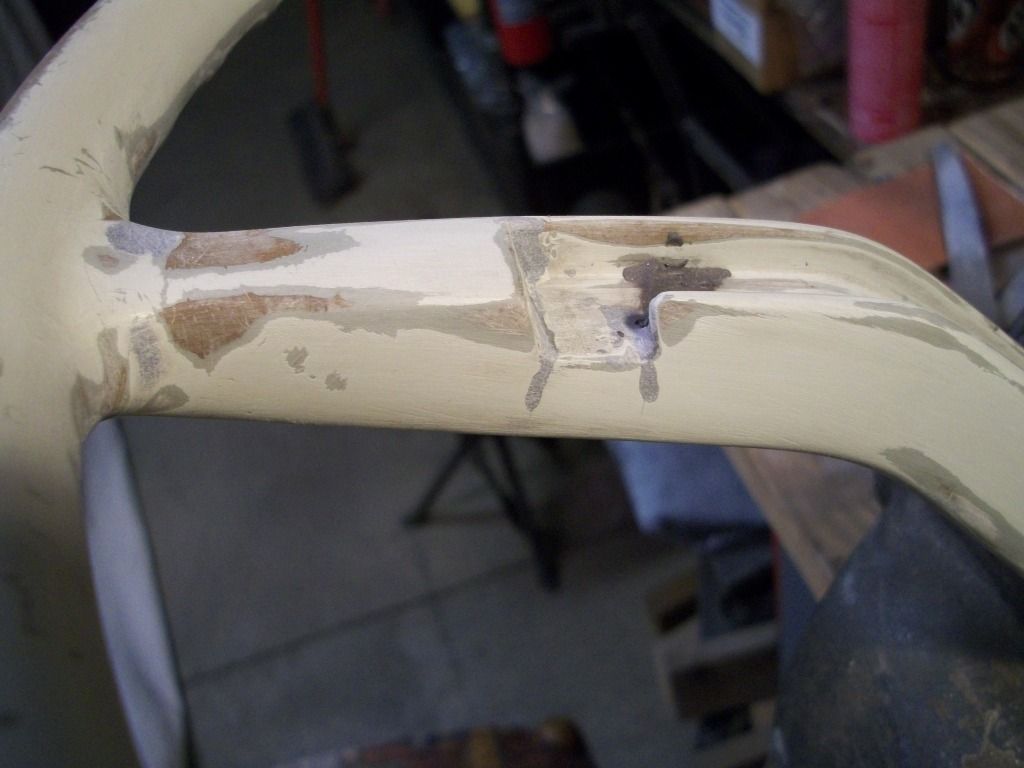 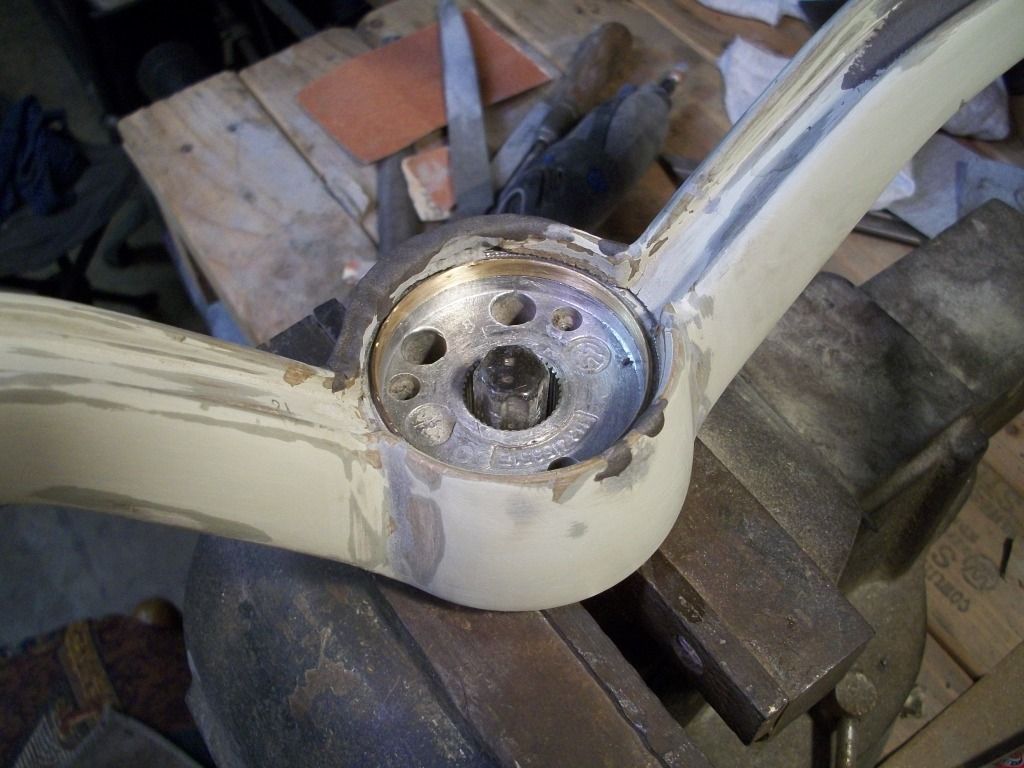 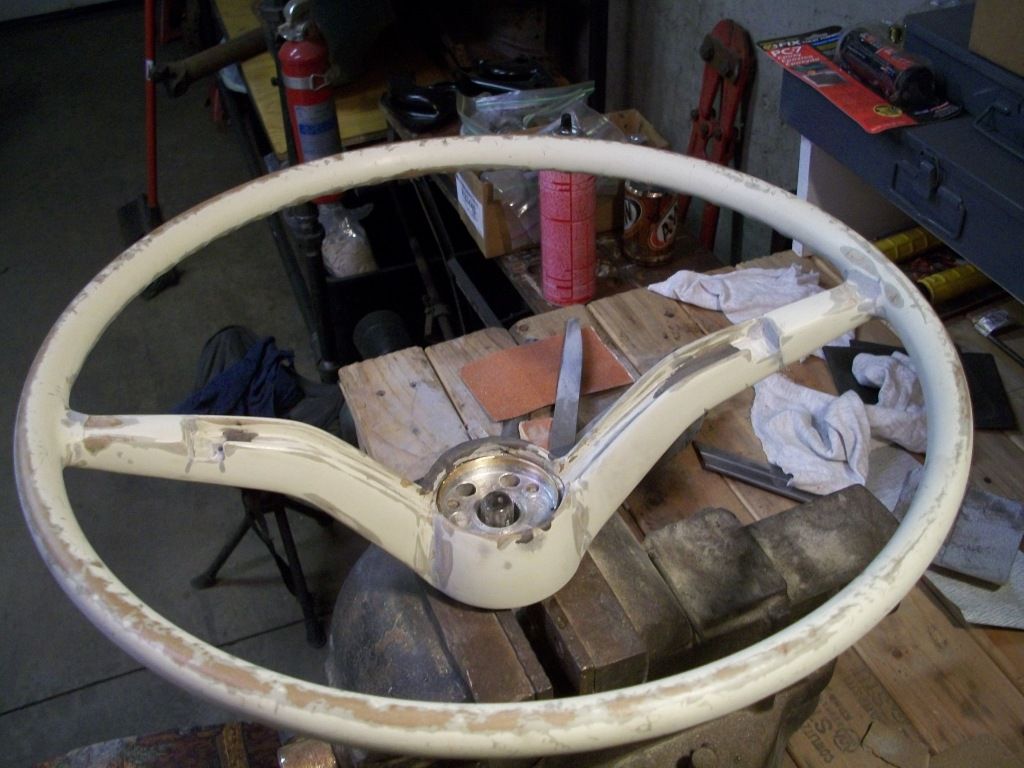
|
|
|
|
|
10-22-2012, 10:51 PM
|
#104 |
|
Registered User
Join Date: Jan 2012
Location: Antioch, IL
Posts: 418
|
Re: 1965 Suburban Resto-Rebuild
So--I have all the front steering stuff installed--and I rebuilt the gear box.. All the internals were still in top-notch condition.. I cleared out all of the old, hard grease, and replaced the input shaft seal--put it some fresh grease in it--and everything is nice and tight..
So--since I was on the "steering" project, I started messing around with the steering column. I was cleaning up the steering shaft and learned that the bottom portion is merely "pressed" or "smooshed" on with a splined area to help the pieces bite together.. Well--I decided to "better" the design and welded it together.. 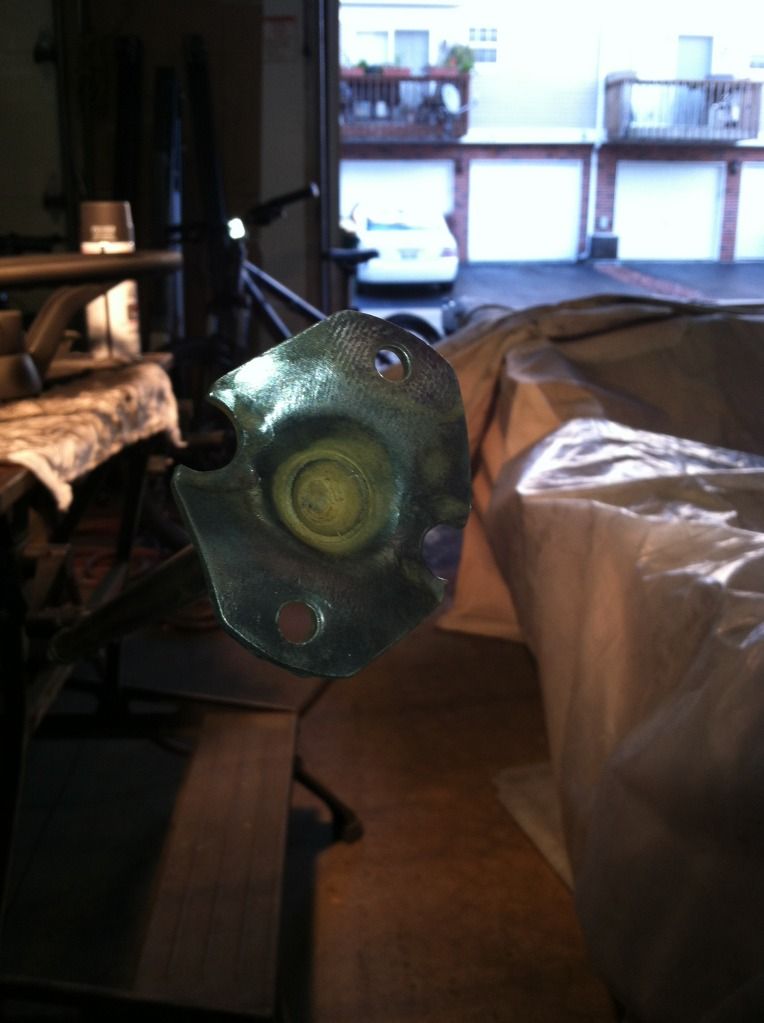 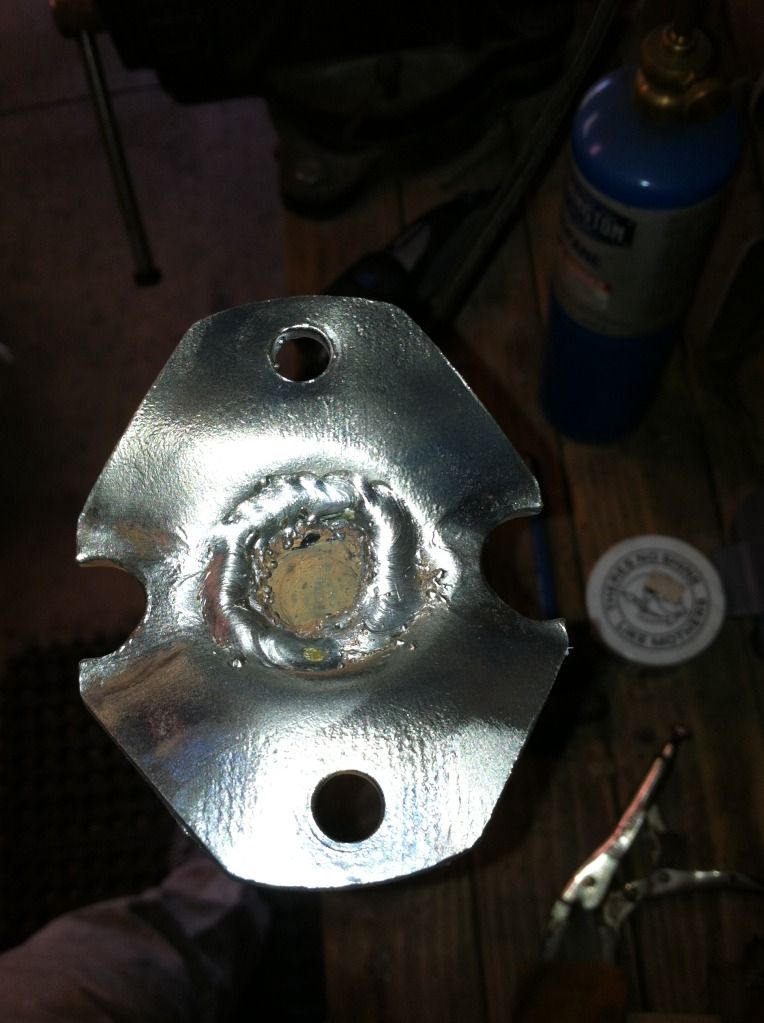 And, here are some goodies I picked up from Ratskin.. I don't know what year the turquoise seat is out of--but this WILL be the pattern that goes into my burban.. This seat is nearly perfect-as it had a old protective cover on it that clearly did its job.. I also picked up this '61 GMC Hood.. I'll ponder it's use.. I almost hate to get rid of the old paint and lettering on it... decisions... I also got this nice "custom" steering wheel which will get some lovin' given to it so it looks nice once again.. It's SO worn down at the top of the rim, that the metal hoop is on the surface of the wheel!!! This week I also got the '69 Camaro dog dish (COPO-style) caps.. Waiting (unfortunately) for the wheel vintiques rims to arrive.. grrrrrr.. 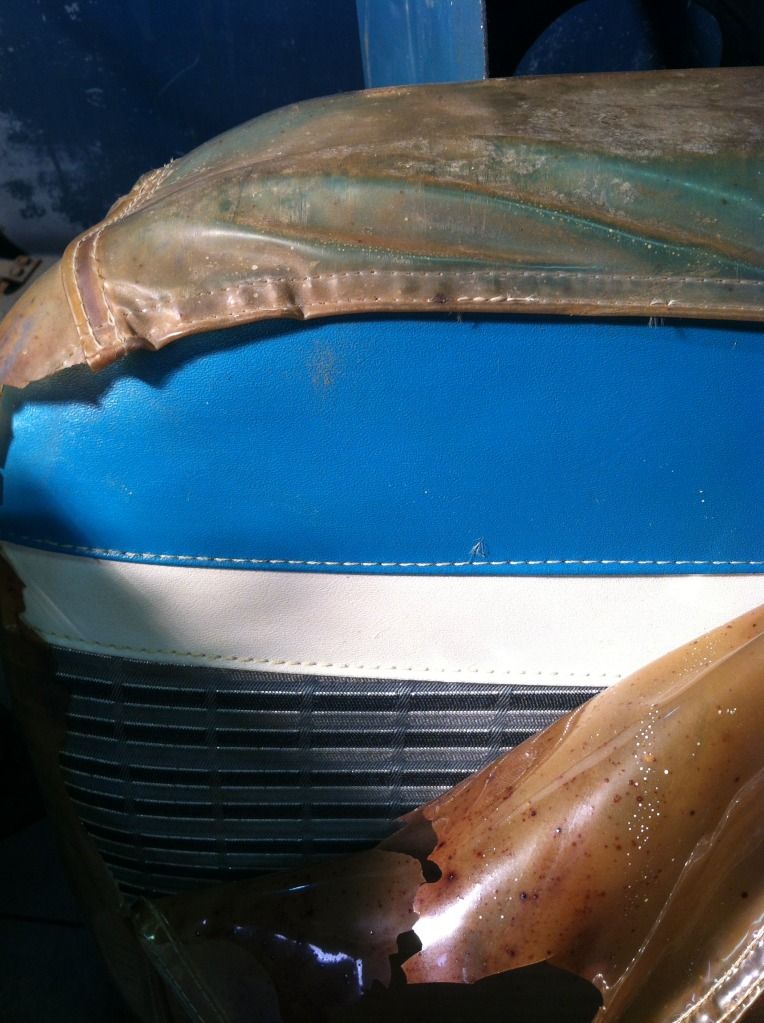  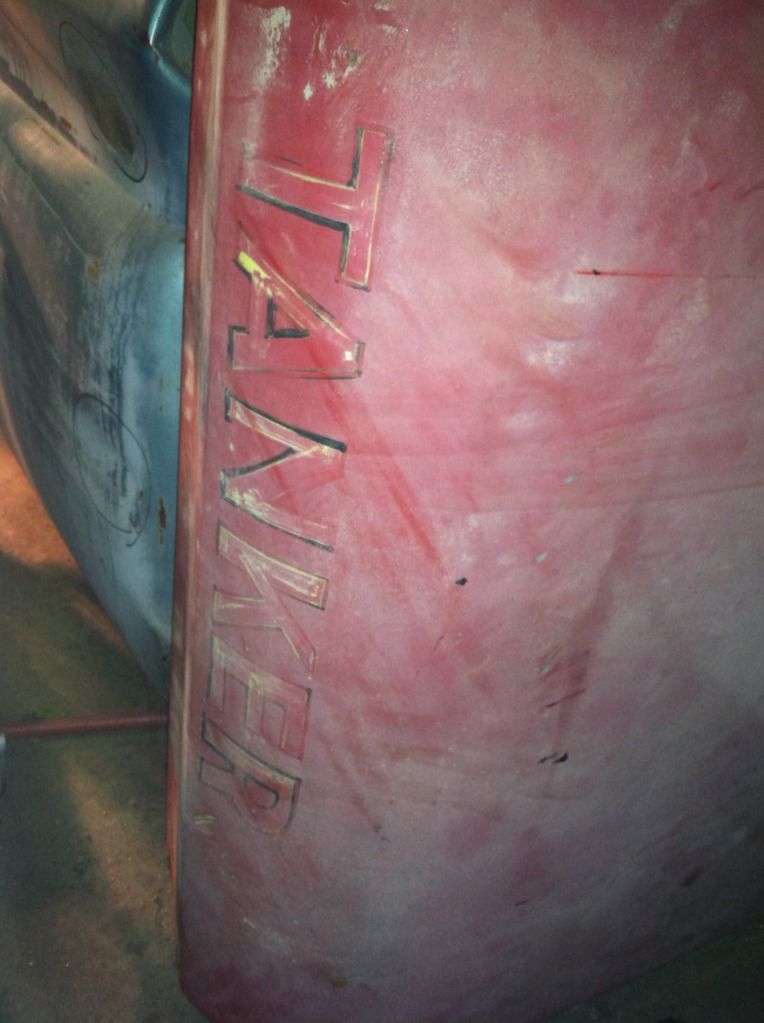 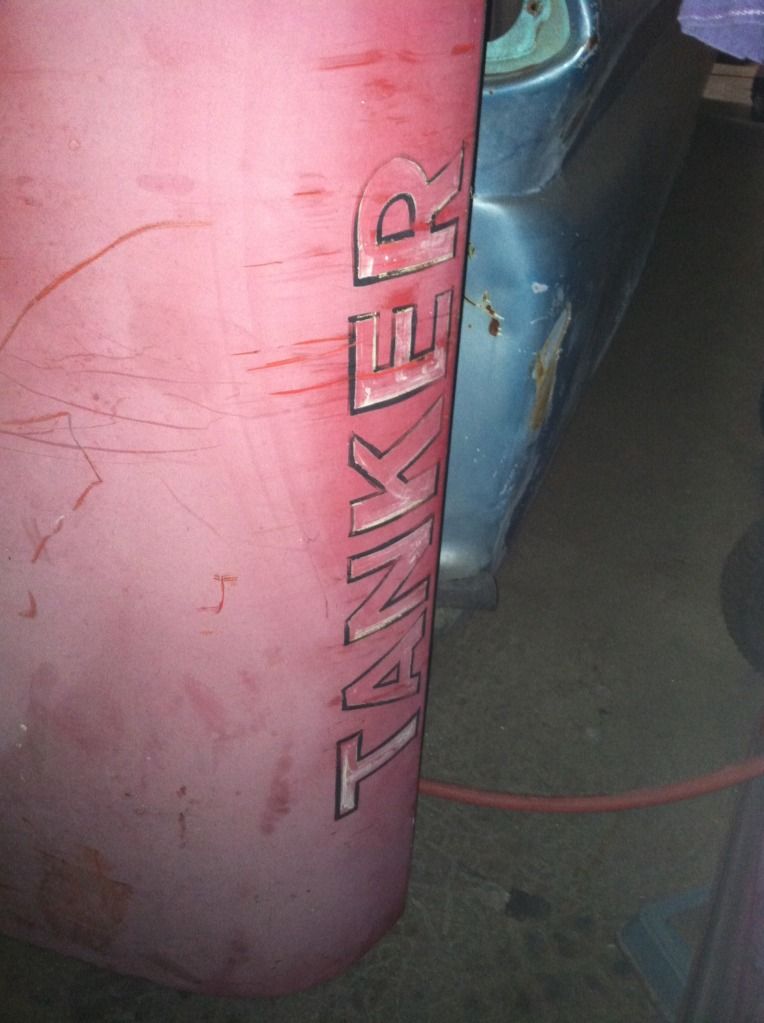 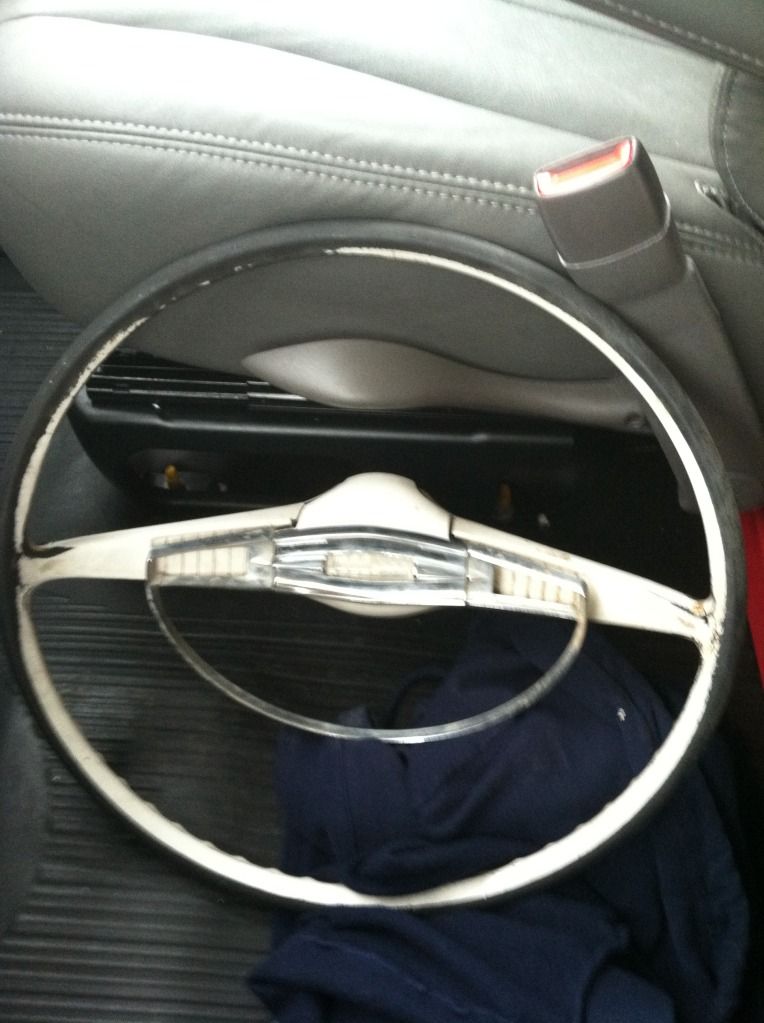 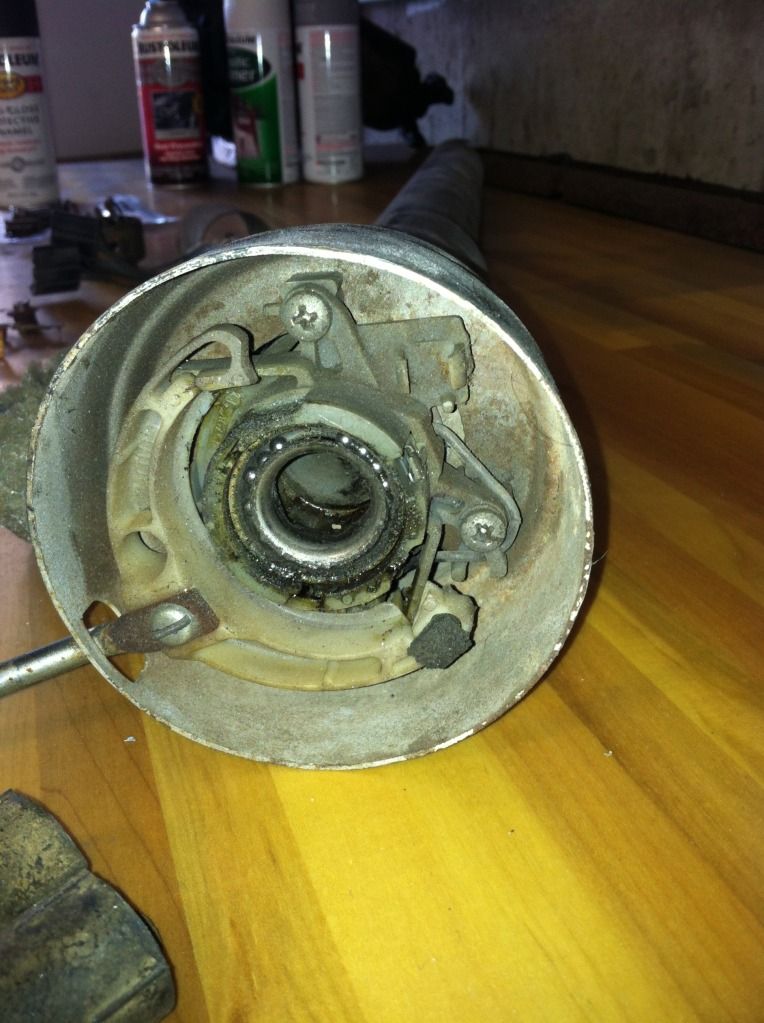 Anyone need some original front spindles, drums and brakes?? Everything is new to make it stop!!!   I also got another front driver's side suburban seat as well as a regular rear seat.. I have plans to make the driver's portion into a middle seat... I'll be needing some measurements of an original middle seat... (gears turnin'....) |
|
|
|
|
10-23-2012, 12:03 AM
|
#105 | |
|
Registered User
Join Date: Jun 2010
Location: Oklahoma City, OK
Posts: 1,524
|
Re: 1965 Suburban Resto-Rebuild
Quote:
__________________
1958 Chevy 1 ton dually 4X4 dump/flat bed My build thread 1966 "Not-So-Original" Chevy Custom Trim Suburban My Time-Killing Project Truck 1966 GMC Extended cab 1 1/4 ton 4X4 My Son's build thread |
|
|
|
|
|
10-23-2012, 01:11 AM
|
#106 |
|
Registered User
Join Date: Oct 2006
Location: Western IL
Posts: 358
|
Re: 1965 Suburban Resto-Rebuild
Looked through your thread tonight-you're doing a nice job! It was nice meeting you and I hope the parts do you well. I'll keep track, as I'm also curious about the middle seat conversion, and wondering about the different stampings on the 3rd seats!
|
|
|
|
|
10-23-2012, 10:14 AM
|
#107 |
|
65 suburban vortec 5.3 bagged
Join Date: Jun 2005
Location: upstate new york
Posts: 1,317
|
Re: 1965 Suburban Resto-Rebuild
awesome progress looks great!!!!
|
|
|
|
|
10-23-2012, 12:51 PM
|
#108 | ||
|
Registered User
Join Date: Jan 2012
Location: Antioch, IL
Posts: 418
|
Re: 1965 Suburban Resto-Rebuild
Quote:
Quote:
|
||
|
|
|
|
11-11-2012, 12:35 PM
|
#109 |
|
Registered User
Join Date: Jan 2012
Location: Antioch, IL
Posts: 418
|
Re: 1965 Suburban Resto-Rebuild
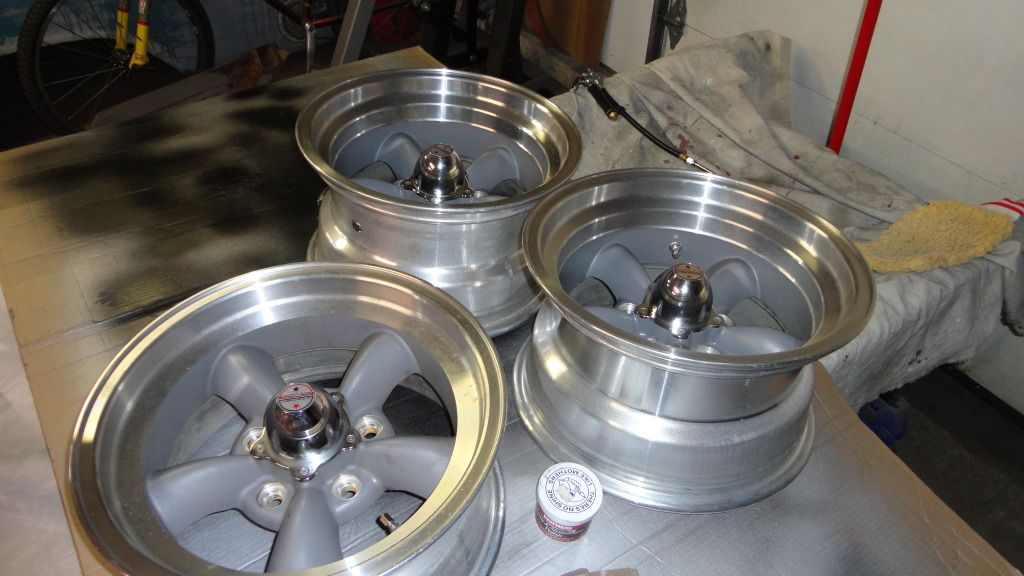
Well, after a horrible experience in trying to purchase wheels with Wheel Vintiques--I went with my other option and nabbed some Torque Thrusts...
|
|
|
|
|
11-12-2012, 02:17 AM
|
#110 | |
|
60-66 Nut
 Join Date: Mar 2007
Location: Coeur d'Alene, Idaho
Posts: 23,252
|
Re: 1965 Suburban Resto-Rebuild
The Burb middle seat is pretty much the same as the drivers seat. The one difference is that the middle seat has the 'notch' in it to clear the rear wheel well. Also the middle seat has the tubular armrest/handle on the passenger side. I believe a drivers seat could be modified to be a middle seat.
Quote:
__________________
Power Steering Box Adapter Plates For Sale HERE Power Brake Booster Adapter Brackets For Sale '63-'66 HERE and '67-'72 HERE and '60-'62 HERE and "60-'62 with clutch HERE Rear Disc Brake Brackets For Sale. Impala SS calipers HERE Camaro Calipers HERE D52 Calipers HERE 6 Lug HERE Hydroboost Mounting Plates HERE |
|
|
|
|
|
11-13-2012, 11:08 AM
|
#111 |
|
Registered User
Join Date: Jan 2012
Location: Antioch, IL
Posts: 418
|
Re: 1965 Suburban Resto-Rebuild
Captain--Thanks for that info.. I'll eventually be looking at doing the middle-seat modifcation most likely.. If not--I have a couple extra seats I can work with now..
|
|
|
|
|
11-13-2012, 11:11 AM
|
#112 |
|
Registered User
Join Date: Jan 2012
Location: Antioch, IL
Posts: 418
|
Re: 1965 Suburban Resto-Rebuild
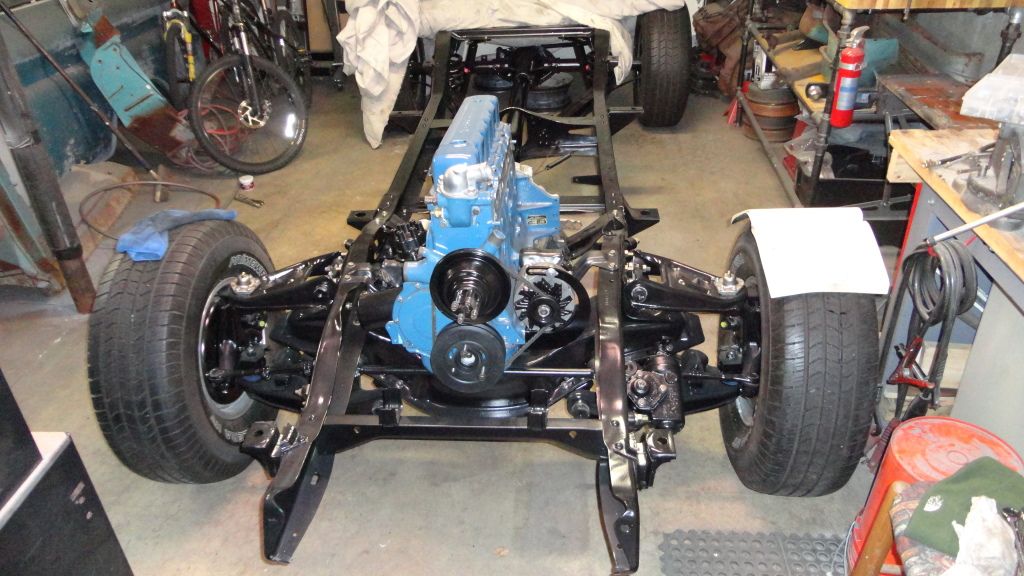
Well, here is the rolling chassis outside.. It's basically complete at this point minus the brake lines and fuel tank/lines... I just need to see how the wheels looked with the big tires on them.. They're tall tires being 31x10.50R15LT's on all four corners..
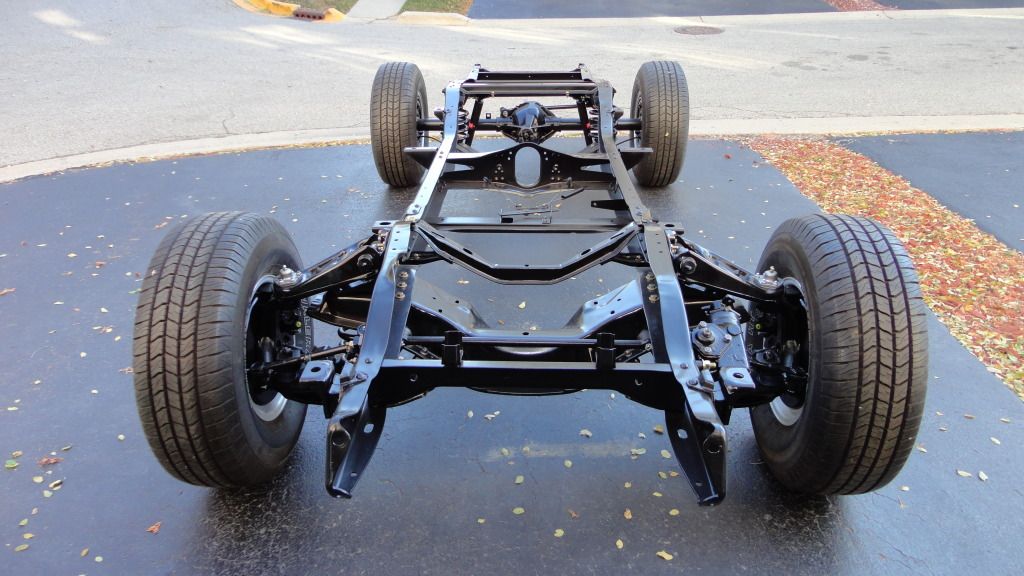 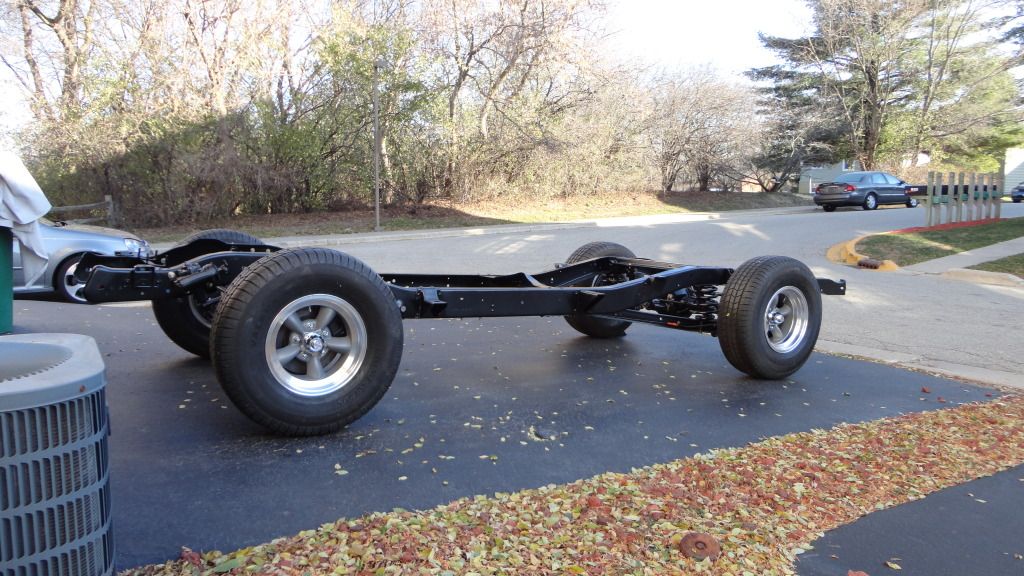  
Last edited by hemifalcon; 11-14-2012 at 01:10 PM. |
|
|
|
|
11-17-2012, 03:58 PM
|
#113 |
|
Registered User
Join Date: Jan 2012
Location: Antioch, IL
Posts: 418
|
Re: 1965 Suburban Resto-Rebuild
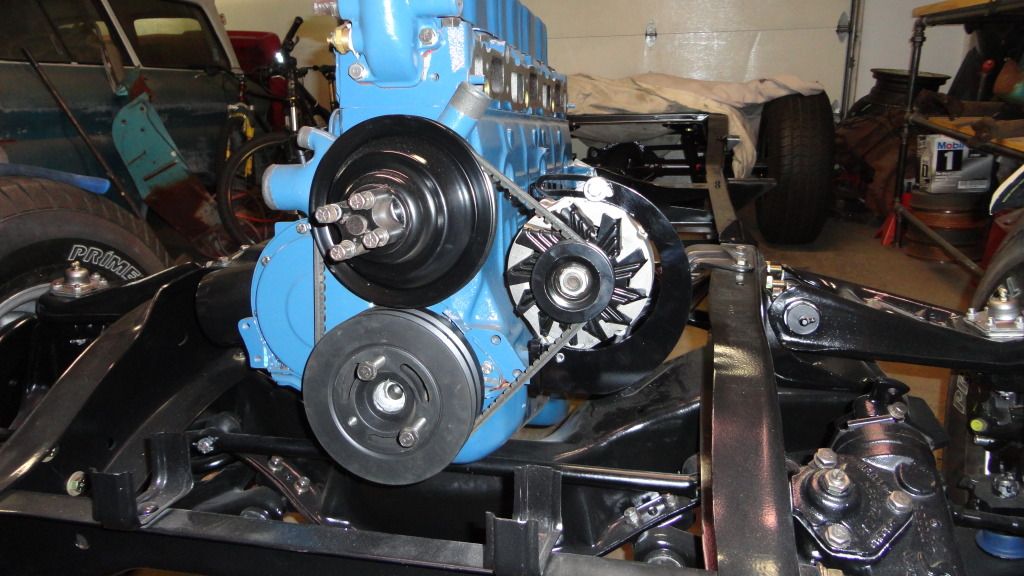
EXPERTS>>> I need some help. I was going to place the motor mounts on the frame today--and possibly work towards putting the engine and trans in the chassis--when I realized that there may be a handup. I have the two motor mount perches which bolt to the motor. And, they are basically idential pieces however, the mounting points on the engine are not. If you look closely, the three bolt holes on the passenger side of the 4.8L block are on the same plane. But-the bosses on the drivers side of the block are on two separate planes. This causes a bit of a problem with the brackets. Are the two brackets supposed to be different? I can't remember when I took them off if there were possibly spacers on the passenger side which allowed for the bracket to fit correctly--anyone have any ideas or pictures to share which might help me out here--
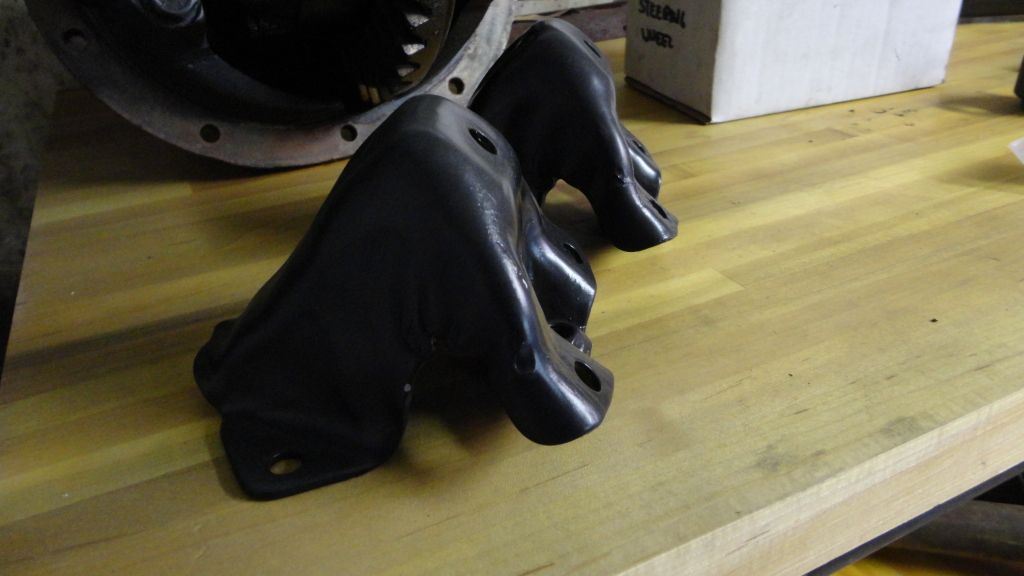 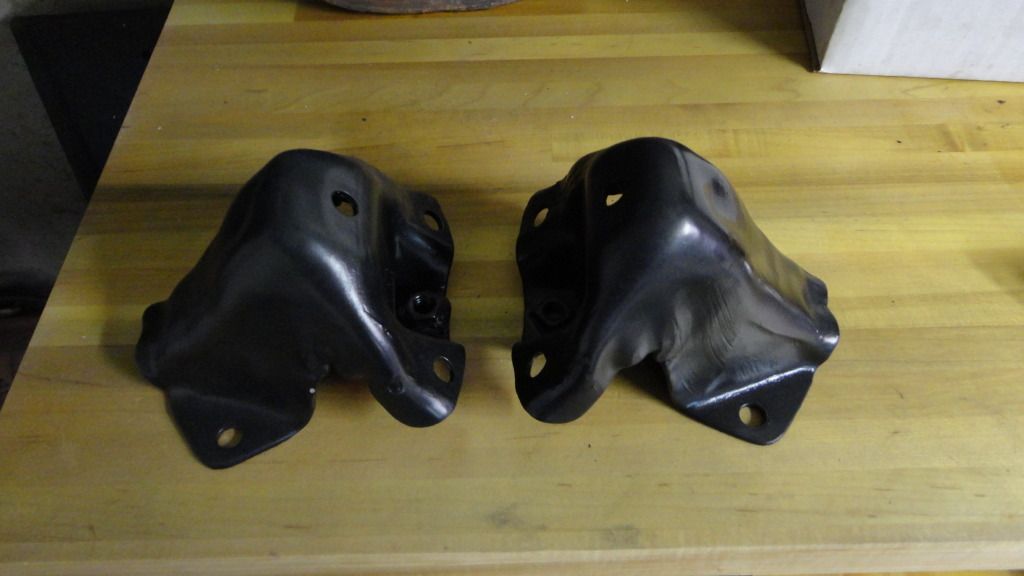 passenger side view..  passenger side showing all three bolt bosses to be "flat" across all points. 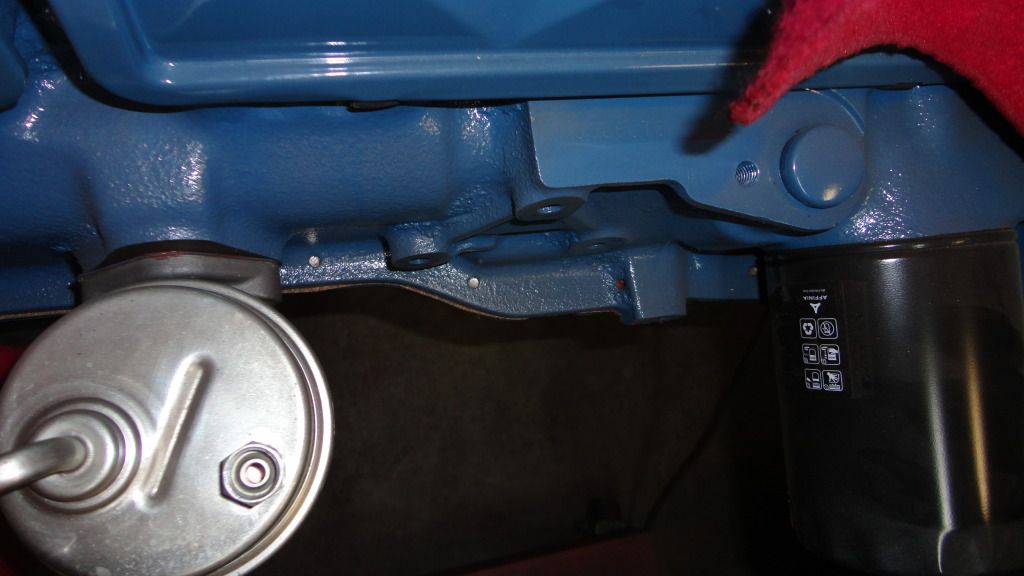 drivers side correct fitment.. 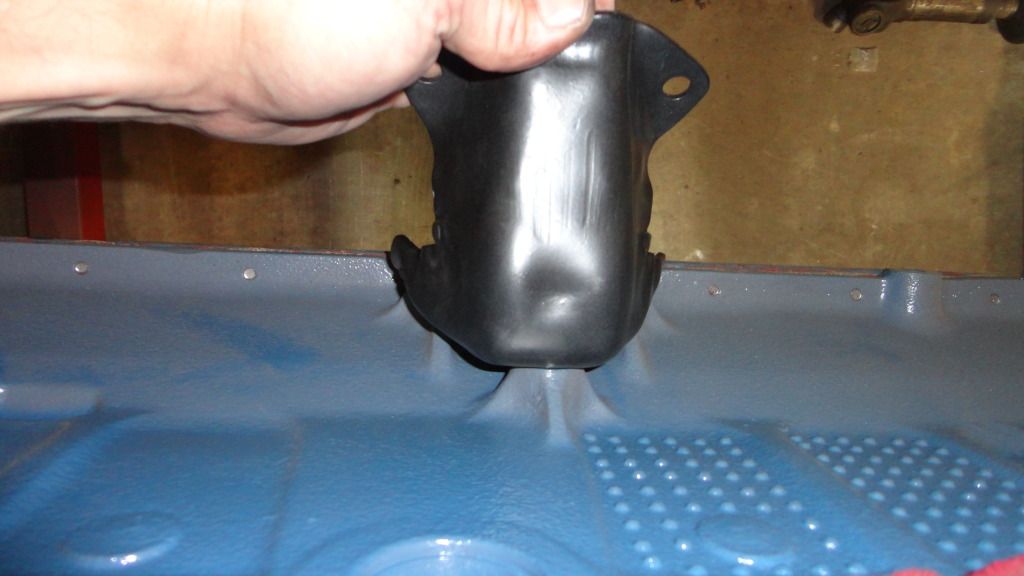 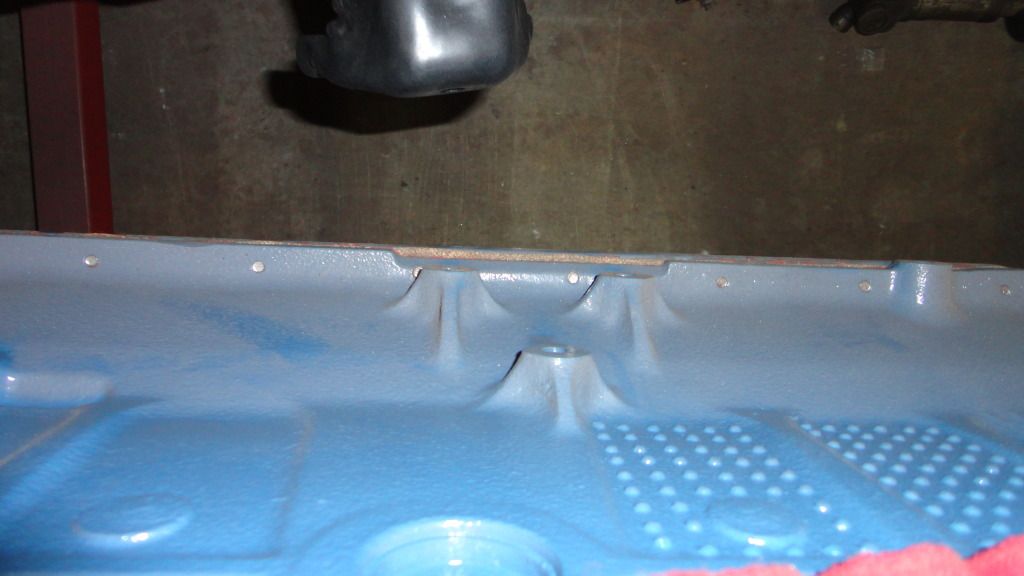
|
|
|
|
|
11-18-2012, 03:46 PM
|
#114 |
|
Registered User
Join Date: Jan 2012
Location: Antioch, IL
Posts: 418
|
Re: 1965 Suburban Resto-Rebuild
So, I was able to get my quetions answered with some help from the forum, a little ebay photo searching, and my own dumb luck stemming from saving everything...
I found the spacers required for the motor mount bracketry and the correct assembly of the engine perches.. Thanks all.. 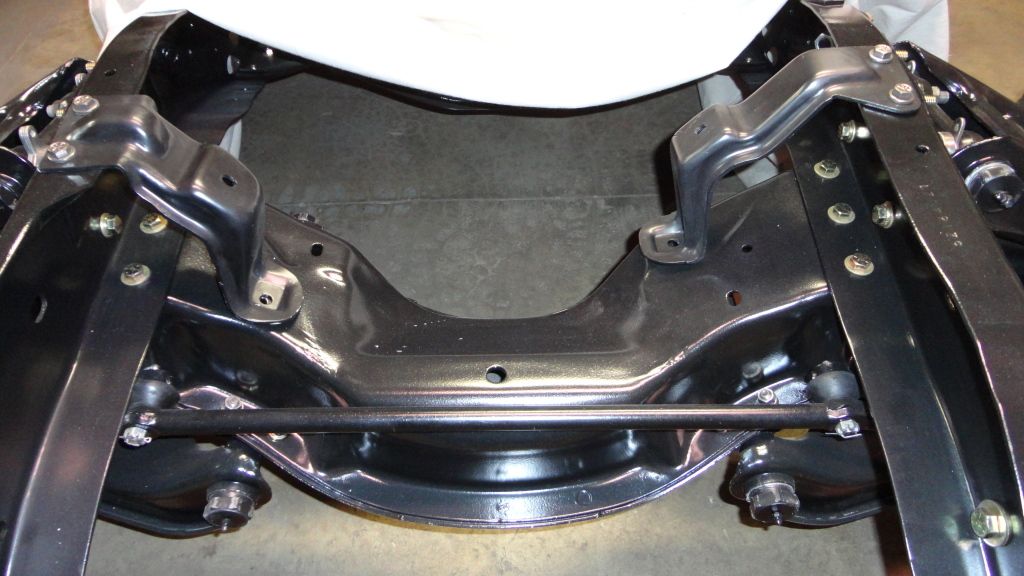 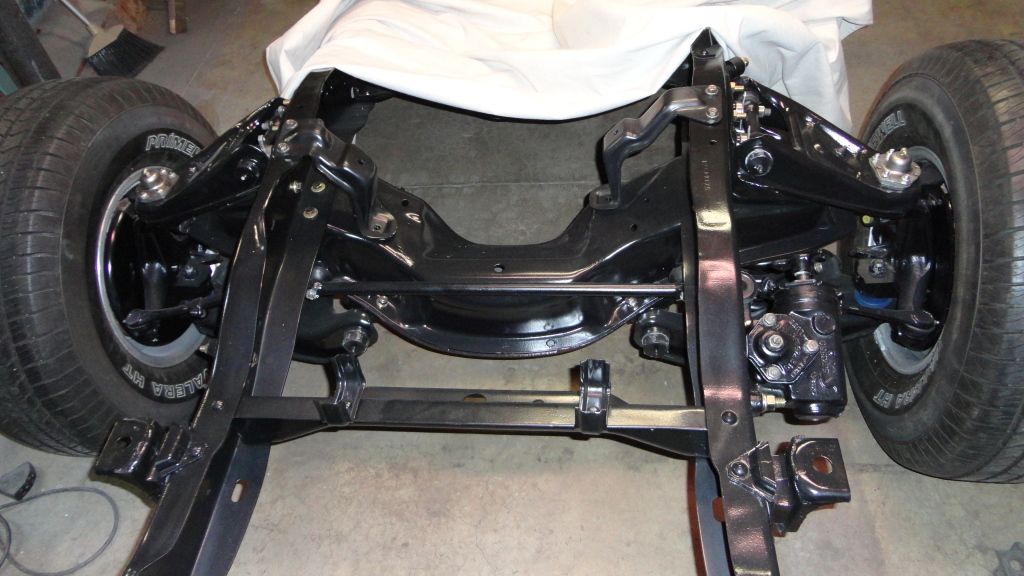 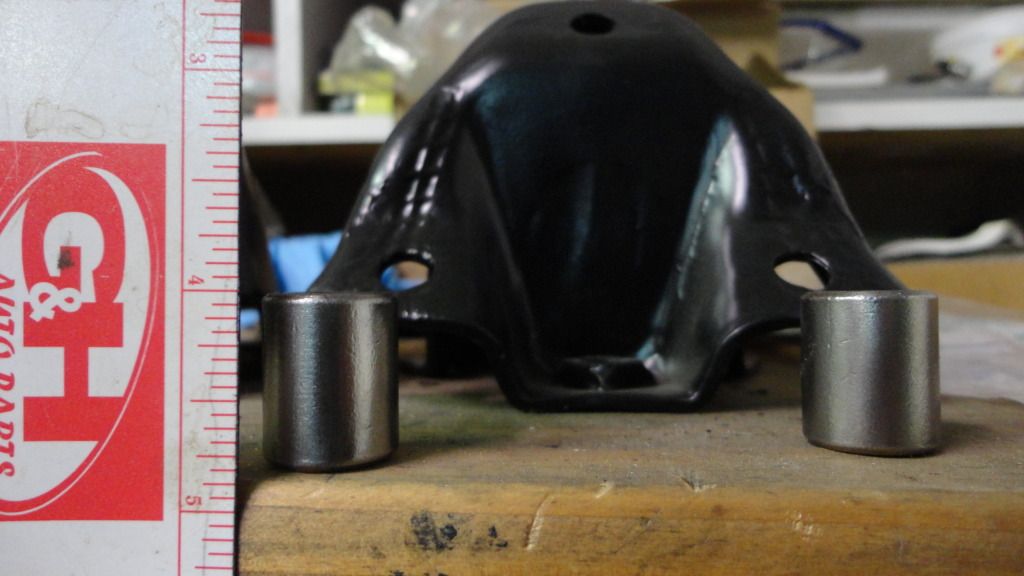 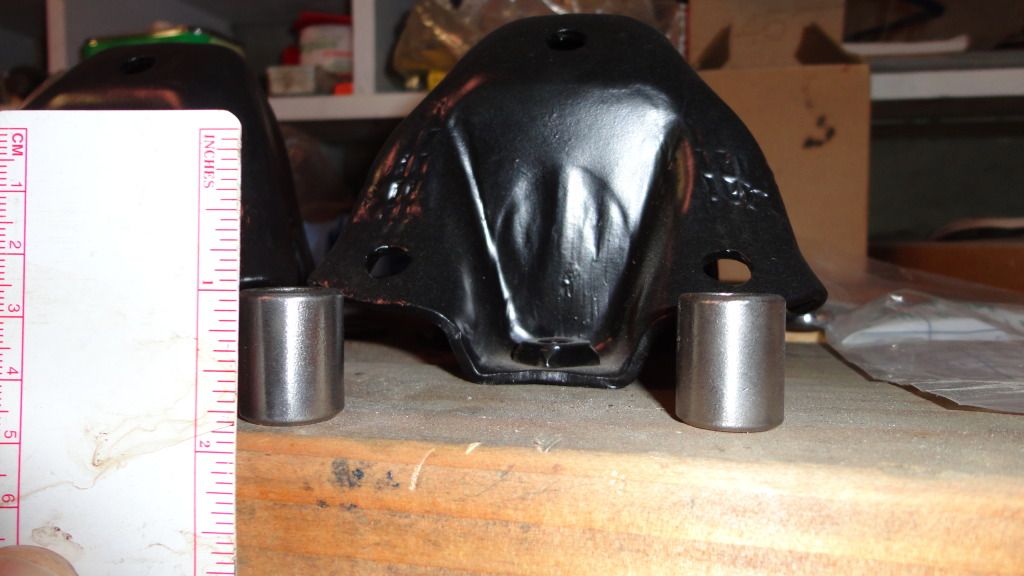 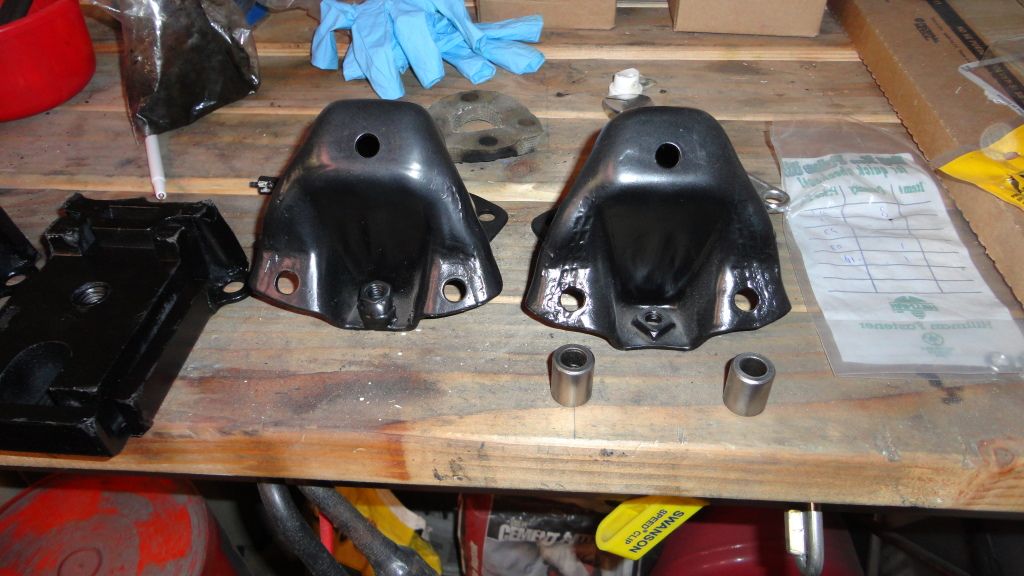
|
|
|
|
|
11-19-2012, 03:11 PM
|
#115 |
|
Registered User
Join Date: Jan 2012
Location: Antioch, IL
Posts: 418
|
Re: 1965 Suburban Resto-Rebuild
SO, here's my first shot at the wheel resto-completed. I will find the horn pieces and horn ring as I will ultimately put this back in my '62 VW since this was the original wheel..
BEFORE___ 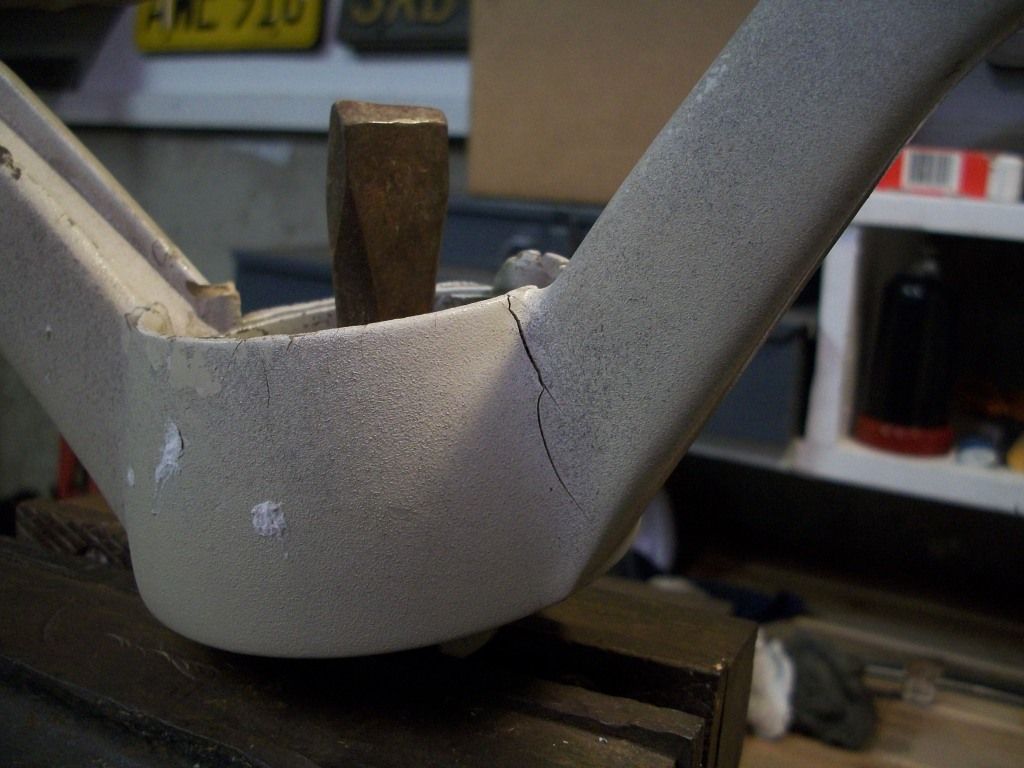 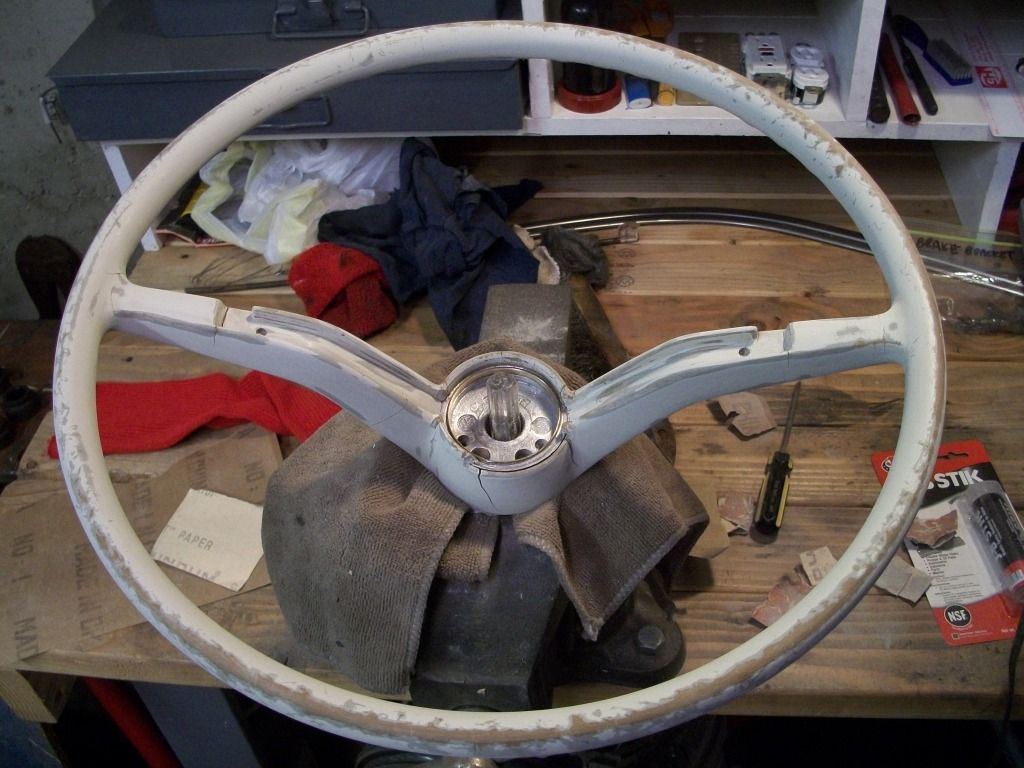 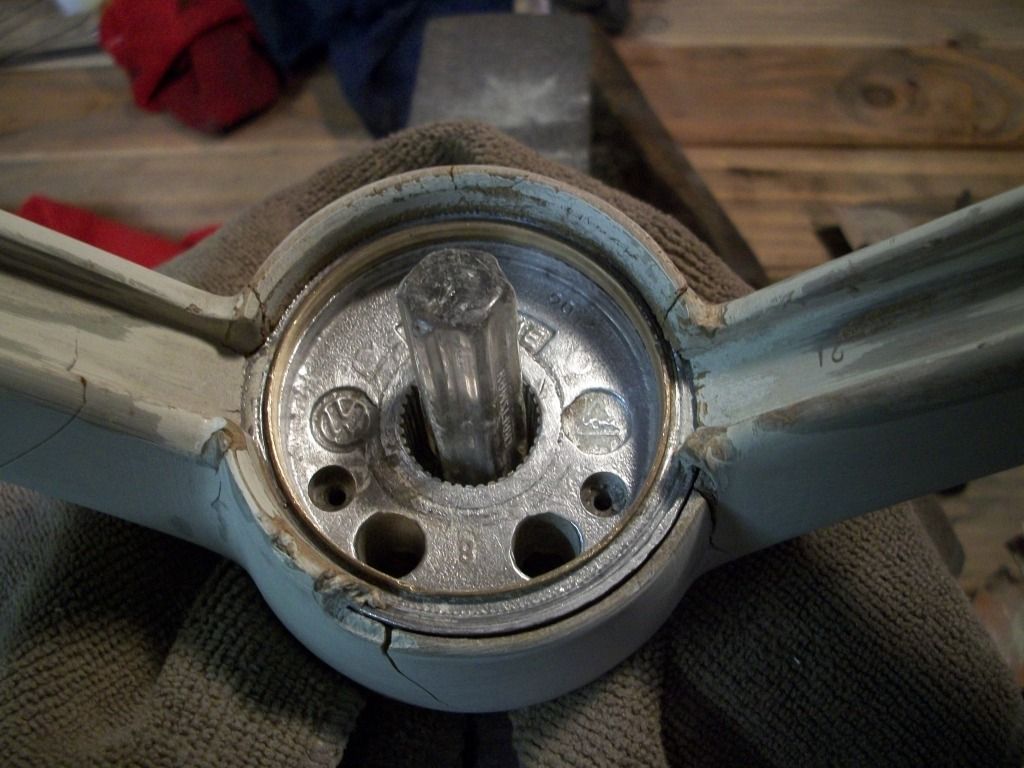 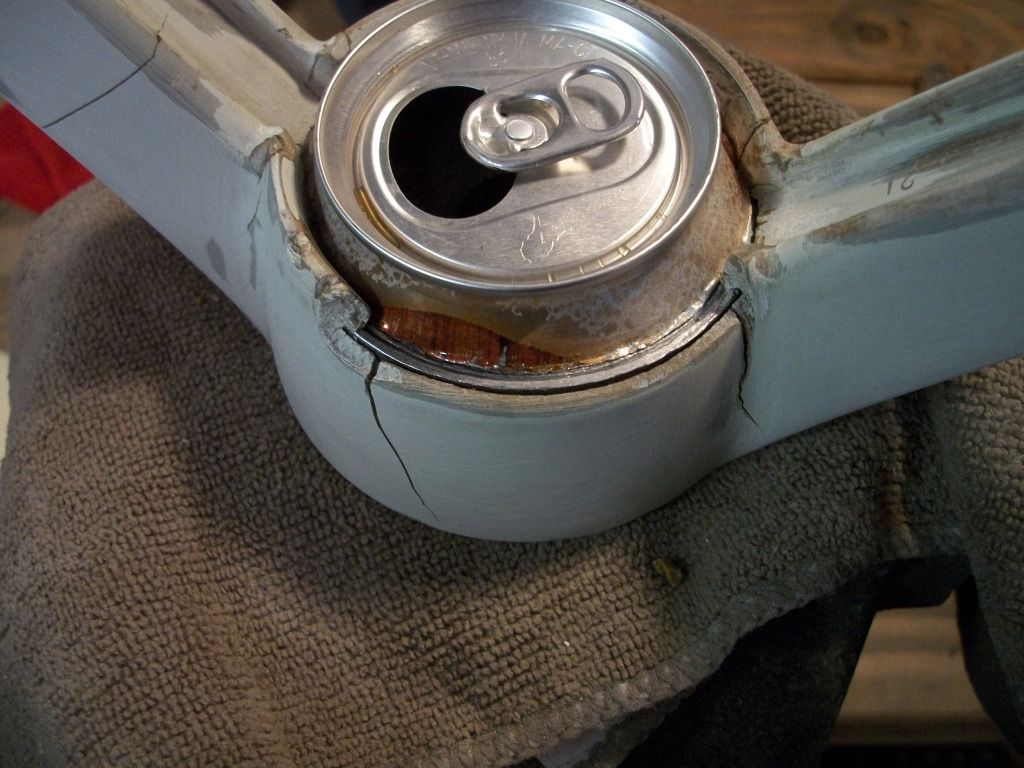 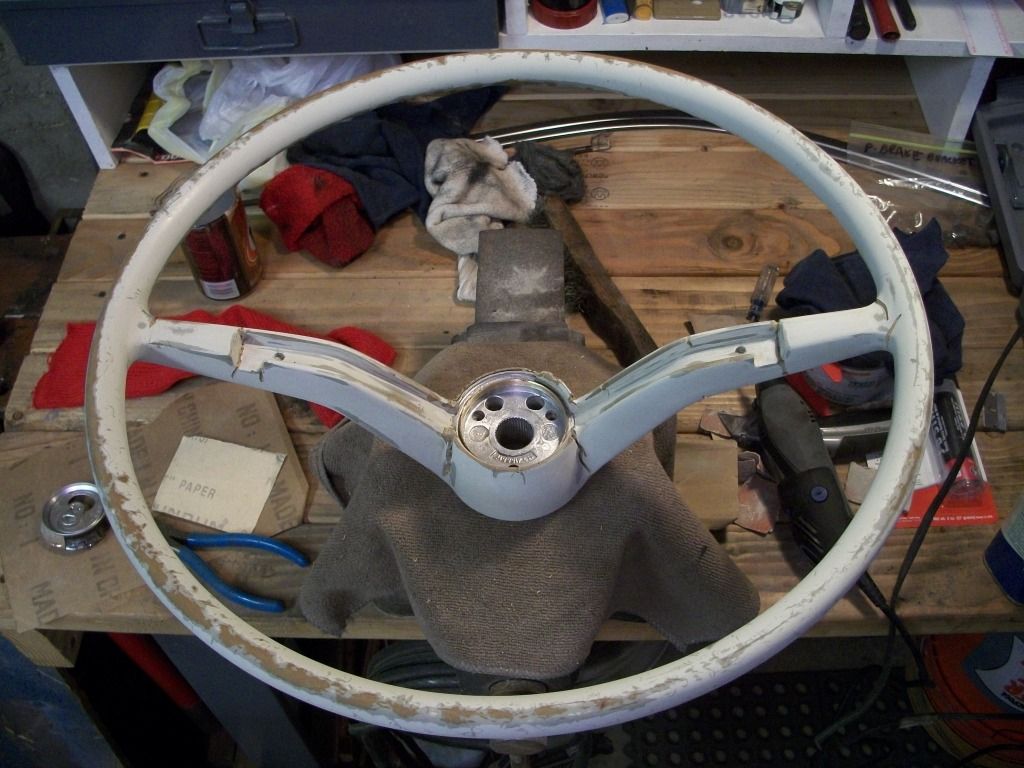 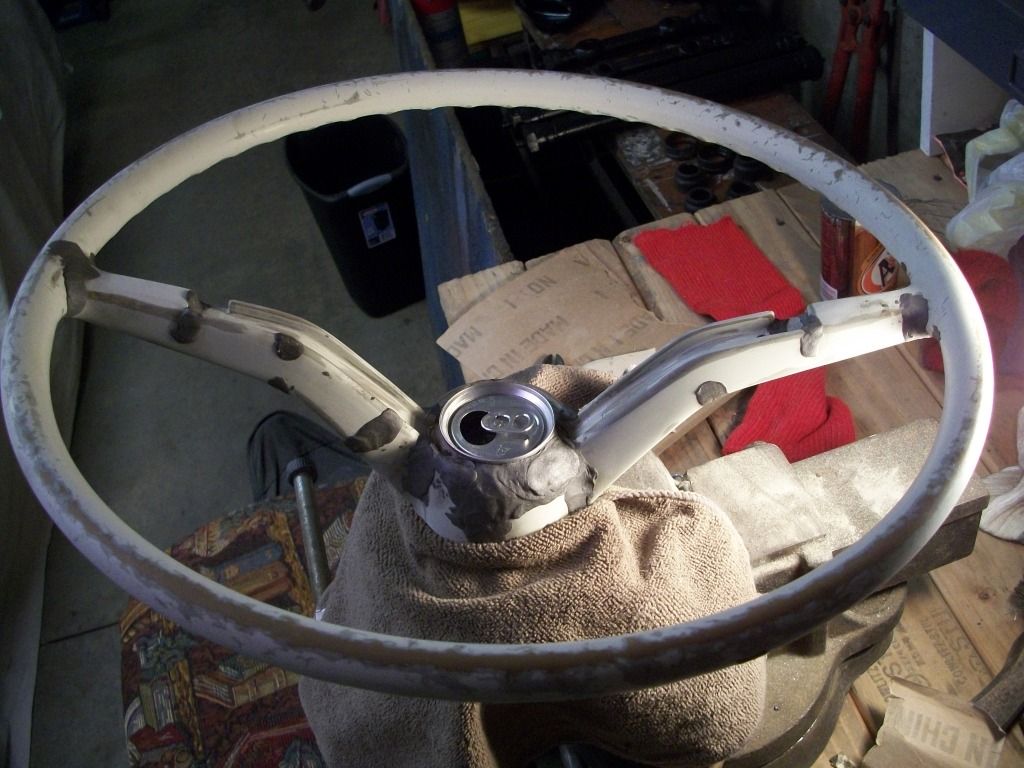 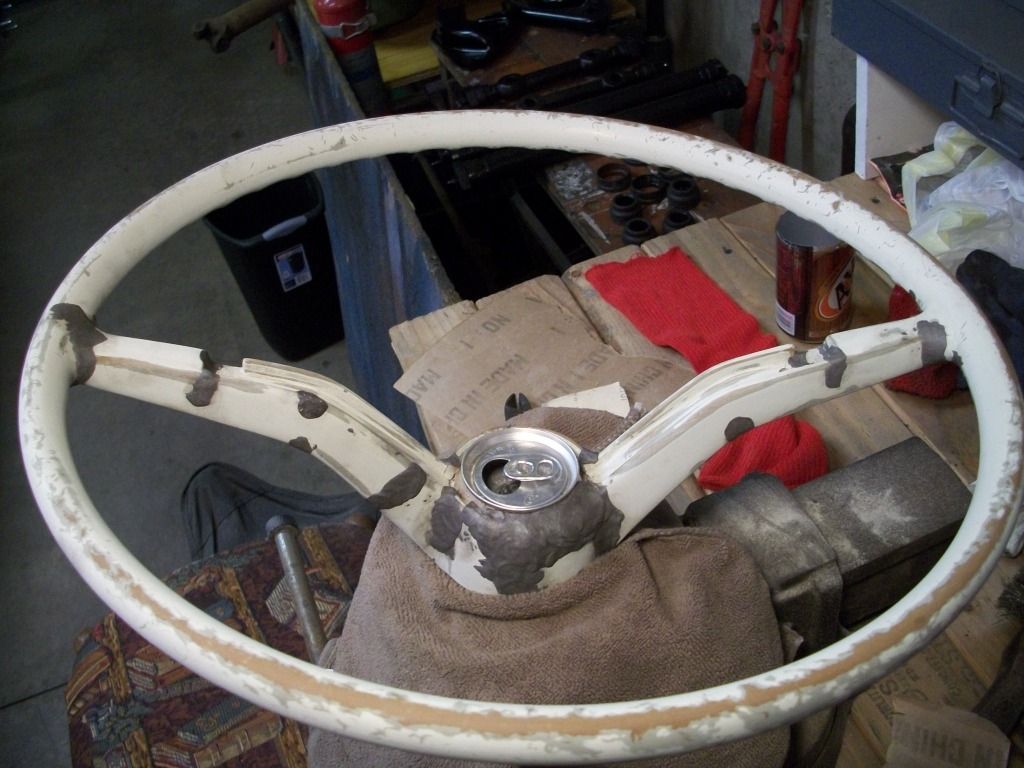 after... the test will be to see how the wheel structure holds up with the "secret" filler material 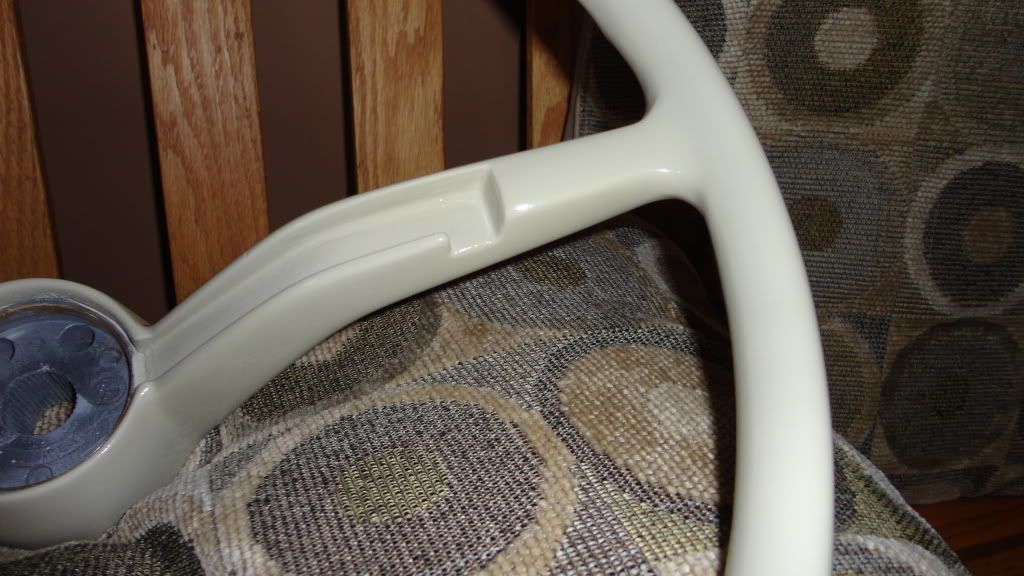 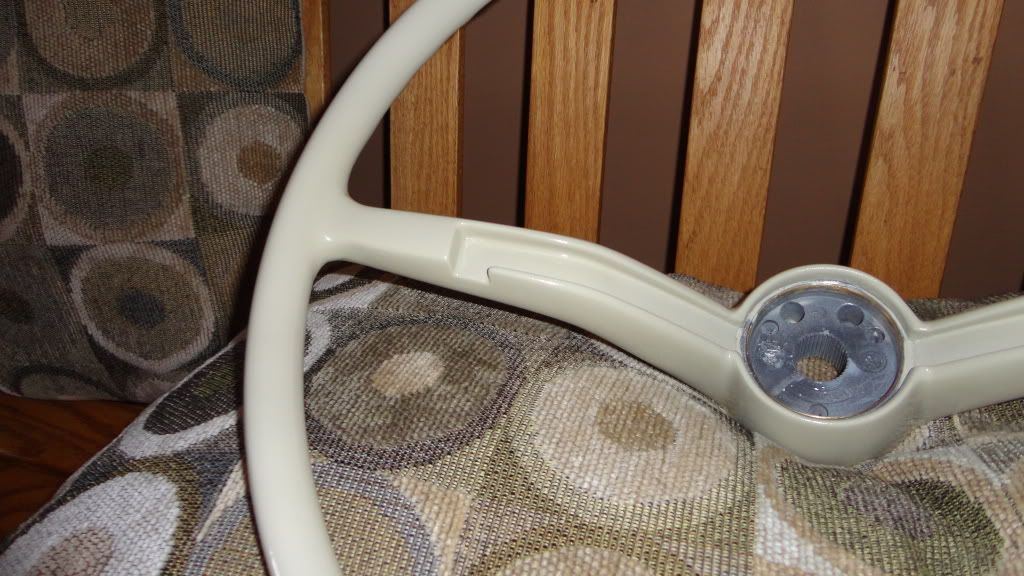 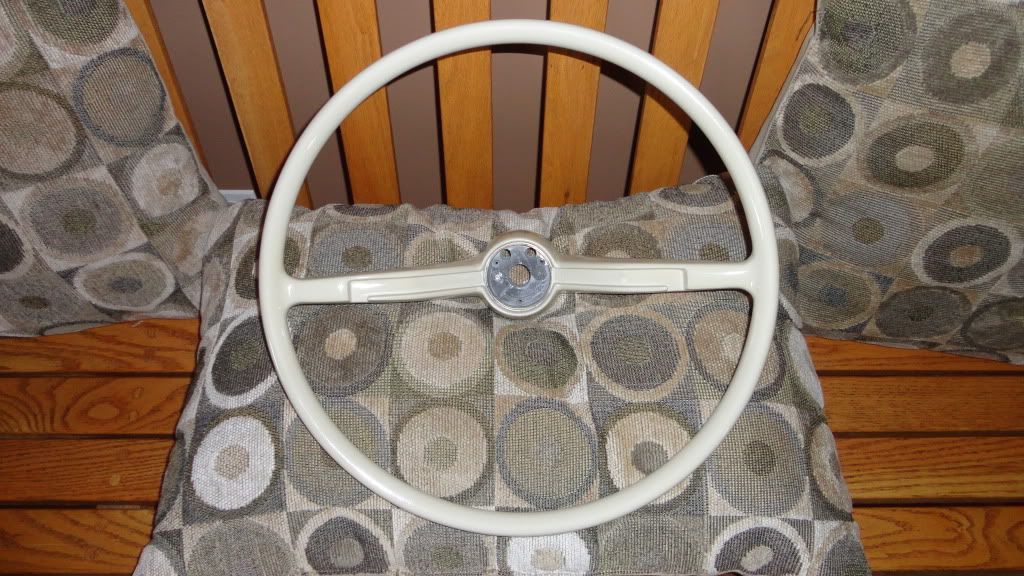 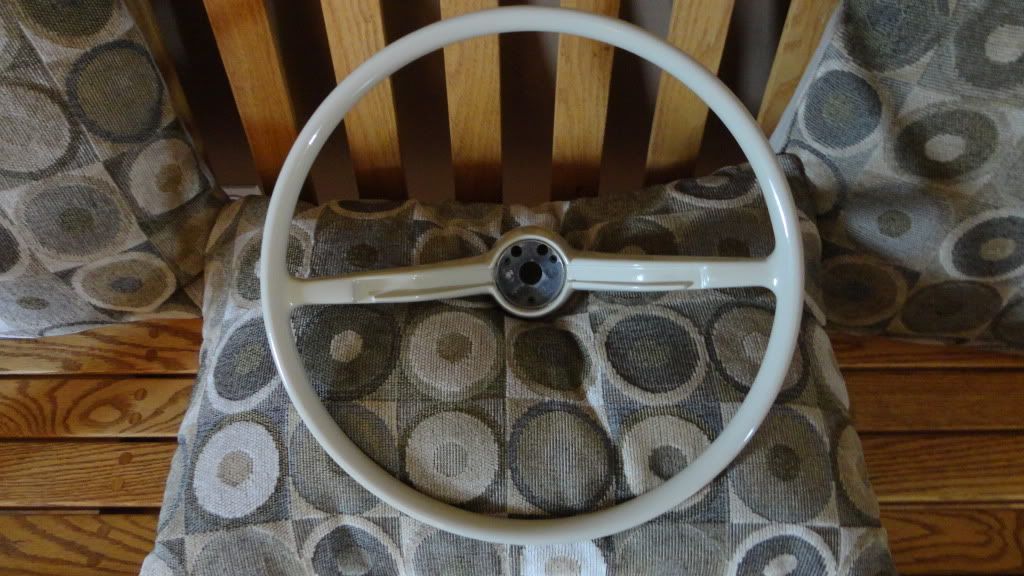
|
|
|
|
|
12-04-2012, 01:58 AM
|
#116 |
|
Registered User
Join Date: Jan 2012
Location: Antioch, IL
Posts: 418
|
Re: 1965 Suburban Resto-Rebuild
SO--not necessarily progress. But--maybe a little.
It was 60 degrees here today--so I had to take advantage of having the garage door open for a little bit.. Following receipt of the fork pivot ball retaining clip, I installed the fork with the T/O bearing and applied a little grease to keep it all nice and smooth. Also put on the new fork boot-works good. Then I put the re-surfaced original flywheel back in place, torquing down the bolts to 110ft/lbs.. Then, I realized there was no pilot bearing/bushing in the tail end of the crankshaft.. NOW--I don't recall ever removing one-so--I think that there wasn't one in there while driving the truck back from California???? So, I ran up to NAPA and managed to squeeze out $2.32 for a bushing which worked perfectly.. I placed the clutch disk on with the pressure plate on loose (no dummy shaft or clutch installation tool), and put the engine and trans together.. Everything went together very smoothly.. I re-located all my original trans>engine bolts--cleaned them all up, put on some new lock washers--and began dancing with the engine hoist.. I was able to maneuver the whole mess onto the chassis and new mounts with relative ease.. just before going to work.. I just have to get a couple new bolts for the engine/trans mounts and then tighten everything down.. Then--I need to sell this old HEMI so I can fund my new intake/exhaust system.. Here's some pics of the day.. (glad to get the engine off of the stand and the trans off the floor)  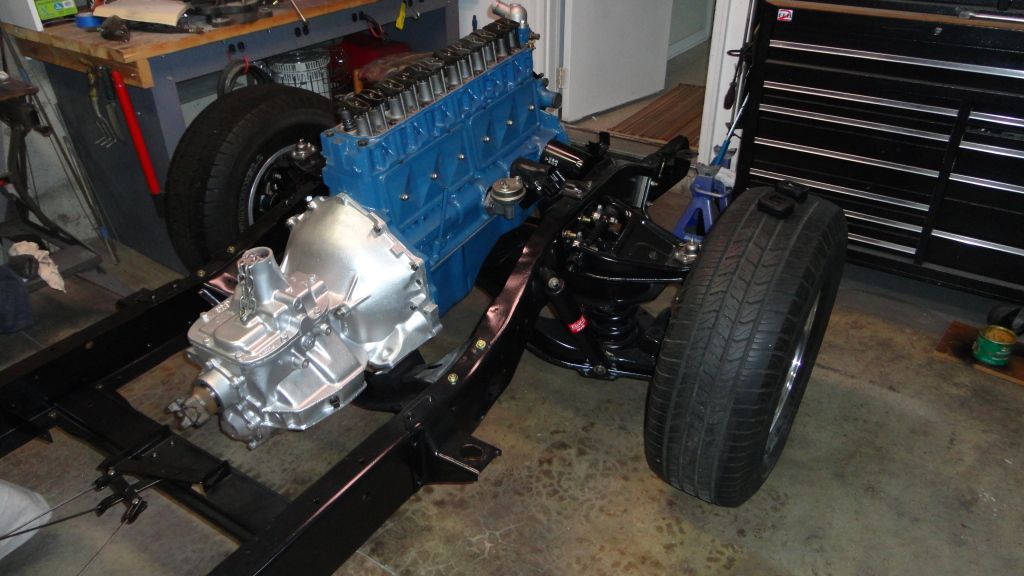 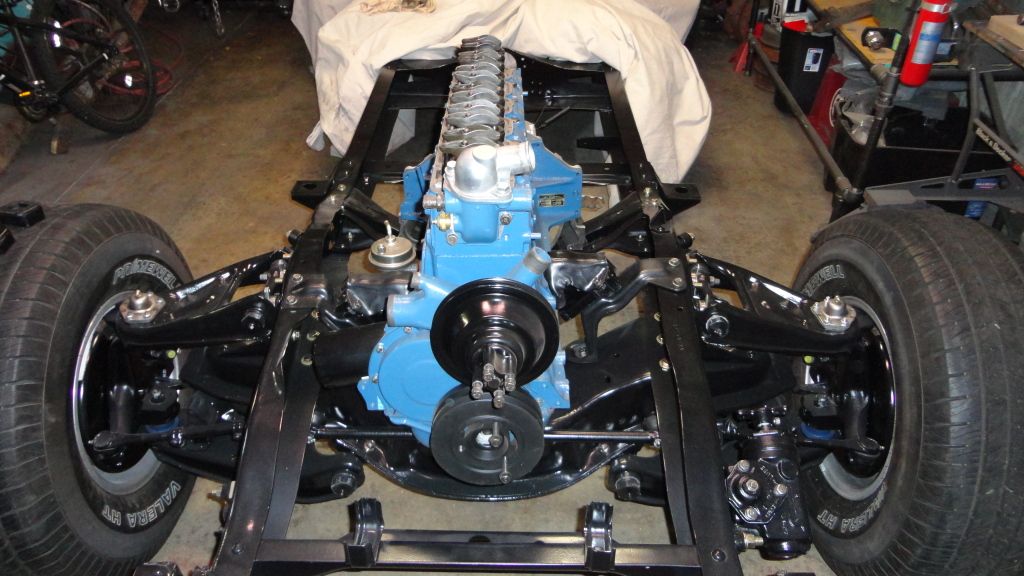
|
|
|
|
|
12-11-2012, 09:34 PM
|
#117 |
|
Registered User
Join Date: Jan 2012
Location: Antioch, IL
Posts: 418
|
Re: 1965 Suburban Resto-Rebuild
...engine and trans mounts are all settled with new bolts..
I sanded the one-piece driveshaft down to bare metal today--and put a nice coat of gloss black on it.. I painted the Davis Speed Equipment alternator mount a nice glossy black as well.. I got the oil system all primed with the 292 and found decent oil movement all the way to the top of all the pushrods.. Happy about that.. I also located a correct spark plug to work with this cylinder head which has smaller spark plug bores than the old 292 head. I'll put some of the parts on tomorrow and snap some pics--nothing sexy.. |
|
|
|
|
12-12-2012, 10:53 PM
|
#118 |
|
Registered User
Join Date: Jan 2012
Location: Antioch, IL
Posts: 418
|
Re: 1965 Suburban Resto-Rebuild
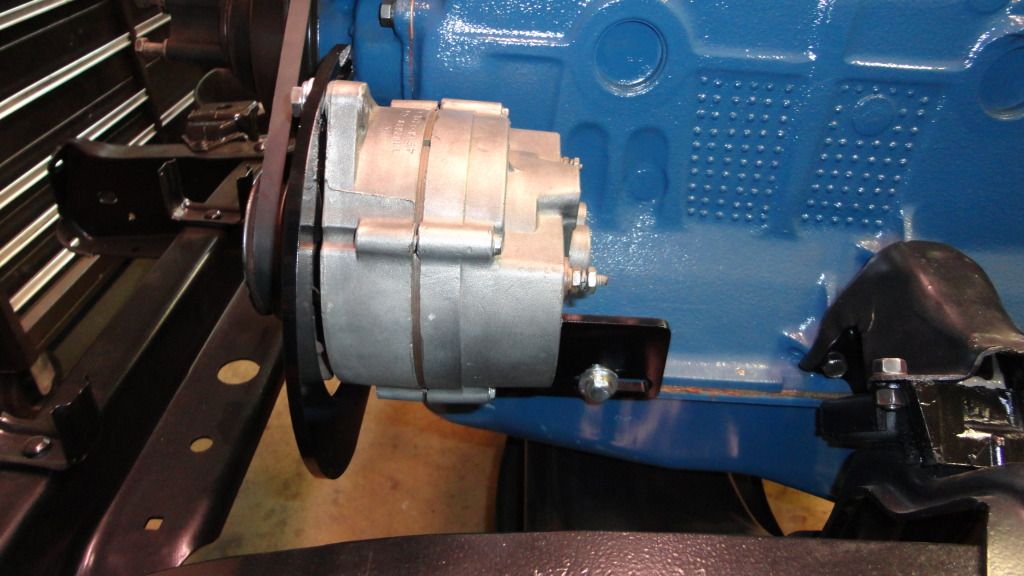
Here's some pictures of the DSE alternator bracket installed.. If only I had access to some metal stock--I think I could make one of these a little better.. But, it works nice and it's pretty clean looking in this setup..
   Installed the driveshaft.. I know this is all piddly ****--but it gets stuff off of the shelf and floor and back where it belongs... 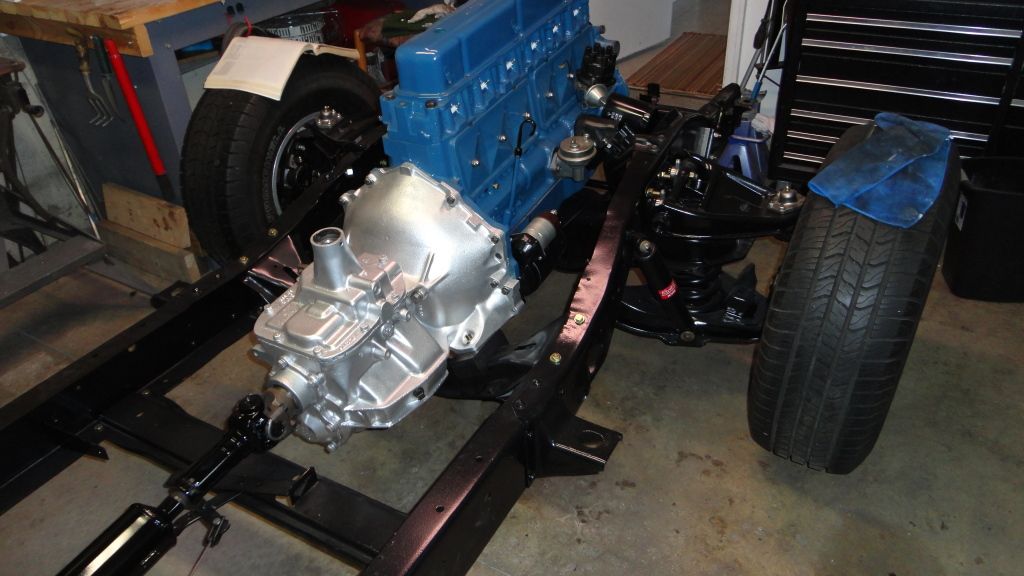  And then I started messing around with the clutch z-bar and linkage.. I disassembled the z-bar only thinking that I was going to need a new one.. But, I removed the ball joint pivots, nylon bushings, and found it to be all in really good shape.. I removed all the old grease and it's got a new coat of paint on it right now... more gloss black. Also, while taking apart the linkage--I found that the pivot had worn down to nearly a 1/3rd of it's thickness. So--I decided to make a "free" repair (free if you don't value time--which I don't get paid for my hobby-labor..) You can see in the following three pictures how well it had worn down.. Again, i'm glad this part did not fail while on the road back from California--or the rigging would have been ridiculous.. 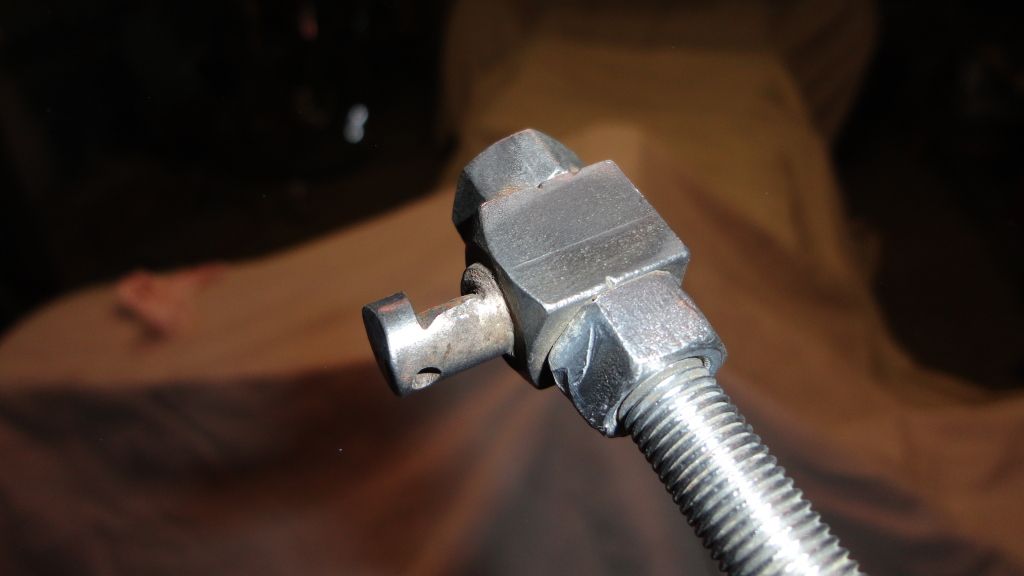 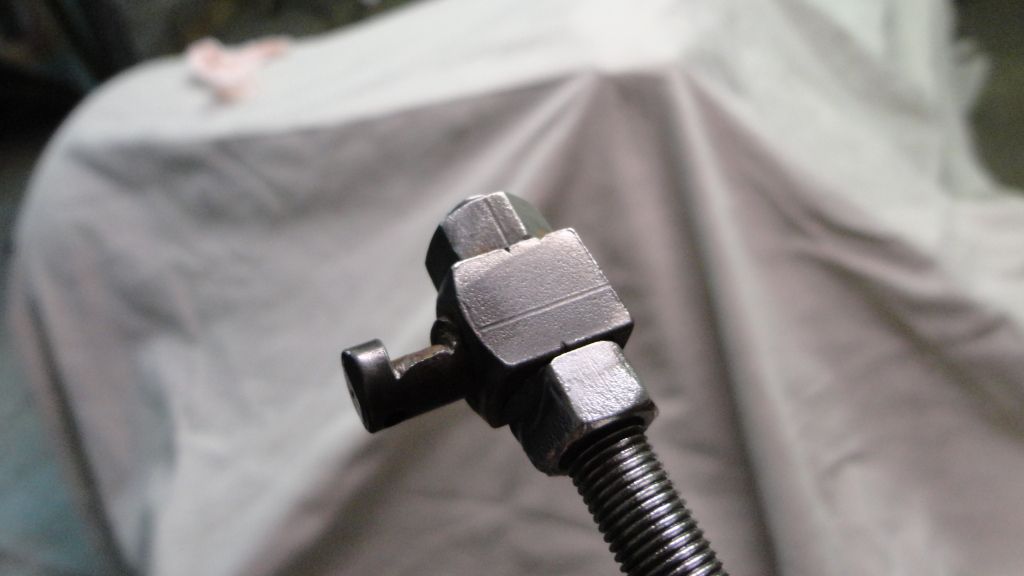 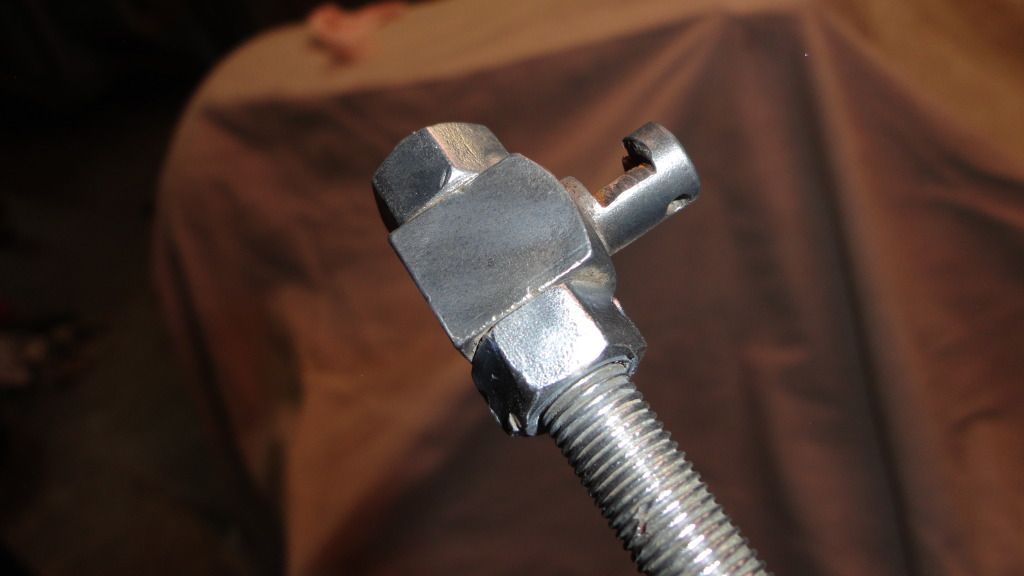 So, I decided as I said to do a little modification and repair of the small pivot arm. I started by hacking off the pivot after I realized it was damned close to the same diameter as a 3/8" bolt. now I could have probably welded around the circumference of the pivot and then filed it all back down to the right size--but I chose not to. So this is my way to fix it..(I'm sure this little piece is only a few bucks from one of the truck places--but I wanted to try this..) 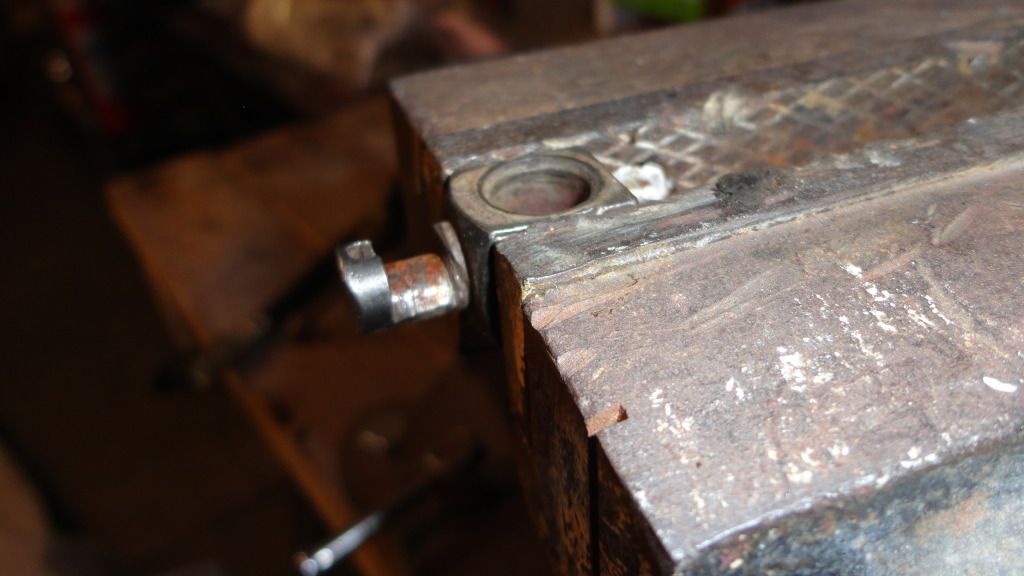 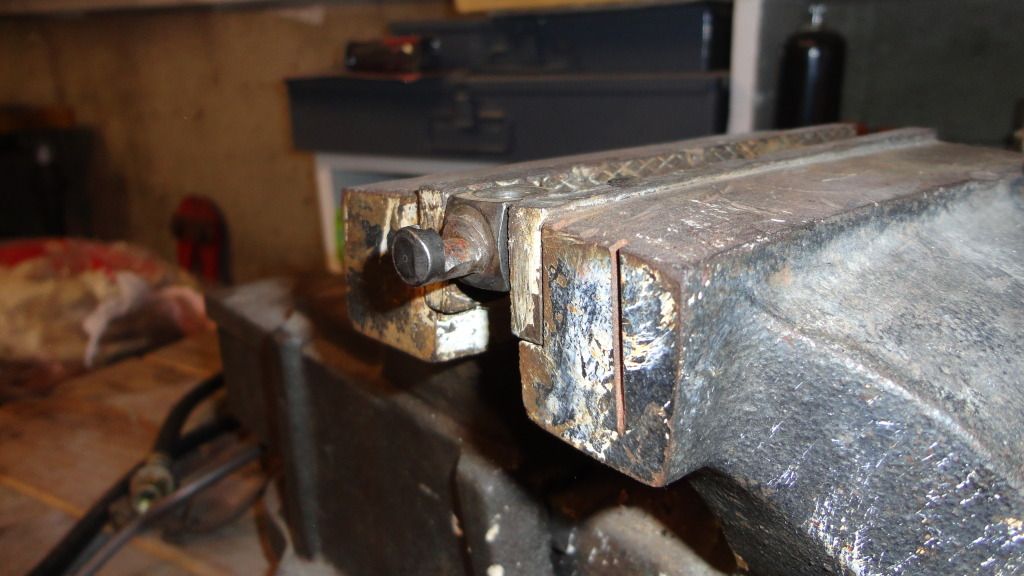 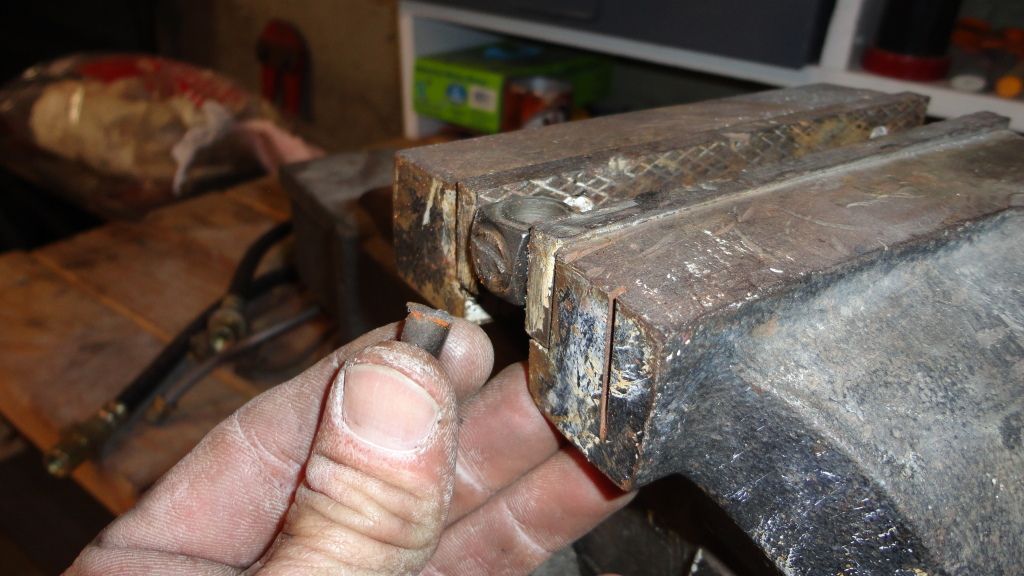 with the pivot piece gone.. I drilled through the center with a wallowed-out 5/16" diameter (needed 21/64ths for a 3/8-24 tap) and then tapped it clear through. 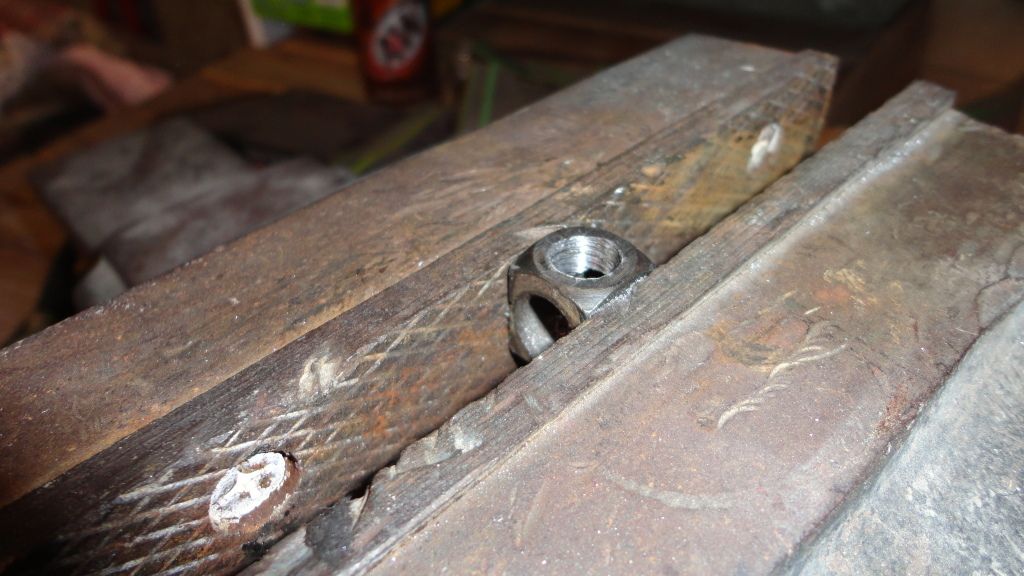 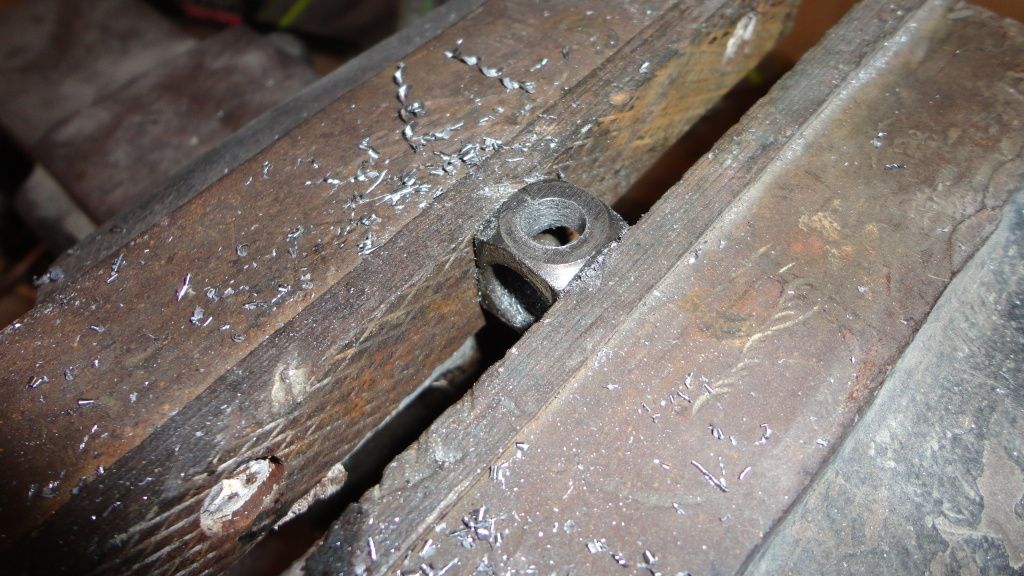 ..then I put the bolt in which I trimmed threads off of for the desired length based off of the original pivot portion. I left it a little longer so that I could place spring washers between the arm of the z-bar and also put a washer in between the z-bar and cotter pin which was not in place before. 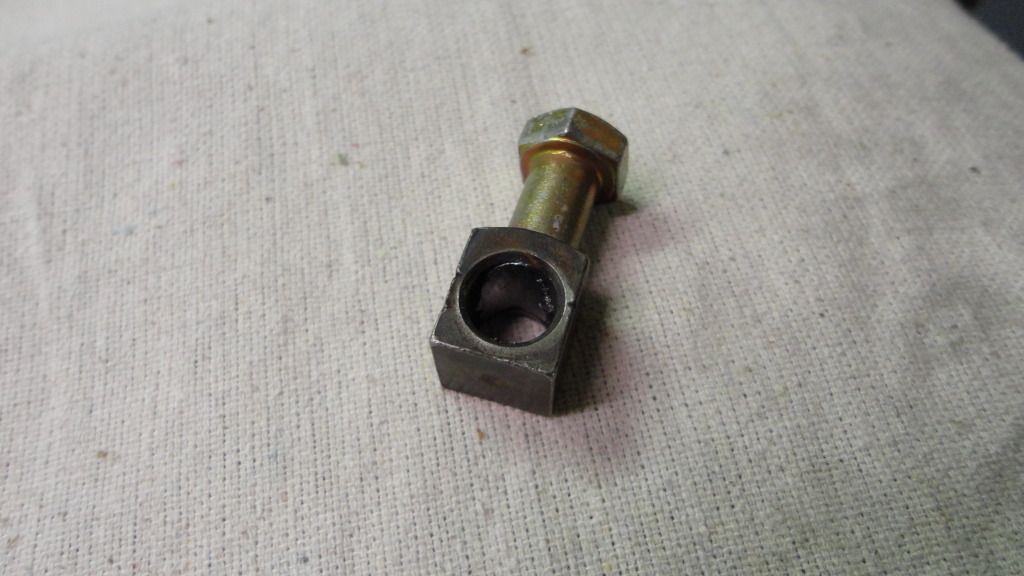 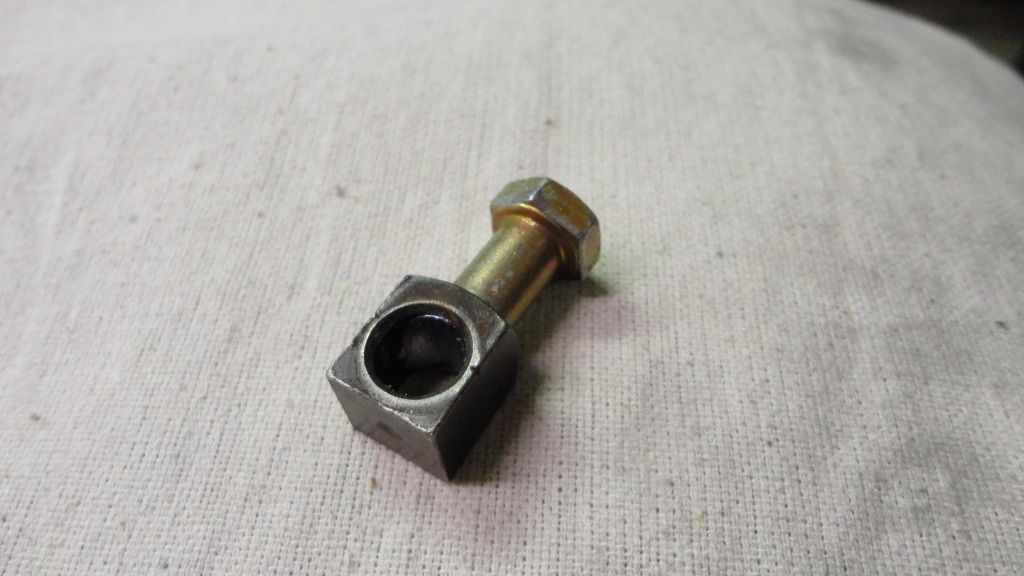 ..and lastly... I welded the INSIDE of the pivot block to the new pivot so as to not have an uneven welded surface next to the pivot arm on the z-bar. This was a little tricky--but I got plenty of heat into both pieces and it's solidly welded together. I lopped the top of the bolt head off, chamfered the edges of the pivot, then drilled a through hole for the cotter pin. Lastly--I filed down the inside of the pivot block so the linkage rod would slide thorugh smoothly.. 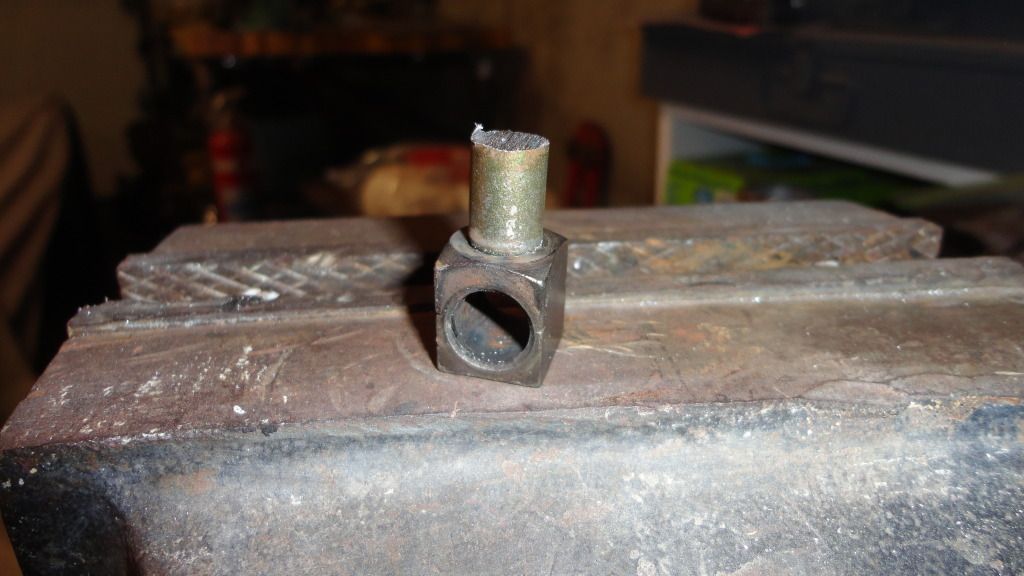 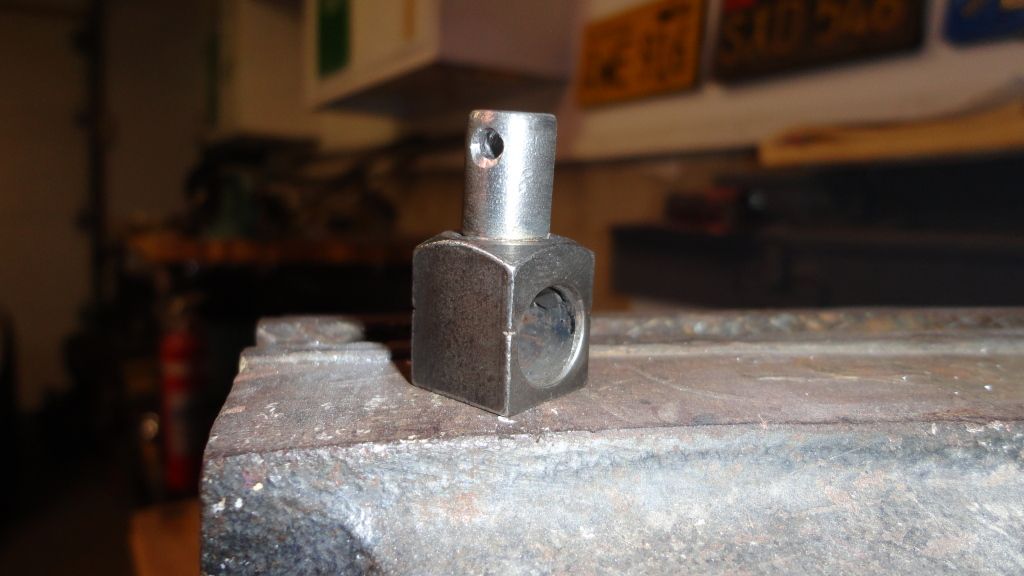
Last edited by hemifalcon; 12-12-2012 at 11:01 PM. |
|
|
|
|
12-12-2012, 11:40 PM
|
#119 |
|
Registered User
Join Date: Apr 2011
Location: .
Posts: 3,104
|
Re: 1965 Suburban Resto-Rebuild
Subscribed.
|
|
|
|
|
12-13-2012, 12:00 AM
|
#120 |
|
Registered User
Join Date: Jan 2012
Location: Antioch, IL
Posts: 418
|
Re: 1965 Suburban Resto-Rebuild
...after this stuff was done and I sprayed some black on the clutch linkage.. I started THIS>.... I already purchased all the vent window rebuild stuff to include rubbers and the latches/handles, etc.. So, I started to take them apart.. (pictures are my favorite way of reference for putting things back together..)
FIRST--removal of the door panel. I was worried about this as my '66 GMC 4x4 that I had about 5 years ago was a pain in the ass.. All the screws required an impact driver to break loose or just break.. Luckly these all came out with just a phillips screwdriver.. 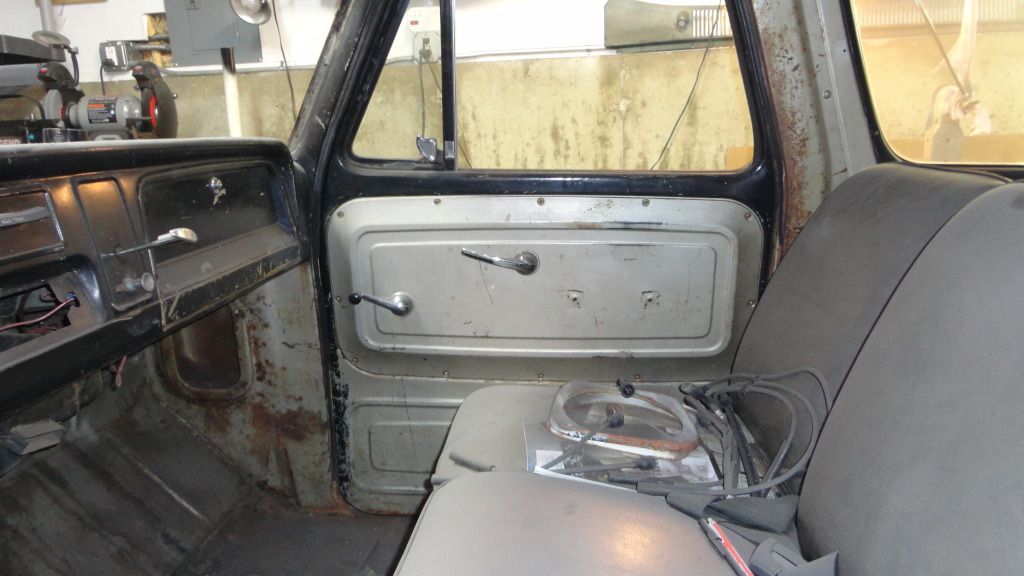 ...one thing I really like about the chevy door handles is that they don't use roll pins to secure them to the door, but just a flathead set screw makes them easy to remove. 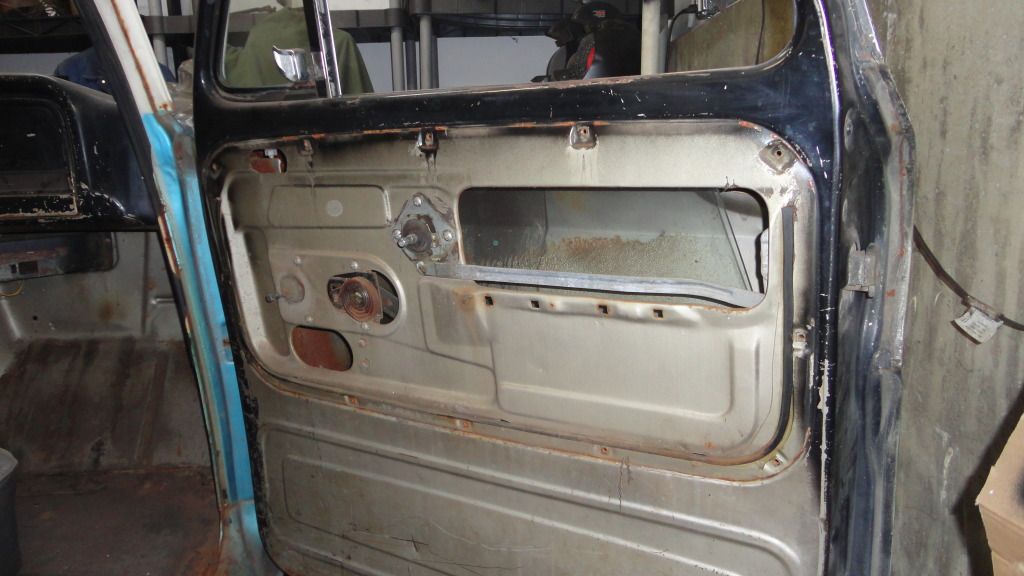 Note: Two rubber "insulators" between the mechanism for both the door latch and window winder.. Must replace.. 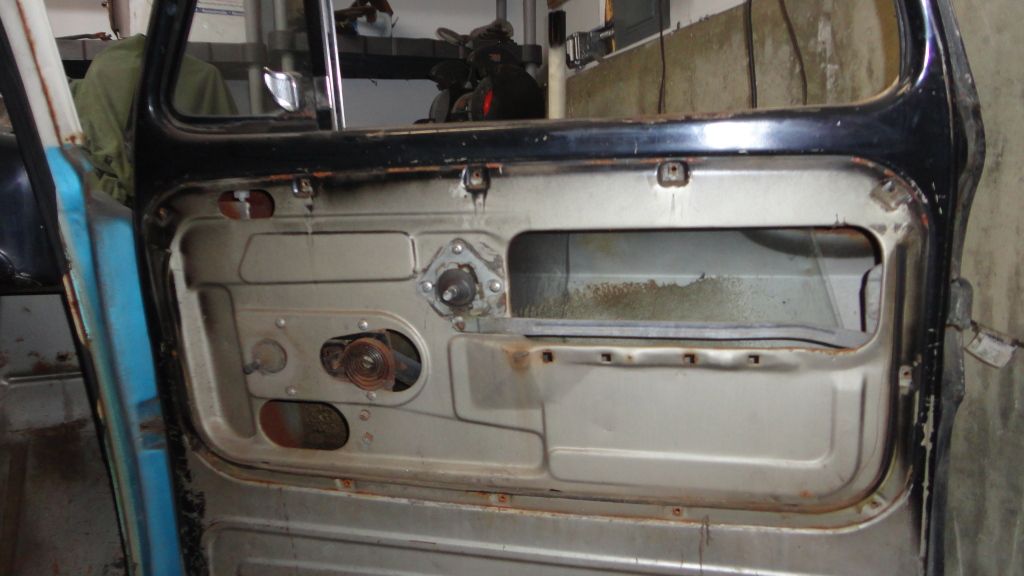 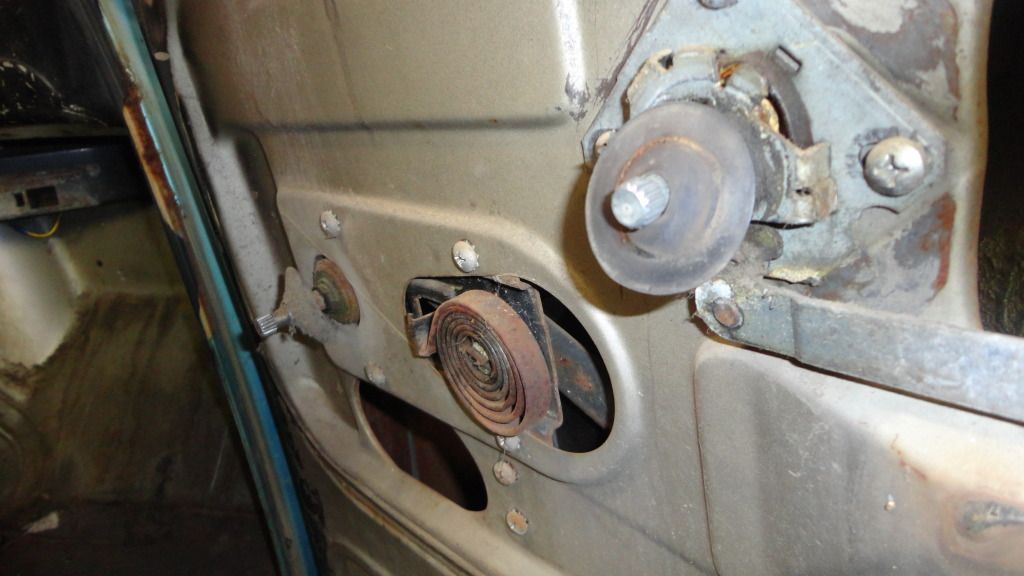 NOTE: the two phillps screws directly south of the winder spring are the ones that secure the division bar for the vent window.. These are the first two I removed in the disassembly of the vent window.. 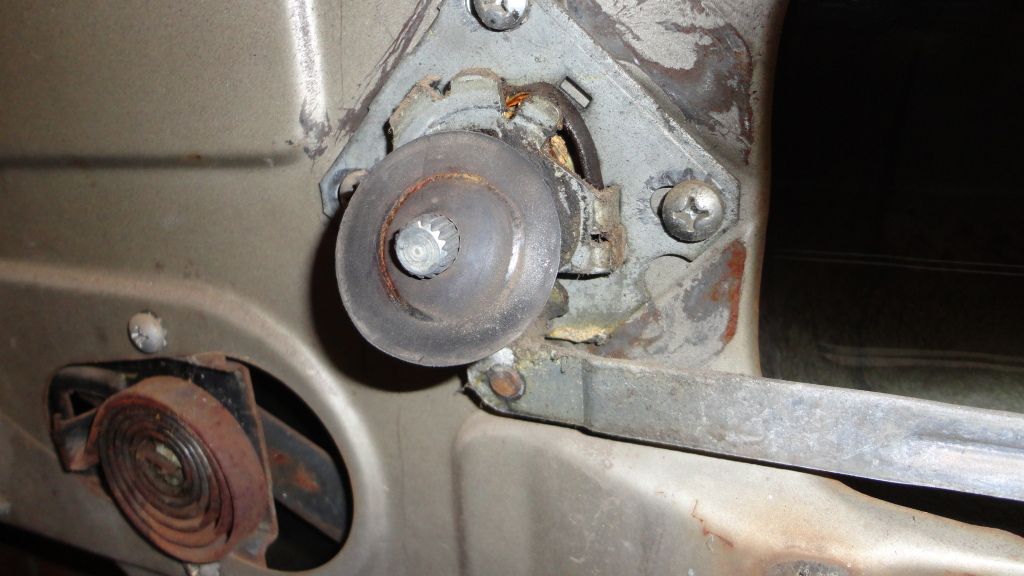 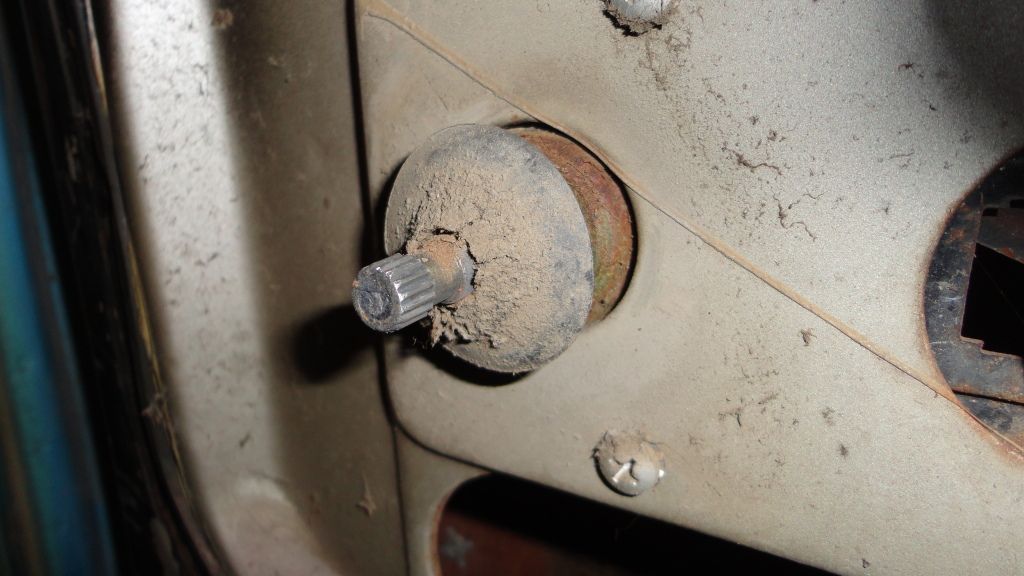 The next things to remove are the three sheetmetal screws along the door edge. Remove the two "forward" ones first and the top one last. I found that opening the vent window a full 90 degrees to the door was a great idea to keep the window from dropping when removing the last screw. If you waited to remove the division bar lowing mounting phillips screws, you don't need to worry about this. 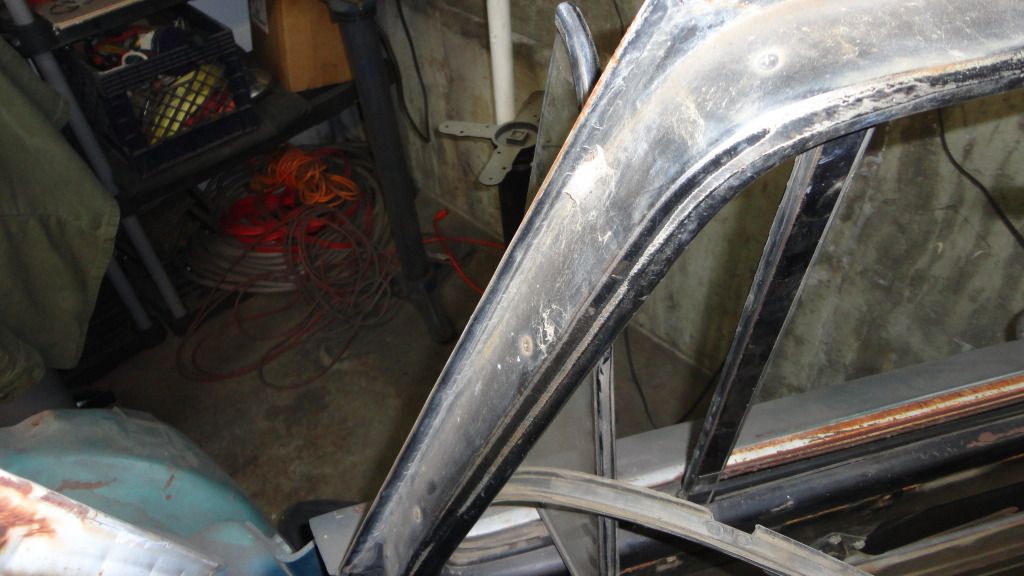 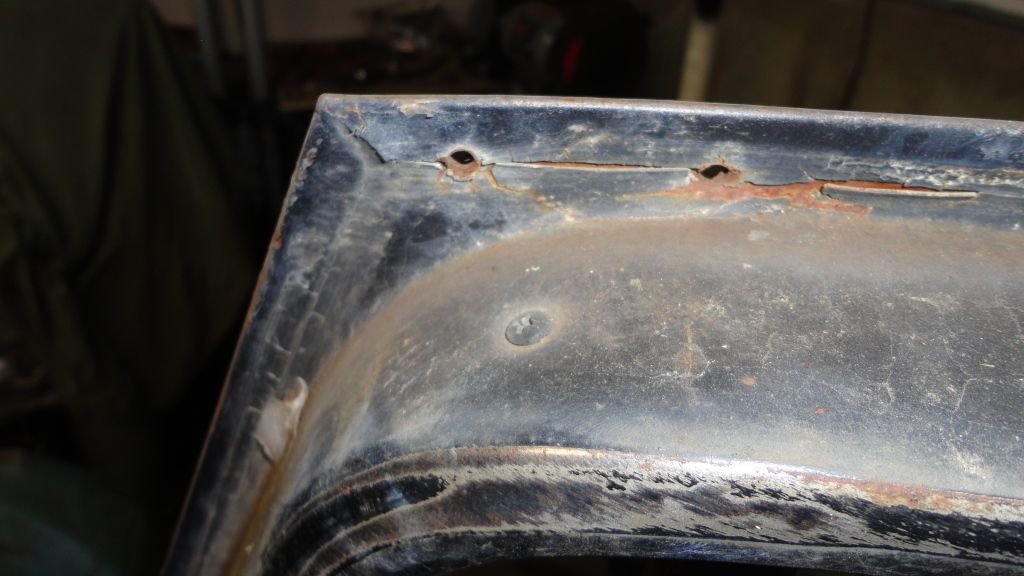 When removing the window and frame, you'll have to turn it to get the lower mount to come through the window opening.. When doing this with NICE paint, place tape or a protective cloth around this area as it is a tight fit.. OR put a small wooden or plastic wedge in the window opening if it needs to be spread slightly.. 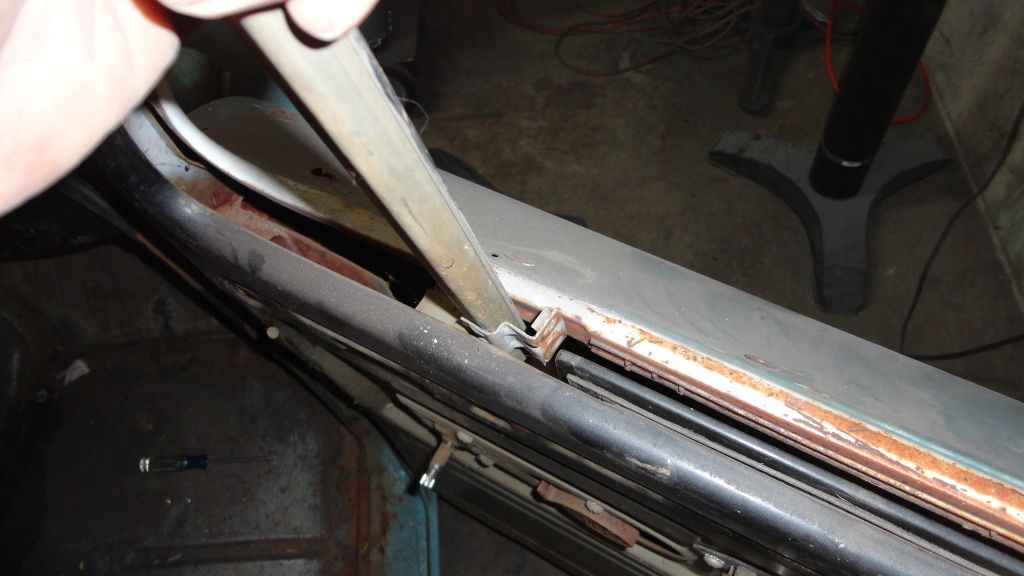 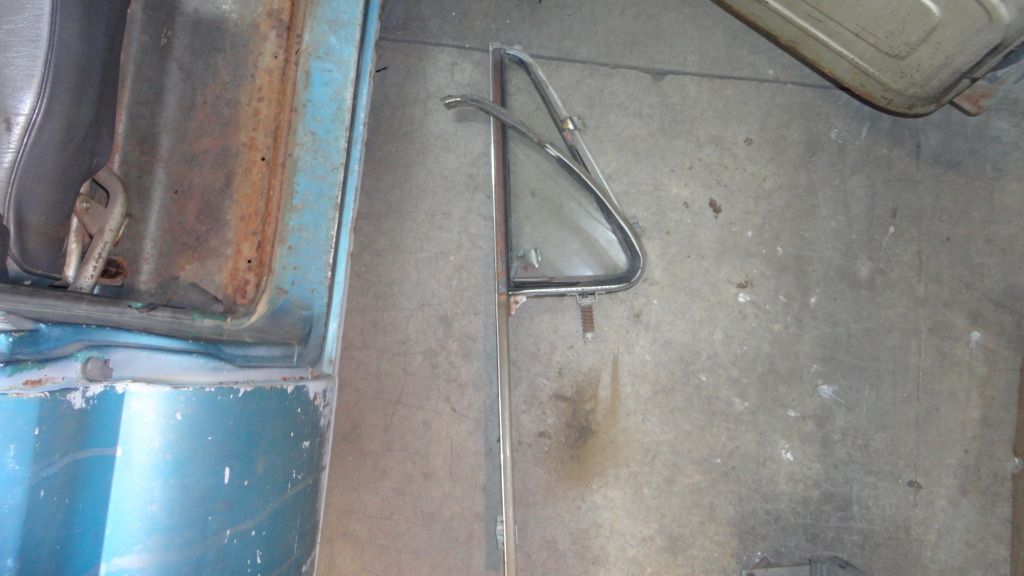 and here's the fully removed vent window.. Three sheetmetal screws (top one is longer), two phillips "bolts" and it's out.. 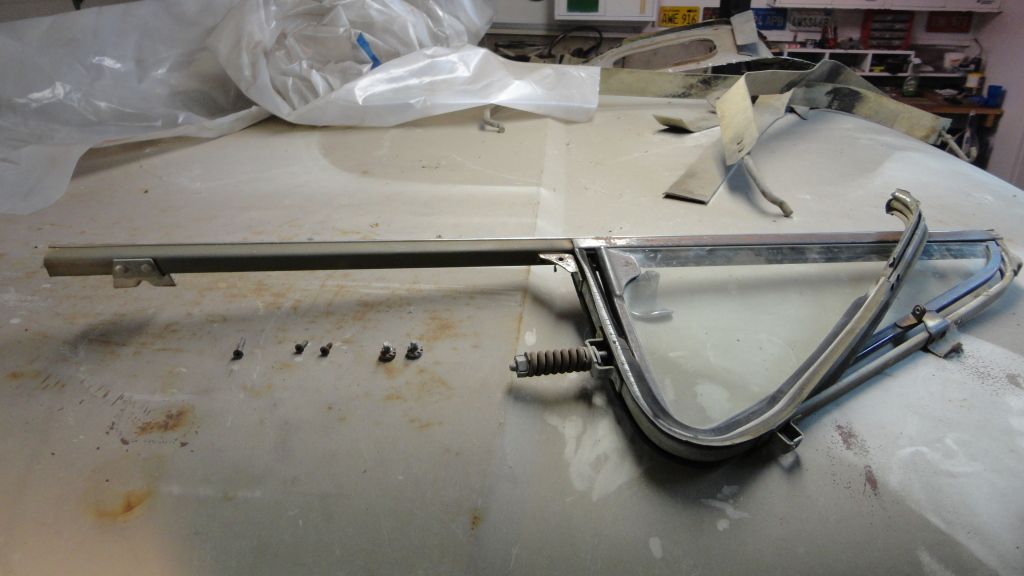 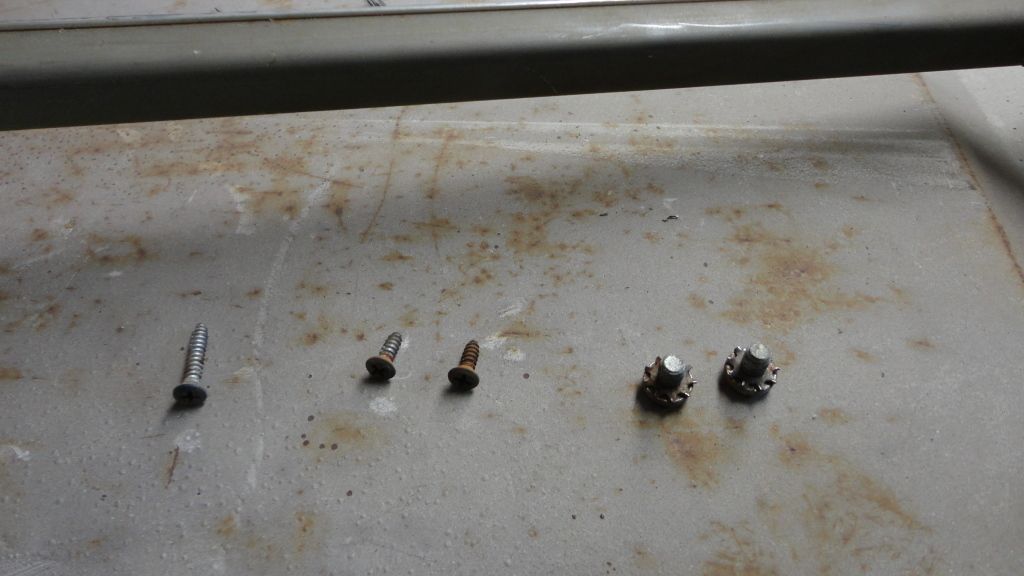 if there's any interest.. I may do a thread on this whole process when I'm done with the vent windows completely.. I know such threads have helped me in other areas--maybe I'll alternately help another truck builder.. Last edited by hemifalcon; 12-13-2012 at 12:11 AM. |
|
|
|
|
12-13-2012, 12:46 PM
|
#121 |
|
Registered User
Join Date: Sep 2011
Location: Tacoma, WA
Posts: 2,425
|
Re: 1965 Suburban Resto-Rebuild
Awesome work man !!
I like the linkage fix !!
__________________
Michael McMurphy My 66 Stepside My 64 Tow Truck My 66 Tempest Table Of Contents Added to Page1 |
|
|
|
|
12-13-2012, 01:38 PM
|
#122 | |
|
Registered User
Join Date: Jan 2012
Location: Antioch, IL
Posts: 418
|
Re: 1965 Suburban Resto-Rebuild
Quote:

|
|
|
|
|
|
12-13-2012, 03:26 PM
|
#123 | |
|
Registered User
Join Date: Feb 2008
Location: Sidney,b.c.
Posts: 4,425
|
Re: 1965 Suburban Resto-Rebuild
Quote:
my frame brkt broke holding the zbar in in downtown Vancouver and had 500mi to home. worst part was getting stuck at a light going up a good hill.This is where second gear in my 5speed and that 453 detroit I had in there started just as soon as I hit the starter and I was under way. my heart was on my sleeve though that it would pull on the starter an flash. that motor never let me down in just about 20 years when I sold it to a fellow that was going to put it in a f250 nice work ron |
|
|
|
|
|
12-13-2012, 03:32 PM
|
#124 | |
|
Registered User
Join Date: Jan 2012
Location: Antioch, IL
Posts: 418
|
Re: 1965 Suburban Resto-Rebuild
Quote:
I know what you mean by shifting--as I typically fly-shift my VW and I did it in the Suburban just to see if it could work.. It's much more sloppy in the old Chevy than my VW as the shifter easily glides in when the RPM's are right where she likes 'em... Running the biggggg diesel's is a fun day when you never touch the clutch pedal... |
|
|
|
|
|
12-13-2012, 06:24 PM
|
#125 |
|
65 suburban vortec 5.3 bagged
Join Date: Jun 2005
Location: upstate new york
Posts: 1,317
|
Re: 1965 Suburban Resto-Rebuild
Keep up the great progress! nice work!
Posted via Mobile Device |
|
|
|
 |
| Bookmarks |
|
|


 ...ordered mine from Carquest through a friend, & we didn't notice until it was time to install them on the new rear...we searched every parts store in town, & every drum was the same...my dad ended up having a friend machine the hole


 Linear Mode

