
 |
|
|
#101 |
|
Registered User
Join Date: Feb 2014
Location: Northern Nevada
Posts: 208
|
Re: $3,000 driver build
I'll tell him it's life or death, I need to drive my 72 haha.
Brian I am SUPER stoked, I'm jones'n to drive her, AND wrench some more to be honest, I love that part but never seem to have the time. Wayne and tommy, thanks for checkin out my build, MORE TO COME!!!
__________________
1972 Driver SOLD |
|
|

|
|
|
#102 |
|
Registered User
Join Date: Feb 2014
Location: Northern Nevada
Posts: 208
|
Re: $3,000 driver build
Oh snap!
 I'll have the new title in a few weeks! I've been a crappy member too, I got started on my seat last night, got the bottom portion done, and didn't take ANY pics. None before, during, or after. WTH. Apparently I was too buzzed up to do both the job and take pics.........
__________________
1972 Driver SOLD |
|
|

|
|
|
#103 | |
|
Registered User
Join Date: Aug 2012
Location: Topeka Kansas
Posts: 2,655
|
Re: $3,000 driver build
Quote:
 you completed work without pics zomg I feel so jipped! you completed work without pics zomg I feel so jipped!  We will settle for some pics of it with the bottom done and then another when it's completed. 
|
|
|
|

|
|
|
#104 |
|
Registered User
Join Date: Feb 2014
Location: Northern Nevada
Posts: 208
|
Re: $3,000 driver build
Deal!
I'll go snap one of the bottom in a few.
__________________
1972 Driver SOLD |
|
|

|
|
|
#105 |
|
Registered User
Join Date: Feb 2014
Location: Northern Nevada
Posts: 208
|
Re: $3,000 driver build
Ok, so I'm no upholsterer. I just wanted a clean(ish) seat for me and the kids to sit on. I went to the fabric store in town, this stuff was called bandana print, it was about $5 a yard and I bought two yards. They had some REALLY furry stuff that wanted, but it was $25 a yard, TOO MUCH!
All together I spent $24 for the fabric, some foam, and these eyelets I used to strap it to the seat. It turned out better than I had hoped lol. I got these eyelets, and they came with the little tool to install them. All I did was smash one in every six inches or so of the perimeter of the fabric once I cut it to size: 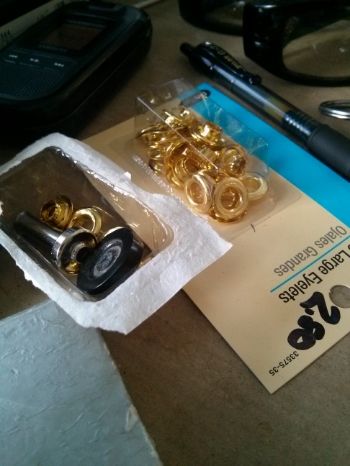 Then just strapped it to the underside of the seat with cable and zipties and put it back in lol. Hey it worked: 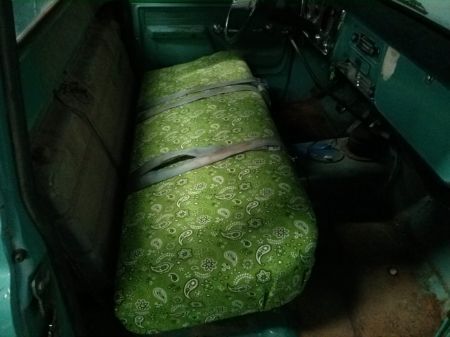 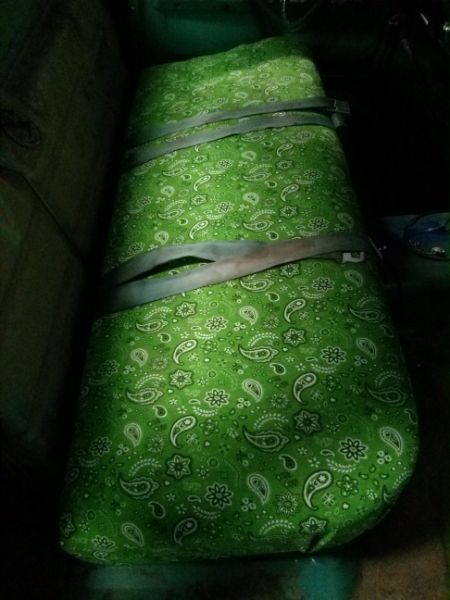 Here's the seat back before I get started, it's in much better shape than the bottom was: 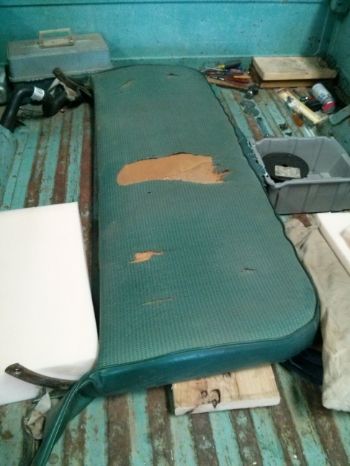 And Elvis holding down the fort while I work: 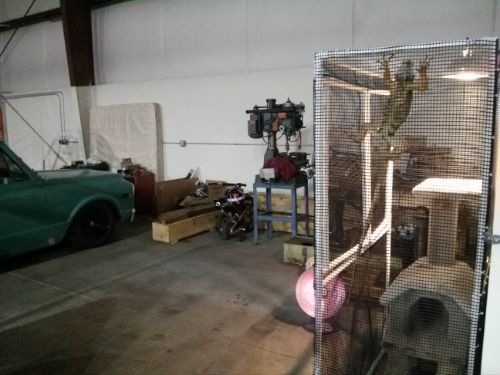 Actually he's just trying to find a way out so he can eat my face off lmao.
__________________
1972 Driver SOLD |
|
|

|
|
|
#106 |
|
Registered User
Join Date: Mar 2013
Location: Grand Island, Ne.
Posts: 1,110
|
Re: $3,000 driver build
Elvis just wants to help.... LOL
Nice work
__________________
J. Vess, 6'6", Gearhead, Welder, Fabricator, Nutcase 1955 Chevy Stepside "Dudley" My daily http://www.67-72chevytrucks.com/vboa...d.php?t=760288 1972 Chevy C10, Project "Chevro~Layed out" Nether Storm Build Thread http://67-72chevytrucks.com/vboard/s...23#post6007523 |
|
|

|
|
|
#107 |
|
Registered User
Join Date: Mar 2014
Location: Gibbstown, NJ
Posts: 176
|
Re: $3,000 driver build
I cant beleive you buffed it. It was perfect as is.
|
|
|

|
|
|
#108 |
|
Registered User
Join Date: Feb 2014
Location: Northern Nevada
Posts: 208
|
Re: $3,000 driver build
No seriously, he would chew my face off if I let him!
hanly that oxidation will come right back if I just leave it alone for a month.
__________________
1972 Driver SOLD |
|
|

|
|
|
#109 |
|
Registered User
Join Date: Feb 2014
Location: Northern Nevada
Posts: 208
|
Re: $3,000 driver build
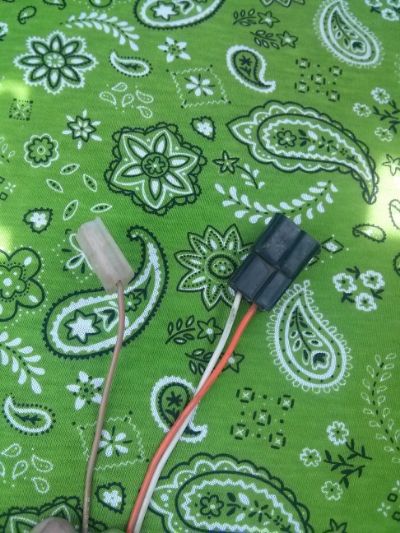
Do you guys know what these two plugs are for coming from behind my gas tank? I'm assuming one is for the fuel gauge, but I don't know:
__________________
1972 Driver SOLD |
|
|

|
|
|
#110 |
|
Registered User
Join Date: Oct 2013
Location: Livermore, ca
Posts: 27
|
Re: $3,000 driver build
Nice truck mike. The best part is that it's going to be a daily driver.
|
|
|

|
|
|
#111 |
|
Registered User
Join Date: Feb 2014
Location: Northern Nevada
Posts: 208
|
Re: $3,000 driver build
Thanks Marc welcome to the site!
__________________
1972 Driver SOLD |
|
|

|
|
|
#112 |
|
Registered User
 Join Date: Jan 2012
Location: Whitesboro, Texas
Posts: 932
|
Re: $3,000 driver build
Mike -
The tan wire goes to your fuel tank sending unit. The orange/white wire goes to your dome light. I'm digging the seat covers!
__________________
Cheers - Wayne Our Shop Build - http://67-72chevytrucks.com/vboard/s...d.php?t=620966 '55 Wagon Build - http://67-72chevytrucks.com/vboard/s...d.php?t=689157 1971 Cheyenne Super Ochre/White LWB 350 Auto - my son's truck "Nancy" 1972 GMC K2500 Custom 4X4 Olive LWB 400 SB 4-speed -"Greenie" - Restoration to begin after the '55 Nothing sucks more than that moment during an argument when you realize you're wrong. |
|
|

|
|
|
#113 |
|
Registered User
Join Date: Feb 2014
Location: Northern Nevada
Posts: 208
|
Re: $3,000 driver build
No wonder the dome light doesn't work!! lol. Wayne on the sending unit wire, will it go to the gauge or the fuseblock?
And thanks, haha, I wasn't going for a nice install at all, I literally spent about an hour on the entire thing, that includes ripping all those damn hog ties off. If it lasts a month I'll be happy. 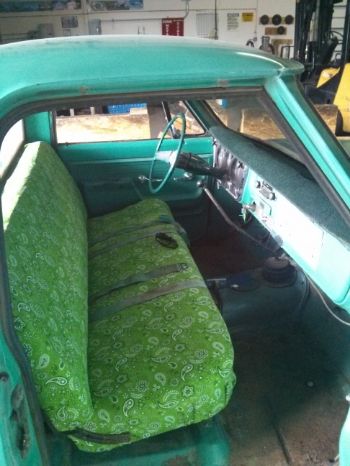
__________________
1972 Driver SOLD |
|
|

|
|
|
#114 |
|
Registered User
 Join Date: Jan 2012
Location: Whitesboro, Texas
Posts: 932
|
Re: $3,000 driver build
Mike, it goes to the top of the fuse block labeled ‘FUEL GA’
See this link for a picture: http://67-72chevytrucks.com/vboard/s...d.php?t=121515
__________________
Cheers - Wayne Our Shop Build - http://67-72chevytrucks.com/vboard/s...d.php?t=620966 '55 Wagon Build - http://67-72chevytrucks.com/vboard/s...d.php?t=689157 1971 Cheyenne Super Ochre/White LWB 350 Auto - my son's truck "Nancy" 1972 GMC K2500 Custom 4X4 Olive LWB 400 SB 4-speed -"Greenie" - Restoration to begin after the '55 Nothing sucks more than that moment during an argument when you realize you're wrong. |
|
|

|
|
|
#115 |
|
Registered User
Join Date: Aug 2012
Location: Topeka Kansas
Posts: 2,655
|
Re: $3,000 driver build
I always kind of liked the Mexican blanket seat cover in these old trucks, I think it's nostalgia from when I was a kid because I grew up in a small town and everyone with an old truck had one

|
|
|

|
|
|
#116 |
|
Registered User
Join Date: Apr 2011
Location: .
Posts: 3,104
|
Re: $3,000 driver build
Okay,,, seen the seat now Im in.
|
|
|

|
|
|
#117 |
|
Registered User
Join Date: Feb 2014
Location: Northern Nevada
Posts: 208
|
Re: $3,000 driver build
Thanks Wayne! I bookmarked that link too that'll definitely come in handy.
Brian those blankets you're talking about are so/so for me I could take em or leave em, but I definitely think they fit these old trucks as far as looks go. What I'll probably end up doing is changing this one when I get bored of it haha, I really want that furry shag stuff but I don't want to cough up the 50 bones for it! But damn it would be cool. Thanks Bomp, stick around more to come! Me and my two roll dogs at Sonic yesterday: 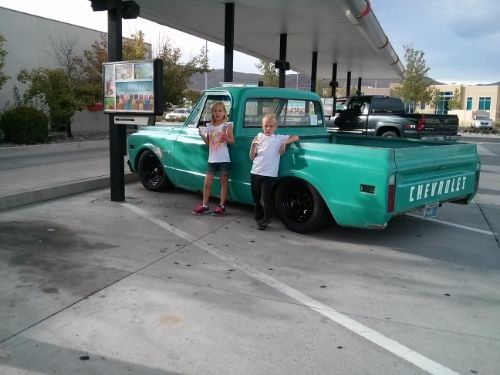
__________________
1972 Driver SOLD |
|
|

|
|
|
#118 |
|
Registered User
Join Date: Aug 2012
Location: Topeka Kansas
Posts: 2,655
|
Re: $3,000 driver build
The truck really looks good that low I like it.
|
|
|

|
|
|
#119 |
|
Registered User
 Join Date: Jan 2012
Location: Whitesboro, Texas
Posts: 932
|
Re: $3,000 driver build
Quote:
No problem Mike. The truck looks great and it looks like your son has already claimed Grumby for himself. 
__________________
Cheers - Wayne Our Shop Build - http://67-72chevytrucks.com/vboard/s...d.php?t=620966 '55 Wagon Build - http://67-72chevytrucks.com/vboard/s...d.php?t=689157 1971 Cheyenne Super Ochre/White LWB 350 Auto - my son's truck "Nancy" 1972 GMC K2500 Custom 4X4 Olive LWB 400 SB 4-speed -"Greenie" - Restoration to begin after the '55 Nothing sucks more than that moment during an argument when you realize you're wrong. |
|
|

|
|
|
#120 |
|
Registered User
Join Date: Feb 2014
Location: Northern Nevada
Posts: 208
|
Re: $3,000 driver build
He sure has! He loves riding in it, the feeling I've gotten the last couple days from him showing so much interest and enjoyment in something I built has really felt amazing. Earlier today him I and drove back to the shop and we got pulled over. At the stop light I answered my phone, (I know I know) and also have a brake light out which he informed me of. After talking about old trucks for five minutes he cut me loose, after going back to his car and bringing my boy a sticker! I wasn't expecting that.
The immediate to do list includes but is not limited to: Get temp gauge working Side markers Mirrors Passenger brake light haha After driving it over 60 it gets real clanky underneath, under the bed and I'm definitely thinking u-joints and more importantly the angle of the driveshaft. It's not all the time either, it does it when coasting. So I gotta take care of that. That's all I can think of for now.
__________________
1972 Driver SOLD |
|
|

|
|
|
#121 |
|
Registered User
Join Date: Aug 2012
Location: Topeka Kansas
Posts: 2,655
|
Re: $3,000 driver build
If you have a 2-piece drive shaft the carrier bearing might need to be replaced.
I would inspect it very closely. www.rockauto.com has them listed as "drive shaft center support" for a good price. If you want an upgrade you can buy the billet aluminum version from CPP. http://www.ebay.com/itm/1963-72-chev...item3cd27bc536 Last edited by Xeen; 08-30-2014 at 10:49 PM. |
|
|

|
|
|
#122 |
|
Registered User
Join Date: Feb 2014
Location: Northern Nevada
Posts: 208
|
Re: $3,000 driver build
It's a 2-piece. The angle from the rear end to the rear shaft doesn't look good to me. I'll have to measure and then look into how close I need to get it, I can make shims at work easy. I could also make the carrier but after finding and buying the bushing it might be easier for me to just buy a replacement. Would a stock replacement work just fine?
__________________
1972 Driver SOLD |
|
|

|
|
|
#123 |
|
Registered User
Join Date: Aug 2012
Location: Topeka Kansas
Posts: 2,655
|
Re: $3,000 driver build
The angle is fine, you just need to make sure everything is as smooth as you can make it.
|
|
|

|
|
|
#124 |
|
Registered User
Join Date: Feb 2014
Location: Northern Nevada
Posts: 208
|
Re: $3,000 driver build
I have the drive shaft out now, carrier bearing had at least 3/4" of play in it, and my rearmost u-joint was pretty bad. Gonna replace both hopefully today, throw it all back together and see what happens.
I also found where my brake fluid was going, the union under the bed on the passenger side frame rail is apparently loose, I bet when I was putting everything back together a couple months ago I didn't even tighten it lol. That would explain why the back resevoir kept draining haha. Pics to come.
__________________
1972 Driver SOLD |
|
|

|
|
|
#125 | |
|
Registered User
Join Date: Aug 2012
Location: Topeka Kansas
Posts: 2,655
|
Re: $3,000 driver build
Quote:
It sounds like it wasn't far from catastrophic failure and you caught it just in time before something really bad happened. |
|
|
|

|
 |
| Bookmarks |
|
|