
|
|
|
 07-07-2021, 05:28 PM
|
#1 |
|
Registered User
Join Date: Jan 2013
Location: Leonardtown, MD
Posts: 1,637
|
Re: 55 Wagon Progress
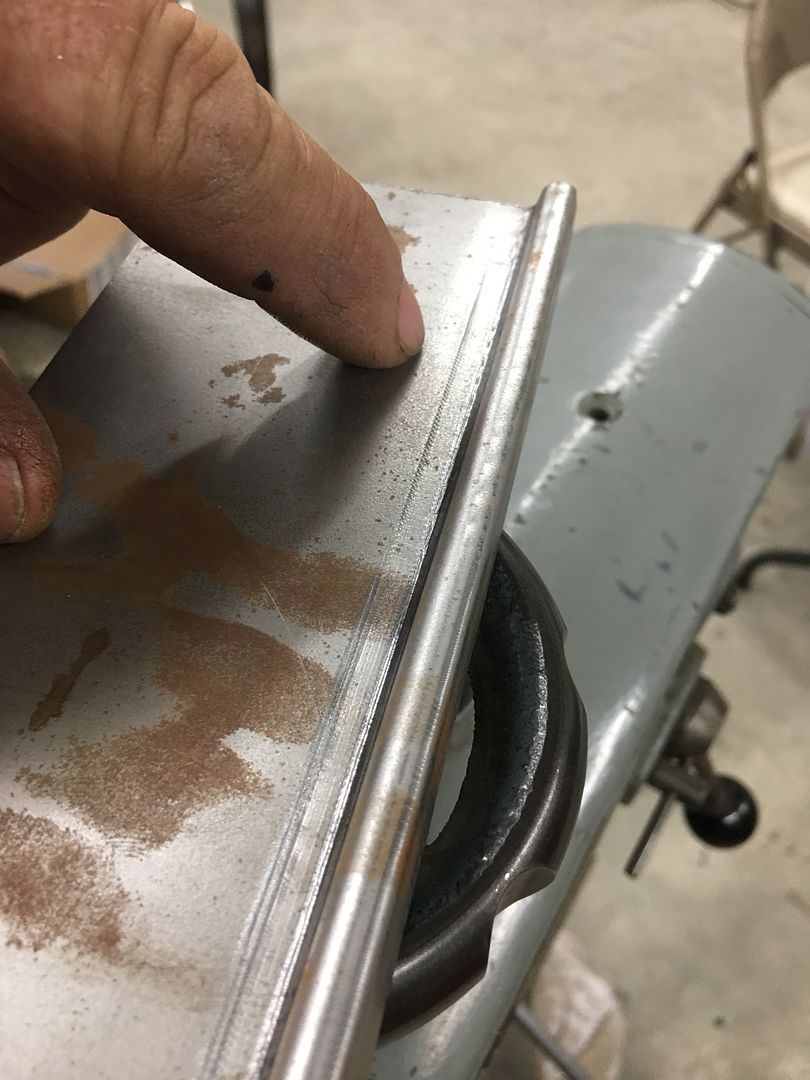
So now for some hindsight. When we had done a flat test sample we noticed the edge of the lower die had made a crease (finger point). To alleviate this, I will normally taper the dies so the edges aren't tight together, in hopes of curing exactly that.
  Looking back, this slight defect would have been at the edge of the center bead and likely not noticeable at all. Next, between this taper and the ~1/2" flange not wanting to stretch, the resulting shape matches the bottom die, and pulls the shroud circumference inward.. which was not desired either. So moving forward, rather than a folded flange here we should opt for an offset first for more flexibility in stretching outward for the bead detail, and then fold the flange last. 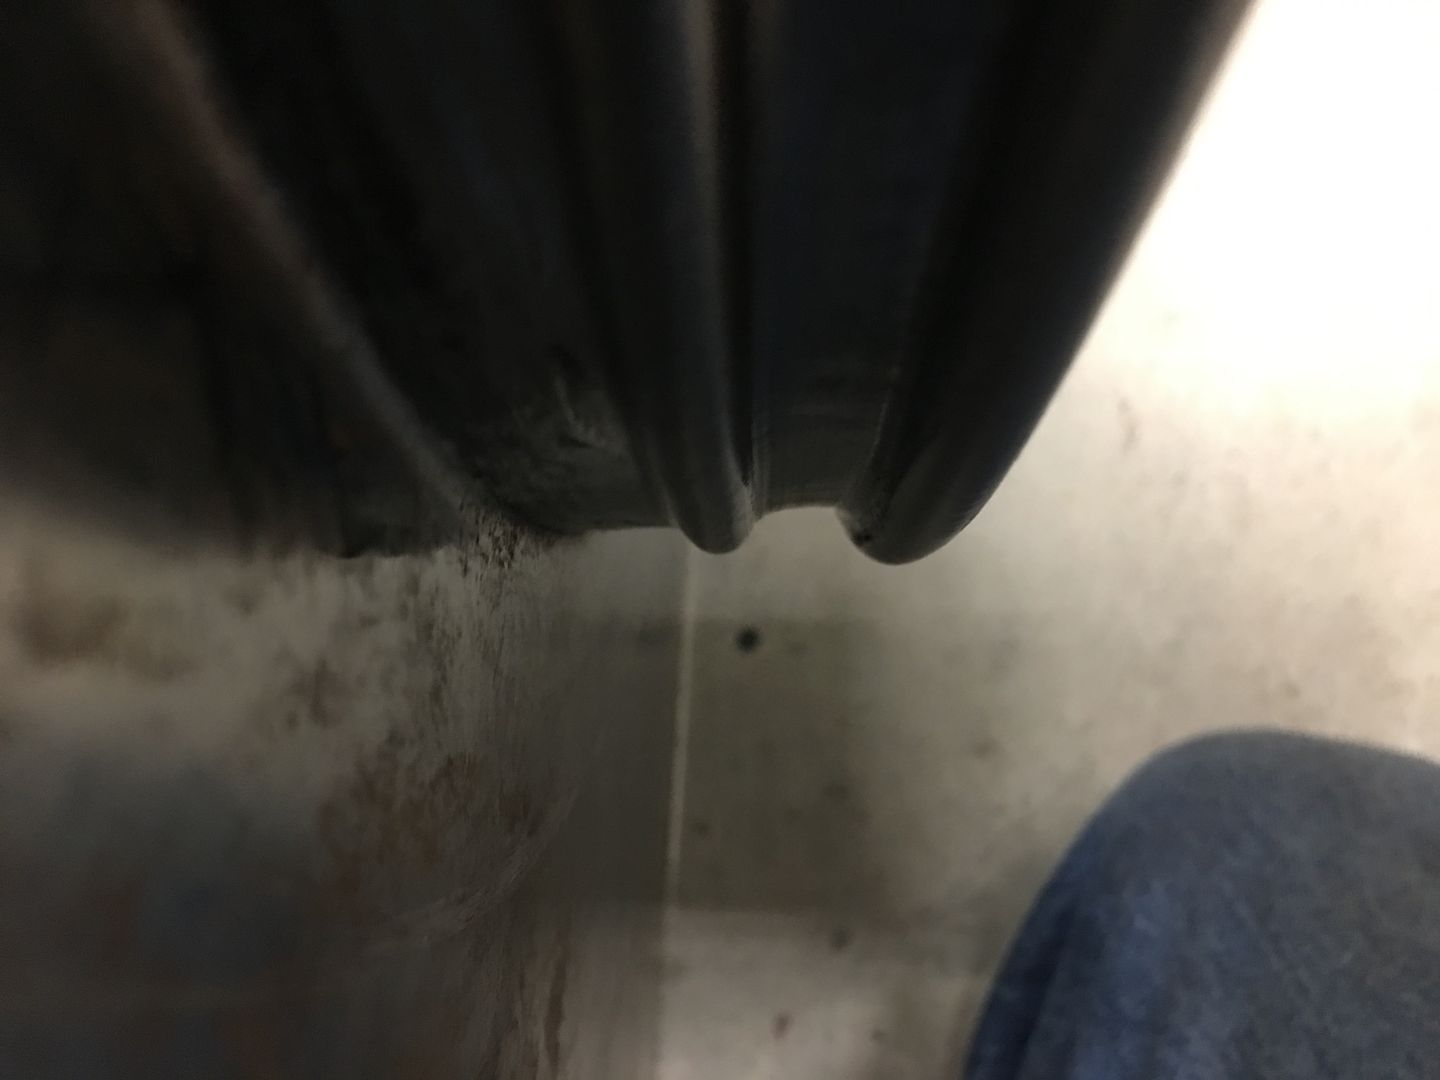 So given our misshapen and slit open fan shroud is no longer viable, what's a person to do? I'm not one to so easily throw in the towel. More accurately, I've been called hard headed. So here we go with the second take of Fan Shroud fabrication. And since we missed this step last time, take a look at this video having just cut out the center hole.. https://www.youtube.com/watch?v=hakmD7Wn4f8 There were absolutely ZERO burrs as can be seen. If your tin snip game is not at this level, please watch this instructional video by my friend and fellow metalshaper Bill Gibson. He will explain exactly what you need to do for the same results... https://www.youtube.com/watch?v=qAOQfUaRZyw I had been using tin snips for DECADES and watched this video, quickly learning what I had been doing wrong for so long... ....and then back on the NEW fan shroud, stretch with a blocking hammer on the stump, tip the edge, stretch again, until we are able to get the shroud into the power hammer... 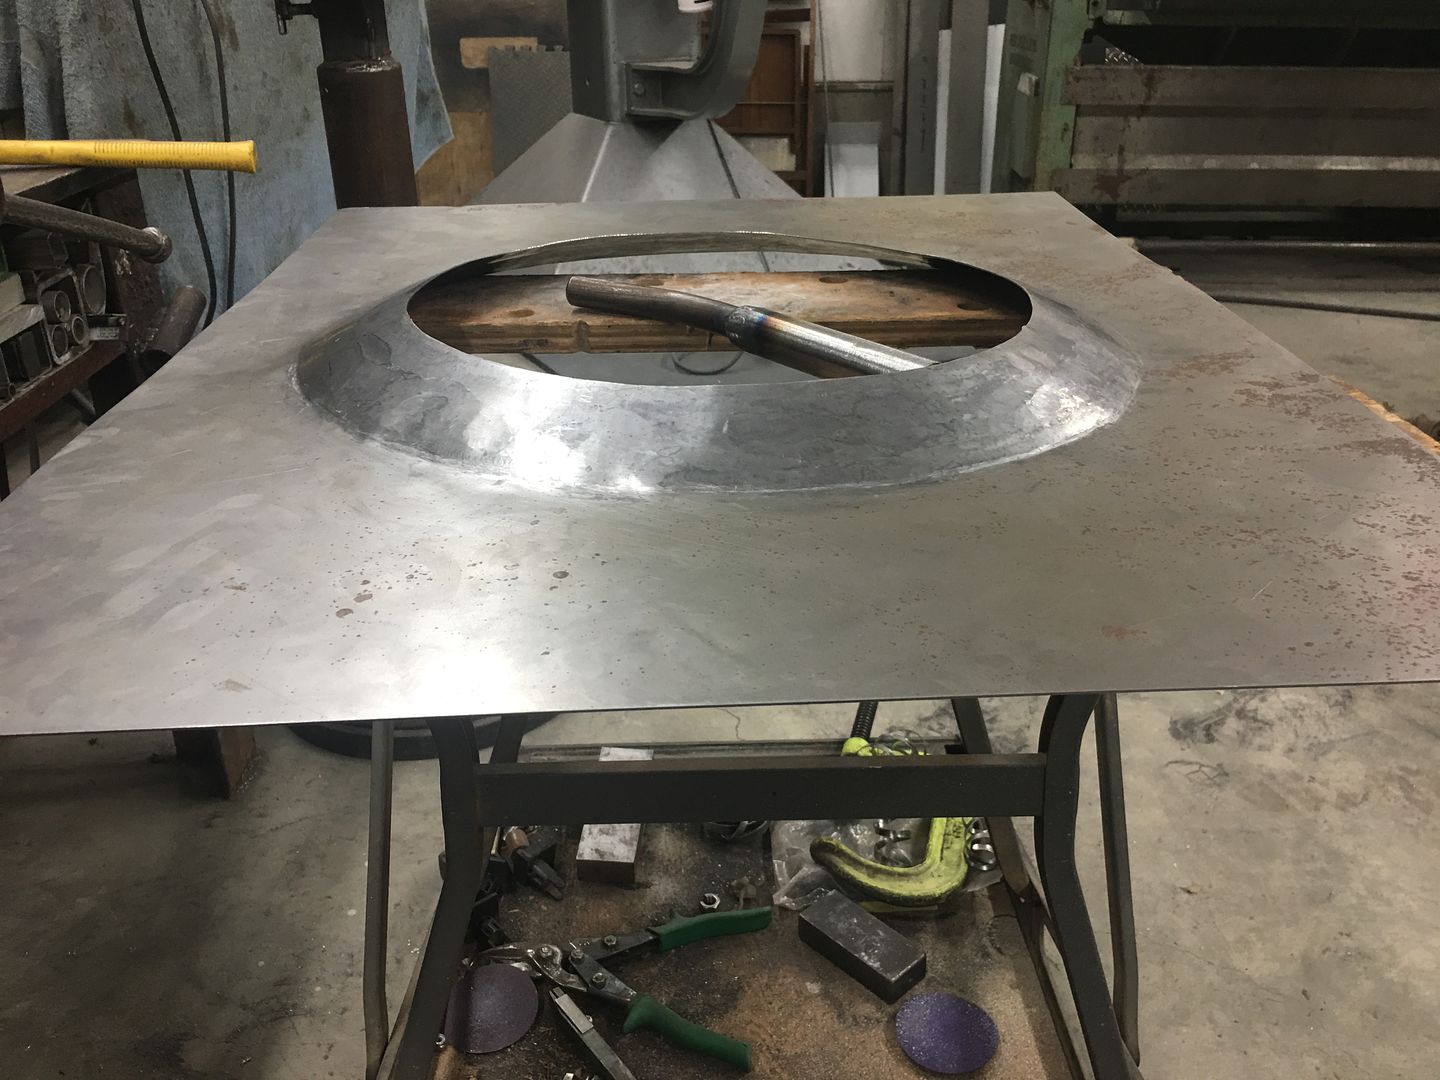 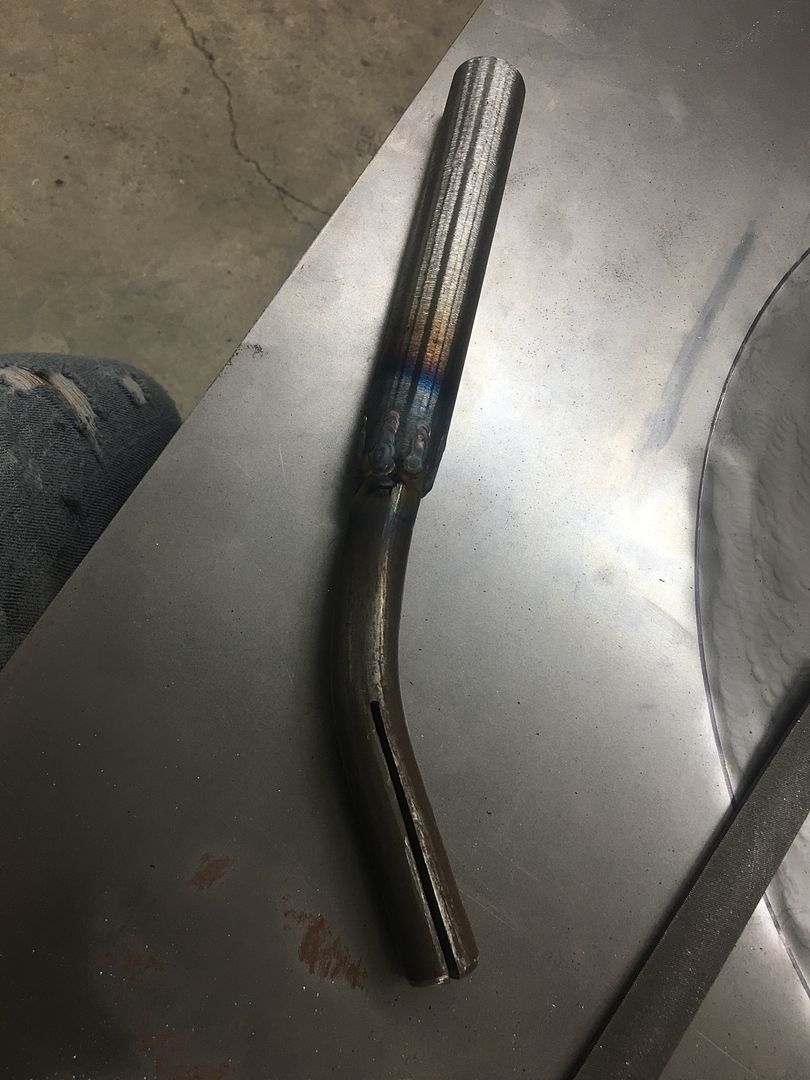 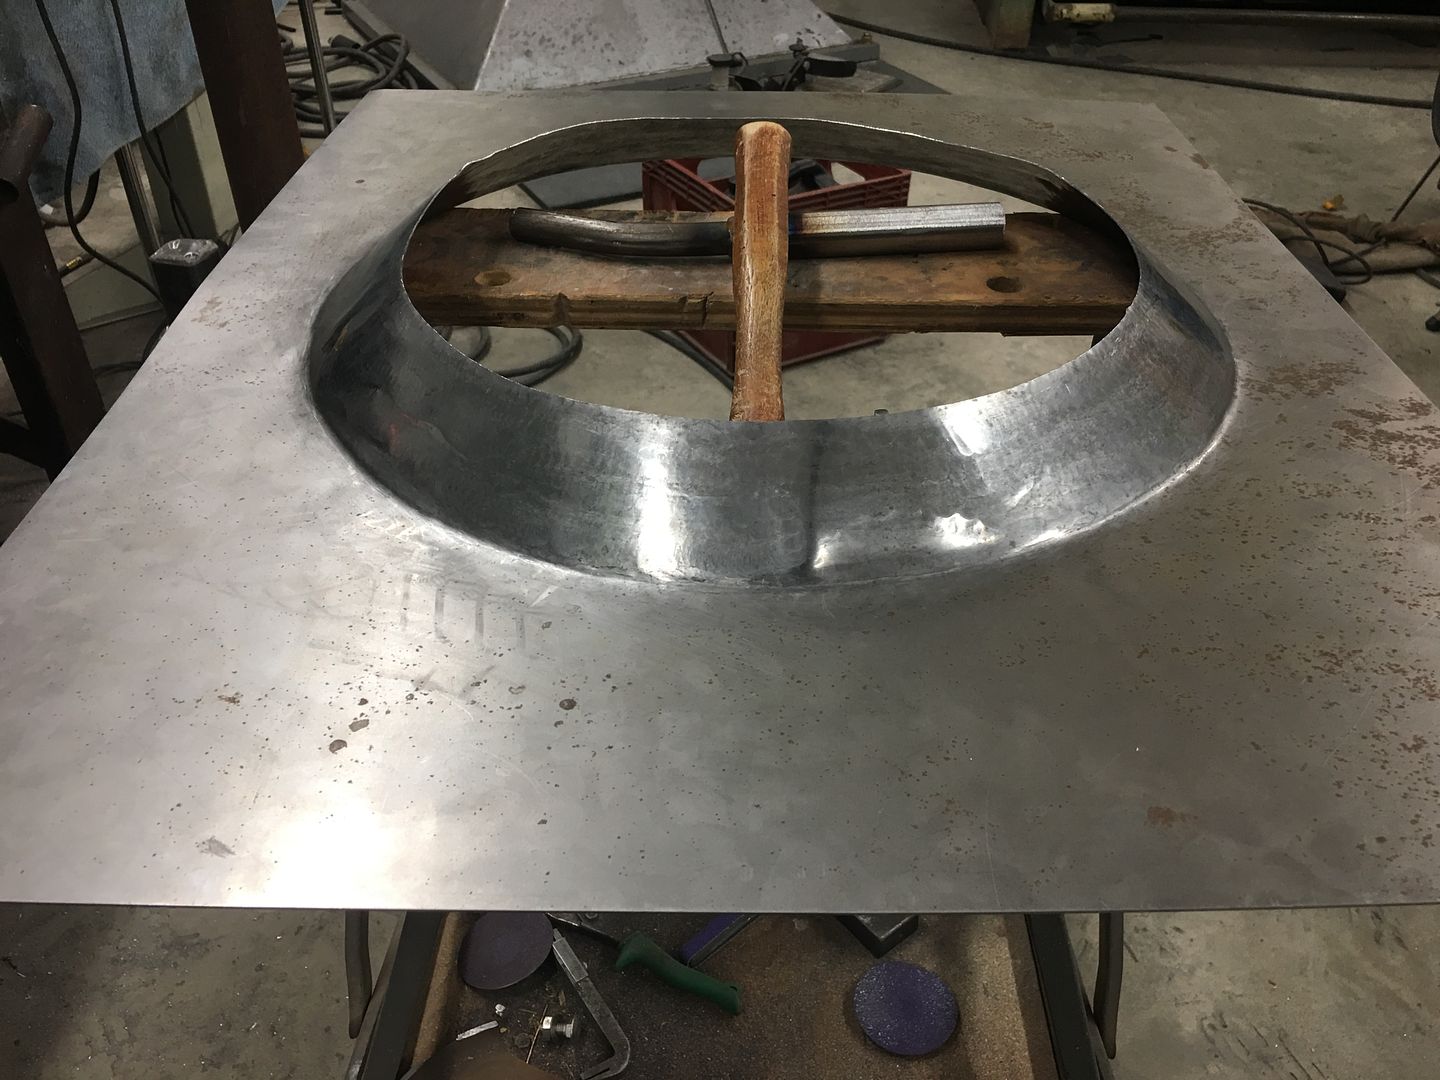 and using the power hammer.... https://www.youtube.com/watch?v=NqGRLIFKQ1o https://www.youtube.com/watch?v=FyCR6sI8TUU Getting close, we're down to about 10% more to go... 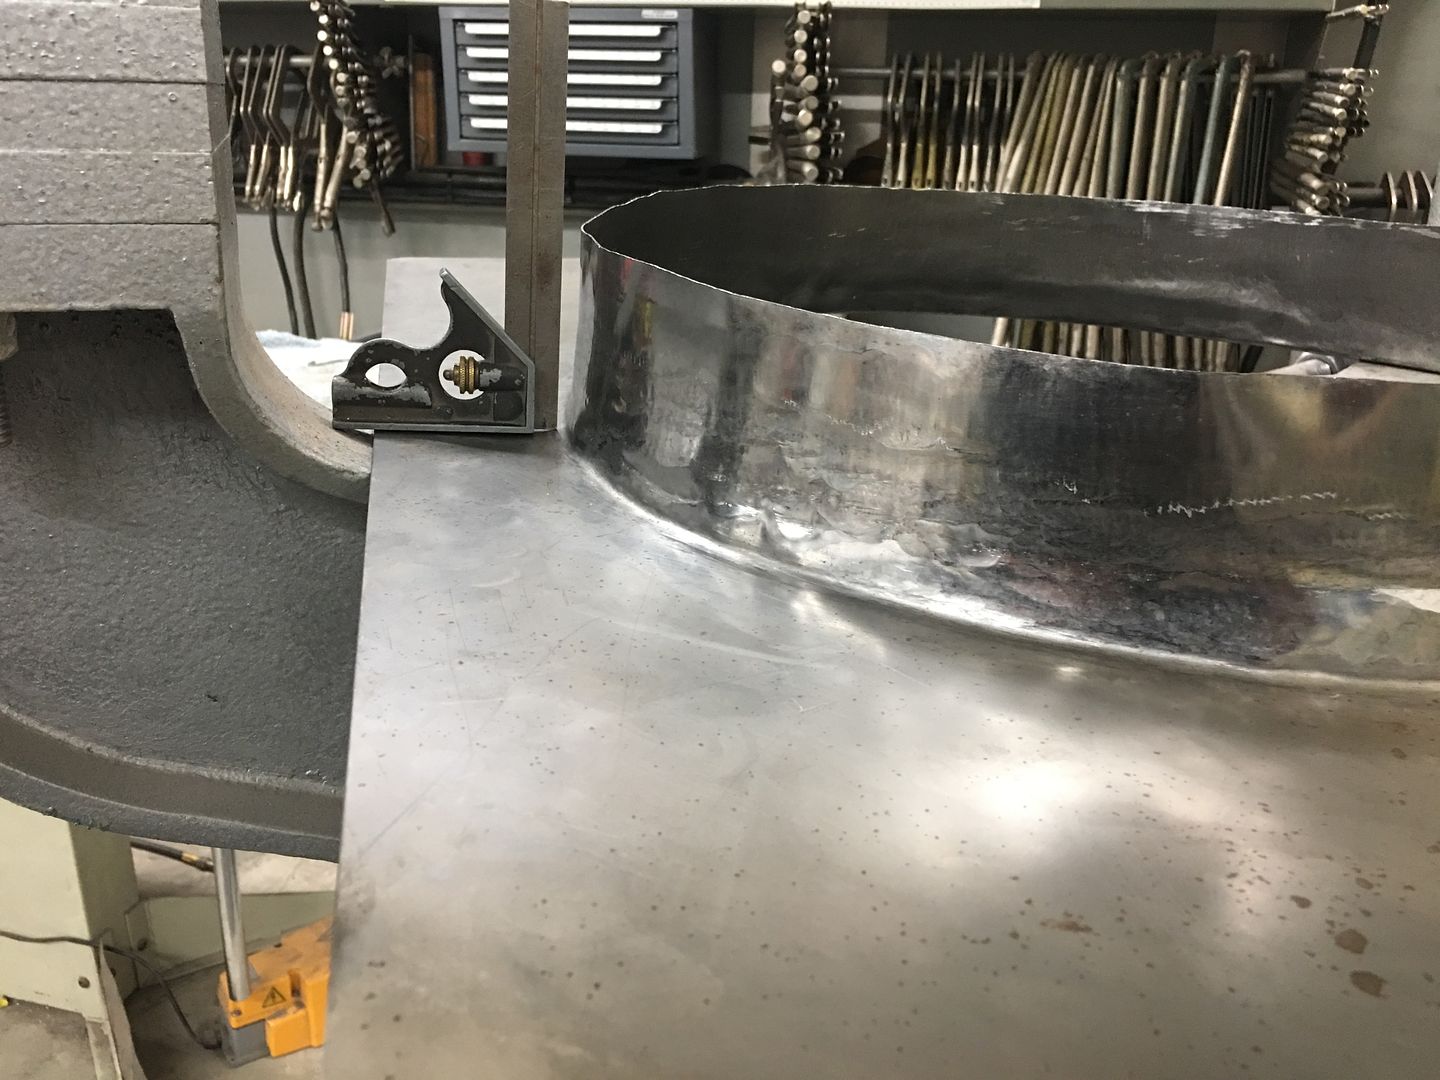 In between all that fiasco, Mike was working on getting the car test fired. All the temporary wiring connected, and for some reason we had no fuel pump action. OK, third time we've dropped the tank in a week, and removing the pump we find NO connectivity from the outside ground to the inside ground. WTF? 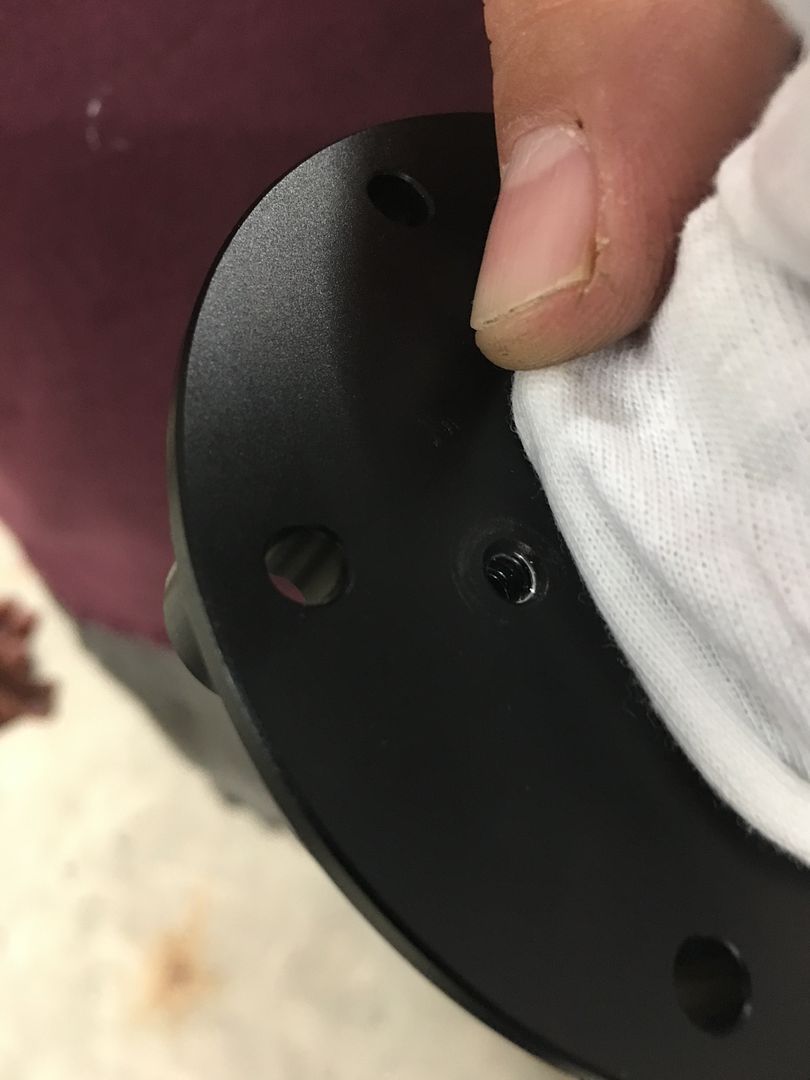 Lo and behold, there is no pass through on the grounds but each (inside and outside) has their own bottom tapped hole. It would appear the tapping occurred PRIOR to the anodize finish, and you know how well that conducts.. The burnishing brushes wouldn't touch the stuff, so we used some sharp implements of destruction to allow a ground path... 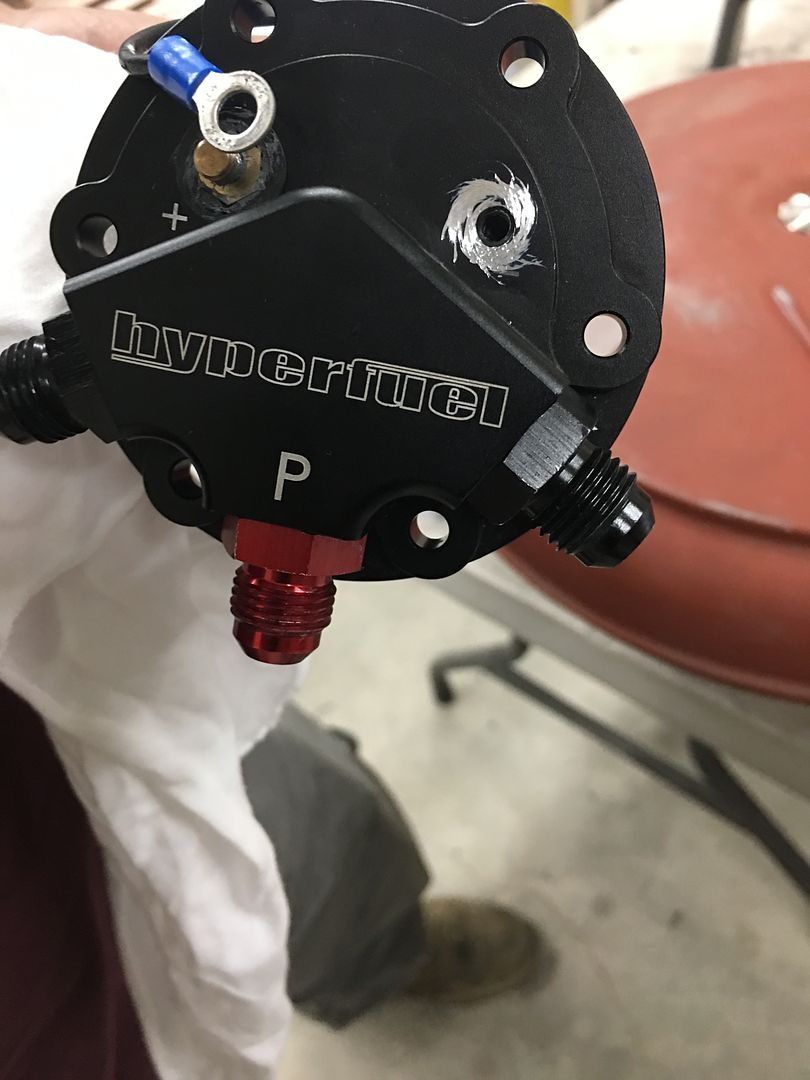 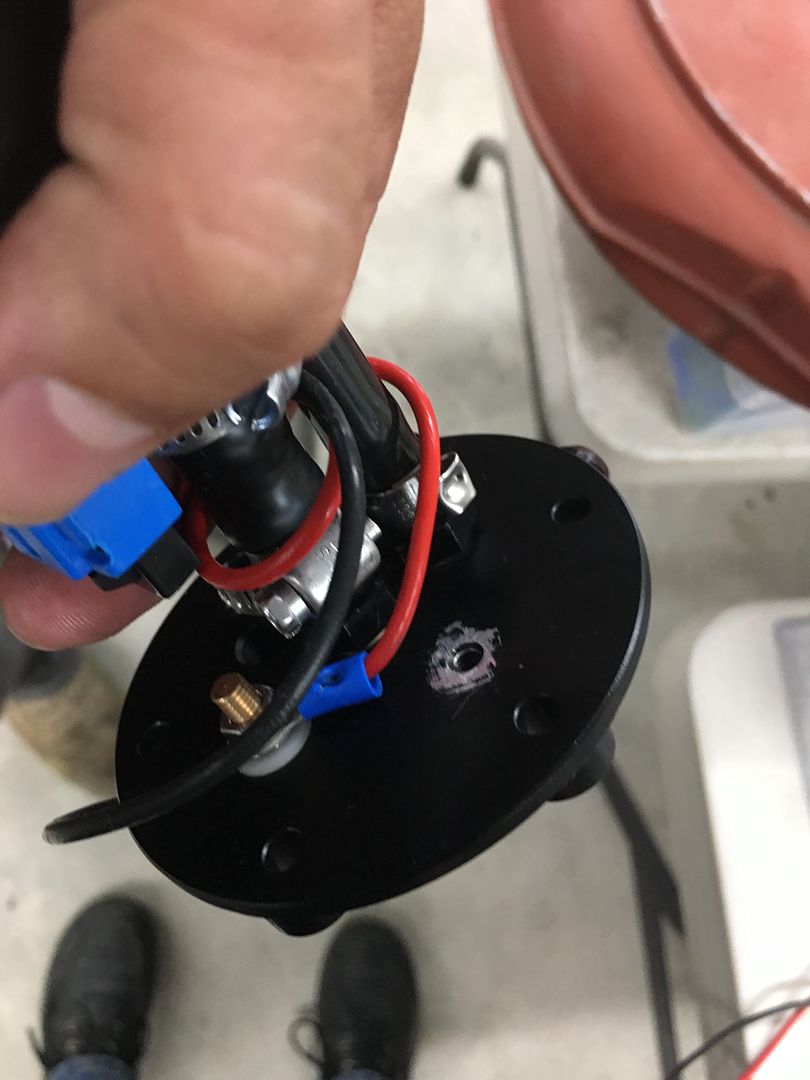 That fixed the issue, one that should not have been there from the start. Next, in the interest of safety, lets move the rear "lift kit" from the tires to just inboard using jack stands.. 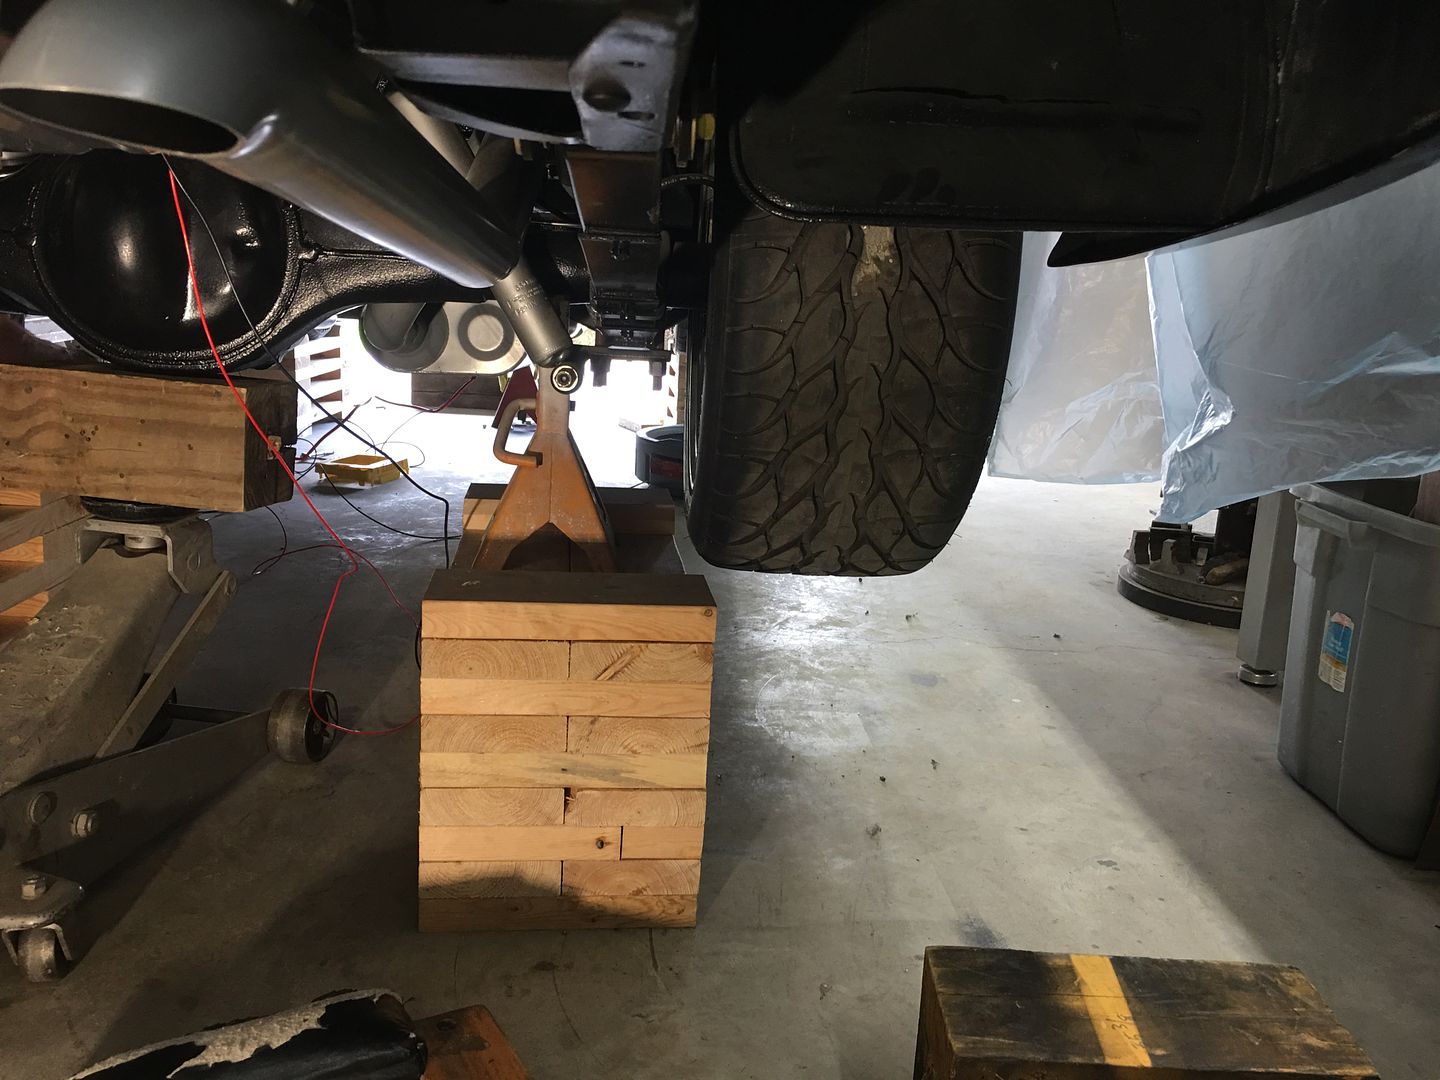 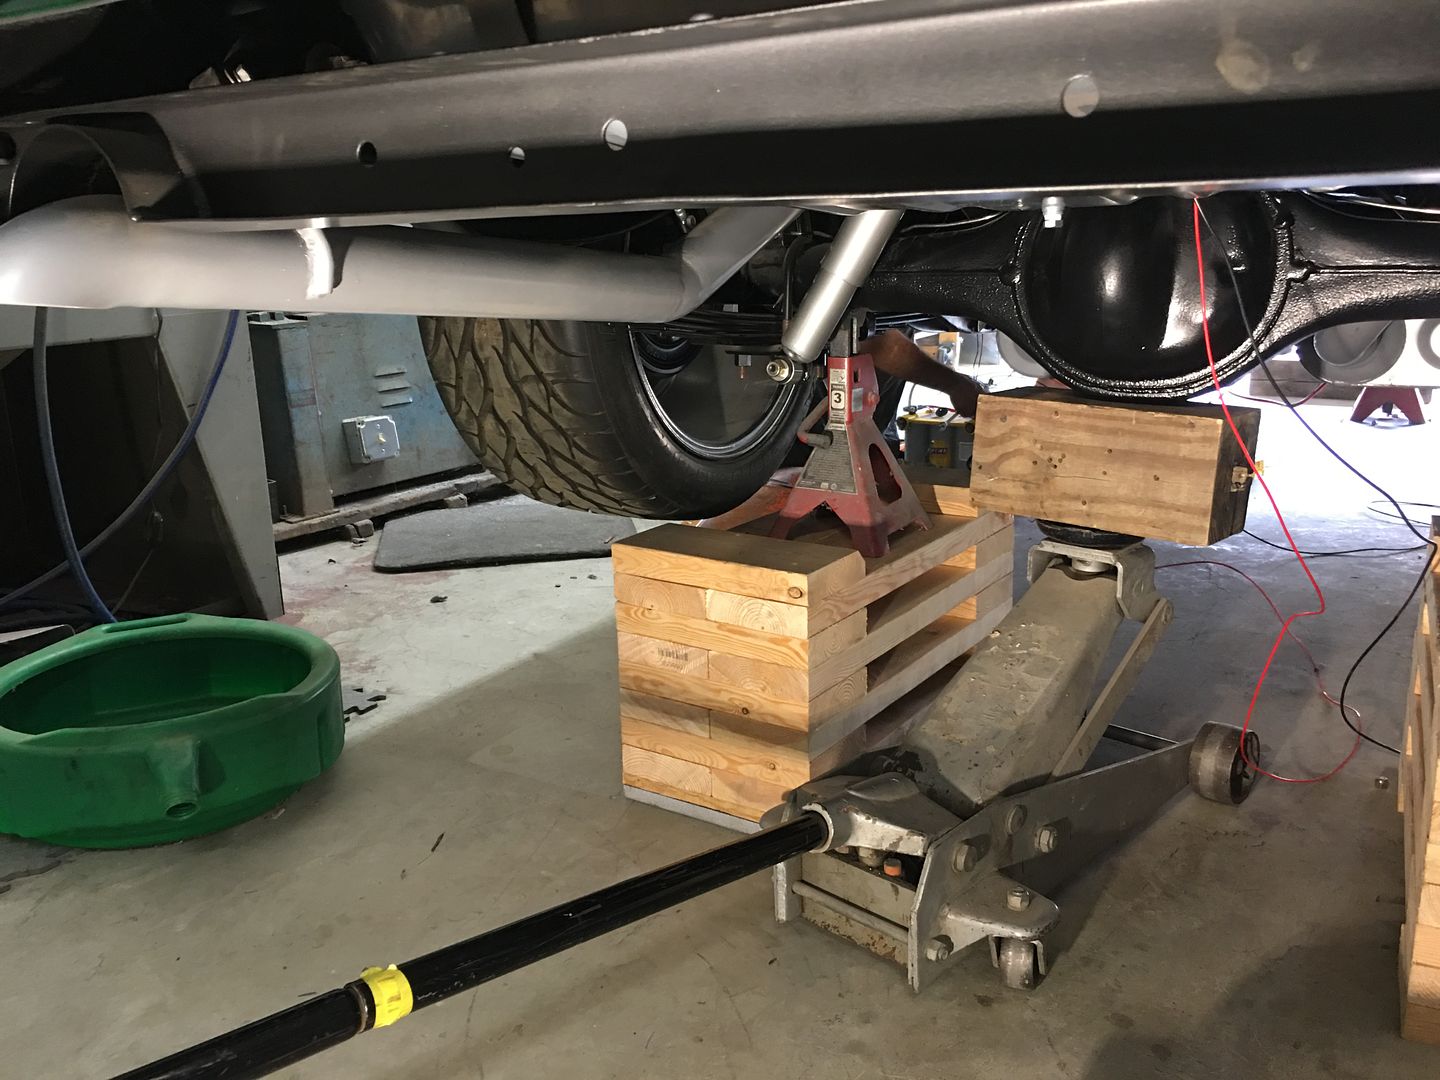 So now with a bit of fuel pressure to work with, we give you a rumble... We still need to adjust the air/fuel ratio but it was good to hear this after everything else the past couple weeks.. https://www.youtube.com/watch?v=MoIjmmmXtO0
__________________
Robert |

|

|
|
07-07-2021, 07:16 PM
|
#2 |
|
Post Whore
  Join Date: May 2015
Location: Alabama
Posts: 14,608
|
Re: 55 Wagon Progress
great news on the test fire...and as always Robert, yall are doing amazing work..maybe round 2 will work out for ya
__________________
Mongo...aka Greg RIP Dad RIP Jesse 1981 C30 LQ9 NV4500..http://67-72chevytrucks.com/vboard/s...d.php?t=753598 Mongos AD- LS3 TR6060...http://67-72chevytrucks.com/vboard/s...34#post8522334 Columbus..the 1957 IH 4x4...http://67-72chevytrucks.com/vboard/s...63#post8082563 2023 Chevy Z71..daily driver |
|
|
|
|
07-12-2021, 02:22 AM
|
#3 |
|
Registered User
Join Date: Jan 2013
Location: Leonardtown, MD
Posts: 1,637
|
Re: 55 Wagon Progress
Thanks Greg!
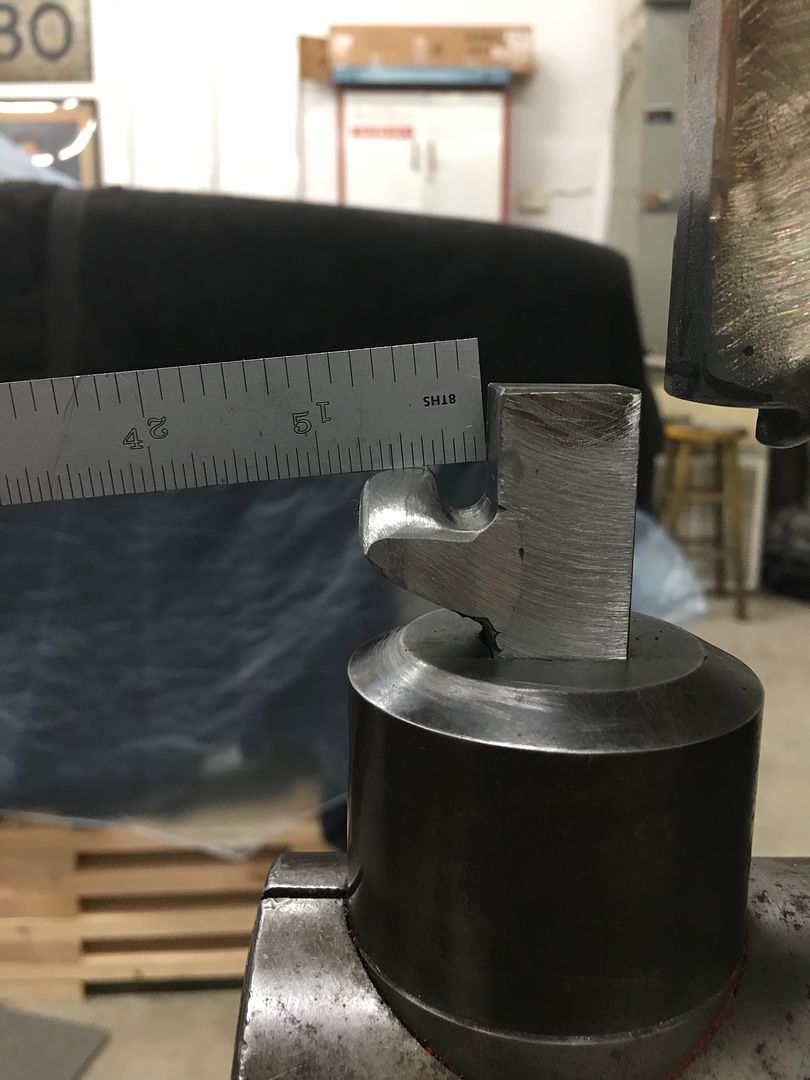
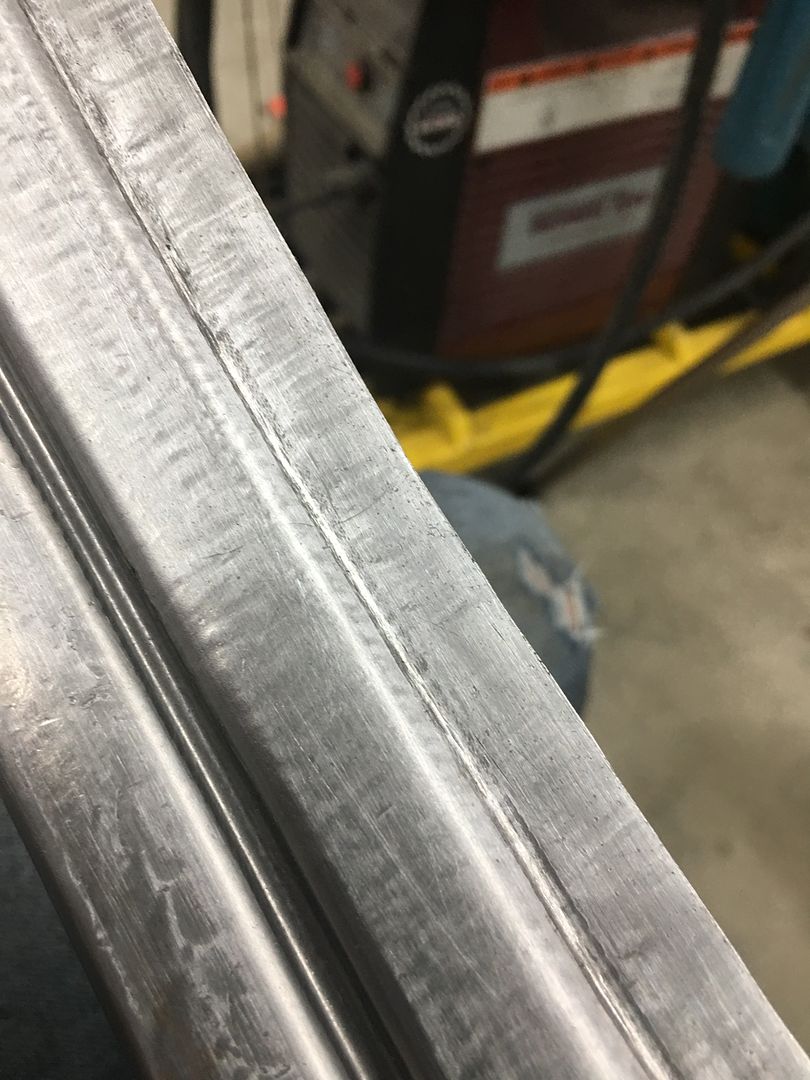
More progress on the (second) fan shroud, but I had a request to show the process in greater detail.. So we'll start with the beginning. First was the layout of the bend line, and then the cut line was located about 3" inside of that. (I'm using some of the pictures from our first attempt as our shop photographer missed some the second time around) 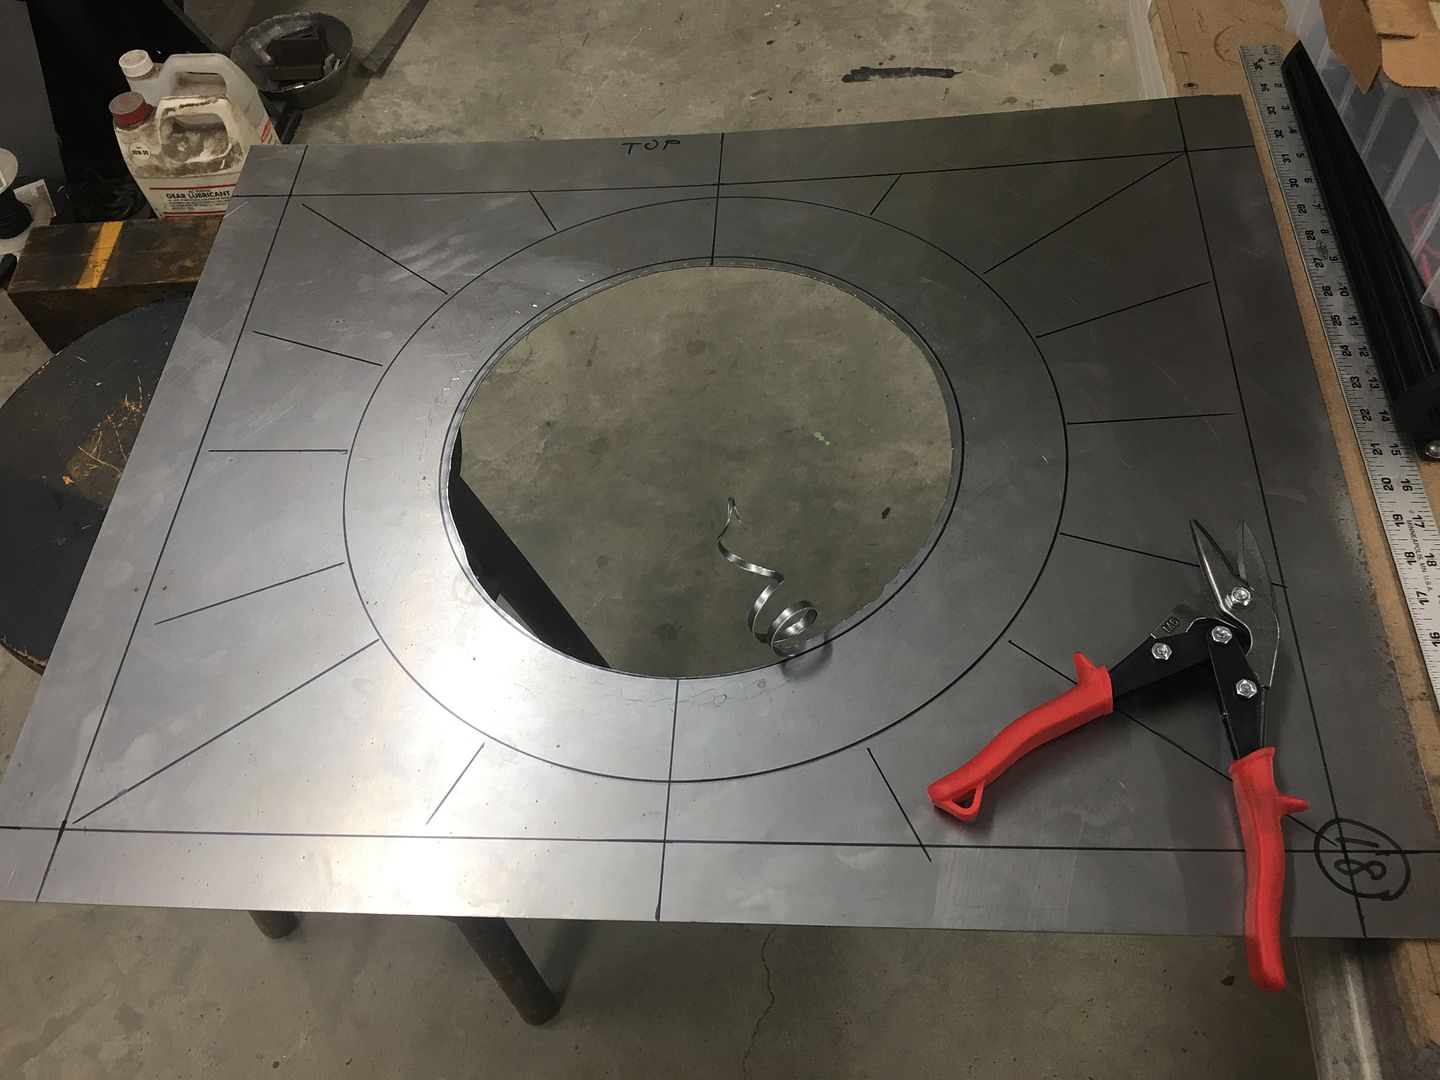 The initial stretch was done using a blocking hammer on the top (flat area) of the stump, primarily at the inside edge as that needed the most stretch. 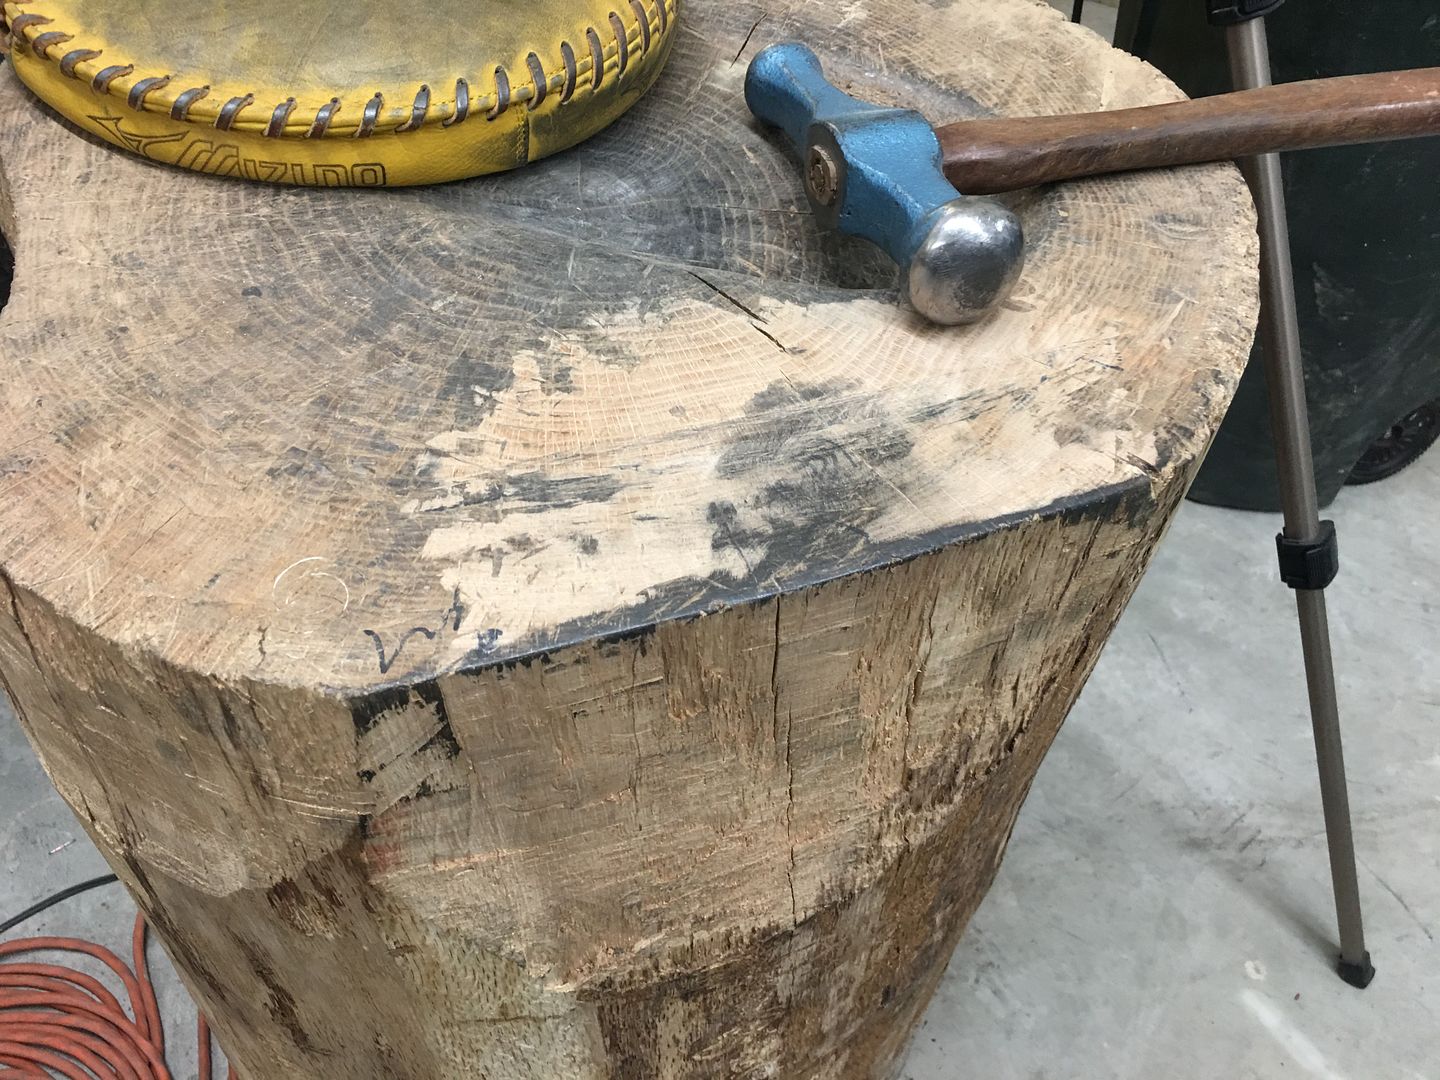 On our first attempt we had a hammer form that was used to "set" the bend line with a crowned body hammer as we added the first bit of stretch. 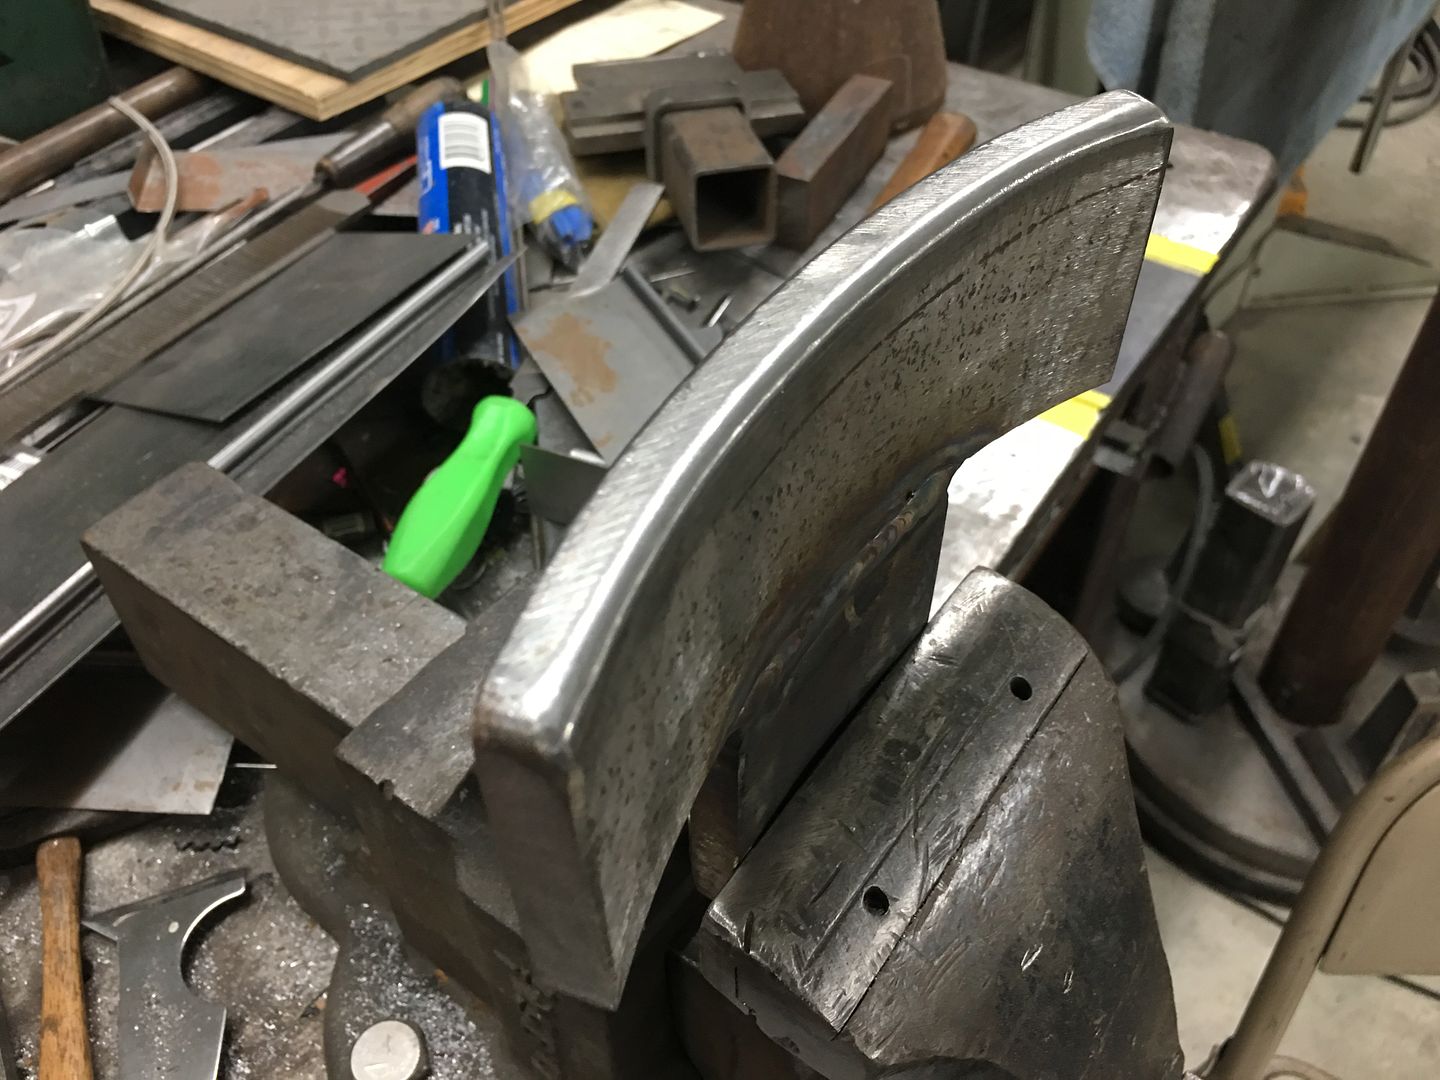 This seemed a bit cumbersome, and the second version I used a bent portion of round stock that was in the scrap pile, added a piece of pipe for a handle, and the band saw added a slice for a new tipping tool. The bend in the tipping tool gave it a built in fulcrum. Normally a tipping operation tries to pull the adjacent material along as the bend forms. In this case we set the panel on a table and used the bend (fulcrum) of the tipping tool against the table to pull the stretched area downward. This allows us to push down on the handle to elevate the panel off the table, and to push downward on the flat panel outside the bend line with the palm of your hand. This does a good job of placing the bend where needed without pulling adjacent metal along for the ride. Even though the pictures show the stretched area upward, the panel was placed with this area downward when using the tipping tool..  This worked much better at setting the bend line than the hammer form, and it was surprisingly accurate. Much of the stretch was done using linear stretch dies on the power hammer, but we also reverted back to the blocking hammer and stump to better focus the stretch locations. https://www.youtube.com/watch?v=FyCR6sI8TUU https://www.youtube.com/watch?v=bKBy-TmkrMM 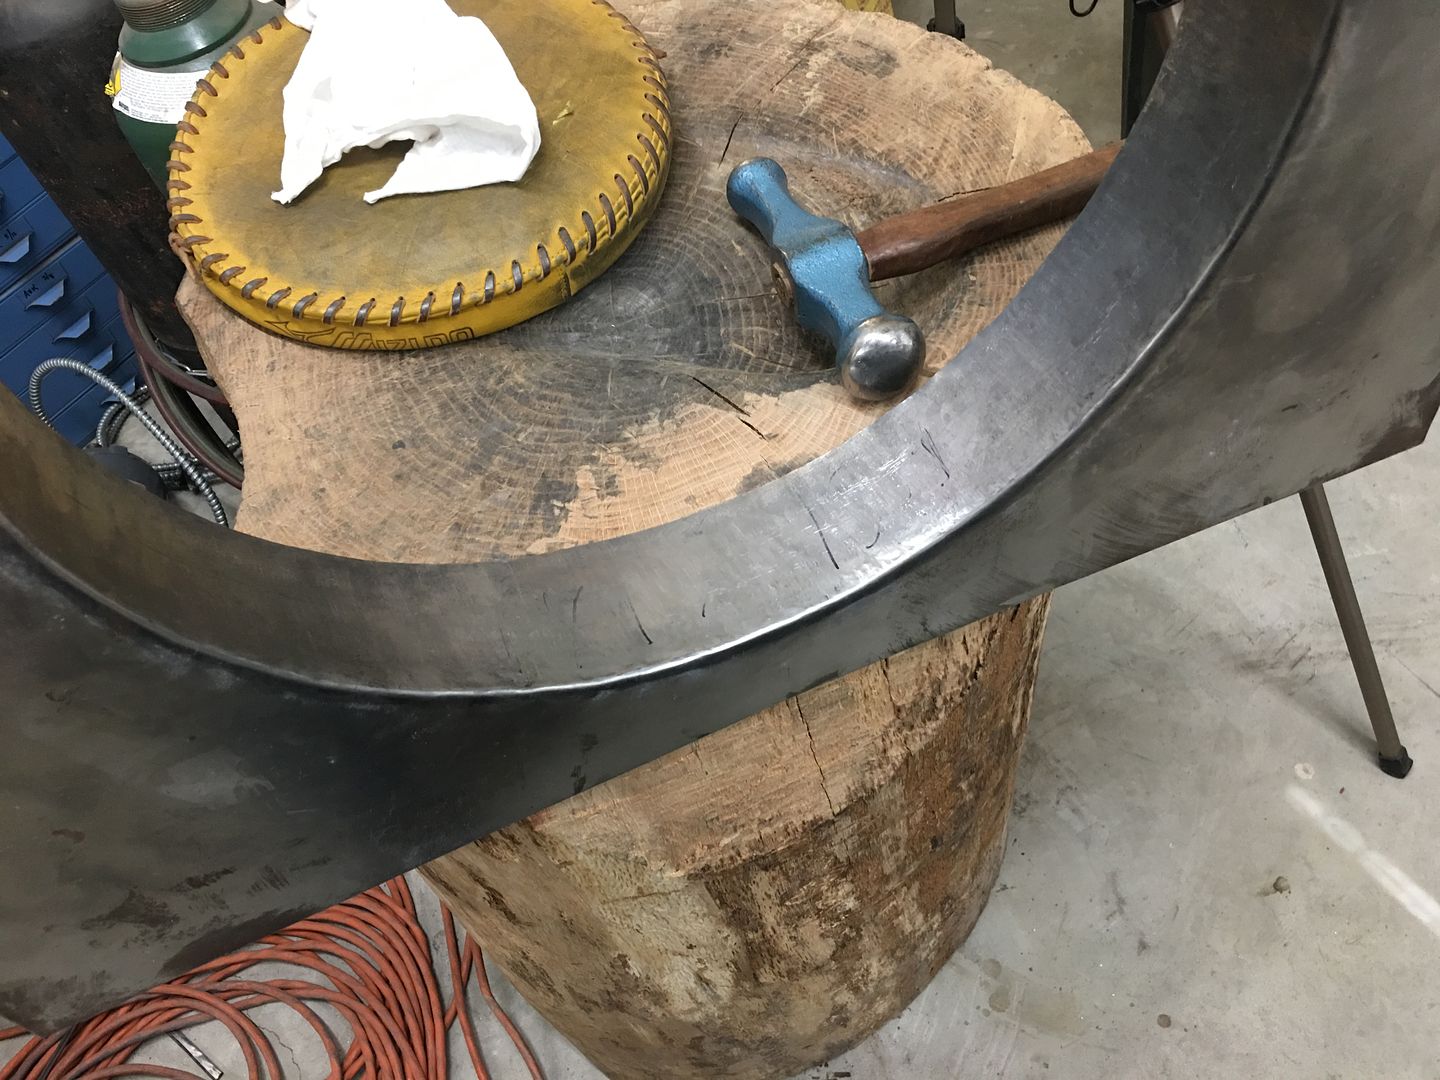 The other issue to overcome with both hammer operations was that they didn't play nice with keeping the shroud in a flat vertical. So the next tool used was a 90 durometer pad of polyurethane and the Model A leaf spring hammer. The hammer face was too short to match the shroud height (approx 3") so three passes were done to cover the entire height and with each pass the hammer hits were about 1/8" or so apart. 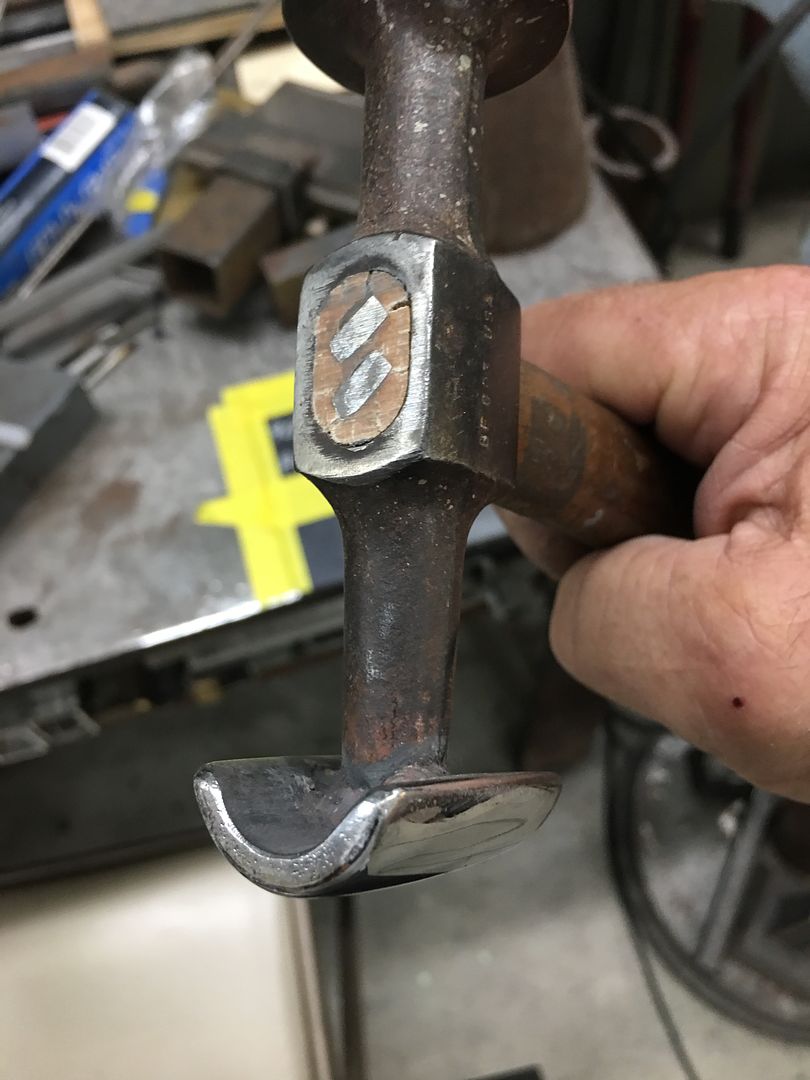 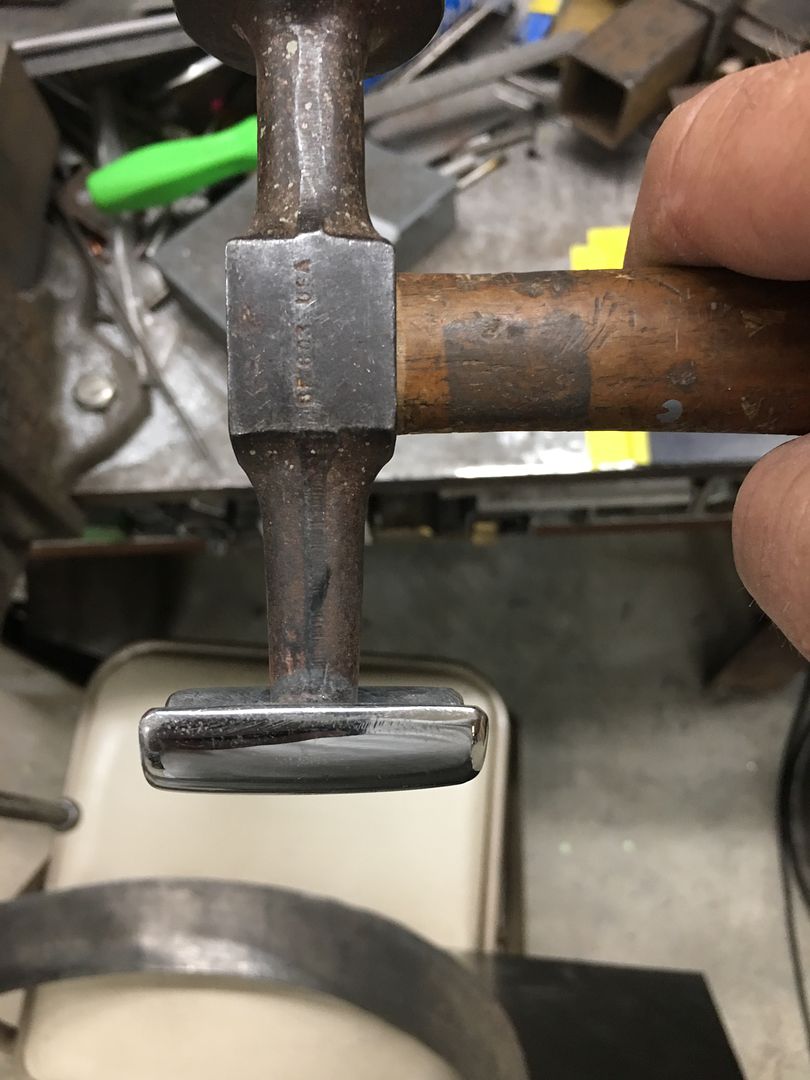 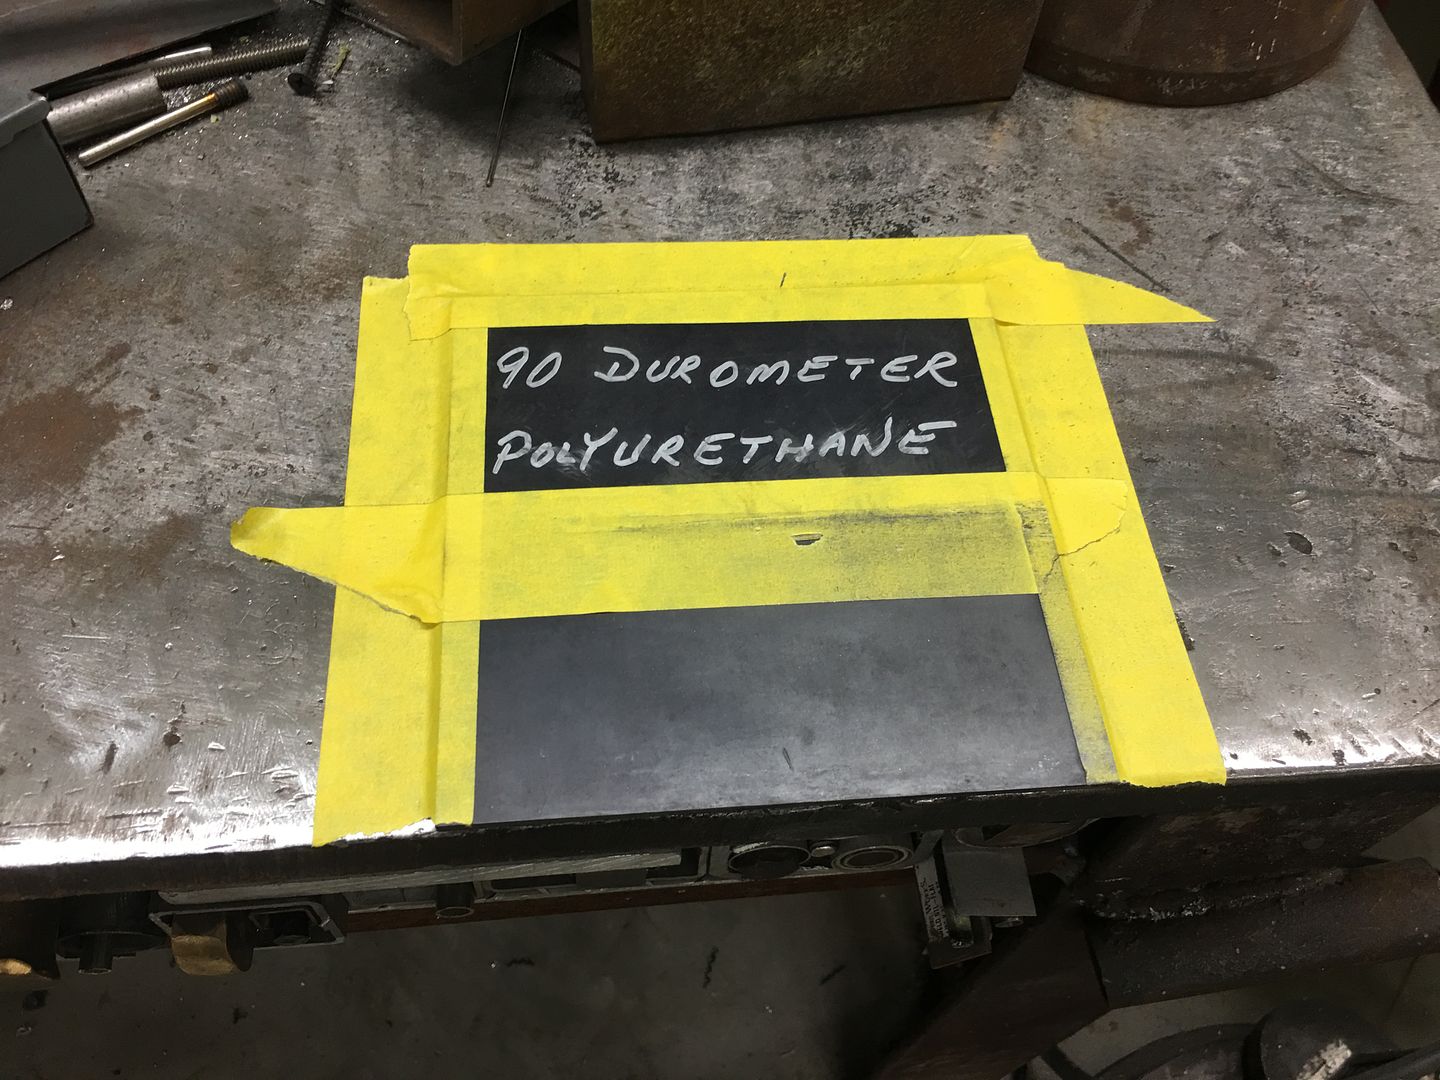 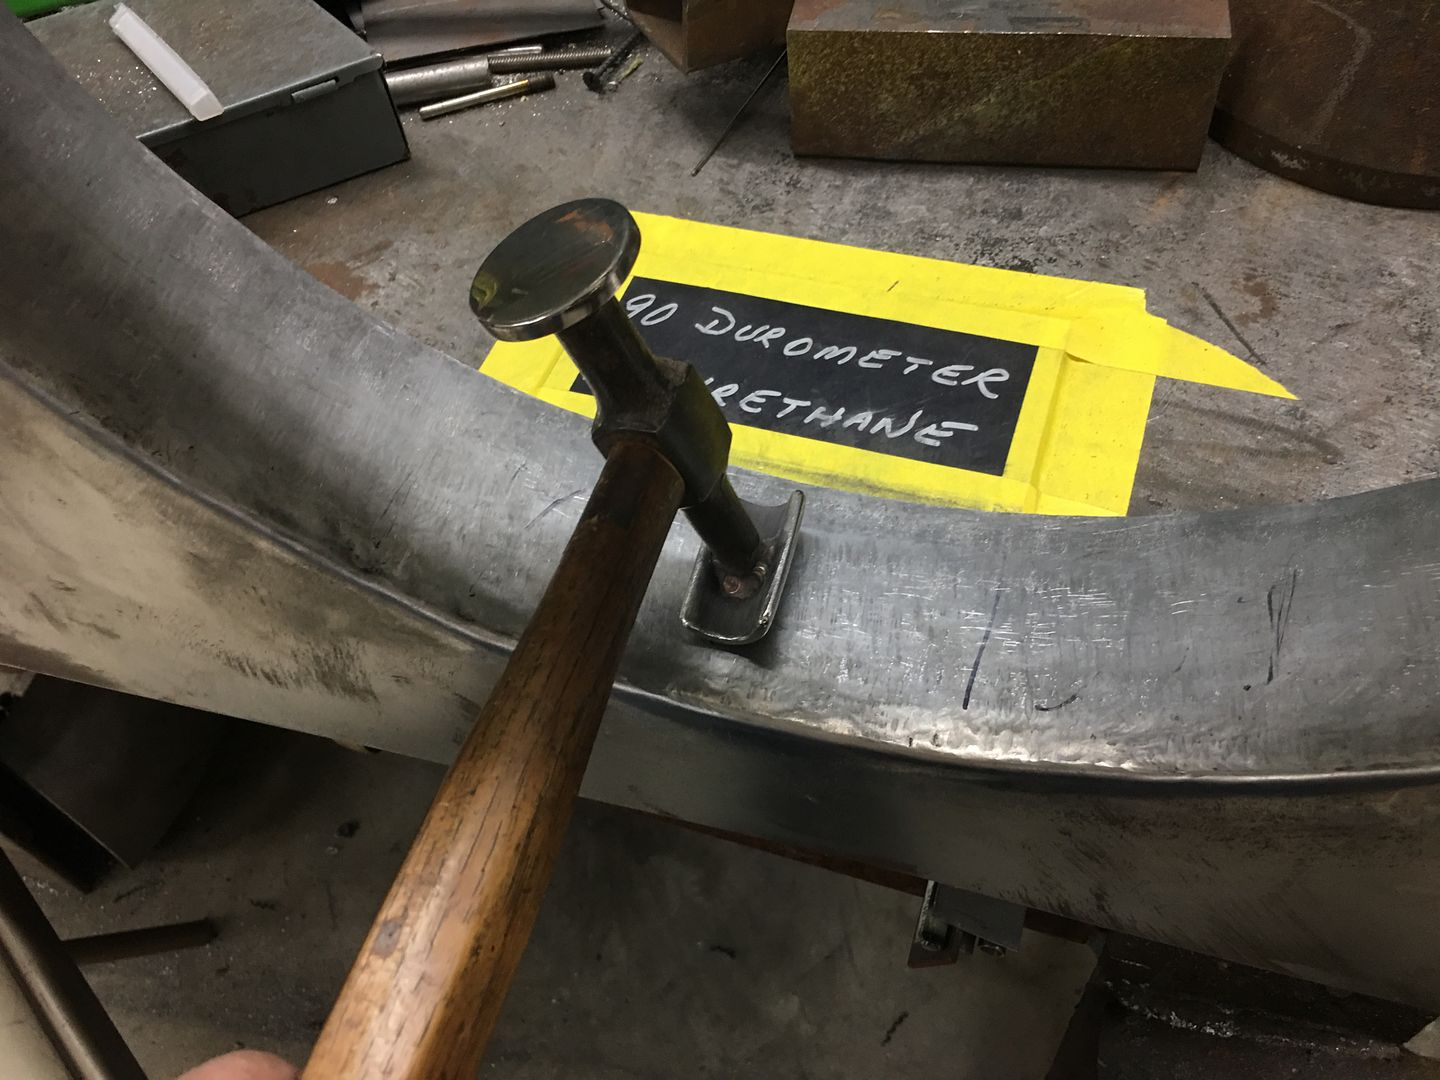 The bulk of the stretch was done on the power hammer, and the front of the lower die holder is missing quite a bit of paint from this job... 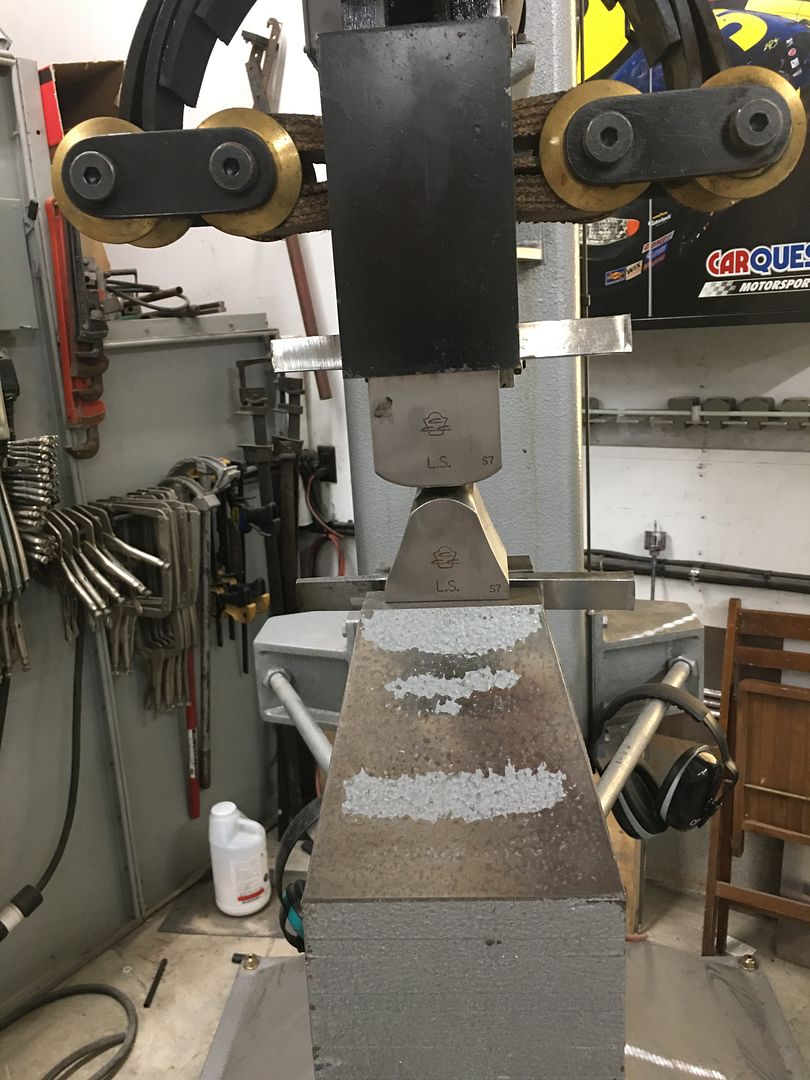 The completed bend, we started with .044 thickness (18 gauge) and it was thinned to .029 thick, or lost about 1/3 thickness to turn the 90... 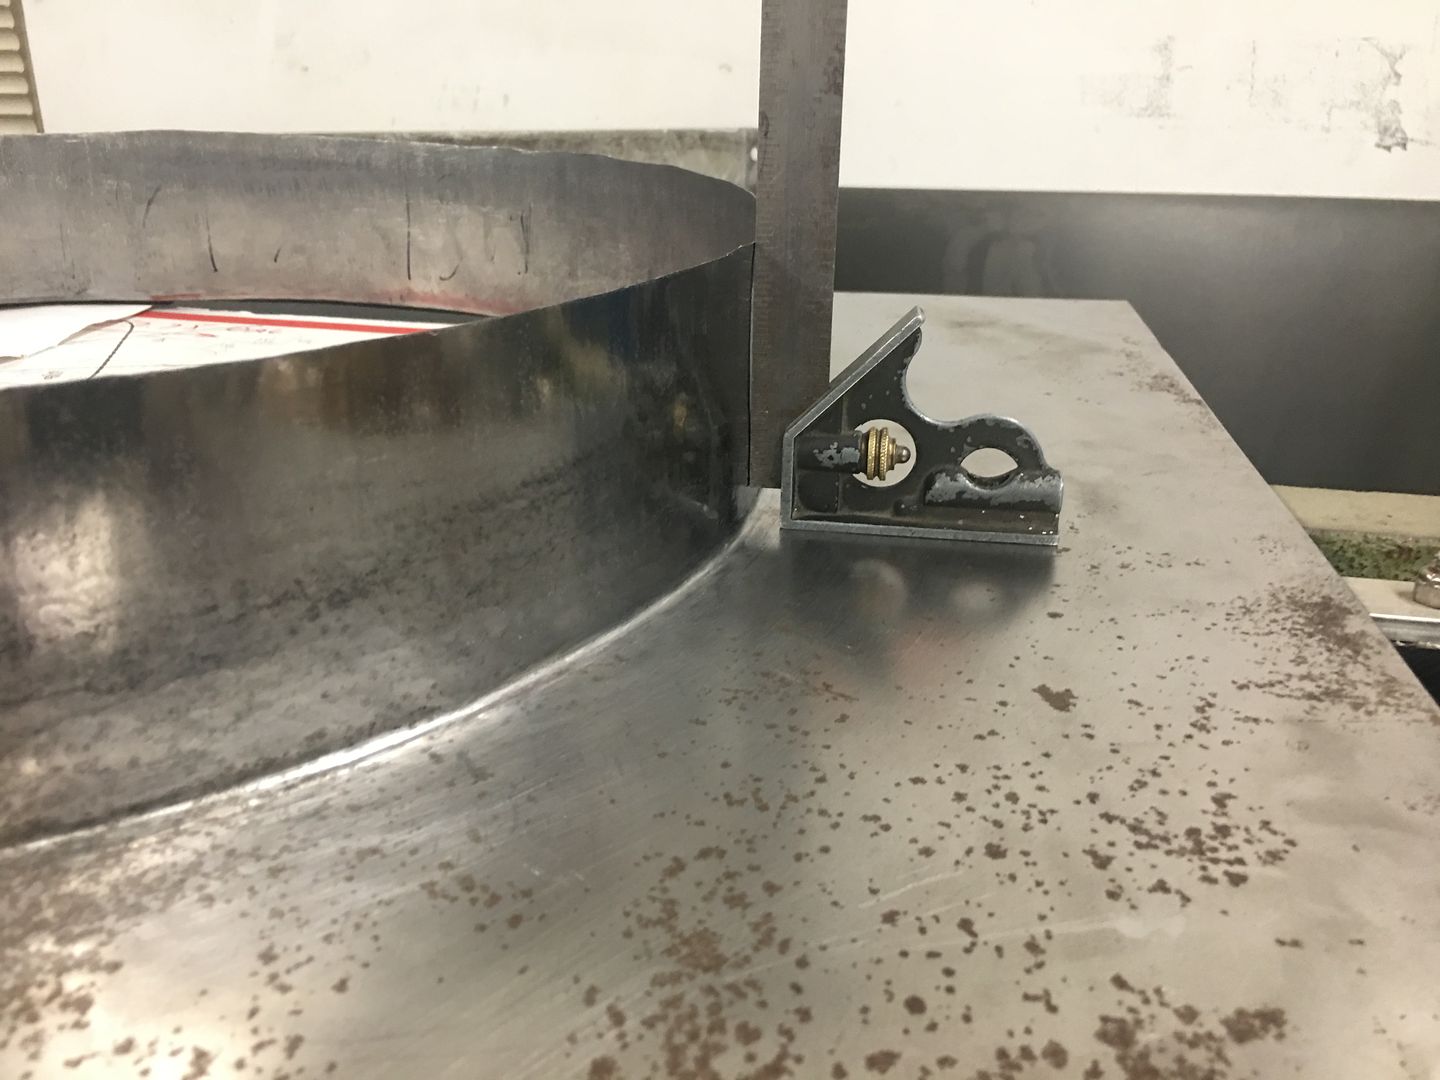 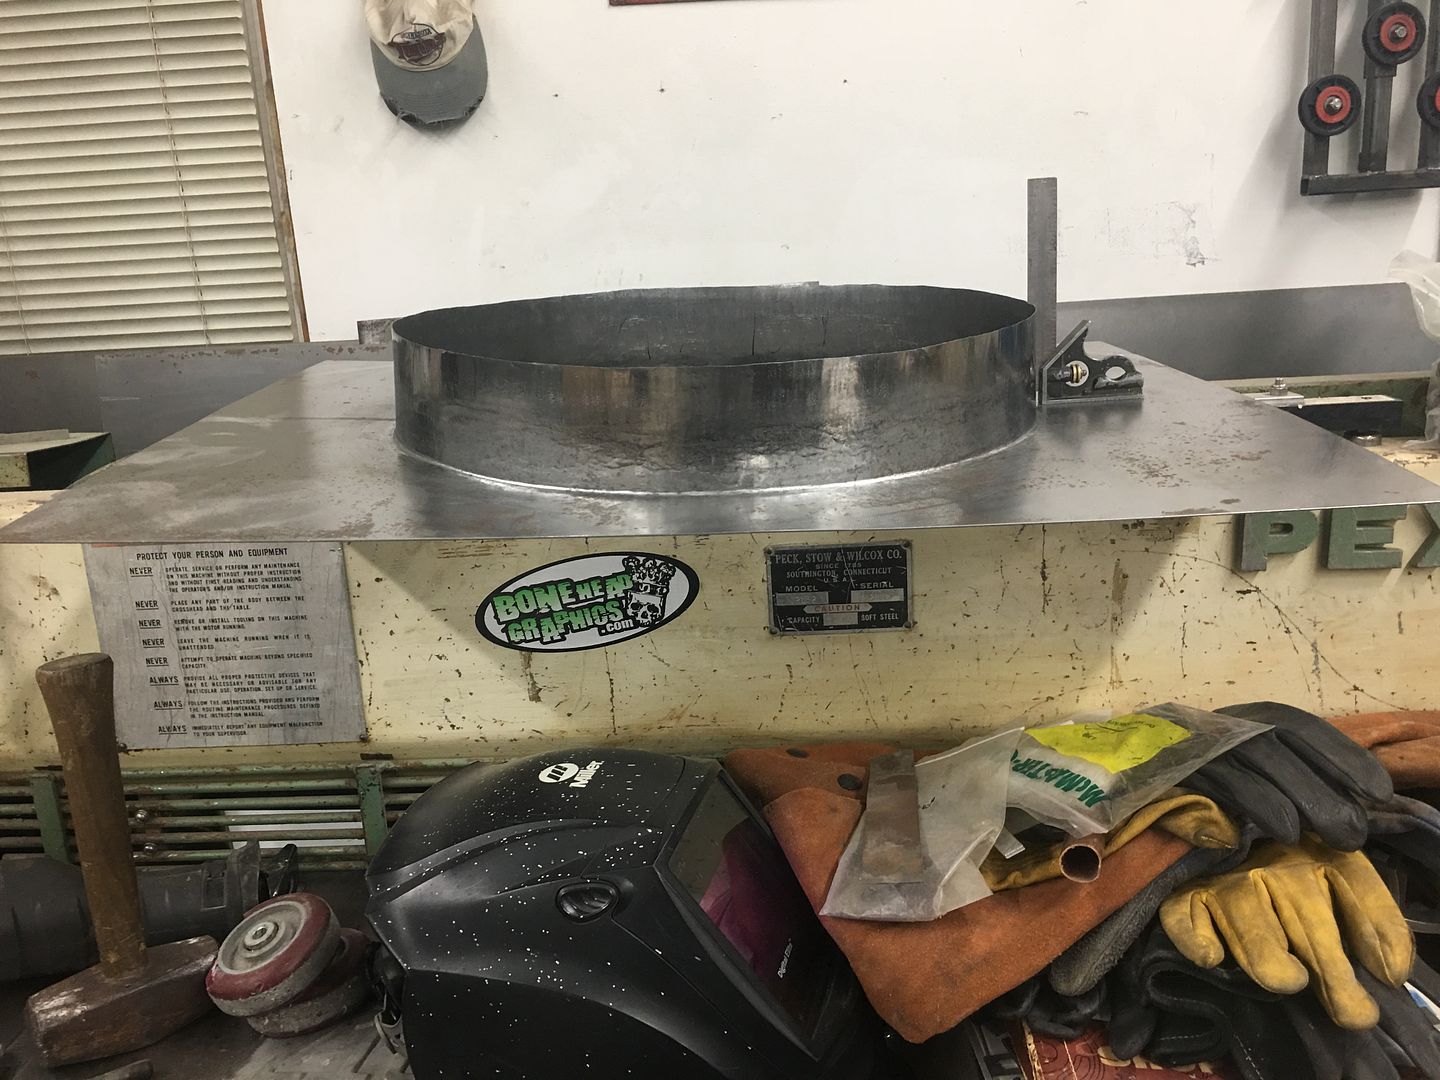 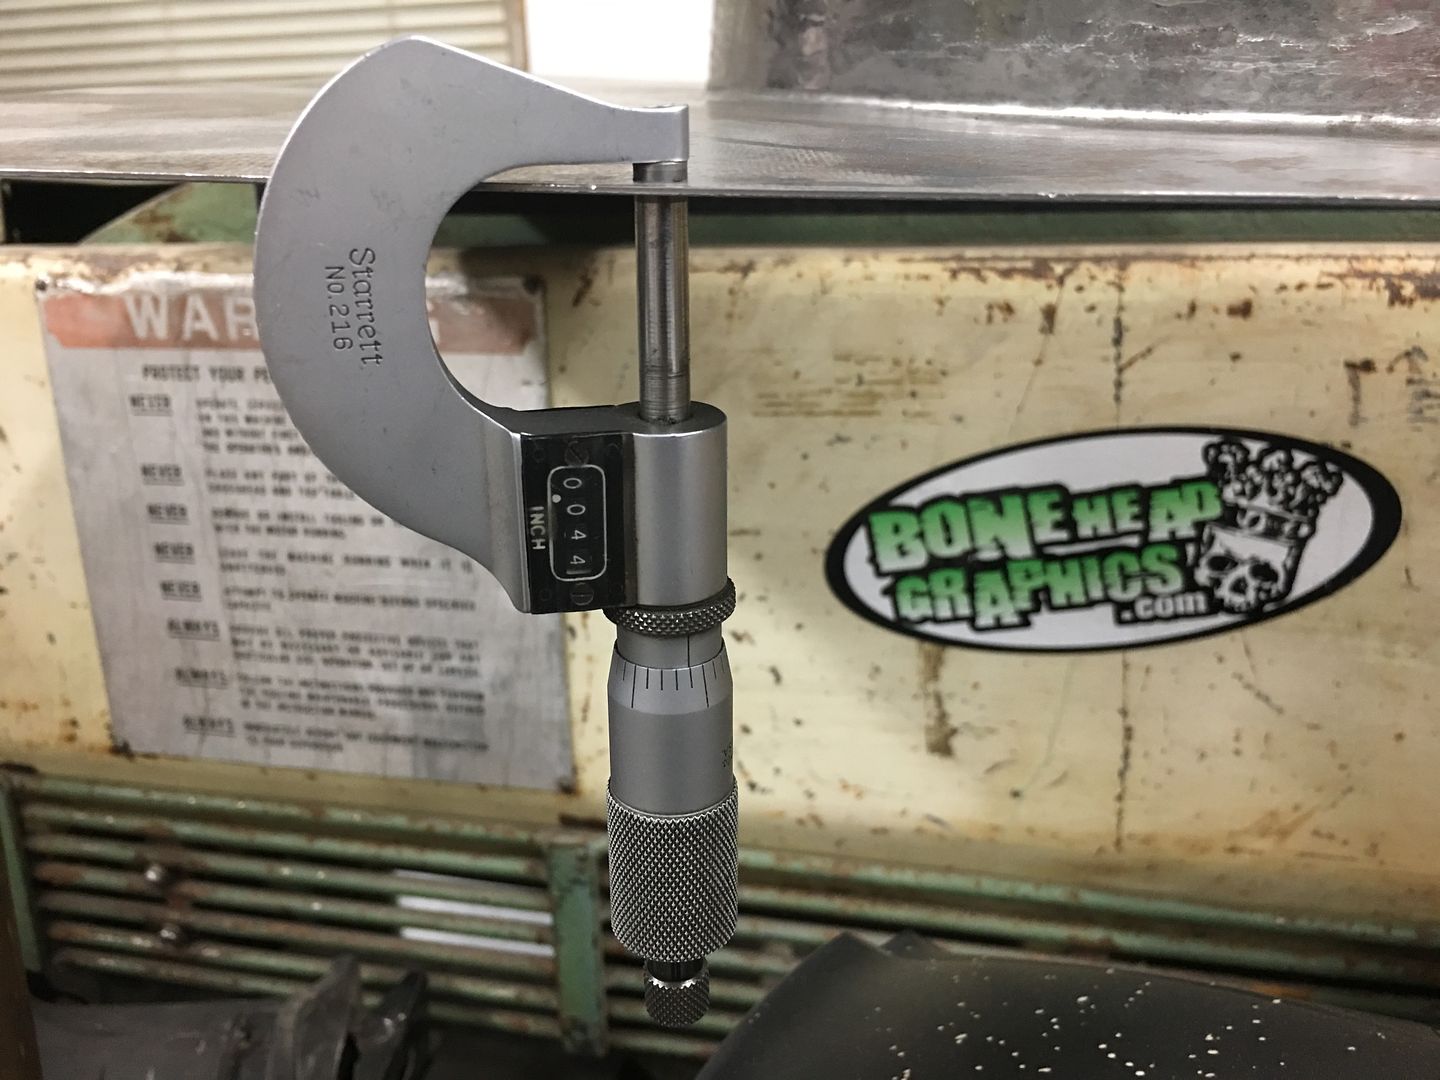 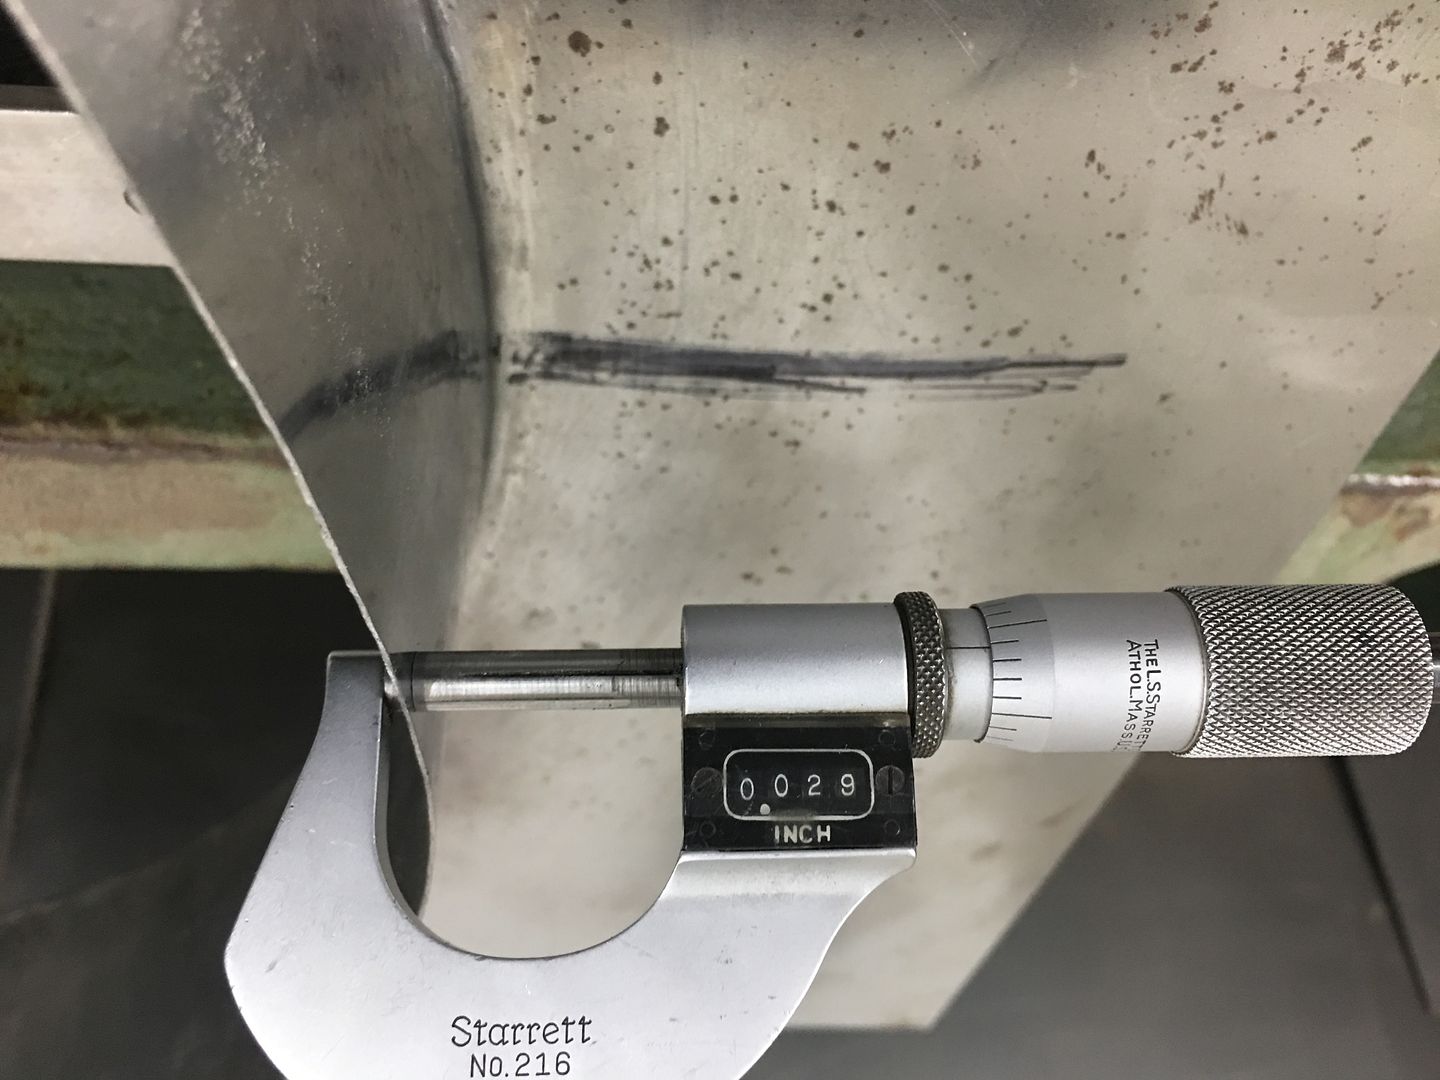 https://www.youtube.com/watch?v=IdSQFxGBoZs
__________________
Robert |
|
|
|
|
07-19-2021, 08:45 AM
|
#4 |
|
Registered User
Join Date: Jan 2013
Location: Leonardtown, MD
Posts: 1,637
|
Re: 55 Wagon Progress
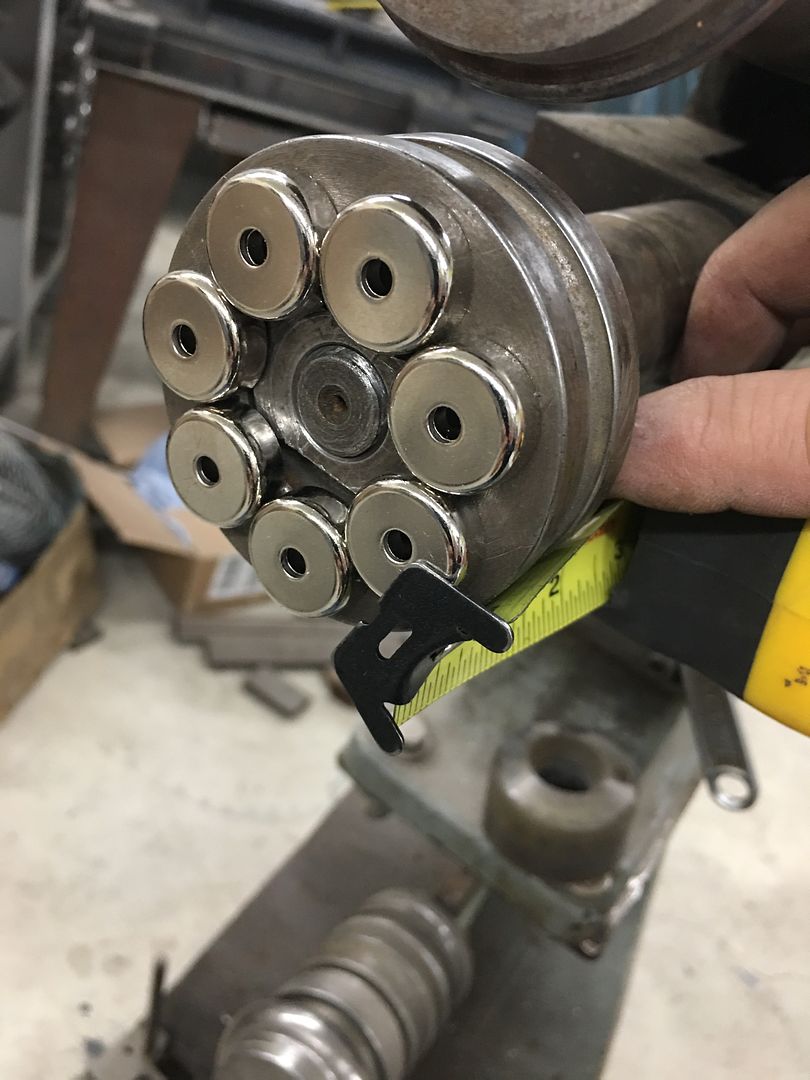
More progress... using our rare earth magnets on the end of the bead roller die to correct the "back spacing", the fan shroud has the center bead added...
 https://www.youtube.com/watch?v=cRXF3sInnTU Next, adding the outer joggle for the wire. Our last mis-step at this stage was expecting a folded flange to perform as it did on a flat piece of metal.. But as a full circle with 1/2" of flange, it tends to resist any change in diameter, so our efforts to add the joggle (stretch outward) were met with catastrophic failure in the way of a split. This next attempt will leave that edge straight out instead of flanged, such that it will be more apt to move/stretch as we need it to.. Additionally, our dies will have a backstop built in and include two bead forming details. One will follow the center bead already installed, and with the back stop as part of the die, should correct any wiggle our bead roller may have added. Having both bead details added to the dies will also help to maintain correct spacing throughout. As these beading dies tend to pull material from either side, having multiple beads makes it more of a challenge to pull sufficient material for both and have enough for the bead height.. Adding one prior using the bead roller means we will only be "pulling" material for the one, for better results. 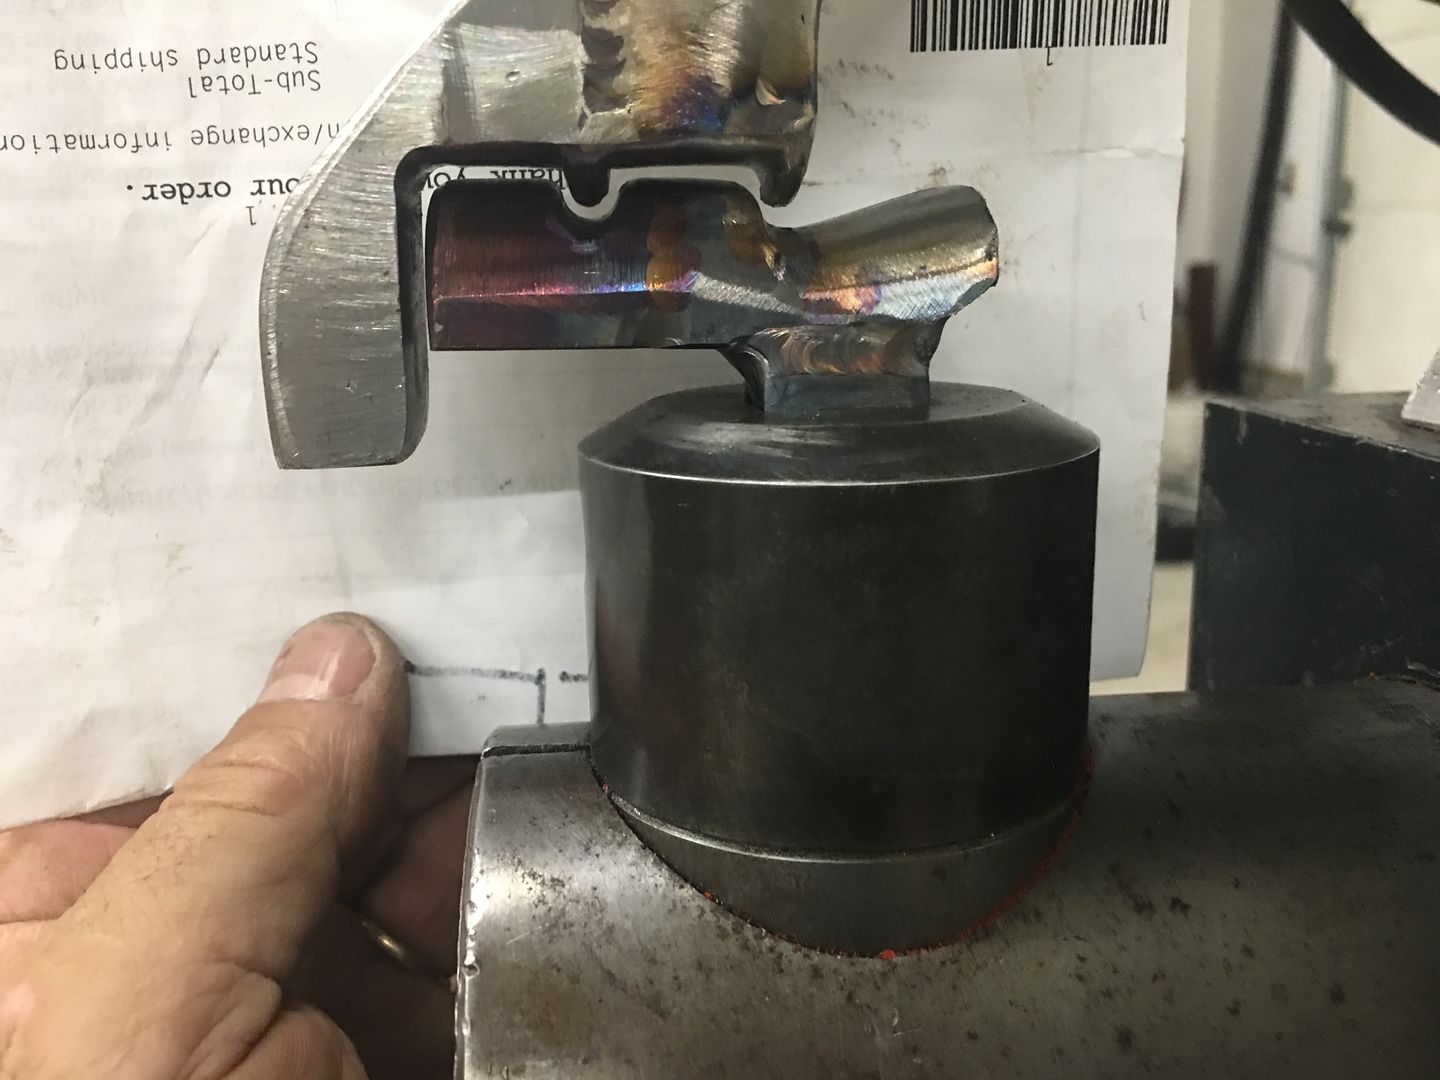 Our test sample shows the wrap for the wire straighter to the side, for less resistance to adding the offset. 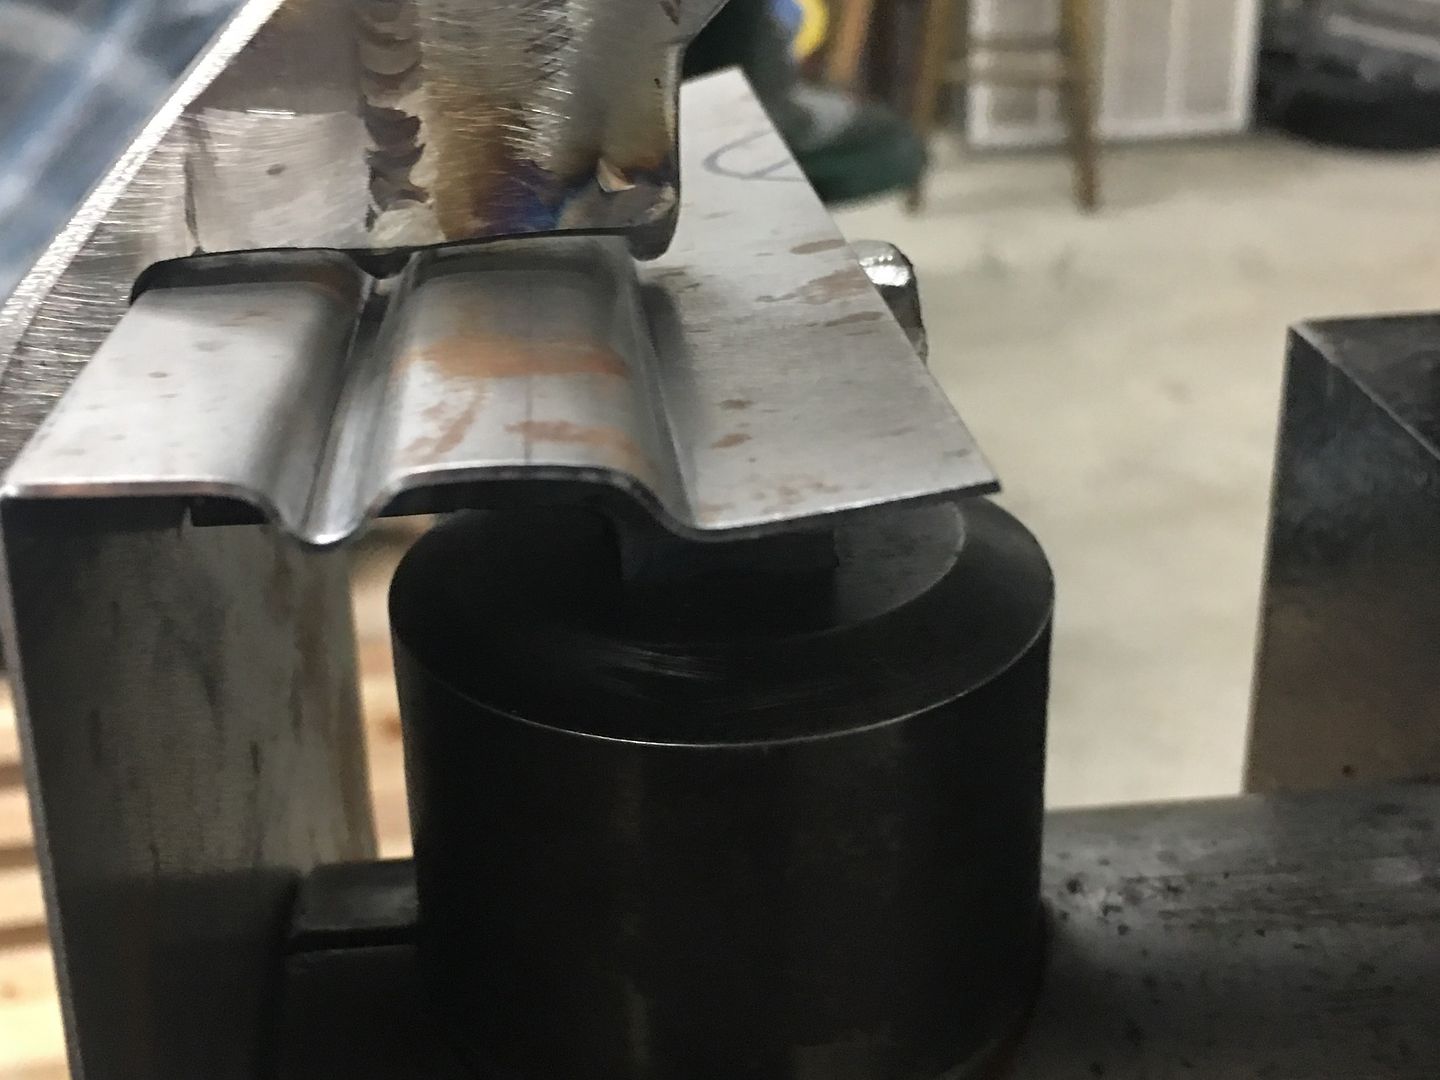 Shroud is then trimmed to size and run through the dies on the Lennox.. 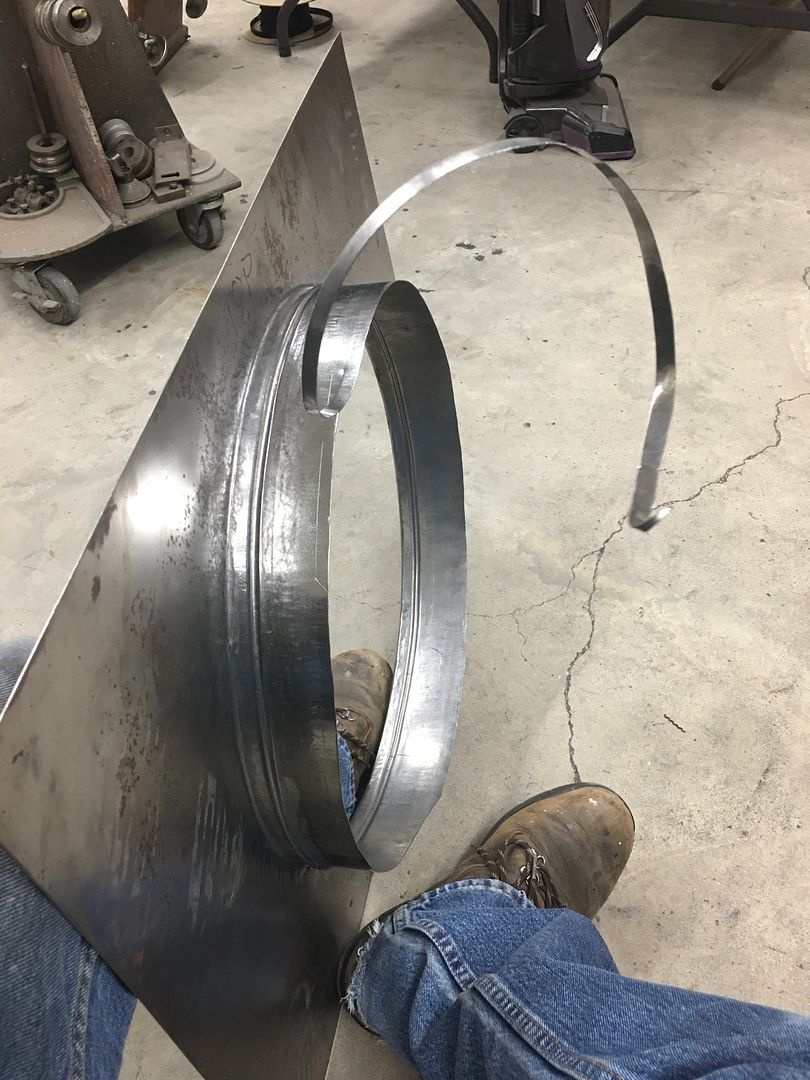 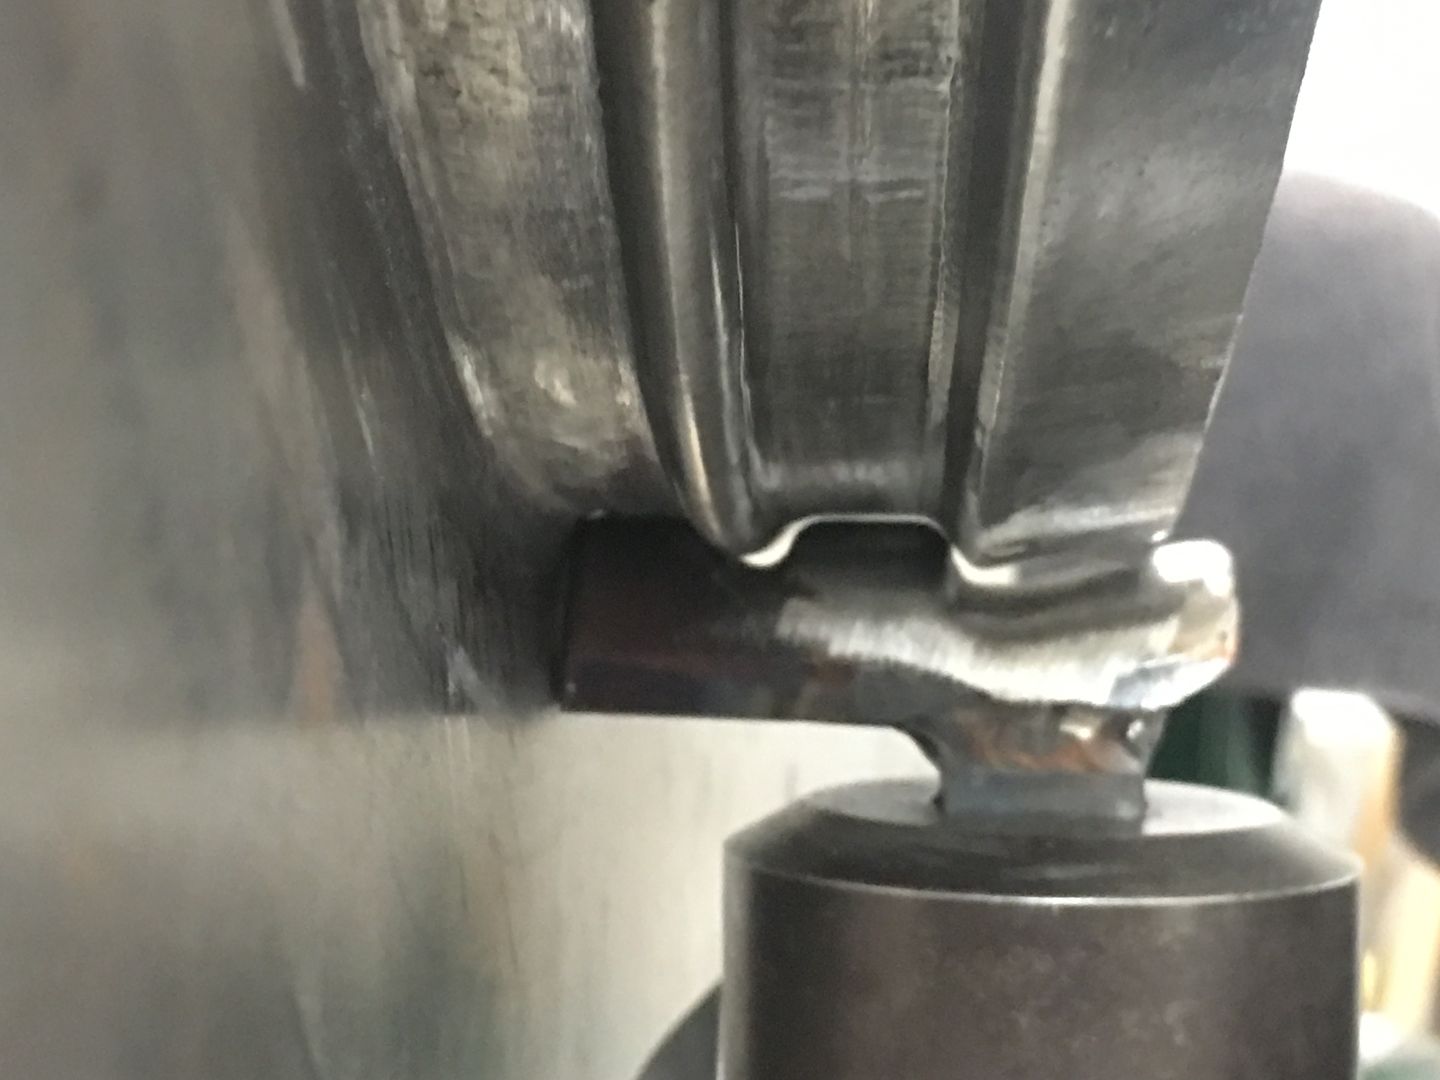 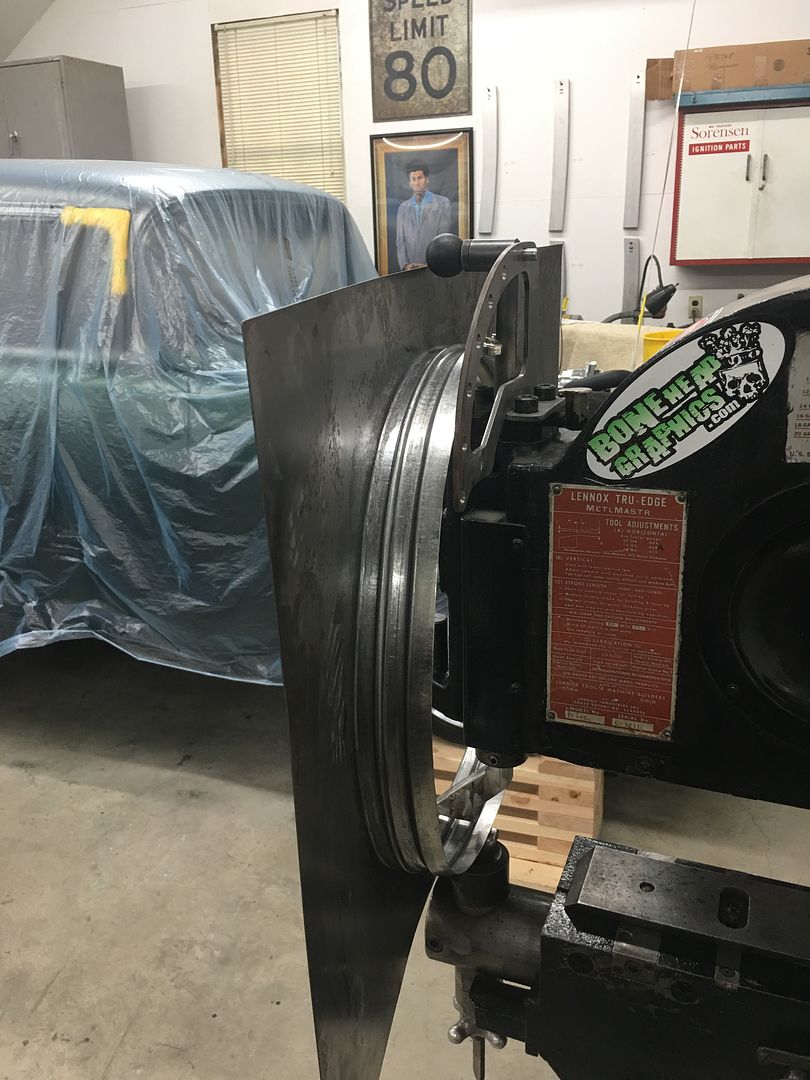 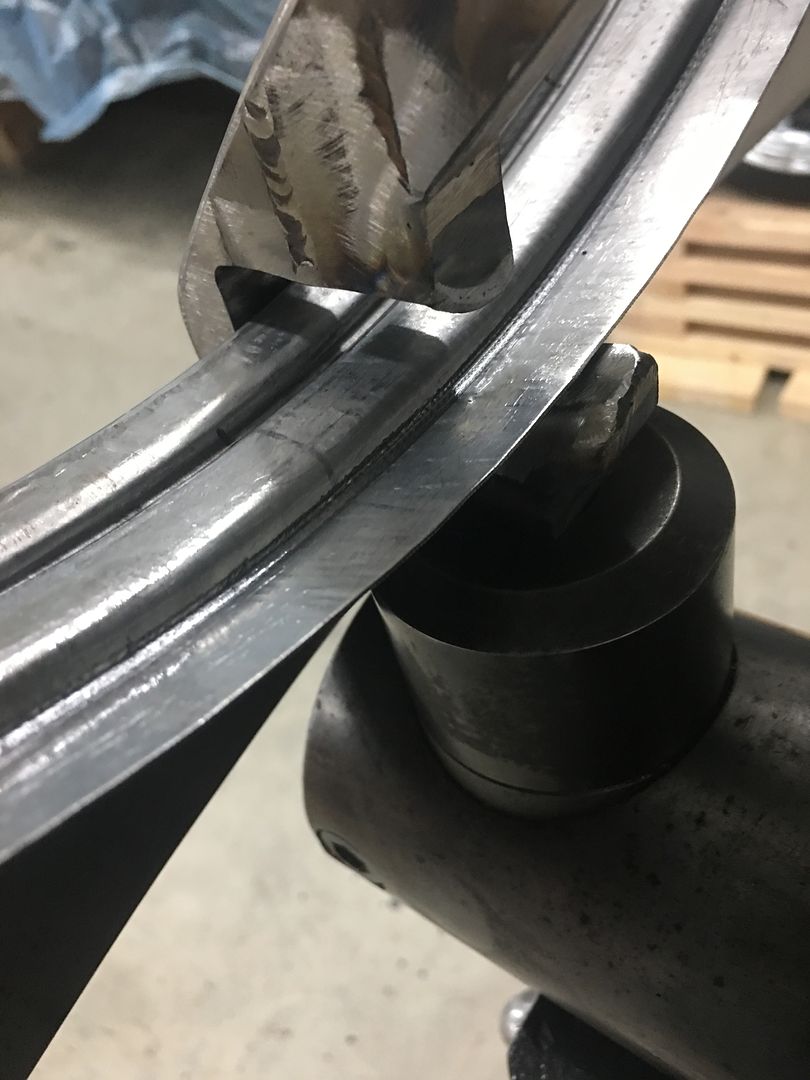 This did give us a slight potato chip shape of the panel, so the offset was stretched in the Erco.. 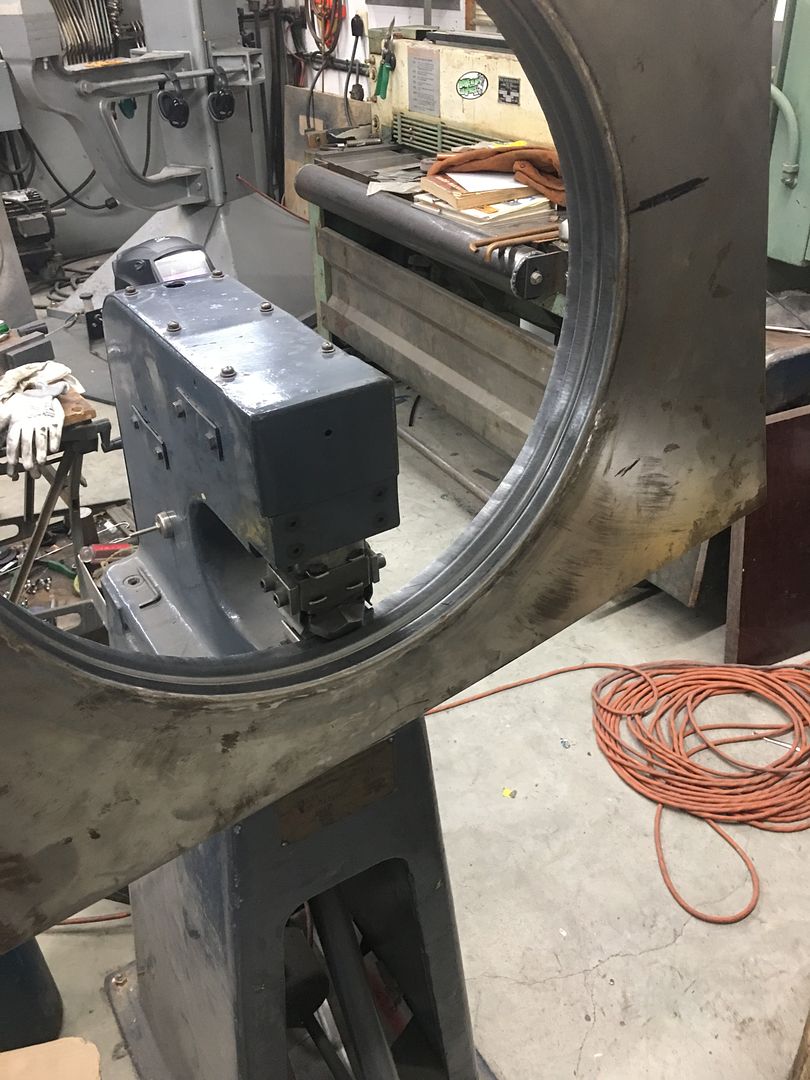 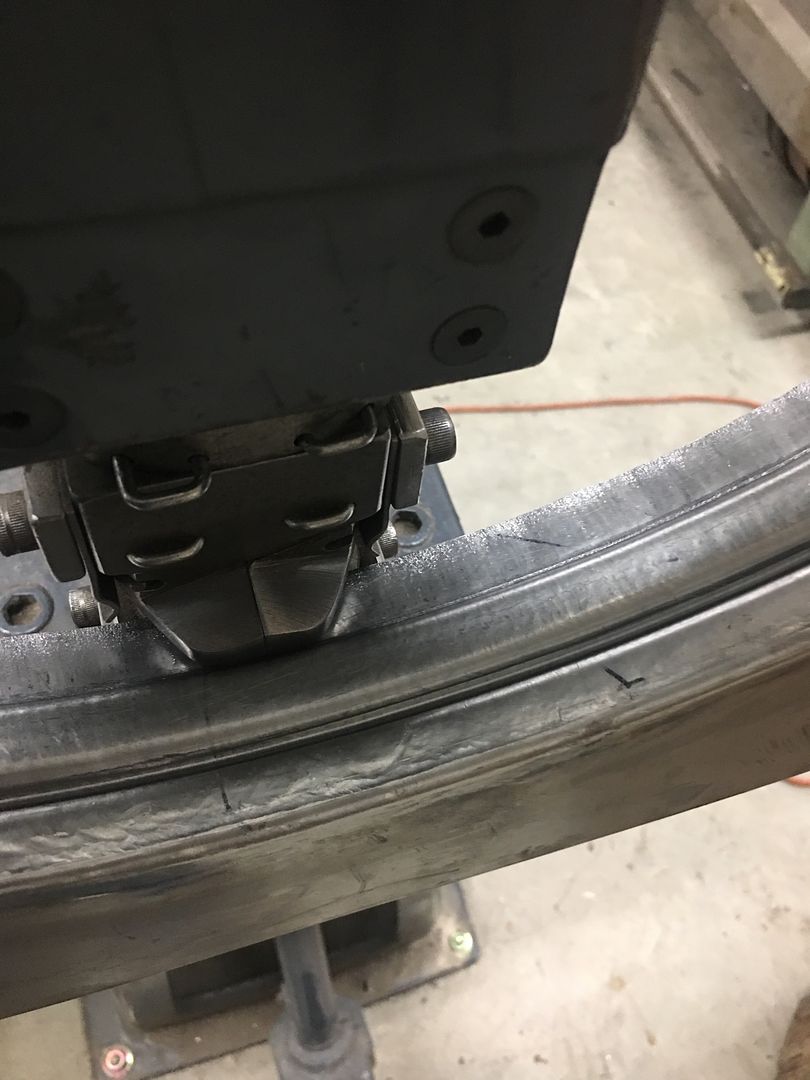 Our tubing straightener is used to make our 3/16 wire more concentric for an easier install.. 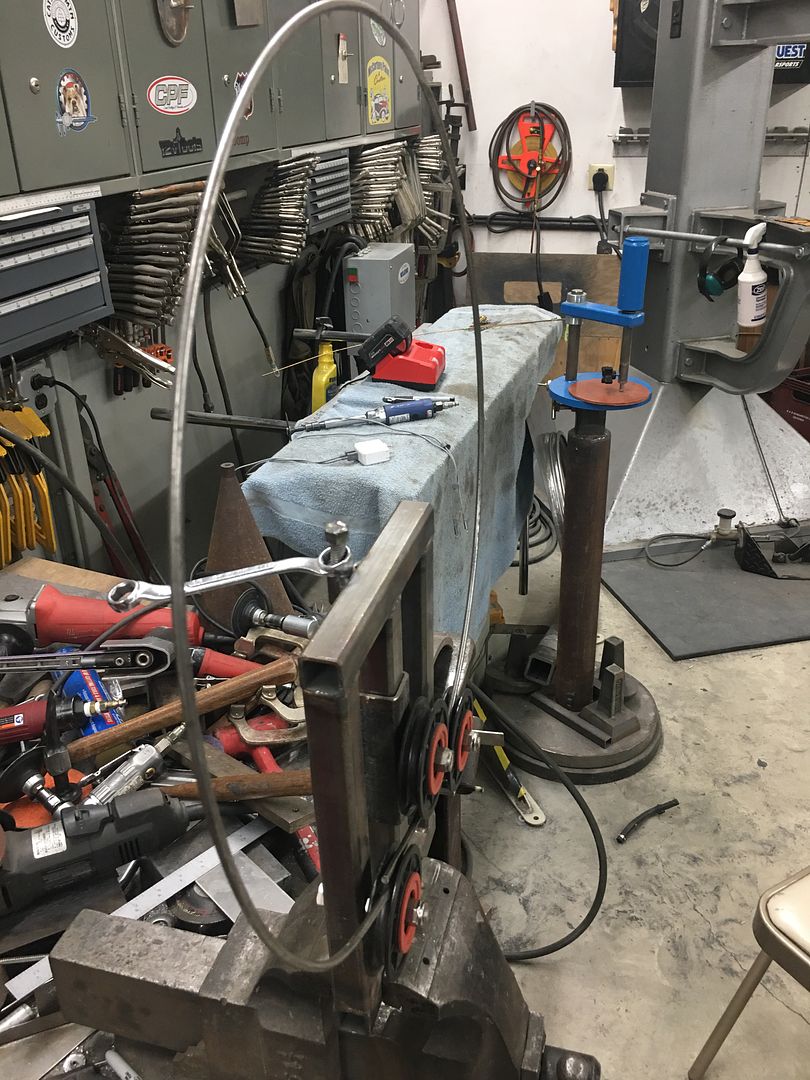 Then the wire was test fit... 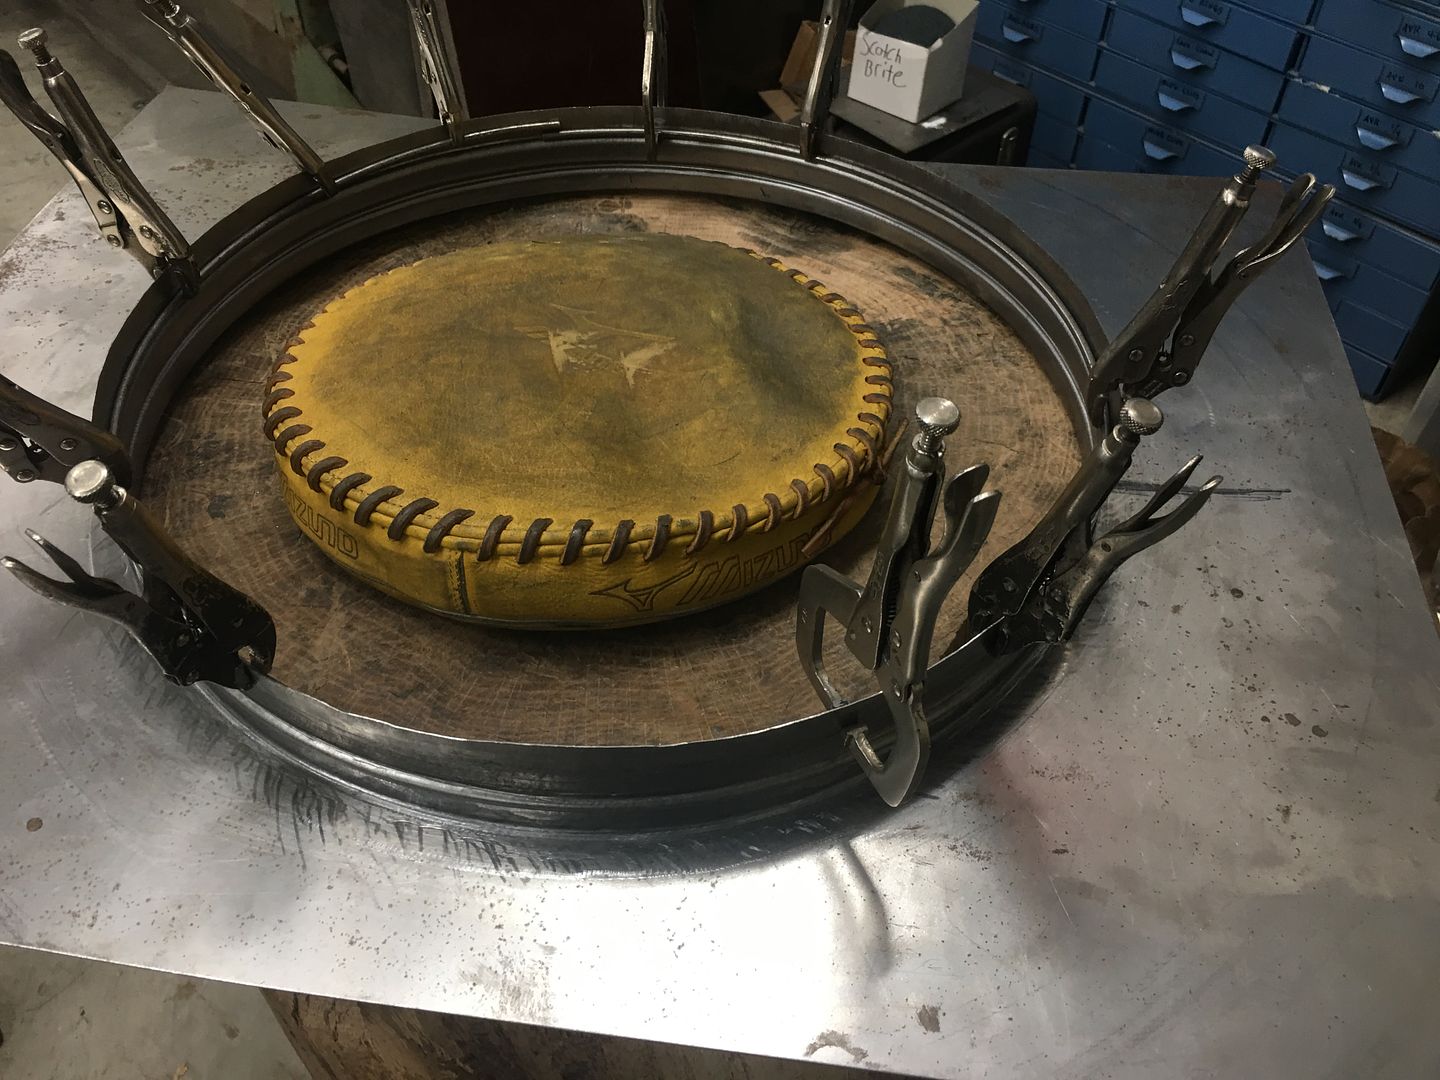 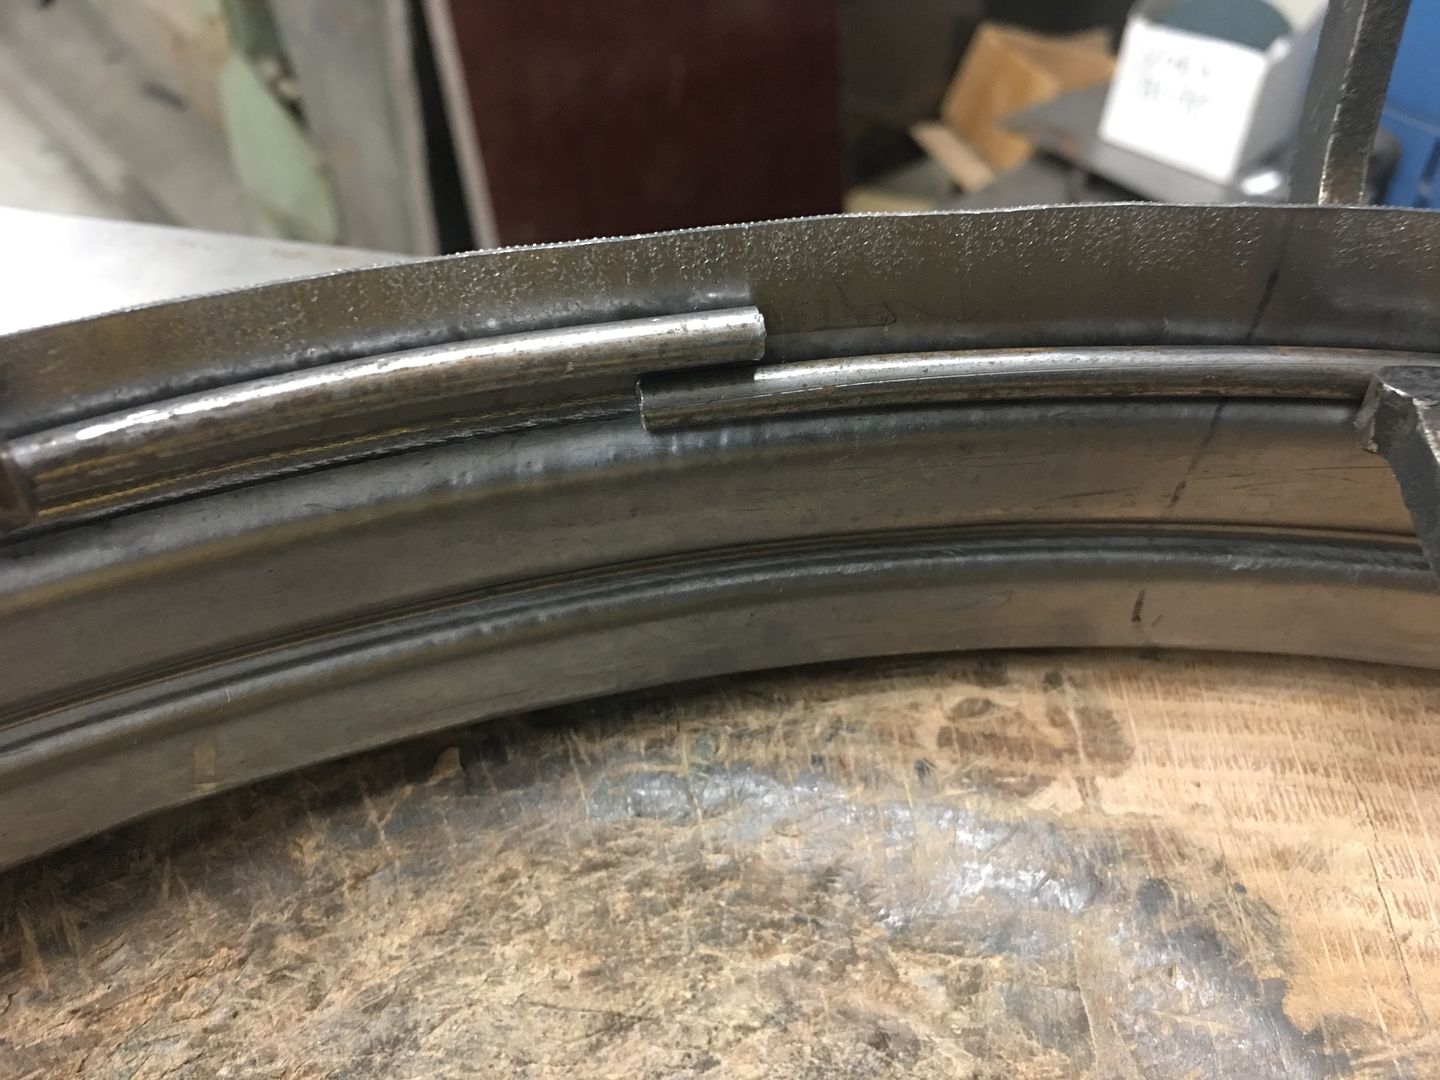 Mike got our interior assembly and wiring started, the rear tail light / fuel door actuator was installed, the sub box and amp installed, and our relays for the fuel door mounted adjacent to the amp, all tucked away behind the rear seat. 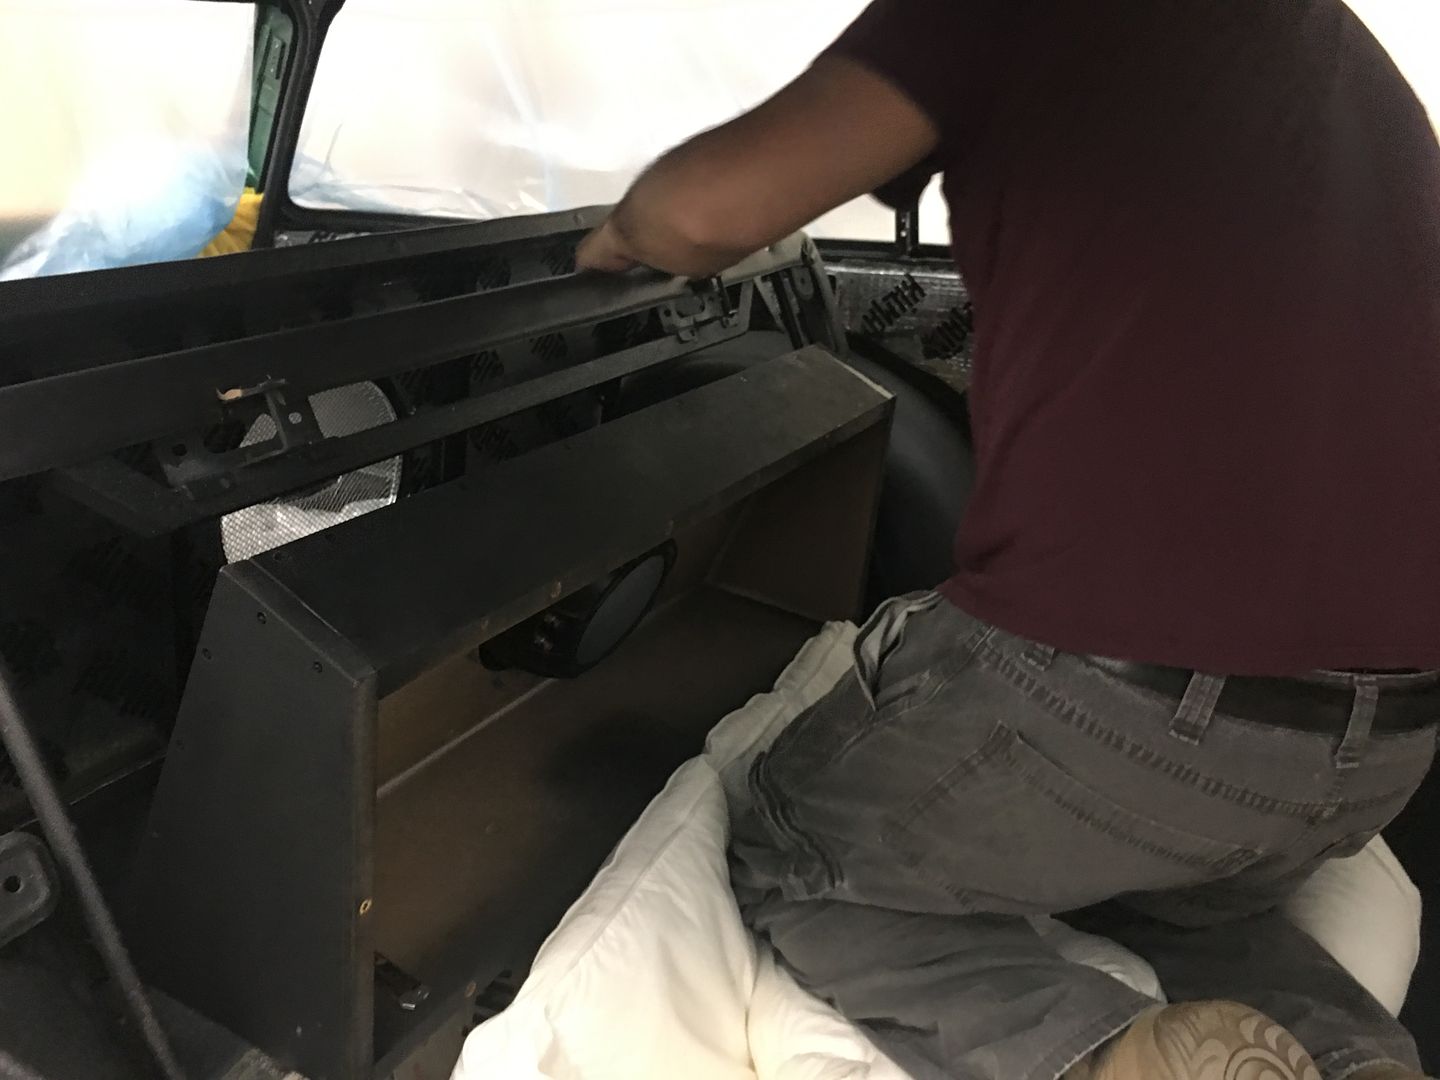 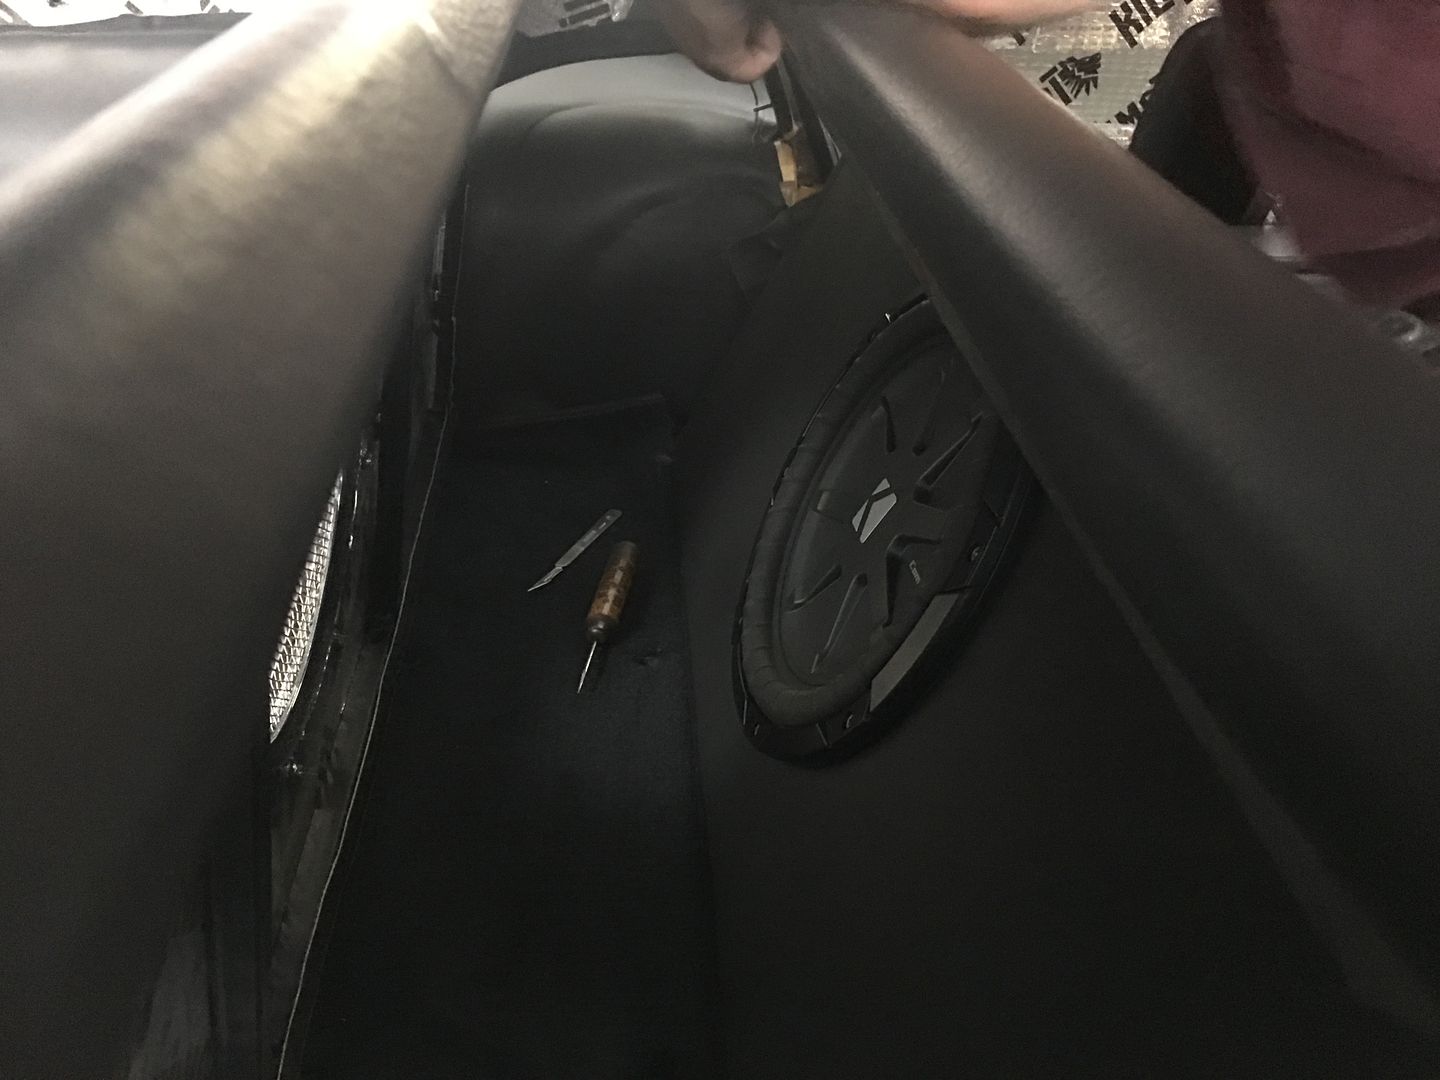 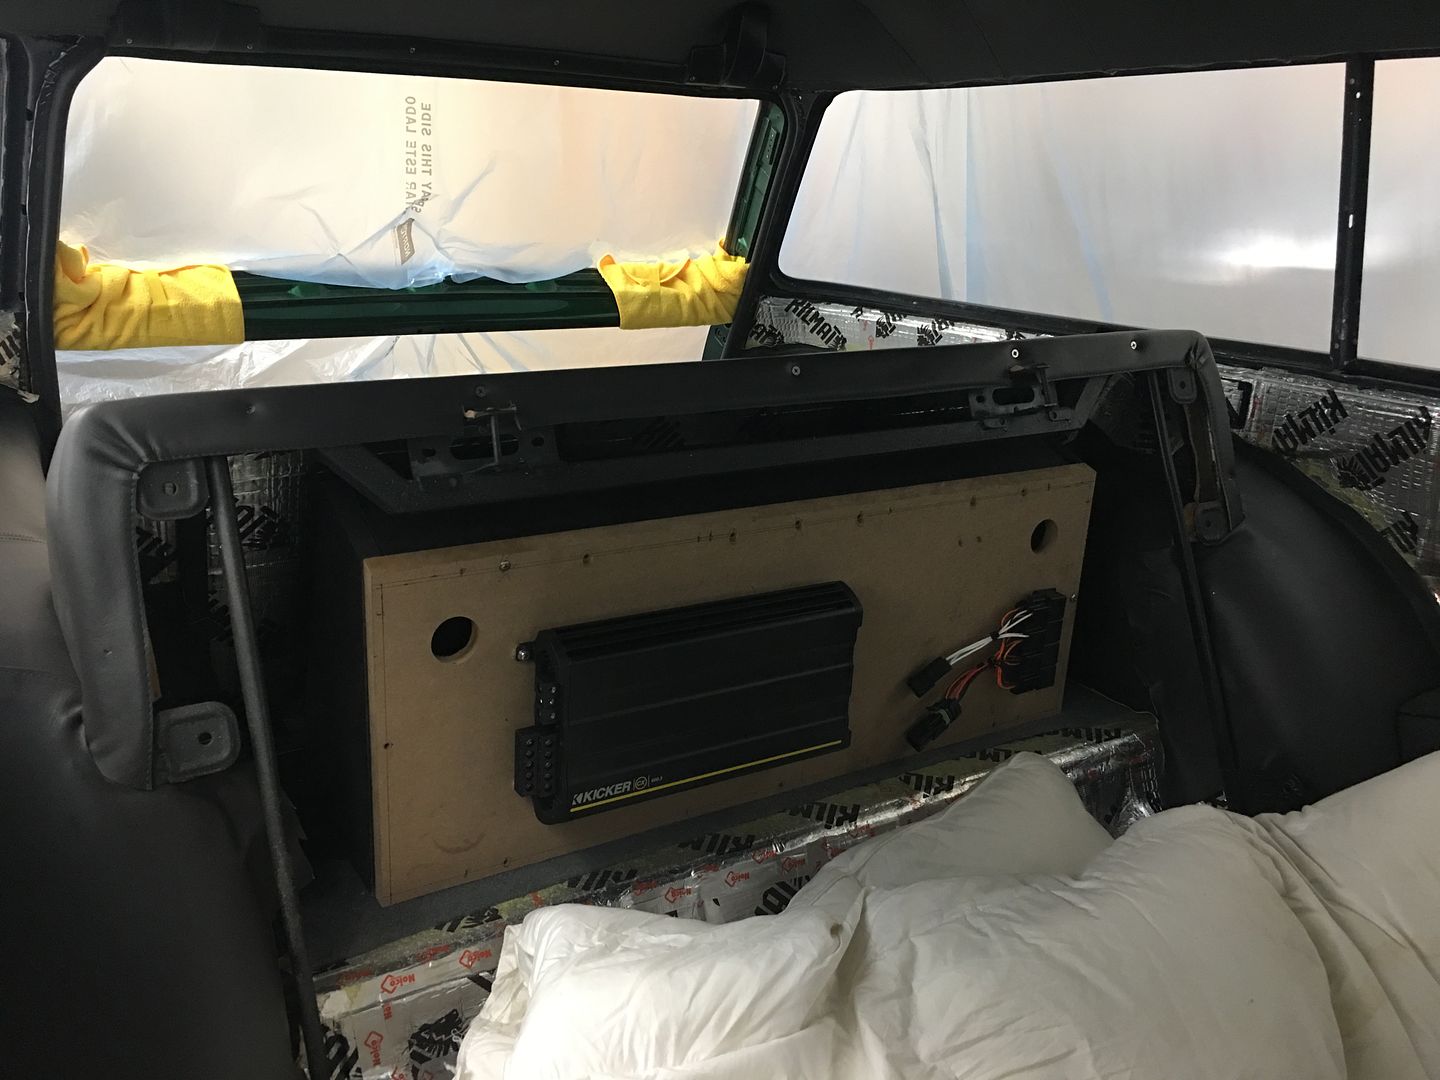 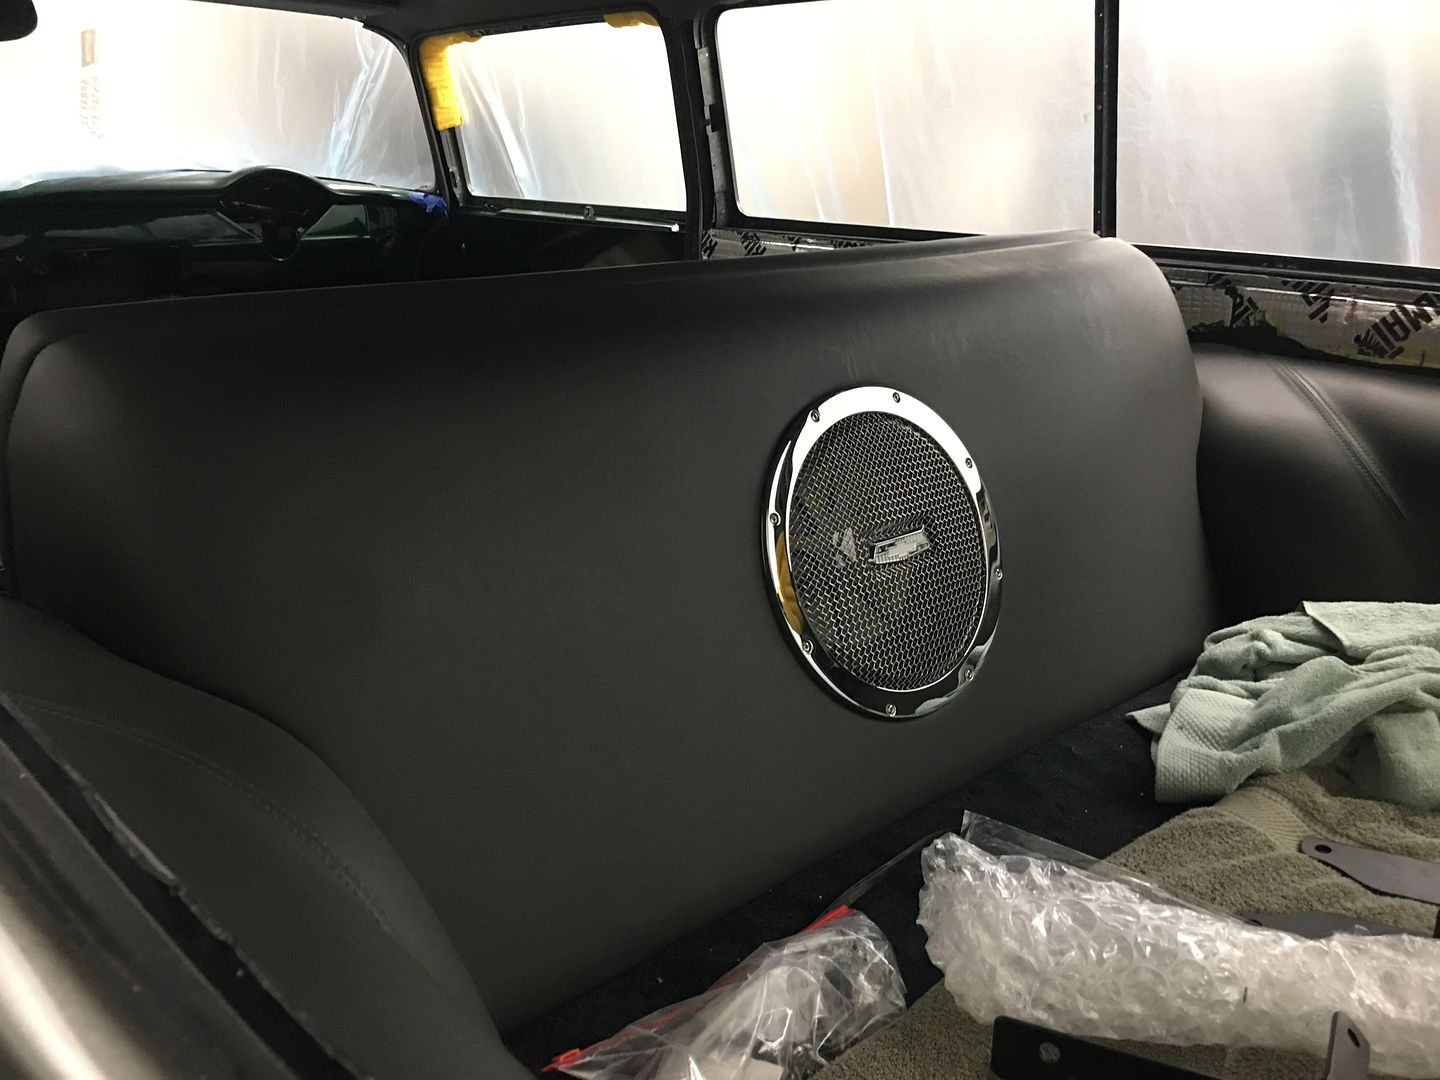
__________________
Robert |
|
|
|
|
07-22-2021, 08:15 AM
|
#5 |
|
Registered User
Join Date: Jan 2013
Location: Leonardtown, MD
Posts: 1,637
|
Re: 55 Wagon Progress
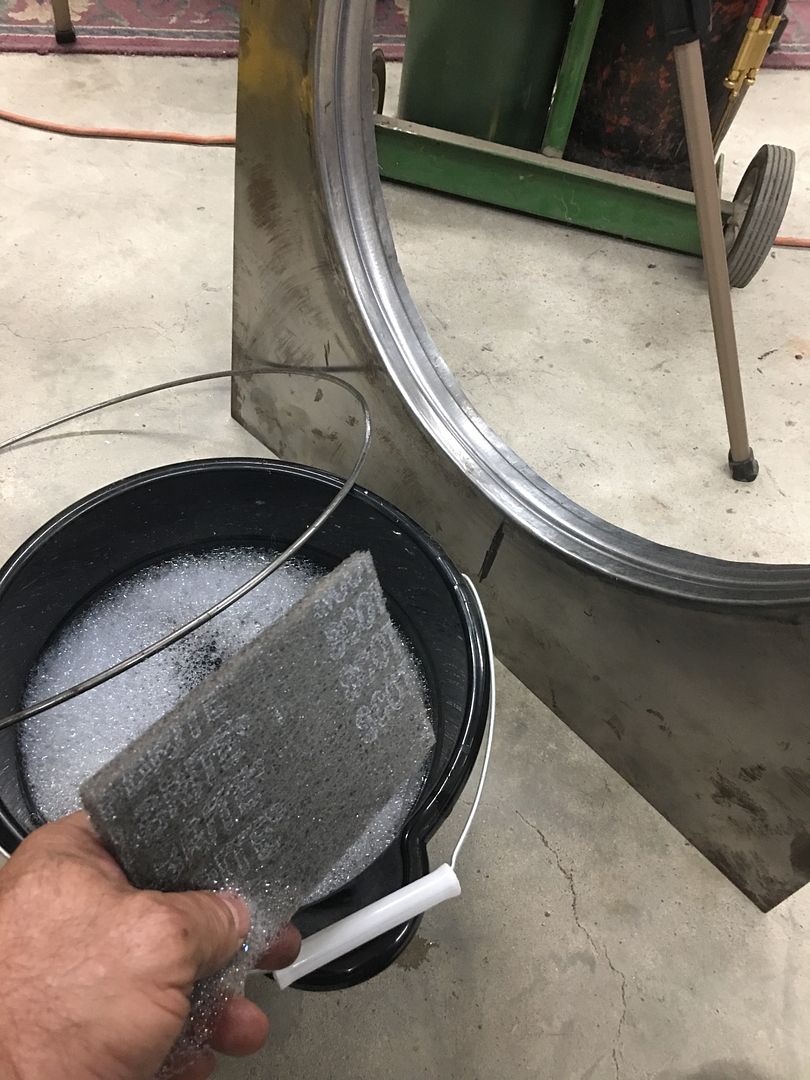
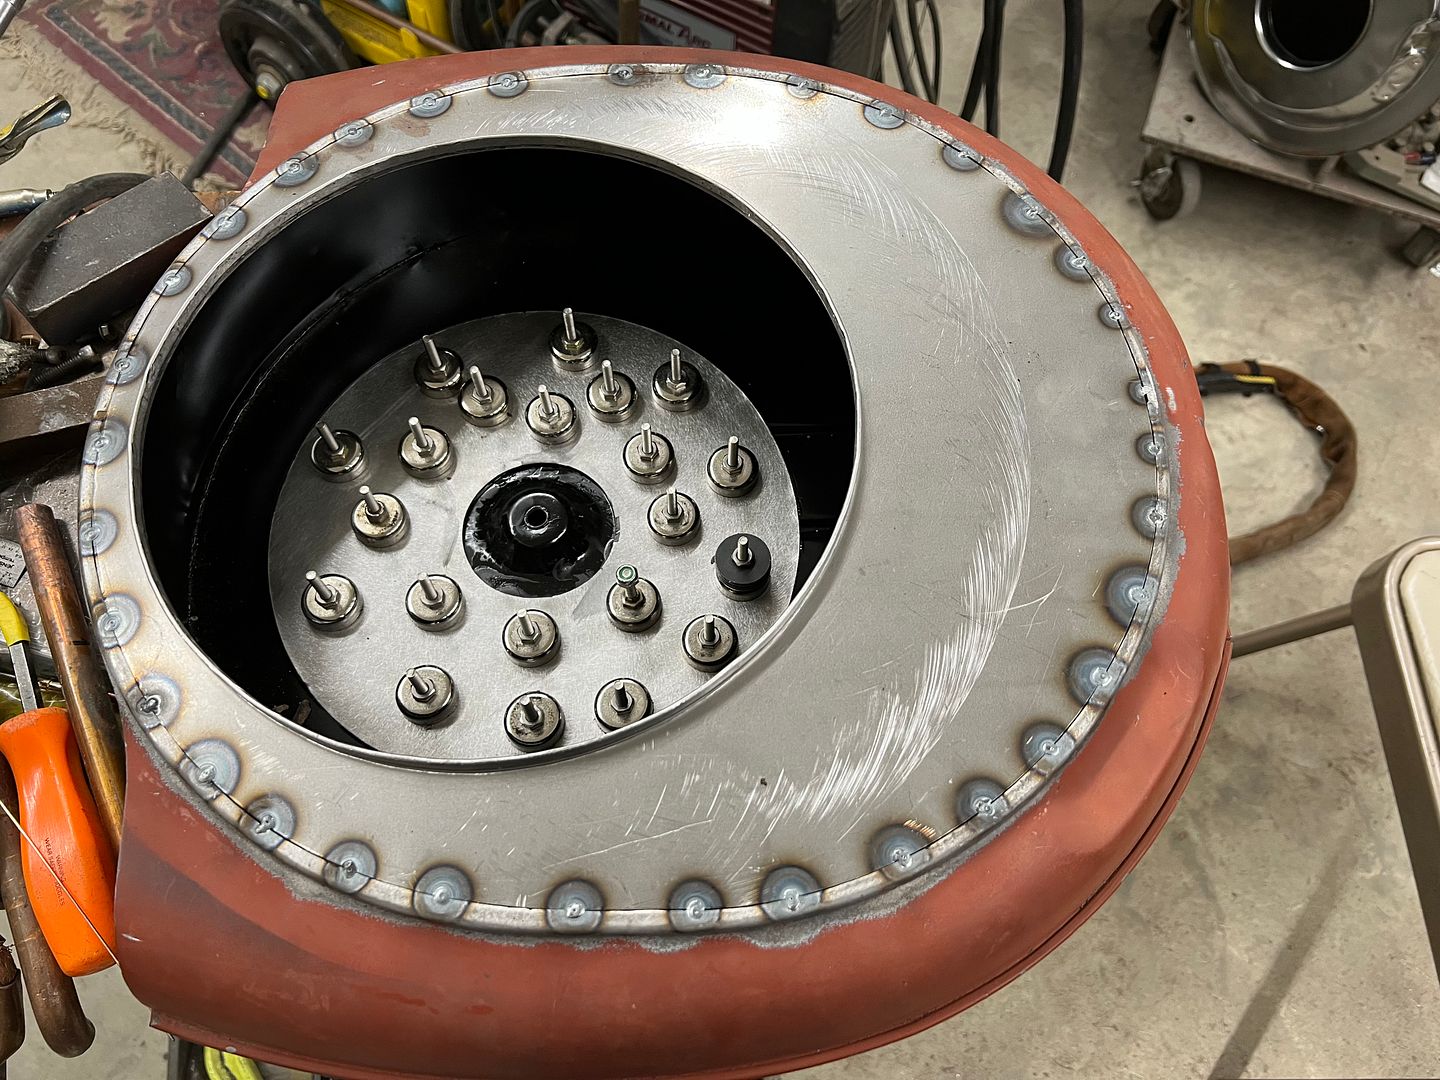
More progress on the fan shroud... Wire edging!! In order to stave off any rust issue as long as we can, I normally treat the wire channel to epoxy primer from the inside-out. So we used a scotchbrite pad and some Ivory liquid in warm water to remove any last remnants of the WD40 used for the last shaping effort on the Lennox.
  Our wire had been test fitted, sized, and tig welded together to form a continuous ring. This adds tremendous strength to the edge and helps to maintain a concentric circle. The wire was then cleaned as well. SPI epoxy was hand applied (acid brush) to the channel, the wire ring pressed in place (it was that tight) and then any bare spots on the ring epoxied as well..  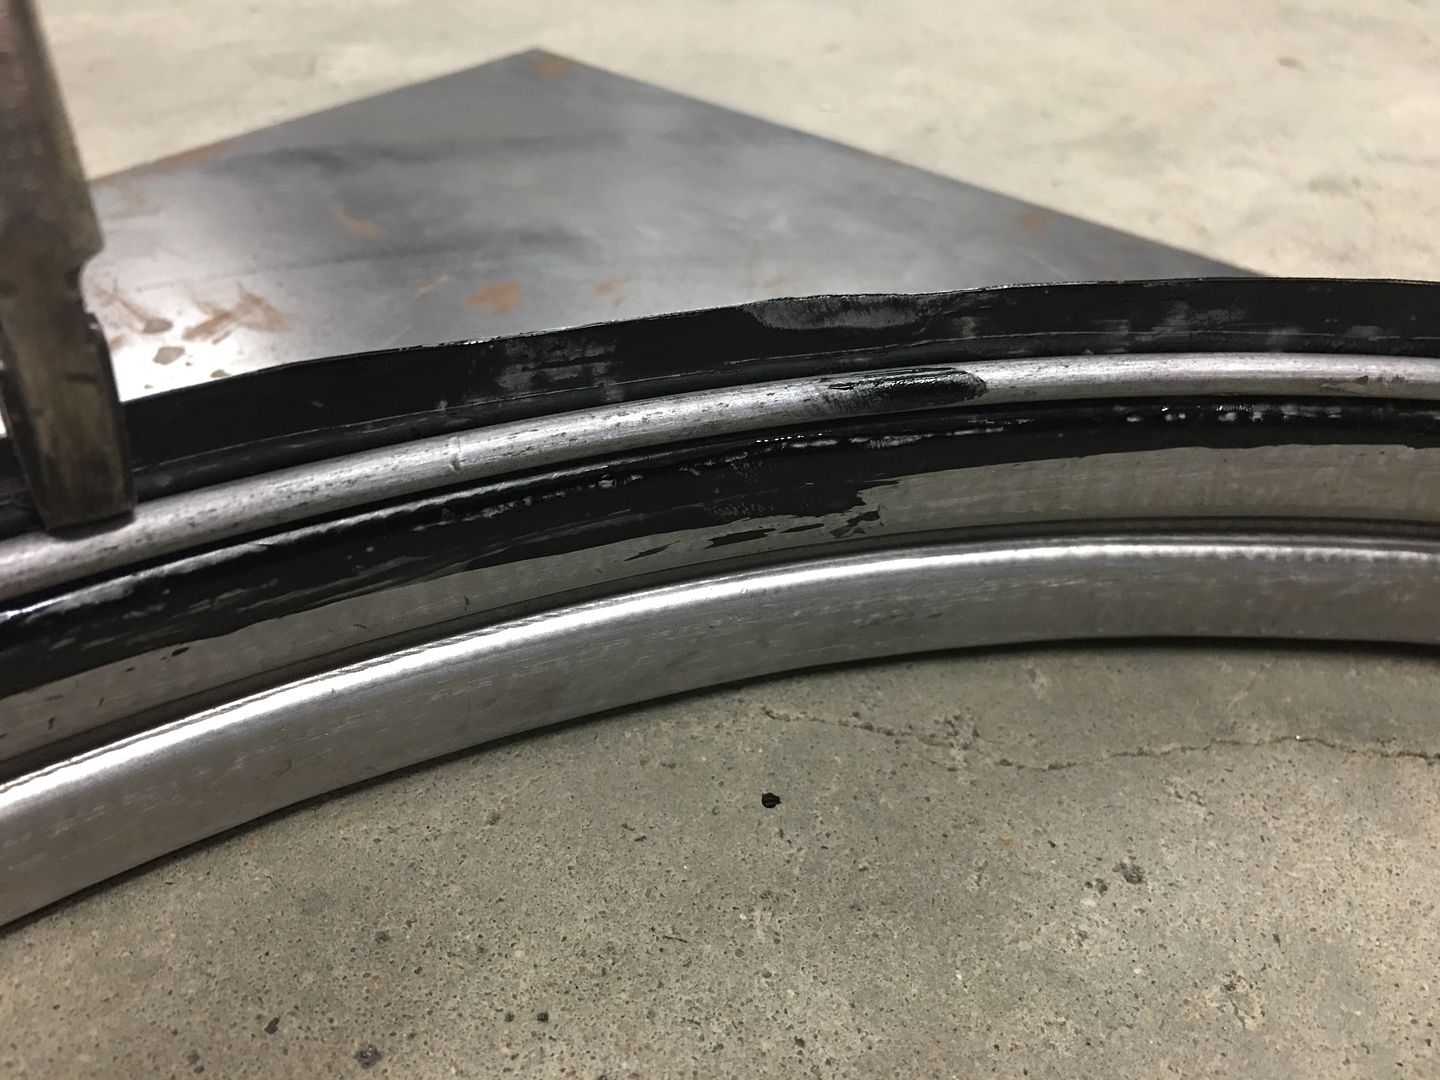 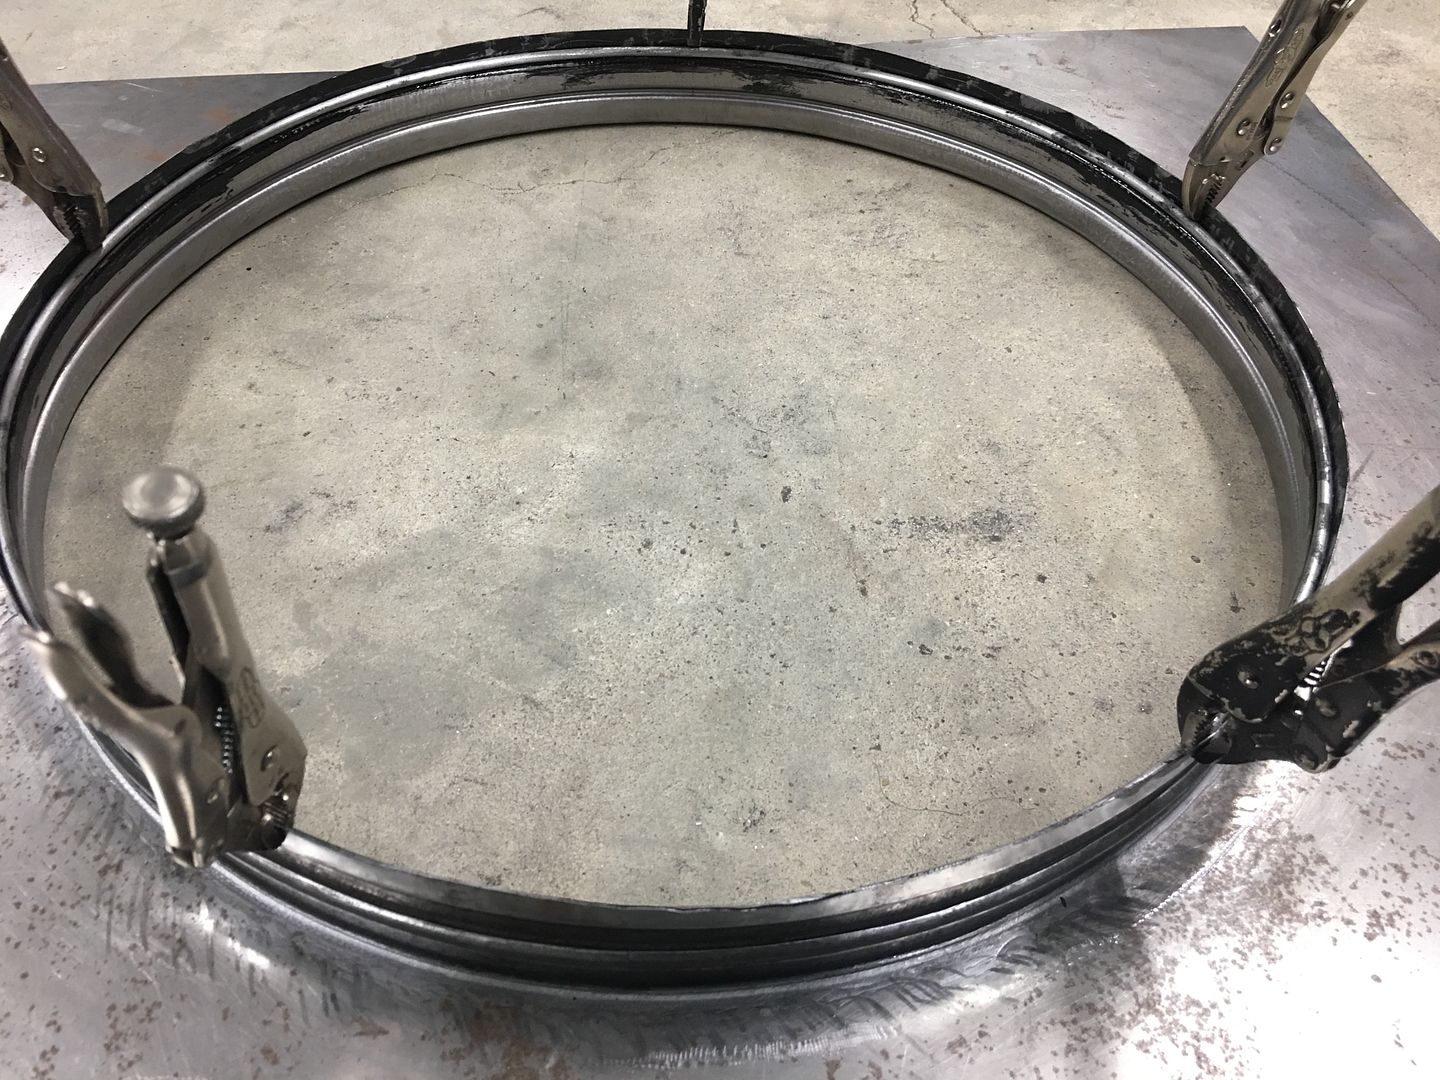 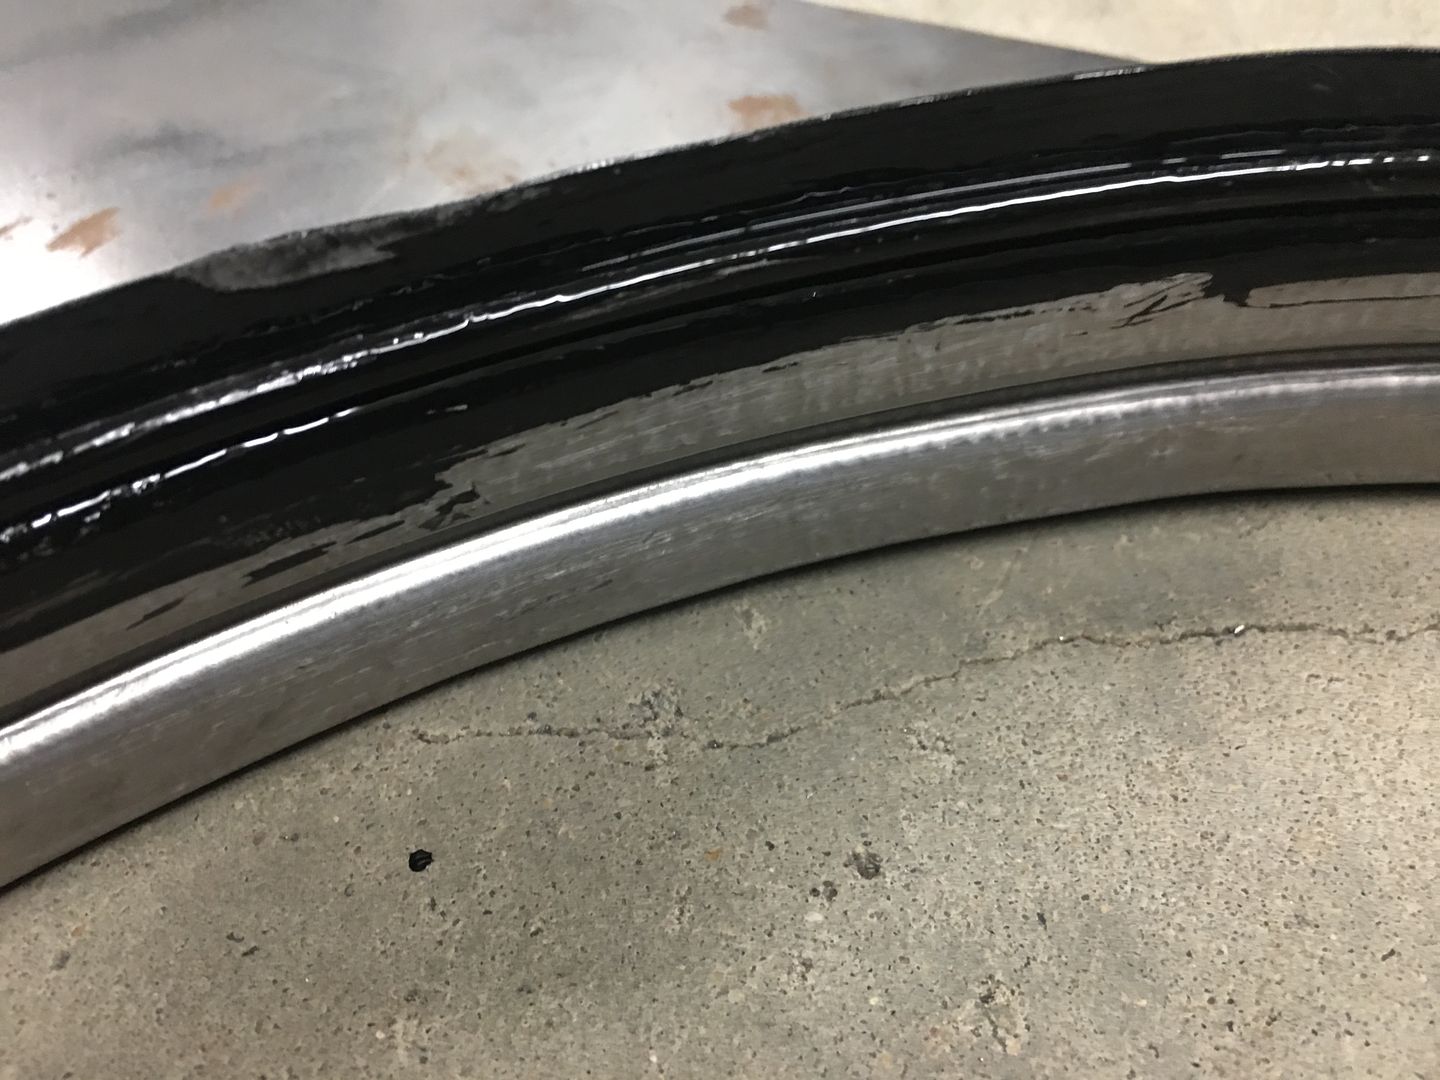 The vise grips hold the wire snug to the bottom of the channel until the edge of the flange can be staked in place. Wire edging process, done using our cone anvil, various hammers, and a 90 durometer polyurethane pad for the final closure of the wrap.. https://www.youtube.com/watch?v=kHOjgRexM30 At the point we were hammering, the epoxy had set up approx 10-15 minutes, so it was not dry yet, but not running either. We'll let the epoxy set a couple days and get additional coats in the slight gap at the edge of the wrap in order to seal things well for rust prevention. 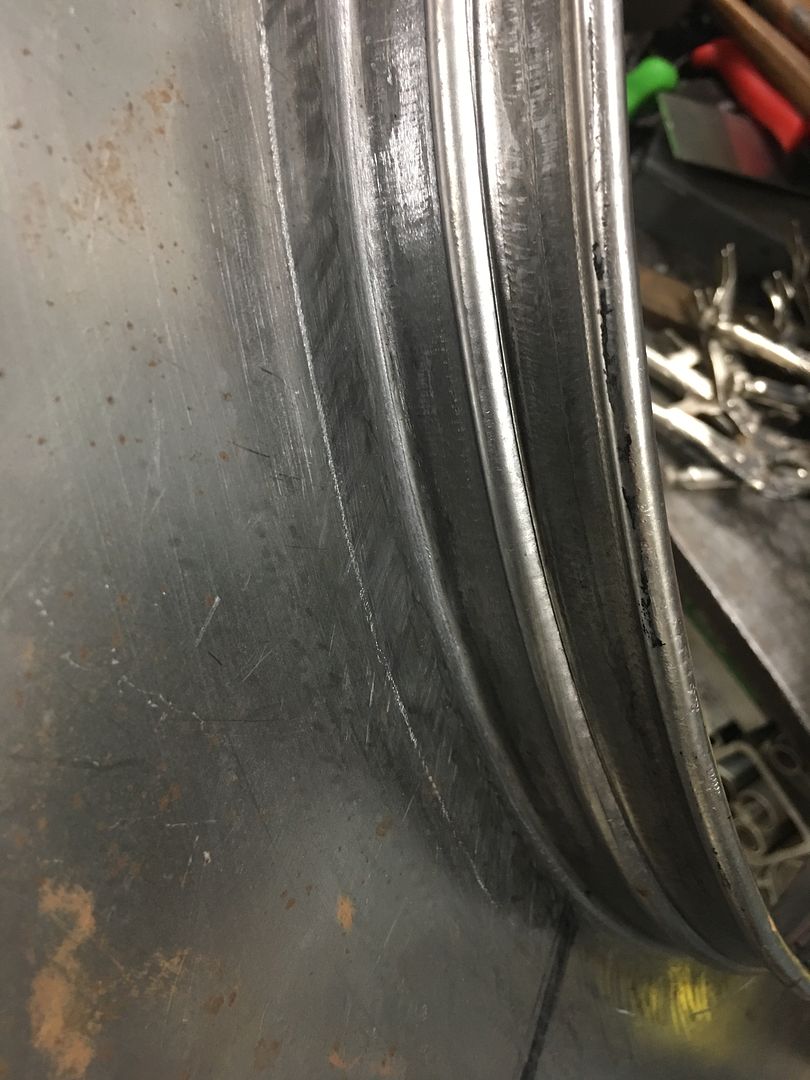 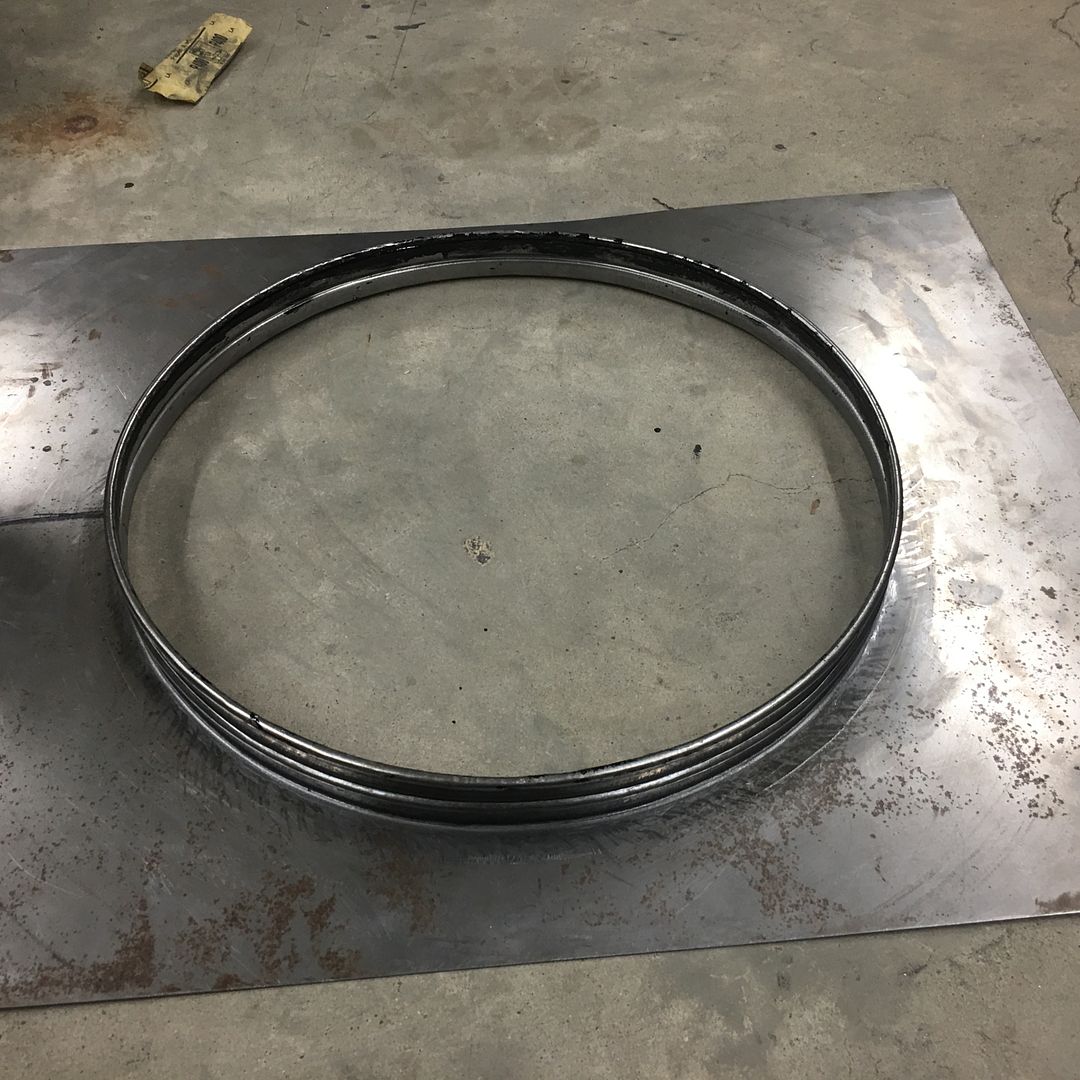 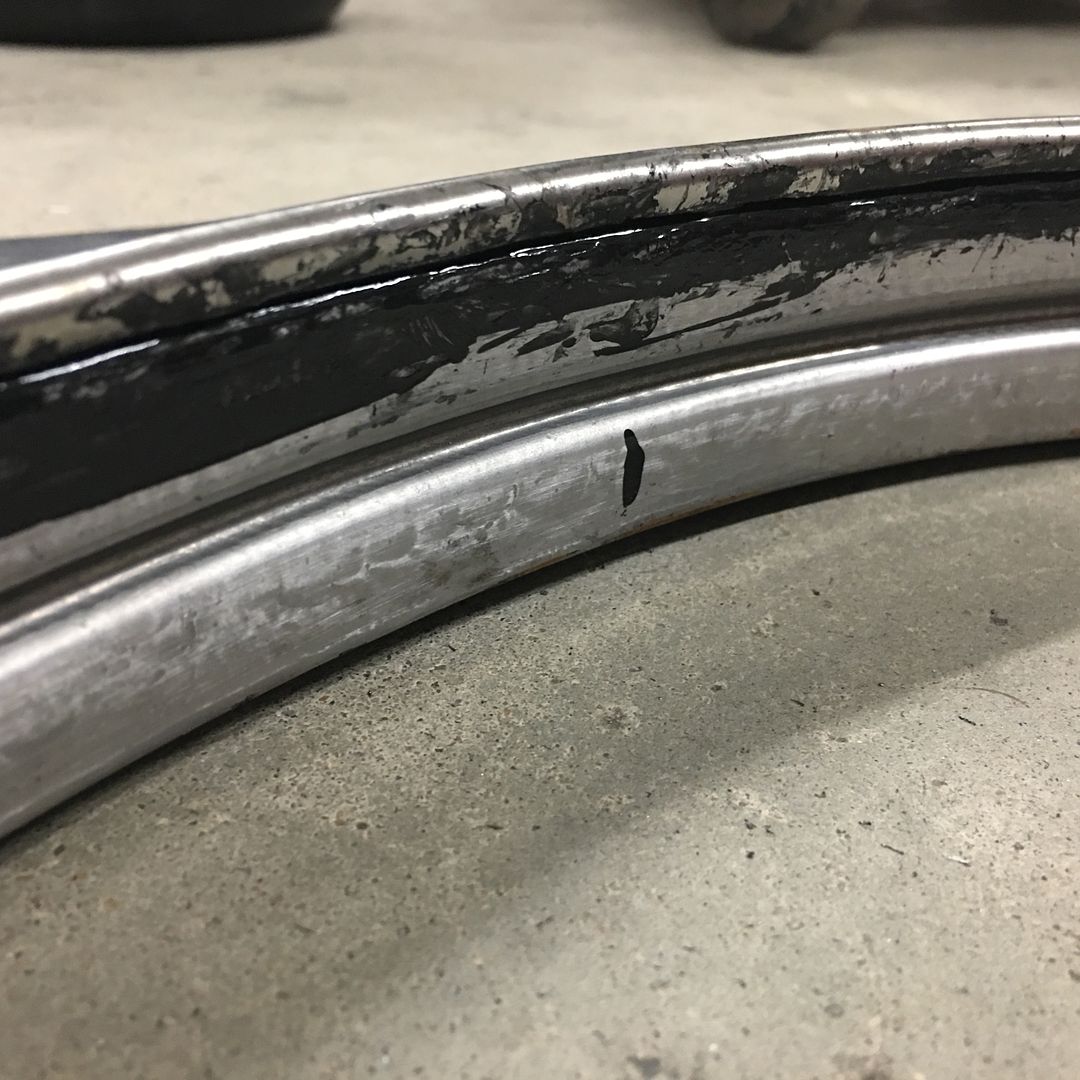 And our inside dimension worked out to what we were looking for, 18-1/8 diameter for our 17-1/4 fan blade. 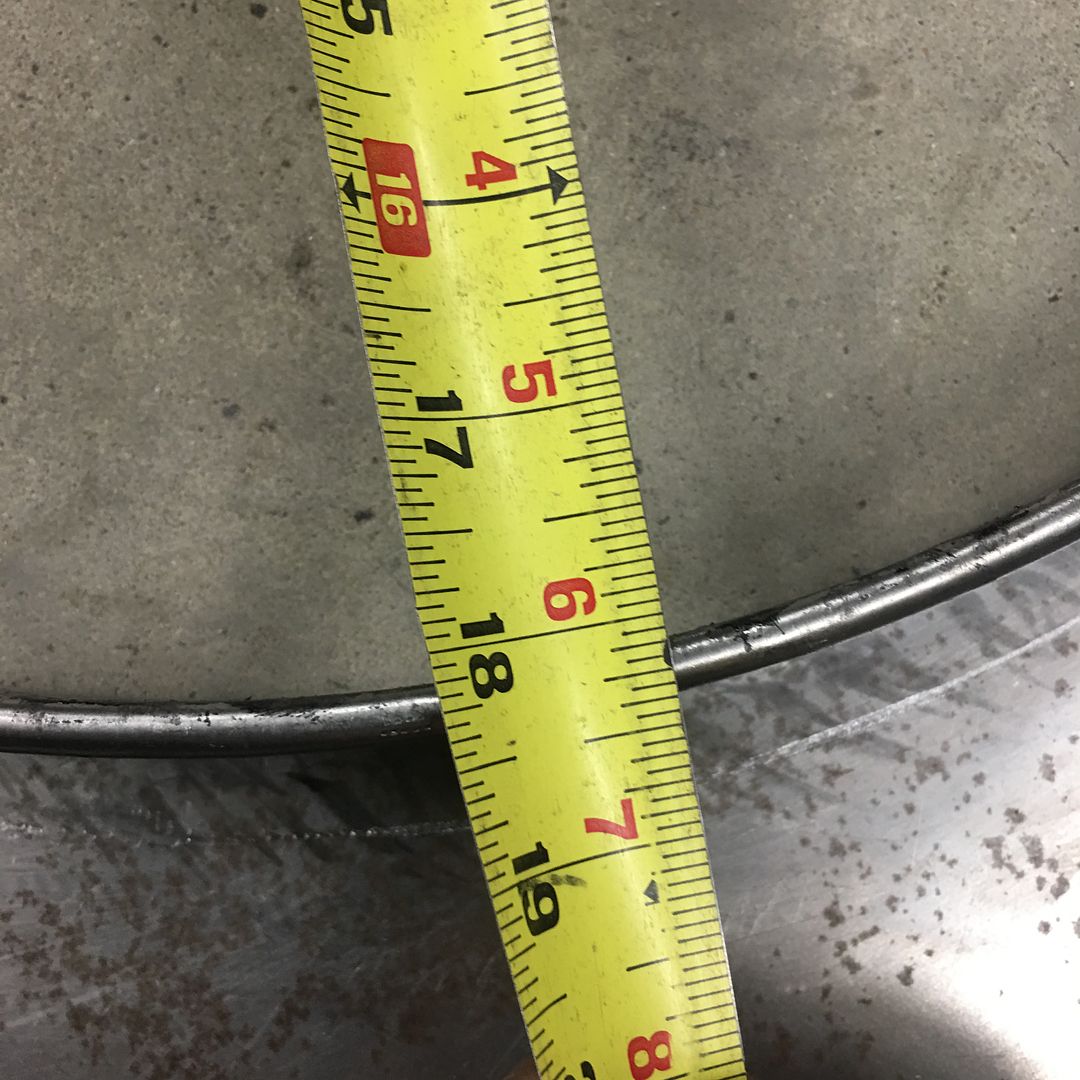 We also got another delivery, some 4" louver dies from Mittler Bros Machine and Tool for another job coming up. Will have to sneak it in here on some wagon parts as well. 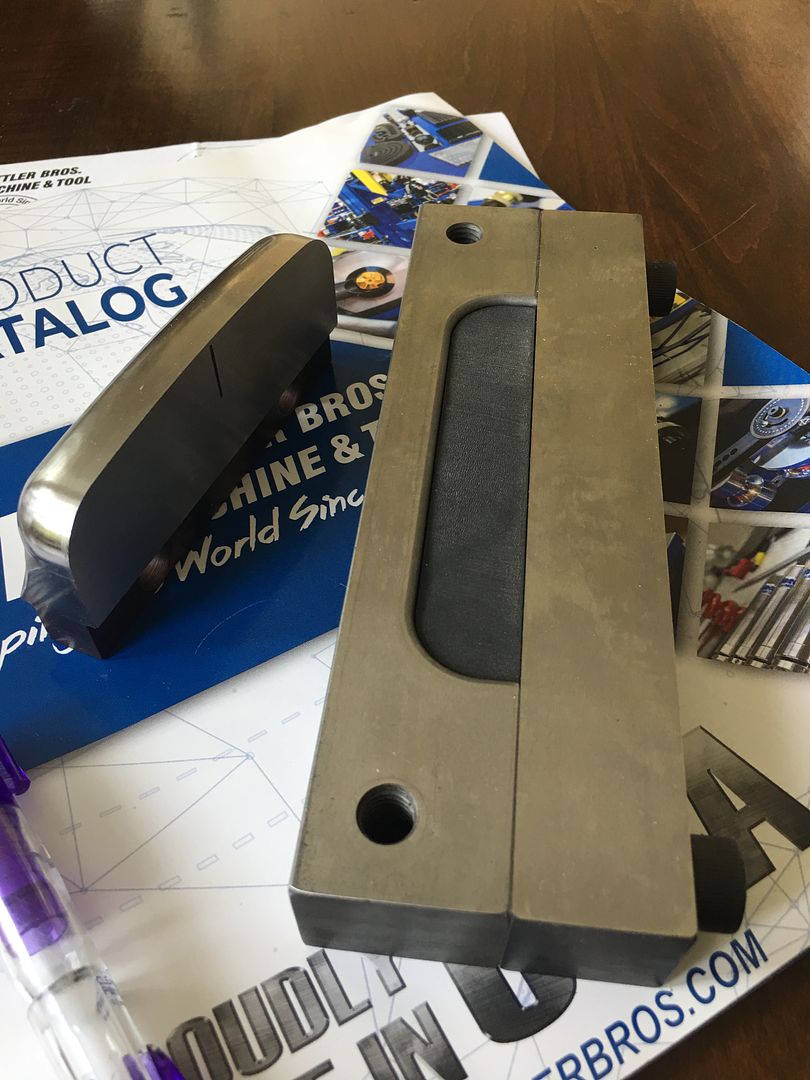
__________________
Robert |
|
|
|
|
07-22-2021, 11:18 AM
|
#6 |
|
6>8 Plugless........
Join Date: Sep 2007
Location: Prairie City, Ia
Posts: 17,140
|
Re: 55 Wagon Progress
More awesome work! That is a lot of quality work put into that shroud! Your die storage box is getting bigger each part.

__________________
Ryan 1972 Chevy Longhorn K30 Cheyenne Super, 359 Inline 6 cylinder, Auto Trans, Tilt, Diesel Tach/Vach, Buckets, Rare Rear 4-link and air ride option Build Thread 1972 GMC Sierra Grande Longhorn 4x4 1972 Chevy Cheyenne Super K20 Long Step side tilt, tach, tow hooks, AC, 350 4 speed 1972 C10 Suburban Custom Deluxe 1969 Chevy milk truck 1971 Camaro RS 5.3 BTR STG3 Cam Super T10 1940 Ford 354 Hemi 46RH Ford 9" on air ride huge project Tired of spark plugs? Check this out. |
|
|
|
|
08-08-2021, 02:52 AM
|
#7 |
|
Registered User
Join Date: Jan 2013
Location: Leonardtown, MD
Posts: 1,637
|
Re: 55 Wagon Progress
Thanks Ryan!
Looking at the fan shroud, the top and bottom will be stepped where it bolts behind the rear edge of the core support. 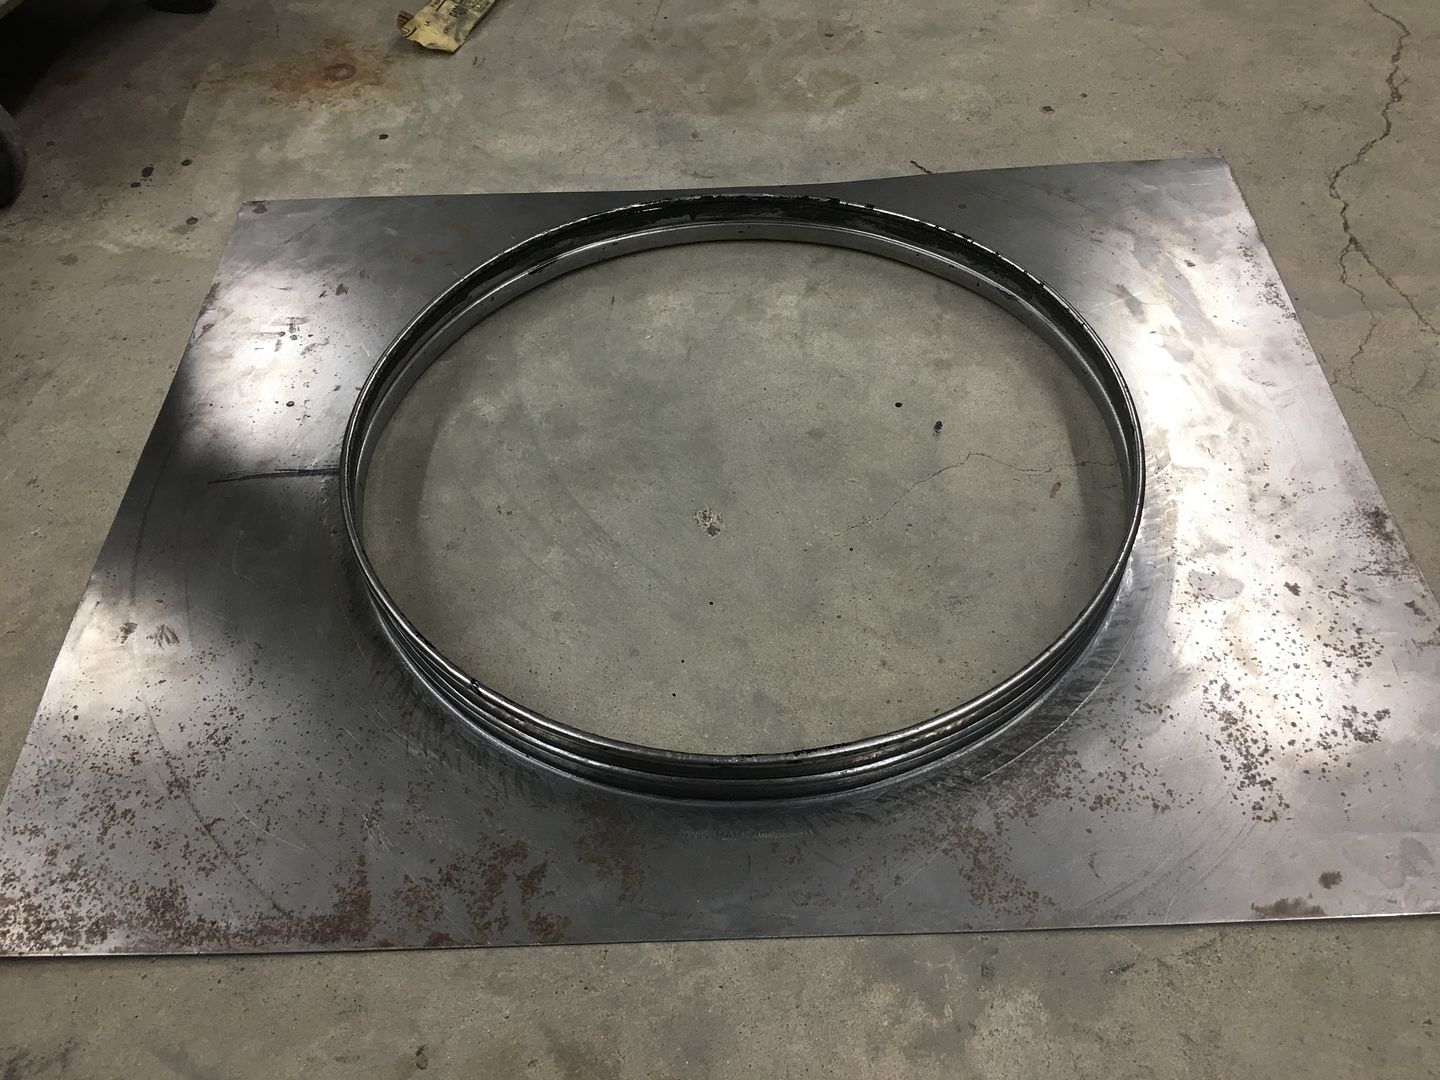 The sides will get a radius bend to bolt to the inside vertical of the core support. This still leave quite a bit of flat metal that just doesn't have much style to it. So let's try some embossing on the side panels.. To better keep things a consistent pattern from left to right, we made a pattern using MDF board.. 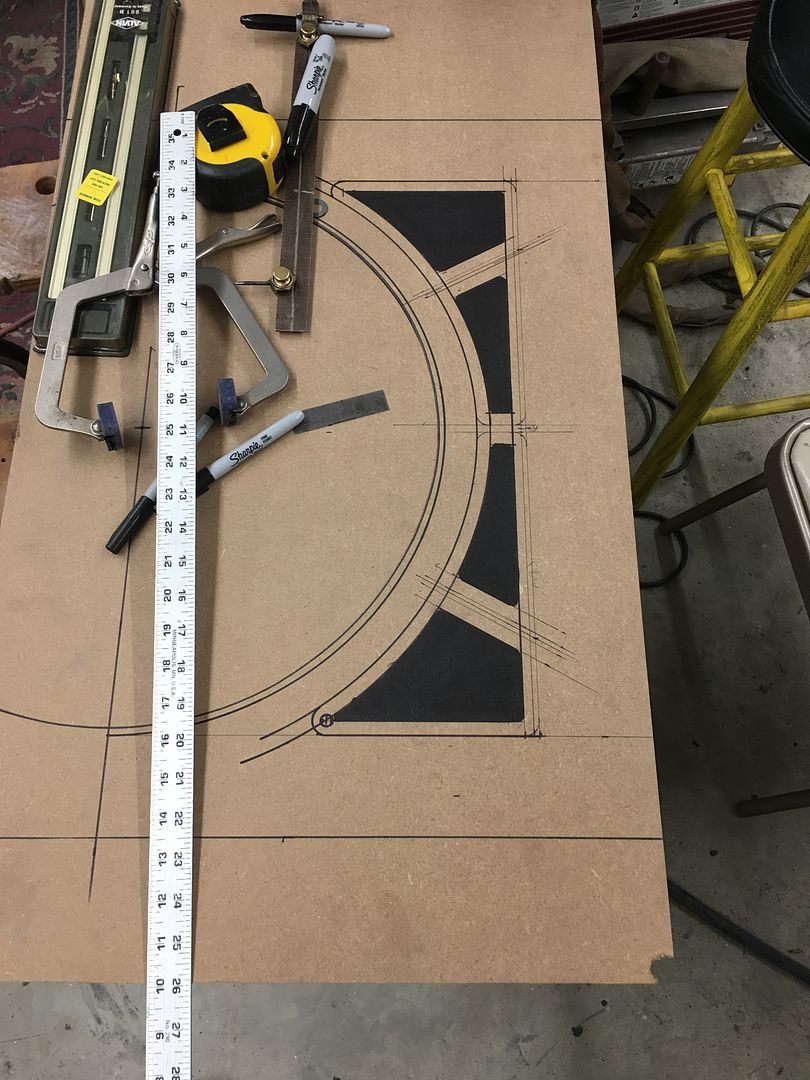 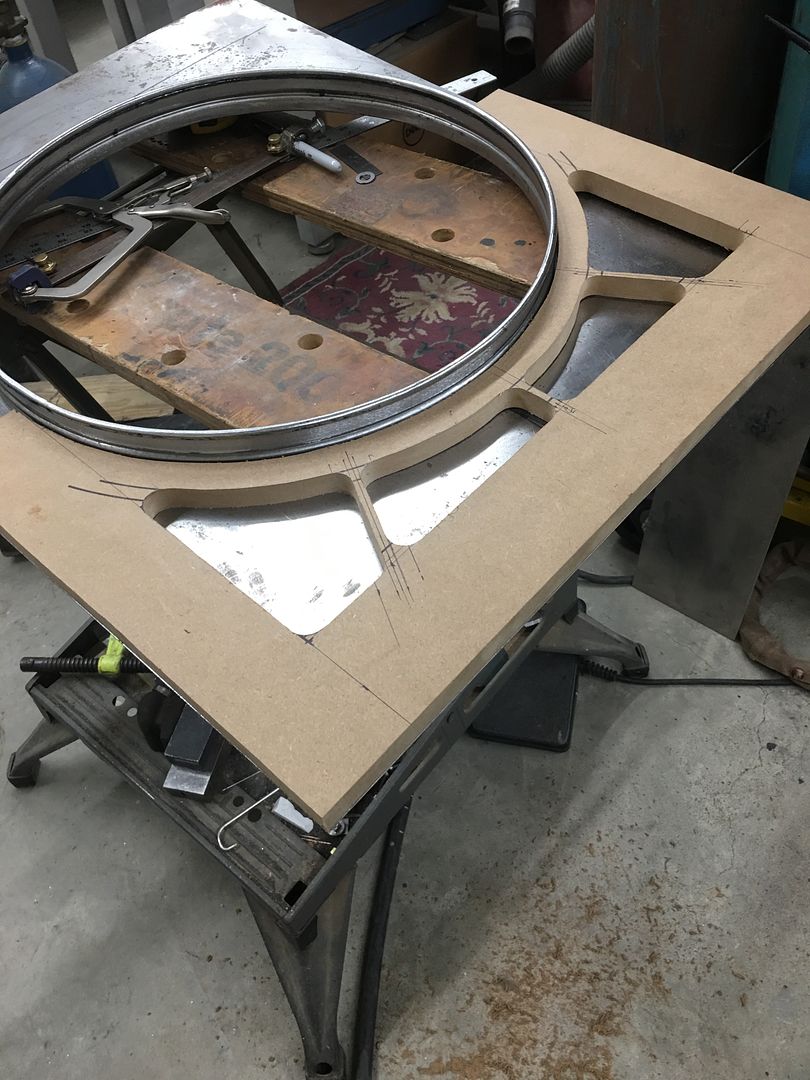 An offset die set is made in the Southbend lathe, the rounded sides will allow it to better travel along the pattern cutout. 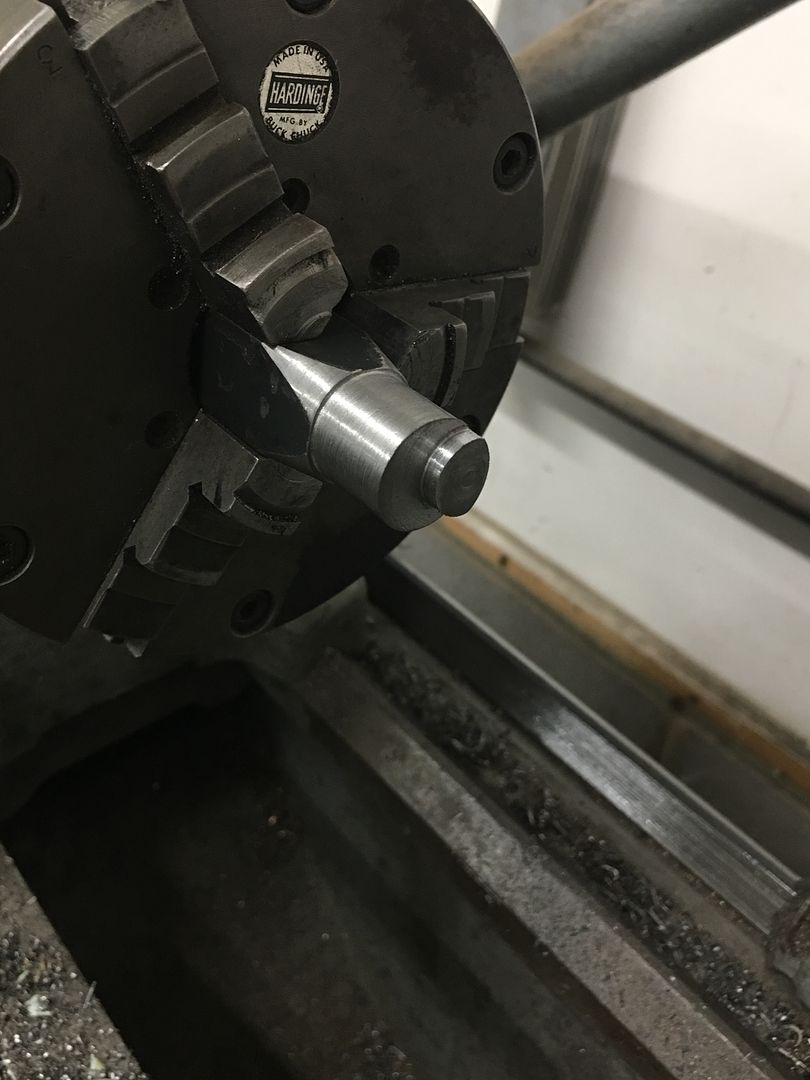 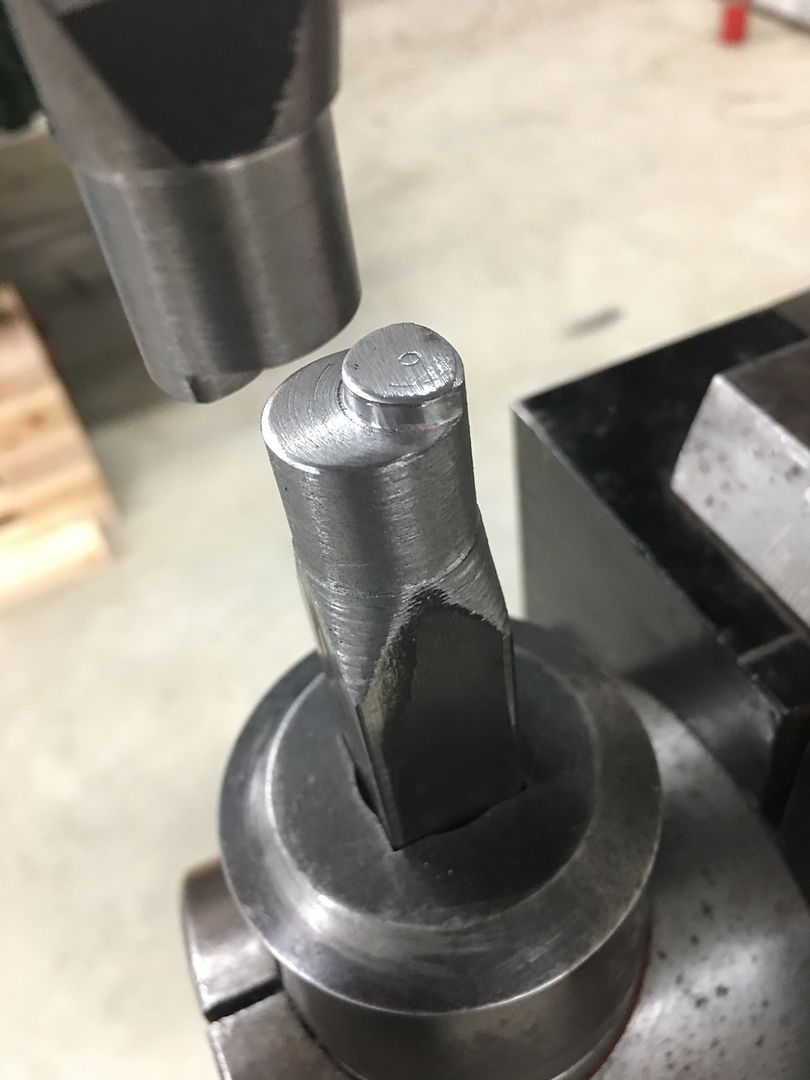 We did a test run on our split original shroud, I had intended for the pattern to be inset when looking at the back.. Someone had the pattern clamped on the wrong side, and it was pressed outward instead.. Hindsight, when looking in the engine compartment from the side, the inset version would be more difficult to see the embossing, and this next "mistake" would be easier to see. 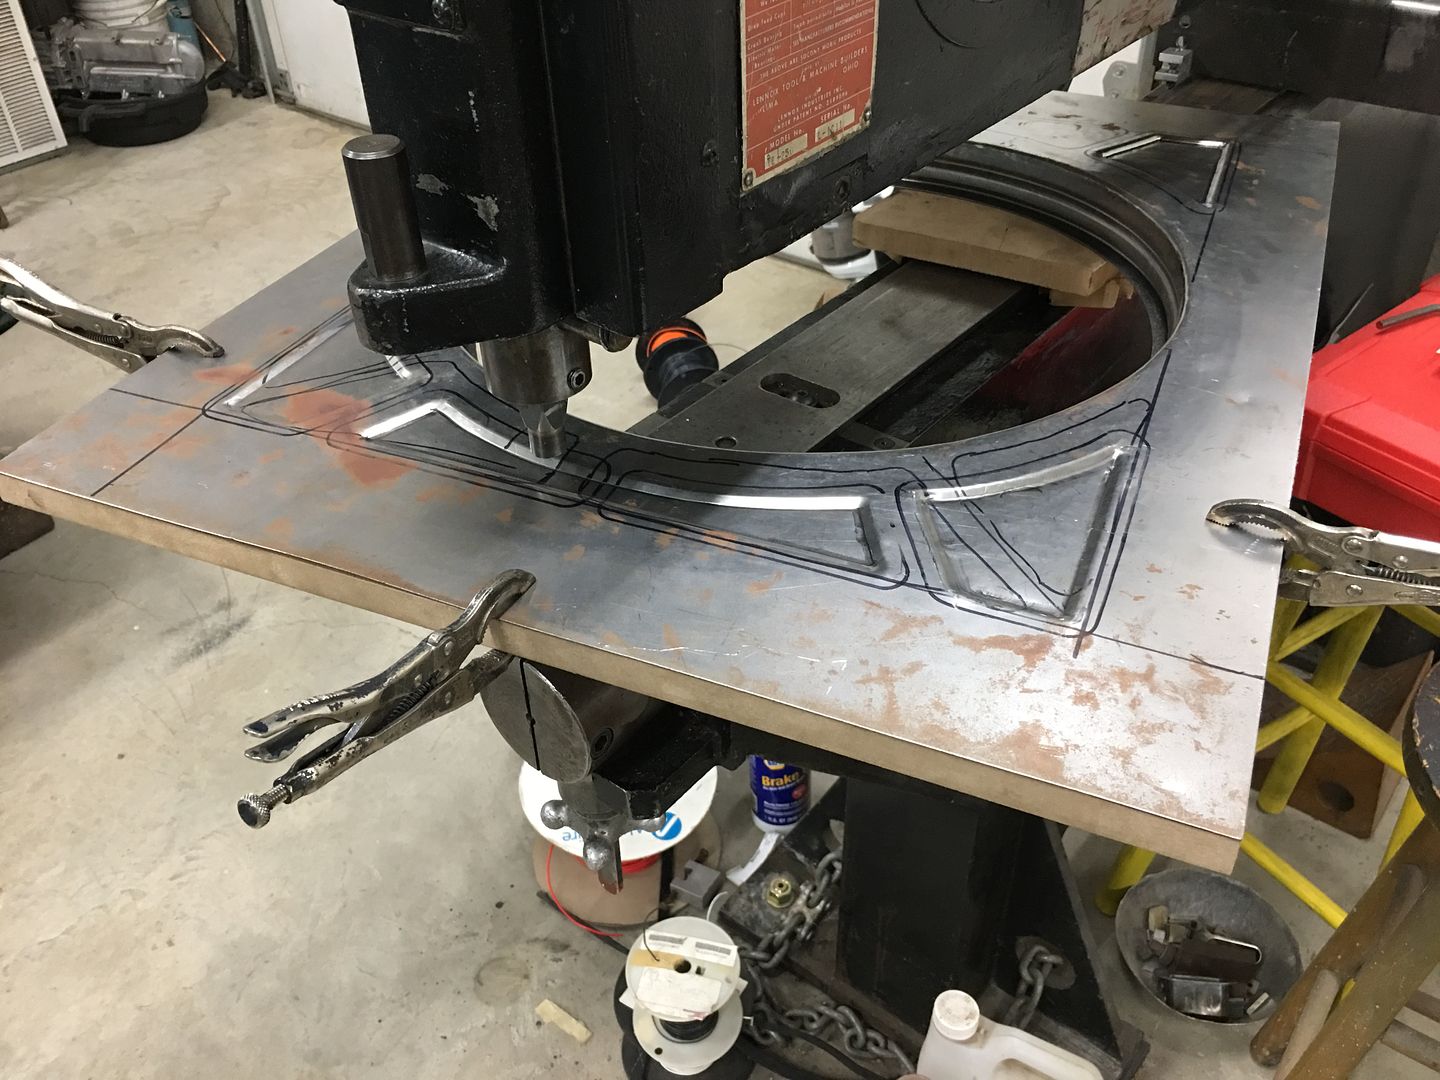 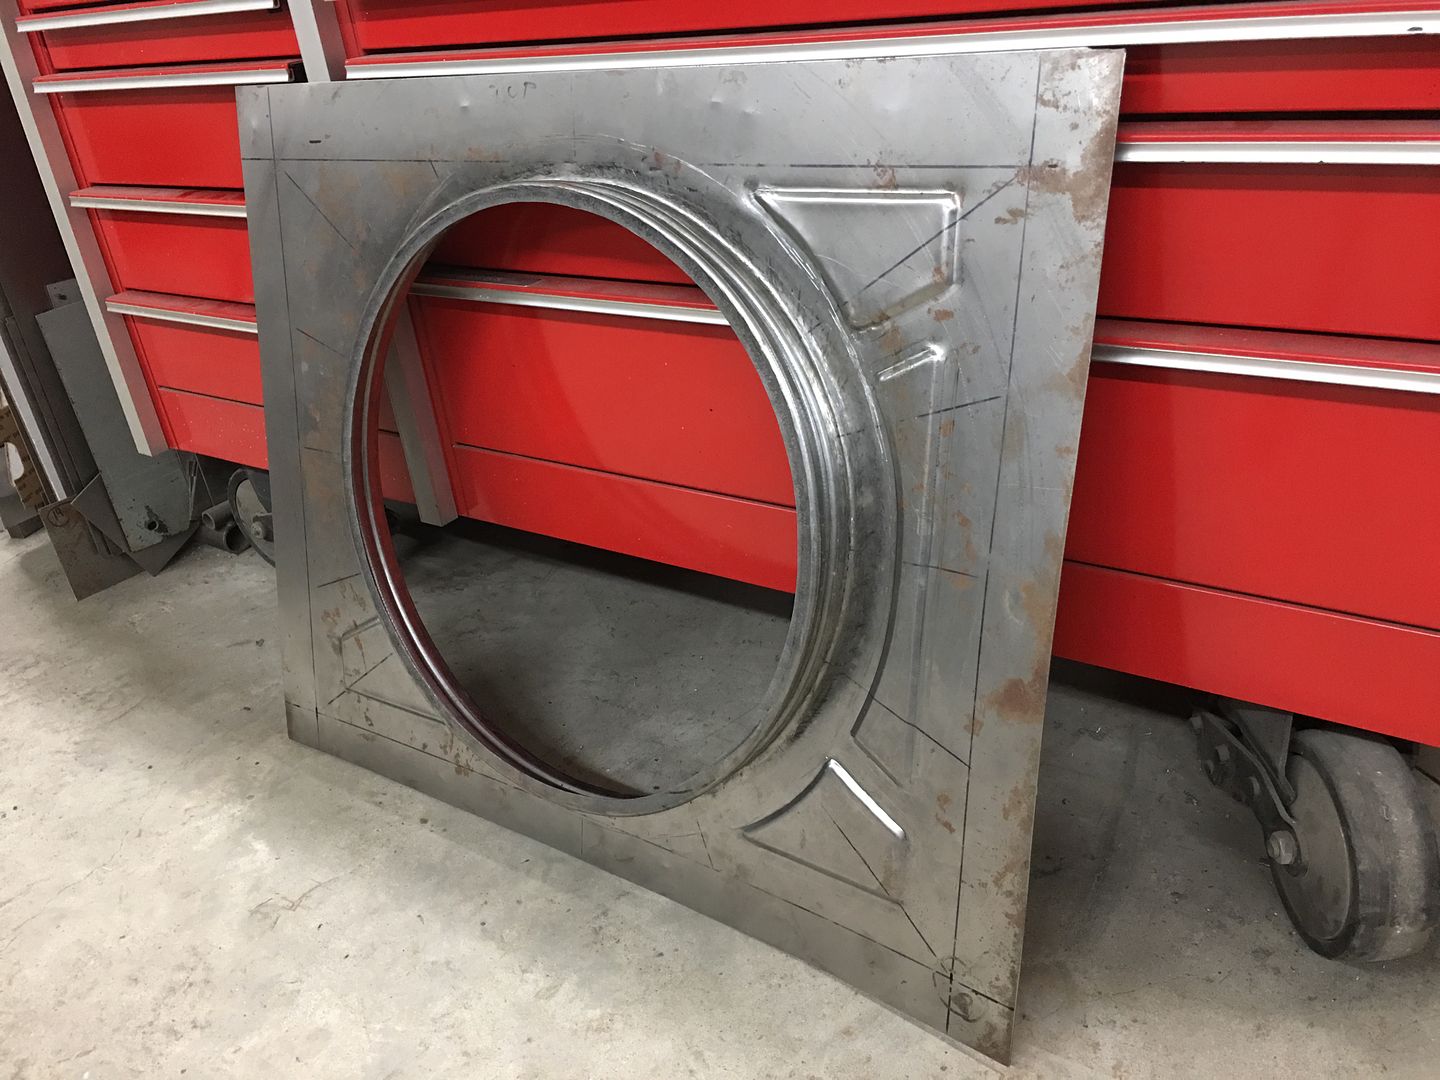 Sometimes things happen for a reason. So guess what we're going with.... The pattern did not have enough real estate to make a wide sweeping turn in the corners, so when using the dies we'll stop short of the corners and will coin them afterward by hand. Time lapse: https://www.youtube.com/watch?v=J_rNdhJcrEY We did have one slip-up, should be an easy fix... 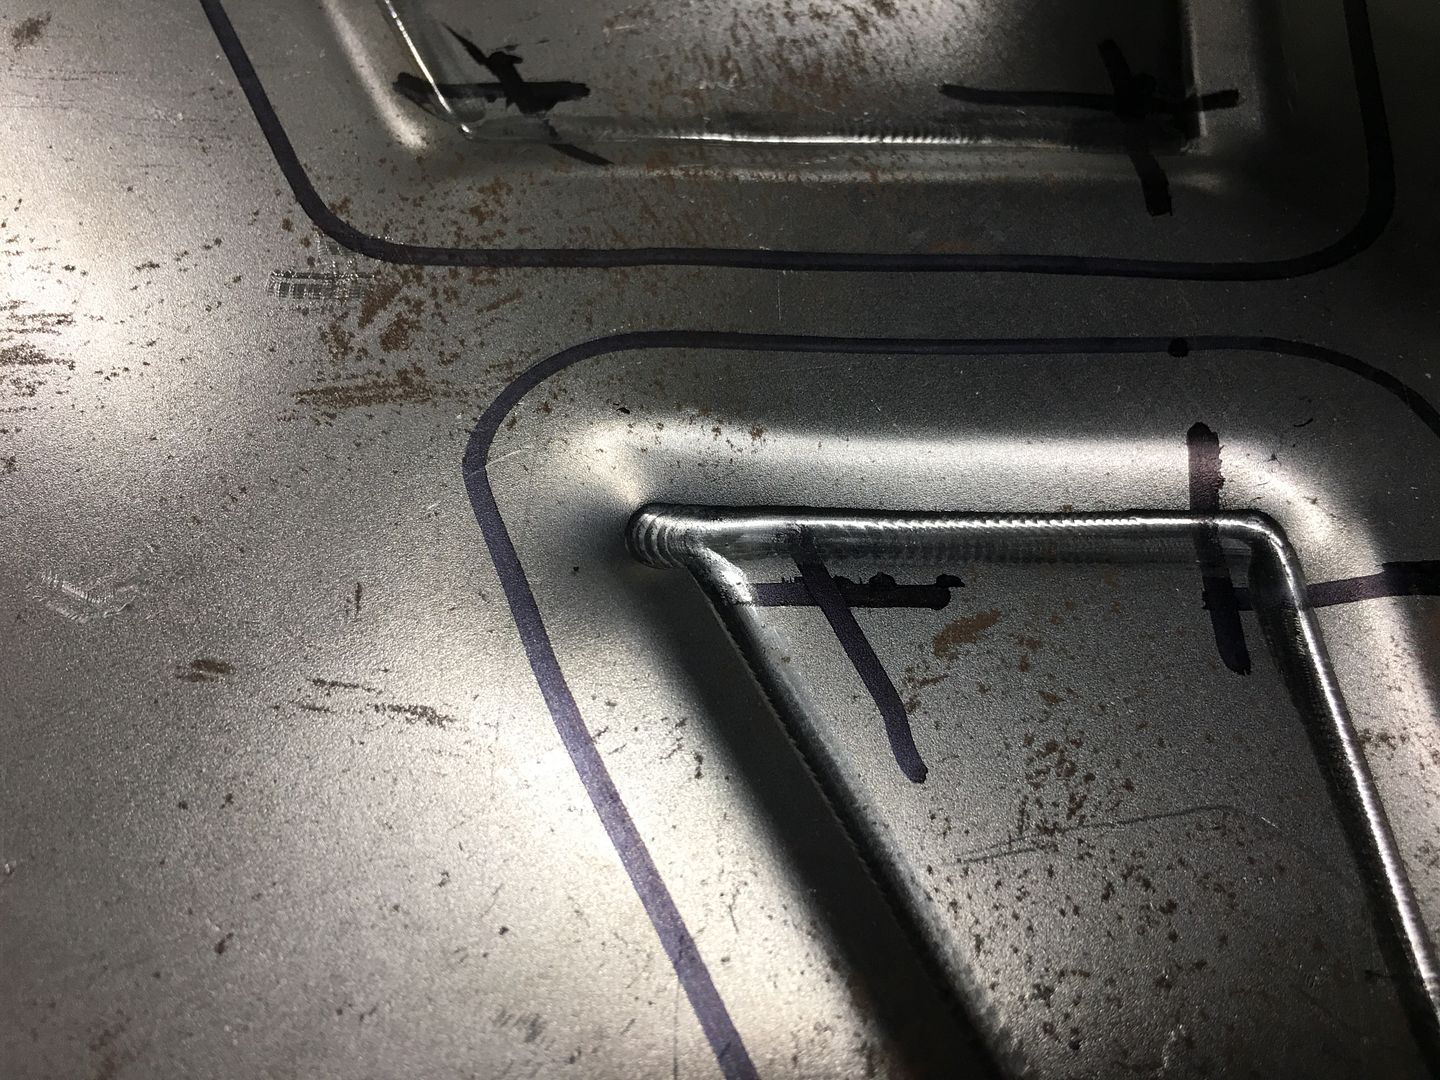 Looks a bit less blah now.... 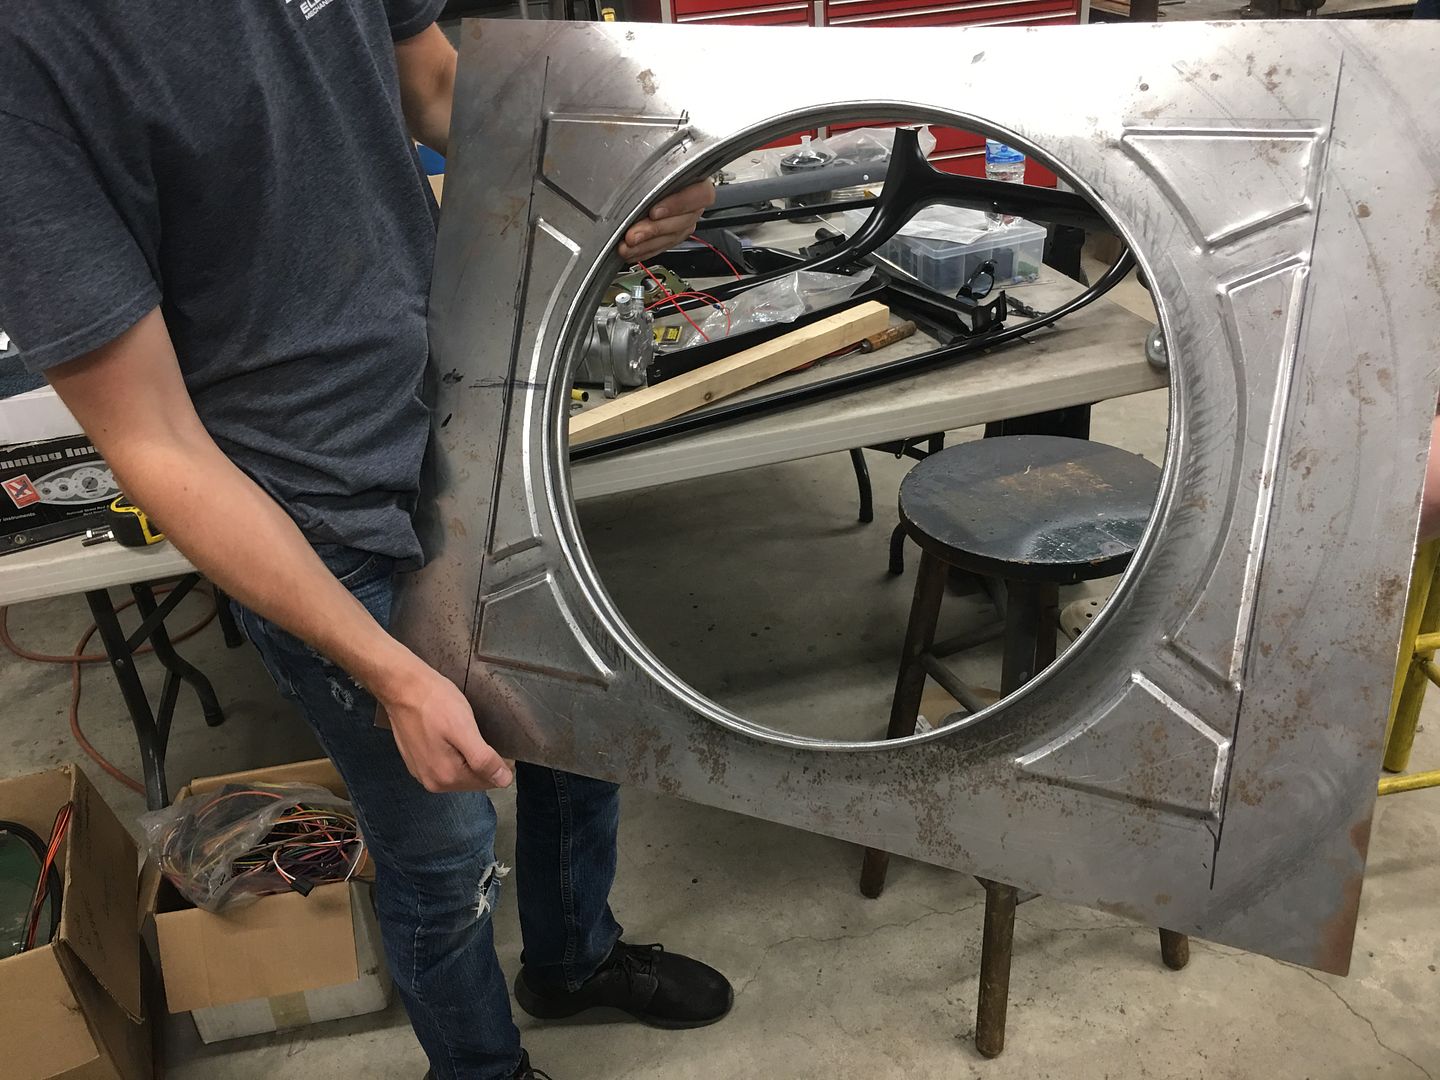
__________________
Robert |
|
|
|
|
08-08-2021, 03:33 AM
|
#8 |
|
Post Whore
Join Date: May 2015
Location: Alabama
Posts: 14,608
|
Re: 55 Wagon Progress
specdangtacular.!!!
__________________
Mongo...aka Greg RIP Dad RIP Jesse 1981 C30 LQ9 NV4500..http://67-72chevytrucks.com/vboard/s...d.php?t=753598 Mongos AD- LS3 TR6060...http://67-72chevytrucks.com/vboard/s...34#post8522334 Columbus..the 1957 IH 4x4...http://67-72chevytrucks.com/vboard/s...63#post8082563 2023 Chevy Z71..daily driver |
|
|
|
|
08-08-2021, 09:46 AM
|
#9 |
|
Senior Member
Join Date: Mar 2011
Location: West Plains, Missouri
Posts: 7,555
|
Re: 55 Wagon Progress
Great work as always...Jim
__________________
my build thread: http://67-72chevytrucks.com/vboard/s...d.php?t=459839 Jimbo's long bed step build:http://67-72chevytrucks.com/vboard/s...t=464626<br /> |
|
|
|
|
10-25-2021, 11:50 PM
|
#10 |
|
Registered User
Join Date: Jan 2013
Location: Leonardtown, MD
Posts: 1,637
|
Re: 55 Wagon Progress
Thanks guys!!
Sorry for the hiatus, more travel for the day job.. hanging more TV's... Back on the wagon, sometimes I get ahead of myself. The core support has rounded corners at the bottom.... 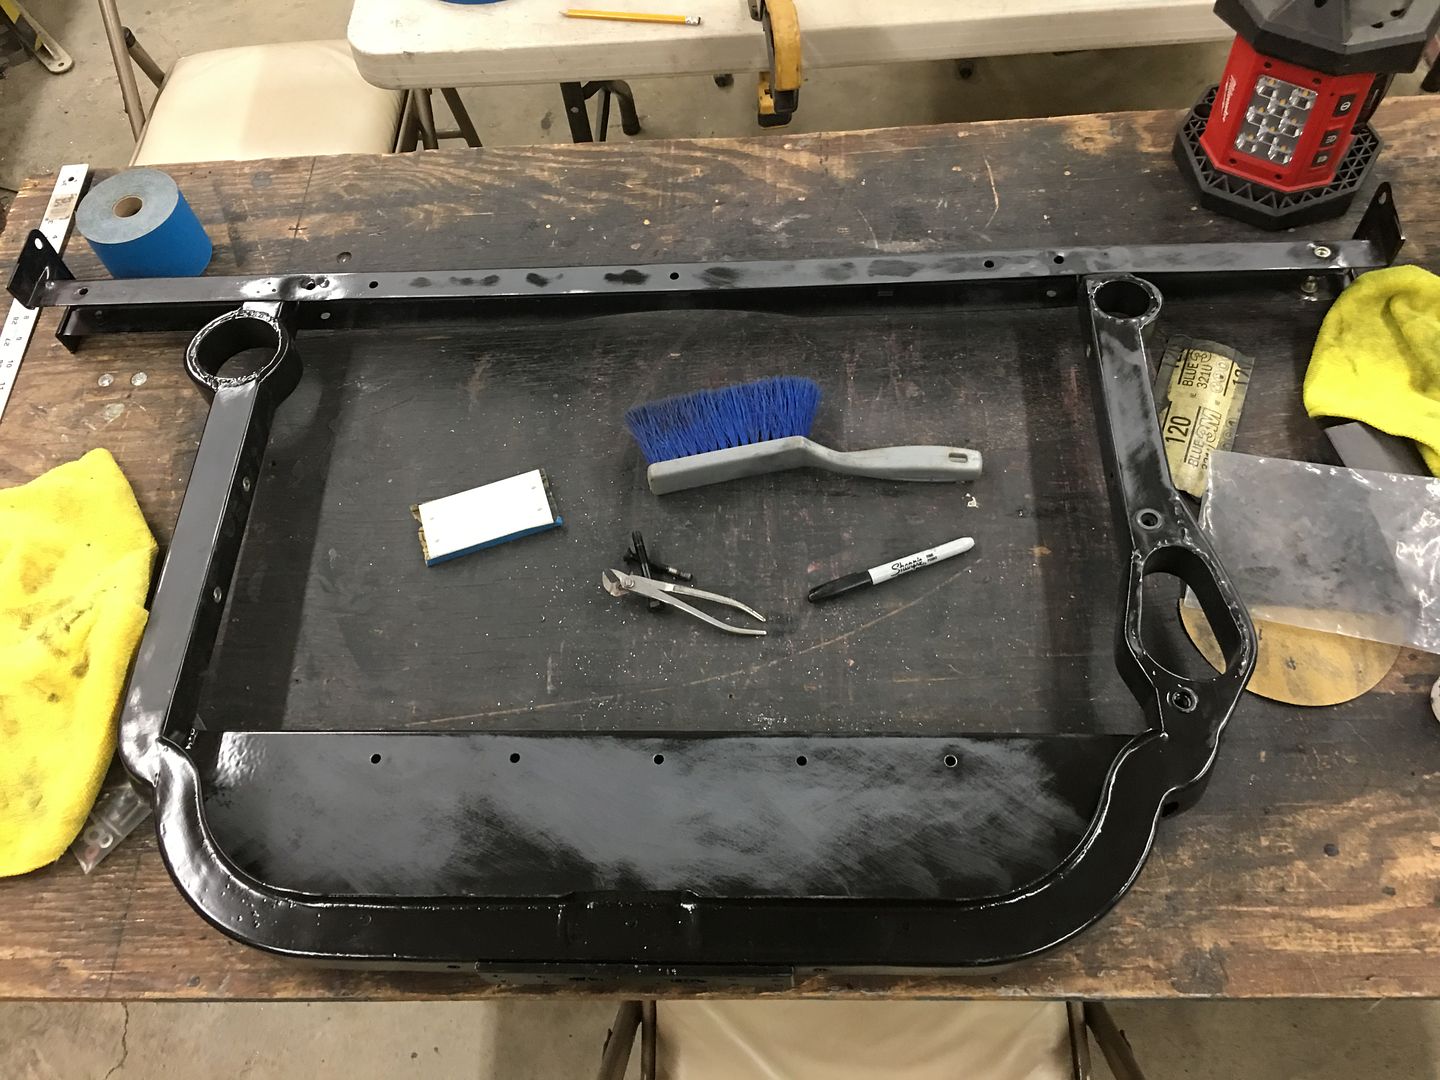 Our embossing did not.... 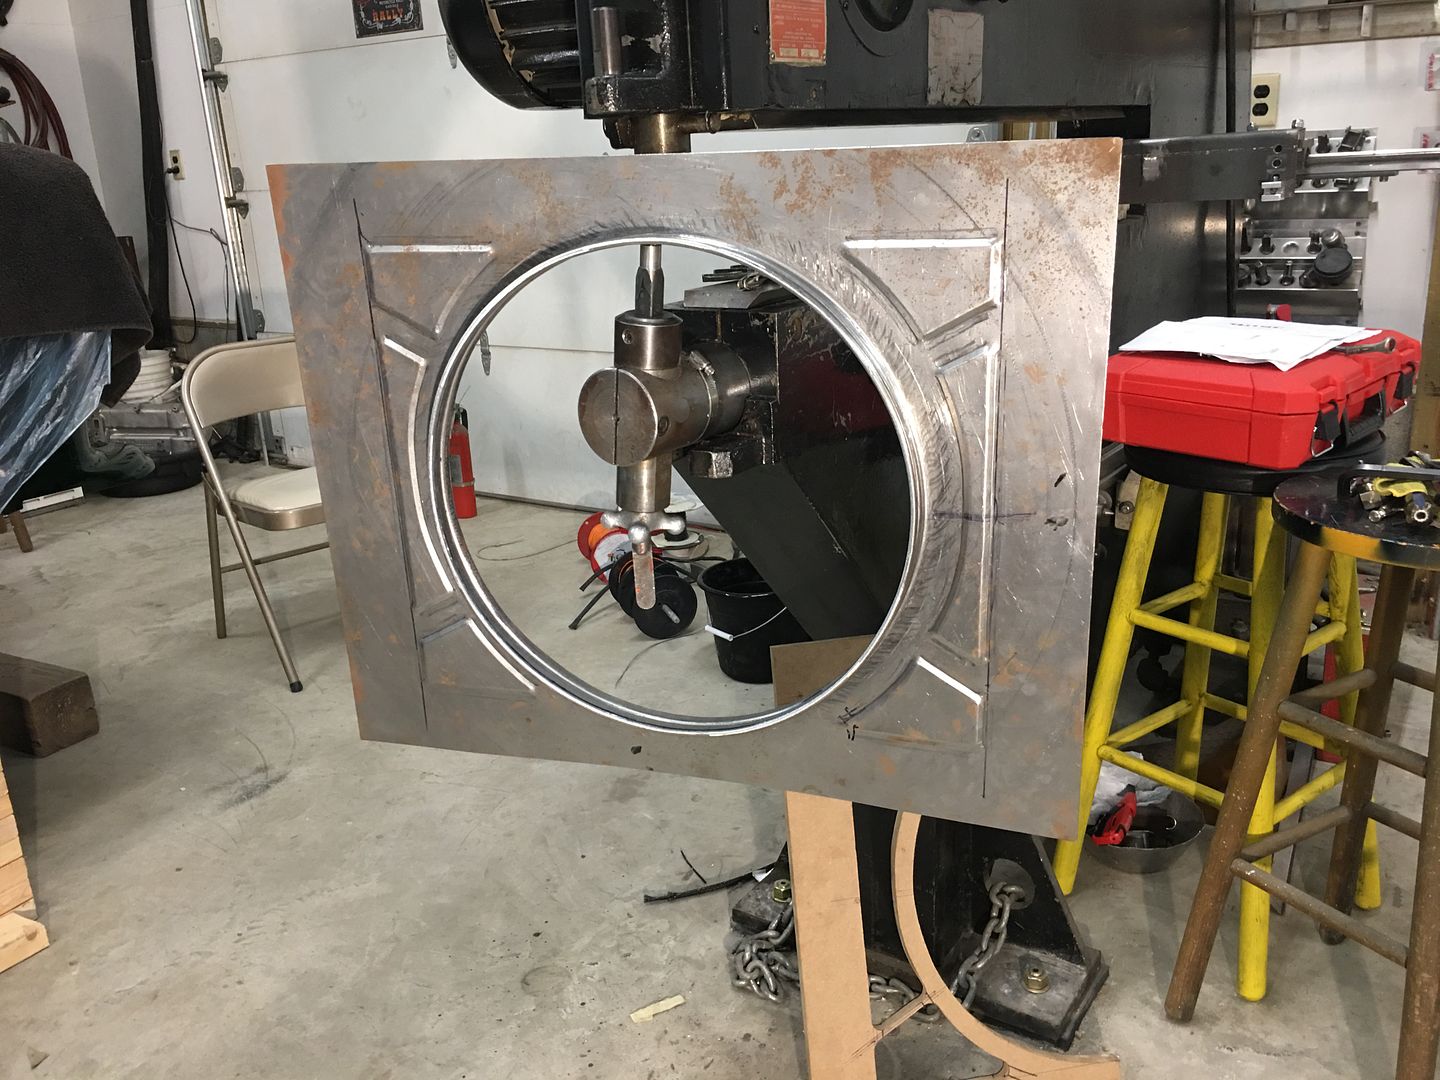 So the lower embossing was flattened, and marked for the new.. 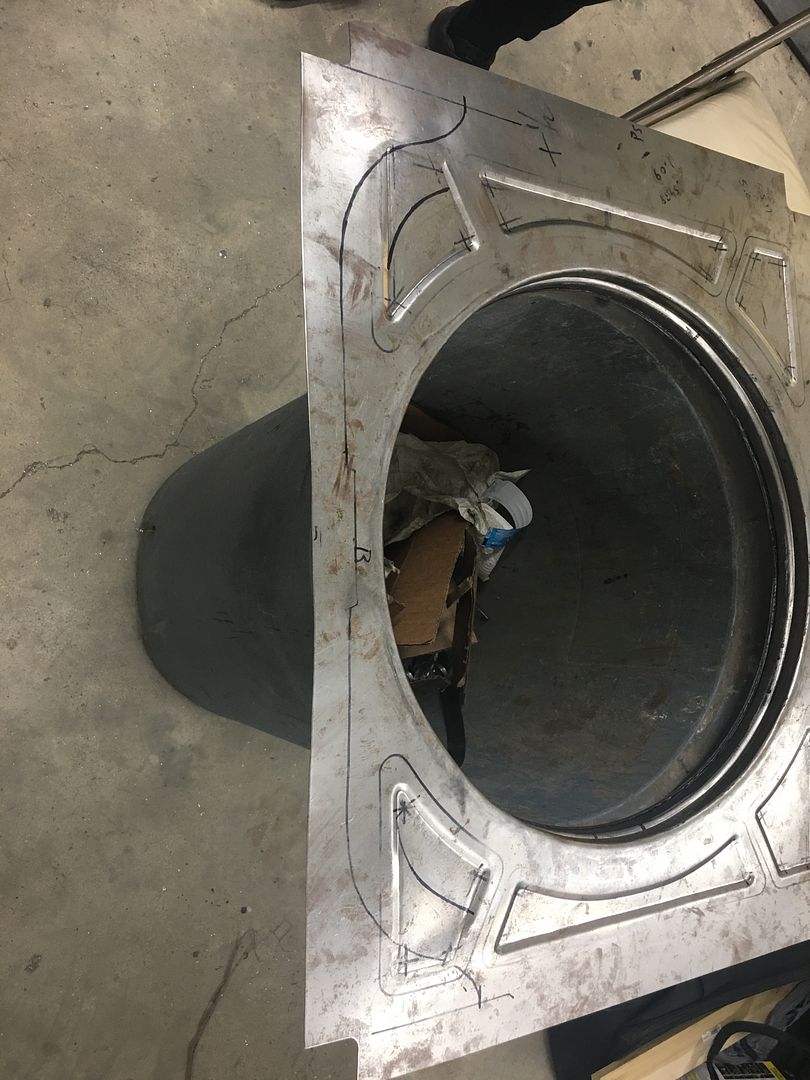 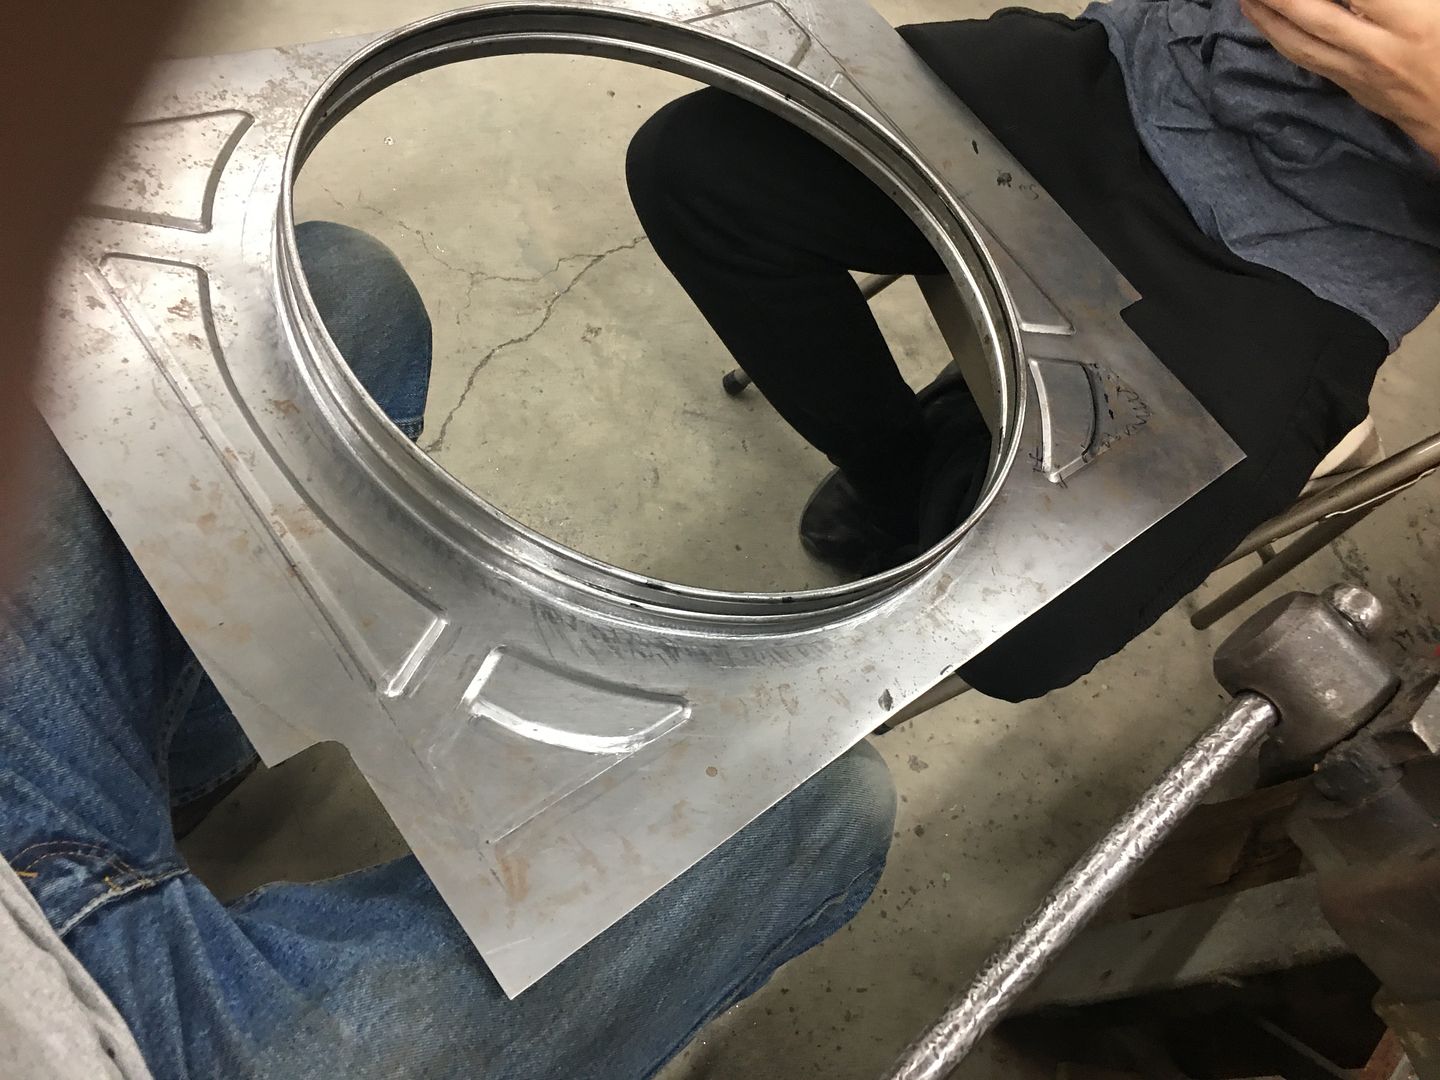 Next on the list, our upper radiator hose is a bit long and needed some support to keep it out of the fan. It's actually a lower hose for a Ford Explorer, but is a perfect fit for our cross flow radiator. So some 16 gauge cold rolled steel is used to fabricate a support bracket.. 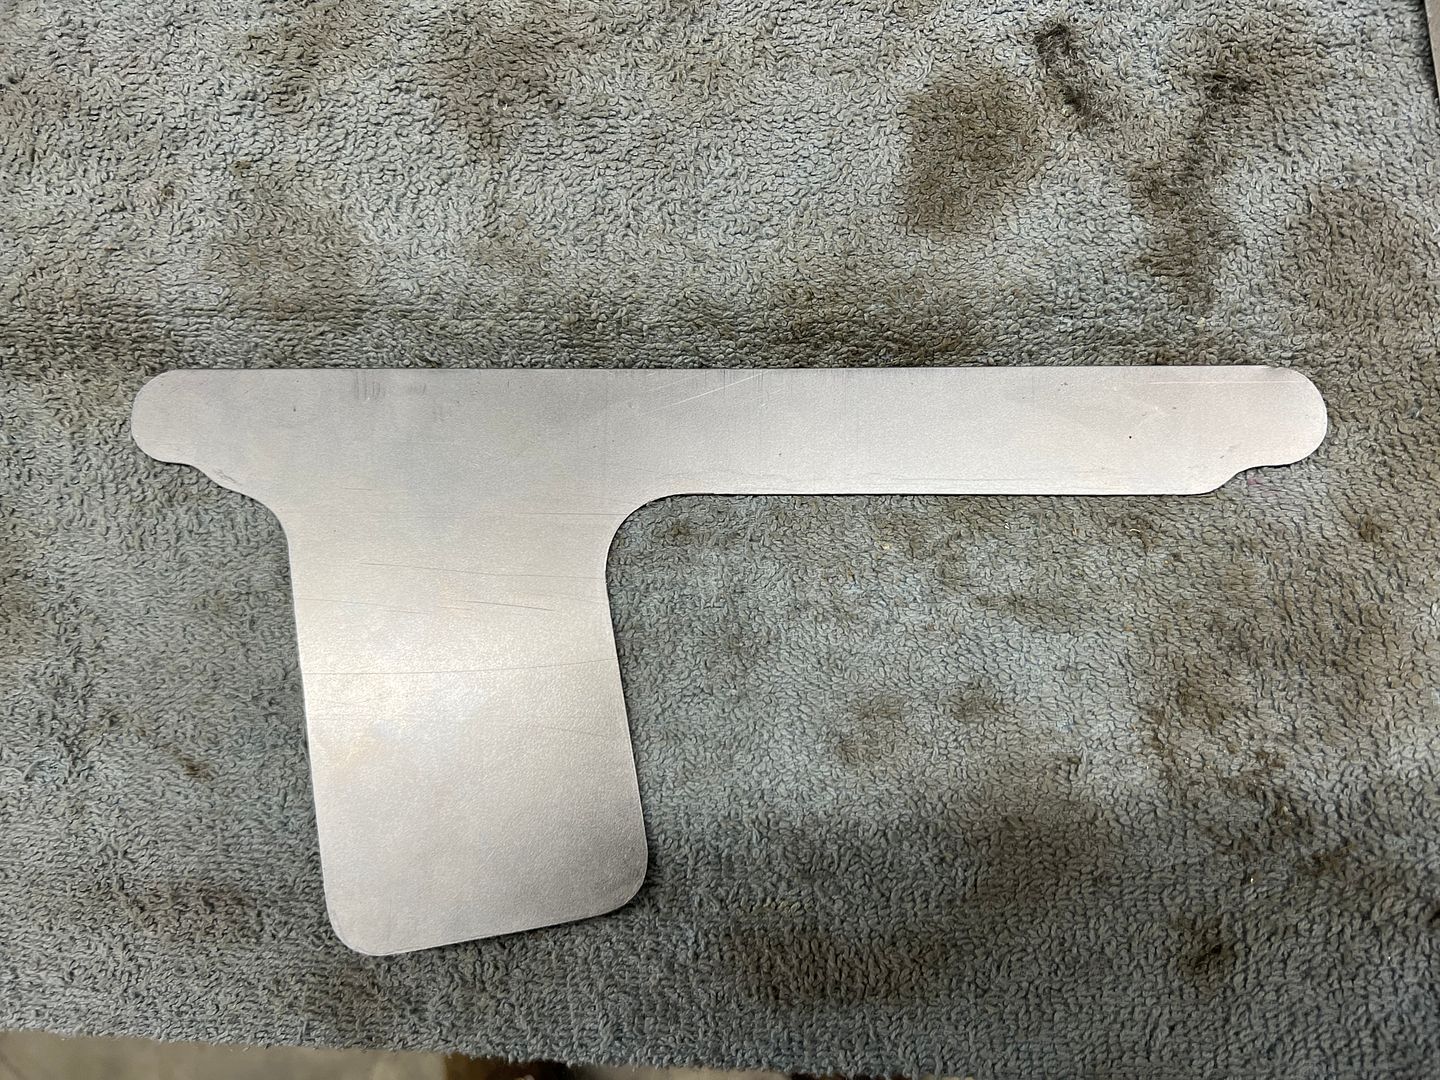 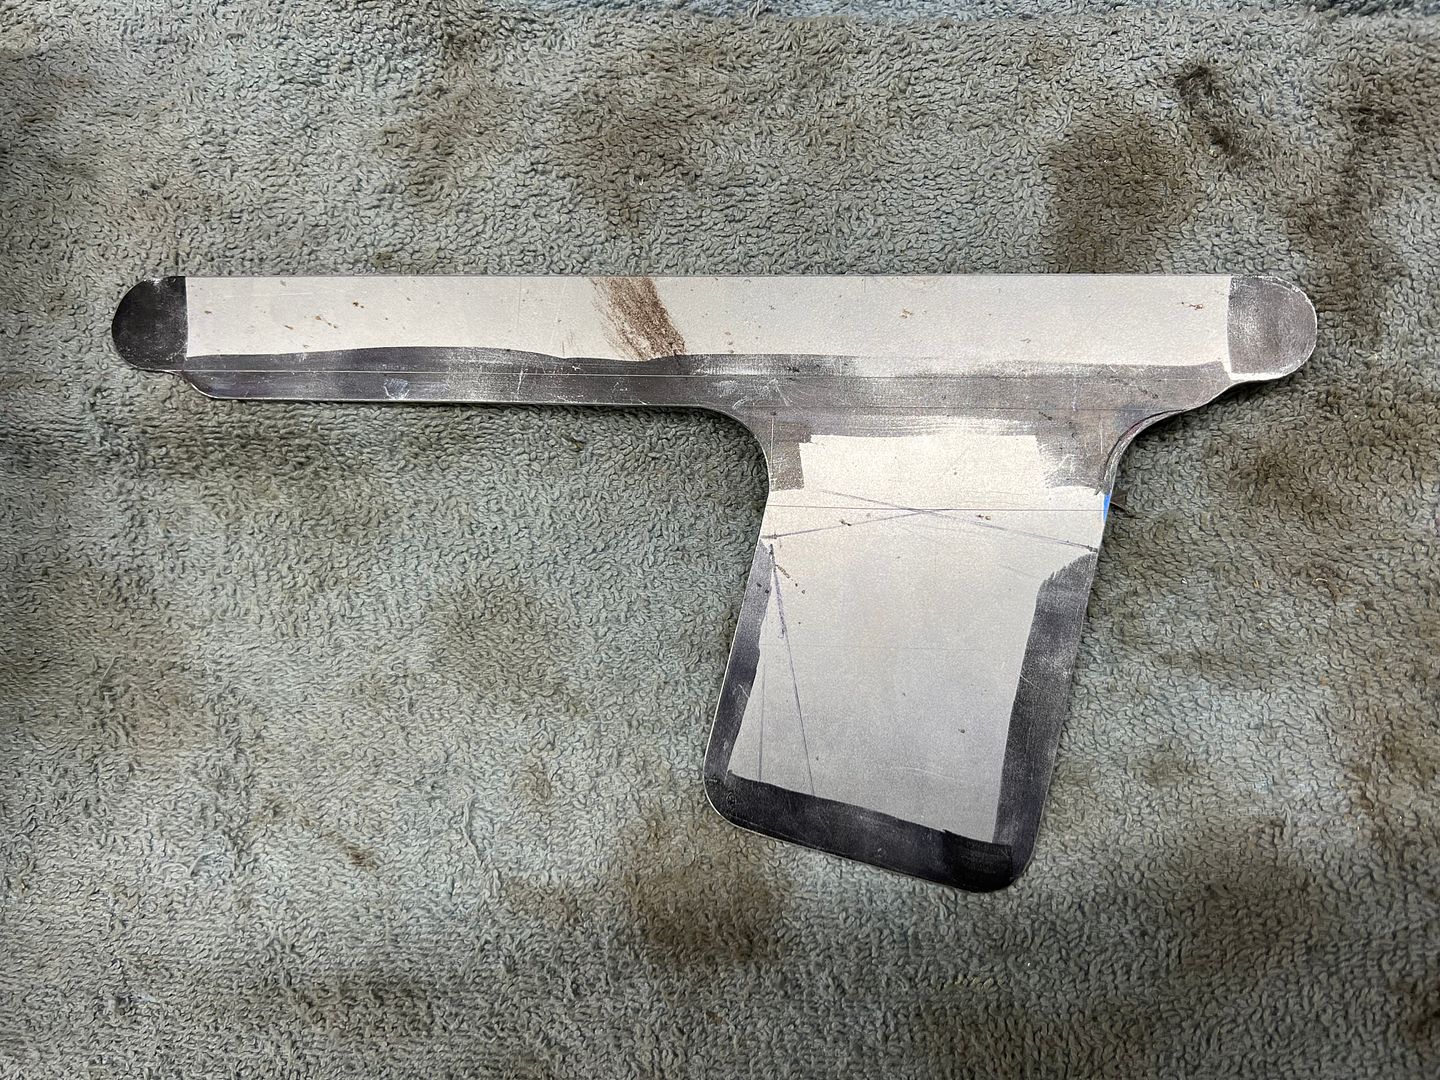 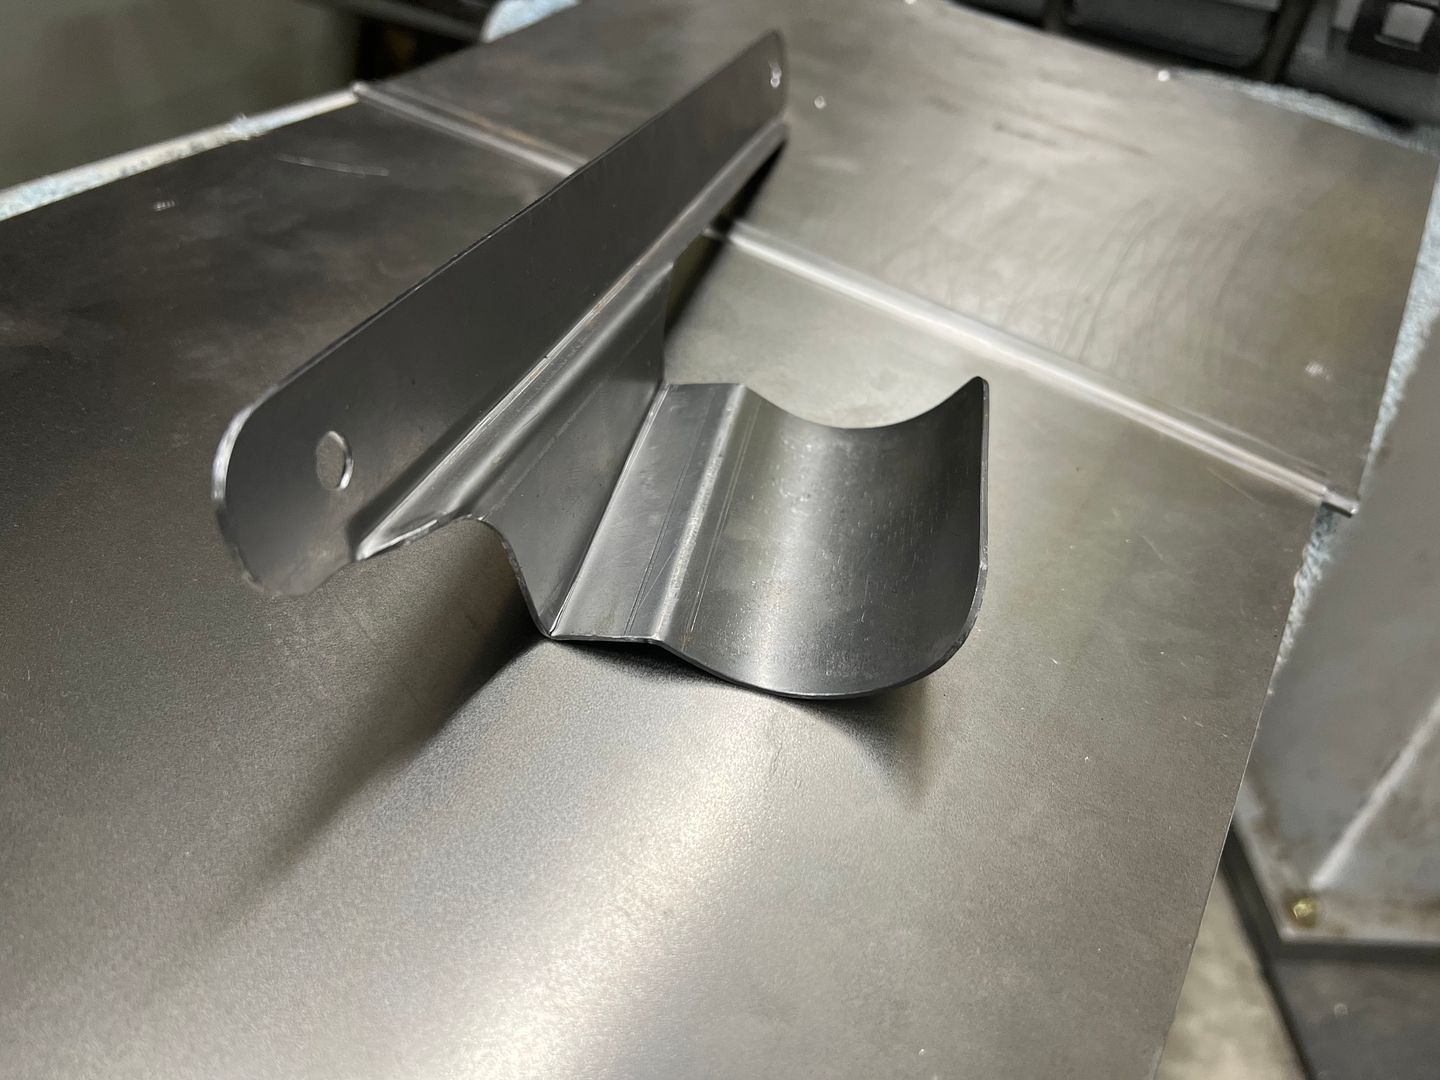 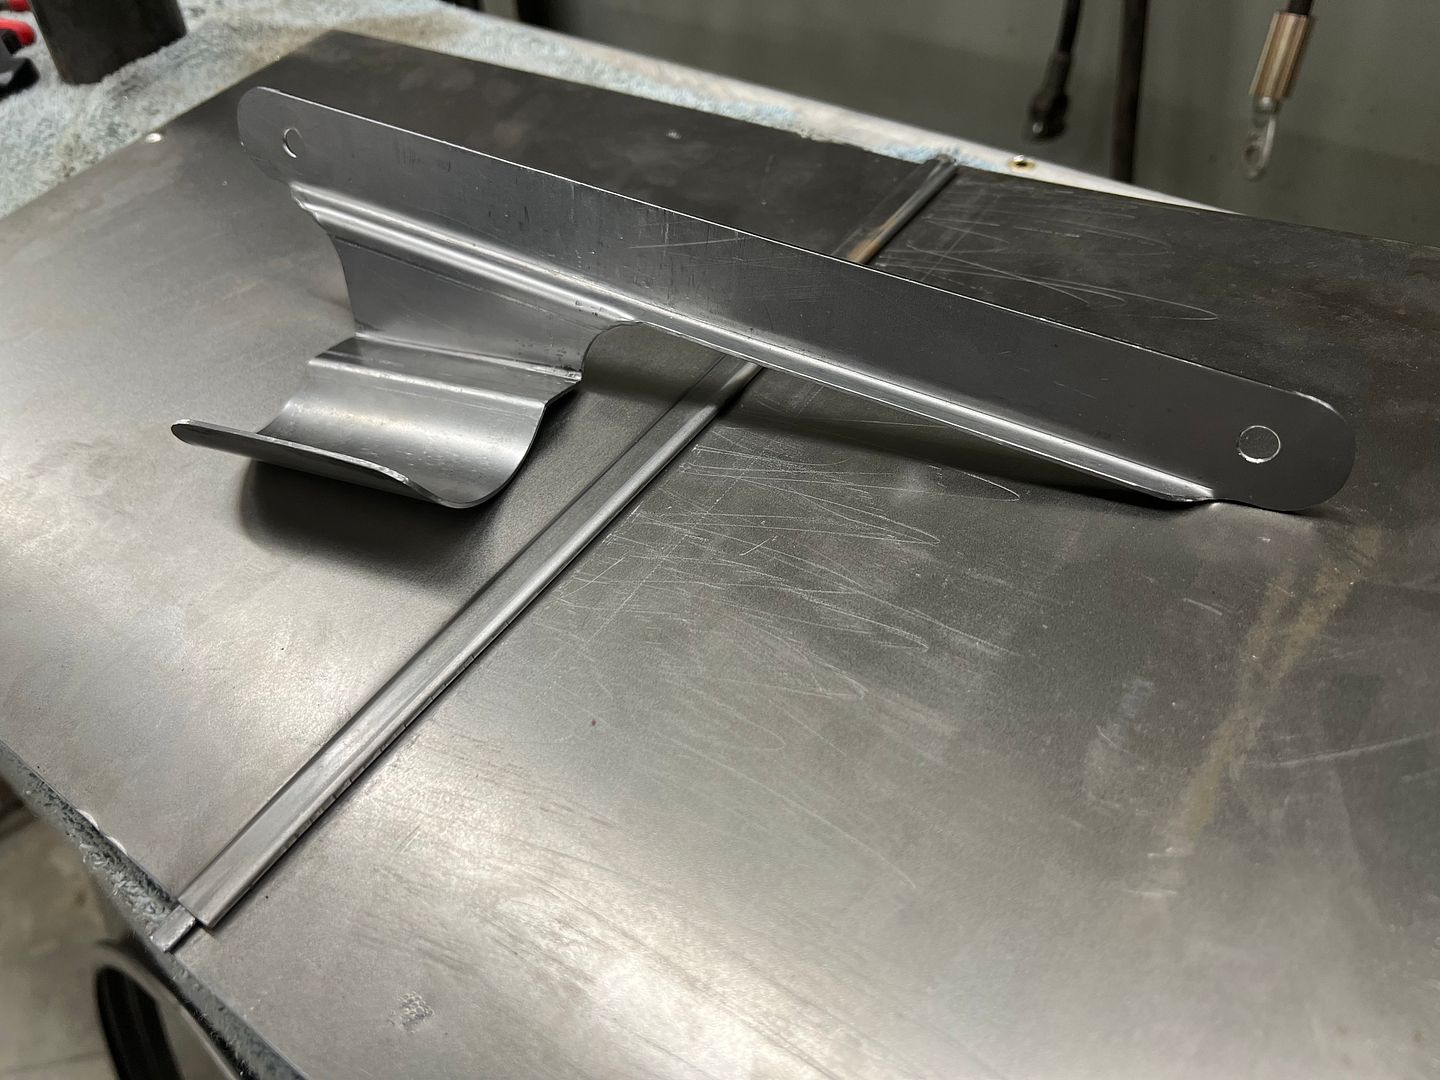 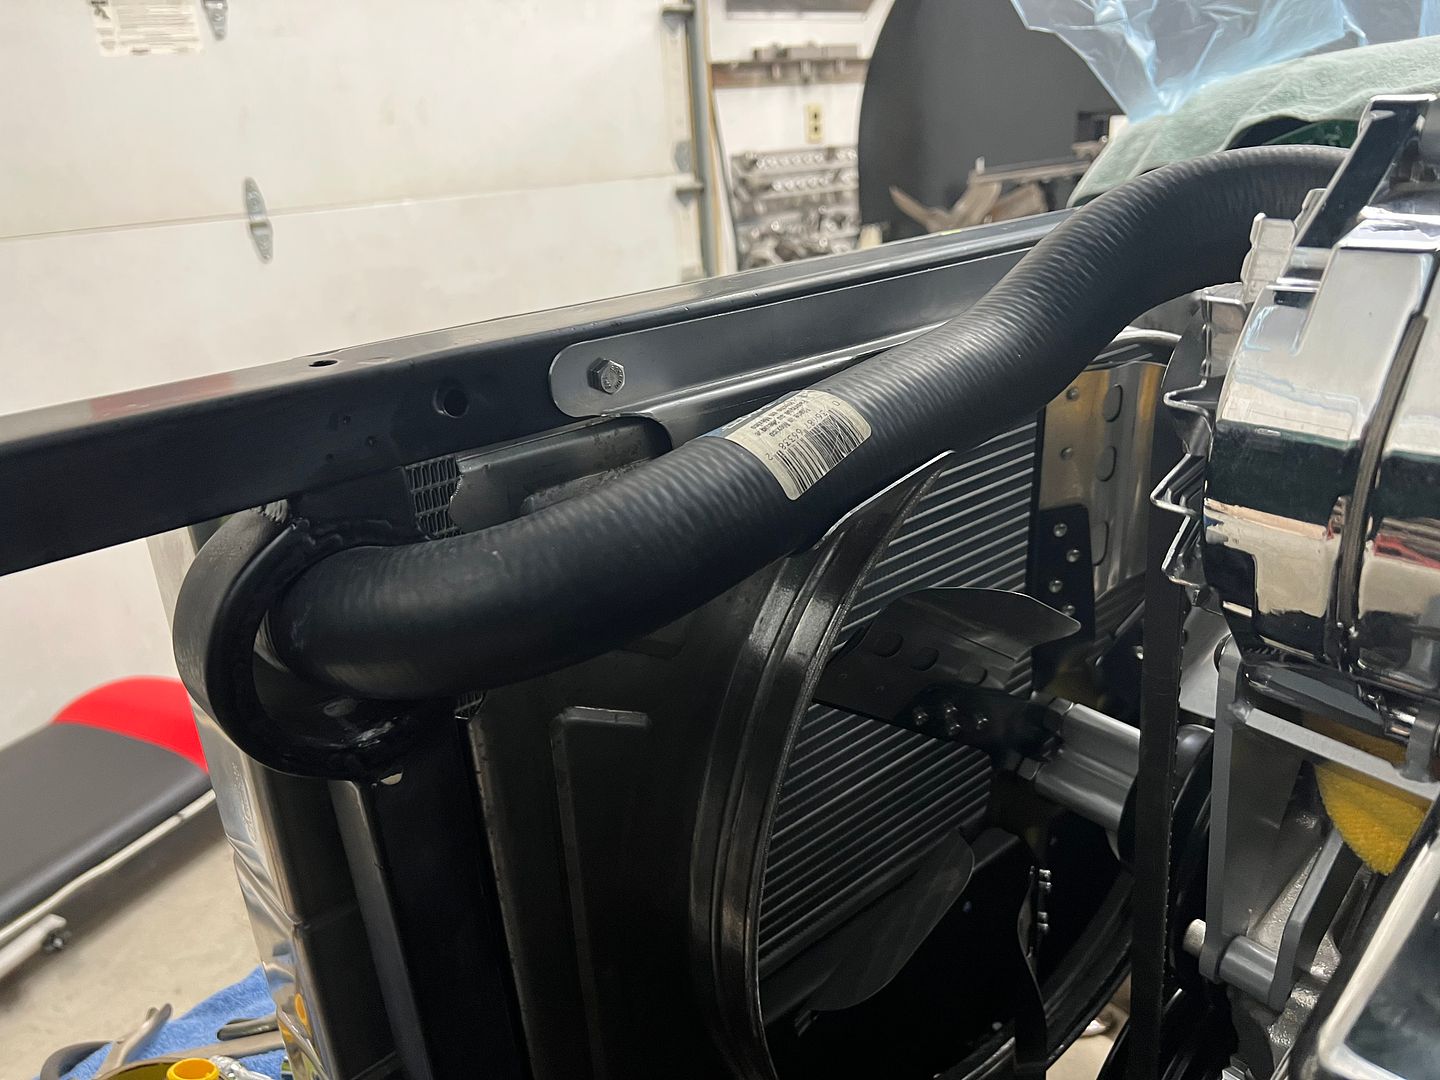 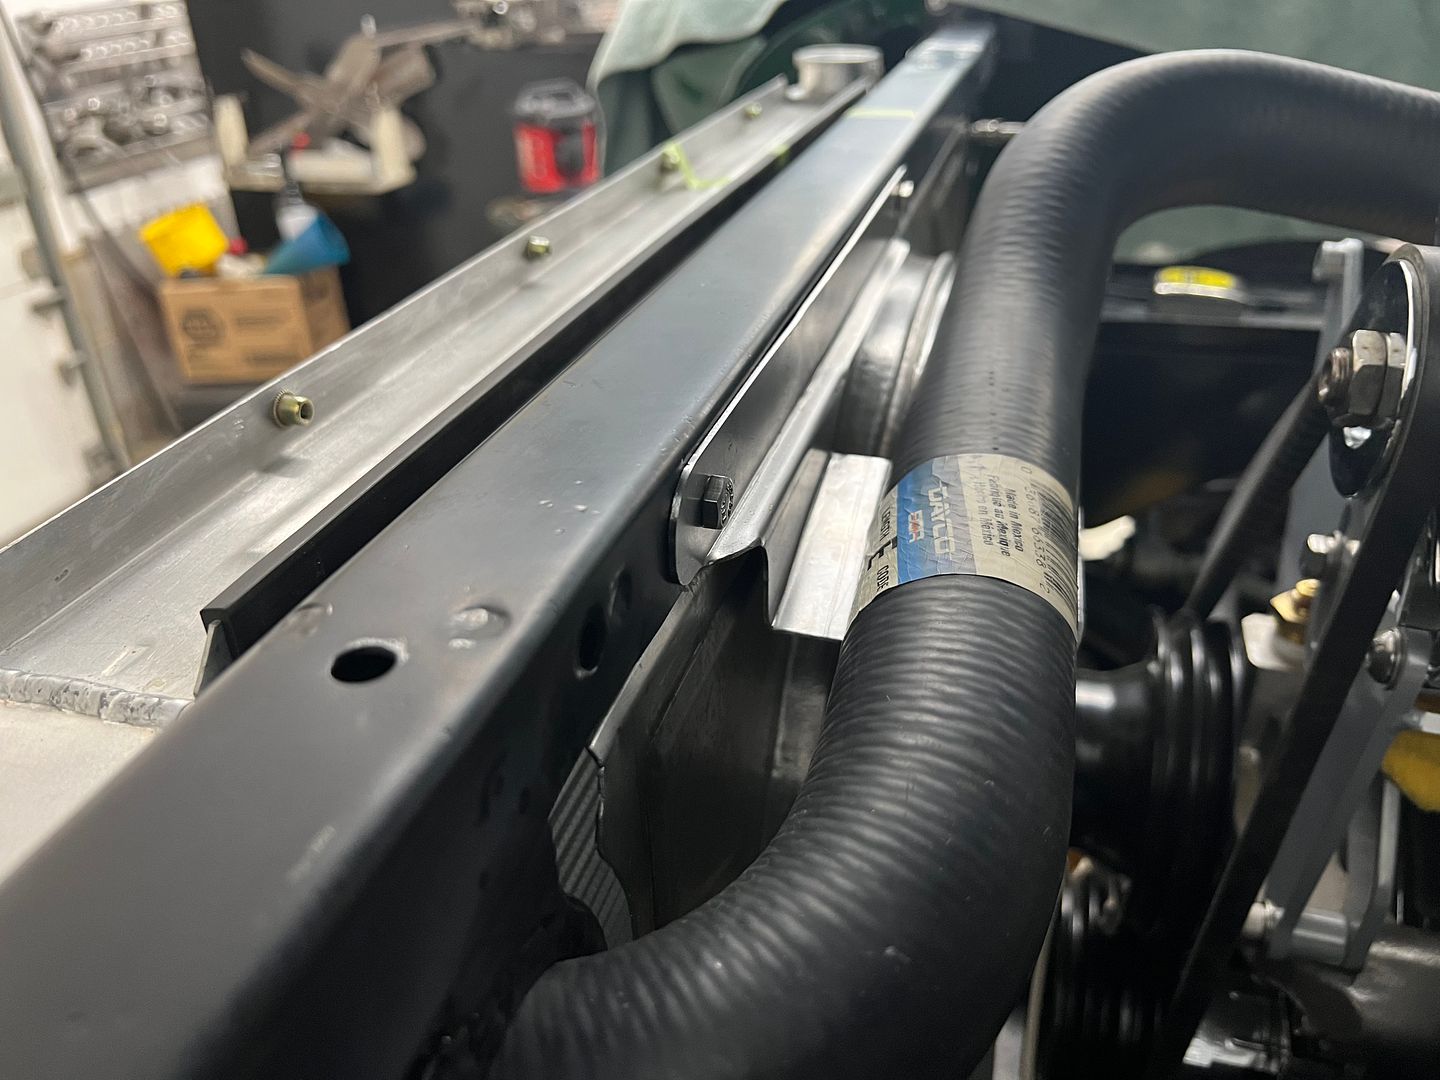 Next, we had moved the battery from the OEM location on the firewall to the dealer installed Air Conditioning location behind the core support. This has the battery in close proximity to the passenger side header, so we punched some louvers on the core supports side baffle to allow for air flow. 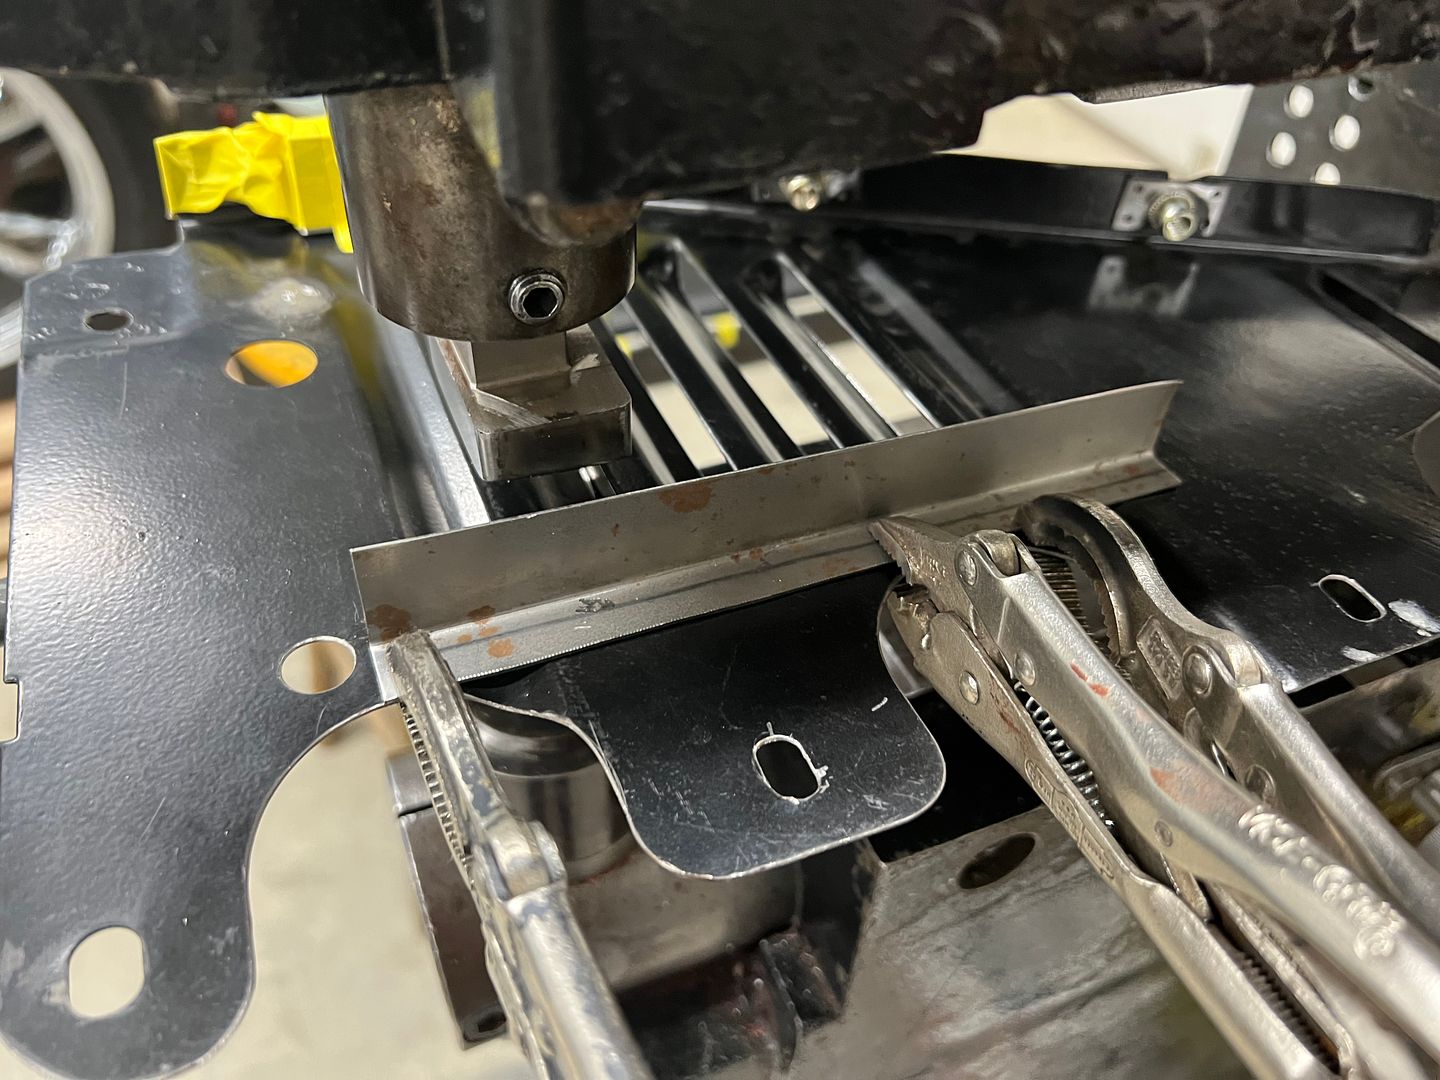 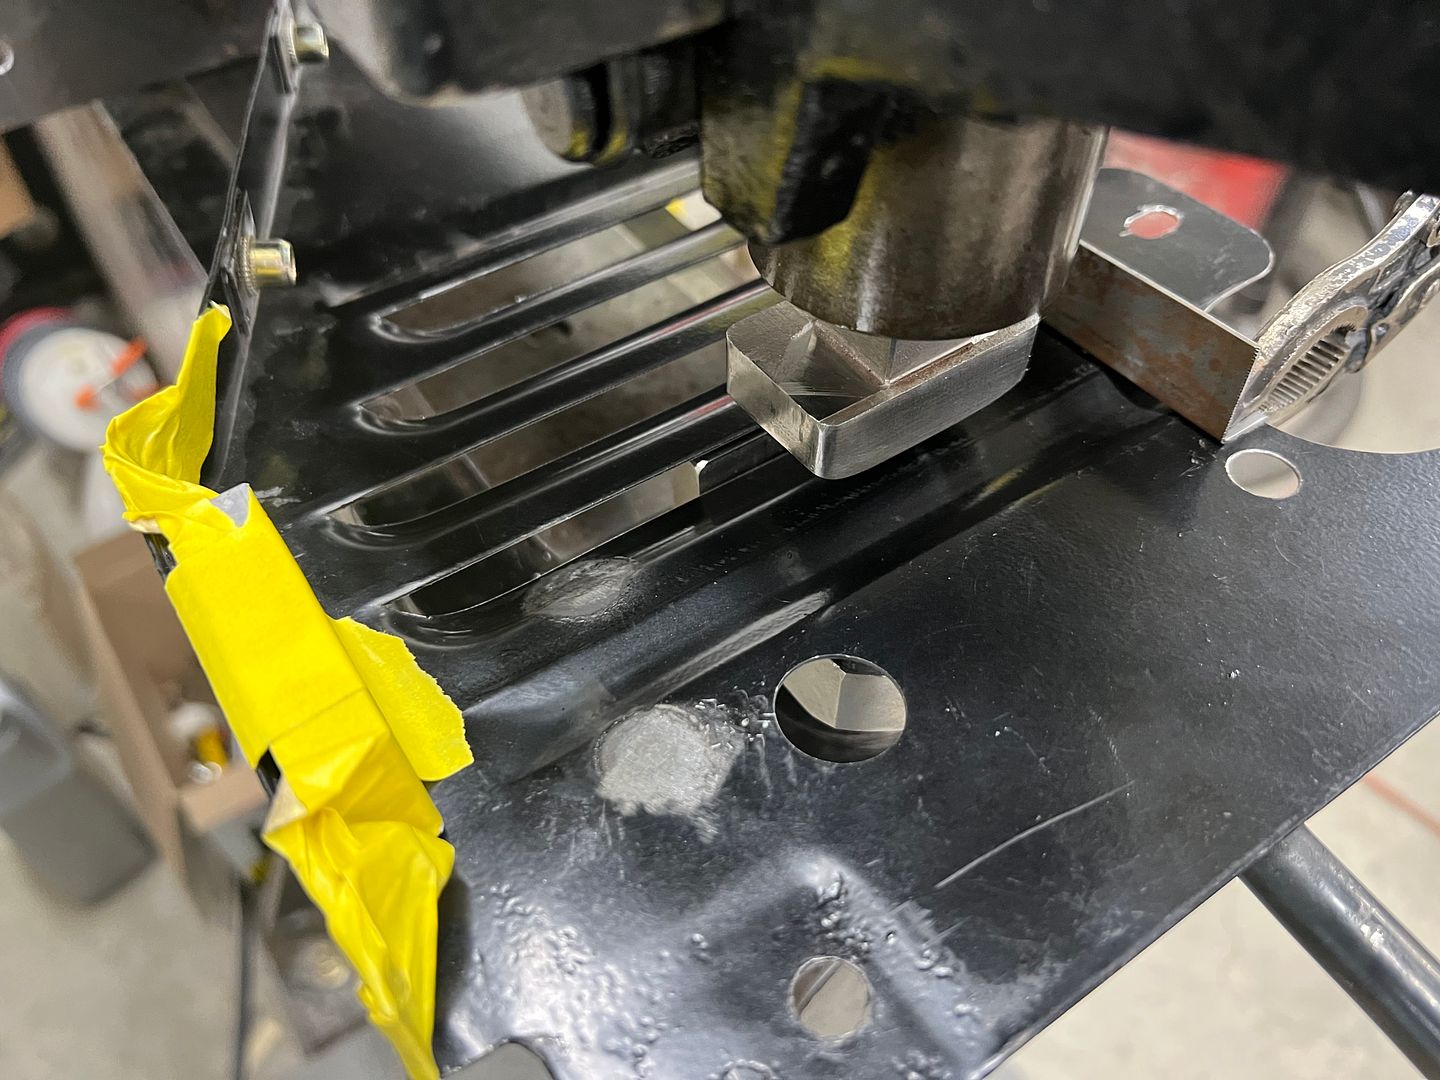 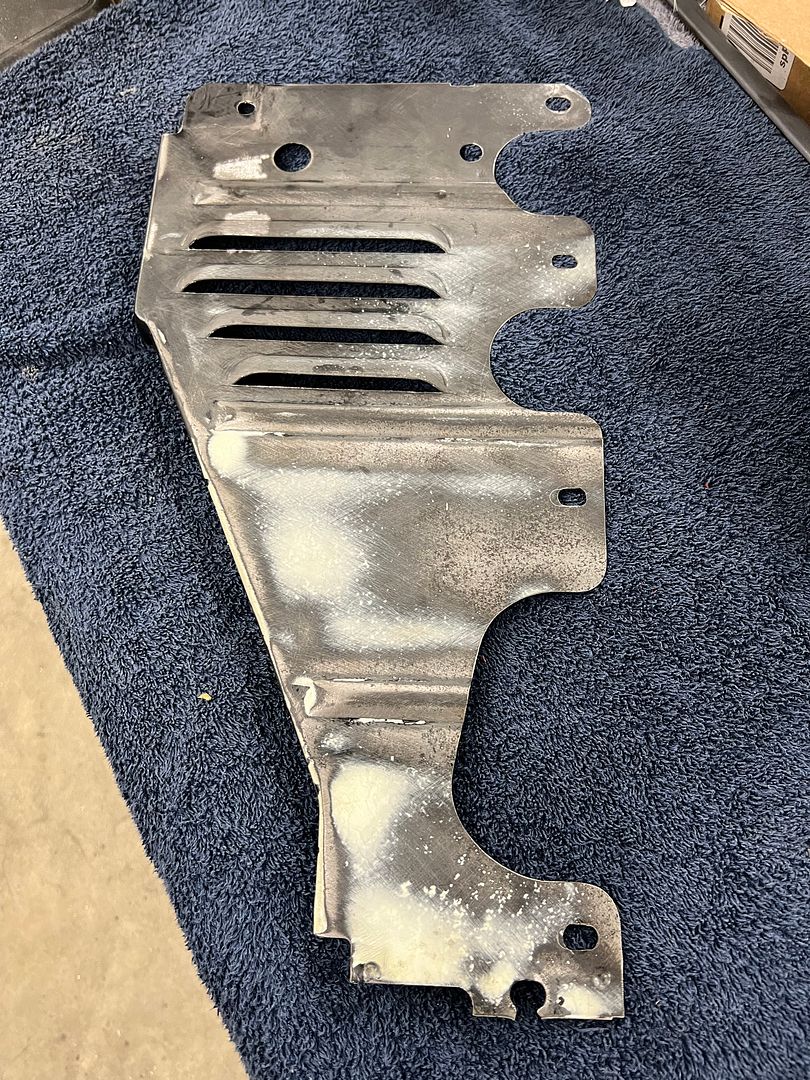 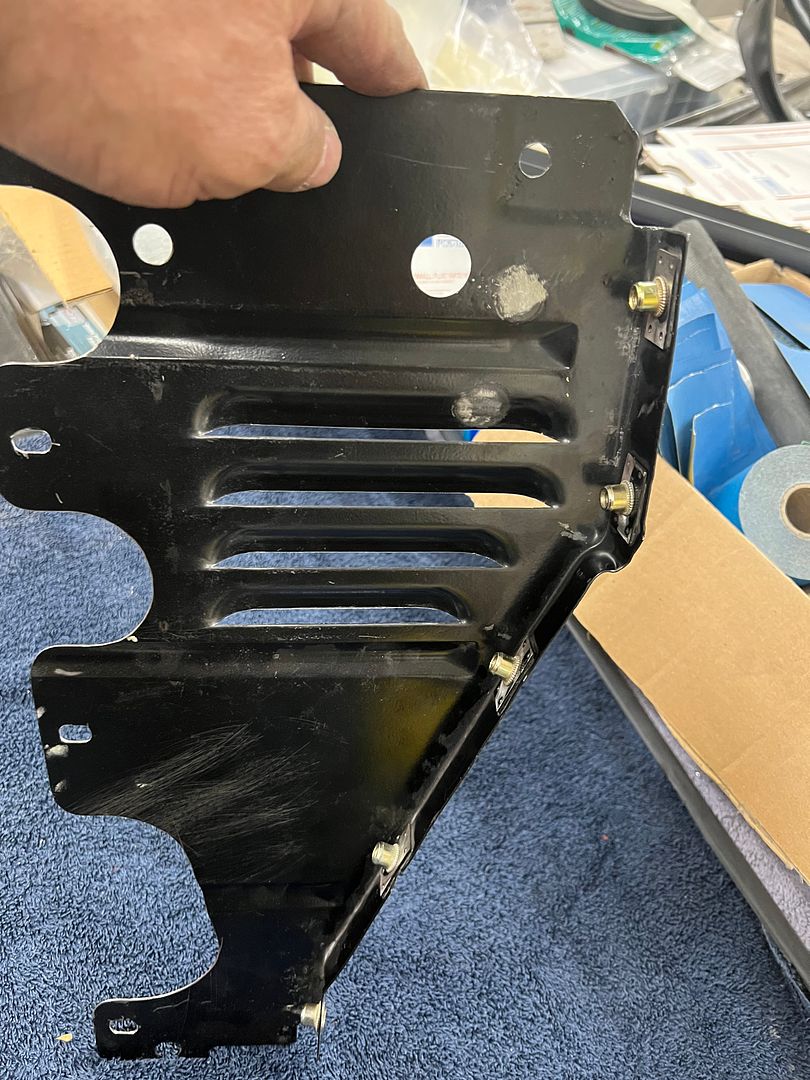 https://www.youtube.com/watch?v=5qFVXdLLeOc
__________________
Robert |
|
|
|
|
10-26-2021, 07:37 PM
|
#11 |
|
Senior Member
Join Date: Mar 2011
Location: West Plains, Missouri
Posts: 7,555
|
Re: 55 Wagon Progress
Really great work...Jim
__________________
my build thread: http://67-72chevytrucks.com/vboard/s...d.php?t=459839 Jimbo's long bed step build:http://67-72chevytrucks.com/vboard/s...t=464626<br /> |
|
|
|
|
11-21-2021, 11:12 AM
|
#12 |
|
Registered User
Join Date: Jan 2013
Location: Leonardtown, MD
Posts: 1,637
|
Re: 55 Wagon Progress
Thanks Jim!!
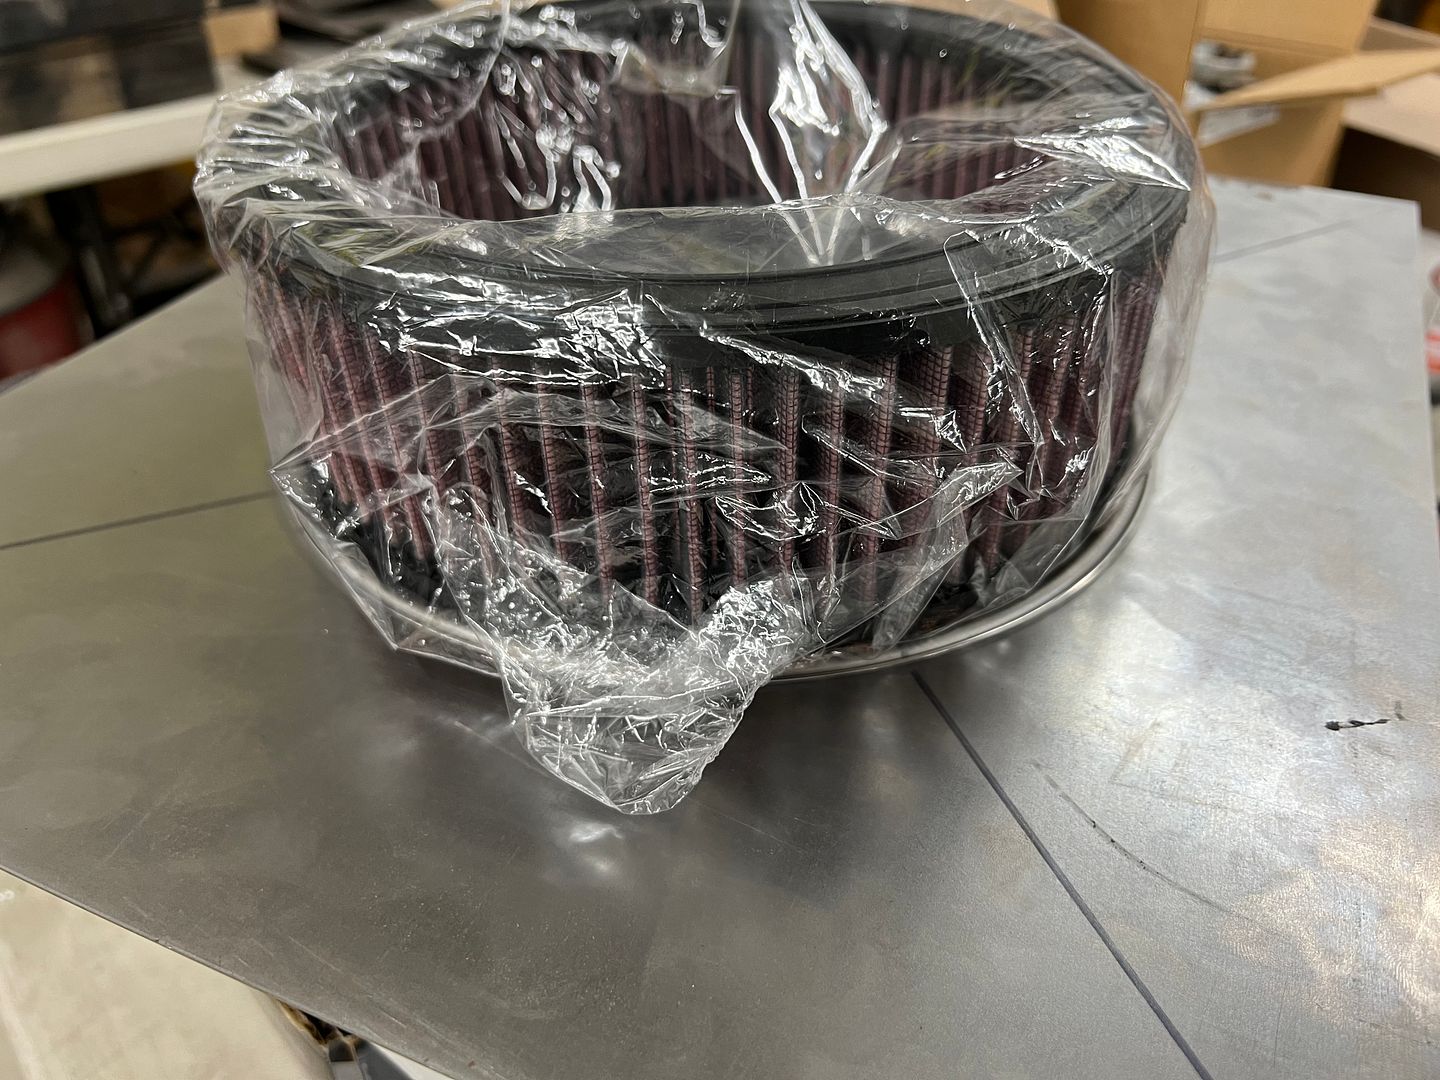
Wagon progress! So Jared has been tackling the fun task of prepping interior trim pieces, getting them ready for another round of epoxy.. 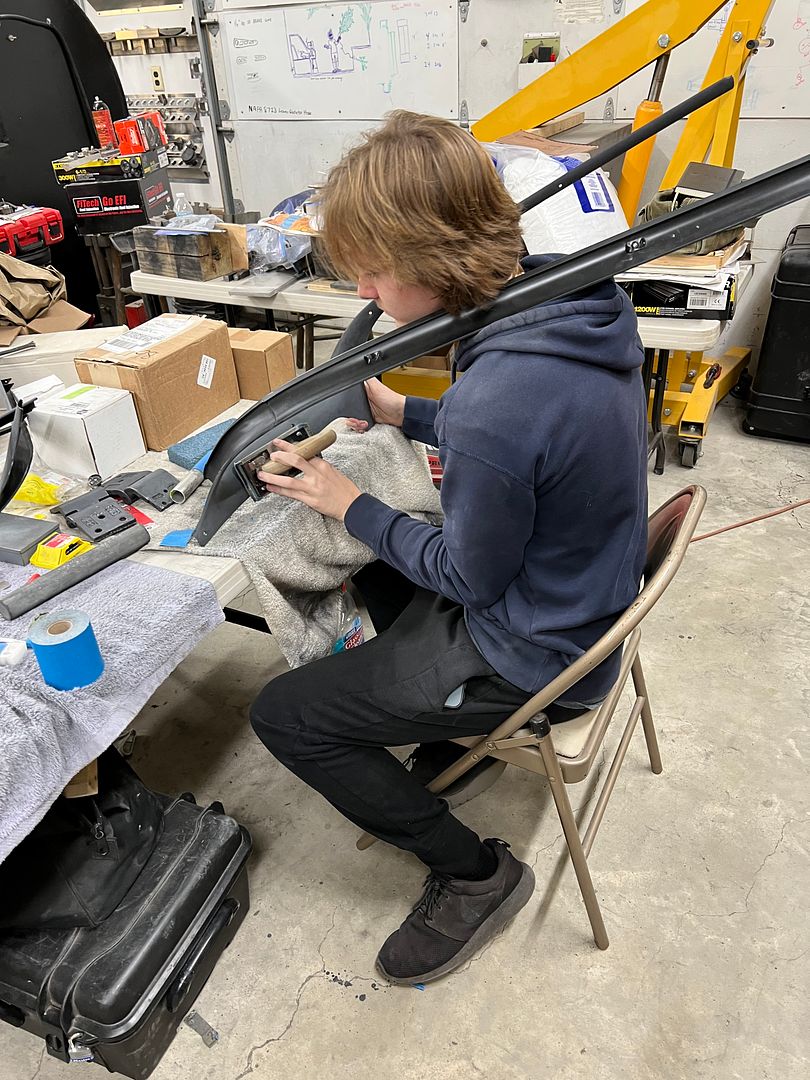 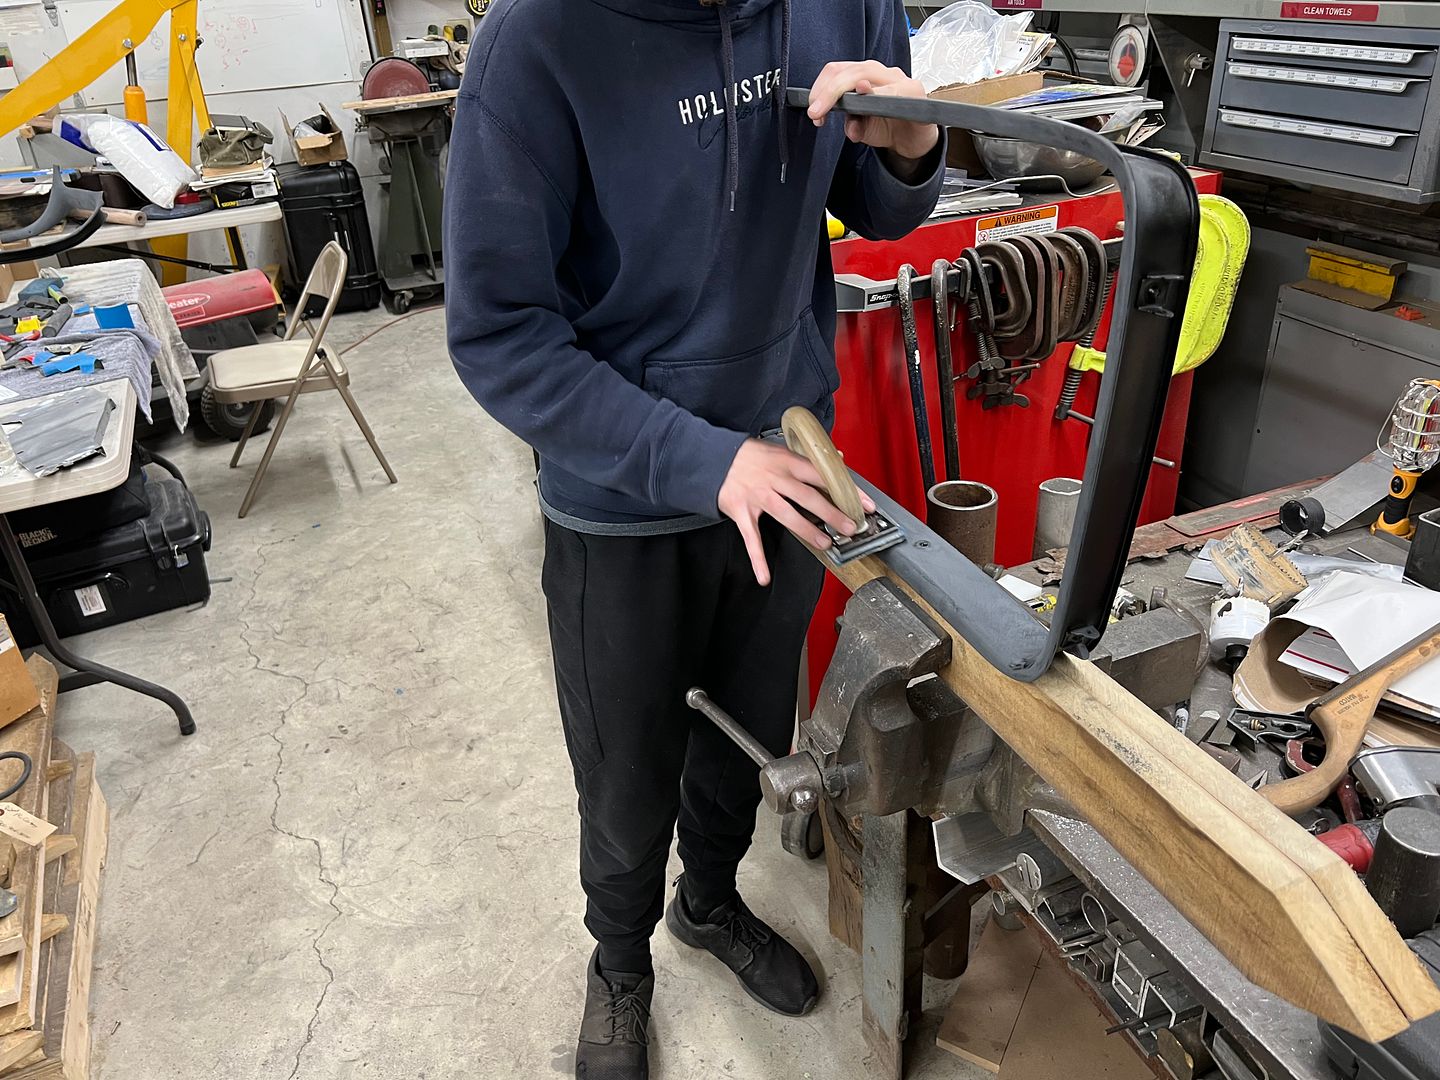 Another modification we're undertaking, the air cleaner, when mocked up on the engine, showed a tight proximity to the back of the AC compressor. Looking at the clearance we had to the firewall, moving backward 1" will give us much needed breathing room for the AC lines. So out with the old .... 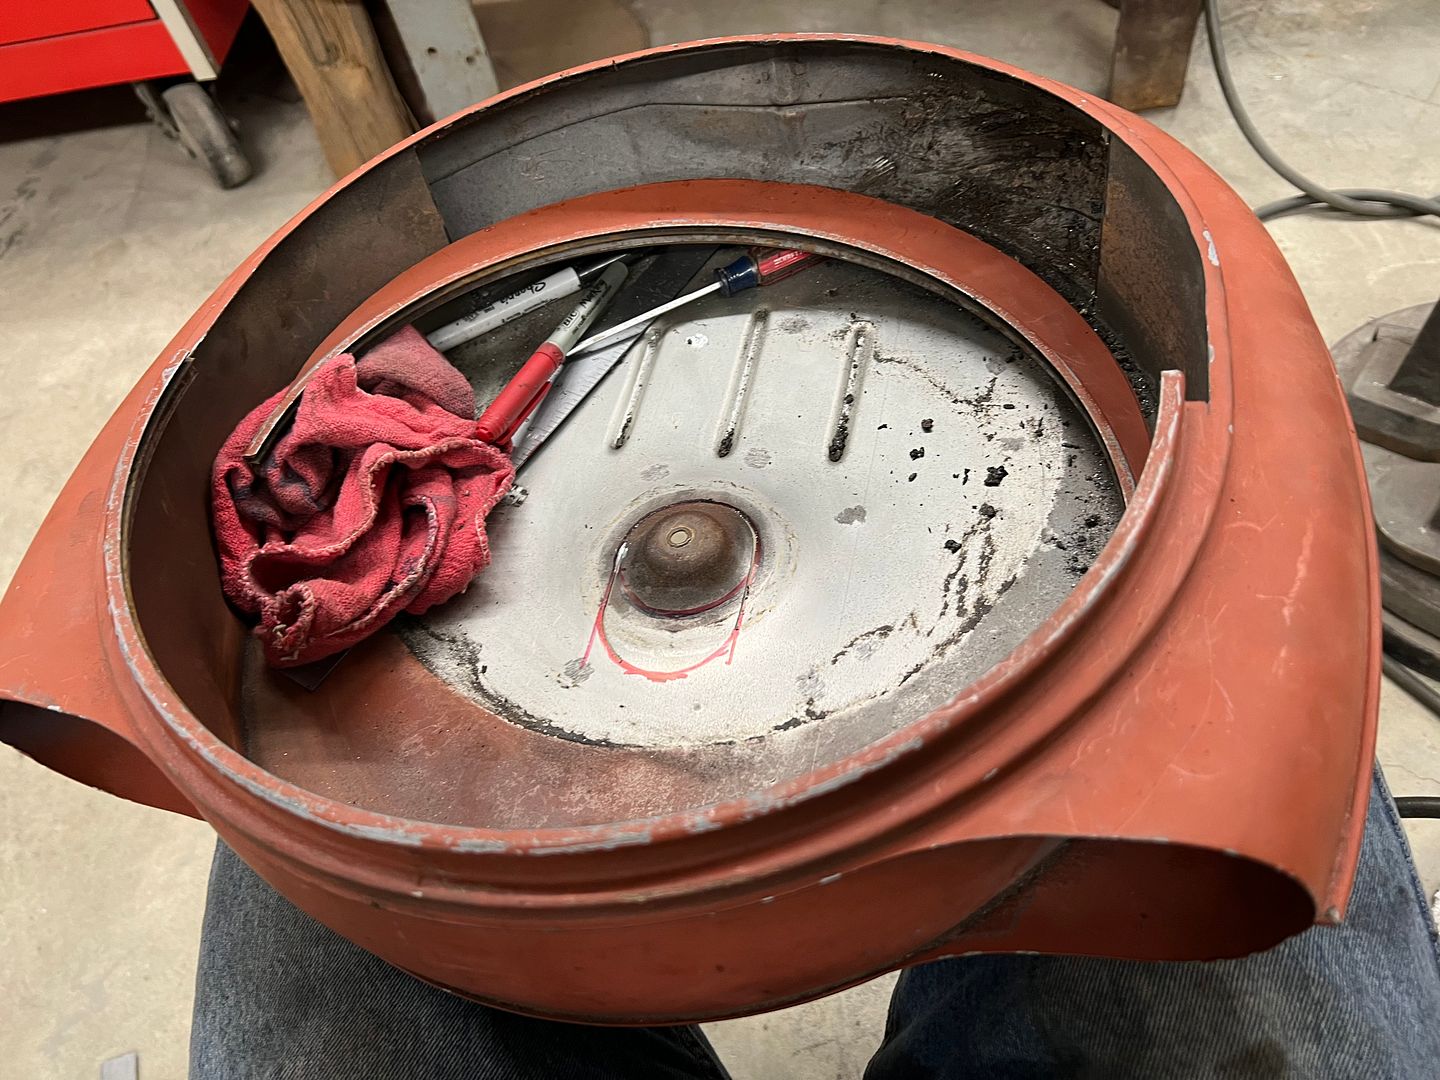 And to move rearward, the mounting hole is moved forward one inch.. 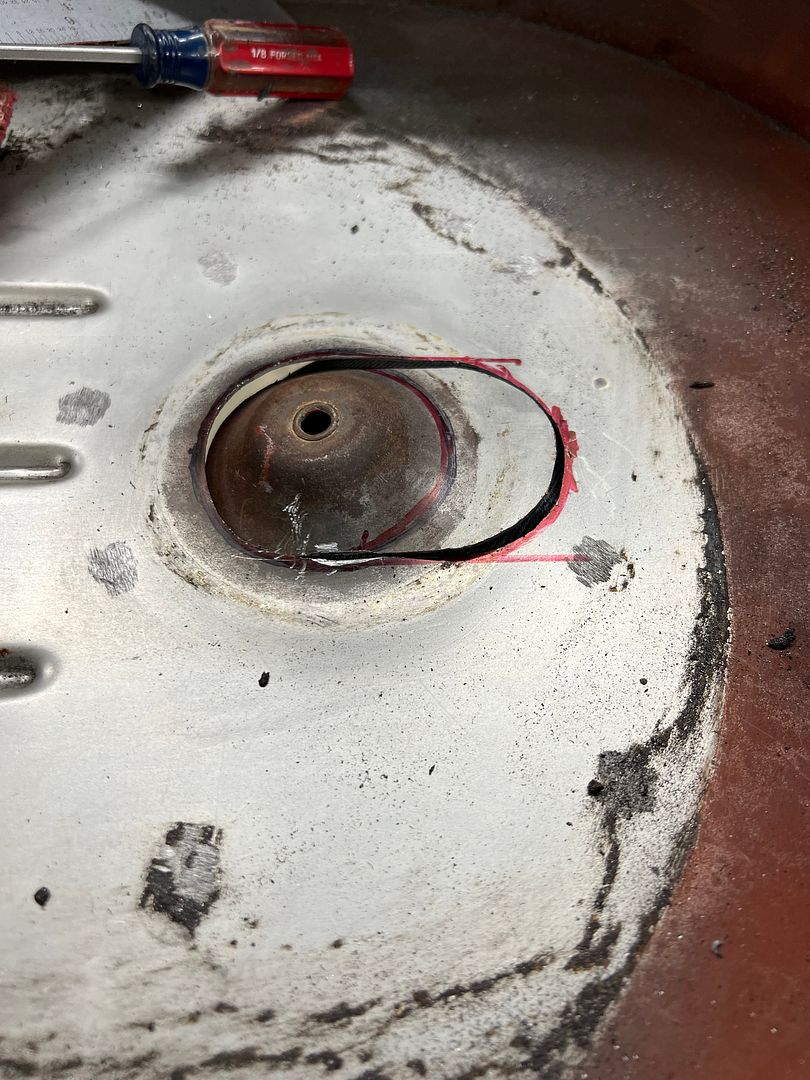 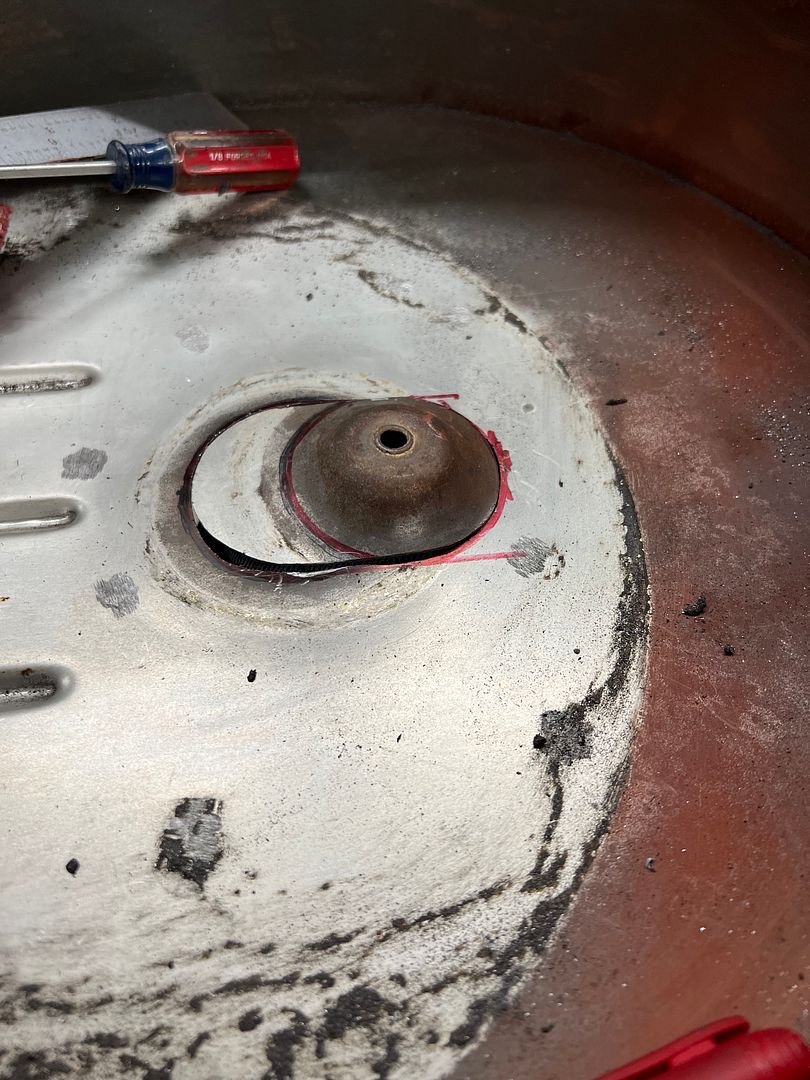 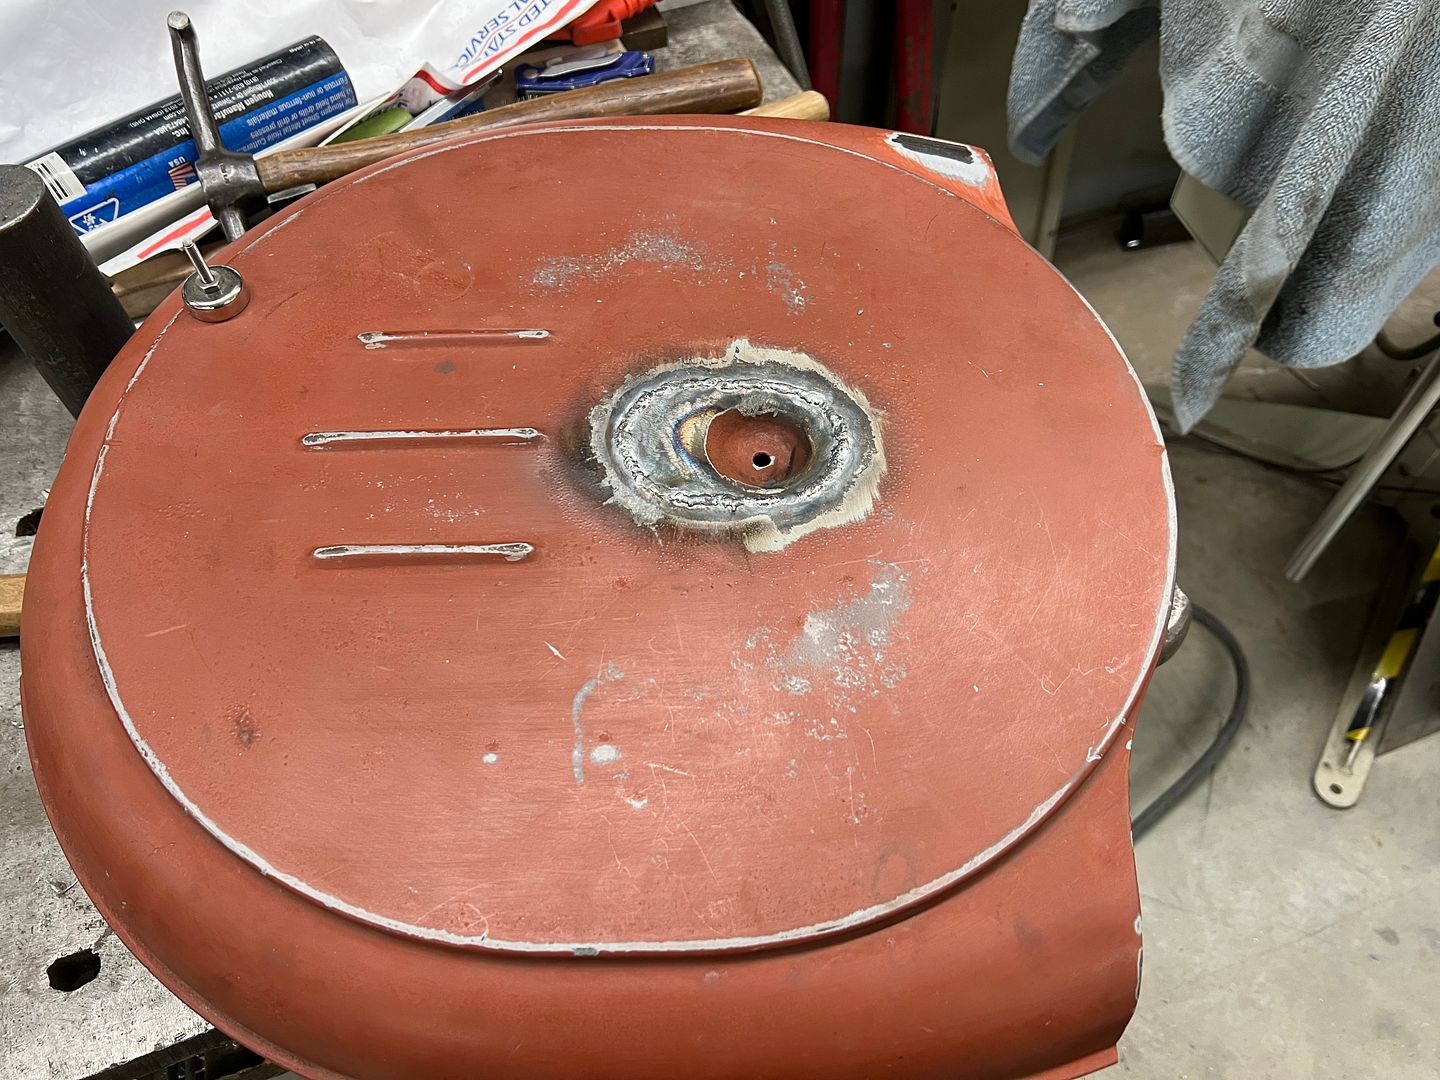 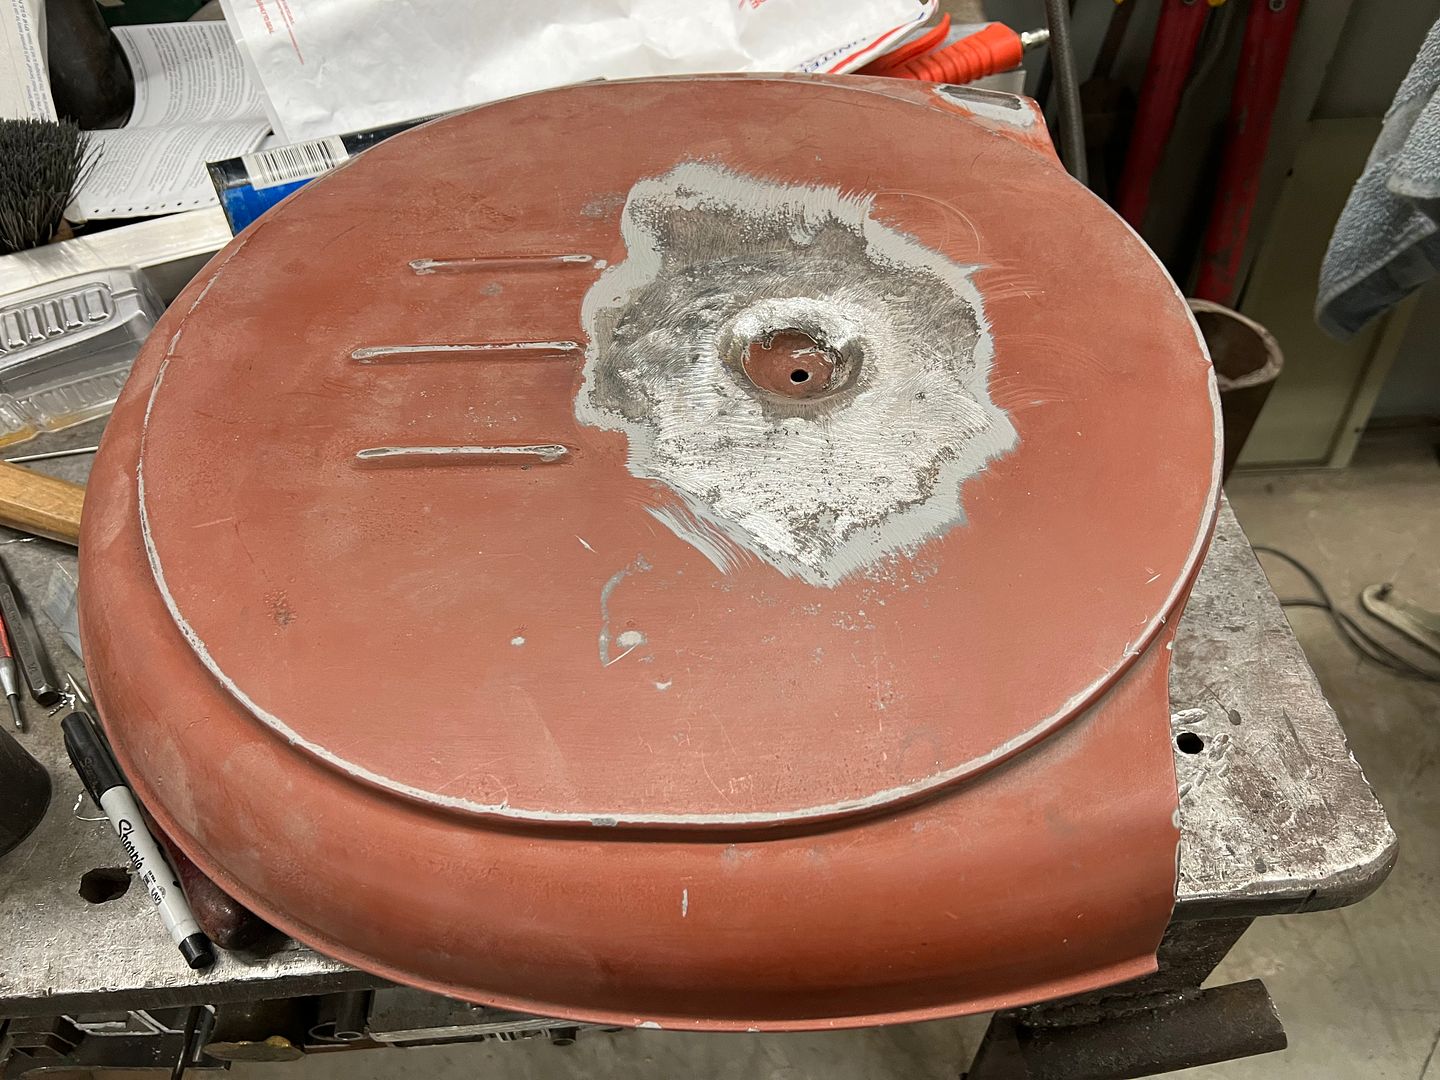 Next in store is a new bottom for the air cleaner.. 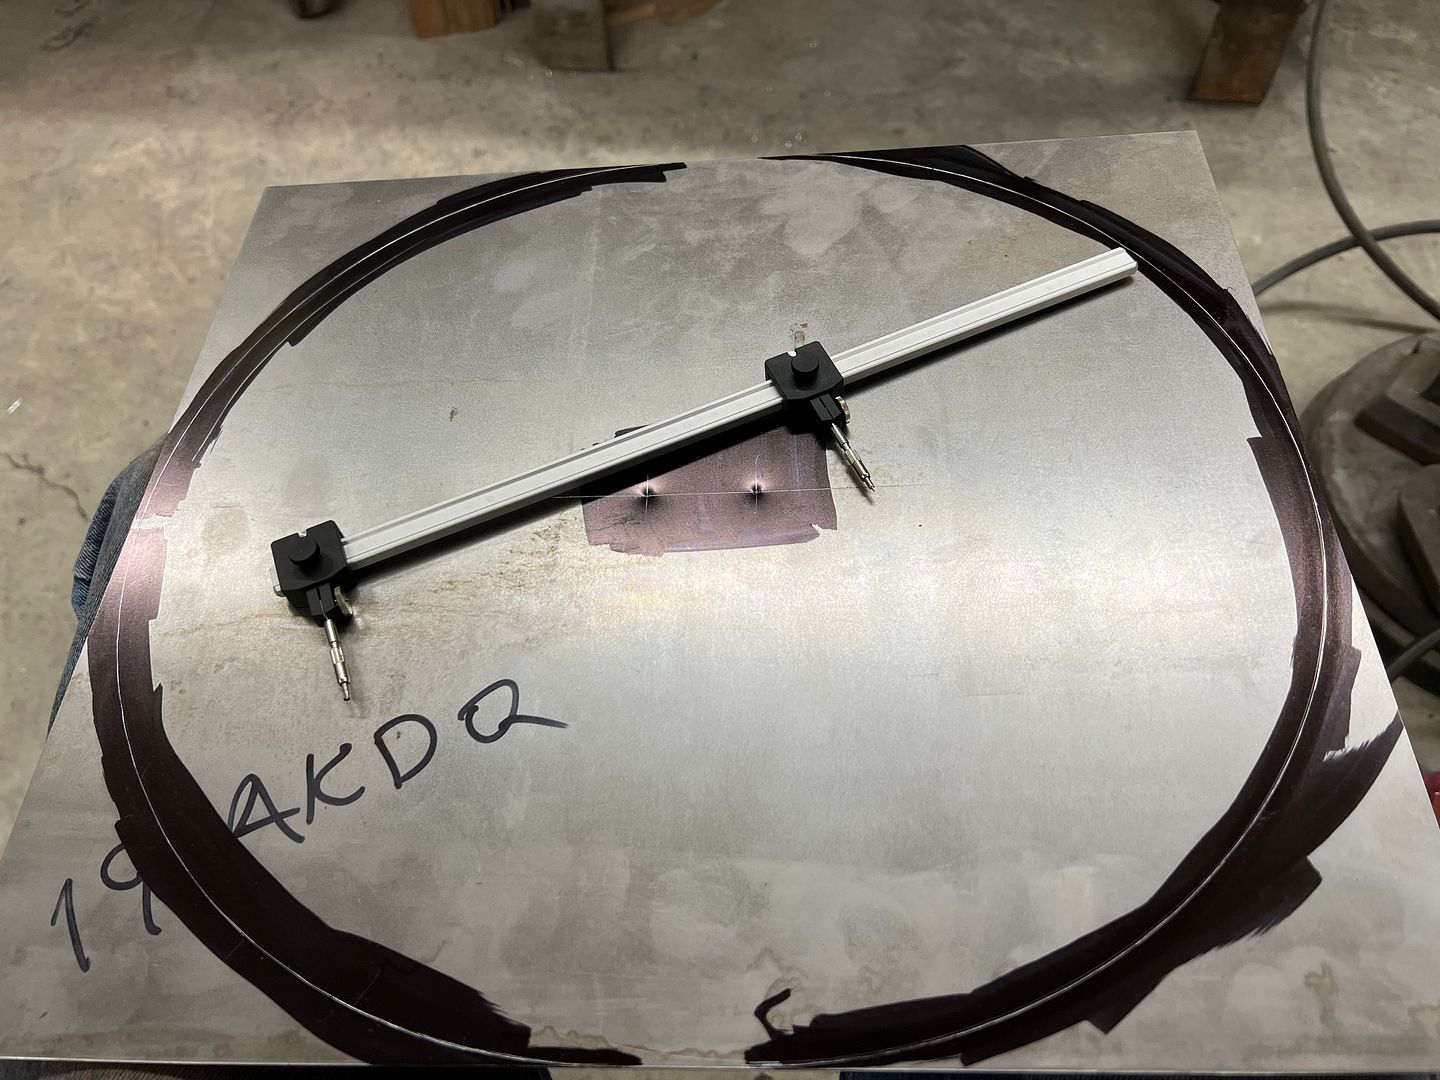 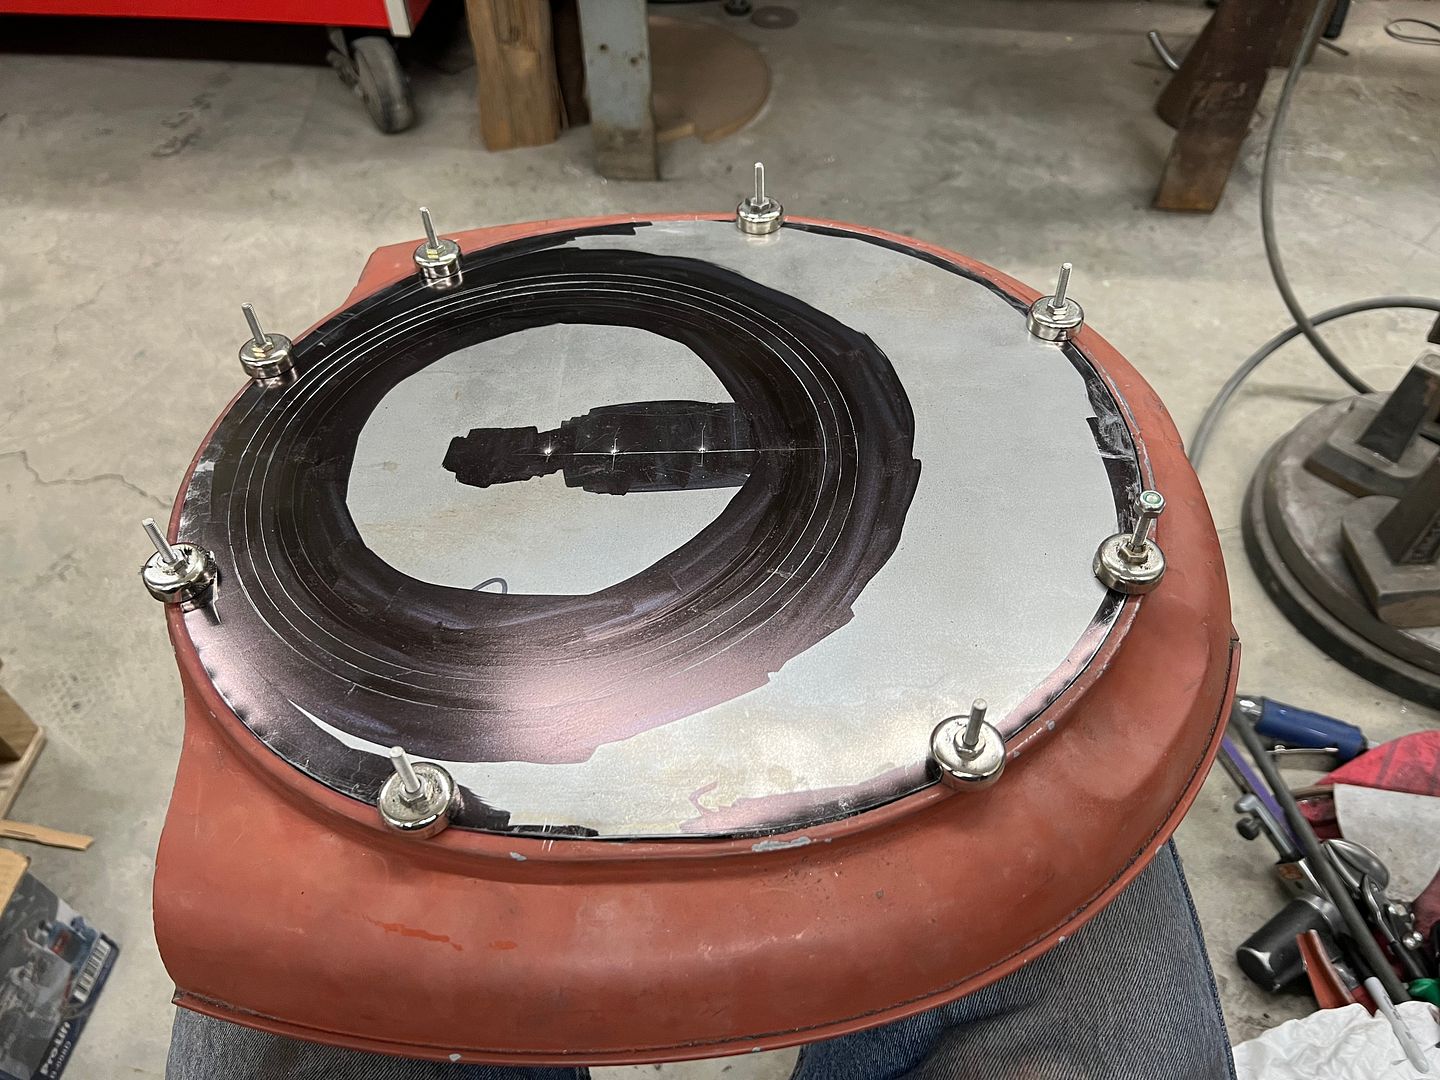 A hammerform is used to give us a folded lip out the bottom 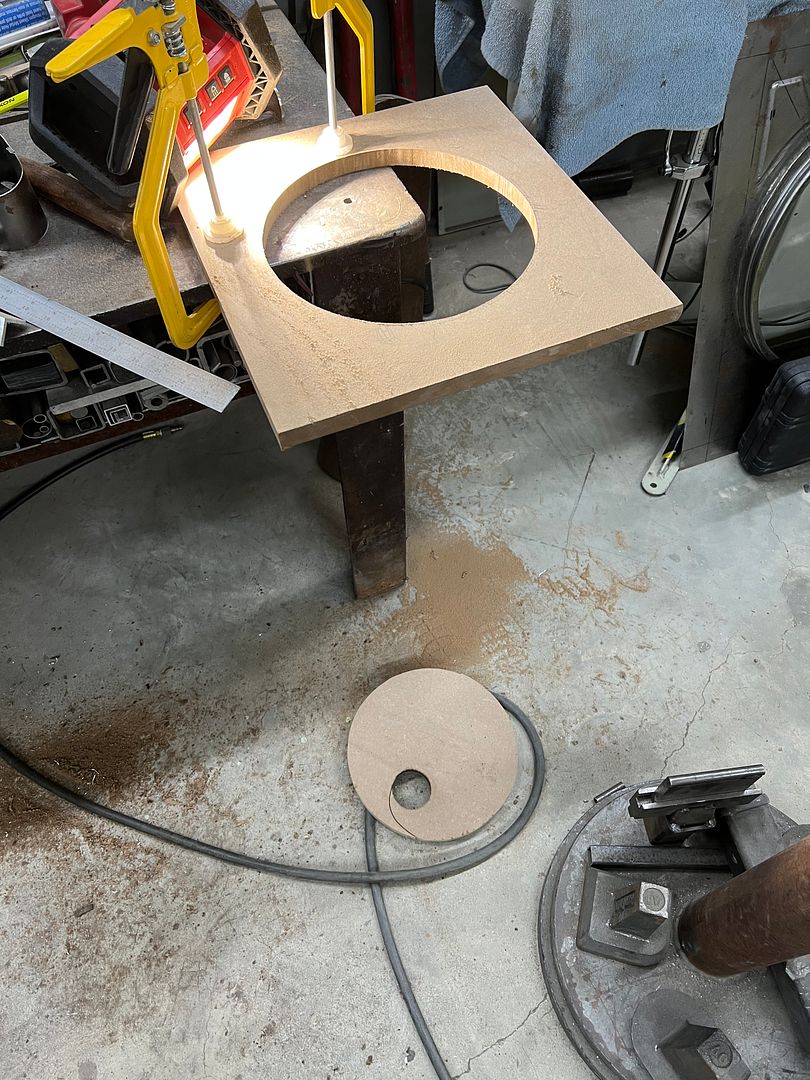 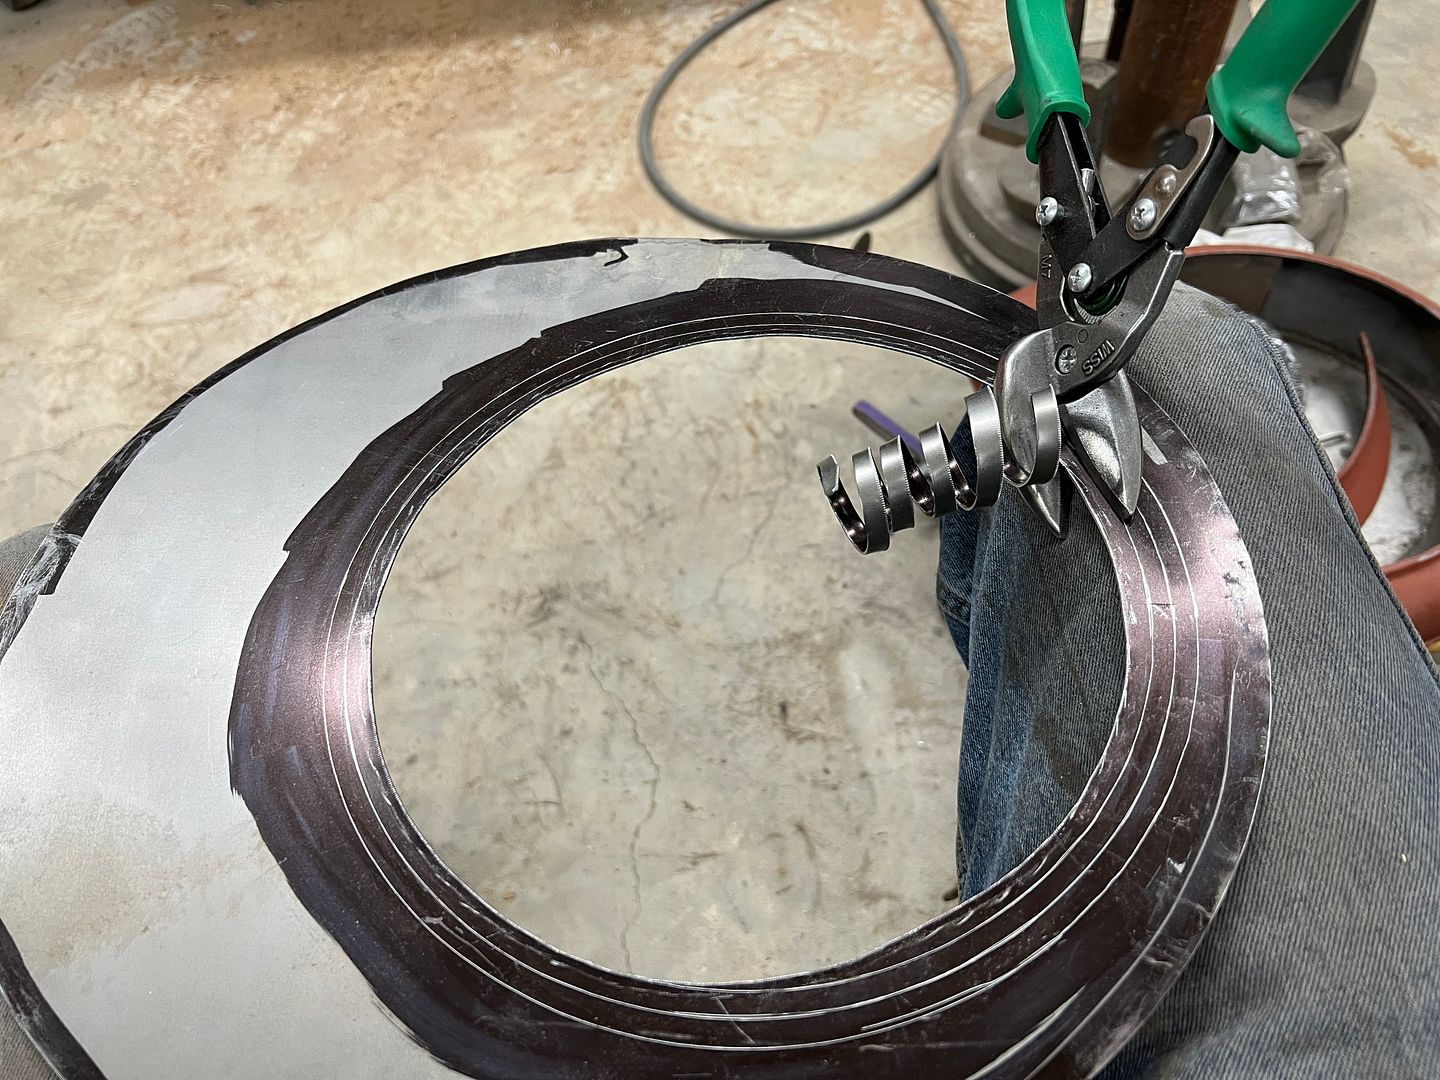 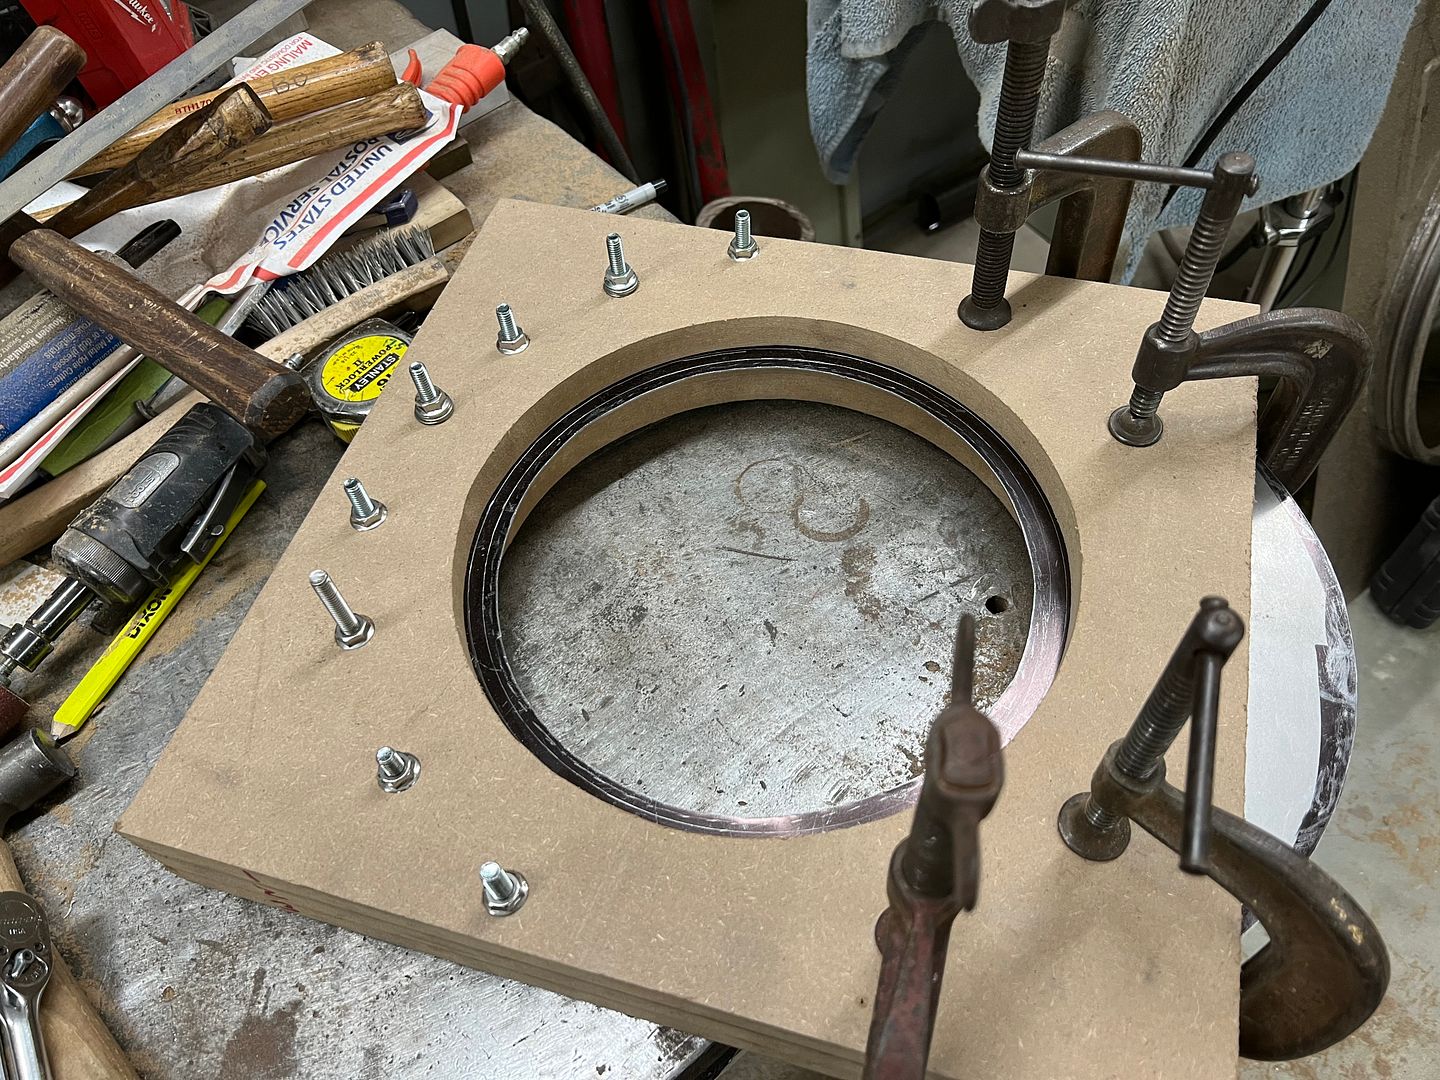 https://youtu.be/QPLDGIxJAYk https://youtu.be/Zm6TIkxDDUA 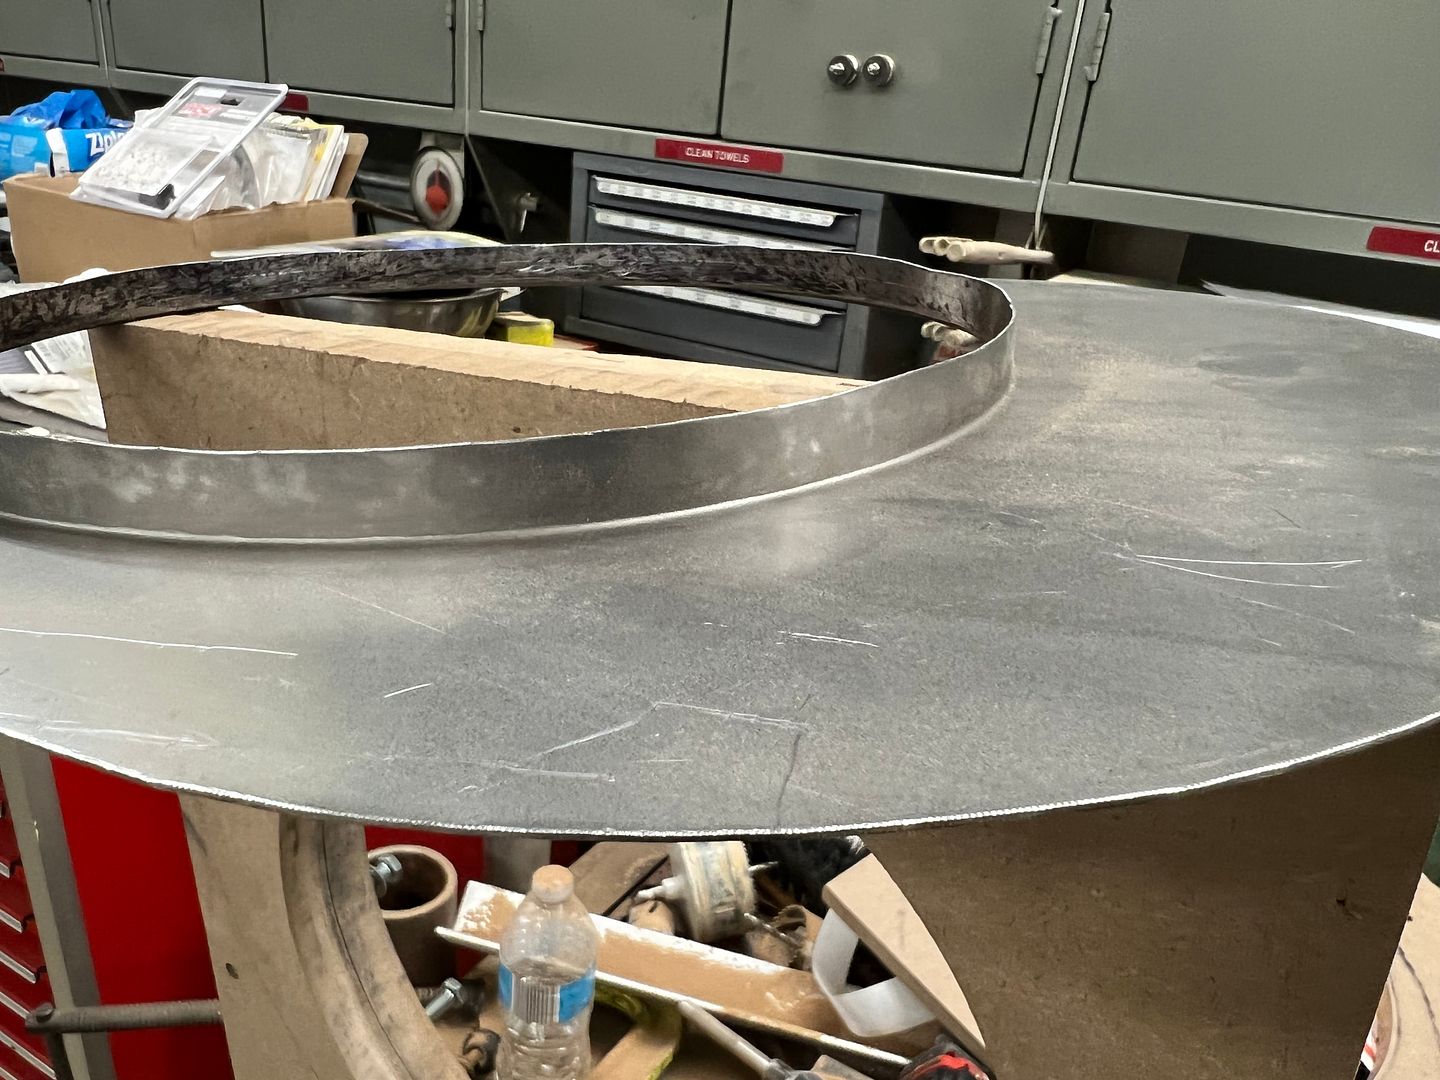
__________________
Robert |
|
|
|
|
11-21-2021, 11:36 AM
|
#13 |
|
Registered User
Join Date: Jan 2013
Location: Leonardtown, MD
Posts: 1,637
|
Re: 55 Wagon Progress
At this point we need to hem the flange so the bottom isn't quite so sharp..
A 1/2 x 1/2 aluminum angle is used as a height gauge so we can use the roloc sander to get our flange to a consistent height. This will allow us to use a tipping die in the bead roller to fold the hem.. 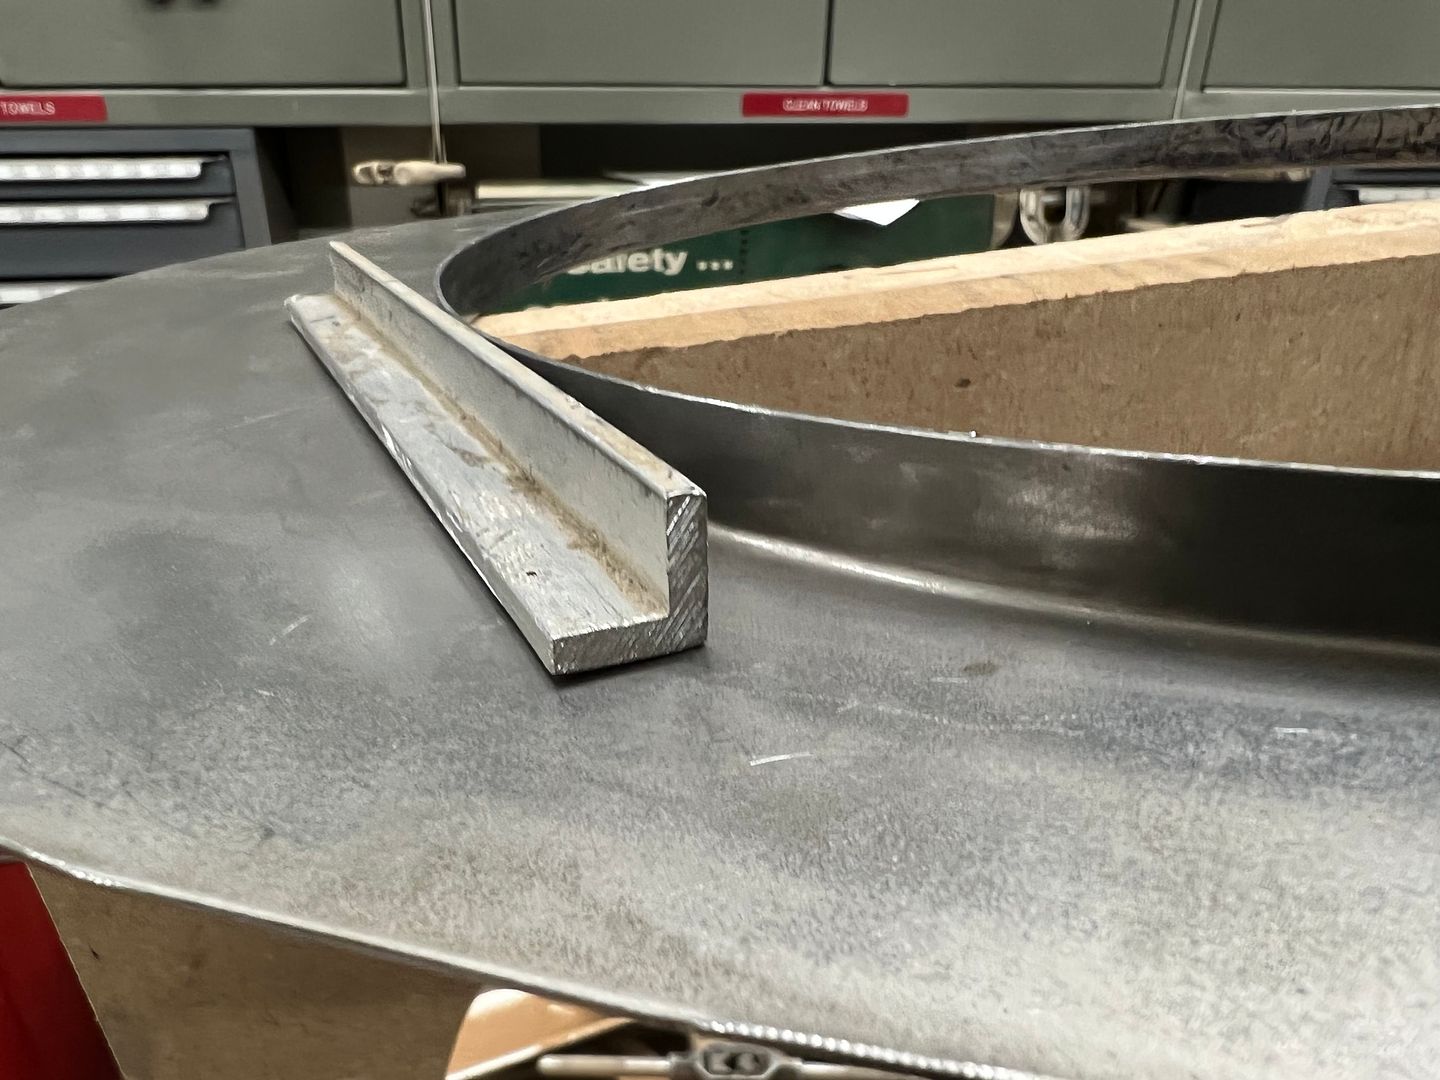 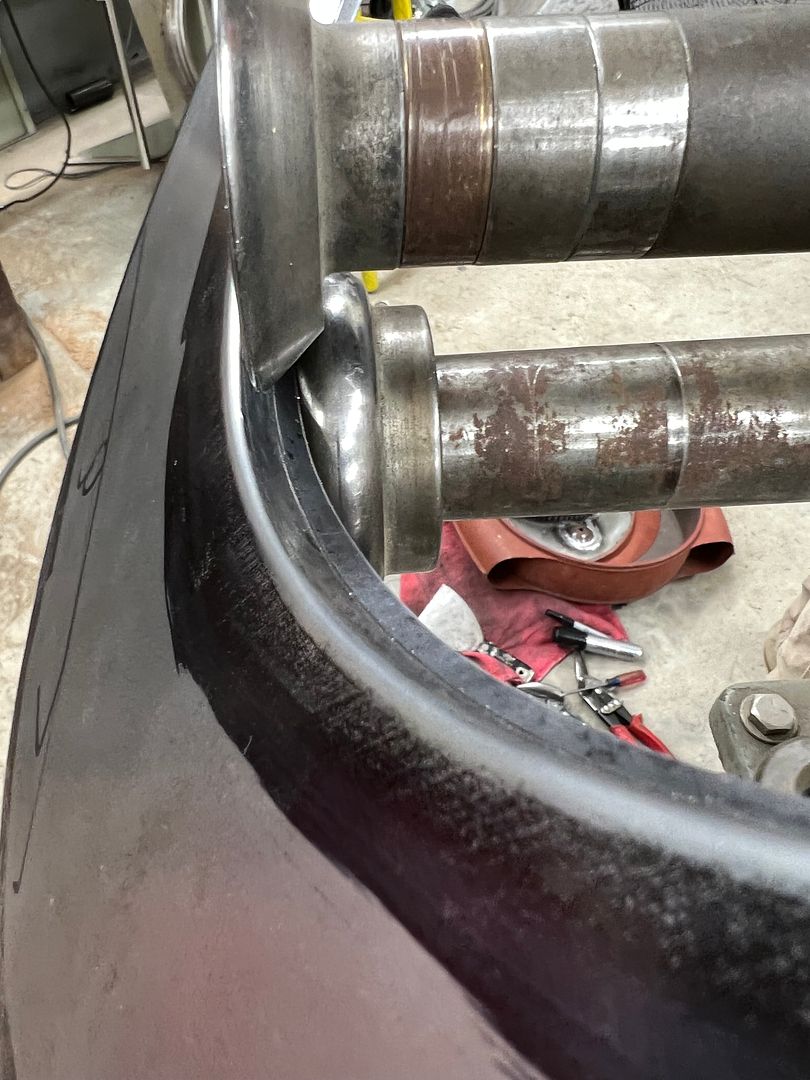 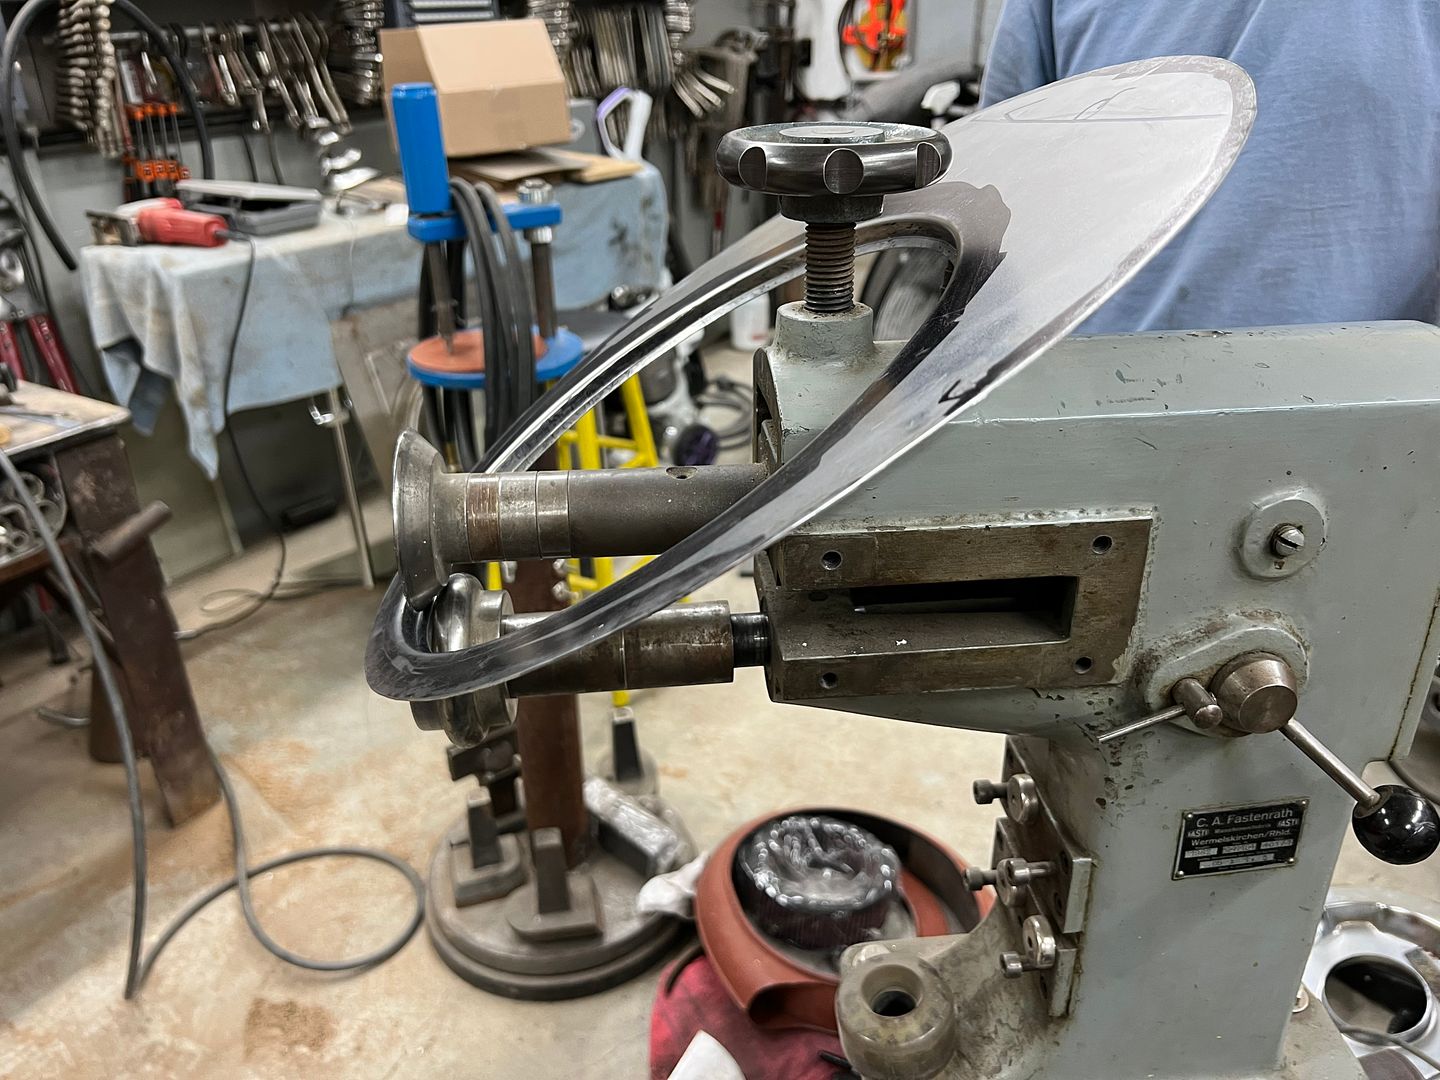 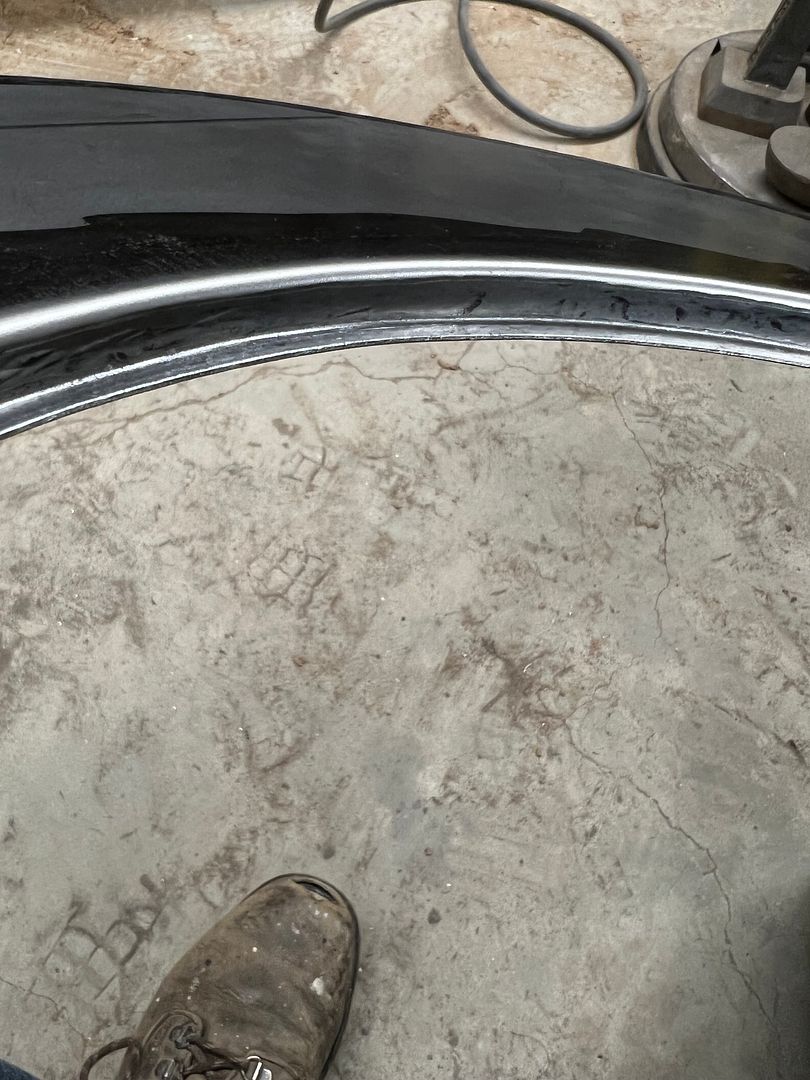 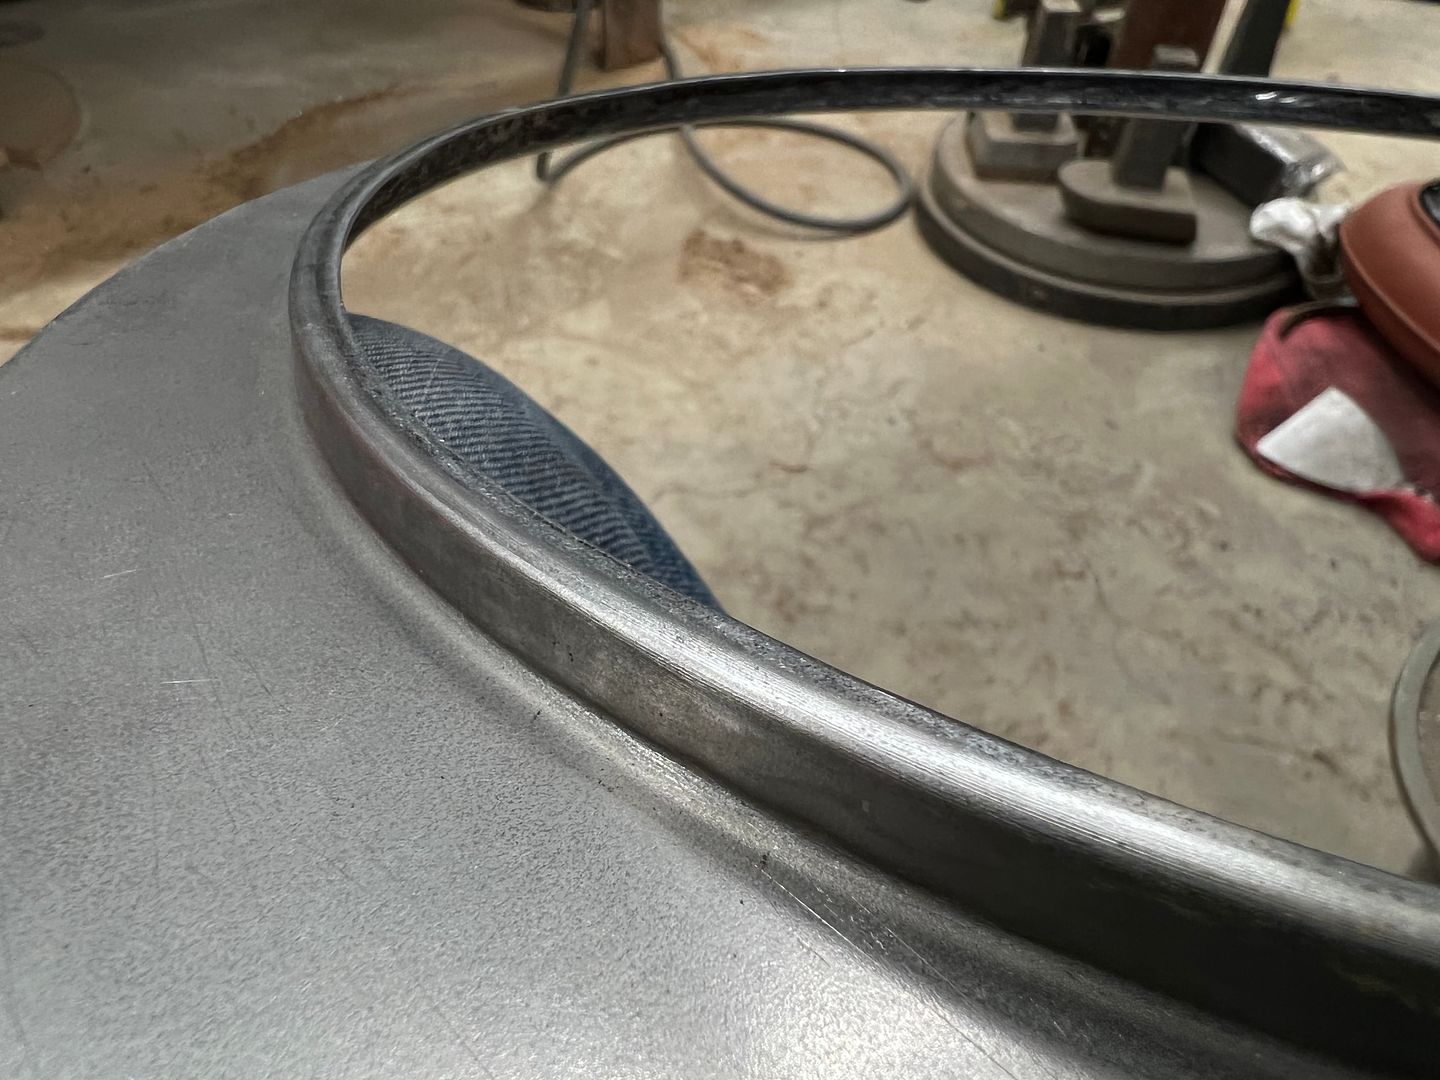 Then the part is re-installed in the hammer form to hammer the hem flat.. 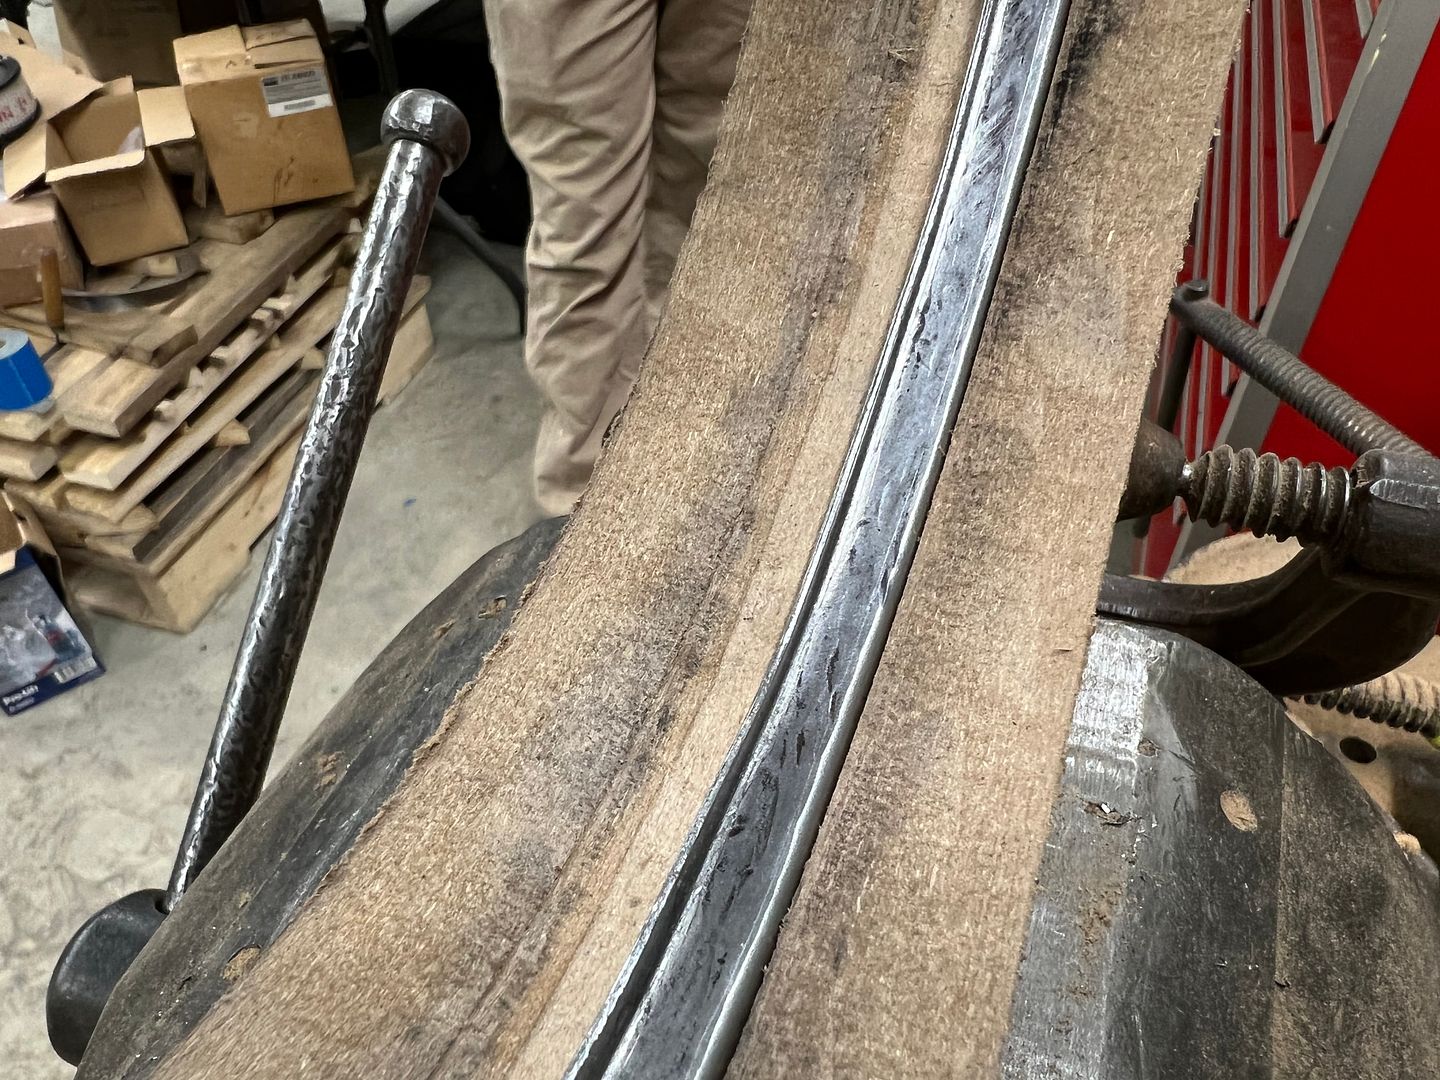 https://youtu.be/eScyS2lkfOU 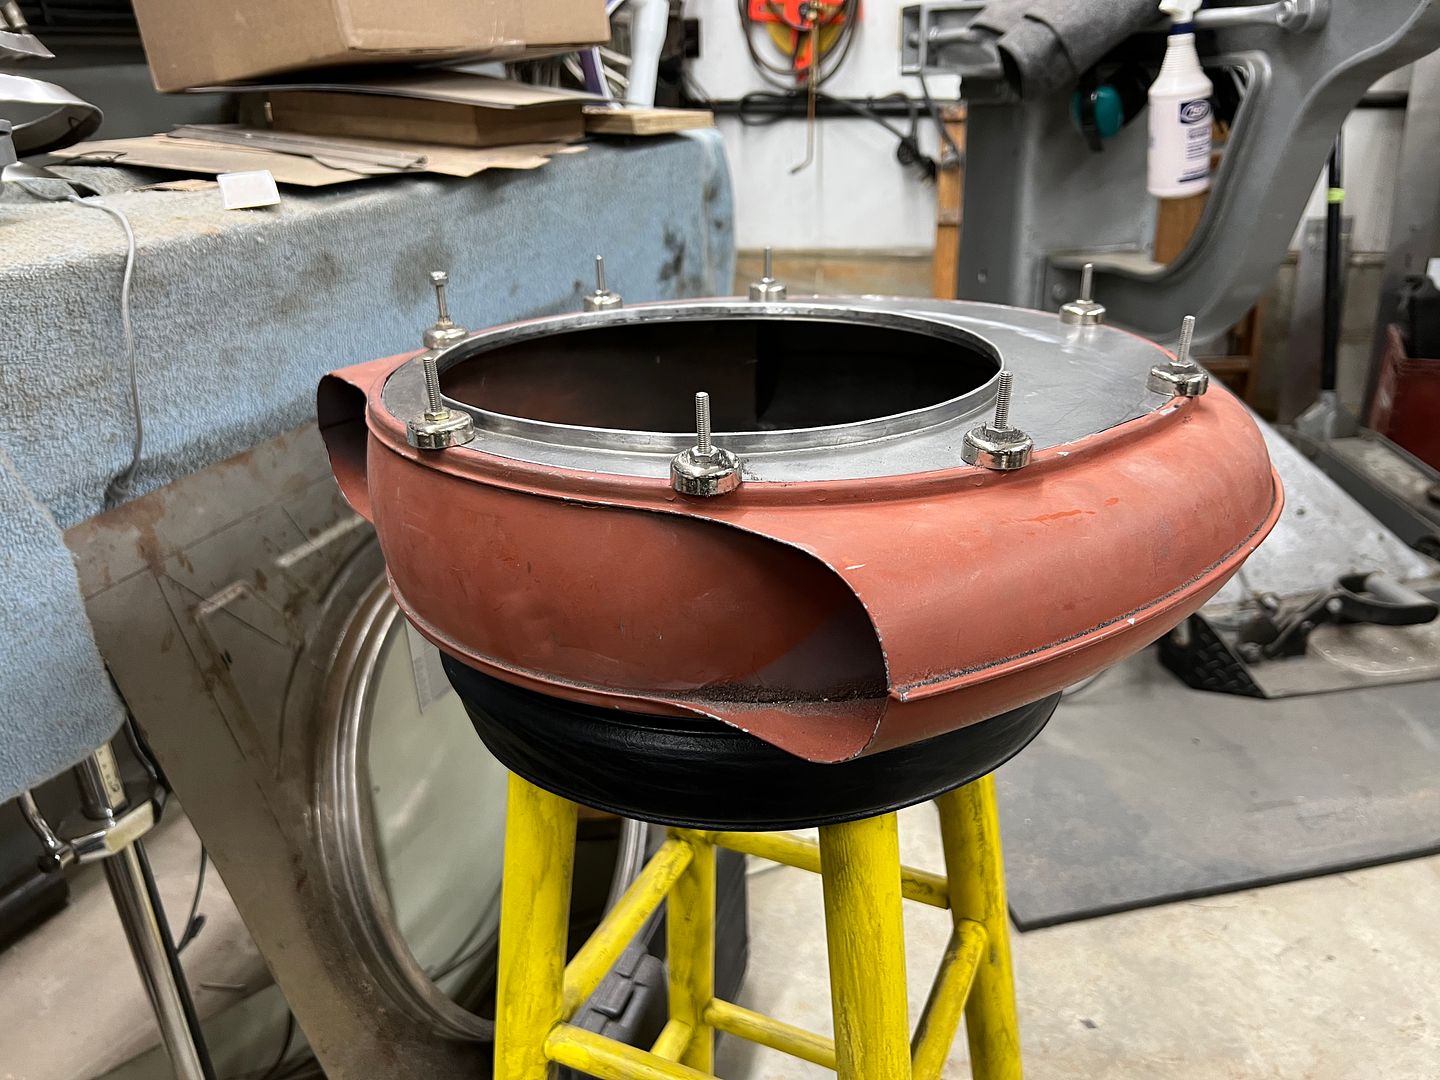
__________________
Robert |
|
|
|
|
11-21-2021, 12:08 PM
|
#14 |
|
Post Whore
Join Date: May 2015
Location: Alabama
Posts: 14,608
|
Re: 55 Wagon Progress
Mighty fine work......as usual
__________________
Mongo...aka Greg RIP Dad RIP Jesse 1981 C30 LQ9 NV4500..http://67-72chevytrucks.com/vboard/s...d.php?t=753598 Mongos AD- LS3 TR6060...http://67-72chevytrucks.com/vboard/s...34#post8522334 Columbus..the 1957 IH 4x4...http://67-72chevytrucks.com/vboard/s...63#post8082563 2023 Chevy Z71..daily driver |
|
|
|
|
11-21-2021, 04:15 PM
|
#15 |
|
Senior Member
Join Date: Mar 2011
Location: West Plains, Missouri
Posts: 7,555
|
Re: 55 Wagon Progress
Amazing work...Jim
__________________
my build thread: http://67-72chevytrucks.com/vboard/s...d.php?t=459839 Jimbo's long bed step build:http://67-72chevytrucks.com/vboard/s...t=464626<br /> |
|
|
|
|
11-22-2021, 09:08 AM
|
#16 |
|
Registered User
Join Date: Jan 2013
Location: Leonardtown, MD
Posts: 1,637
|
Re: 55 Wagon Progress
Thanks guys!!
So I've had some questions as to why this or that with modifying the air cleaner. I was going to hold out with the REAL reason, but here goes.... This firewall is just too clean that I can't bring myself to clutter it up (or the wheelwell) by mounting an ignition coil and then being forced into using an overly long coil wire.. .JPG) So as shown here.... this will be the approximate location as we fabricate a sealed cavity from the bottom side of the air cleaner to mount the coil. This should put the coil wire about two inches in front of the distributor... .JPG) So this should give us a nice clean look and keep the firewall as open as we can...
__________________
Robert |
|
|
|
|
11-24-2021, 01:42 AM
|
#17 |
|
Registered User
Join Date: Jan 2013
Location: Leonardtown, MD
Posts: 1,637
|
Re: 55 Wagon Progress
Time for some welding.. TIG used to tack the new bottom in place.....
  I thought my eyesight was going.... time to replace these.. 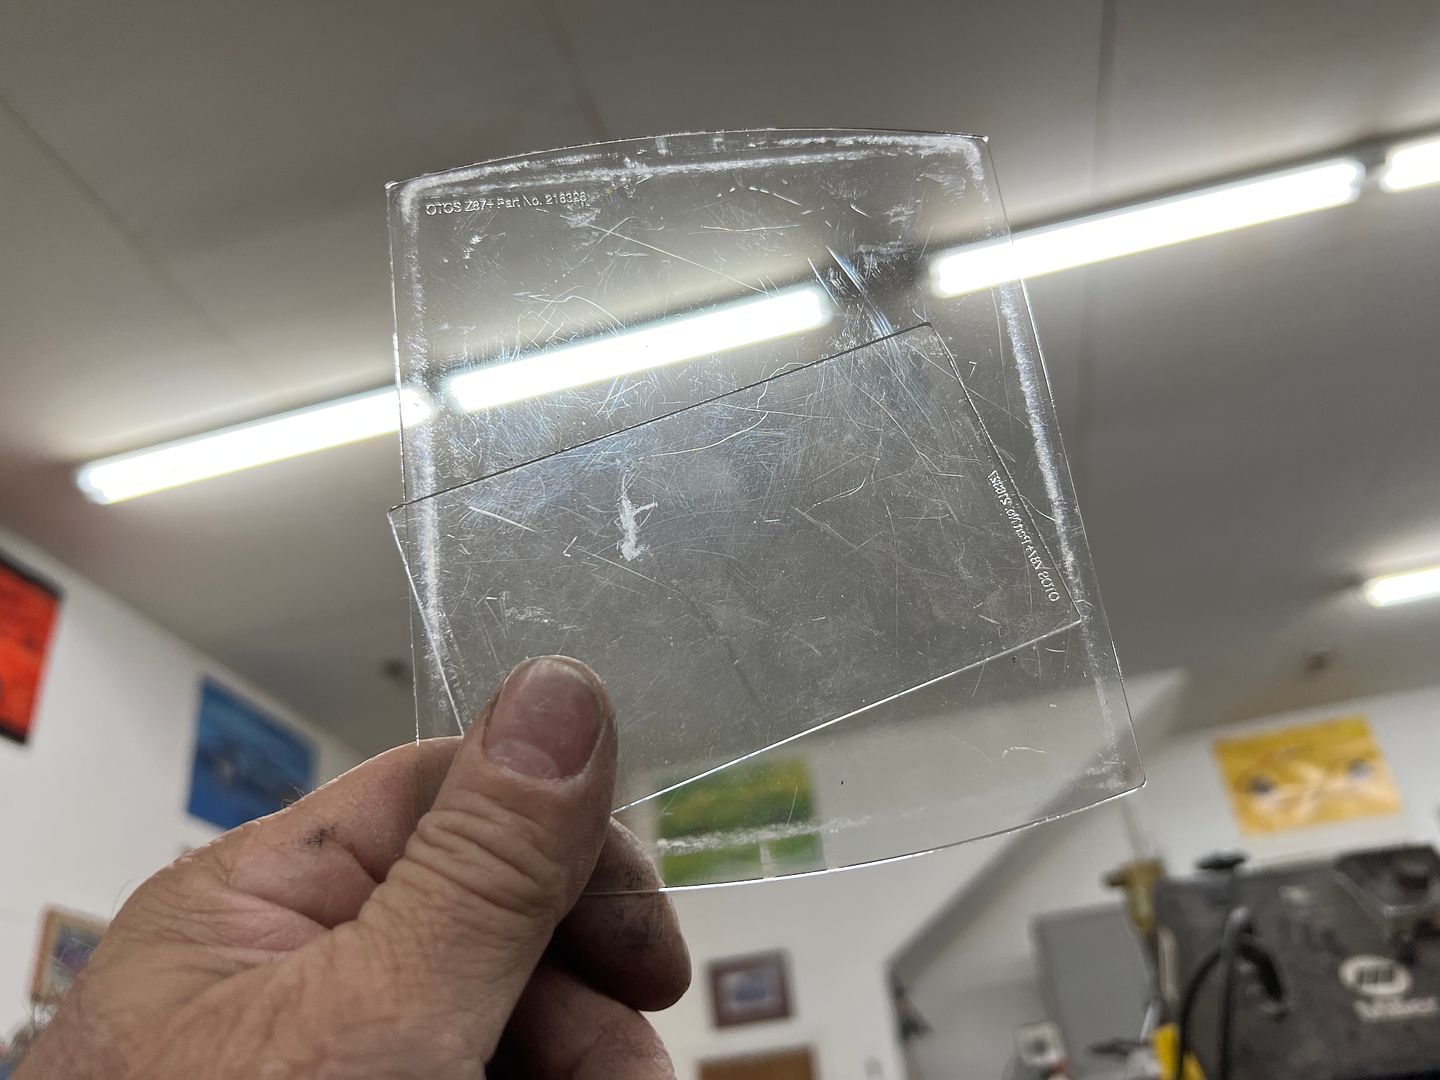 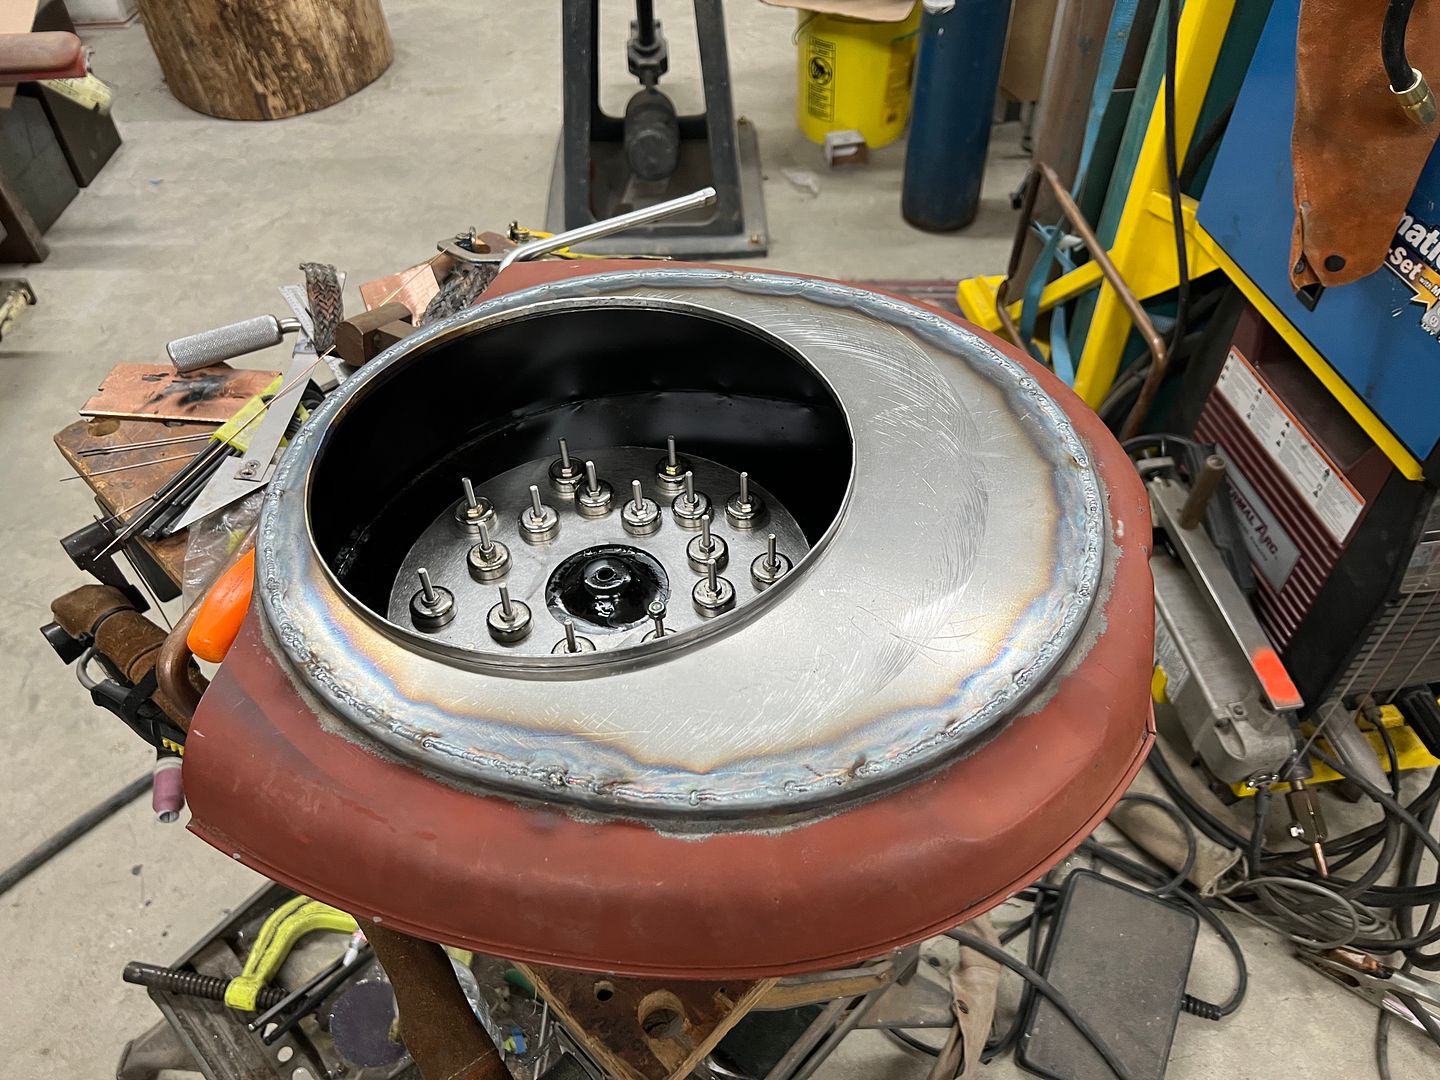 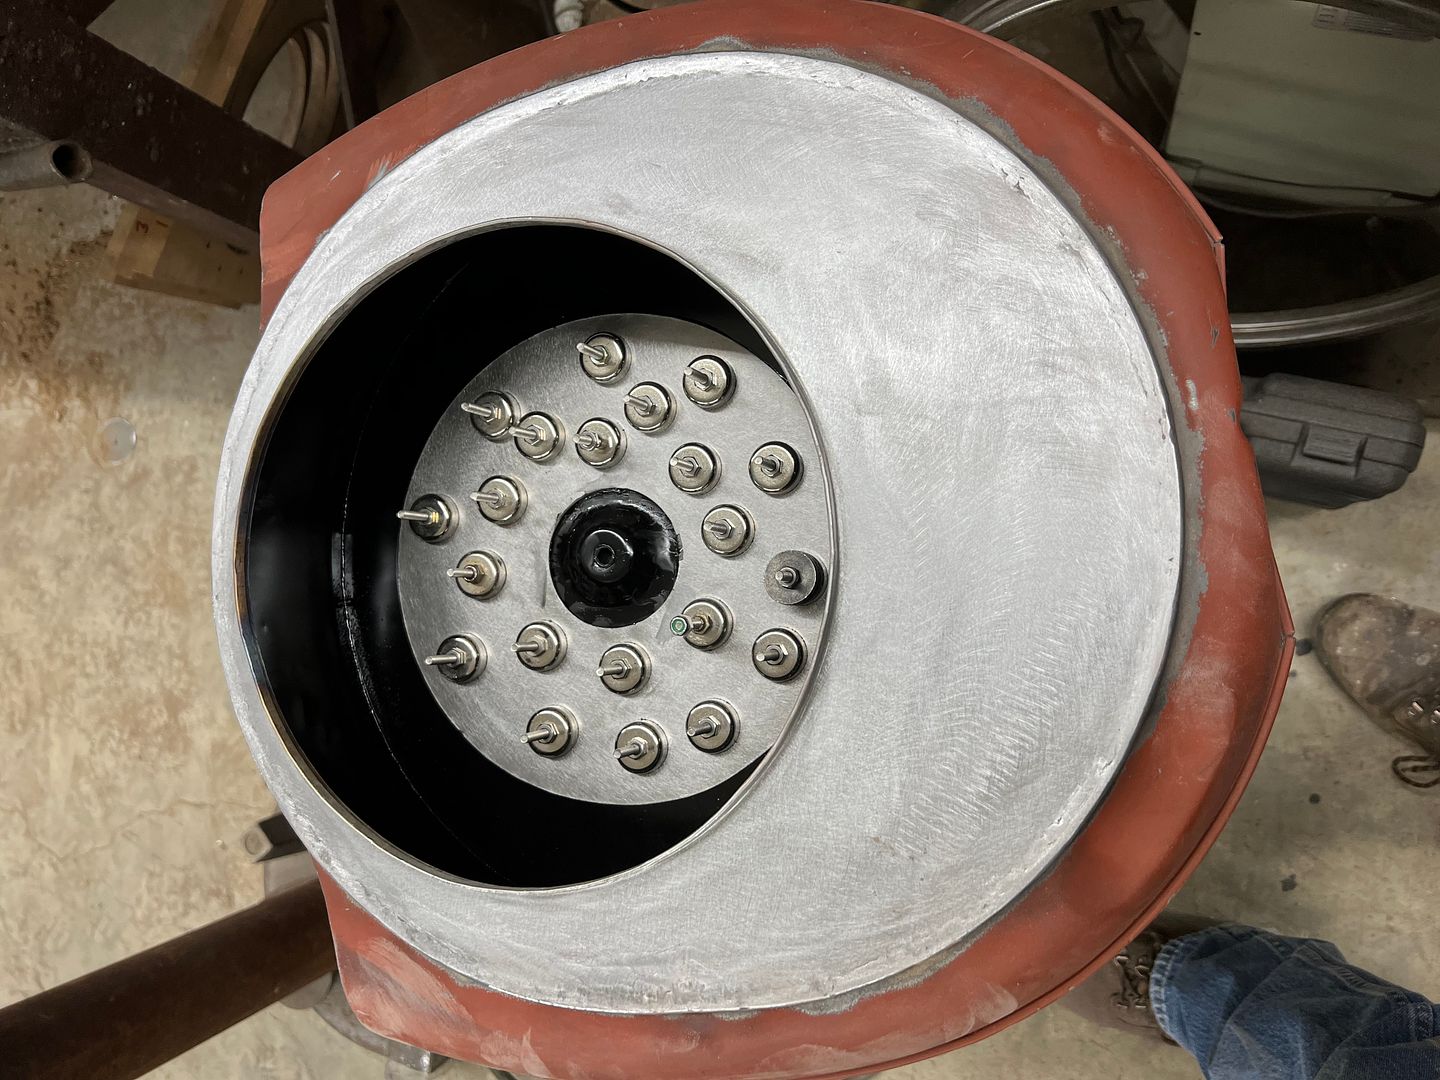 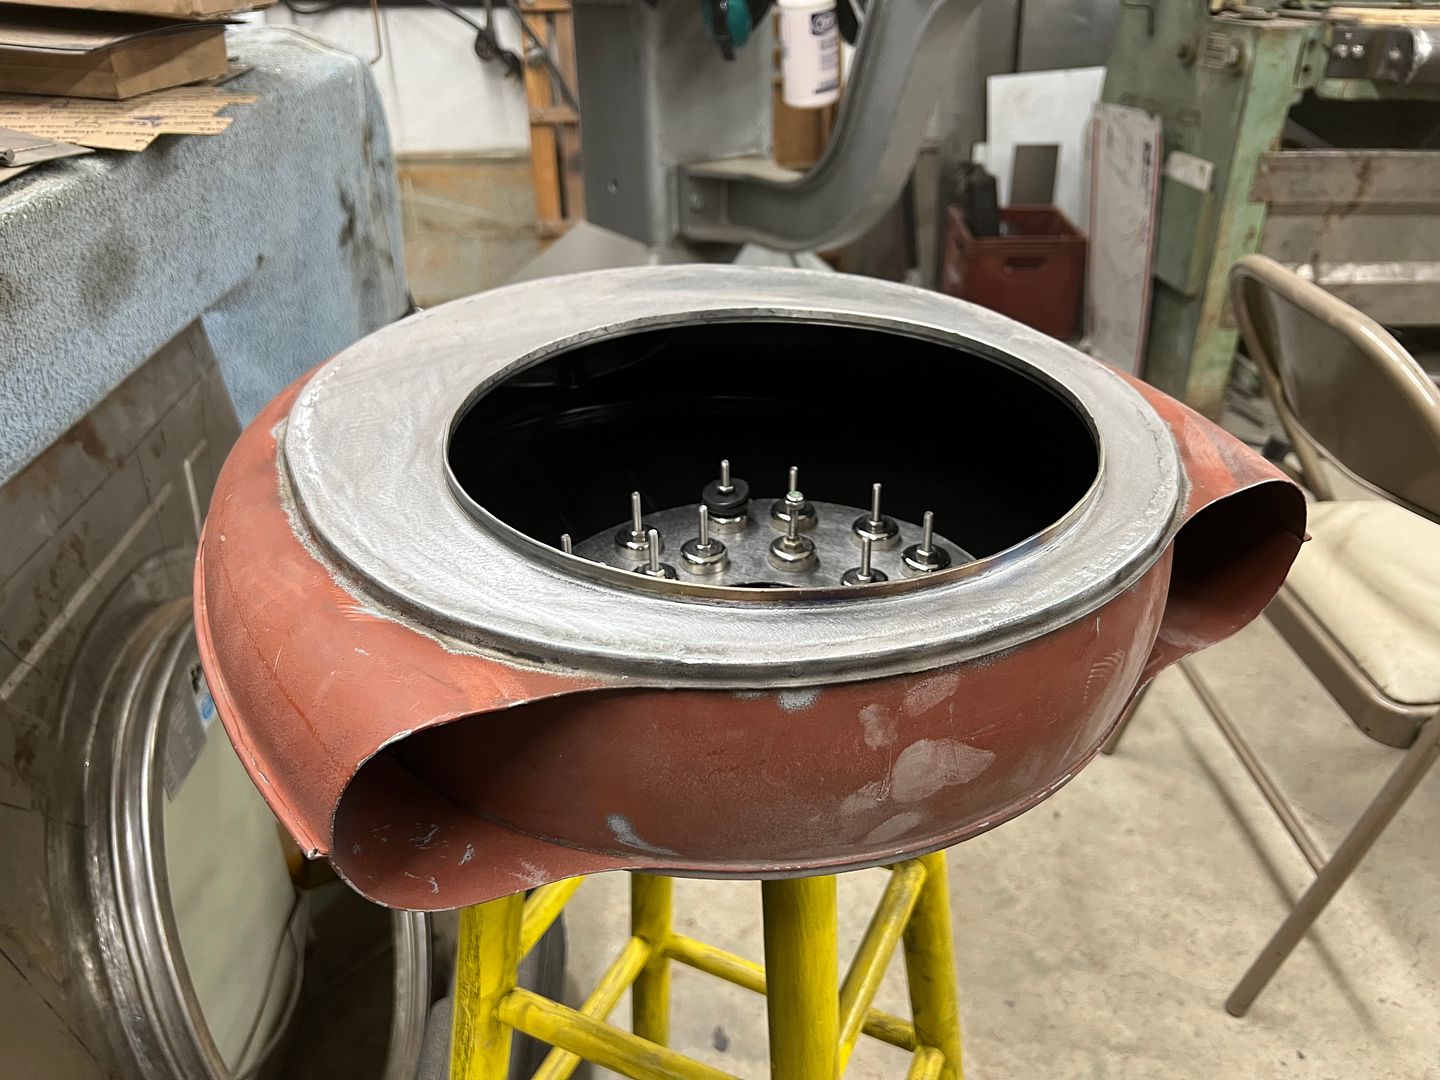 Next, we'll work on the base plate....
__________________
Robert |
|
|
|
|
11-24-2021, 01:56 AM
|
#18 |
|
Post Whore
Join Date: May 2015
Location: Alabama
Posts: 14,608
|
Re: 55 Wagon Progress
I think you need more magnets..!!..haha...
__________________
Mongo...aka Greg RIP Dad RIP Jesse 1981 C30 LQ9 NV4500..http://67-72chevytrucks.com/vboard/s...d.php?t=753598 Mongos AD- LS3 TR6060...http://67-72chevytrucks.com/vboard/s...34#post8522334 Columbus..the 1957 IH 4x4...http://67-72chevytrucks.com/vboard/s...63#post8082563 2023 Chevy Z71..daily driver |
|
|
|
|
11-27-2021, 01:16 AM
|
#19 |
|
Registered User
Join Date: Jan 2013
Location: Leonardtown, MD
Posts: 1,637
|
Re: 55 Wagon Progress
Greg, it's just like clamps, never enough
More work on the Caddy air cleaner, time to fabricate the pocket for the coil. Our radius brake that is bolted to the front of the shear is used to bend some 18ga into a horseshoe. One side is trimmed short and the other is left long to bend and form the bottom in the magnetic brake. 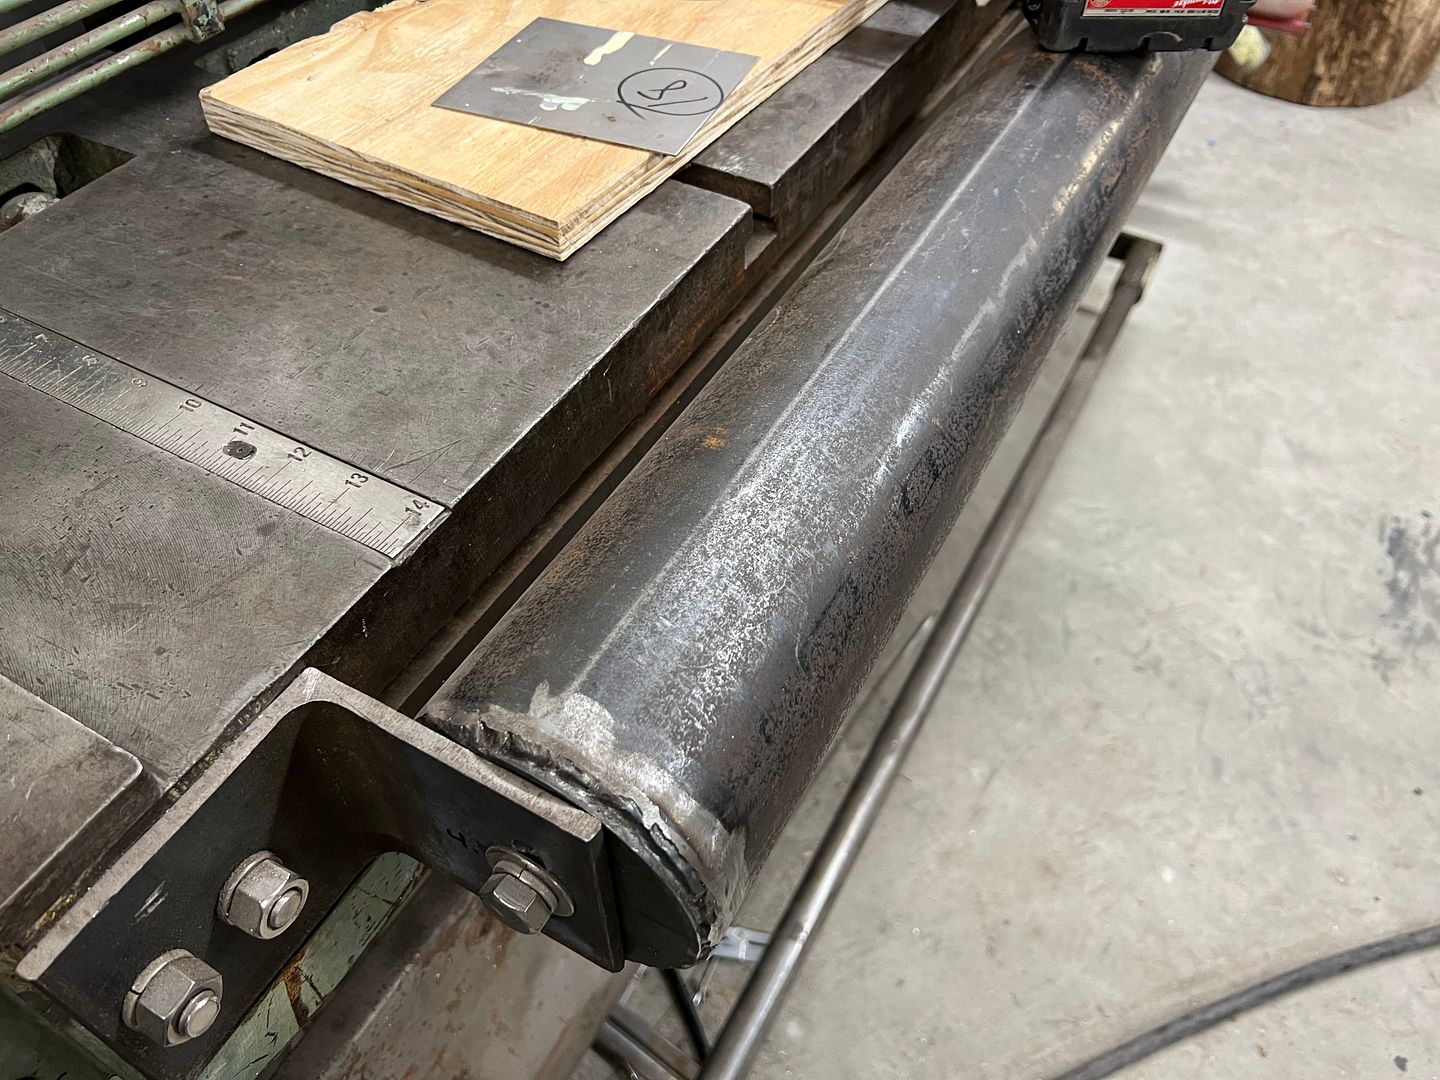 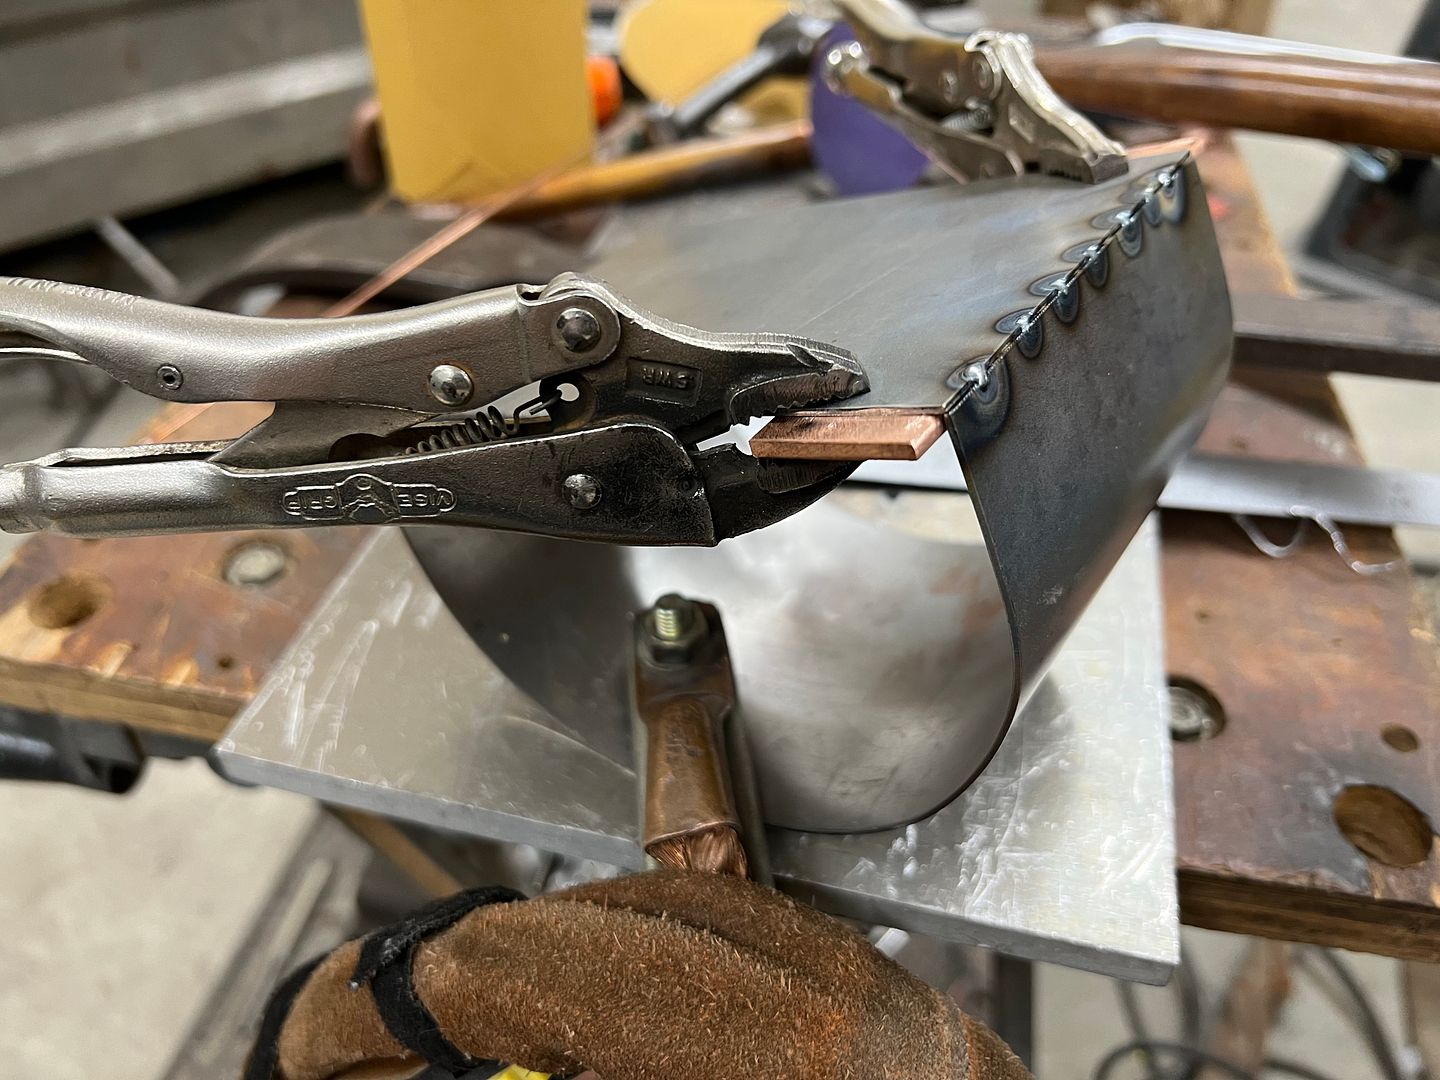 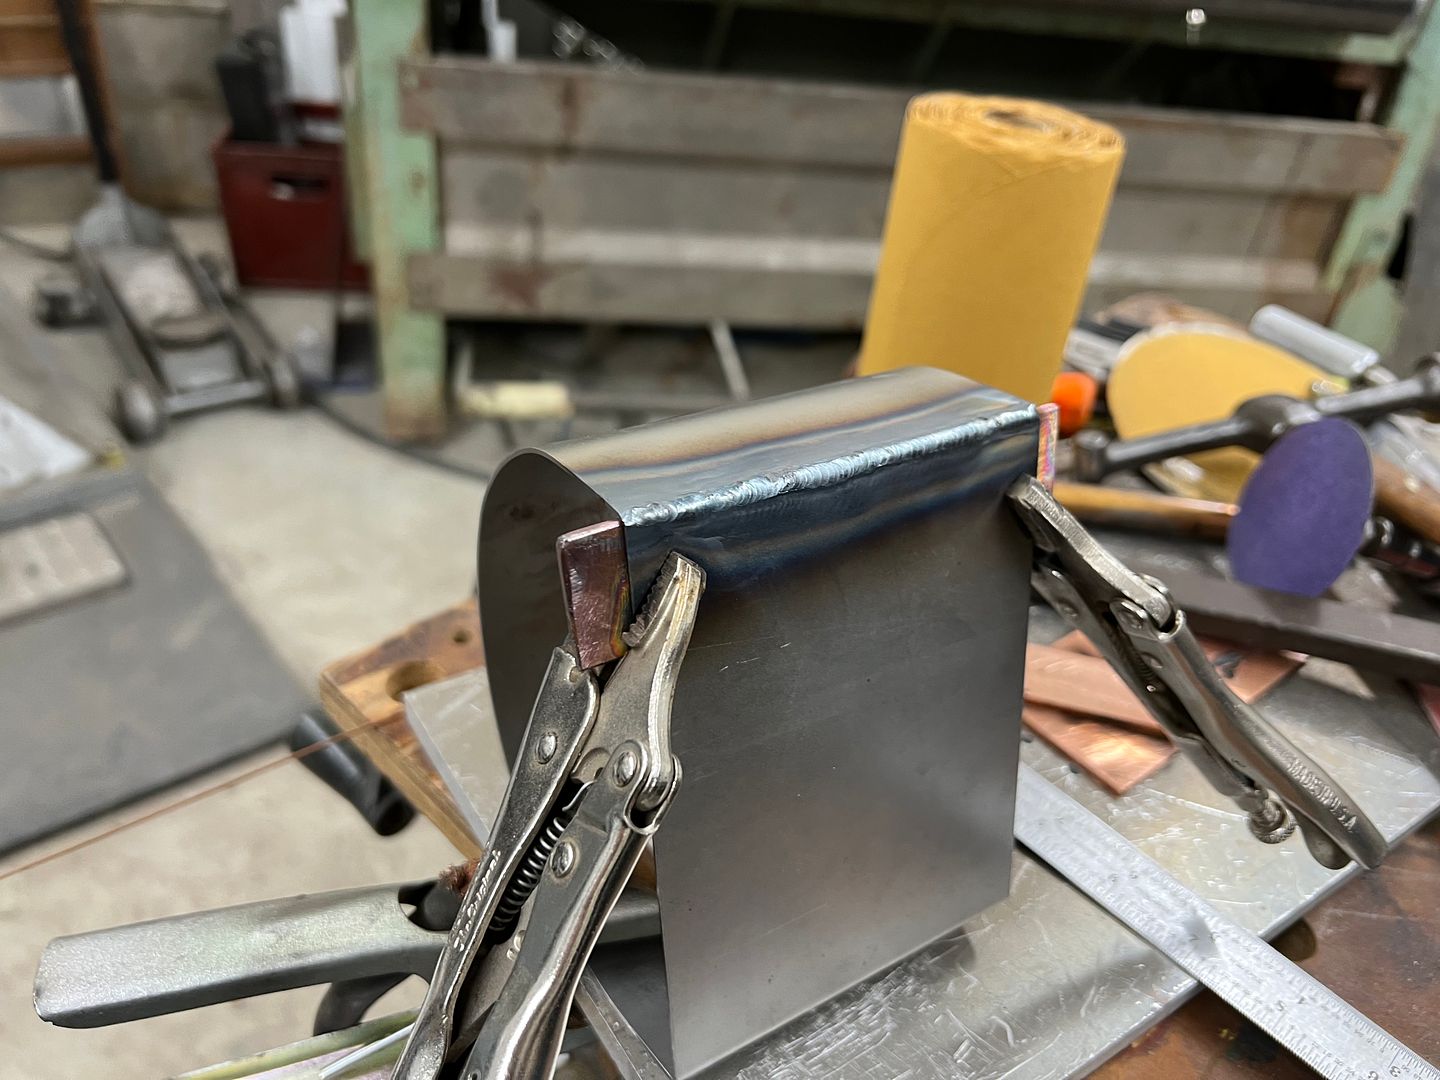 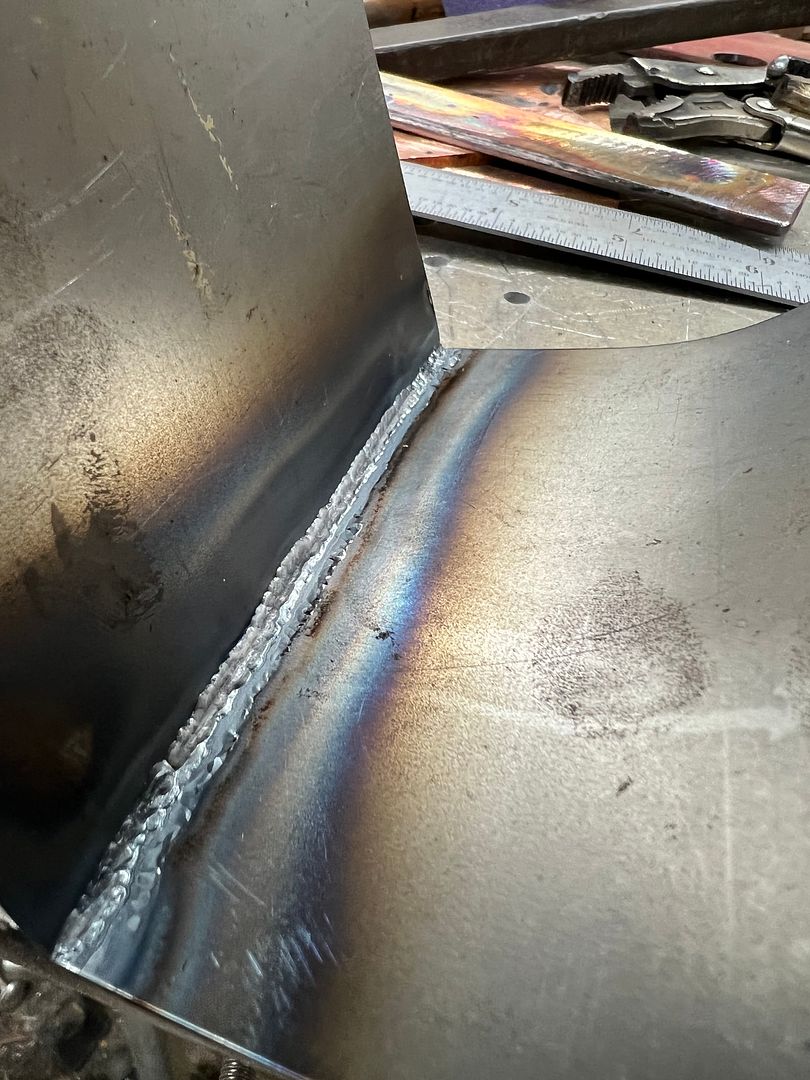 And end plate is cut out to seal off the void from the rest of the air cleaner innards. This gets tacked in place and then fusion welded using the TIG.  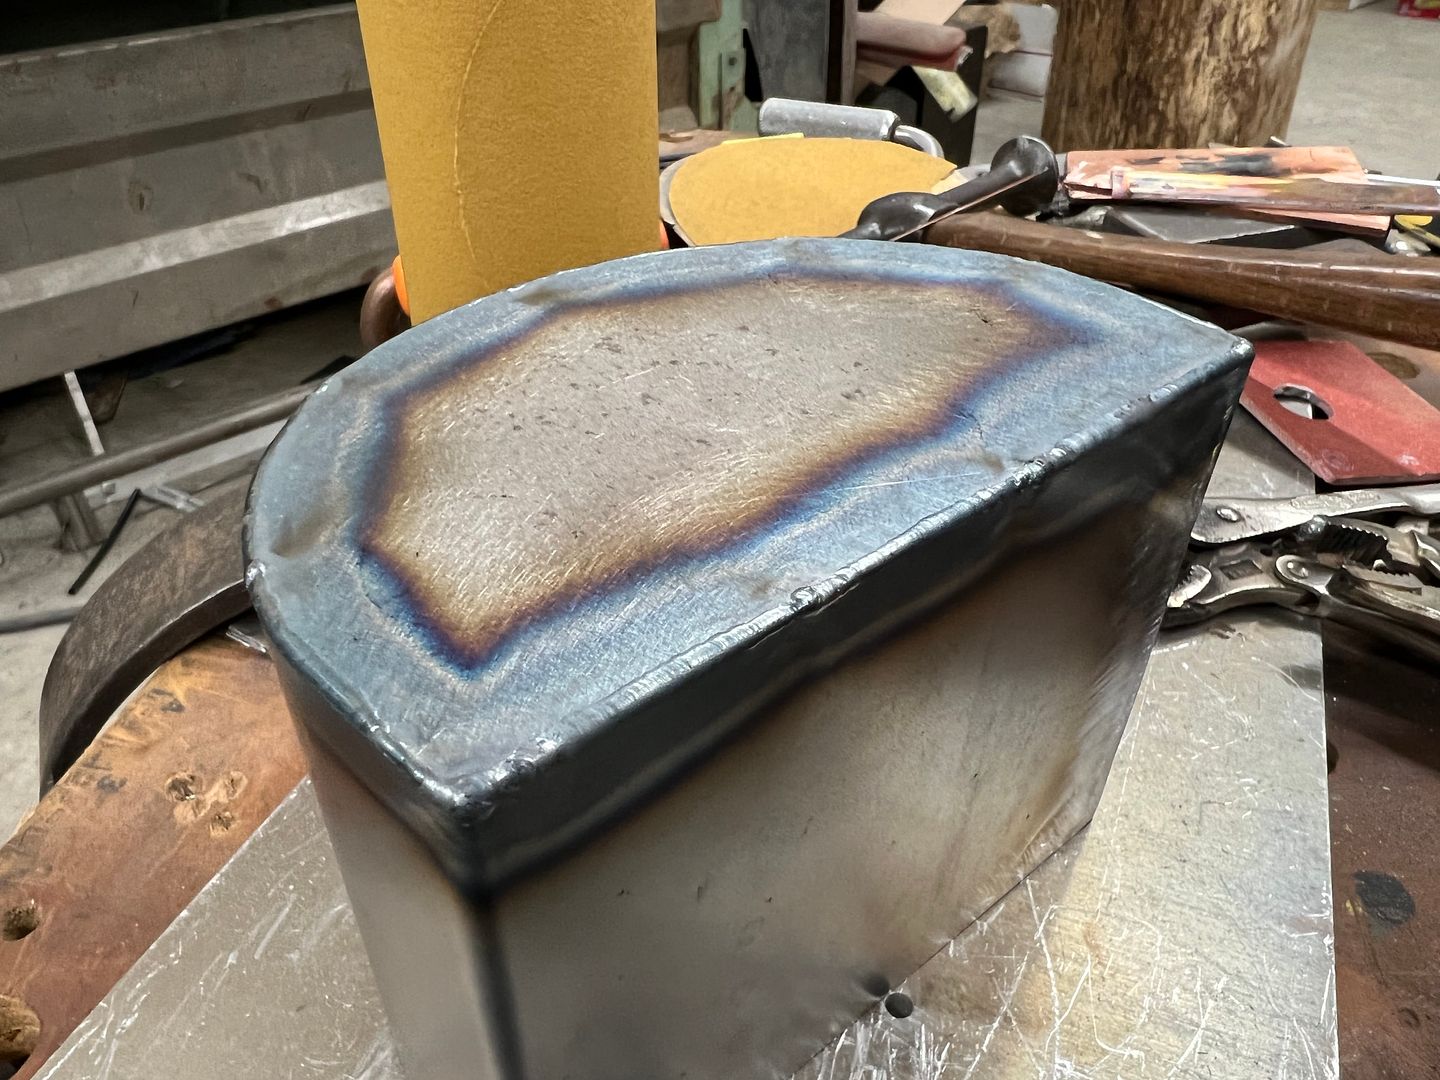 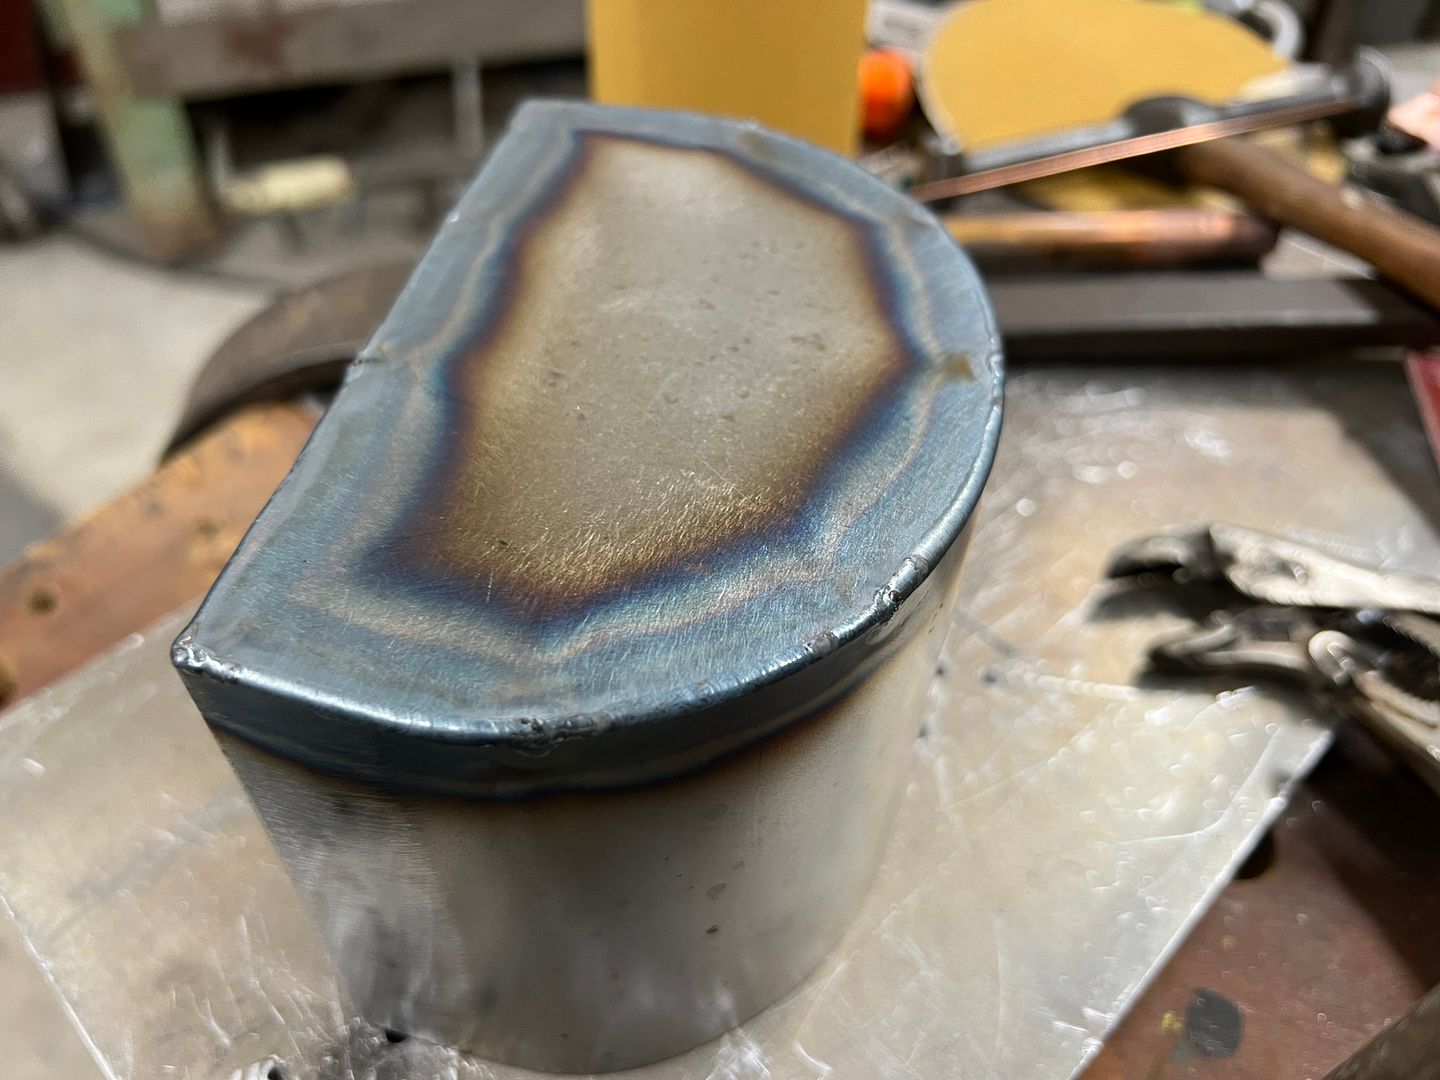 A holesaw is used to get the hole started and offset Wiss snips to trim out the hole in both the housing and the mounting flange. TIG tacked and fusion welding on the flange, and it then gets trimmed to fit inside the air cleaner housing. 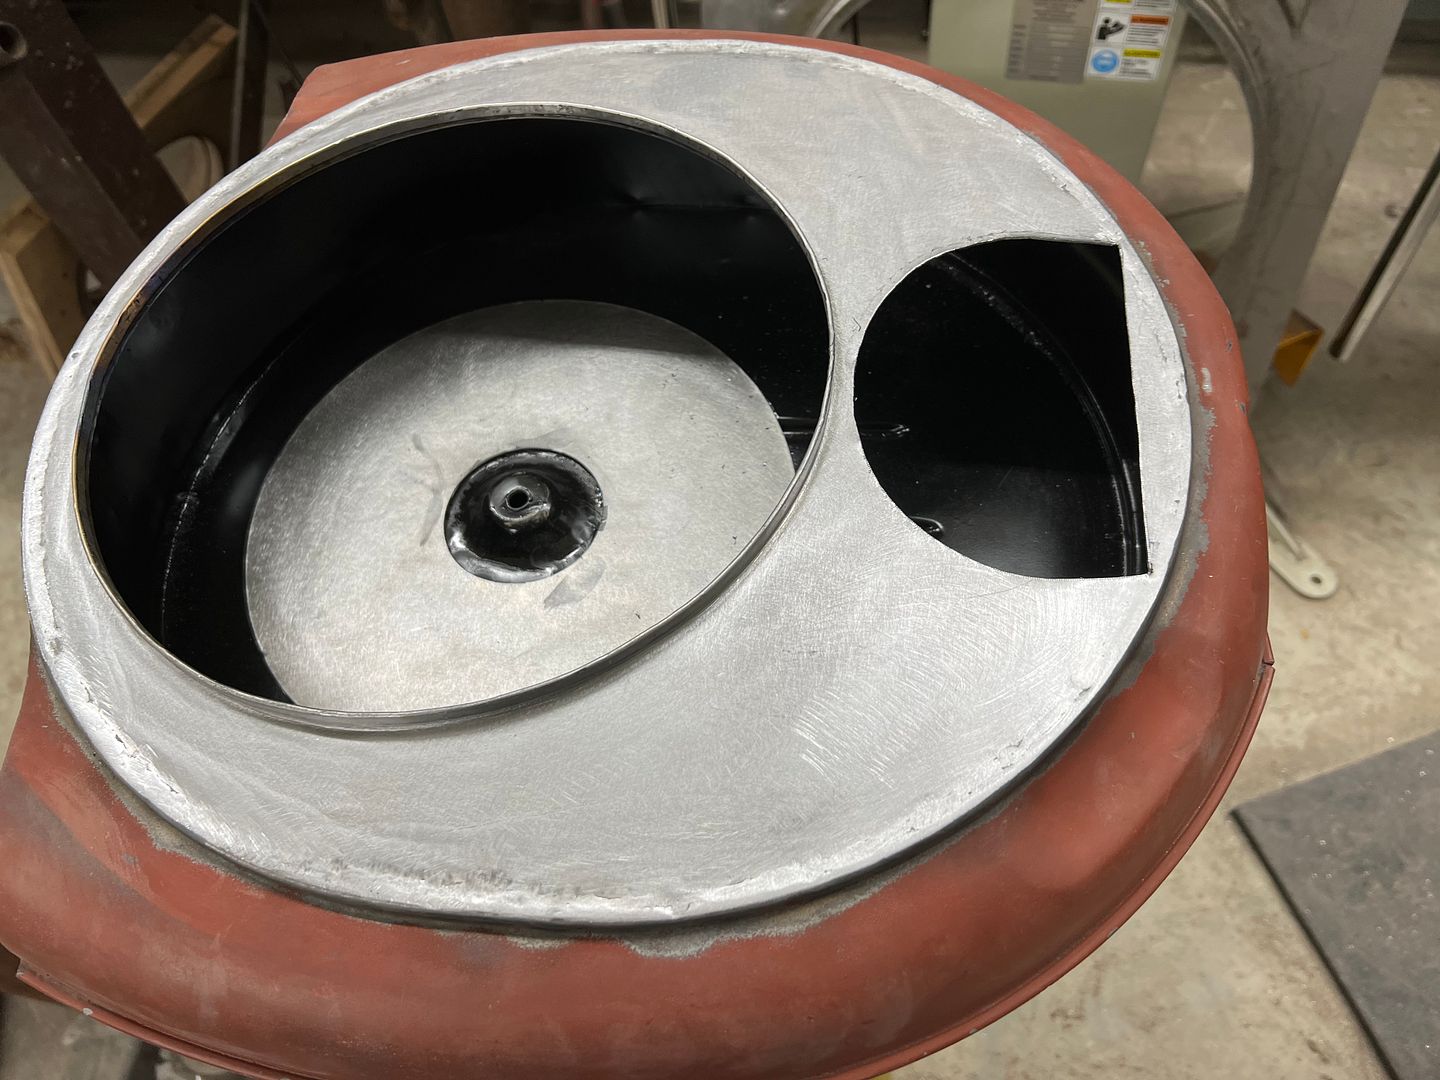 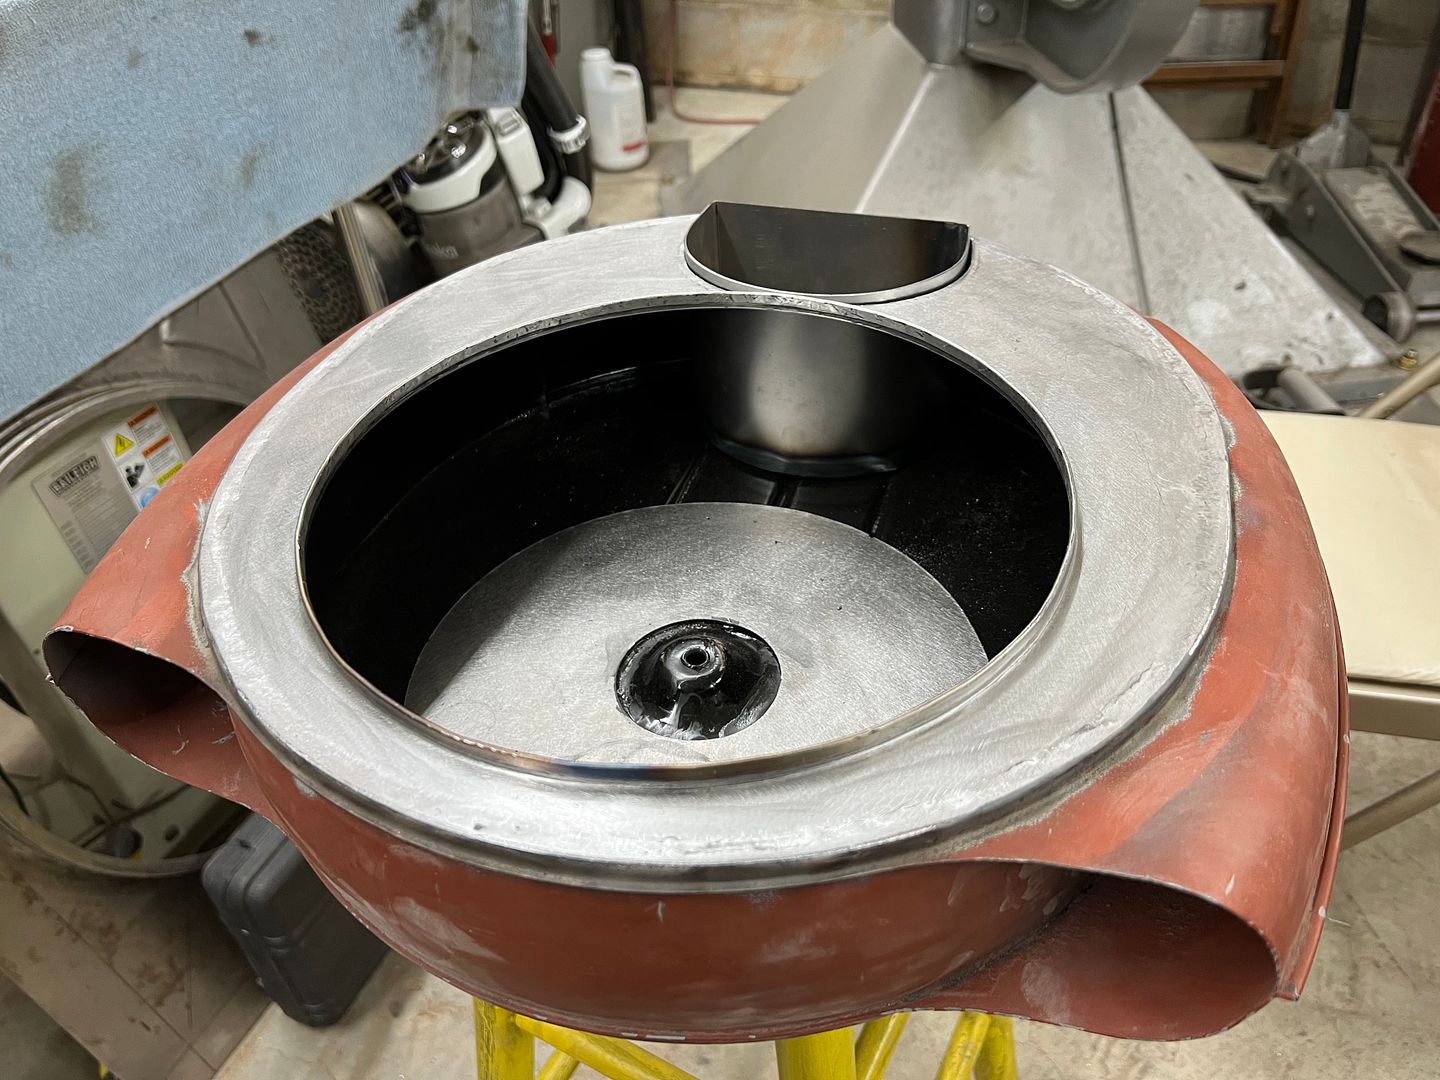  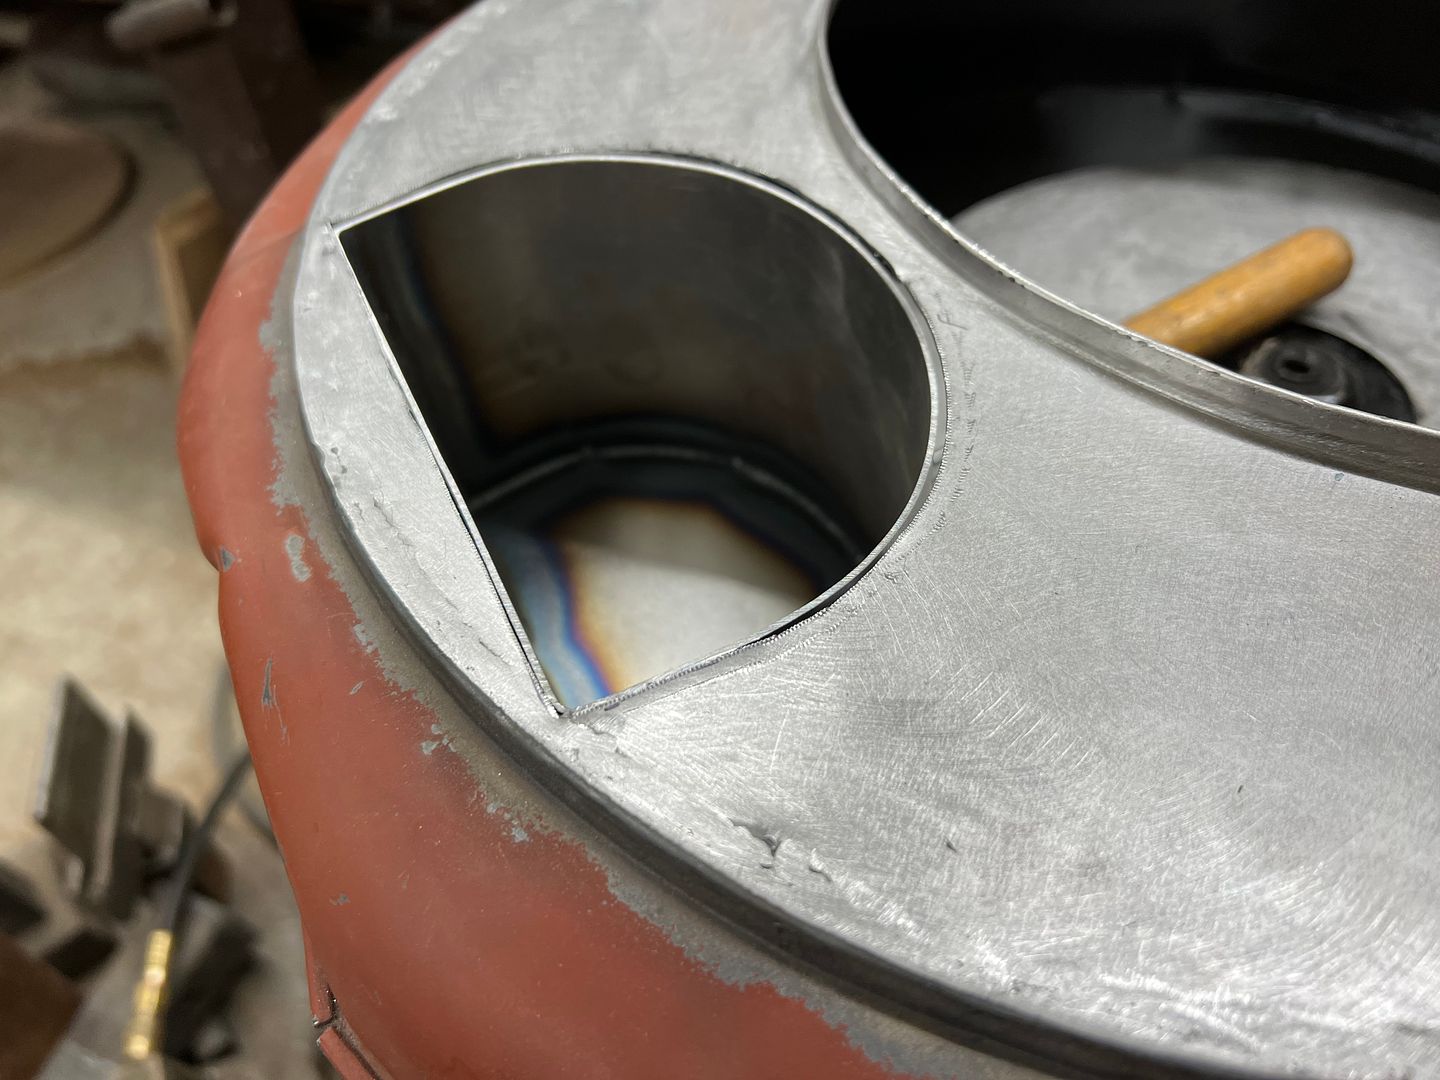 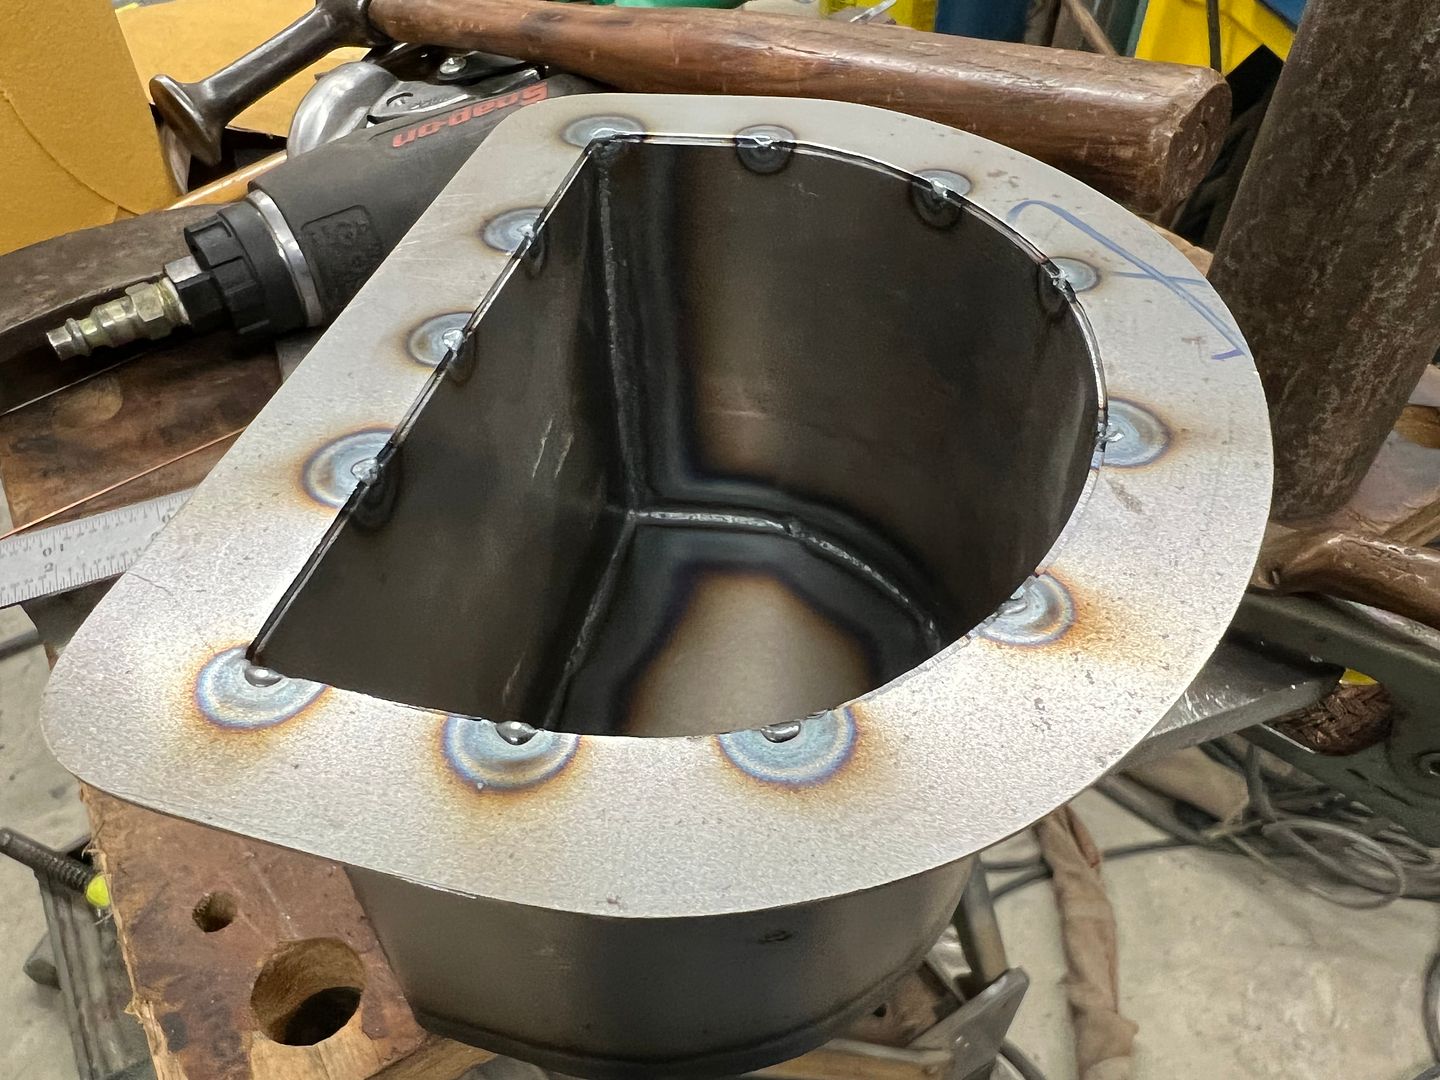 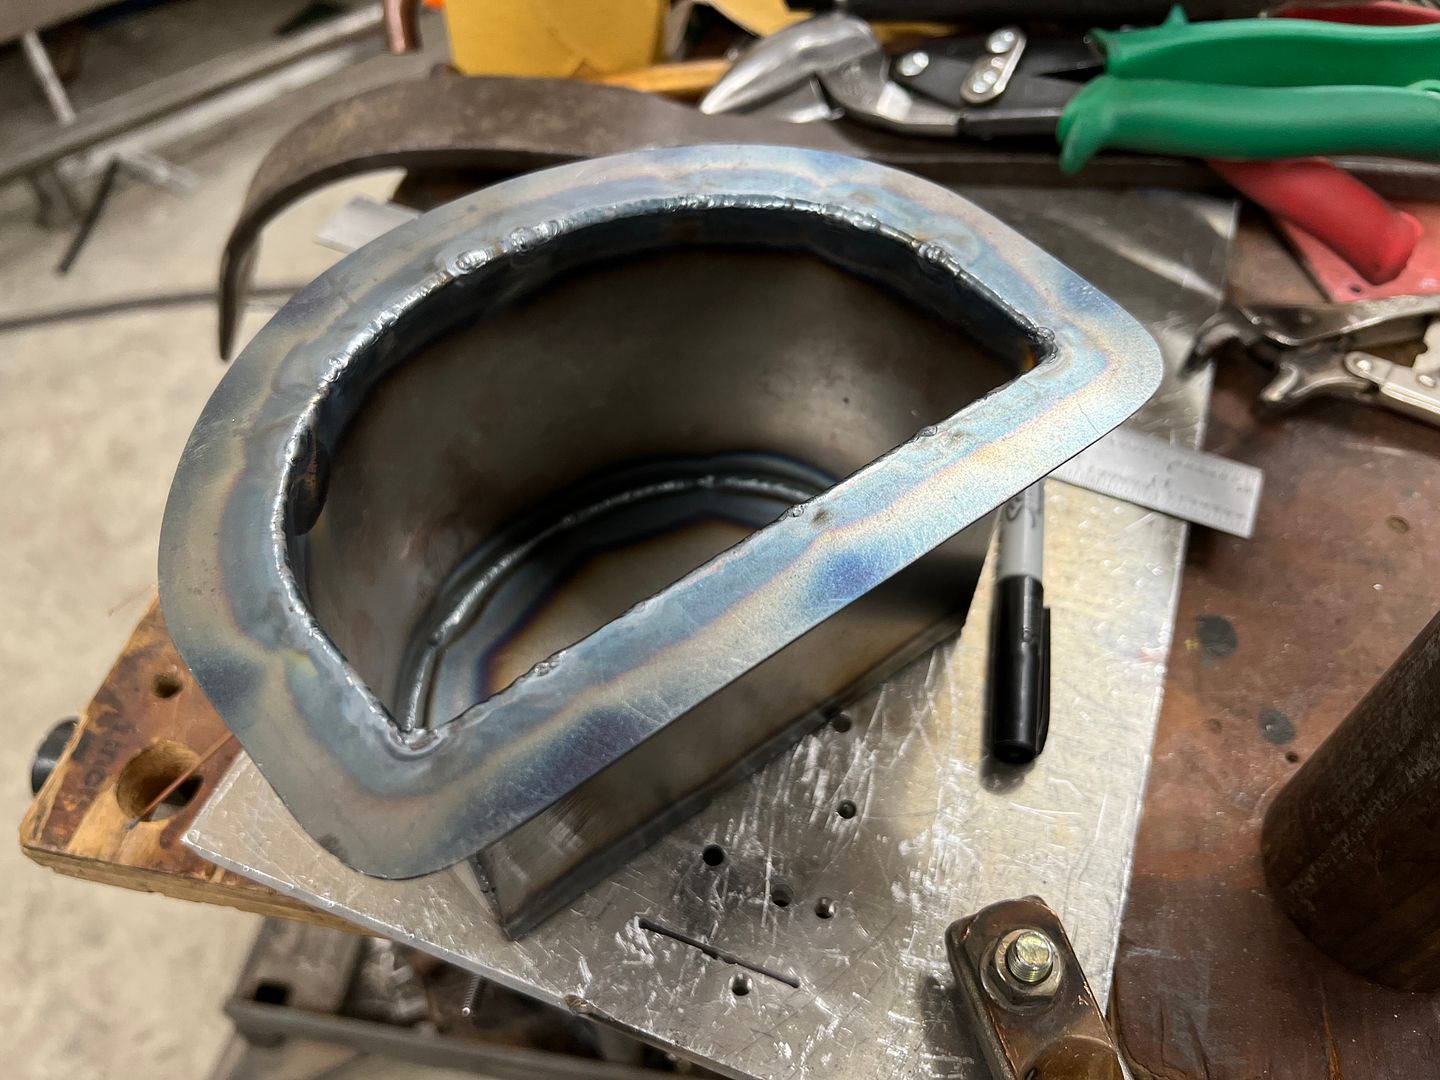 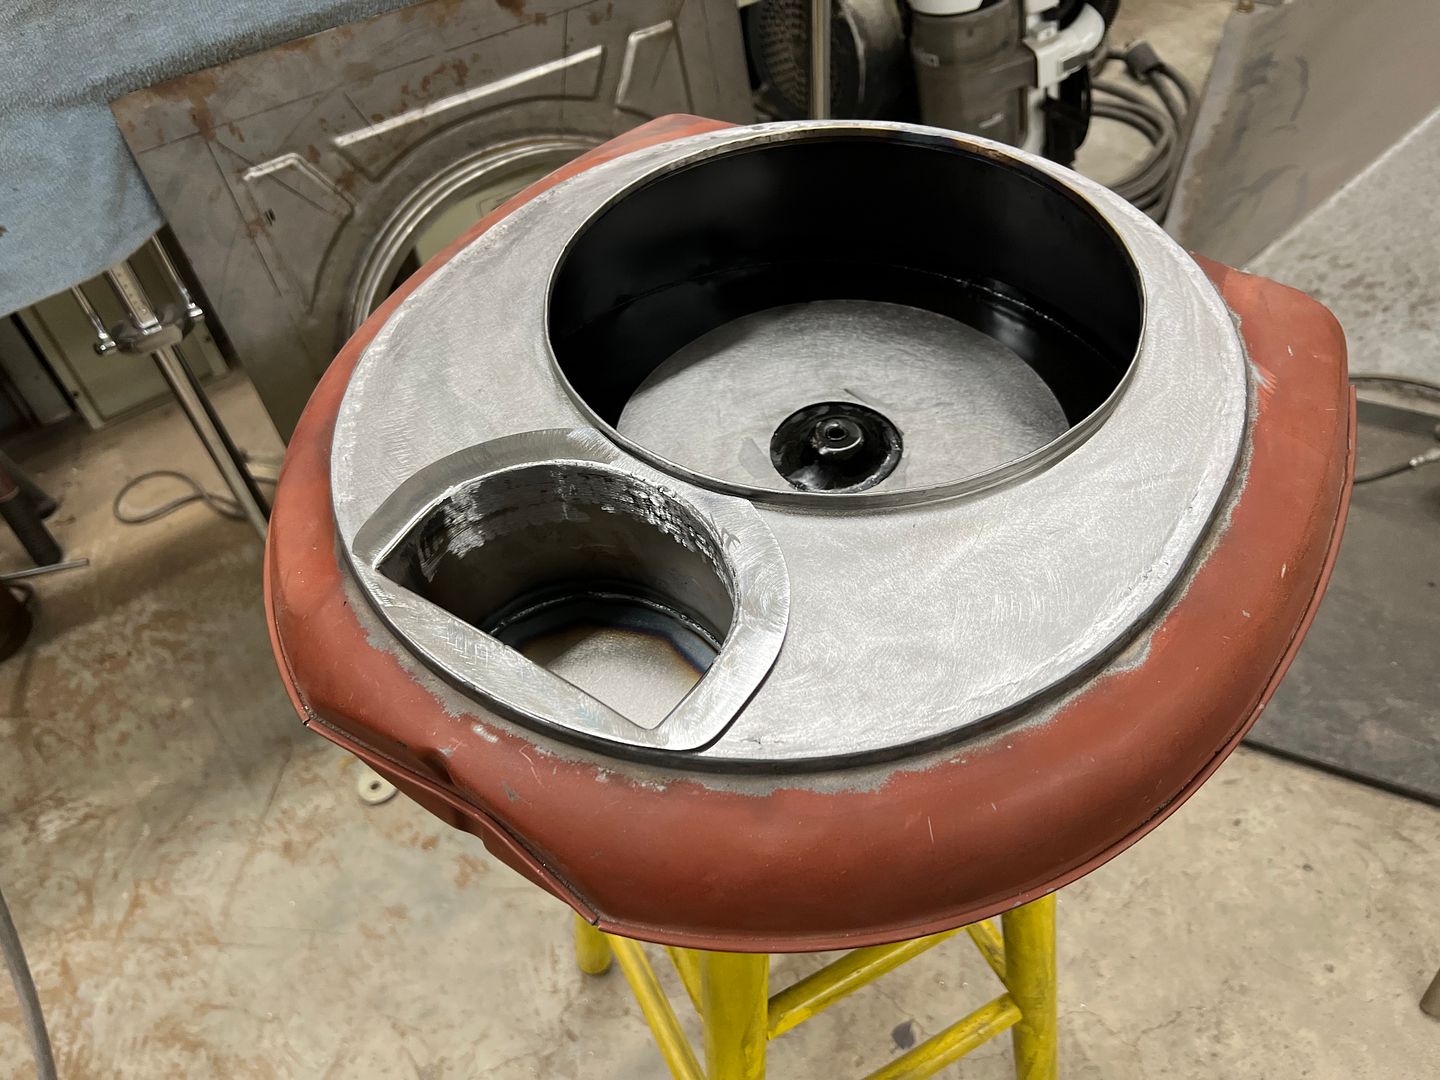 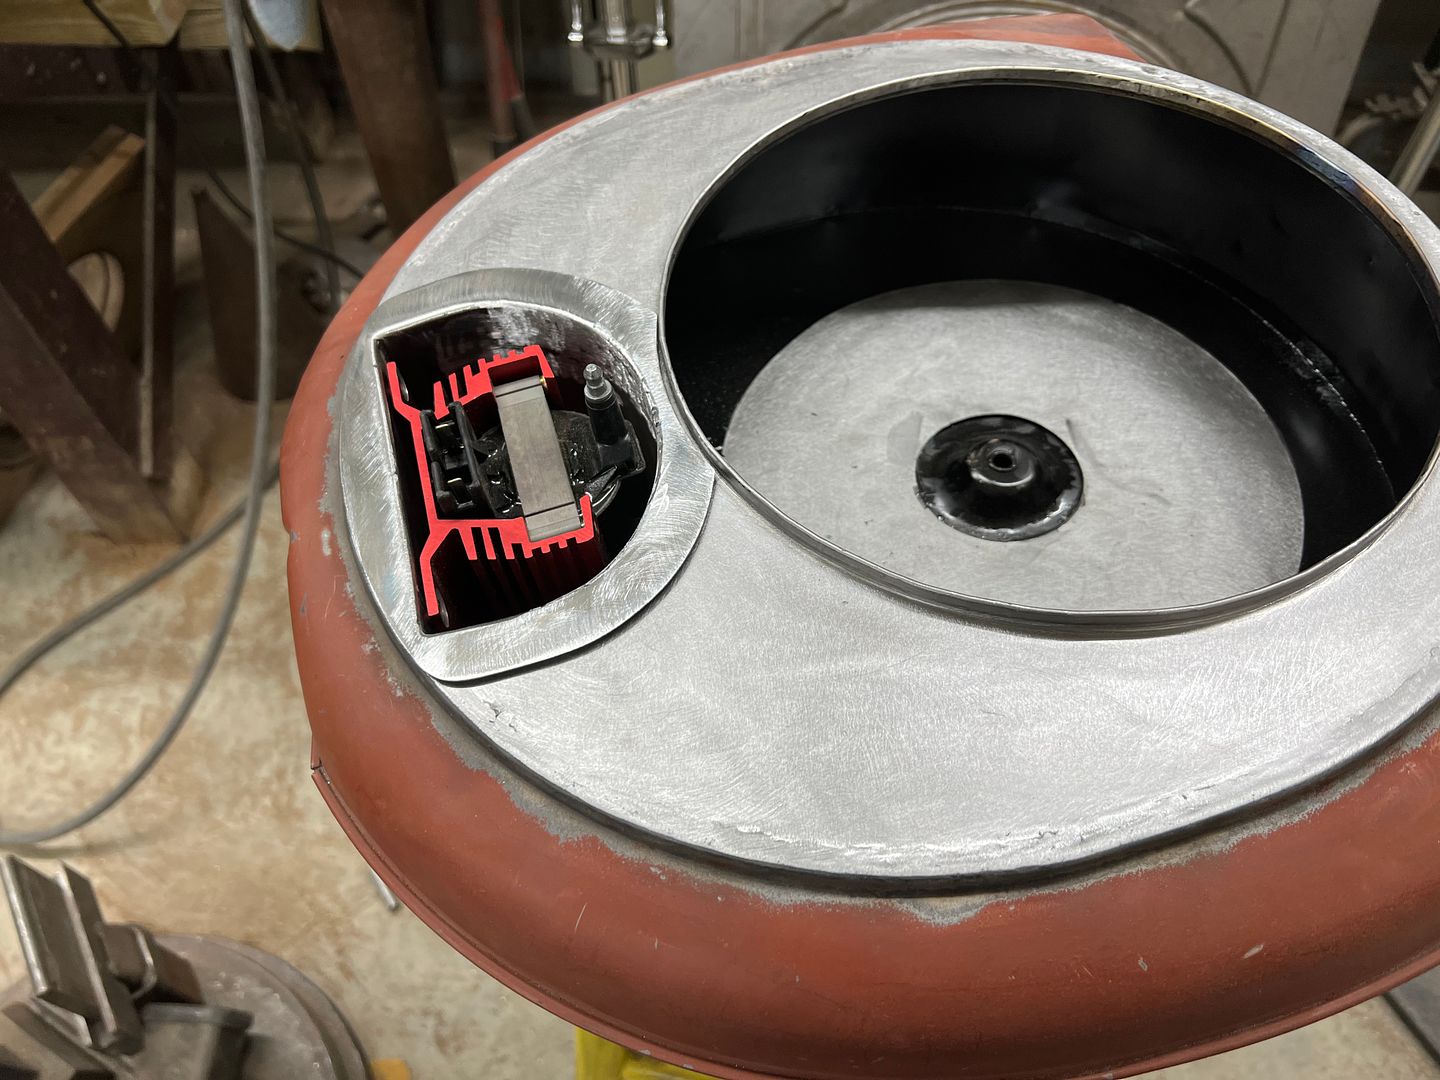 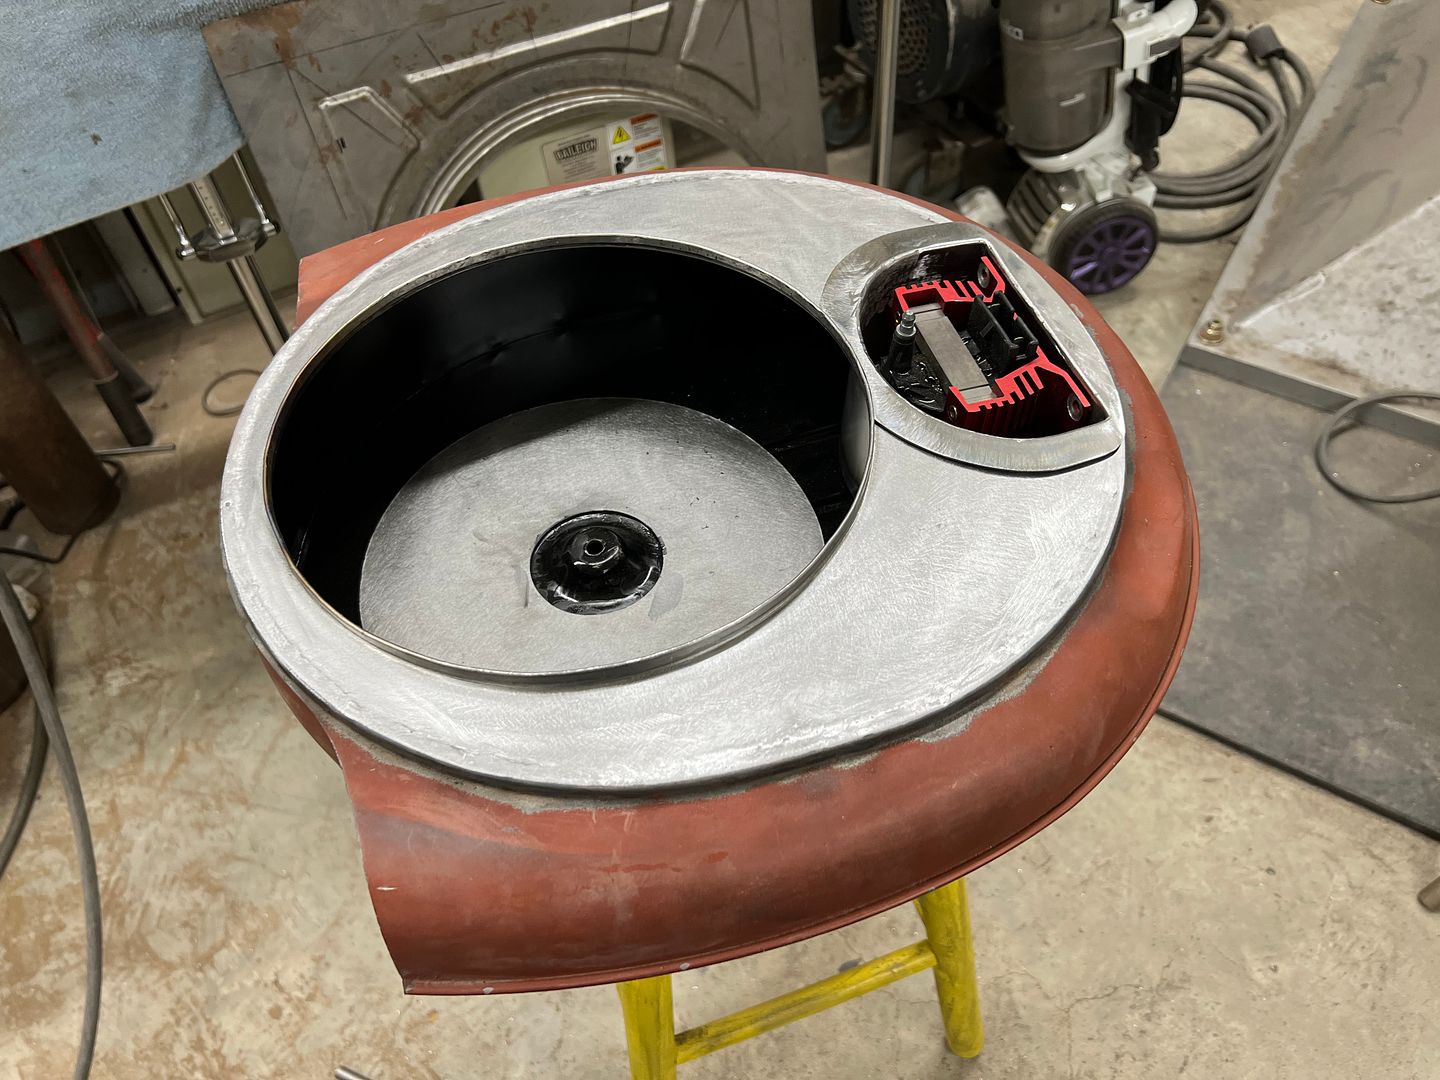 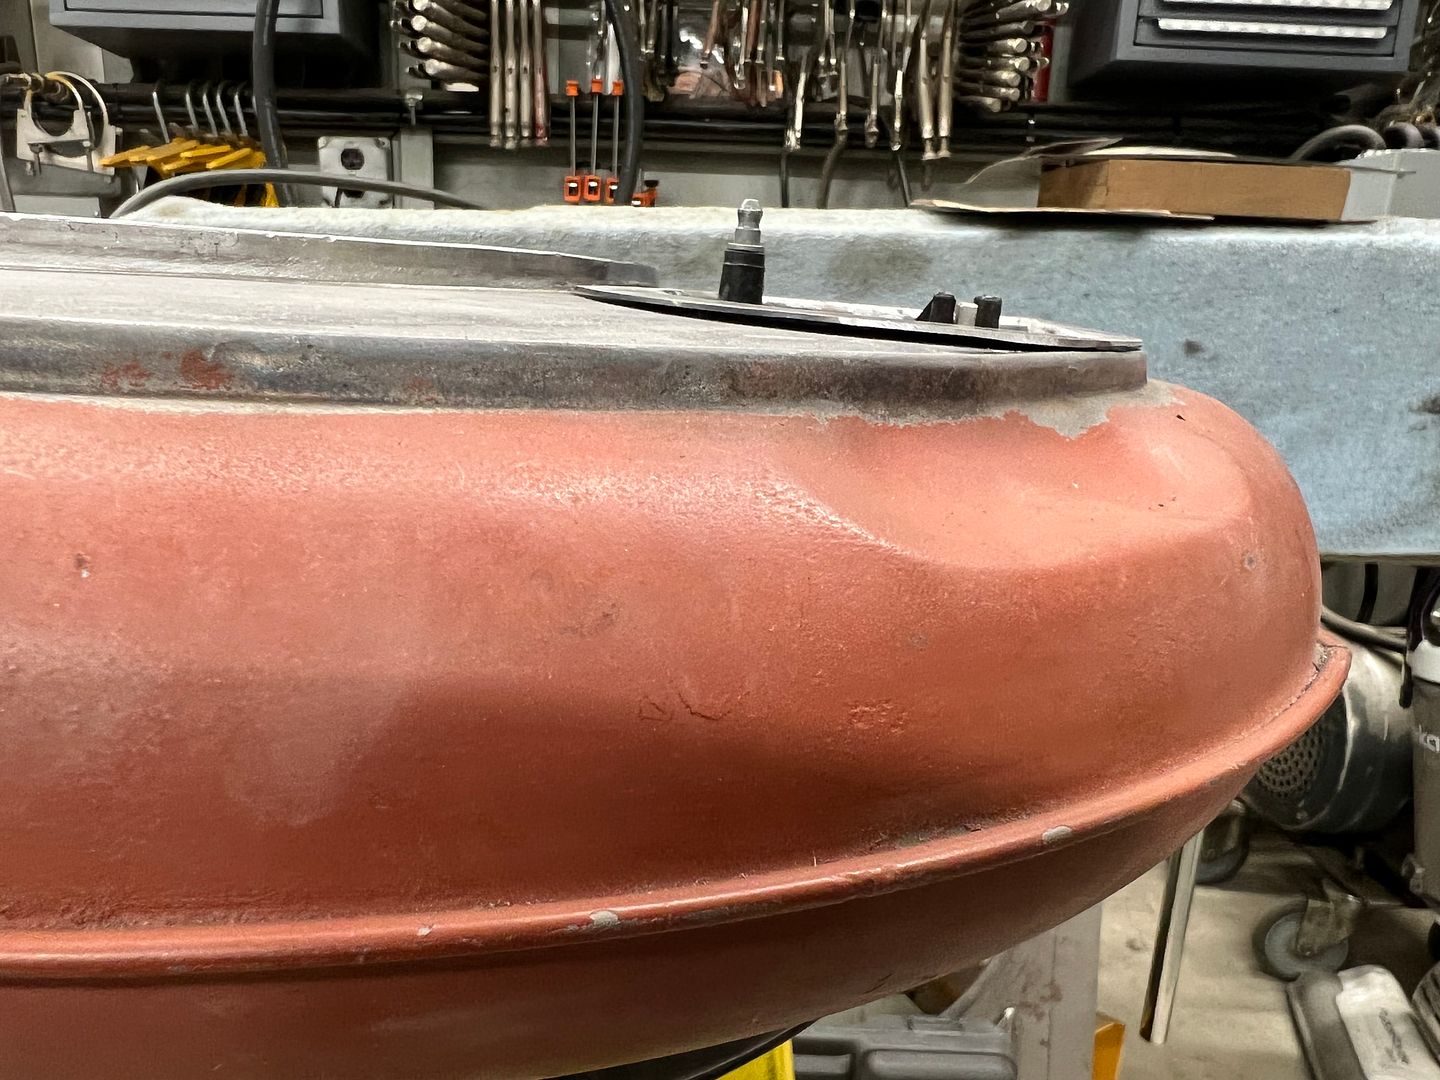 Yup, that's what I was looking for...
__________________
Robert |
|
|
|
|
11-27-2021, 04:17 AM
|
#20 |
|
Post Whore
Join Date: May 2015
Location: Alabama
Posts: 14,608
|
Re: 55 Wagon Progress
looks great..!!!
any worries about the coil overheating tucked up in there?
__________________
Mongo...aka Greg RIP Dad RIP Jesse 1981 C30 LQ9 NV4500..http://67-72chevytrucks.com/vboard/s...d.php?t=753598 Mongos AD- LS3 TR6060...http://67-72chevytrucks.com/vboard/s...34#post8522334 Columbus..the 1957 IH 4x4...http://67-72chevytrucks.com/vboard/s...63#post8082563 2023 Chevy Z71..daily driver |
|
|
|
|
11-27-2021, 11:40 AM
|
#21 | |
|
Registered User
Join Date: May 2010
Location: Lawrenceville, Ga
Posts: 2,640
|
Re: 55 Wagon Progress
Quote:
|
|
|
|
|
|
11-27-2021, 10:27 AM
|
#22 |
|
low n' slo
Join Date: Mar 2009
Location: rosenberg, texas
Posts: 5,143
|
Re: 55 Wagon Progress
wow, that turned out nice
__________________
67 1/2 ton Suburban - Project DRGNWGN. Build thread  -_--_--_ _________ _--_-_ -/____|__|__\__ ,.,,,.,.,,.,|_O _______ O_] |
|
|
|
|
11-27-2021, 01:19 PM
|
#23 |
|
Registered User
Join Date: Jan 2013
Location: Leonardtown, MD
Posts: 1,637
|
Re: 55 Wagon Progress
We have more tricks coming to take care of air circulation.
Posted via Mobile Device |
|
|
|
|
11-28-2021, 12:24 AM
|
#24 |
|
Registered User
Join Date: Jan 2013
Location: Leonardtown, MD
Posts: 1,637
|
Re: 55 Wagon Progress
Now for our bottom plate for the air cleaner.. In order to keep the filter located properly (keep it from moving around) we decided to add a bead to the bottom of the plate.
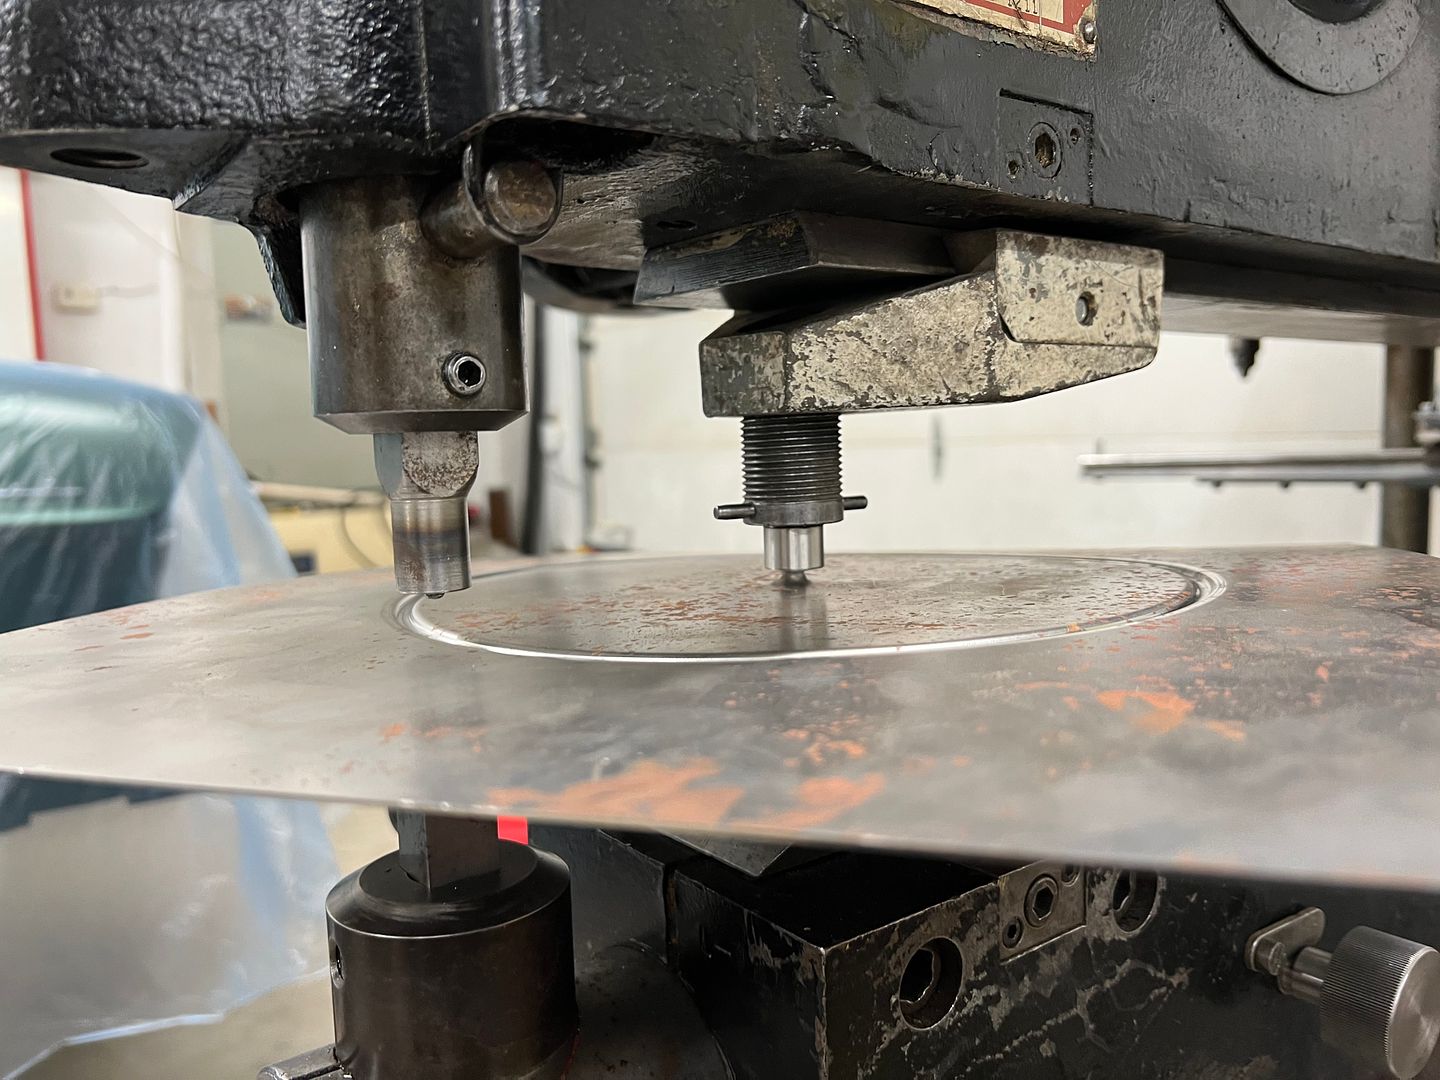 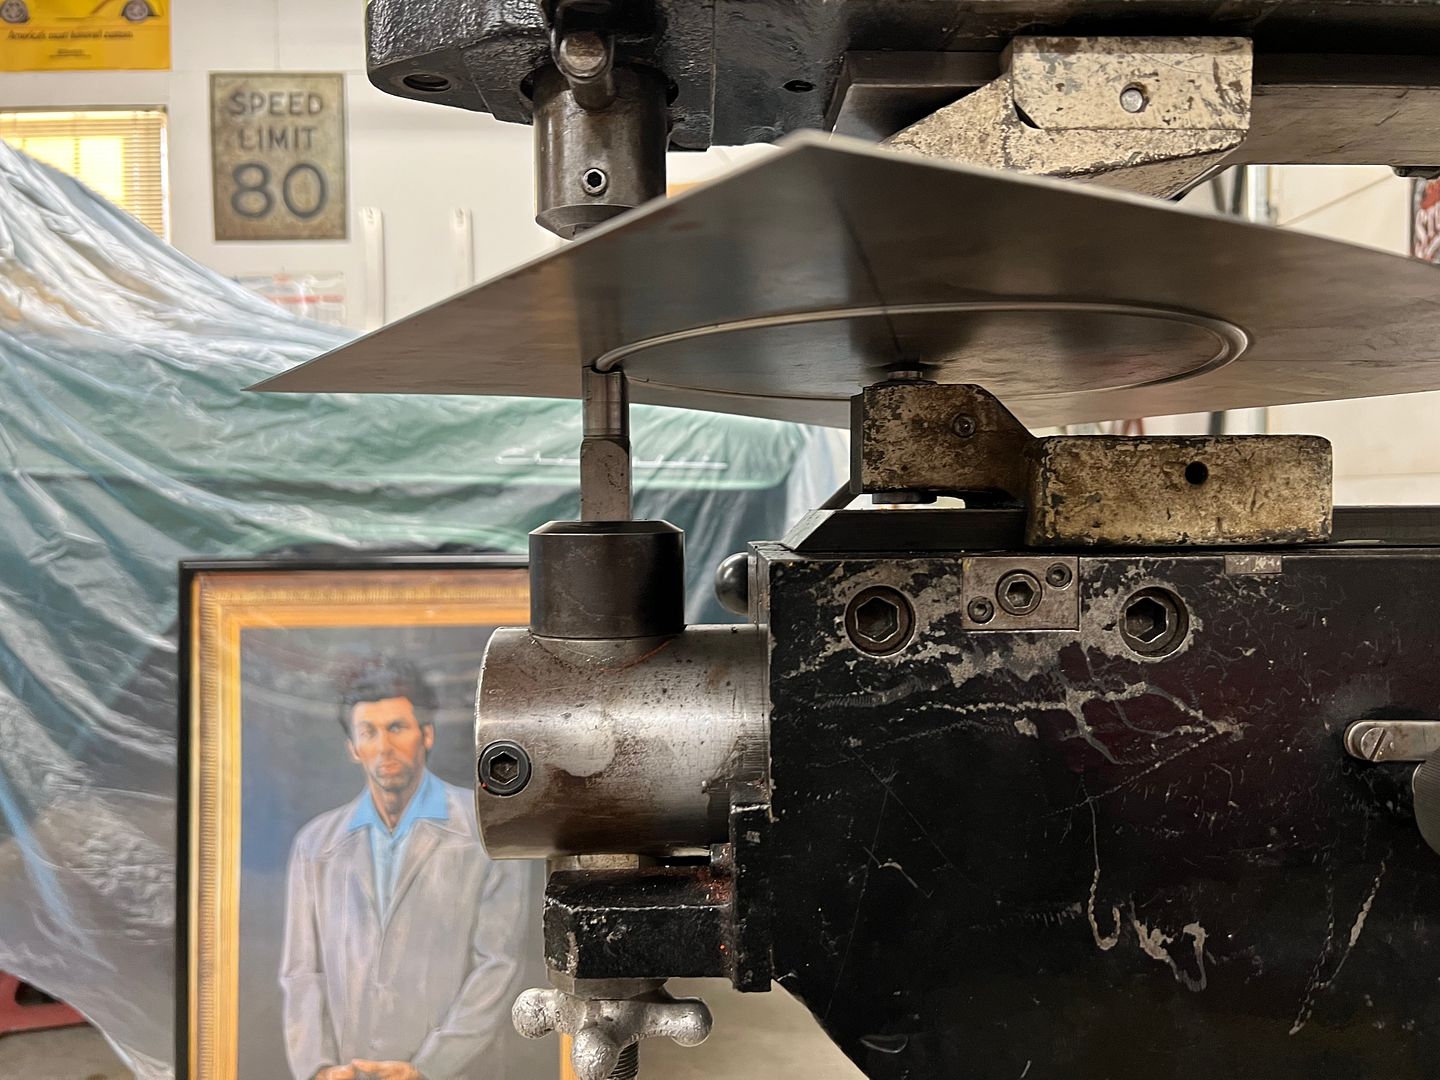 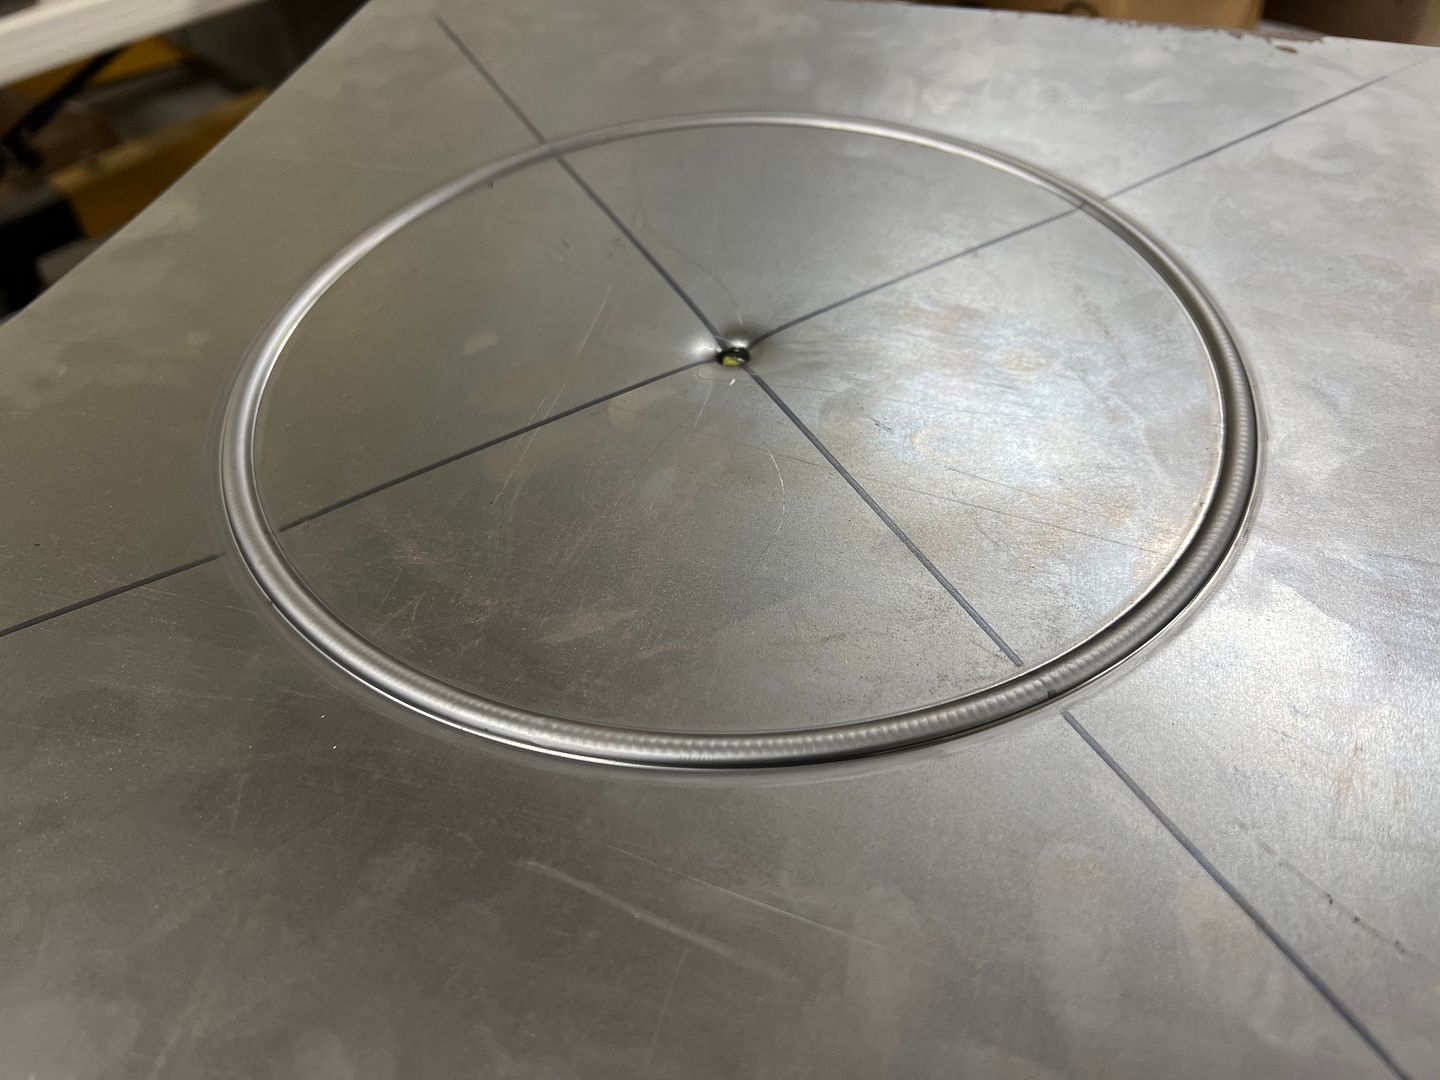  Then the plate is trimmed to a circle, and the thumbnail dies in the Lennox used to start the shrinking process around the edge. https://youtu.be/Vy30NeziryY We then jumped on the Erco kick shrinker to flatten the uneven surface.. https://youtu.be/B1Jg_9BfDNc https://youtu.be/Xlu2LsUNcj0 And repeat. Repeatedly. We have two or three more rounds to go and we can start tipping and stretching. 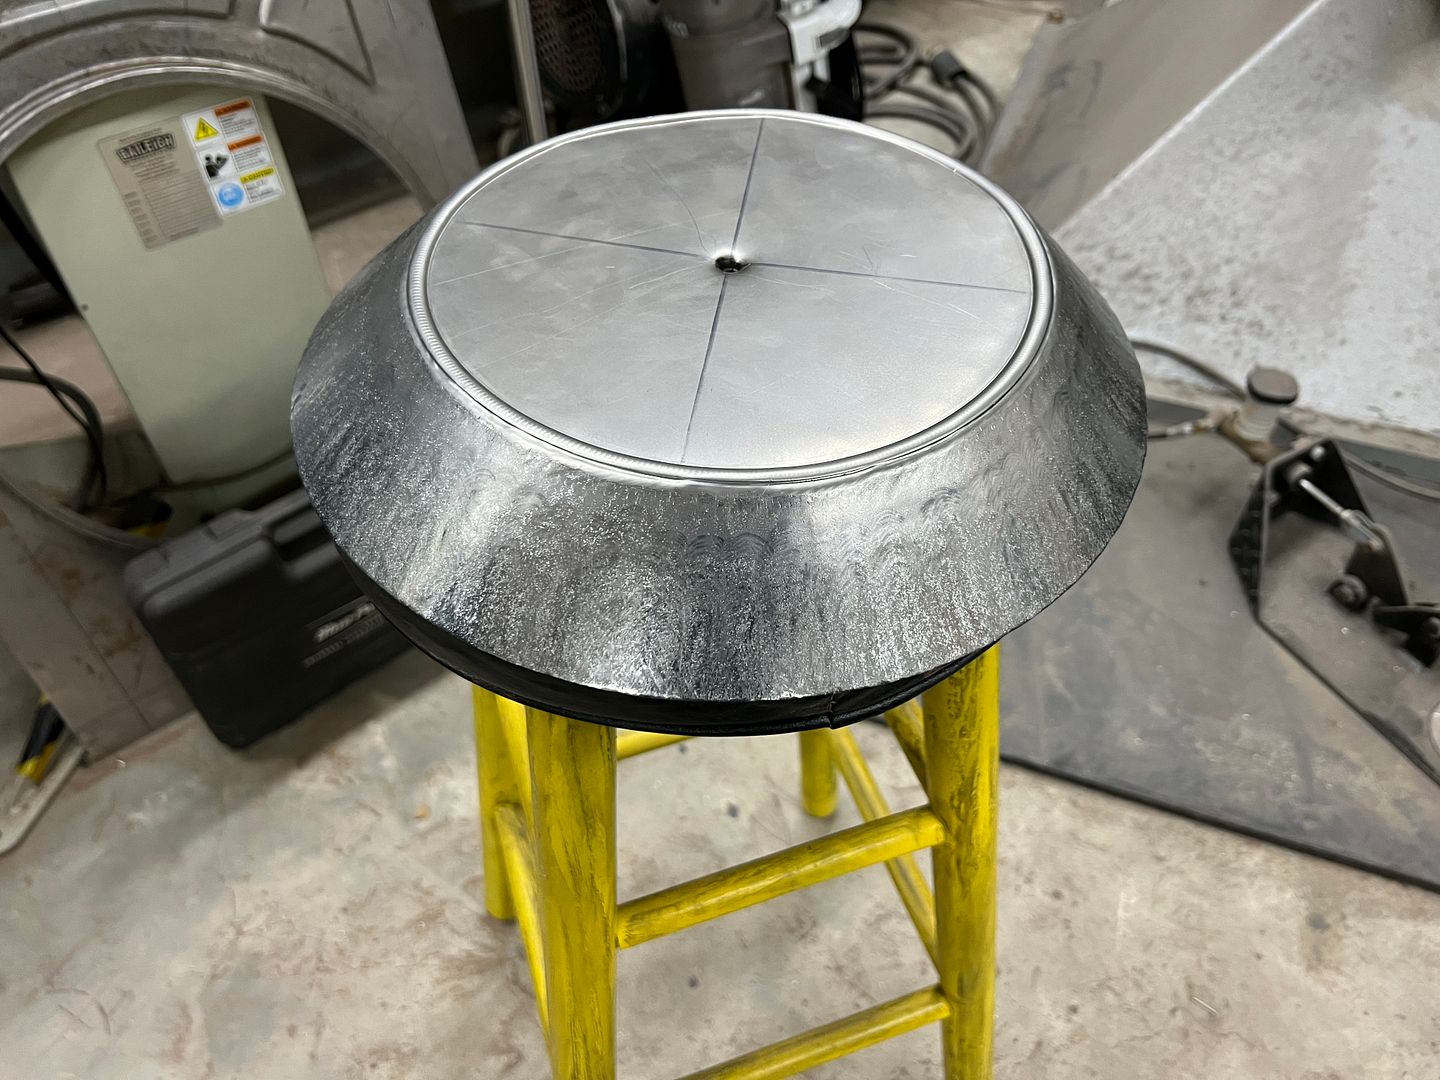 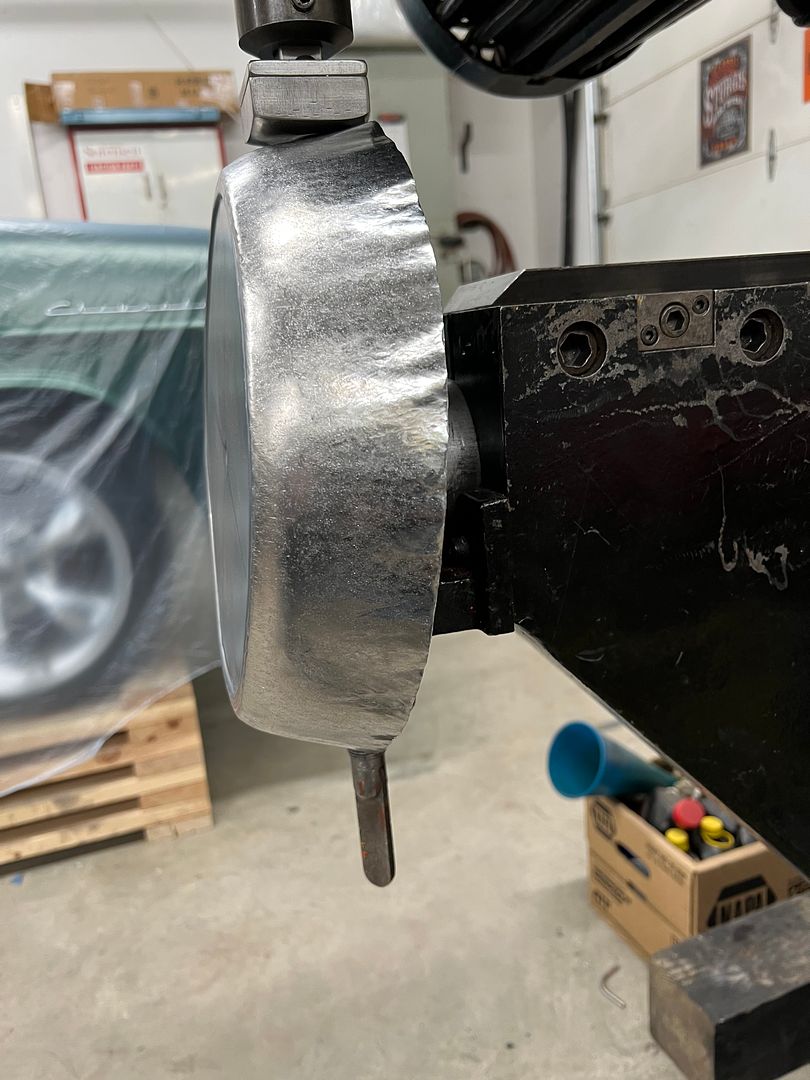 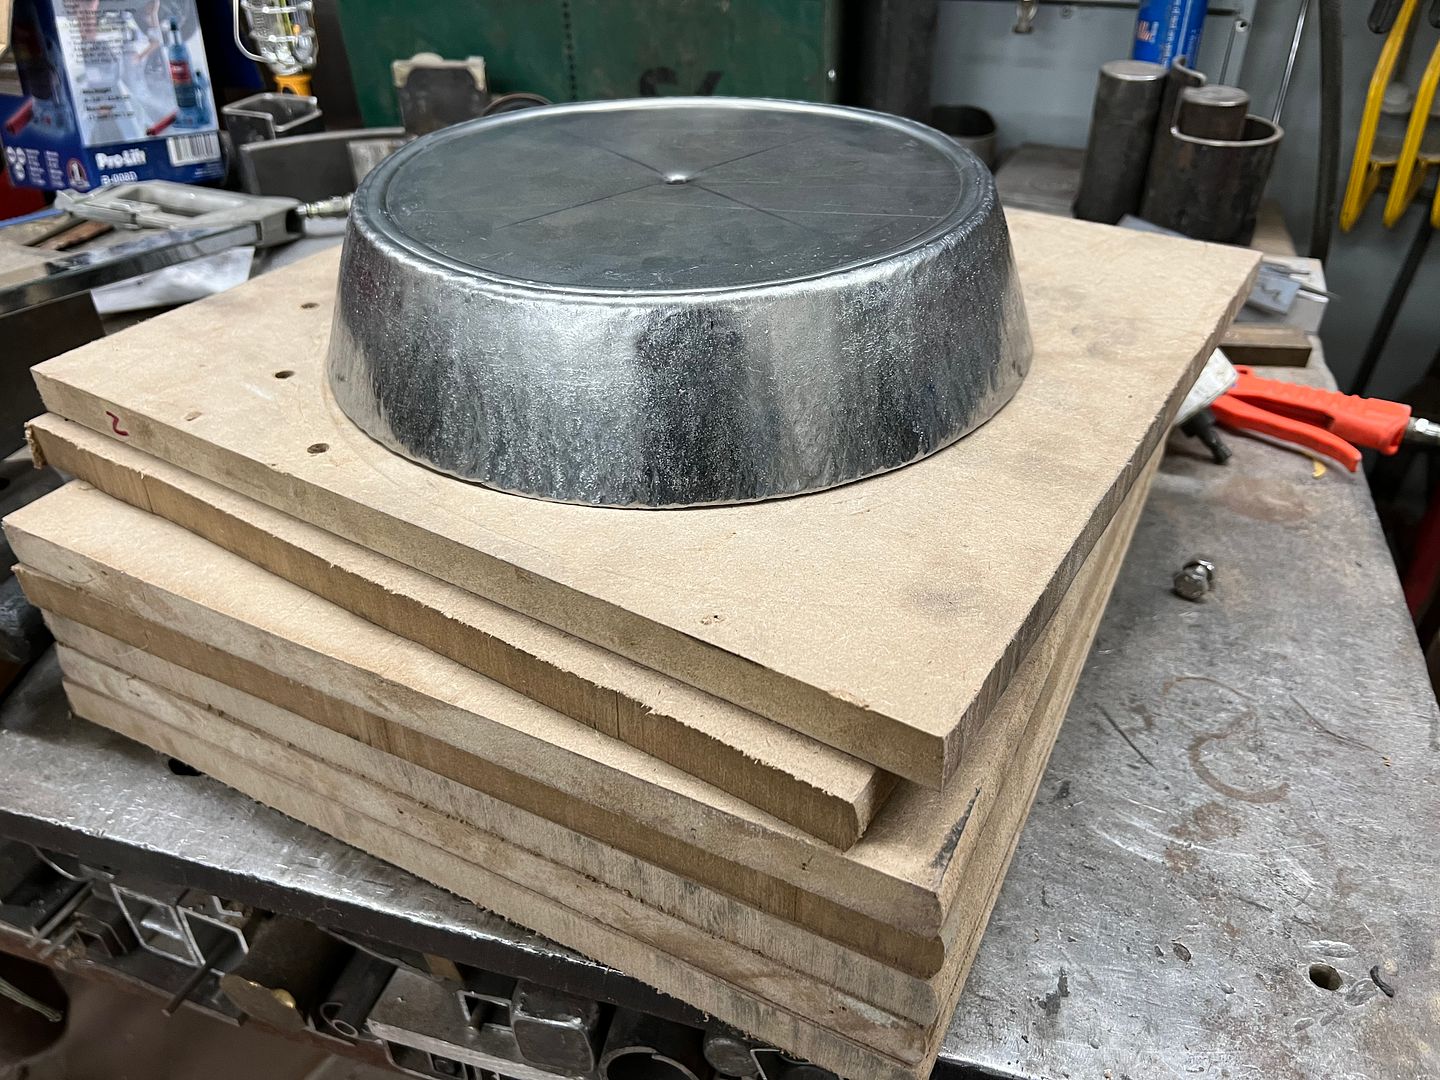
__________________
Robert |
|
|
|
|
11-28-2021, 02:59 AM
|
#25 |
|
Post Whore
Join Date: May 2015
Location: Alabama
Posts: 14,608
|
Re: 55 Wagon Progress
...
__________________
Mongo...aka Greg RIP Dad RIP Jesse 1981 C30 LQ9 NV4500..http://67-72chevytrucks.com/vboard/s...d.php?t=753598 Mongos AD- LS3 TR6060...http://67-72chevytrucks.com/vboard/s...34#post8522334 Columbus..the 1957 IH 4x4...http://67-72chevytrucks.com/vboard/s...63#post8082563 2023 Chevy Z71..daily driver |
|
|
|
 |
| Bookmarks |
|
|


 Hybrid Mode
