
 |
|
|
#1251 |
|
Post Whore
  Join Date: May 2015
Location: Alabama
Posts: 14,662
|
Re: 55 Wagon Progress
Mighty fine work......as usual
__________________
Mongo...aka Greg RIP Dad RIP Jesse 1981 C30 LQ9 NV4500..http://67-72chevytrucks.com/vboard/s...d.php?t=753598 Mongos AD- LS3 TR6060...http://67-72chevytrucks.com/vboard/s...34#post8522334 Columbus..the 1957 IH 4x4...http://67-72chevytrucks.com/vboard/s...63#post8082563 2023 Chevy Z71..daily driver |
|
|

|
|
|
#1252 |
|
Senior Member
 Join Date: Mar 2011
Location: West Plains, Missouri
Posts: 7,559
|
Re: 55 Wagon Progress
Amazing work...Jim
__________________
my build thread: http://67-72chevytrucks.com/vboard/s...d.php?t=459839 Jimbo's long bed step build:http://67-72chevytrucks.com/vboard/s...t=464626<br /> |
|
|

|
|
|
#1253 |
|
Registered User
Join Date: Jan 2013
Location: Leonardtown, MD
Posts: 1,647
|
Re: 55 Wagon Progress
Thanks guys!!
So I've had some questions as to why this or that with modifying the air cleaner. I was going to hold out with the REAL reason, but here goes.... This firewall is just too clean that I can't bring myself to clutter it up (or the wheelwell) by mounting an ignition coil and then being forced into using an overly long coil wire.. .JPG) So as shown here.... this will be the approximate location as we fabricate a sealed cavity from the bottom side of the air cleaner to mount the coil. This should put the coil wire about two inches in front of the distributor... .JPG) So this should give us a nice clean look and keep the firewall as open as we can...
__________________
Robert |
|
|

|
|
|
#1254 |
|
Registered User
Join Date: Jan 2013
Location: Leonardtown, MD
Posts: 1,647
|
Re: 55 Wagon Progress
Time for some welding.. TIG used to tack the new bottom in place.....
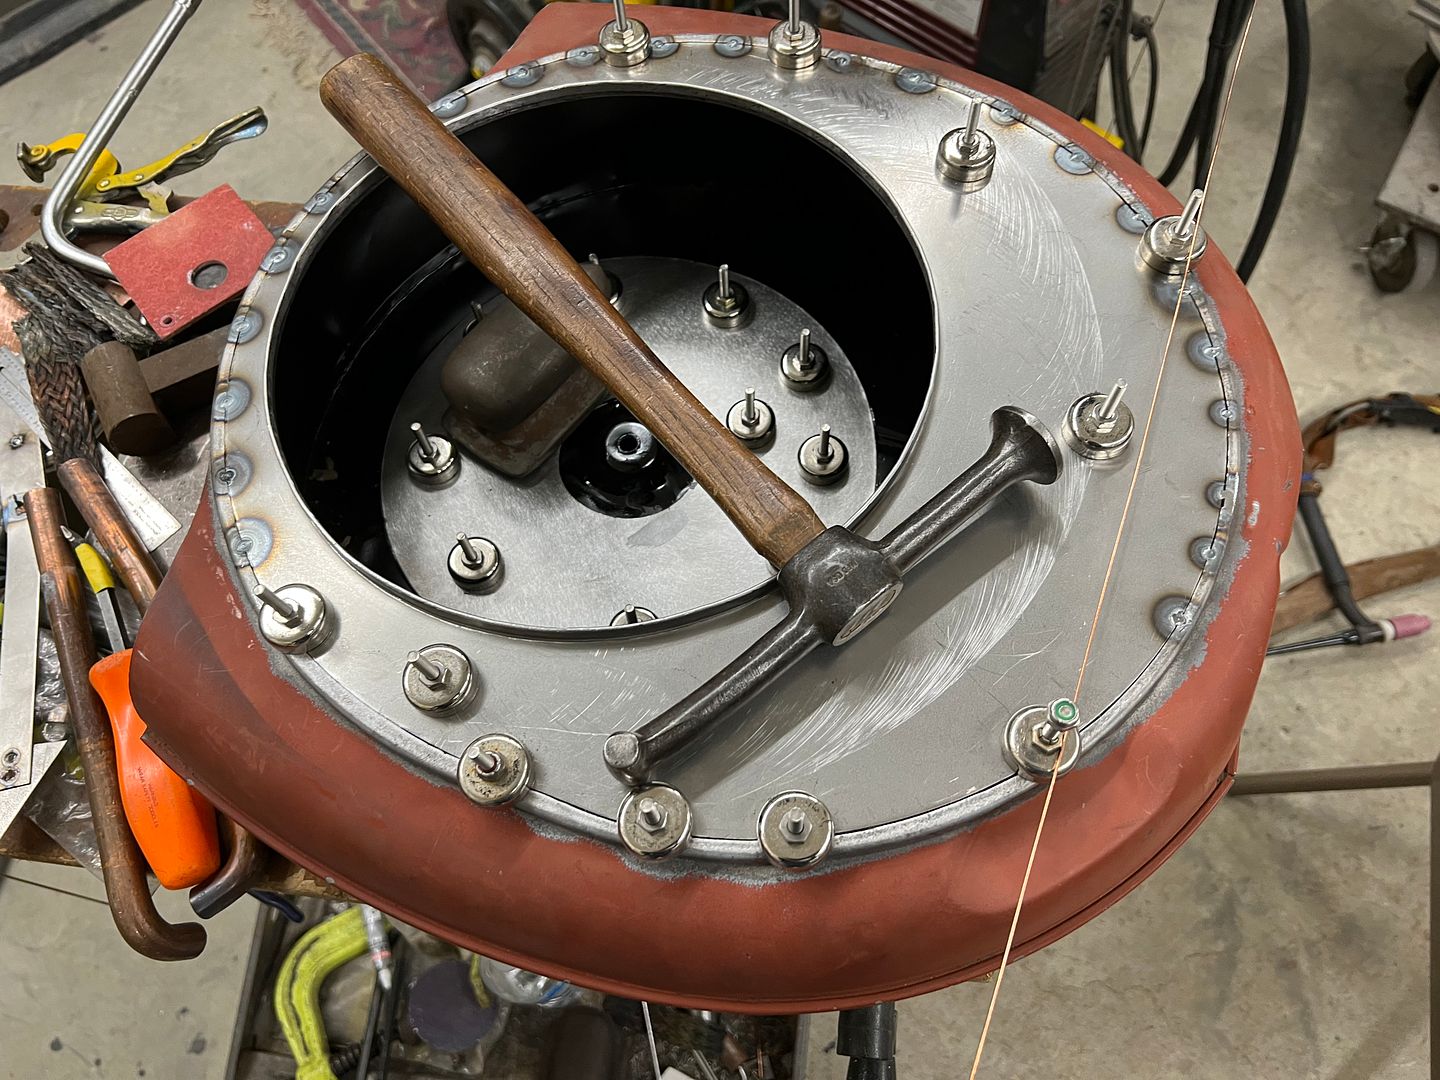 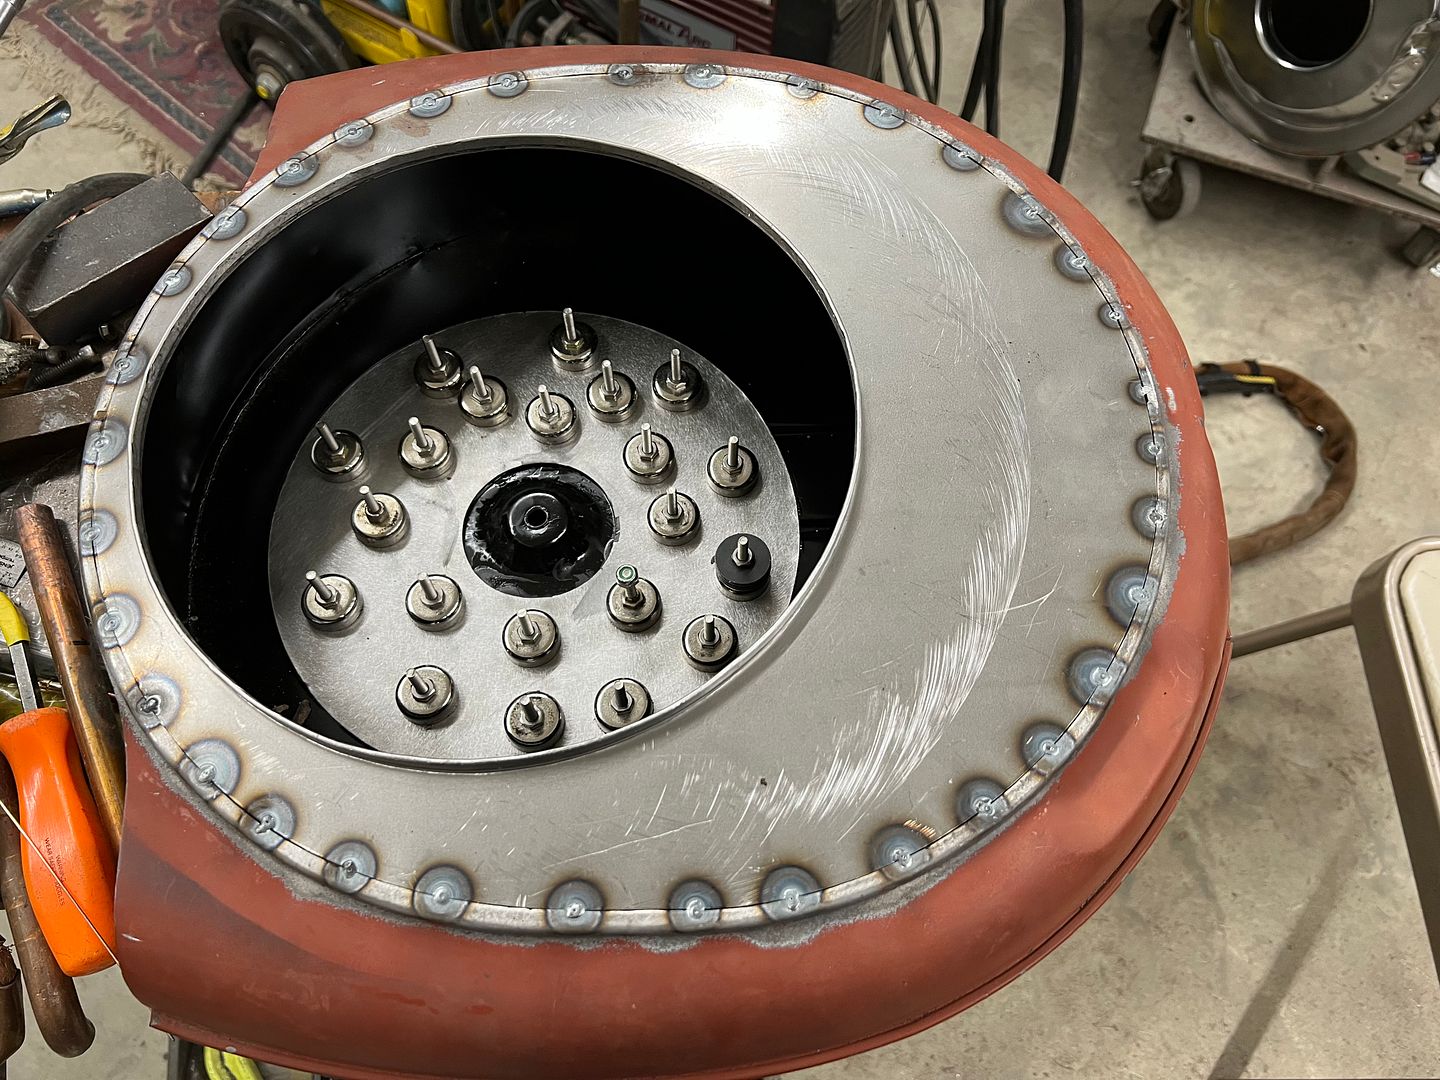 I thought my eyesight was going.... time to replace these.. 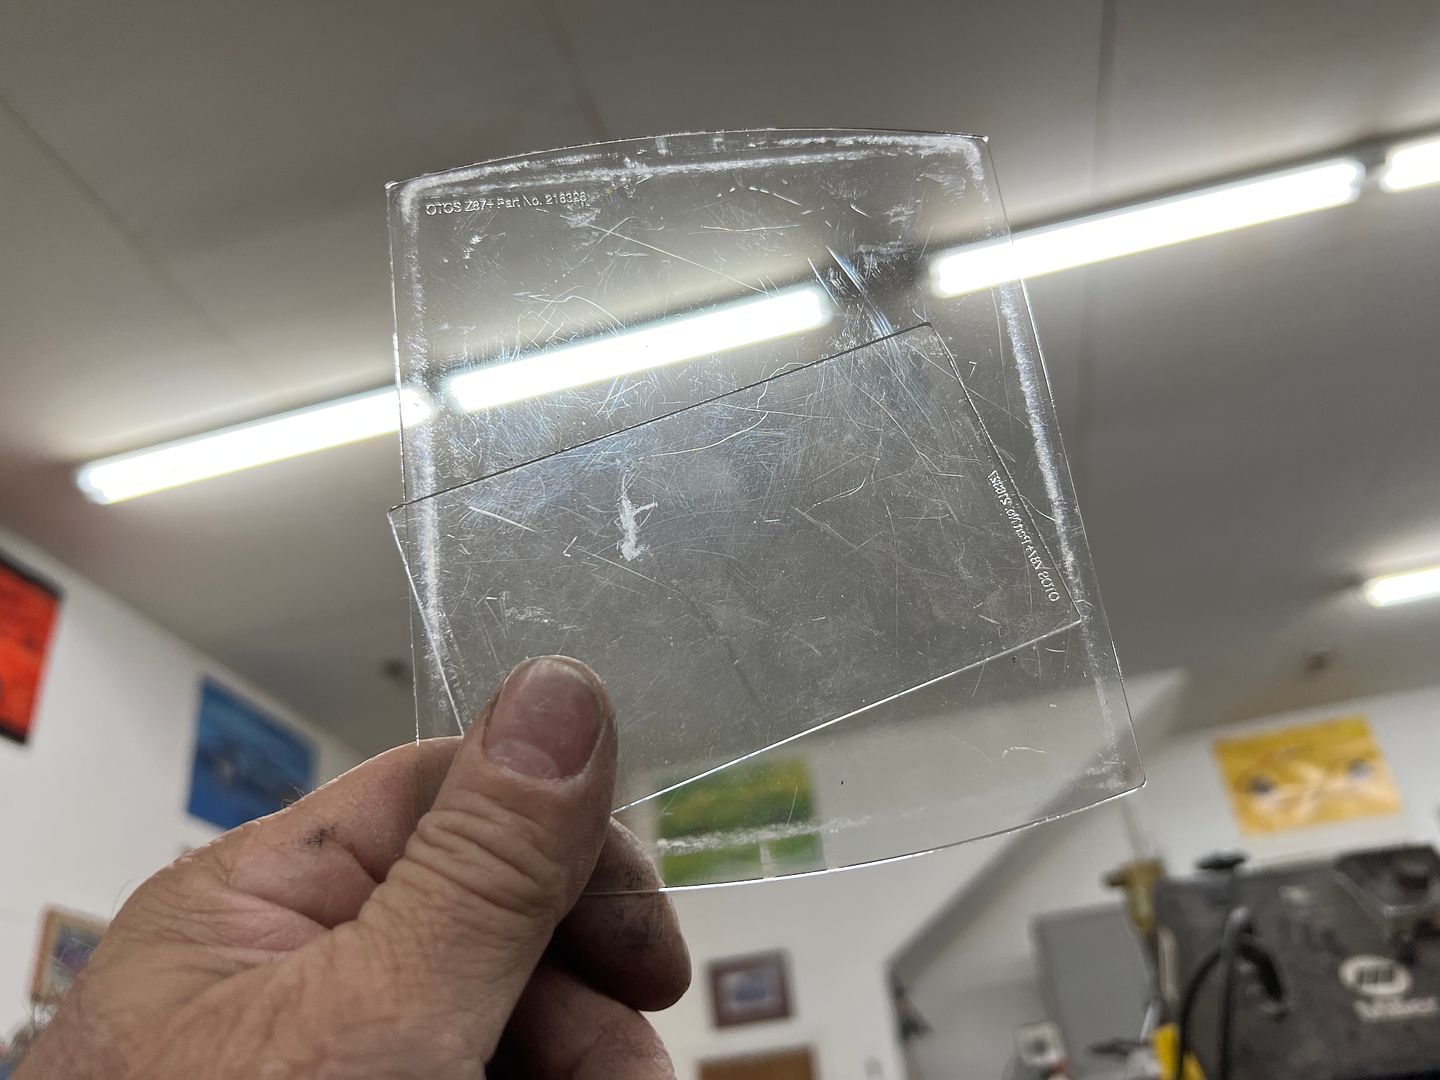 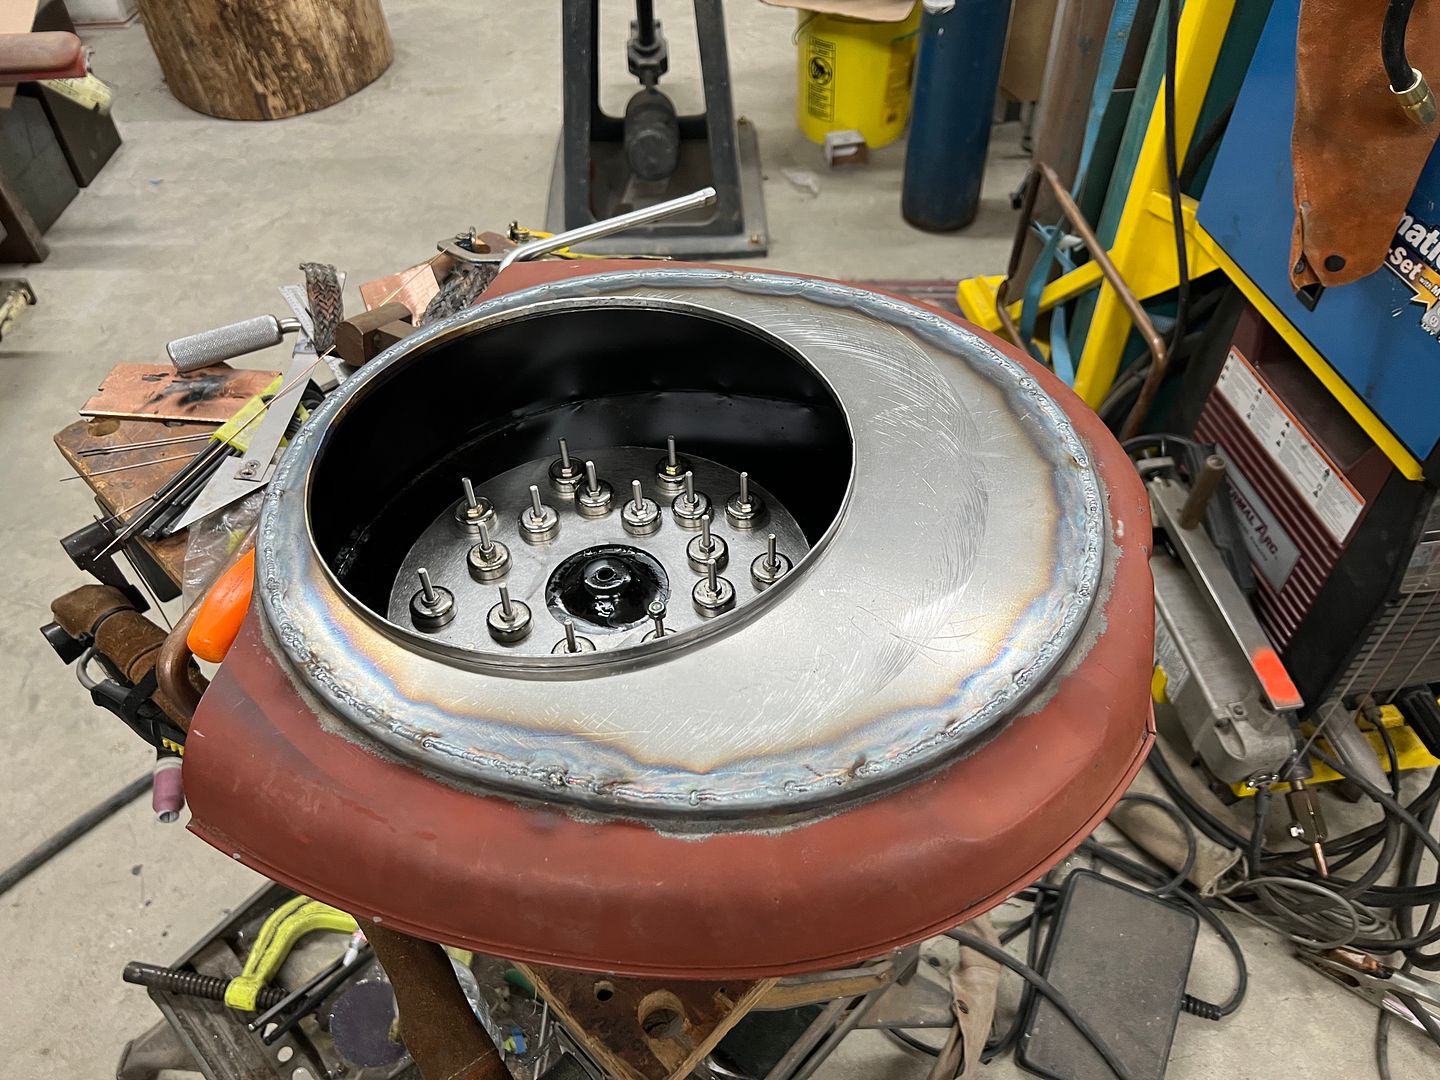 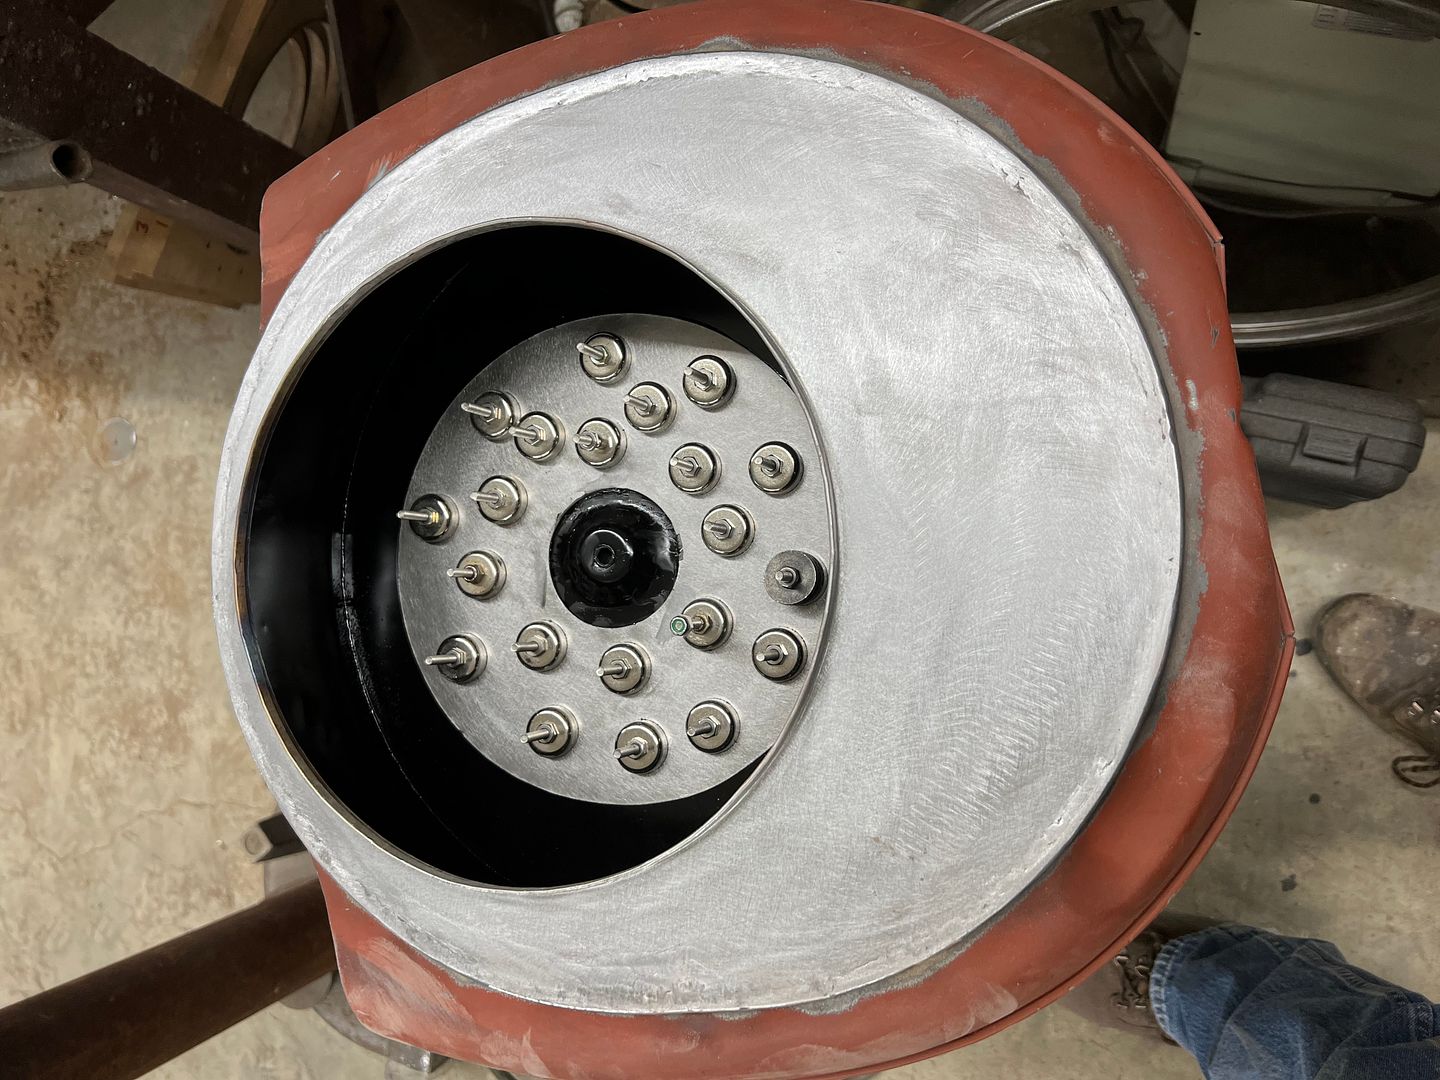 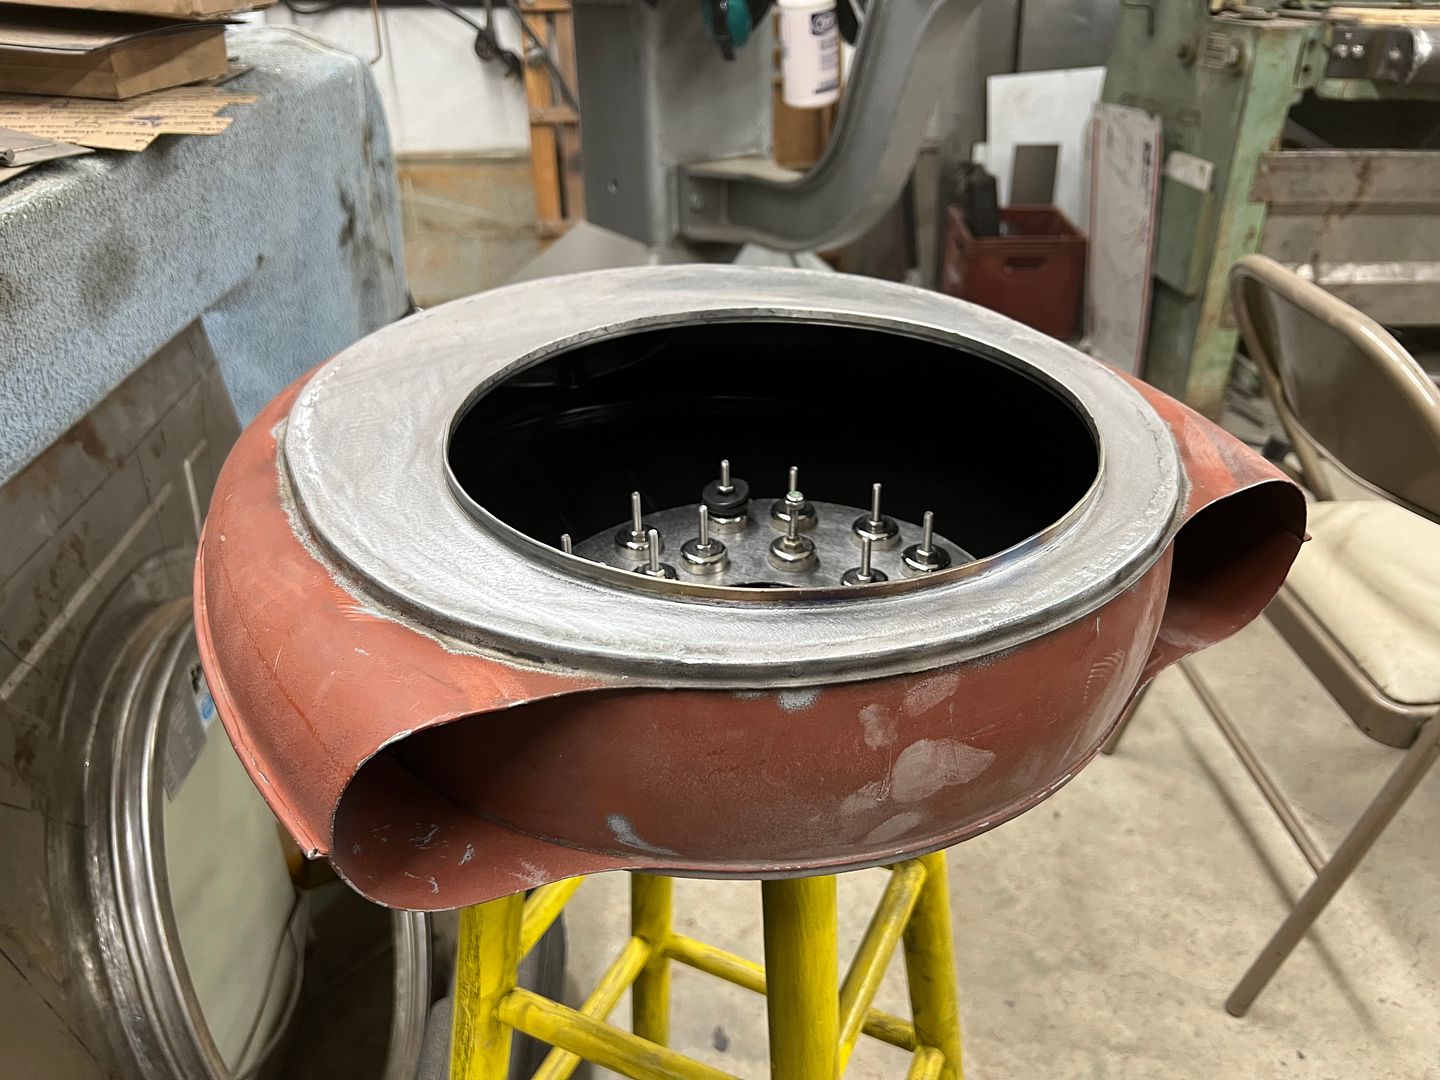 Next, we'll work on the base plate....
__________________
Robert |
|
|

|
|
|
#1255 |
|
Post Whore
  Join Date: May 2015
Location: Alabama
Posts: 14,662
|
Re: 55 Wagon Progress
I think you need more magnets..!!..haha...
__________________
Mongo...aka Greg RIP Dad RIP Jesse 1981 C30 LQ9 NV4500..http://67-72chevytrucks.com/vboard/s...d.php?t=753598 Mongos AD- LS3 TR6060...http://67-72chevytrucks.com/vboard/s...34#post8522334 Columbus..the 1957 IH 4x4...http://67-72chevytrucks.com/vboard/s...63#post8082563 2023 Chevy Z71..daily driver |
|
|

|
|
|
#1256 |
|
Registered User
Join Date: Jan 2013
Location: Leonardtown, MD
Posts: 1,647
|
Re: 55 Wagon Progress
Greg, it's just like clamps, never enough
 More work on the Caddy air cleaner, time to fabricate the pocket for the coil. Our radius brake that is bolted to the front of the shear is used to bend some 18ga into a horseshoe. One side is trimmed short and the other is left long to bend and form the bottom in the magnetic brake. 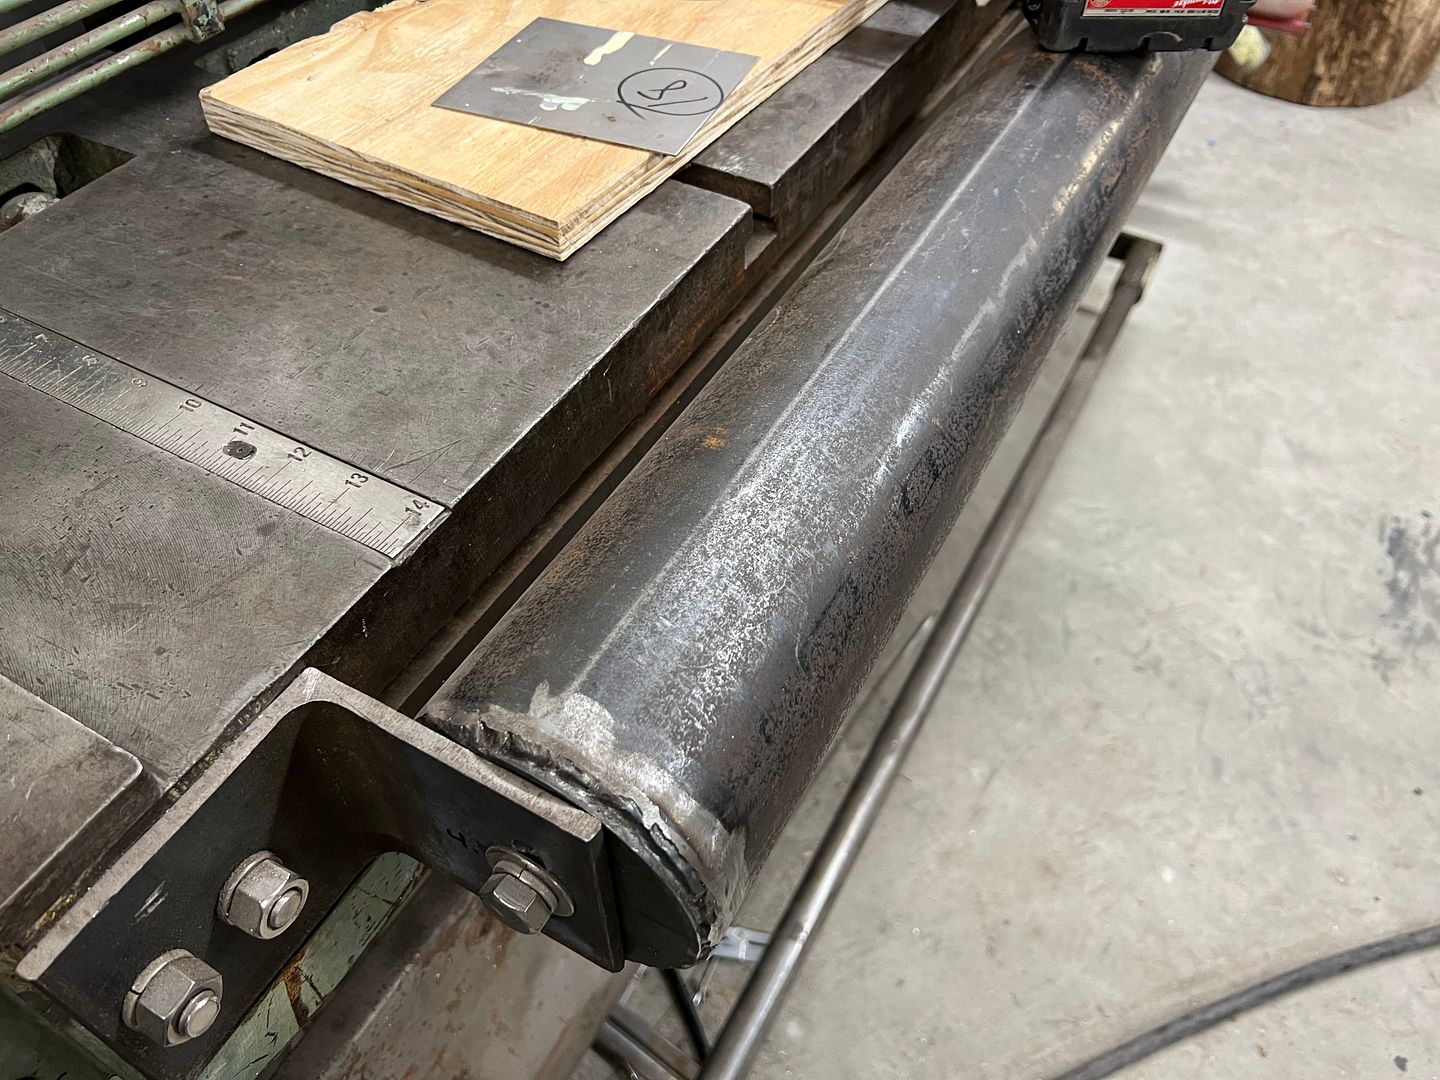 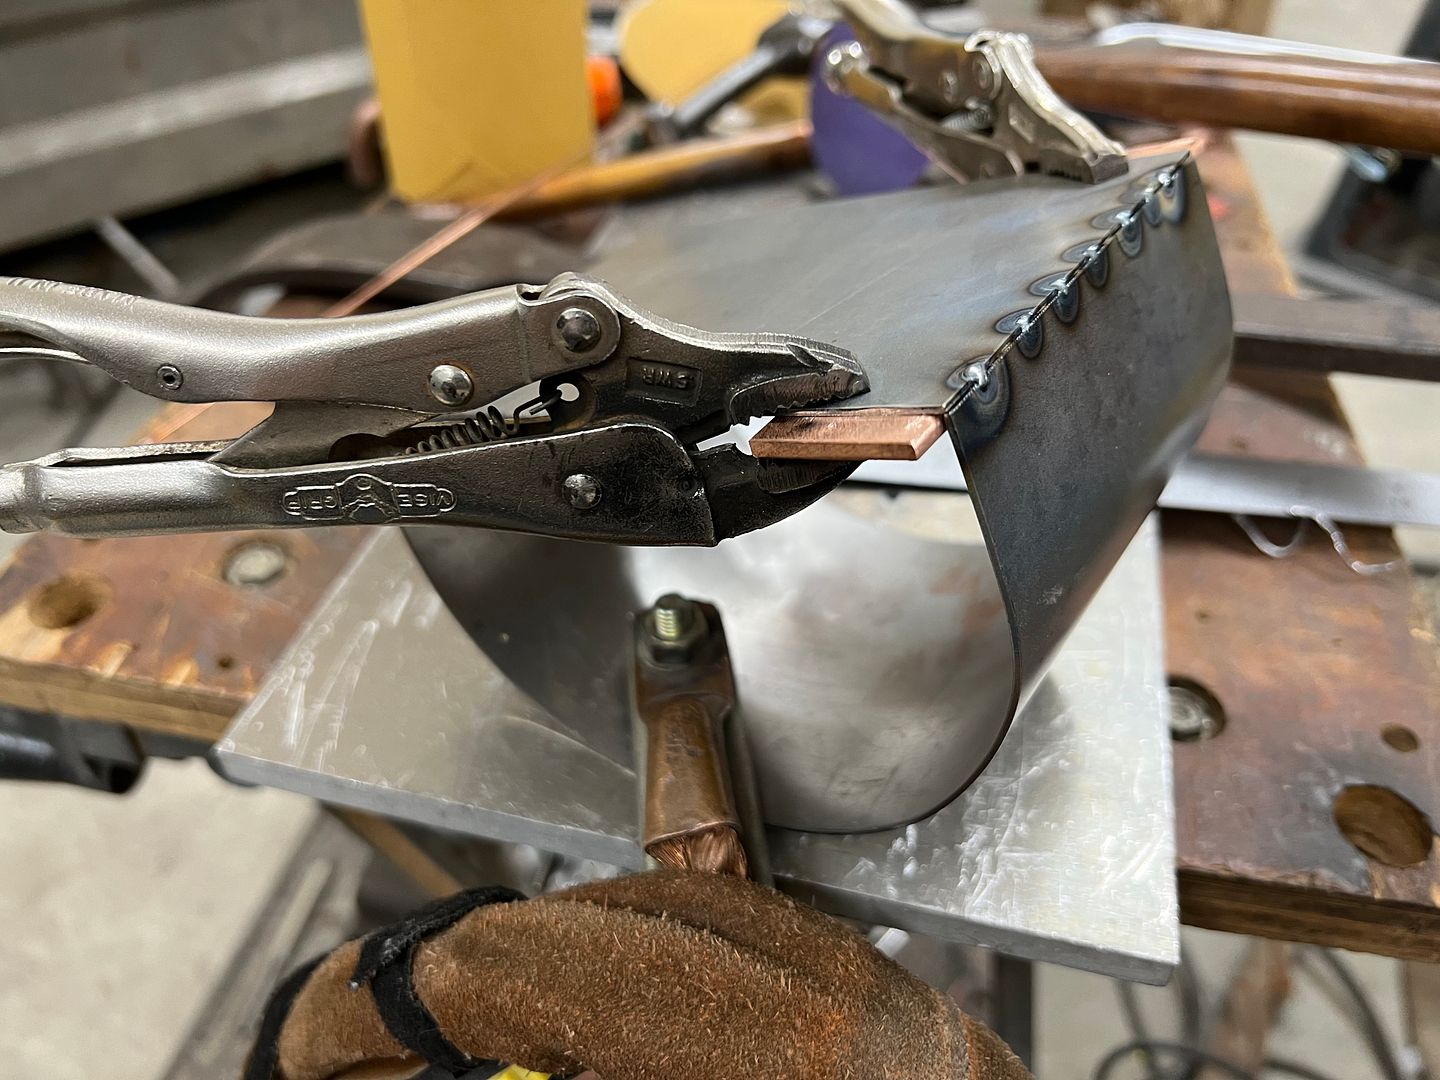 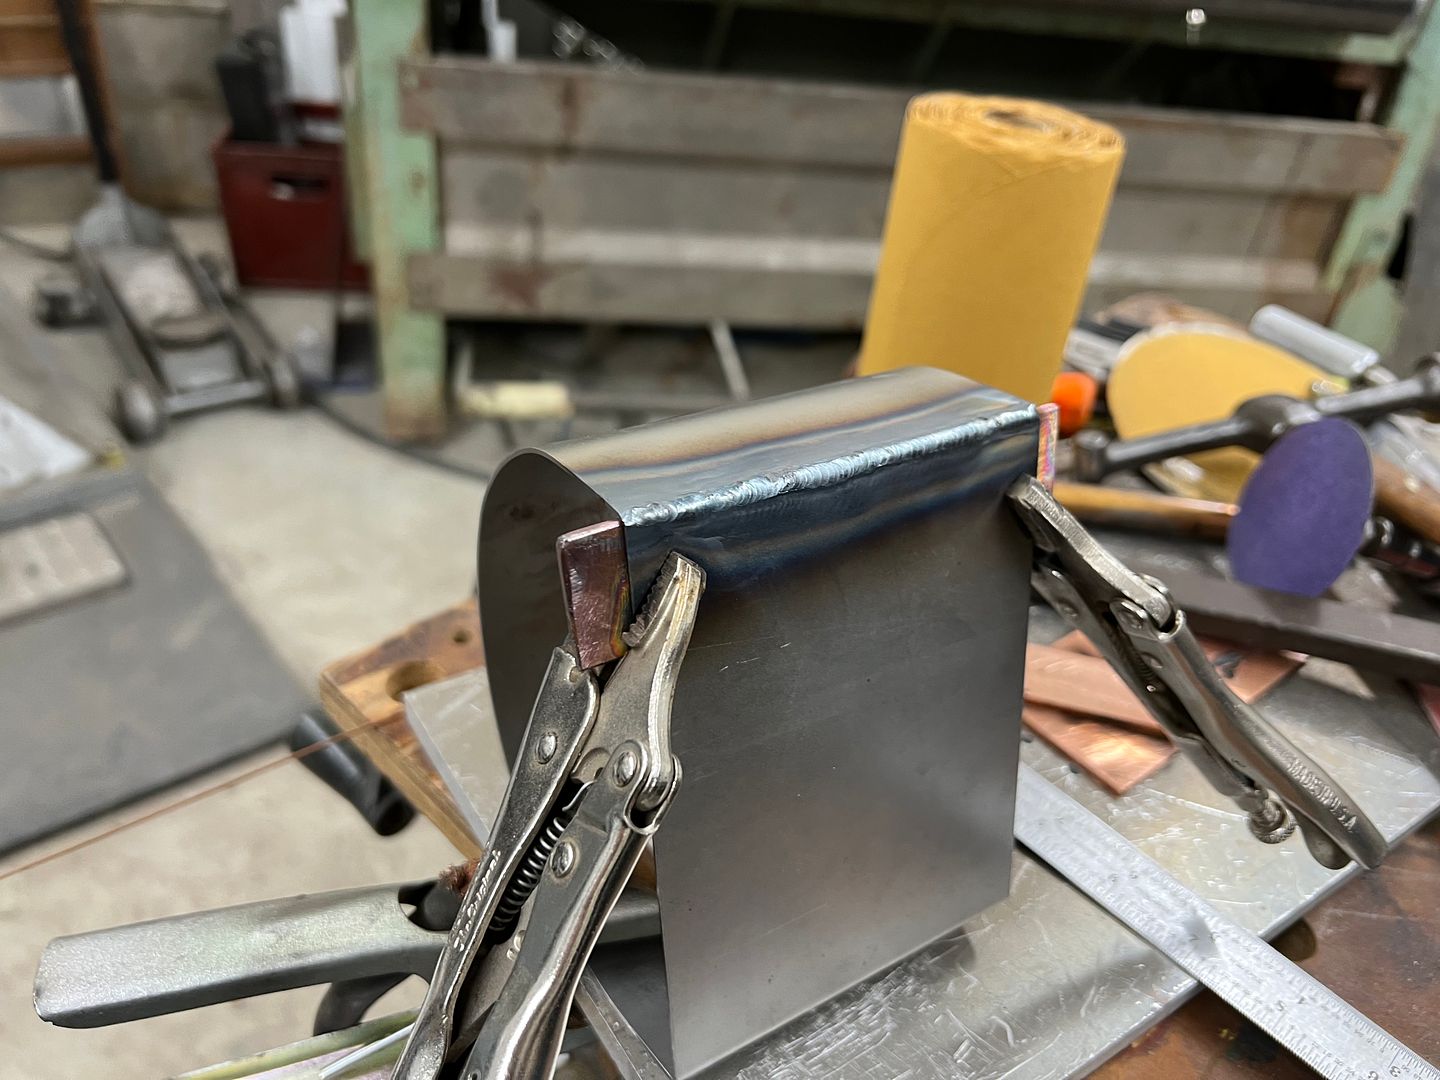 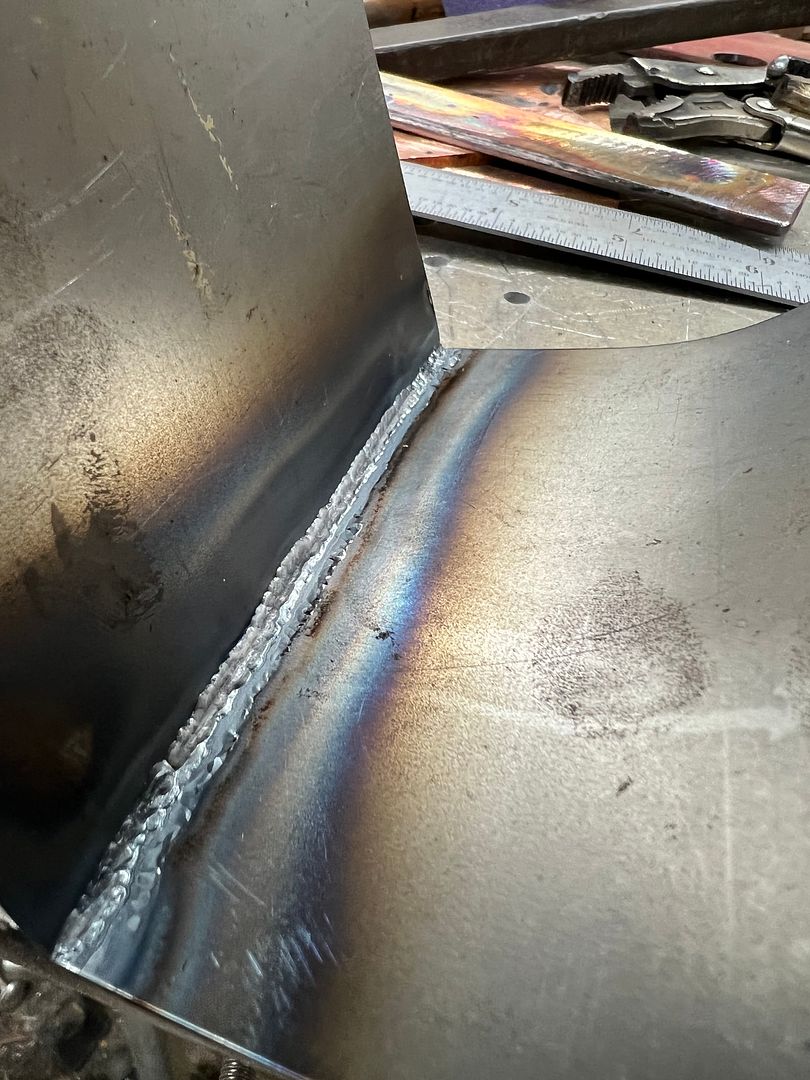 And end plate is cut out to seal off the void from the rest of the air cleaner innards. This gets tacked in place and then fusion welded using the TIG. 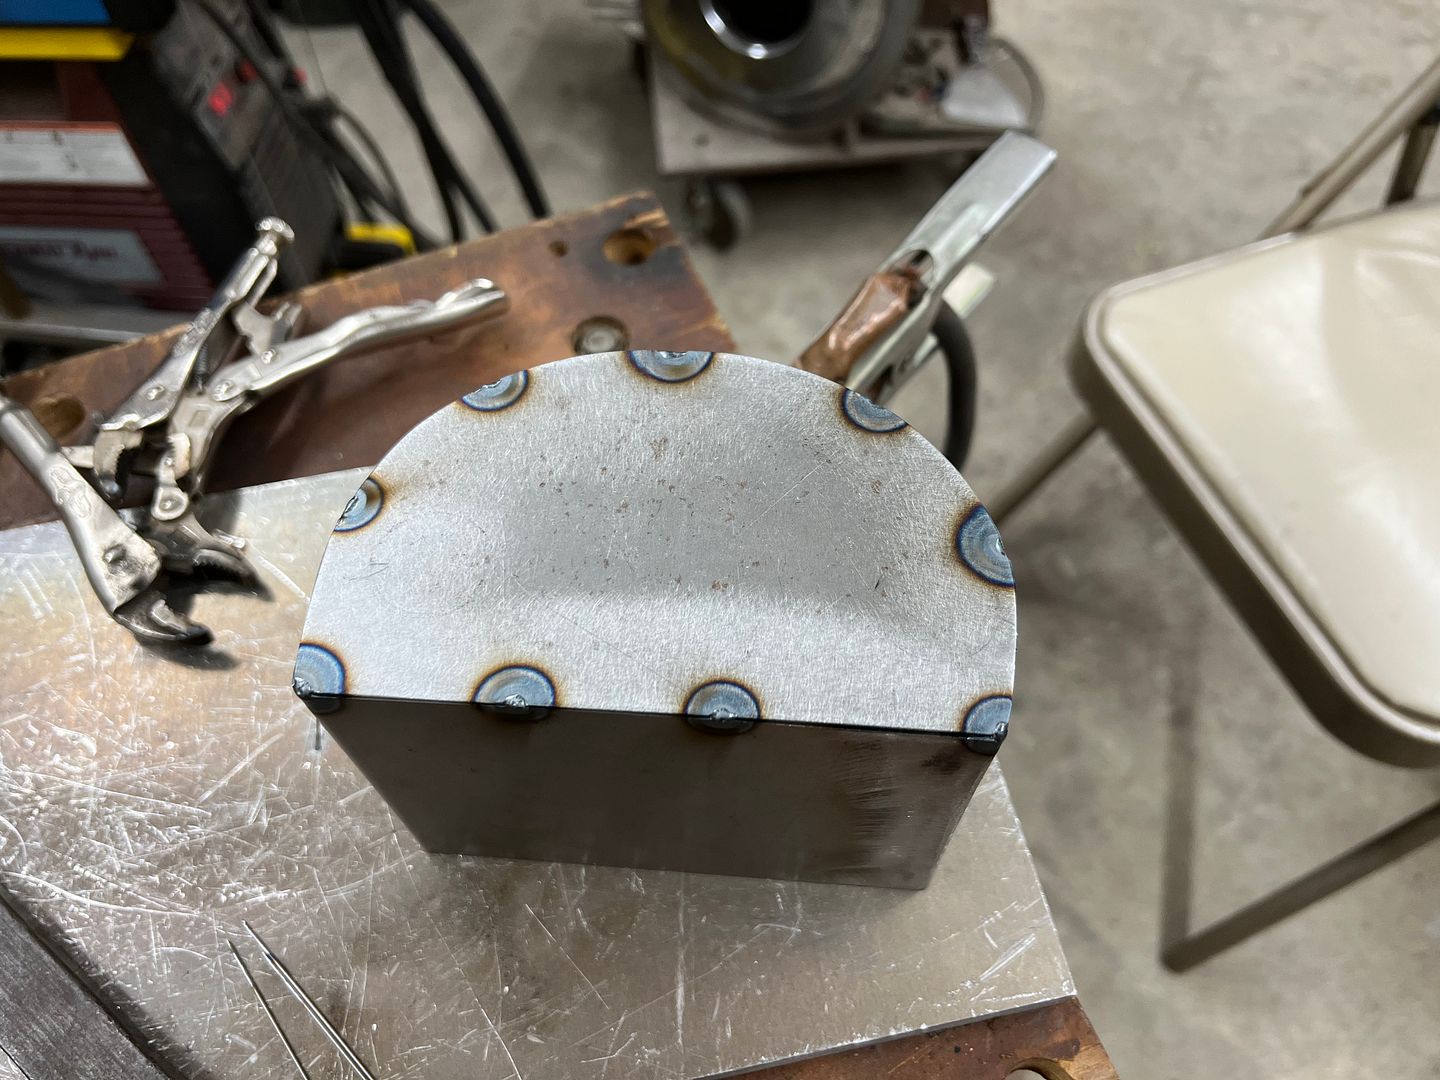 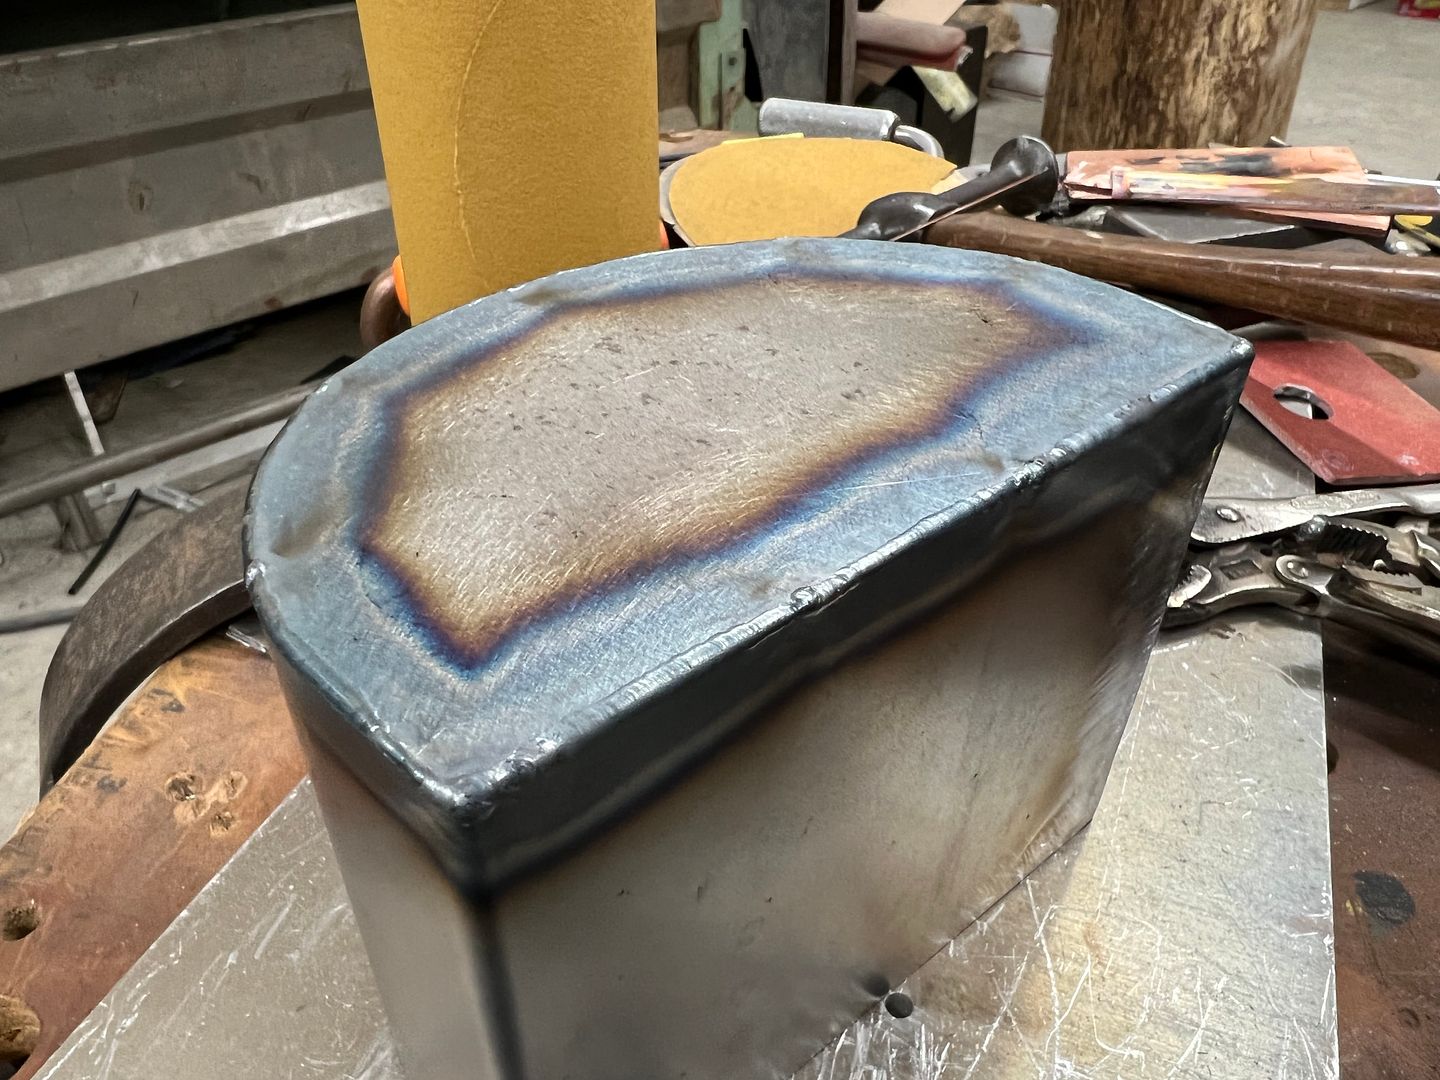 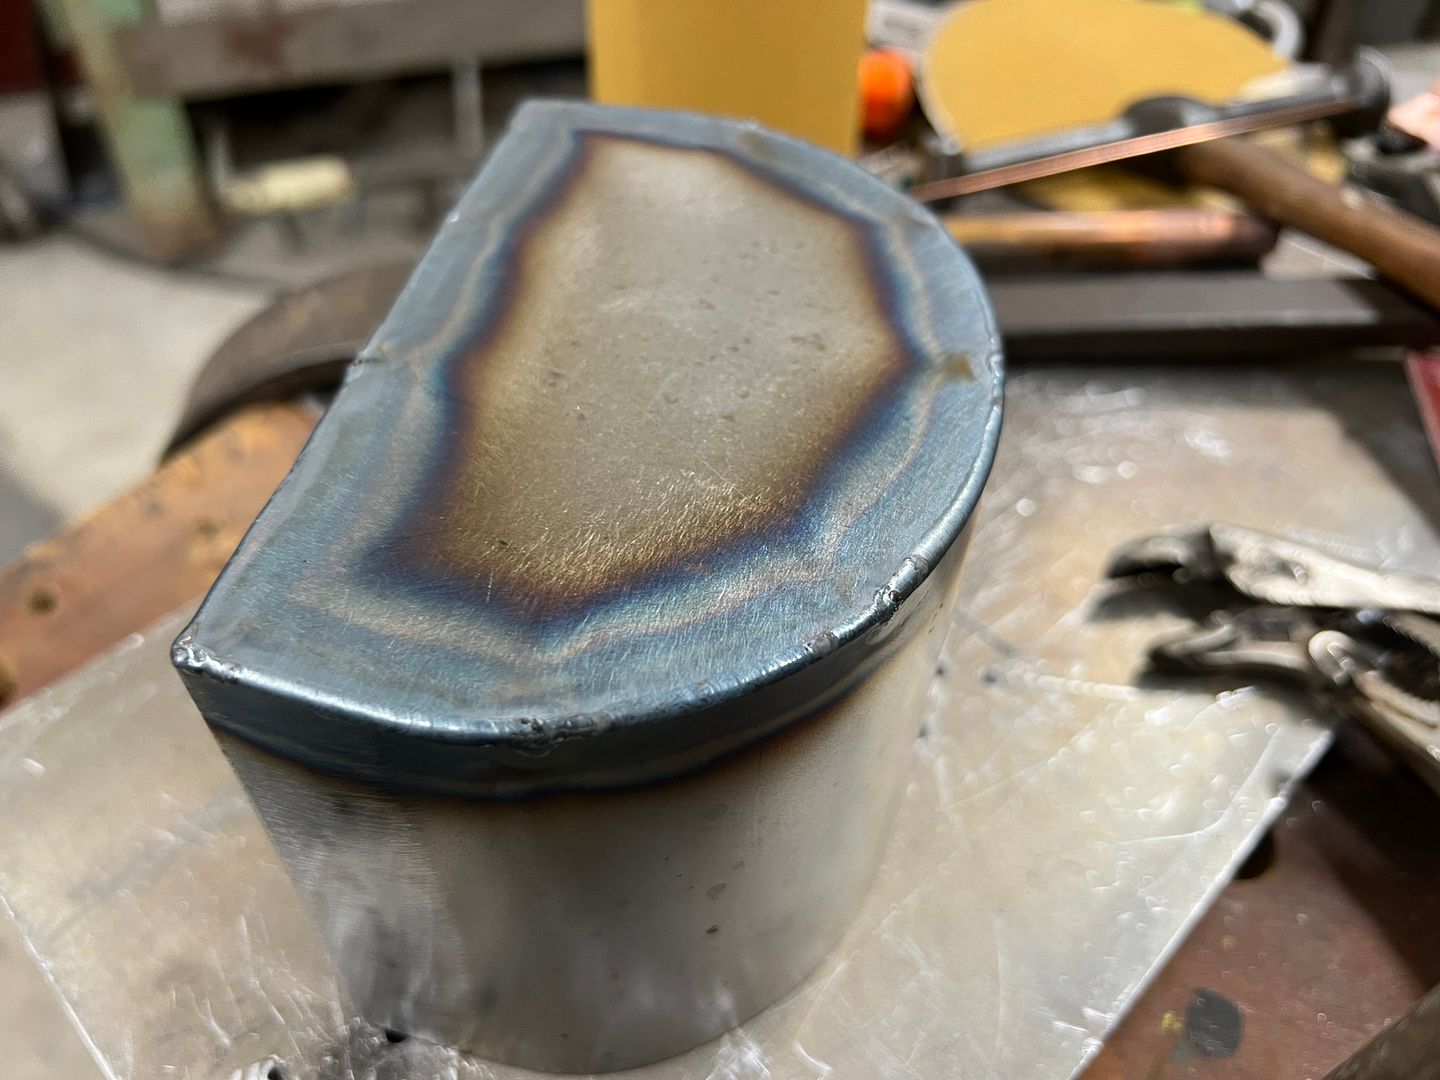 A holesaw is used to get the hole started and offset Wiss snips to trim out the hole in both the housing and the mounting flange. TIG tacked and fusion welding on the flange, and it then gets trimmed to fit inside the air cleaner housing. 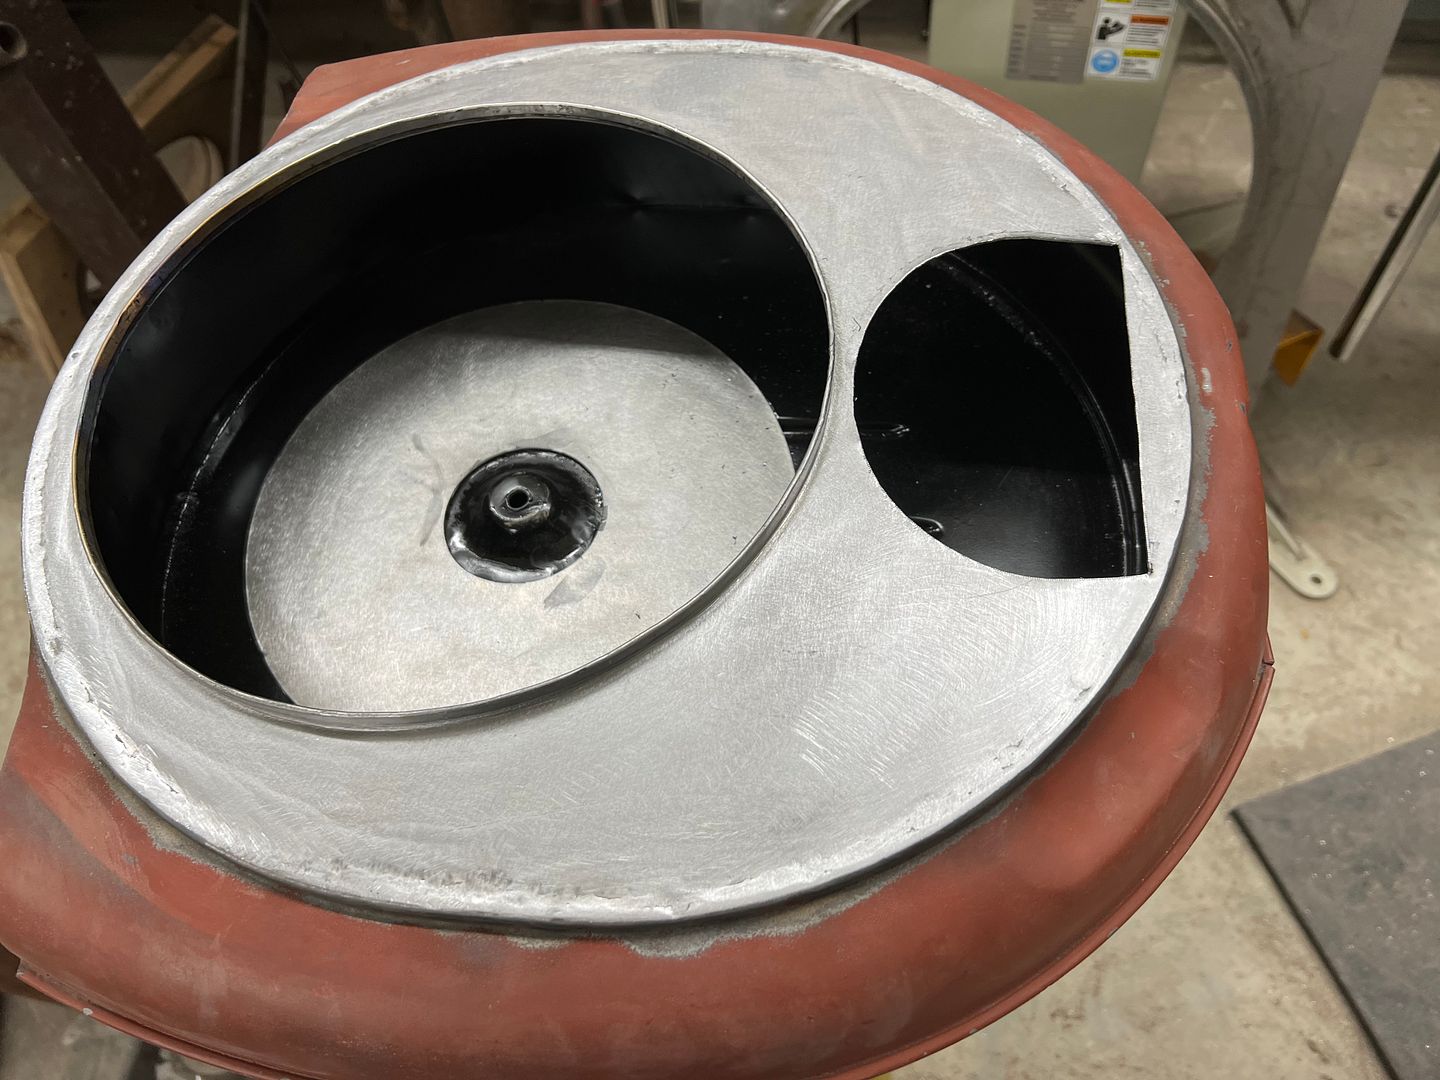 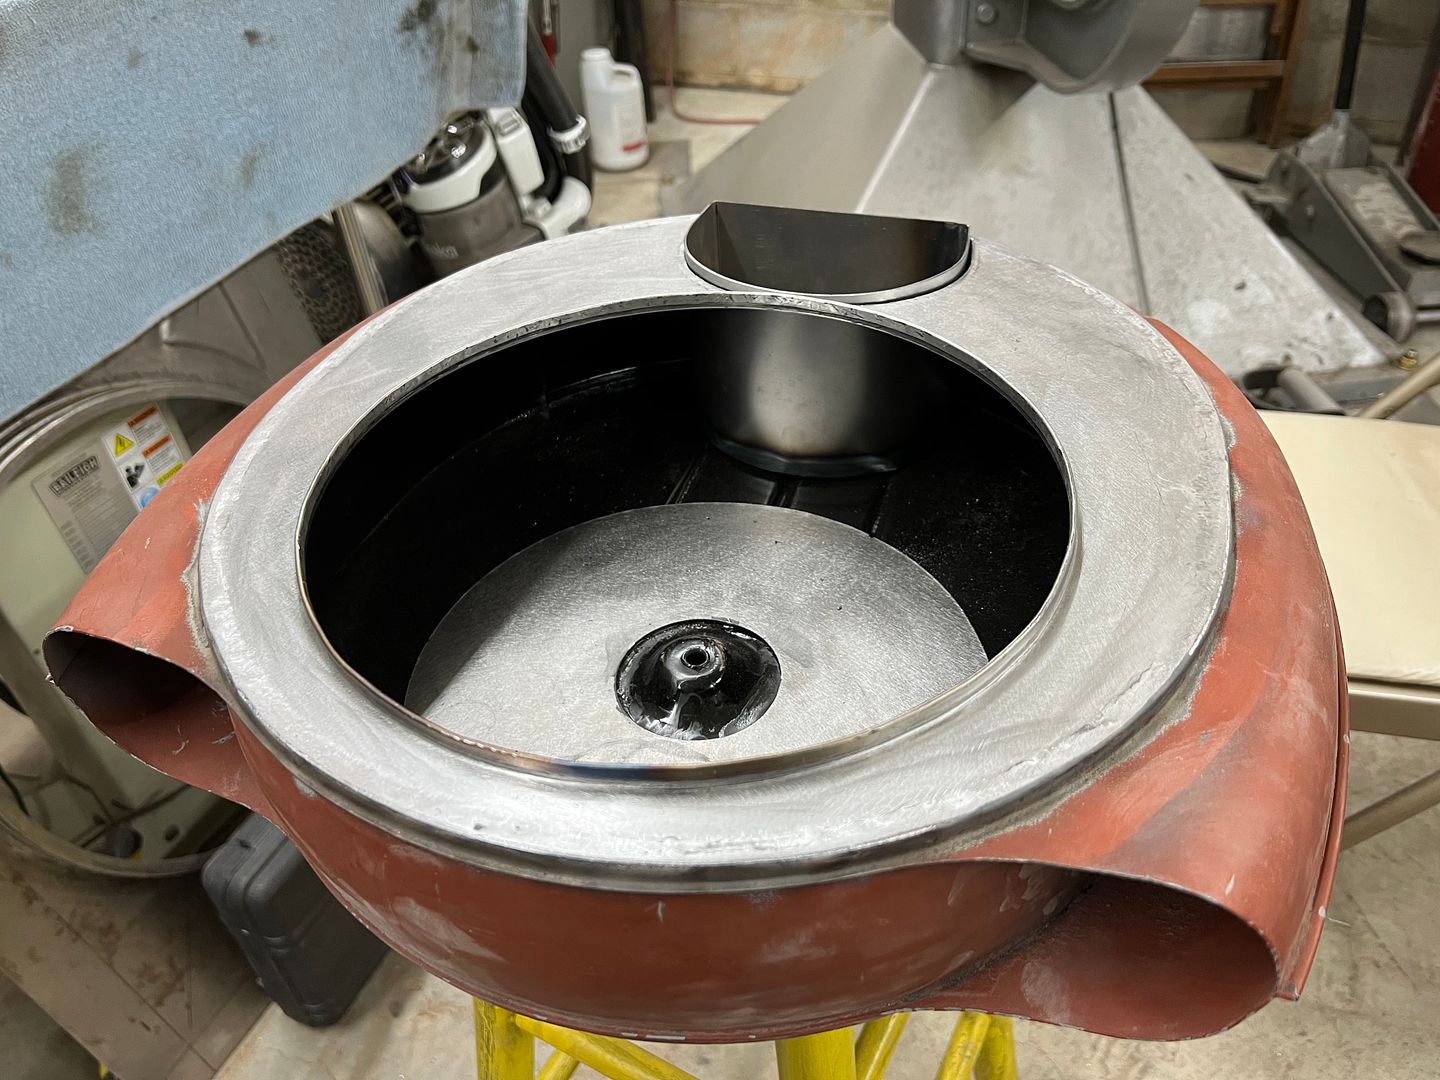 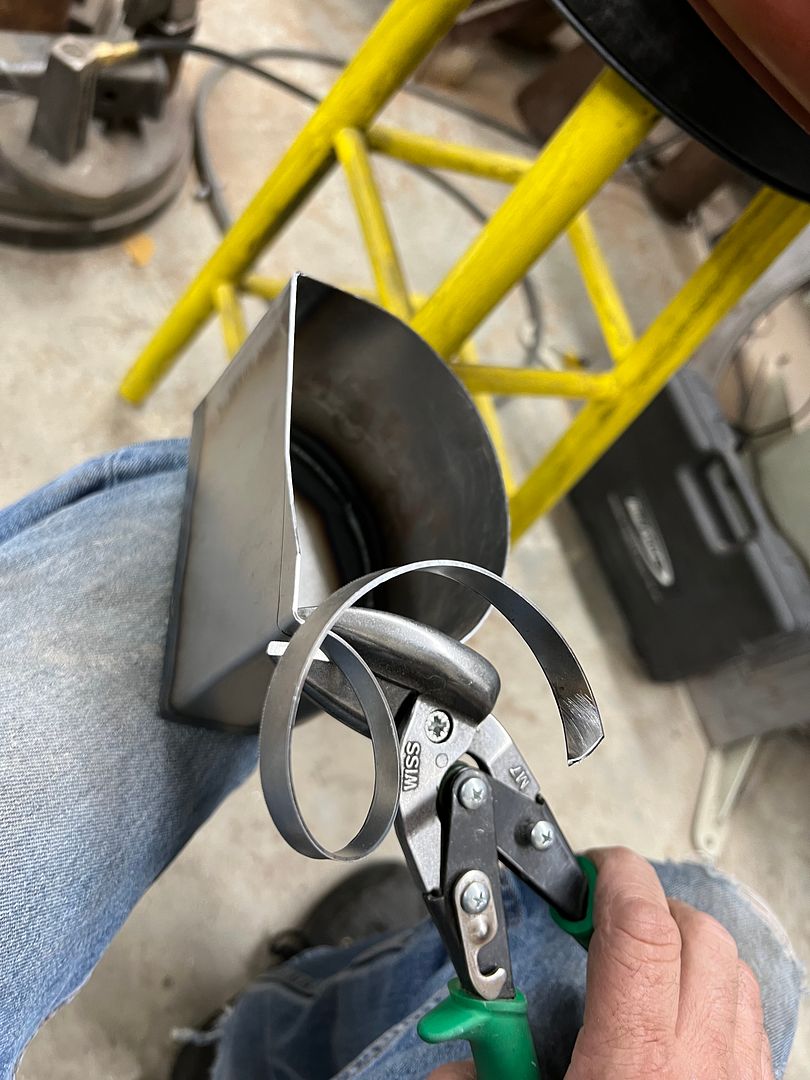 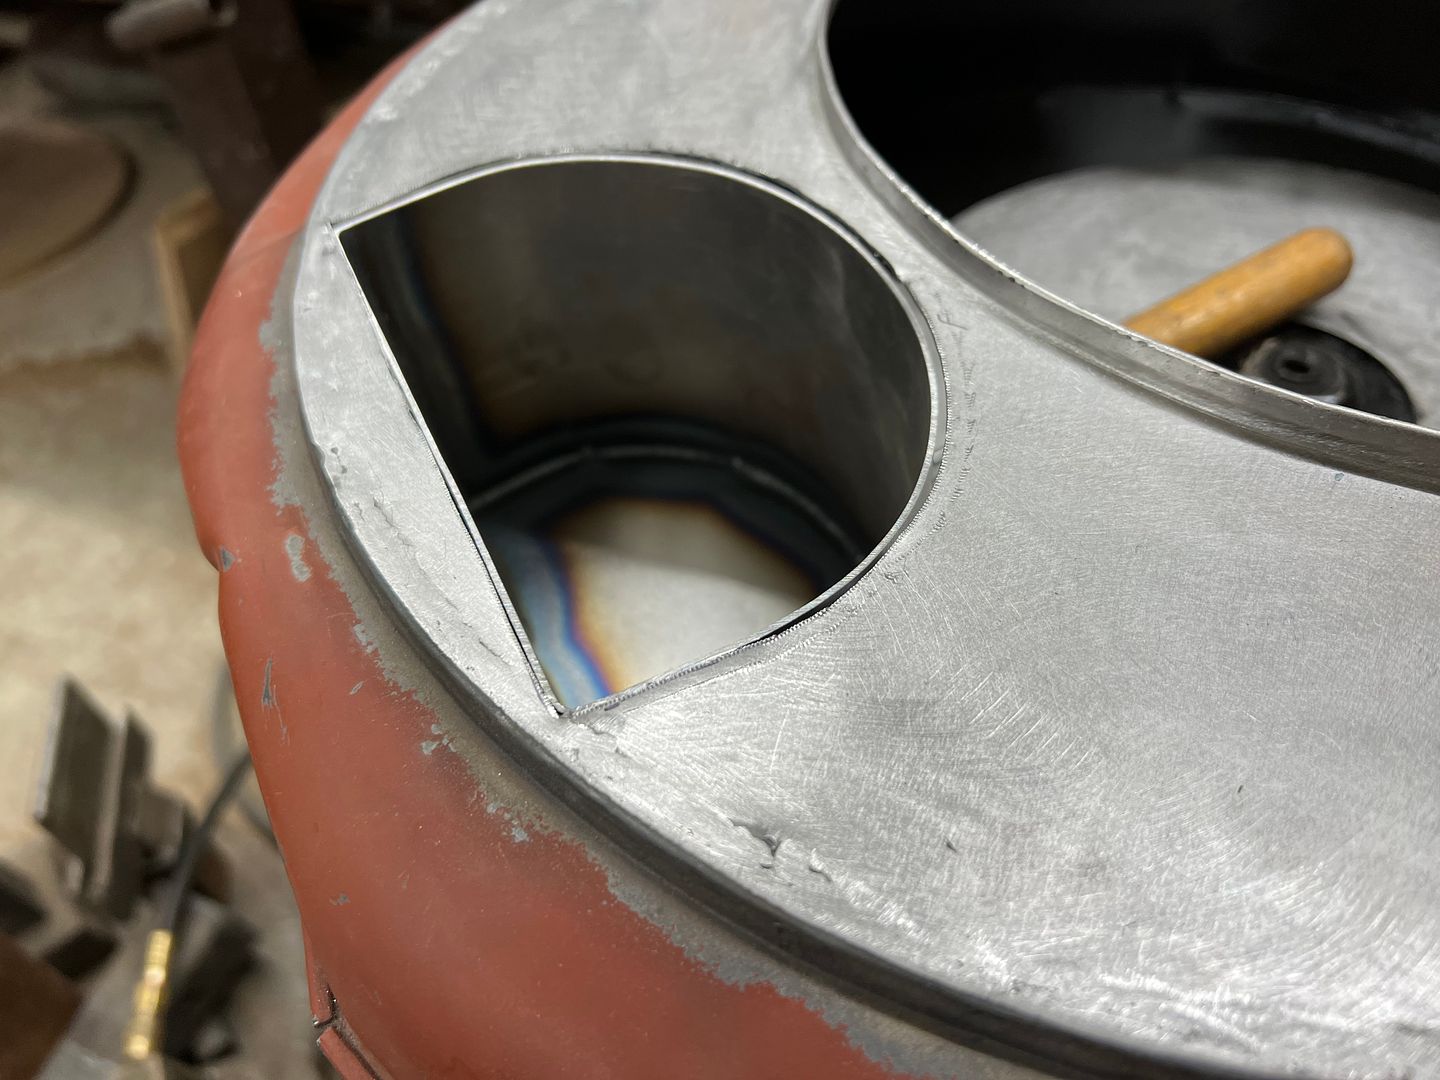 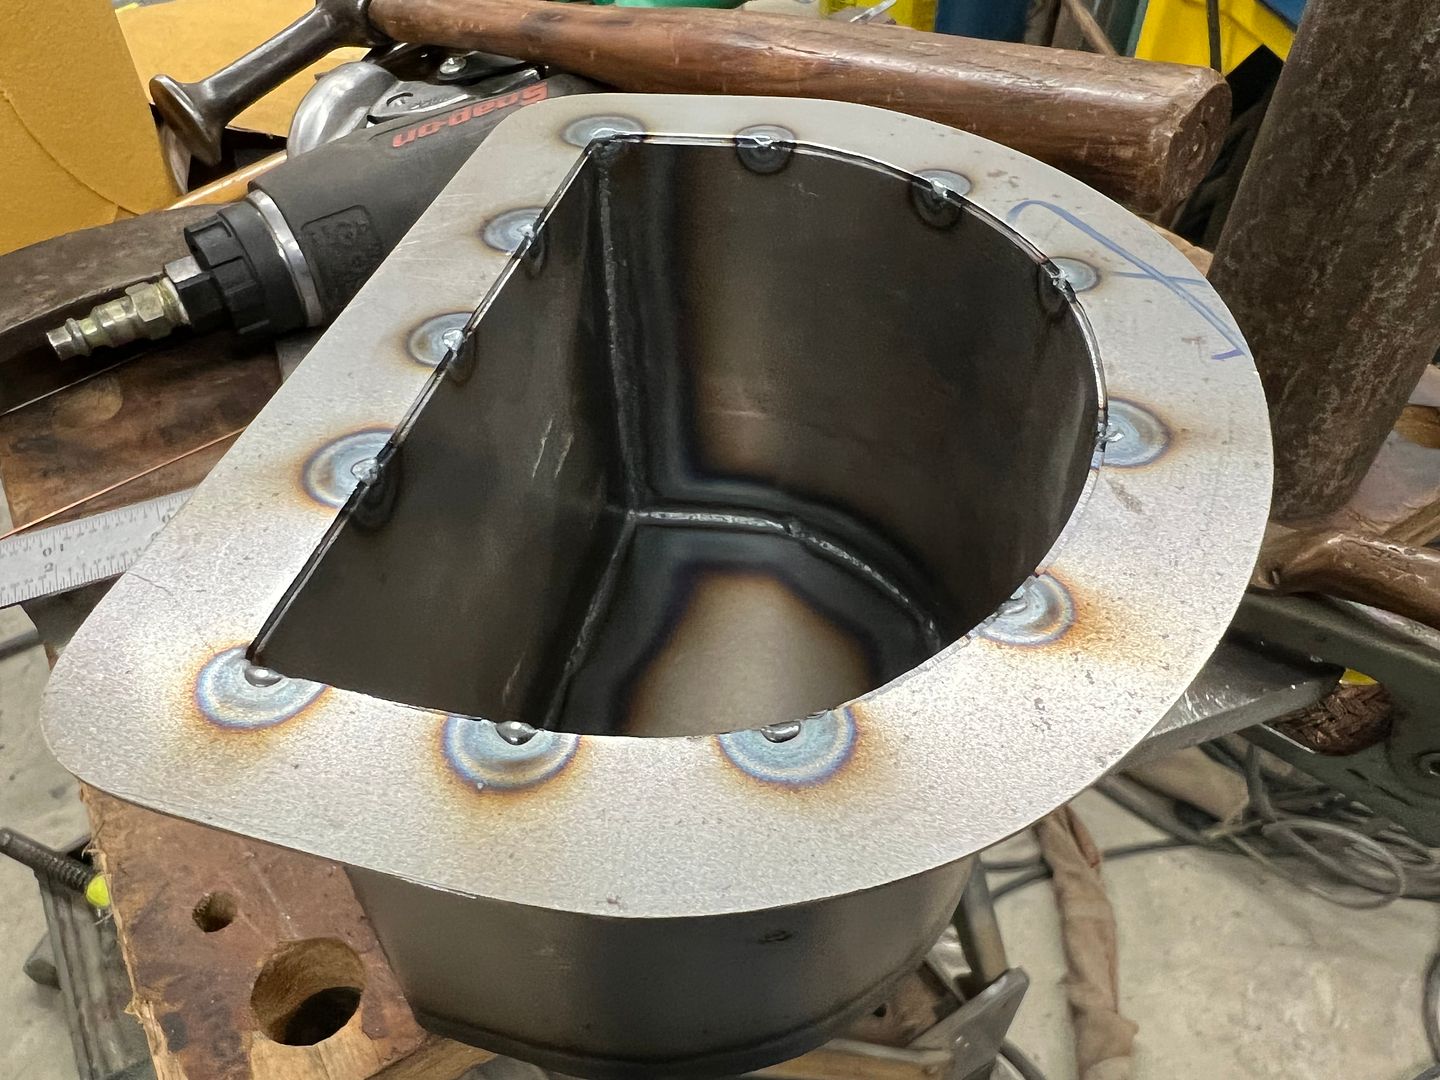 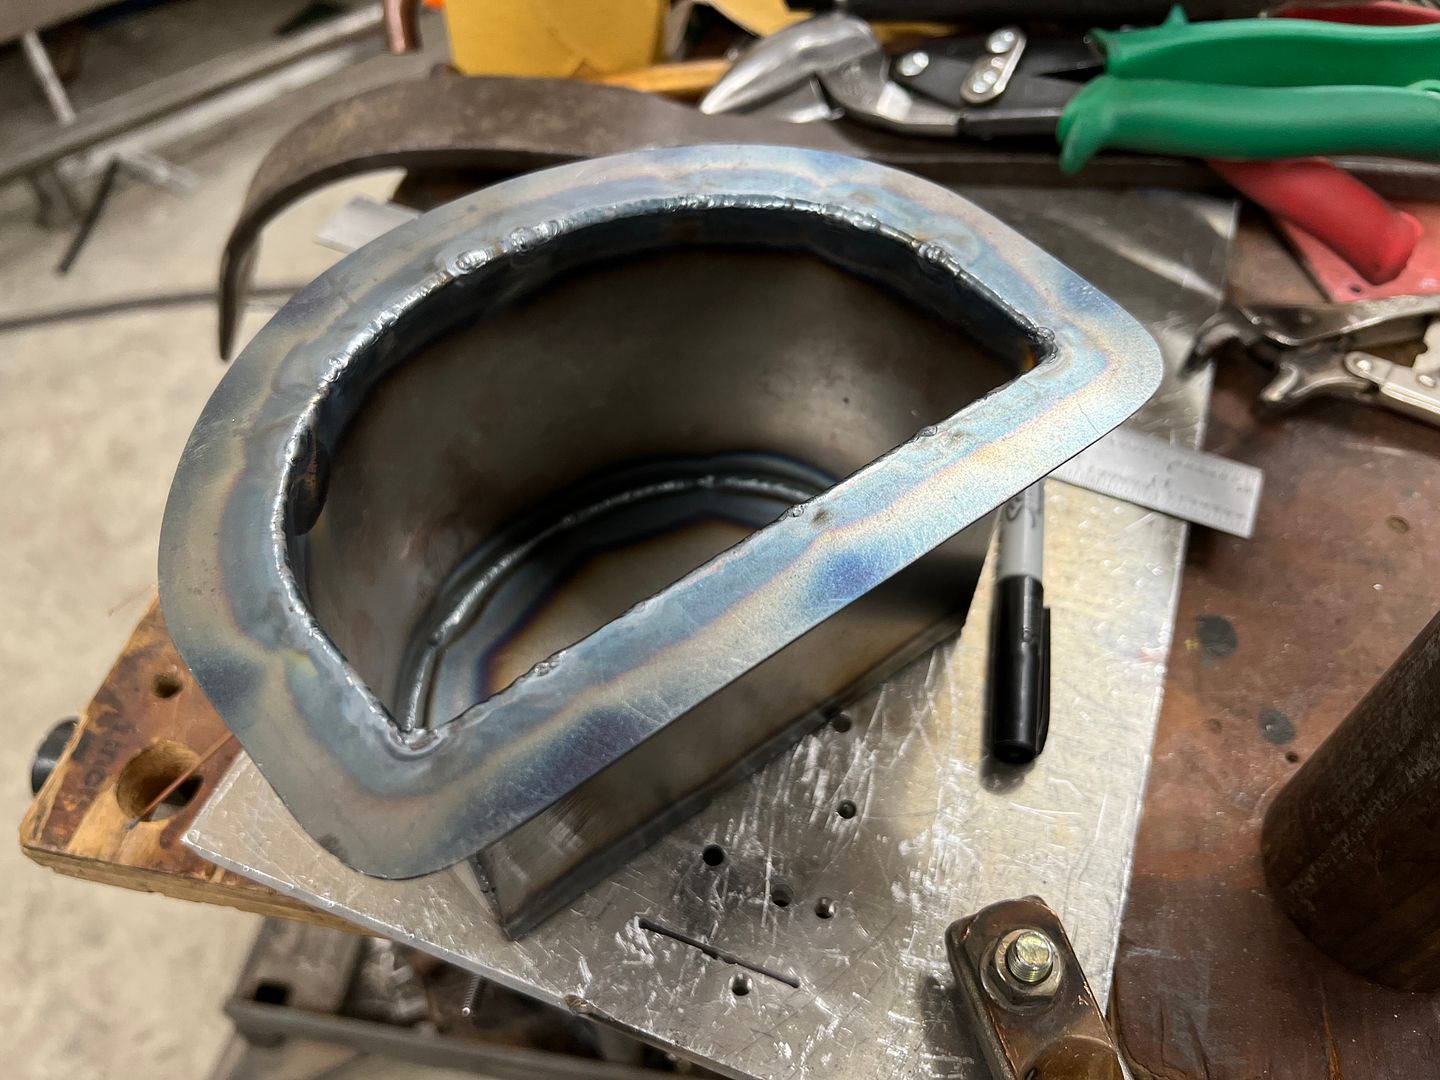 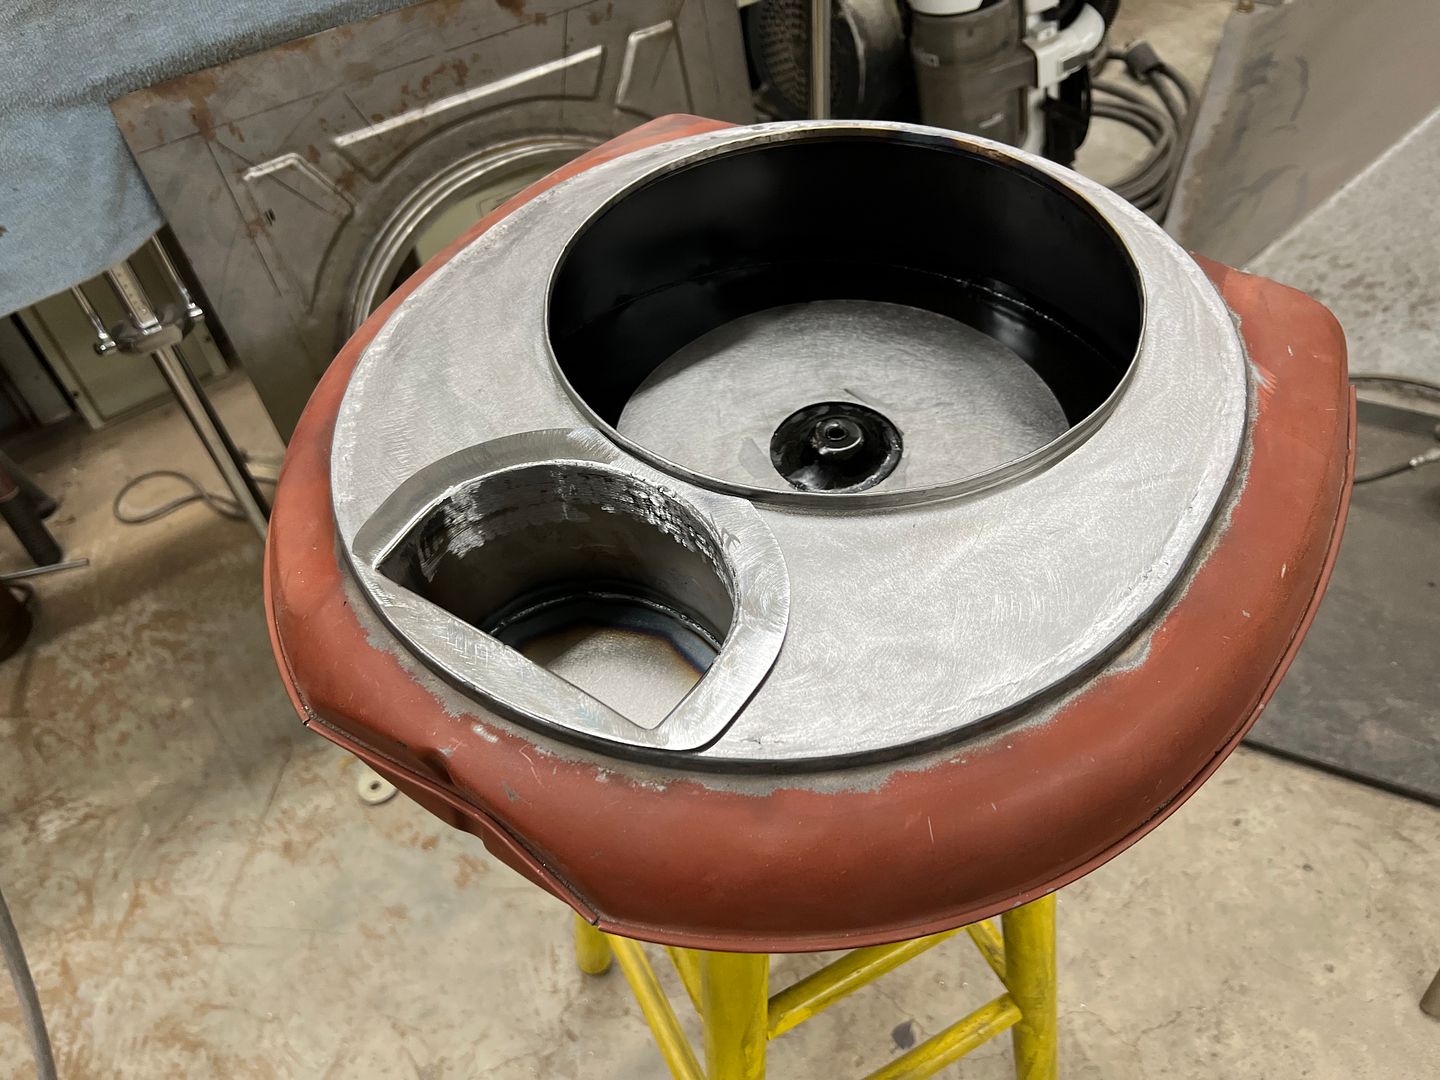 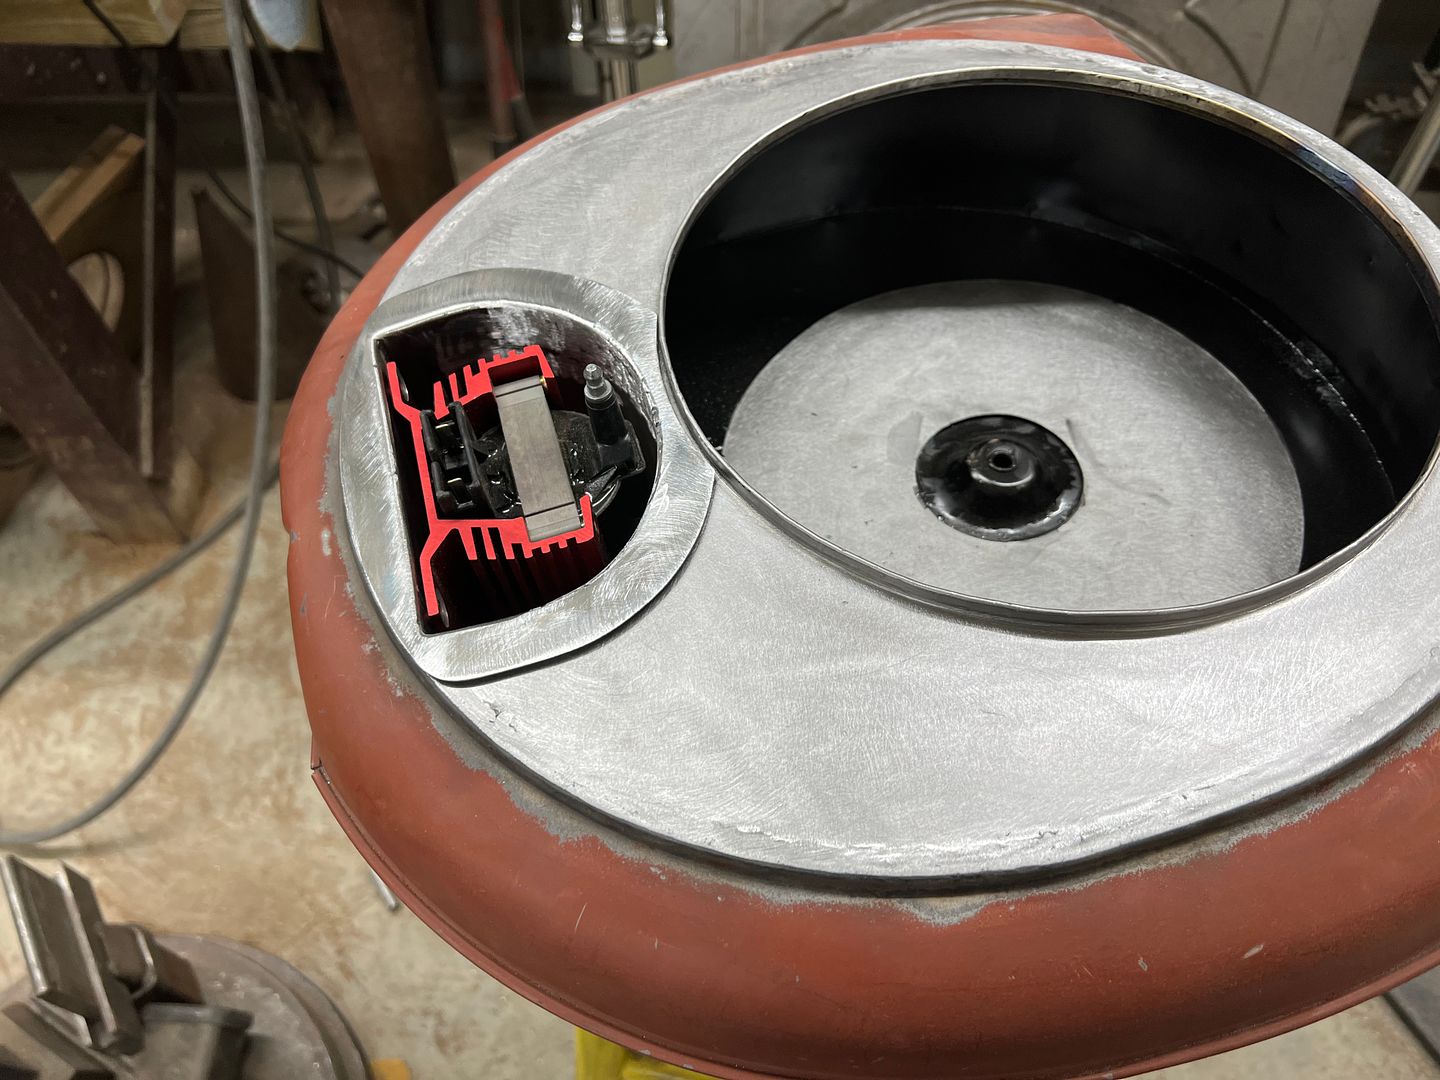 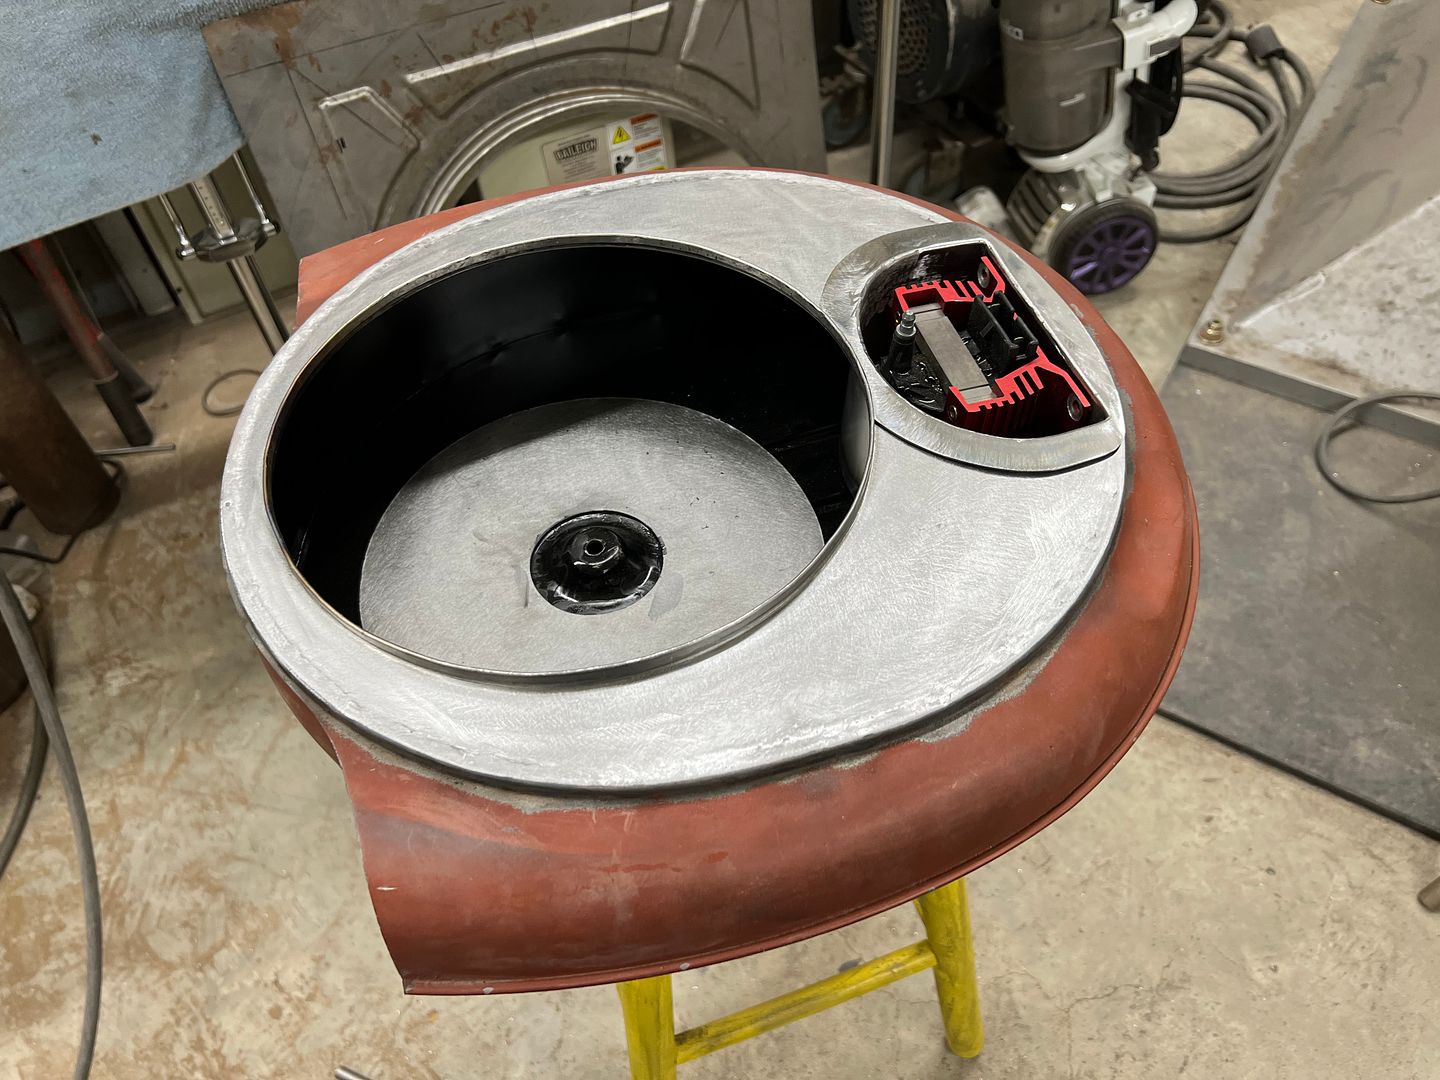 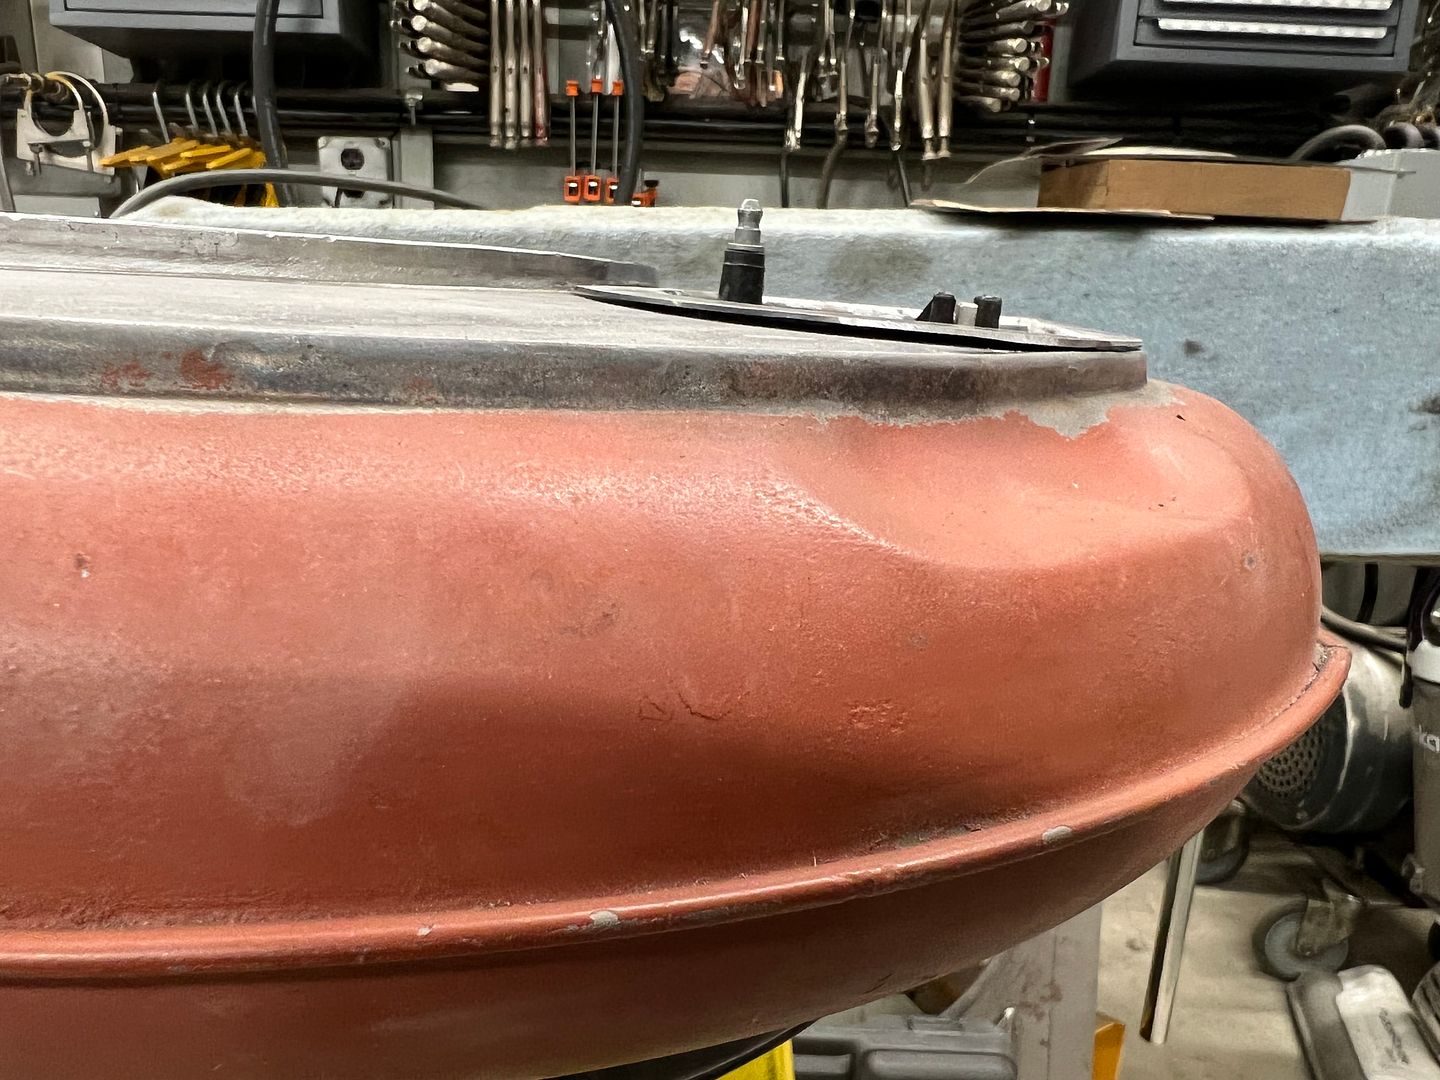 Yup, that's what I was looking for...
__________________
Robert |
|
|

|
|
|
#1257 |
|
Post Whore
  Join Date: May 2015
Location: Alabama
Posts: 14,662
|
Re: 55 Wagon Progress
looks great..!!!
any worries about the coil overheating tucked up in there?
__________________
Mongo...aka Greg RIP Dad RIP Jesse 1981 C30 LQ9 NV4500..http://67-72chevytrucks.com/vboard/s...d.php?t=753598 Mongos AD- LS3 TR6060...http://67-72chevytrucks.com/vboard/s...34#post8522334 Columbus..the 1957 IH 4x4...http://67-72chevytrucks.com/vboard/s...63#post8082563 2023 Chevy Z71..daily driver |
|
|

|
|
|
#1258 |
|
low n' slo
 Join Date: Mar 2009
Location: rosenberg, texas
Posts: 5,172
|
Re: 55 Wagon Progress
wow, that turned out nice
__________________
67 1/2 ton Suburban - Project DRGNWGN. Build thread  -_--_--_ _________ _--_-_ -/____|__|__\__ ,.,,,.,.,,.,|_O _______ O_] |
|
|

|
|
|
#1259 |
|
Registered User
Join Date: May 2010
Location: Lawrenceville, Ga
Posts: 2,646
|
Re: 55 Wagon Progress
|
|
|

|
|
|
#1260 |
|
Registered User
Join Date: Jan 2013
Location: Leonardtown, MD
Posts: 1,647
|
Re: 55 Wagon Progress
We have more tricks coming to take care of air circulation.
Posted via Mobile Device |
|
|

|
|
|
#1261 |
|
Registered User
Join Date: Jan 2013
Location: Leonardtown, MD
Posts: 1,647
|
Re: 55 Wagon Progress
Now for our bottom plate for the air cleaner.. In order to keep the filter located properly (keep it from moving around) we decided to add a bead to the bottom of the plate.
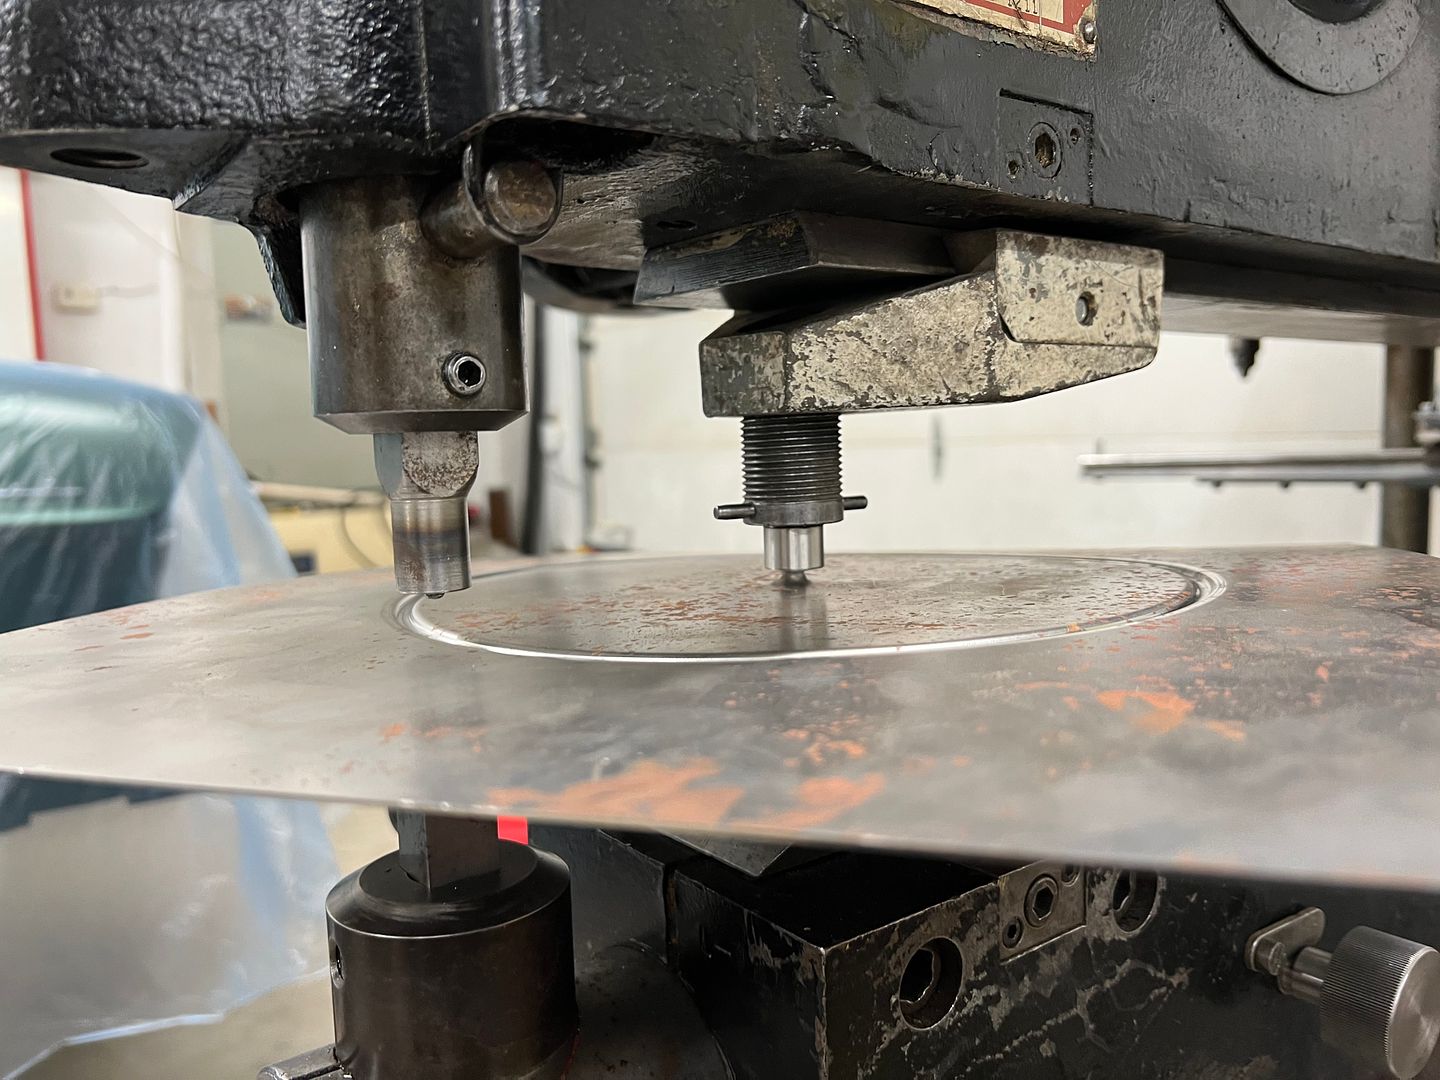 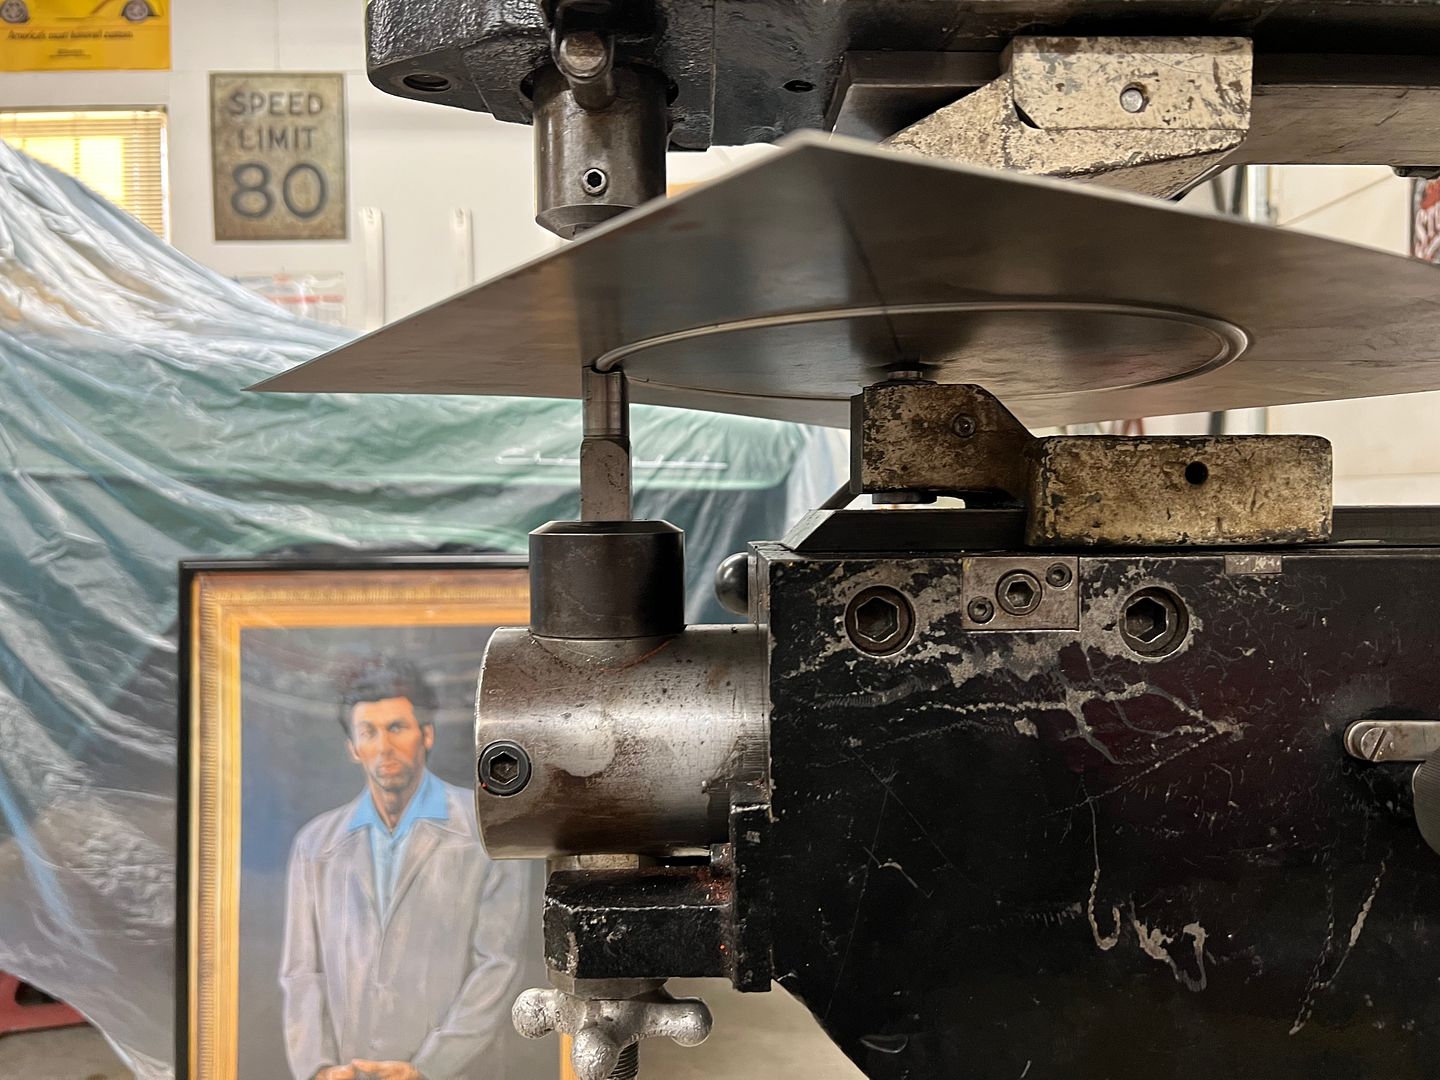 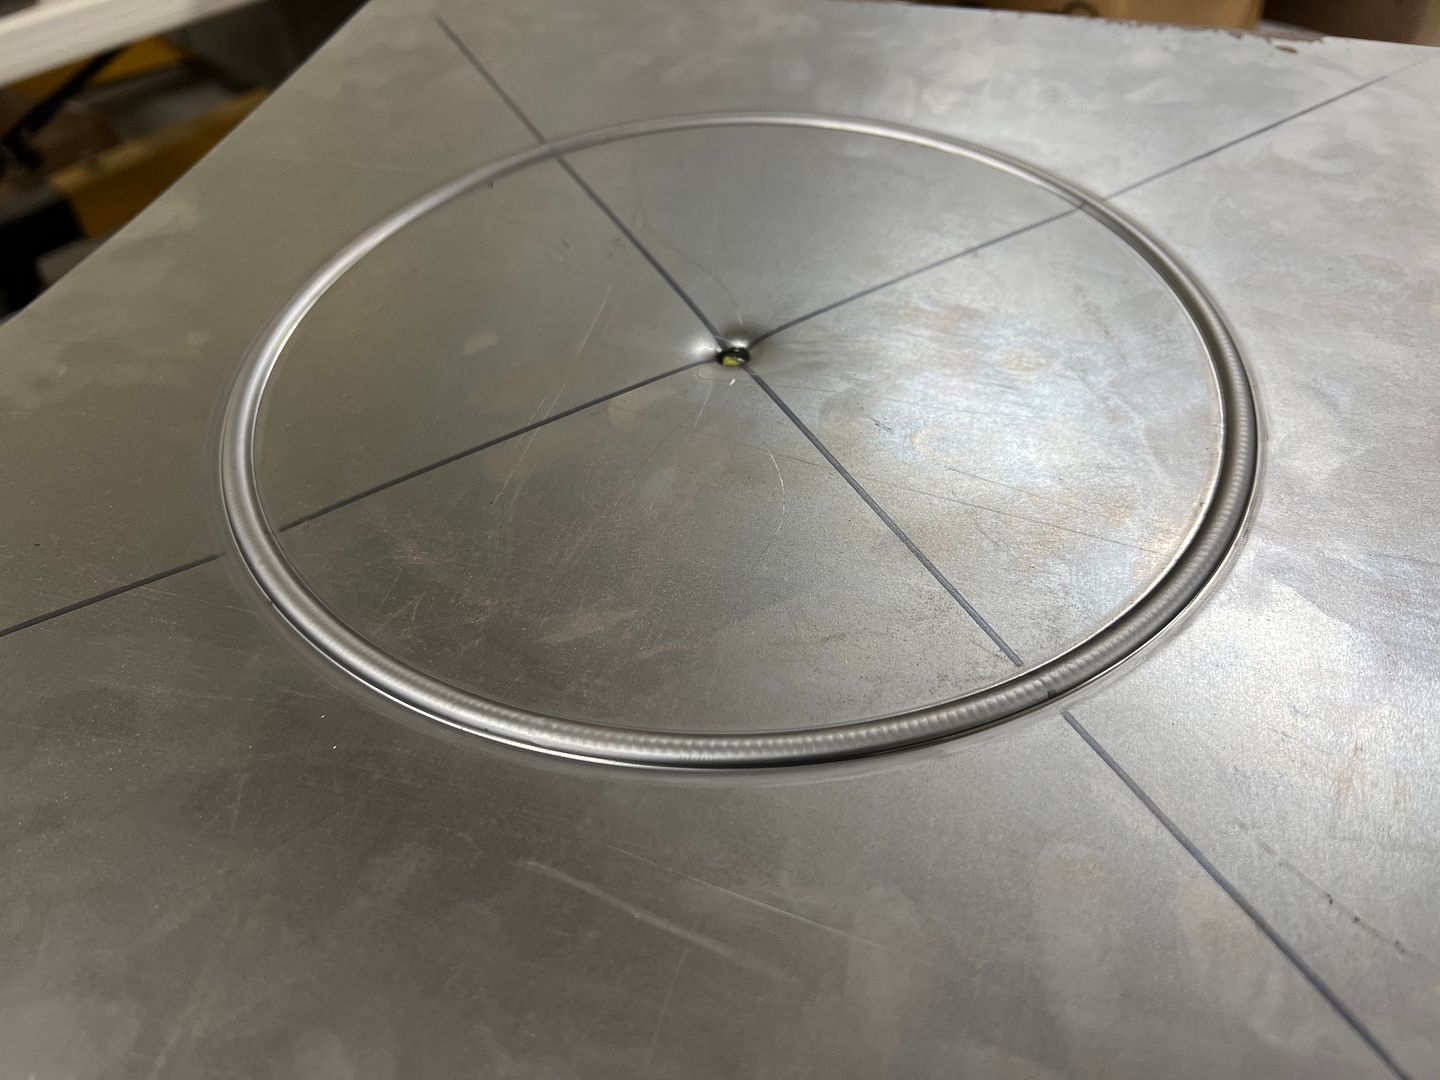 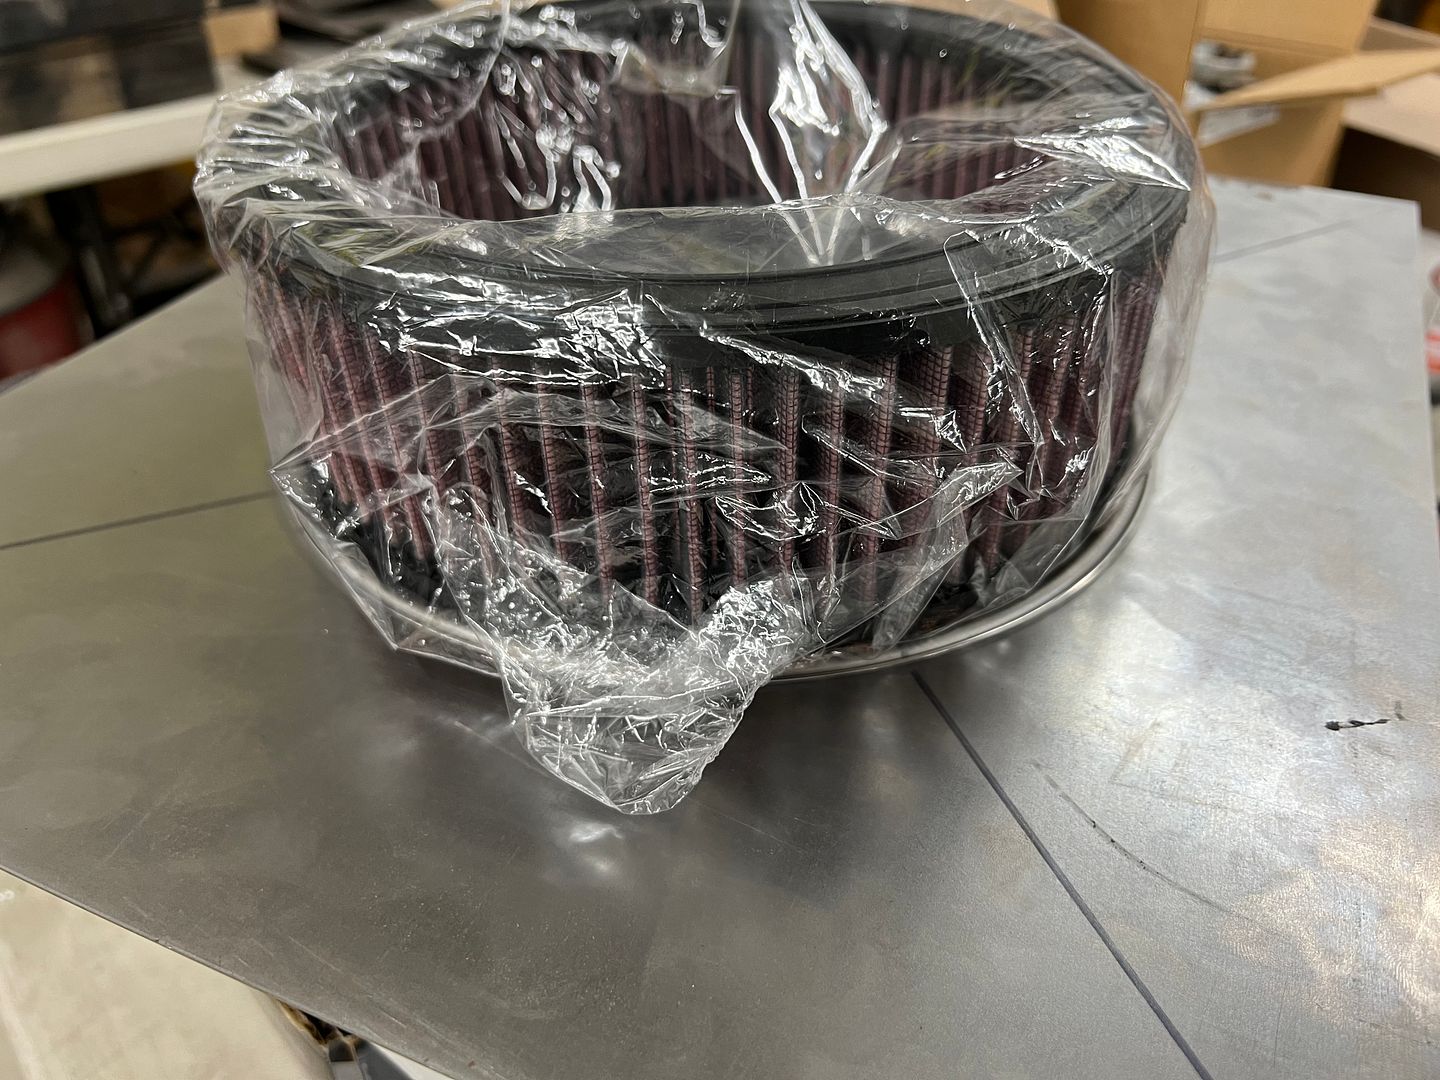 Then the plate is trimmed to a circle, and the thumbnail dies in the Lennox used to start the shrinking process around the edge. https://youtu.be/Vy30NeziryY We then jumped on the Erco kick shrinker to flatten the uneven surface.. https://youtu.be/B1Jg_9BfDNc https://youtu.be/Xlu2LsUNcj0 And repeat. Repeatedly. We have two or three more rounds to go and we can start tipping and stretching. 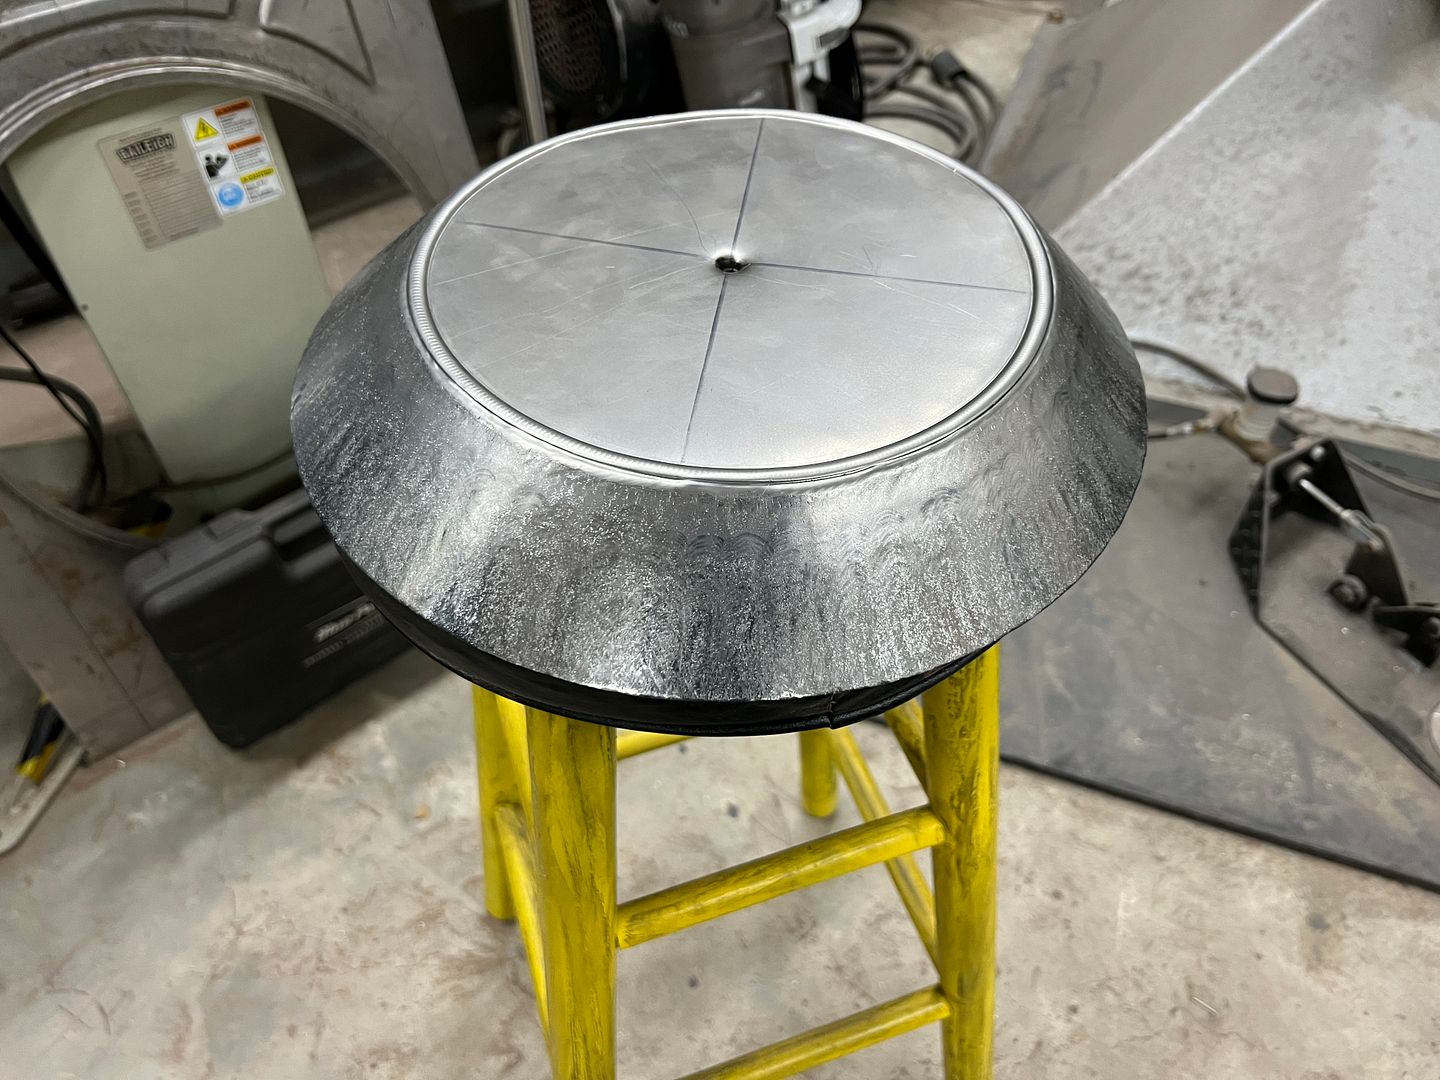 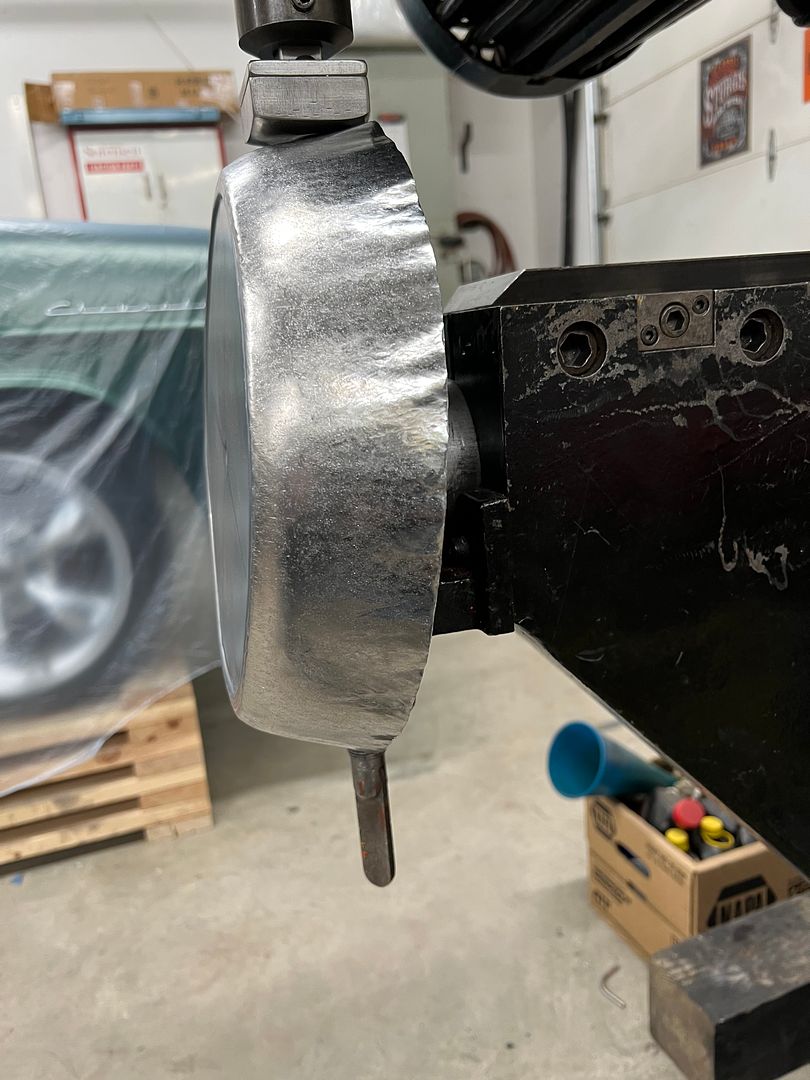 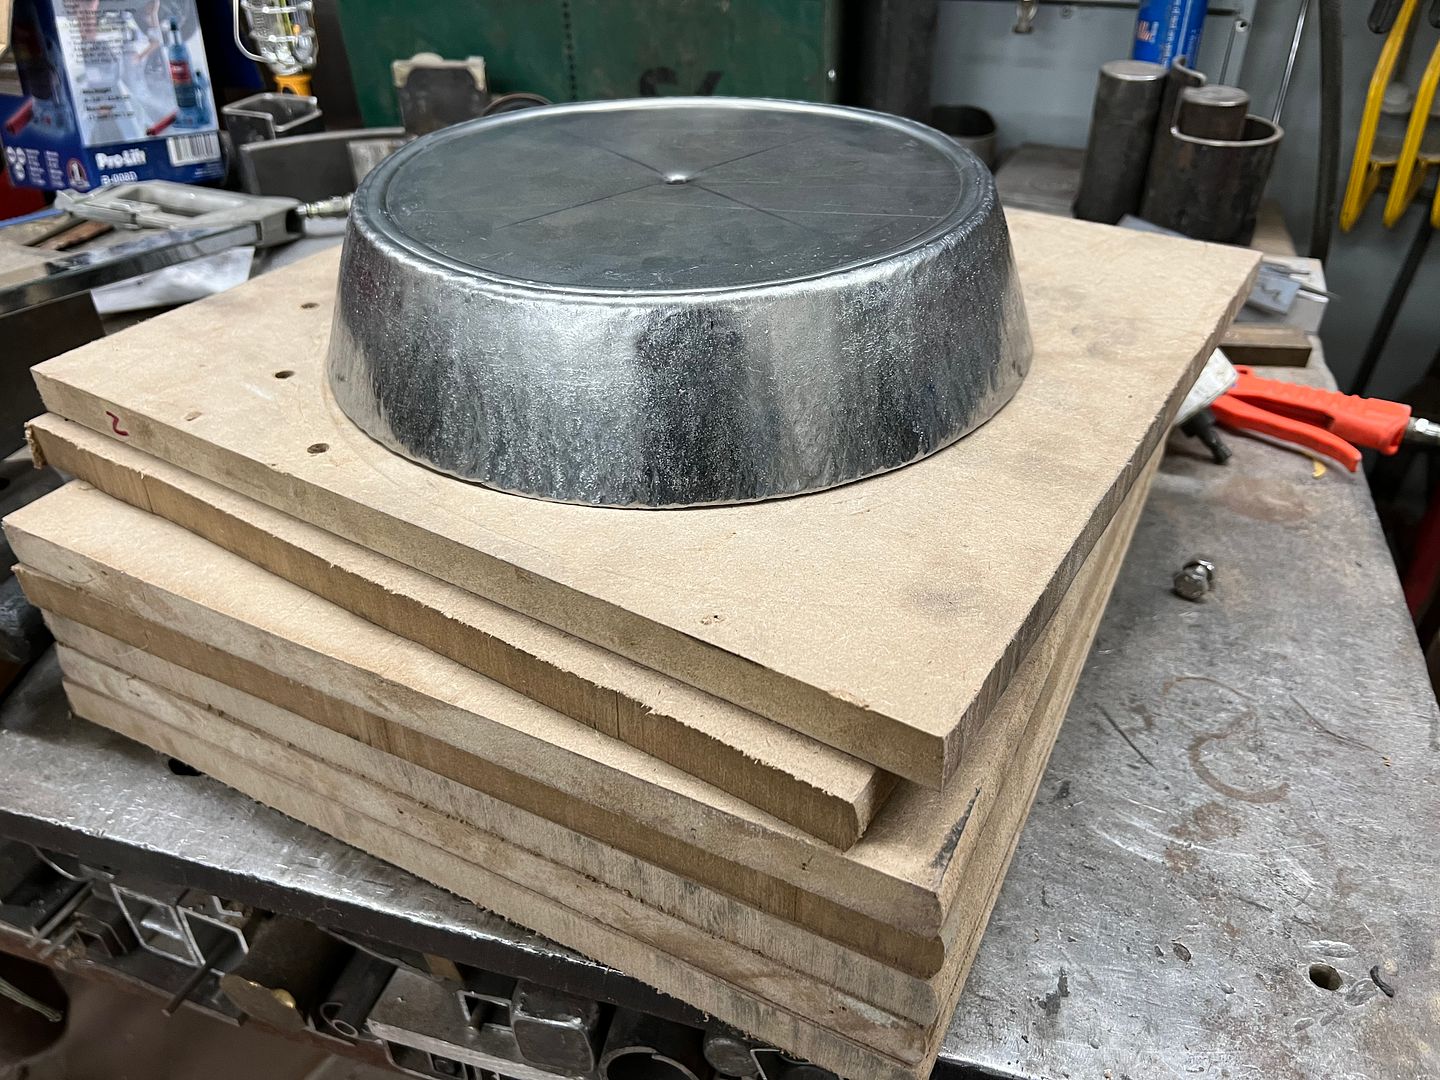
__________________
Robert |
|
|

|
|
|
#1262 |
|
Post Whore
  Join Date: May 2015
Location: Alabama
Posts: 14,662
|
Re: 55 Wagon Progress
...
__________________
Mongo...aka Greg RIP Dad RIP Jesse 1981 C30 LQ9 NV4500..http://67-72chevytrucks.com/vboard/s...d.php?t=753598 Mongos AD- LS3 TR6060...http://67-72chevytrucks.com/vboard/s...34#post8522334 Columbus..the 1957 IH 4x4...http://67-72chevytrucks.com/vboard/s...63#post8082563 2023 Chevy Z71..daily driver |
|
|

|
|
|
#1263 |
|
Registered User
Join Date: Dec 2009
Location: Arizona City, AZ
Posts: 747
|
Re: 55 Wagon Progress
That air cleaner with the coil in it looks great!
__________________
----------------------------------------------------------- Erik My 69 suburban http://67-72chevytrucks.com/vboard/s...d.php?t=530626 1970 C10 step Project Jiminy http://67-72chevytrucks.com/vboard/s...d.php?t=682647 RUST!? Thats just mother natures way of telling all of us.....MINE!!!! |
|
|

|
|
|
#1264 |
|
Registered User
Join Date: Jan 2013
Location: Leonardtown, MD
Posts: 1,647
|
Re: 55 Wagon Progress
Thanks guys!!
Last night we changed out the thumbnail shrinking dies for linear stretch dies in the Lennox TE250 in order to tip the flange back horizontal again. We have a backstop / fence that had been notched for tooling and this did a nice job of getting the flange depth consistent. 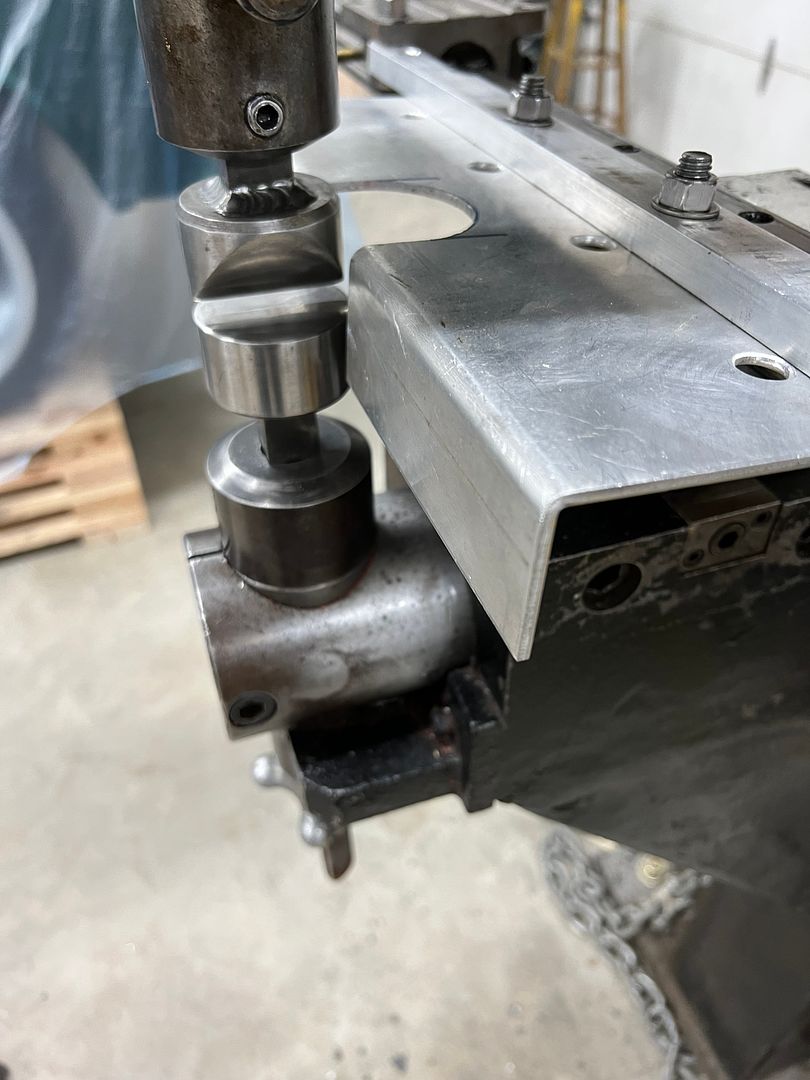 As this gets bolted to our linear slide and we'll need that to remain stationary, some Cerutti built clamp blocks are added. 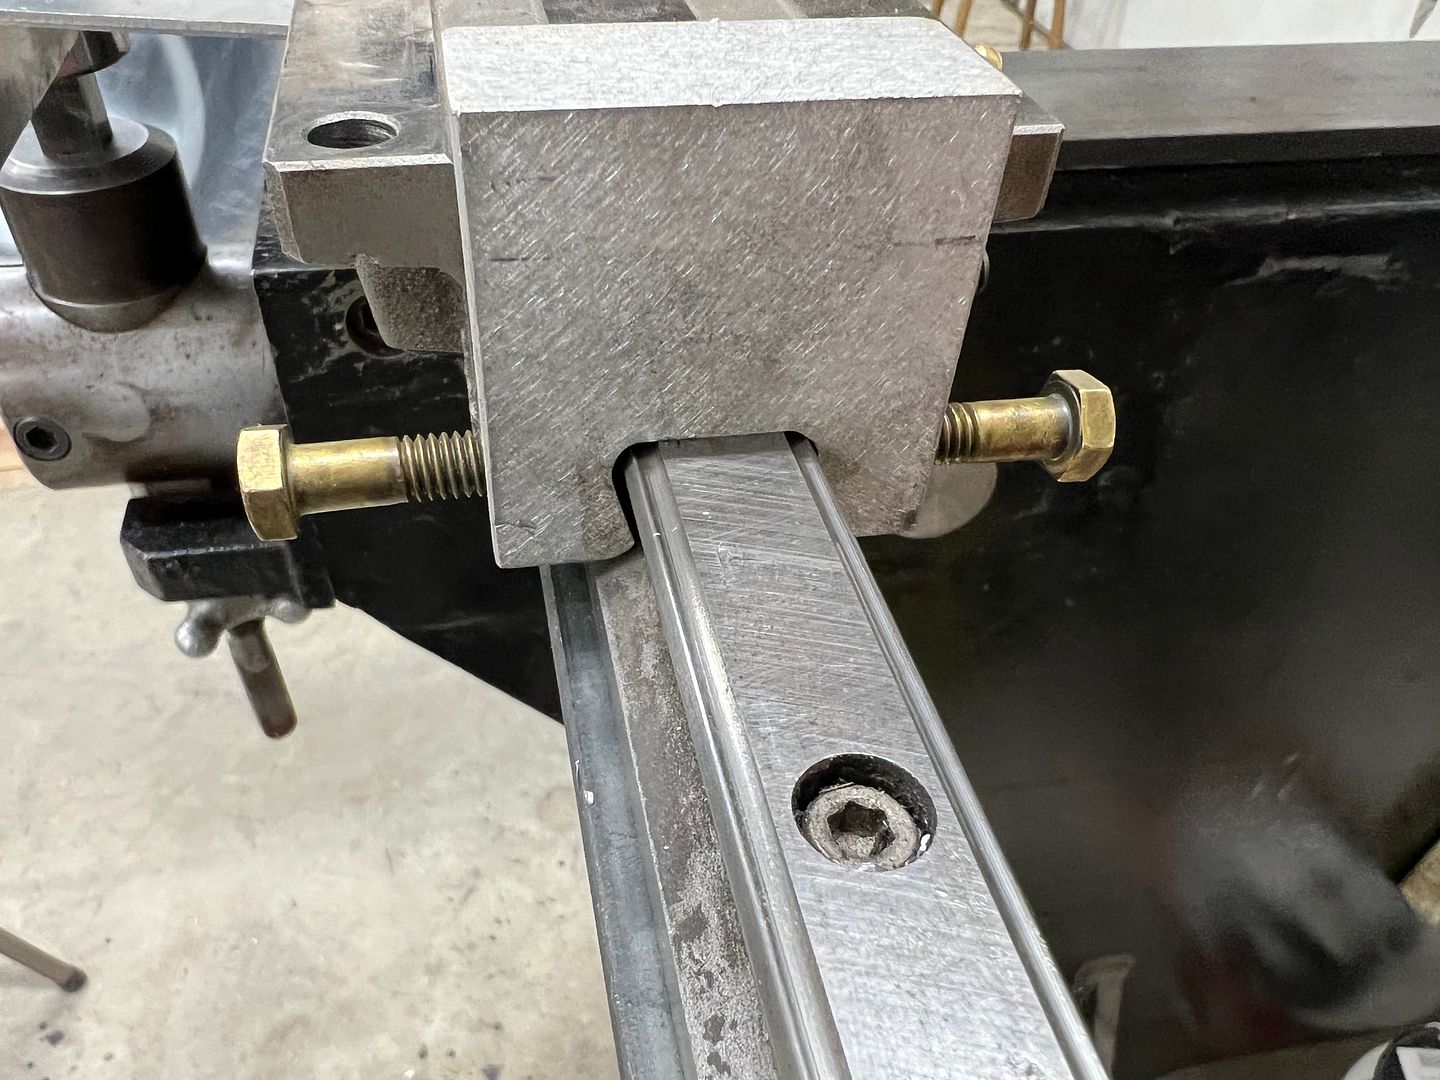 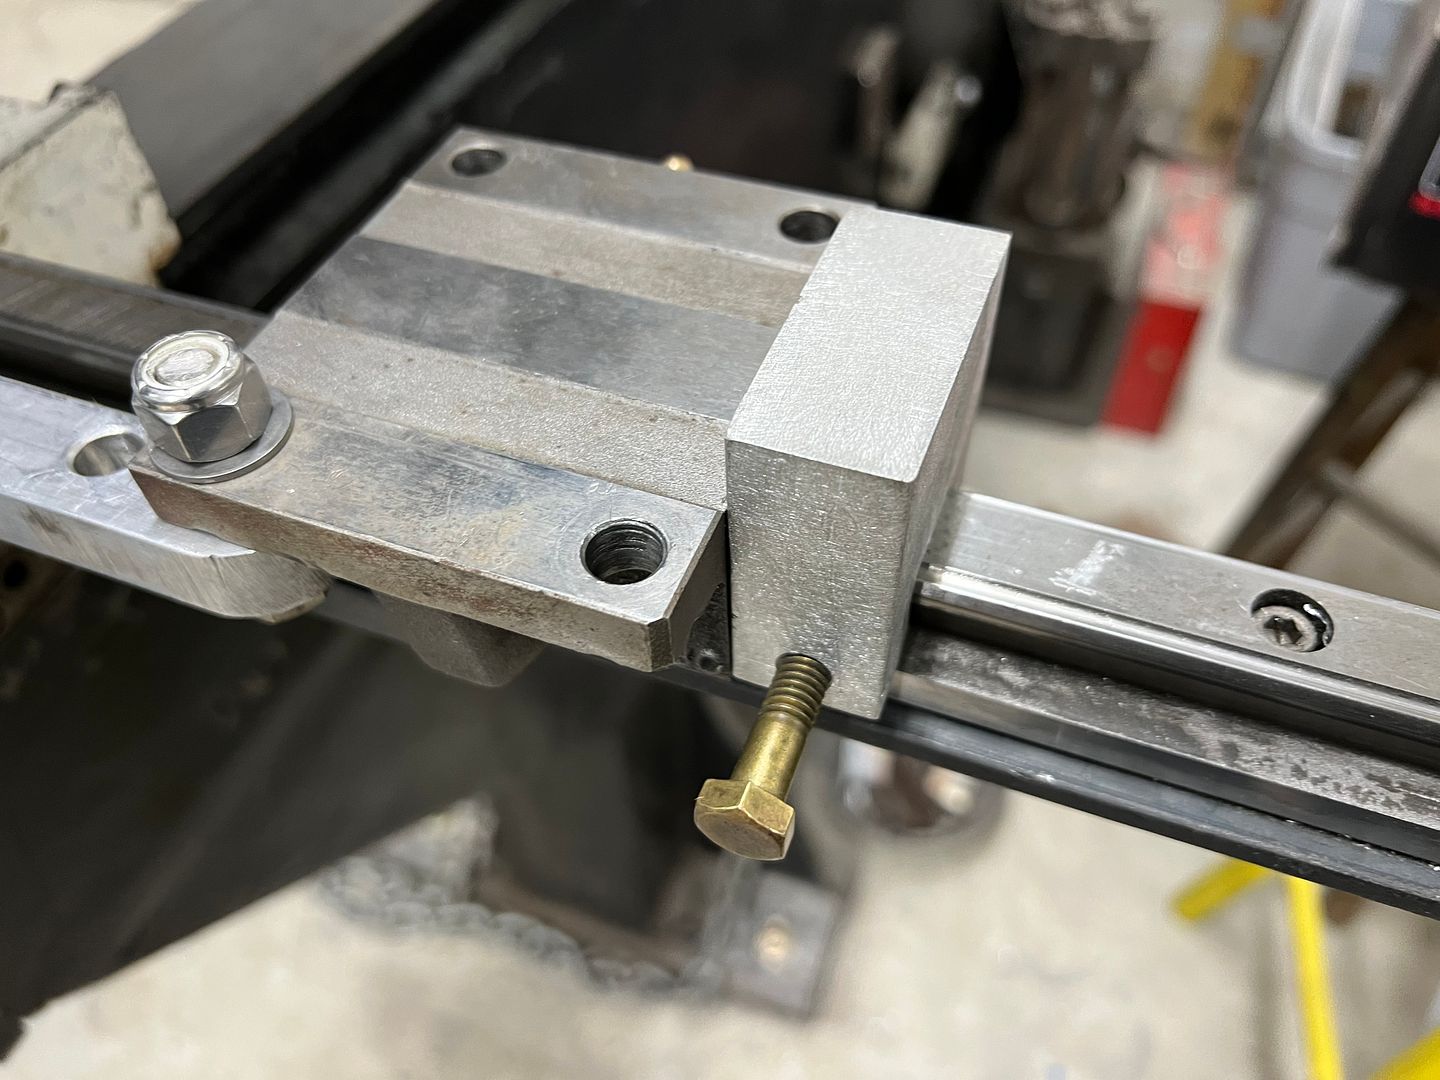 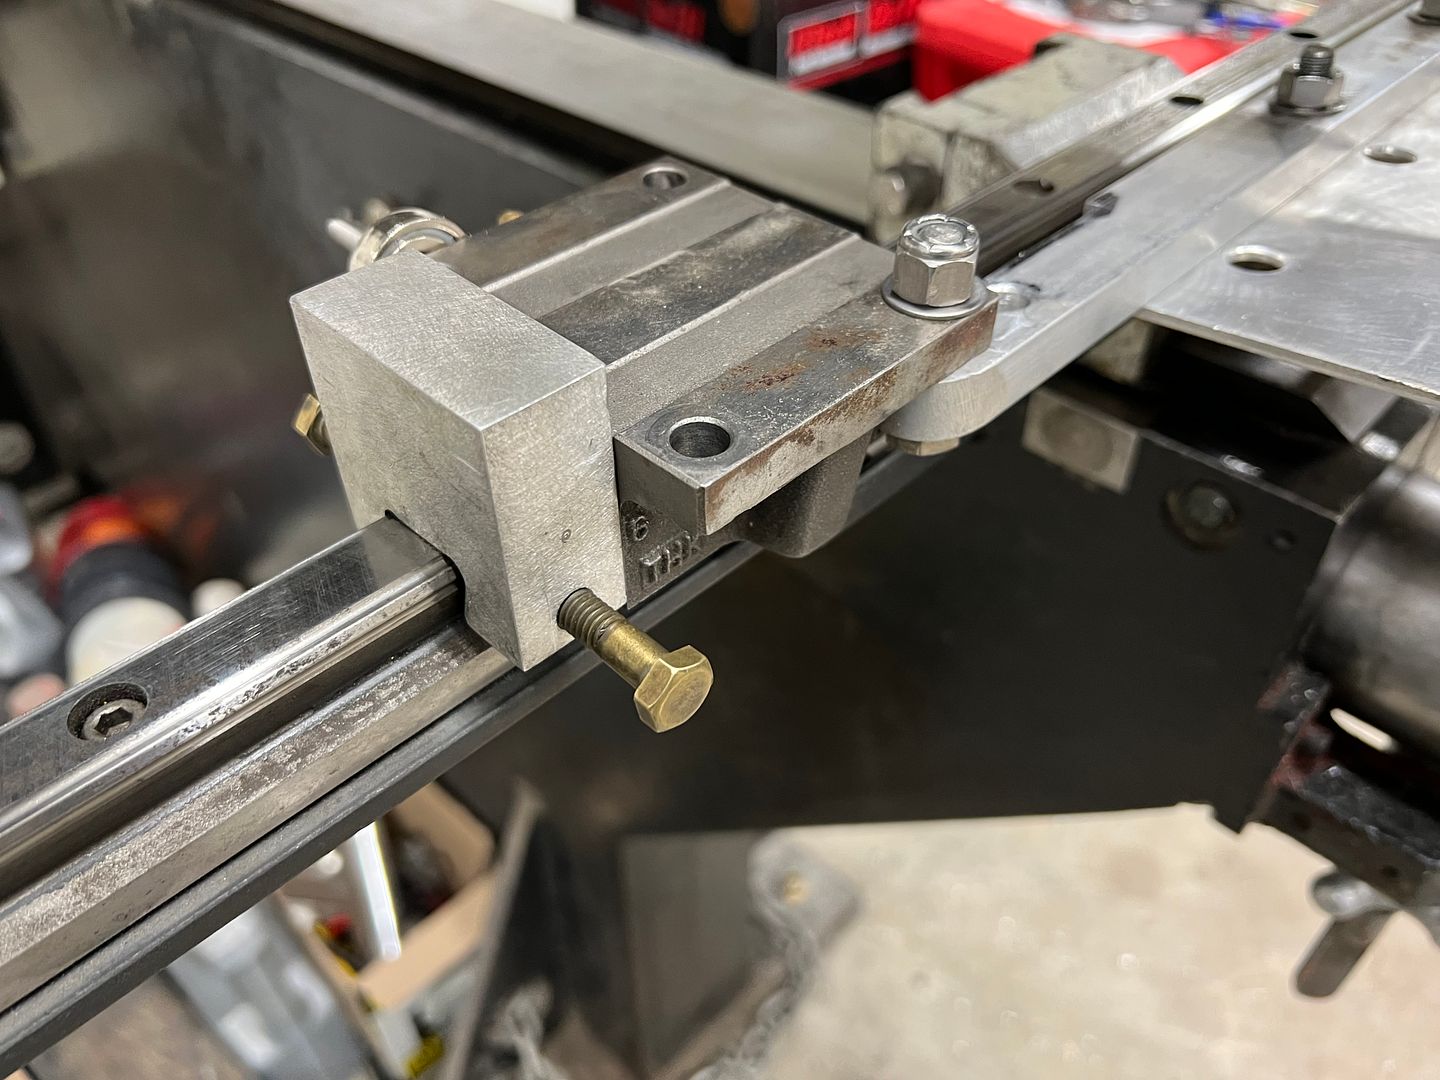 Linear stretch dies in action: https://www.youtube.com/watch?v=-euPrCTj9zI 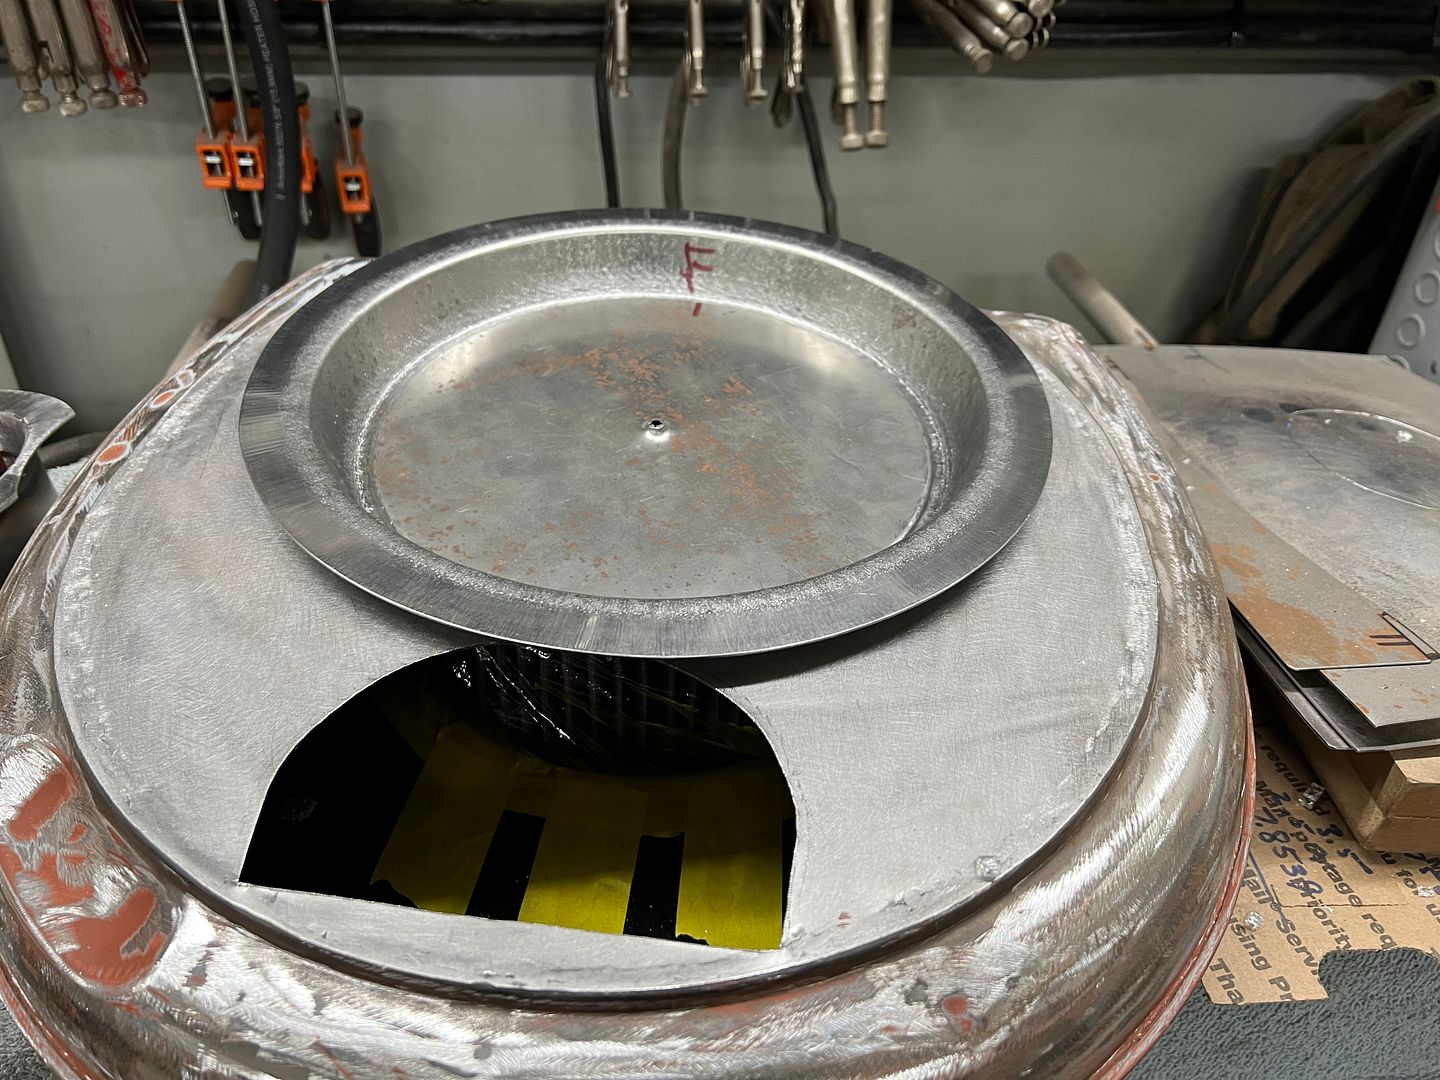 Next, we had been having issue with the Skat Blast cabinet, and given the sale going on this week at TP Tools, ordered a new high volume cabinet gun and nozzle, some high flow fittings, and while we're at it, how about some fresh glass.. _IMG_1775.JPG) 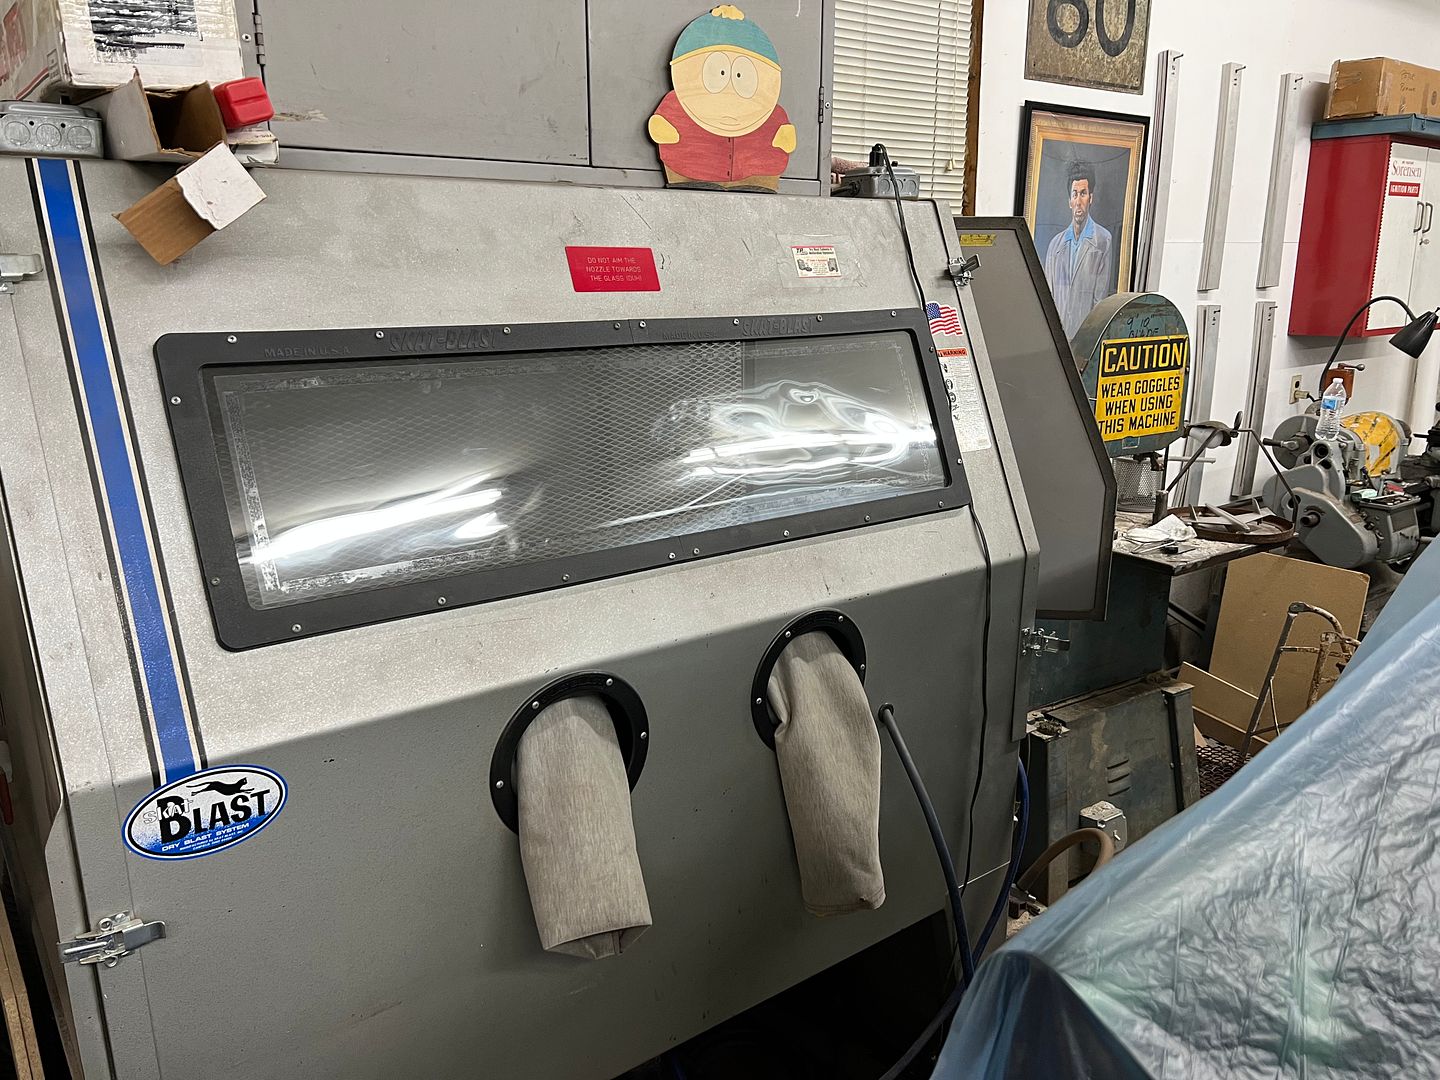 Amazing....we can see! 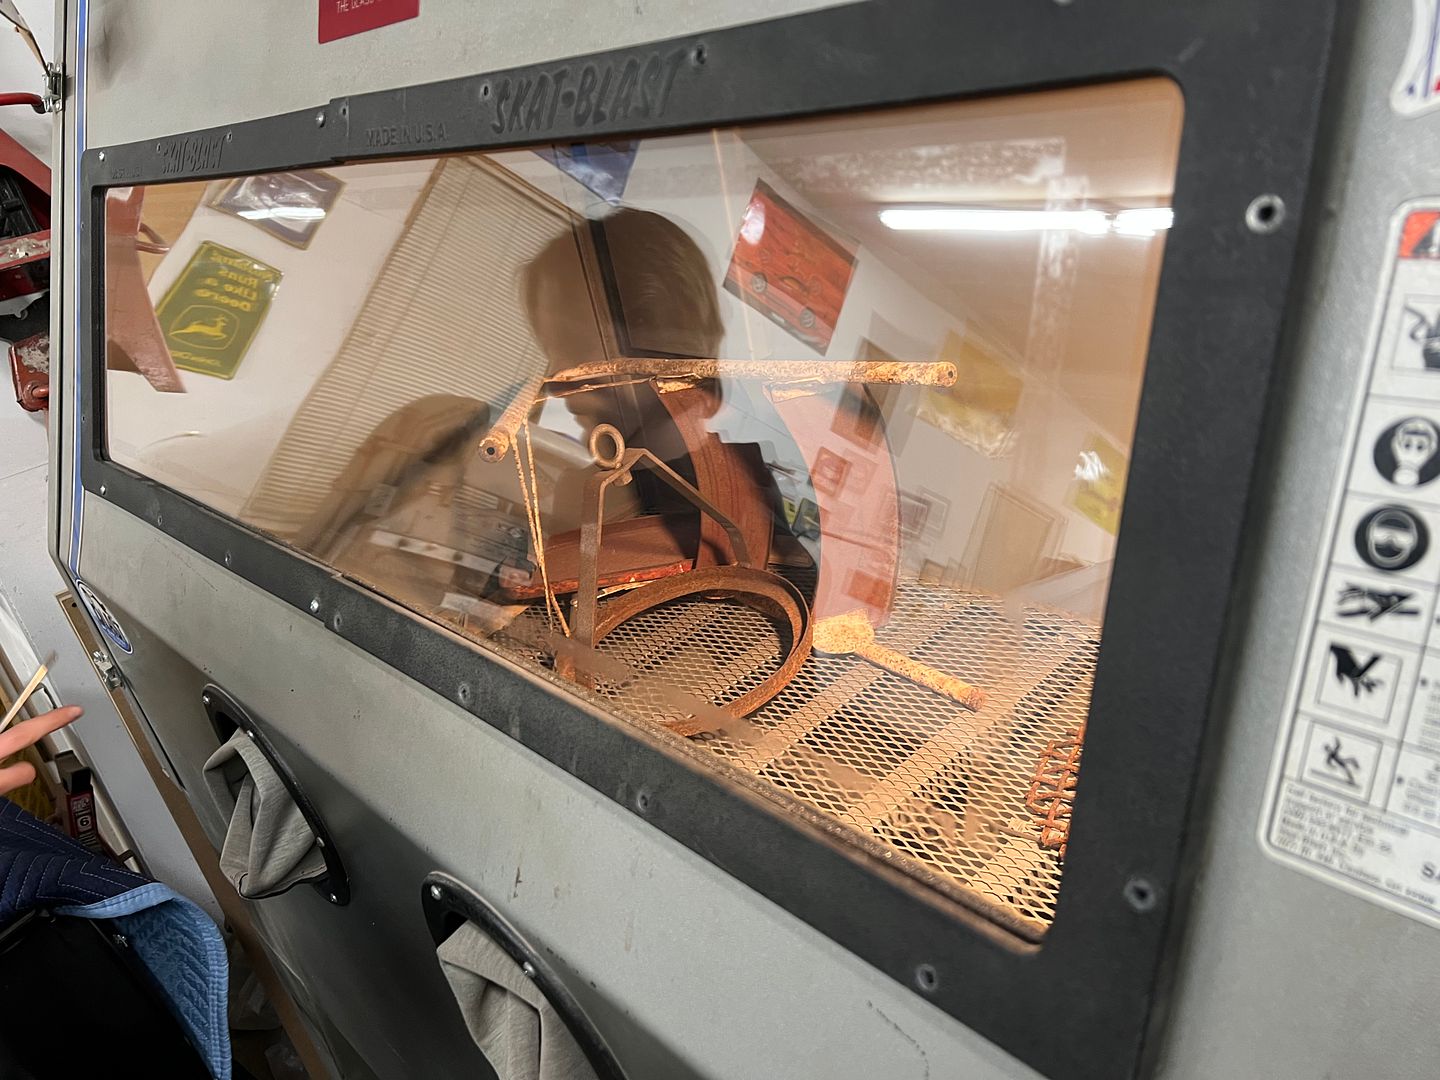 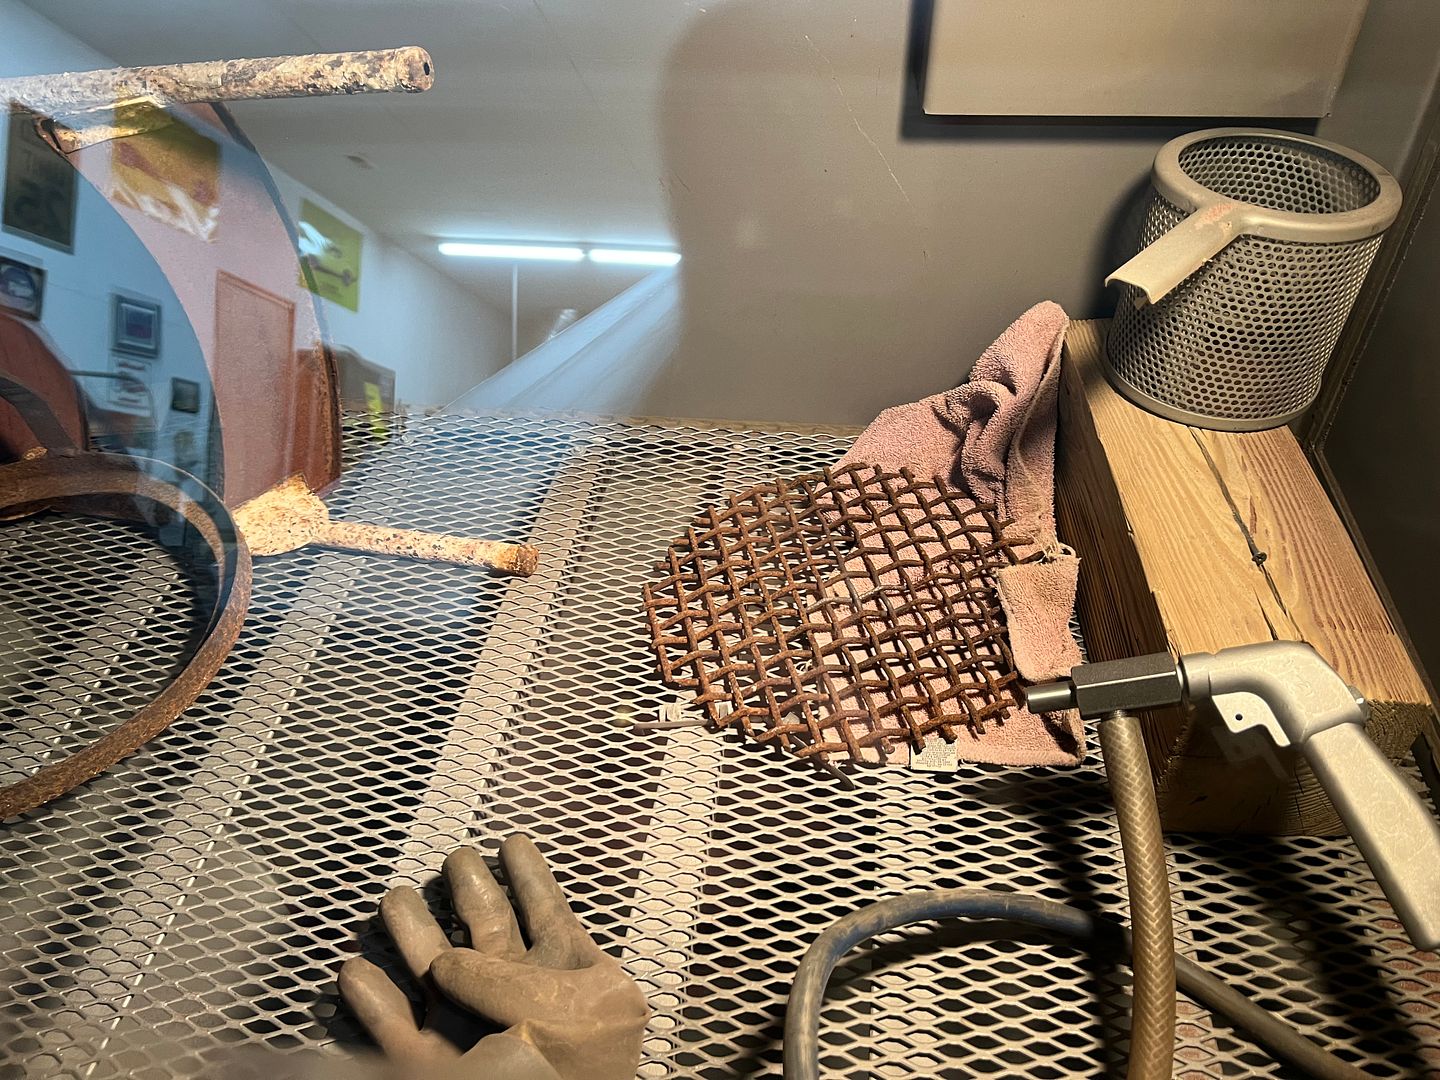 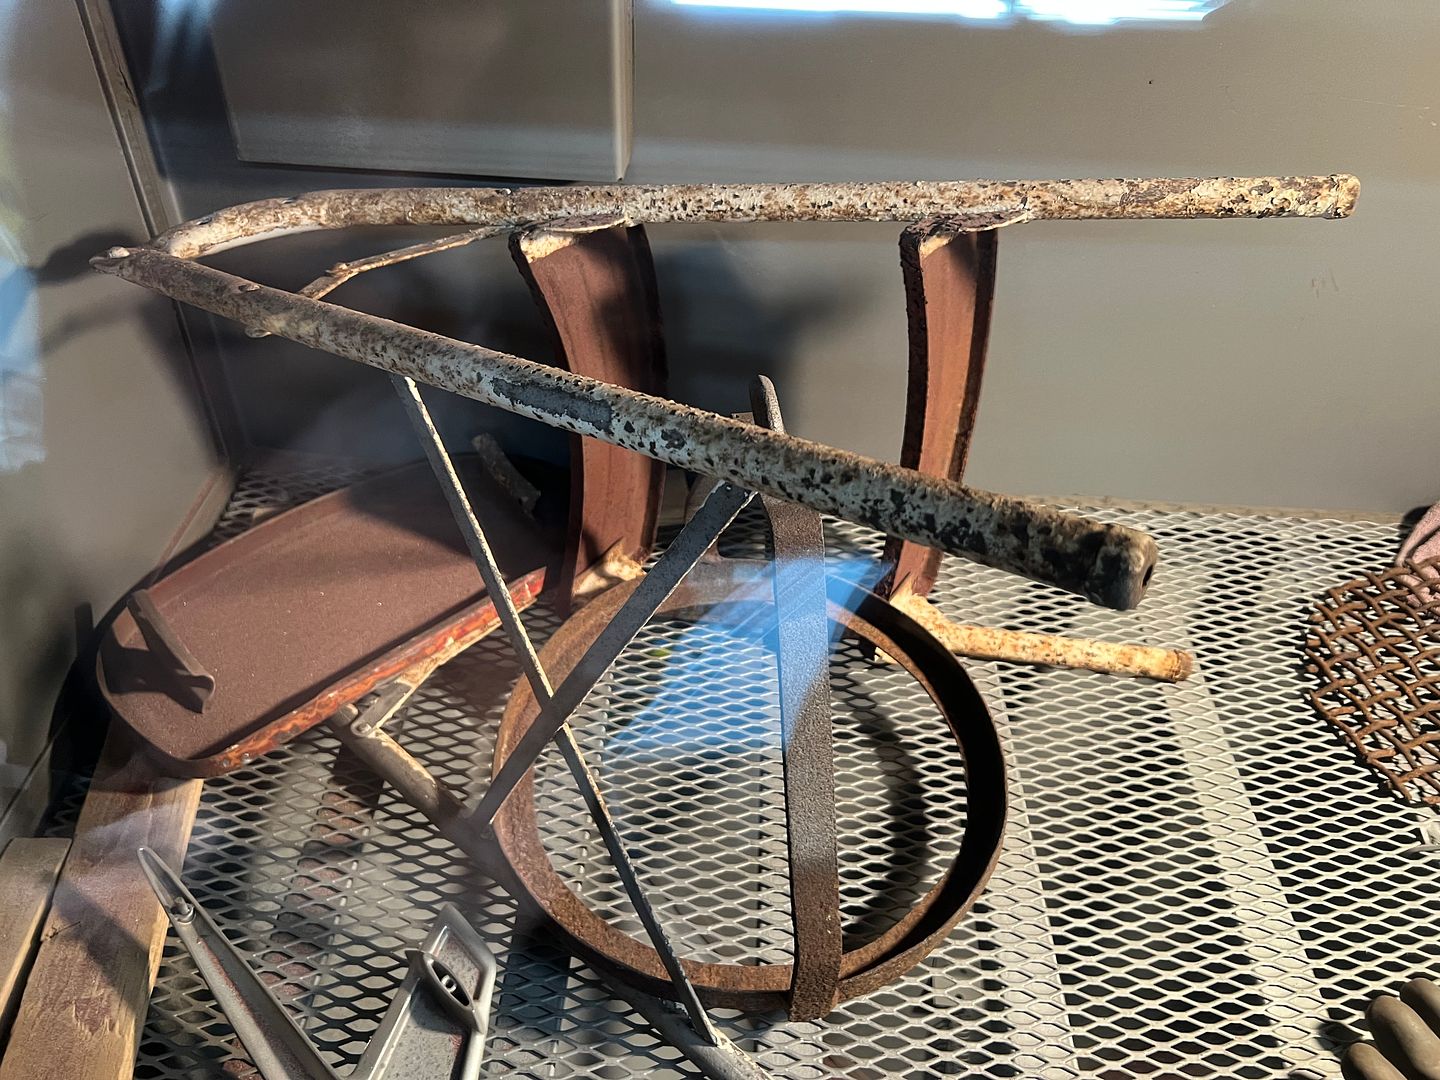 But alas, all the new parts did not fix the losing media about 5-10 seconds in. So we figured this was a blockage with the suction tube, which requires removing the expanded metal deck inside. Which has sealant along front and rear edge. So a handy utility knife was employed, along with this fancy tool we had made up for removing tiles in raised flooring, as it did well in pulling up the expanded metal. 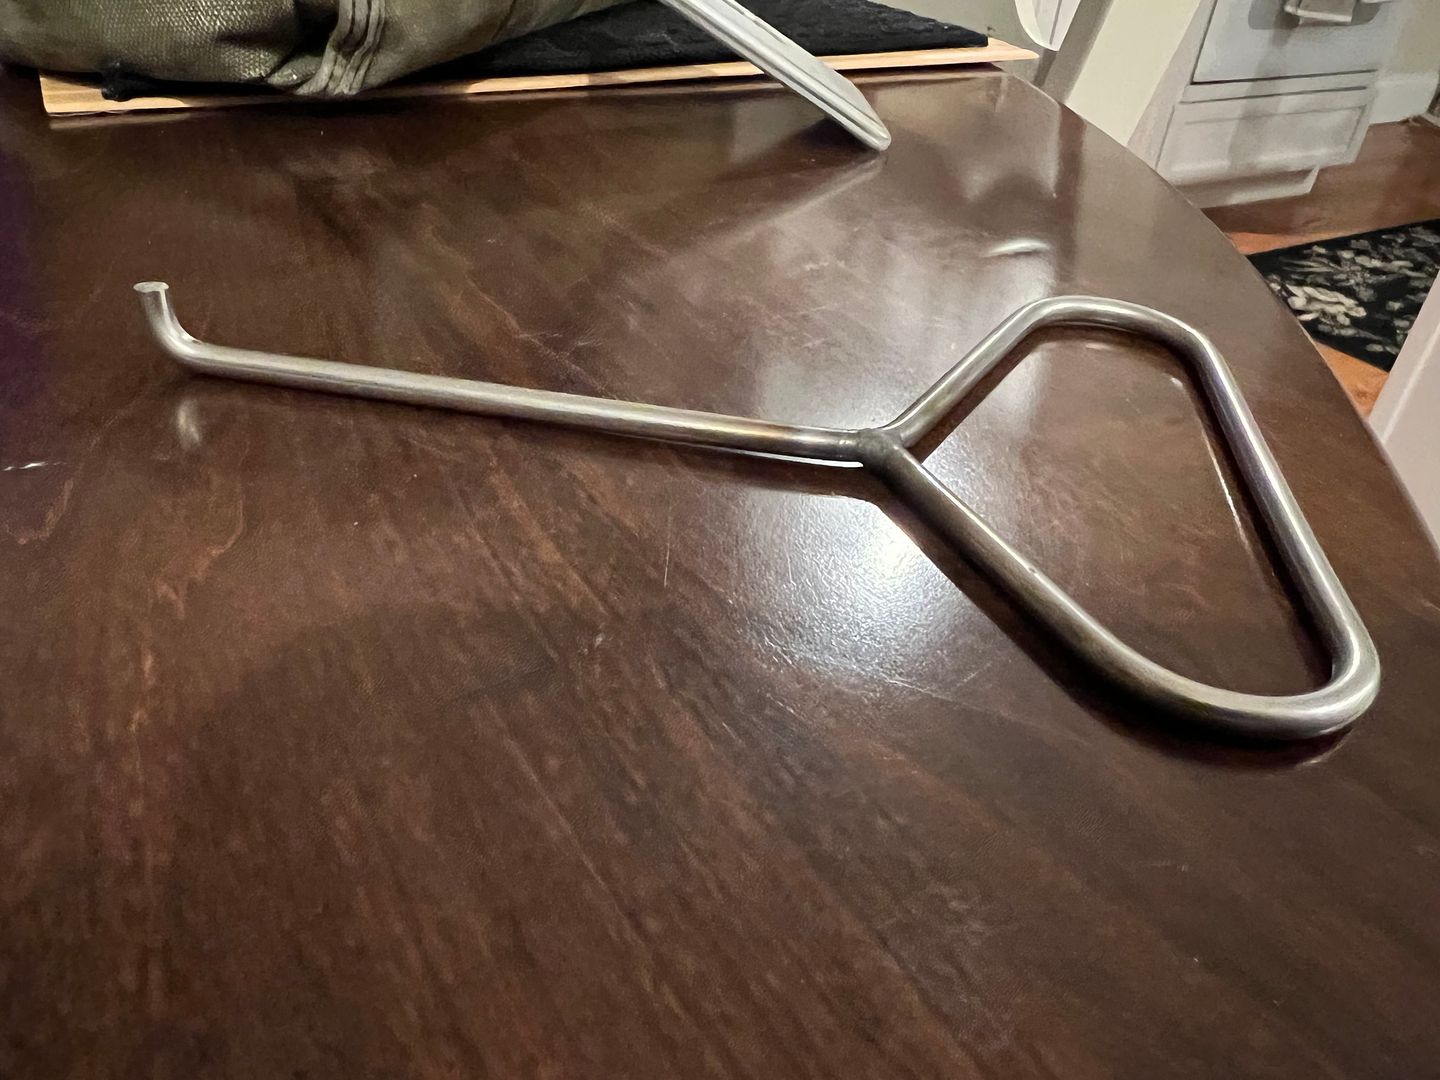 The screen was tipped up out of the way and a large magnet holds it in place... 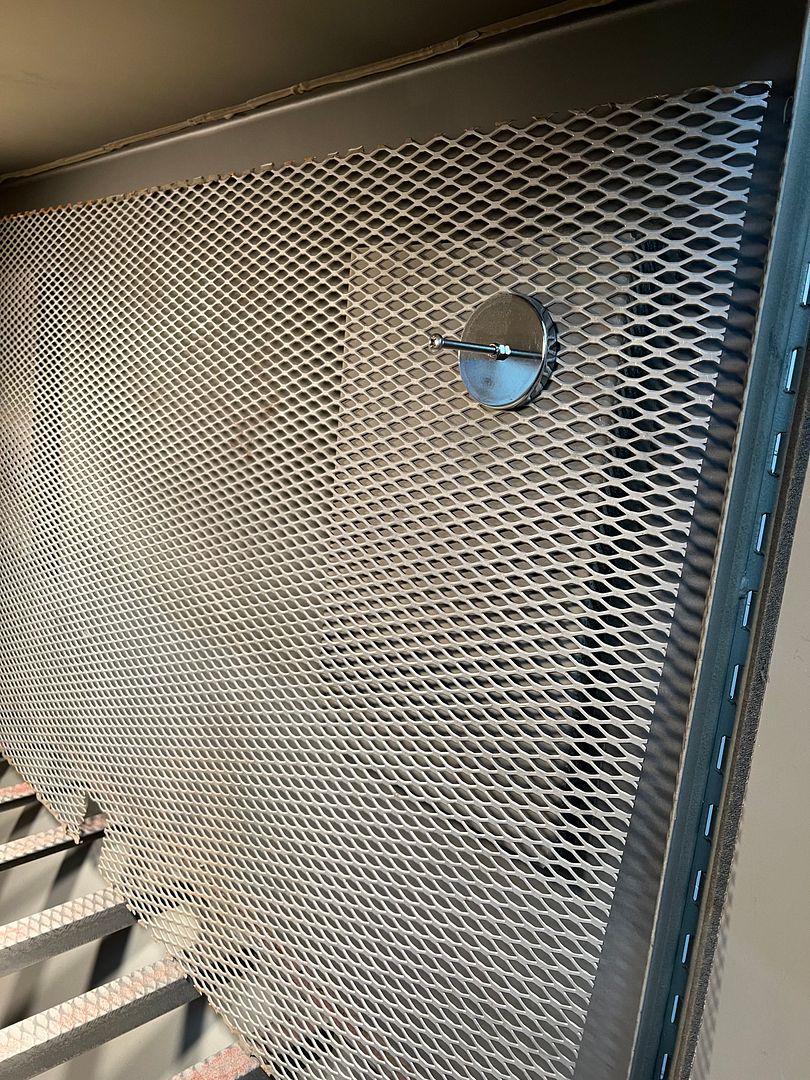 Once we had access to the pickup tube, we noticed a hole in the inside corner that didn't belong. 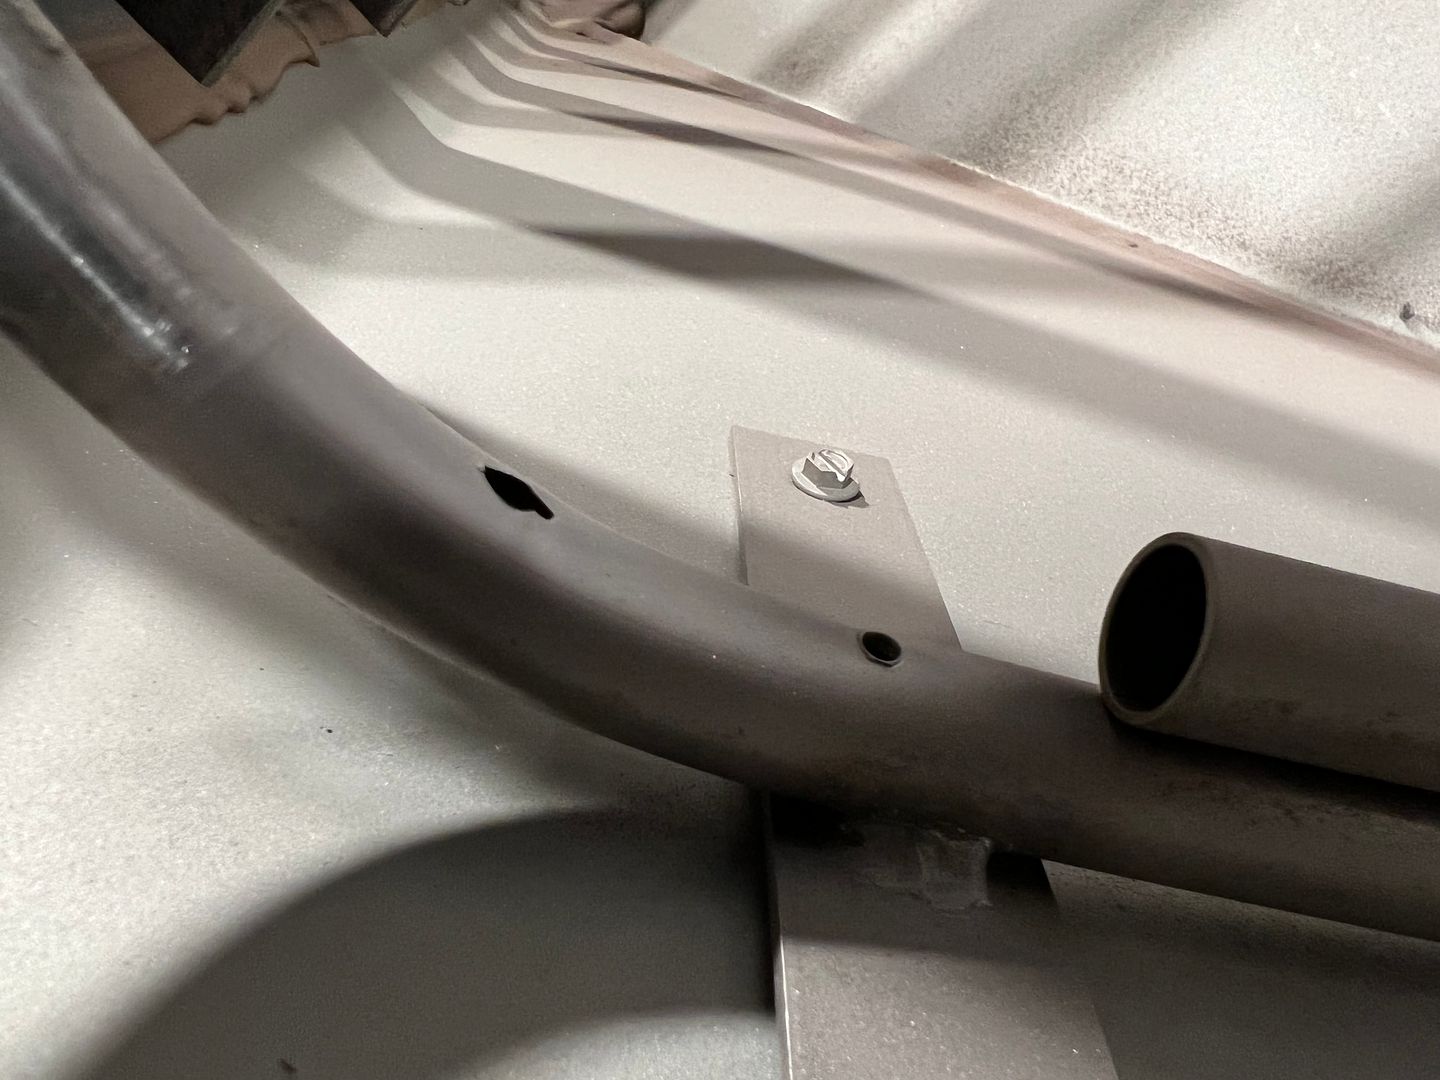 Once we removed the tube, we noticed it was more widespread... 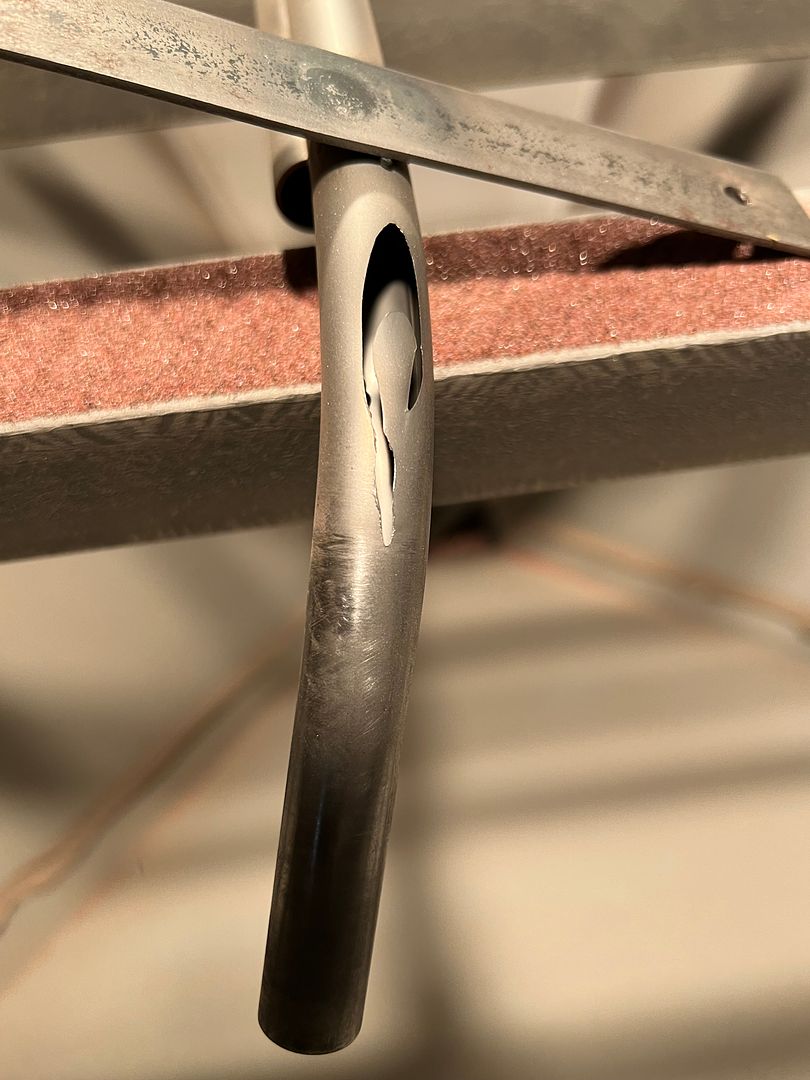 Well, I guess we have found the suction/media issue, and now have a used High flow gun/nozzle for sale. Luckily the sale is still going on, ordered the replacement tube last night..
__________________
Robert Last edited by MP&C; 12-01-2021 at 01:33 PM. |
|
|

|
|
|
#1265 |
|
Post Whore
  Join Date: May 2015
Location: Alabama
Posts: 14,662
|
Re: 55 Wagon Progress
Robert , our cabinet at work had the same suction issues,,as I was reading this i was thinking,(I bet theres a hole in the suction tube)...and behold , you already found it....I'll say yours is way worse than ours was..now if I could just find gloves I can get my hands in..
__________________
Mongo...aka Greg RIP Dad RIP Jesse 1981 C30 LQ9 NV4500..http://67-72chevytrucks.com/vboard/s...d.php?t=753598 Mongos AD- LS3 TR6060...http://67-72chevytrucks.com/vboard/s...34#post8522334 Columbus..the 1957 IH 4x4...http://67-72chevytrucks.com/vboard/s...63#post8082563 2023 Chevy Z71..daily driver Last edited by mongocanfly; 12-01-2021 at 11:29 AM. |
|
|

|
|
|
#1266 |
|
Registered User
 Join Date: May 2007
Location: Deale Md
Posts: 4,663
|
Re: 55 Wagon Progress
I always enjoy having the opportunity to stop by Roberts shop. It's a big difference seeing in person verses seeing a picture.
__________________
James 63 GMC V6 4speed carryall 65 chevy swb bbw V8 auto 68 K20 327/4 speed, buddy buckets 2002 GMC CC Dually Duramax 64 GMC lwb 3/4 V6 4speed SOLD 66 GMC swb bbw buddy buckets SOLD IG duallyjams The only thing that stays the same is constant change! |
|
|

|
|
|
#1267 |
|
Registered User
Join Date: Jan 2013
Location: Leonardtown, MD
Posts: 1,647
|
Re: 55 Wagon Progress
Stop by anytime!! Bring your stainless pieces next time..
__________________
Robert |
|
|

|
|
|
#1268 |
|
Registered User
Join Date: Jan 2013
Location: Leonardtown, MD
Posts: 1,647
|
Re: 55 Wagon Progress
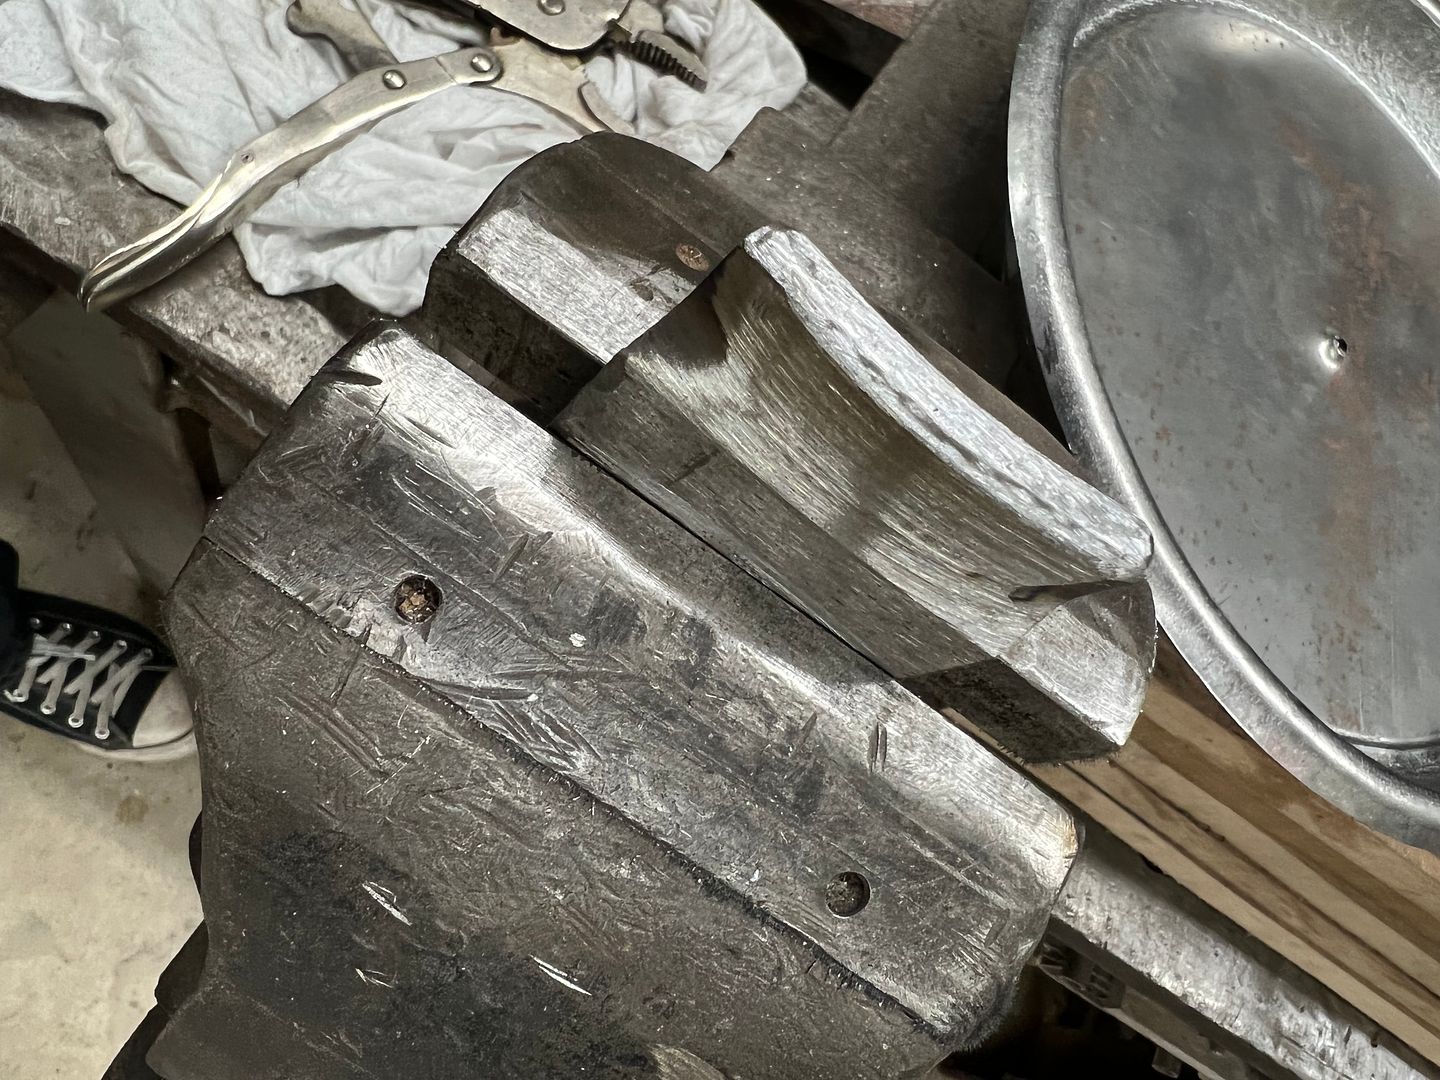
Now to fold the outer perimeter of our air cleaner base. I thought of using a tipping wheel, but that appeared to be rather close for comfort. So a curved piece of bar stock in the scrap pile (resource inventory) was selected and a drum sander used to fine tune the radius to match our part.
 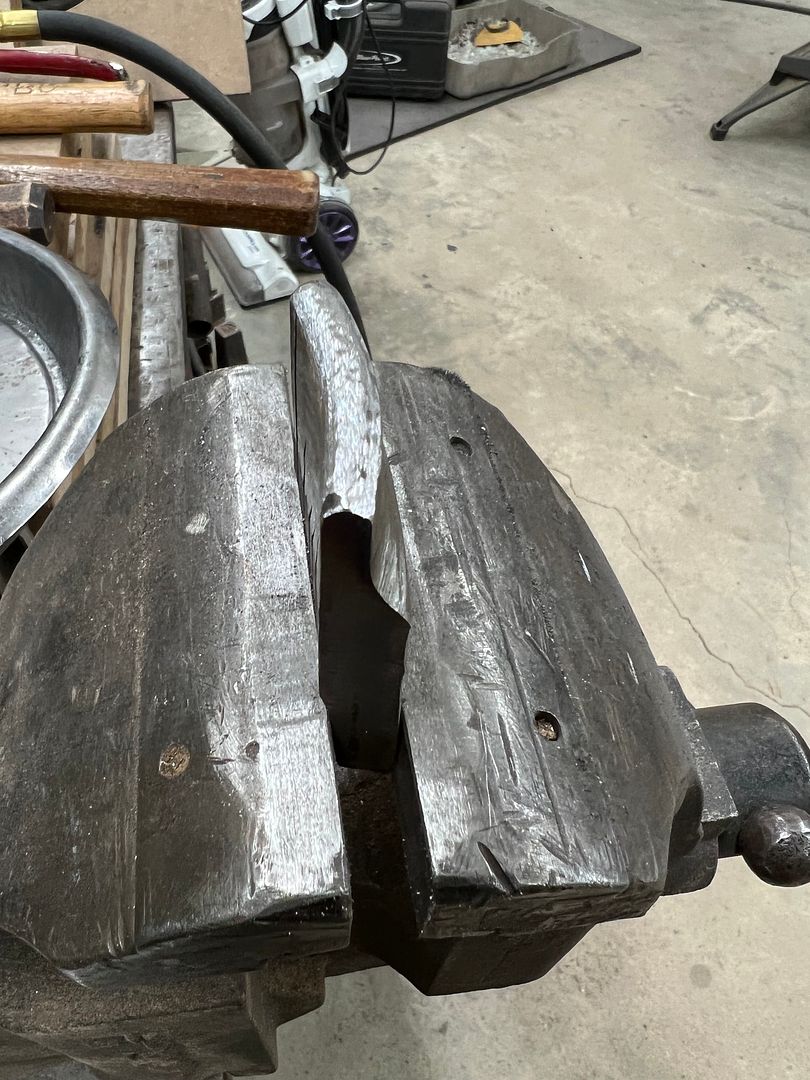 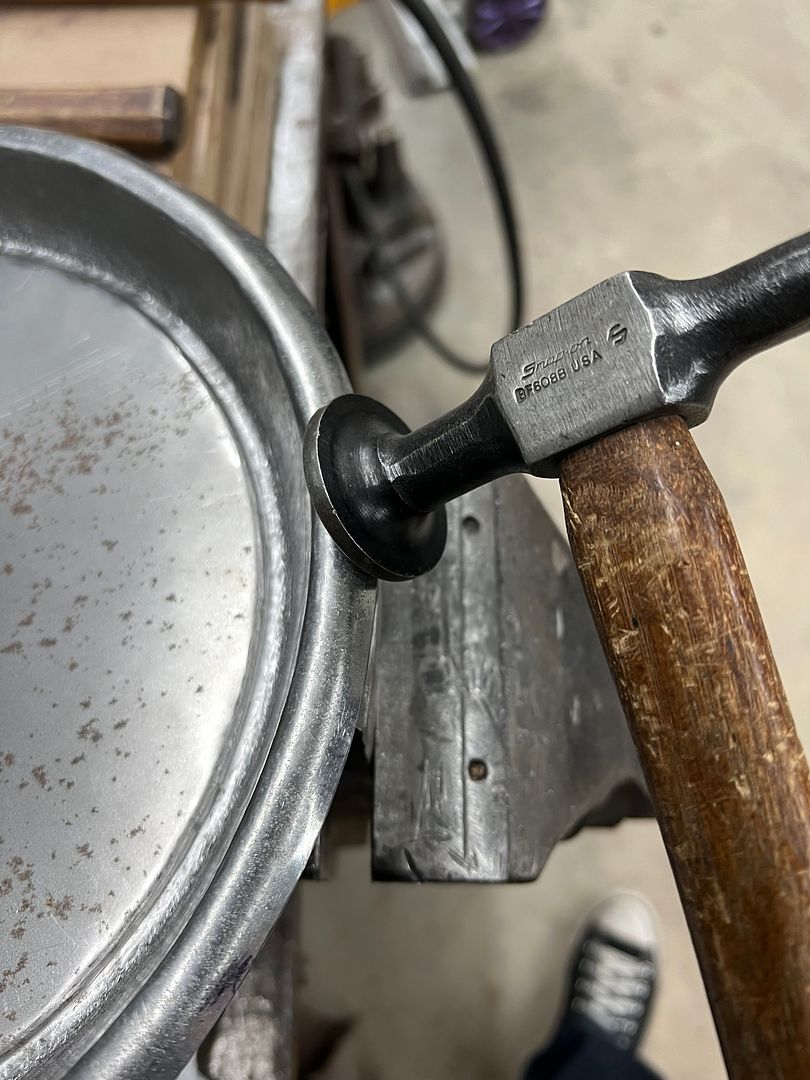 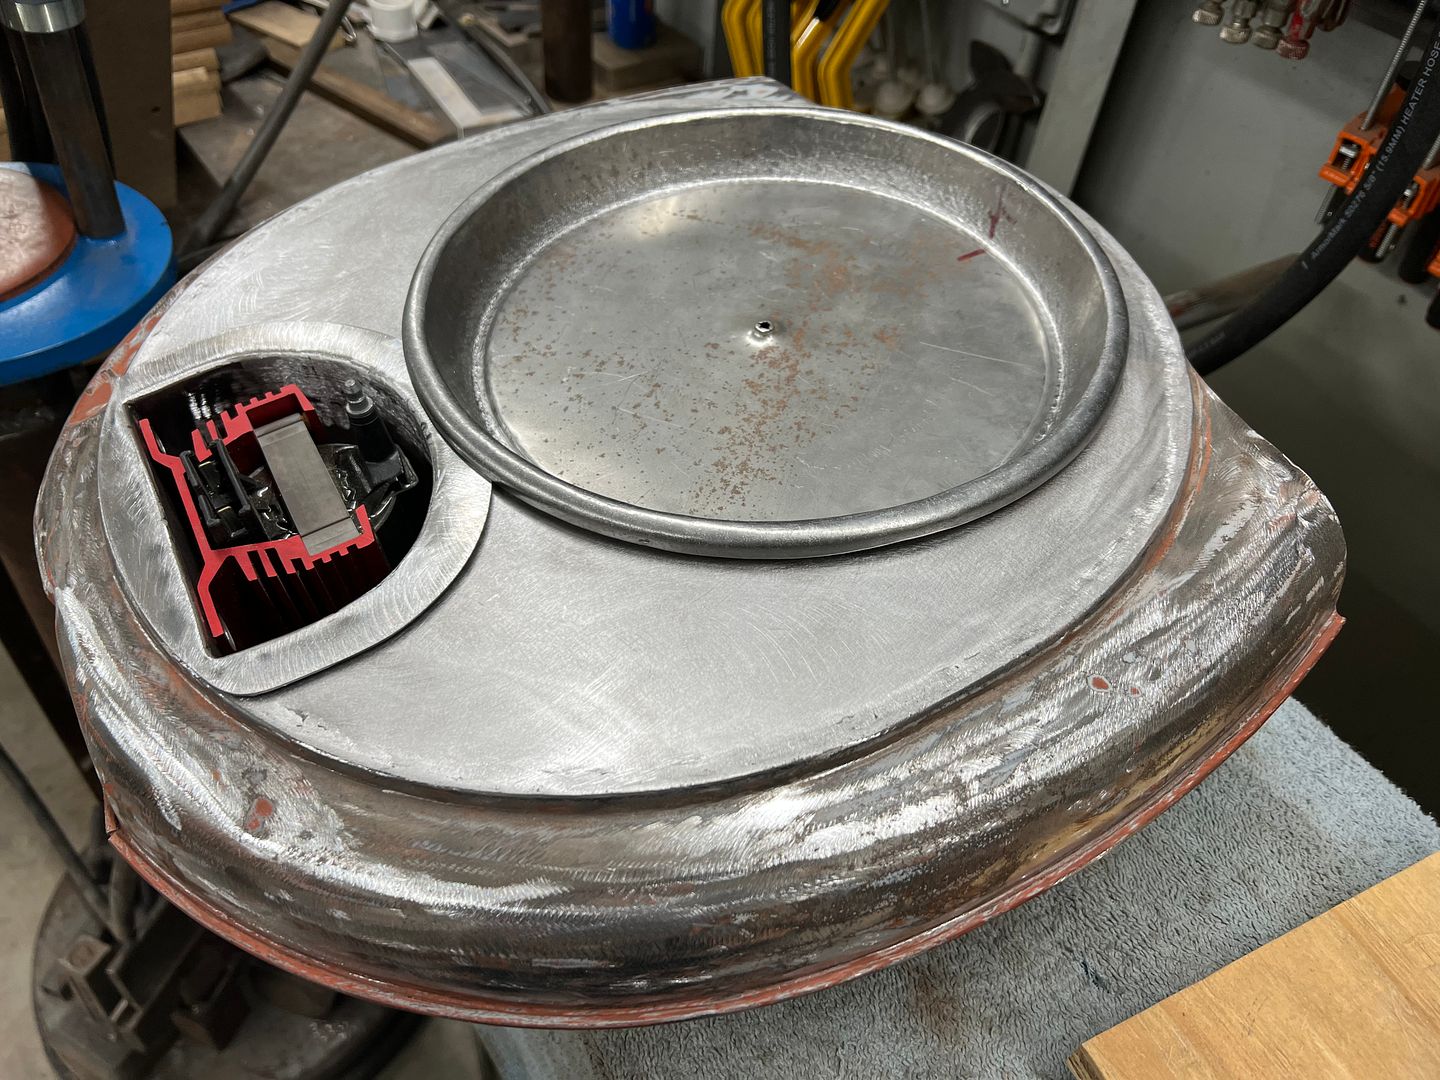 Then a hammer form was made to stretch and shape the "horn" of the base. Quite a bit of stretch needed but you don't know until you try... 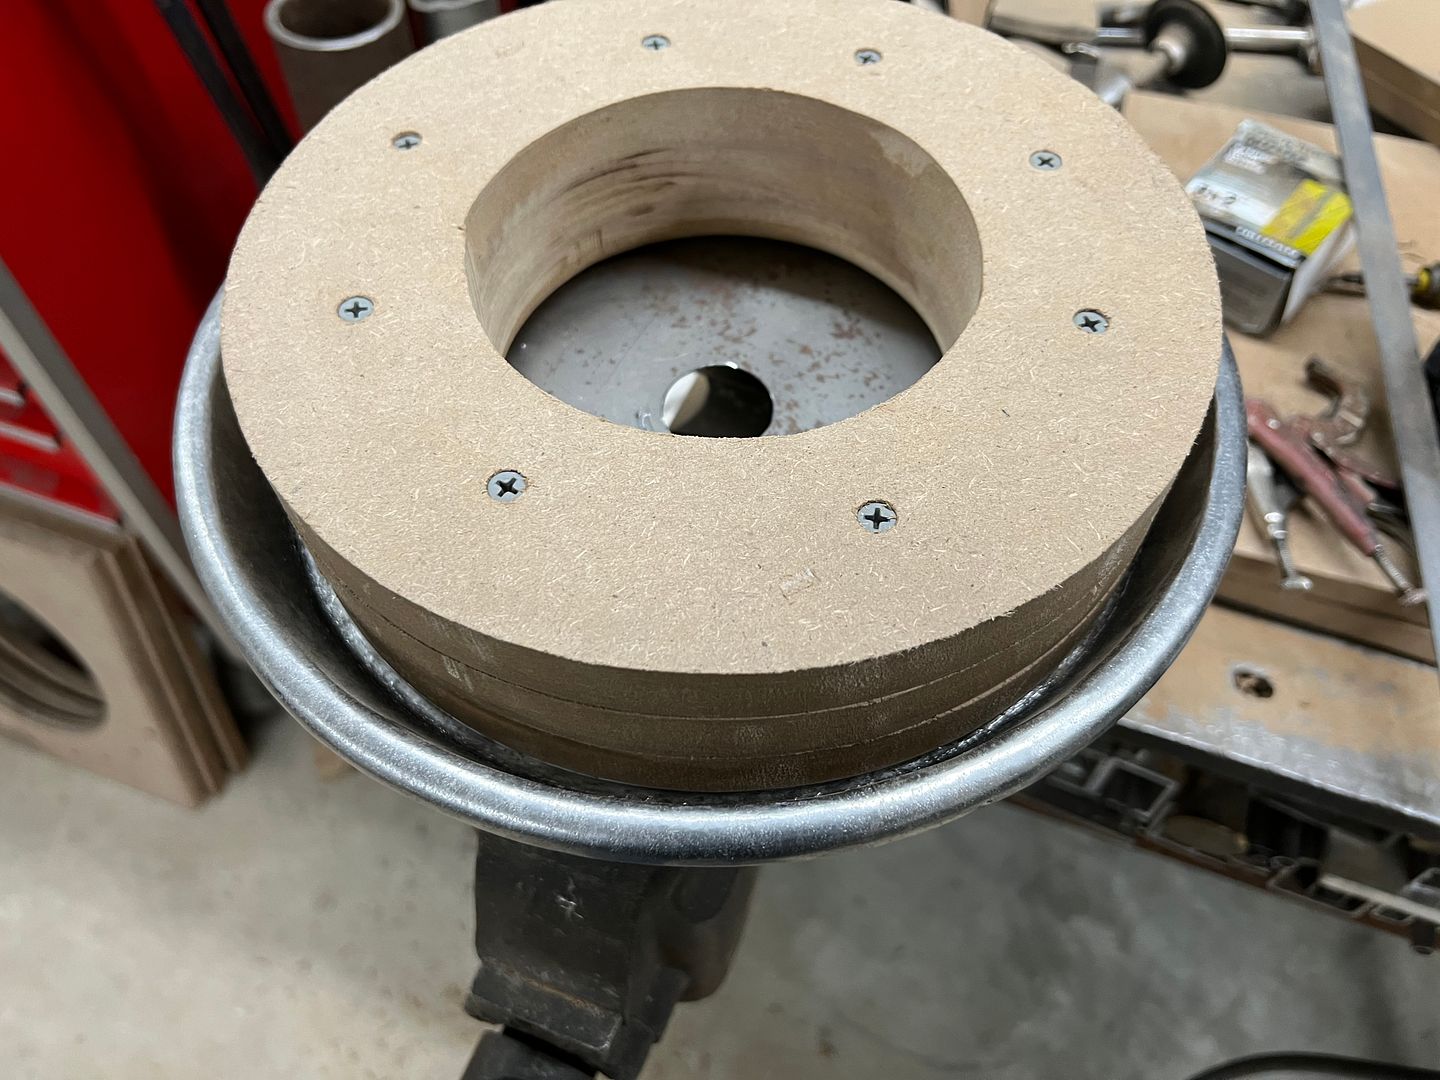 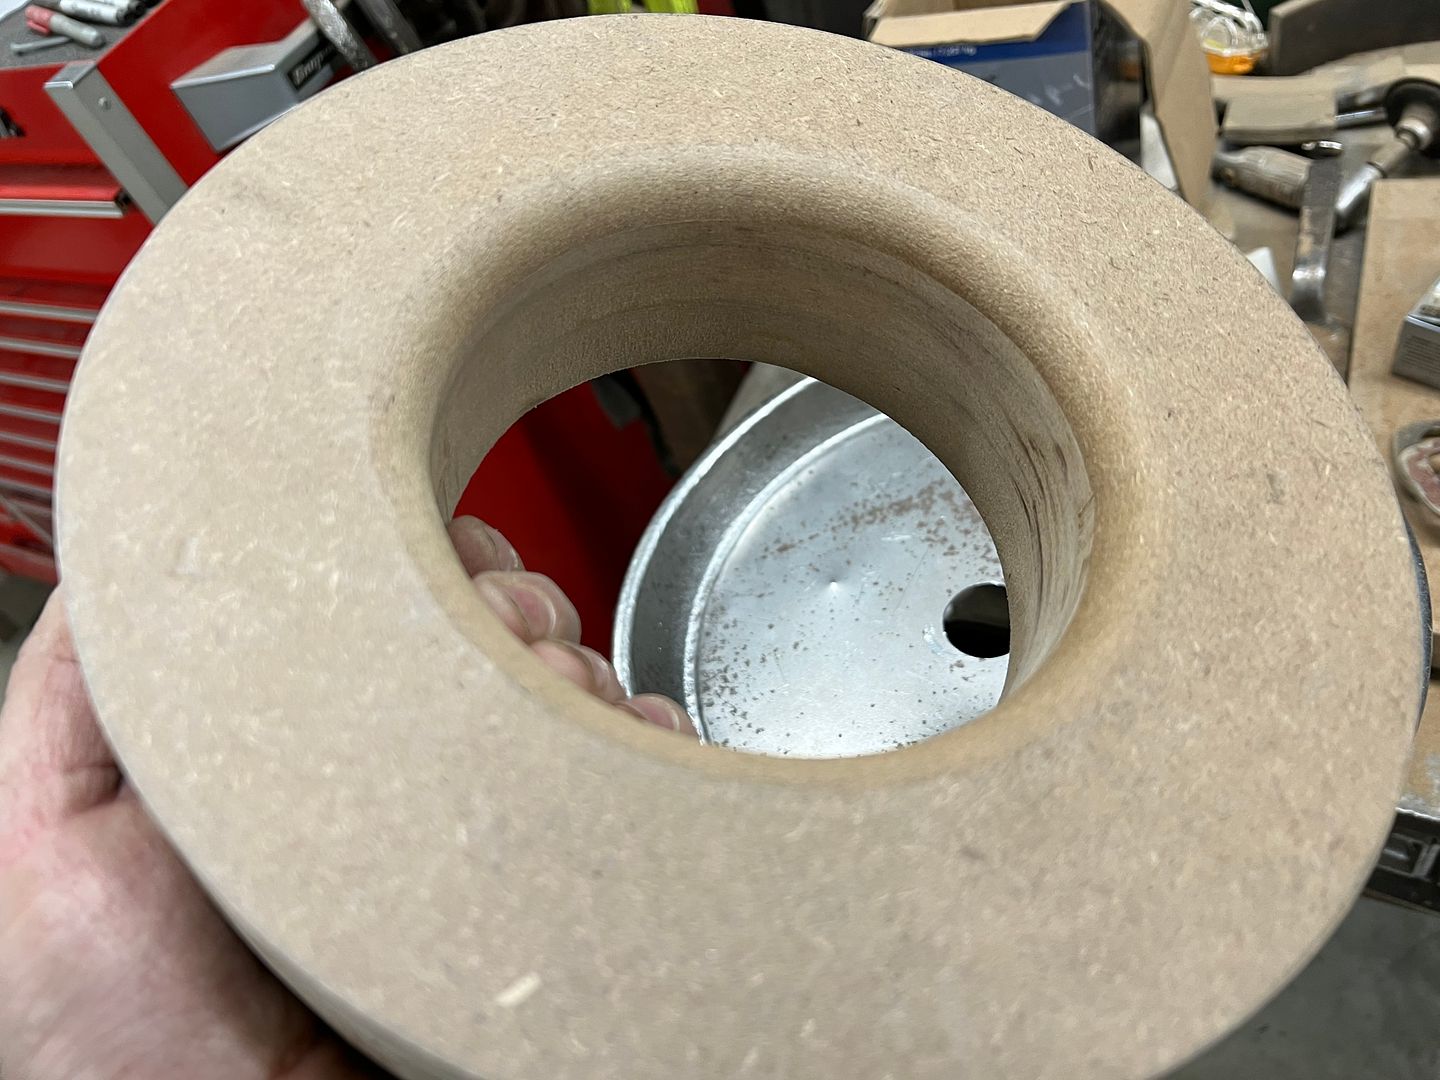 Video of hammer action: https://youtu.be/am3PNWl467o Alas, cracking occurred, so the horn was trimmed just down from the radius and a piece of 18ga was hemmed, rolled, and welded, to form a band. The band was tacked up for a test fit, we'll get it fully welded tomorrow and get all the parts bolted up with some rivnuts and press nuts.. 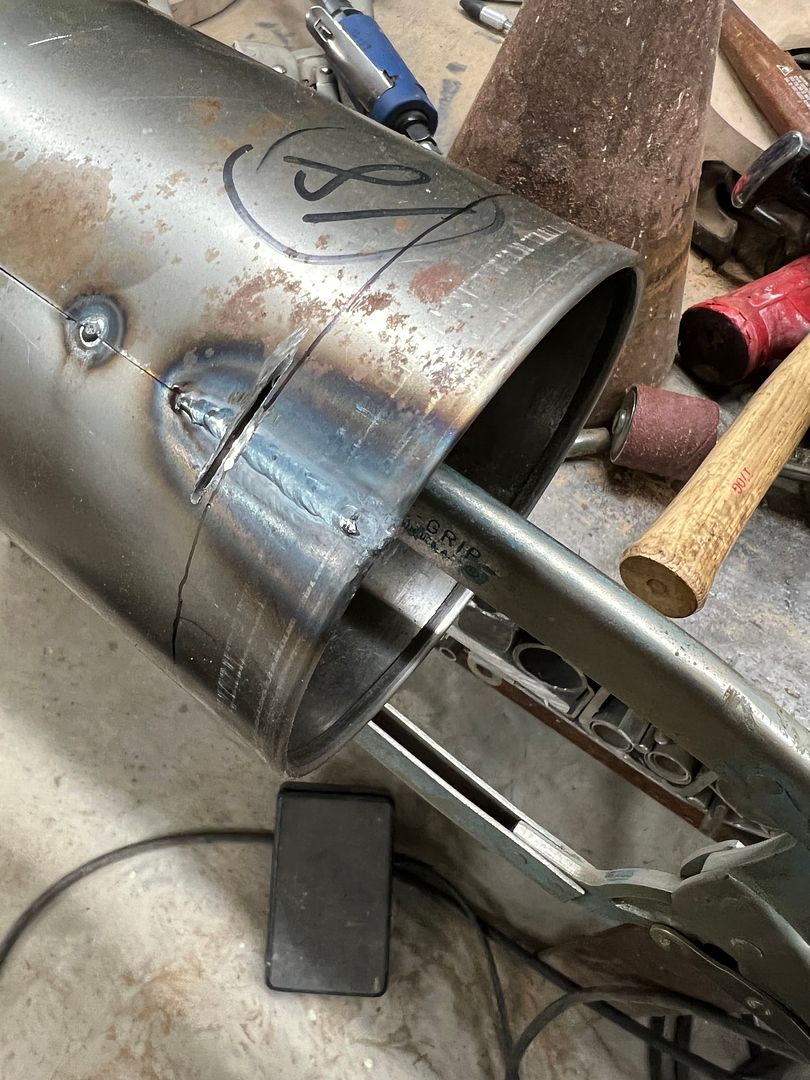 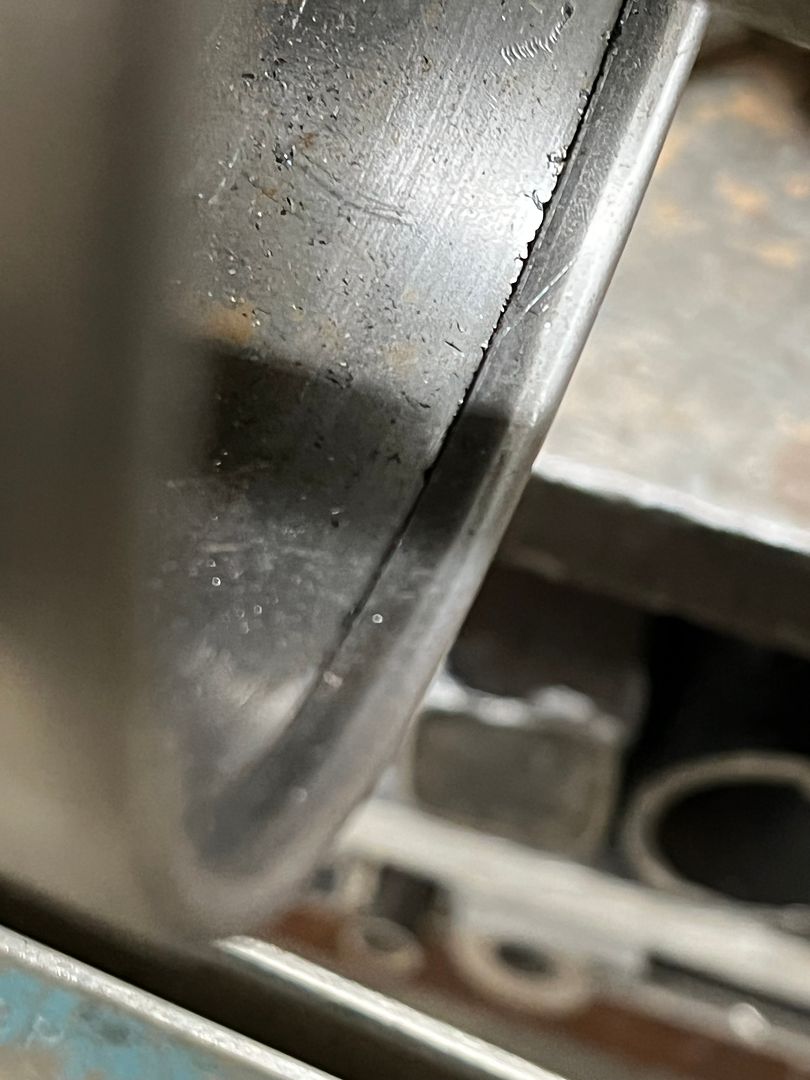 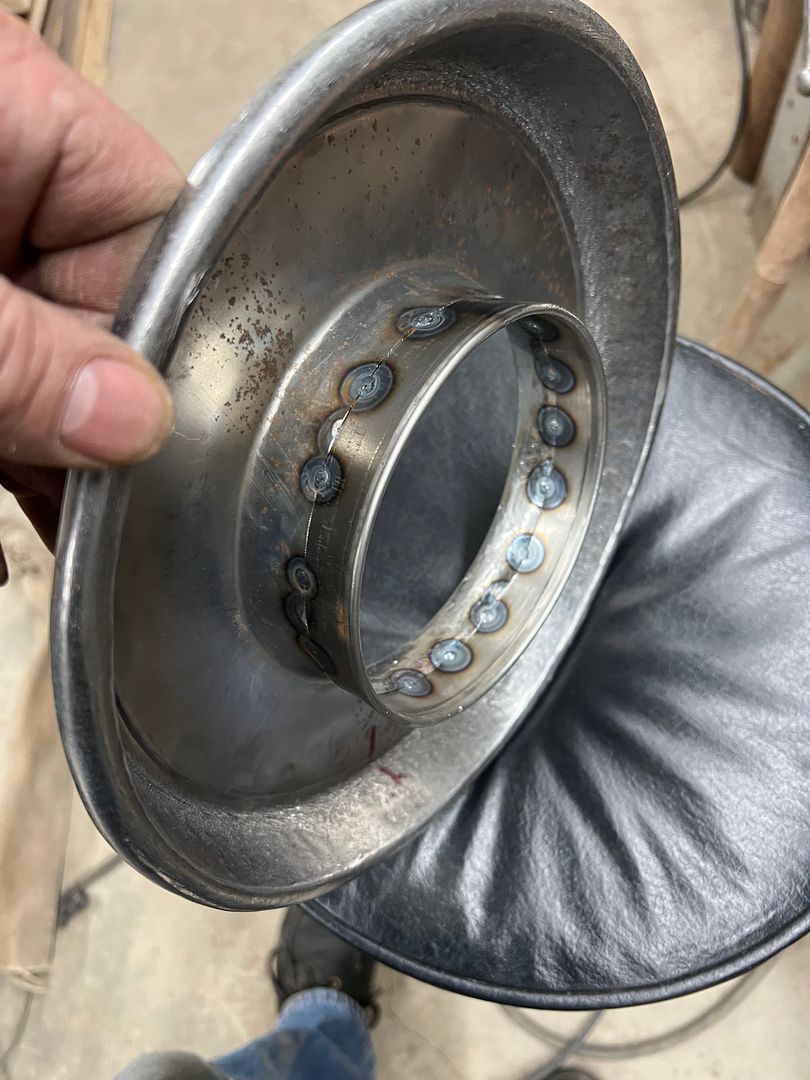 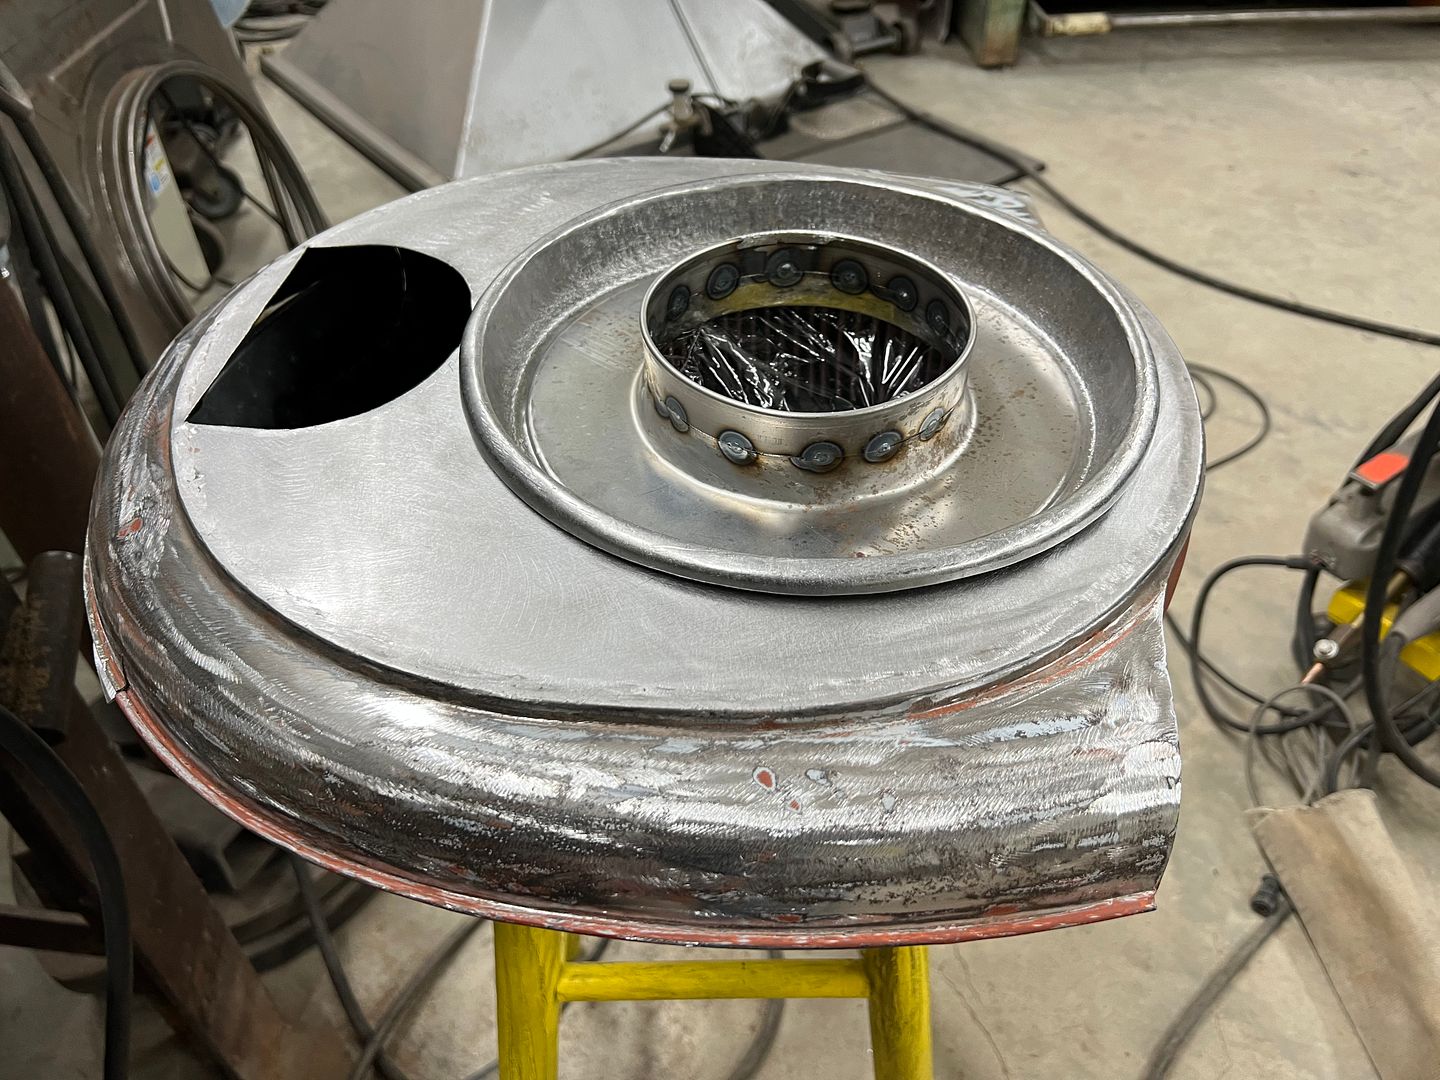 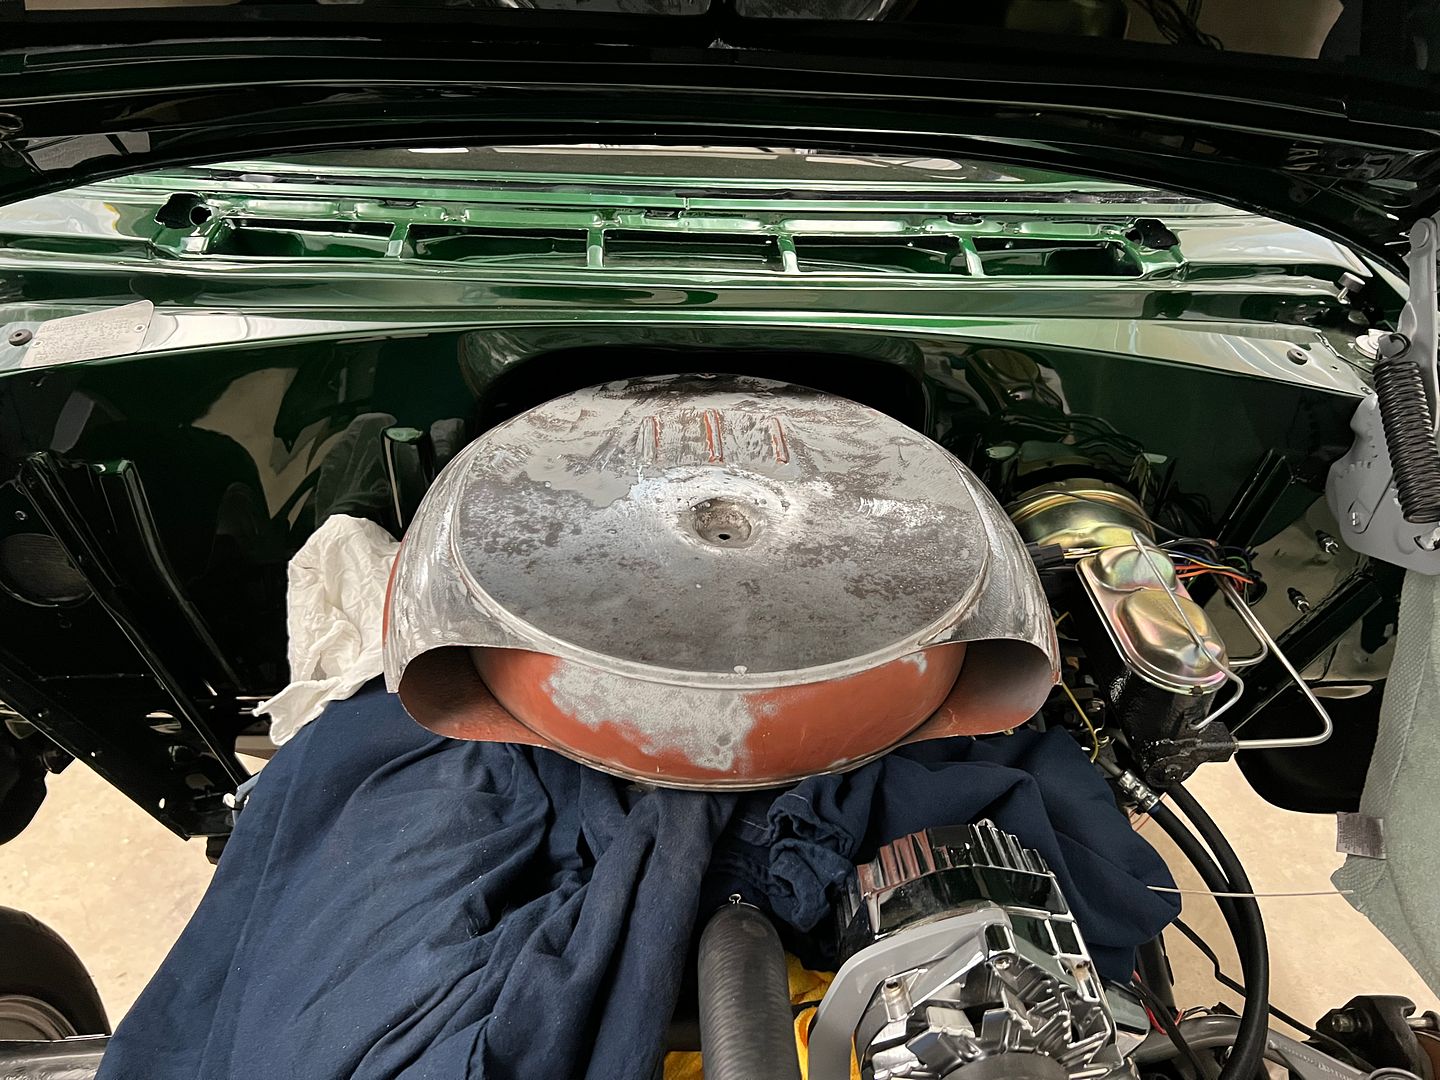 Yesterday we got our replacement tube from TP Tools for the Skat Blast 1536 cabinet. Can't remember the last time it worked like this, so I'd guess we've had a "leak" for a while now. https://www.youtube.com/watch?v=-VWNn523SDc And since we replaced the nozzle unnecessarily, we now have a good used media blast cabinet gun for sale. Has the High Volume power head (20-25 cfm required) and tungsten carbide nozzle, if anyone needs one. I think $50 plus shipping would be fair. No trigger, intended for use with foot pedal. For a hopper/suction machine, it does work nicely.. 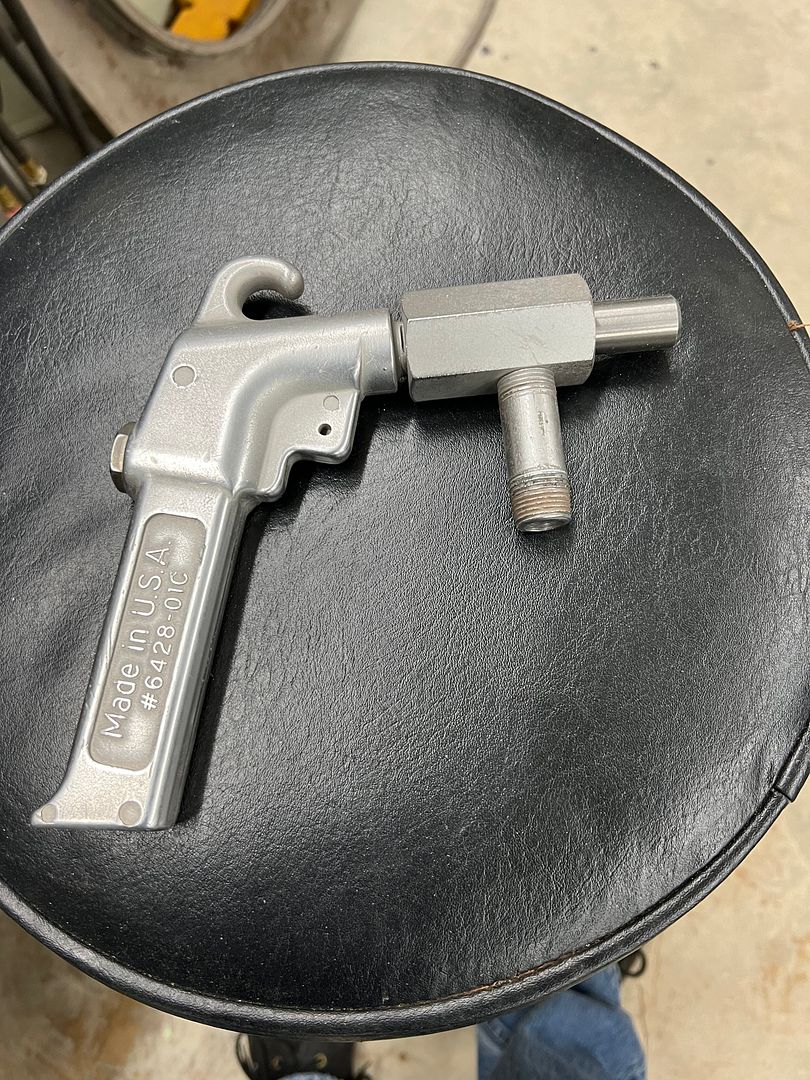
__________________
Robert |
|
|

|
|
|
#1269 |
|
Senior Member
 Join Date: Mar 2008
Location: tyler texas
Posts: 1,537
|
Re: 55 Wagon Progress
Awesome and impressive work as usual Robert.
__________________
NHRA Super Street 469C It only runs 10.90 at 156 mph |
|
|

|
|
|
#1270 |
|
Registered User
Join Date: Jan 2013
Location: Leonardtown, MD
Posts: 1,647
|
Re: 55 Wagon Progress
More travel for the day job, had to install a 24' video wall. Back in the shop finally, progress on the air cleaner continues.. We had some stainless mesh left over from our speaker grill fabrication that we plan on using to address air flow inside our pocket for the ignition coil.
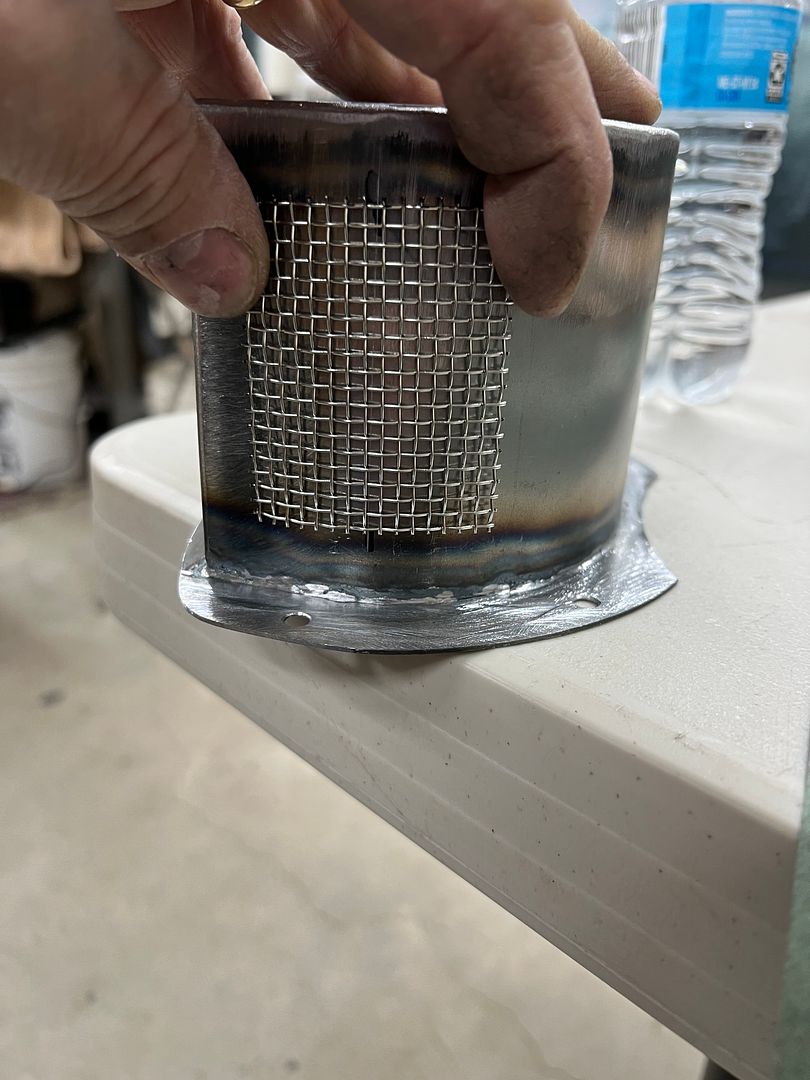 An 1-1/2" Rotacut is used to provide the hole in the pocket, two pilot holes spaced 1/2" apart will expand the hole for us.. The venturi effect inside the breather should promote air flow across the coil. 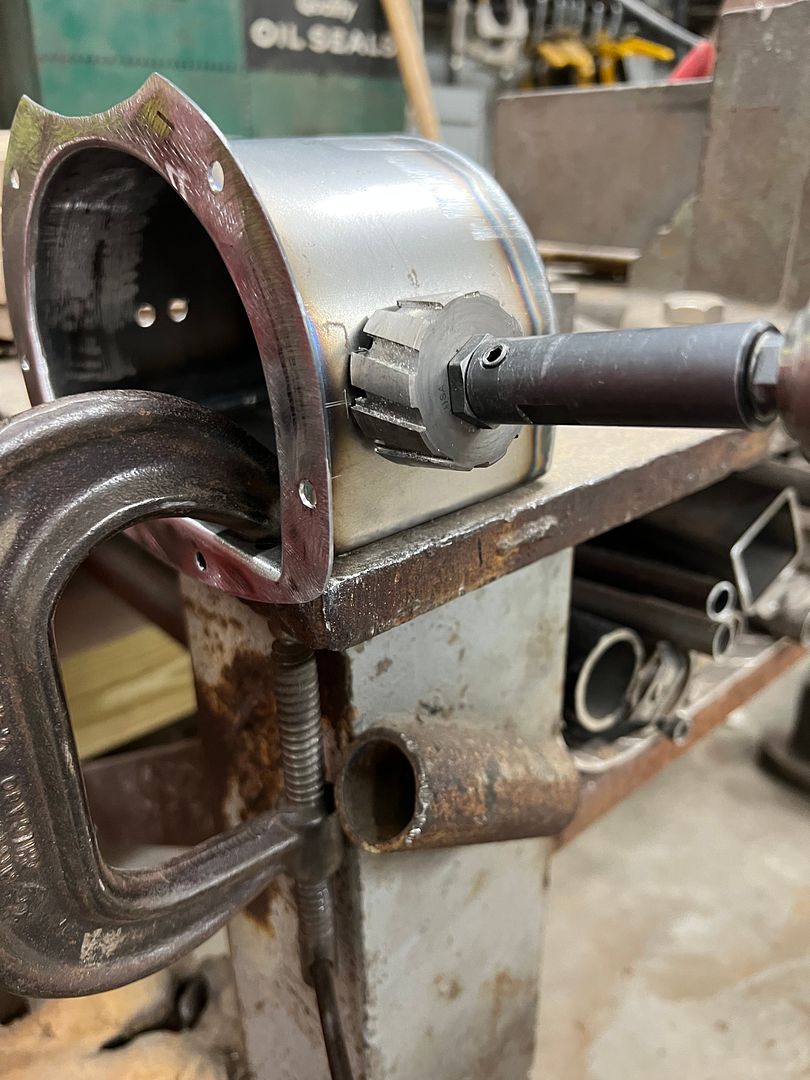 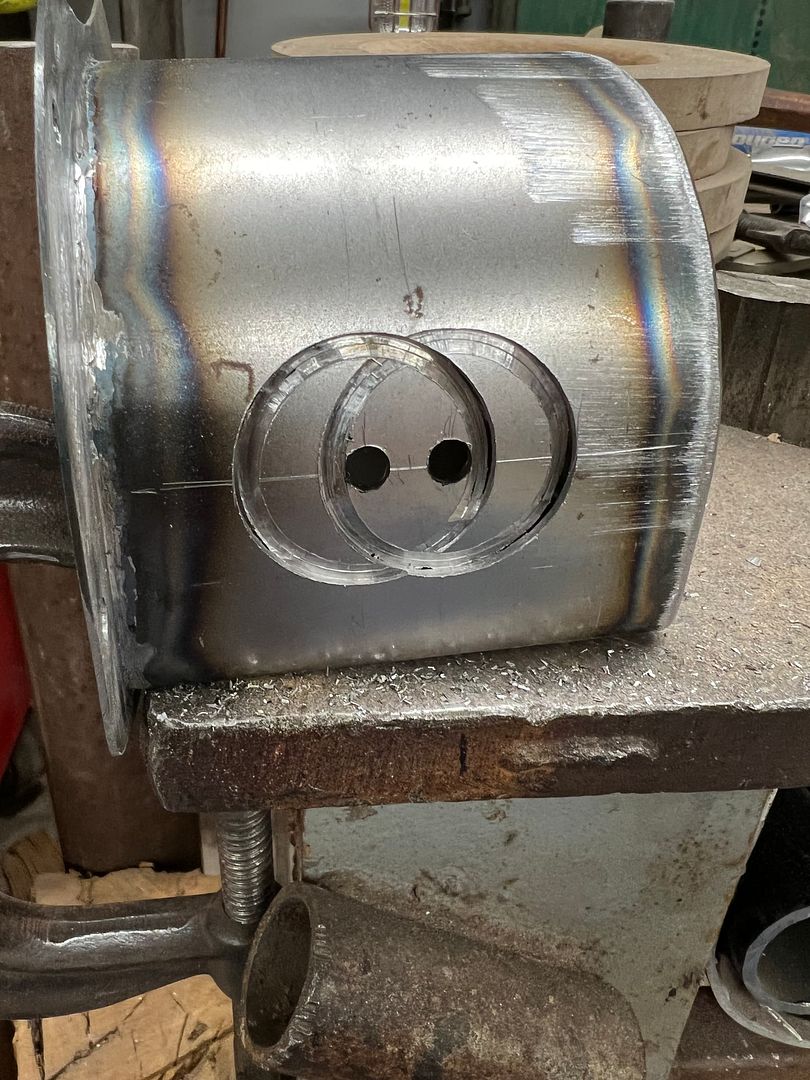 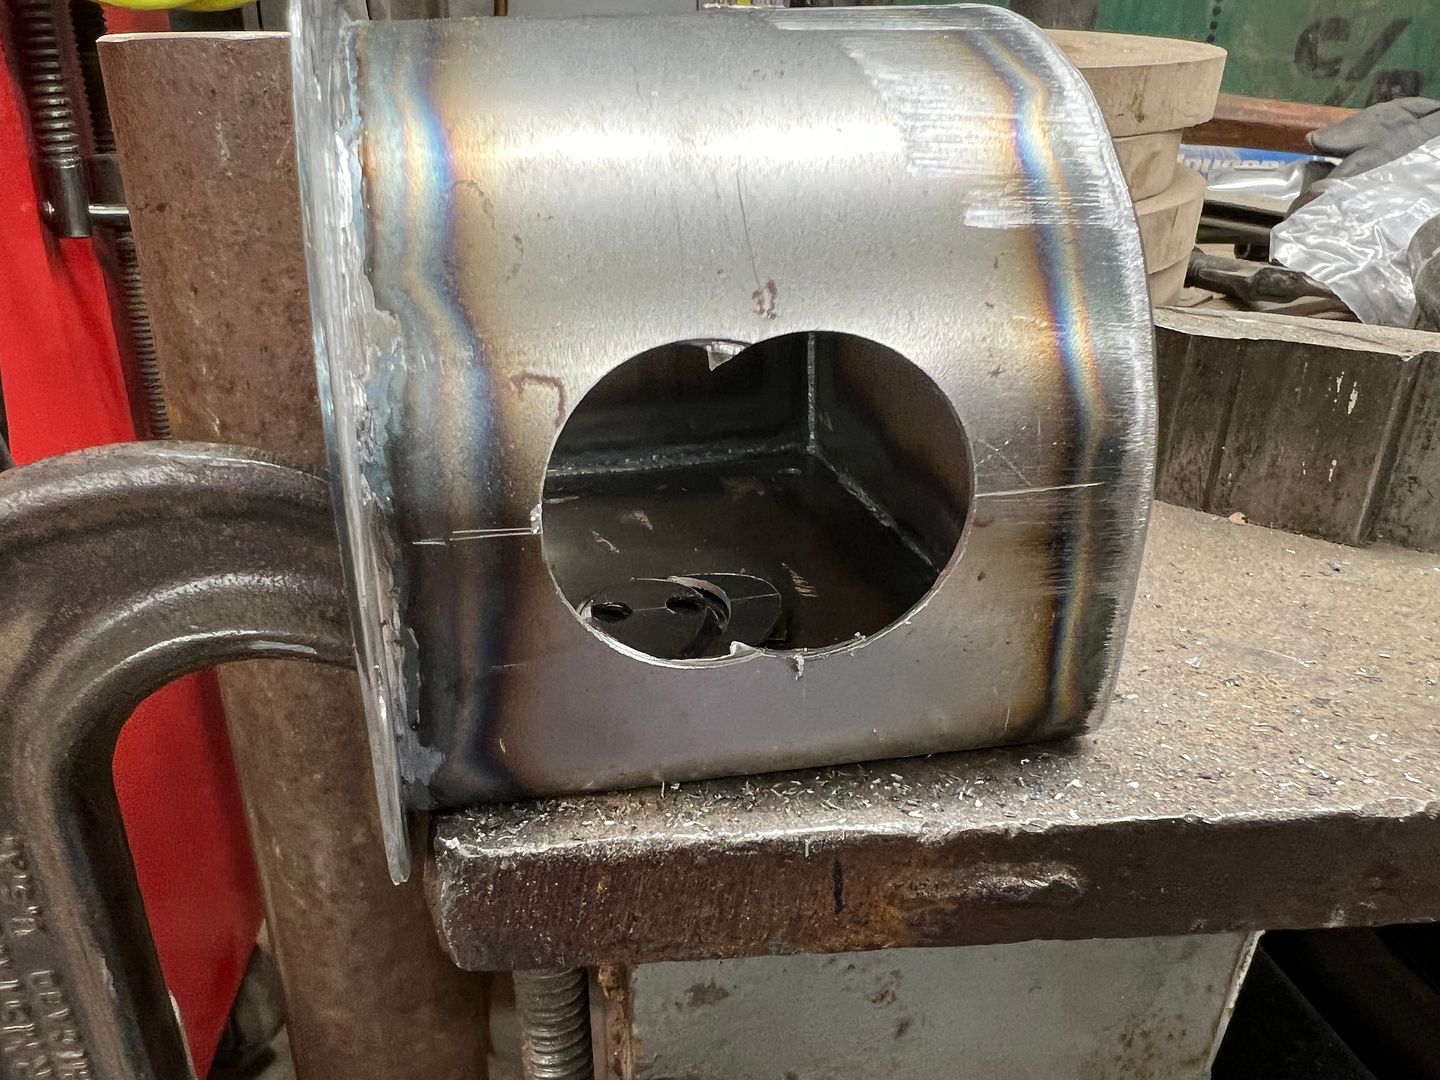 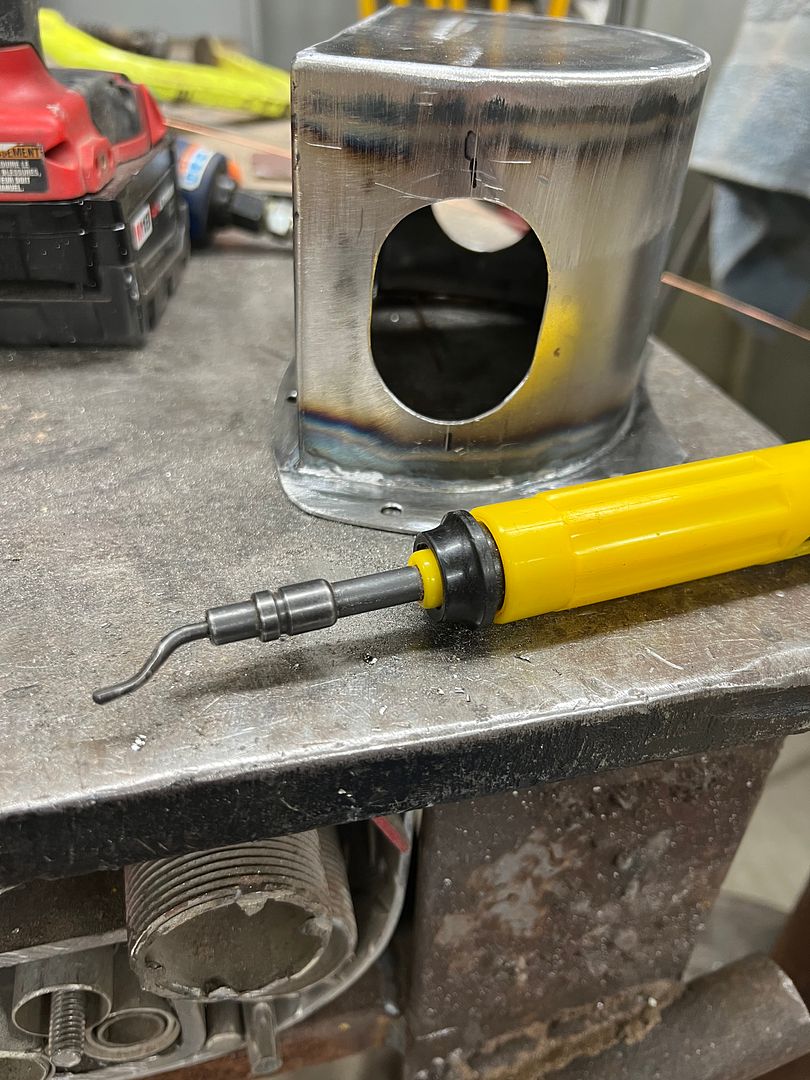 Next, to hold the mesh in place some retaining rings will be needed. We'll use some MDF trimmed to size to fabricate these... 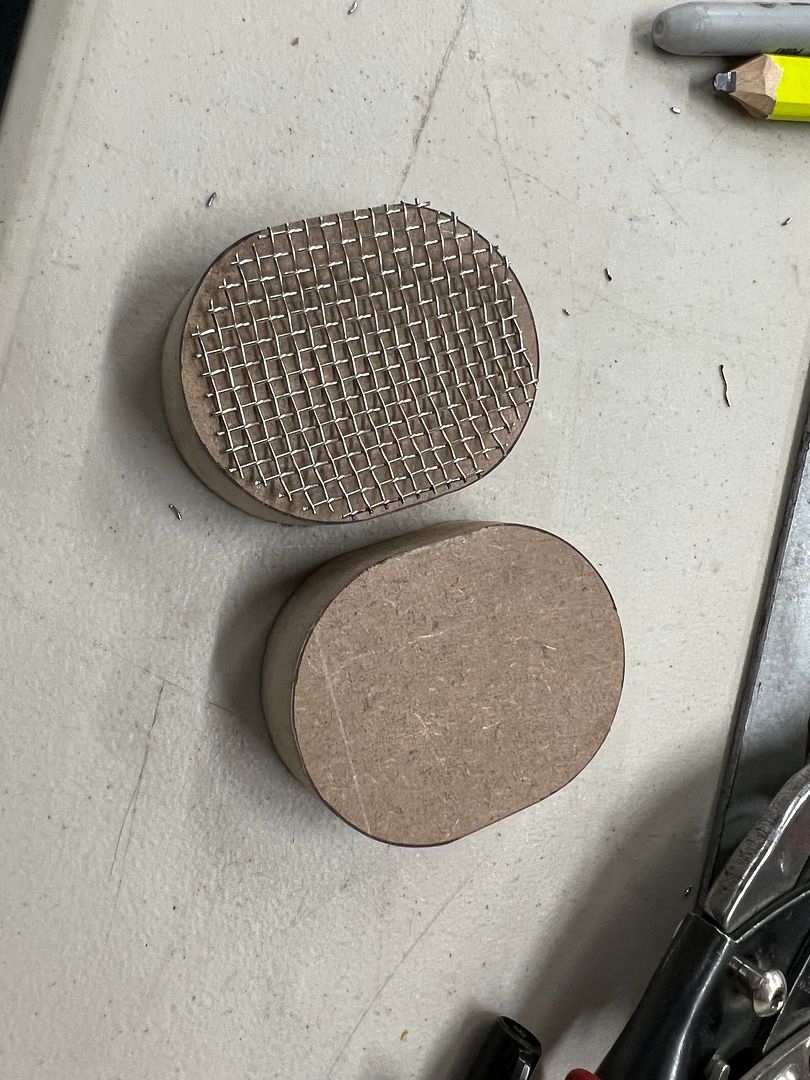 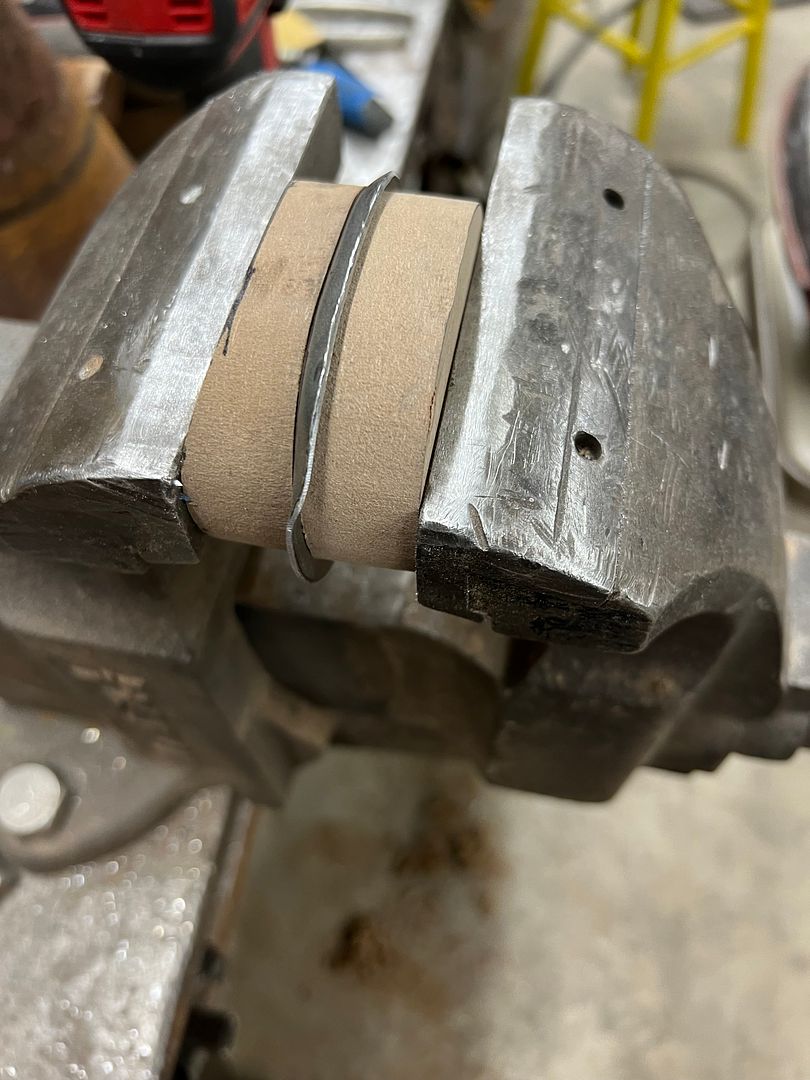 Or the action version.... https://www.youtube.com/watch?v=y9xRENMU9l8 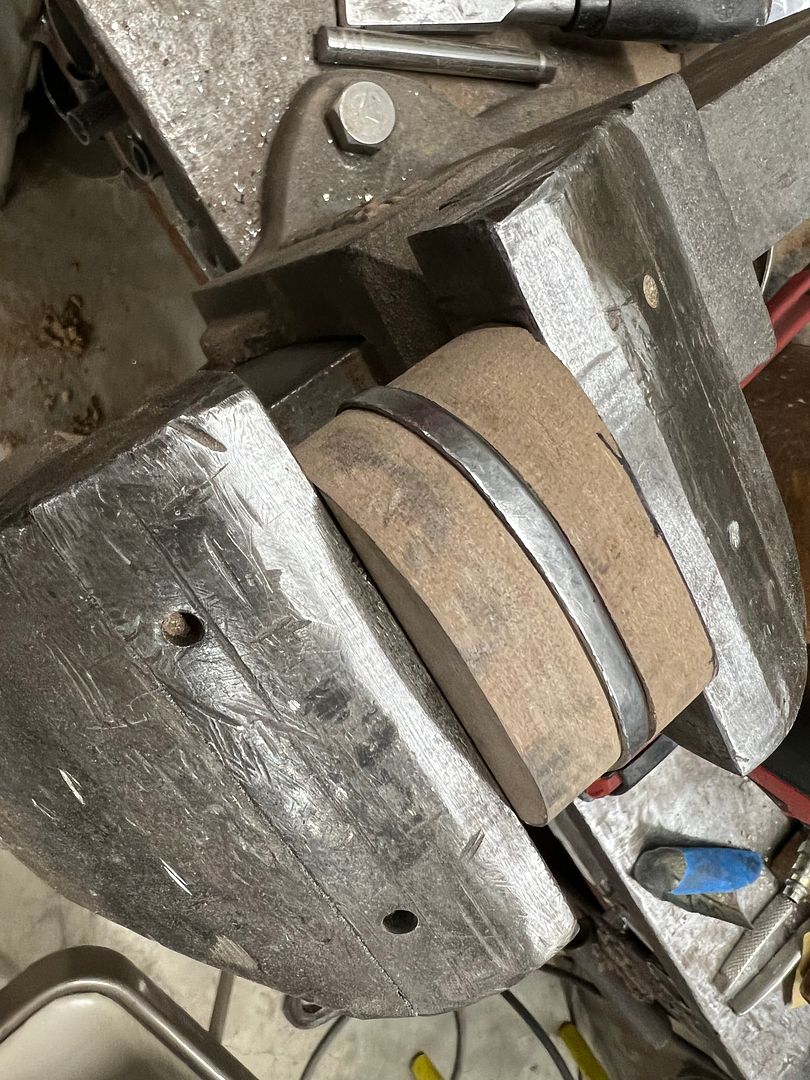 The newly formed part has a tight hold on the hammer form, so much that we can clamp it in the vise, drill the two pilot holes to match the pocket, and drill out two 1-1/2" Rotacut holes without the part budging.. https://www.youtube.com/watch?v=wVM_iv-XZdw The dynabride belt sander cleans up the points into flats, the side flanges are trimmed to size with a roloc sander, and then we can roll to fit the inside of the pocket. https://www.youtube.com/watch?v=OyHC0p9NKrE test fit.... https://www.youtube.com/watch?v=7DxT-oGXcfk Holes are added for some 3/32 rivets to clear the mesh 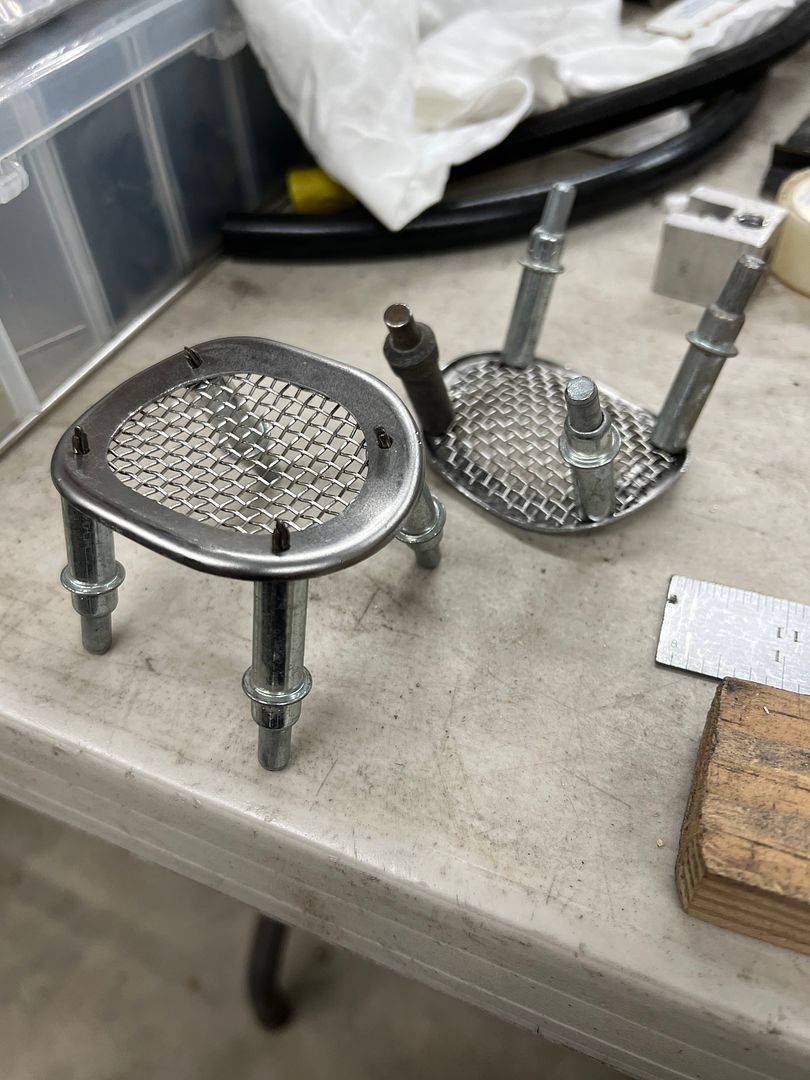 Aluminum pop rivets are used to get a better view of the final look before we blow it apart for priming.. .JPG) https://www.youtube.com/watch?v=Z9-Hp-O925M We will be using press nuts in the coil to ease the pain of assembly, and we also added some more shiny stuff on the front end.. 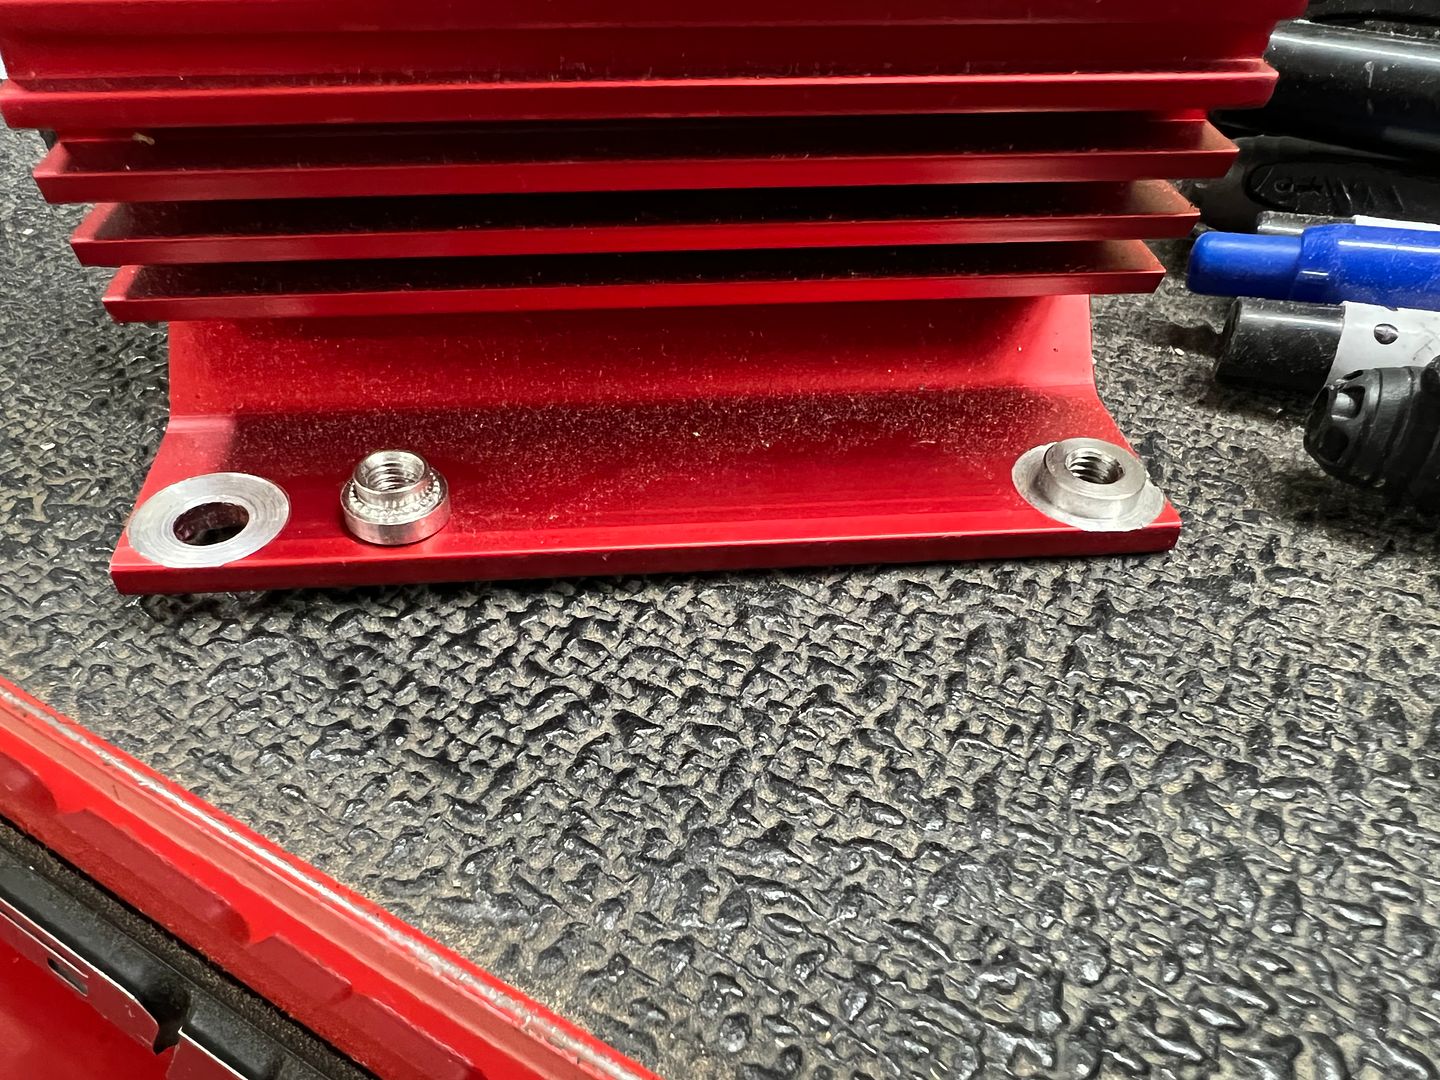 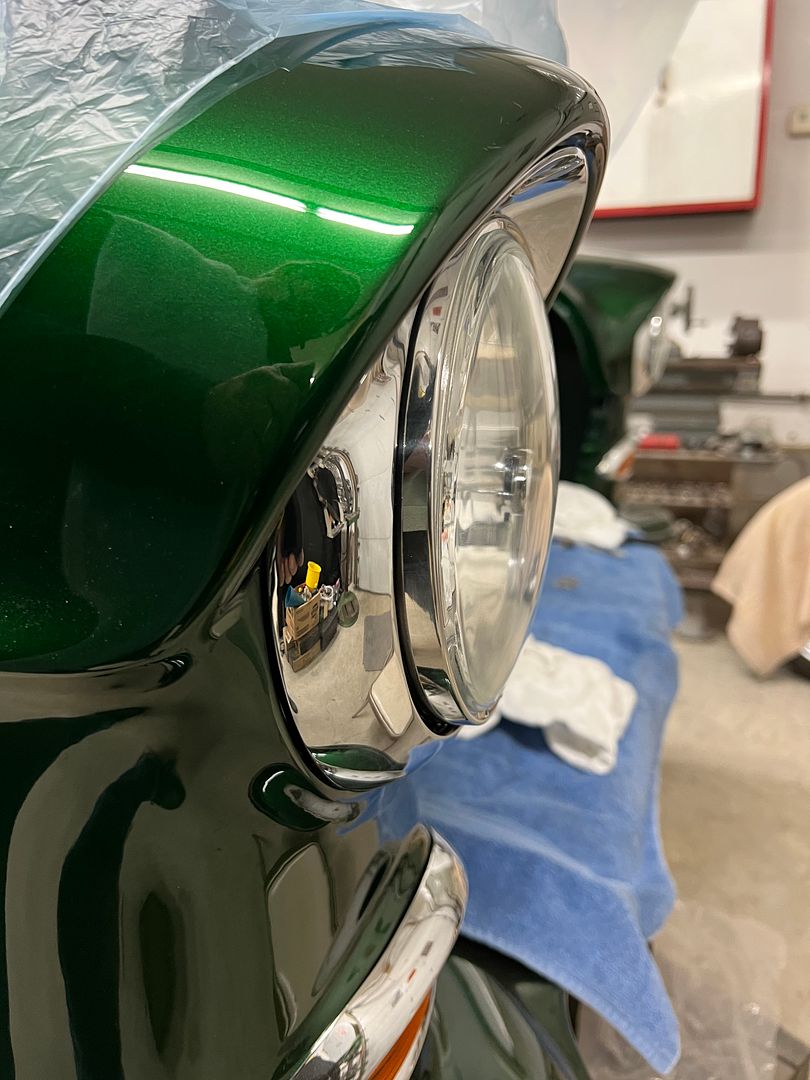
__________________
Robert |
|
|

|
|
|
#1271 |
|
Post Whore
  Join Date: May 2015
Location: Alabama
Posts: 14,662
|
Re: 55 Wagon Progress
Very nice.!
They should get plenty of air like that.. Also like the electrical tape bandaid...I've had my share of those..!!
__________________
Mongo...aka Greg RIP Dad RIP Jesse 1981 C30 LQ9 NV4500..http://67-72chevytrucks.com/vboard/s...d.php?t=753598 Mongos AD- LS3 TR6060...http://67-72chevytrucks.com/vboard/s...34#post8522334 Columbus..the 1957 IH 4x4...http://67-72chevytrucks.com/vboard/s...63#post8082563 2023 Chevy Z71..daily driver Last edited by mongocanfly; 12-21-2021 at 09:43 PM. |
|
|

|
|
|
#1272 |
|
Senior Member
 Join Date: Dec 2009
Location: TN.
Posts: 8,300
|
Re: 55 Wagon Progress
I watched the video's on the vents for the coil.
Great Job.  
__________________
________________________________________________________________________________________ ____________________________________________ 84 Chevy K-20 63 Impala (my high school car) http://67-72chevytrucks.com/vboard/s...Crew Cab Build |
|
|

|
|
|
#1273 |
|
Senior Member
 Join Date: Mar 2011
Location: West Plains, Missouri
Posts: 7,559
|
Re: 55 Wagon Progress
Great work...Jim
__________________
my build thread: http://67-72chevytrucks.com/vboard/s...d.php?t=459839 Jimbo's long bed step build:http://67-72chevytrucks.com/vboard/s...t=464626<br /> |
|
|

|
|
|
#1274 |
|
Registered User
Join Date: Jan 2013
Location: Leonardtown, MD
Posts: 1,647
|
Re: 55 Wagon Progress
Thanks for checking out the progress guys!!
Some equipment repairs were in order over the New Year's break, our tried and true Lathem time clock in the shop had given up the ghost. In speaking to Lathem, this model has been obsolete for some time and the only parts available are the print ribbon and a replacement motor. Doesn't help me with this little part... 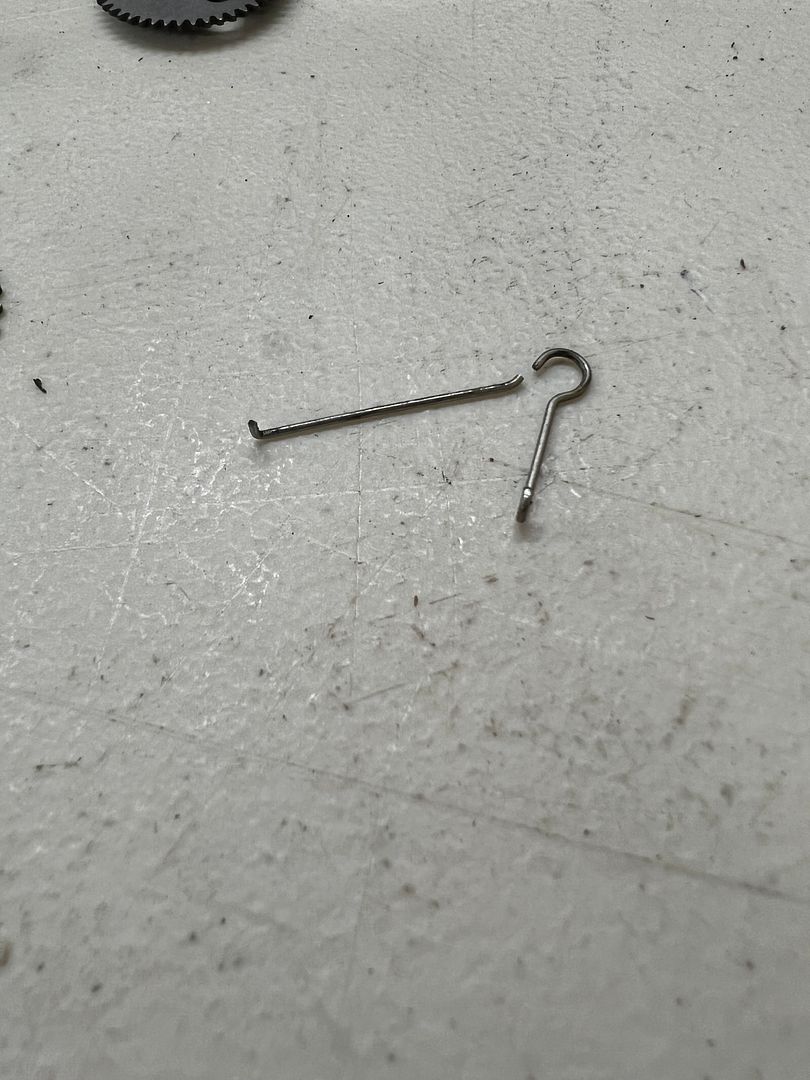 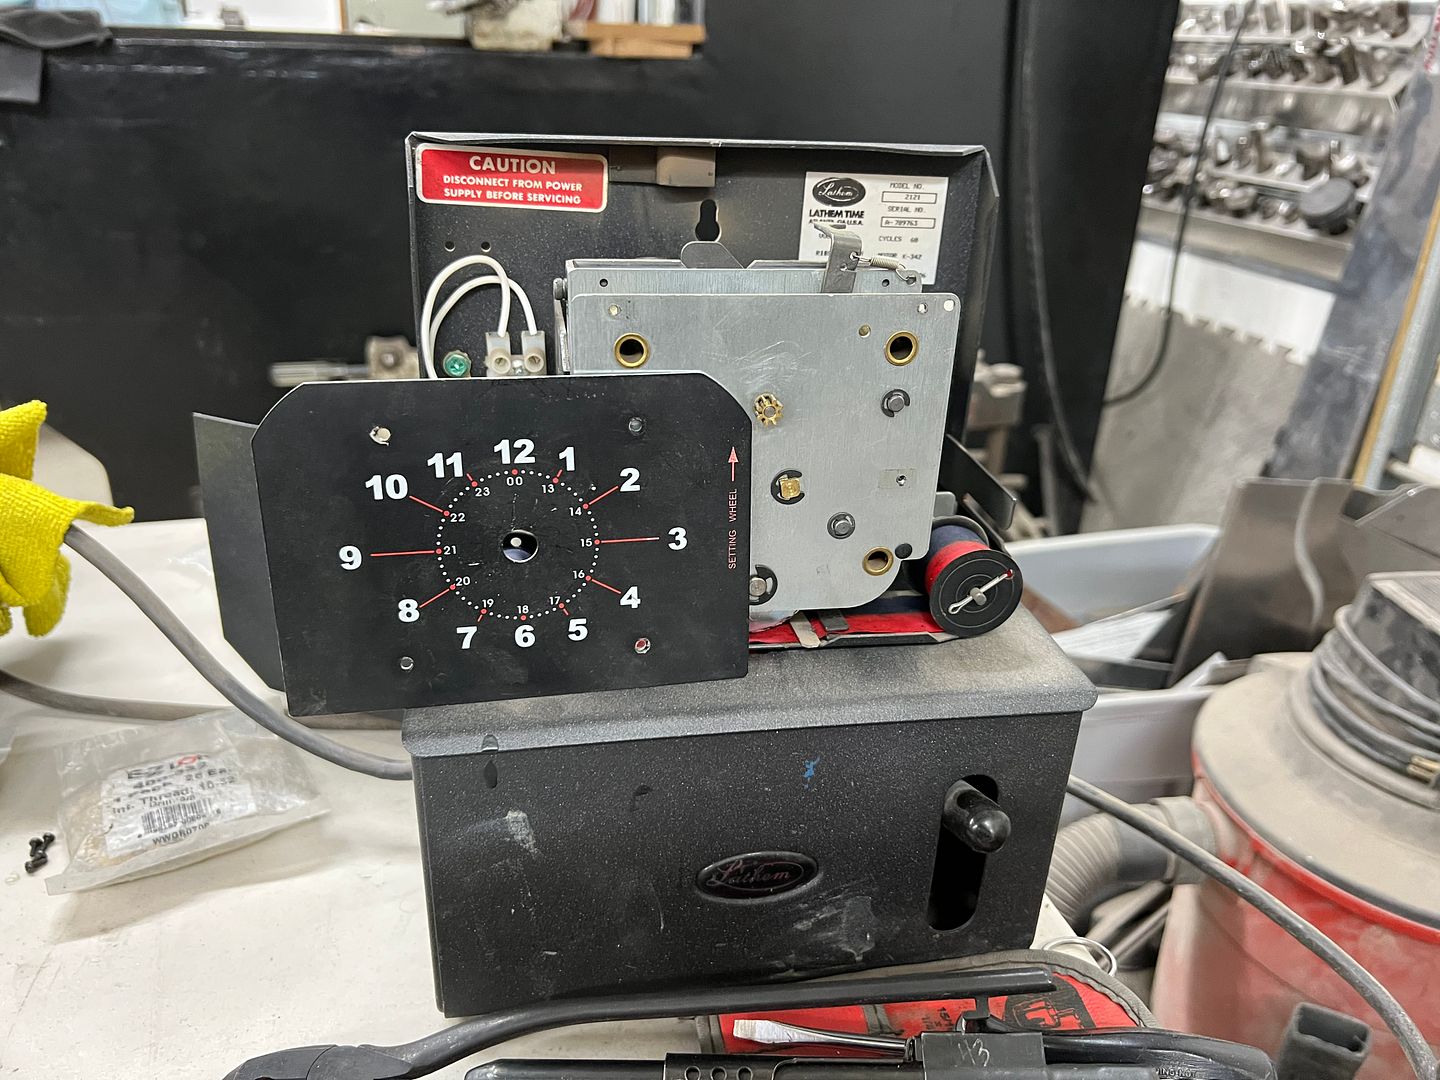 Quite used to this lack of availability in car parts, how hard can it be? A $1.99 package of music wire from Hobby Lobby and some round nose pliers, we are back in business.... 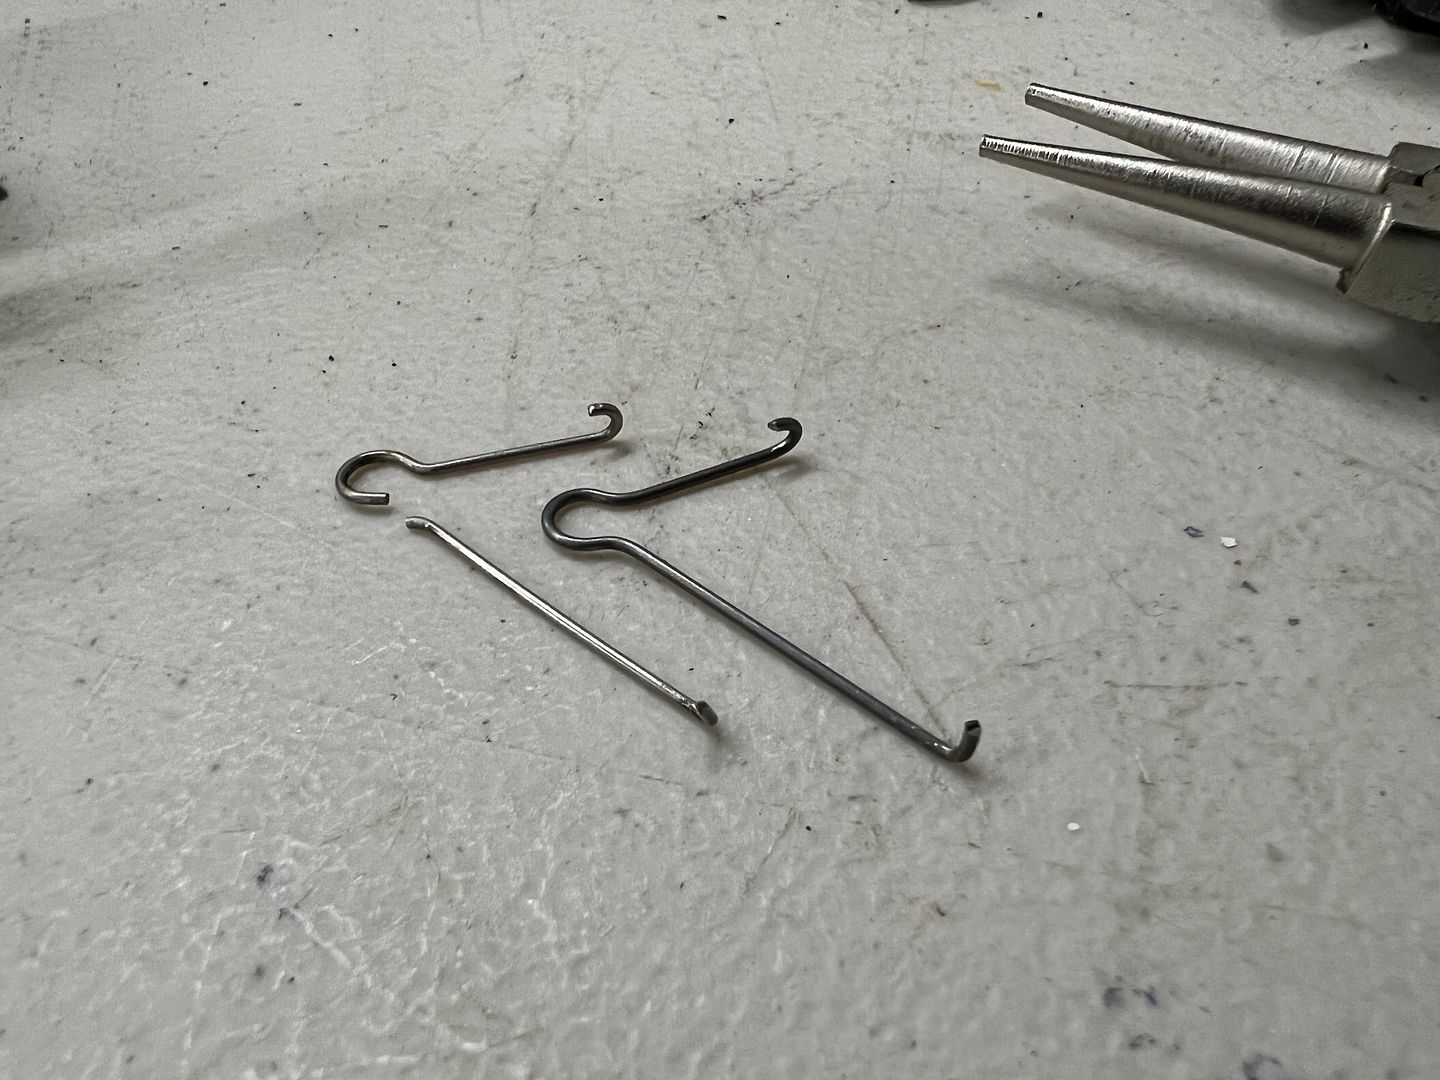 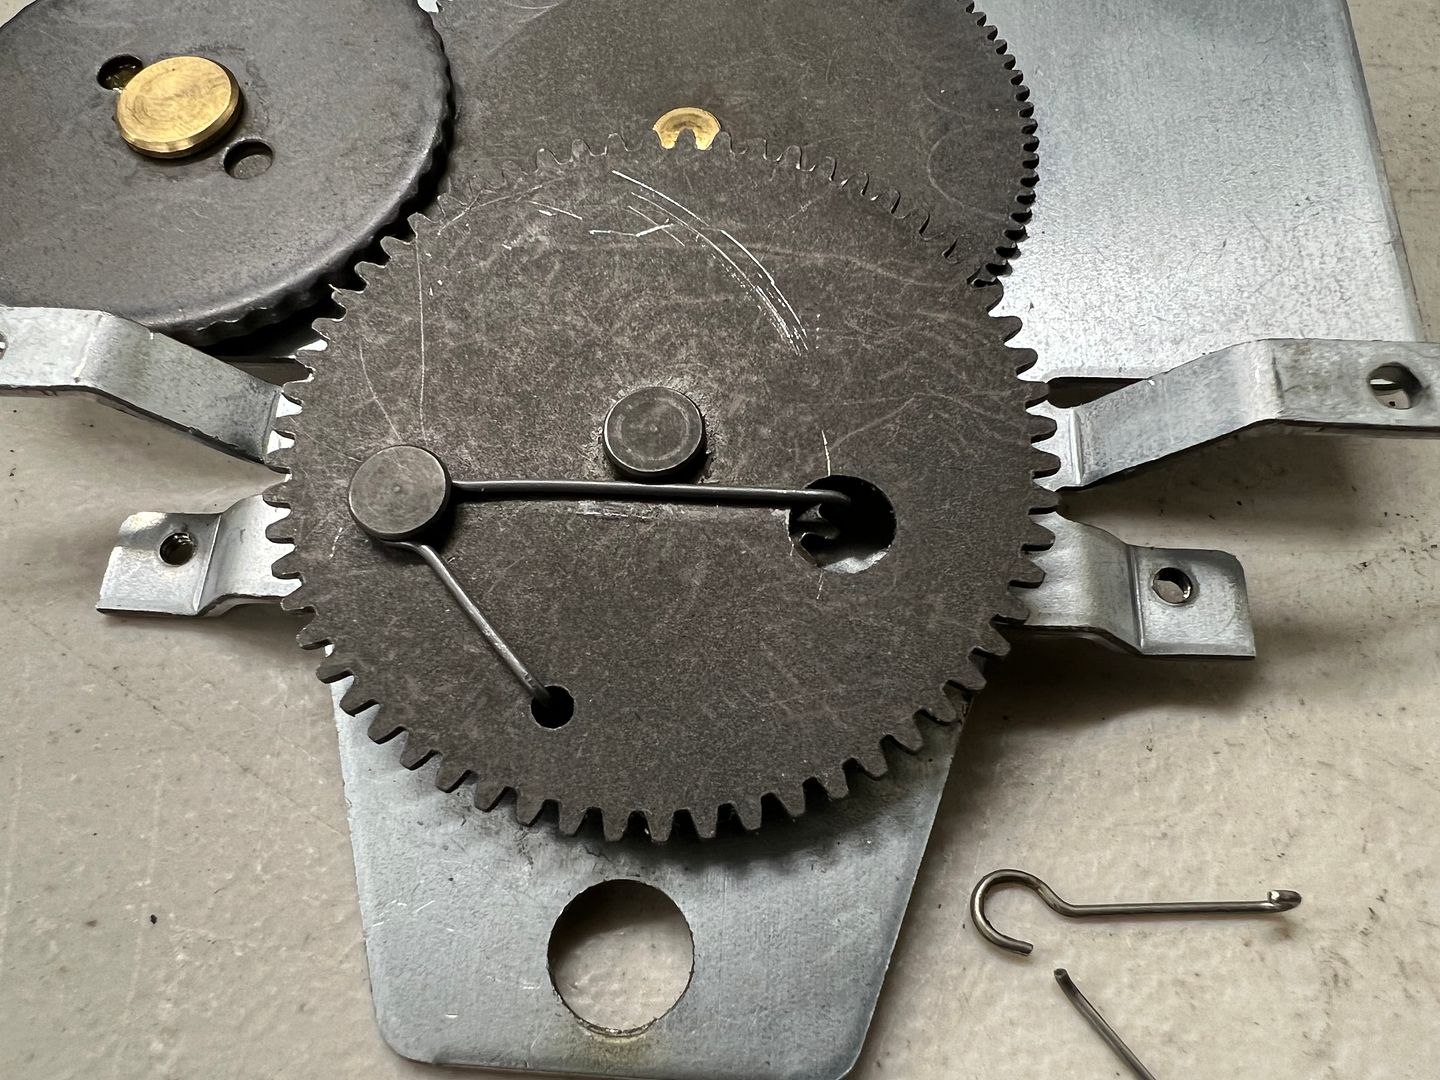 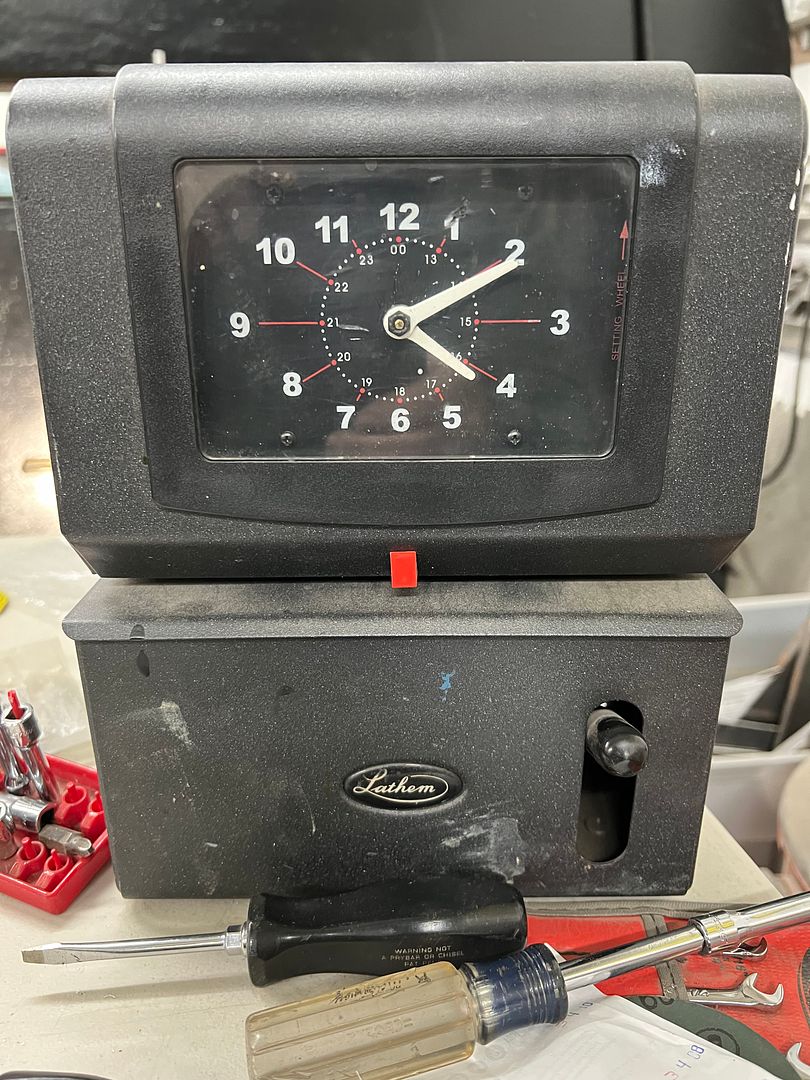 Next on the list, I had received a pair of Fairmount wire edge pliers for Christmas, which had quite a twist to the handles where it was difficult for the catch to swing over the adjacent handle: https://youtu.be/r_saJkGxvKw Since these aren't available for return at the local hardware store (obsolete), and also since they are drop forged, I decided to do some heating and twisting. The Meco torch was used to bring the handles to a light tan color.... and a twisting device employed with a bit of tension via ratchet strap as the handles cooled... 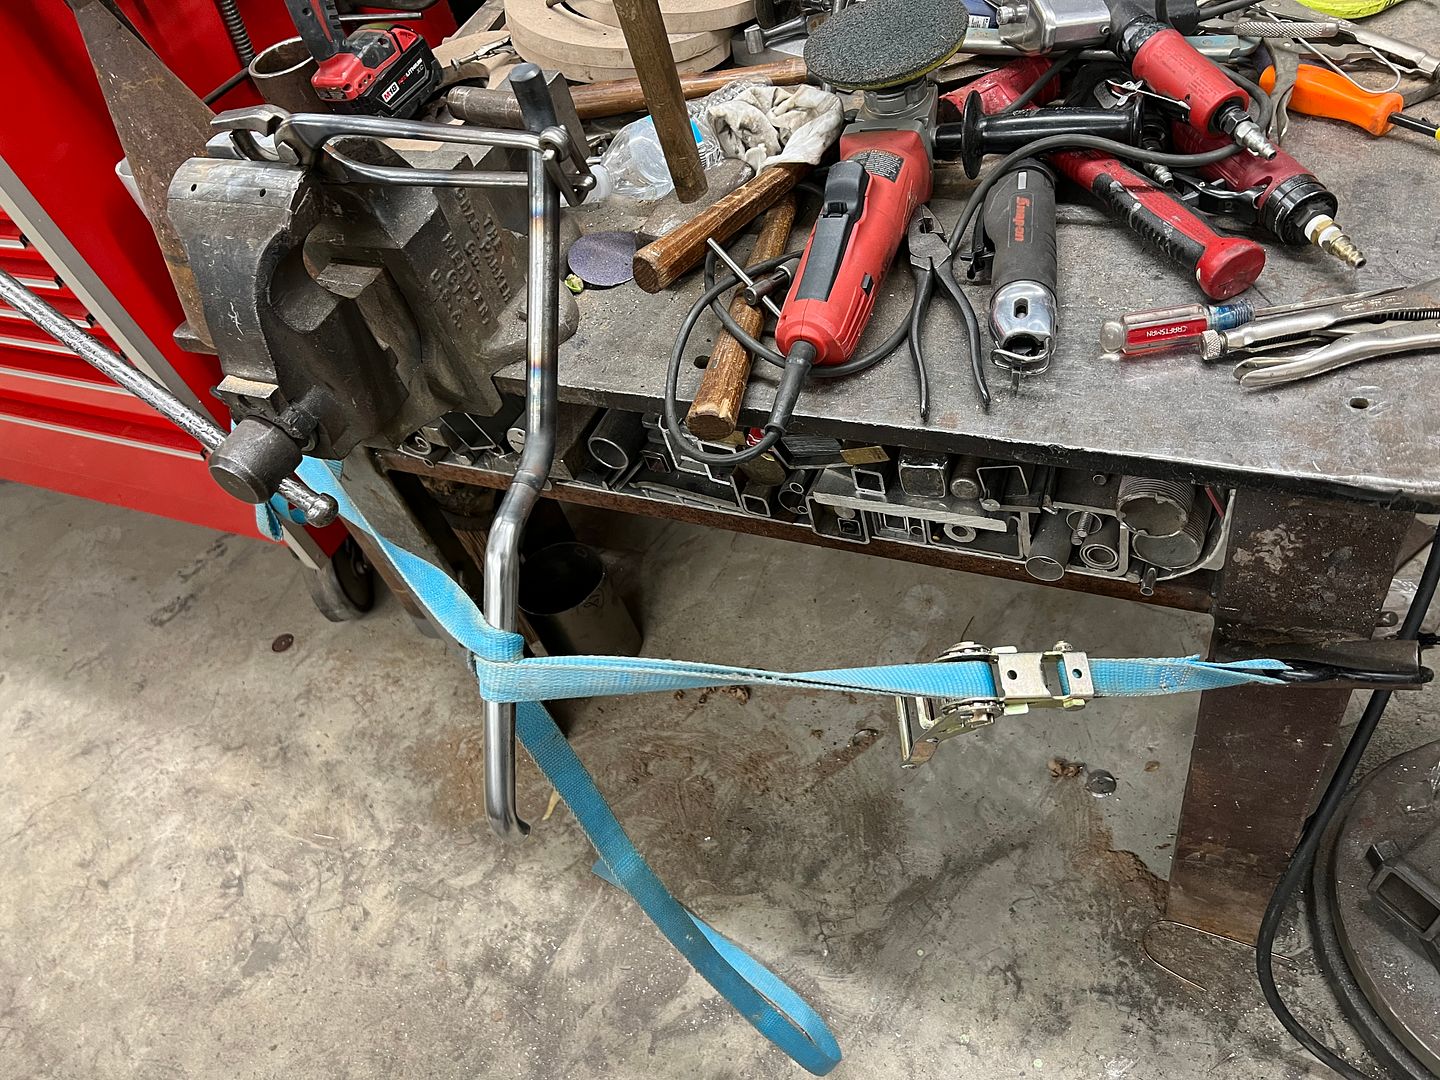 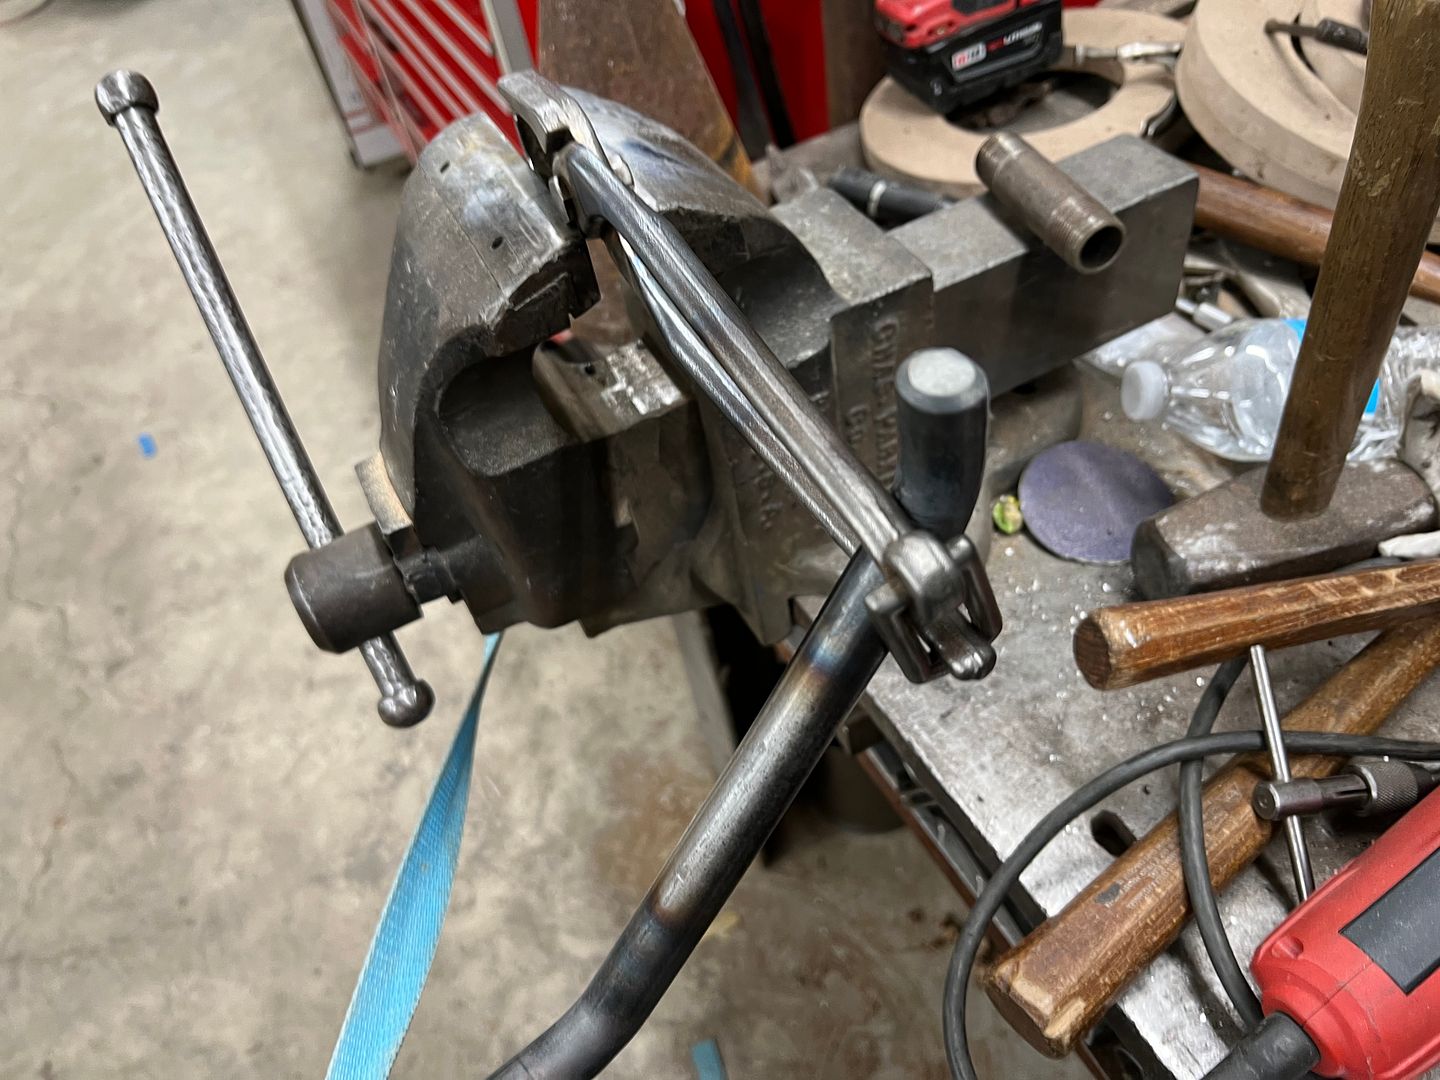 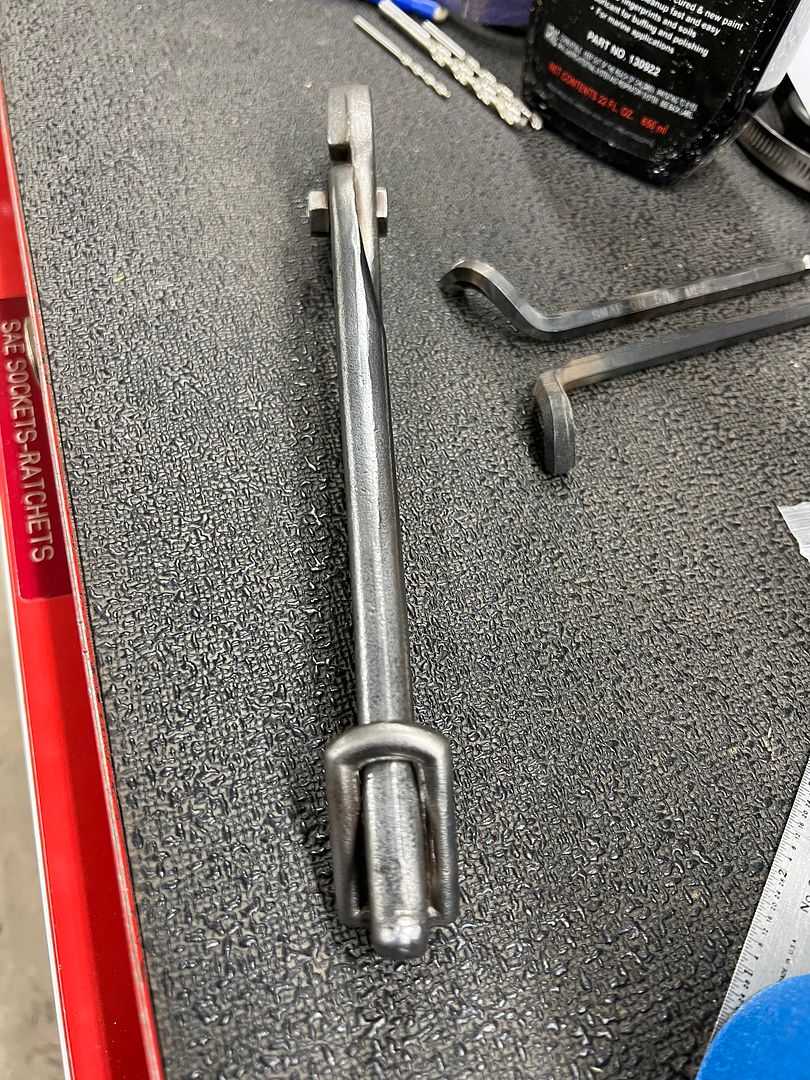 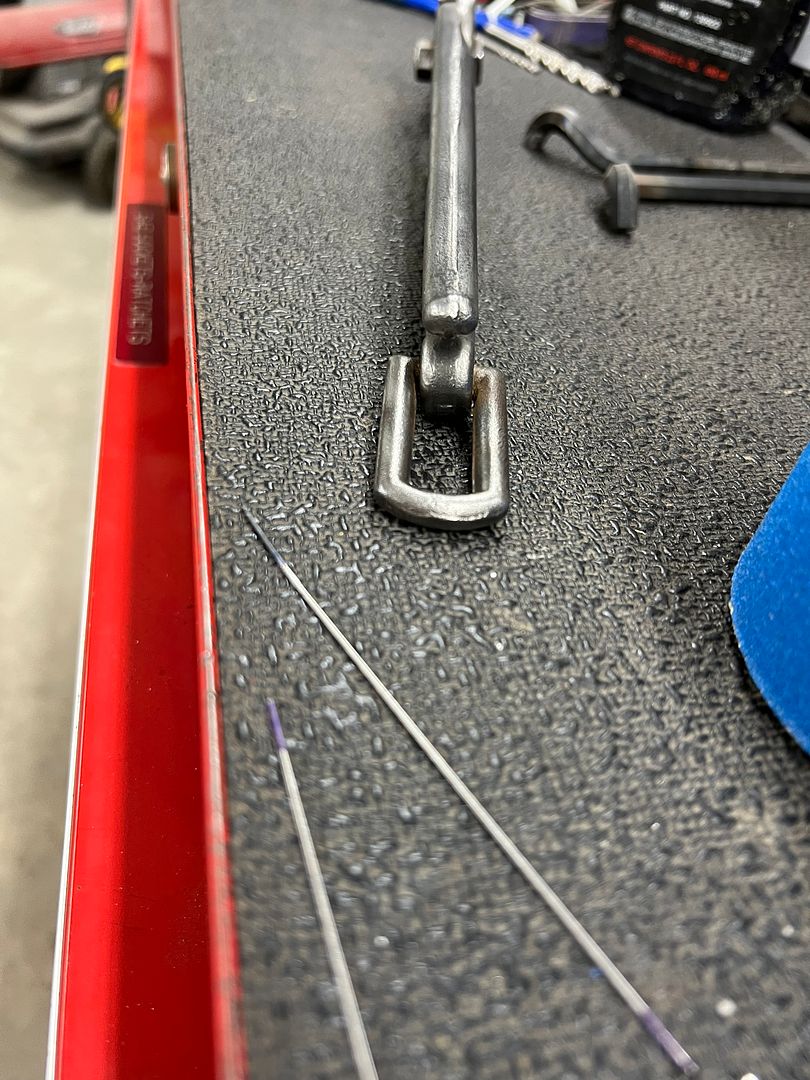 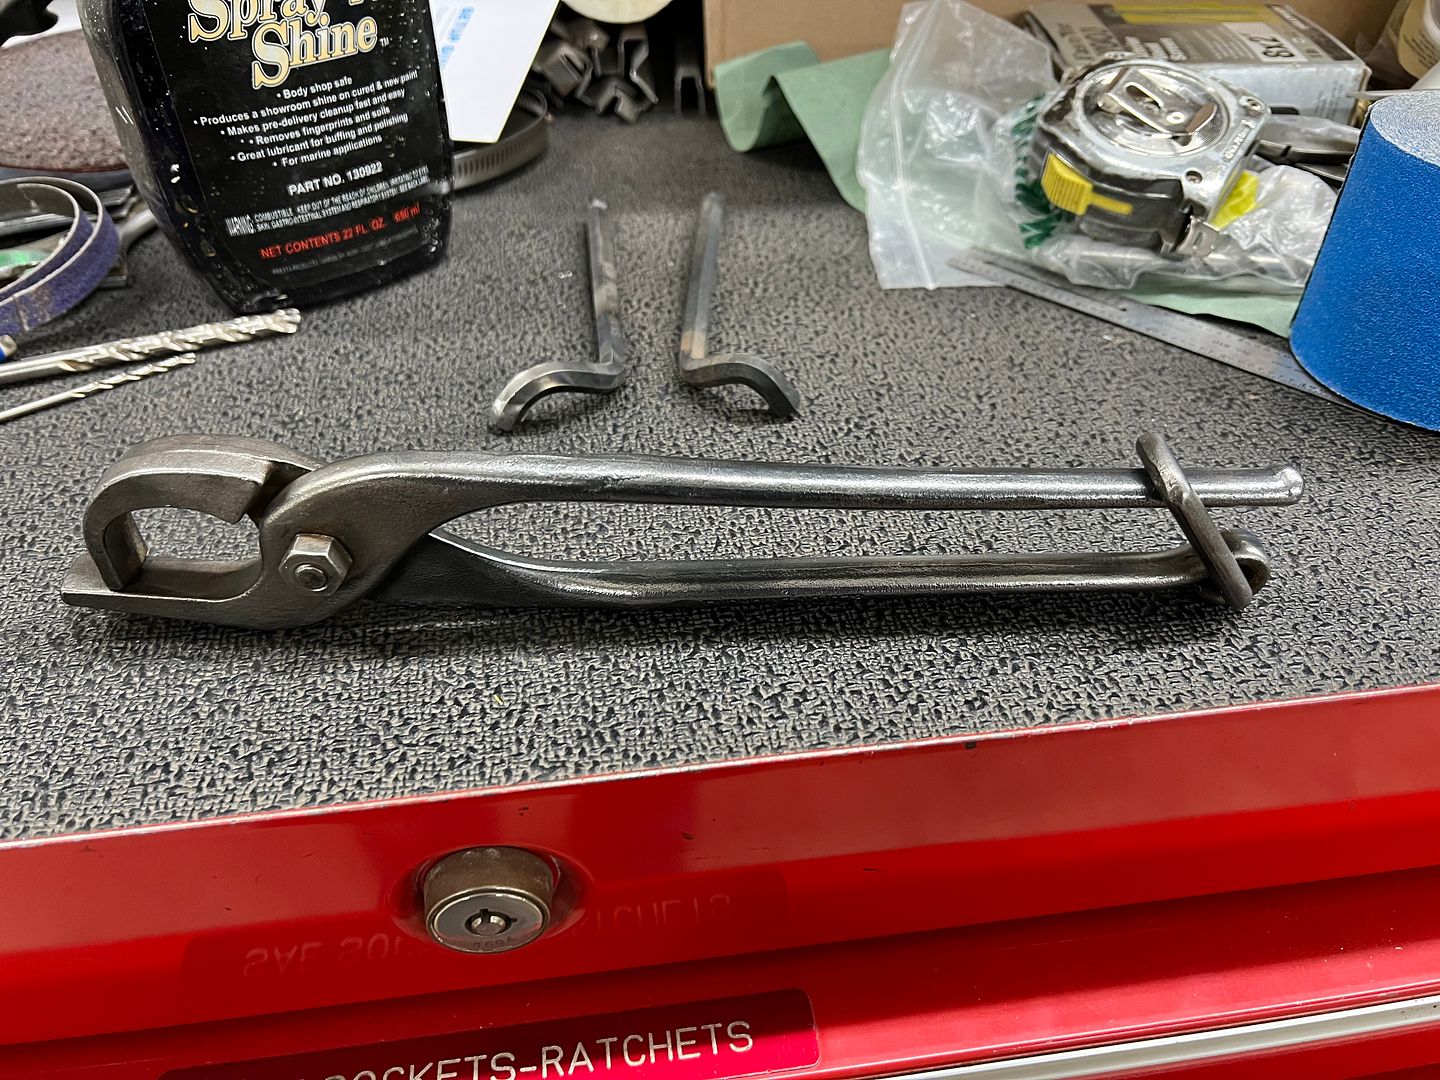 ....and here's a video showing their use on a test sample. These do a nice job of locking the wire tight to the flange as you stake and wrap the wire.. https://youtu.be/220OxhKXVoU Finally, since the artist in the family had asked a few months ago, looking for a canvas to paint, I pointed her to the Lennox. Here is the layout on the one side in Sharpie in prep for painting.. 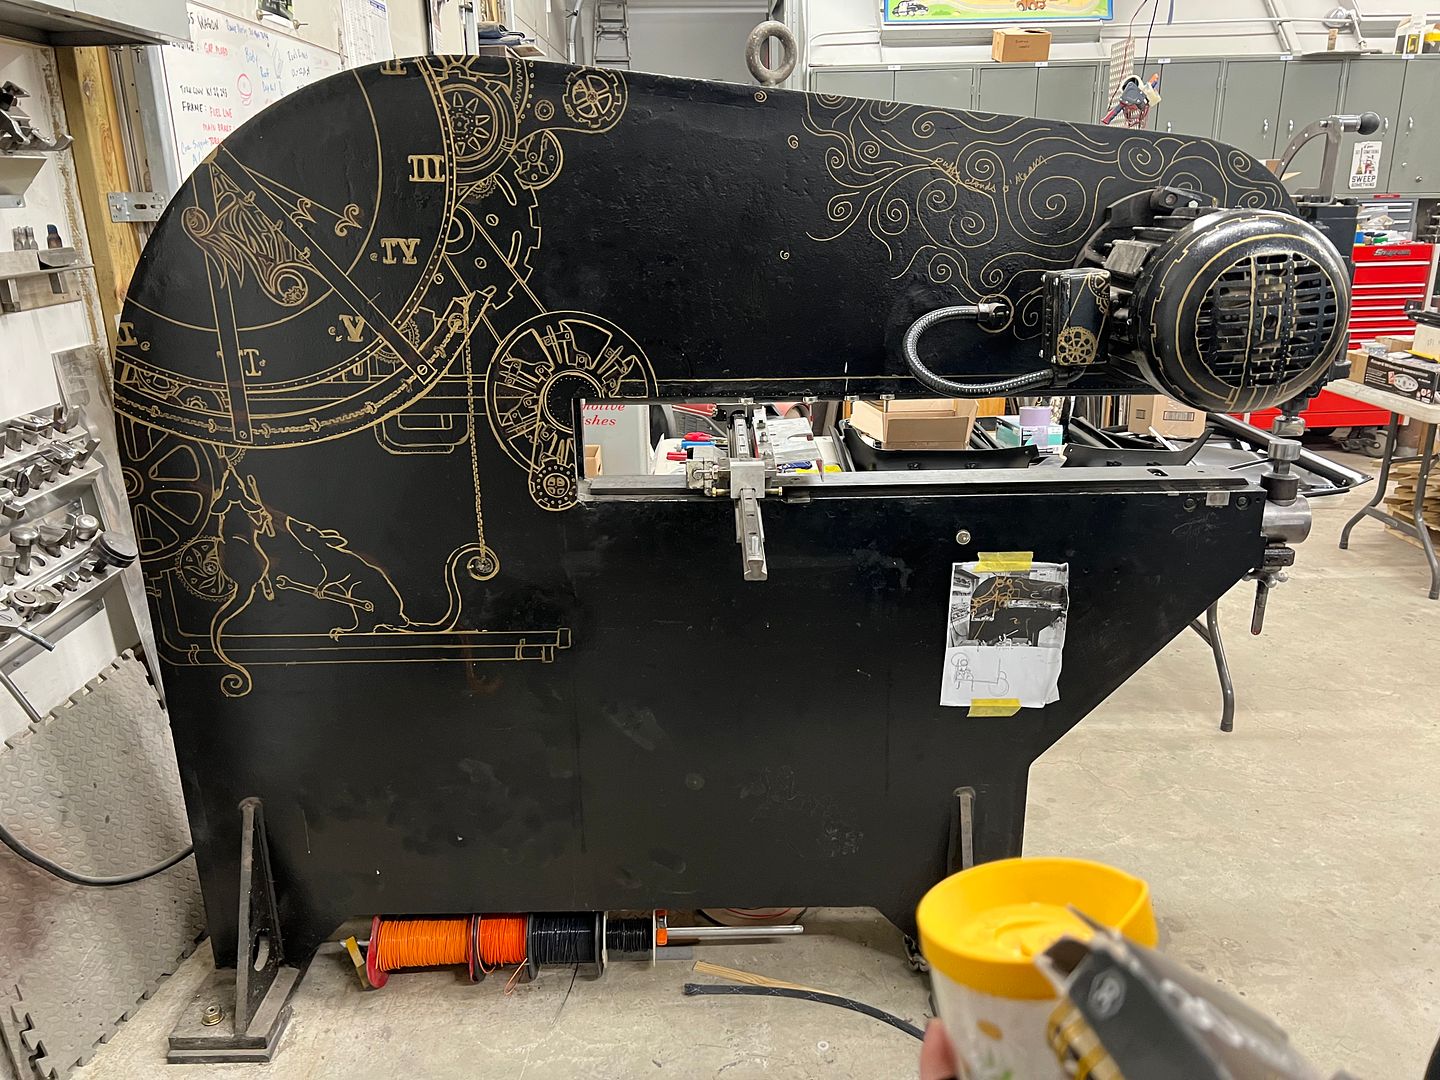 As far as the wagon, we are still here, back to one of the more boring stages..... applying epoxy primer and making black dust on the floor...  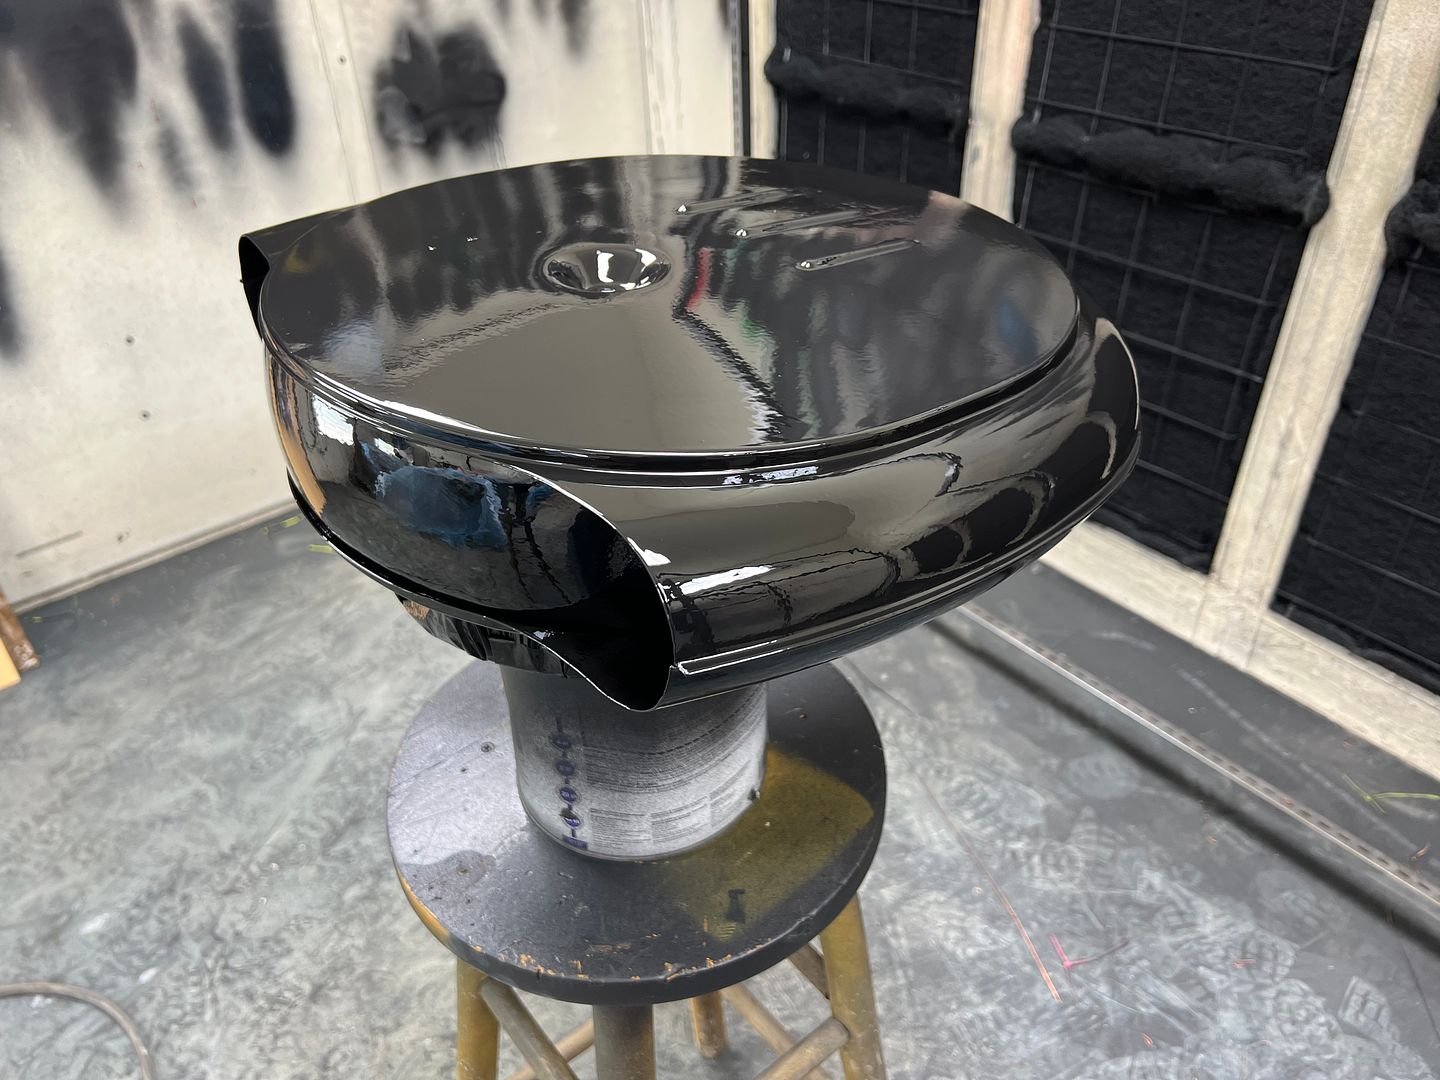 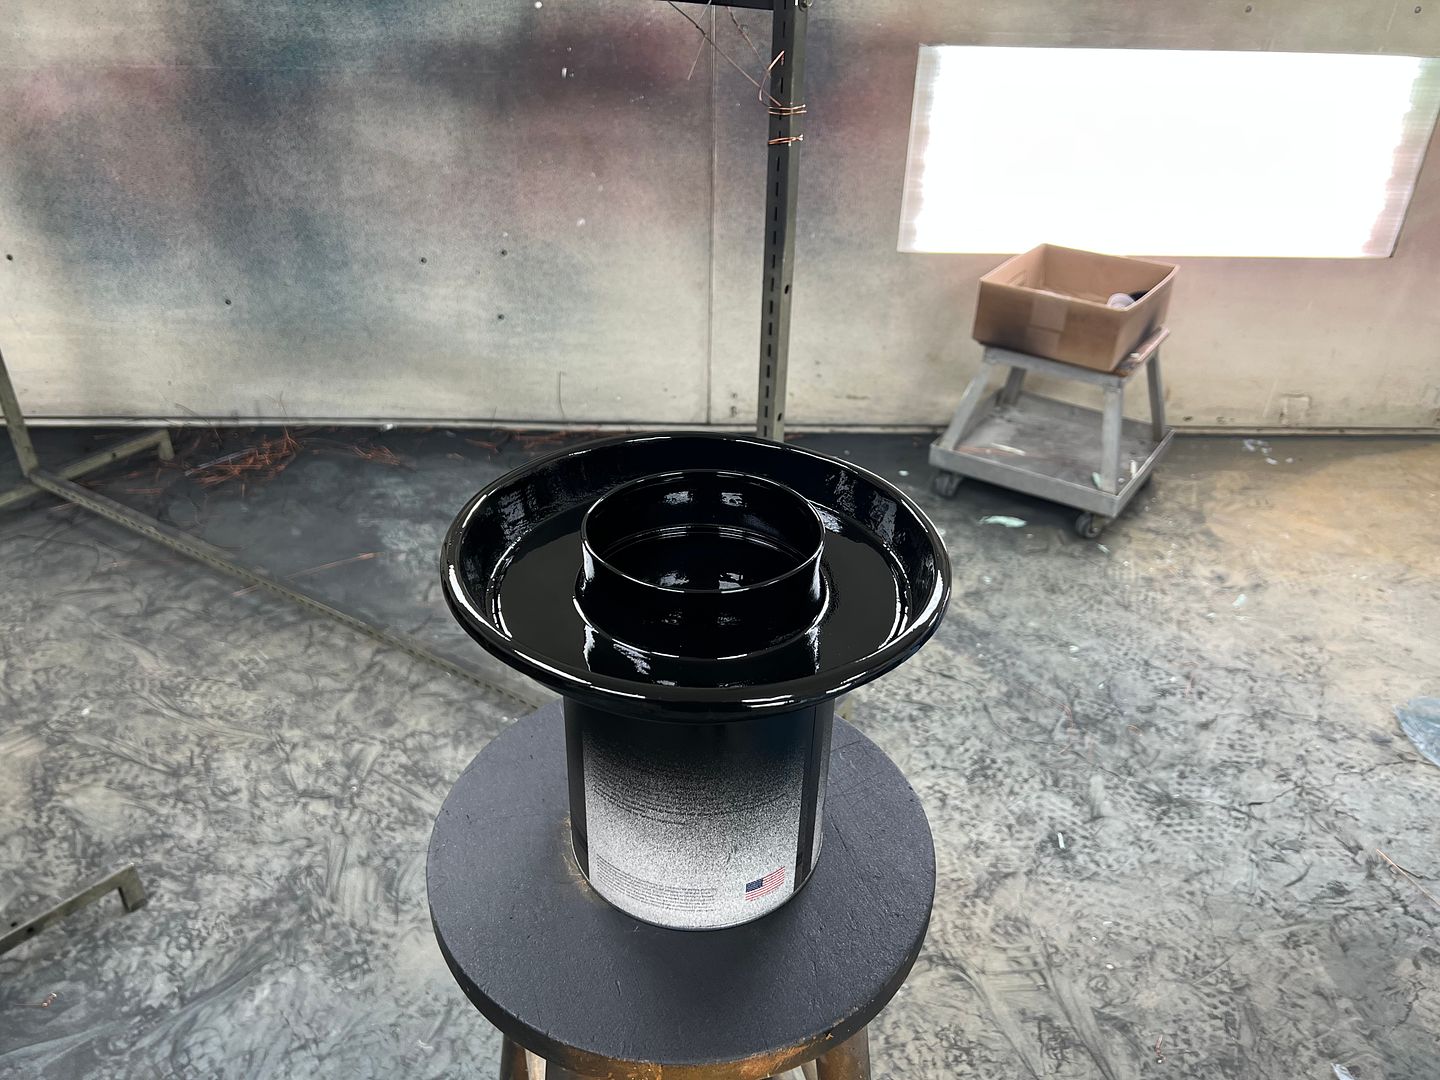 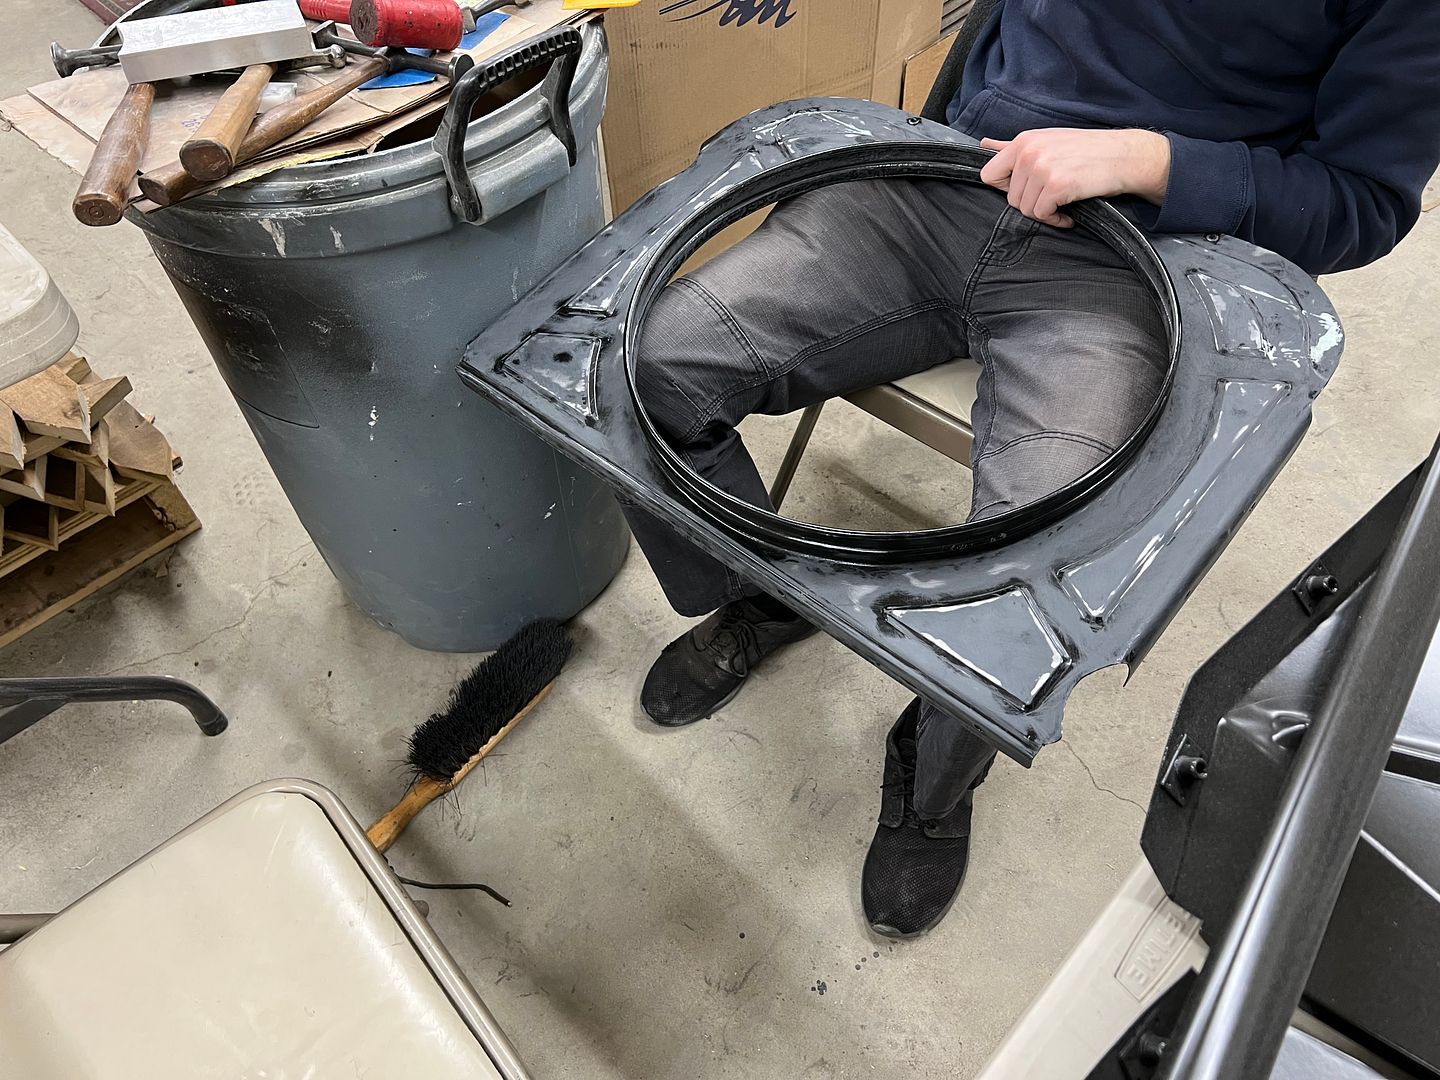 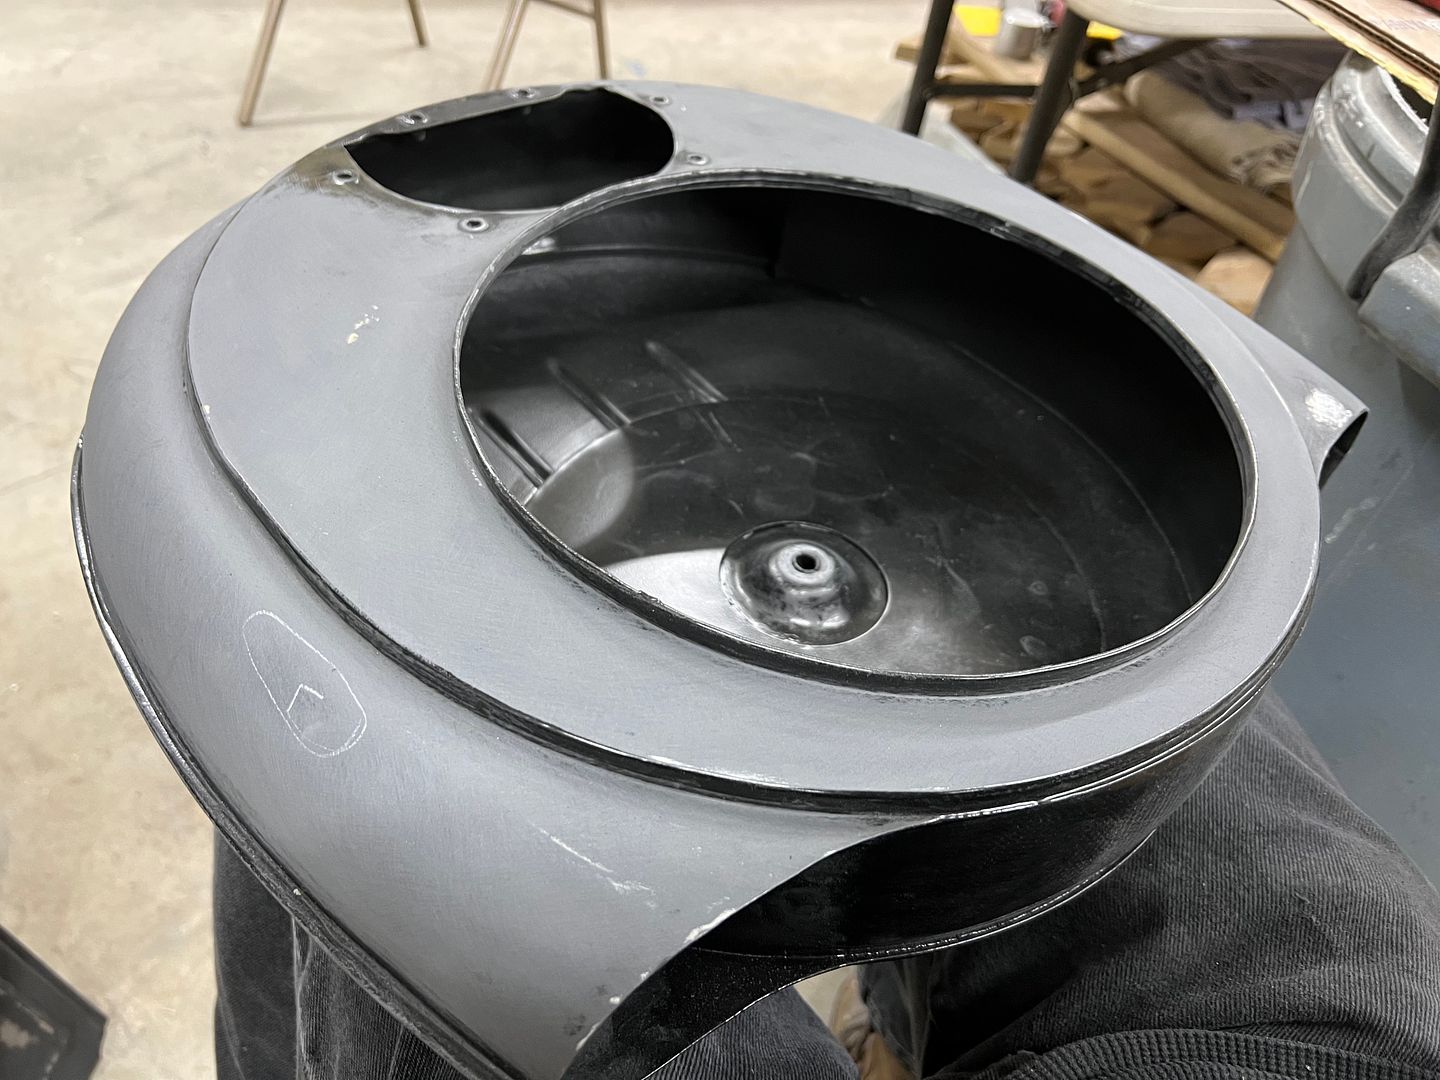 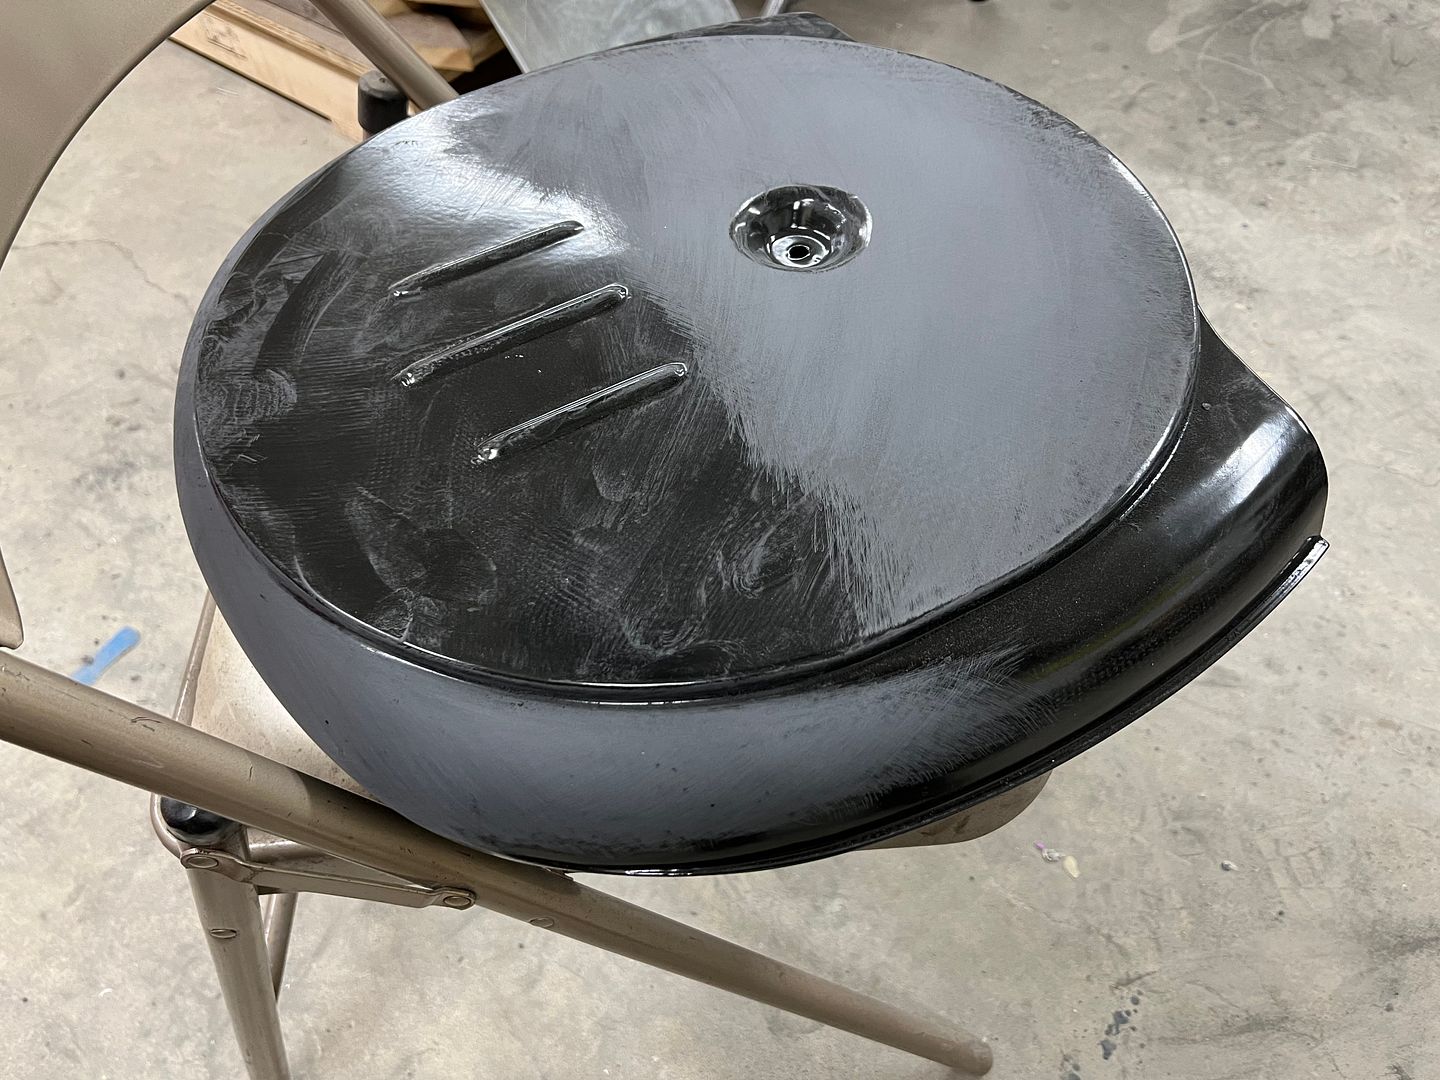 And in the planning stage for one of the trim details, the owner had ordered a ball milled dash insert for the wagon many months ago, which was far too 1990's billet. So naturally I breathed a sigh of relief when it did not fit the dash contour. (go figure) I was leaning toward an engine turned panel as it is more of a hotrod flavor. Unfortunately, it is more of a TRADITIONAL hot rod flavor, and we were in the gray area there as well. So in the meantime, a buddy has a shop in Wilmington DE, and does absolutely fabulous detail work (had a hand in the Double Bubble wagon's fabrication), and has been using this ribbed stainless sheet for dash inserts and other details.. (his picture and work) 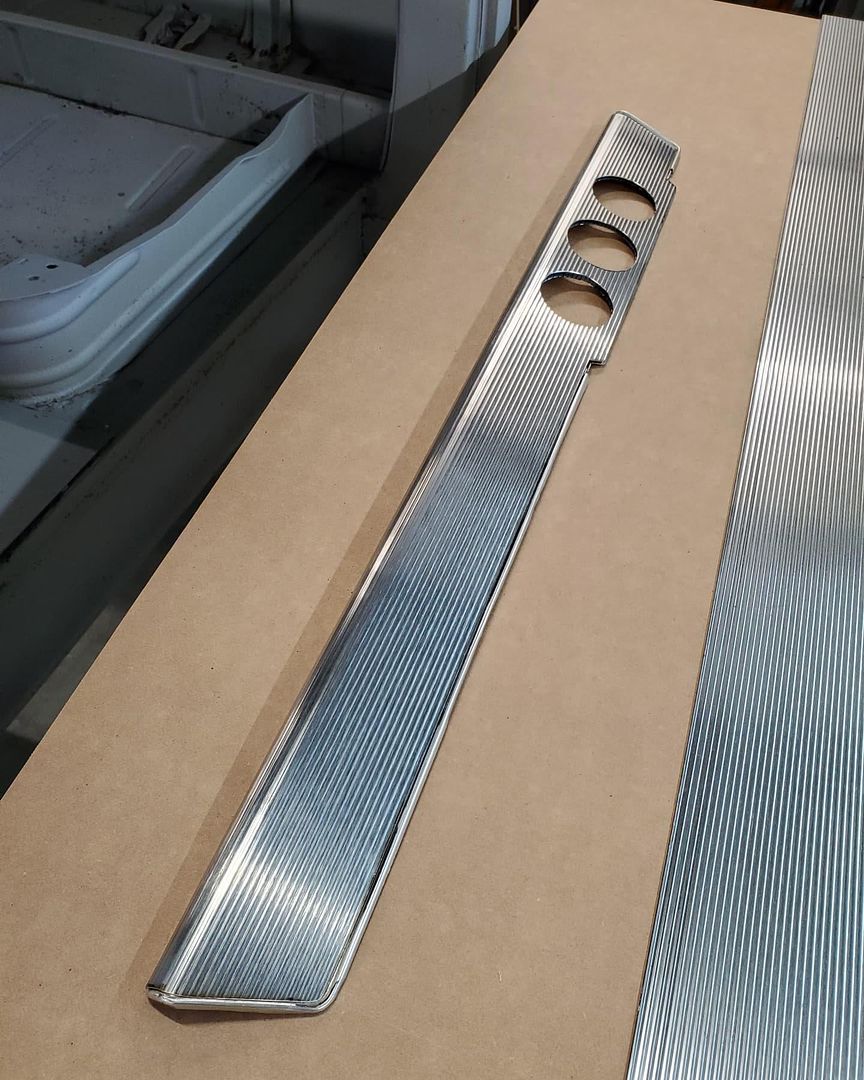 This gives a nice classy and timeless look that is a better fit to the flavor of the car we have, so that is the direction we're headed... So to test a theory in adding a finished edge around the perimeter, we broke out the false wire edge Pullmax dies and installed them in the Lennox for a test run on some 19 gauge stainless. The "backstop" was setup to be just shy of a full wrap, which should give us a slight gap for the ribbed stainless to slide into. Our edge strips will be "outfitted" with some hidden press studs to hold it in place on the dash. https://youtu.be/ktpJ4sSOqy0 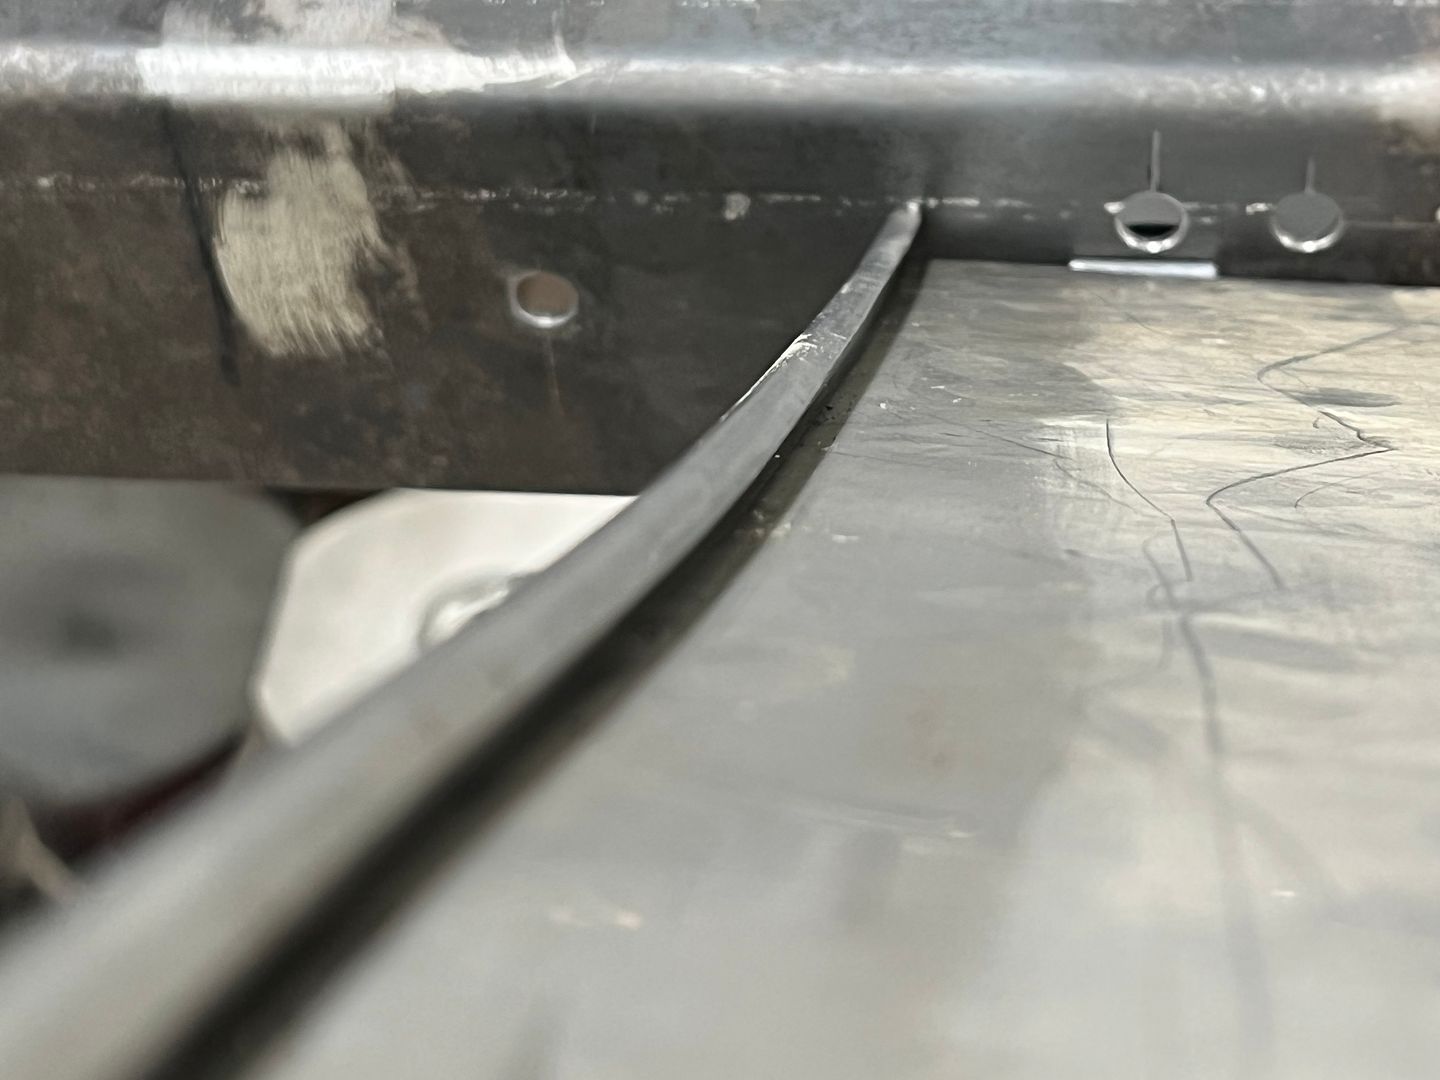 That may just work.....
__________________
Robert |
|
|

|
|
|
#1275 |
|
Registered User
Join Date: Jan 2013
Location: Leonardtown, MD
Posts: 1,647
|
Re: 55 Wagon Progress
Duplicate post removed
__________________
Robert Last edited by MP&C; 01-14-2022 at 09:40 AM. |
|
|

|
 |
| Bookmarks |
|
|