
 |
|
|
#1301 |
|
Registered User
Join Date: Jan 2013
Location: Leonardtown, MD
Posts: 1,647
|
Re: 55 Wagon Progress
Thanks Greg!!
One expensive lesson we learned from installing a window three times, the tack strip that the owner bought was too thick for the headliner, and as a side effect cramped the glass going in. This also meant the upper window clips, which also serve to "position" the garnish molding, pushed the molding down far enough that the back side was visible through the glass. 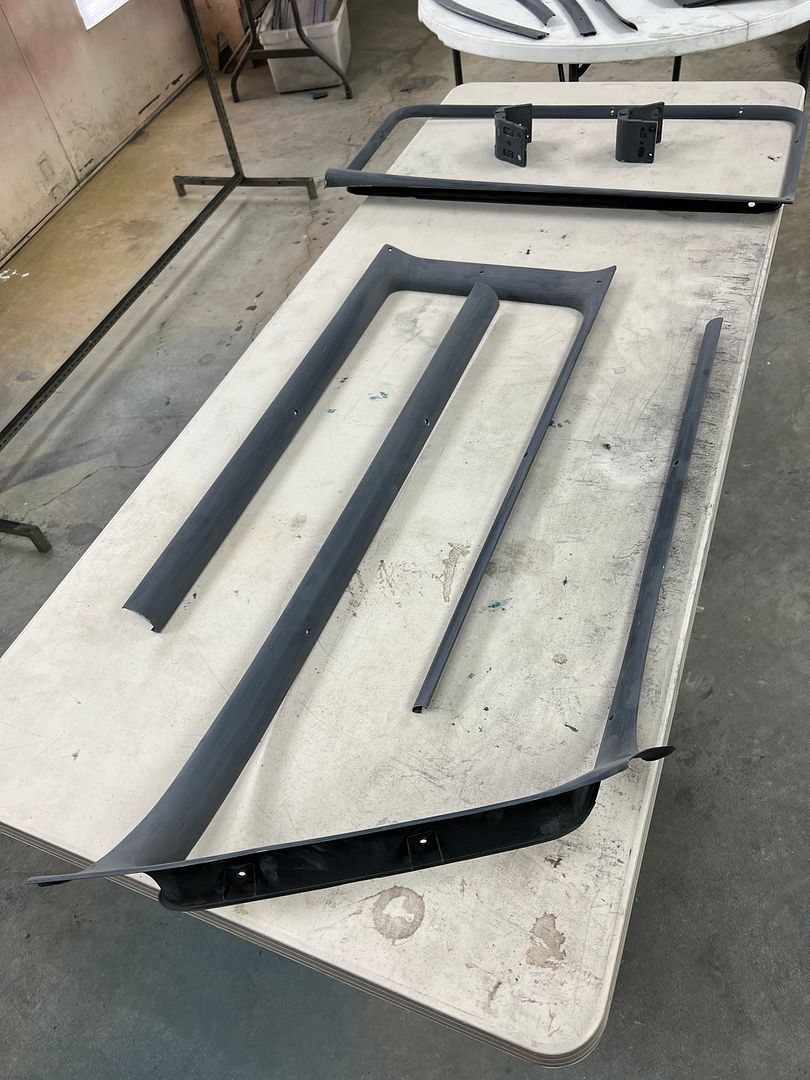 In order to remedy that view through the glass, we need to fabricate new clips that allow the trim to position higher on the glass. We start with a set of dies for the Lennox so we can make a run of the needed shape, and then cut them individually to size. This should give us the best consistency on size. Our first set of dies will take a folded 90* shape and form it into a "U" shape. We used the Southbend "milling machine" to provide a relief for the long side flange of the clip. https://www.youtube.com/shorts/hM2p3GJ8hFc Additional reliefs and some roloc sander action and we have the lower die ready for the shortened clip. 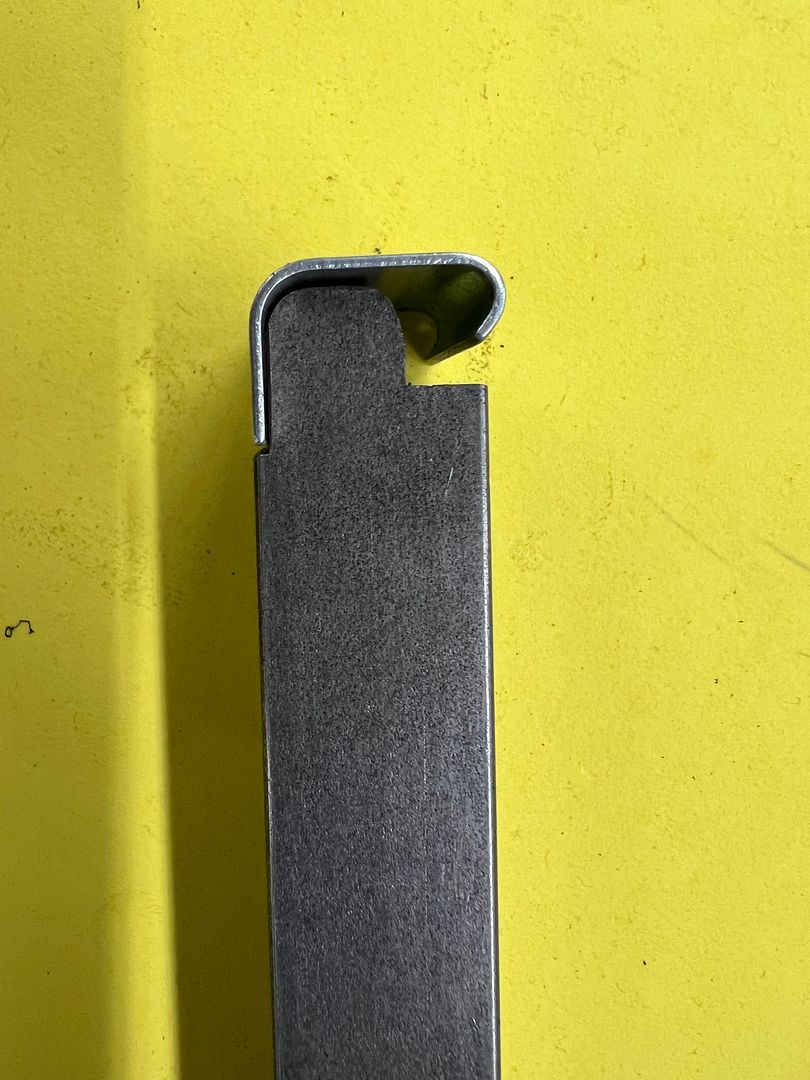 Then our 3/8 end mill is brought in from the end to form a matching profile. 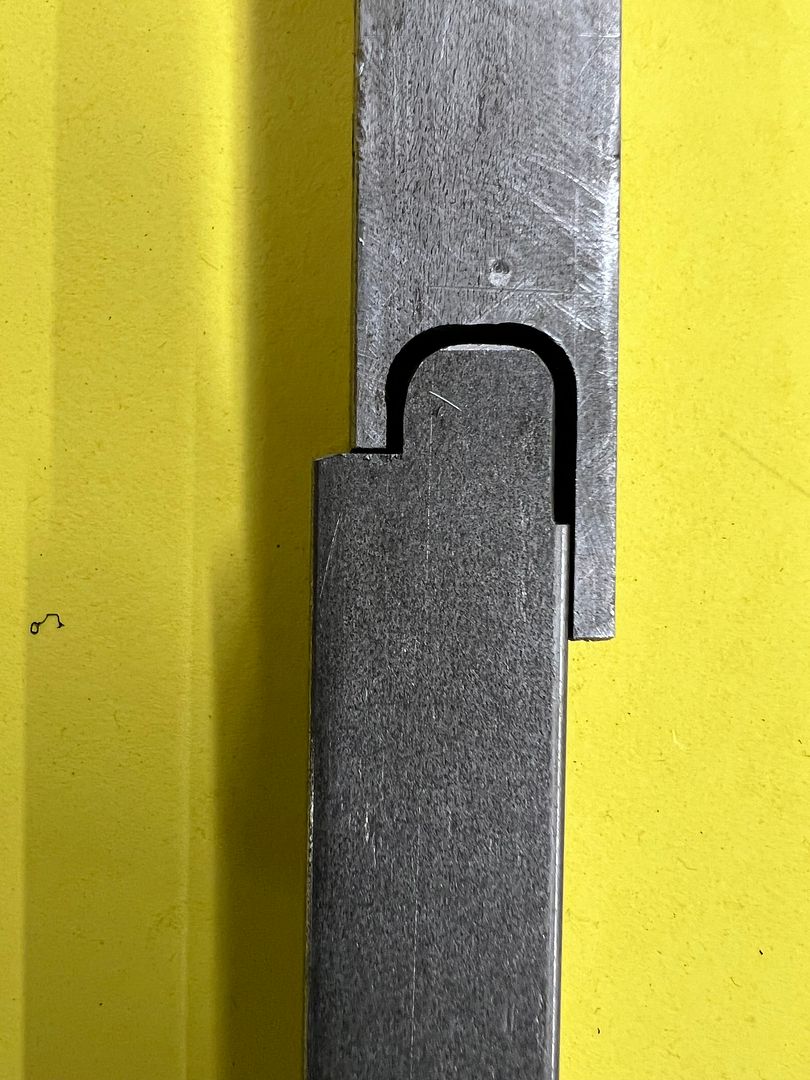 A piece of 1018 is welded onto the side to give us more "meat" to make the folding ramp, and then machined to clean up the weld. 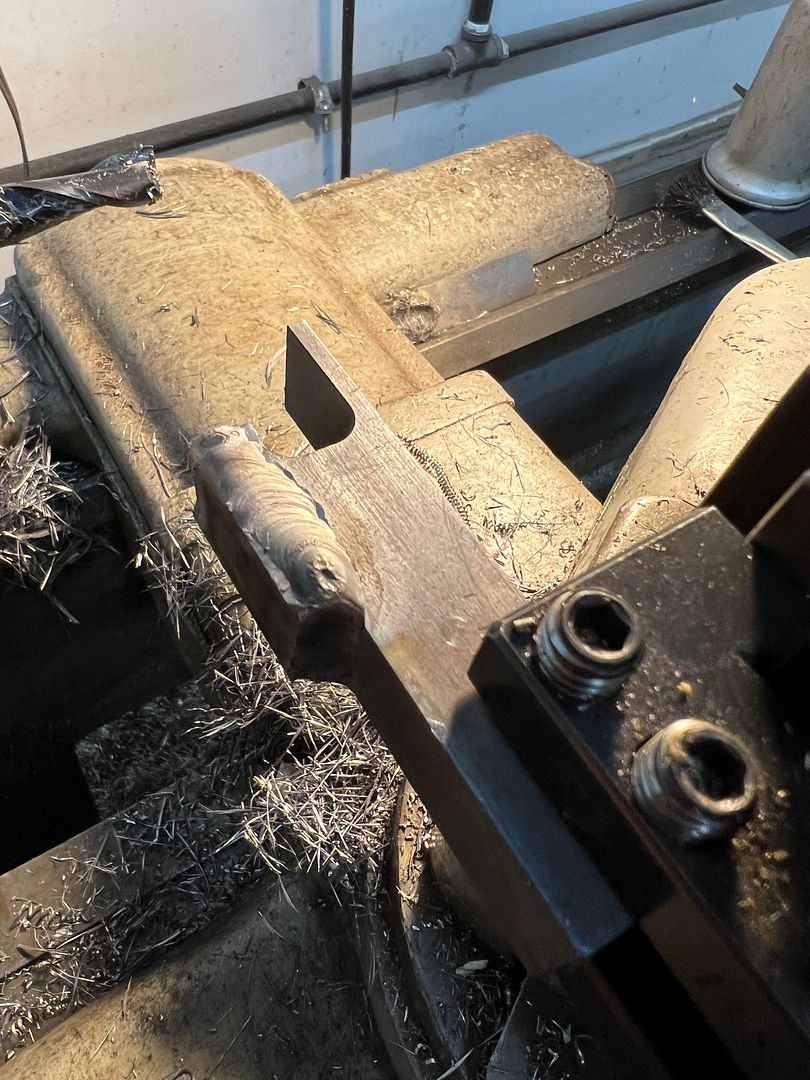 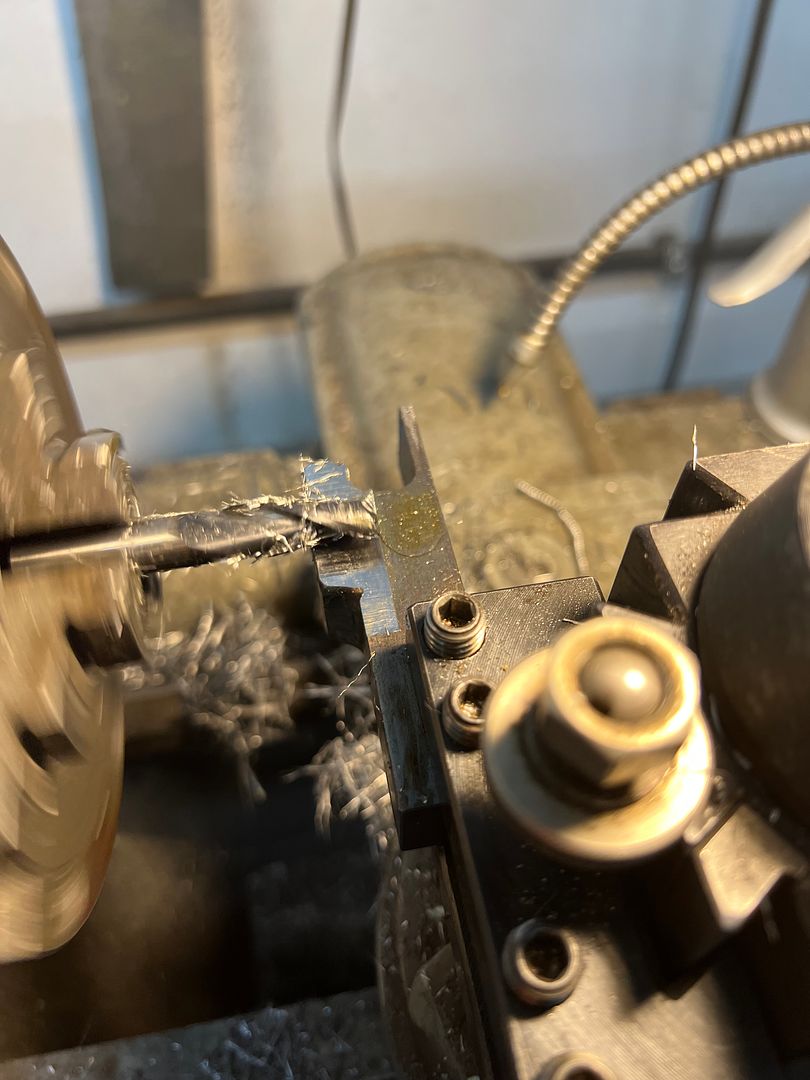 Using the pneumatic belt sander and a cone shaped die grinder we add the ramp to the upper die and then run a profile through.. 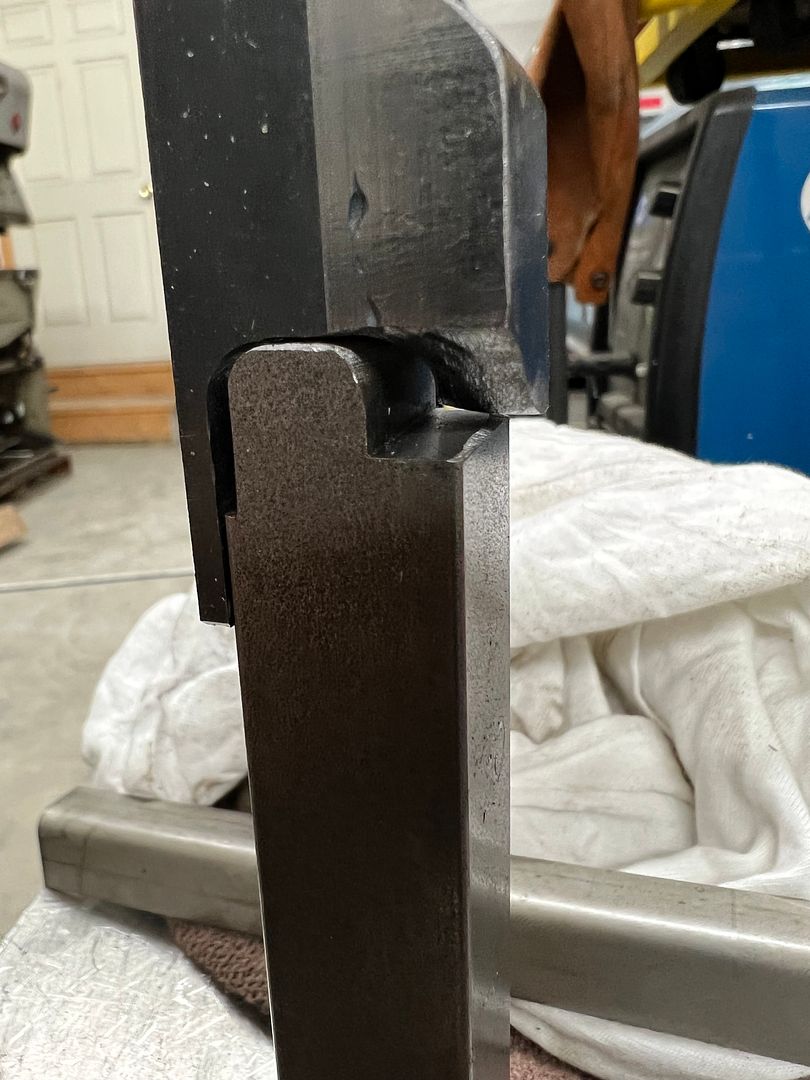 https://www.youtube.com/shorts/W9BHwcKvH_g Our next set of dies for the wrap around fold.... 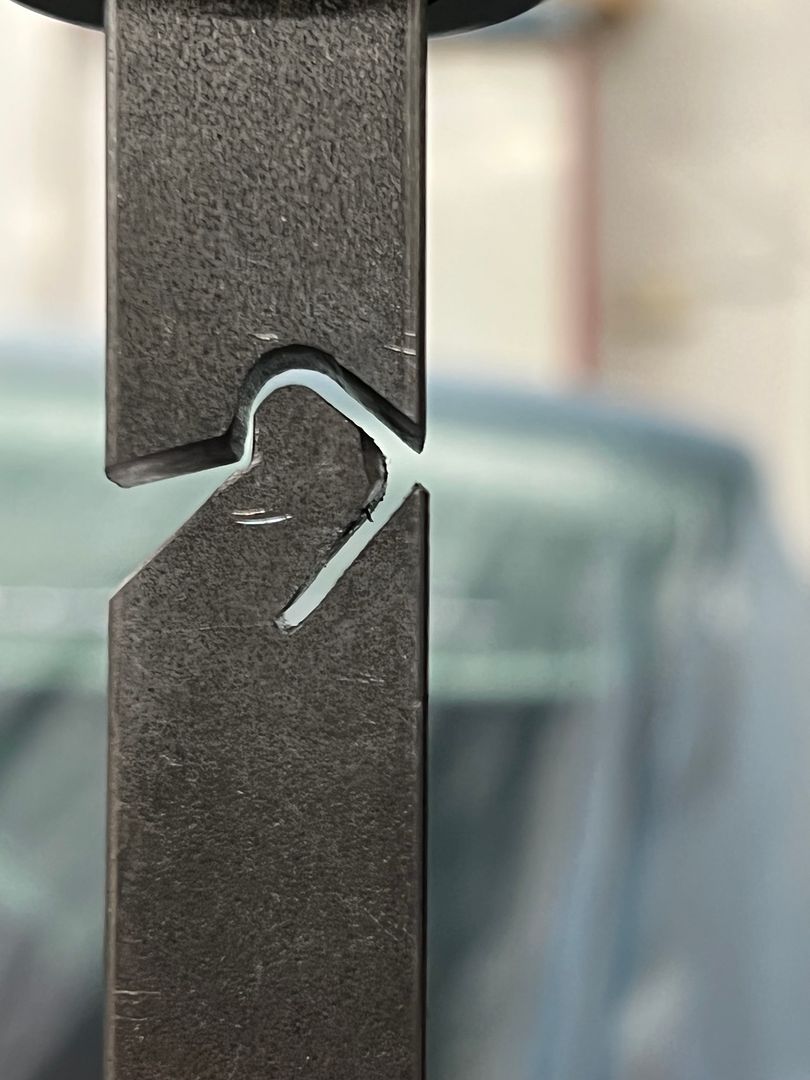 https://www.youtube.com/shorts/0uDZveTZBzY Clips cut to length and mounting holes drilled 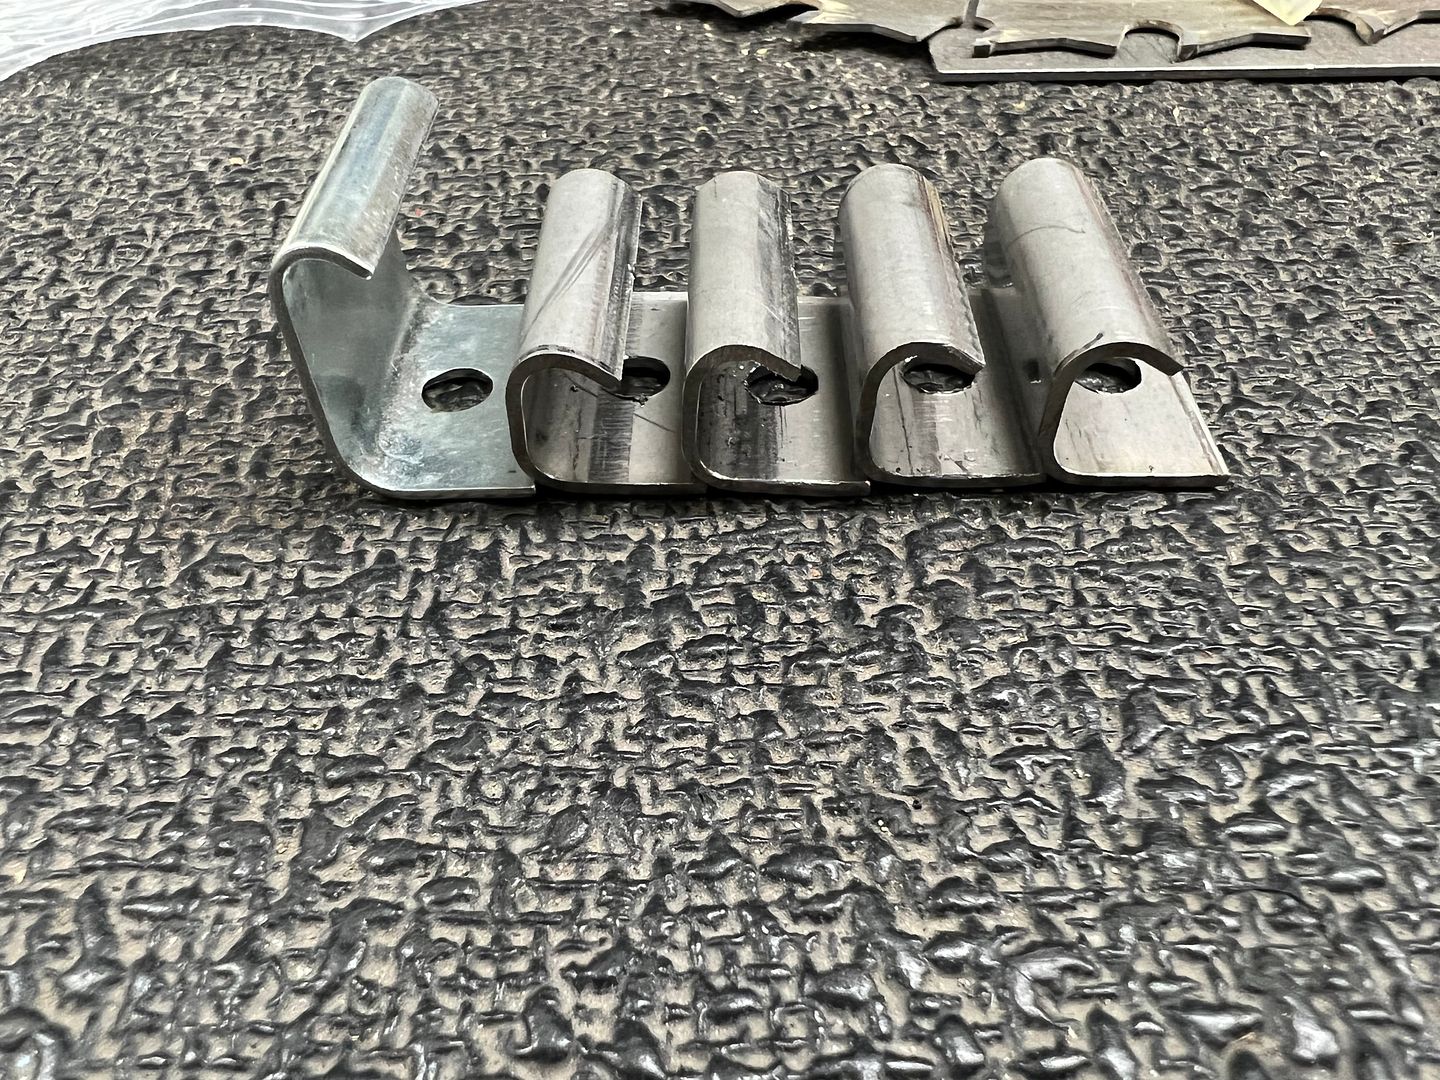 Next on the list was to install the new wiper washer nozzles on my daily, since the old ones couldn't stand the heat under the hood with a turbo. The barb fitting had broken free of the nozzle and we no longer had windshield cleaning service. Upon removal, I found that one of the barb couplings had disintegrated as well. And here we were one hour after the auto parts stores had closed. Here's a still intact sample: 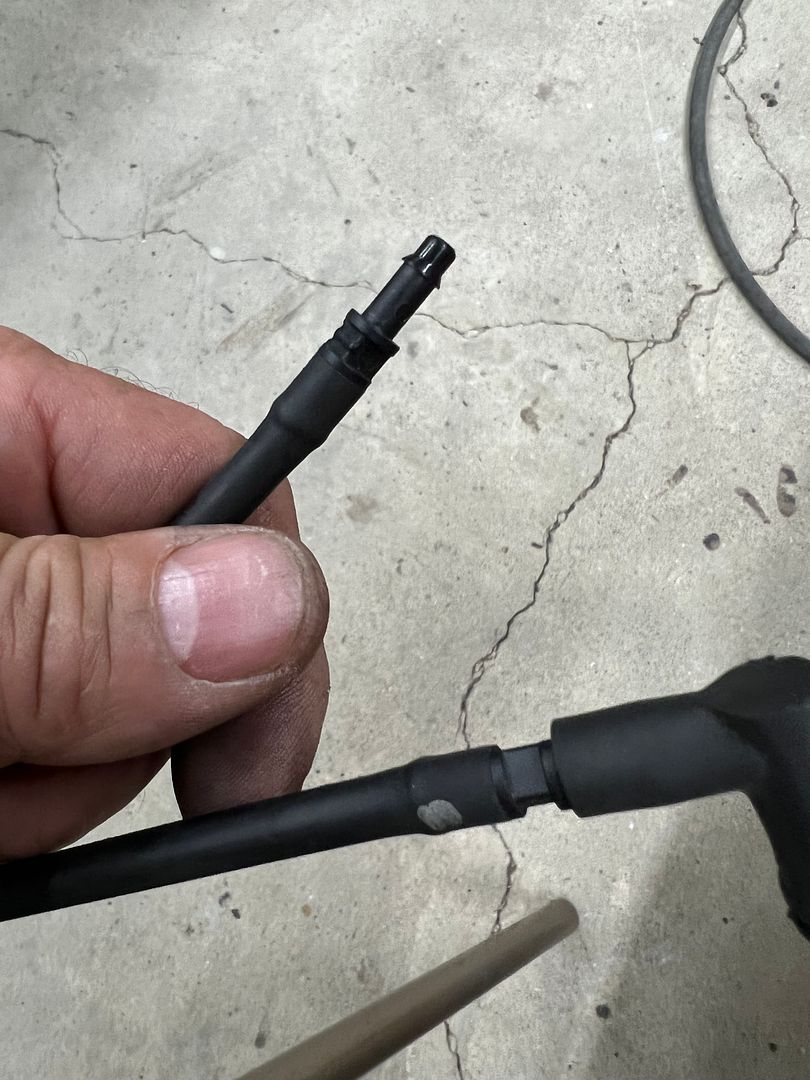 Since we had some stainless brake line left over from the wagon, lets make some lemonade... 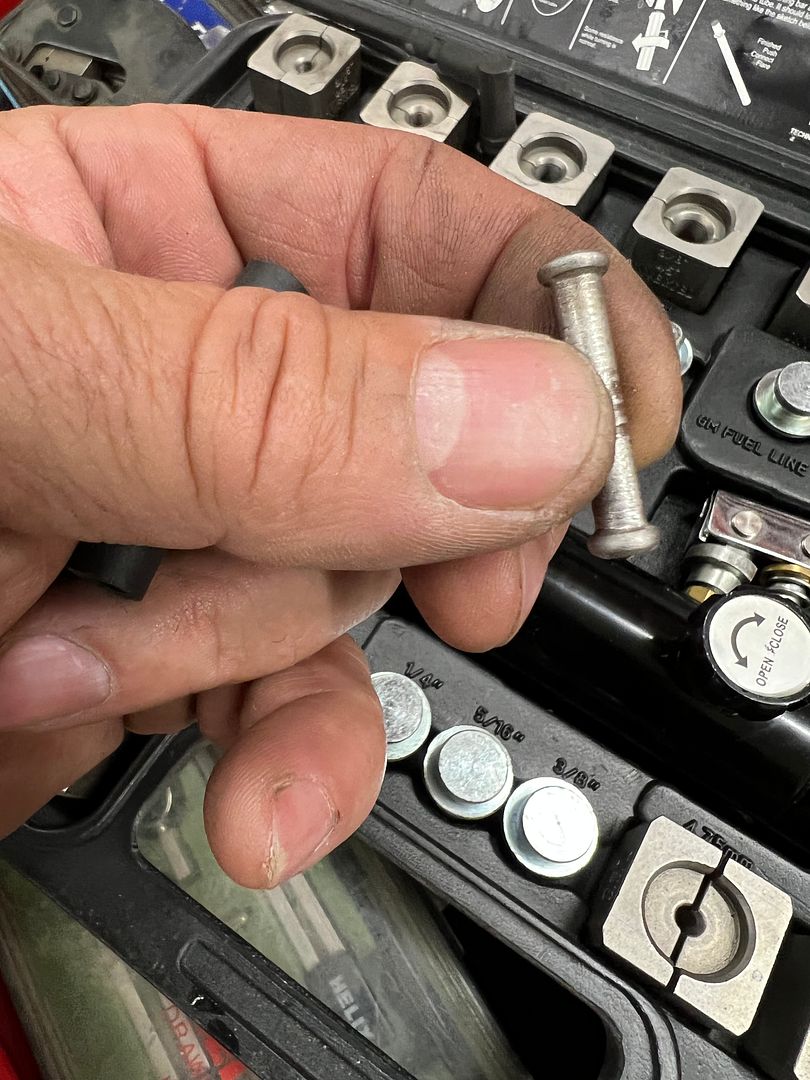 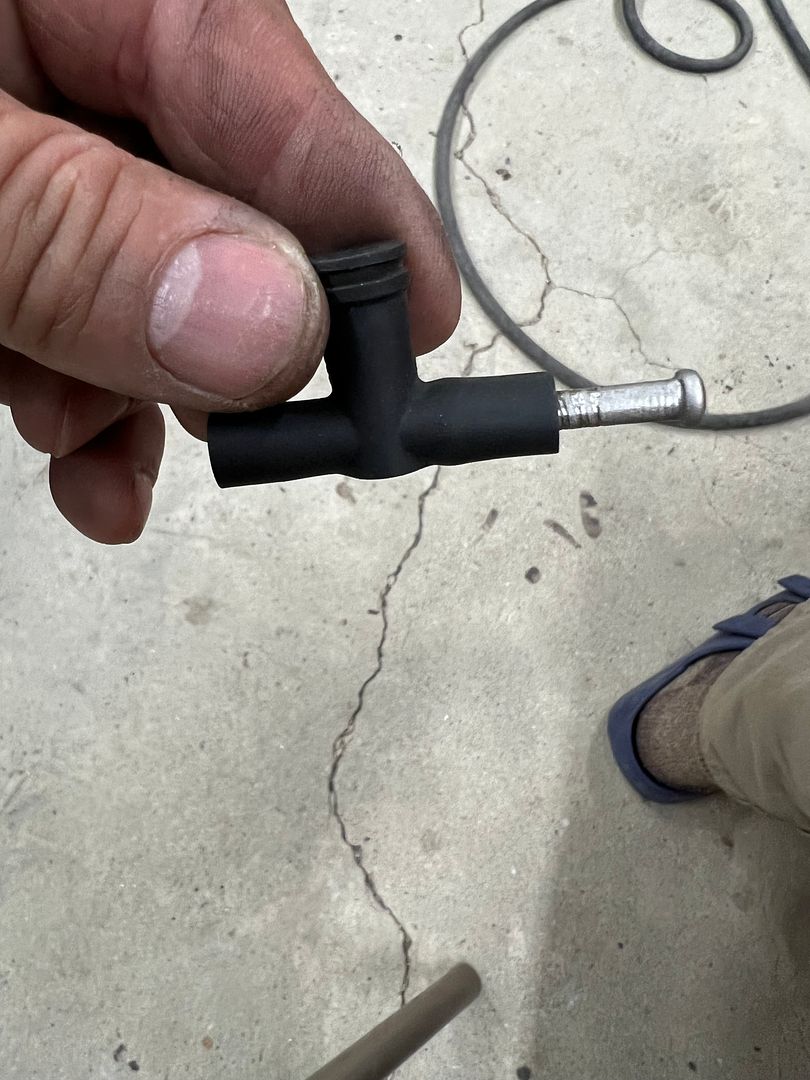 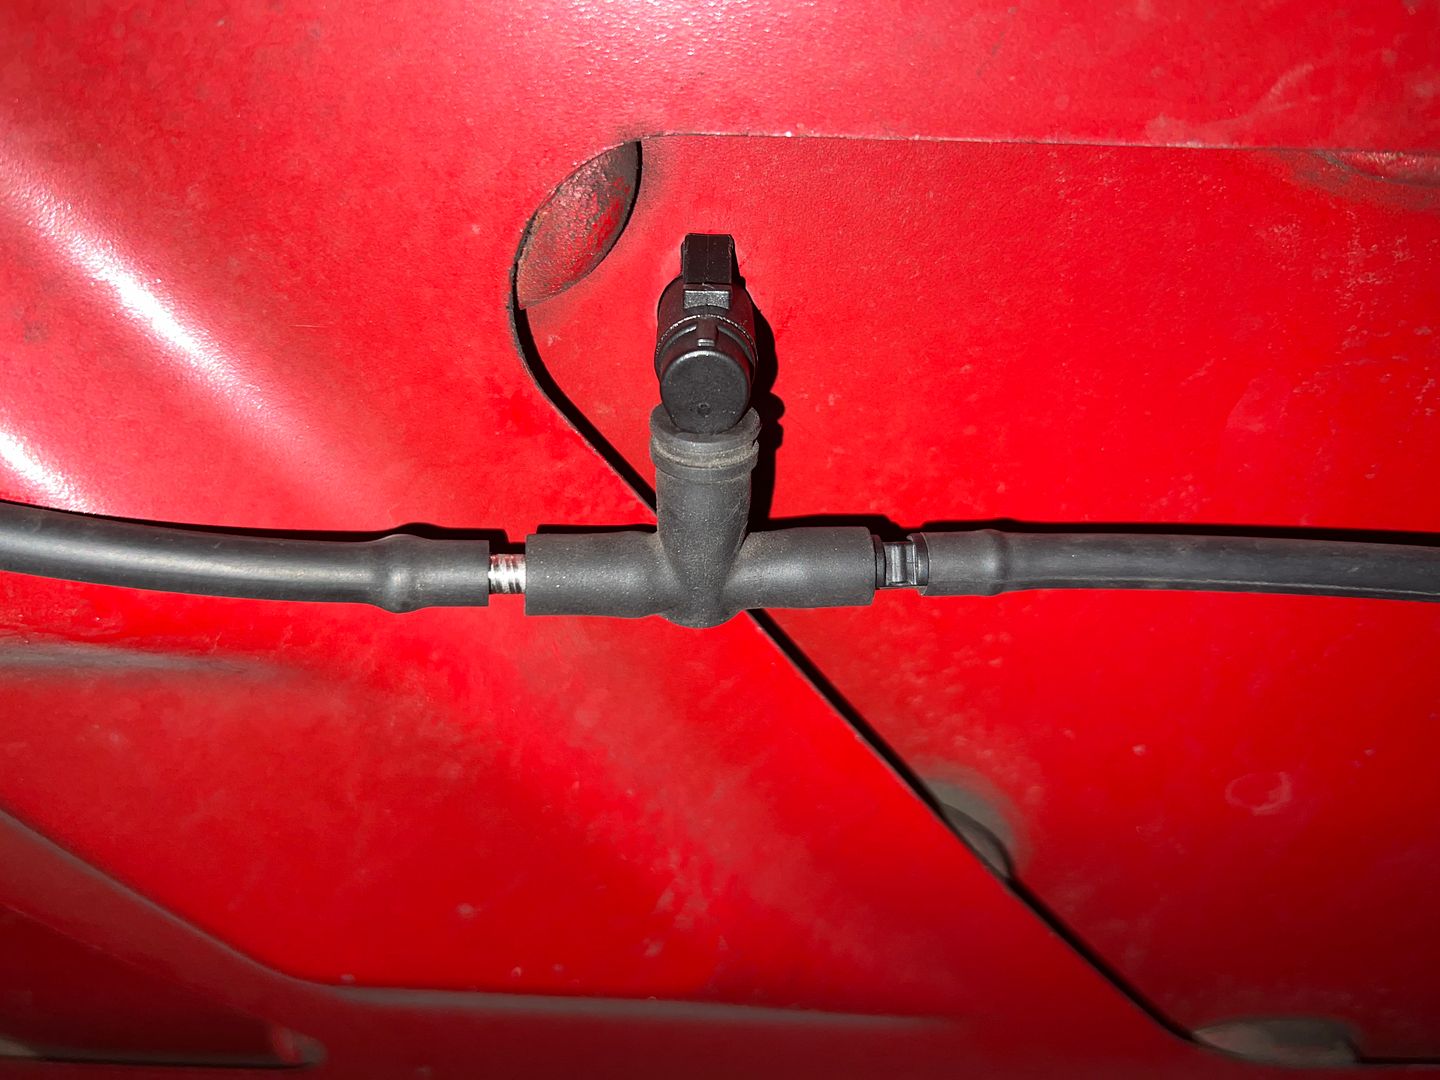 Back in business.. And the artist has made some progress on the Lennox.... 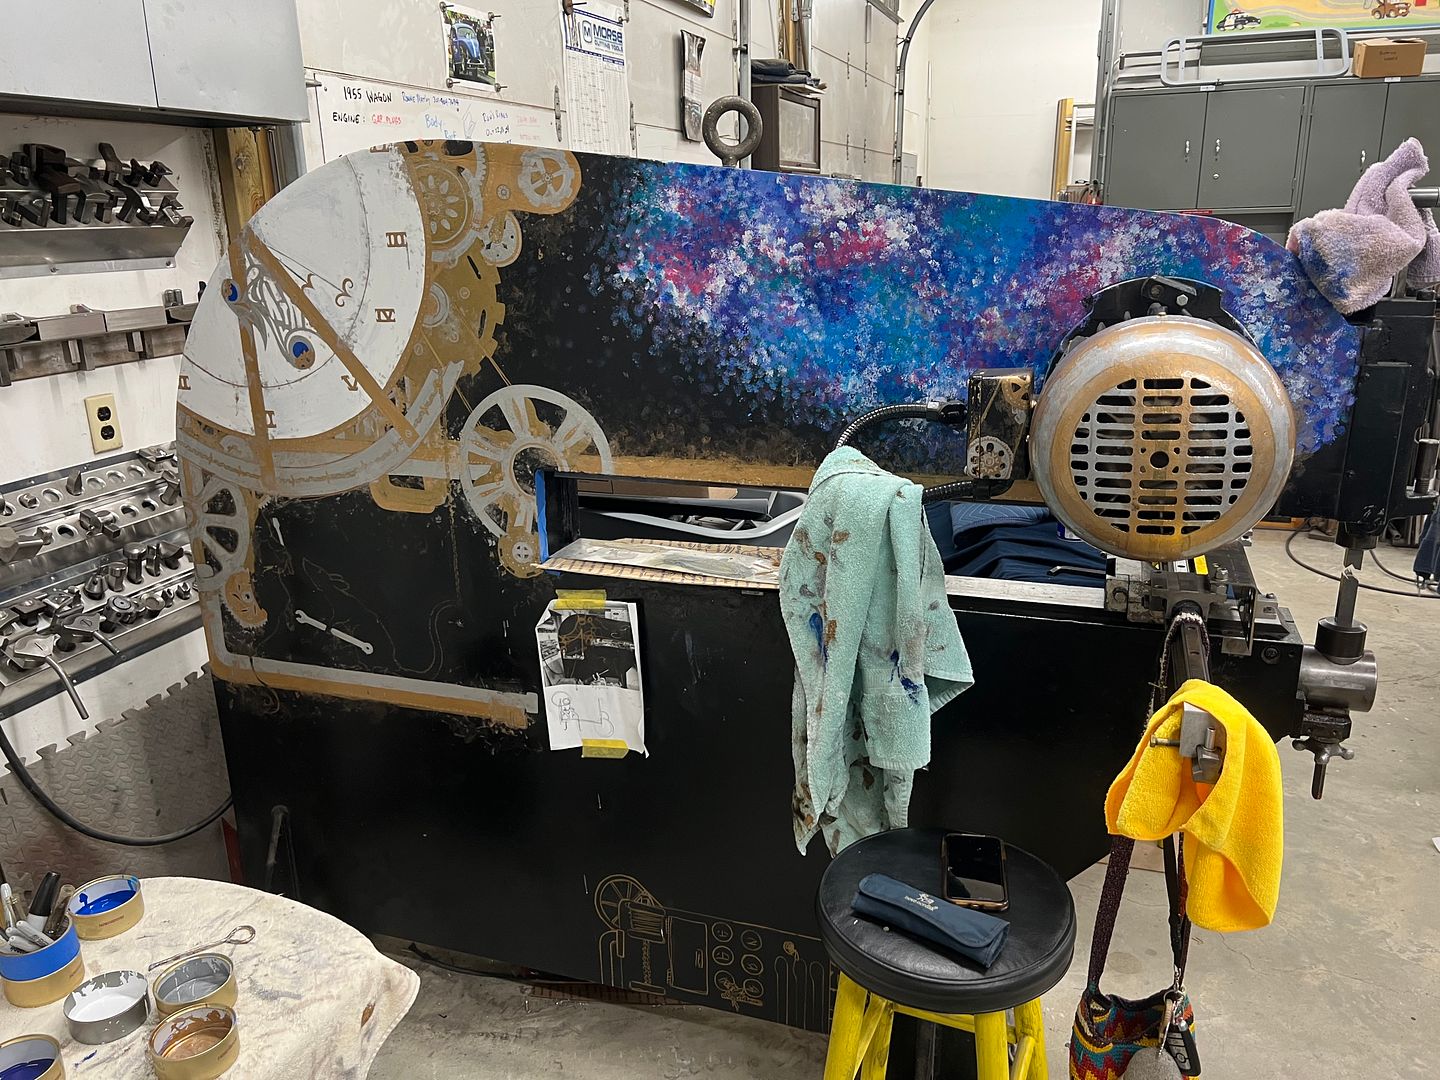
__________________
Robert |
|
|

|
|
|
#1302 |
|
Post Whore
  Join Date: May 2015
Location: Alabama
Posts: 14,663
|
Re: 55 Wagon Progress
Robert, all your pics say "this image is currently unavailable "
Edit::::All good now Looks great.!! This is what I was seeing
__________________
Mongo...aka Greg RIP Dad RIP Jesse 1981 C30 LQ9 NV4500..http://67-72chevytrucks.com/vboard/s...d.php?t=753598 Mongos AD- LS3 TR6060...http://67-72chevytrucks.com/vboard/s...34#post8522334 Columbus..the 1957 IH 4x4...http://67-72chevytrucks.com/vboard/s...63#post8082563 2023 Chevy Z71..daily driver Last edited by mongocanfly; 06-22-2022 at 07:38 AM. |
|
|

|
|
|
#1303 |
|
Registered User
Join Date: Jan 2013
Location: Leonardtown, MD
Posts: 1,647
|
Re: 55 Wagon Progress
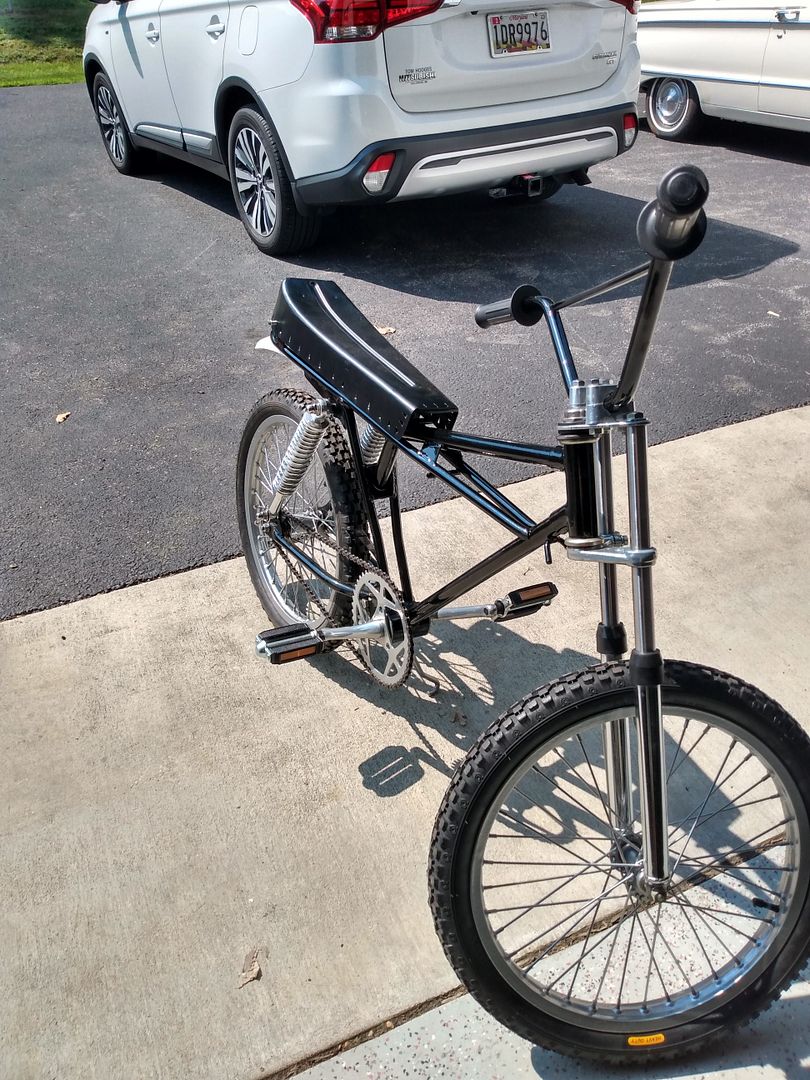
Update on the Kent bike seat, we have a good fit and now it's off to the upholstery shop..
__________________
Robert |
|
|

|
|
|
#1304 |
|
Registered User
Join Date: Jan 2013
Location: Leonardtown, MD
Posts: 1,647
|
Re: 55 Wagon Progress
So I've been rather lax on the updates as we've had a distraction here at the shop. Someone had a mishap in returning home on Memorial day (about midnight) from one of the local watering holes. Let's call him "Dale Jr"
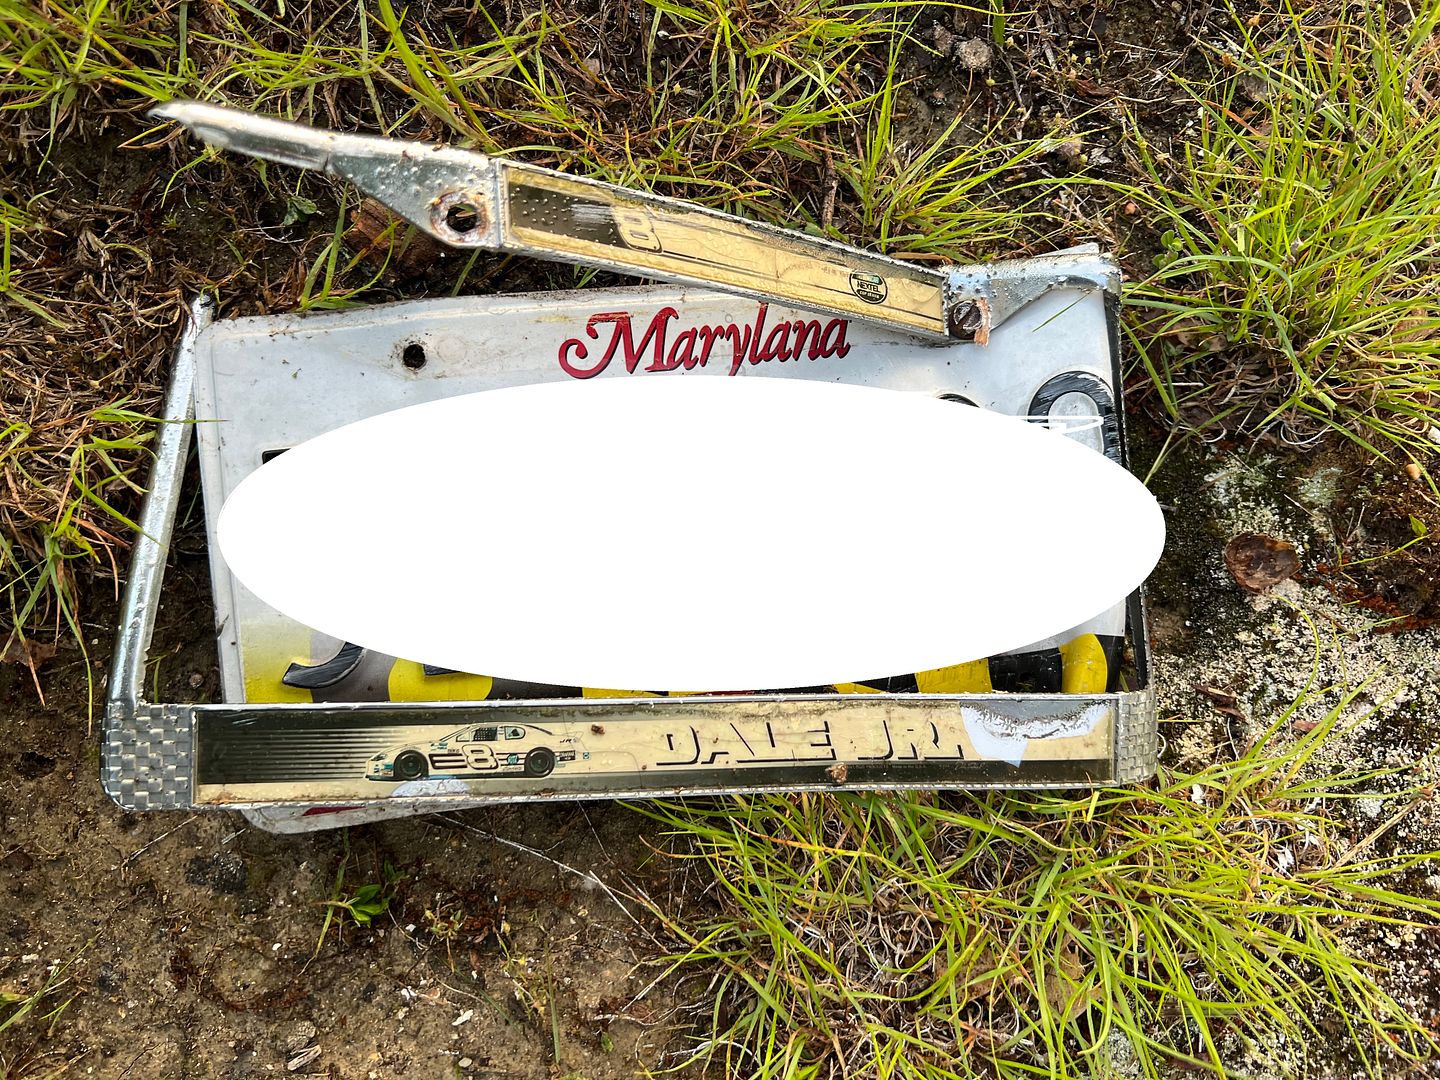 Seems he was coming in a bit hot in the final turn where his left tires were out in the grass in the opposite lane..  Which, when combined with over-correction.... 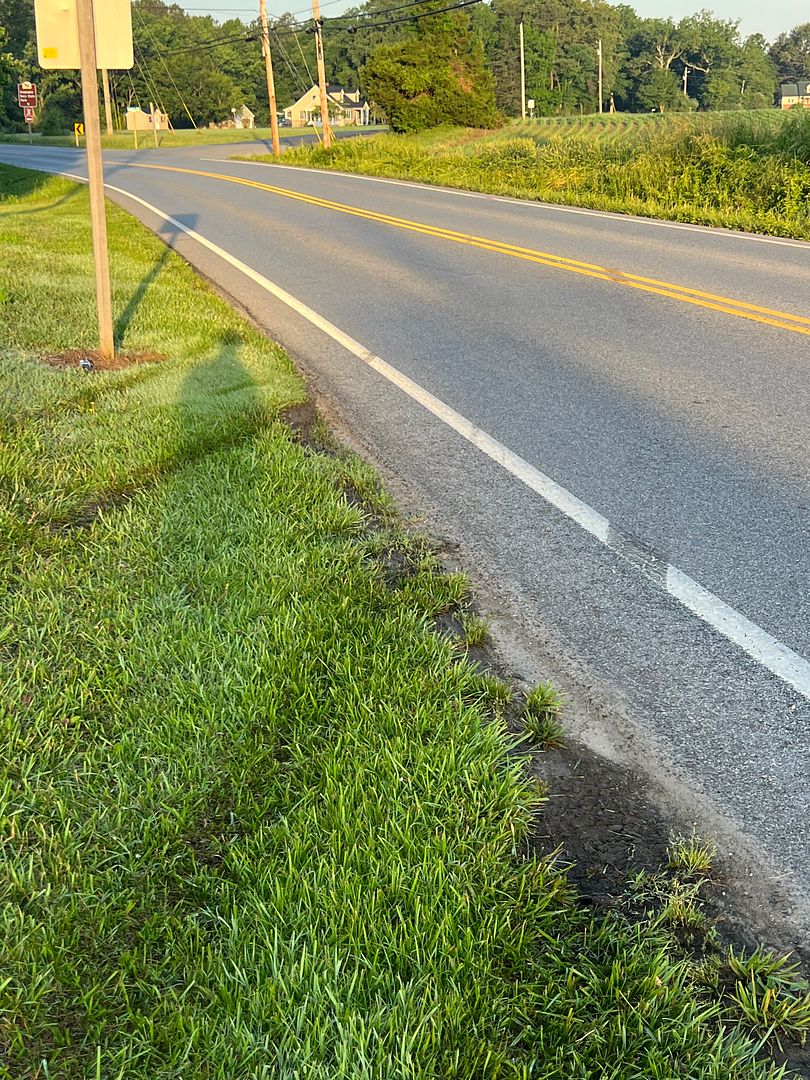 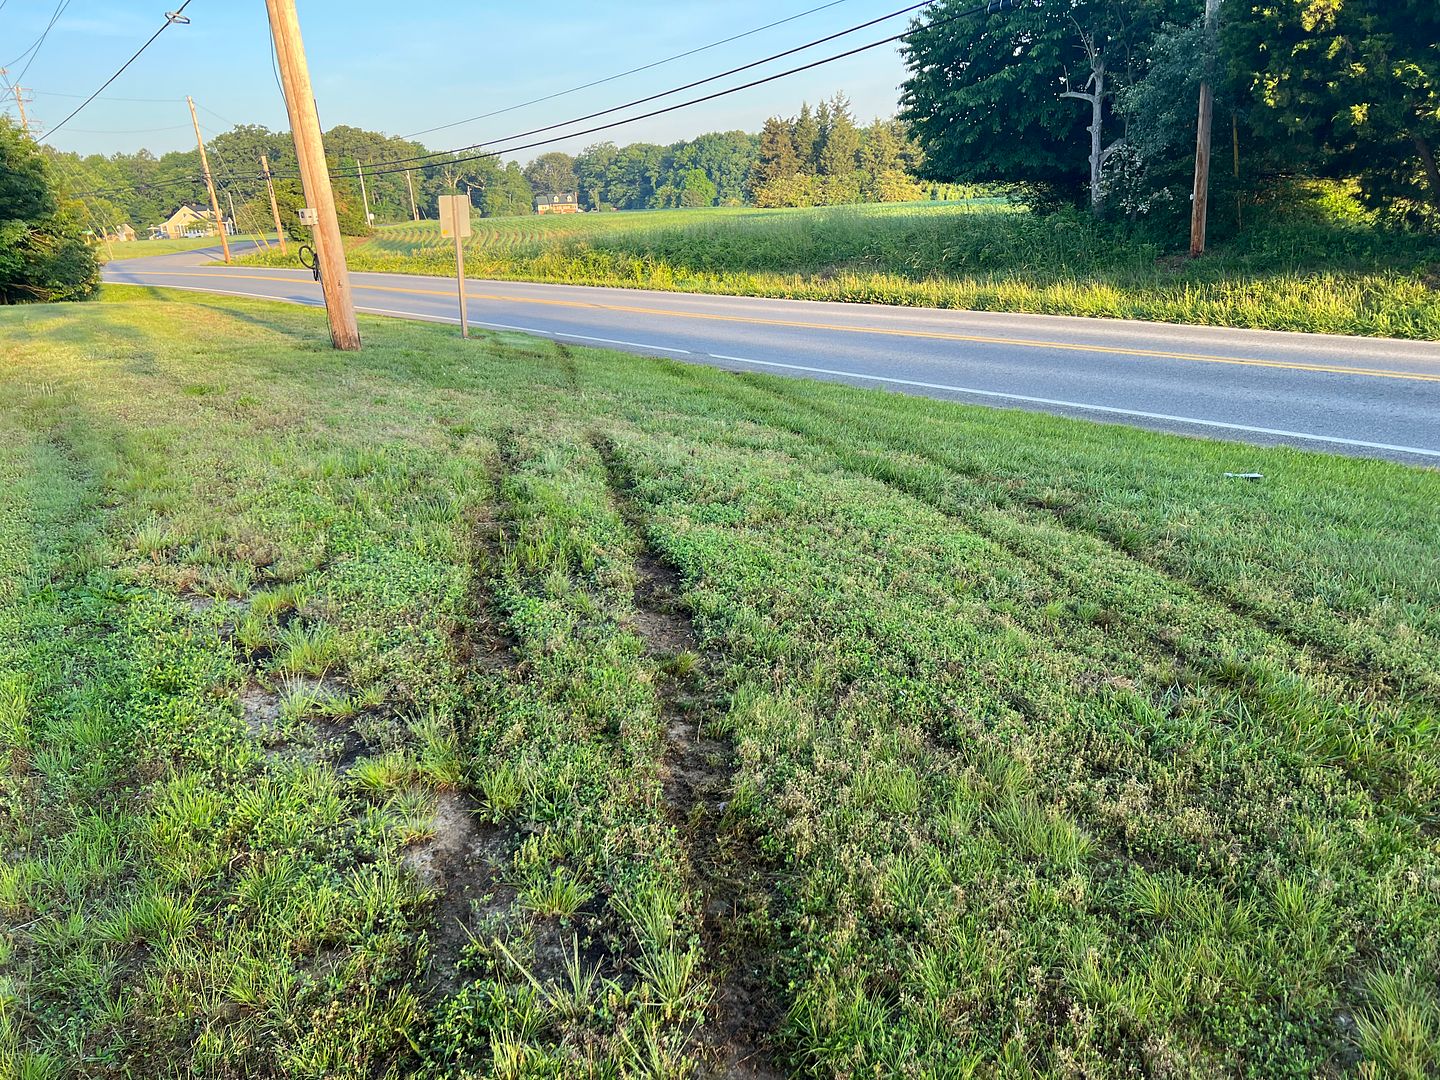 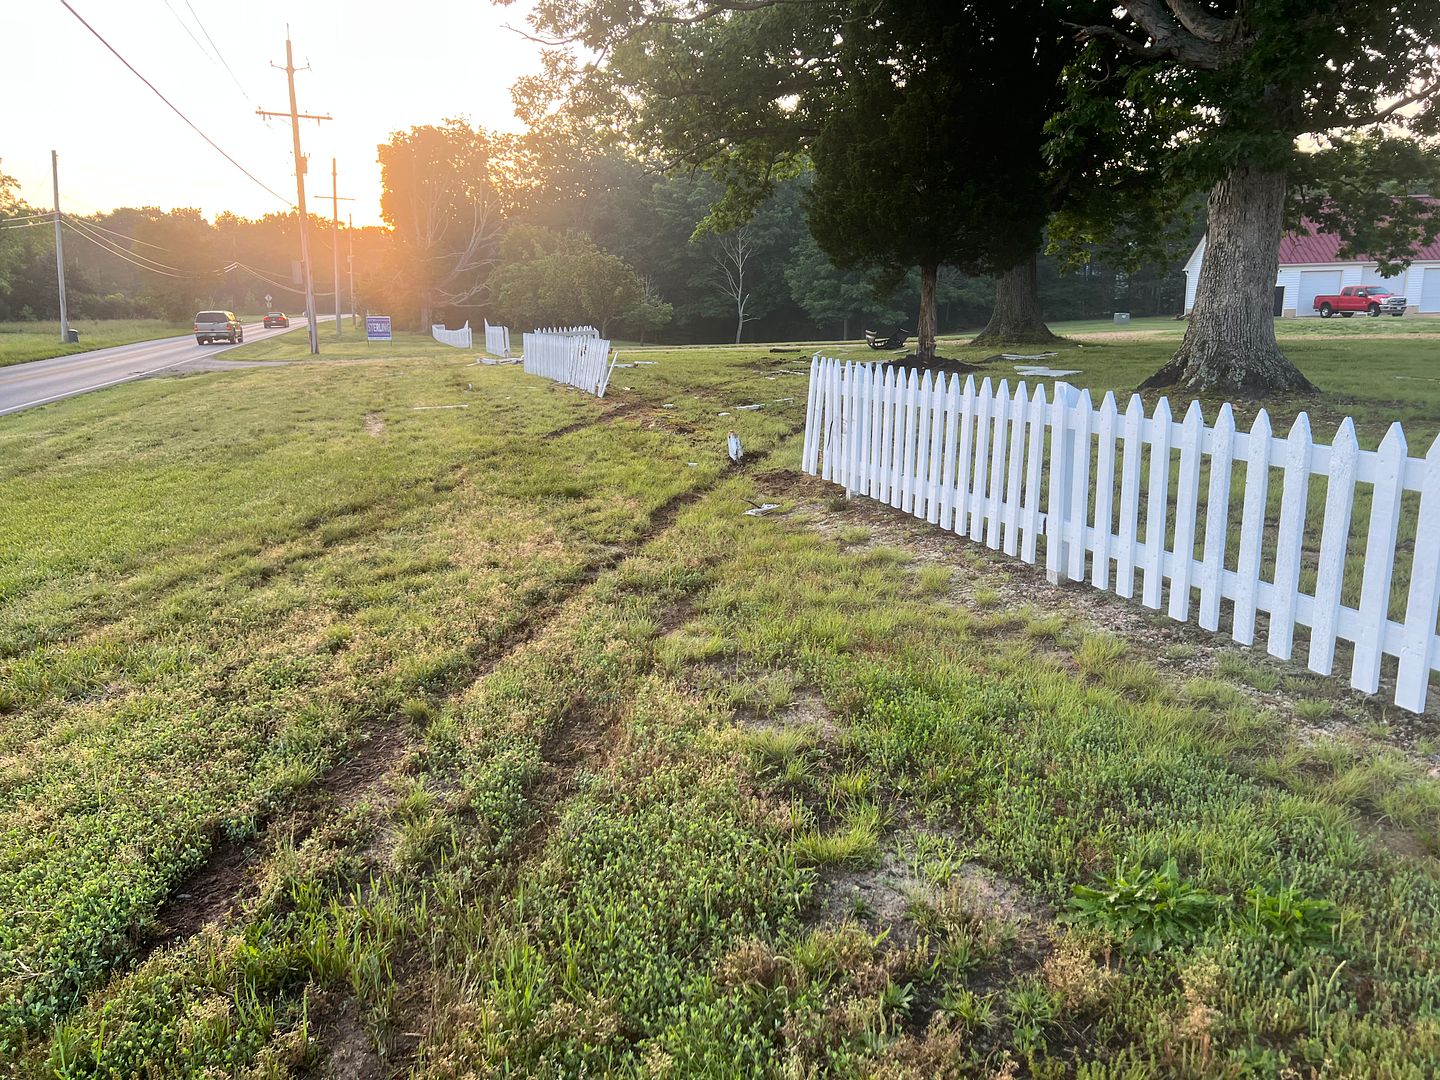 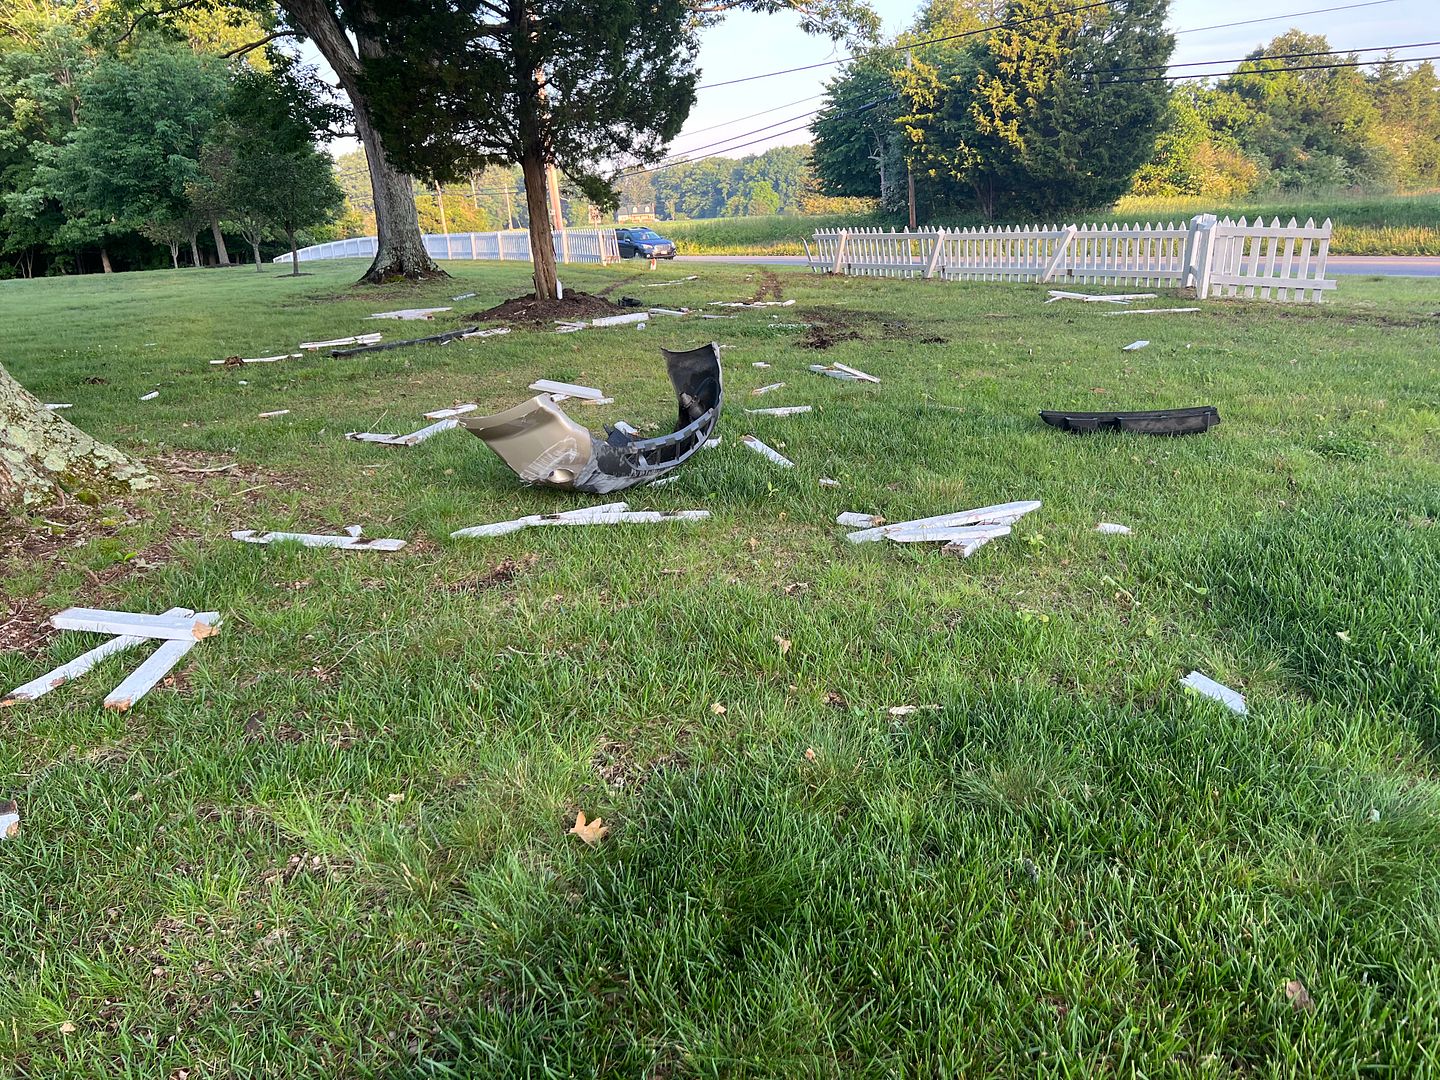 Here, I guess not wanting to go a lap down, he took the nearest path back to the "track", completely ignoring pit road to his right.... 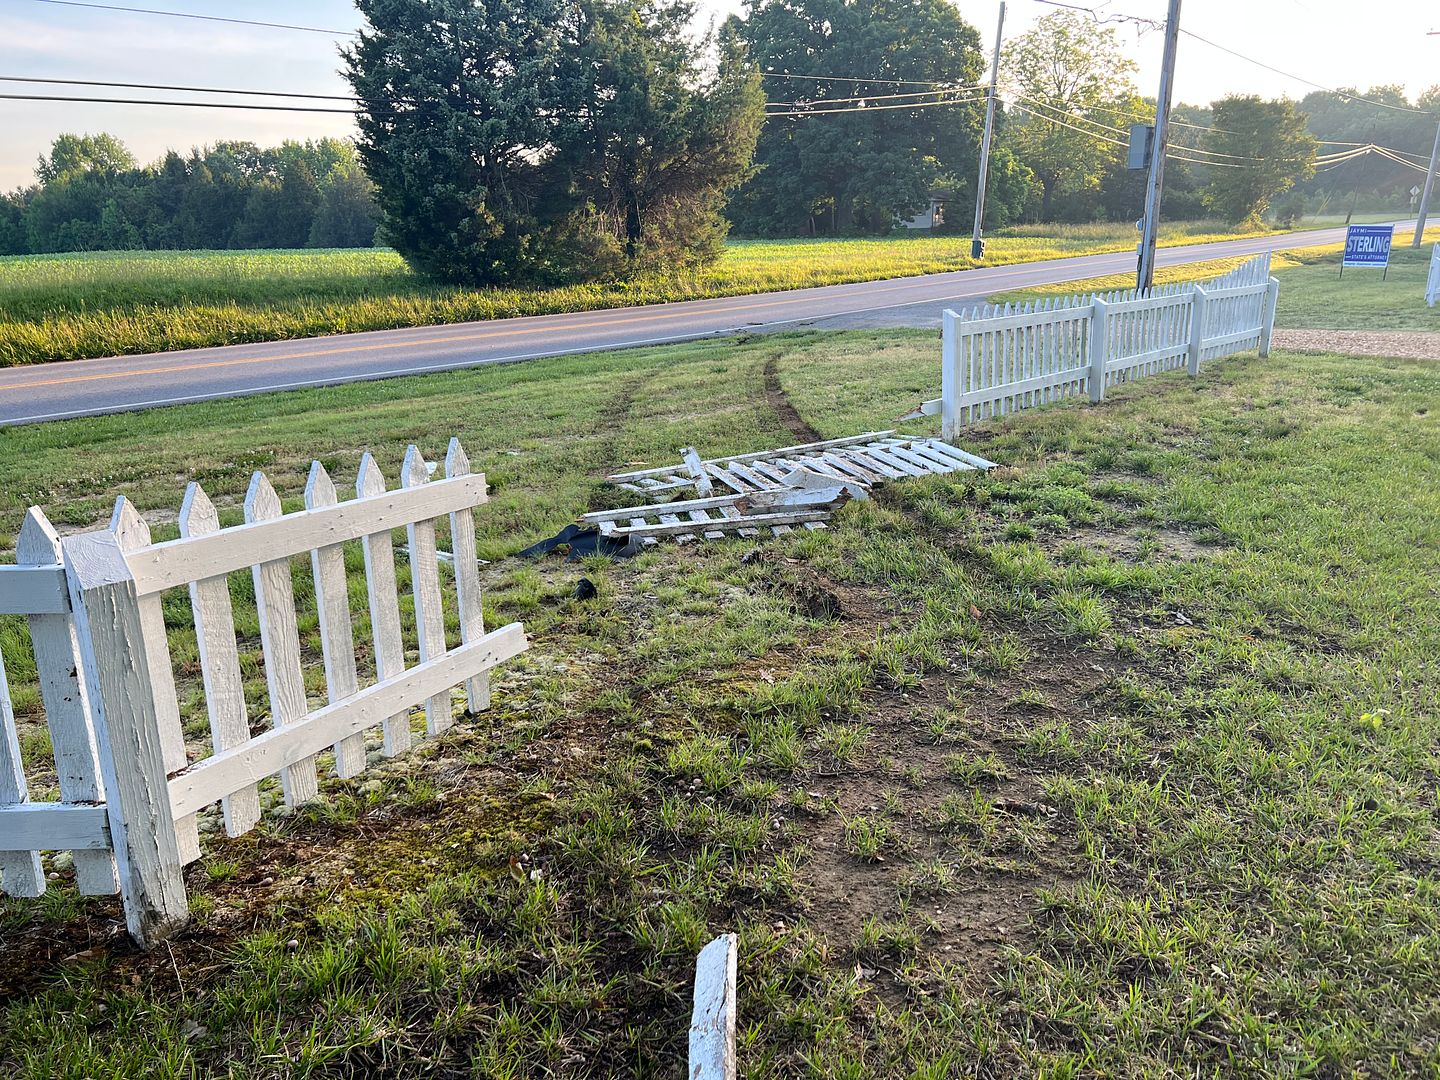 The remnants left behind suggested the drivers window broke out, likely when this gem flew out of the vehicle...  So we've been rebuilding from that the past few weeks in spare time, pre-painting pickets to limit June/July sun exposure..... 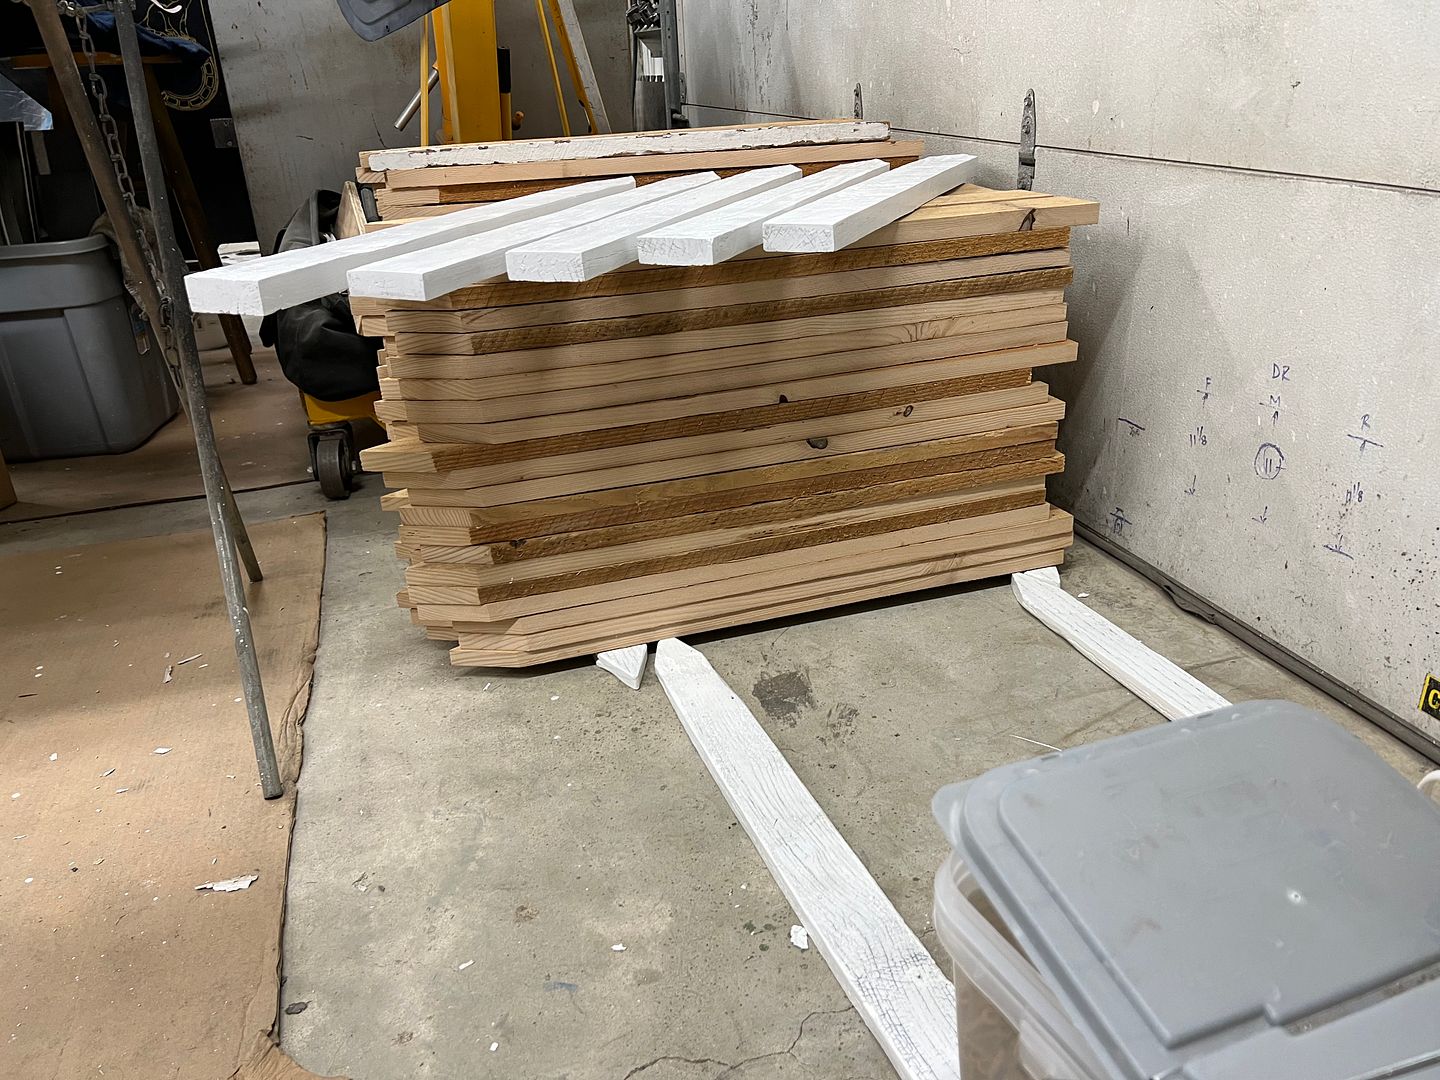 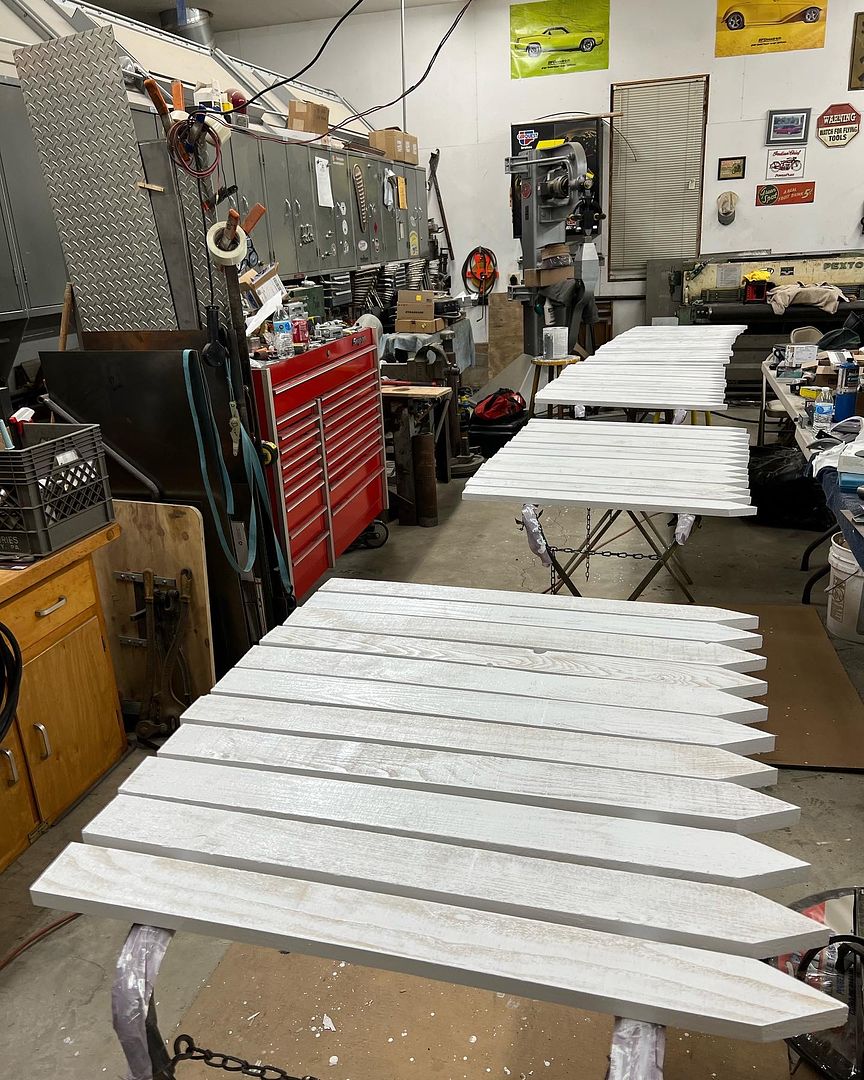 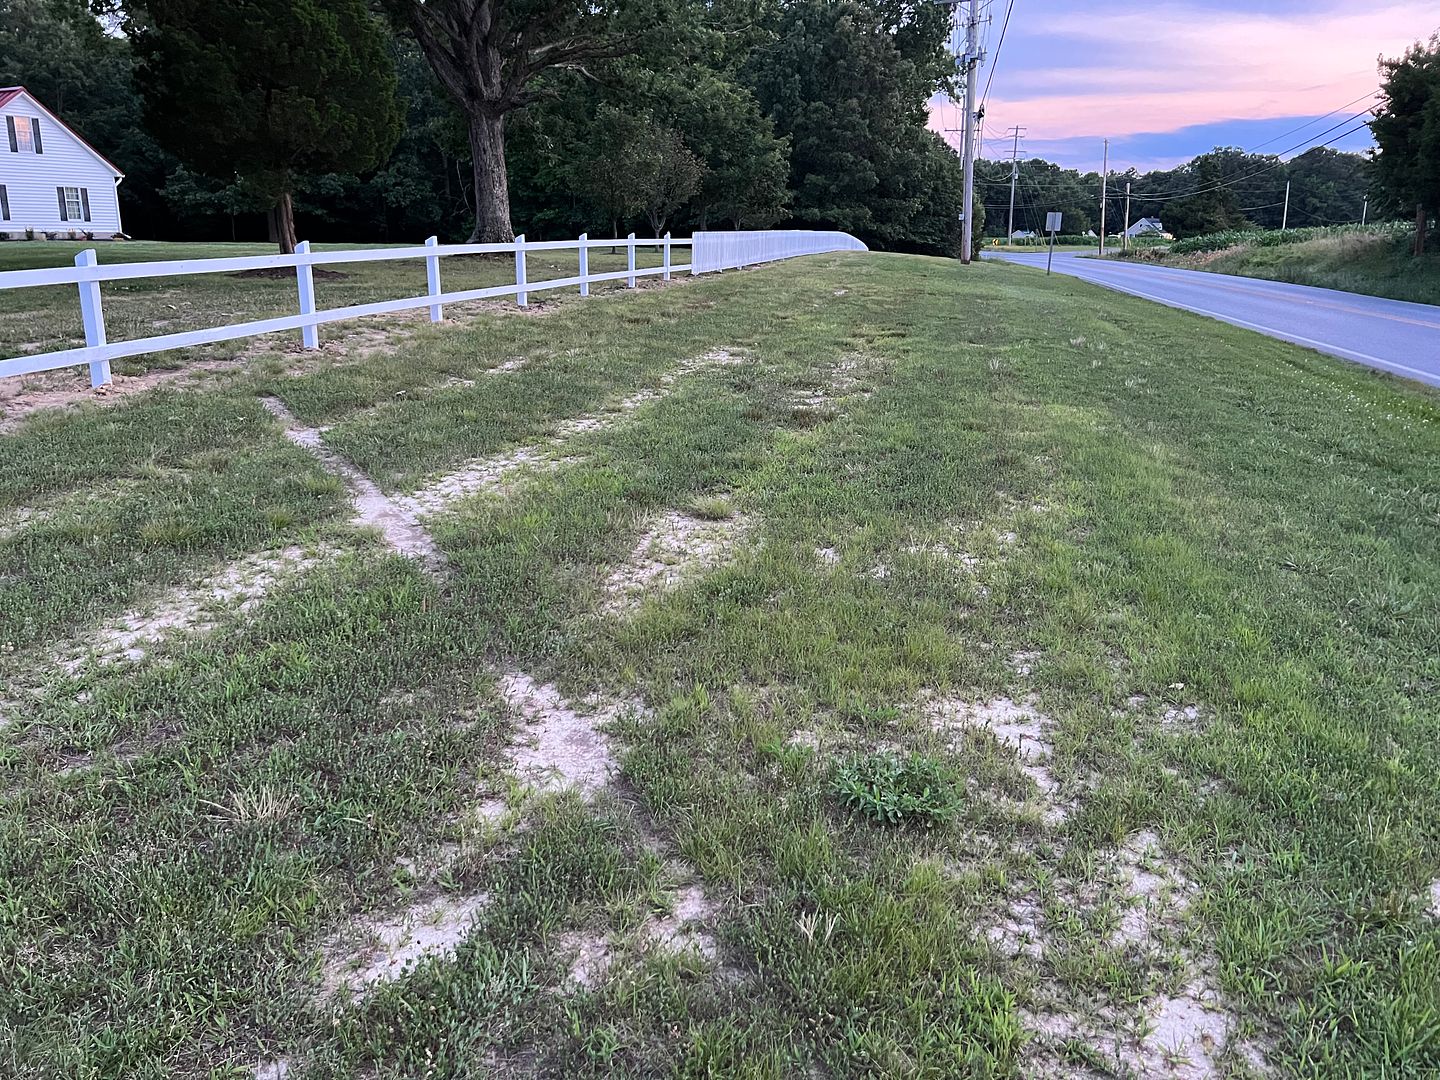 and we finished off here yesterday around noon... 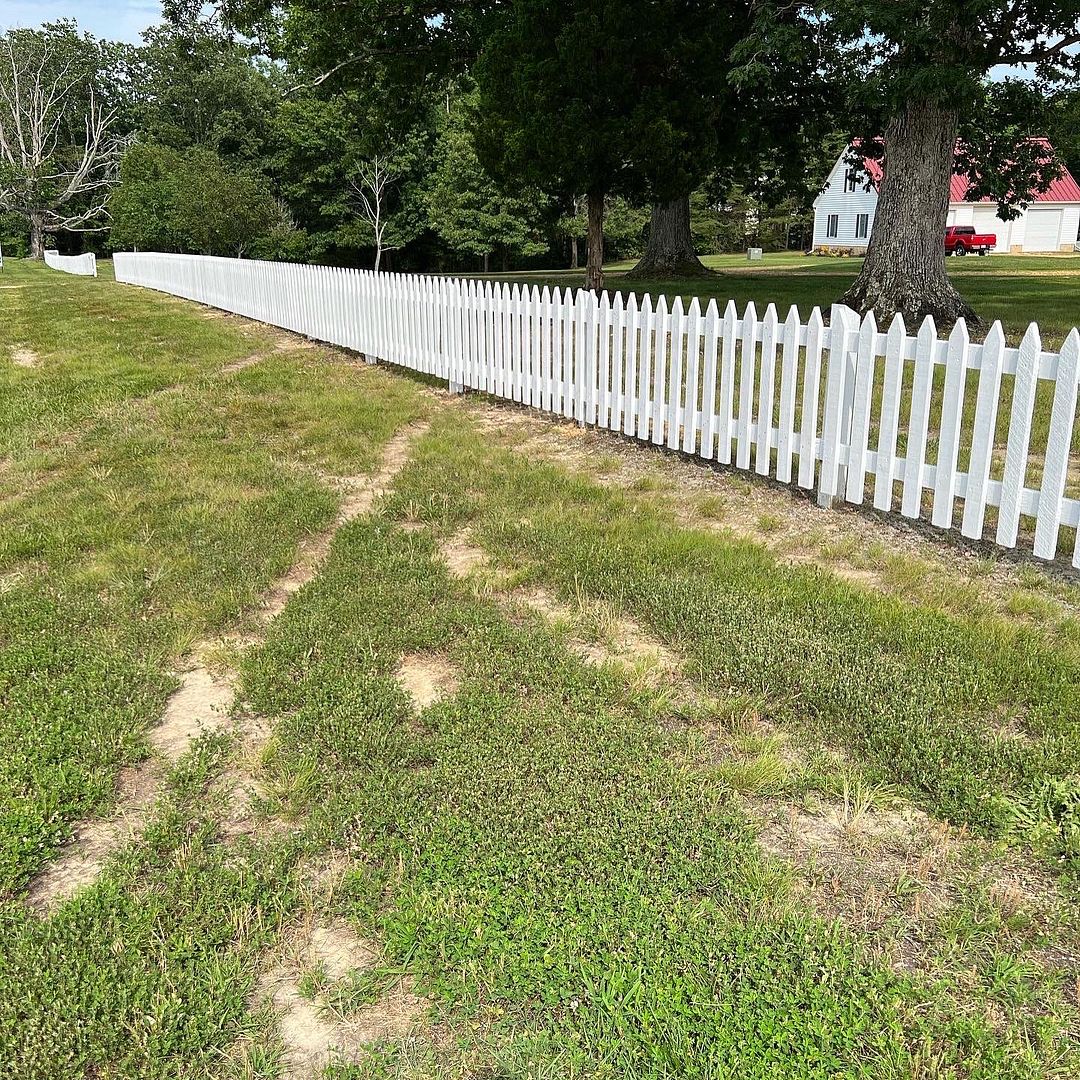 Still have one more coat of paint to apply, but this will hold it until cooler days or the next mishap at the track..
__________________
Robert |
|
|

|
|
|
#1305 |
|
Post Whore
  Join Date: May 2015
Location: Alabama
Posts: 14,663
|
Re: 55 Wagon Progress
Dang!!!
Maybe Jr was trying to pull one of Srs "pass in the grass" moves
__________________
Mongo...aka Greg RIP Dad RIP Jesse 1981 C30 LQ9 NV4500..http://67-72chevytrucks.com/vboard/s...d.php?t=753598 Mongos AD- LS3 TR6060...http://67-72chevytrucks.com/vboard/s...34#post8522334 Columbus..the 1957 IH 4x4...http://67-72chevytrucks.com/vboard/s...63#post8082563 2023 Chevy Z71..daily driver |
|
|

|
|
|
#1306 |
|
Registered User
Join Date: Jan 2013
Location: Leonardtown, MD
Posts: 1,647
|
Re: 55 Wagon Progress
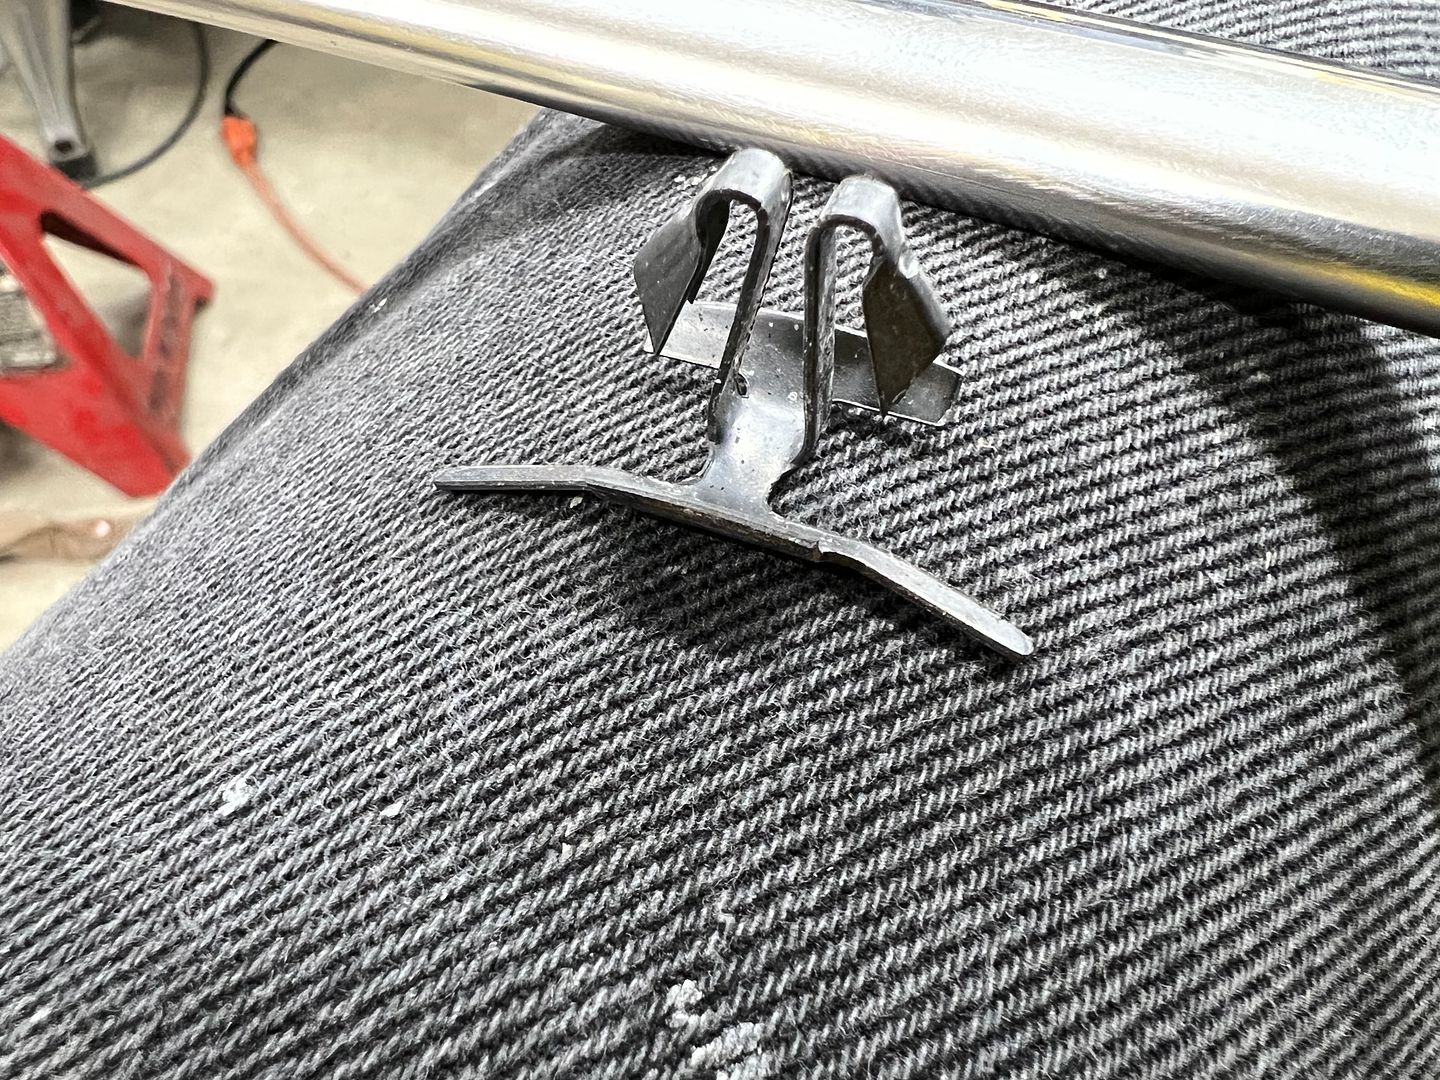
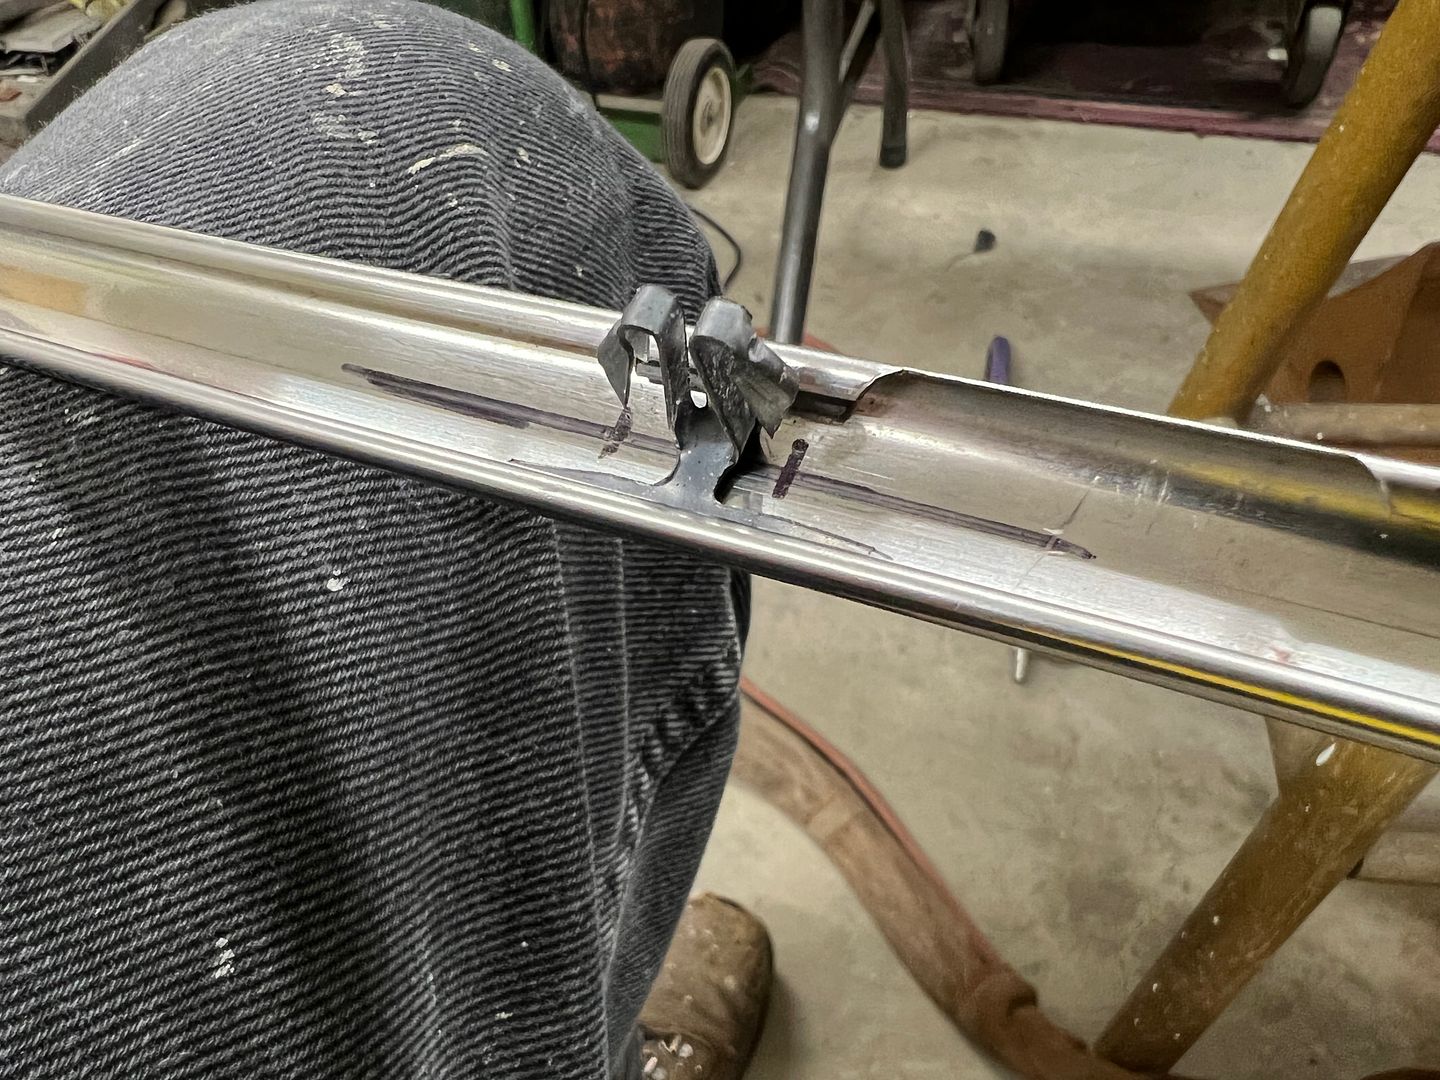
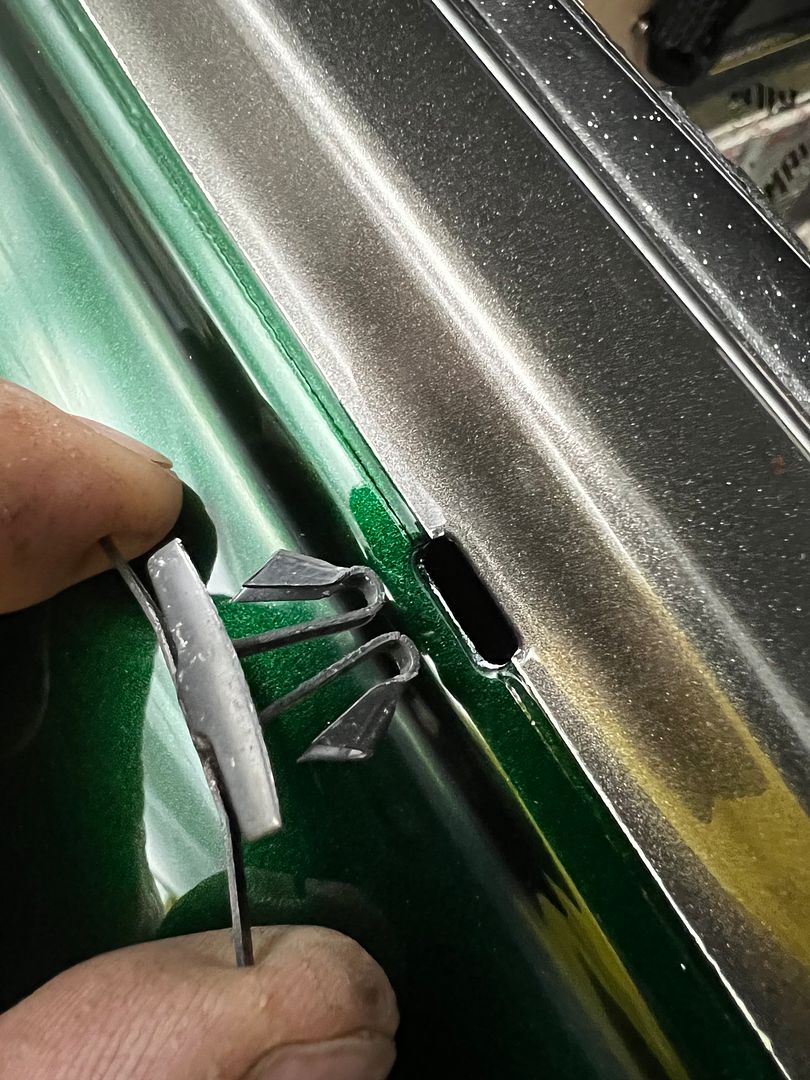
With fence repair duties out of the way we can get back to some progress on the wagon. Finally got the correct clips for the beltline molding...
   We had been attempting to polish up some of the stainless trim but always seems to find 67 years worth of scratches difficult to remove. So we opted to give Trizact a try, starting with 1500, then 3000, 5000, and finally 8000.. The edge of the 3000 and up seemed to bear the brunt of the polishing duties, and wore off much sooner than the center. In an effort to get more life out of the trizact pads, we purchased a 5" Dynabrade where we could cut the outer (worn) portion off the pads and continue to use.. The Trizact did well on the stainless, a much easier task at the polishing stage... 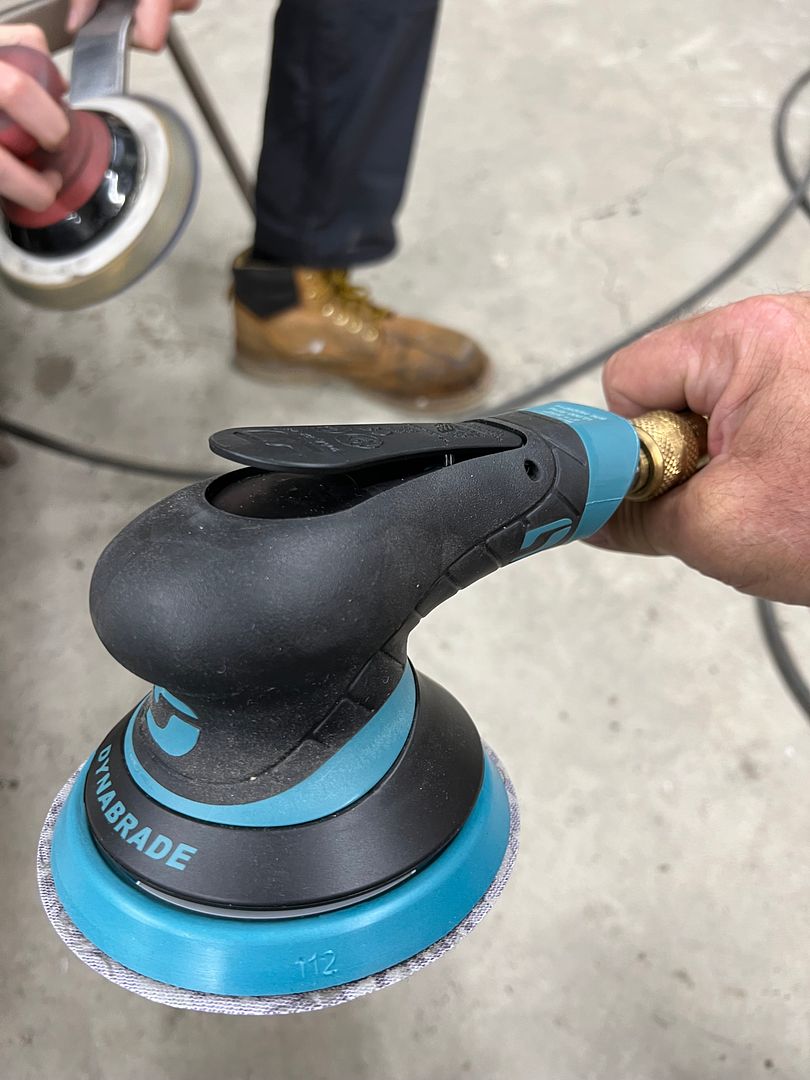 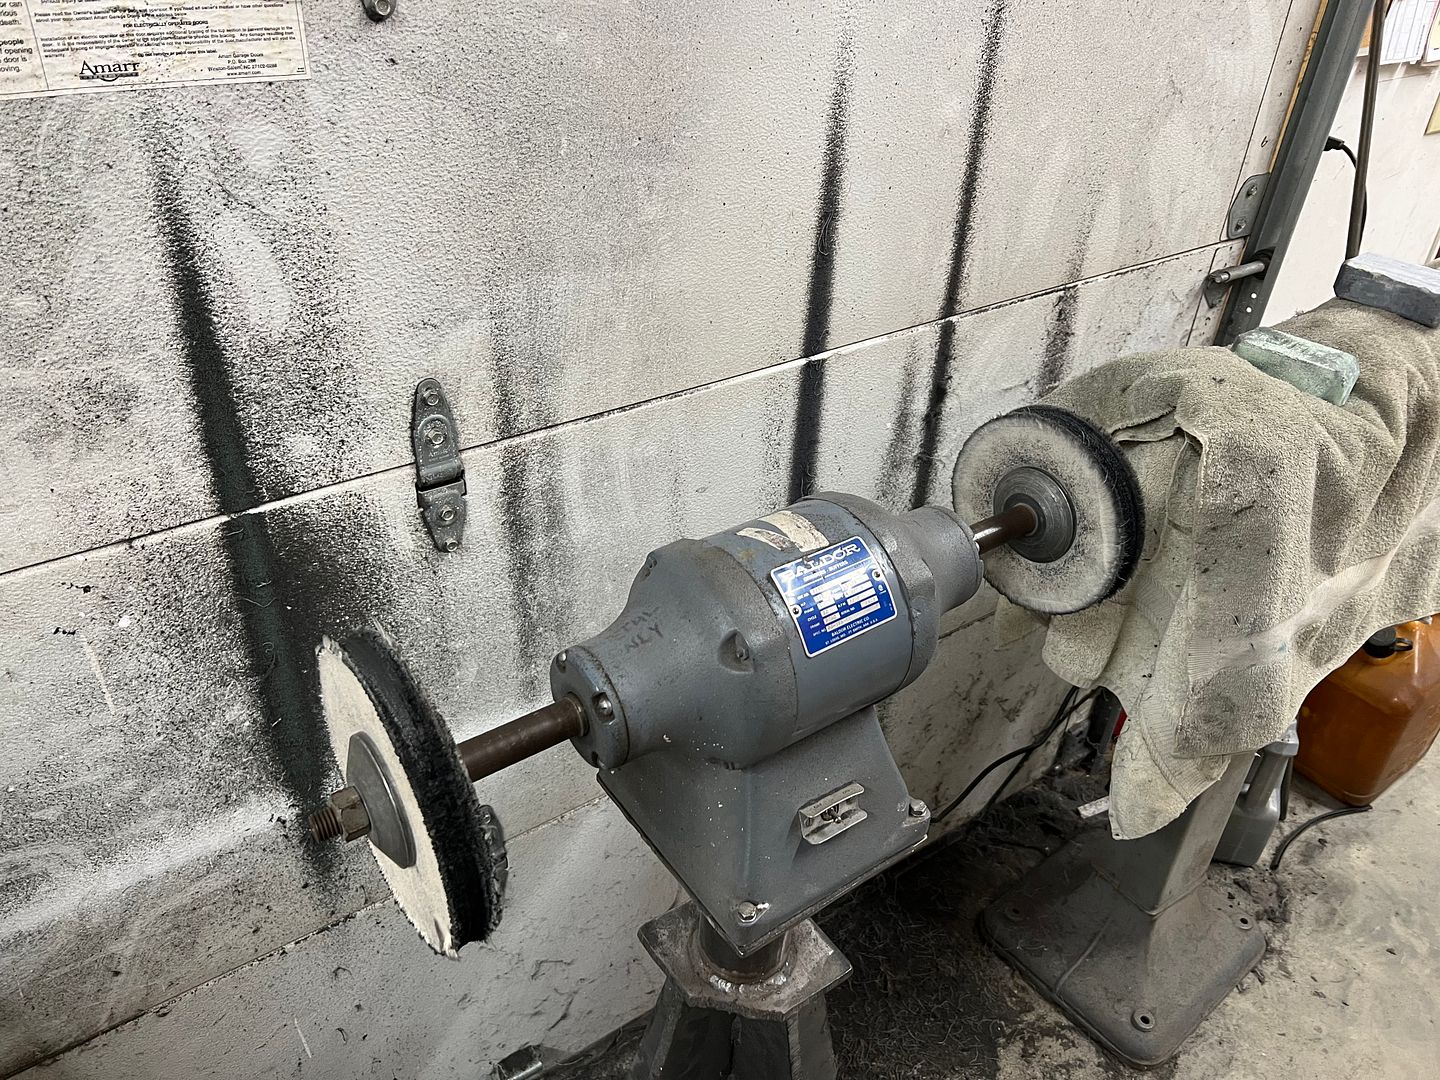 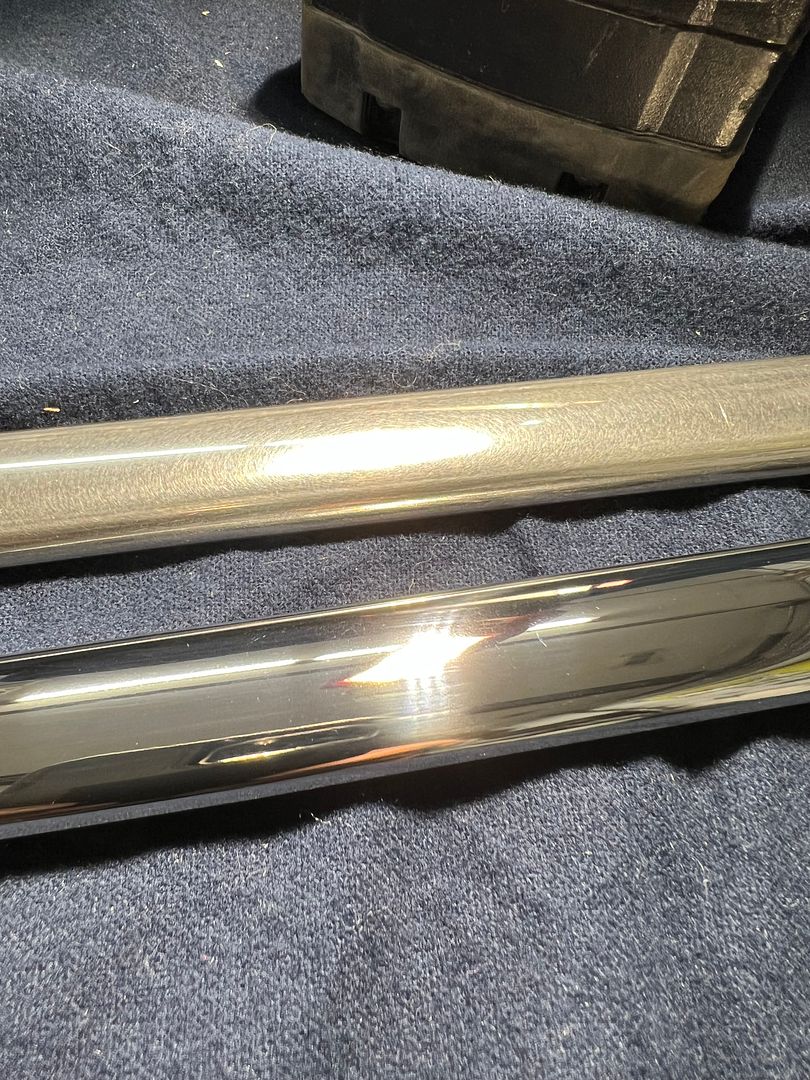 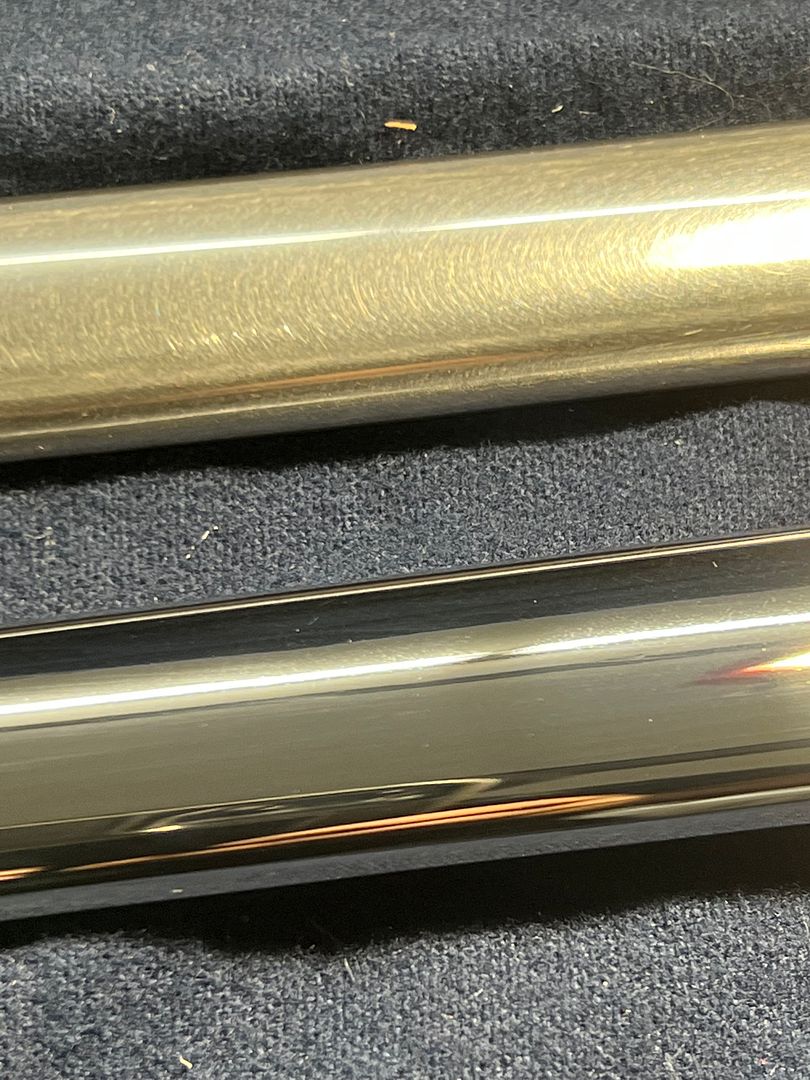 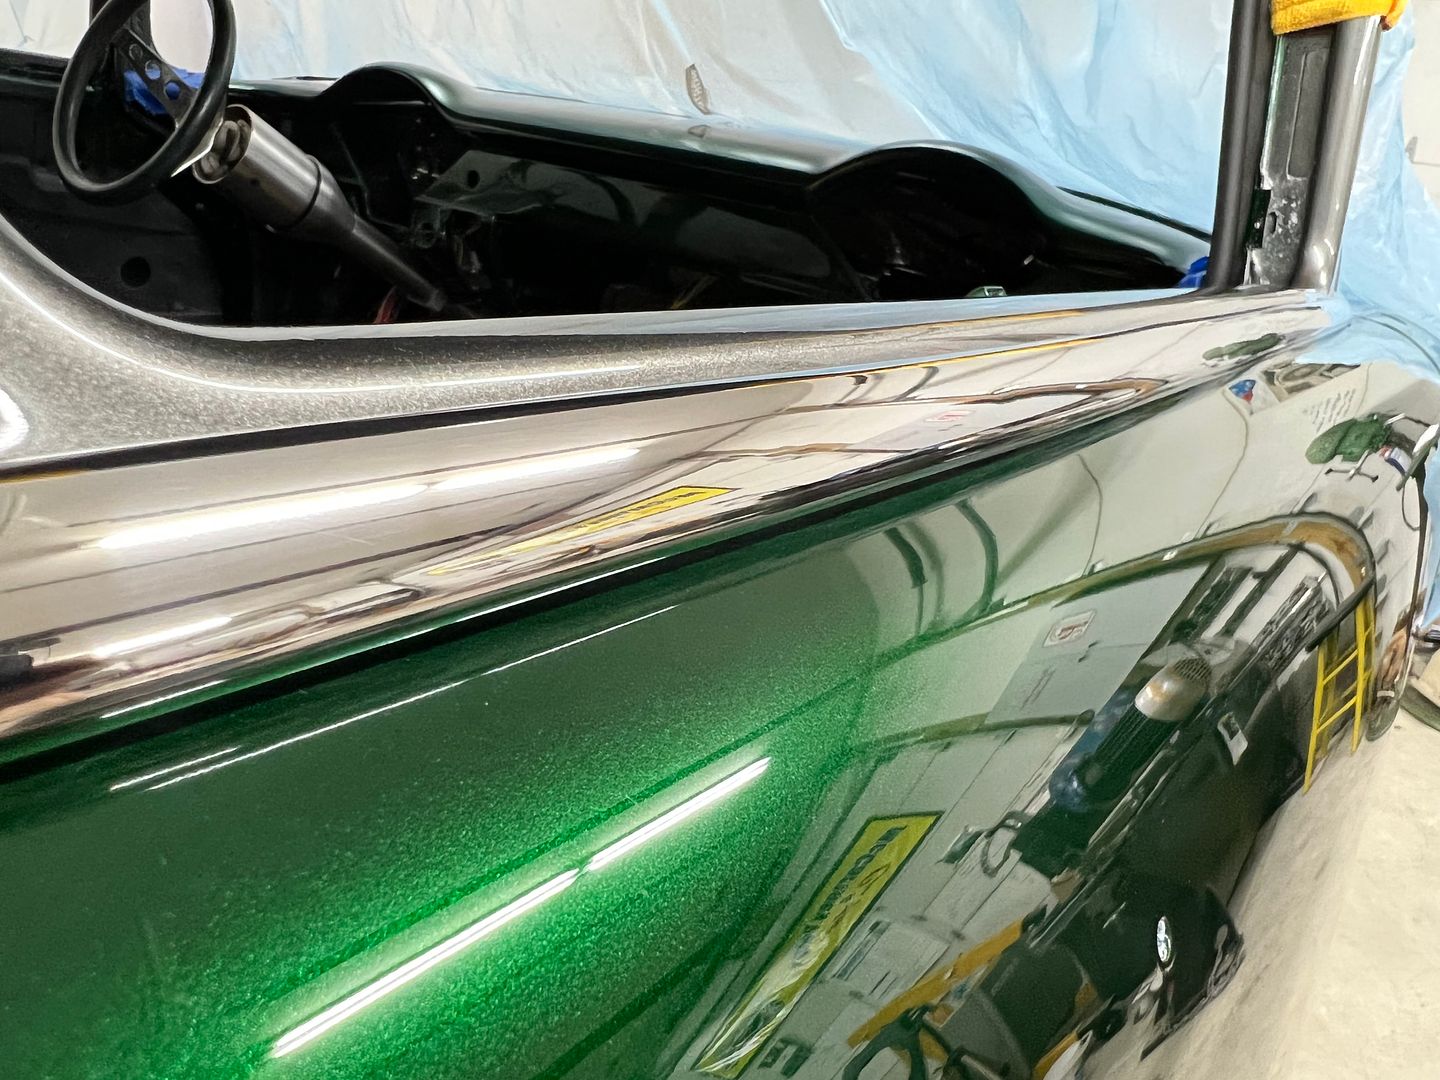 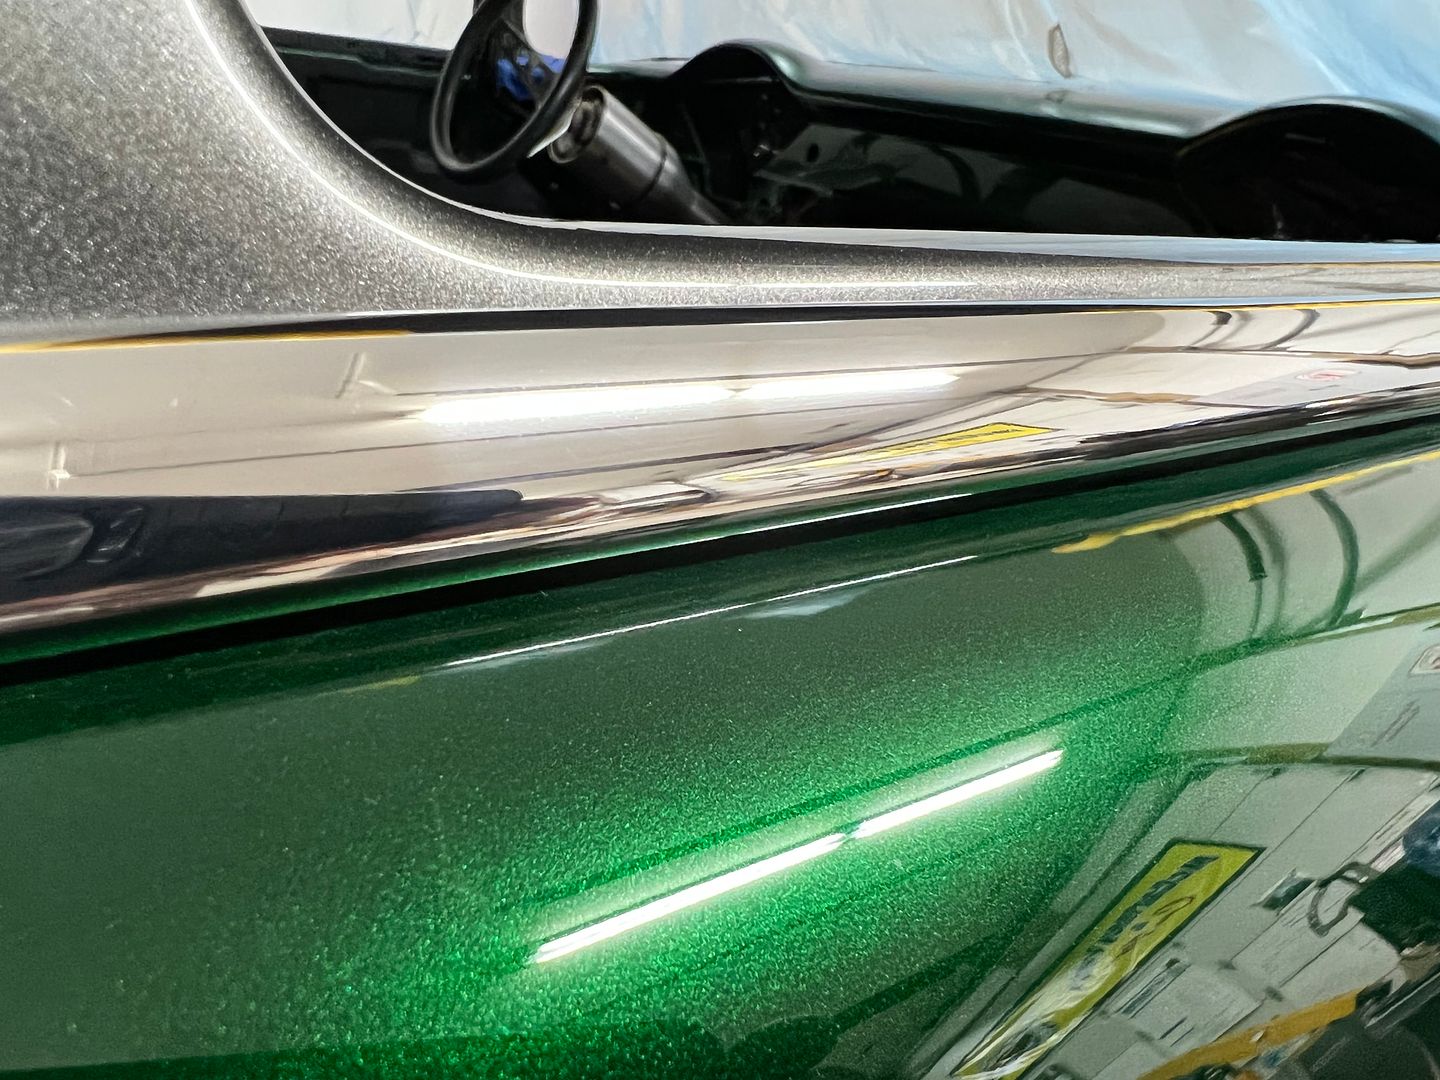 We also have been working on the wiring, and getting it run inside some protective loom. To keep things tidy and knot free, we opted for some heat shrink tubing spaced at regular intervals.. Where I've seen electrical tape used in similar situations, the tape seems to turn into a sticky mess in short order so we'll give this a try. Jared has some re-wiring to do on his 39 coupe so this is good practice (learning curve) for him.. This section is from the fuse box to the rear of the body, the tan wire pulled out is for the fuel sending unit. 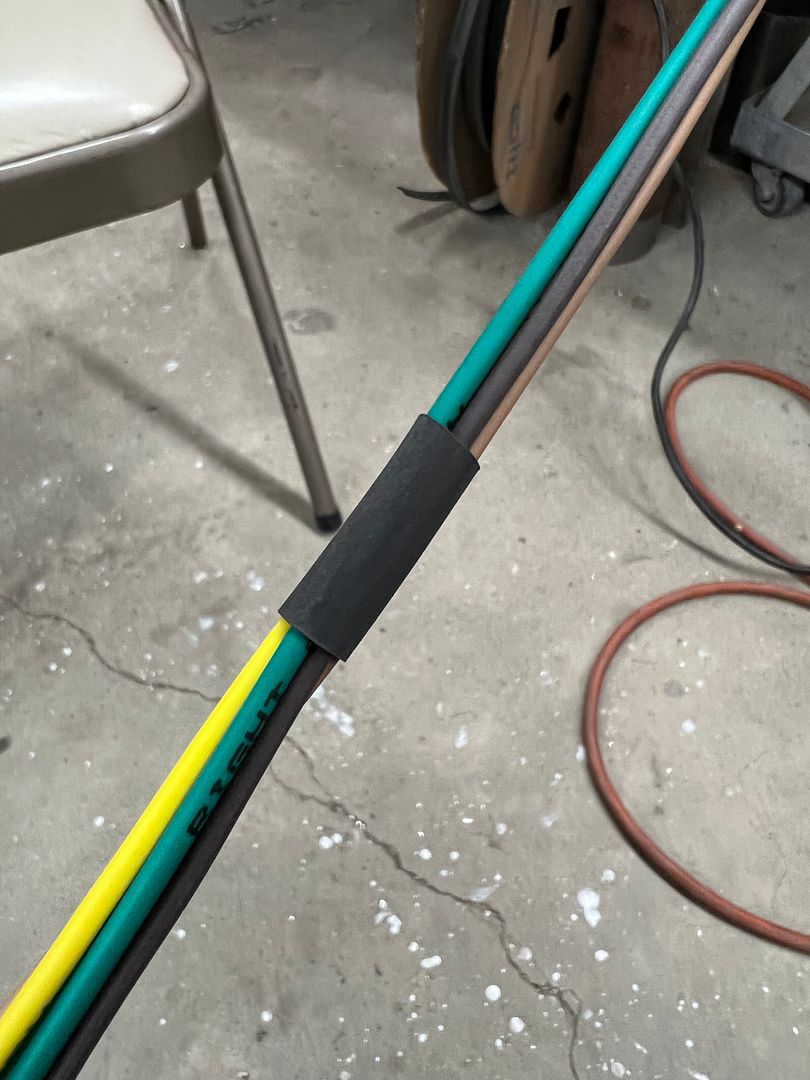 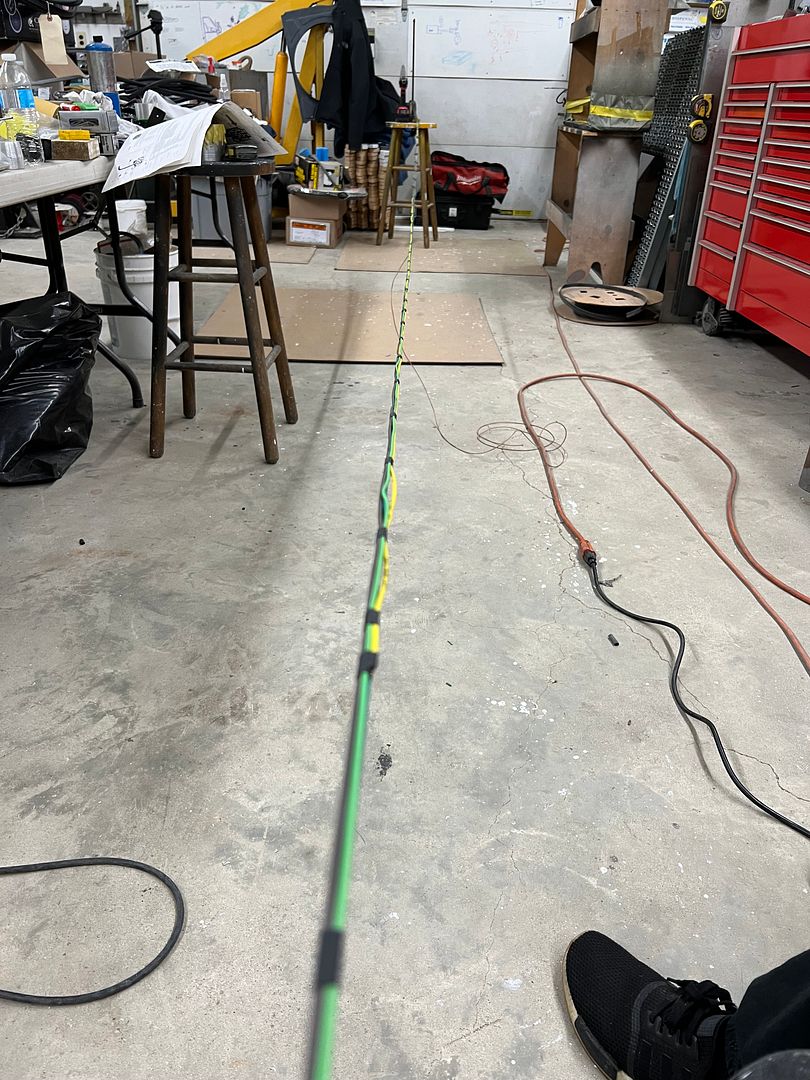 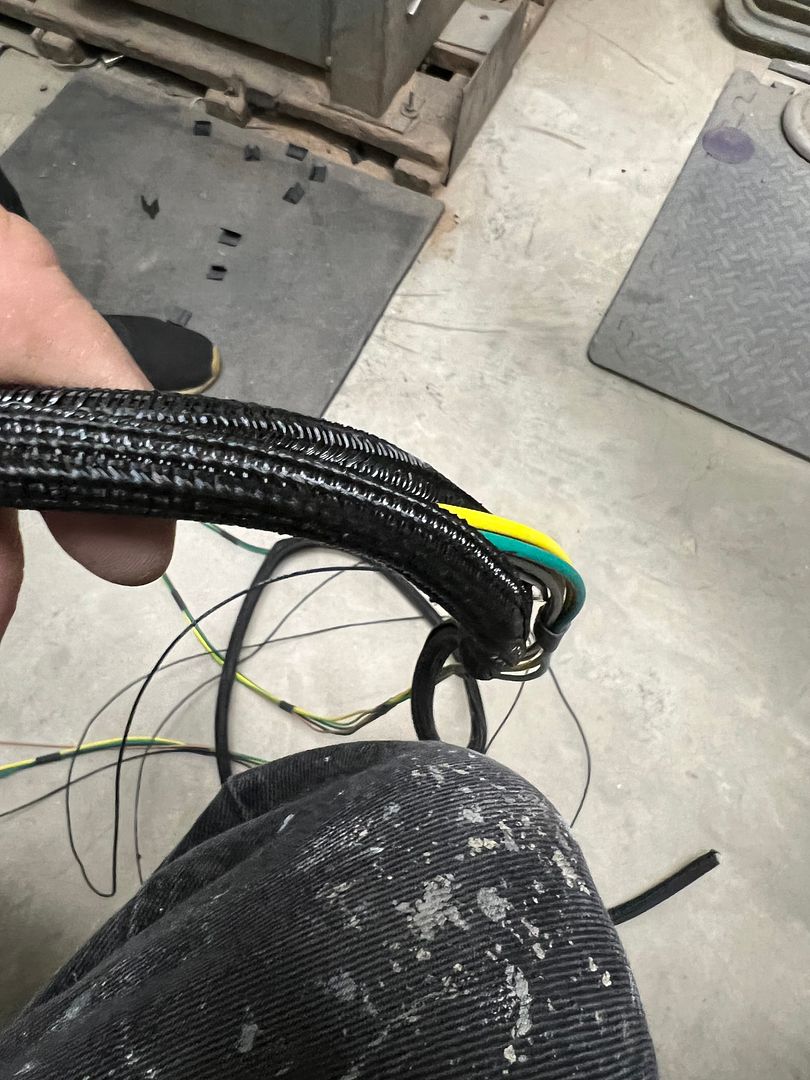 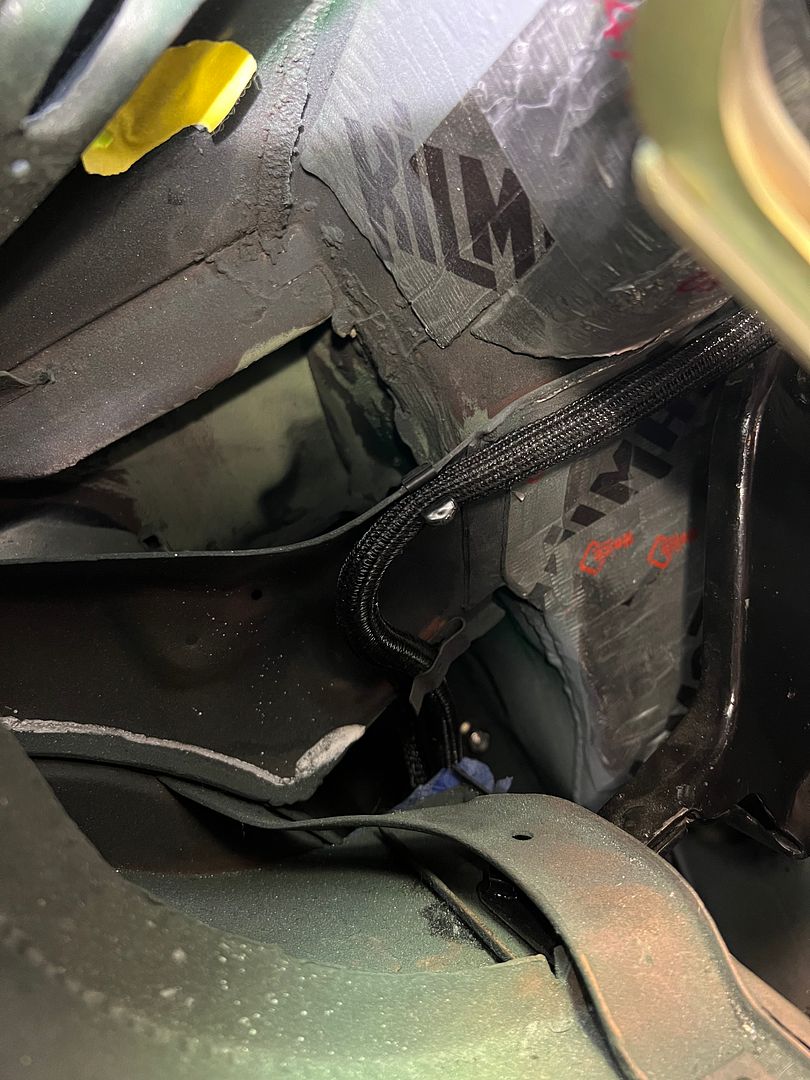 These clips are just about the right size for this harness "portion", we got them to run along the frame rail behind the rear axle, but found use for them in a couple other locations. Corvette part. 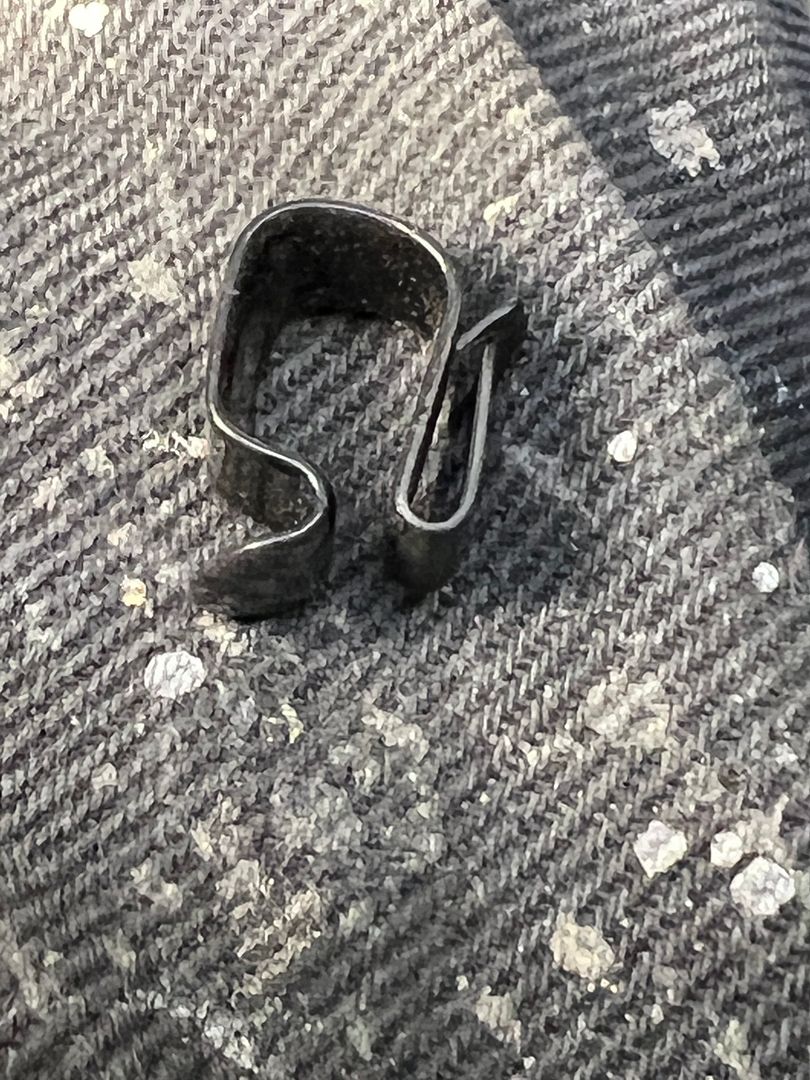 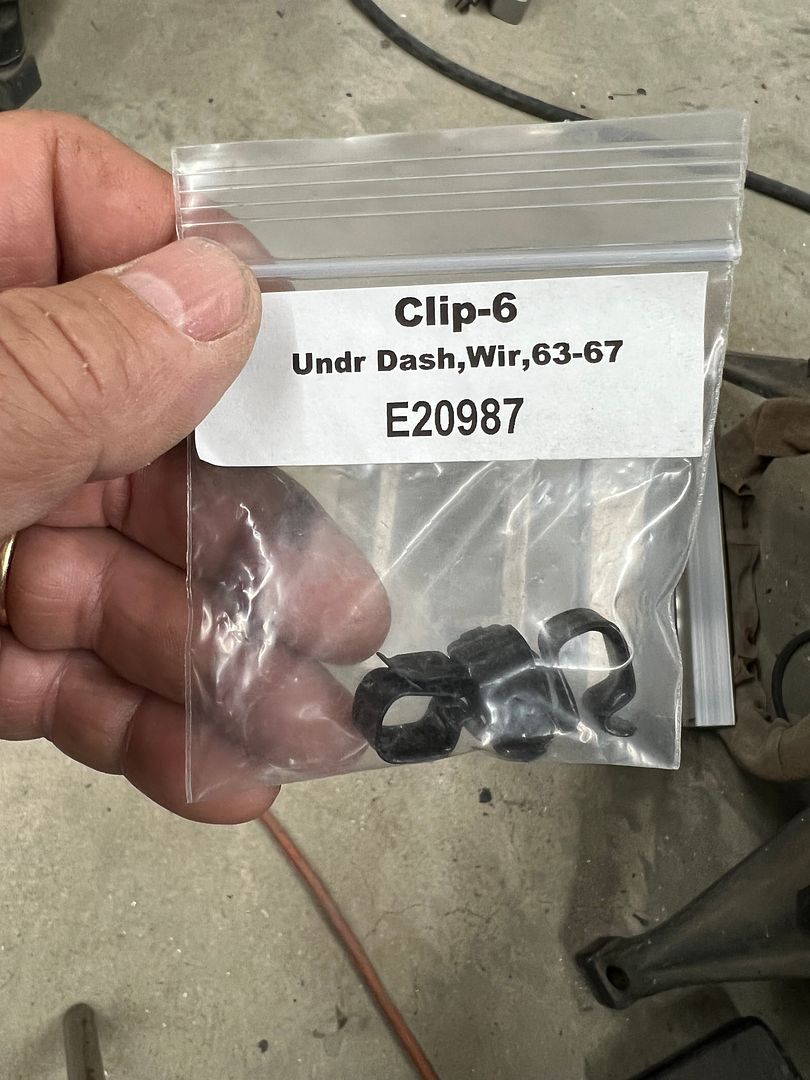 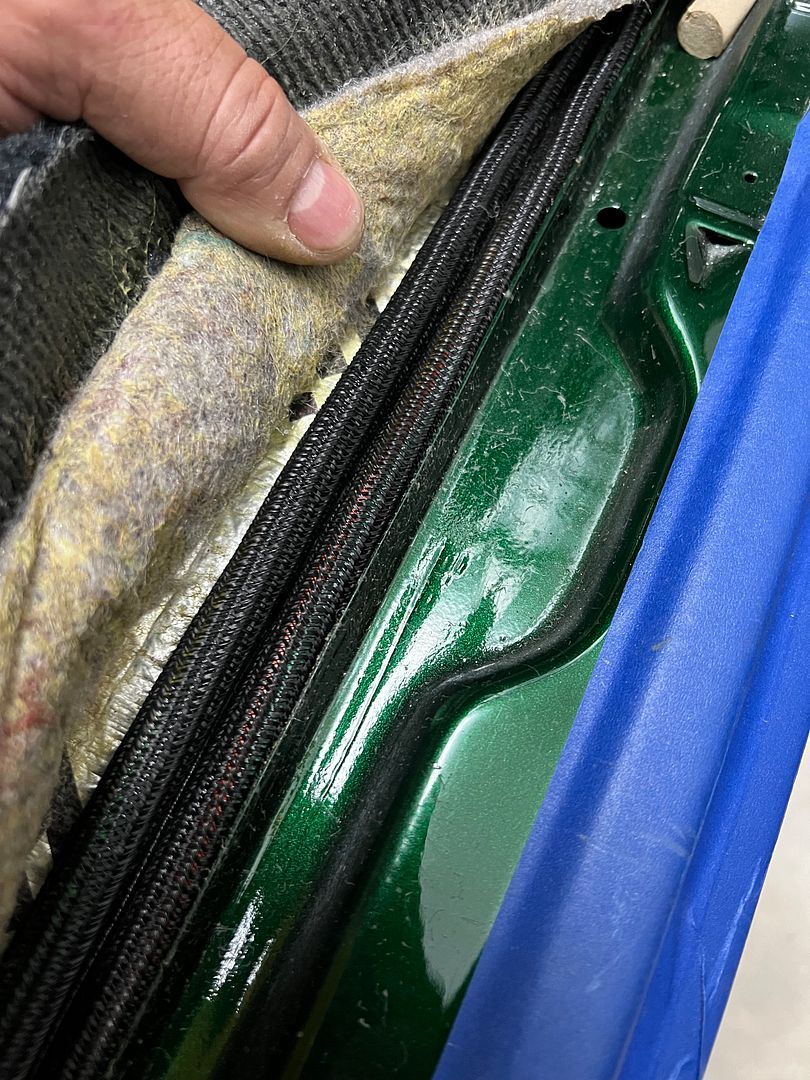 Here Jared made a protective channel where the wire passes under the rear seat frame. 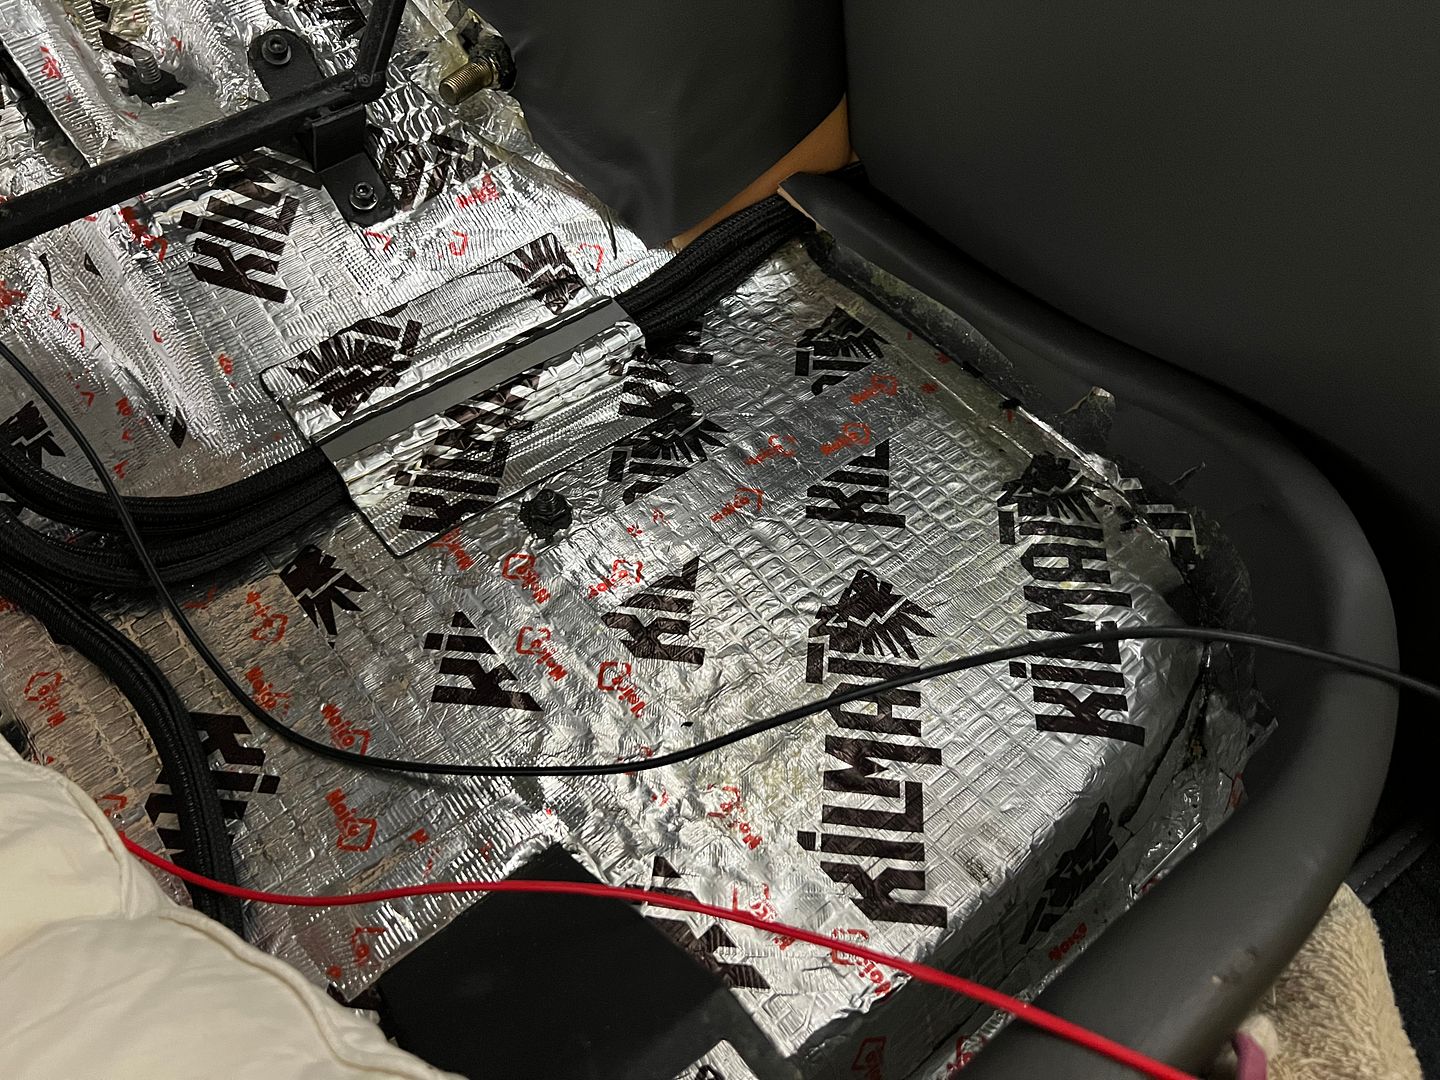
__________________
Robert |
|
|

|
|
|
#1307 |
|
Post Whore
  Join Date: May 2015
Location: Alabama
Posts: 14,663
|
Re: 55 Wagon Progress
Heat shrink vs sticky tape....great idea..!!!
__________________
Mongo...aka Greg RIP Dad RIP Jesse 1981 C30 LQ9 NV4500..http://67-72chevytrucks.com/vboard/s...d.php?t=753598 Mongos AD- LS3 TR6060...http://67-72chevytrucks.com/vboard/s...34#post8522334 Columbus..the 1957 IH 4x4...http://67-72chevytrucks.com/vboard/s...63#post8082563 2023 Chevy Z71..daily driver |
|
|

|
|
|
#1308 |
|
Post Whore
 Join Date: Feb 2016
Location: Portland Oregon
Posts: 11,300
|
Re: 55 Wagon Progress
I've been watching this from the side line for quite awhile now. Awestruck by the quality of the work I never thought that I would be able to contribute. Today is different. Here are some harness tapes I have used without issue over the years.
The first link is what I use on motorcycles. The 2nd link is what I use for interior wiring harnesses or if I need to match a factory GM harness. https://revivalcycles.com/products/t...c-harness-tape https://www.americanautowire.com/shop/harness-tape Thank you for all the knowledge you have shared.
__________________
Thanks to Bob and Jeanie and everyone else at Superior Performance for all their great help.  RIP Bob Parks. 1967 Burban (the WMB),1988 S10 Blazer (the Stink10 II),1969 GTO (the Goat), 1970 Javelin, 1952 F2 Ford OHC six 4X4, 29 Model A, 72 Firebird (the DBP Bird). 85 Alfa Romeo If it breaks I didn't want it in the first place The WMB repair thread http://67-72chevytrucks.com/vboard/s...d.php?t=698377 |
|
|

|
|
|
#1309 |
|
Registered User
Join Date: Jan 2013
Location: Leonardtown, MD
Posts: 1,647
|
Re: 55 Wagon Progress
Thanks for adding those resources, good to have..
More progress on the wagon, we're getting some of our wiring run to the back of the car... 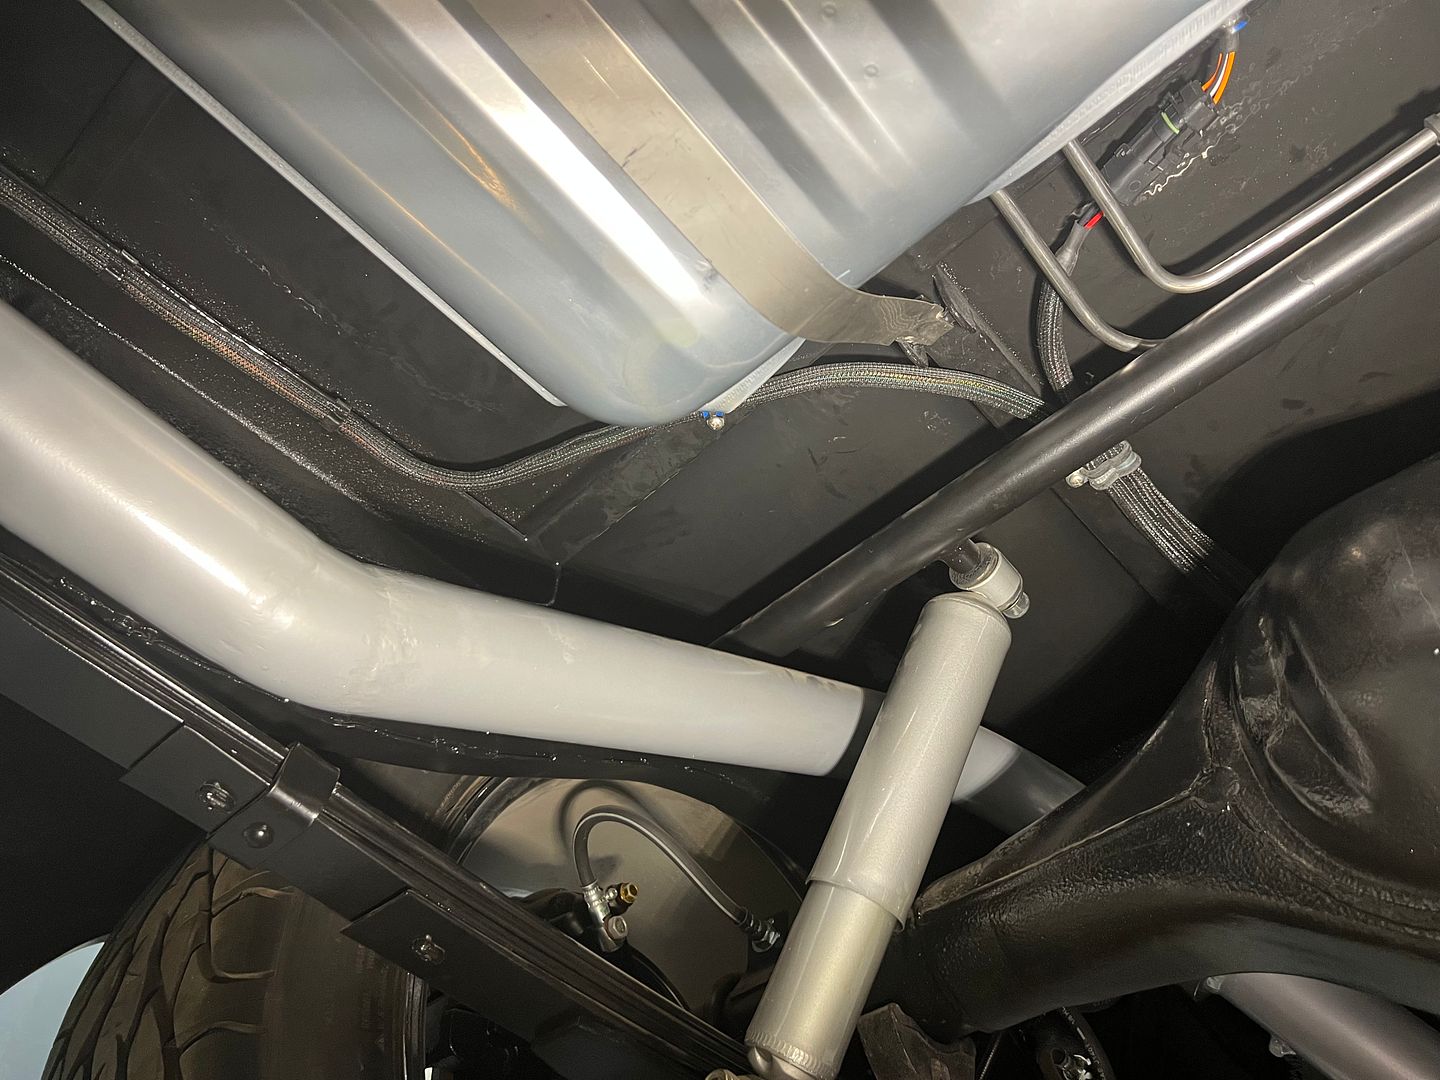 In cutting out door panels our upholsterer cut out the speakers a bit too large for how we were mounting them. I don't think I had conveyed those details as I had planned on doing the speaker cutouts portion.. So to keep him from having to do that work over again, we offered to cut them out this time around. 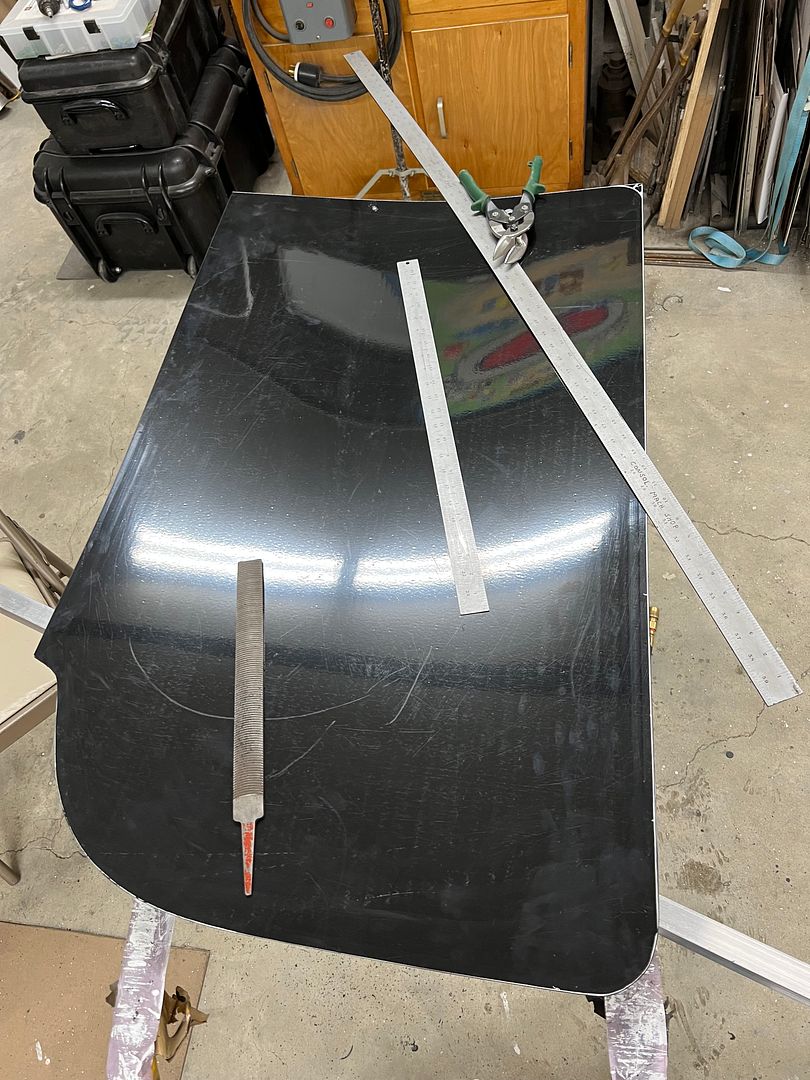 6-32 Riv-nuts used to hold the tweeter grill in place... 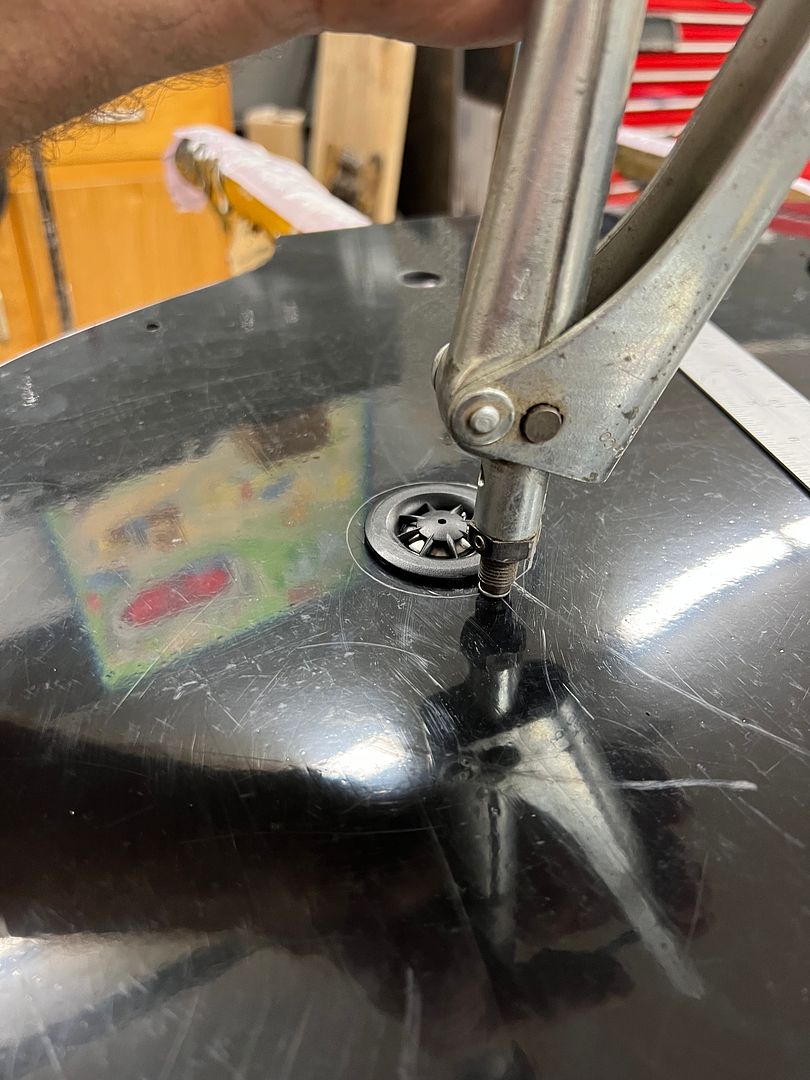 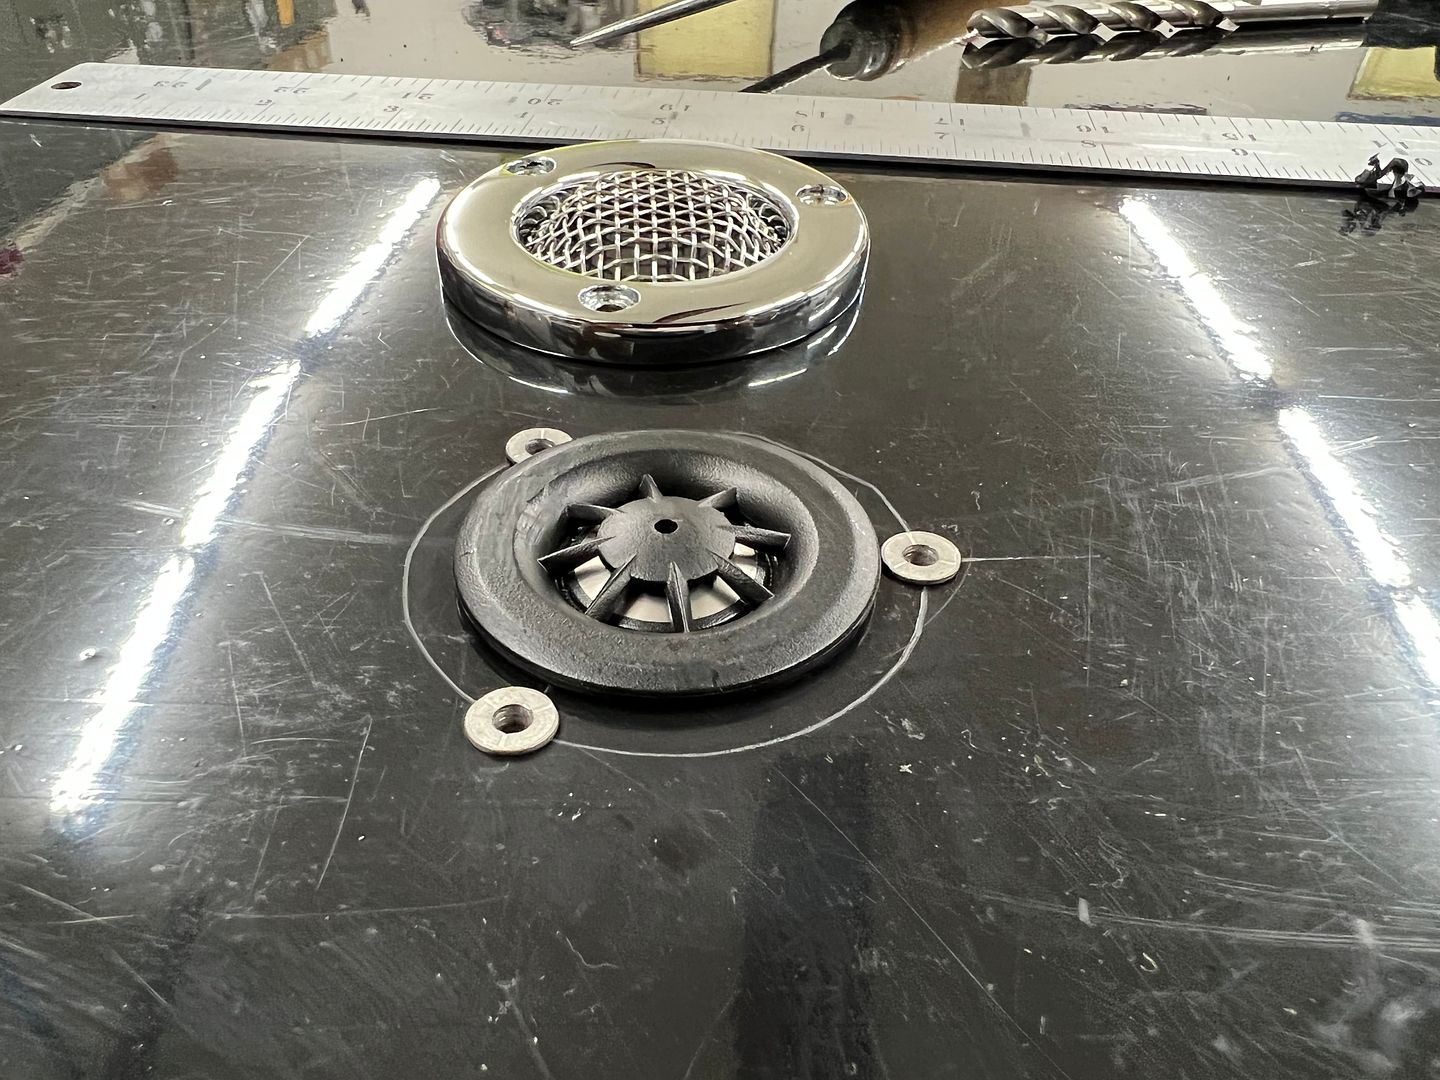 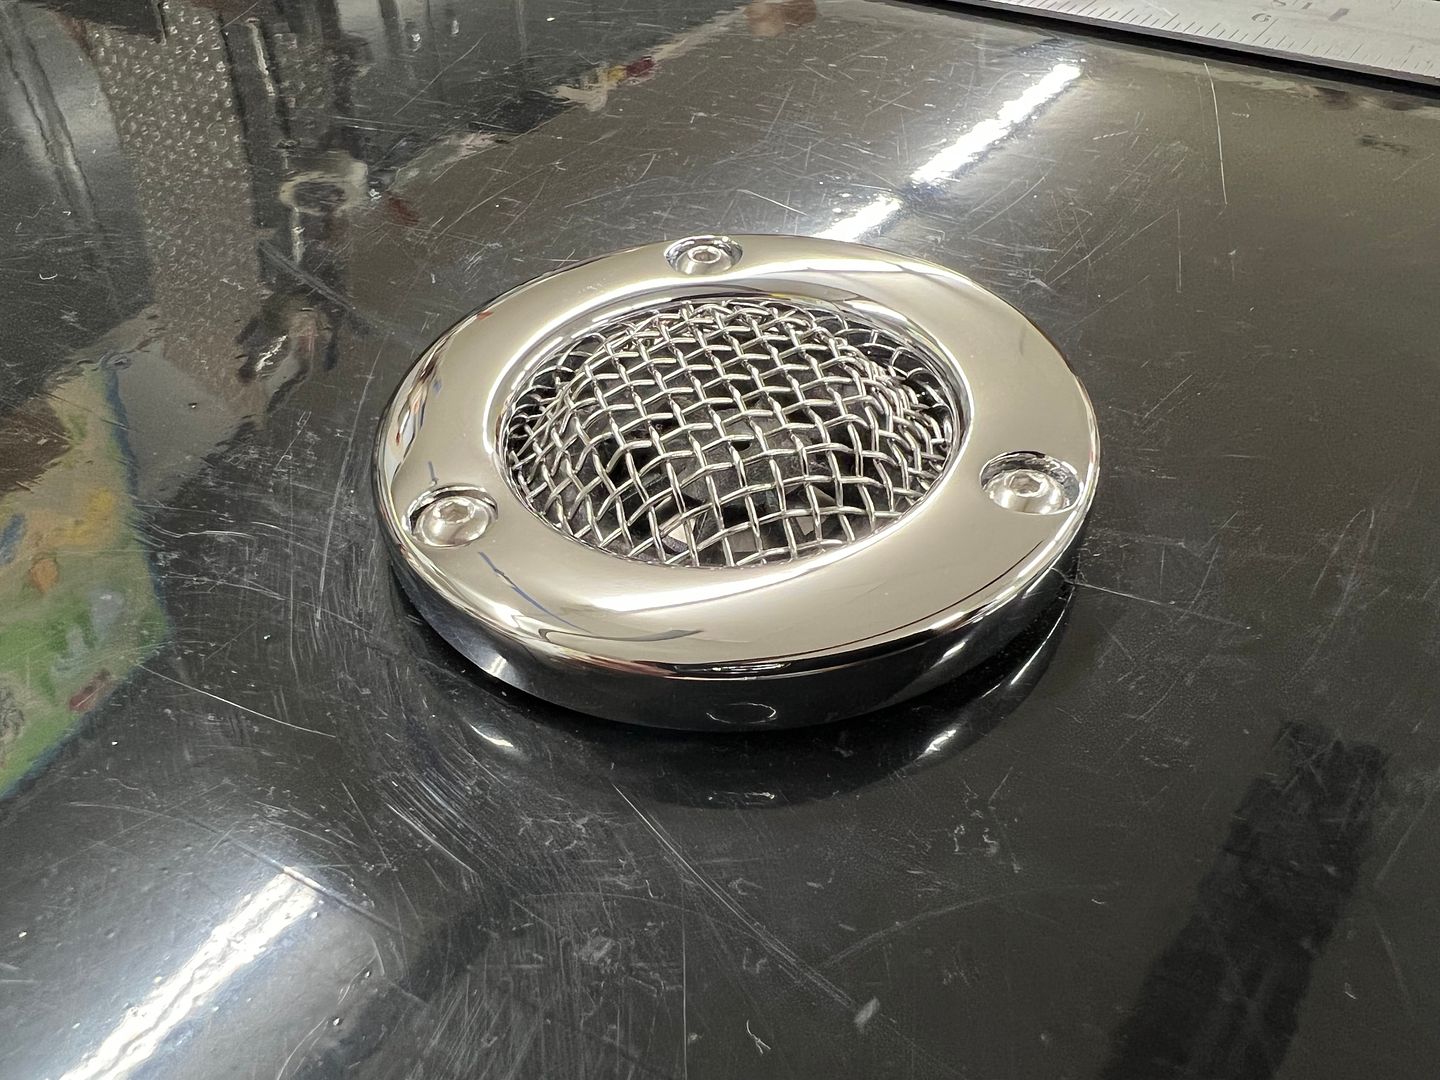 8-32 machine screws were sharpened to transfer the hole pattern onto the panel, then our speaker spacers matched to those for cutting out the center hole. 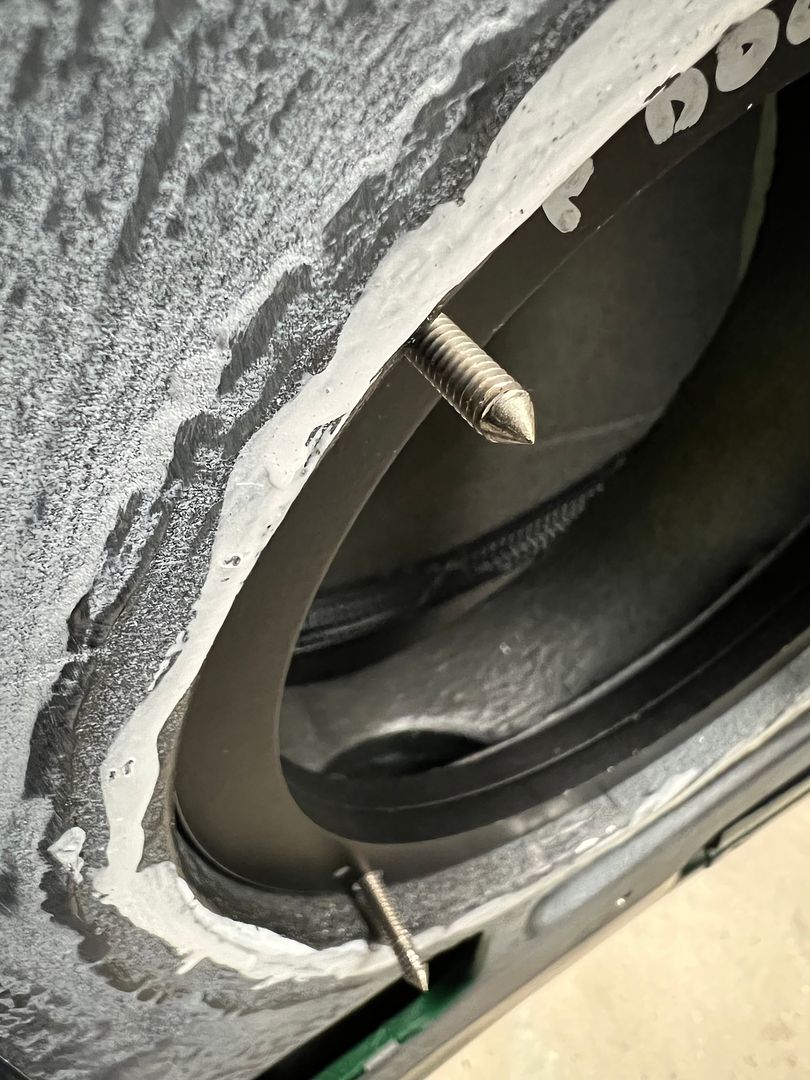 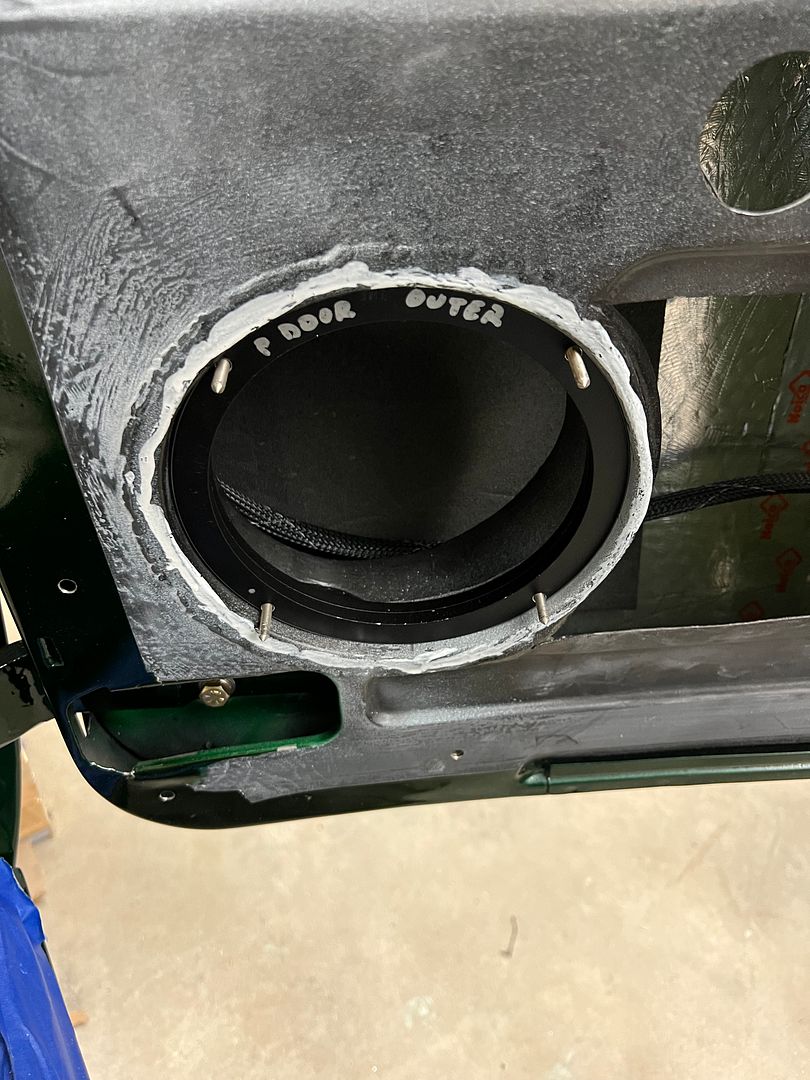 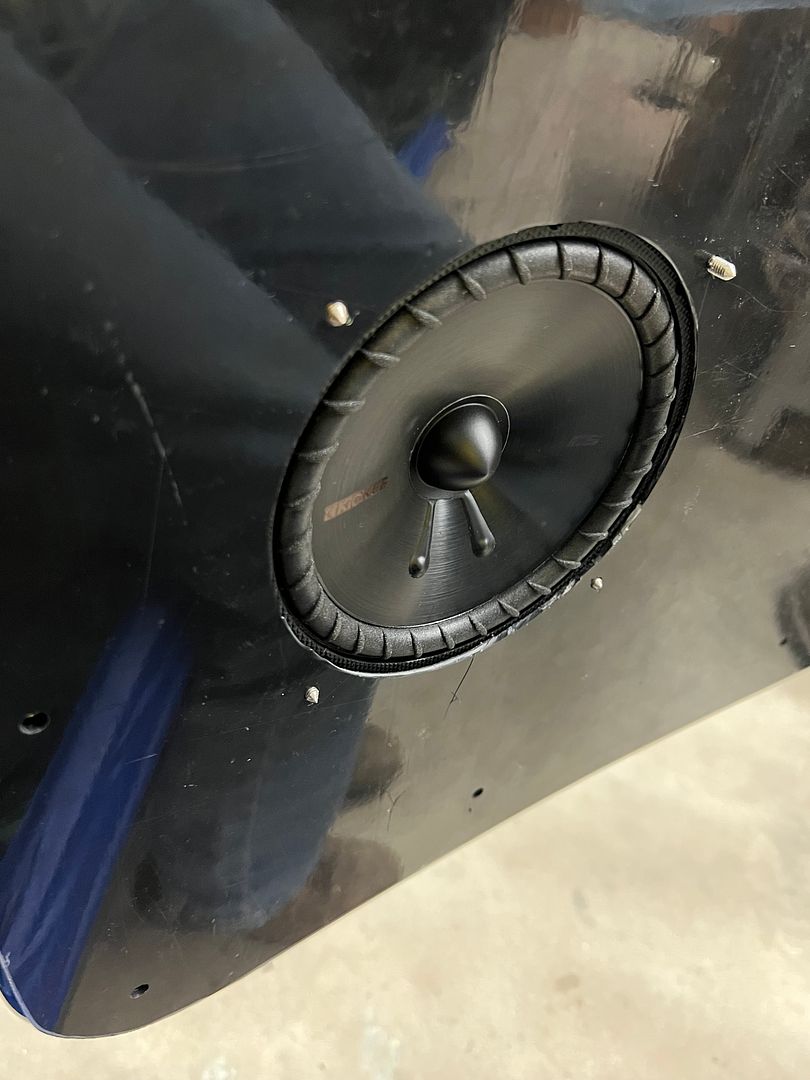 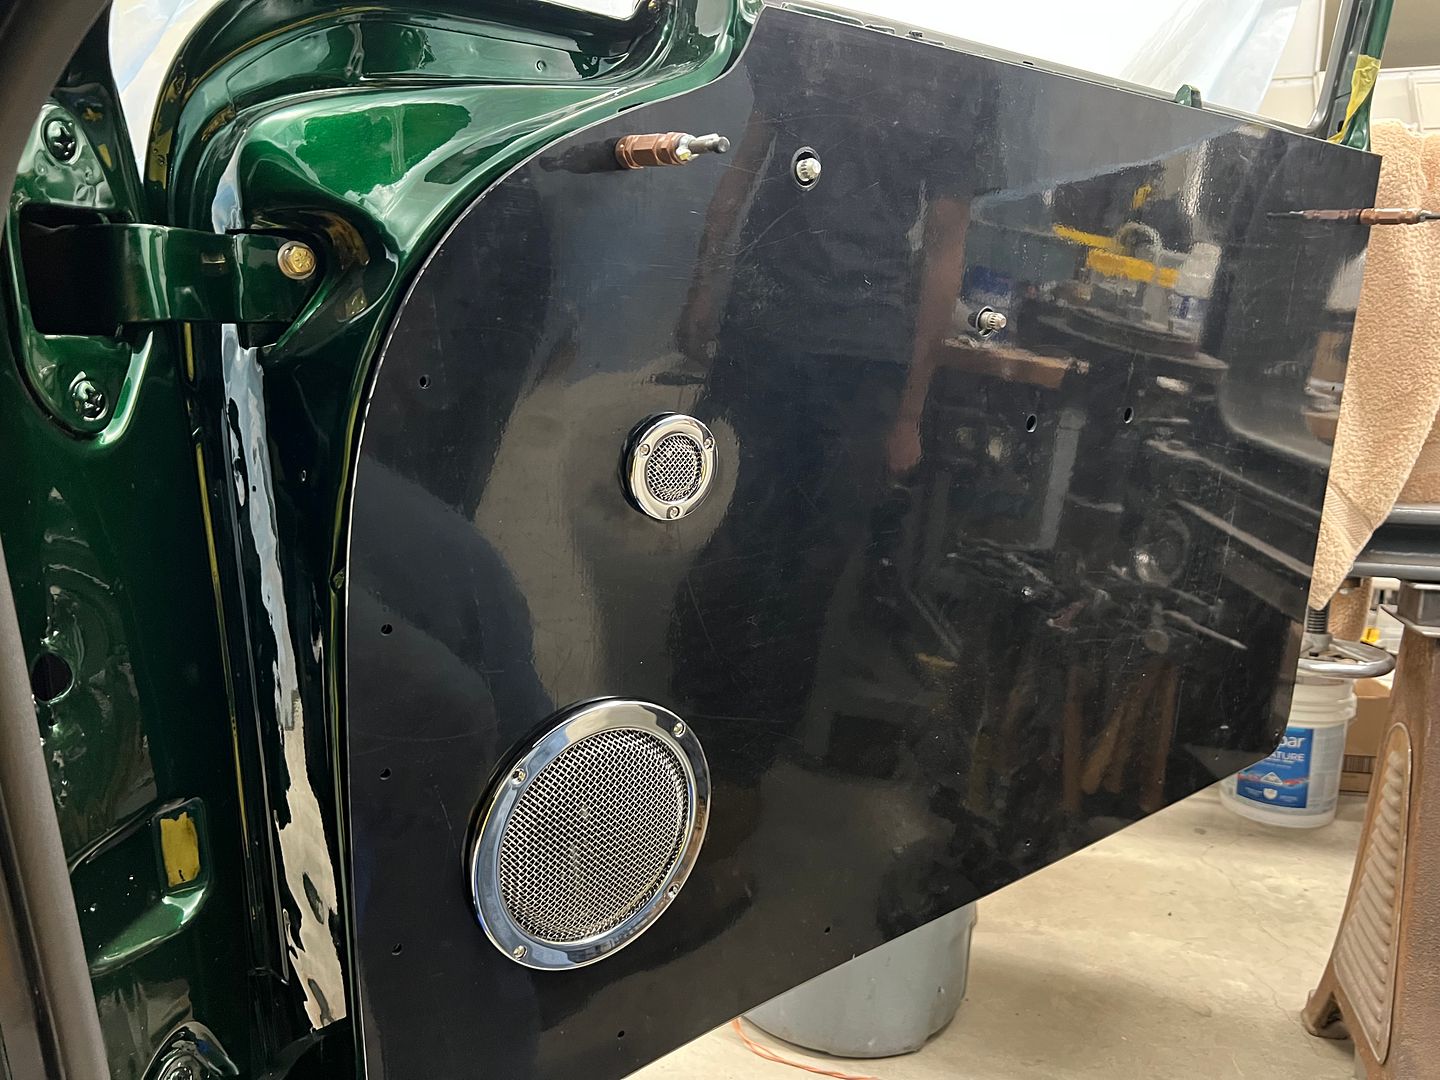 Next, holes drilled for our stainless trim that we had welded the impaling pins on prior.... 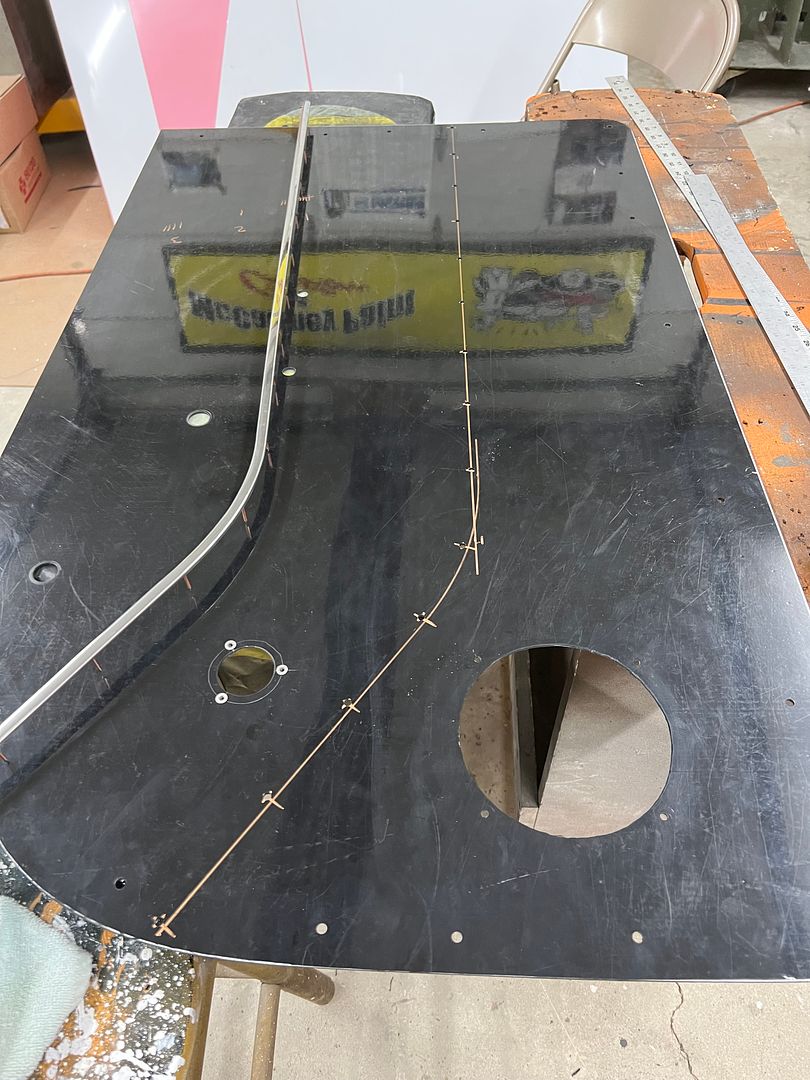 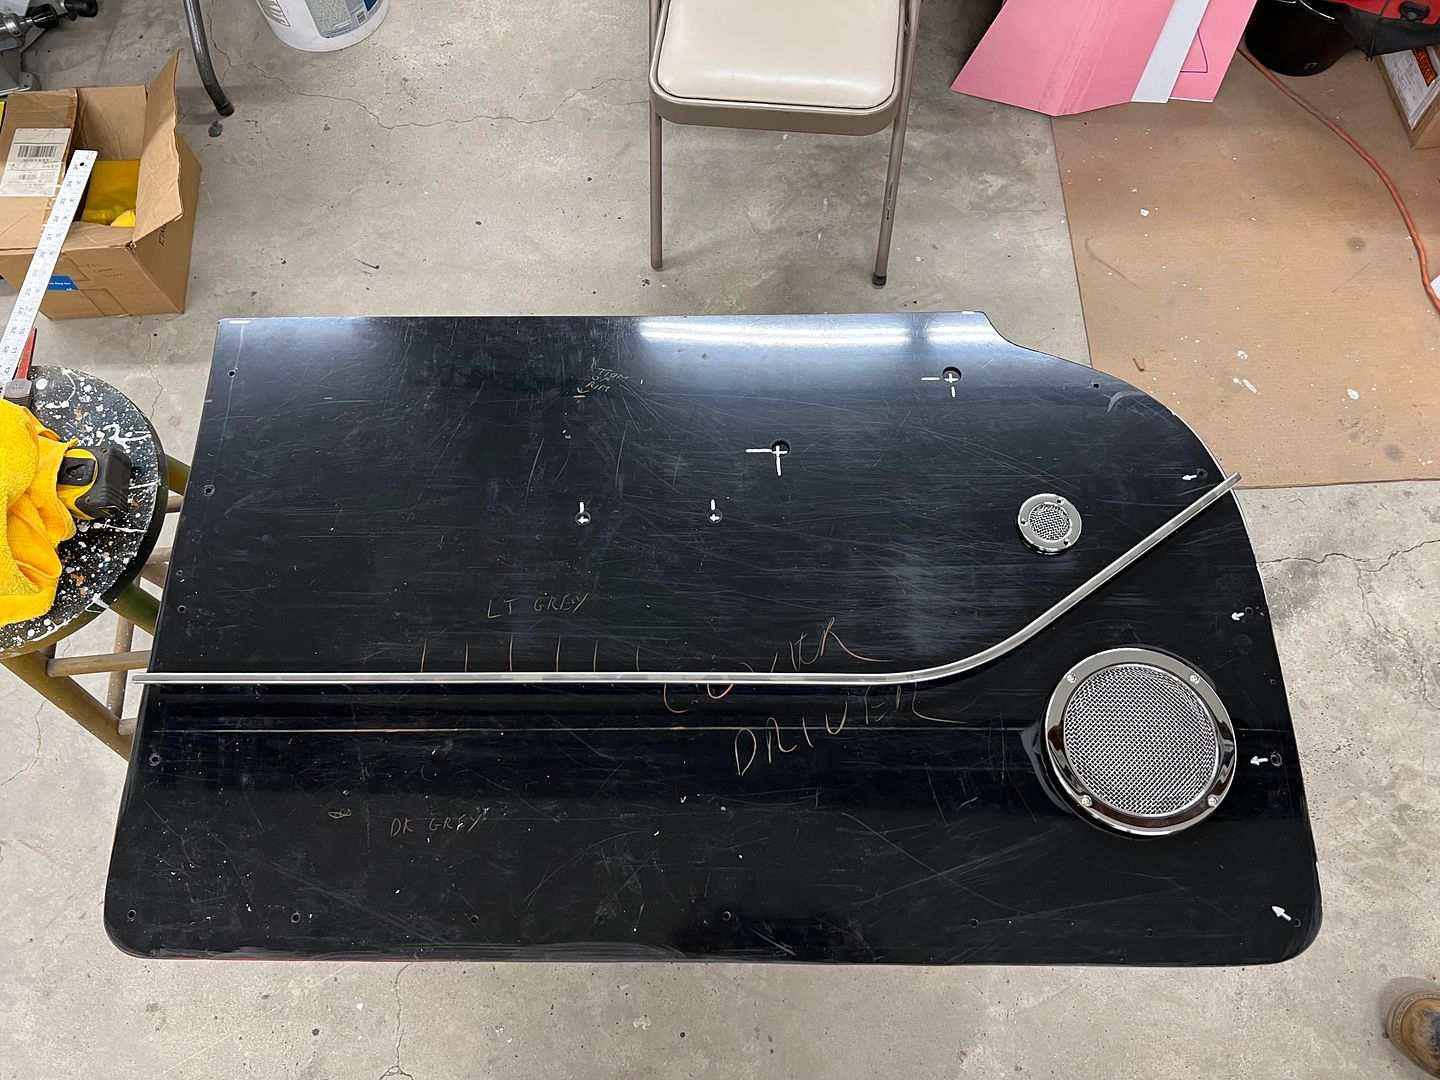 The stainless trim would be needed for upholstery, so we got to polishing.. A board was drilled to accept the impaling pins and better hold the trim piece for our prep stage of removing 67 years worth of scratches. Also worked well in holding things steady at the buffer.. 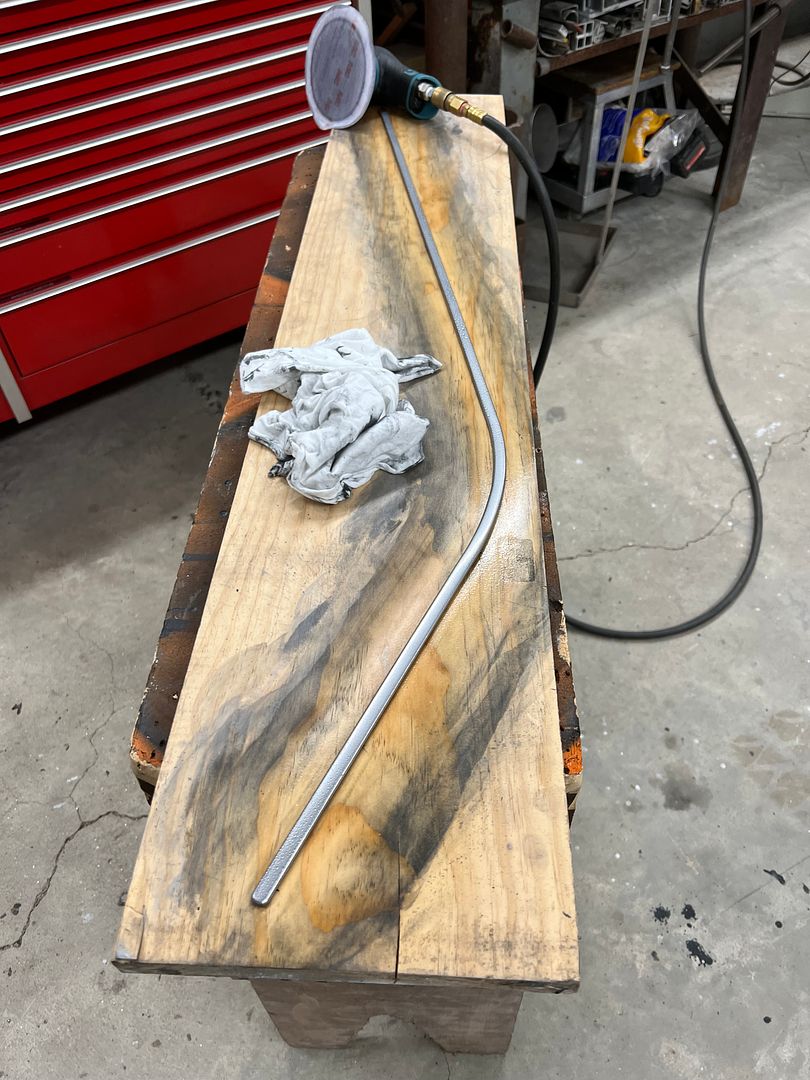 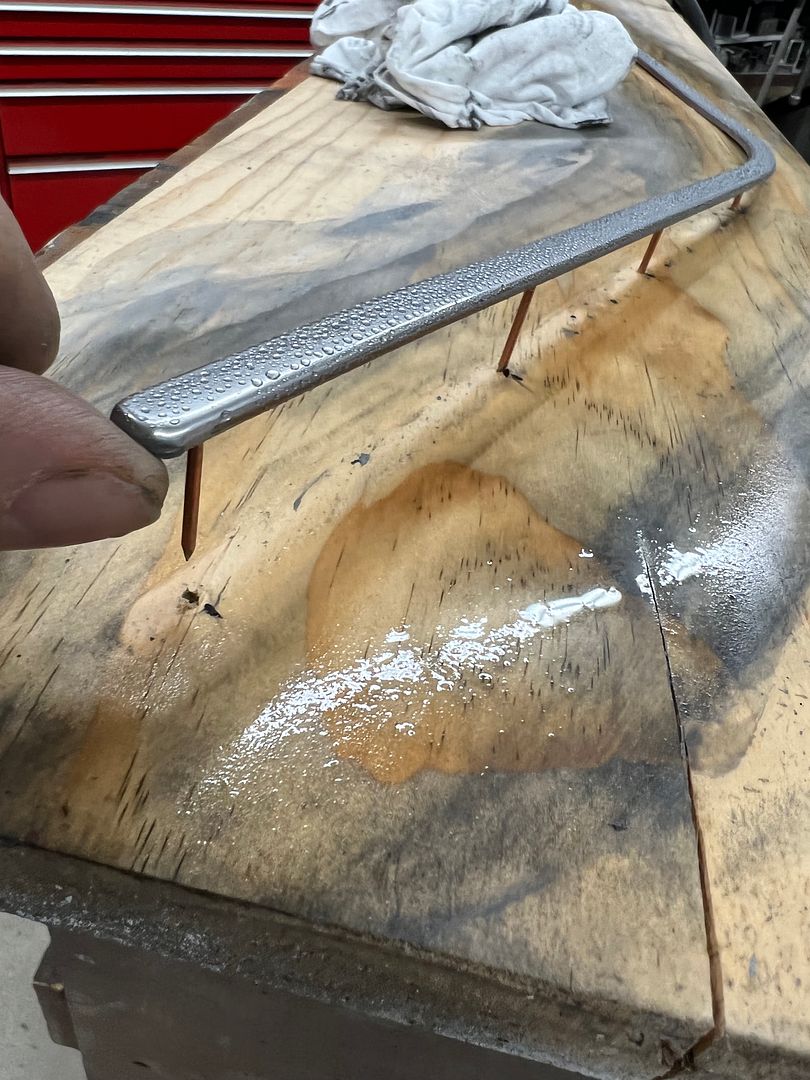 We used 3M Trizact on the DA, starting with 1500 grit and finishing with 8000 grit. This process cuts out the first two buffing stages, and seems to polish out nicer. Buffing process was using green rouge on sewn wheel and final was grey rouge on loose wheel. https://youtu.be/REH9gLXxaco This is after 3000 Trizact: _IMG_4062.JPG) This is after 8000 Trizact: _IMG_4064.JPG) This is after buffing: _IMG_4068(1).JPG) That'll do pig, that'll do.
__________________
Robert |
|
|

|
|
|
#1310 |
|
Registered User
Join Date: Jan 2013
Location: Leonardtown, MD
Posts: 1,647
|
Re: 55 Wagon Progress
I spent a week in Tennessee just south of Nashville, attending a metalshaping workshop and delivering the Pullmax there for Mike Abbott of Steel Rose Metal Co in Memphis TN. We had a good time learning tips and tricks, meeting old friends and making new ones.
Jesse Harris, who lives about 15 minutes from me, travelled out as well, and gave an awesome demo on using the bead roller with a focus on artwork. 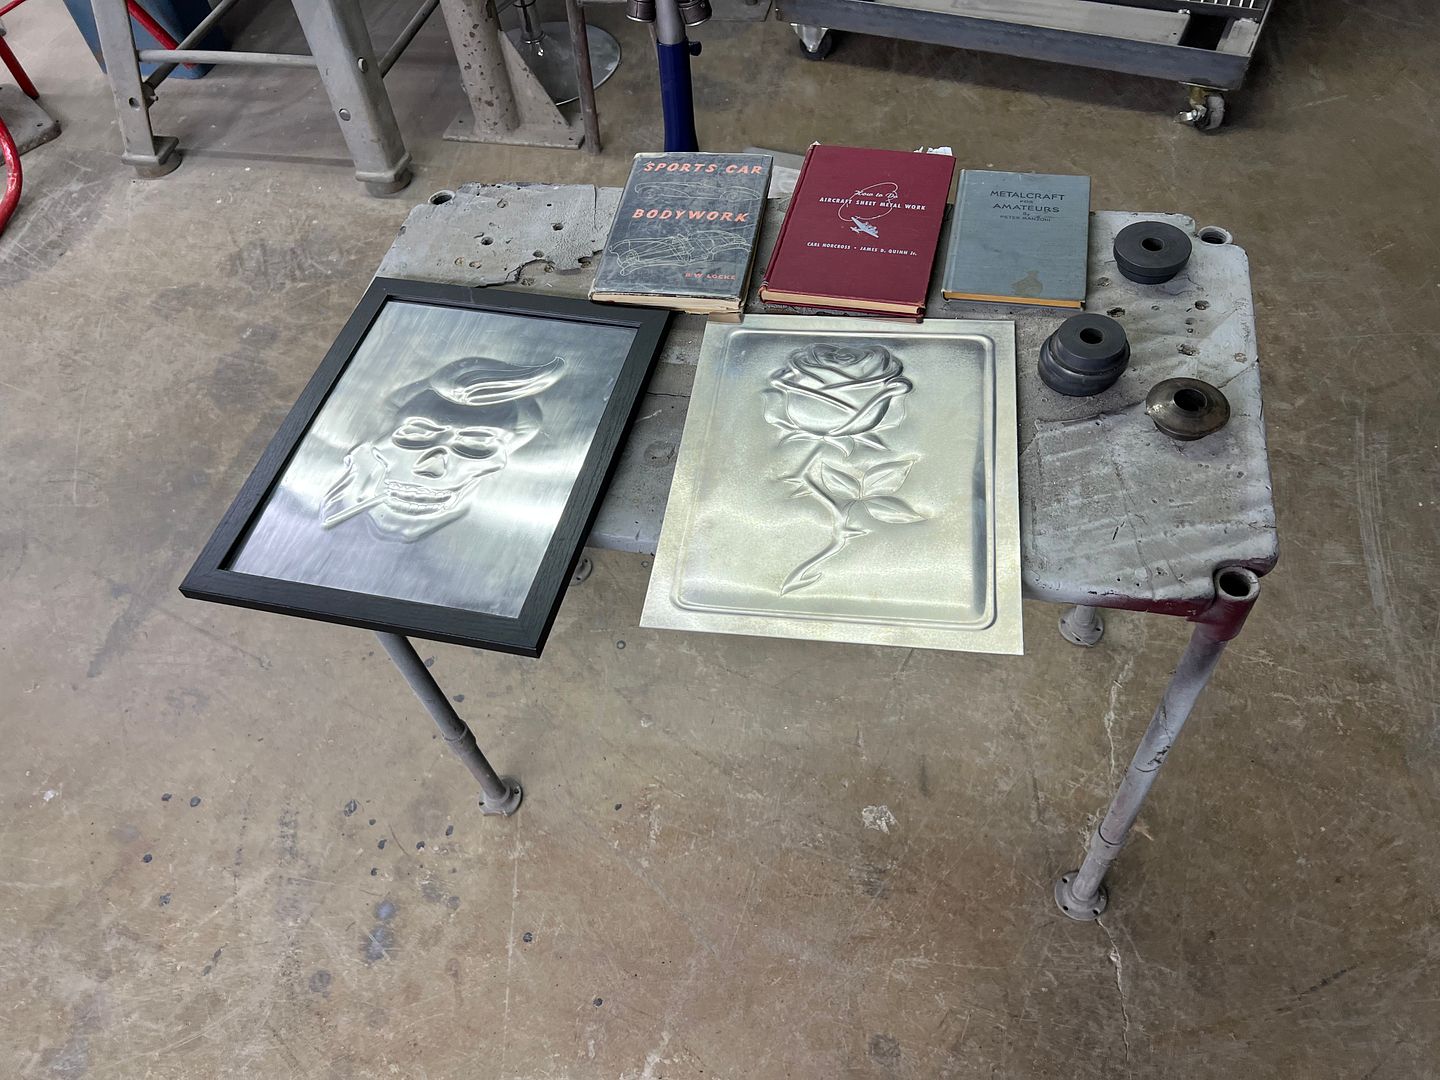 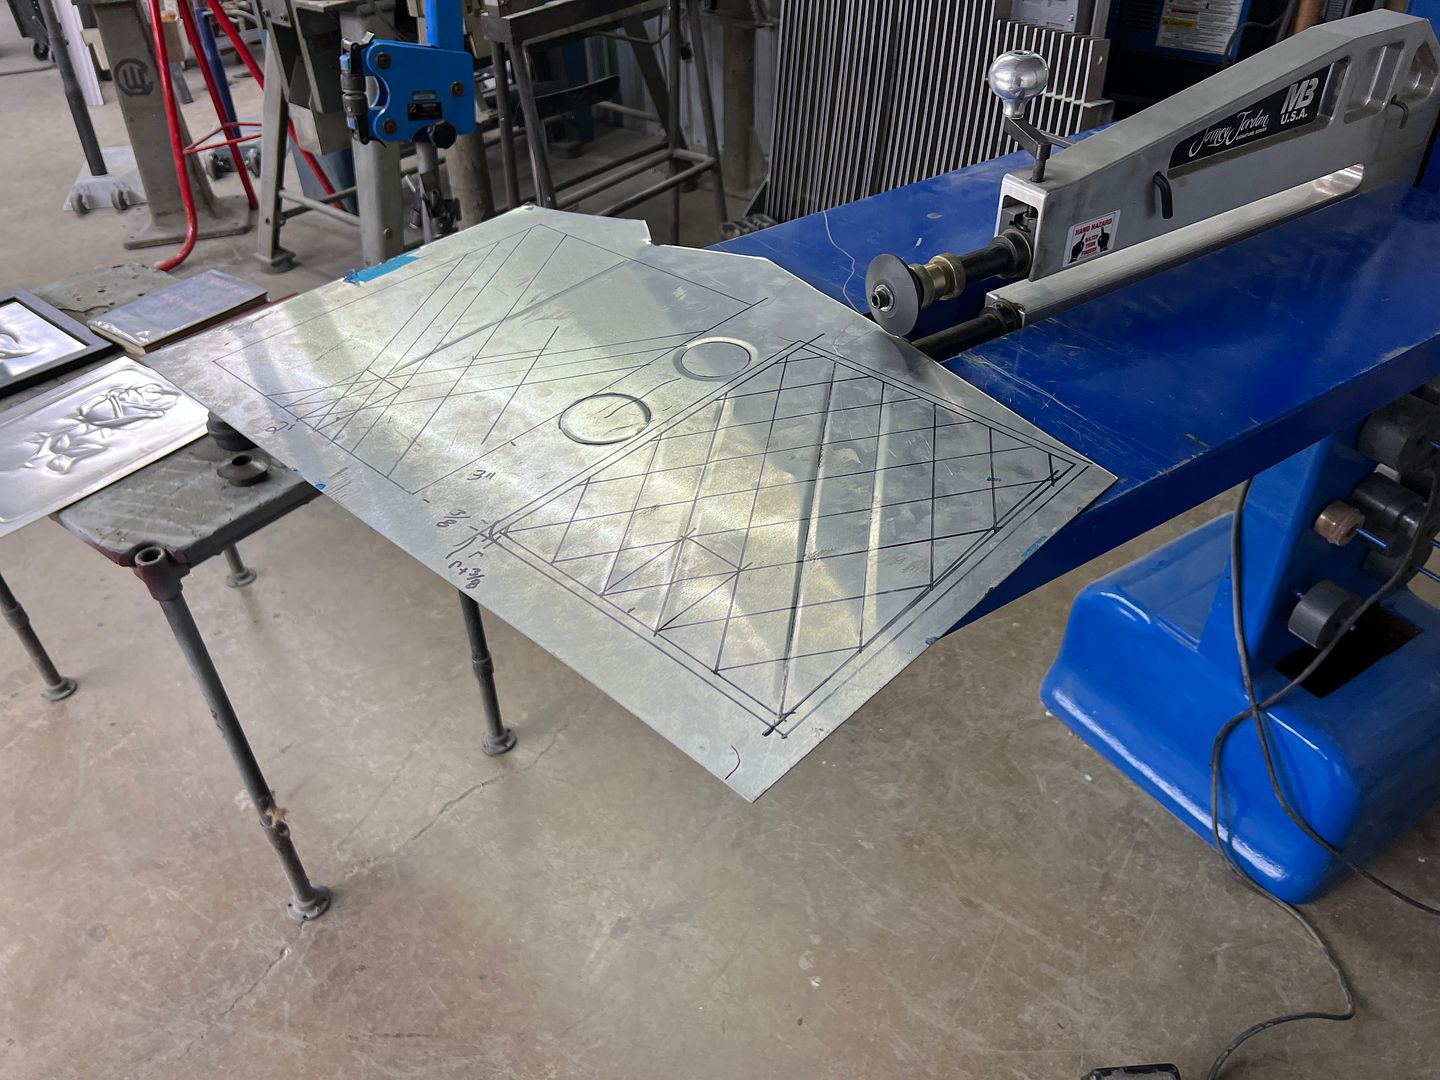 A leading demo on an aluminum Rolls Royce door... 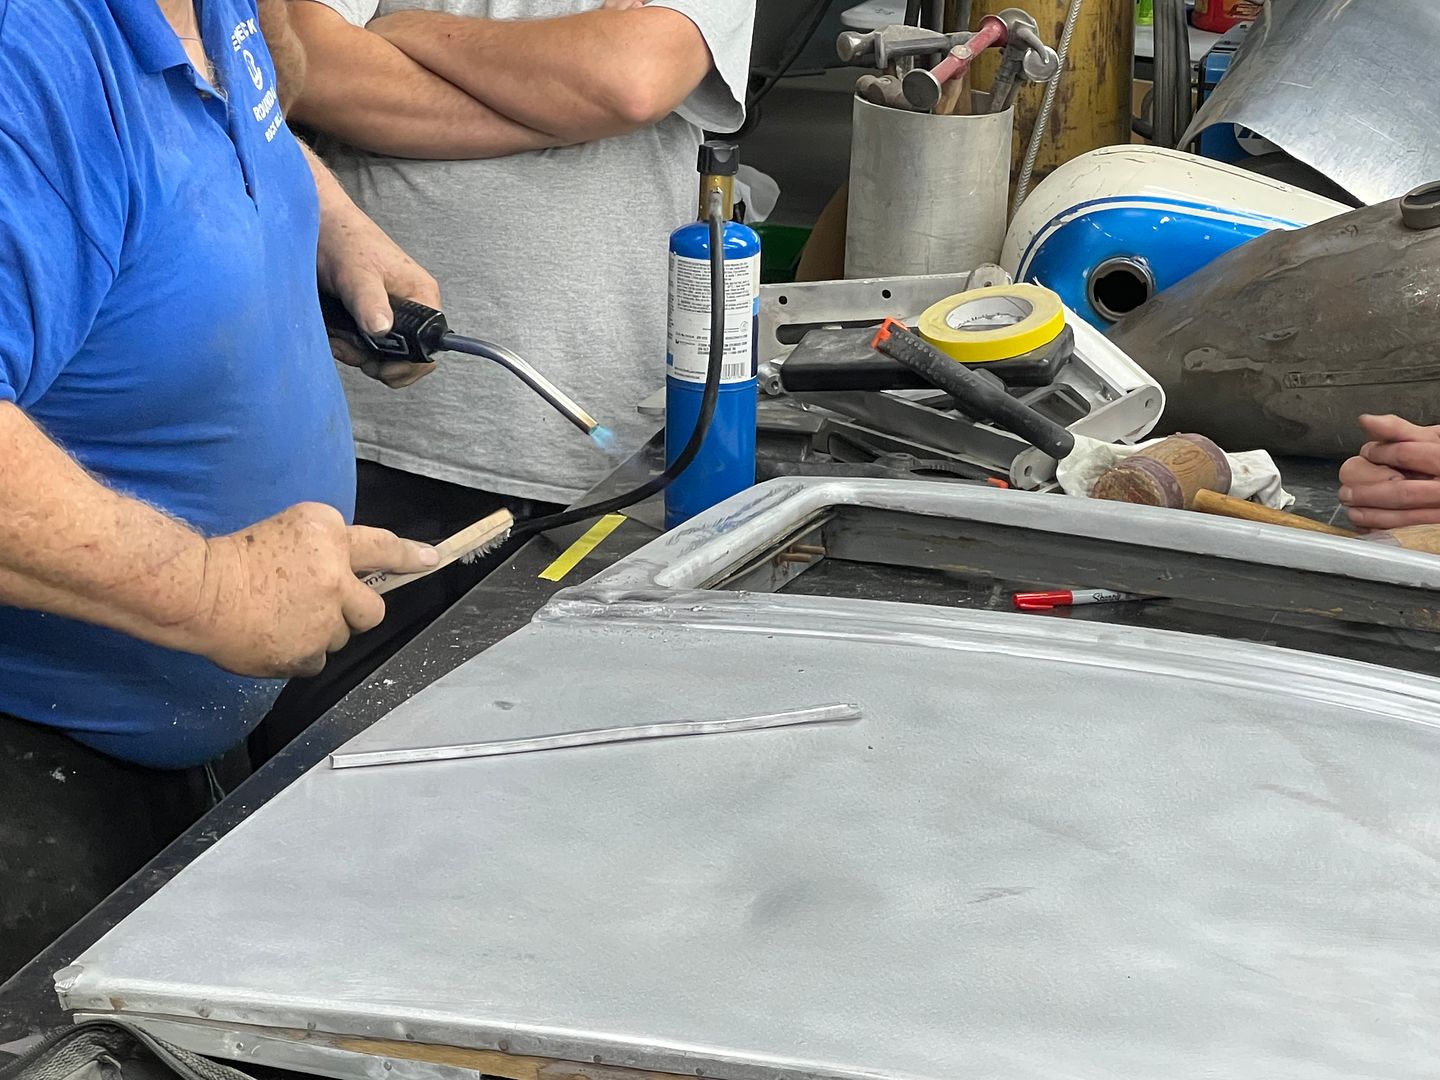 One of the attendees lives just north of Nashville, and a few of us travelled one evening to check out his shop, Ace Chassis. He has been building pulling tractors for about 20 years now and has quite the setup for machining, welding, and sheet metal fabrication. 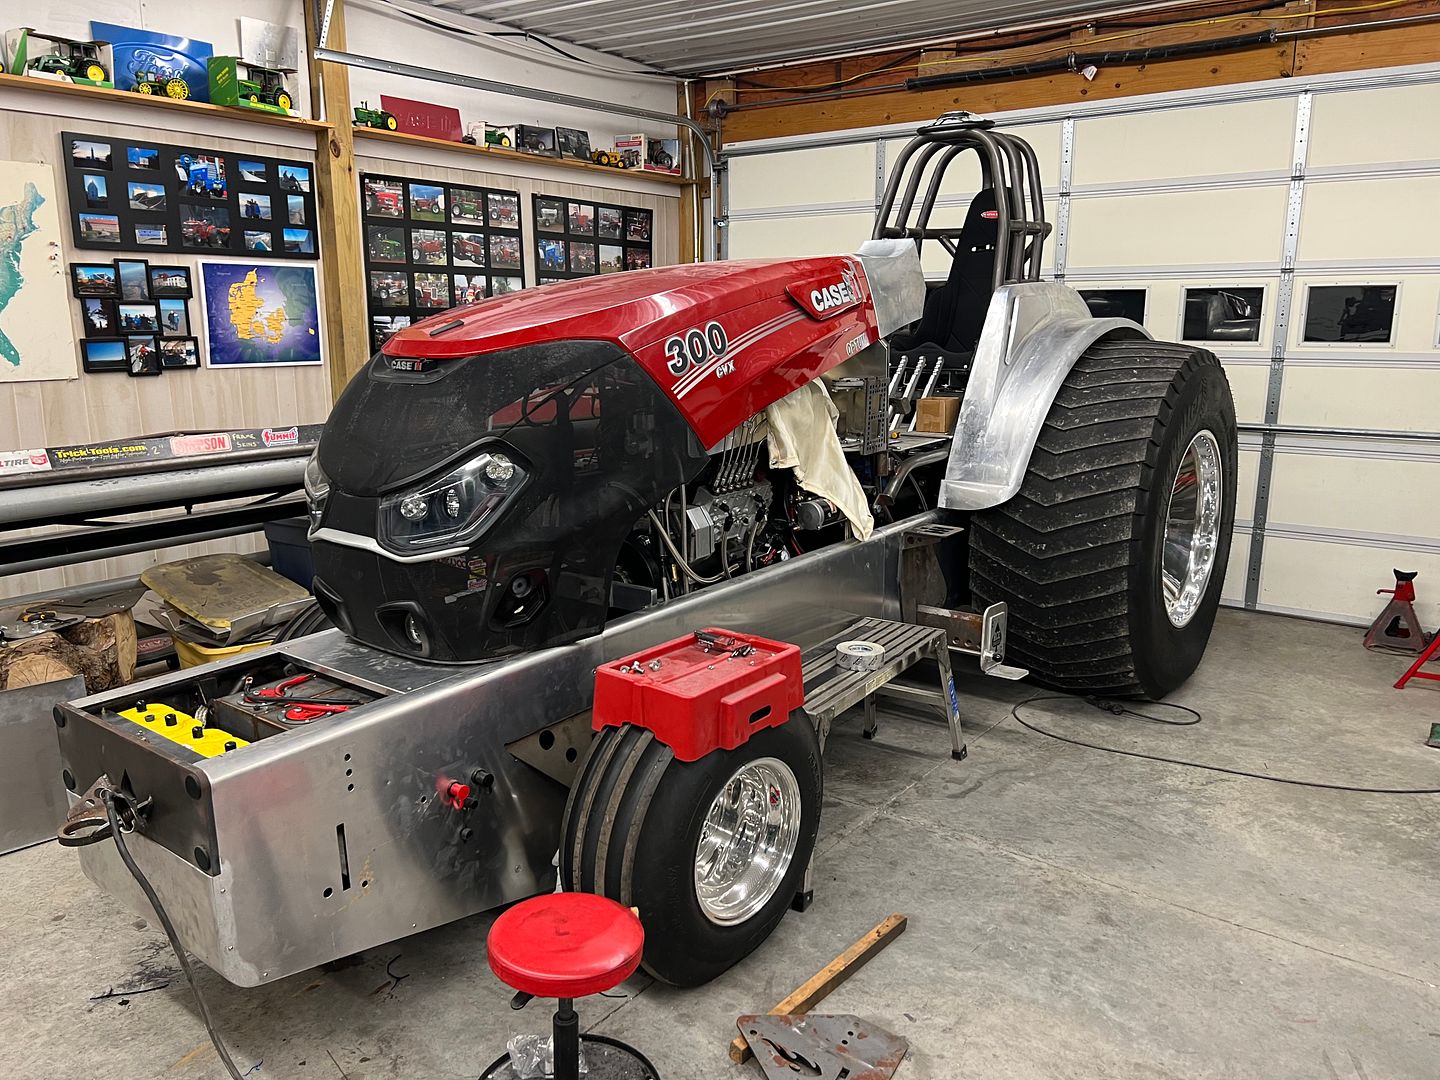 Upon return from TN, Jared brought over his 39 Ford so we could install a new wiring harness in place of the convoluted mess that was there. https://youtu.be/SpXH3K4BGXM He had some issues and a local fella that wires boats or something had made some repairs. This is his mainstay, I'd never seen the stuff and now having seen his work, I have my doubts about anyone who would use it on a regular basis. 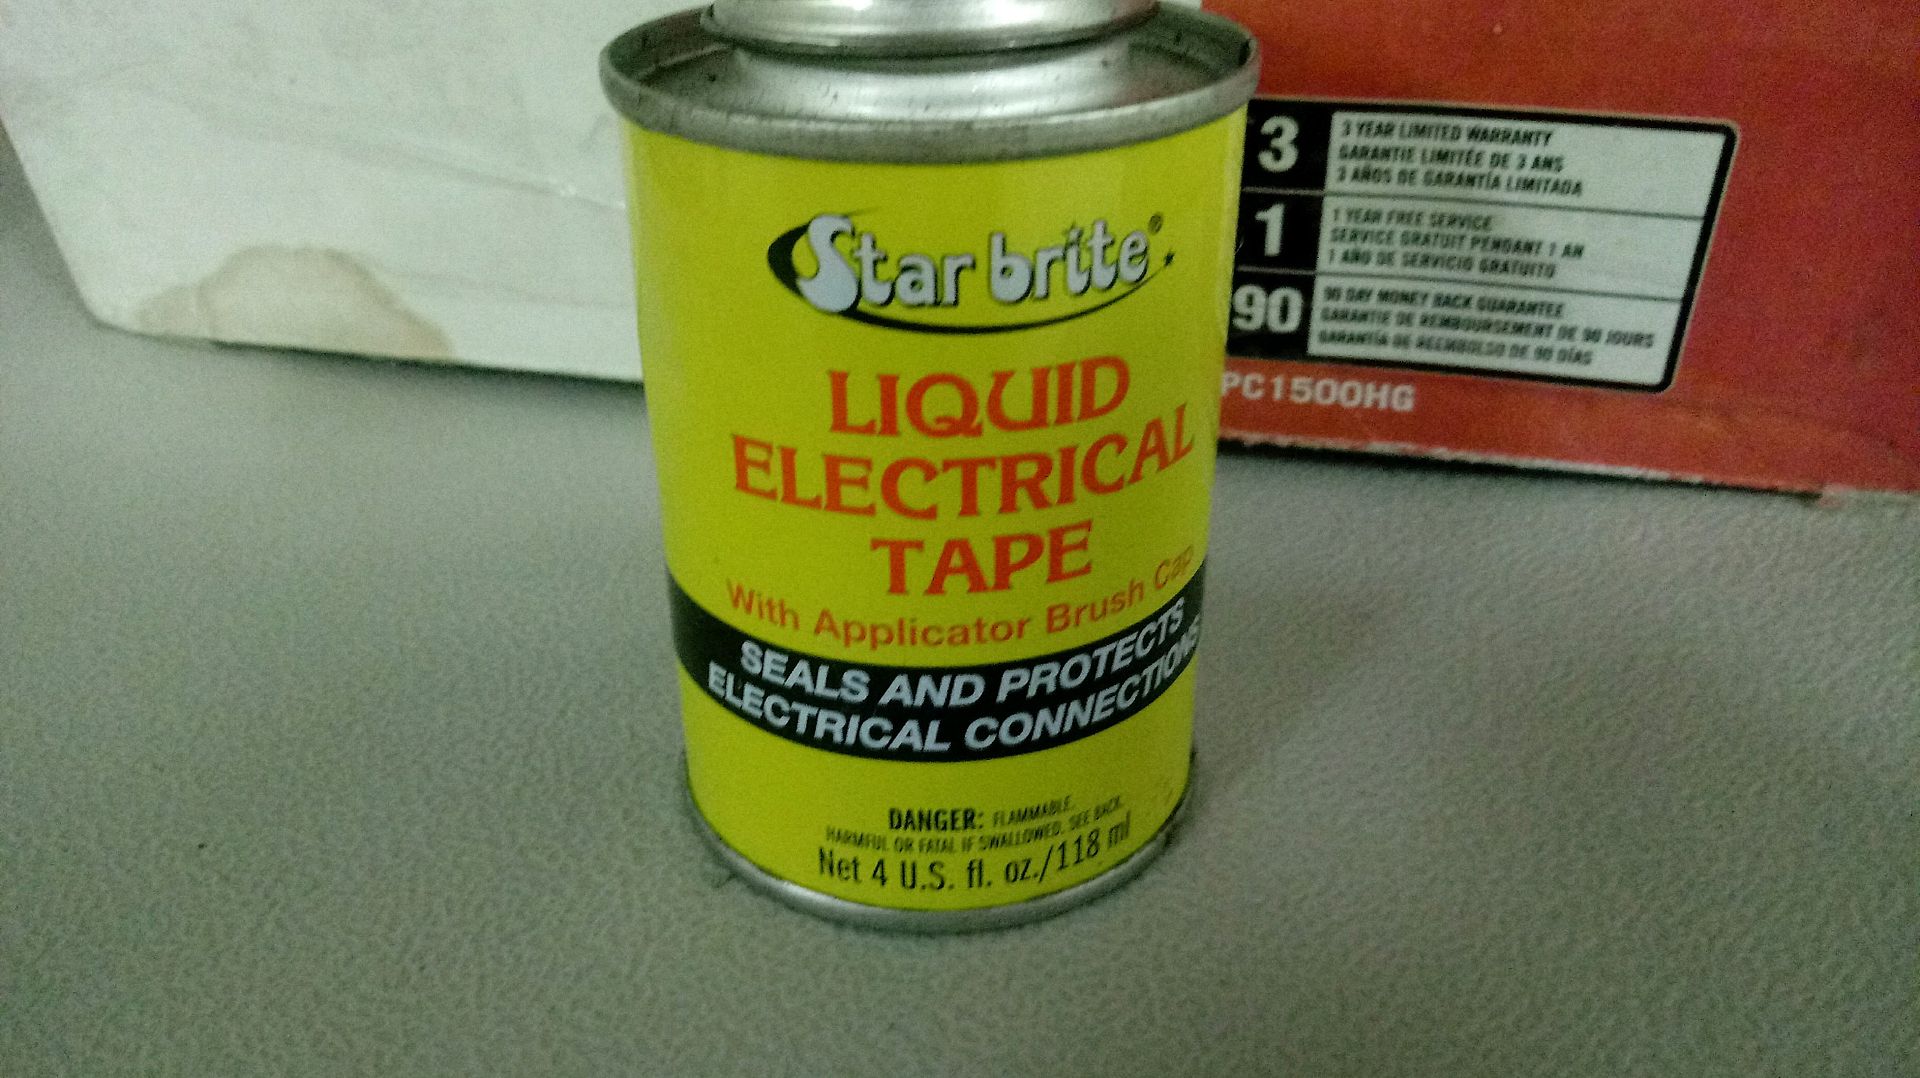 Here's some before pictures to highlight both his repairs and what was done before he got there. For some reason he decided that two separate runs of 12V power from the same source needed a resettable circuit breaker between them. 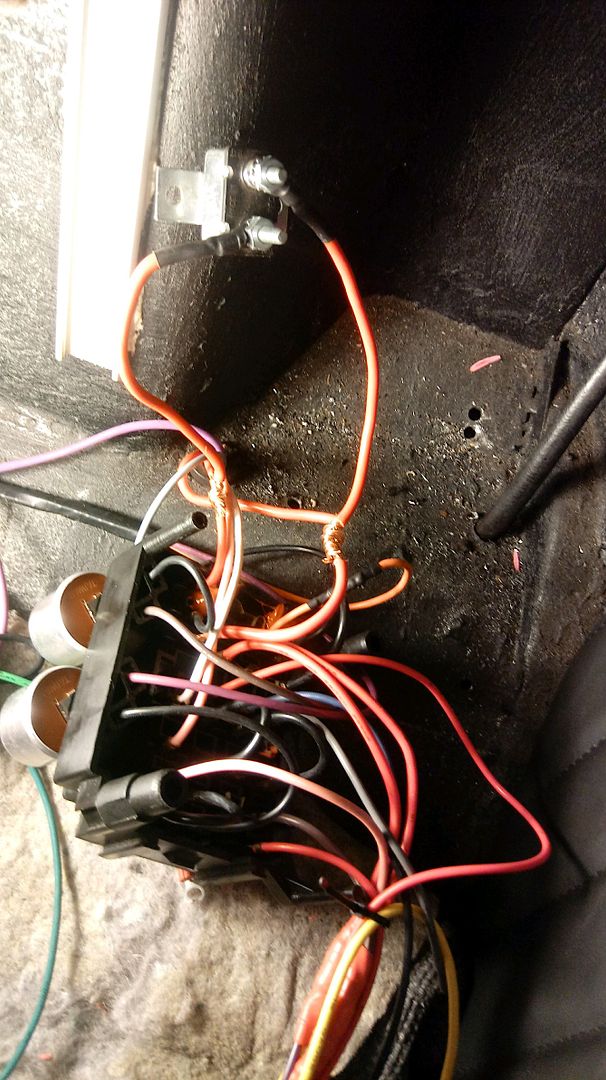 Personally, I'm confused. But that's not the half of it. This is a "ground" cable that was attached to the frame. 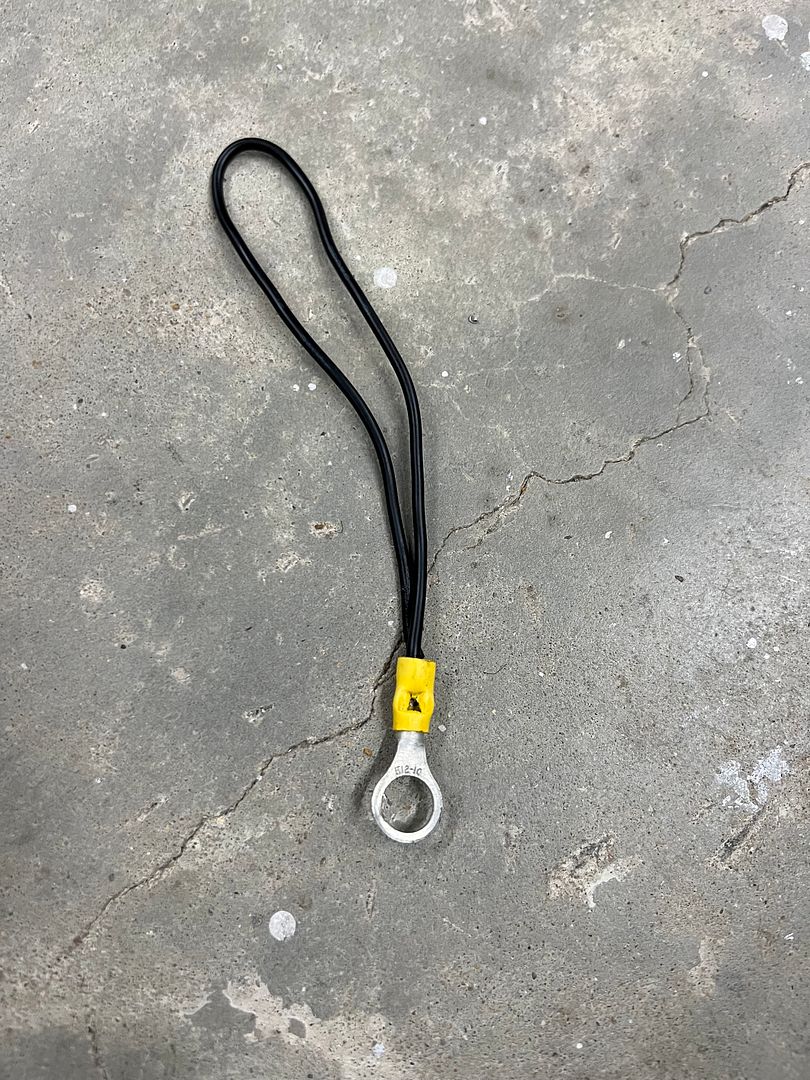 under the dash... 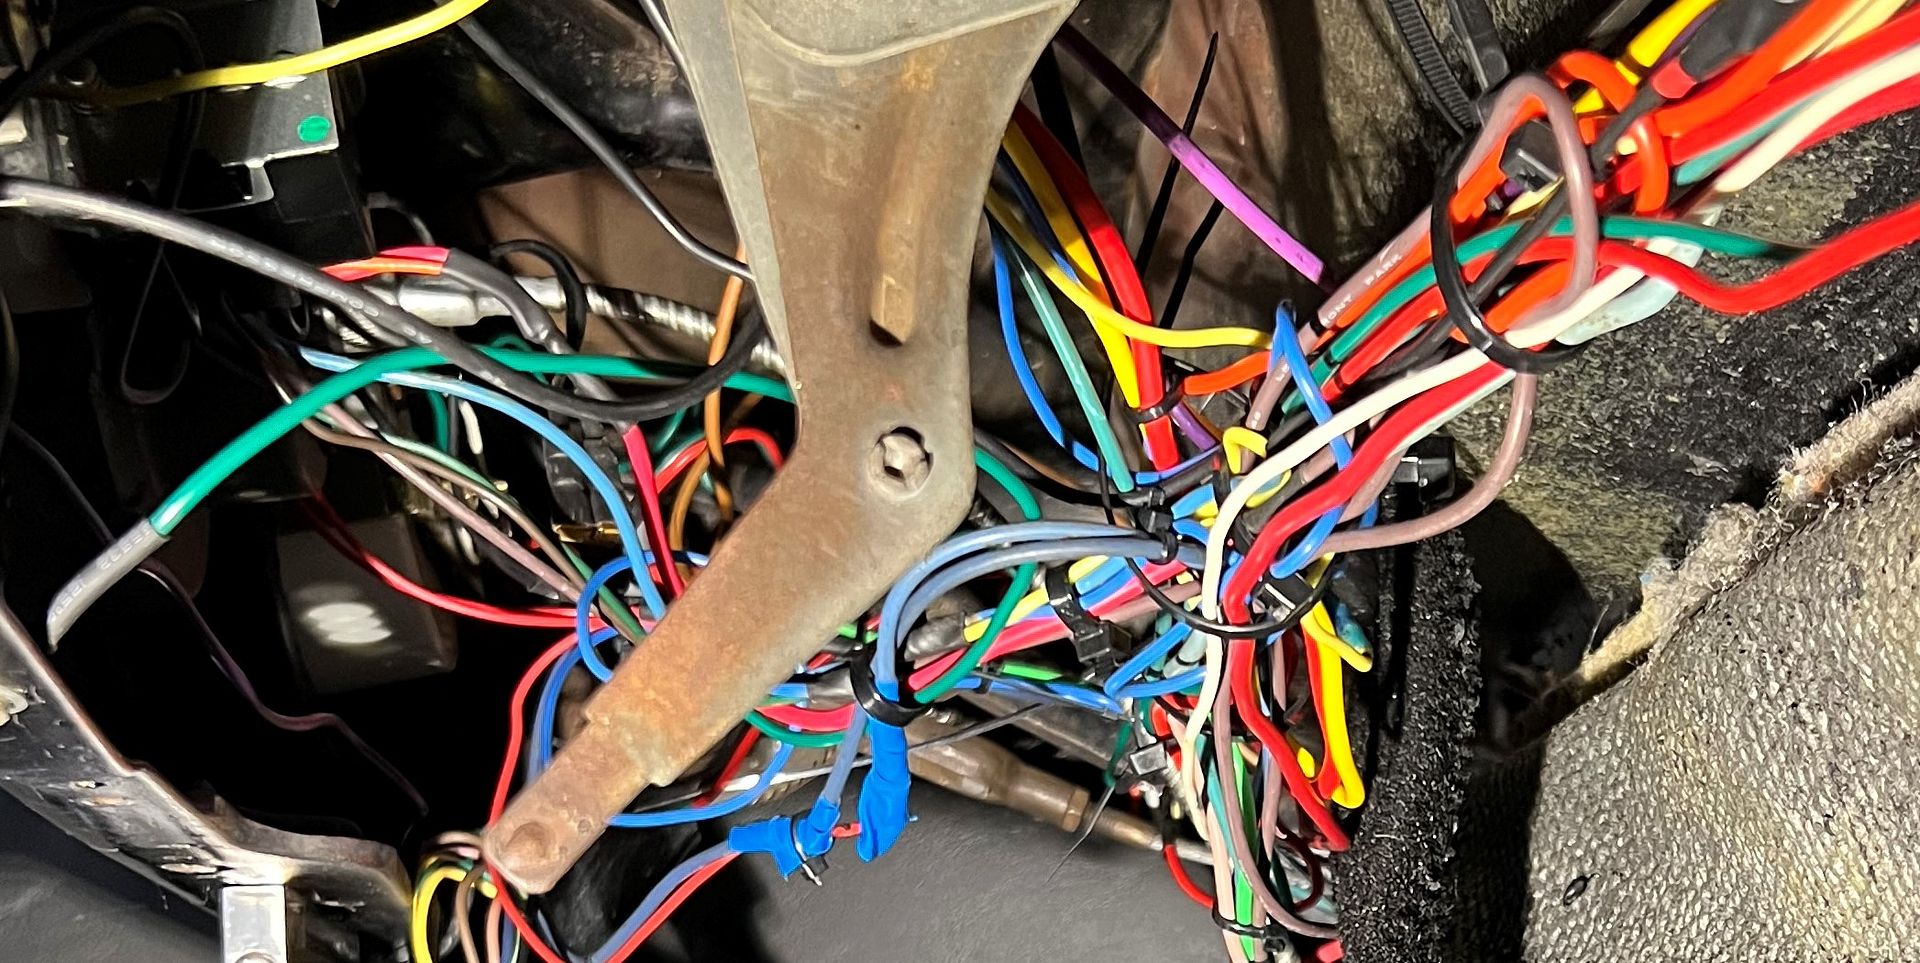 This is in the passenger front floor area, there is a fusebox in there somewhere.. 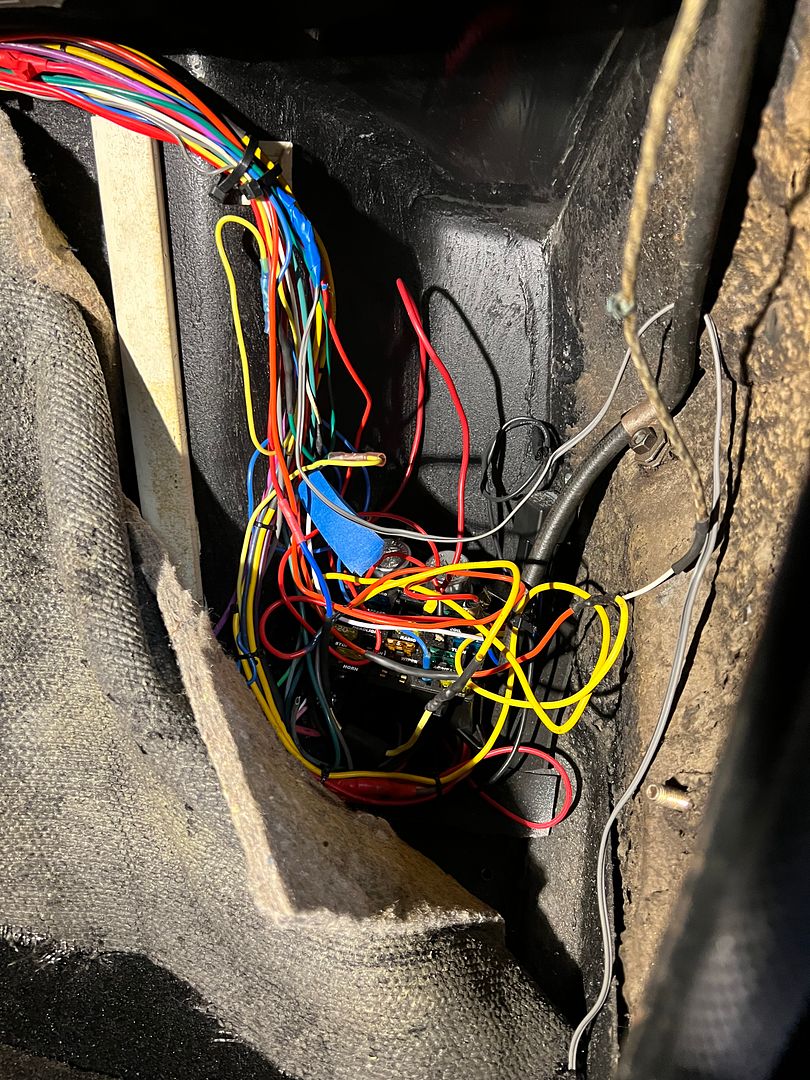 The battery was located behind the passenger seat, and here is the cable routing beneath the car... 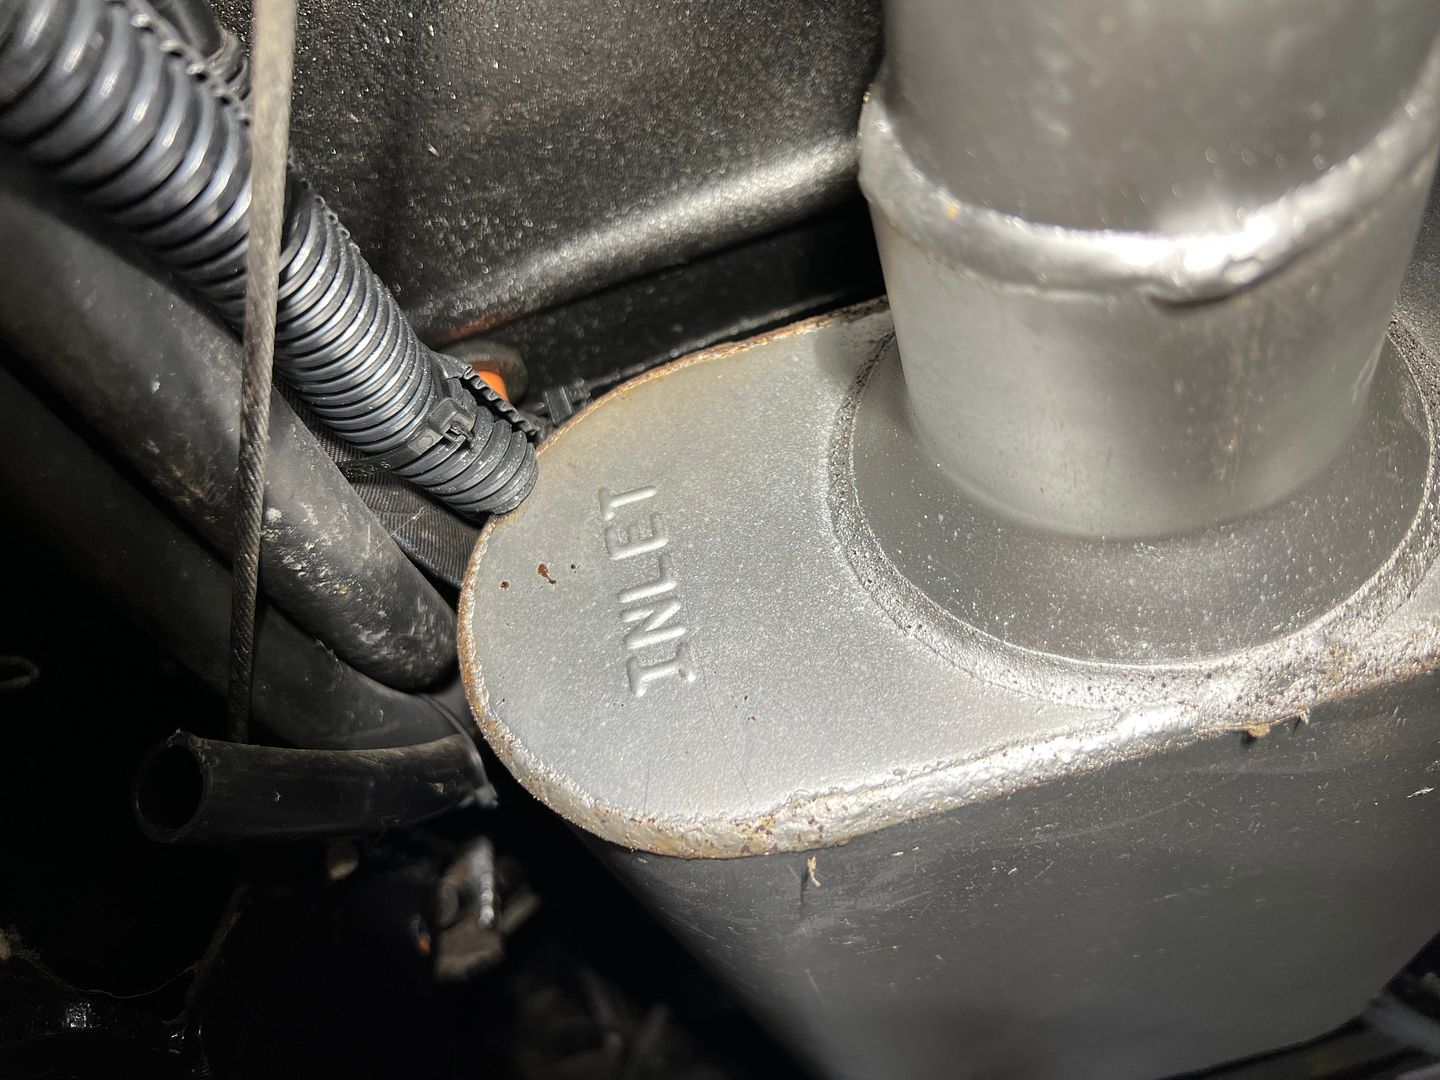 Yes, that's the positive battery cable against the muffler..... 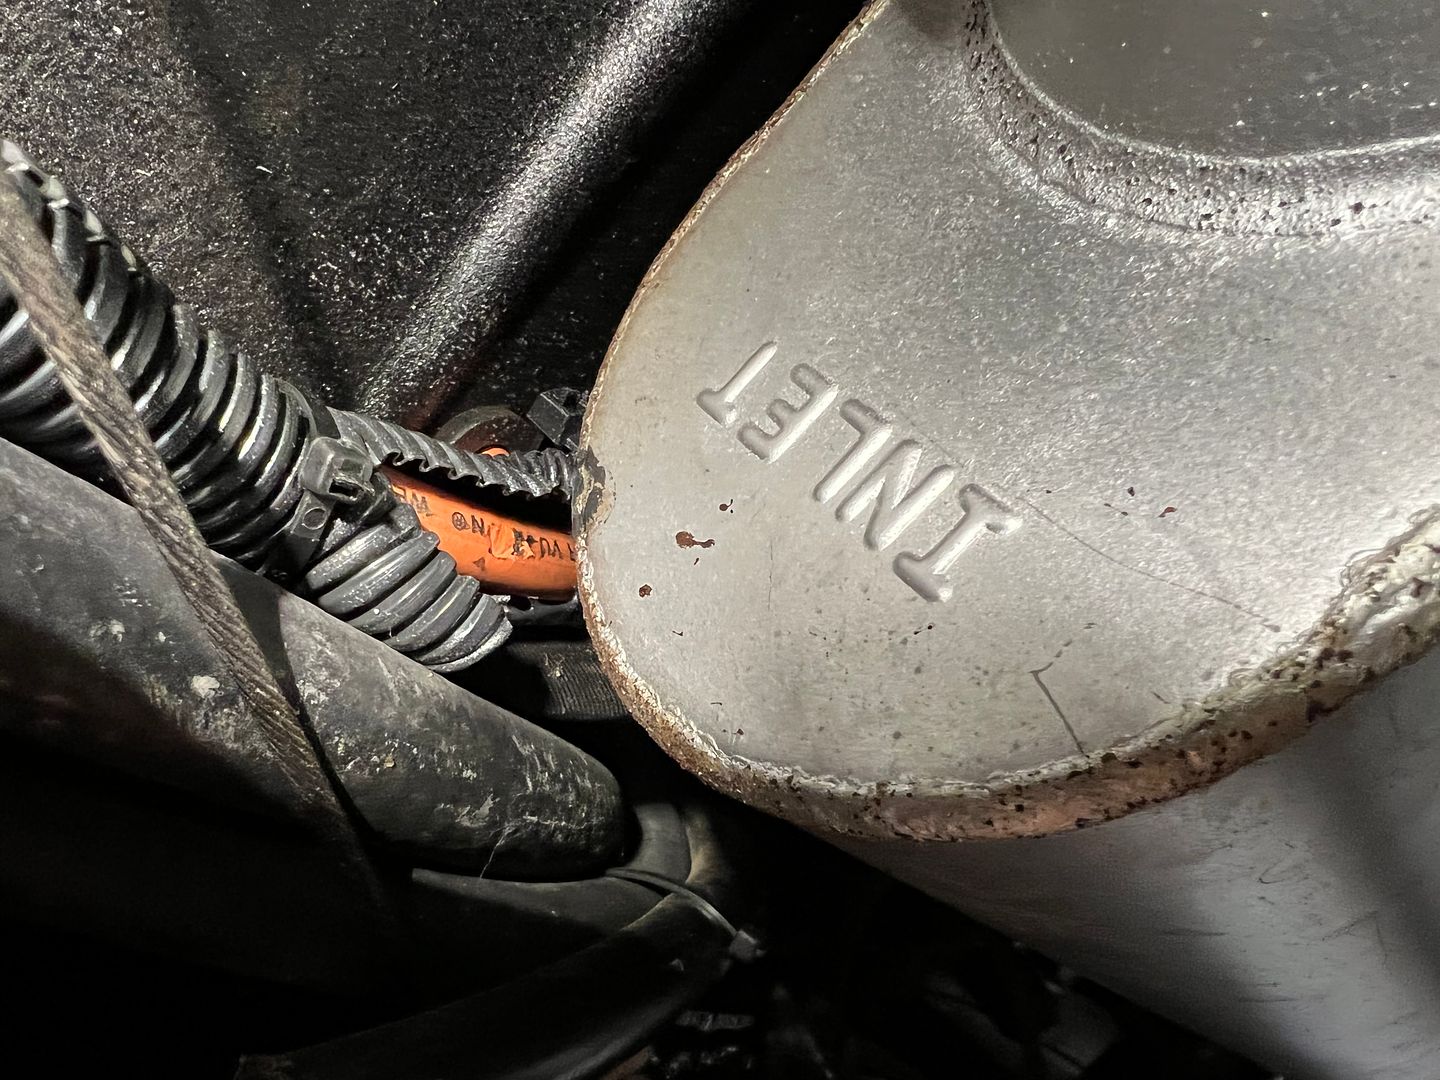 With all this we found our best option was to remove the battery and start cutting out ALL the wiring. 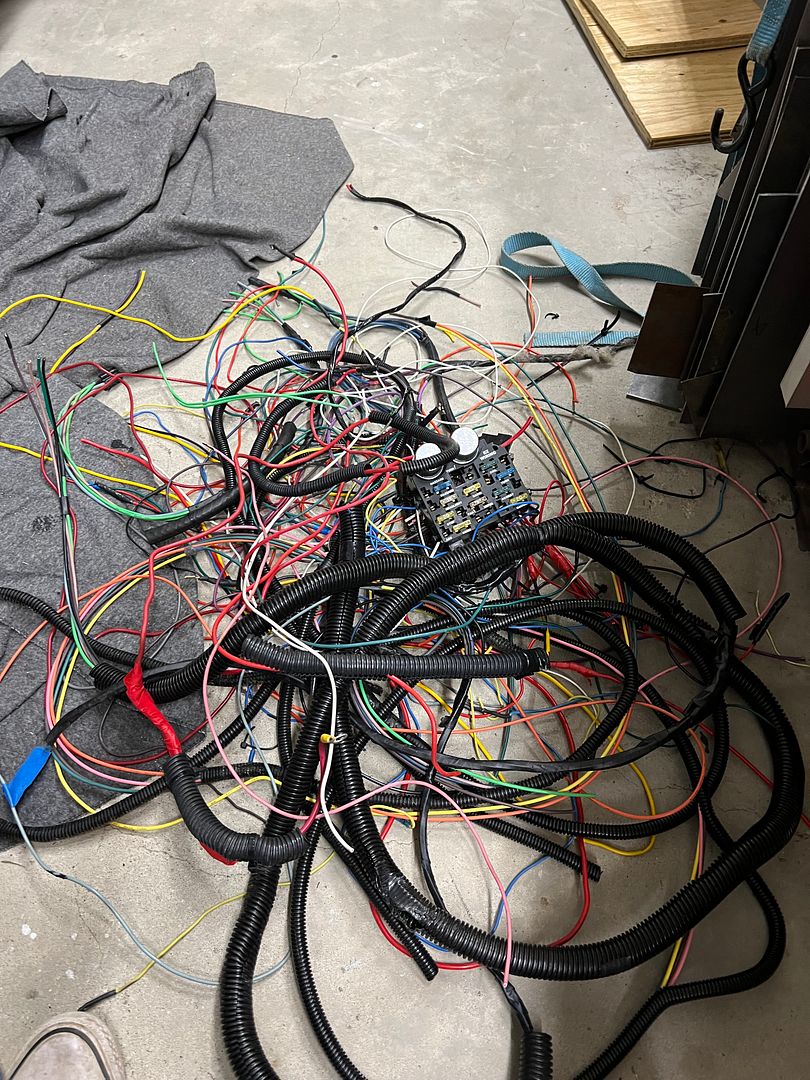 First order of business was to fabricate a mounting plate for the new fuse panel to get it out of the floor... 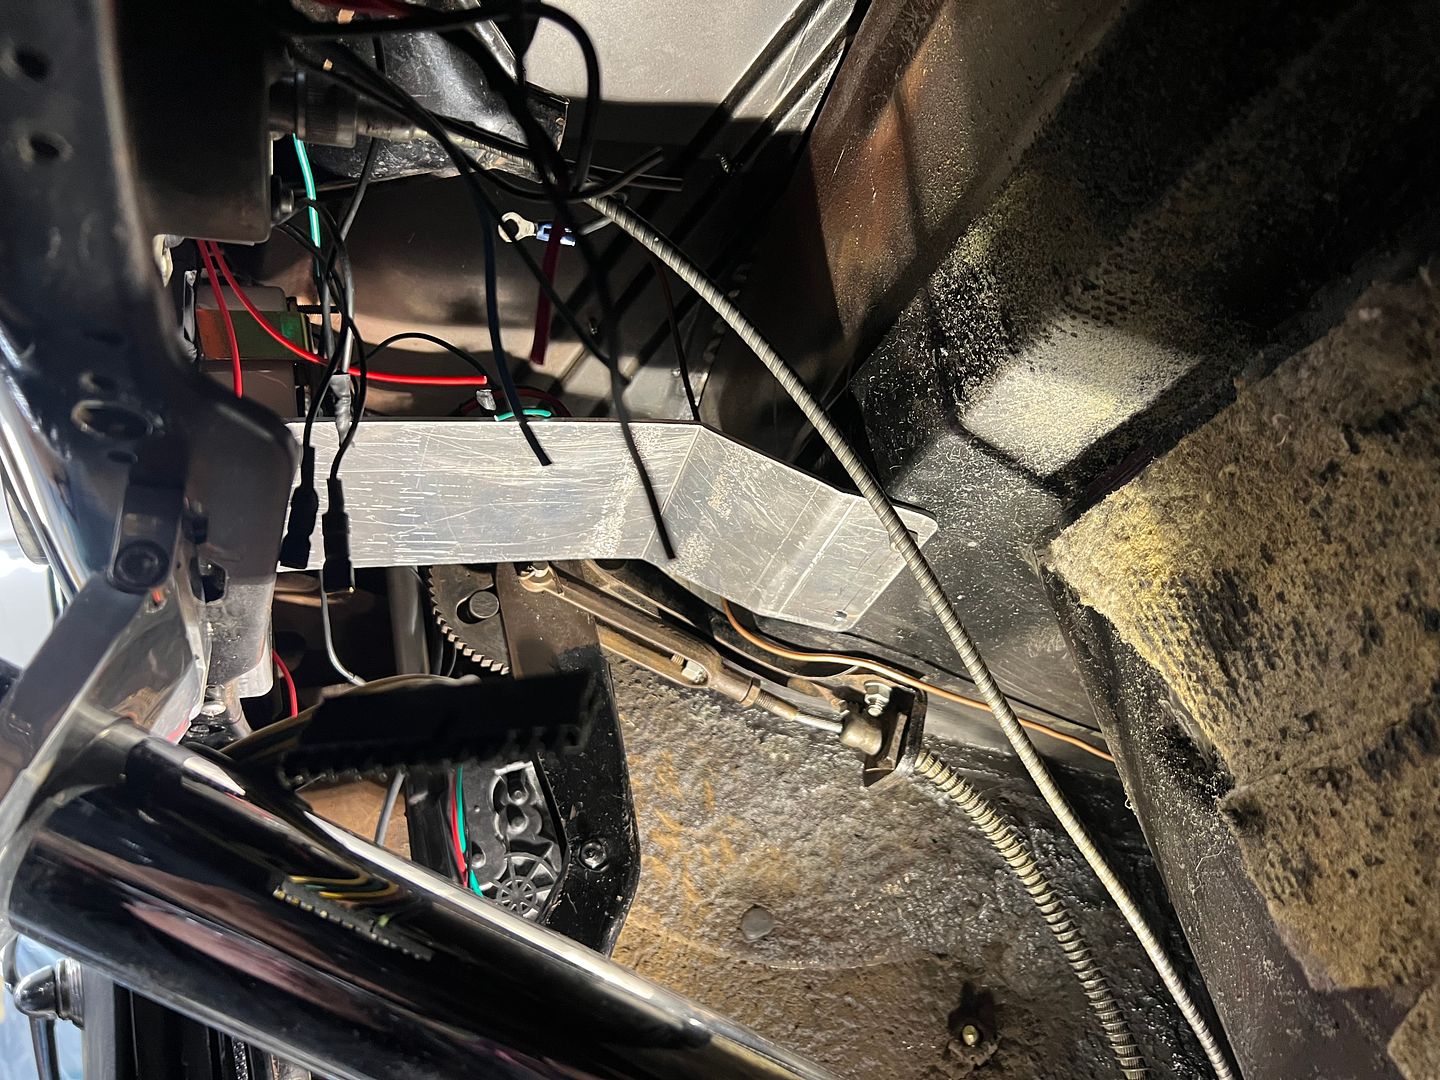 Having removed the most splices I have ever seen under a dash board, our goal was to have as few splices as possible, and make direct runs where we could. W crimps were used throughout, adding glue lined heat shrink in place of the previously favored liquid tape.. Tail light wiring was plenty long so new contact buttons eliminated the typical splicing of pigtails.. 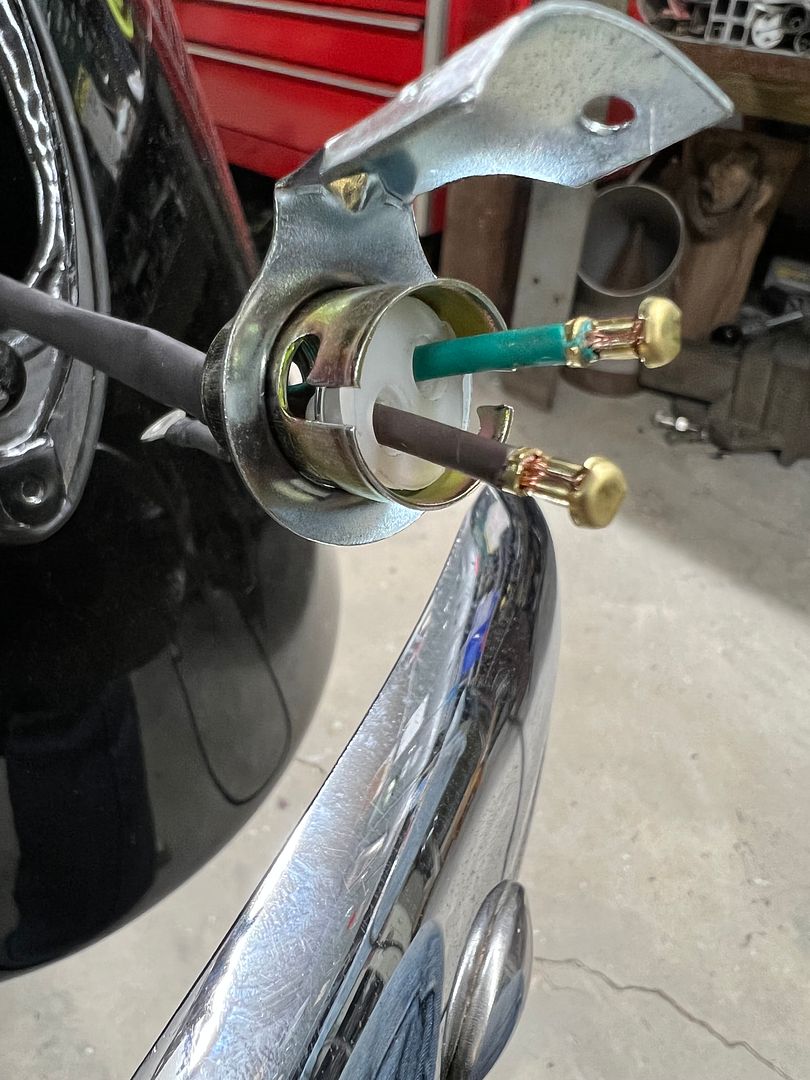 Tach and Speedometer connected... 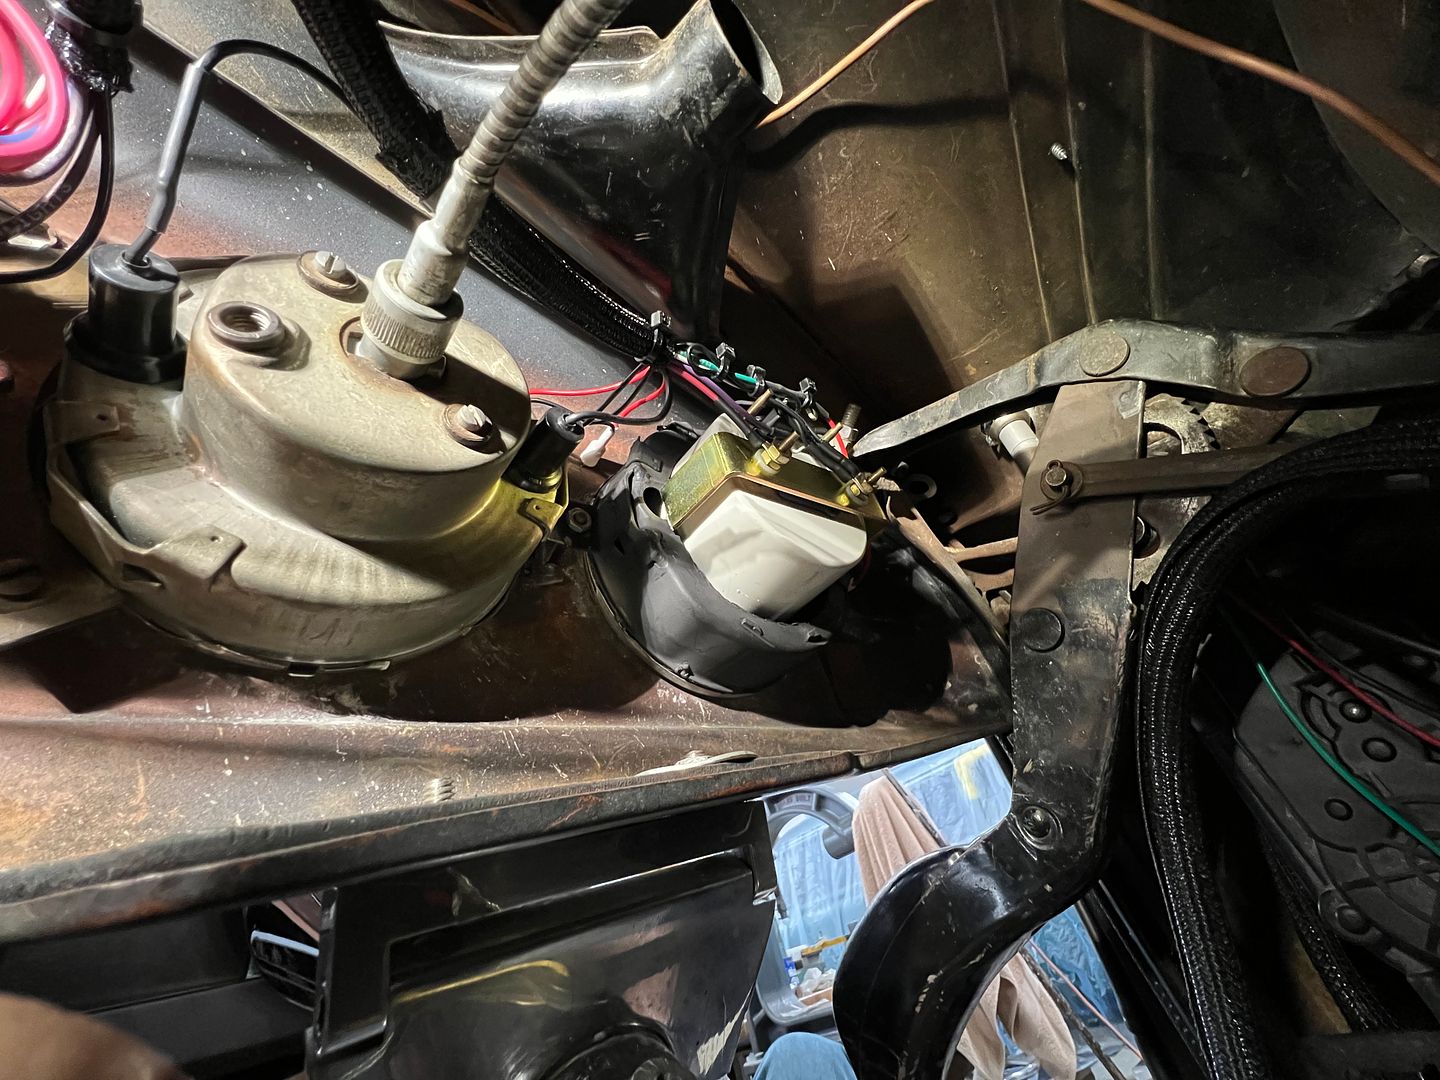 Headlight switch... 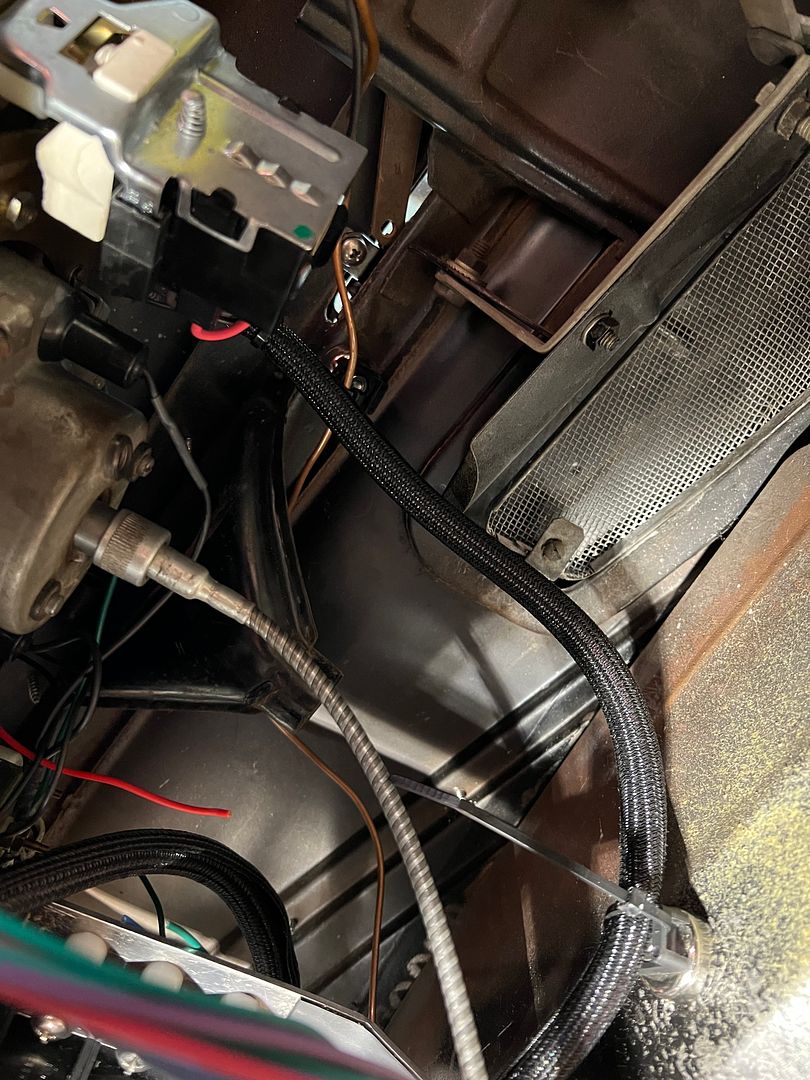 For routing purposes, and to keep from drilling the firewall, we made some cable management using rare earth magnets and cable saddles.. 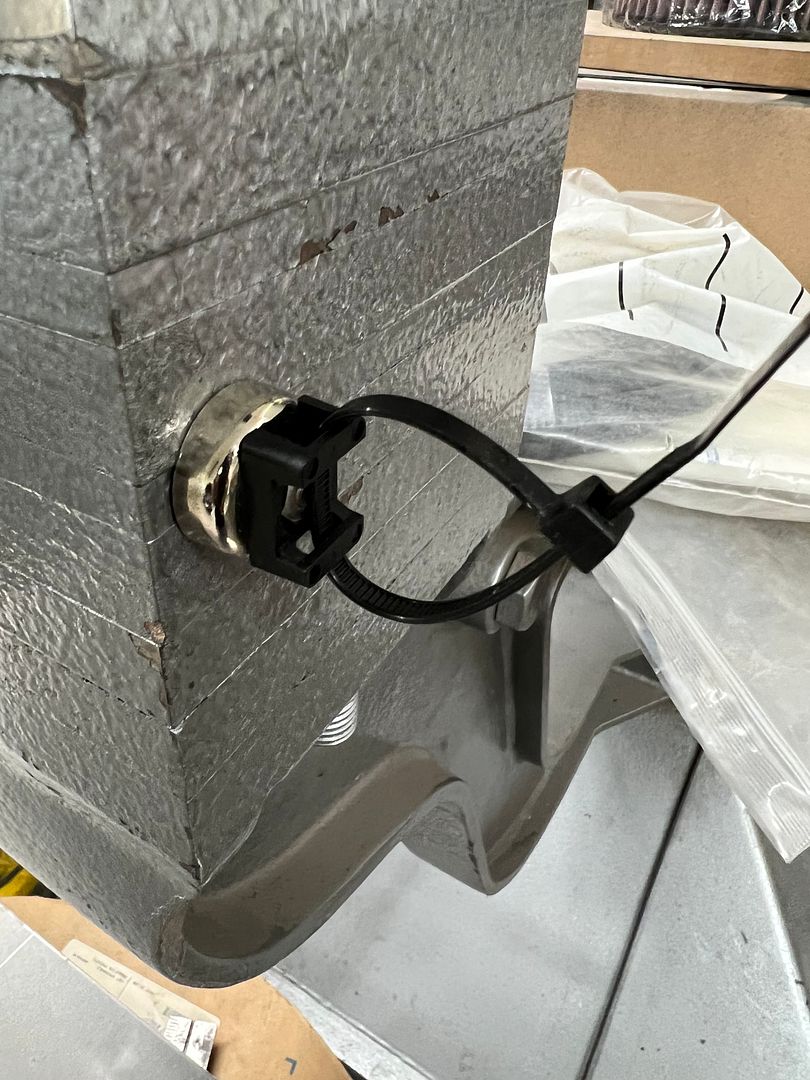 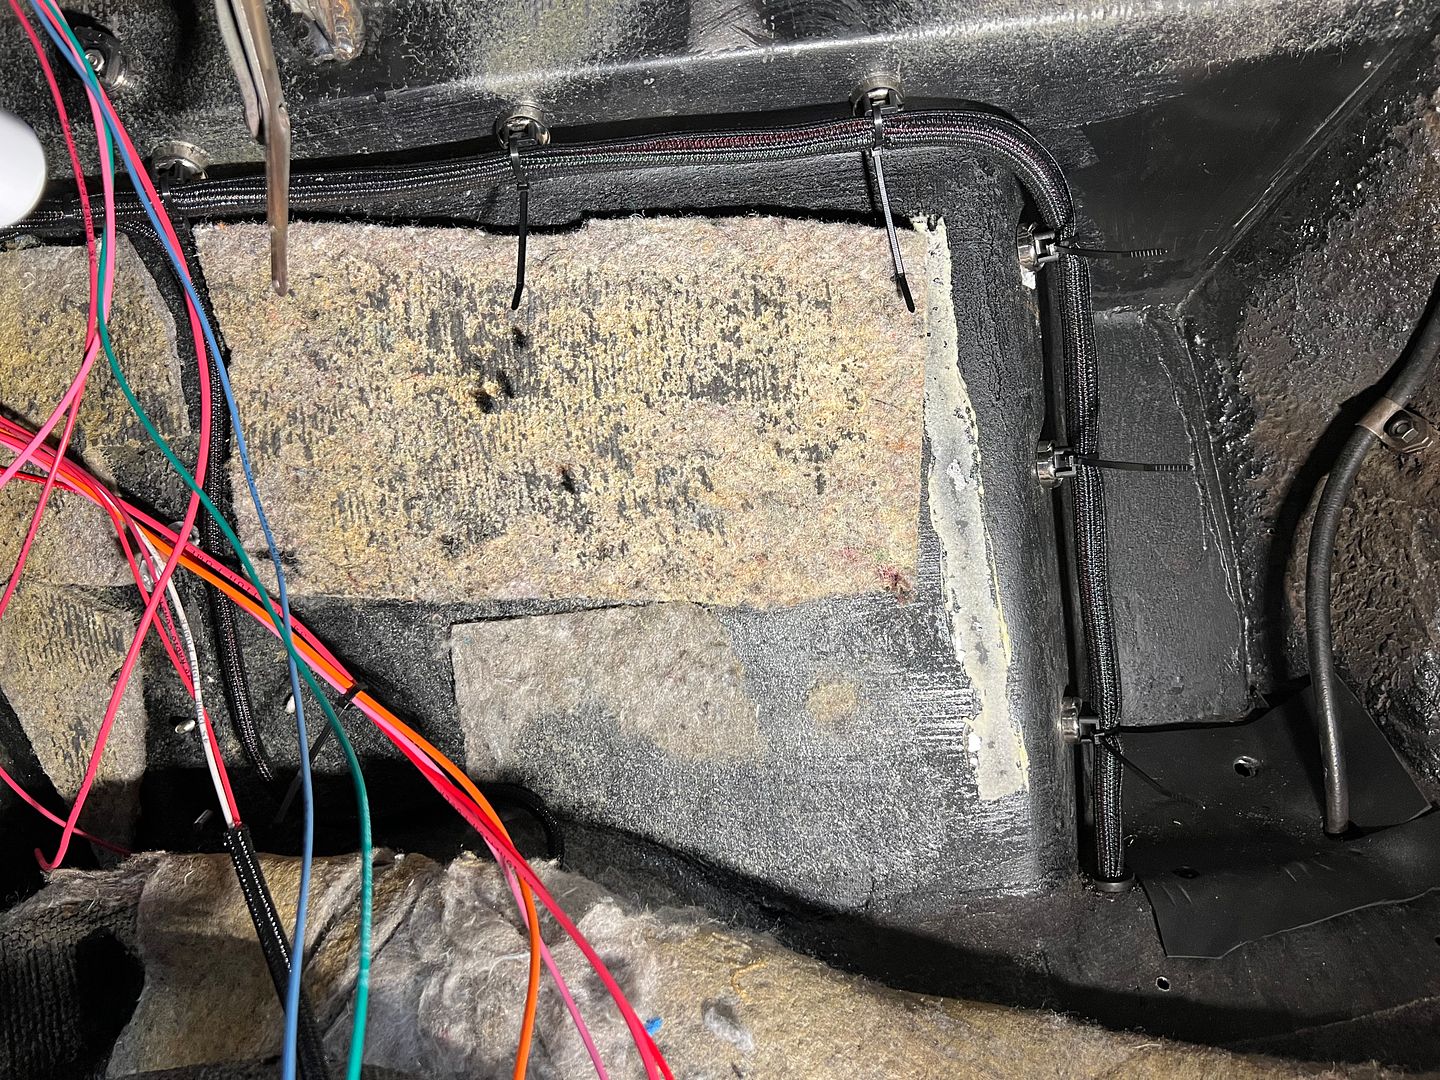 more to come......
__________________
Robert |
|
|

|
|
|
#1311 |
|
Registered User
Join Date: Dec 2009
Location: Arizona City, AZ
Posts: 747
|
Re: 55 Wagon Progress
Looking great! love the idea of wire management using magnets. I have had problems in supporting wire cradles with 3m tape so I think magnets might be the perfect idea. Out of curiosity what material did you use for the door panels. I was looking for something like that for my project.
__________________
----------------------------------------------------------- Erik My 69 suburban http://67-72chevytrucks.com/vboard/s...d.php?t=530626 1970 C10 step Project Jiminy http://67-72chevytrucks.com/vboard/s...d.php?t=682647 RUST!? Thats just mother natures way of telling all of us.....MINE!!!! |
|
|

|
|
|
#1312 |
|
Registered User
Join Date: Jan 2013
Location: Leonardtown, MD
Posts: 1,647
|
Re: 55 Wagon Progress
On the wagon we used an ABS ? plastic, the upholsterer usually does the press board but we've all seen how they look years later when they get damp. Keeping my fingers crossed with these..
__________________
Robert |
|
|

|
|
|
#1313 |
|
Registered User
Join Date: May 2010
Location: Lawrenceville, Ga
Posts: 2,648
|
Re: 55 Wagon Progress
That wiring was terrible, and dangerous, but that frame ground wire takes the cake. It puzzled me at first, but then it came to me. He has heard the term "ground loop" and must have thought it meant something like that. Glad you fixed that wiring before the car burned up. Also, that pulling tractor looks beautiful. I watch tractor pulling on TV and I will watch to see if I see it.
|
|
|

|
|
|
#1314 |
|
Registered User
Join Date: Jan 2013
Location: Leonardtown, MD
Posts: 1,647
|
Re: 55 Wagon Progress
Ace Chassis is the name of his company, he has tractors in about seven different countries.
__________________
Robert |
|
|

|
|
|
#1315 |
|
Registered User
Join Date: Jan 2013
Location: Leonardtown, MD
Posts: 1,647
|
Re: 55 Wagon Progress
Progress on the 39's wiring, let's show this with a before and after sequence..
This car has the battery mounted behind the passenger seat, and the orange cable shown is the positive cable. (ground cable hidden above muffler) Both cables exit directly above muffler with not quite enough room for a good bend radius, as shown by the melted insulation.  The other hoses shown are the heat and AC lines as that is also located behind the driver's seat. We relocated the battery cable entry points to in front of the muffler. The heat and AC lines were re-dressed and loop clamped to get them farther away from the muffler.. Rubber plugs were used to fill the old holes. 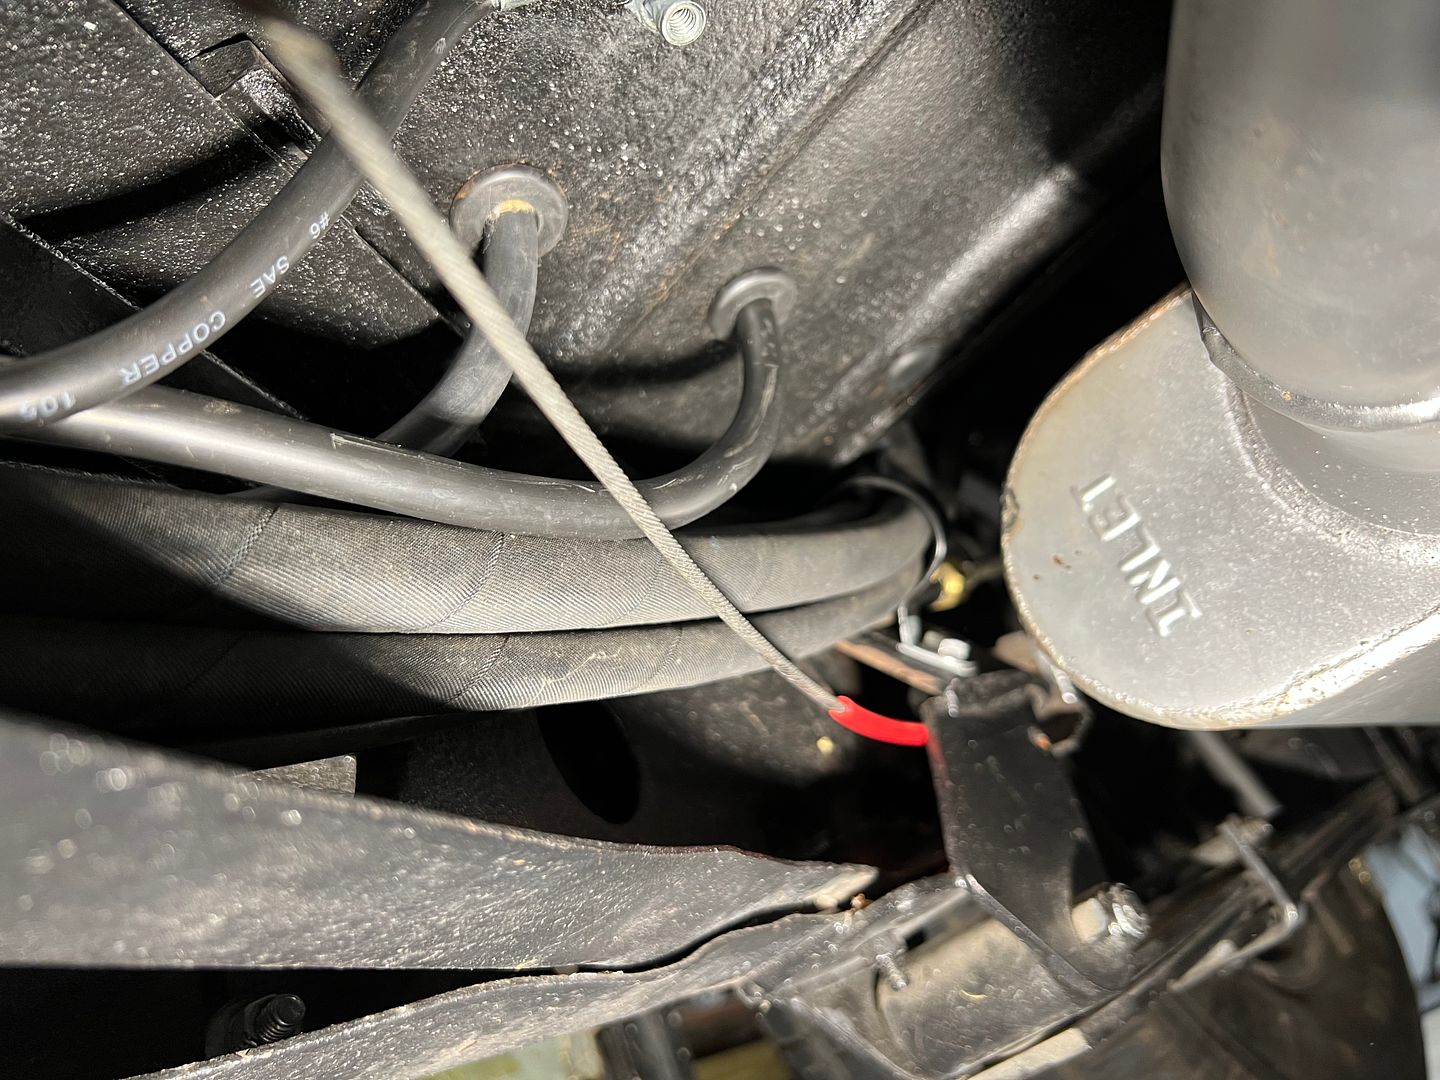 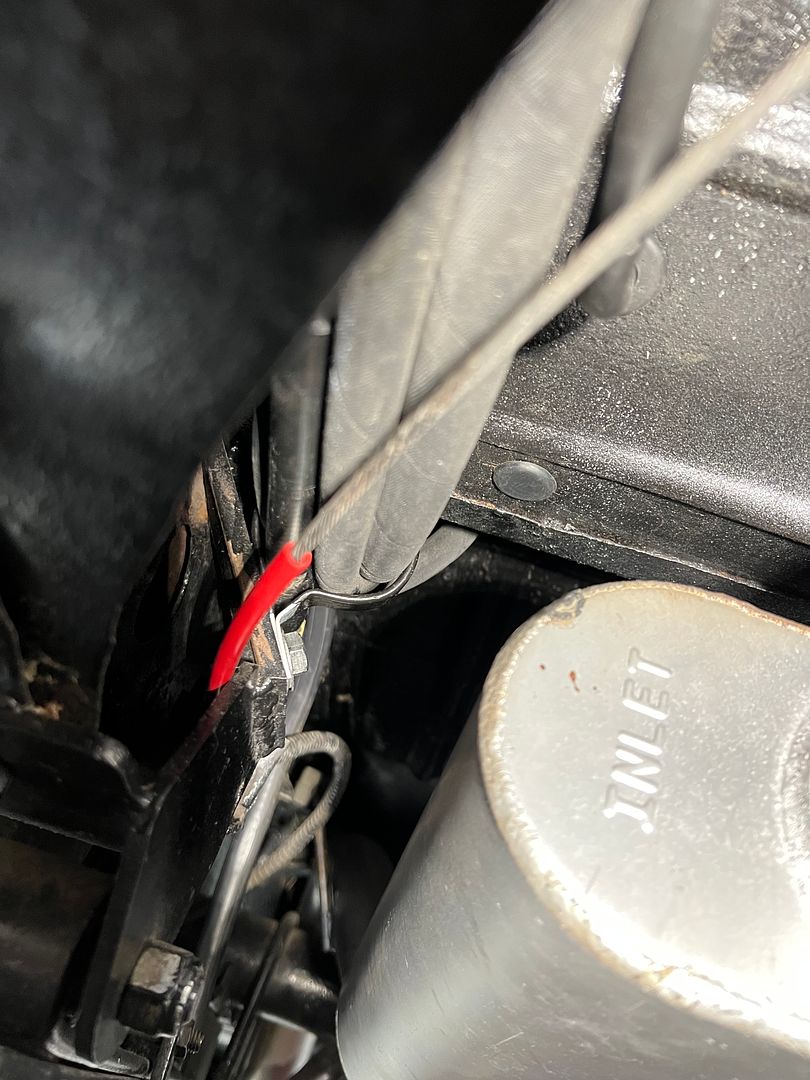 This is the previous location of the fuse box (it's in there someplace)  With the fuse box relocated under the dash, the floor area is cleared up with less chance of stepping on wires. The radio and antenna cabling will be routed into the glove box, the radio location. 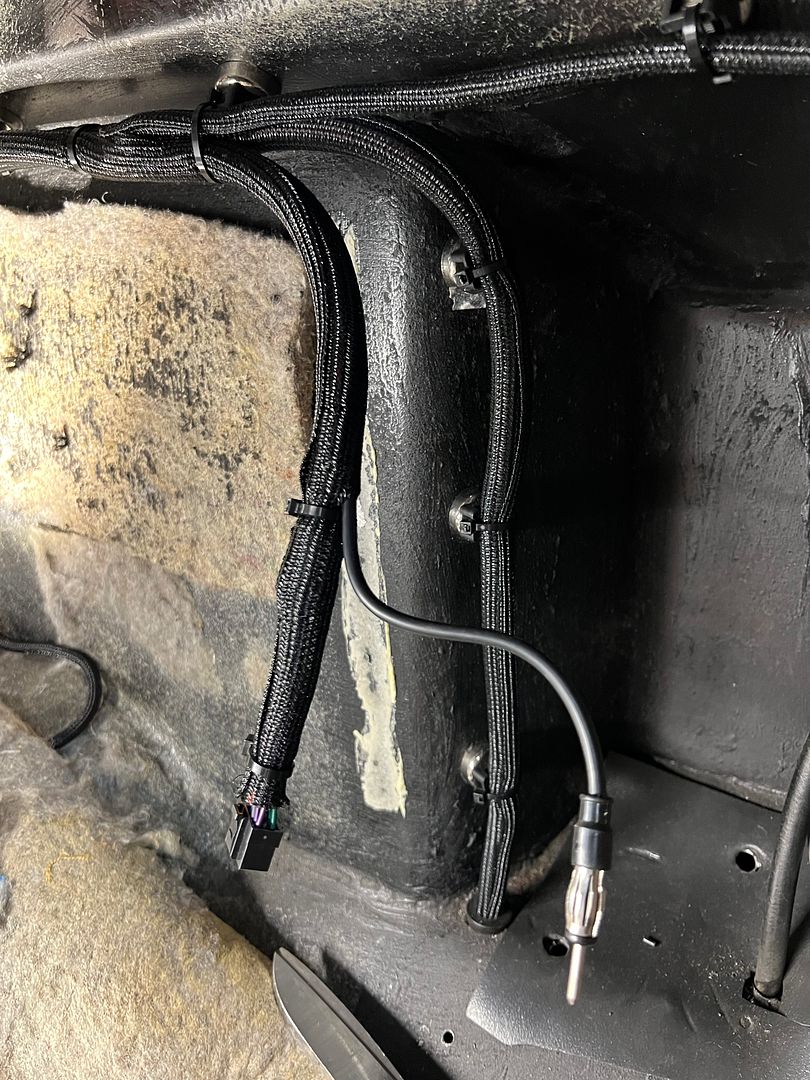 Previous underdash: 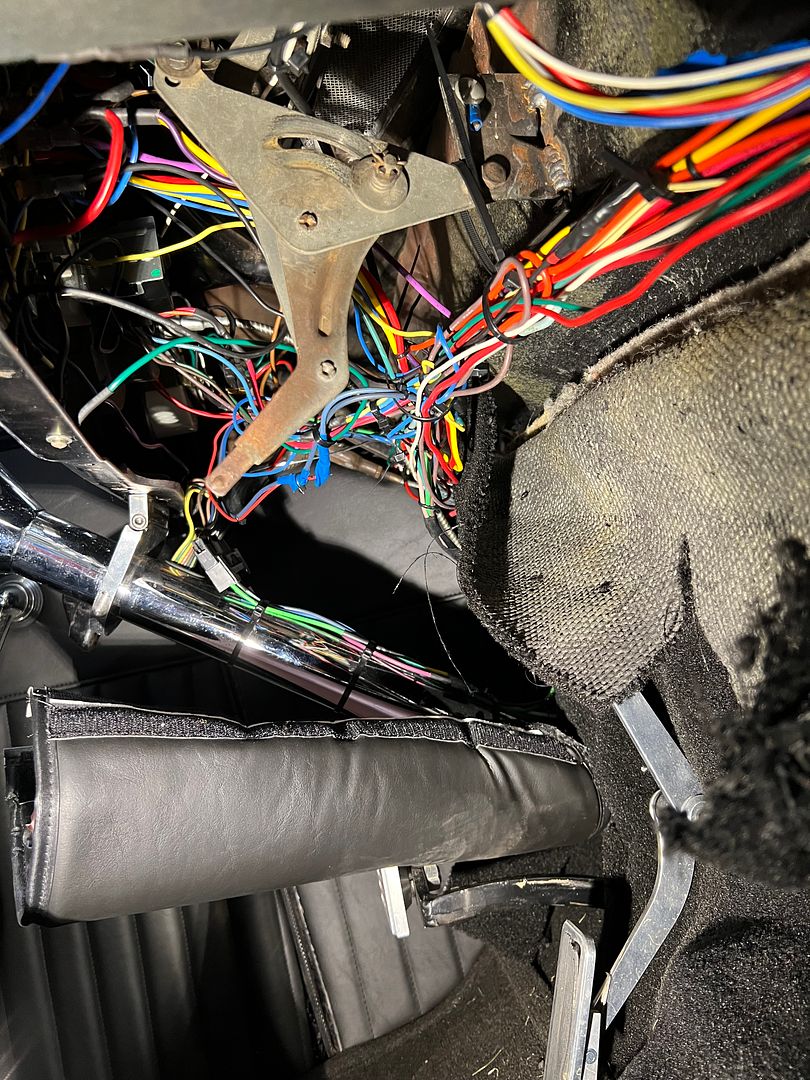 Fabricated plate for mounting fuse box up under the dash..  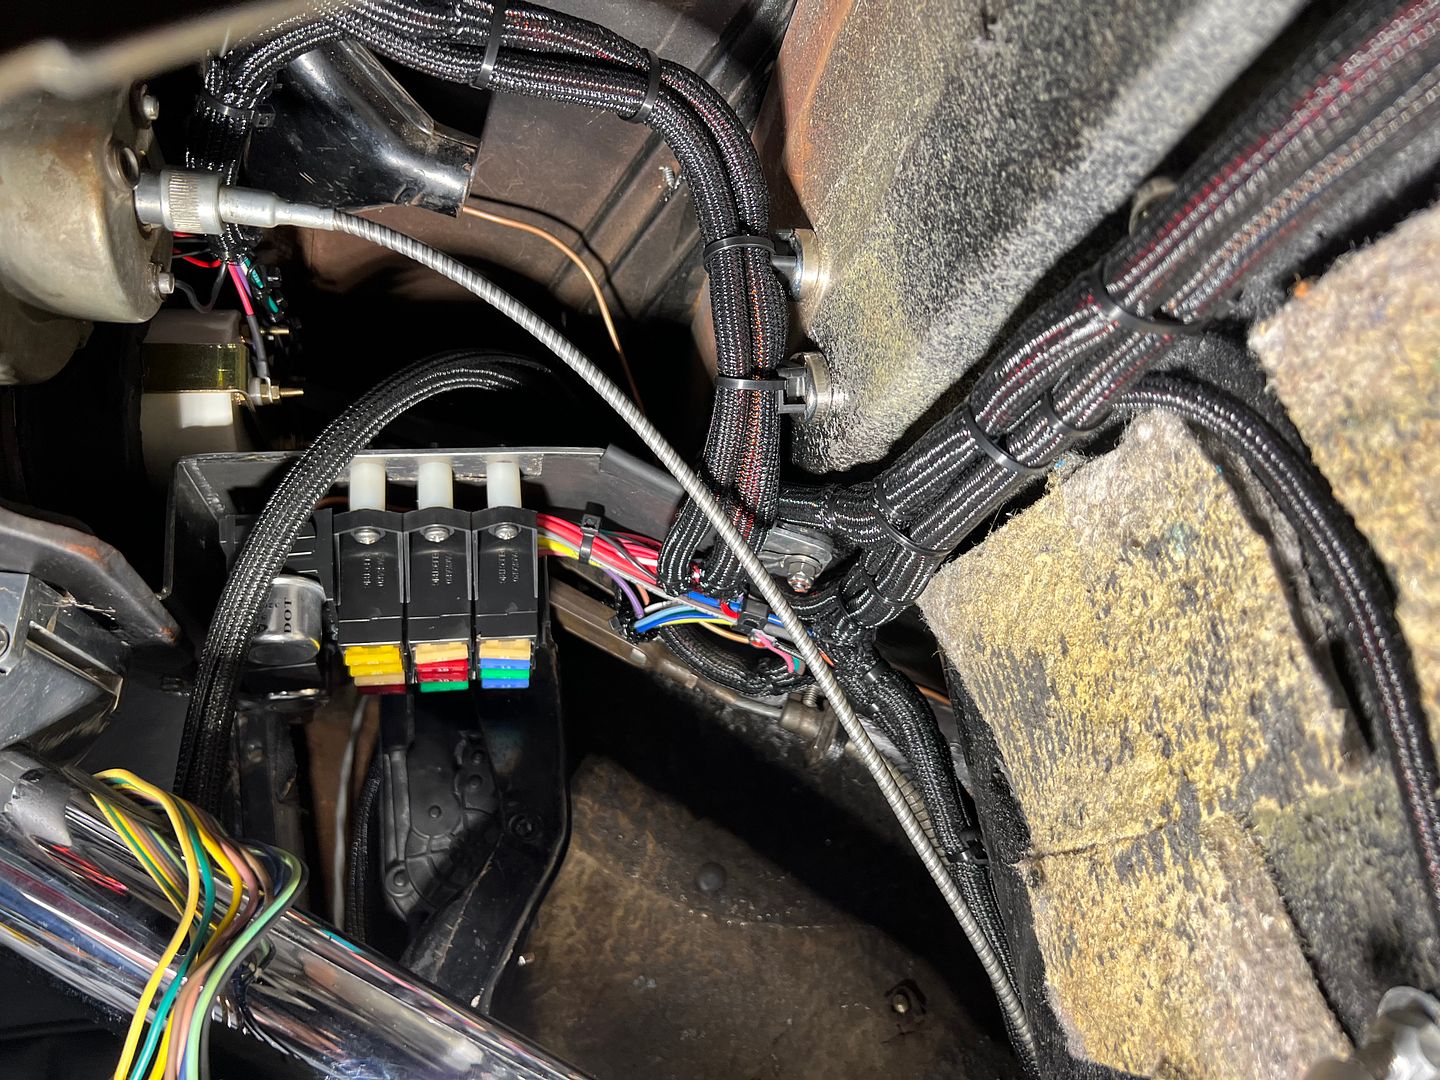 Steering knuckle sleeve weld... 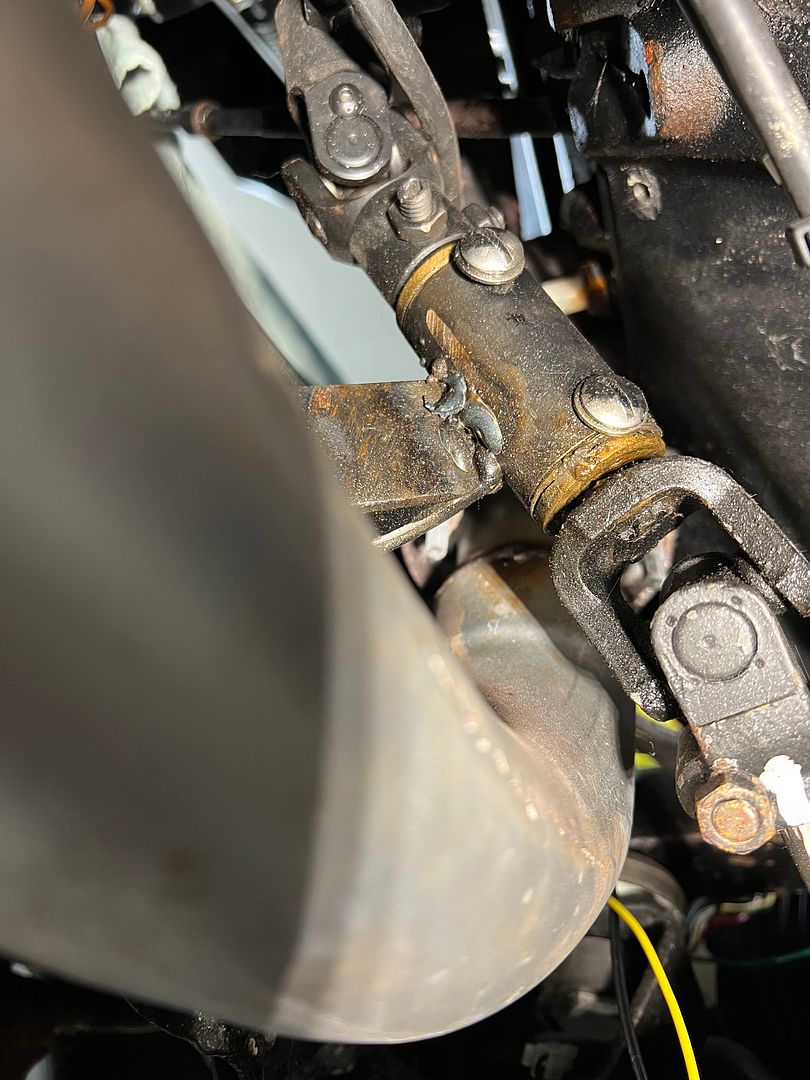 Despite grinding out the mud dauber's nest and wiping multiple times with acetone, we still got a pin hole in the weld. To limit damage (shrinking) from excessive heat we left it with the pin hole. Still much better than what was there prior. 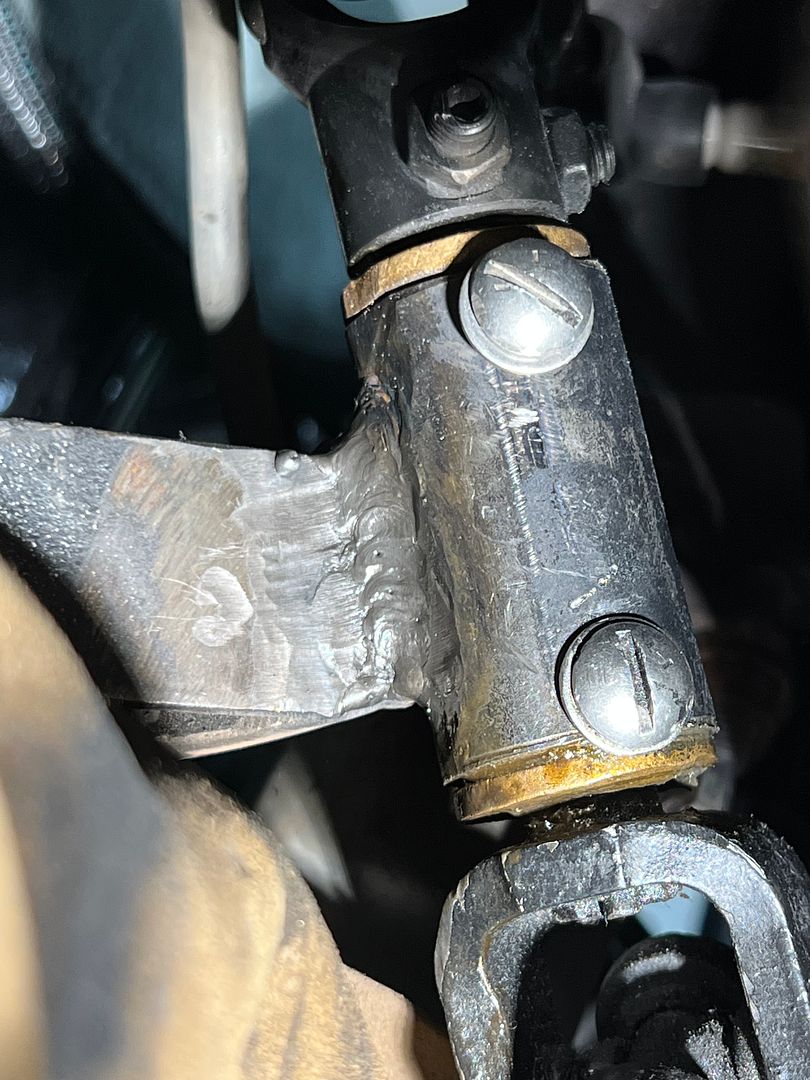 The links for the front sway bar as well as the radius arms had little left for bushings. The local auto parts store was not much help for replacement parts, so some delrin round stock was used to fabricate bushings. 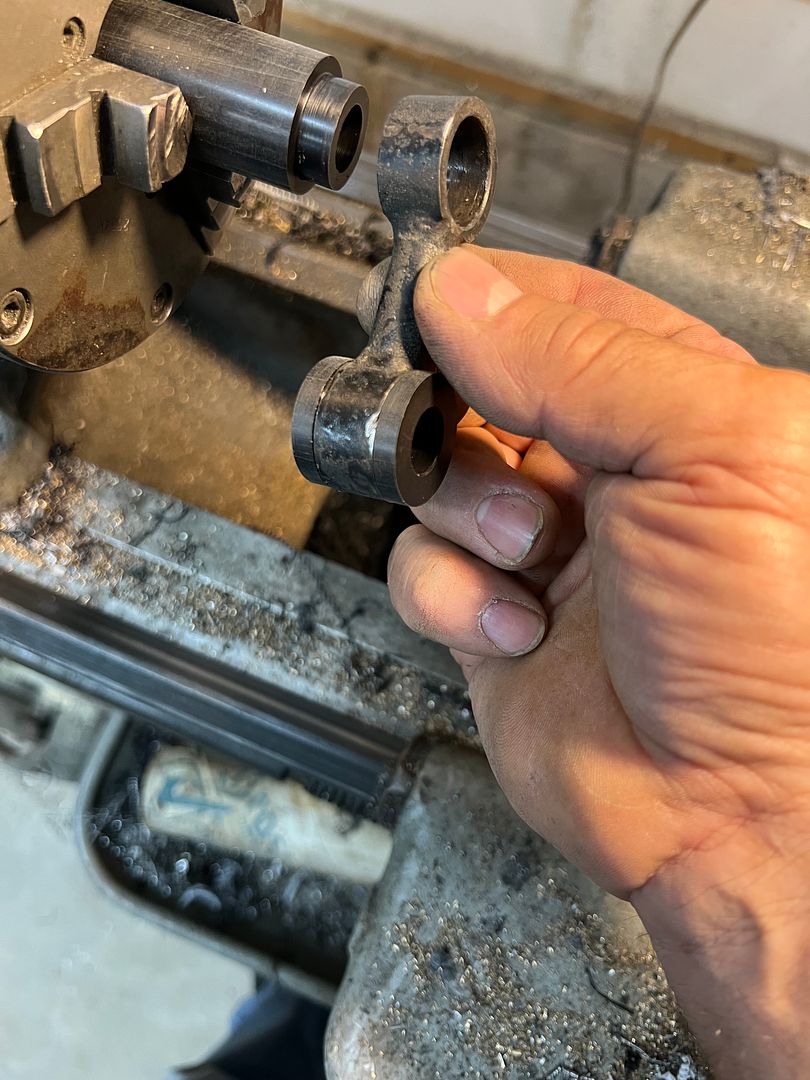 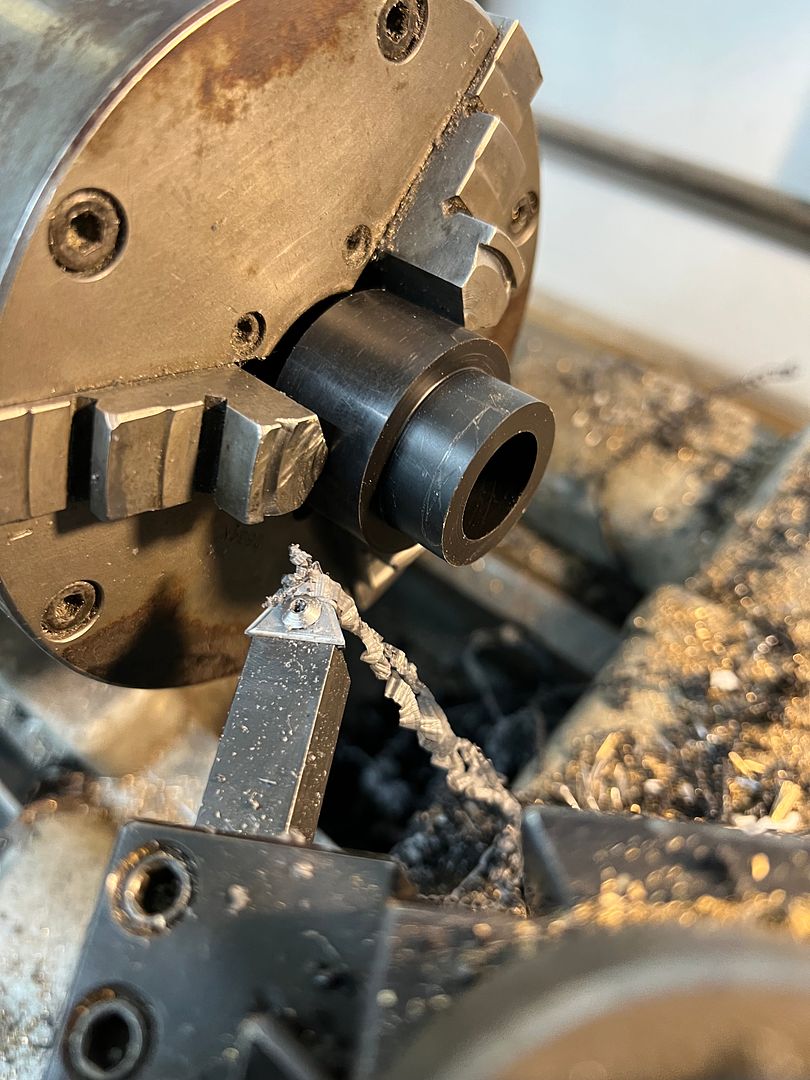 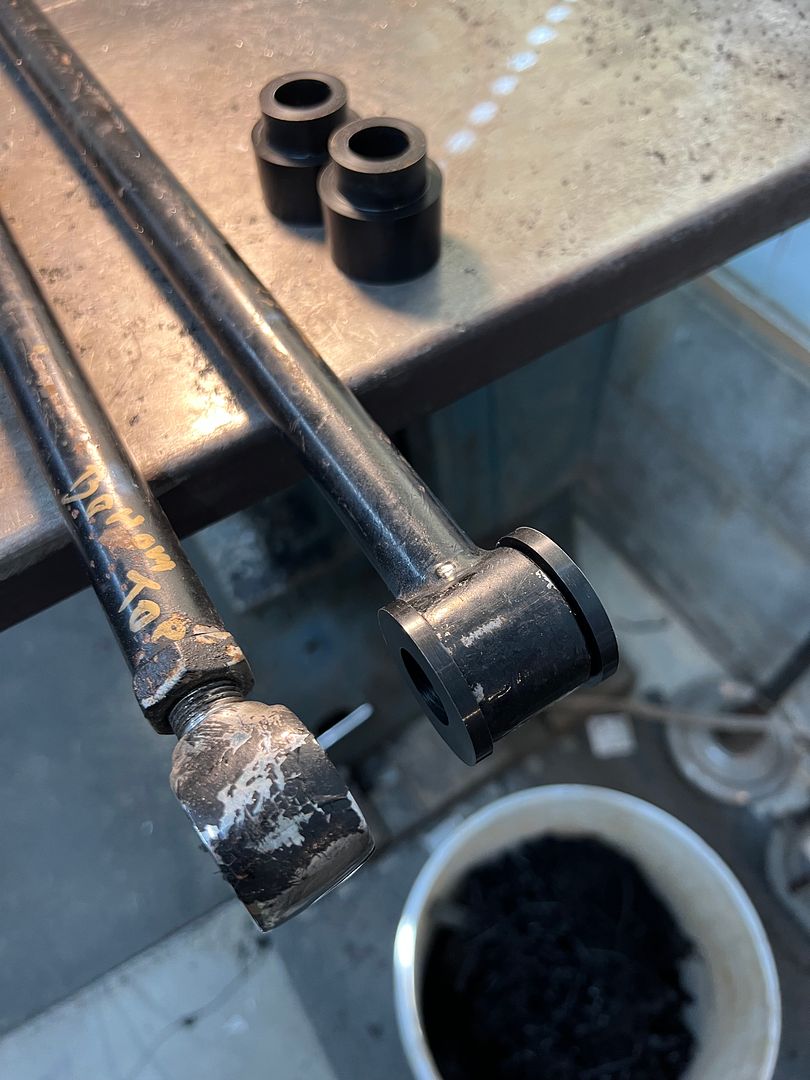 The tag light insulator was hard plastic and brittle, so our attempts to install a longer wire for the light resulted in a broken insulator. More delrin to the rescue.. 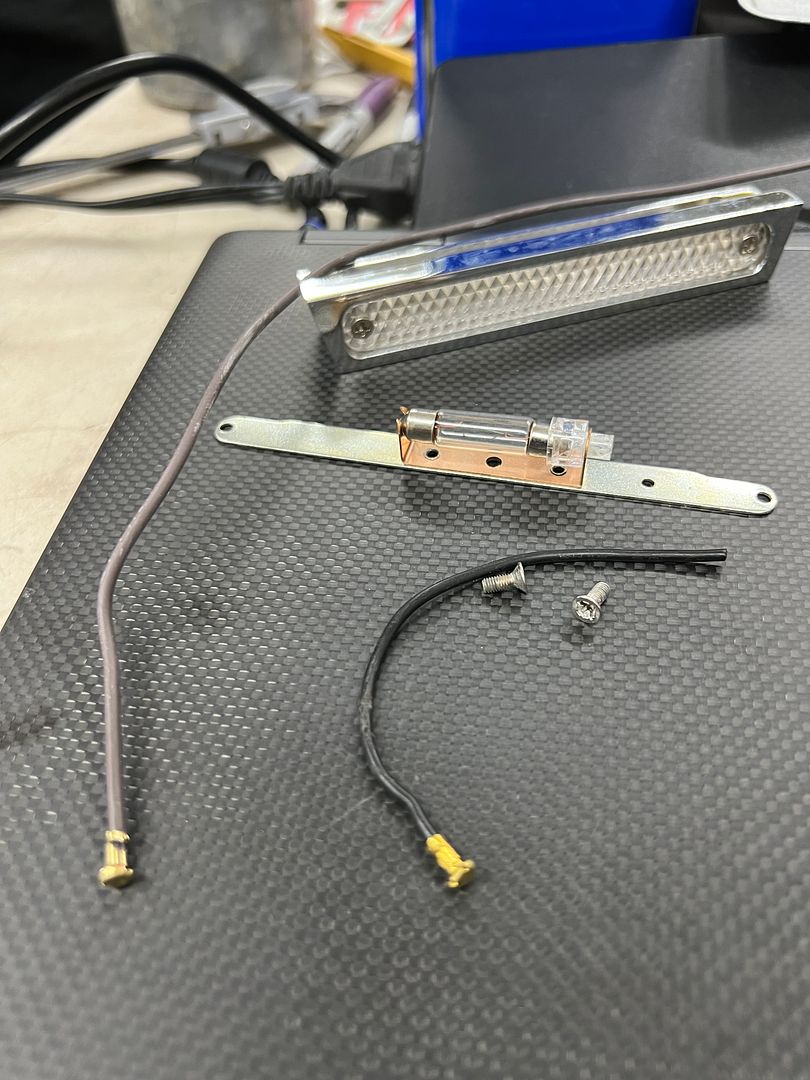 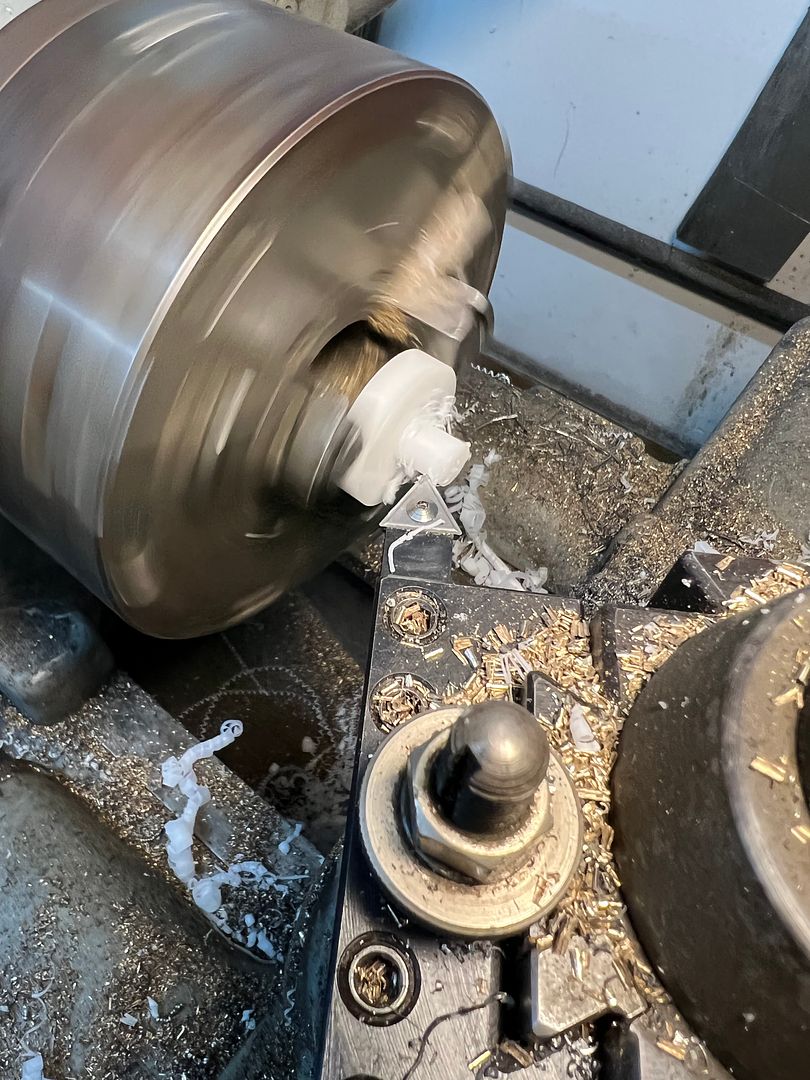 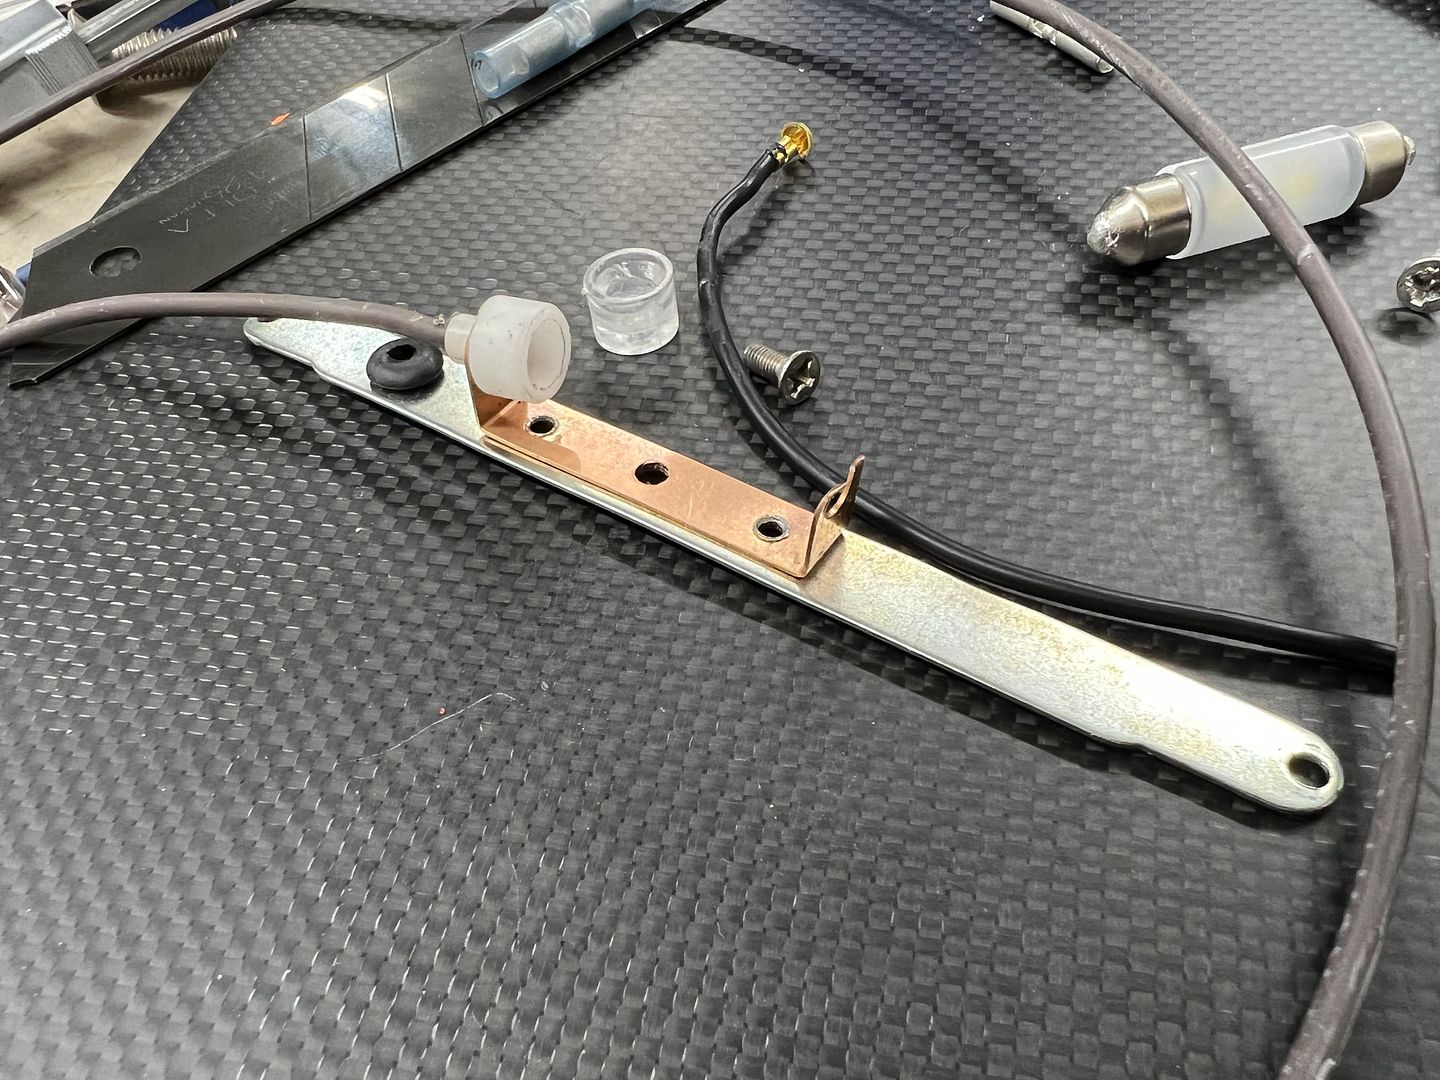 Left to do is the front end/engine compartment and re-assembly.
__________________
Robert |
|
|

|
|
|
#1316 |
|
Registered User
Join Date: Jan 2013
Location: Leonardtown, MD
Posts: 1,647
|
Re: 55 Wagon Progress
A recent find of some metalshaping tools, finally found a stake plate and stake anvils... Along with some dolly's I didn't have..
https://youtu.be/p2Hr-YZL448 The wiring harness installed, here's our first test start of the 39.... https://youtu.be/MfxF8fu39s4 Lighting tests: https://youtu.be/rF4uwzYycLs https://www.youtube.com/shorts/bBfAGzQnuL8 With that, the 39 has left the building... Here's the test drive taking it home. Also found out the easy way of opening the ash tray... https://youtu.be/QkSSQfQtnmk
__________________
Robert |
|
|

|
|
|
#1317 |
|
Post Whore
 Join Date: Feb 2016
Location: Portland Oregon
Posts: 11,300
|
Re: 55 Wagon Progress
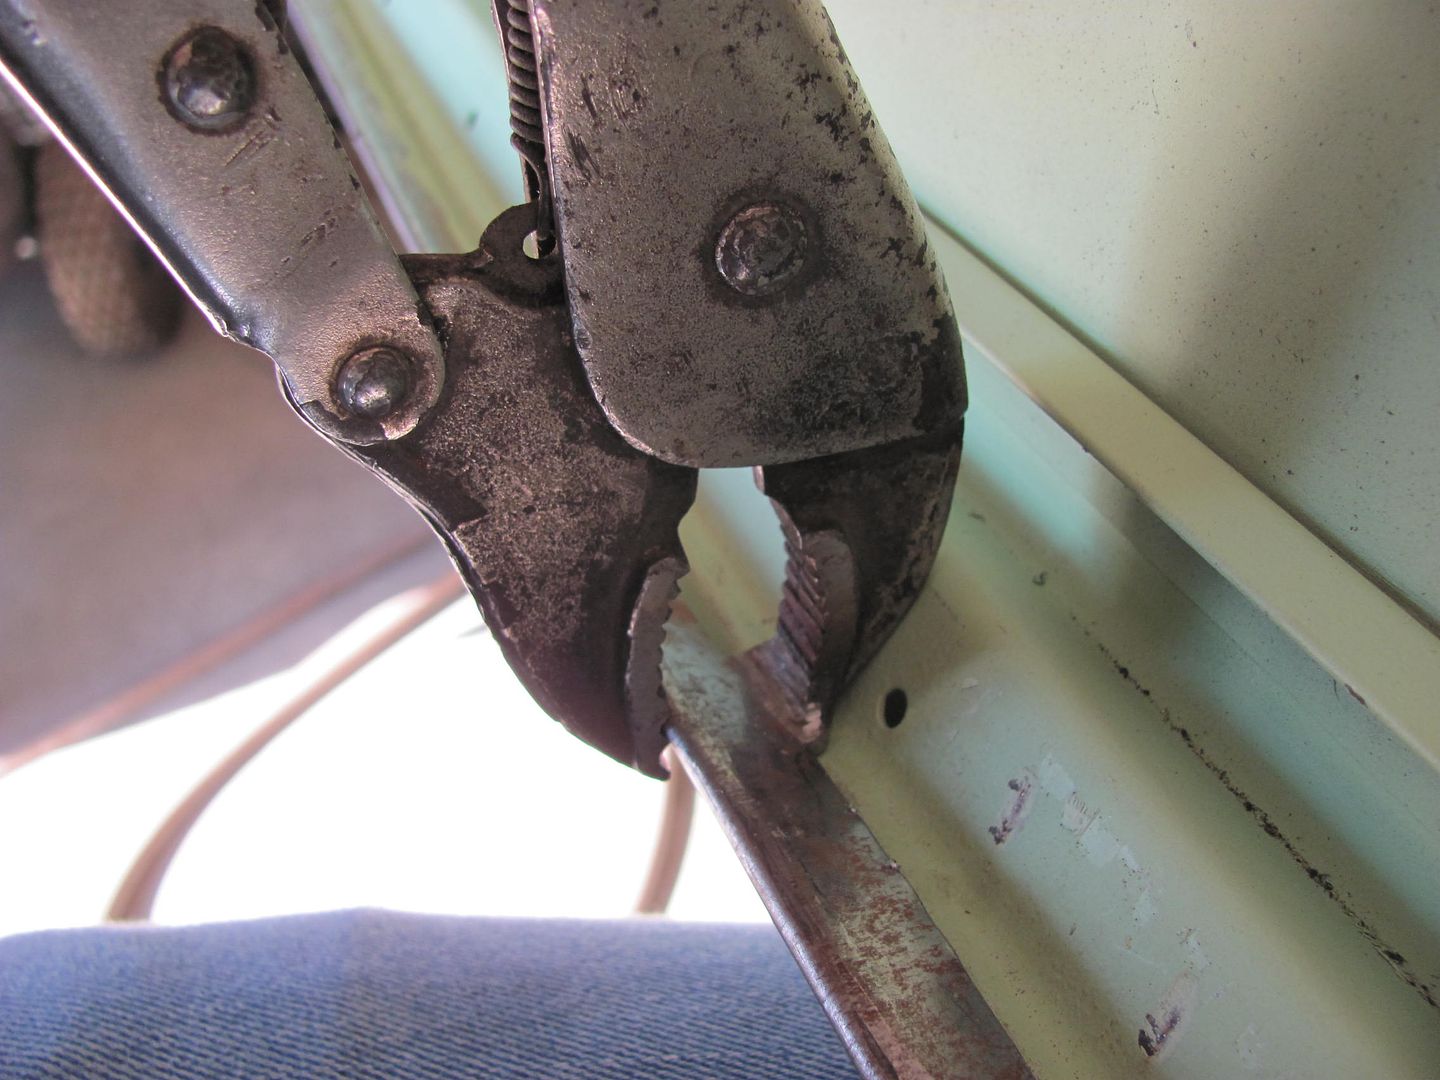
If you have a free minute or three. I noticed your door skin removal tool and decided I need make one.
My question is if you were building another one would you change anything? Wider/narrower blade? Chisel blade on the lower jaw instead? Or is this one the Acme of evolution? Thank you in advance.
__________________
Thanks to Bob and Jeanie and everyone else at Superior Performance for all their great help.  RIP Bob Parks. 1967 Burban (the WMB),1988 S10 Blazer (the Stink10 II),1969 GTO (the Goat), 1970 Javelin, 1952 F2 Ford OHC six 4X4, 29 Model A, 72 Firebird (the DBP Bird). 85 Alfa Romeo If it breaks I didn't want it in the first place The WMB repair thread http://67-72chevytrucks.com/vboard/s...d.php?t=698377 |
|
|

|
|
|
#1318 | |
|
Registered User
Join Date: Jan 2013
Location: Leonardtown, MD
Posts: 1,647
|
Re: 55 Wagon Progress
Quote:
__________________
Robert Last edited by MP&C; 11-27-2022 at 11:42 AM. |
|
|
|

|
|
|
#1319 | |
|
Registered User
Join Date: Jan 2013
Location: Leonardtown, MD
Posts: 1,647
|
Re: 55 Wagon Progress
Quote:
__________________
Robert |
|
|
|

|
|
|
#1320 |
|
Registered User
Join Date: Jan 2013
Location: Leonardtown, MD
Posts: 1,647
|
Re: 55 Wagon Progress
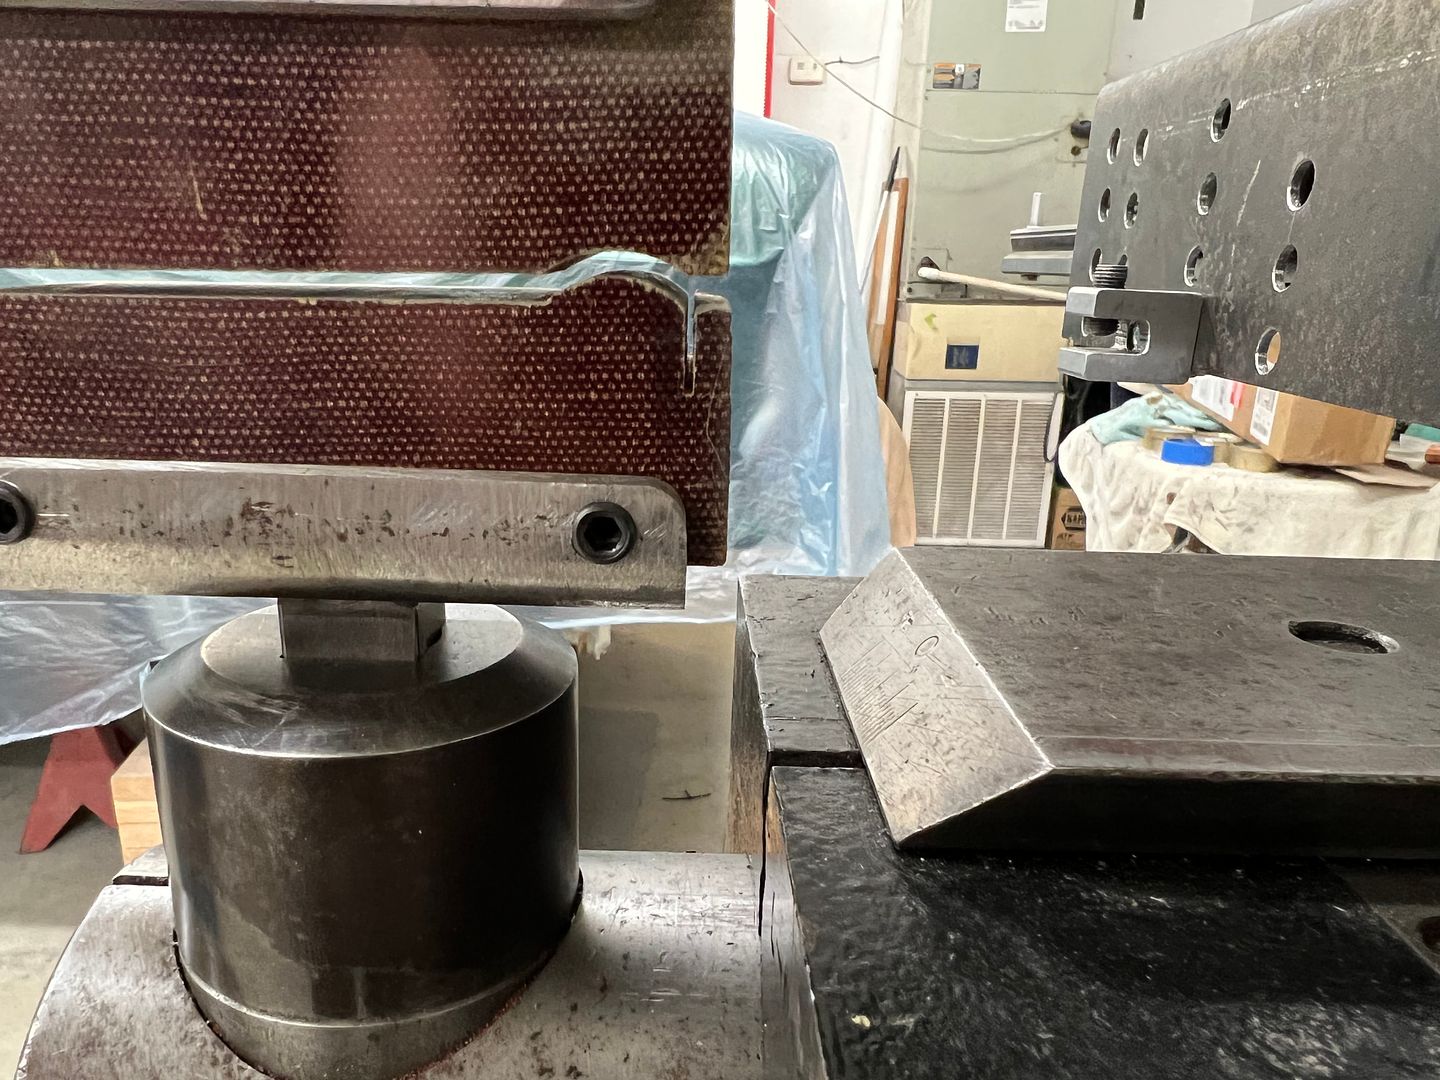
We've all seen the rusted out floor pans in old cars with a sign screwed or pop riveted in place to keep your feet from falling through. As a first for me, now I've repaired one of those signs. We needed to make some dies for the Lennox to produce the "picture frame" border...
 https://www.youtube.com/watch?v=4jHXHTfZsG0 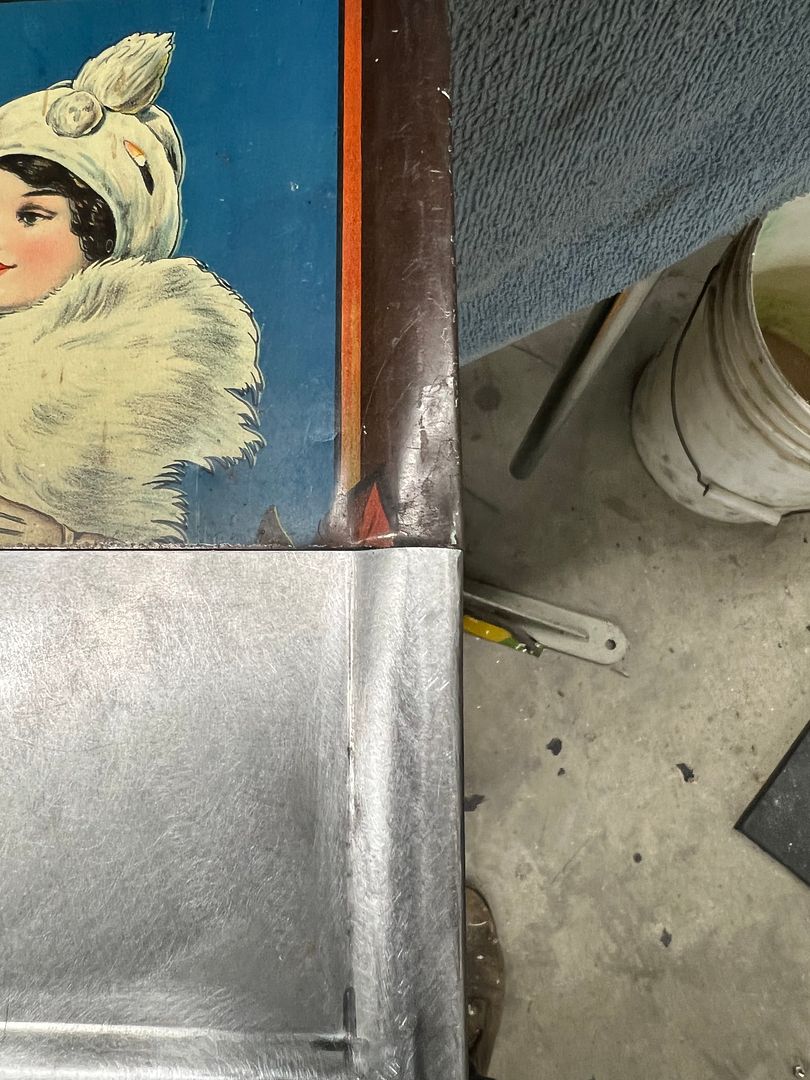 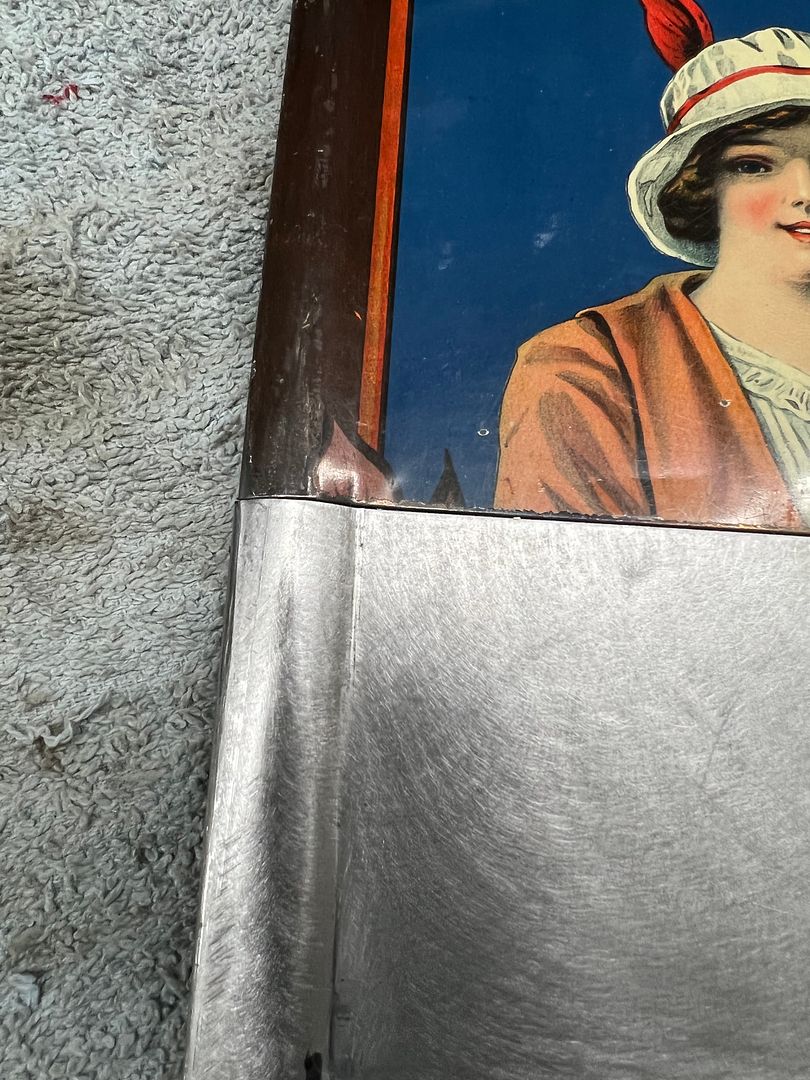 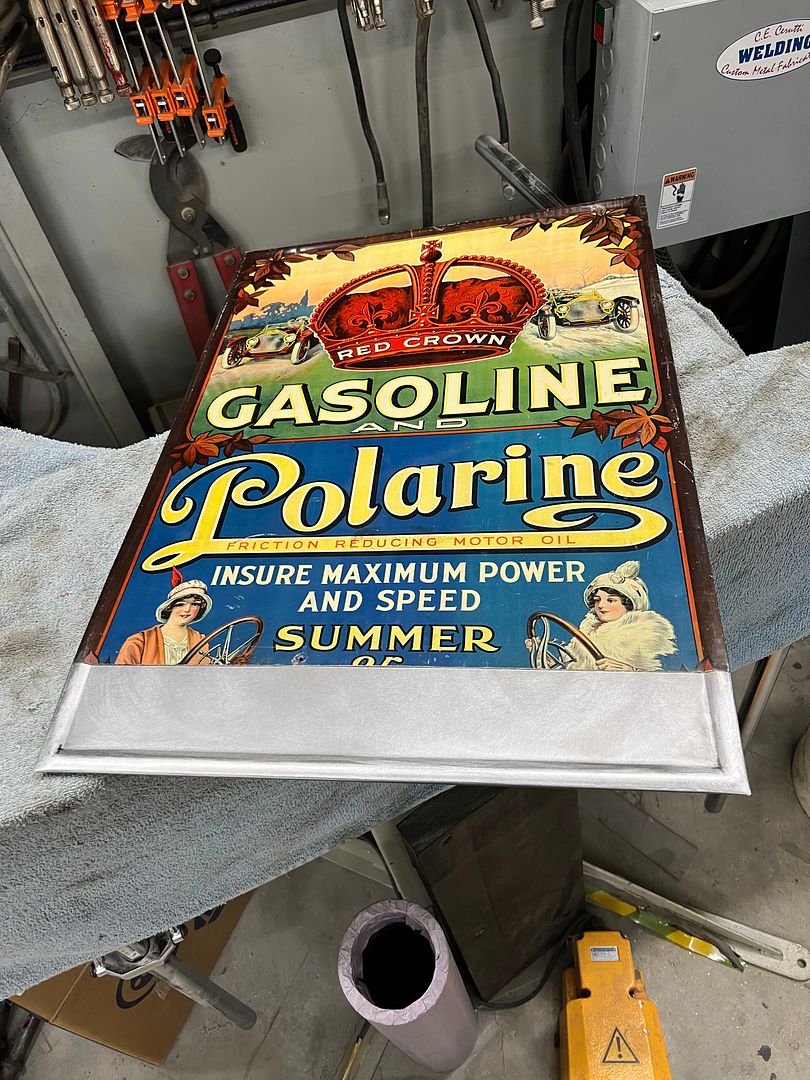 https://www.youtube.com/shorts/lwfCSv58raE The owner plans on using panel adhesive to attach, in order to save as much of the original paint as possible. We made some splice plates for the back side to use with the panel adhesive. He has an artist lined up to re-create the bottom portion.
__________________
Robert |
|
|

|
|
|
#1321 |
|
Registered User
Join Date: Jan 2013
Location: Leonardtown, MD
Posts: 1,647
|
Re: 55 Wagon Progress
The hinge covers for the wagon is one of the many loose ends we have left to address, quite a bit of rust...
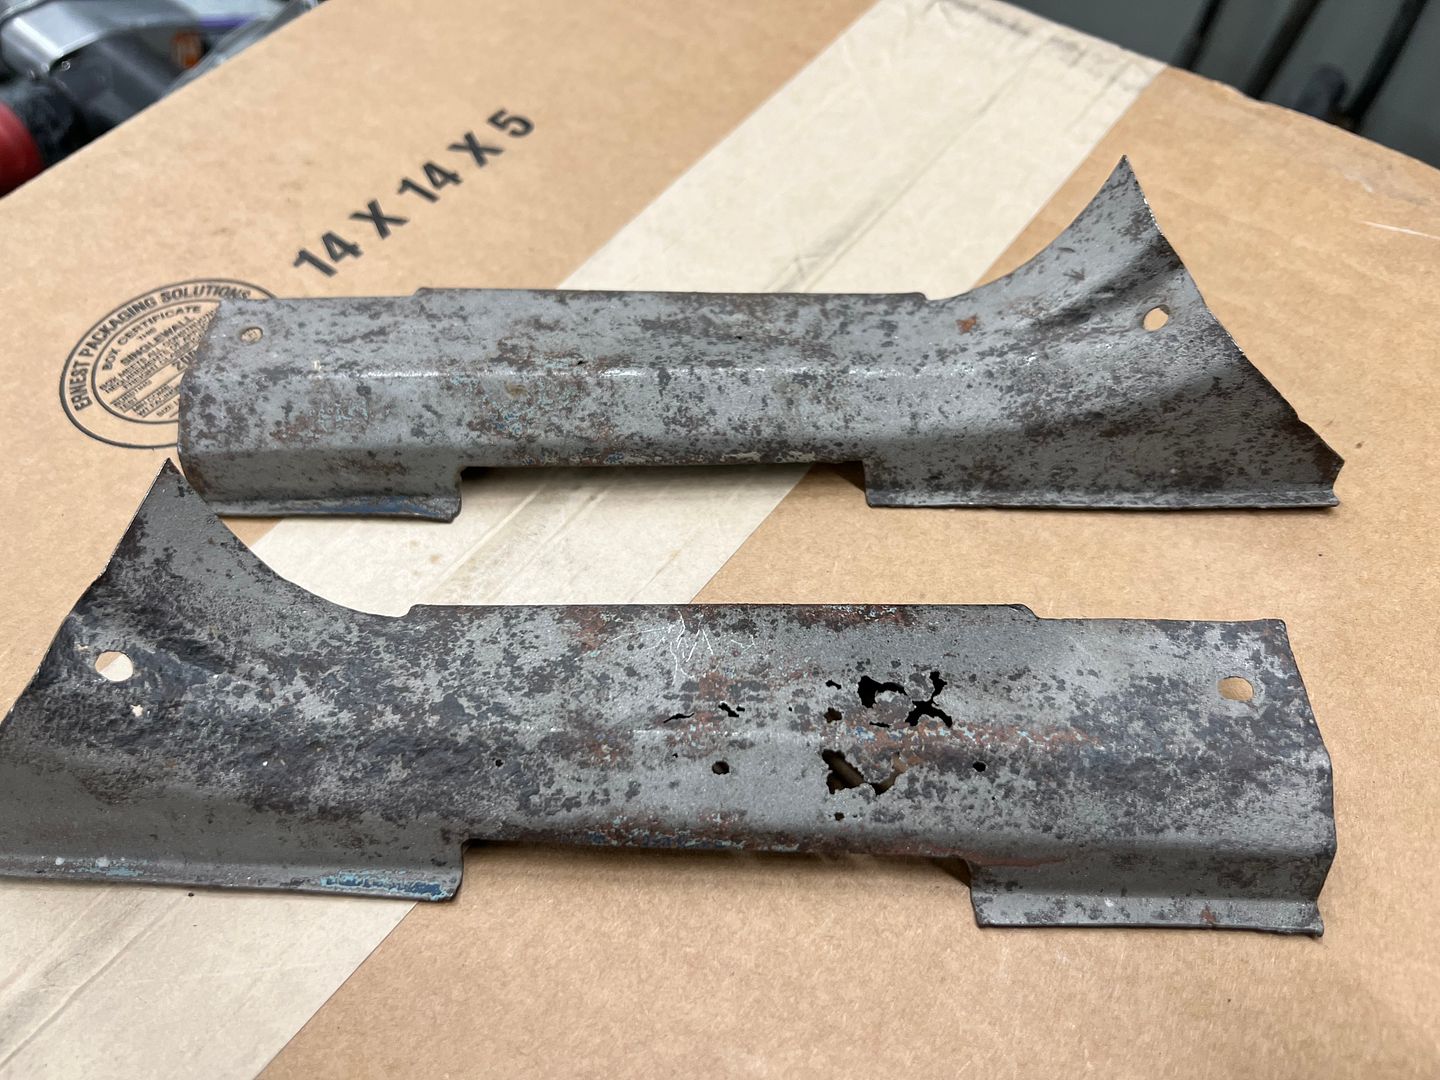 A quick test fit before we go off fabricating anything shows these factory original parts are no better than many of the reproduction parts you get today.. I had planned on fabrication work, didn't know we needed a redesign. 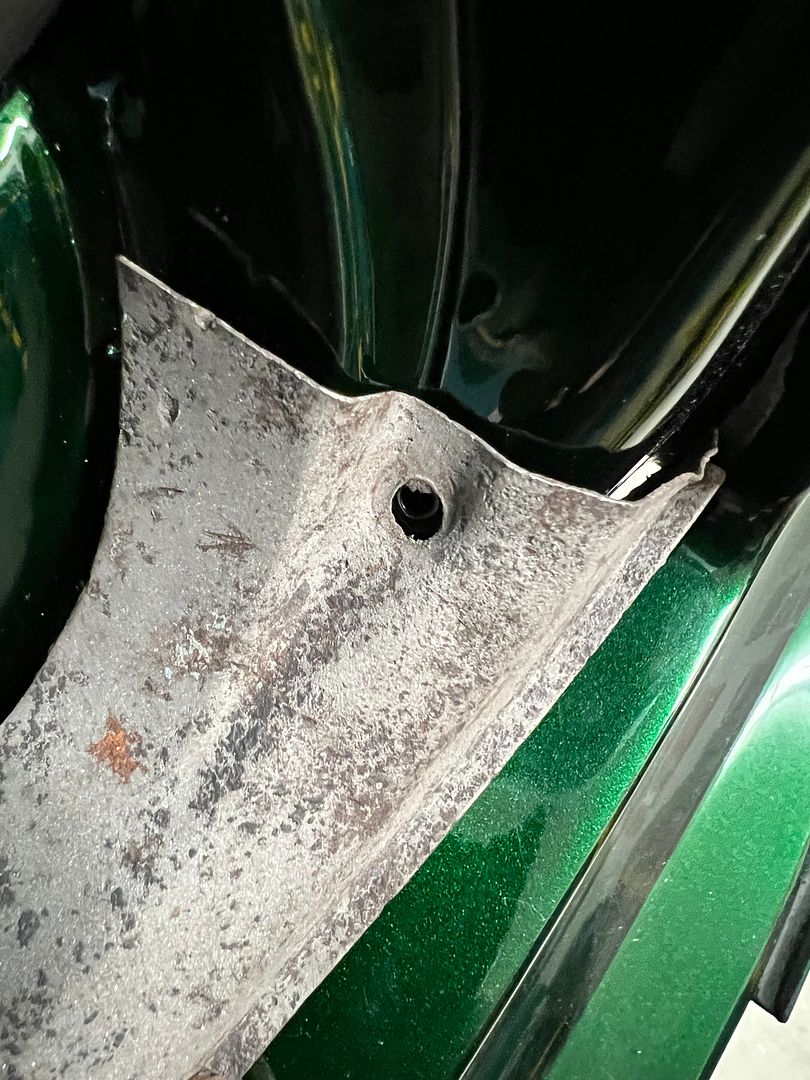 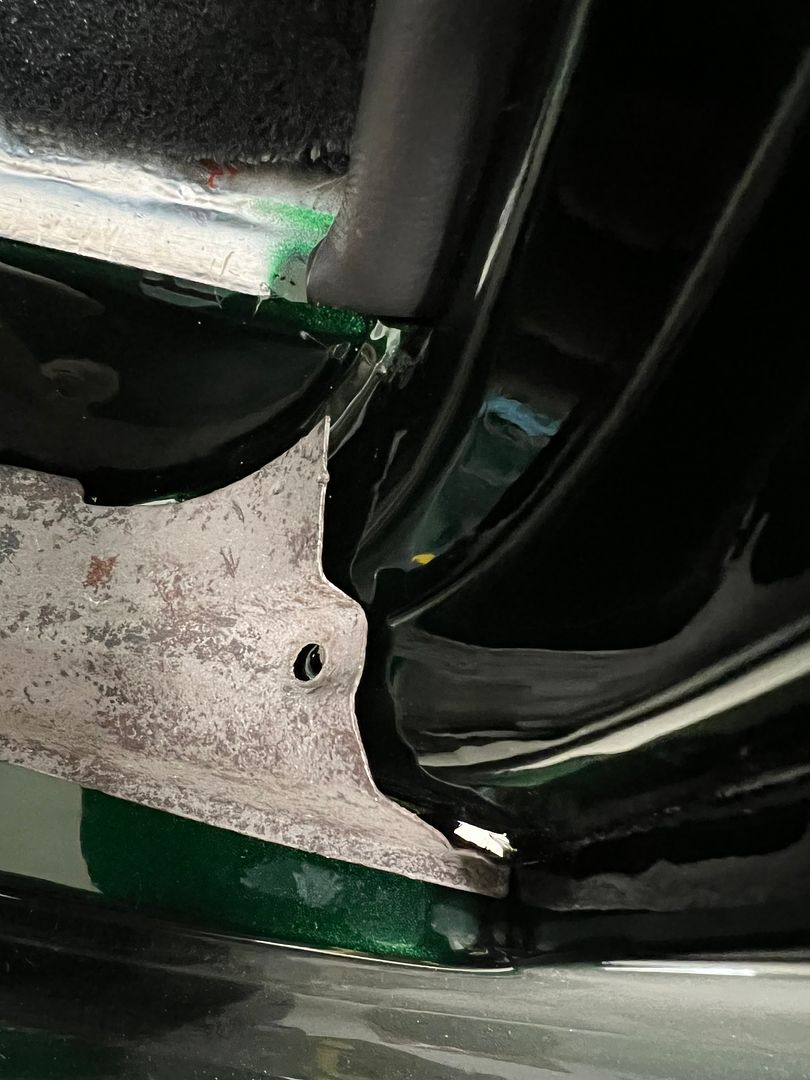 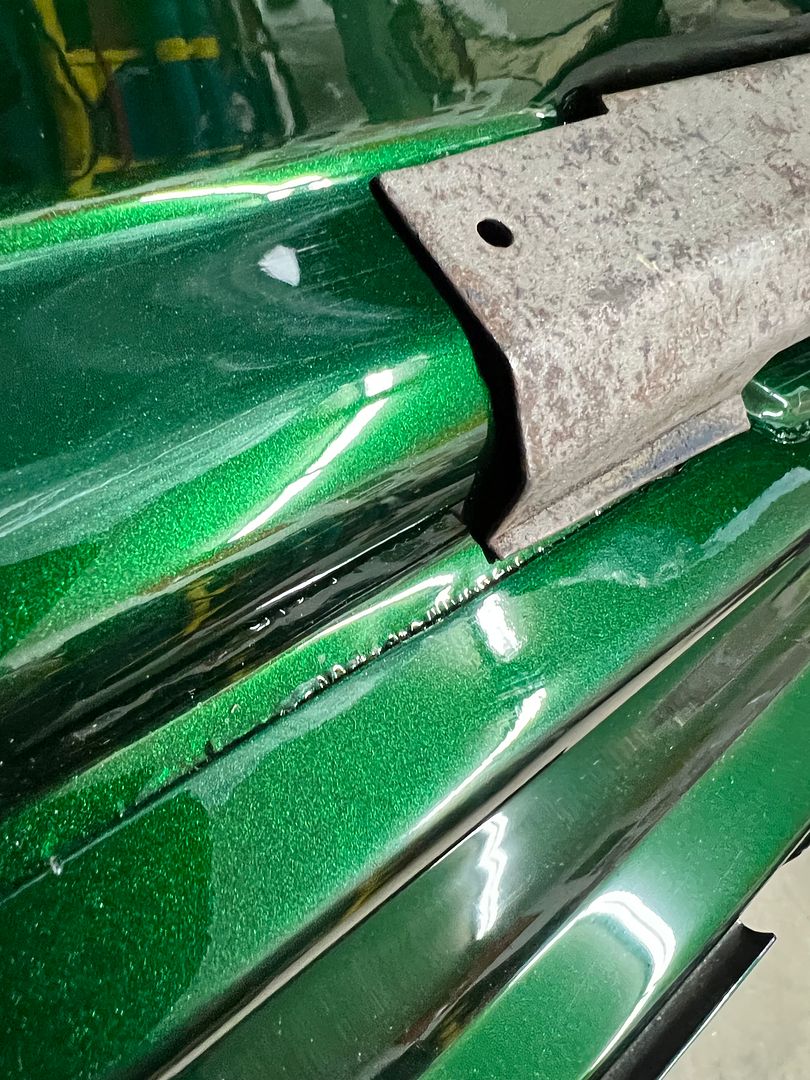 We ordered a piece of round stock to match the radius to use on the Magnetic brake, that should arrive Tuesday. Next, we need to fold a hem for our stainless edge trim we plan on using for the ribbed stainless dash insert. The magnetic brake leaves a bit to be desired in having balls enough to hem a short return flange, so we packed up our sheet metal strips we had cut to size and went to another local metalshaper's shop to make use of his apron brake. 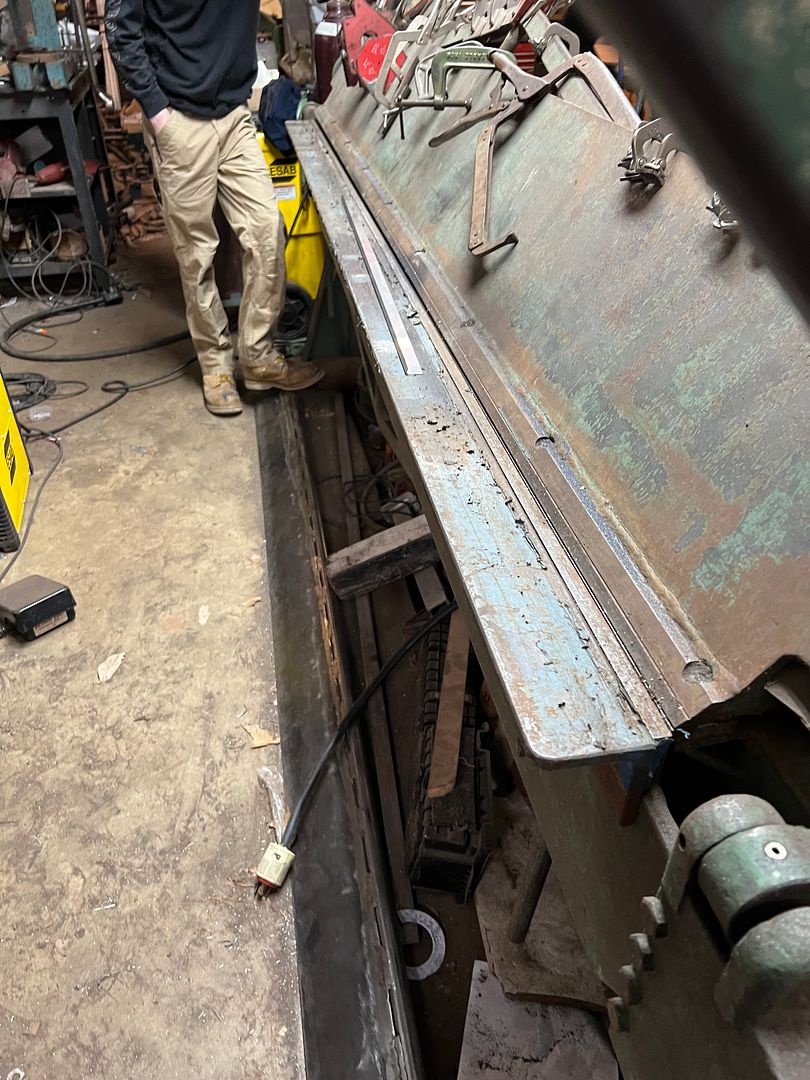 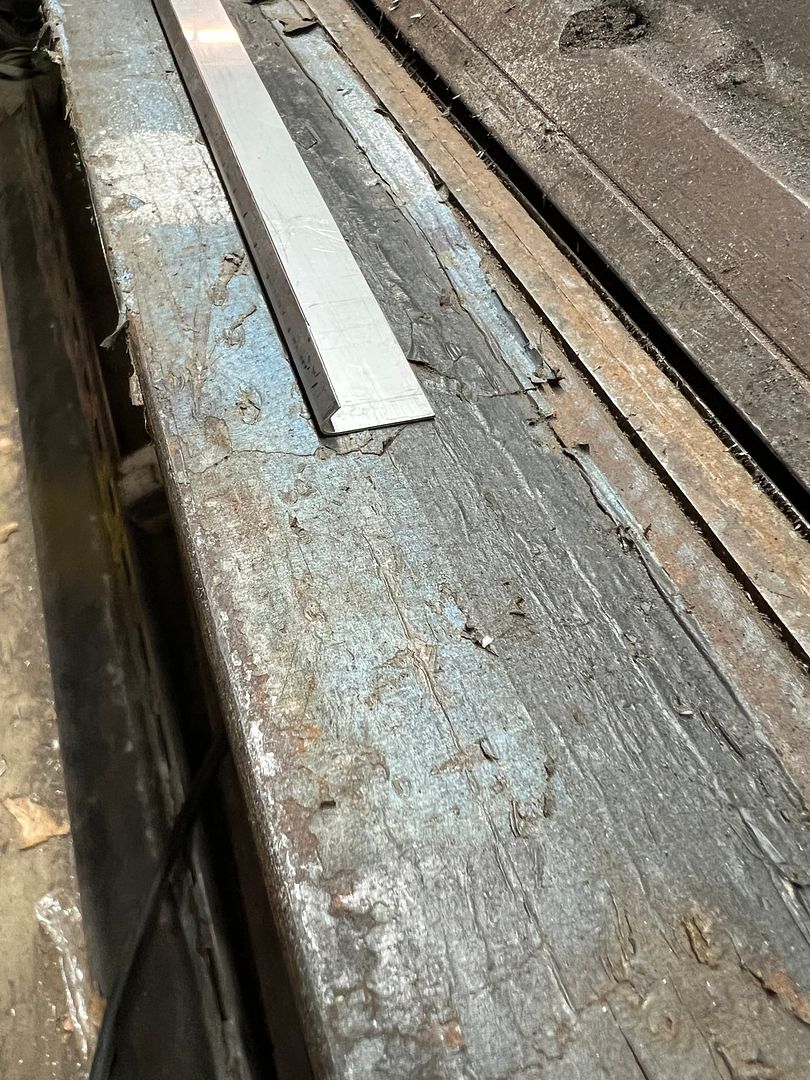 A piece of .030 aluminum acted as a spacer to maintain our hem gap. The brake worked well but the parts needed a bit more flatness to provide nice crisp details. Since he also had a powered Mittler Bros. bead roller, we used some flat dies and ran through all the bent pieces. https://www.youtube.com/shorts/hrFMqEeRhAw test fit of the ribbed stainless.... 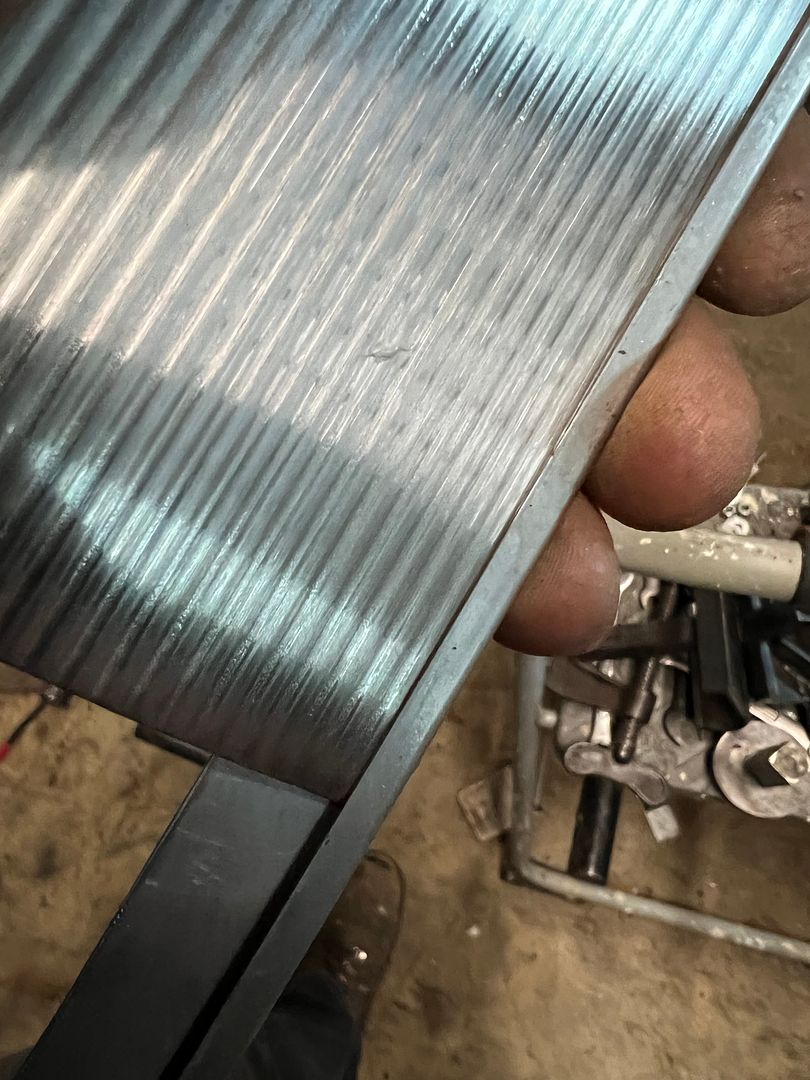 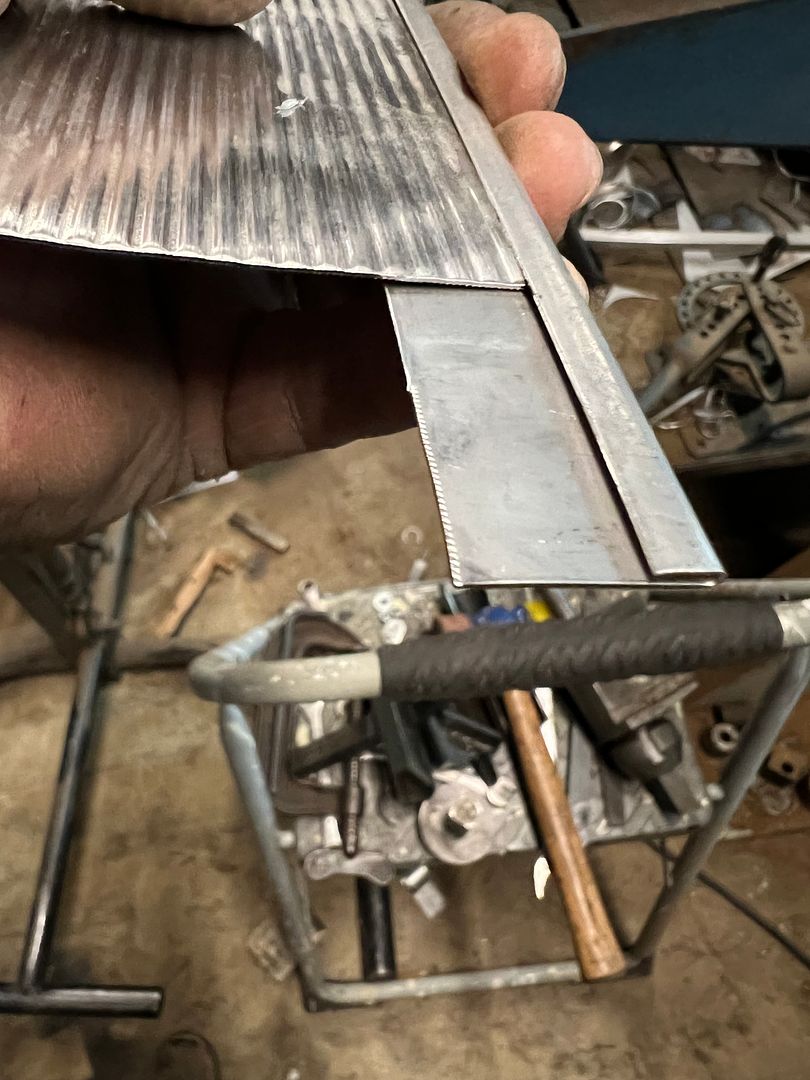 And for a teaser of how it will look after polishing.... https://www.youtube.com/shorts/GfqiYbIZYvo
__________________
Robert |
|
|

|
|
|
#1322 |
|
Senior Member
 Join Date: Mar 2011
Location: West Plains, Missouri
Posts: 7,559
|
Re: 55 Wagon Progress
Great work...Jim
__________________
my build thread: http://67-72chevytrucks.com/vboard/s...d.php?t=459839 Jimbo's long bed step build:http://67-72chevytrucks.com/vboard/s...t=464626<br /> |
|
|

|
|
|
#1323 |
|
Registered User
Join Date: Jan 2013
Location: Leonardtown, MD
Posts: 1,647
|
Re: 55 Wagon Progress
Thanks Jim!
We had a customer bring in a "Patent Idea Display". This had a battery pack inside that powered the headlights (headlight bezels not shown) and featured a rod down the bottom that would oscillate the left headlight, and I believe would flash that headlight as well (based on linkage tied to a relay inside). The control switch is actually the left half of a Model T instrument cluster. 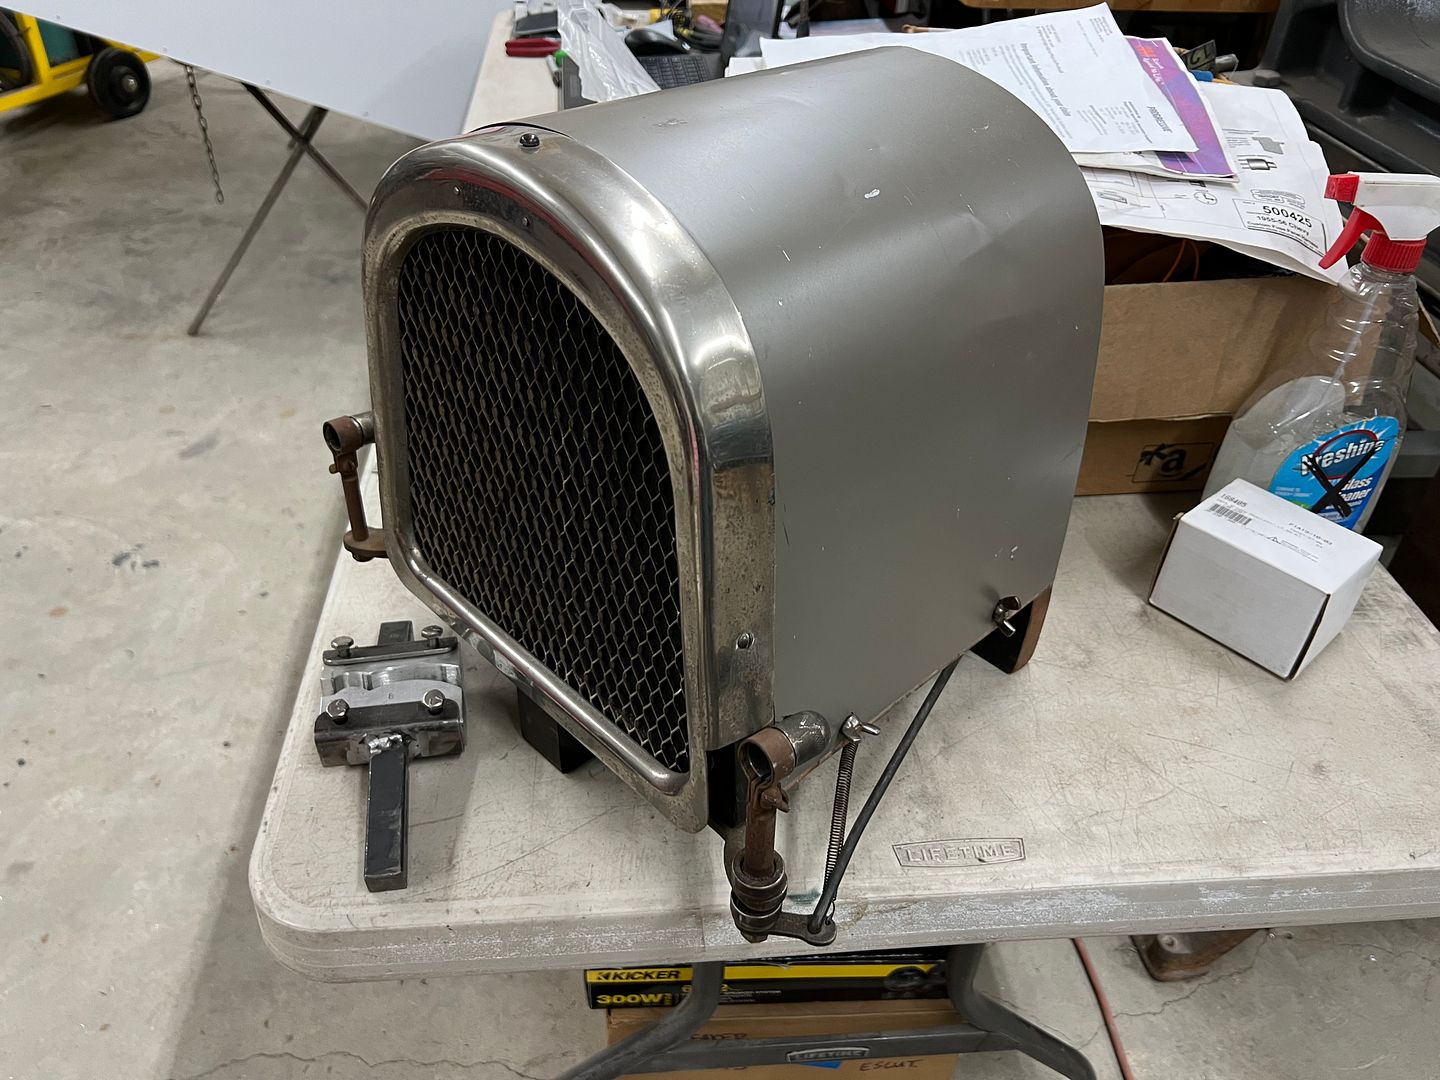 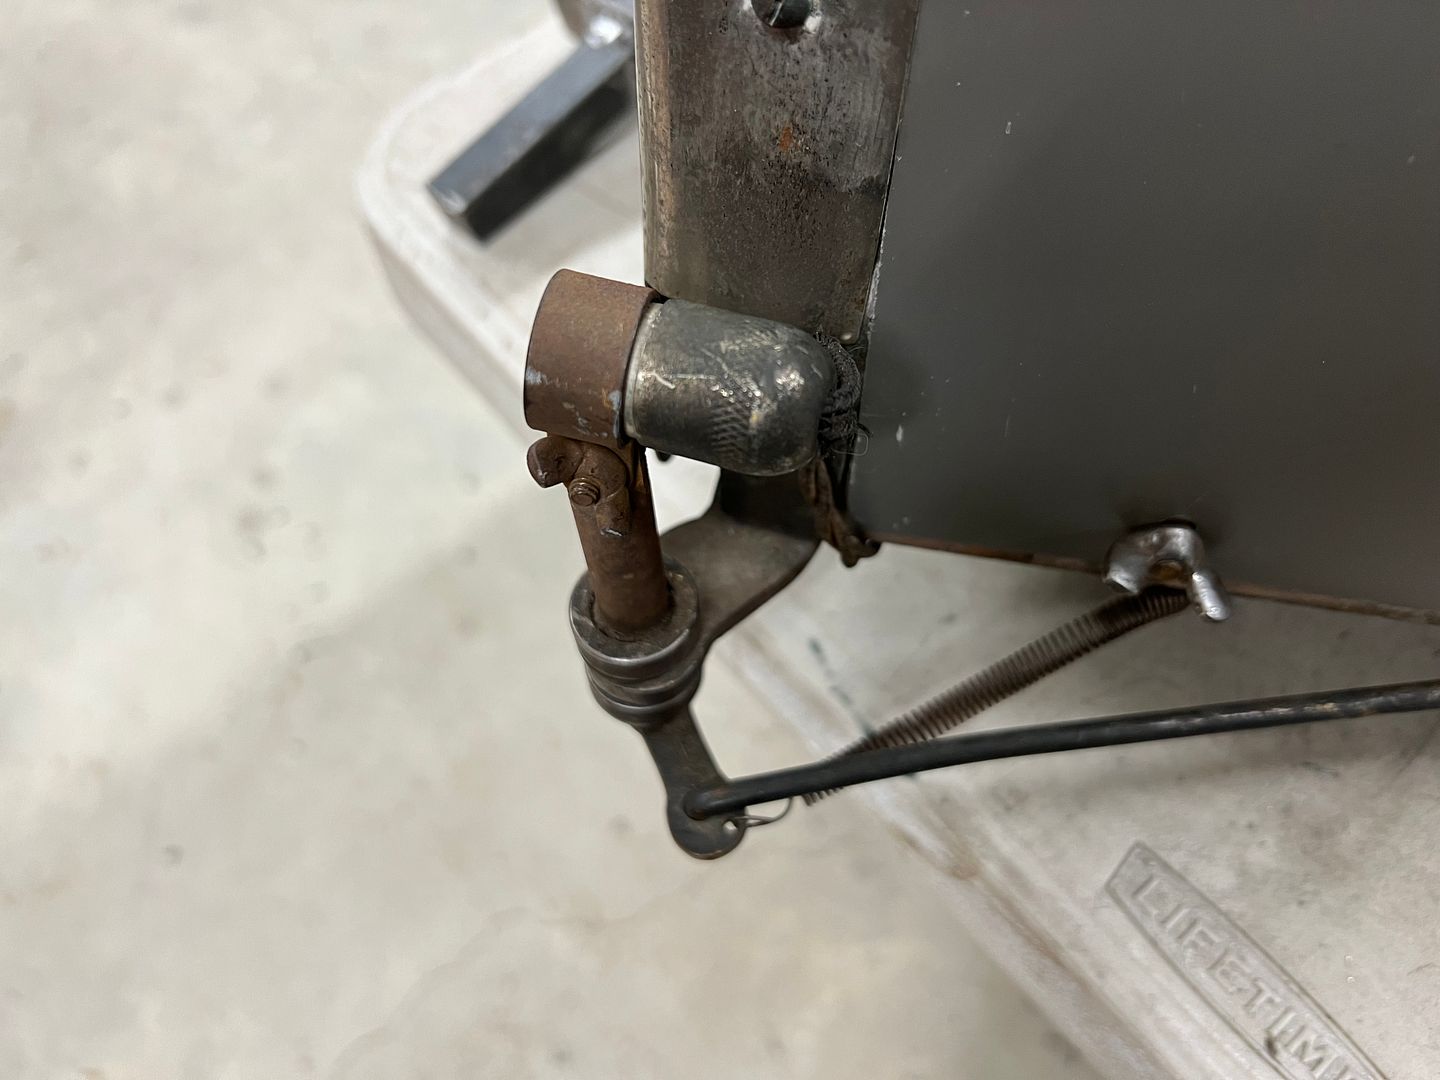 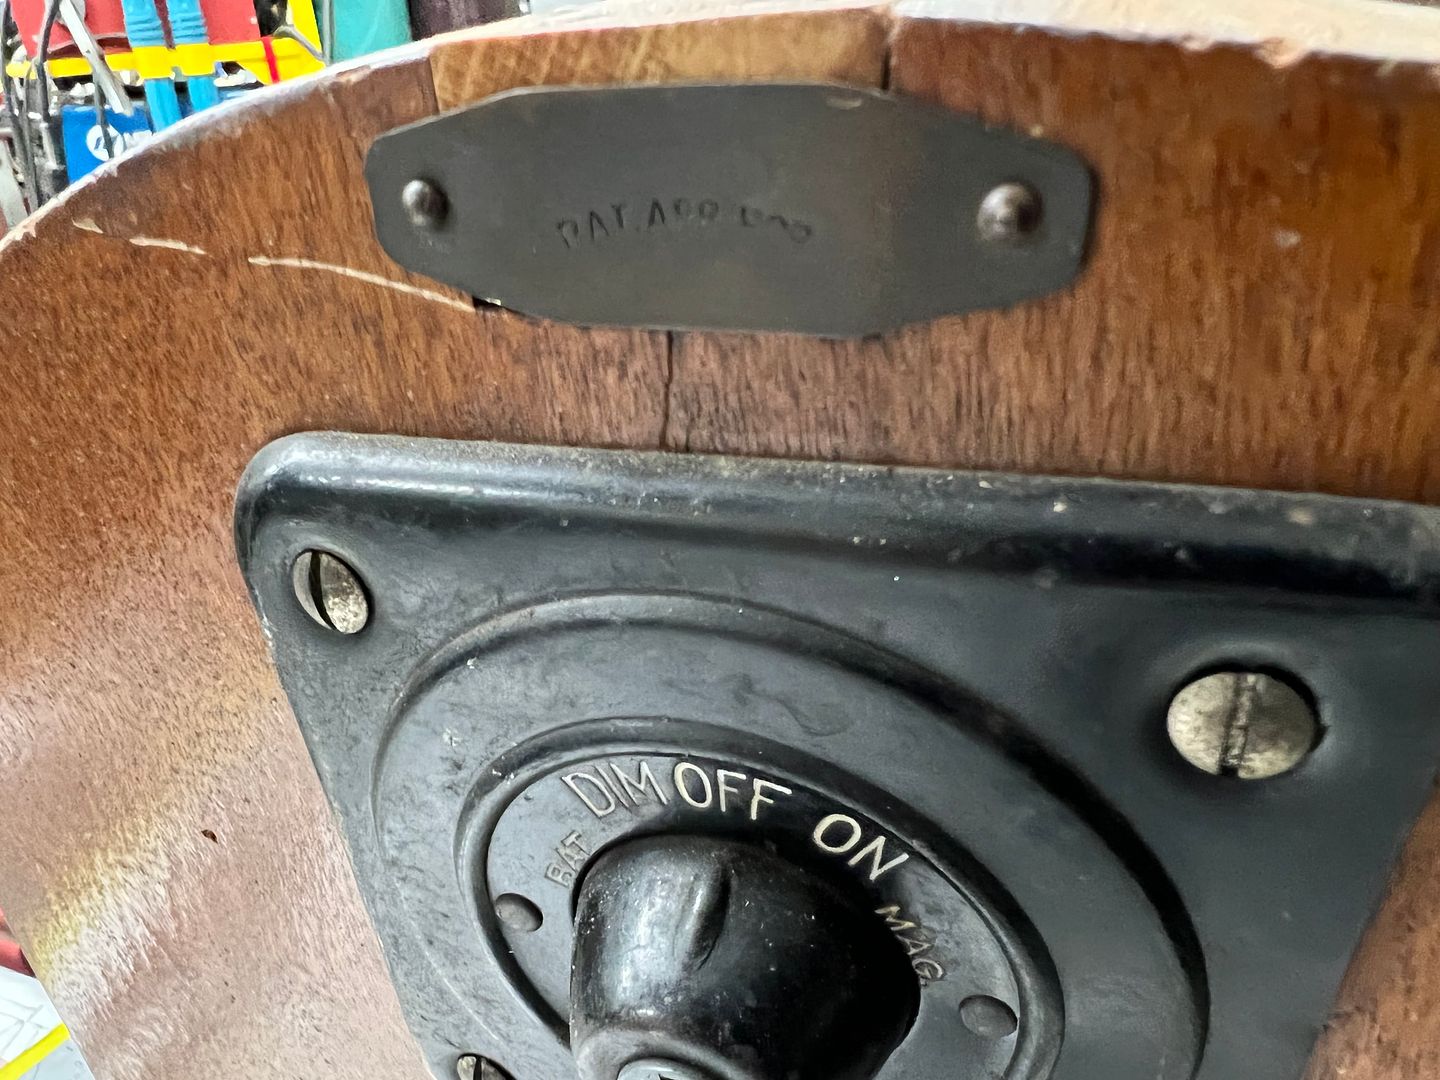 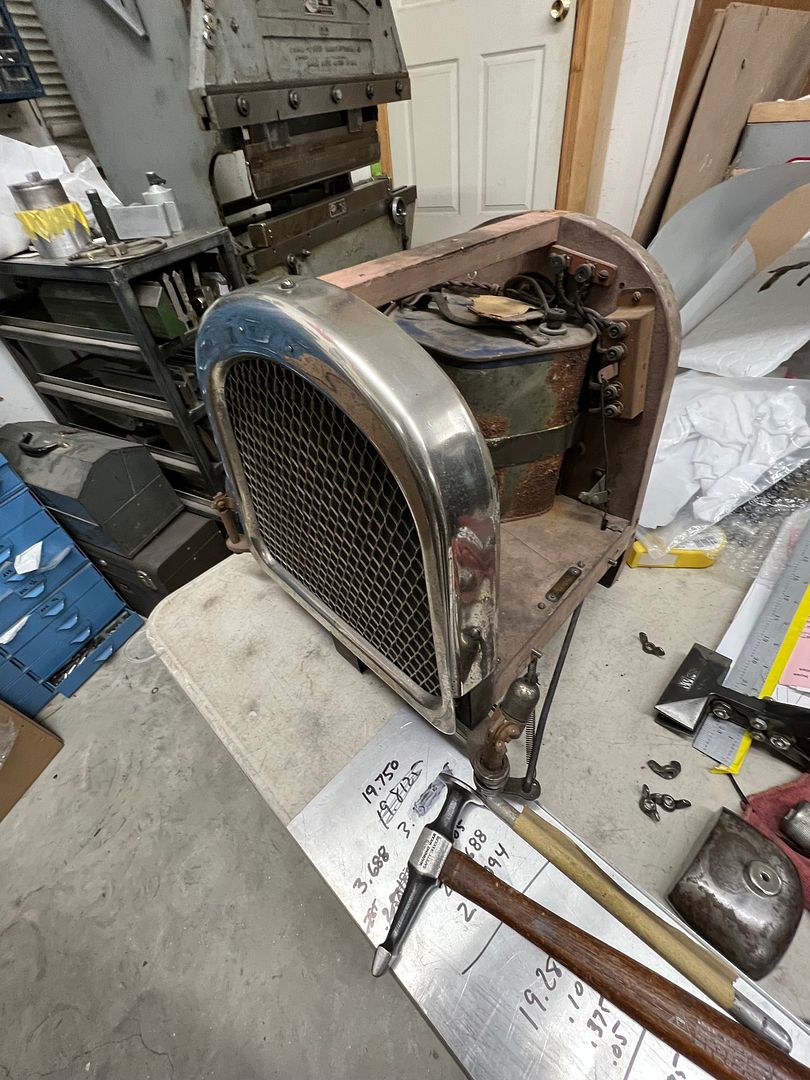 It has obviously had parts (hood) that went missing over the years and an aluminum flashing replacement had been added. He wanted a hood fabricated that looked more period correct, so we offered to do louvers and a faux hinge at the top. For the hood we used 19 gauge AKDQ, and for the louvers we are using the Diacro press brake. The louver dies weren't tall enough for the Diacro, so an adapter was used at the top to make up the difference. 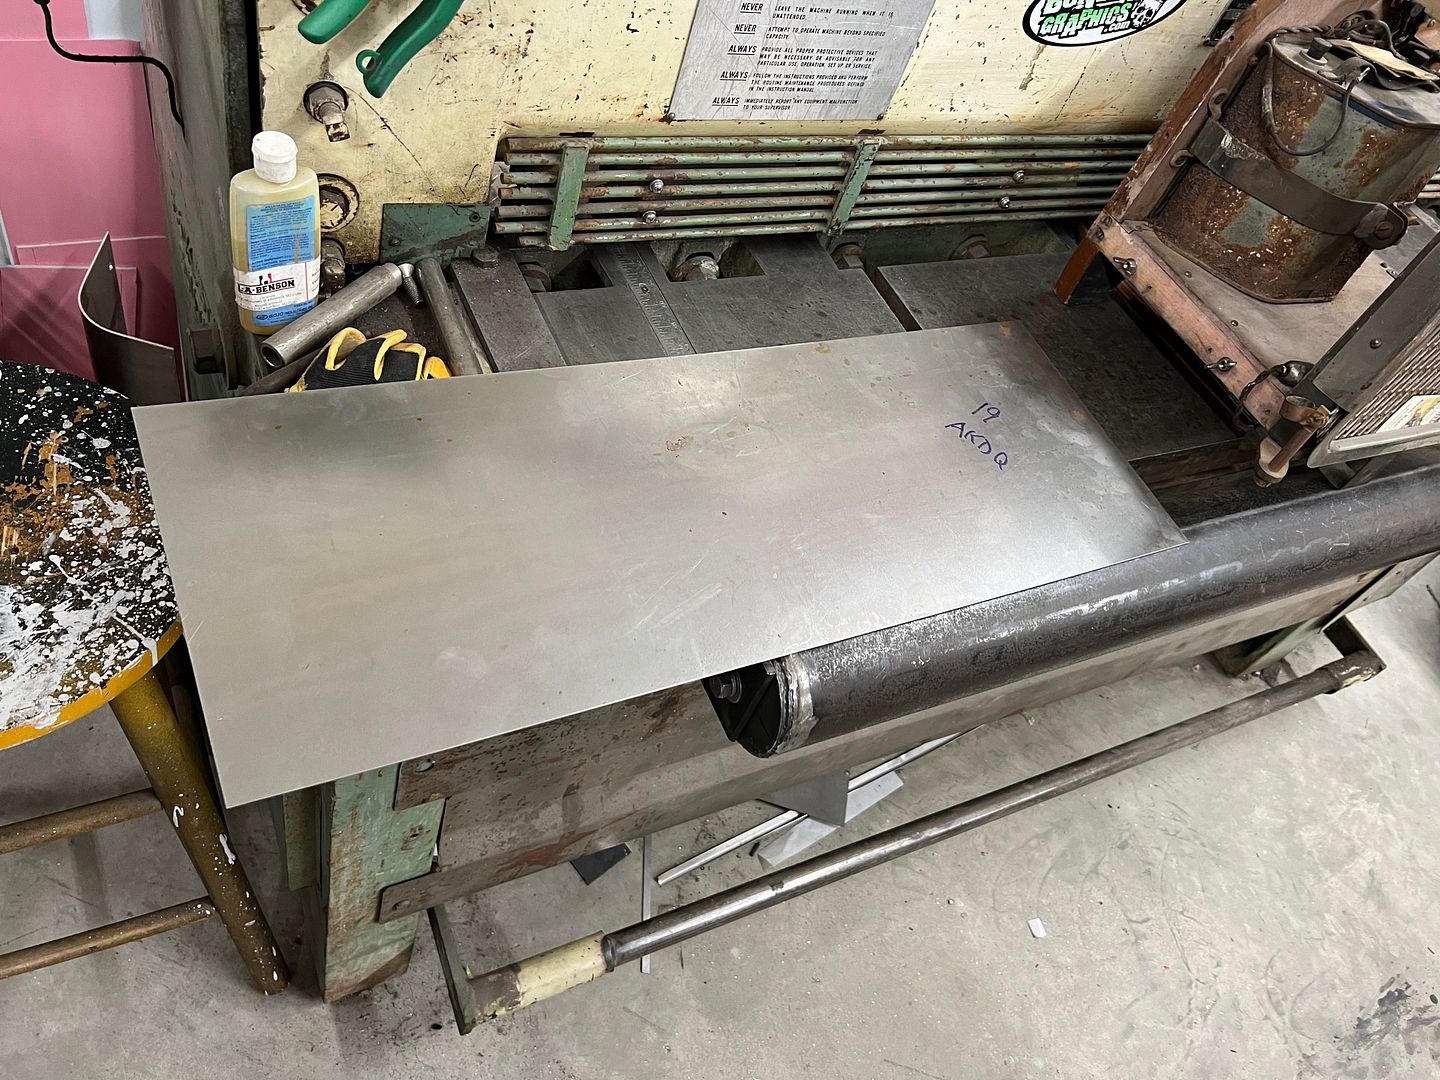 Our practice punches worked fine, but the machine did not have enough depth to the vertical supports of the press brake for the size of our hood. We would need to get sketchy. Real sketchy. With only about half of each die in the machine, and two set screws holding on for dear life.... 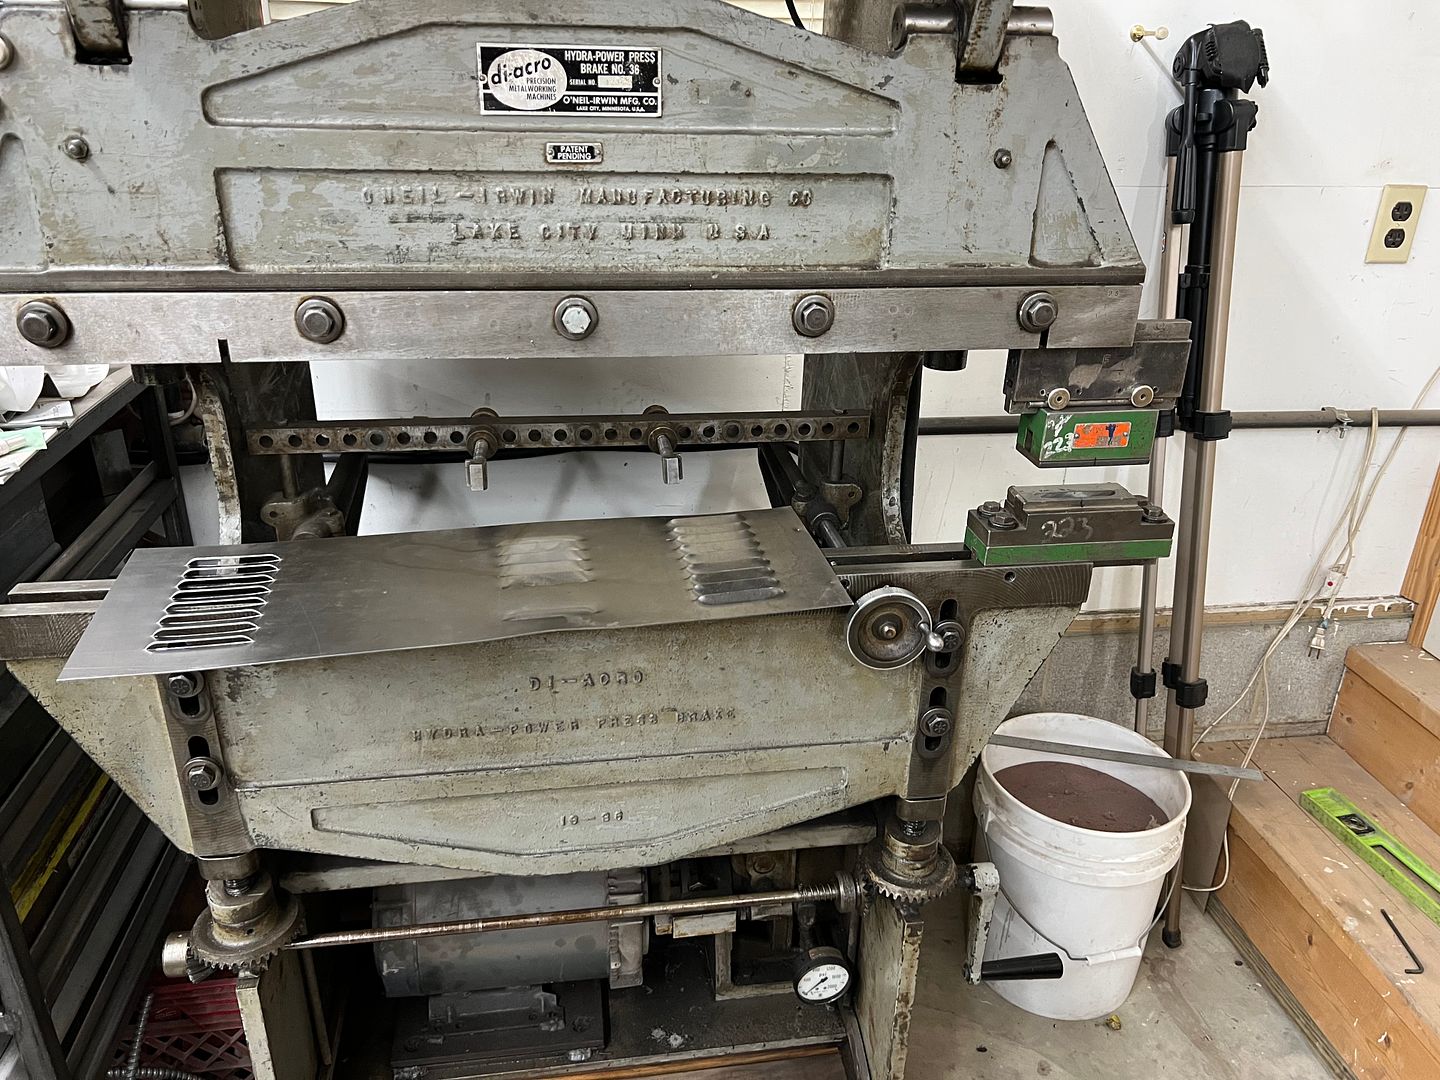 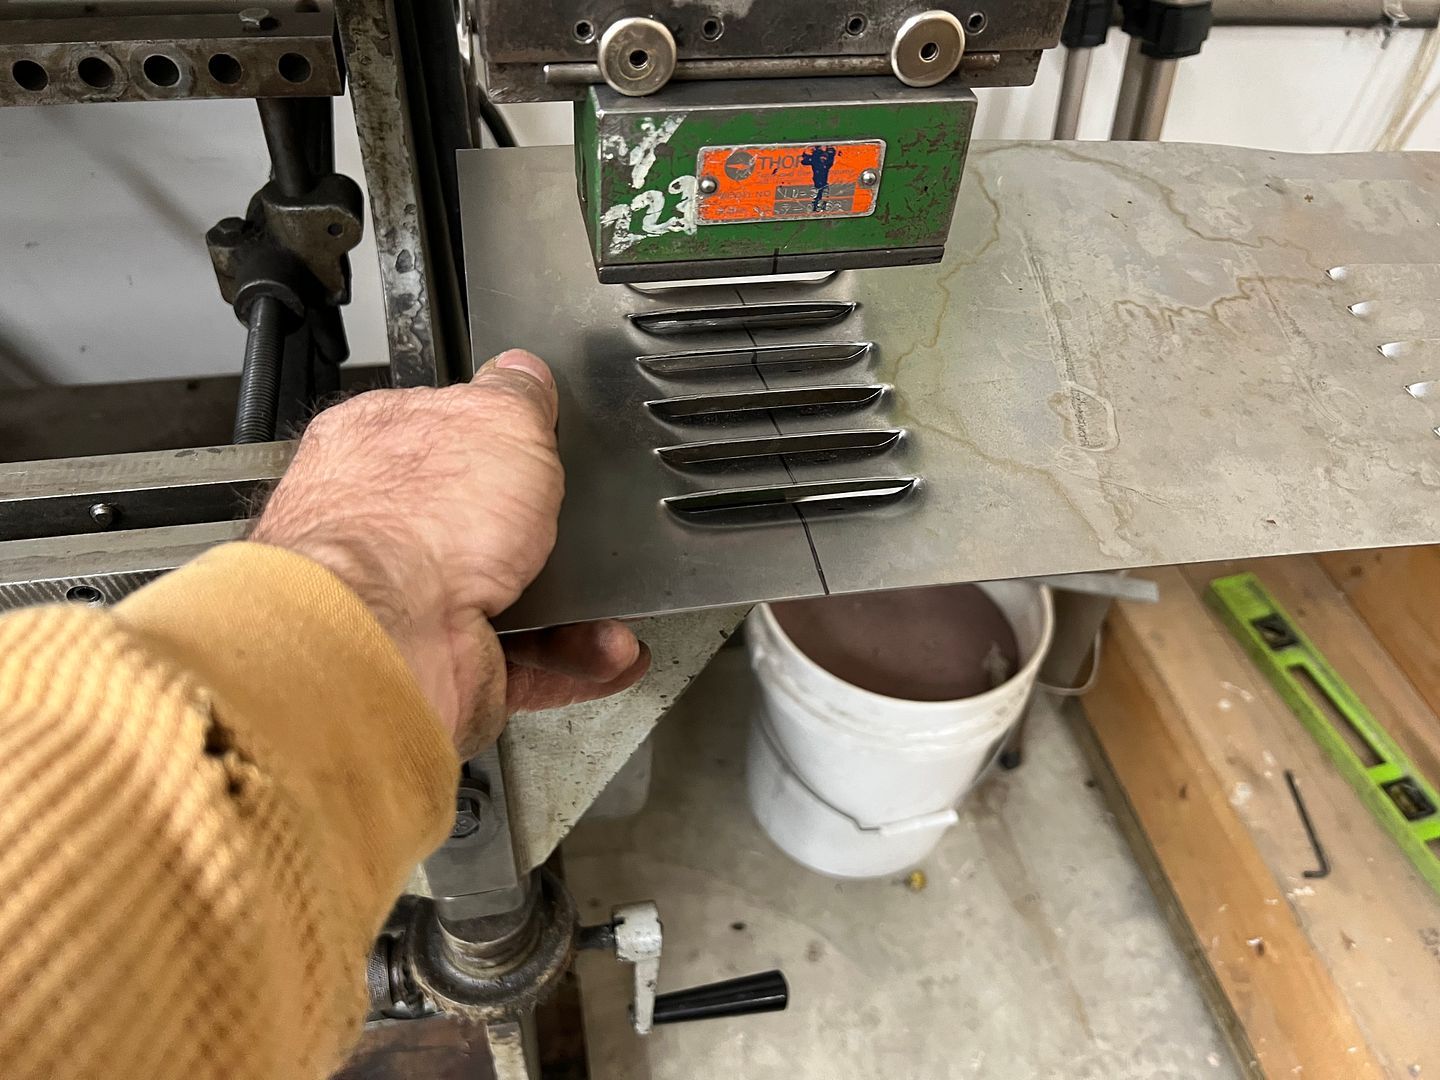 https://youtu.be/2ktrqMyY2VQ 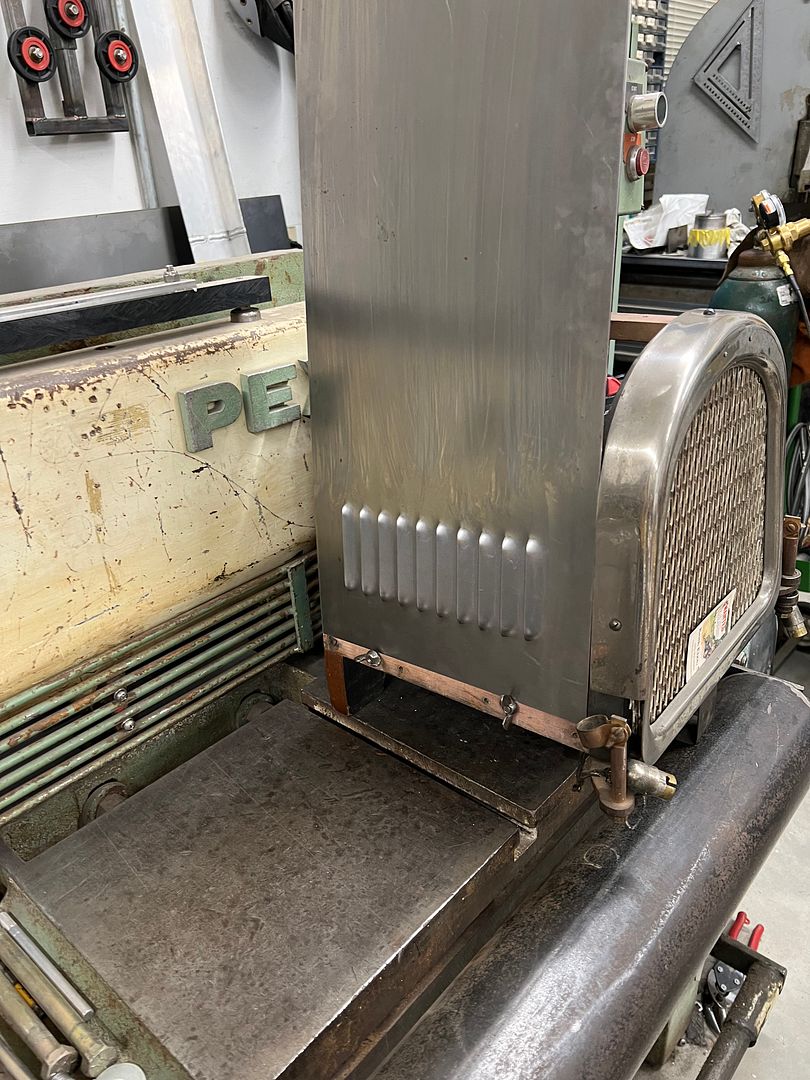 With louvers punched, we used the highly technical argon bottle radius brake to add our hoop. next on the list was to make our hinge using a piece of 1/4" stainless tubing. 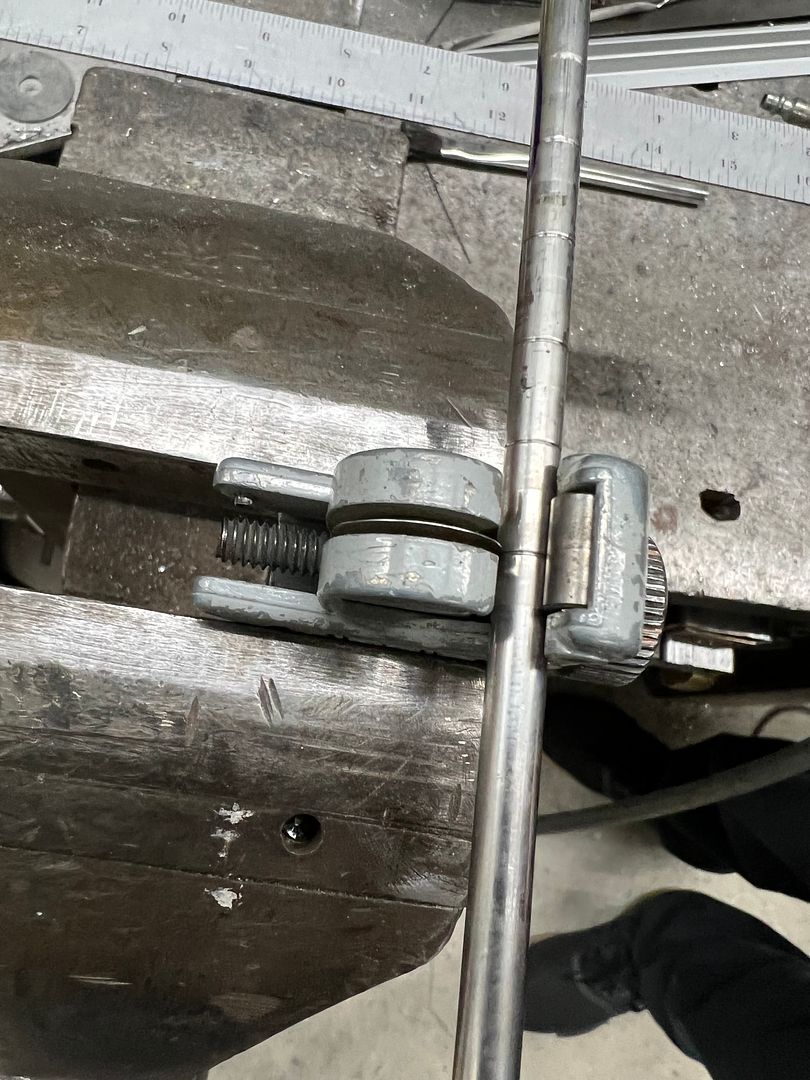 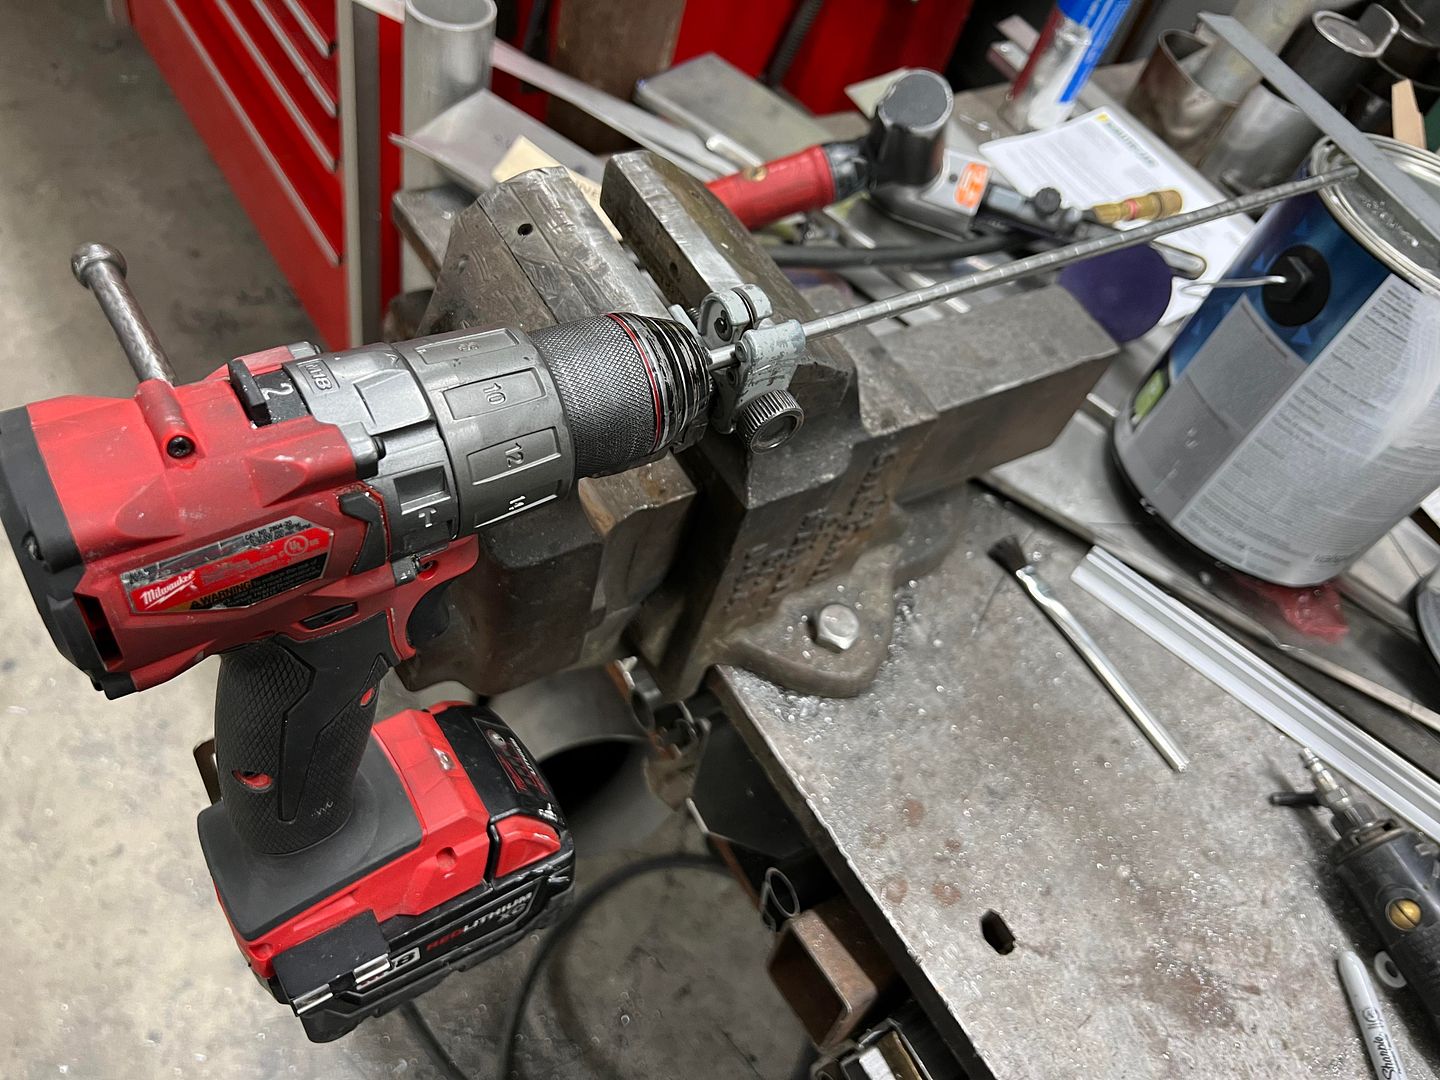 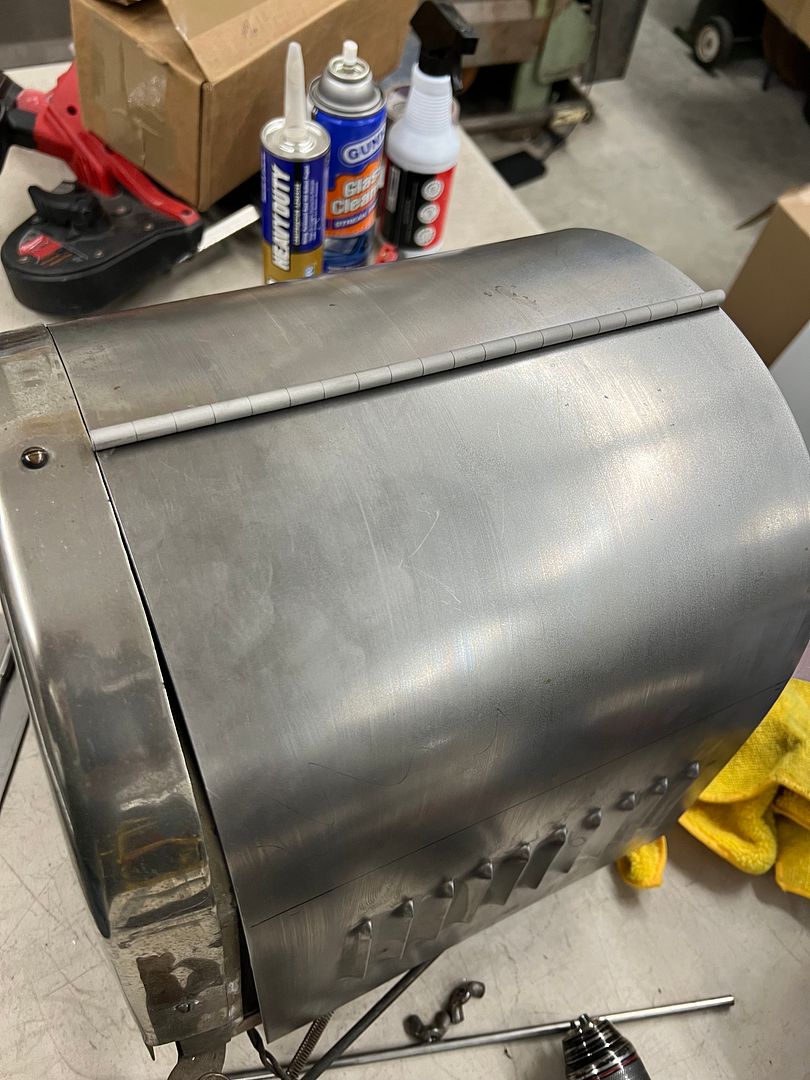 Next, our hood needs the beltline bead to match cars of the era, and to simulate the hidden hinges for the hood sides. https://youtu.be/Vm47BL7zQ8g Our "hinge" was plug welded in place... 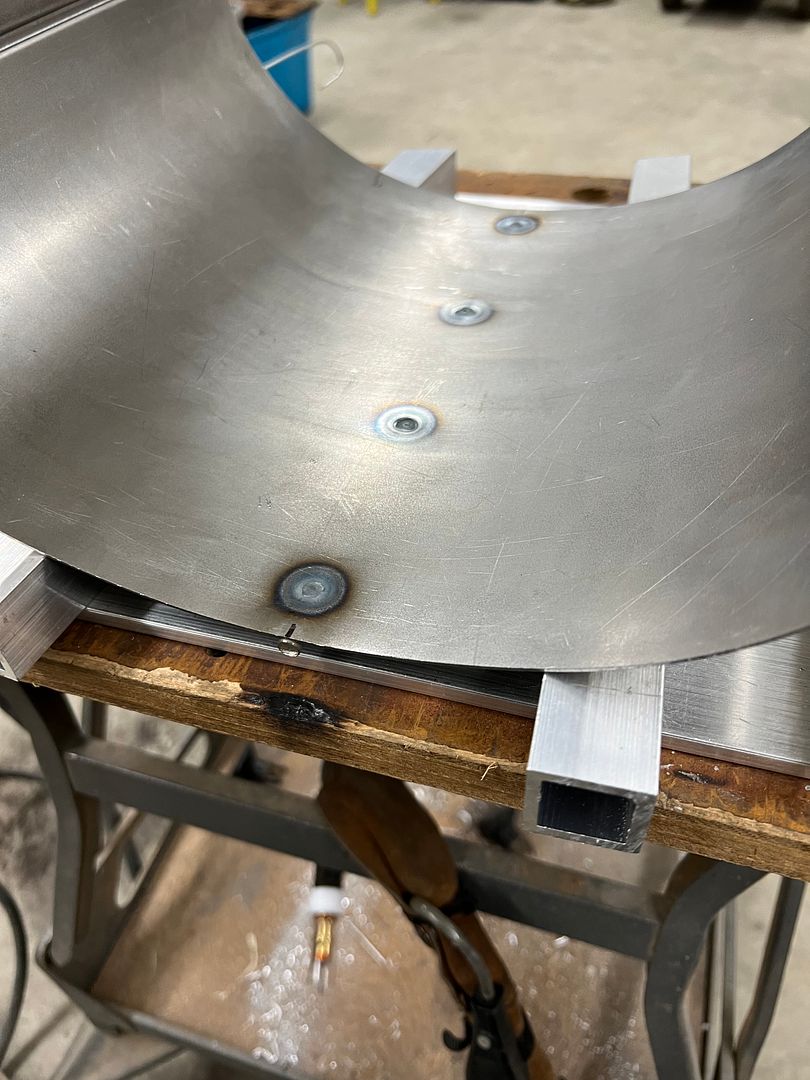 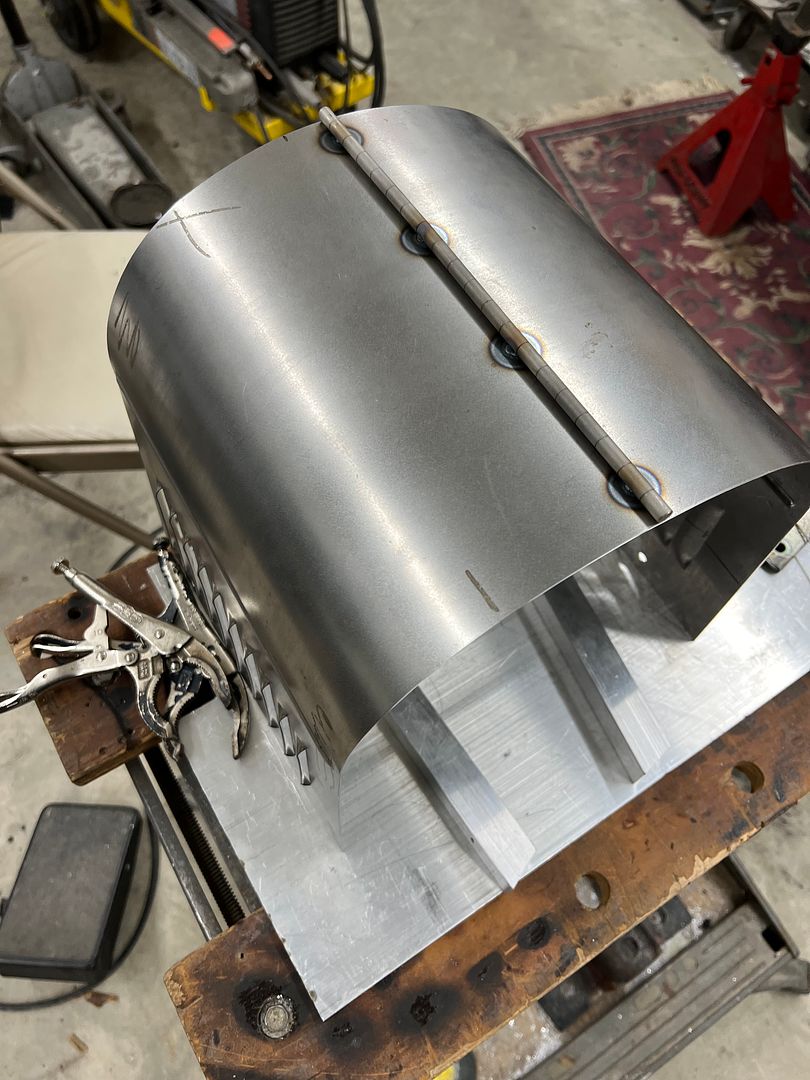 Media blasted for better paint adhesion, and ready for delivery.. 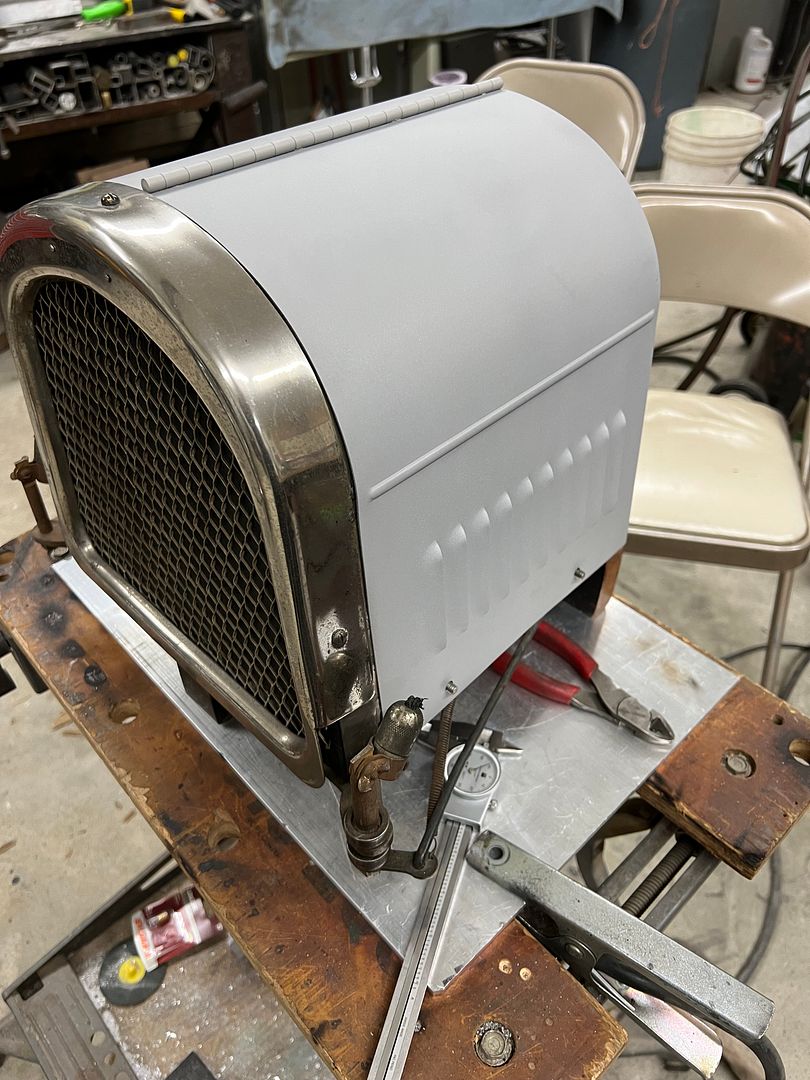 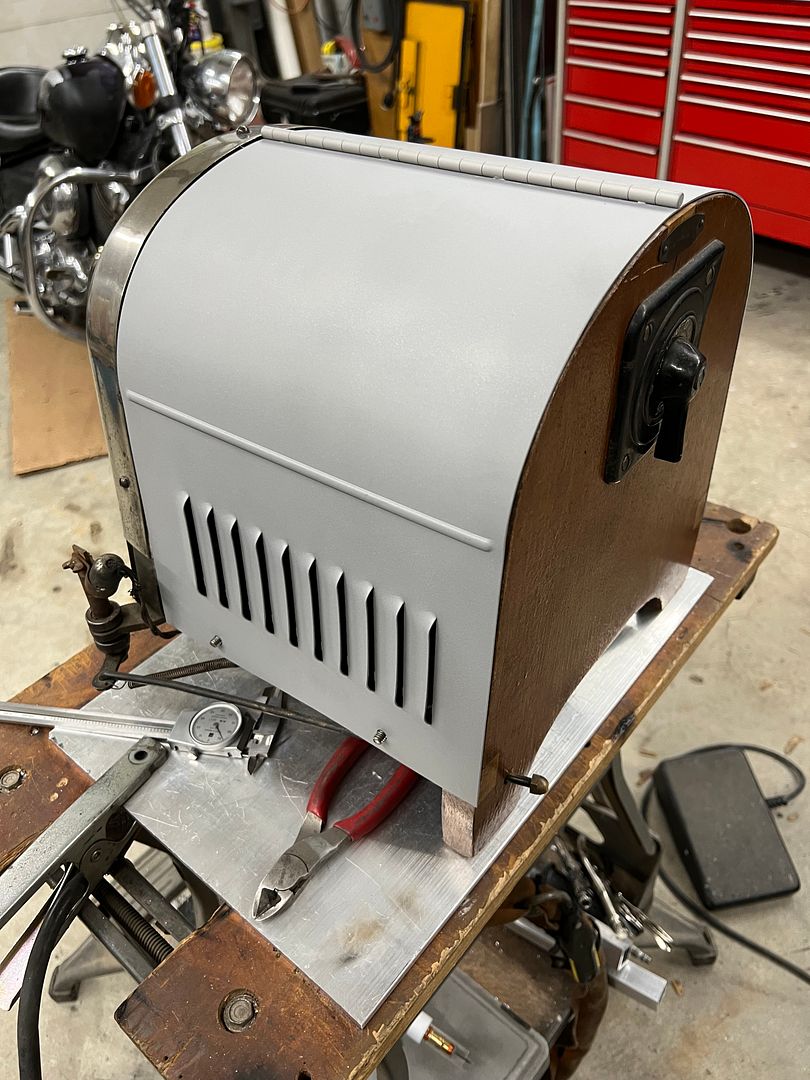
__________________
Robert Last edited by MP&C; 01-23-2023 at 08:28 AM. |
|
|

|
|
|
#1324 |
|
Post Whore
  Join Date: May 2015
Location: Alabama
Posts: 14,663
|
Re: 55 Wagon Progress
that is cool as all heck..!!!!!...nice work.!!
__________________
Mongo...aka Greg RIP Dad RIP Jesse 1981 C30 LQ9 NV4500..http://67-72chevytrucks.com/vboard/s...d.php?t=753598 Mongos AD- LS3 TR6060...http://67-72chevytrucks.com/vboard/s...34#post8522334 Columbus..the 1957 IH 4x4...http://67-72chevytrucks.com/vboard/s...63#post8082563 2023 Chevy Z71..daily driver |
|
|

|
|
|
#1325 |
|
Senior Member
 Join Date: Dec 2009
Location: TN.
Posts: 8,329
|
Re: 55 Wagon Progress
Great Job again.
You have the best ideas and designs. 
__________________
________________________________________________________________________________________ ____________________________________________ 84 Chevy K-20 63 Impala (my high school car) http://67-72chevytrucks.com/vboard/s...Crew Cab Build |
|
|

|
 |
| Bookmarks |
|
|