
|
 05-01-2024, 08:18 AM
|
#1376 |
|
Registered User
Join Date: Jan 2013
Location: Leonardtown, MD
Posts: 1,640
|
Re: 55 Wagon Progress
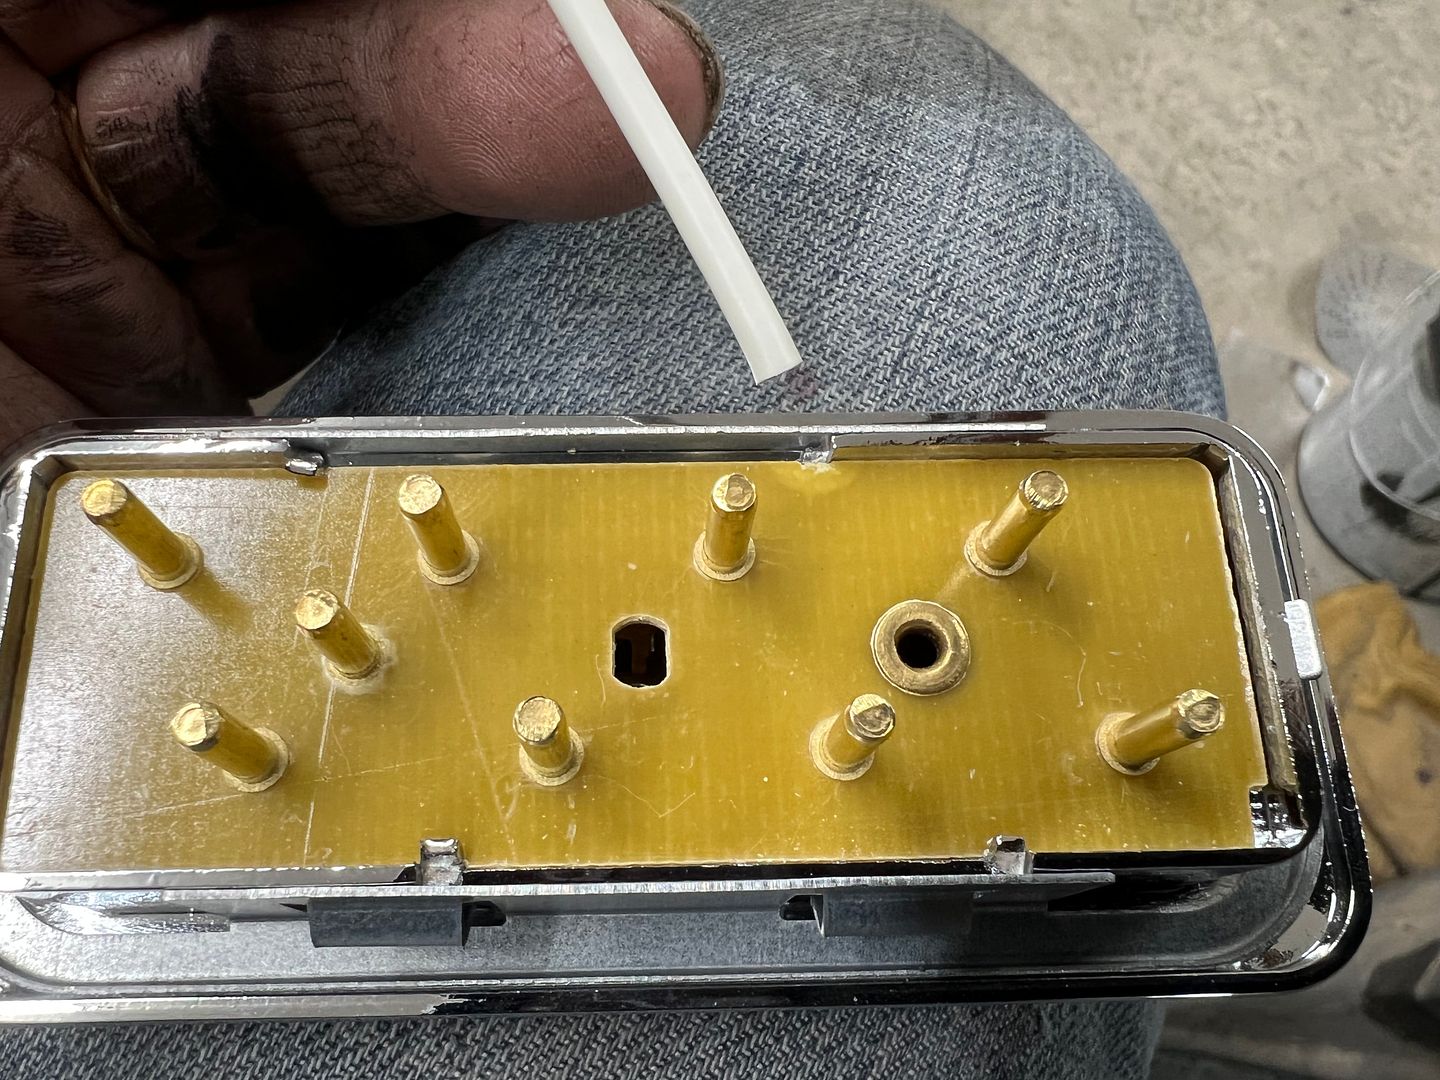
We had ordered a 4 position switch for the power windows in the wagon, with plans to install in the console. Not knowing the origin of the part when it showed up, I thought some due diligence was in order and broke out the multimeter to test all the switch positions for connectivity. Wouldn't you know, one of the end switches had no contact in one position. Further investigation showed that the spring contact board was held in place with four tabs from the factory, except we only had three, which allowed the board/switch to lose contact. I sent the next picture of the damaged part (pointing to the damage with a white wire) in a message to the eBay seller who immediately questioned my abilities with a multimeter and assured me it functioned exactly as it should.
 So for a more direct approach, I assured them I knew how to operate a multimeter, and perhaps they should look at the attached picture this time. To help eliminate any interpretation errors, I had doctored the original rear view picture to make things more obvious since they missed the visual cues the first time.... 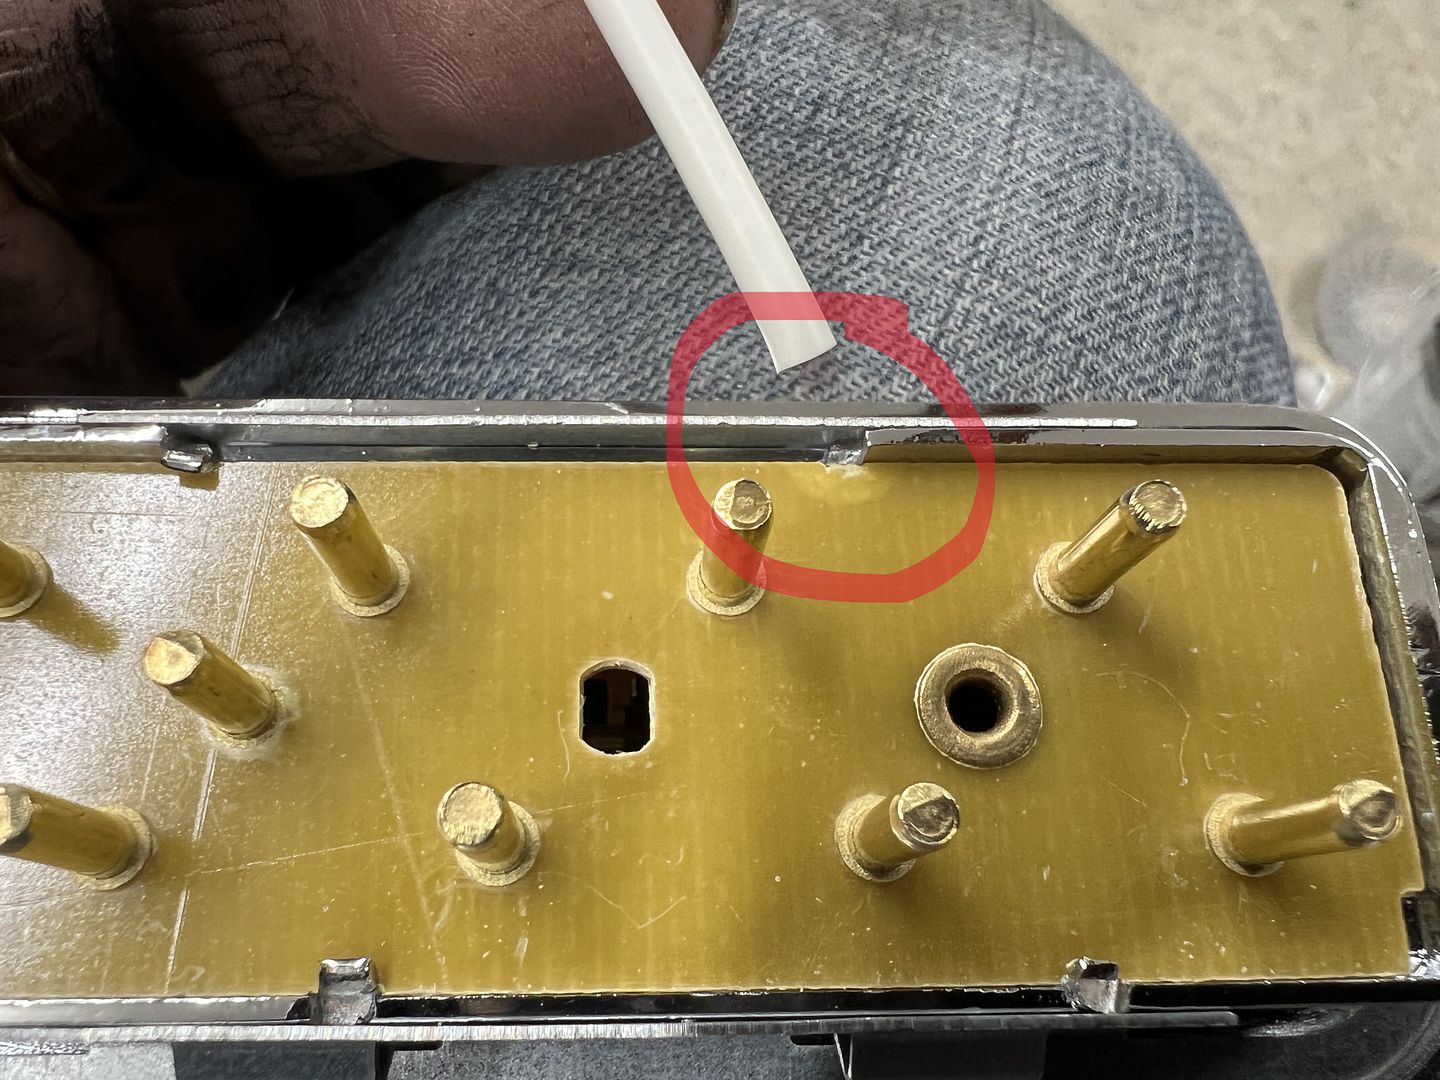 Oh, that. We'll send out a new switch. Thank you.. So with the console on hold to make sure we didn't have to use a different style switch (in case their whole batch was bad) we turned our attention to the tailgate, and started the fit up of the Mad Mooks polished stainless border trim. https://madmooks.com/ To preface, I will say the Mad Mooks parts are some of the nicest fit and finish parts you'll find ANYWHERE to trim out your Tri-five Chevy, as well as parts for other GM vehicles. Only the corner pieces didn't fit our tailgate. It appears that when yours truly did the rust repairs of the tailgate (before repop's were available) the replacement patches weren't exactly spot on. So yes, this is my F-up.. 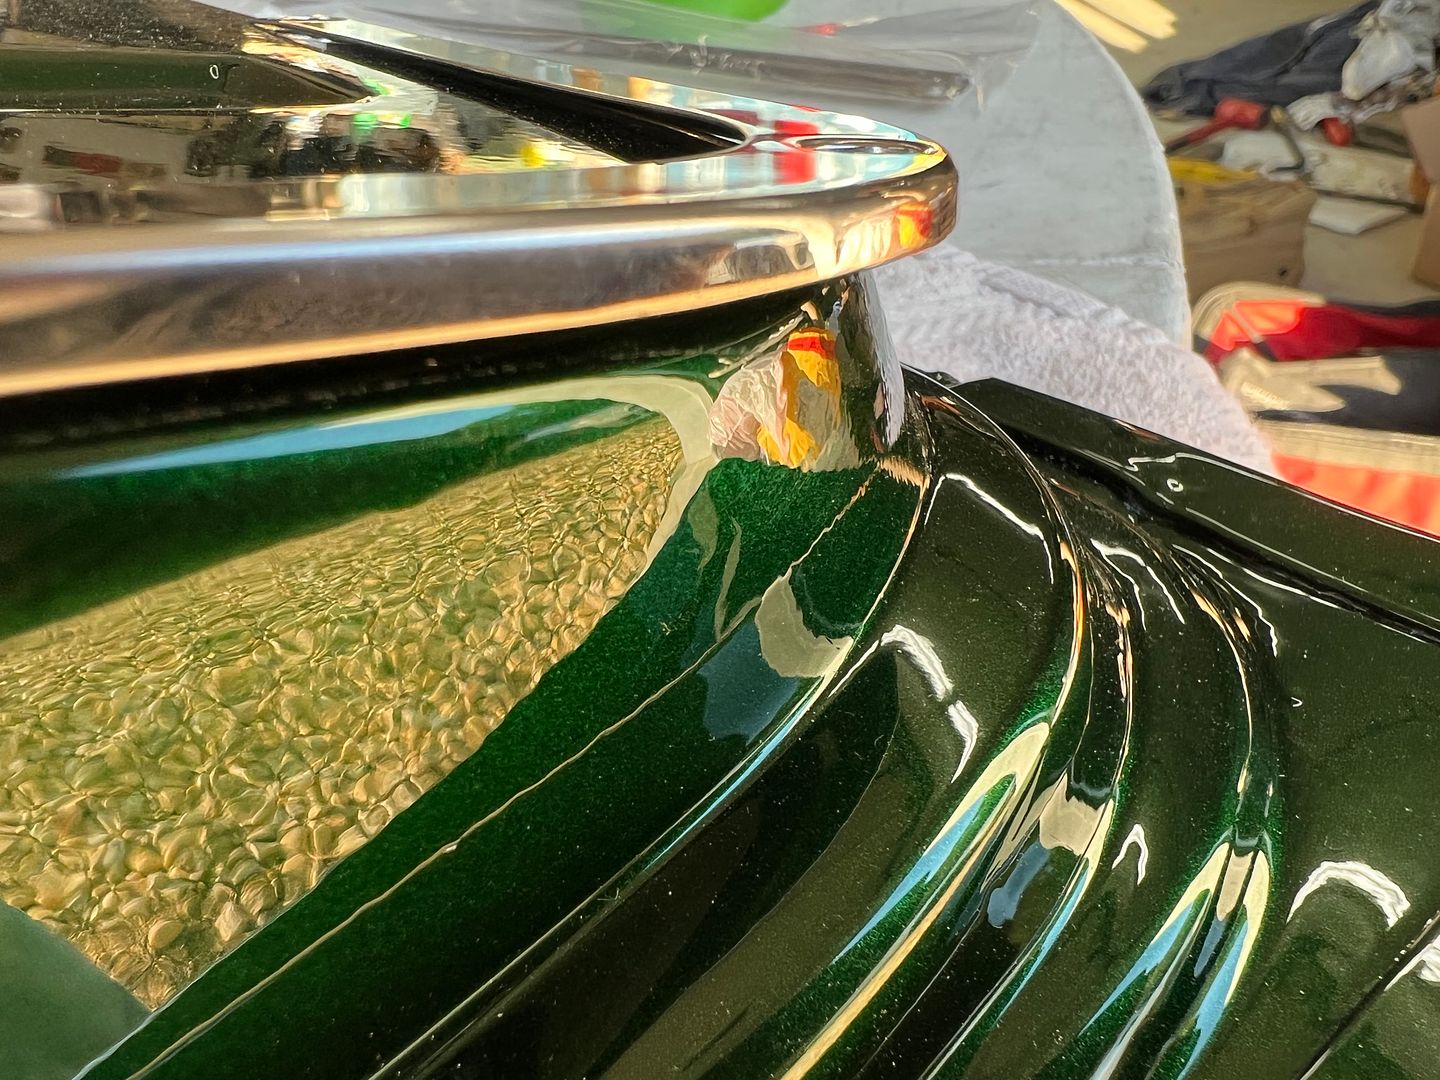 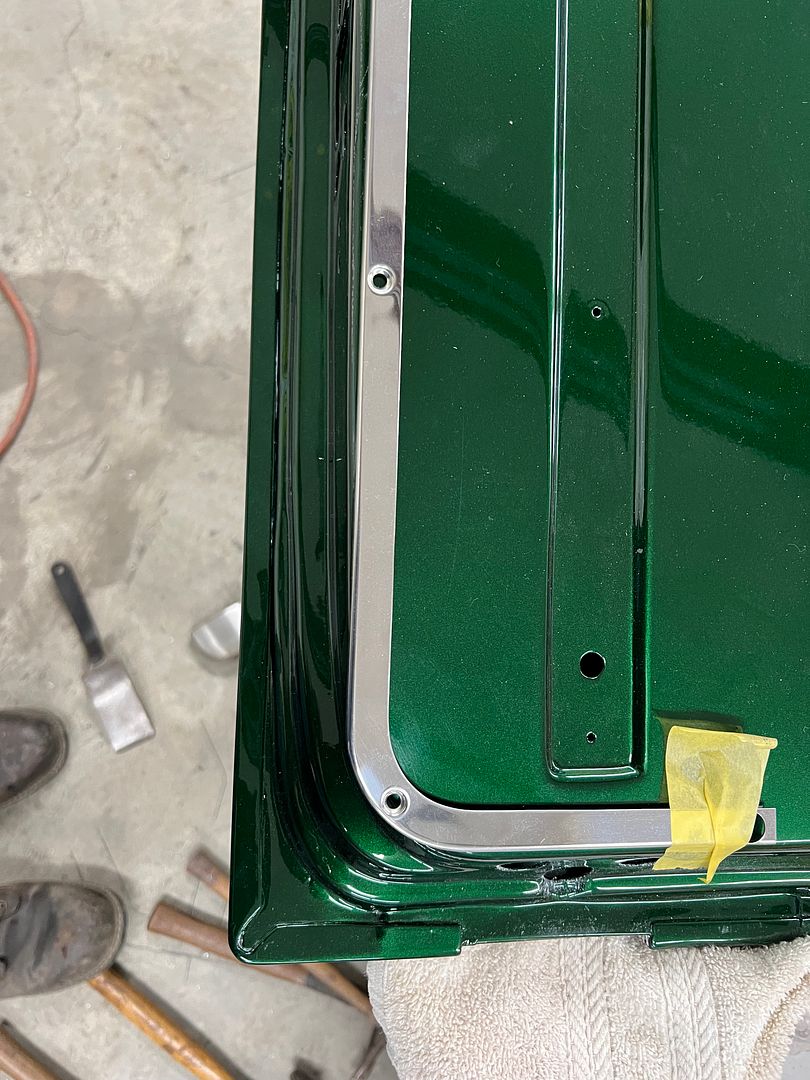 We had also ordered some stainless strips for the voids in the tailgate from McMillan Rod and Custom and wanted to retain the stainless border to use with these parts. 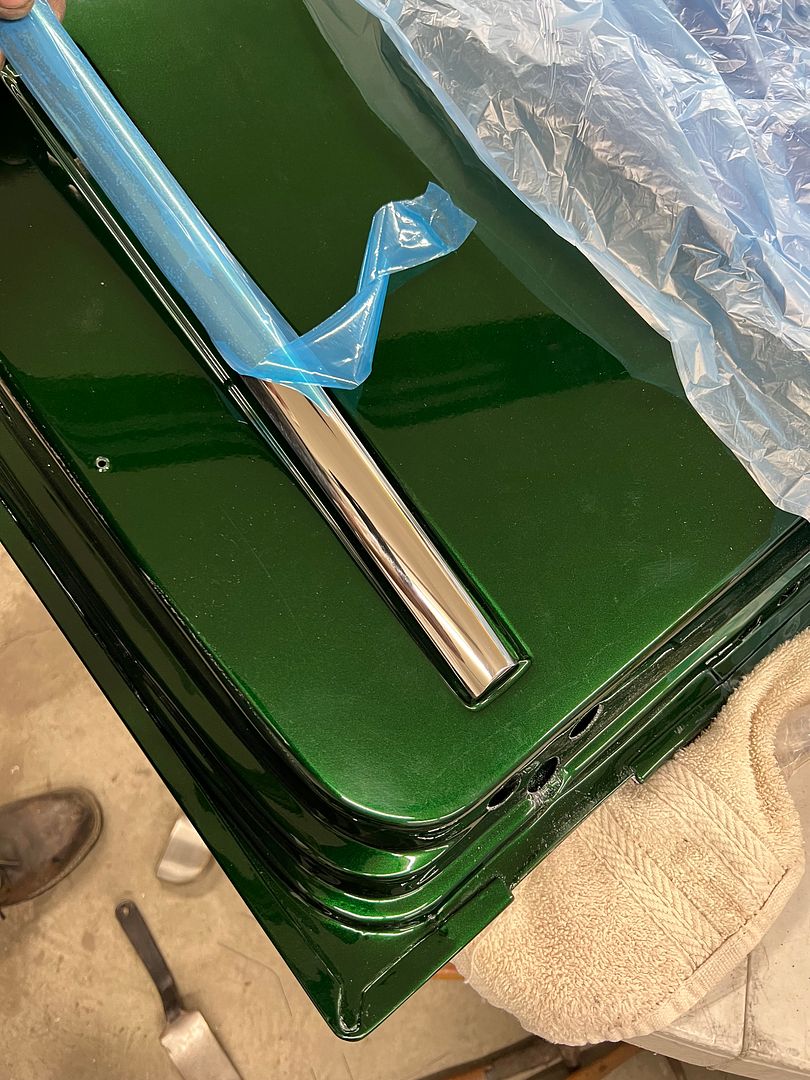 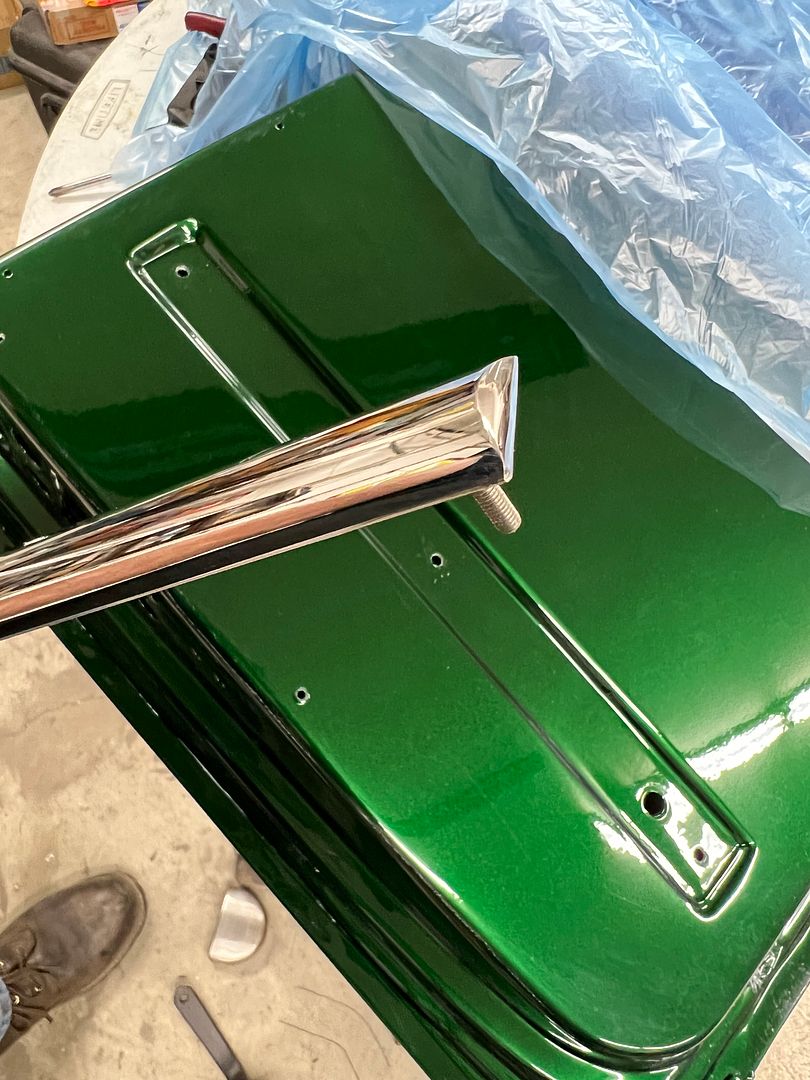 We had some 19 gauge stainless in stock, so let's give this a go. First order is to make sure we can duplicate the dimpled hole for the countersunk screws... 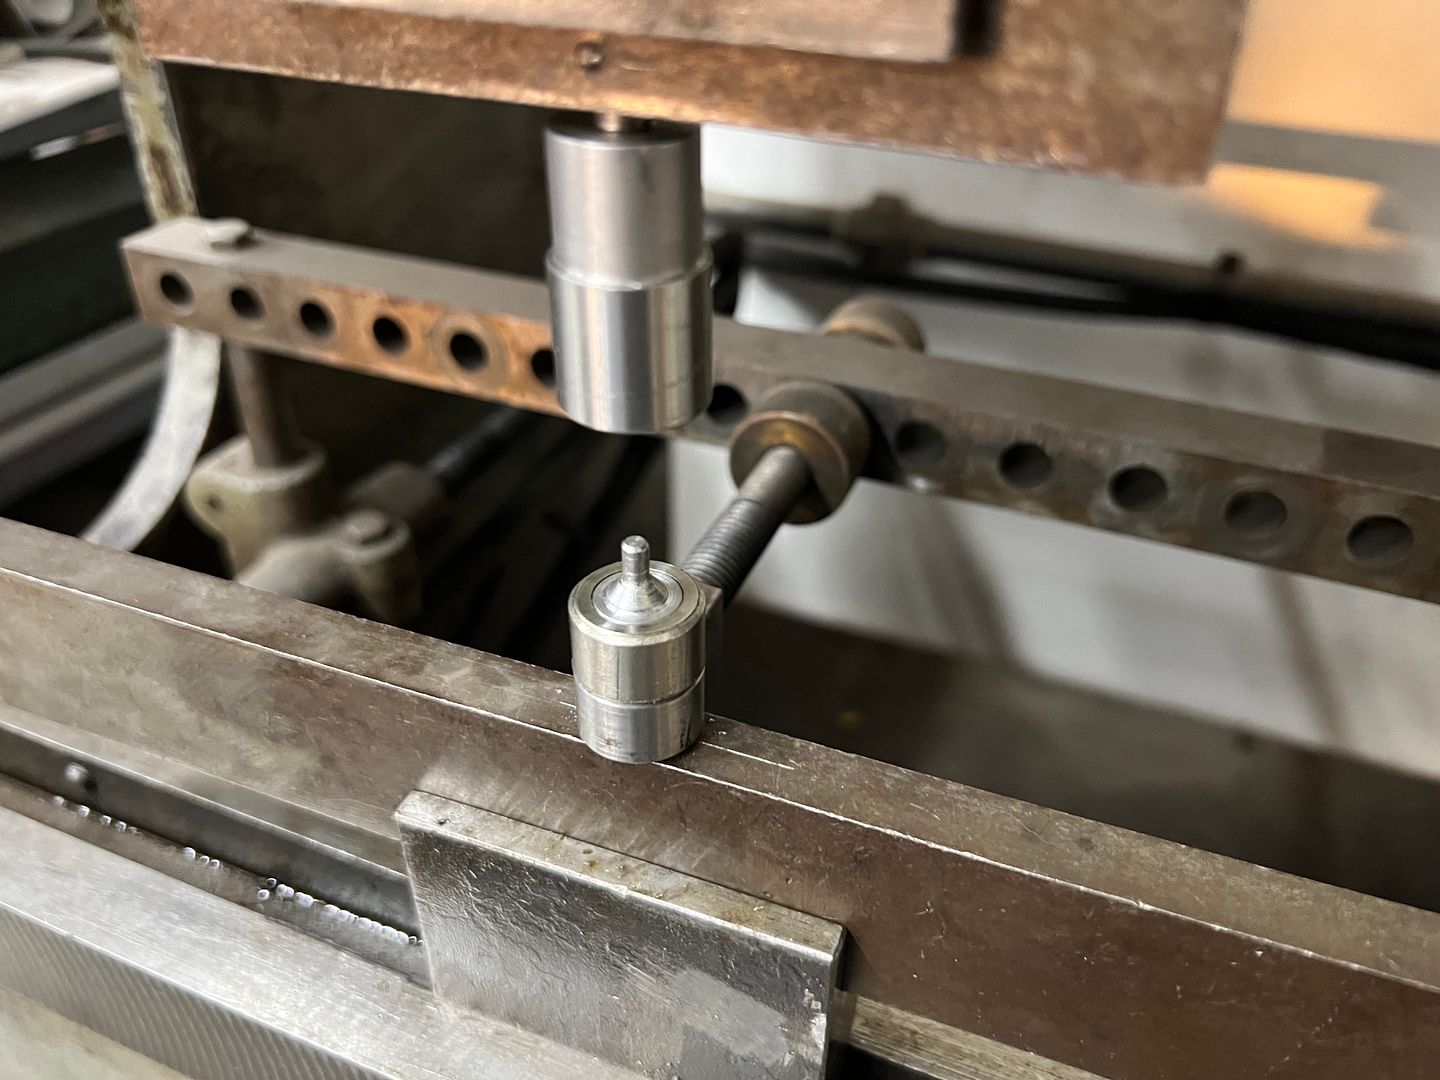 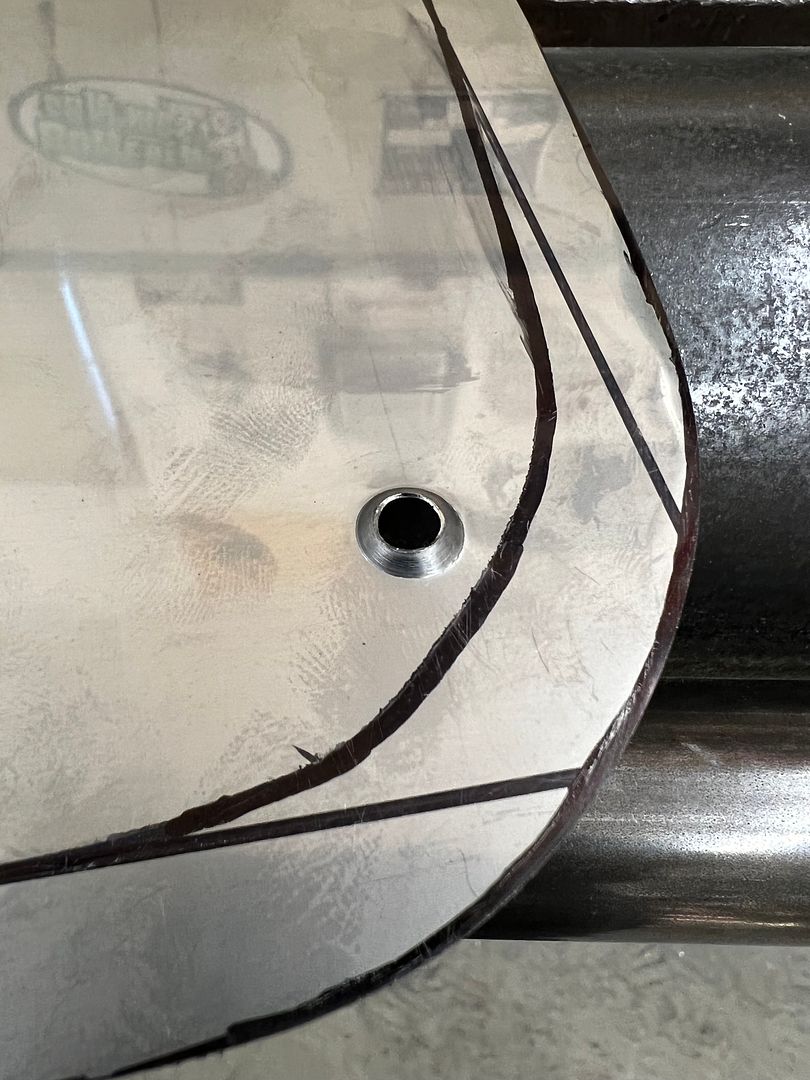 Next, the folded (side) flange on the trim piece is a consistent width and will need to be real accurate. So we opted for a hammer form to match the shape, used a tipping die to thin the bend location (to tell the metal where to bend) and a backstop on the Lennox to set the flange height. A paper pattern was used to capture the tailgate outline. 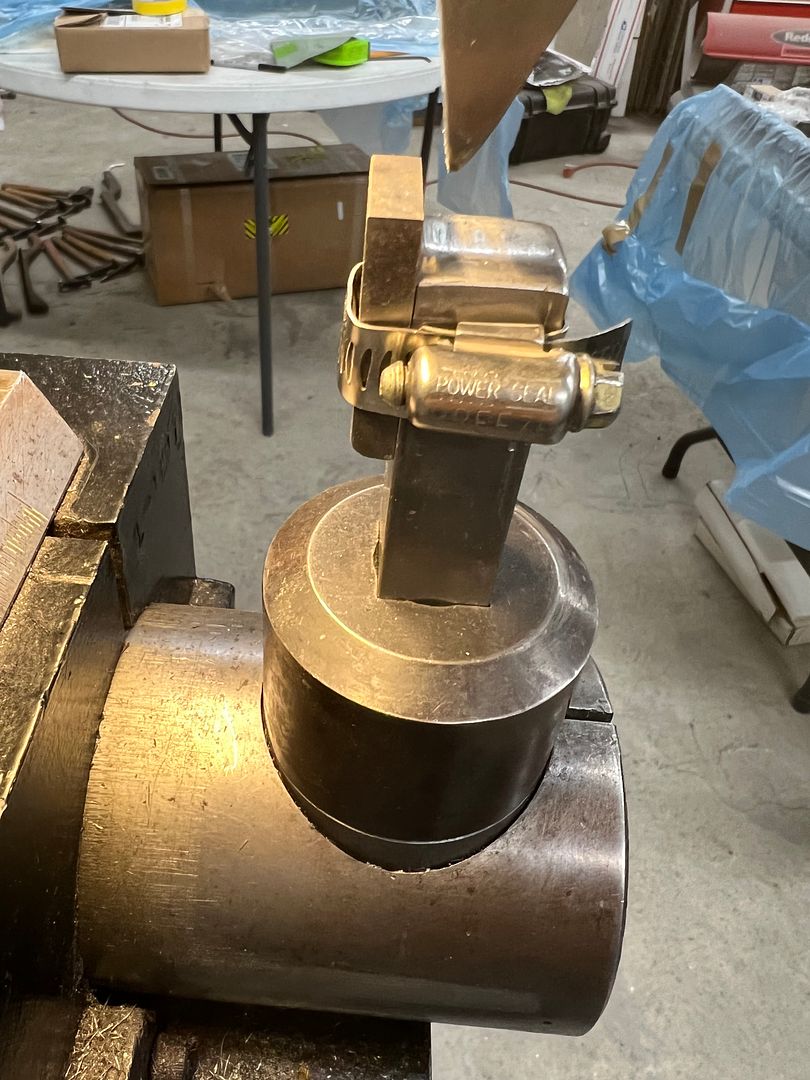 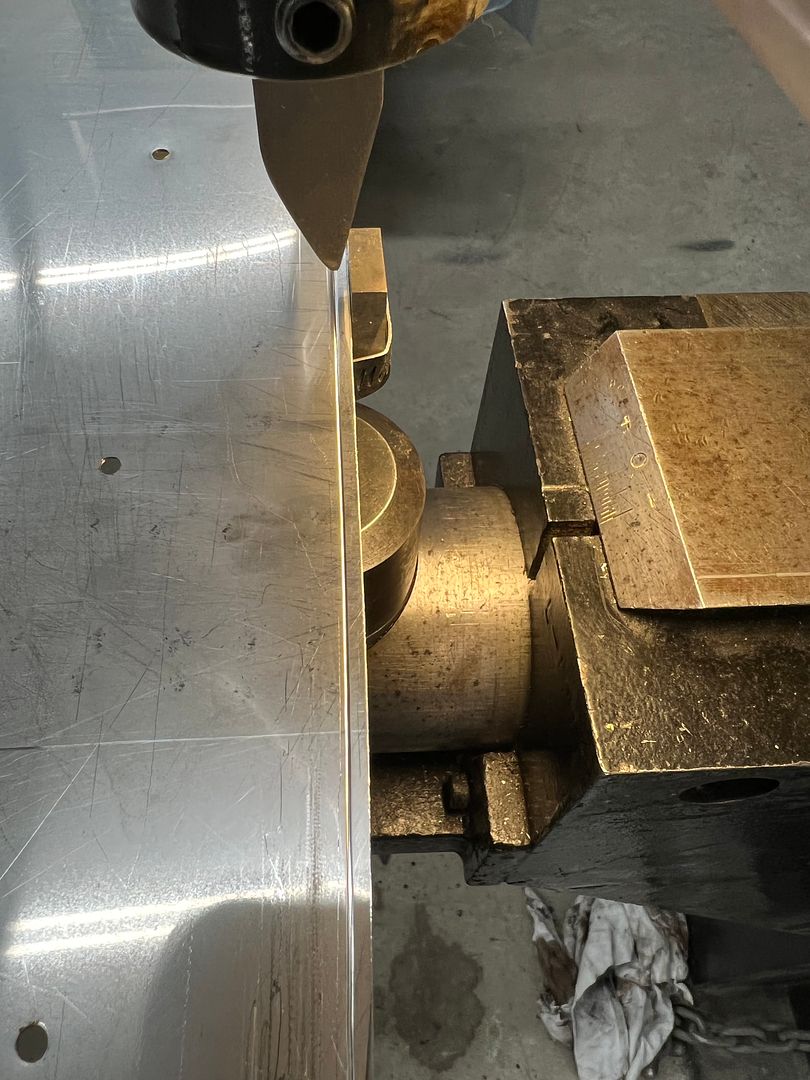 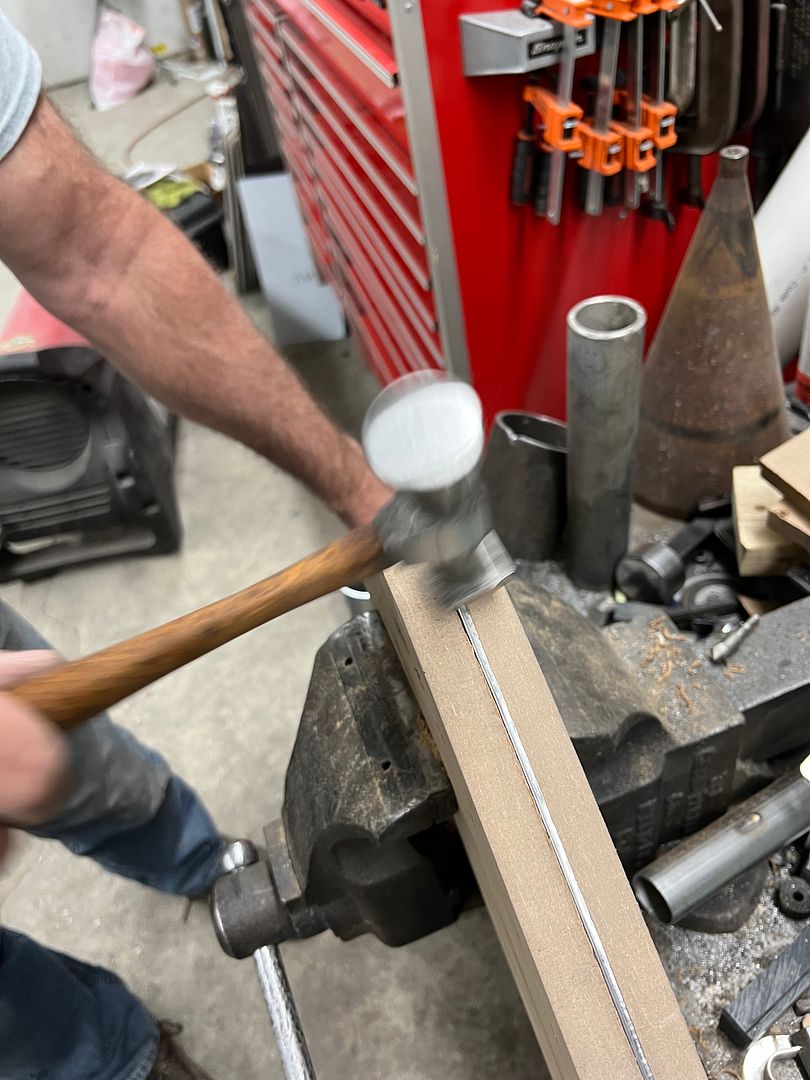 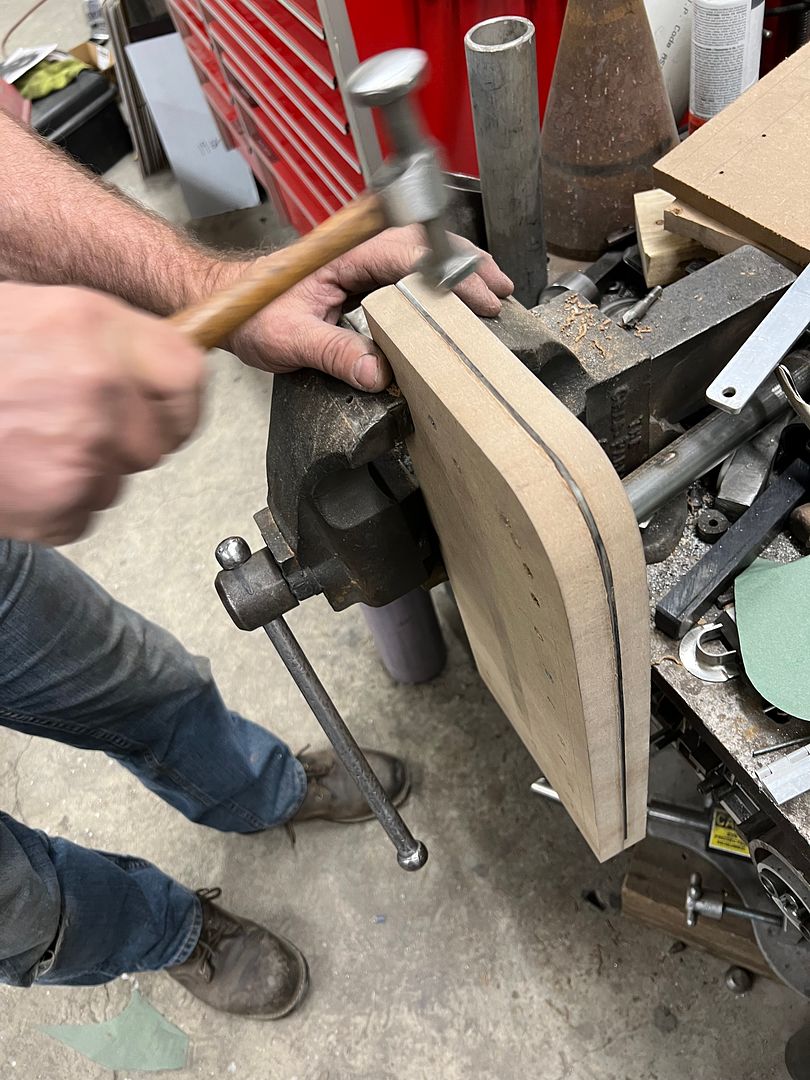 After the flange had been folded, the top part of the hammer form is set aside and the bottom section used to hold the part for polishing. We'll get it polished, trim the width and punch dimple holes, and then do a final polish.  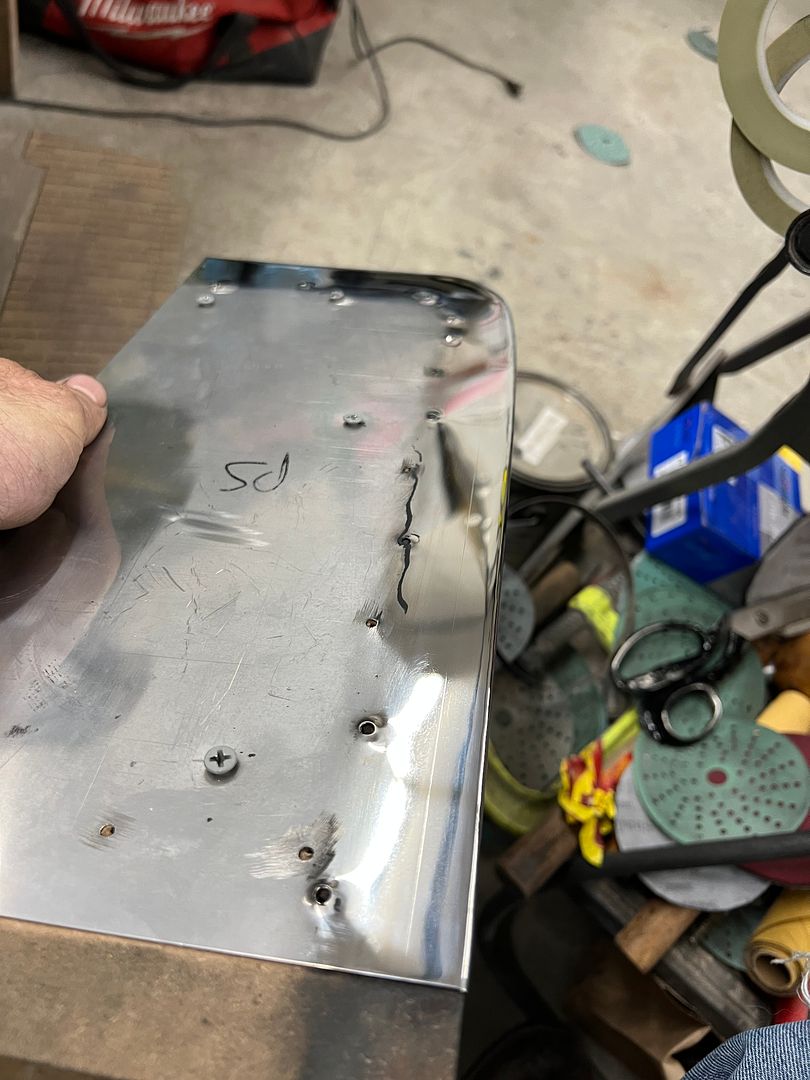 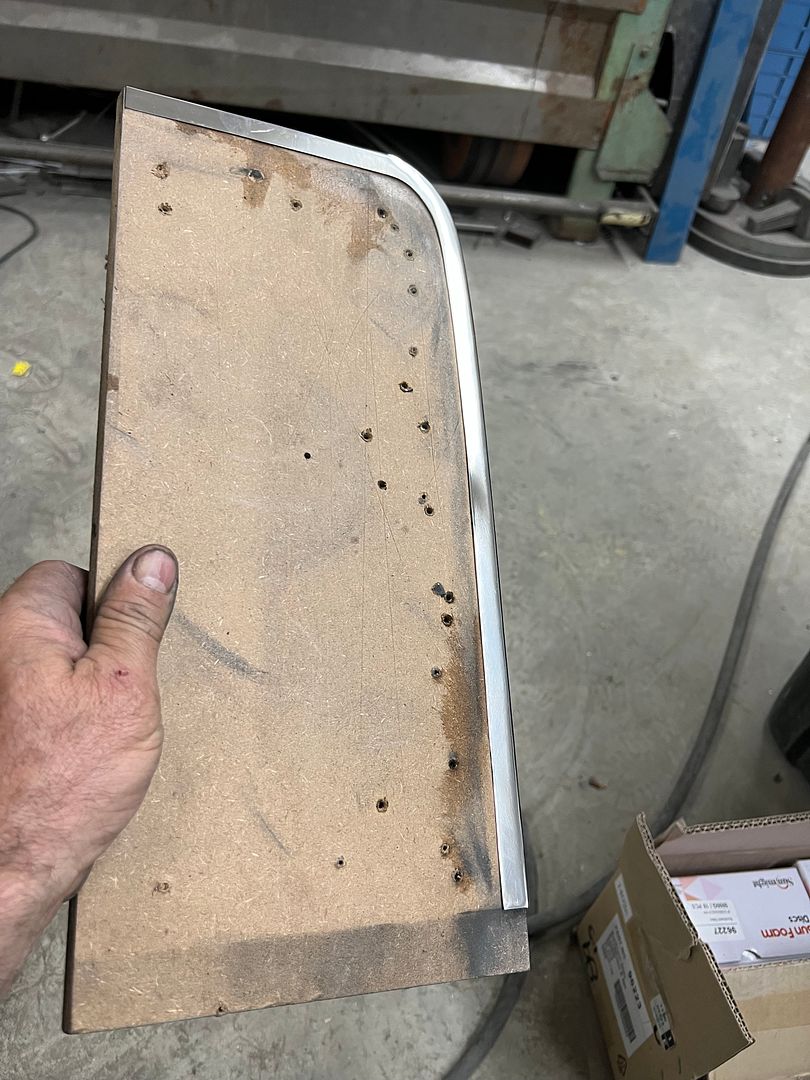 Test fit looks much better to match our one-off tailgate. 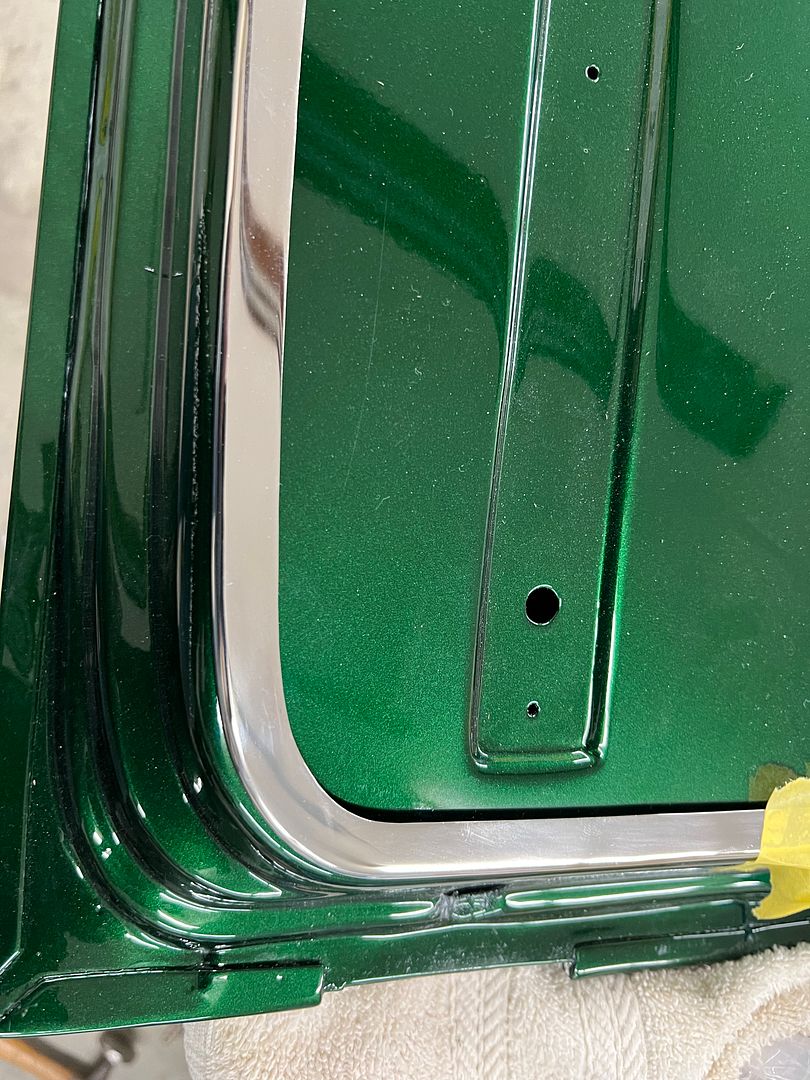 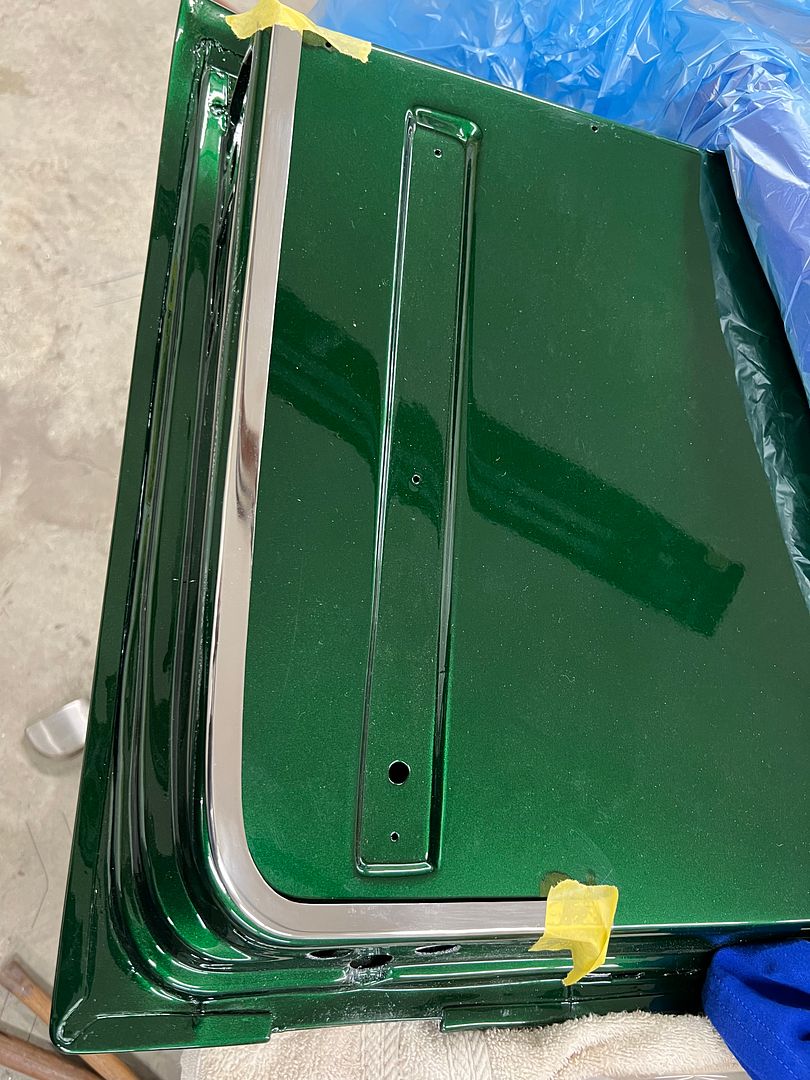 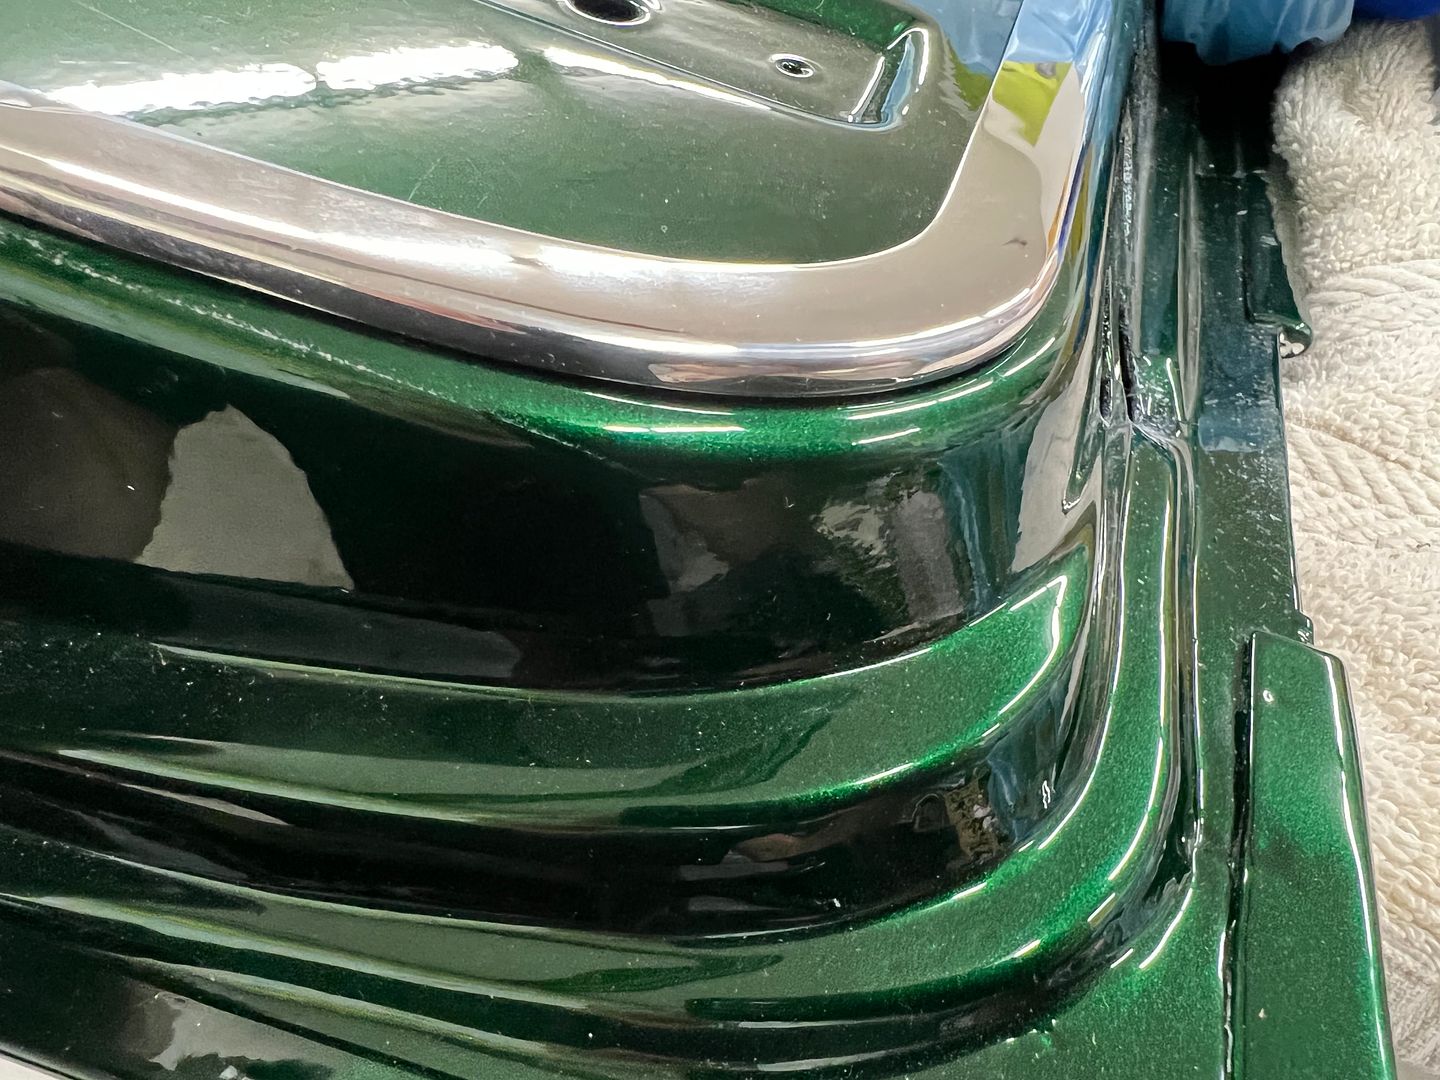
__________________
Robert |

|

|
|
05-09-2024, 08:50 AM
|
#1377 |
|
Registered User
Join Date: Jan 2013
Location: Leonardtown, MD
Posts: 1,640
|
Re: 55 Wagon Progress
We got the other side trim done for the tailgate and I had been asked to show the hammer form in more detail, so here's another go.. We actually started by pulling a paper pattern of the profile, some autobody masking paper is taped to hang over the edge, and the tracing done to show where to trim. Although we didn't have the plastic in the way at the time, here the pattern is after trimming.
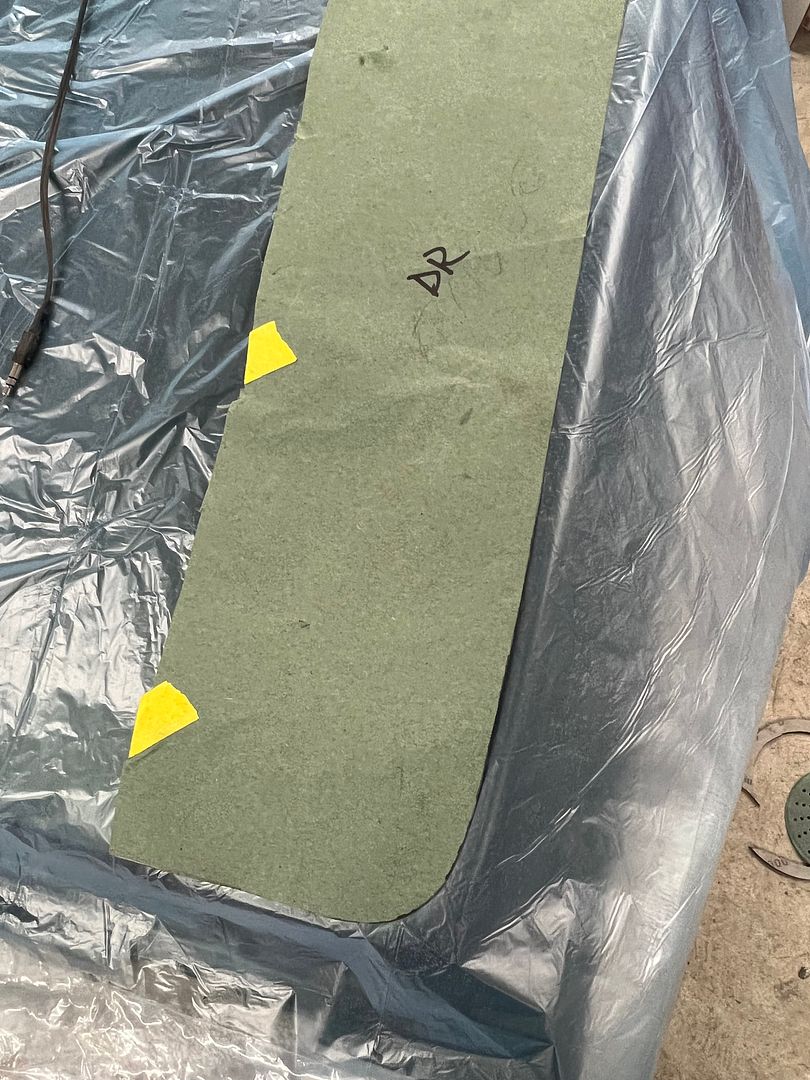 This is the pattern we use for the overall of the stainless, so that once the flange has been folded we will have a border of paint surrounding the trim (set in somewhat). Once the 19 gauge stainless has been trimmed to match our pattern, we use the tipping die in the Lennox to thin the "bend line", this gives the metal a suggestion of where it needs to bend so we should have a somewhat sharper crease given how the MDF tends to compress under a hammer blow. Where I would normally use one of our round backstops on the lower die, this shows to leave us without contact with the backstop at the initial entry and final exit from the machine, as the backstop is centered on the die. To correct that, we opted for 3/4 flat stock that gives us contact the entire width of the die set. 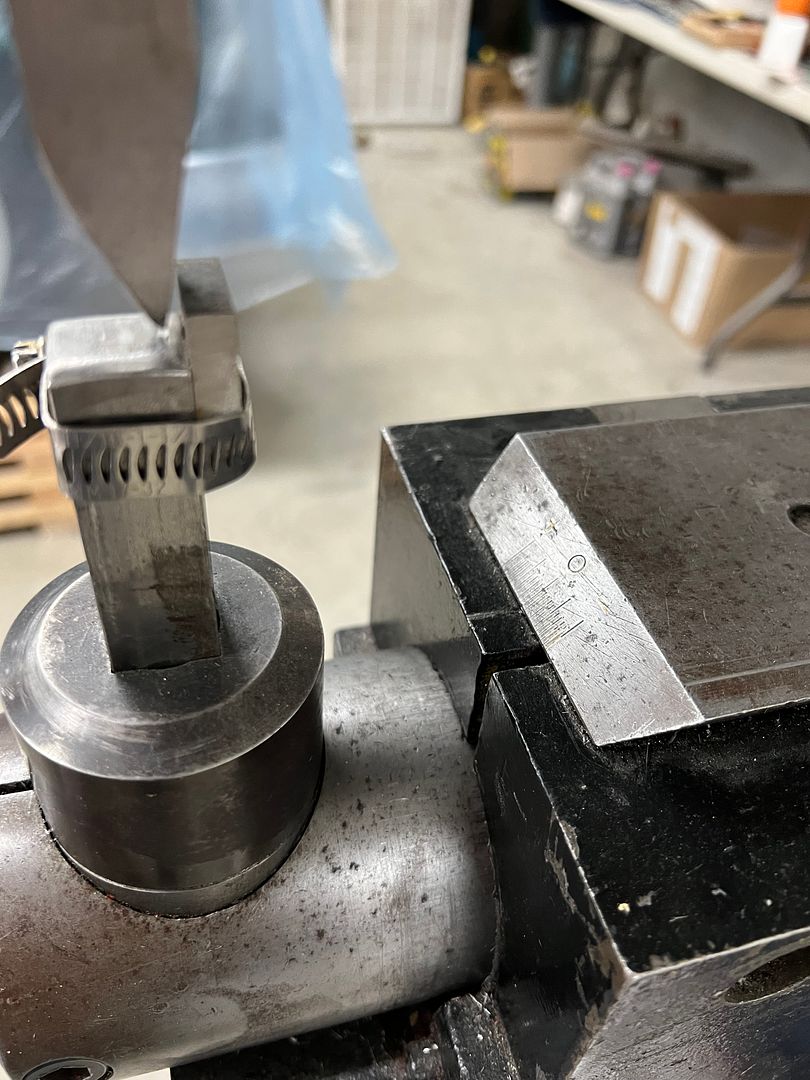 The backstop distance sets the height of the side flange of the trim, and here is the stainless after running through the tipping die for thinning the bend line. 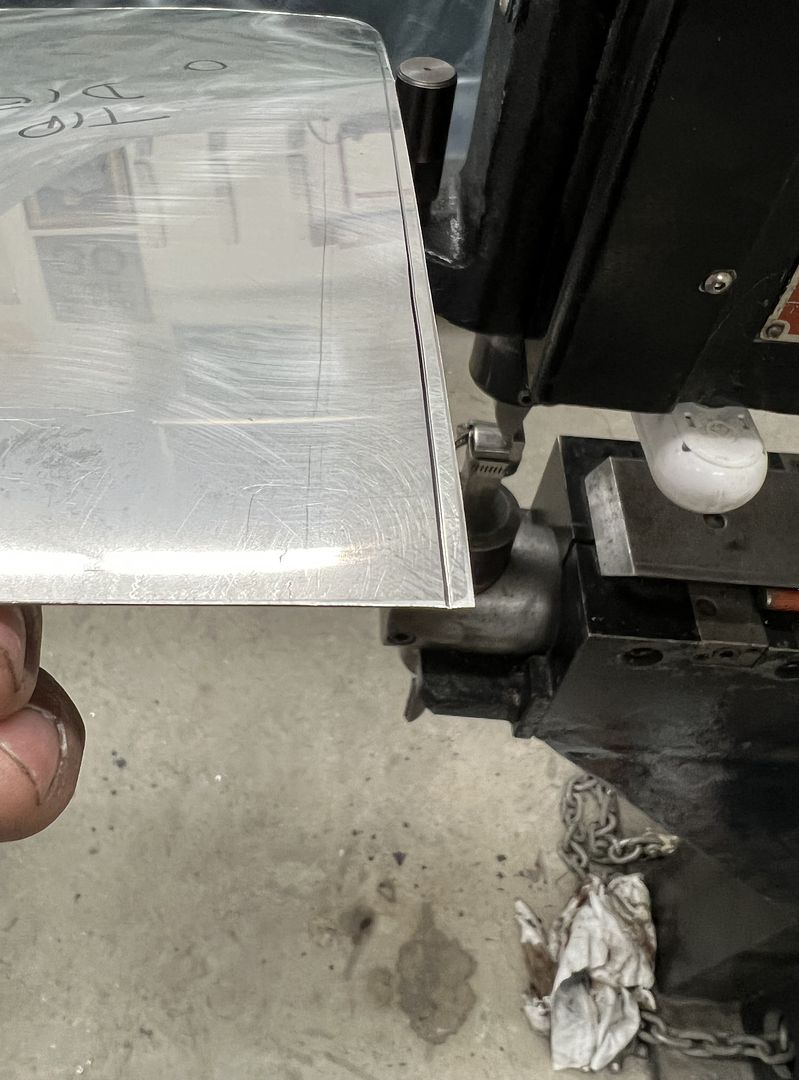 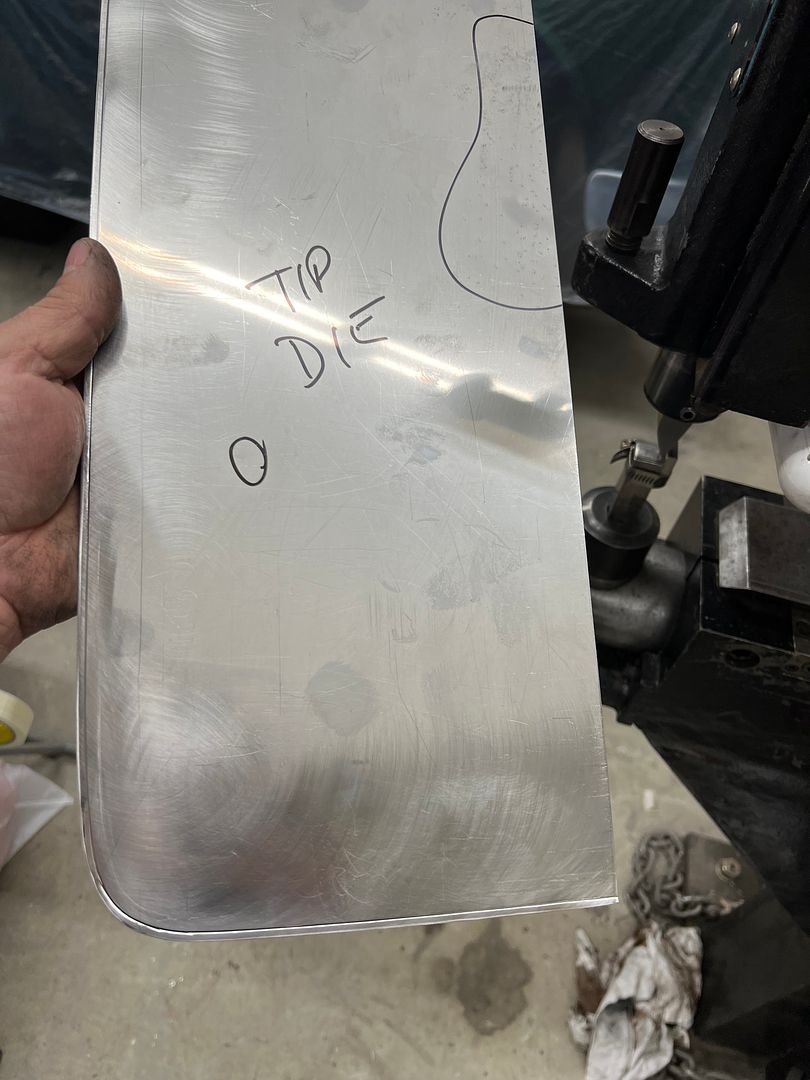 Then the stainless is clamped between our MDF hammer form, note the outer portion of the hammer form matches the thinned bend line exactly. 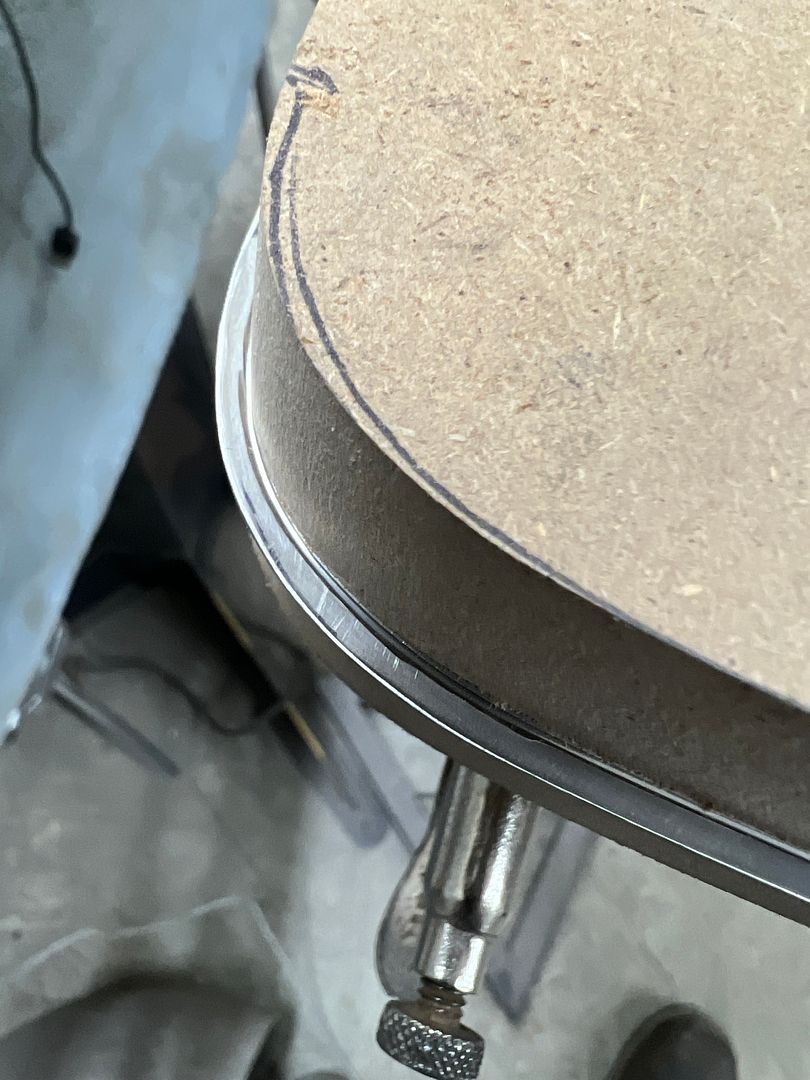 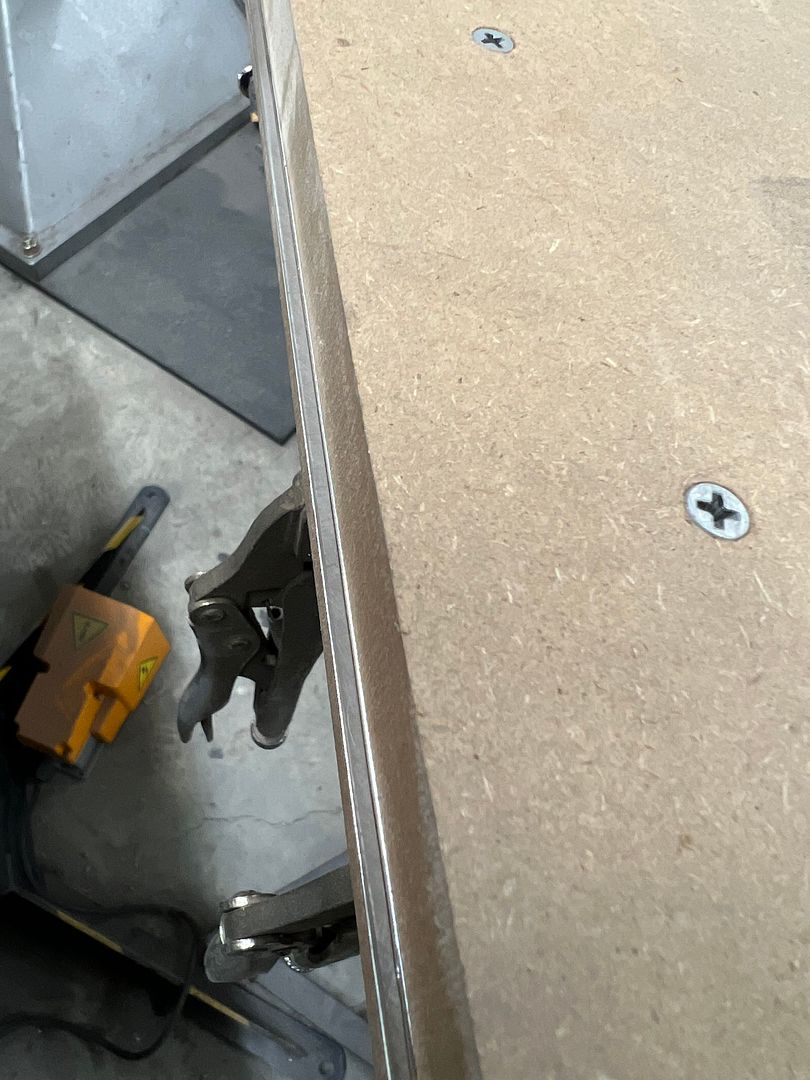 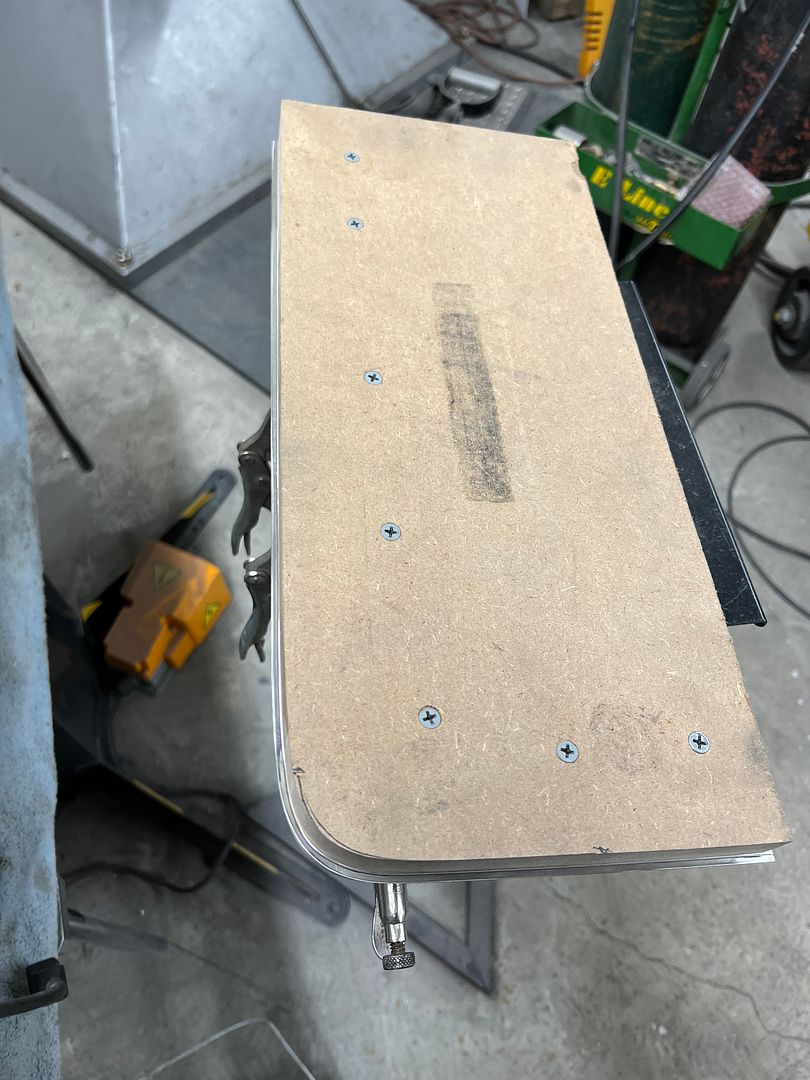 The Sandwich is held together with screws and then clamped in the vise for the hammering operation... https://youtube.com/shorts/5WiGK0550...bhT7Mo5BjpPIHR Once complete the bottom half of the hammer form becomes a stable base for pre-polishing, and some shorter screws are used to keep thing in unison. We use our typical polishing sequence of 400, 800, 1500, and then polishing on the buffer using green compound for a darker hue. https://youtu.be/3OGAjPCnGwQ?si=cryFGWW1Q2eeEVfL After the initial polish, the outer flange is covered with masking tape (to protect from scratching at this next step) and calipers are used to set the width and mark the cut line, like shown here.. The bulk is trimmed away using our Milwaukee M18 shears, and final done using Wurth snips. The edge is fine tuned with our Dynabrade belt file, and then the holes are located and dimple countersunk. Then another polish job, and all the parts are located in prep for drilling the screw holes into the tailgate. Really happy with the nice parallel setback from the edge with these new trim pieces to match my patch panels. 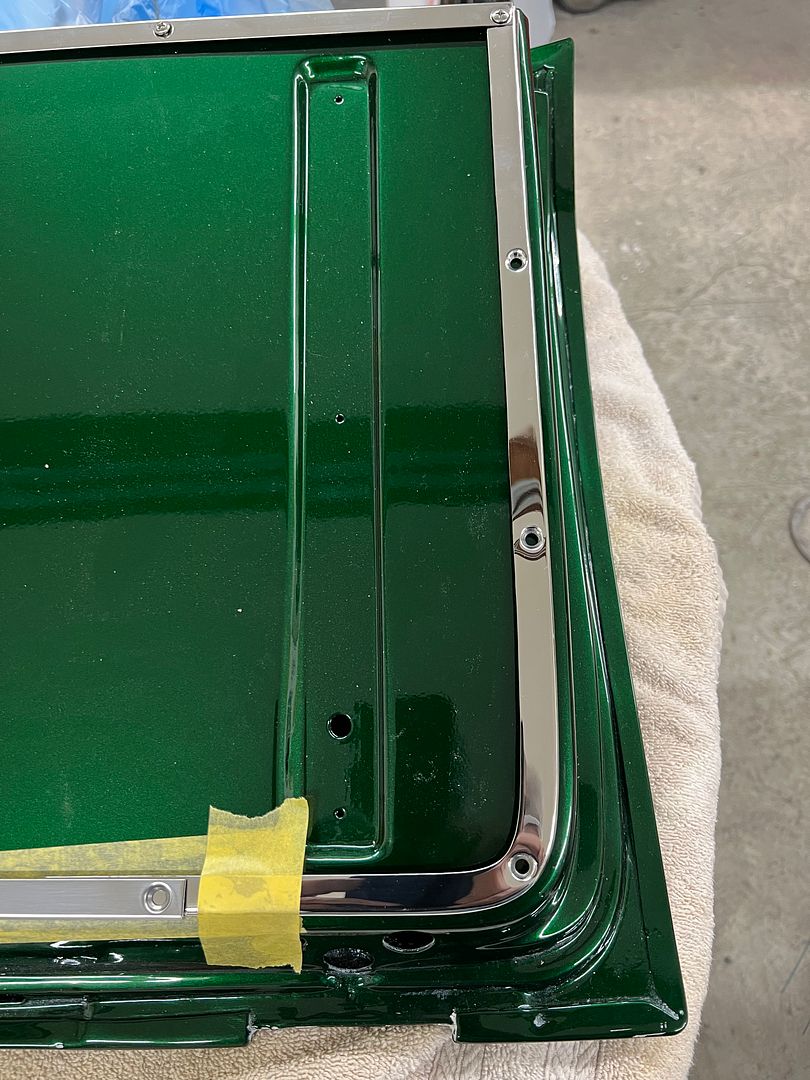 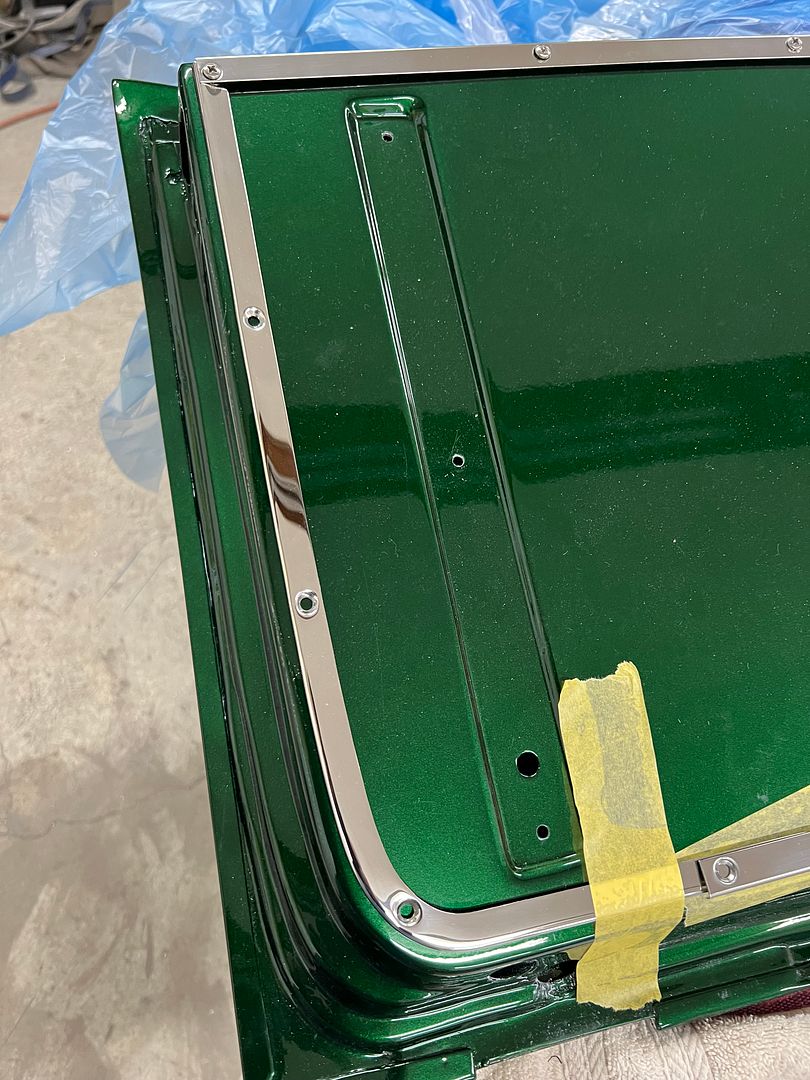 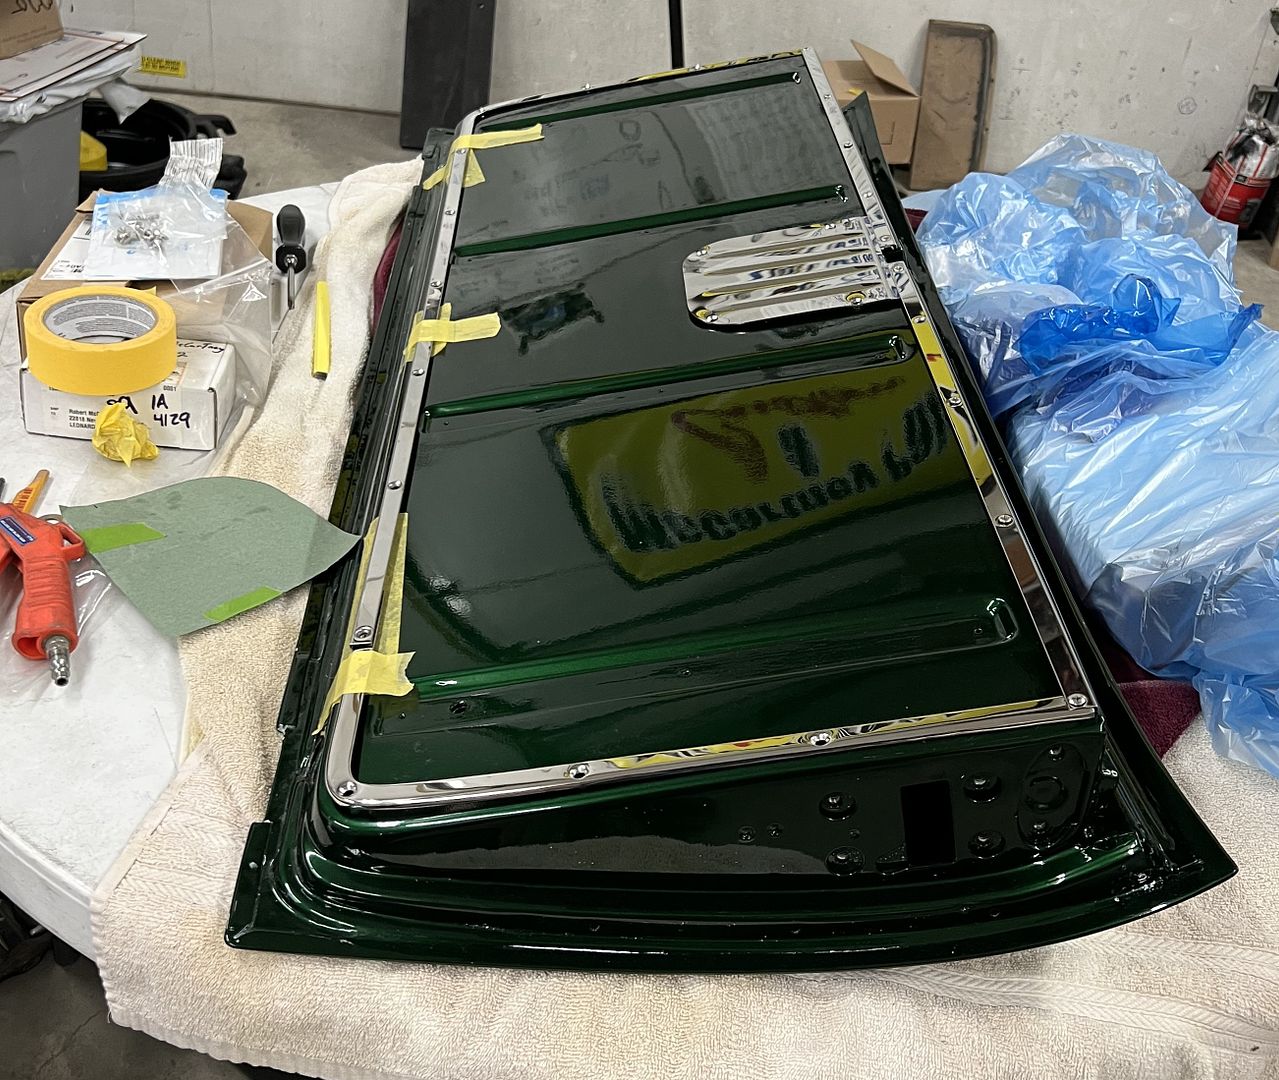 Next we'll get all the holes drilled and our upholstery added in the center...
__________________
Robert |
|
|
|
|
05-29-2024, 09:35 AM
|
#1378 |
|
Registered User
Join Date: Jan 2013
Location: Leonardtown, MD
Posts: 1,640
|
Re: 55 Wagon Progress
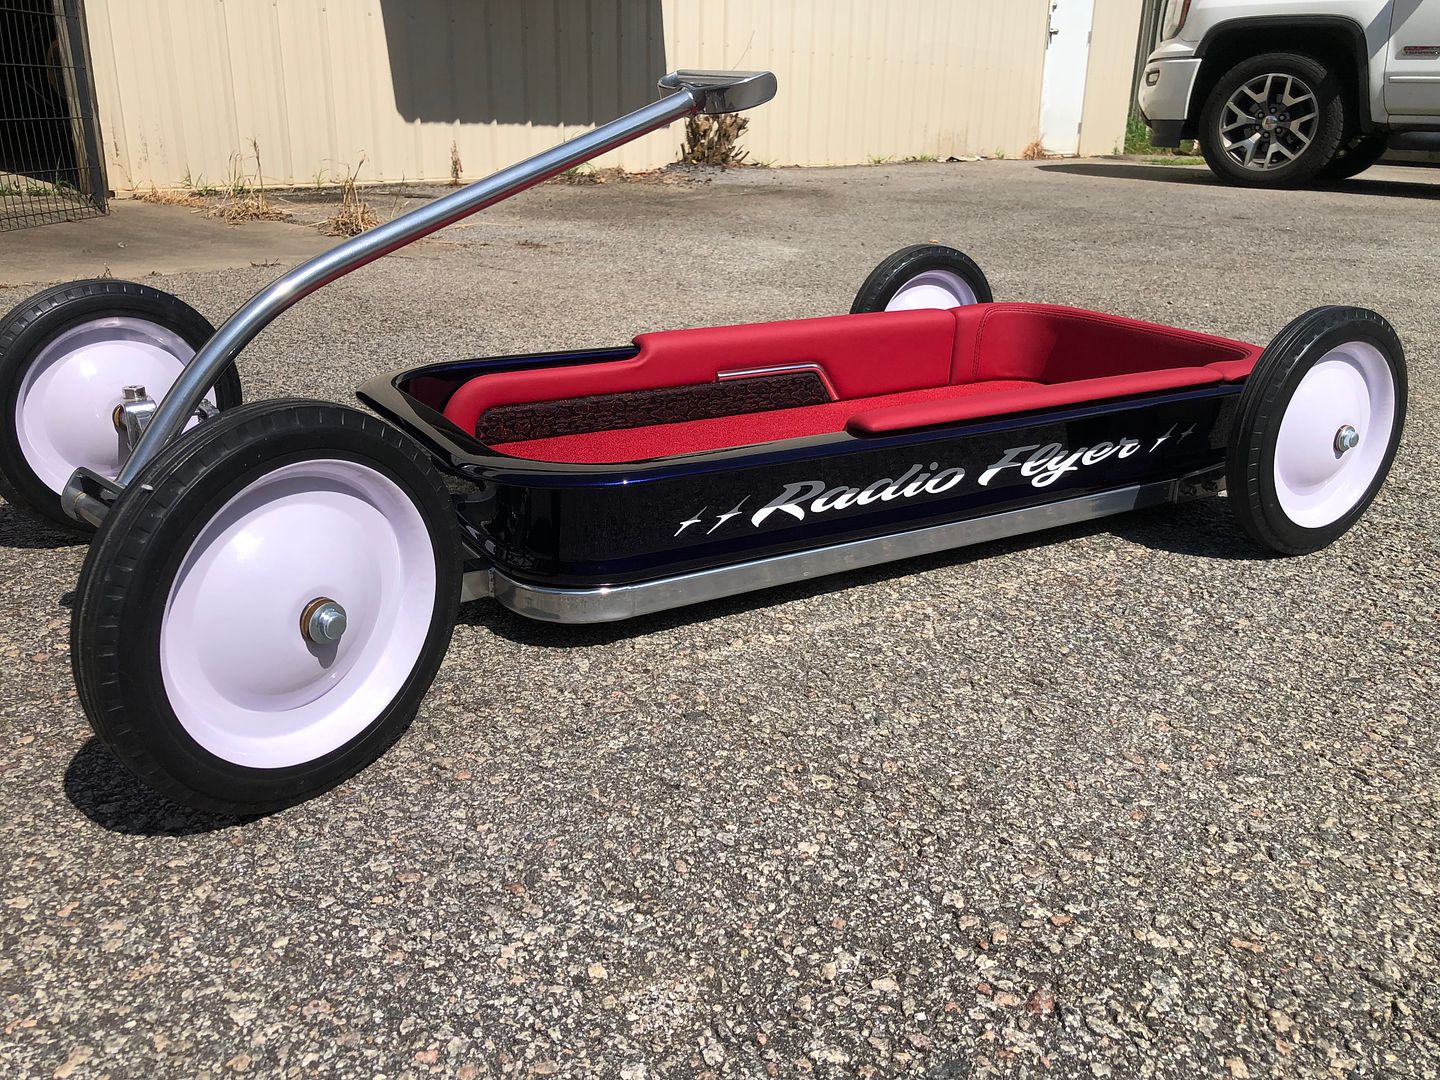
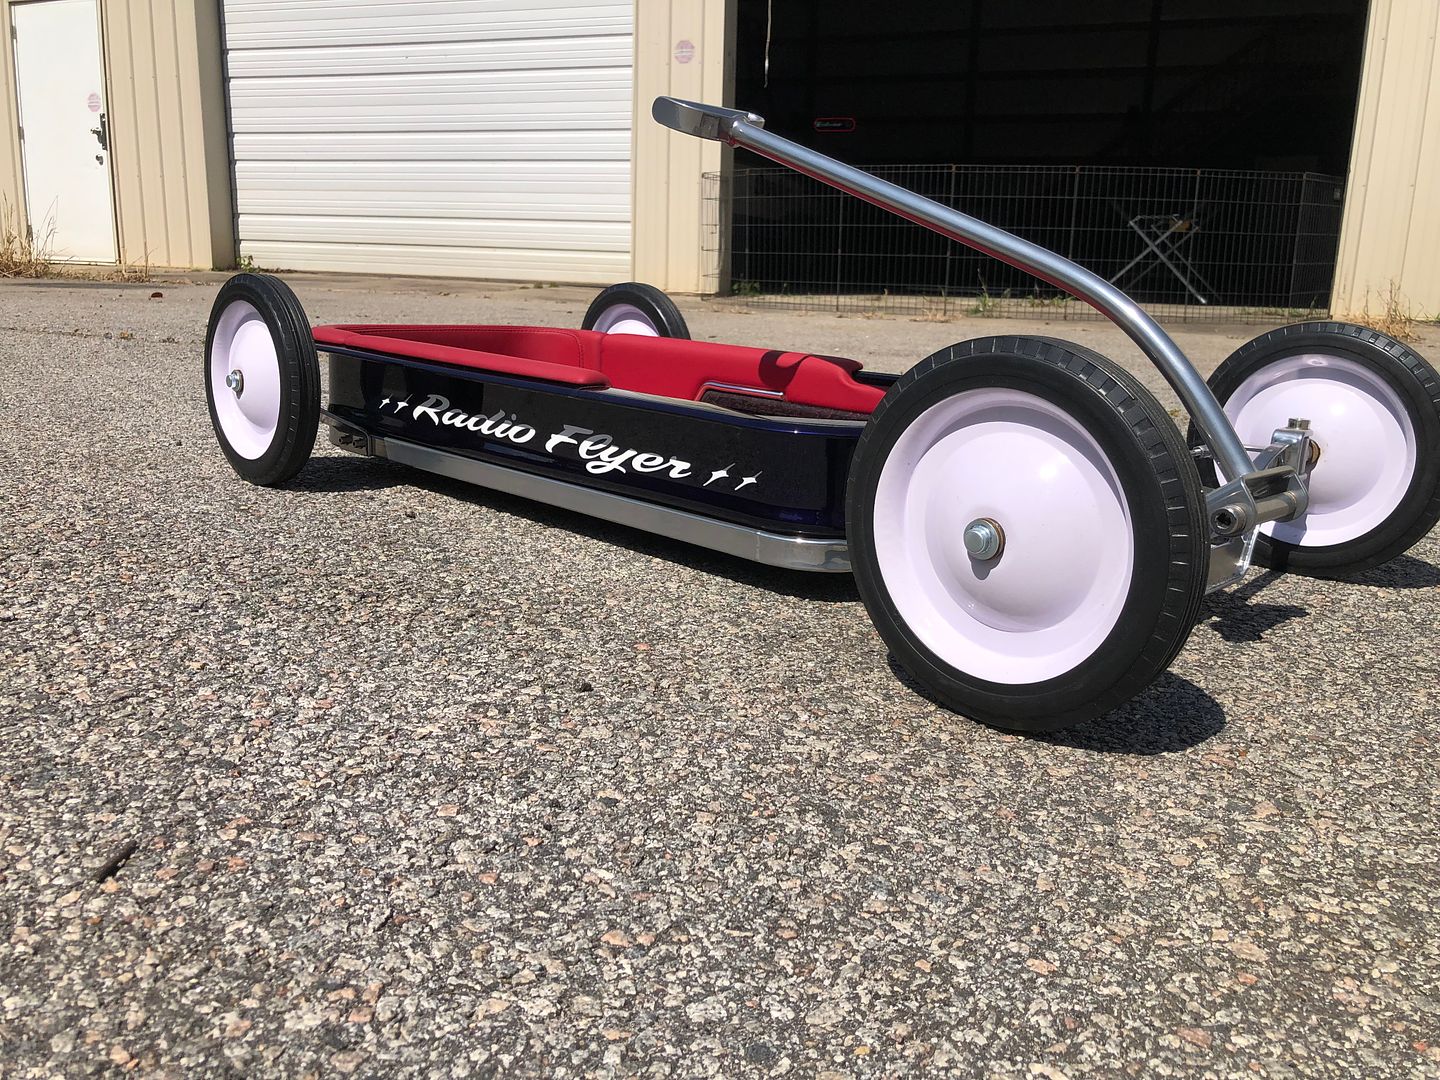
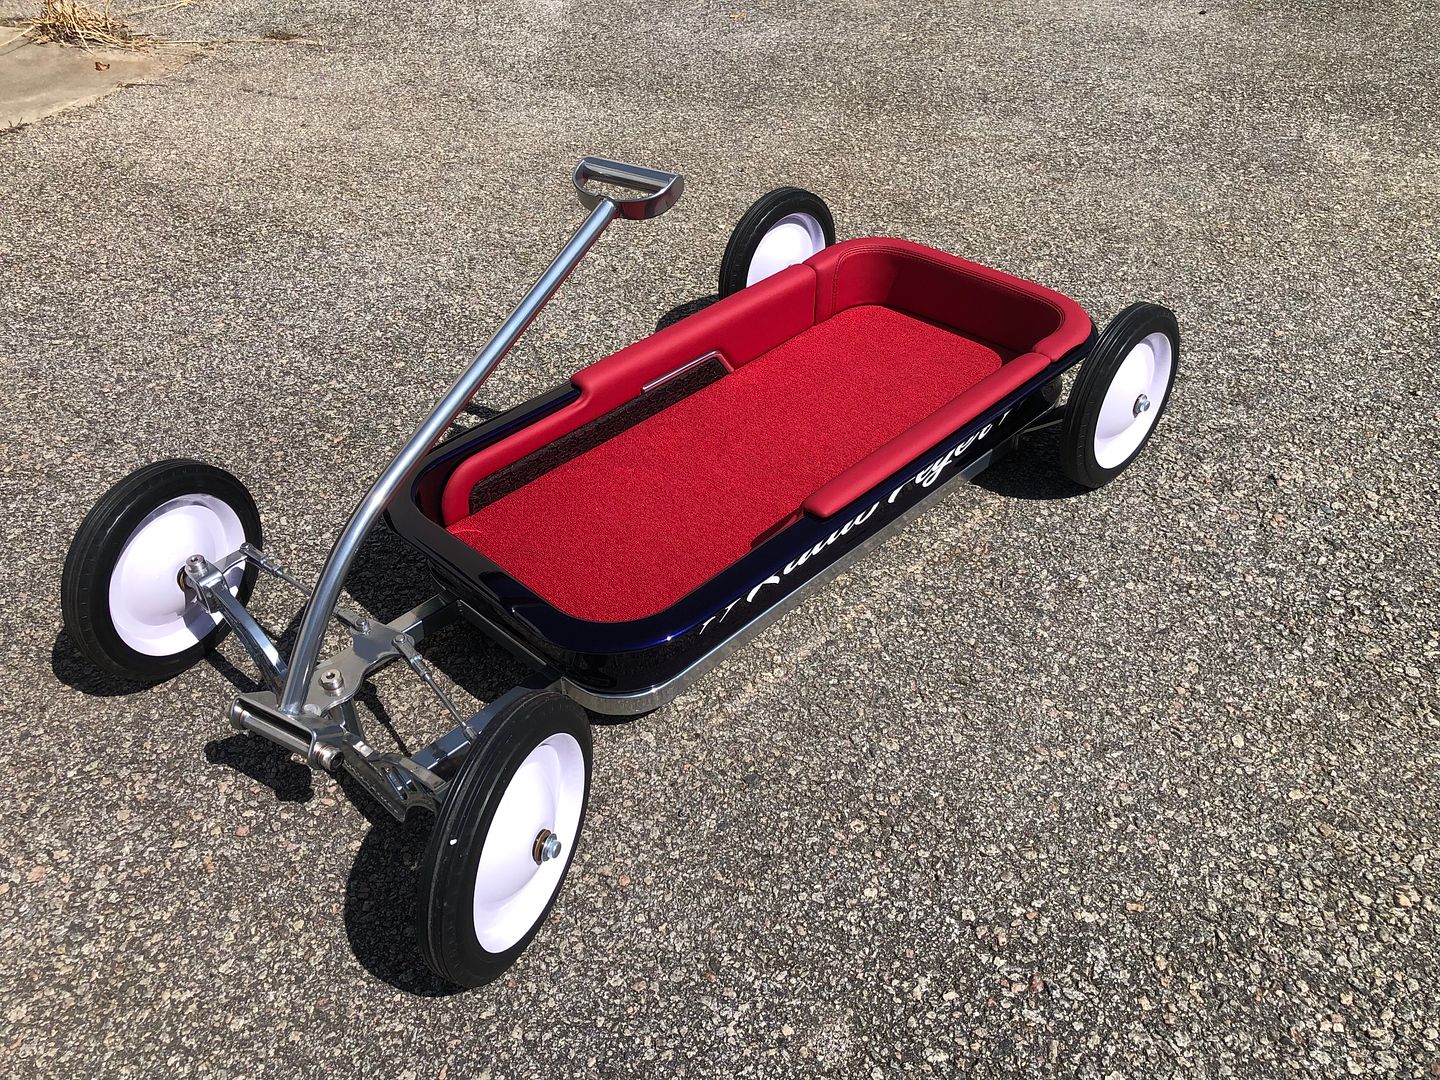
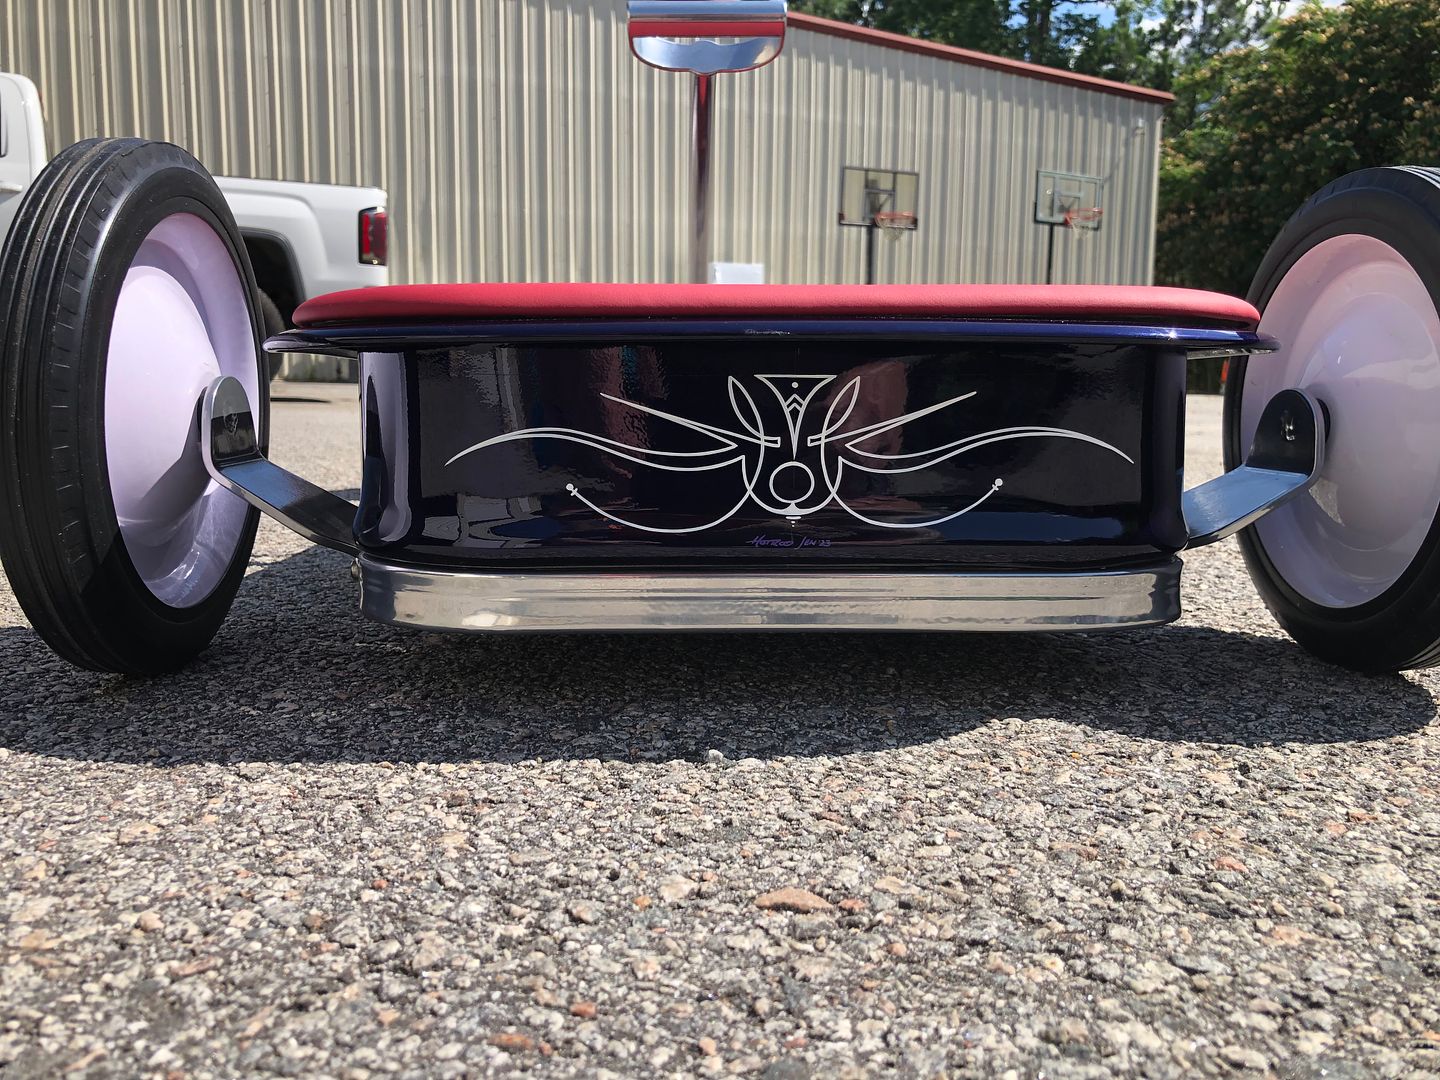
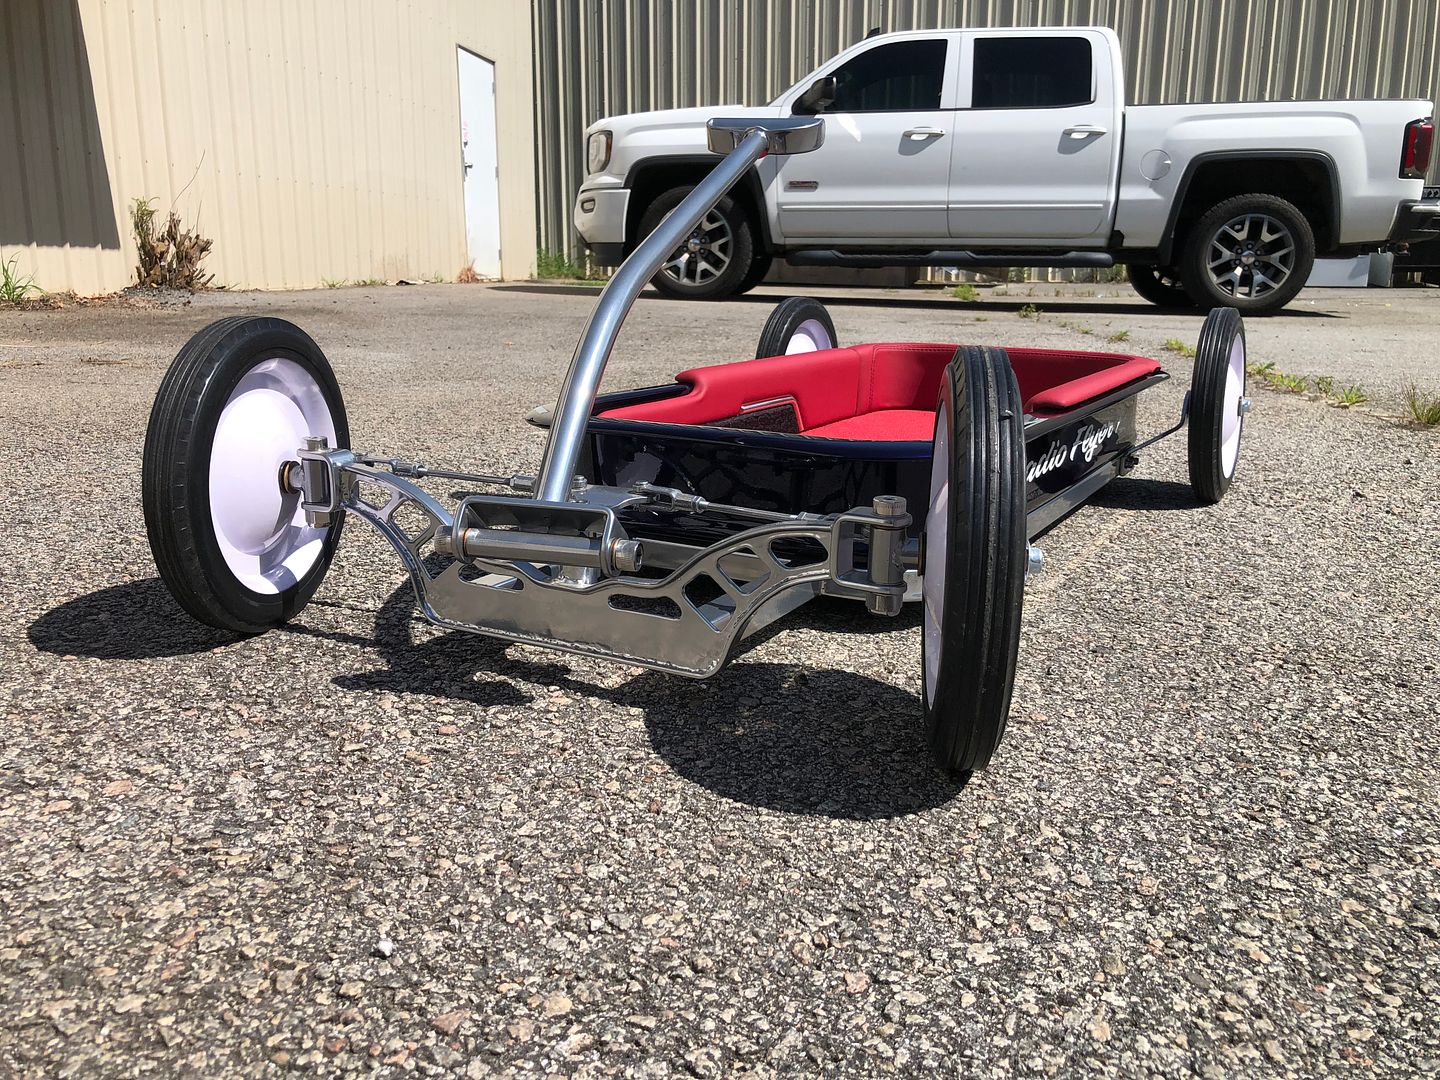
Got some pics from JB at the upholstery shop yesterday. The Radio Flyer wagon is now complete. He was initially going to do tan upholstery, but when he laid the red against the wagon he said the wild color won out. Better match to the build. So this little wagon was painted in Leonardtown MD, lettered and striped in Hummelstown PA, and now upholstered in Lexington SC. It really gets around..
__________________
Robert |
|
|
|
|
05-30-2024, 12:32 AM
|
#1379 |
|
Post Whore
  Join Date: May 2015
Location: Alabama
Posts: 14,624
|
Re: 55 Wagon Progress
WOW..!!! that is slick!!
__________________
Mongo...aka Greg RIP Dad RIP Jesse 1981 C30 LQ9 NV4500..http://67-72chevytrucks.com/vboard/s...d.php?t=753598 Mongos AD- LS3 TR6060...http://67-72chevytrucks.com/vboard/s...34#post8522334 Columbus..the 1957 IH 4x4...http://67-72chevytrucks.com/vboard/s...63#post8082563 2023 Chevy Z71..daily driver |

|
|
|
Today, 07:41 AM
|
#1380 |
|
Registered User
Join Date: Jan 2013
Location: Leonardtown, MD
Posts: 1,640
|
Re: 55 Wagon Progress
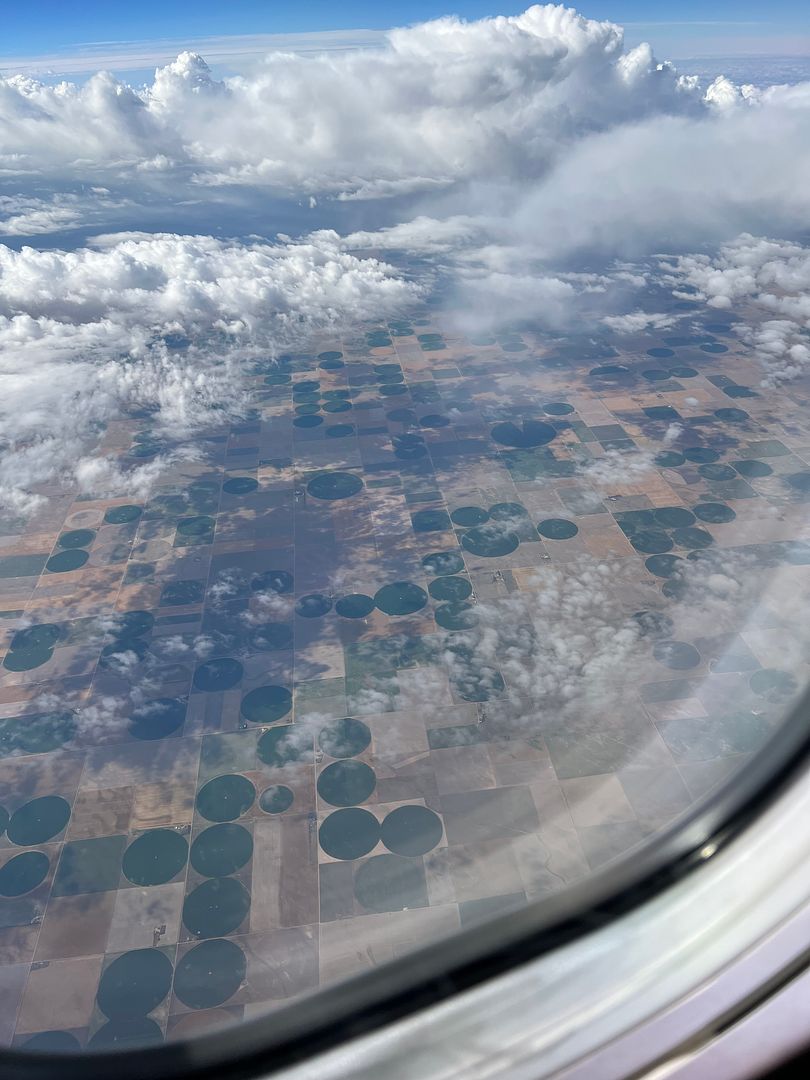
Some pictures from my recent trip to pick up a new shop truck... July 3rd, I flew out of BWI about 8am with a layover in Denver. Then a connection up to Redmond Oregon.
   The truck had some dry rot on the old tires, so rather than tempt fate, I sprung for some new tires and the two fellas I dealt with, Chuck and Robert, went above and beyond to help get the truck ready.. while one was picking me up from the airport, the other was picking up the wheels/new tires from the local Discount Tire. 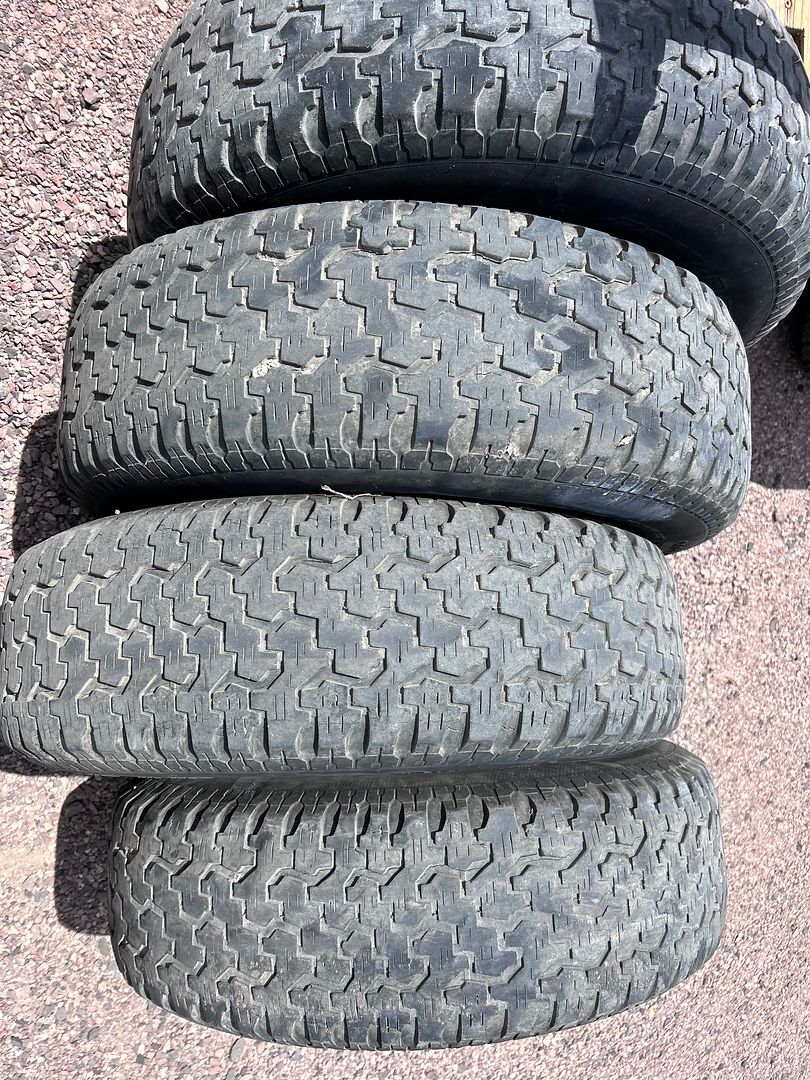 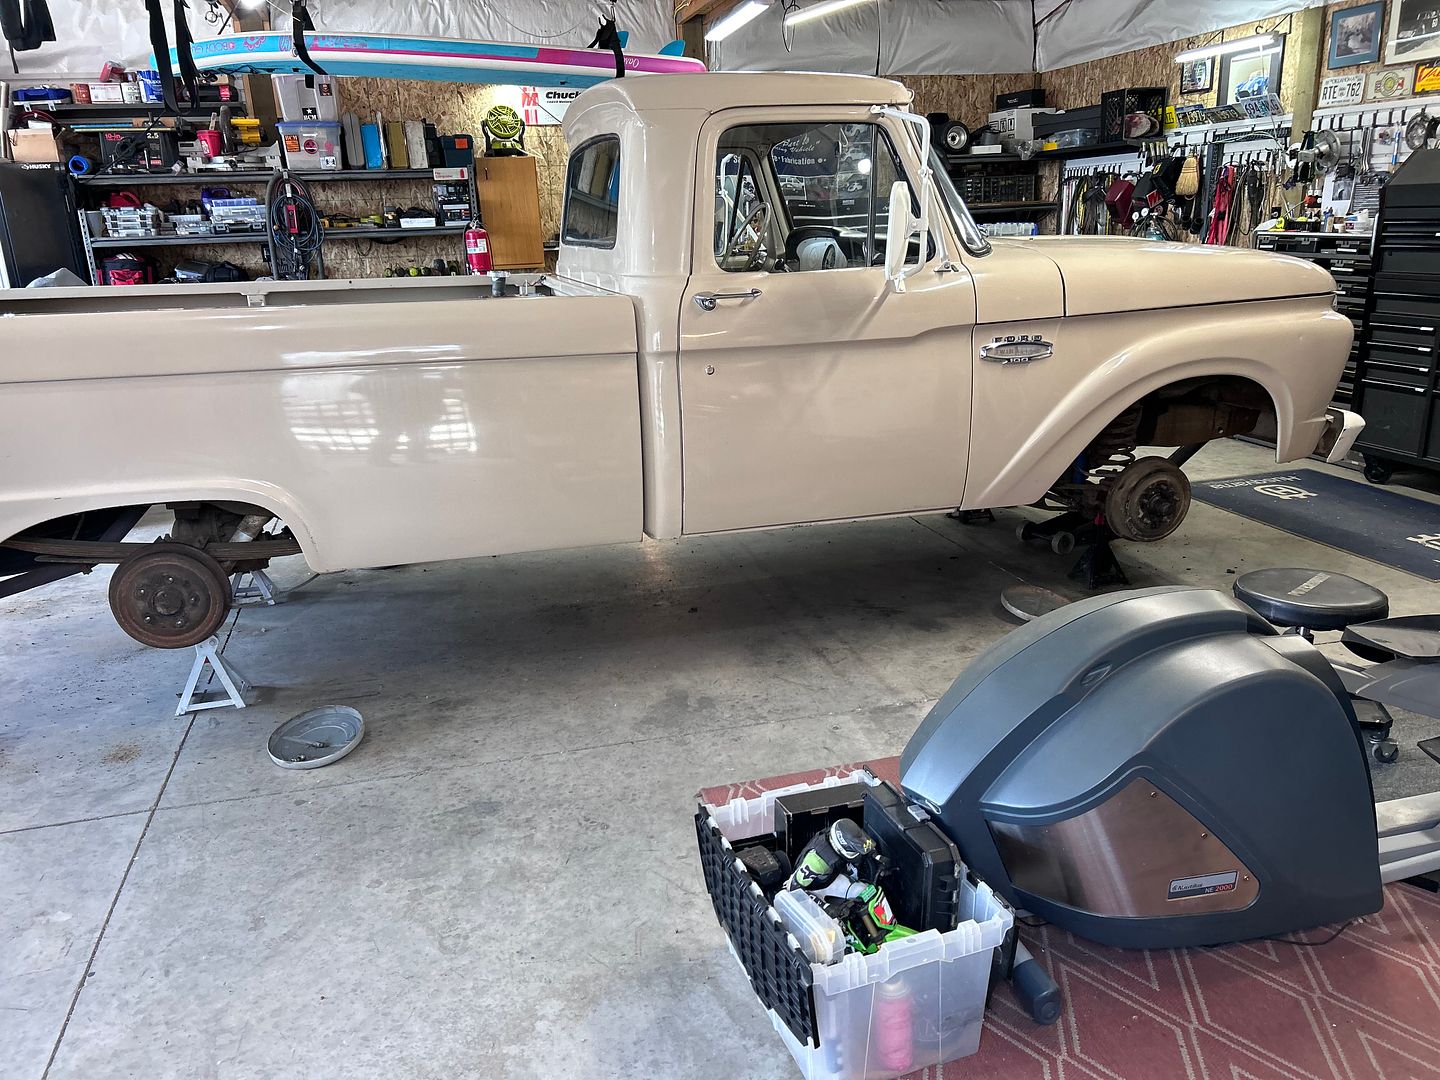 Upon arrival I find about the most solid, original 1966 I have ever seen. We looked over a few things and installed the wheels/new tires on the truck. My departure was the first test drive. Got to have faith in the old 66.. https://www.youtube.com/watch?v=rKTU0pc7Oqk I drove south of Terrebonne to Redmond, stopped at the local Walmart for some essentials. A cooler, drinks, ice, a fire extinguisher, and a suction cup phone mount for map navigation. Heading east out of Oregon towards Idaho. 4-65 AC at its finest. 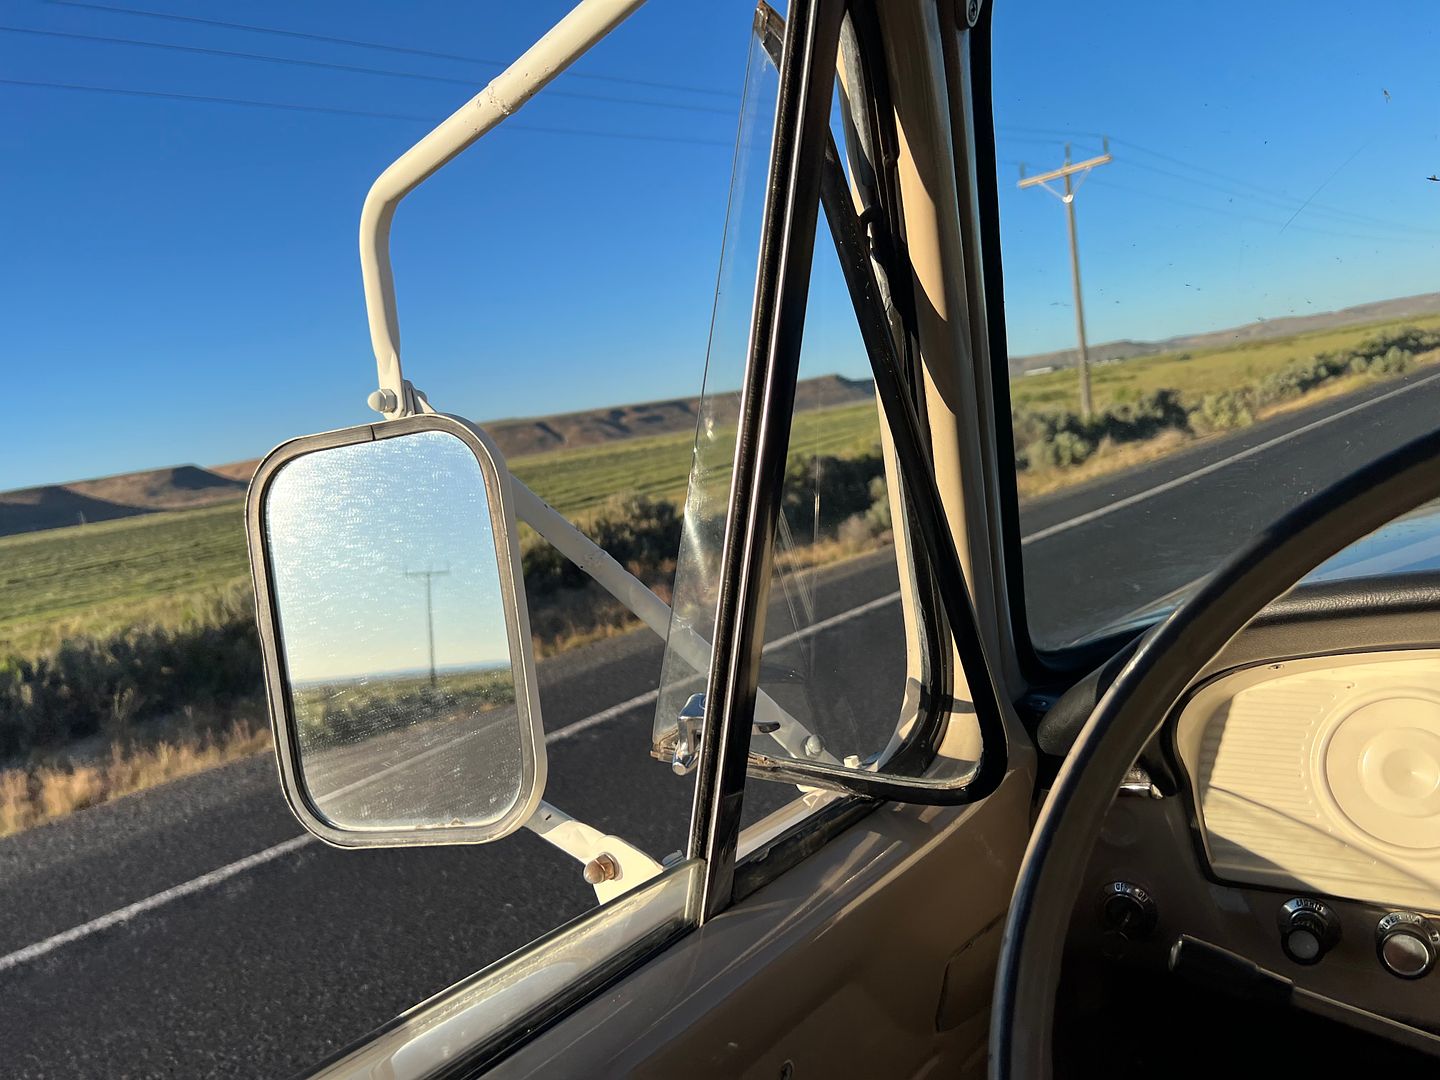 I wanted to drive past Boise the first day to get an early start around SLC the next day. So I drove halfway between Boise and the Utah border, and stopped at a local rest stop. Set the alarm for about 4 in the morning. Just about had the rest area to myself. 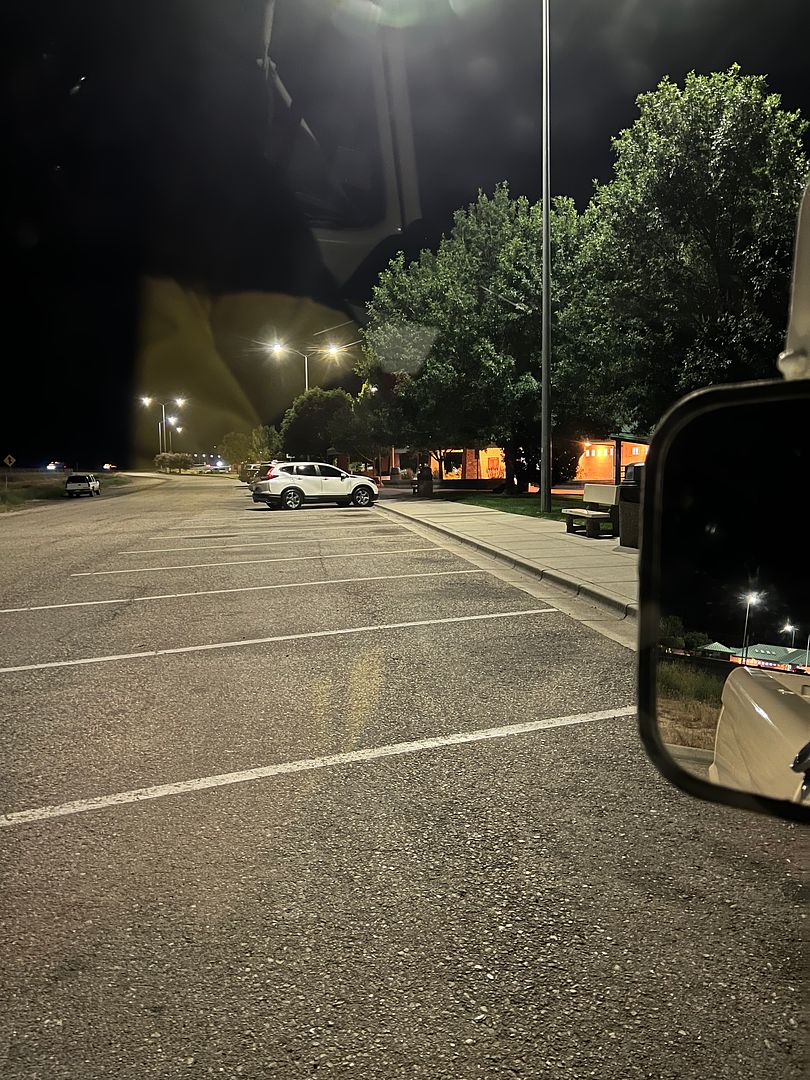 Utah here we come... 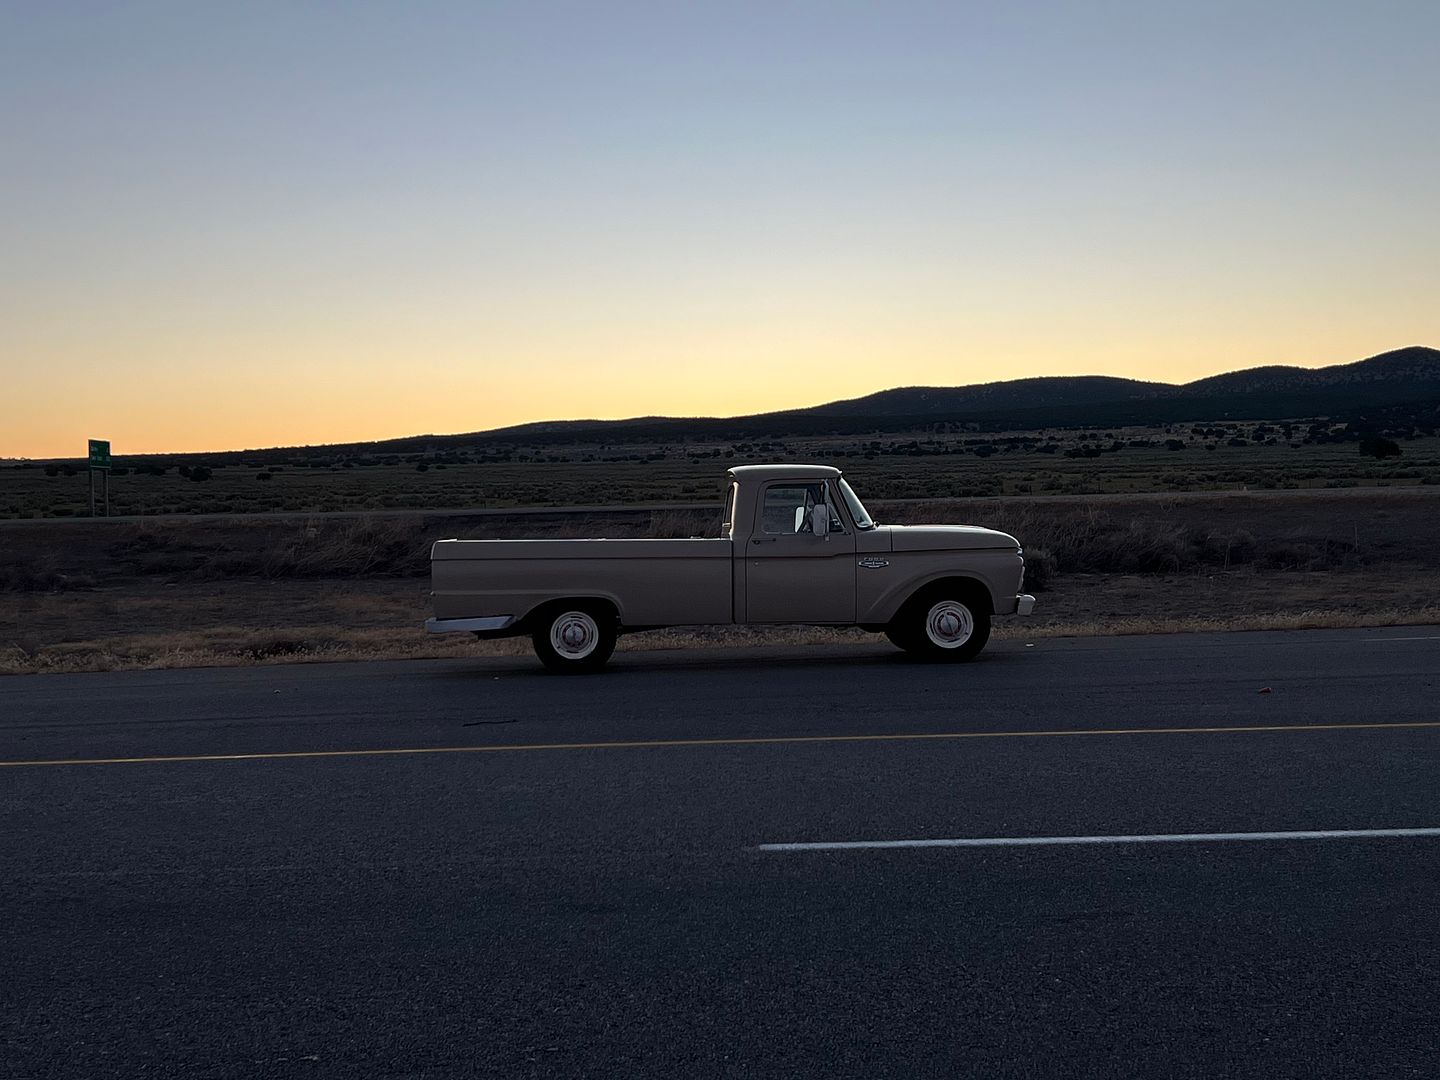 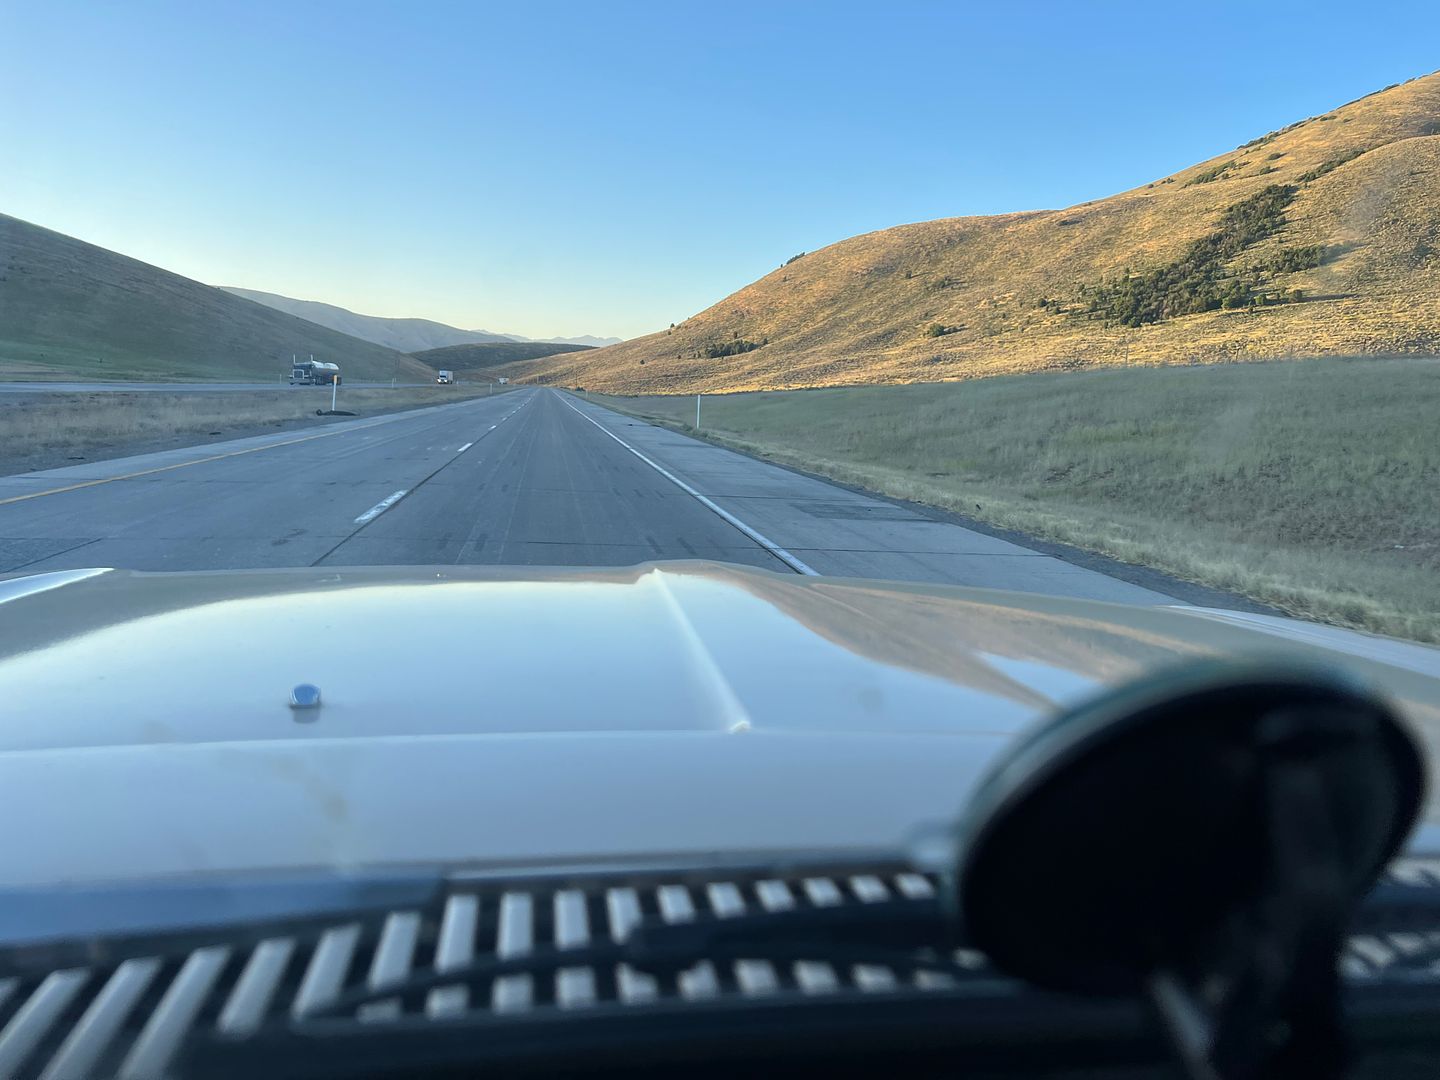 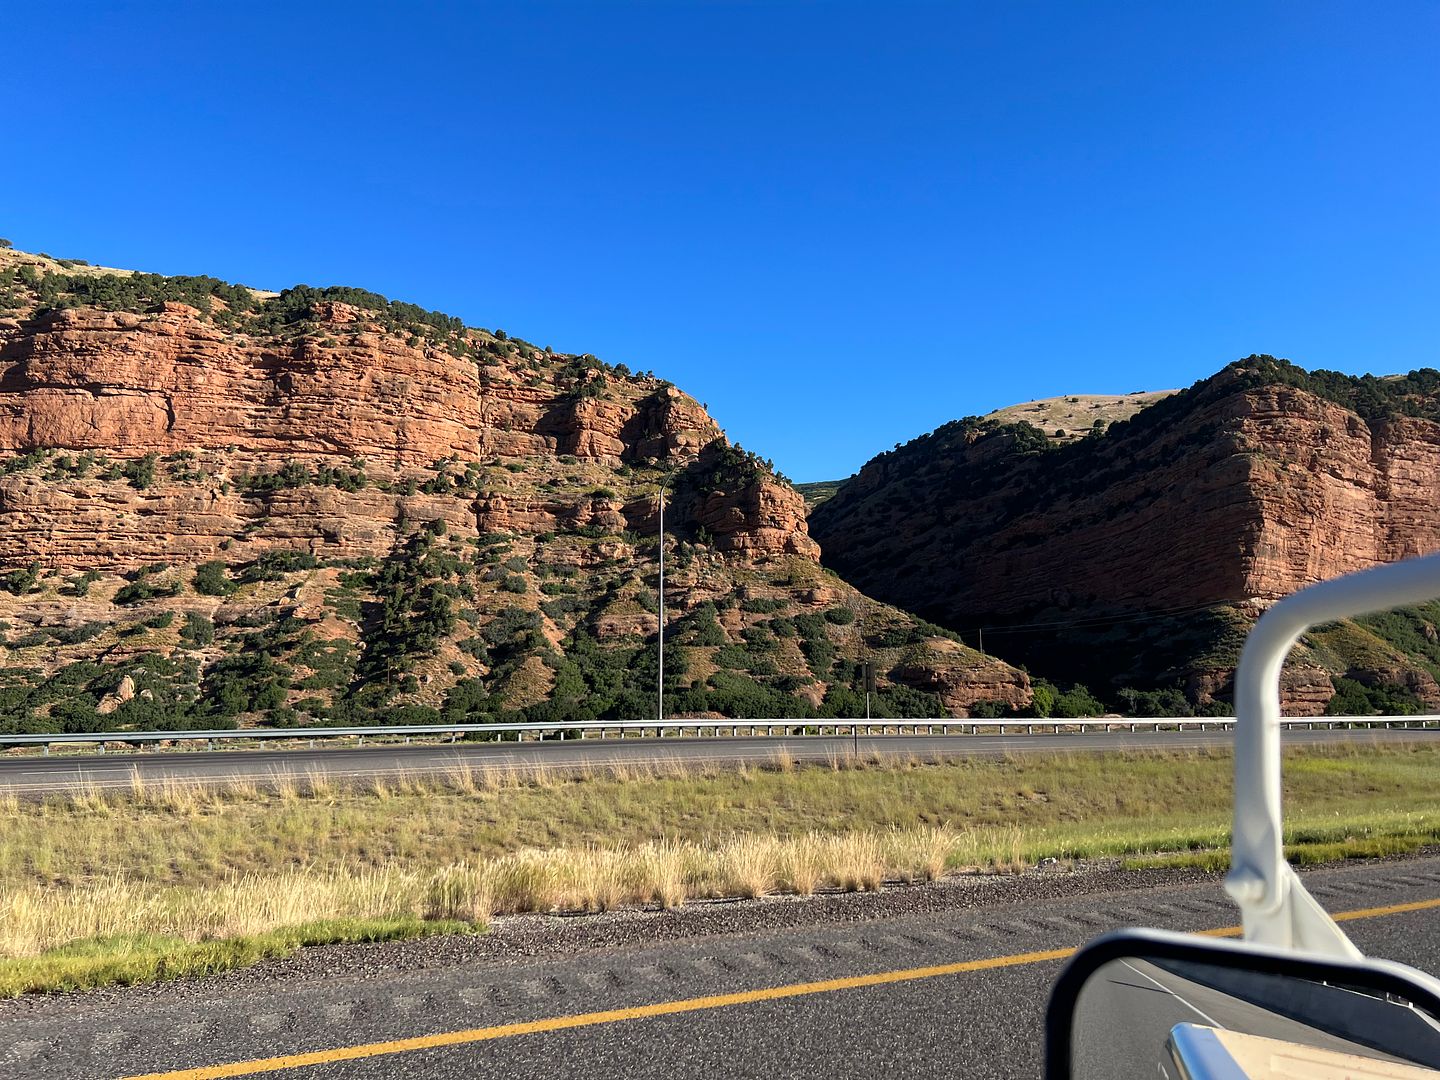 I had reached out to Mike to stop by his place for a shop tour, but alas, he had to work the 4th, and with me facing 40+ hours of driving, it wasn't a sit and wait kind of day. I'll have to make time to visit the next time through.. Wyoming. A lot of wide open, with mountains of all shapes and sizes. They even have some that look like someone's been playing Jenga on a grand scale, flat rocks with rounded edges stacked one on the other. The pyramids have nothing on these Jenga mountains of Wyoming. They have plenty of exits off I-80, but most go nowhere. There are exits to put on tire chains, exits to take off tire chains, exits for trucks to park and sleep, and for the messy truck drivers, exits to park and sleep WITH dumpsters to clean out your trucks. Then the exits that go nowhere, but open up to the gravel wide open.  Then there's the entertainment. It's a stock truck.... So I had to sing to myself.. For 3-1/2 days... It was painful to listen to. I may now be a well practiced singer, but not one anybody would care to listen to.. 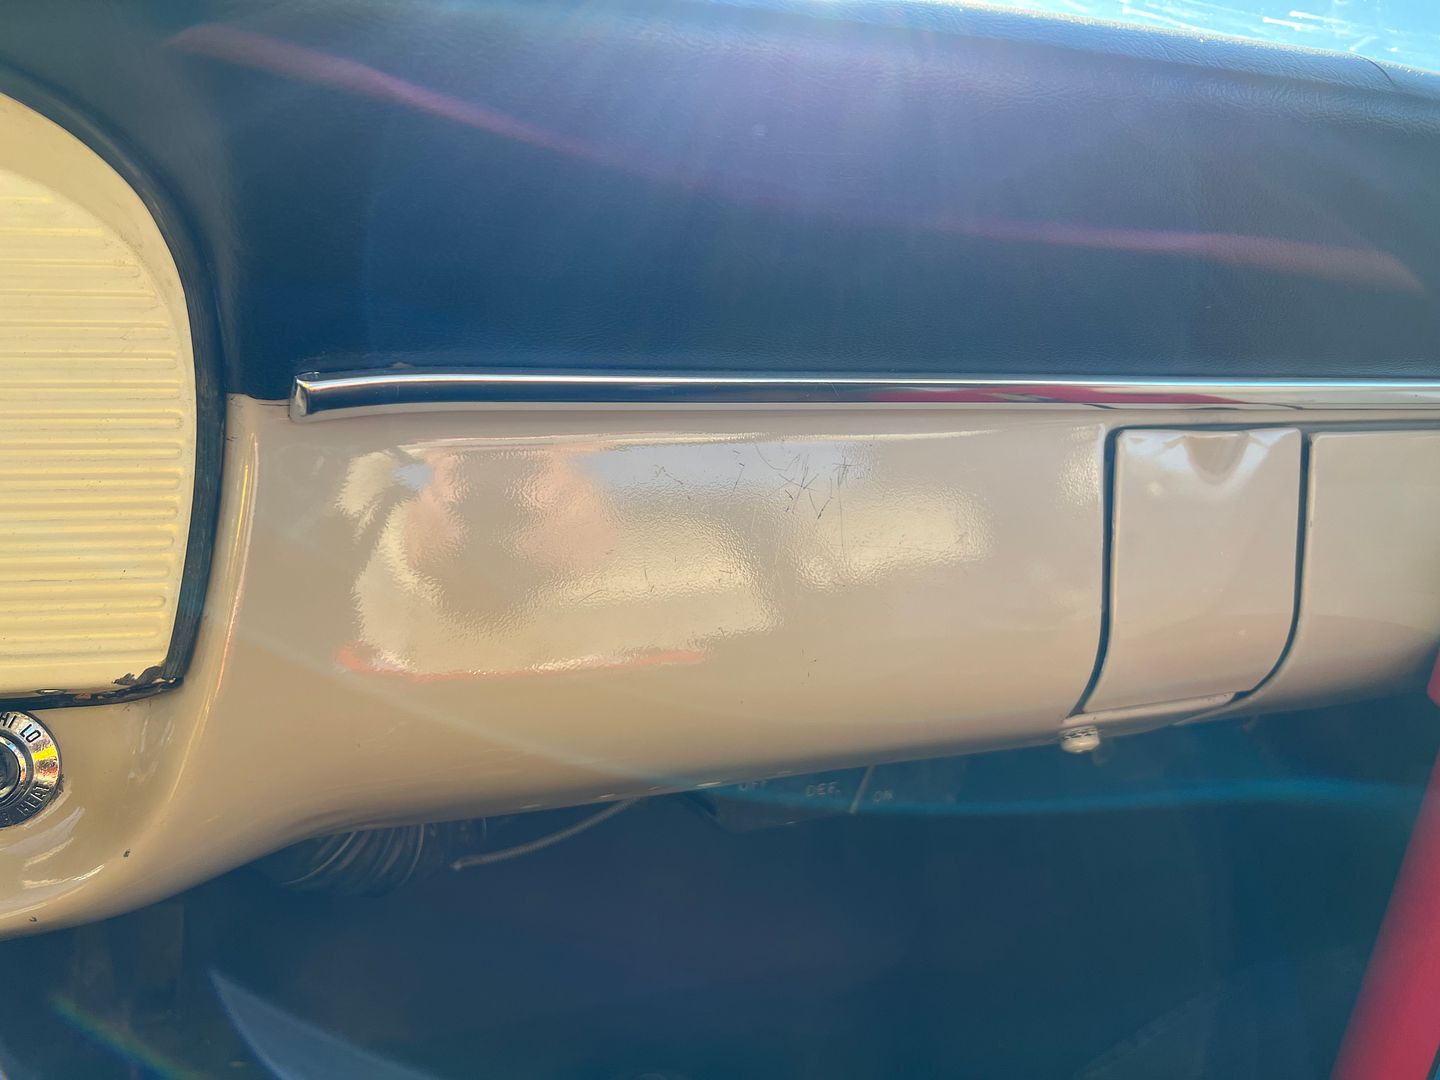 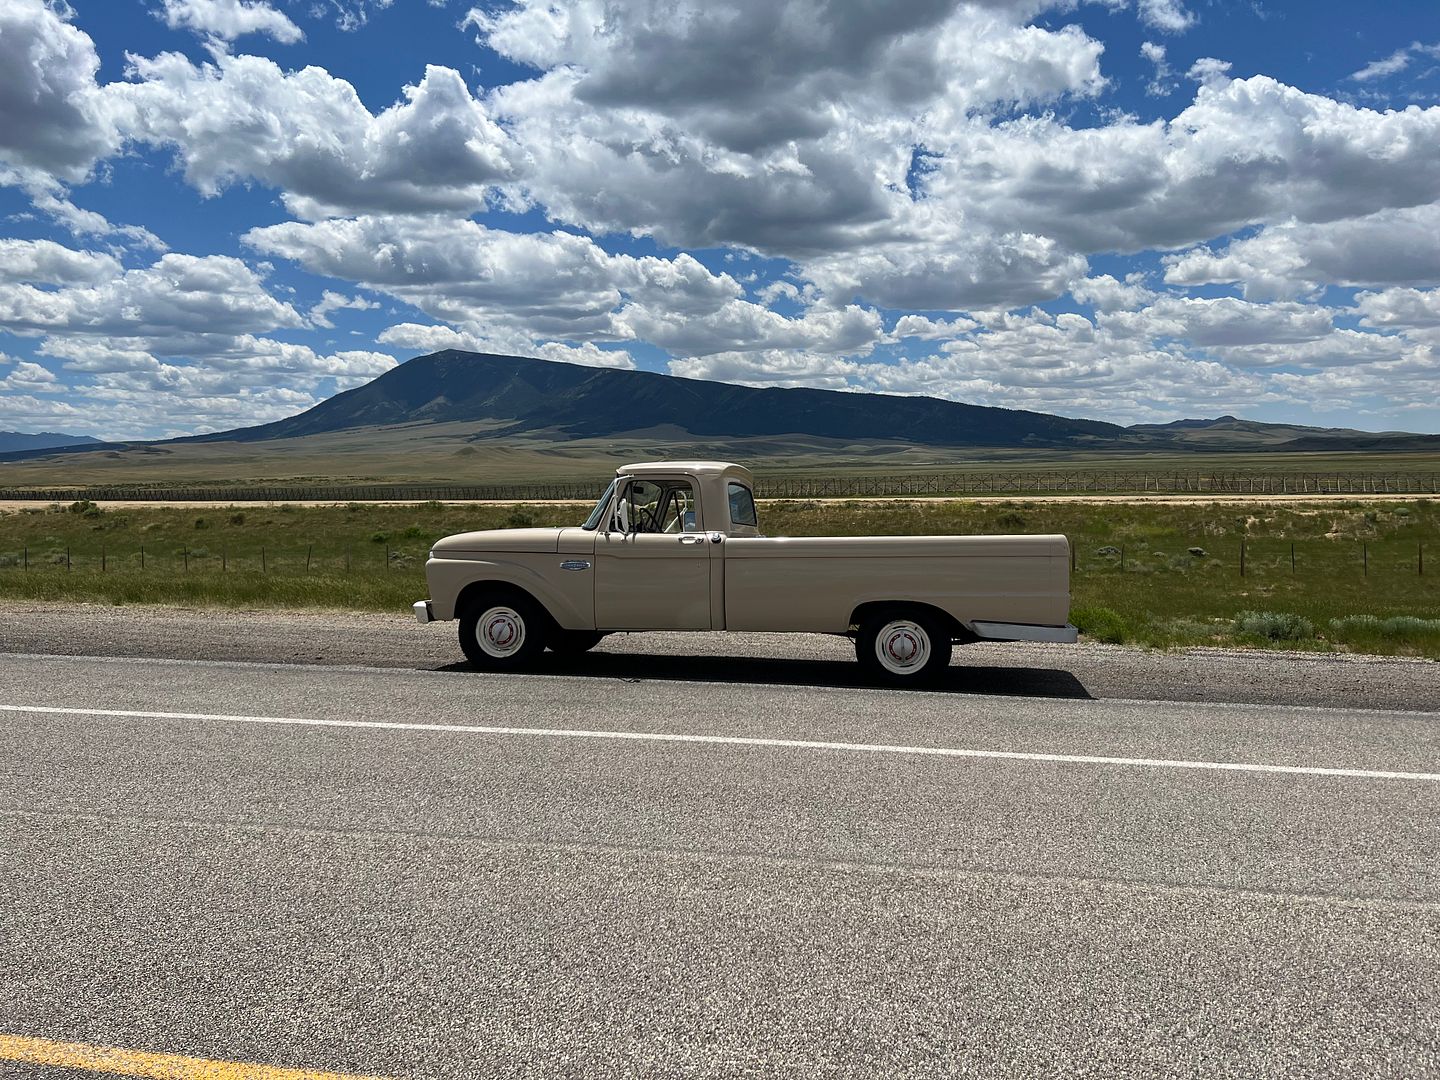 One thing Chuck was not able to get fixed, the gas gauge. He had installed a new sending unit to no avail. Given the 18 gallon tank and an estimated 12 mpg, I should have a safe range of about 200 miles per tank without fear of running out. Just in case, Robert had fixed me up with a couple 5 gallon gas cans so I would have a reserve. 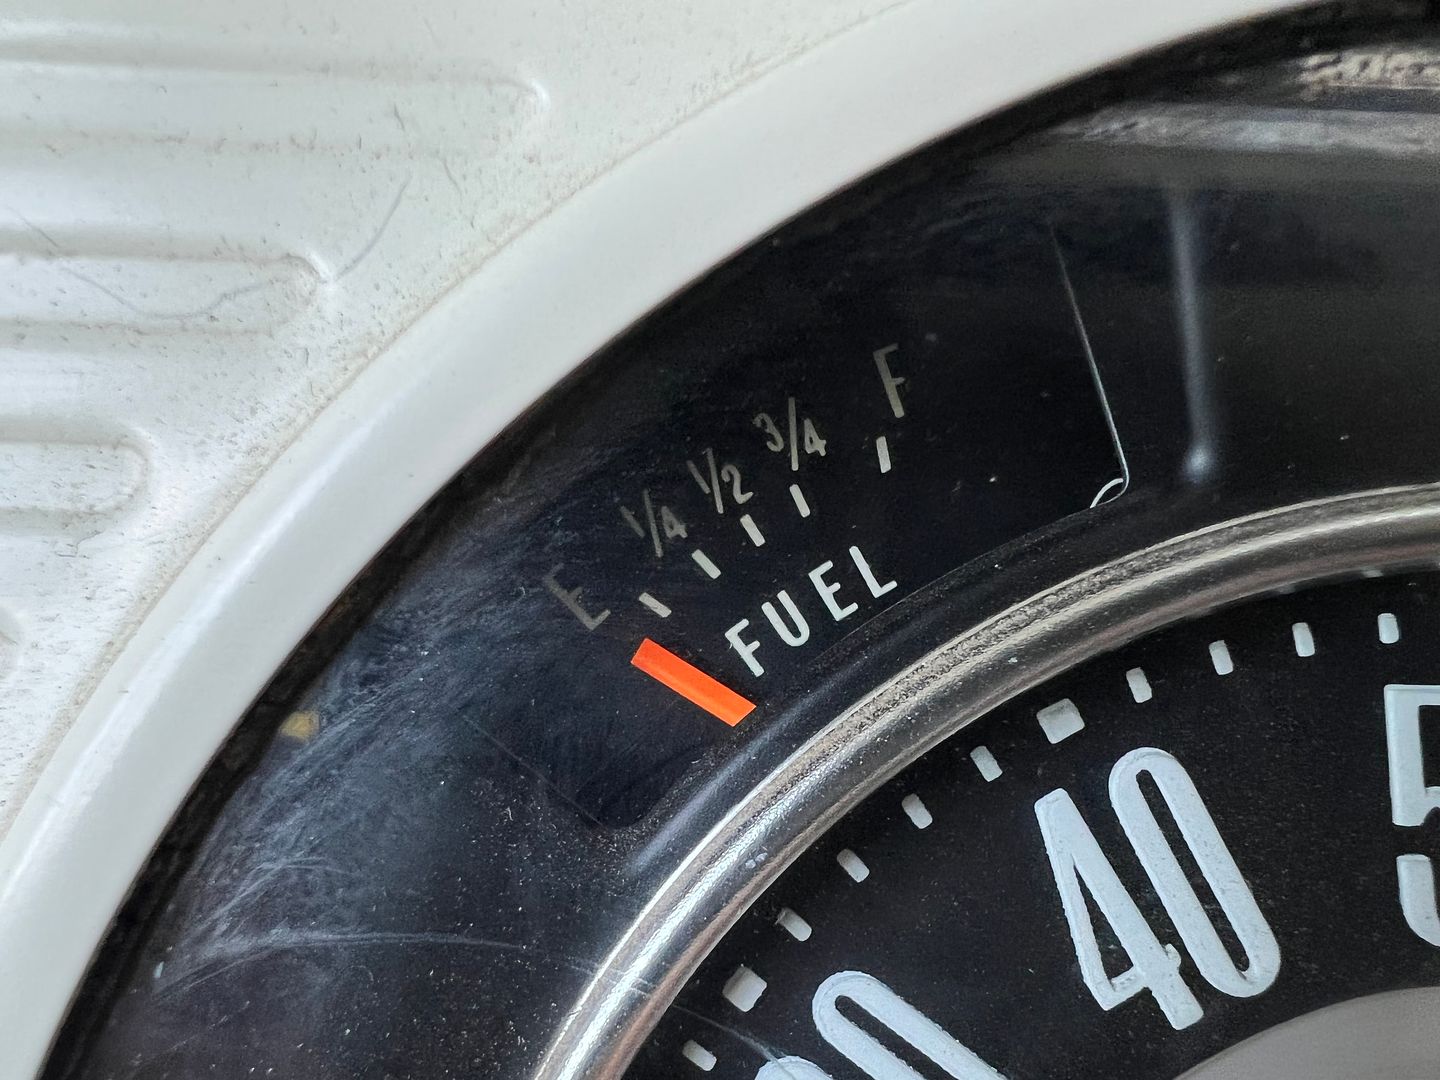 So at every fill-up, I would observe the mileage, bump it by 200, and note it for when I needed fuel. 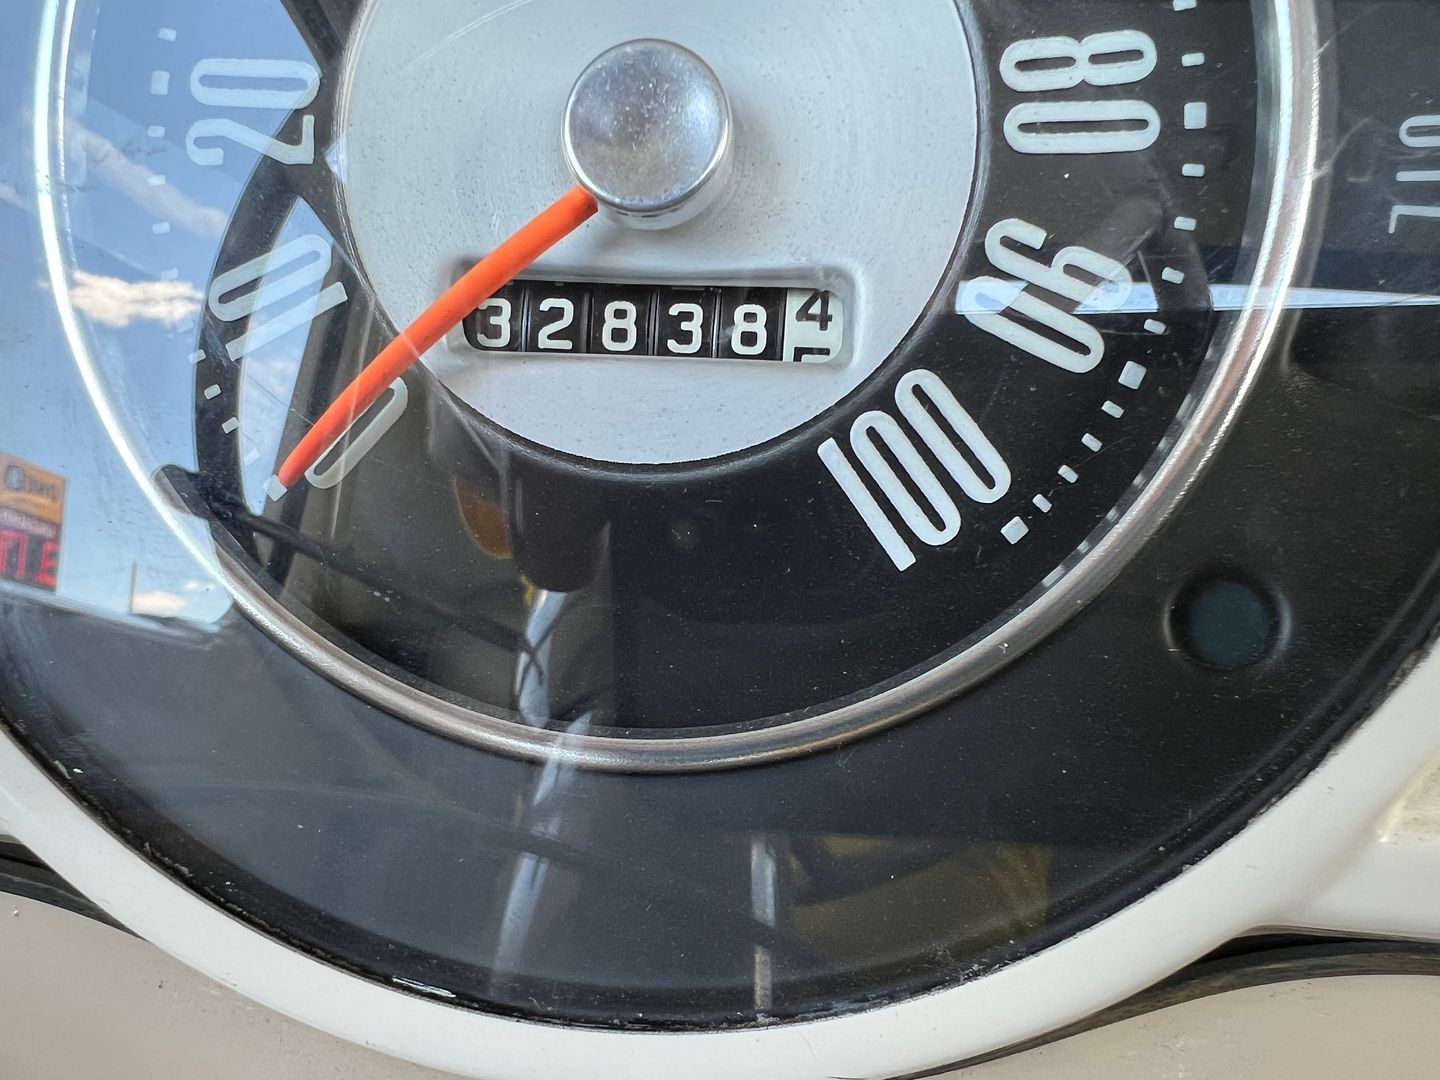 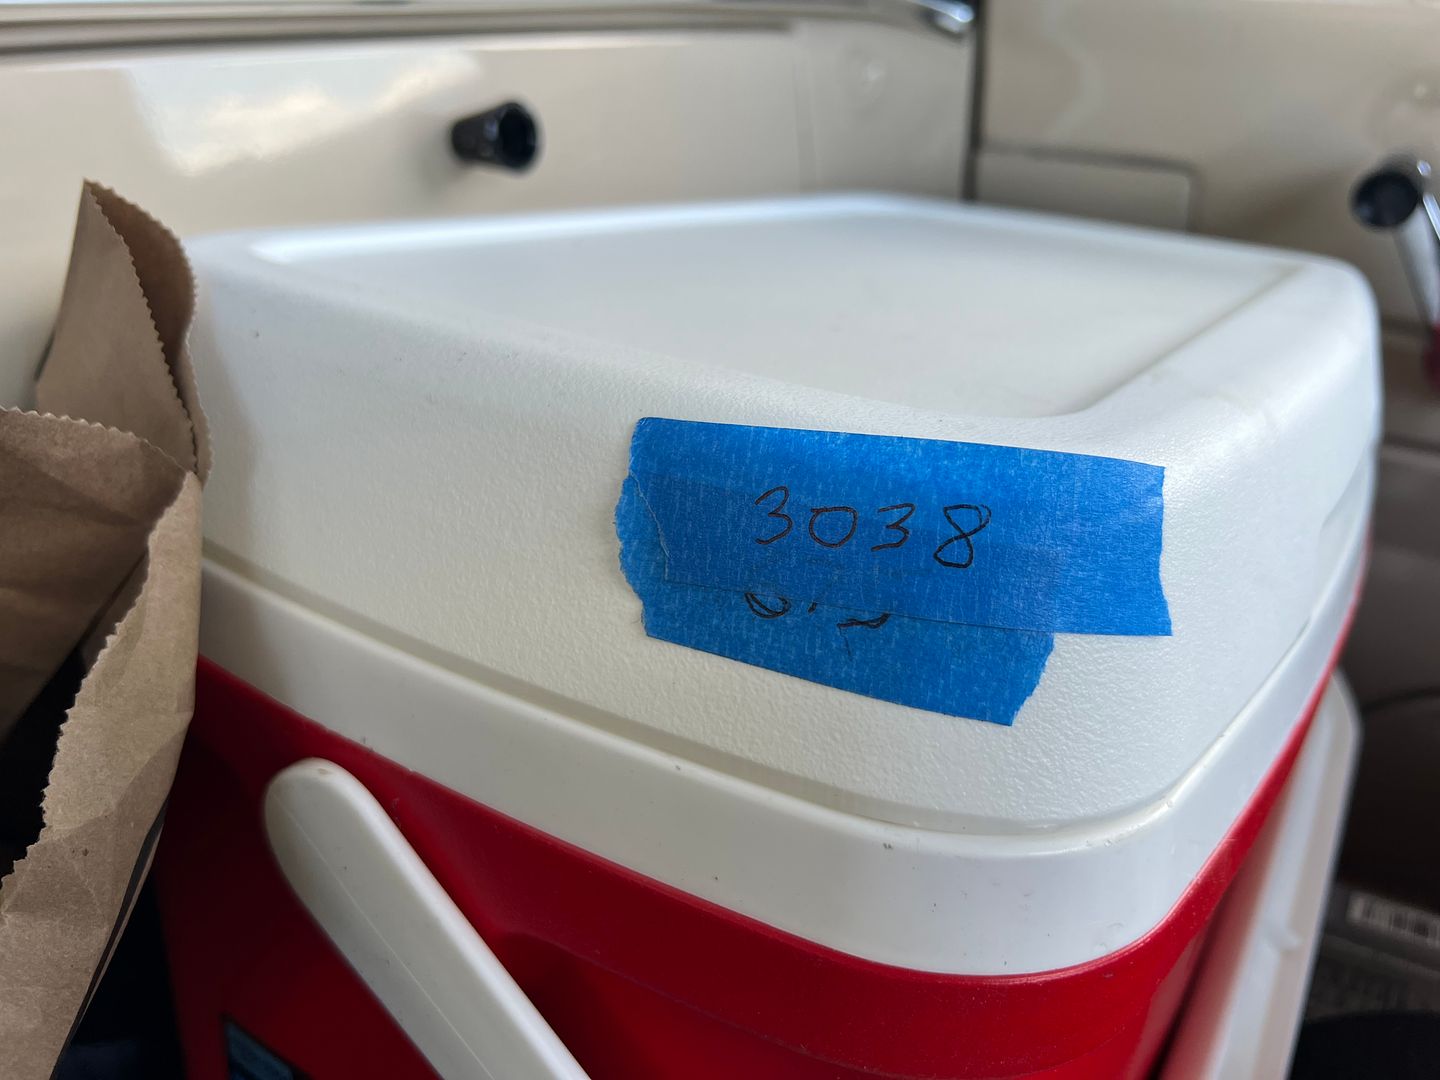 Knock on wood, this process served well, and I wasn't forced to use the back-up supply of fuel the entire trip. I checked the mileage the second tank and was getting about 12.5 per gallon. About what I expected with a 352 with 3.50 gears and a granny gear 4 speed. 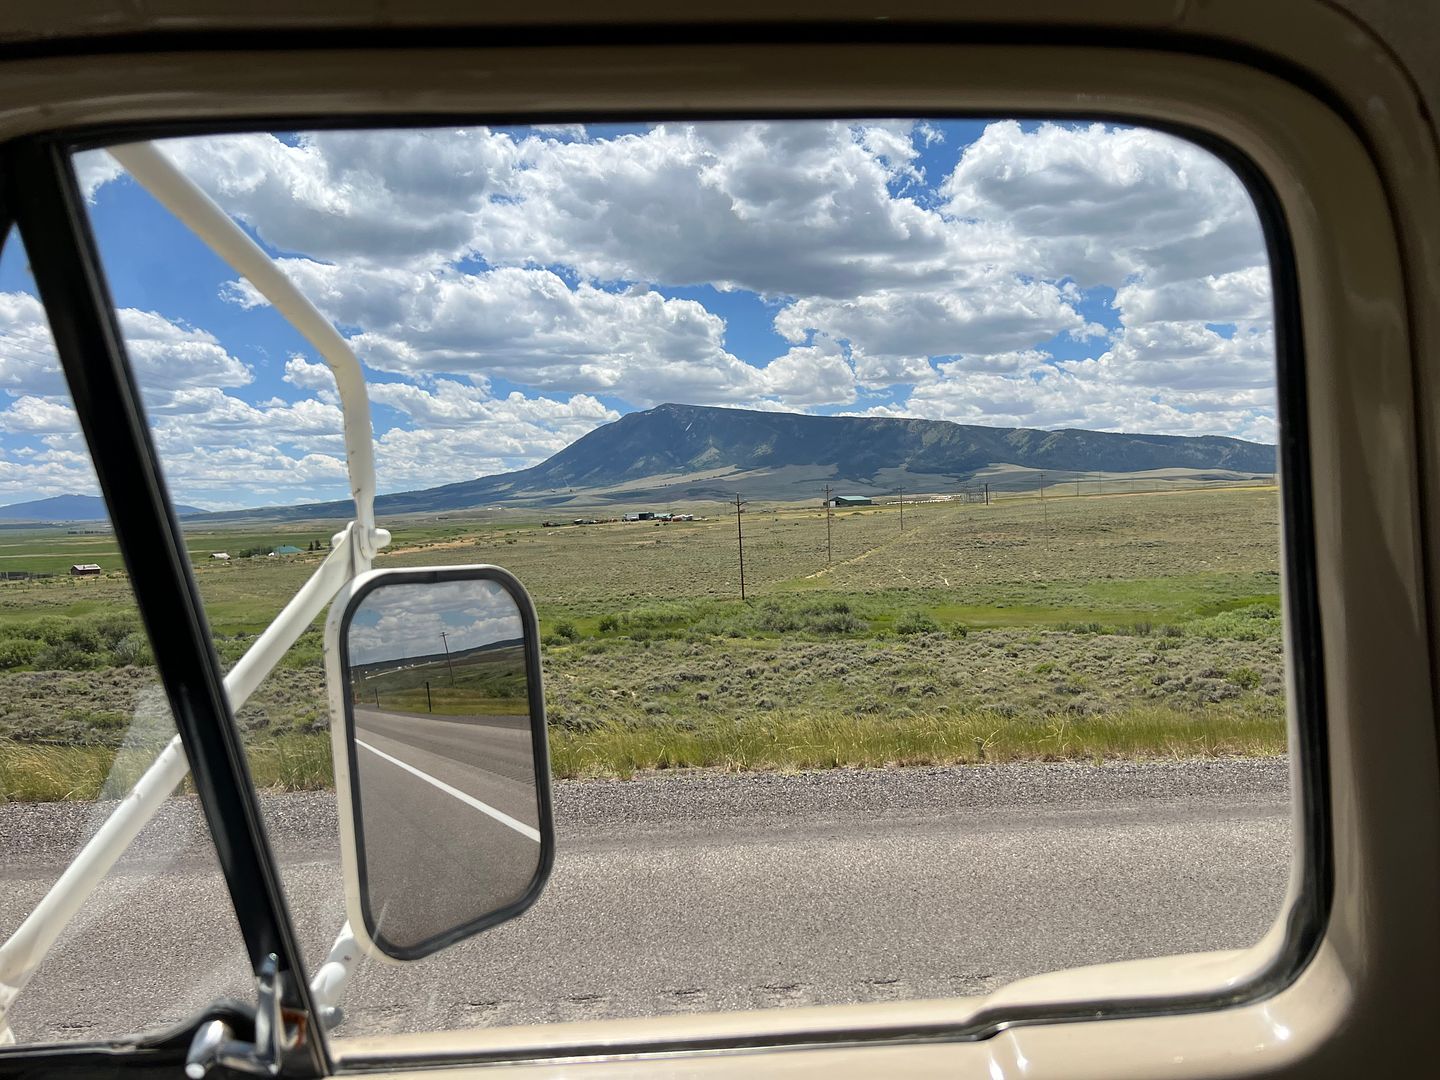 I was chastised by my wife and daughter with the accommodations I was using, so Thursday evening I made it into Nebraska and found a motel for a shower and more comfy bed (over a 1966 front seat)
__________________
Robert |
|
|
|
|
Today, 07:43 AM
|
#1381 |
|
Registered User
Join Date: Jan 2013
Location: Leonardtown, MD
Posts: 1,640
|
Re: 55 Wagon Progress
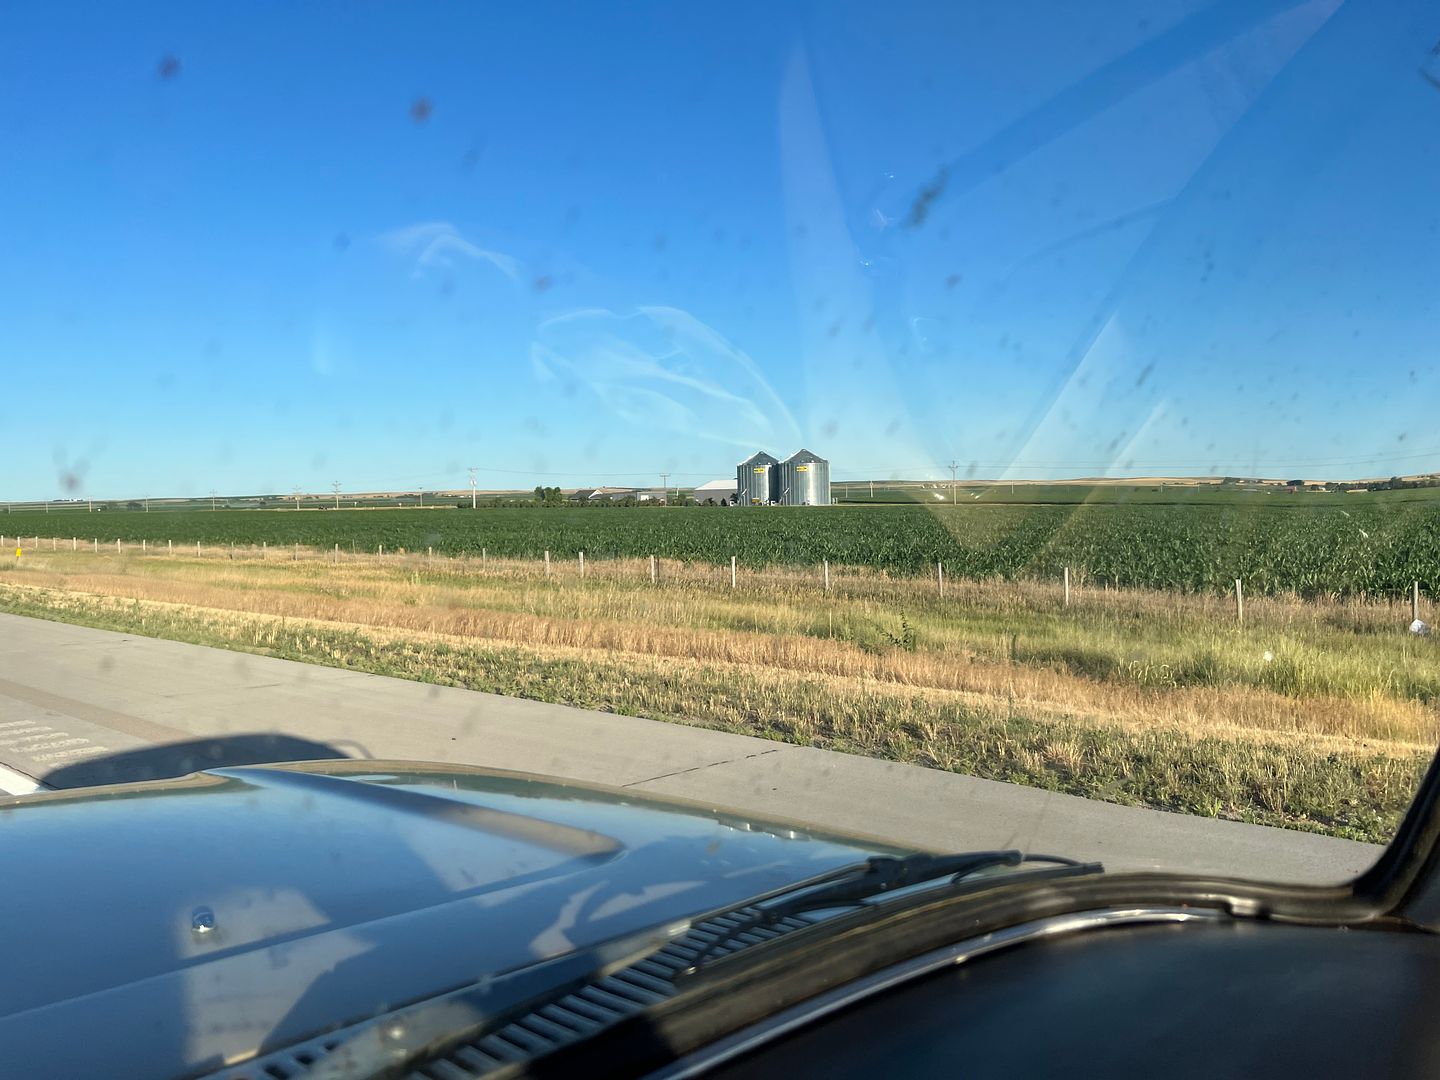
The truck was performing better than expected, but I was losing a touch of oil. Travelling the interstates at ~70 mph, and given tire size and gearing, the old truck was revving about 2850 rpms. Perhaps some oil loss was expected. The transmission housing did have some oil on the outside, so I suspected valve covers. A rear main seal was ruled out as there was no clutch slippage or drips at the front of the bell housing. We were in Nebraska and heading to Hastings. Scenery a bit flatter than the neighboring Wyoming.
 I've always considered 3 my lucky number, so I had to capture this.... 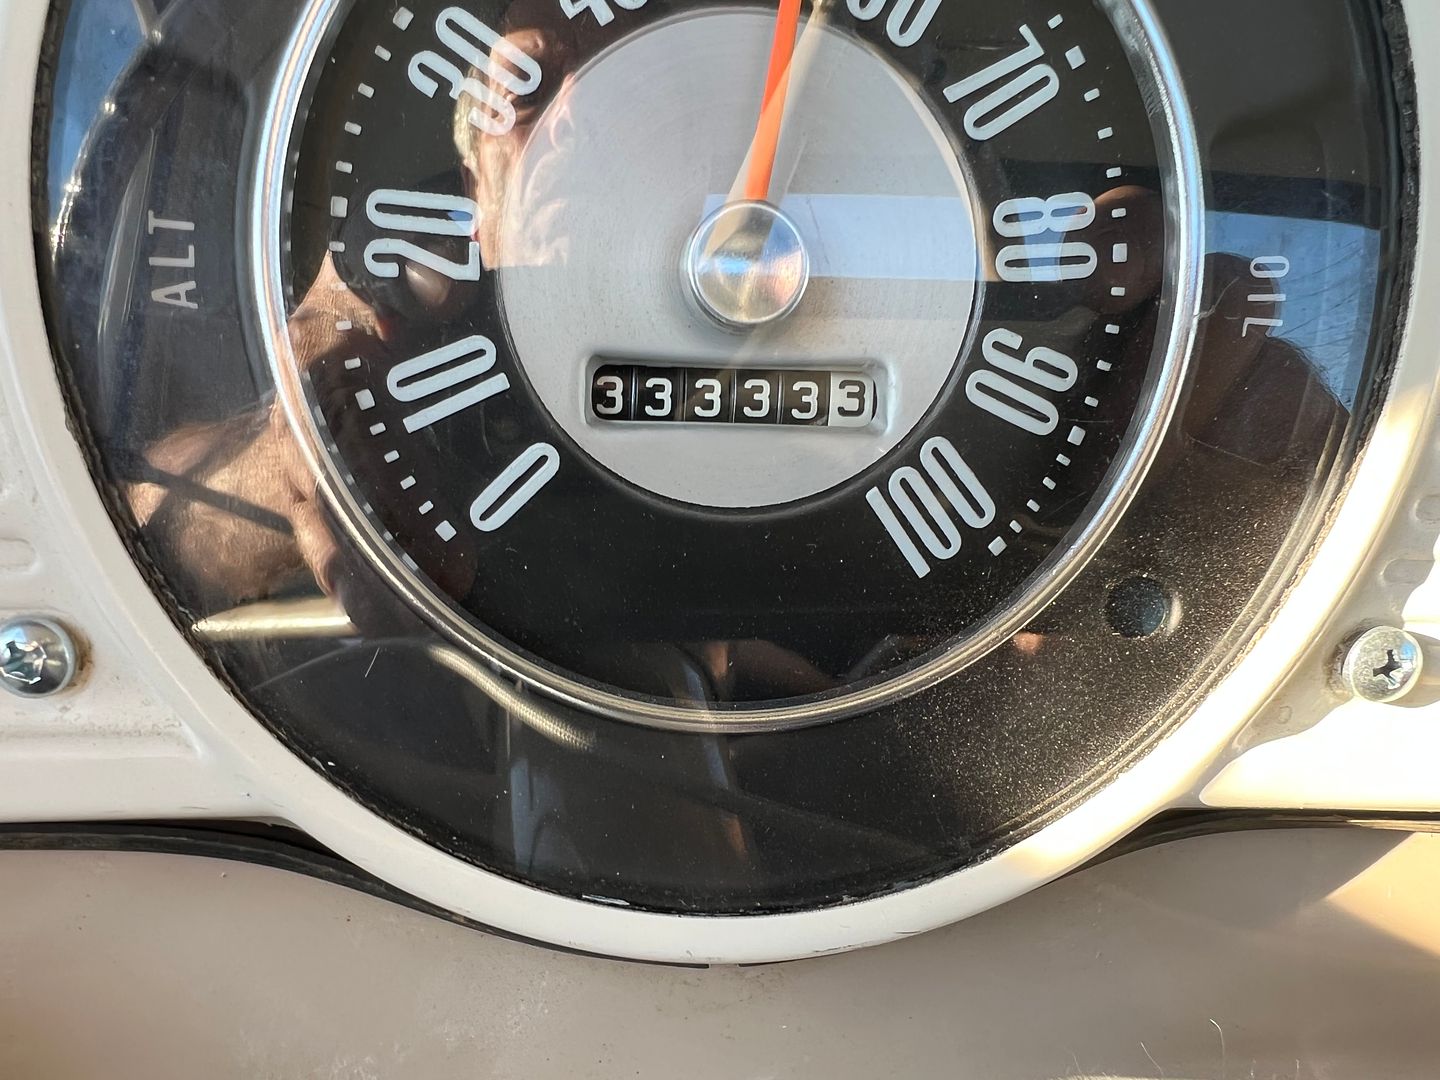 My stop in Hastings on Friday was at the World Headquarters of Imperial Wheeling Machines. My good friend Pat Brubaker, the owner, dug up a ratchet, extension, and socket so I could snug up the valve cover bolts. The rear bolt on the drivers side proved to be the (a) culprit, with a good two turns to snug up the bolt. After talking shop with Pat, he suggested (as did others) that I stop at the Speedway Motors Museum of American Speed in Lincoln, NE. Quite a bit to take in... 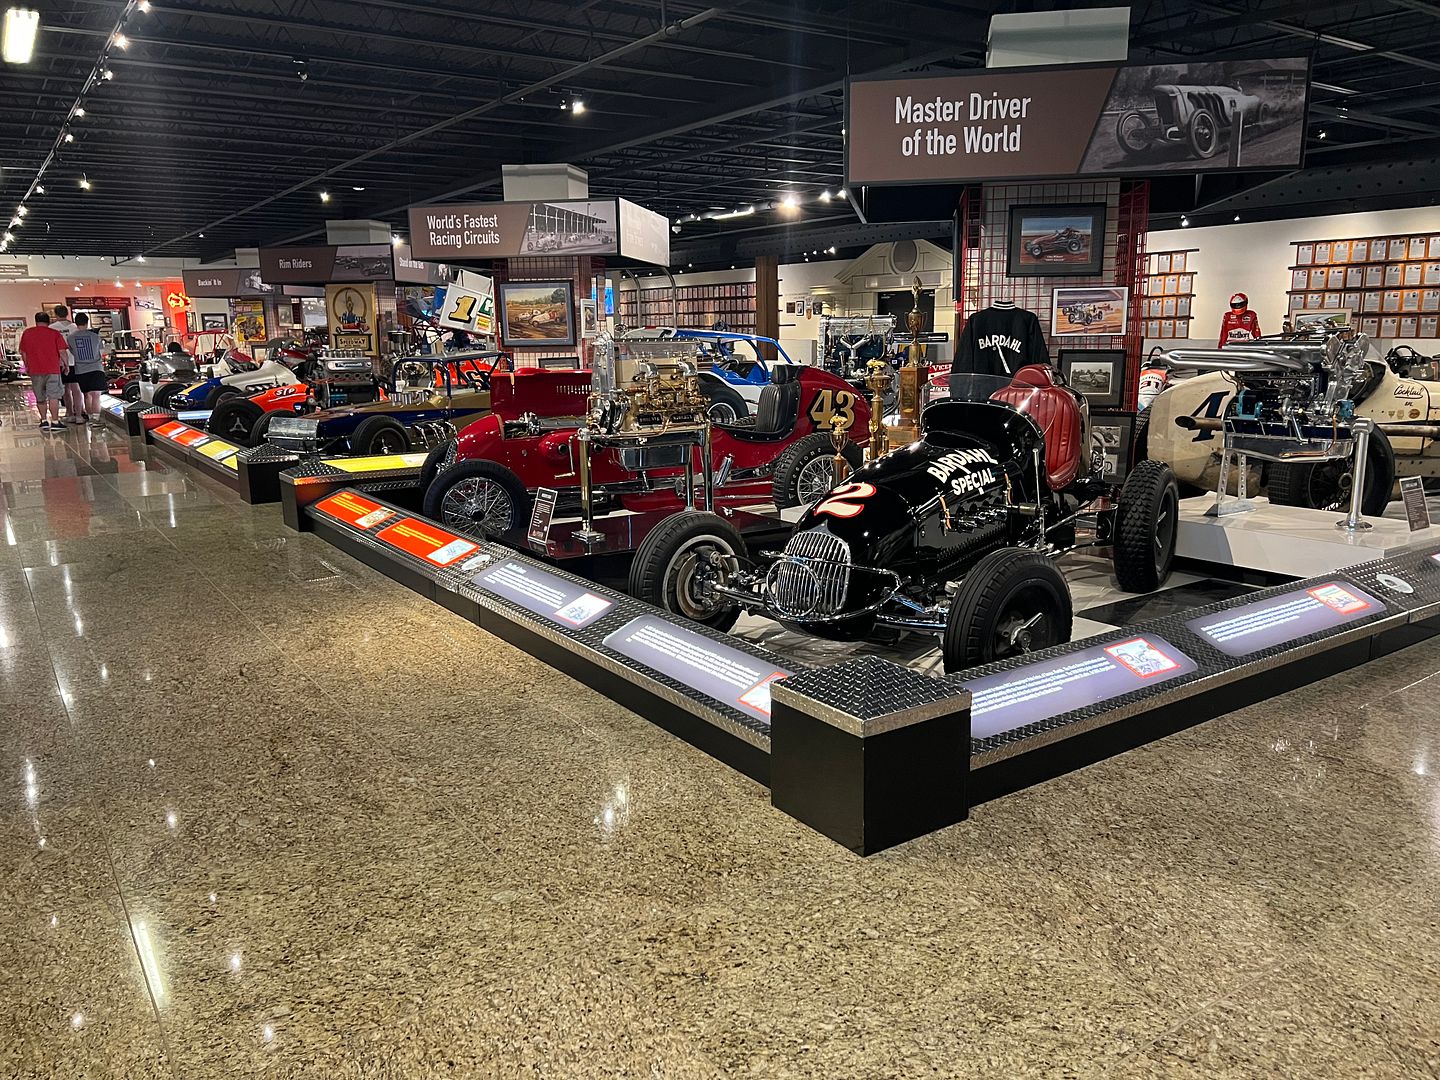  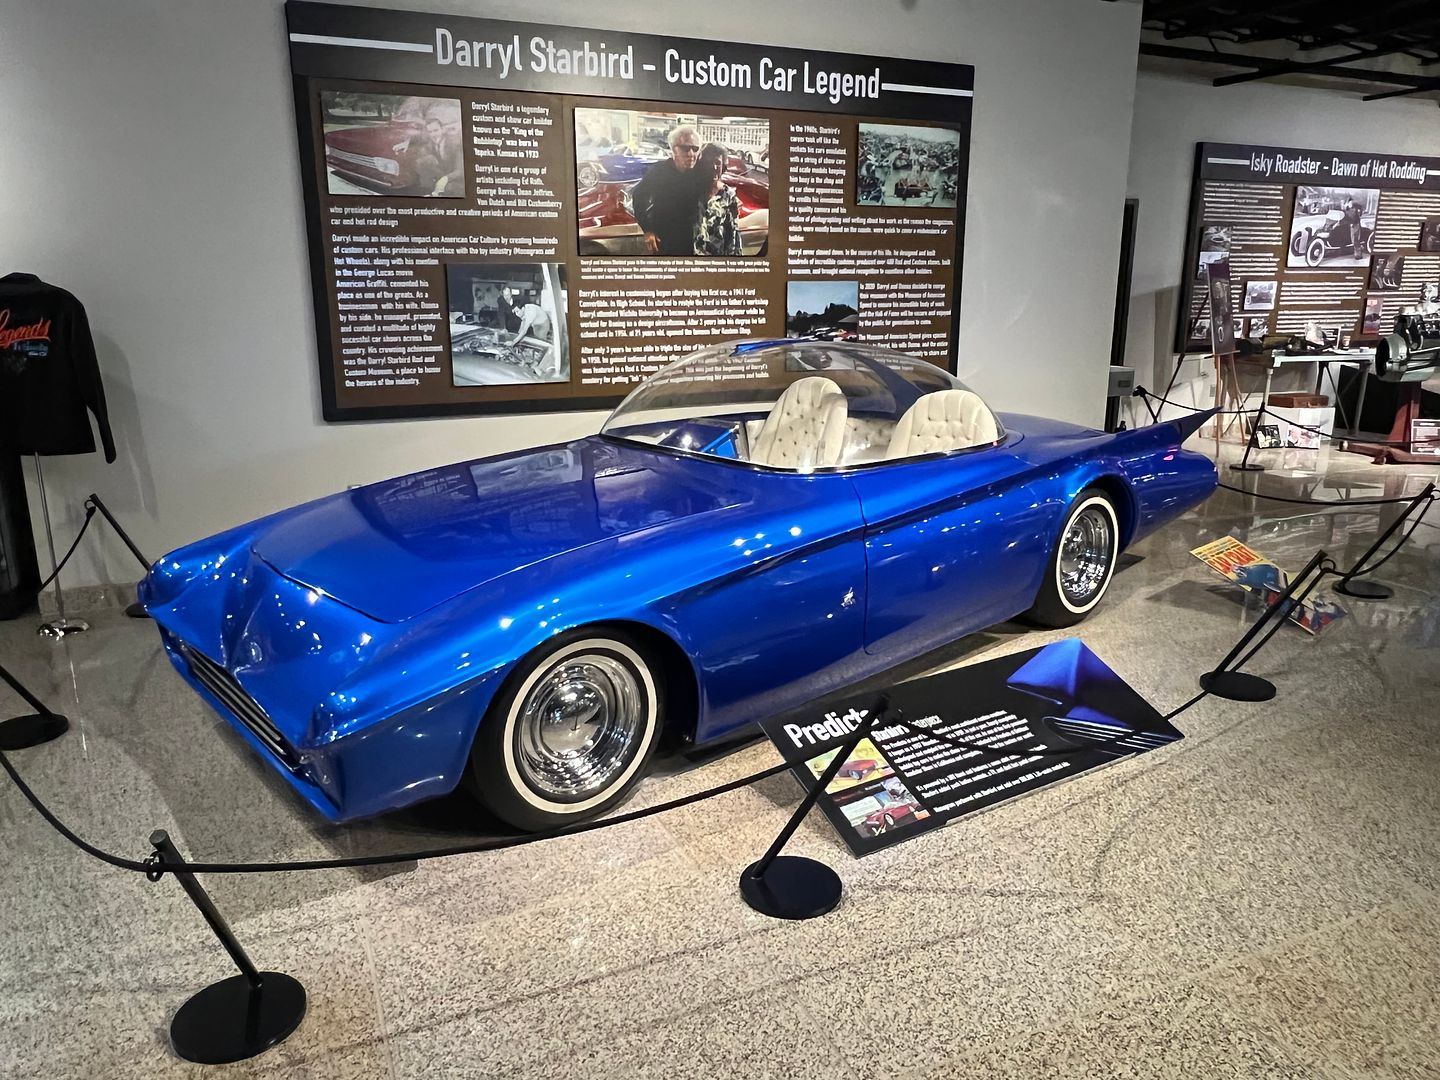 I did find an engine I could use for the new shop truck... 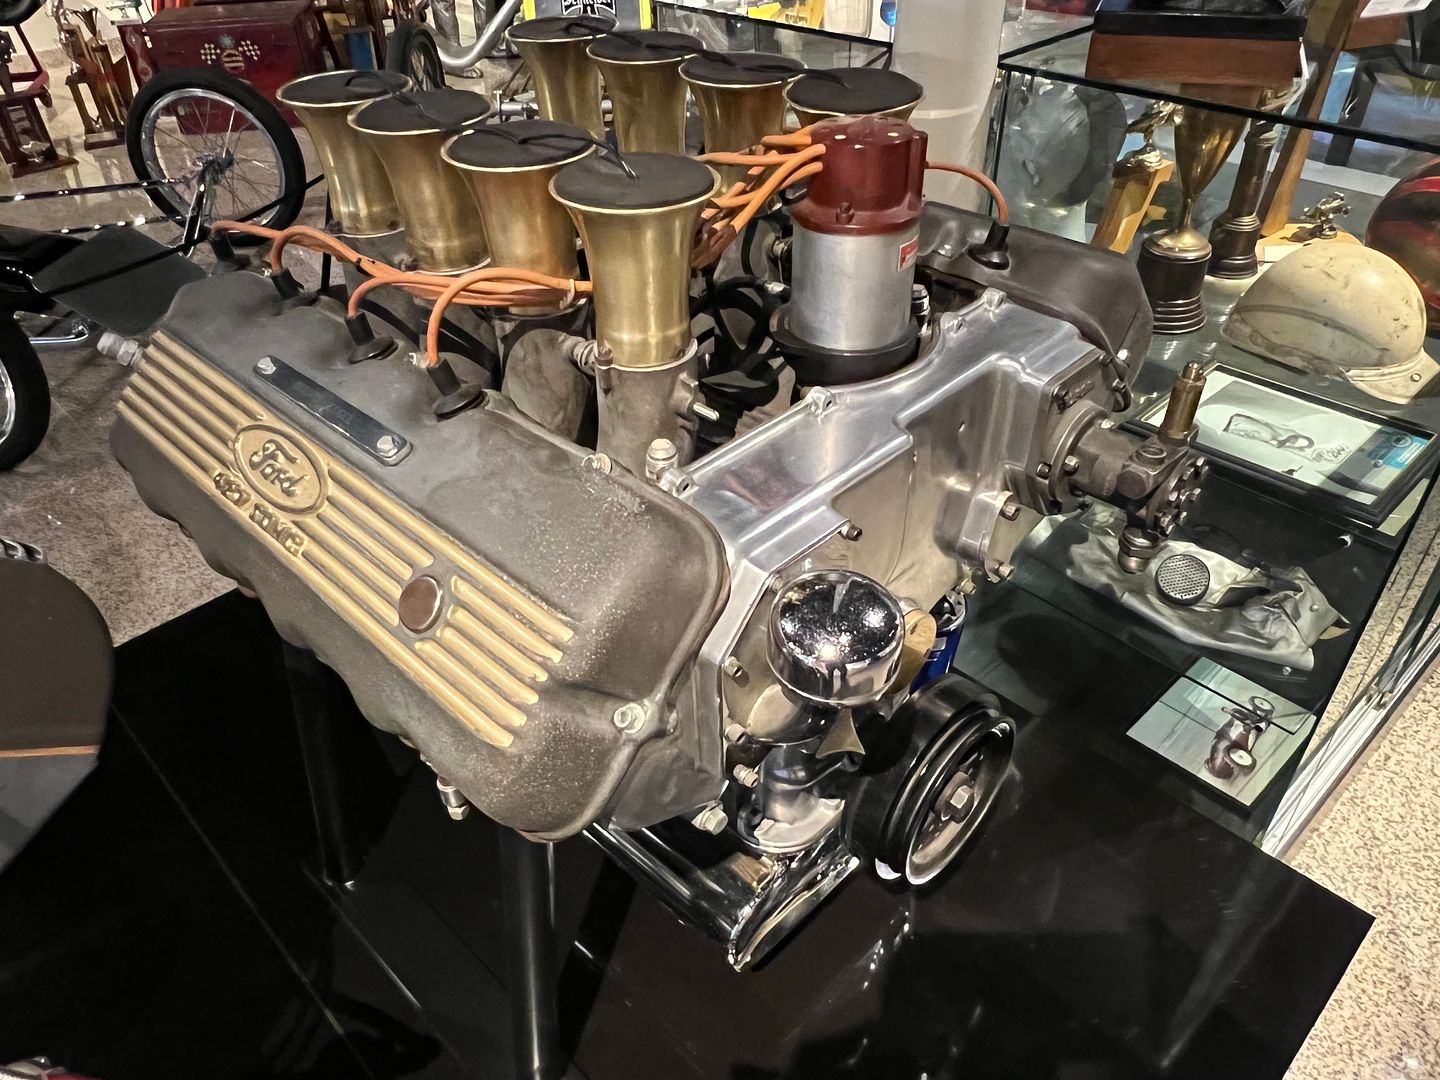 and what is likely the first ramp truck in existence. 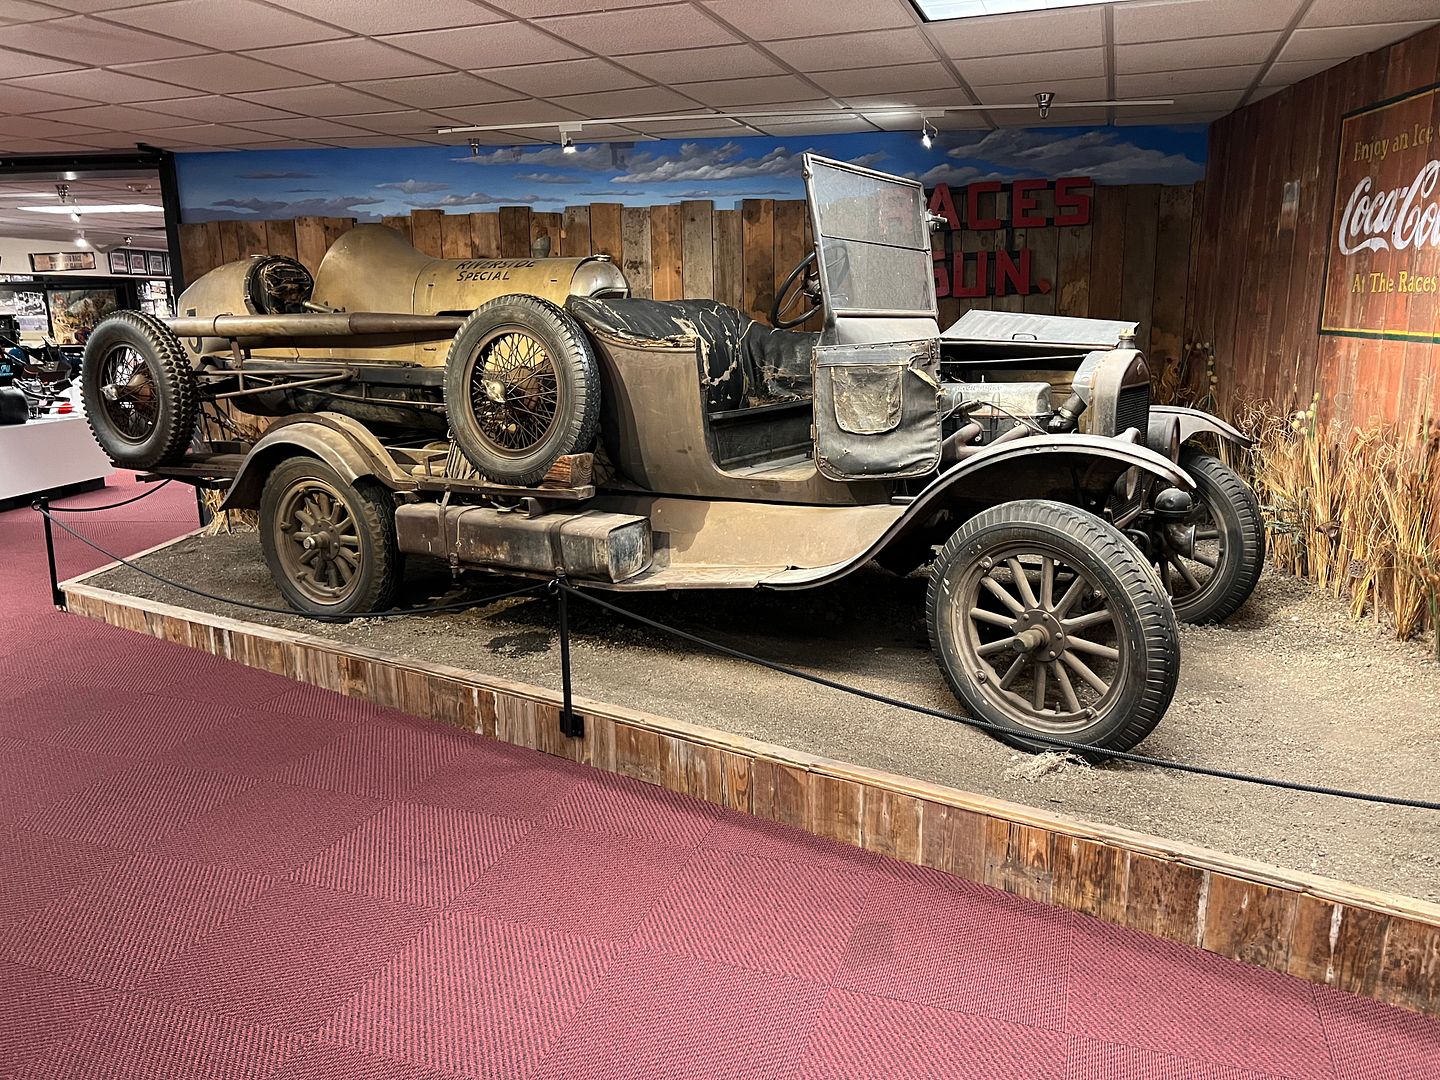 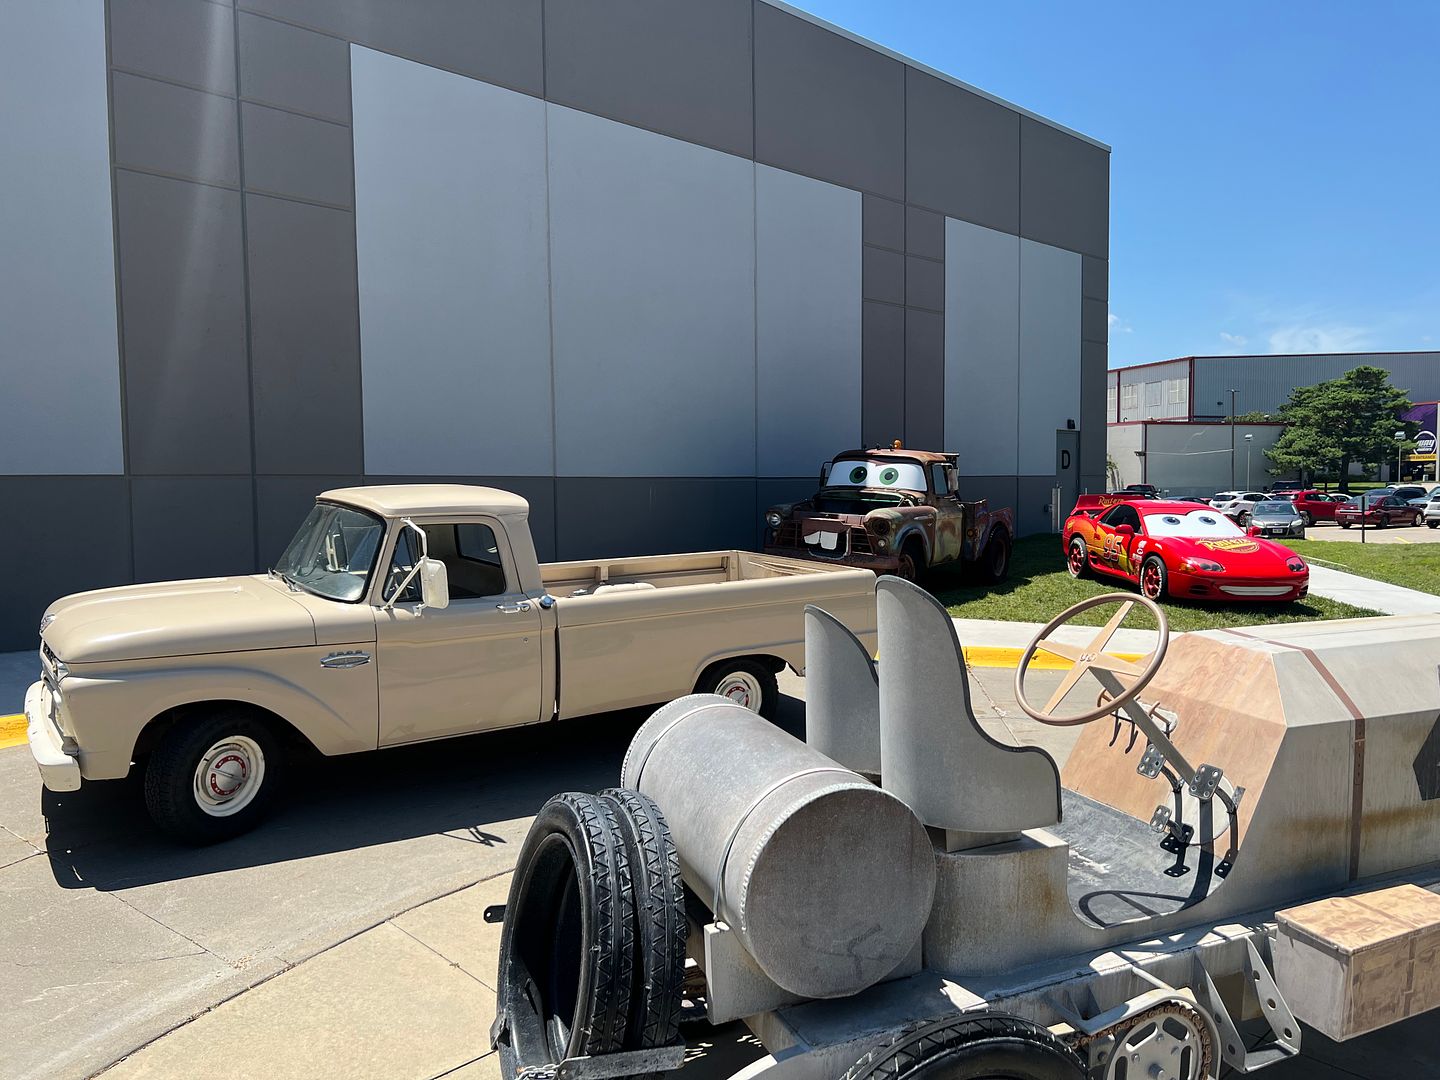  Next we headed into Iowa, and a visit that has been on the bucket list for quite some time... 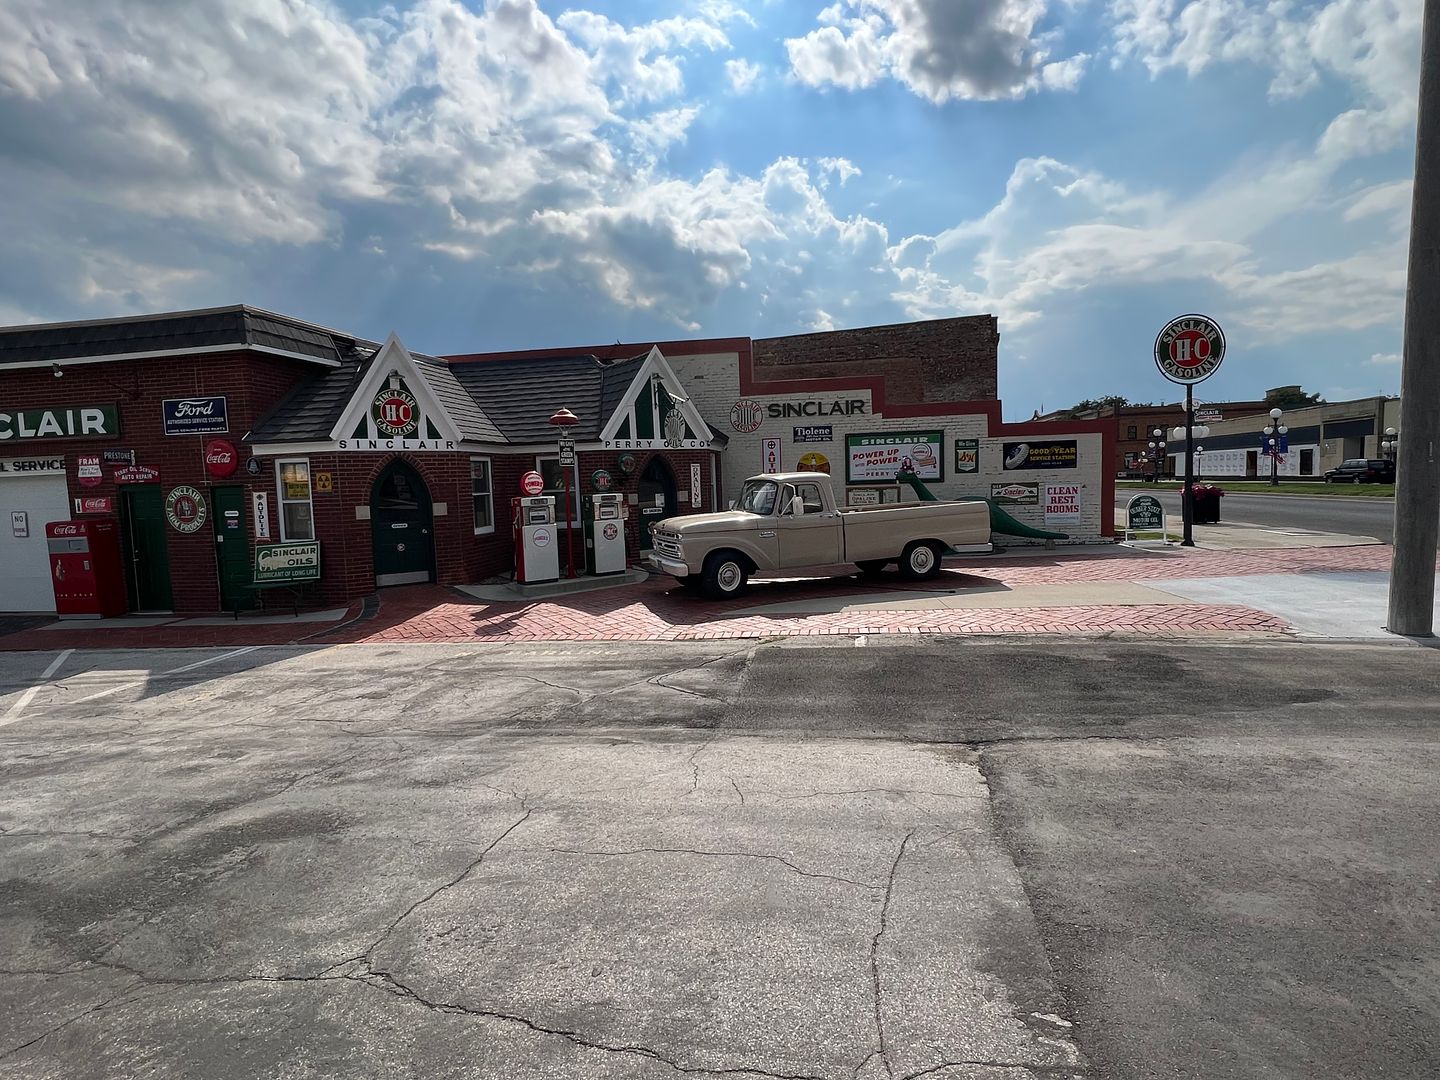 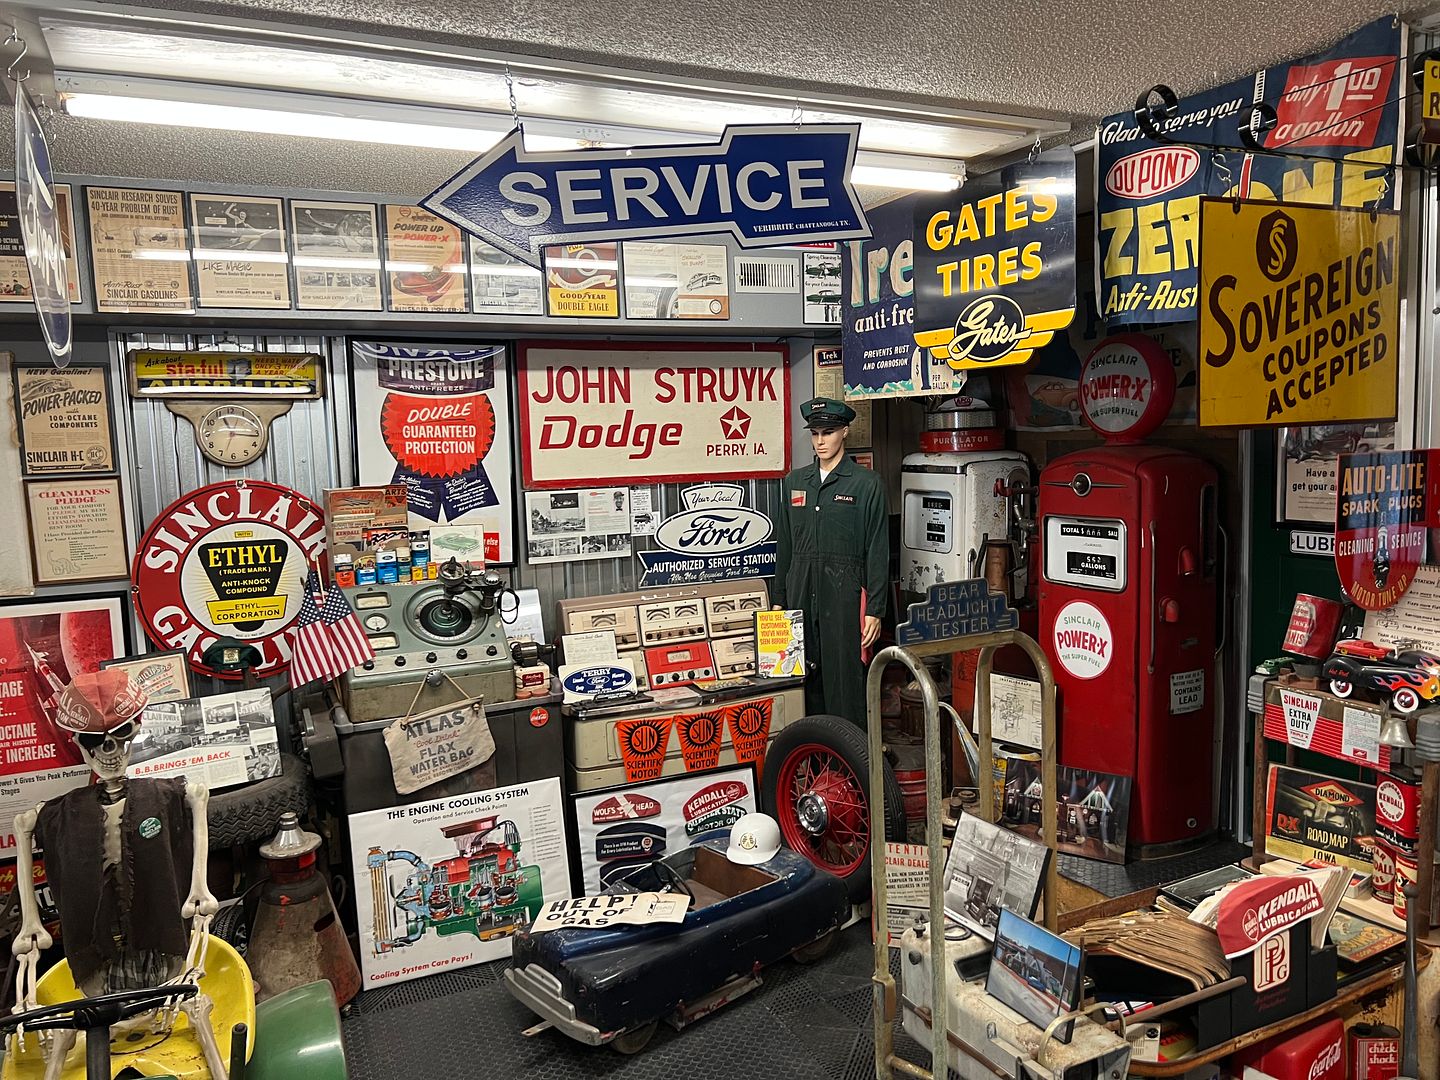  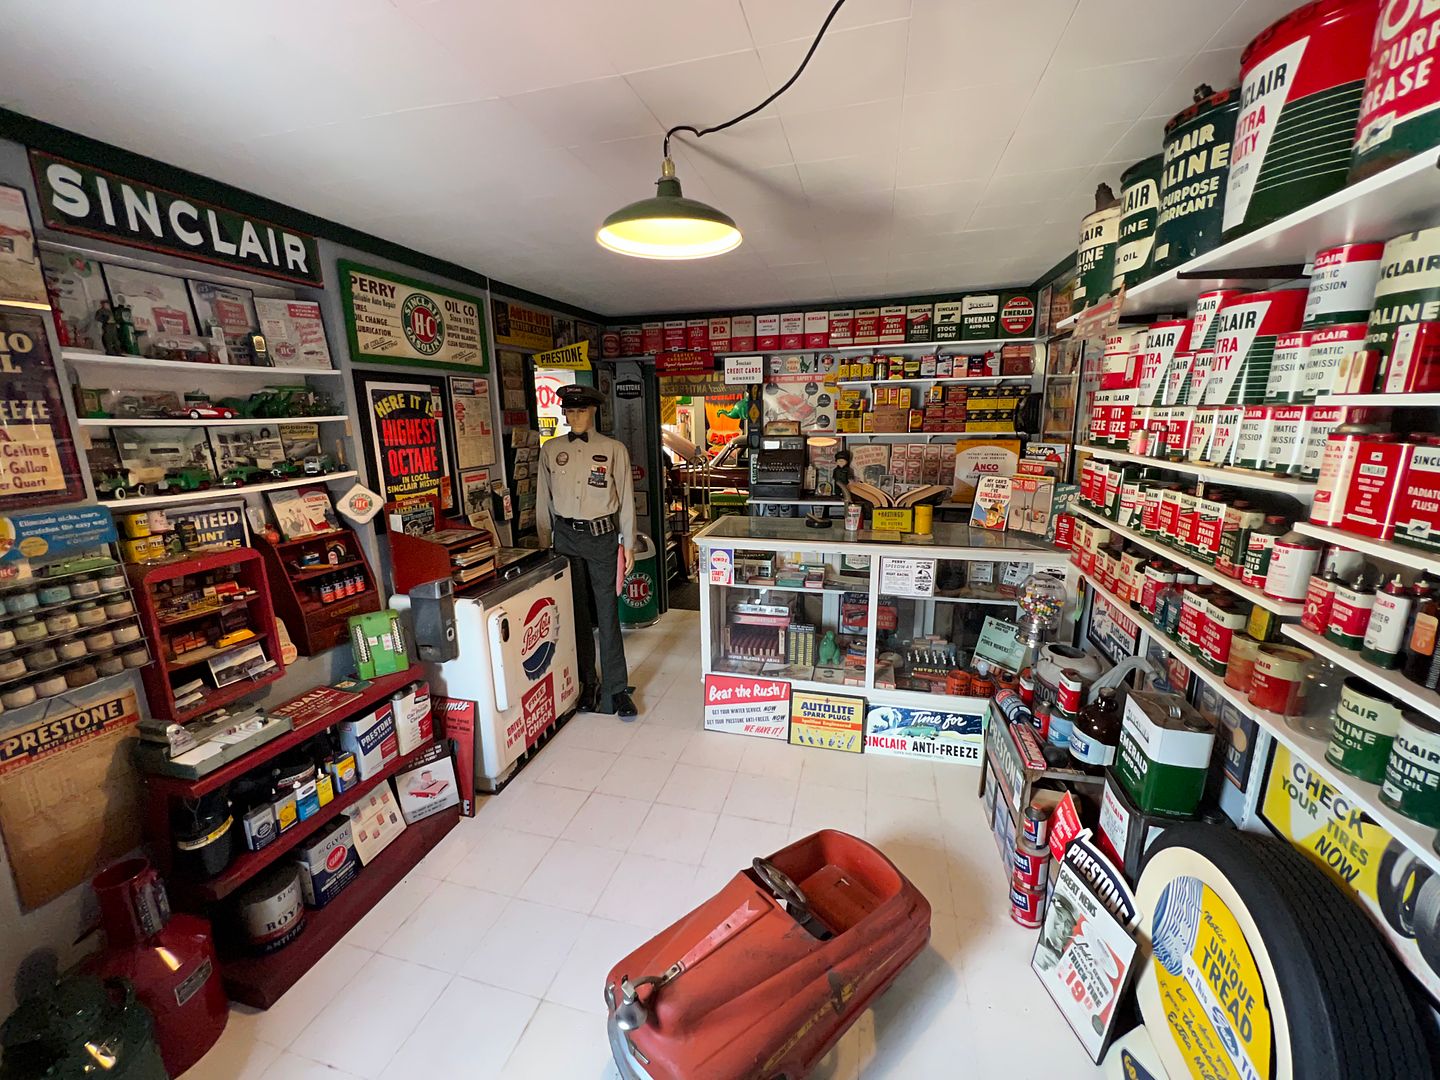 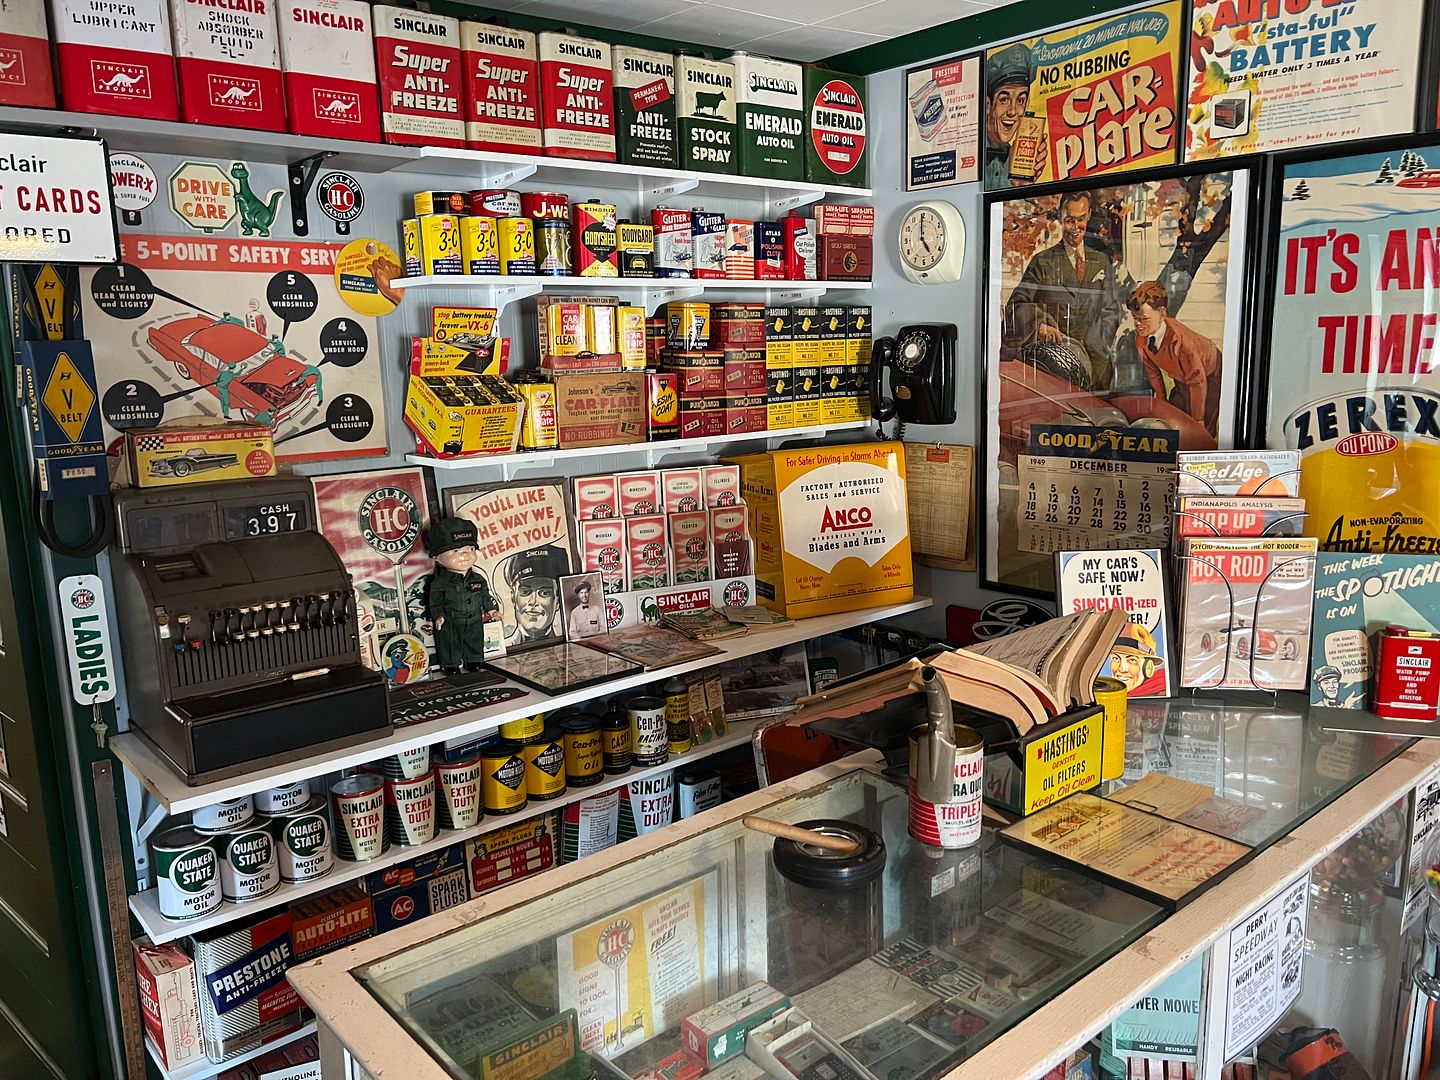 Quite a step back in time.....and the visit would not be complete without a picture in front of the mural... 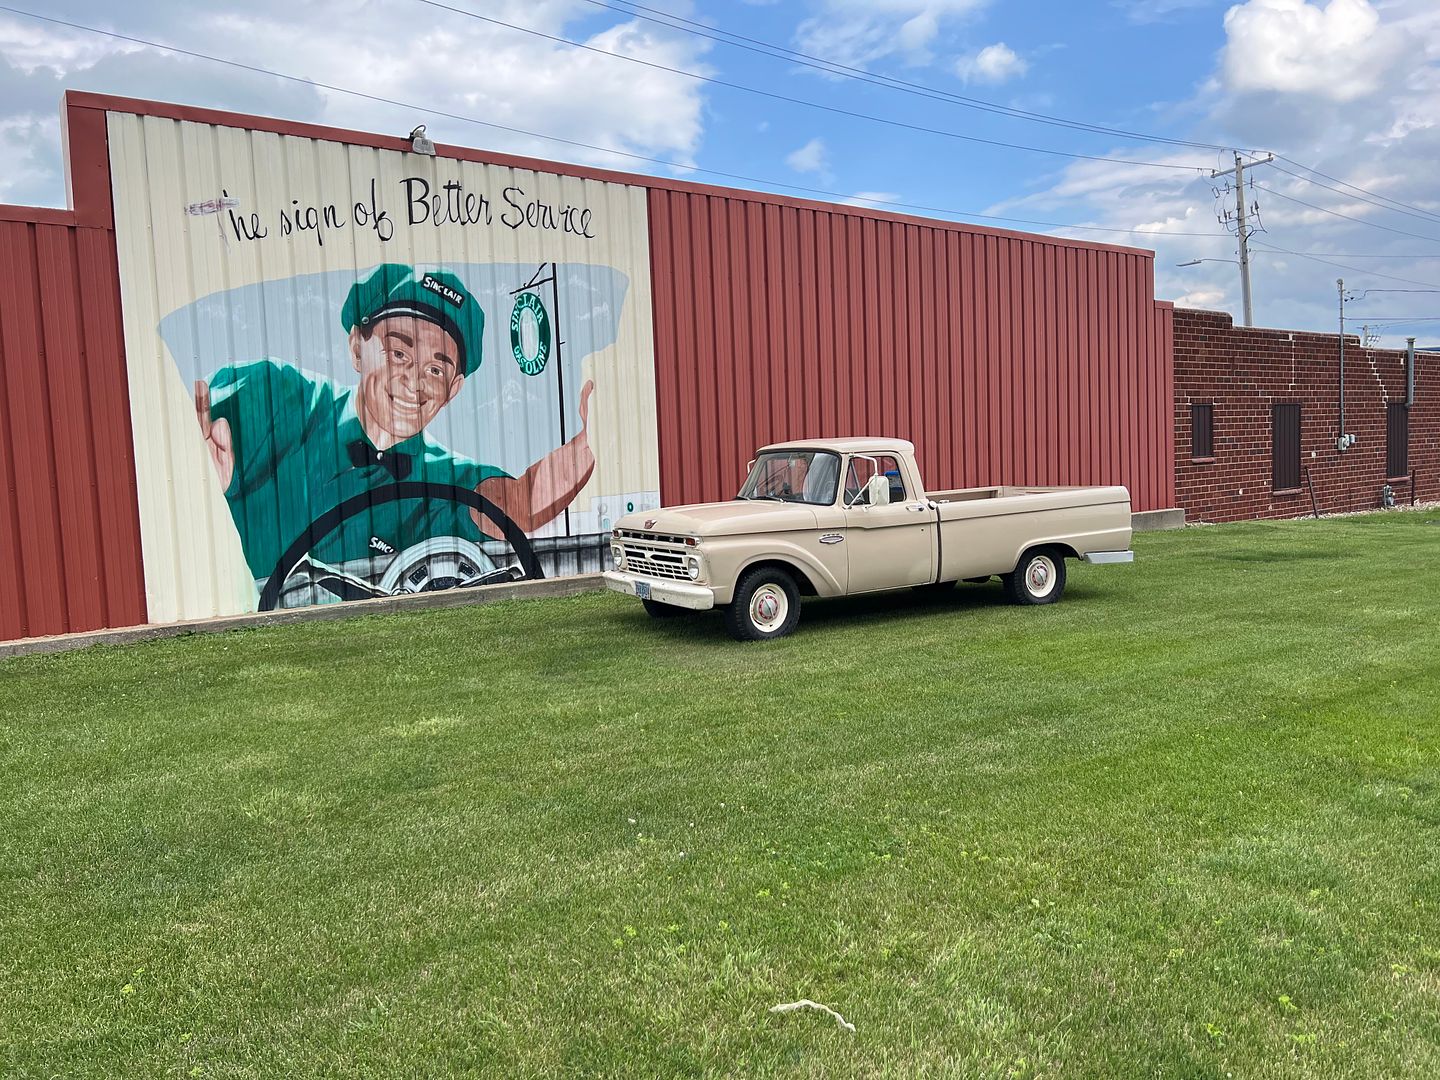 I could have stayed for a day or two, but didn't want to wear out Joe's hospitality. That, and there was a storm heading in and I wanted to stay in front of it.. I headed the more southerly route on I-74 to bypass Chicago and head towards Cincinnati for our next shop tour, set up for Saturday morning. I drove into Indiana and found a rest stop. And set the alarm for 430.
__________________
Robert |
|
|
|
|
Today, 07:45 AM
|
#1382 |
|
Registered User
Join Date: Jan 2013
Location: Leonardtown, MD
Posts: 1,640
|
Re: 55 Wagon Progress
Saturday we had about a three hour drive to our next stop southeast of Cincinnati, at Cornfield Customs. Mike Wagner is among the premiere craftsmen in the country when it comes to metalshaping, it was nice to get to see his shop and some of the projects he has going on.
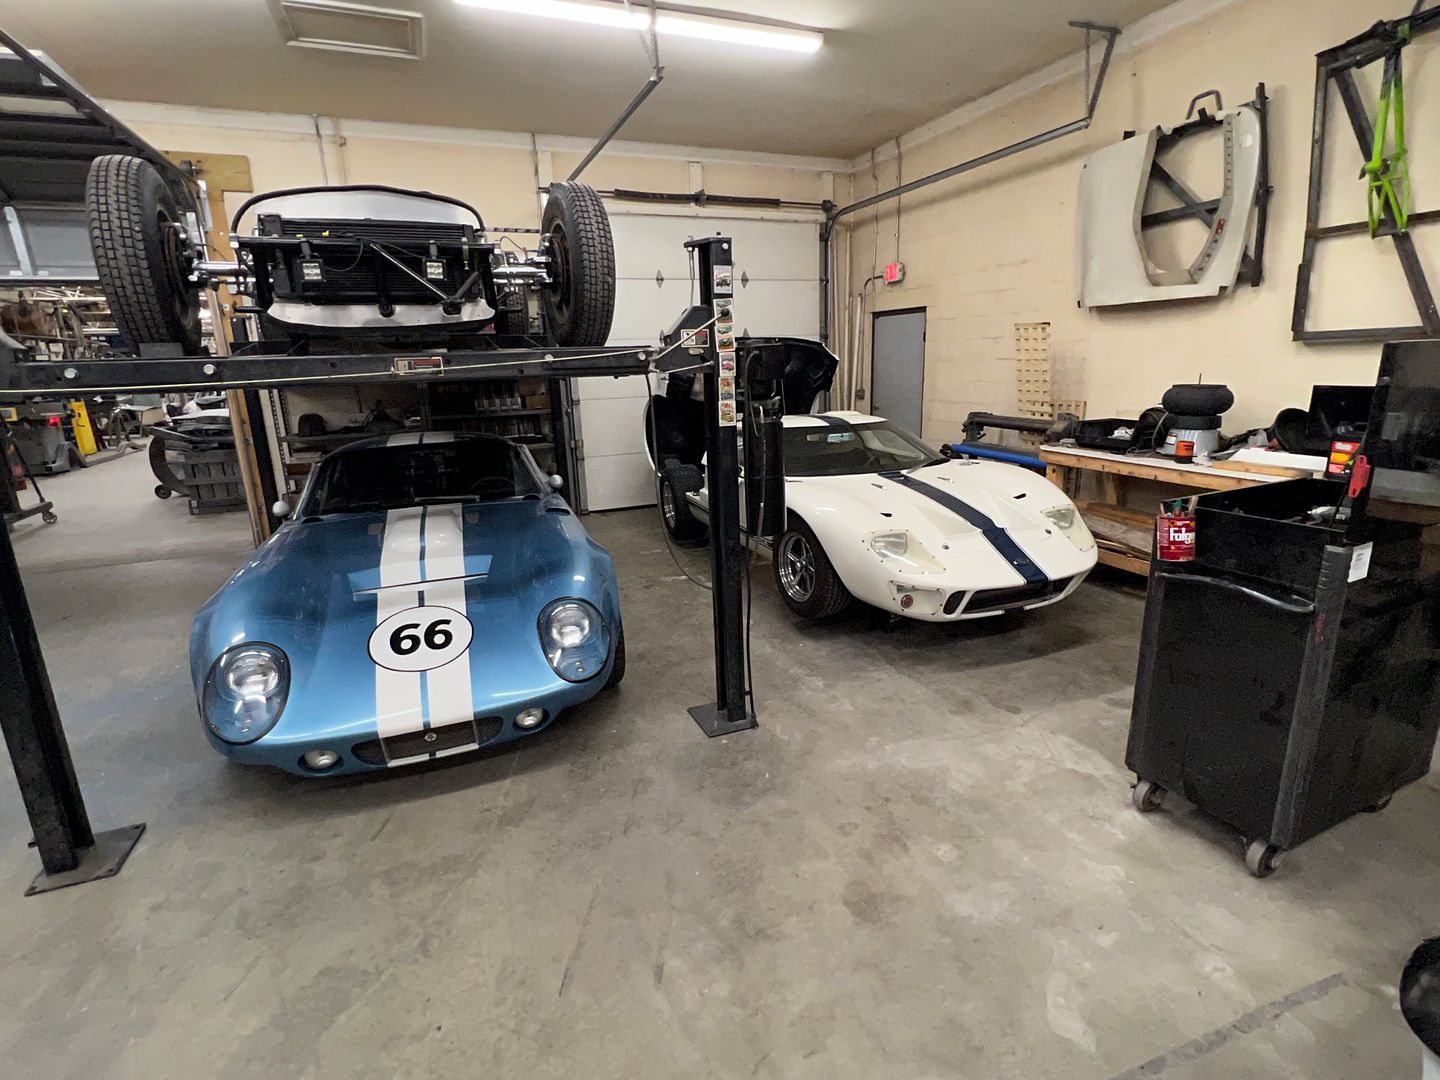 Mike's shop is a mix of both new and vintage equipment, here is an early Pettingel power hammer that came out of a local warehouse. If only it could tell stories of it's past life... 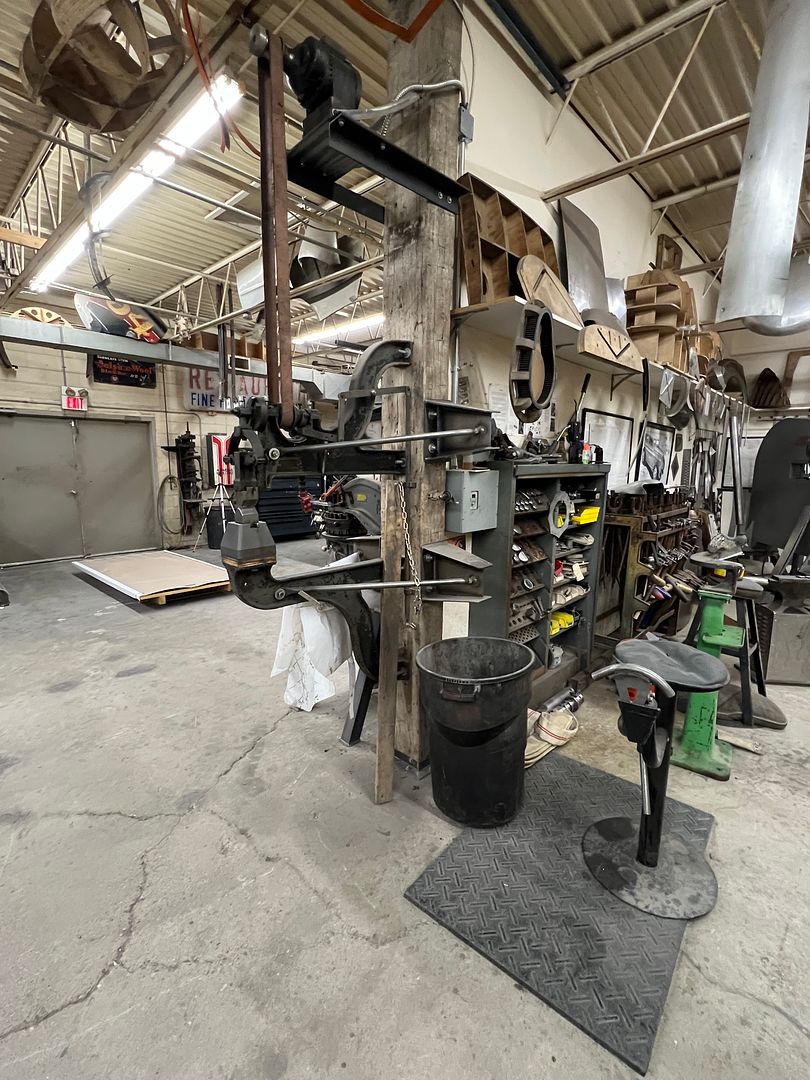 One of the projects, an all aluminum fabricated hood for a Galaxie, complete with tear drop hood scoop. 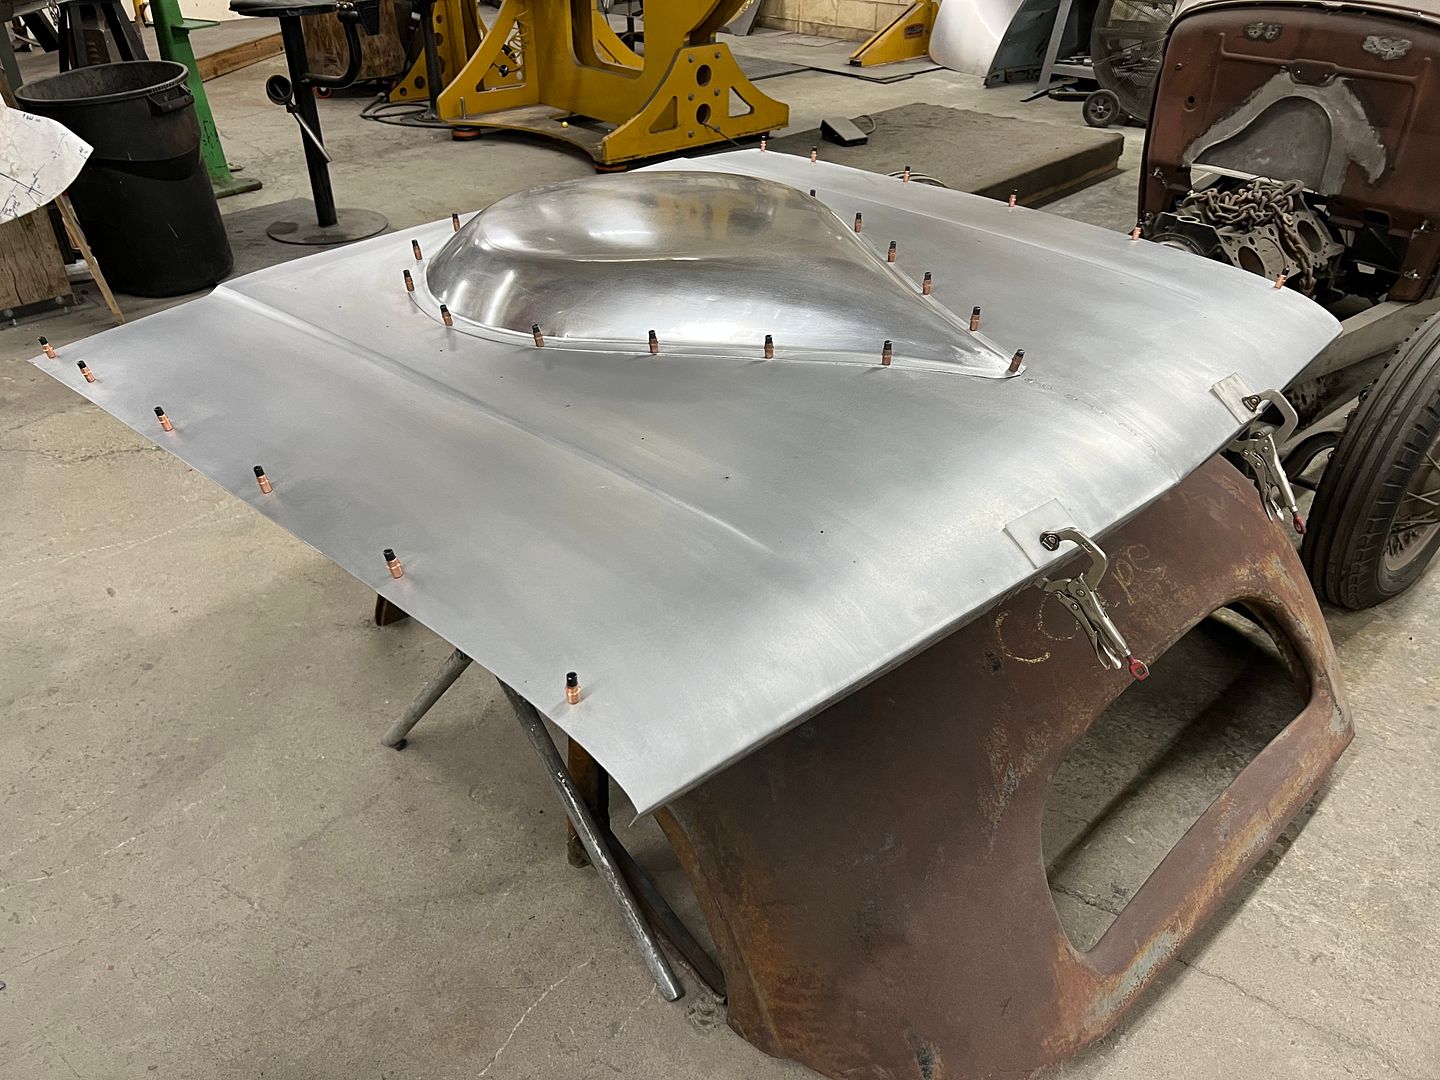 Before leaving I had to get a picture next to his 61 Unibody Salt Flats push truck. 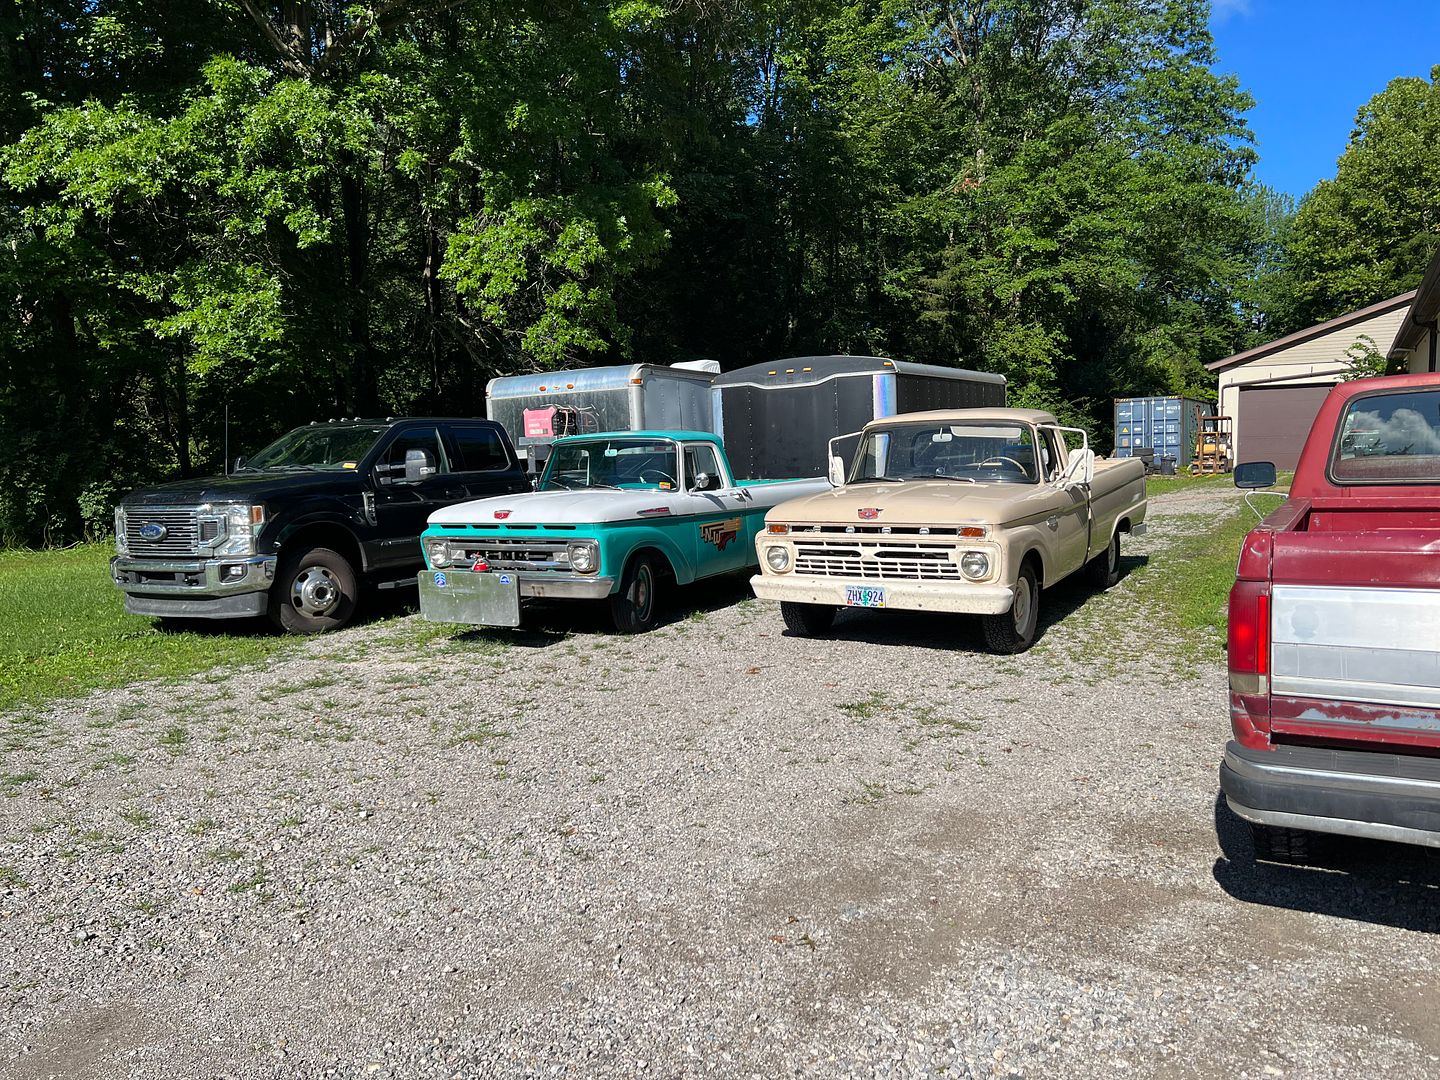 Mike, thanks for the hospitality!! From there I had about a 9-1/2 hour ride home. Here's what 11 states worth of bugs looks like... 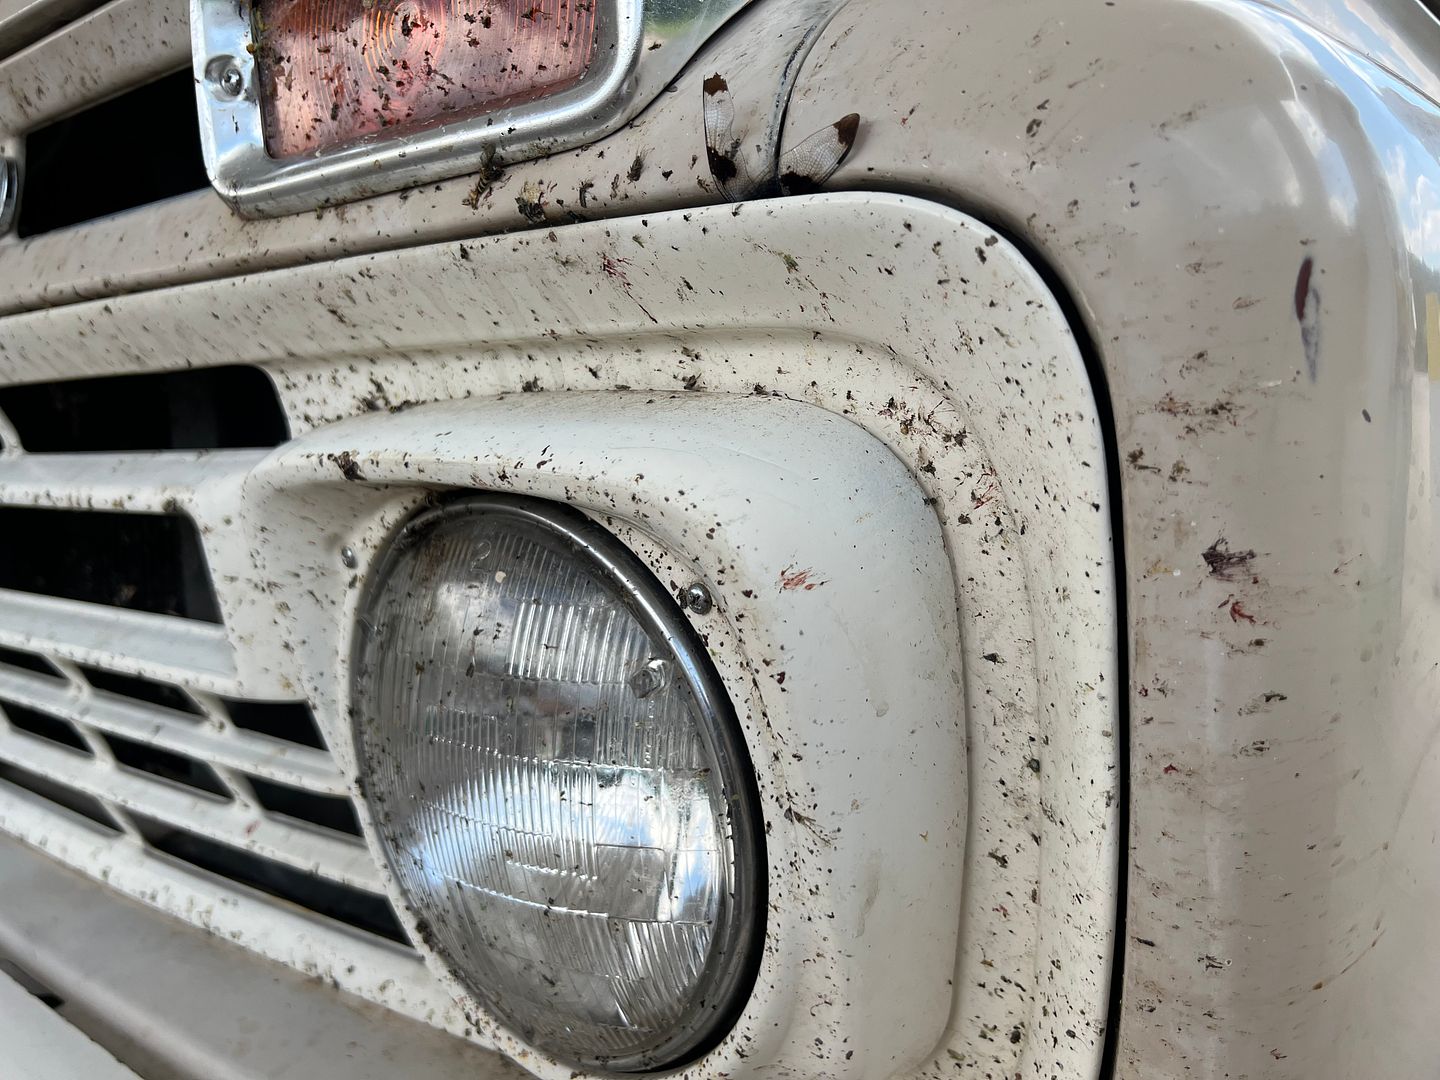 I had noticed that the fuel economy appeared to be getting better. Or more precisely, that it was taking less fuel to fill up at about the same mileage reading using the tape notation method. So I broke out the calculator again, the last tank was 14.1 mpg. My driving started at about 4 pm in Oregon on Wednesday evening and I was home all safe and sound back in Maryland Saturday night at 9 pm. Quite an adventure. 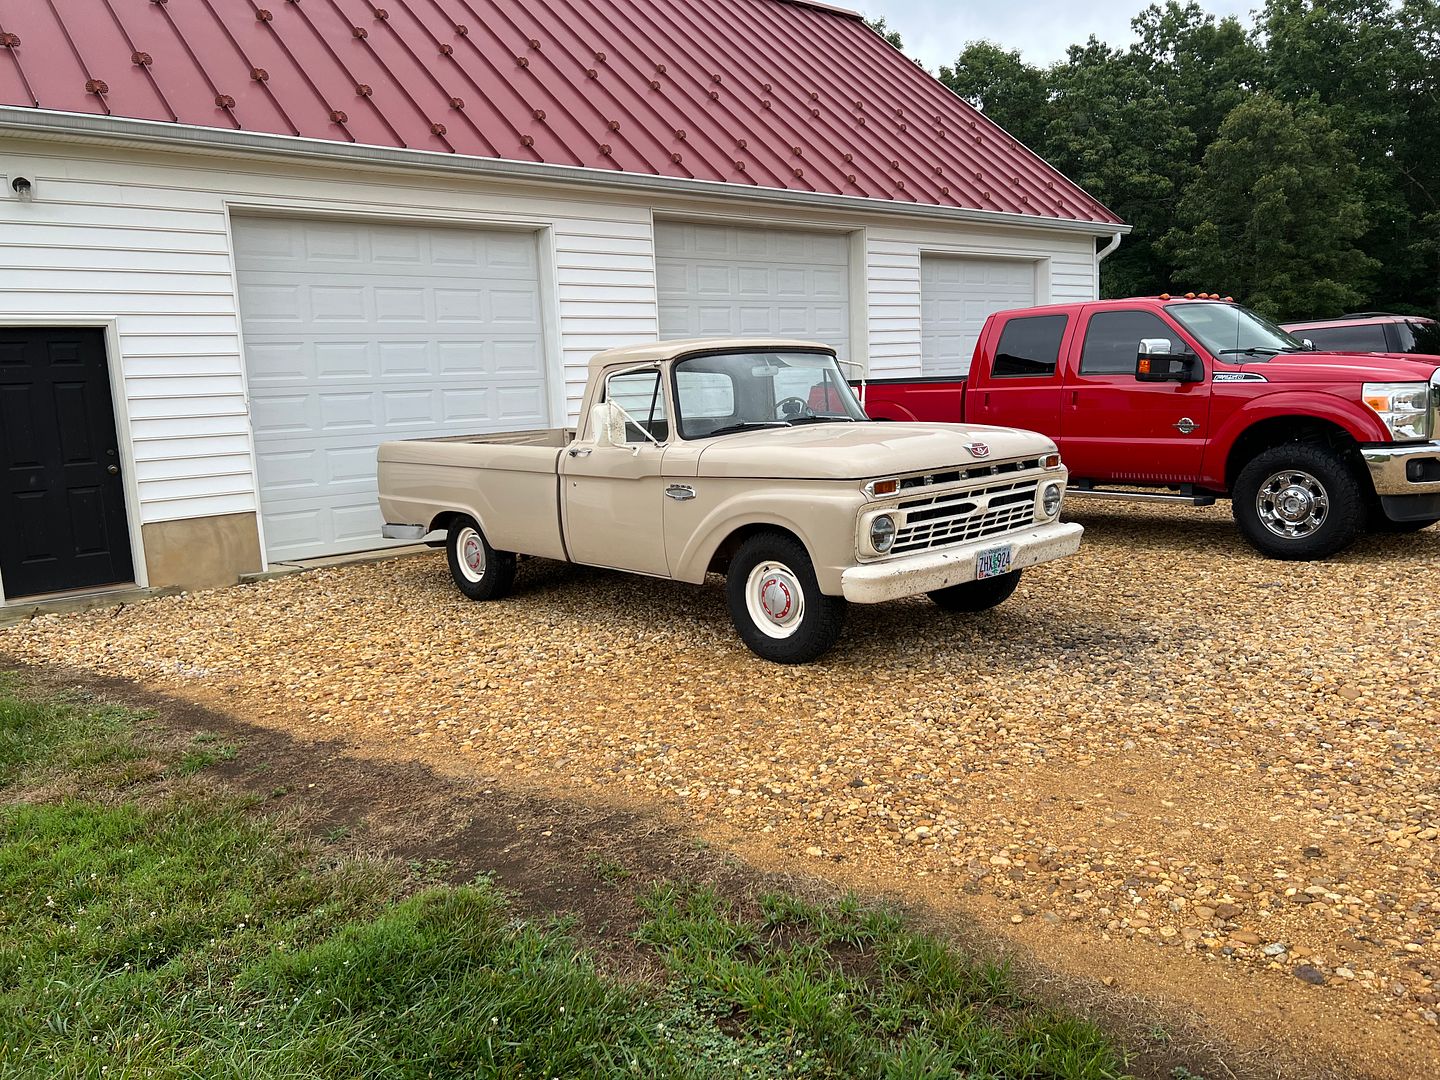
__________________
Robert |
|
|
|
 |
| Bookmarks |
|
|


 Linear Mode

