
 |
|
|
#126 |
|
Registered User
Join Date: Aug 2012
Location: Salem Mo
Posts: 657
|
Re: 1957 Chevy truck re-rebuild
Ha ha, that'll be tomorrow night. I'm still pre-historic, dial-up, about an hour to upload 3 pics.
I'm starting to get some options for internet service, soon I will have high speed. Do you still have that house for sale down the street, that might be a quicker way for me to get high speed. 
|
|
|

|
|
|
#127 | |
|
Registered User
Join Date: Aug 2007
Location: Corona, California
Posts: 7,998
|
Re: 1957 Chevy truck re-rebuild
Quote:
Looking forward to seeing how they turned out. Kim |
|
|
|

|
|
|
#128 |
|
Registered User
Join Date: Jan 2012
Location: Motown
Posts: 7,680
|
Re: 1957 Chevy truck re-rebuild
dial up??? i didn't know they still offered that
 though i'm sure it's not available in the boonies either when i lived in southern minnesota we had an 8 party line, ufda   
__________________
cool, an ogre smiley  Ogre's 58 Truk build Ogre's 58 Truk buildhow to put your truck year and build thread into your signature shop air compressor timer |
|
|

|
|
|
#129 | |
|
Registered User
 Join Date: May 2012
Location: Finley, TN.
Posts: 198
|
Re: 1957 Chevy truck re-rebuild
Quote:
|
|
|
|

|
|
|
#130 | |
|
Registered User
Join Date: Aug 2012
Location: Salem Mo
Posts: 657
|
Re: 1957 Chevy truck re-rebuild
Quote:
Ok Kim, I got off work today and began the up-loading process. Lets see, I hit enter, then fed the dogs and started a load of laundry. Once that pic was done I hit enter on another pic, about that time the Fed Ex truck showed up with the headlights we were talking about. I'm very happy with the look of the headlights. They are a halogen bulb and they have a small amber light for the turn signals. What I really like is they are called a 3 bar design. The three bars come to the center and form what I will call a pupil. I chose the black pupil design to give the look of an actual eyeball. I'll have pictures later. After about an hour I have pictures. The final result of the gills is basically the same as when I had them taped in place, I'm just glad that the welding didn't make a mess. I will show the process regardless...... After the stitch welding done on the backside the penetration still came through to the front side. Although I have grinding clean up to do, it's far less than if I welded on the front side. 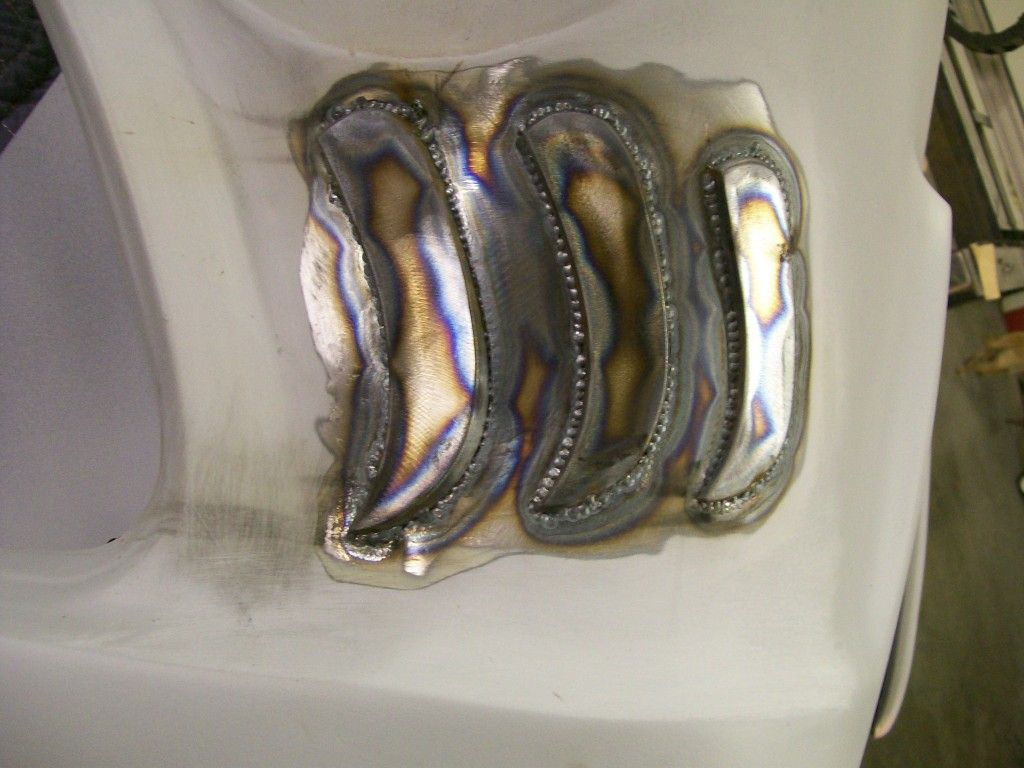 For some reason I didn't get a good picture of the gills during the weld clean up grinding. I used a 3" cut off wheel. I was able to get close to the gills without cutting into them. A pic of the process... 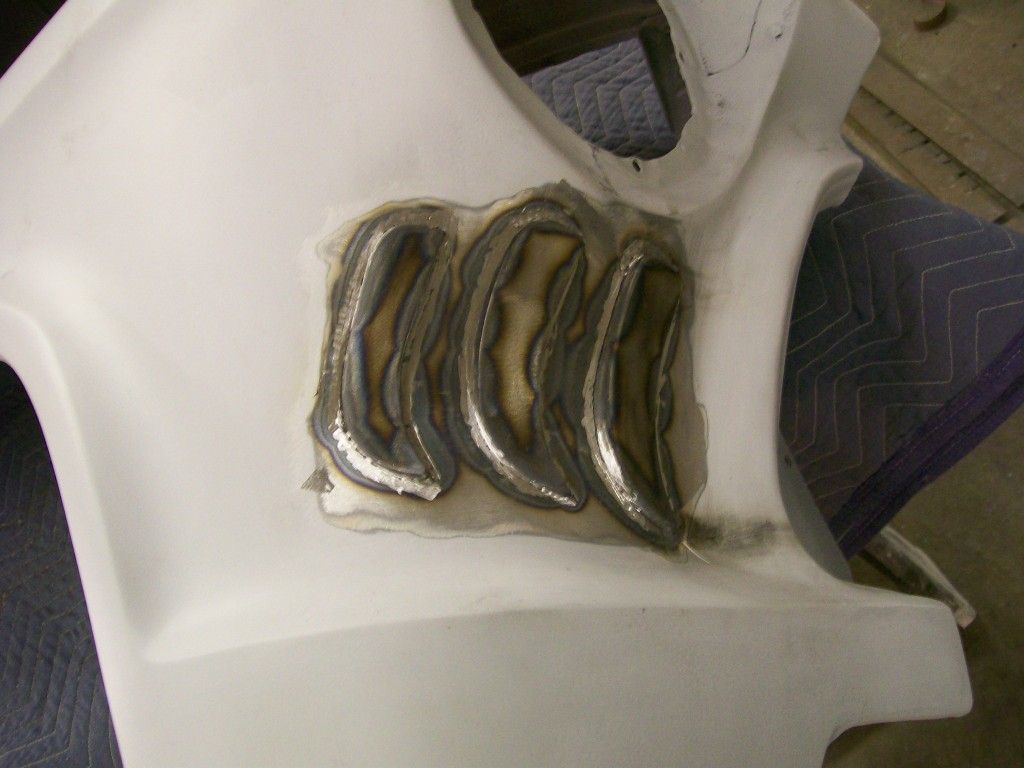 Finished... From this point I could either very lightly apply some body filler to smooth the edges or, apply a couple coats of epoxy primer, apply a thin layer of spot putty then finish with a primer like feather fill. I'll probably go with the second choice. I've mentioned this before, I am old school that I like the sand blaster. Not only does it clean the area, it also removes most of the grinding marks. 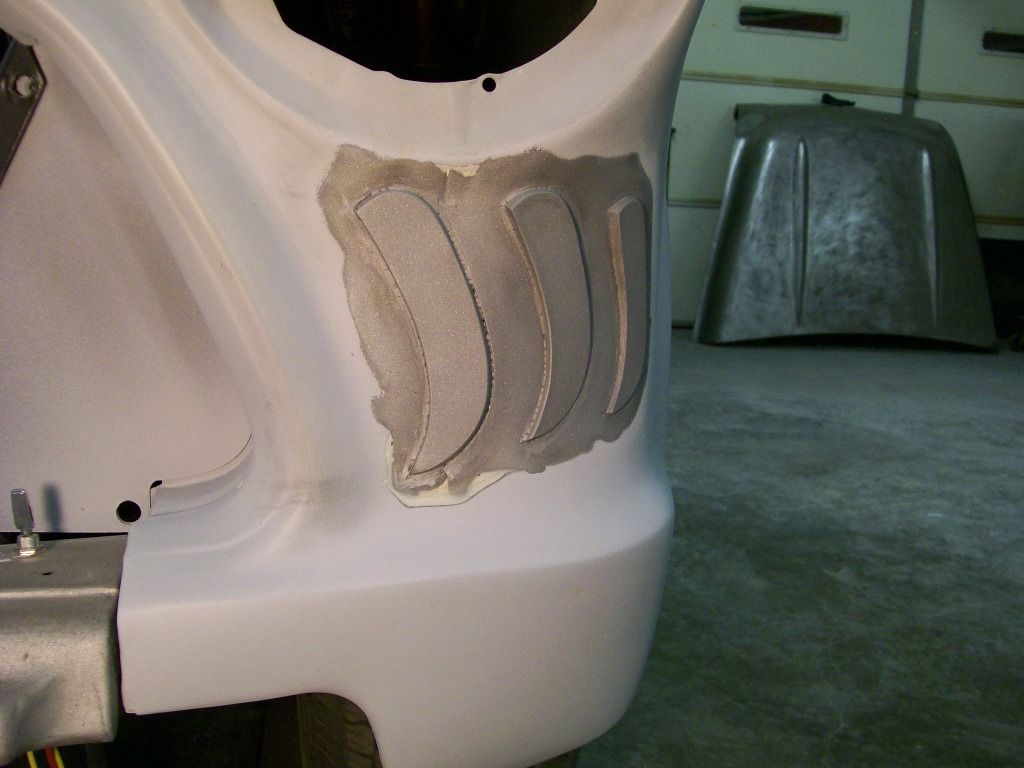 One more of the front. Now I wish I had the new headlights installed for this picture. 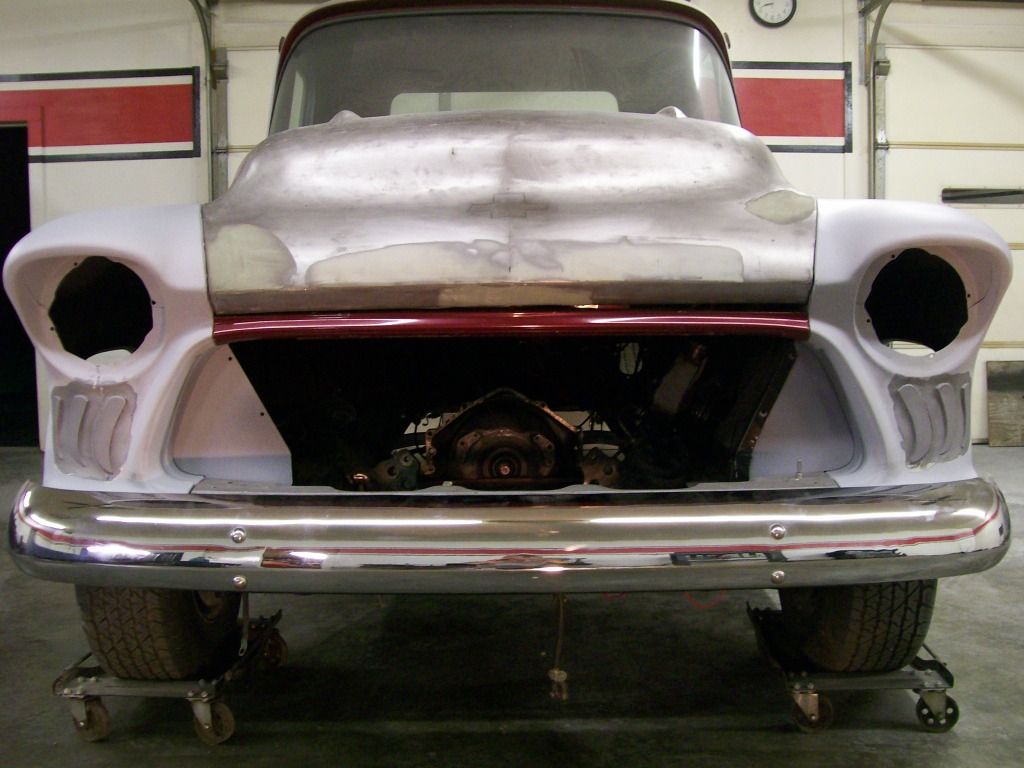
Last edited by Stepside Jim; 12-08-2012 at 08:32 PM. |
|
|
|

|
|
|
#131 |
|
Registered User
 Join Date: May 2012
Location: Finley, TN.
Posts: 198
|
Re: 1957 Chevy truck re-rebuild
How much for the siv tail light frame items?
|
|
|

|
|
|
#132 |
|
Registered User
Join Date: Aug 2007
Location: Corona, California
Posts: 7,998
|
Re: 1957 Chevy truck re-rebuild
They came out nice.
Adds a different and unique visual look to your truck. Kim |
|
|

|
|
|
#133 |
|
Registered User
Join Date: Aug 2012
Location: Salem Mo
Posts: 657
|
Re: 1957 Chevy truck re-rebuild
|
|
|

|
|
|
#134 |
|
Registered User
Join Date: Aug 2012
Location: Salem Mo
Posts: 657
|
Re: 1957 Chevy truck re-rebuild
Still working on the truck..... it seems some stuff goes fast and you can see the progress, others seem to go on forever and you don't see much progress. I'm sure most everybody has been down the same road.
 On the front end, as of now, I'm sticking with the grill that dad perfered. He liked the 55 and 56 grill so I've settled back to it for now. 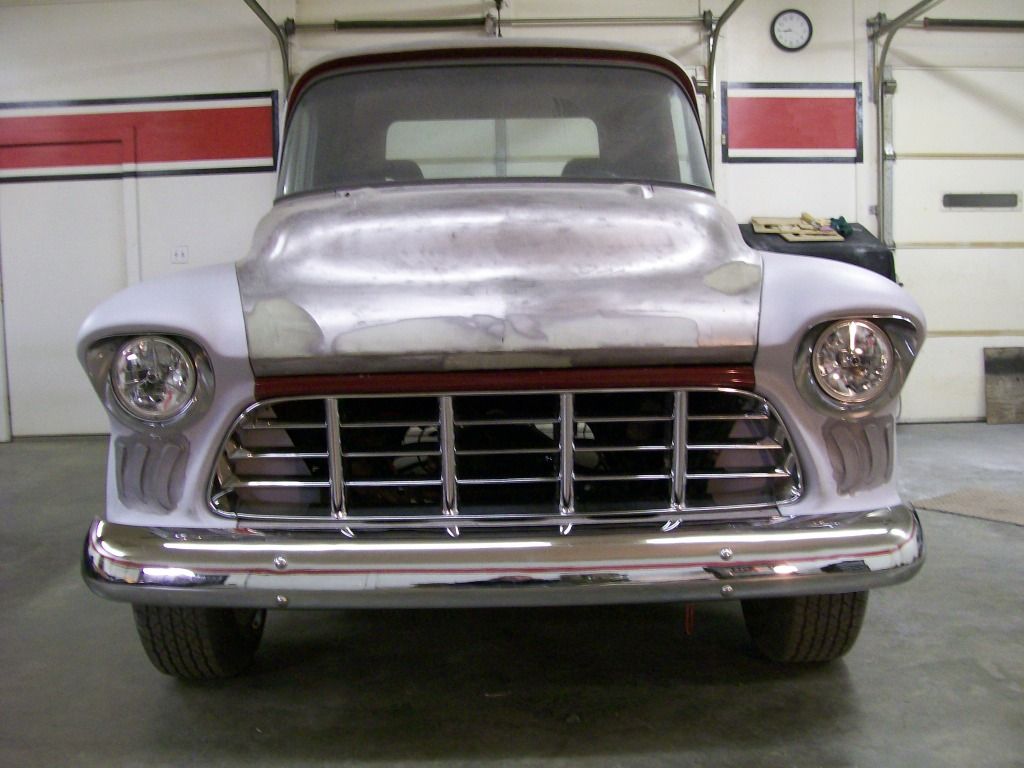 I've moved to the inside of the cab. Had a couple issues to work on. First, someone way back in the early 80's decided to go with a bigger radio than the original. I couldn't see any evidence where a radio, or any wiring, or any speakers were installed though. So the cutting of the dash seemed a waste of time. It had a tilt column when I got it. I decided to put the ignition switch back in the dash as original so I removed the column switch and smoothed over the swith hole. Did the same with the column shift boss, cut and smoothed it also. I didn't want to see the wiring from the turn signal still in the column so I made a cover for the mounting and the wiring. 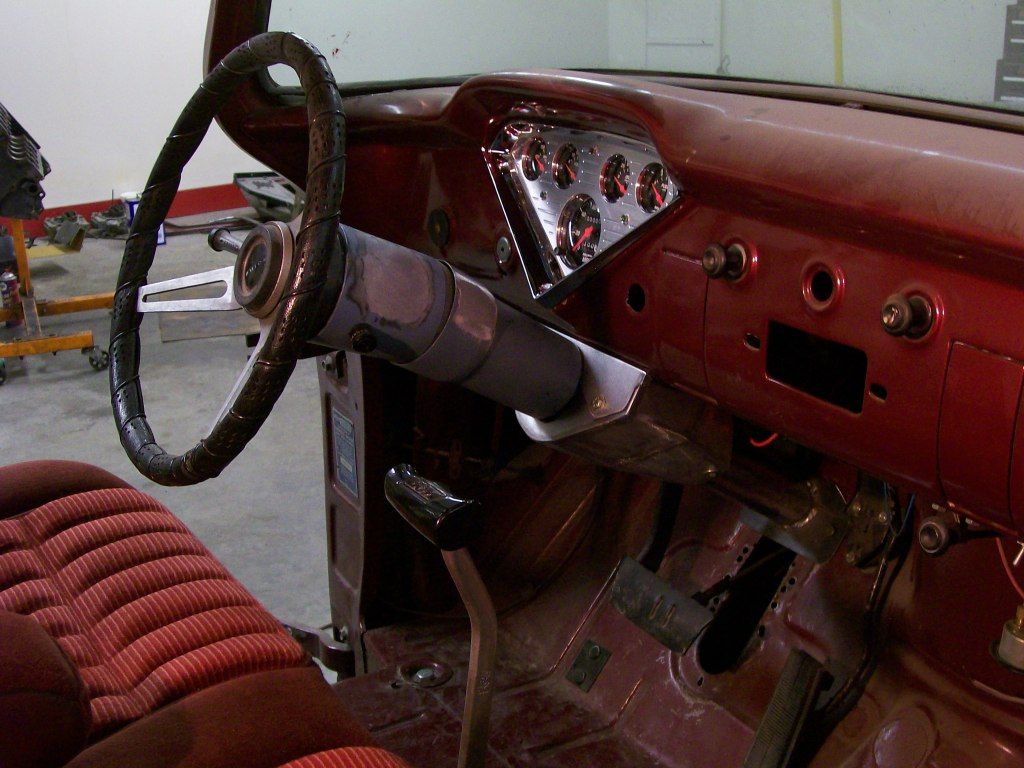 To take care of the radio problem, Classic parts had a patch panel for the dash fix, radio problem fixed. The patch panel also had the 3 switch holes above the radio, I didn't need them so I cut the panel just below the holes. I did however want another switch outlet on the dash. I used one of the patch panel switch holes and installed it between the two switch holes on the left side of the instrument cluster. I went back to the floor dimmer switch. I didn't like the original location so I moved it to the left. I know the front tire will throw road crud on the switch so I will build a cover so it will stay dry. I didn't get a heater with the truck and saw one that Classic parts had. I at least need a heater for defrost to keep the windshield clear. It's mounted under the dash behind the glove box. I had to shorten the glove box to fit it way up there, so now I have the heater and a slightly shorter glove box. Yes, I'm very lucky, still the original floor. 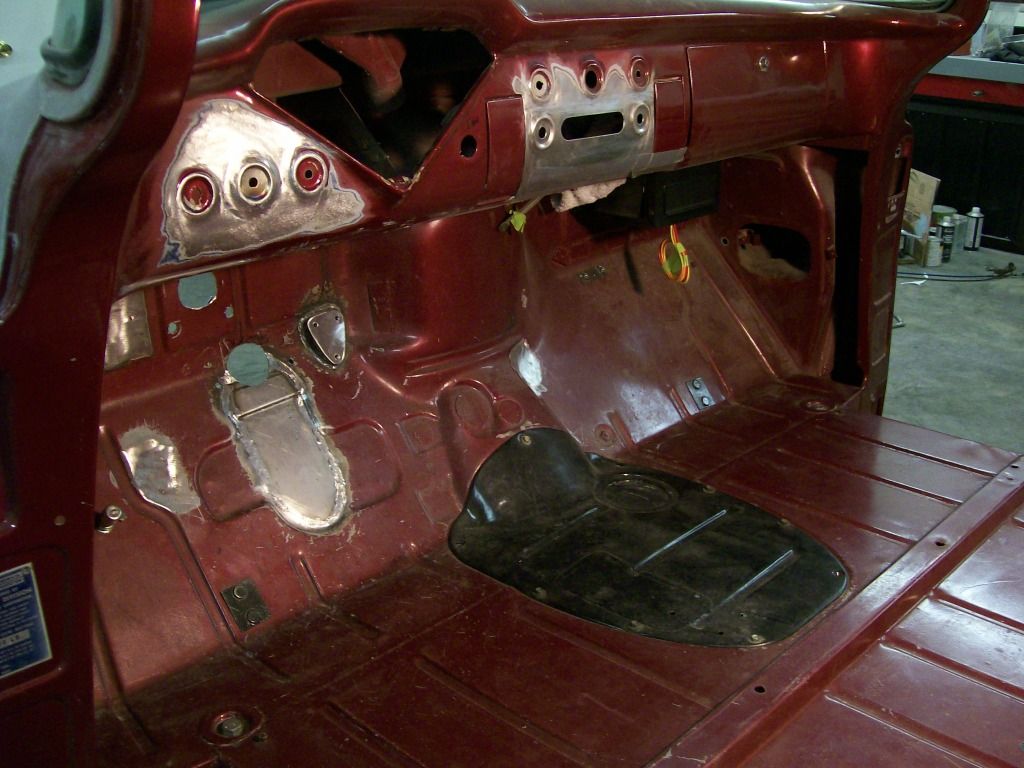 I have pics of some of the progress as I did the work, these are the only pics I have loaded right now. 
|
|
|

|
|
|
#135 |
|
Registered User
Join Date: Aug 2007
Location: Corona, California
Posts: 7,998
|
Re: 1957 Chevy truck re-rebuild
Looking good.
The front fenders came out nice. Kim |
|
|

|
|
|
#136 |
|
Registered User
Join Date: Aug 2012
Location: Salem Mo
Posts: 657
|
Re: 1957 Chevy truck re-rebuild
Thanks Kim, any more it's not easy finding a new twist, I hope it looks good when painted and done.
 Focusing on the radio patch panel...... I'm going back to a song from the 70's. " No one knows what goes on behind old paint" Yeah, I changed the words a bit.  I've looked at the dash for a couple years now, over time I realized someone altered the dash for a different radio. It looked ok with the paint covering what was lurking underneath. Looking from the backside I could see a plate tack welded to the dash. I figured the plate was just a reinforcement. Ha, they cut open the dash, then welded a plate on the backside. Then used body filler to fill the gap. 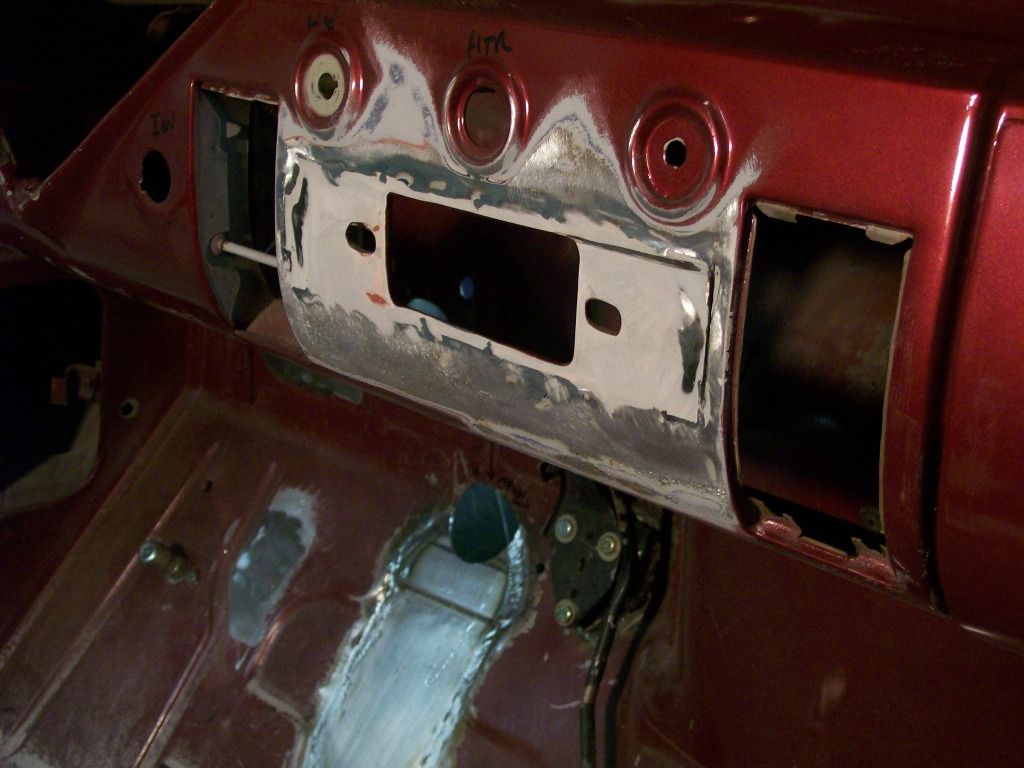 Here's the new plate, I'm so glad to find this available. 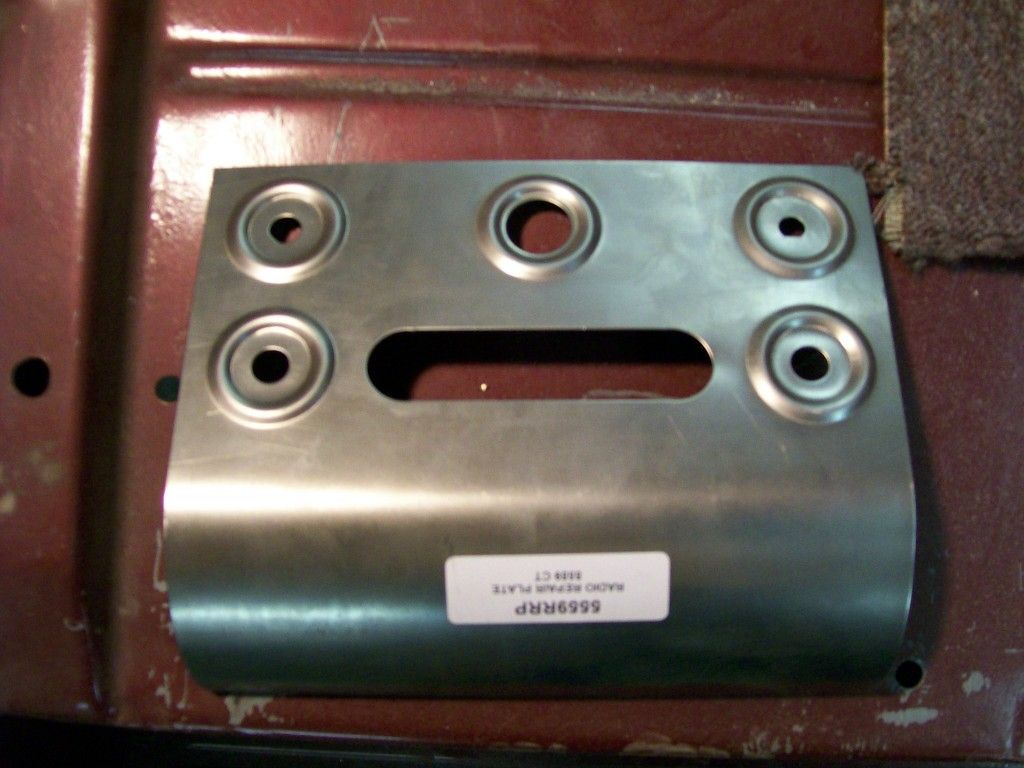 Fitted and welded. 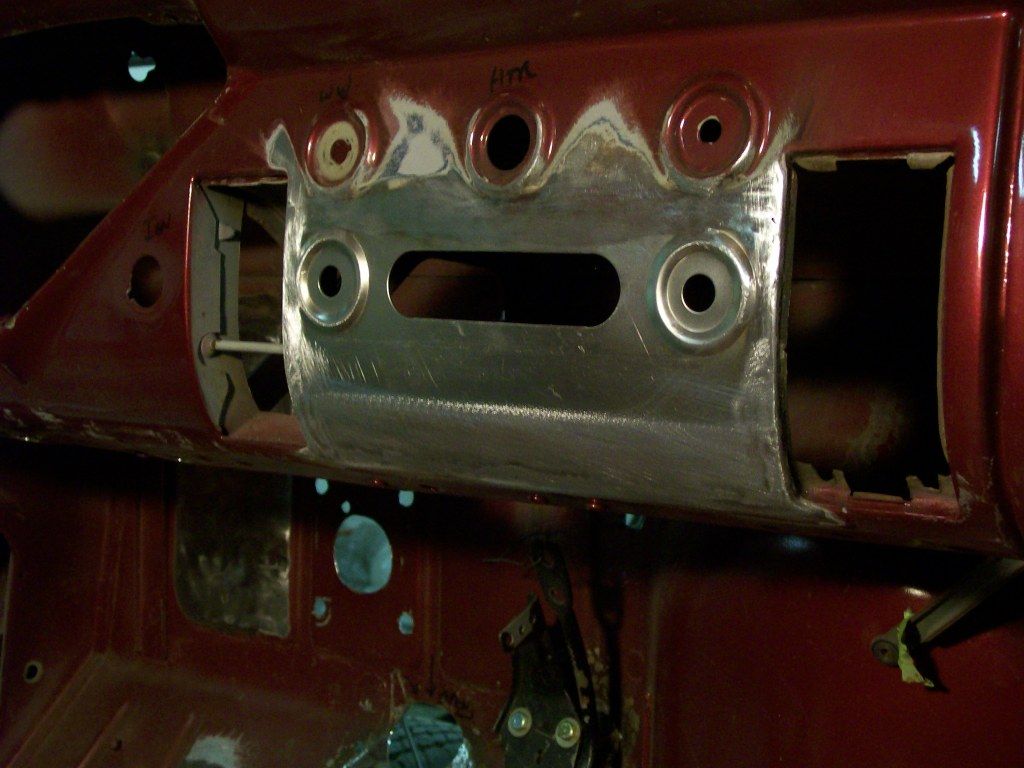 I just got the new radio today and went right to the shop to check the fit. There isn't much room for the radio to fit and I was concerned I'd have to alter the new panel holes to fit the new radio. I'm happy to say, it all fit perfect. Check one more item of the "to do" list. 
|
|
|

|
|
|
#137 |
|
Registered User
 Join Date: May 2012
Location: Finley, TN.
Posts: 198
|
Re: 1957 Chevy truck re-rebuild
[QUOTE=Stepside Jim;5807711]Thanks Kim, any more it's not easy finding a new twist, I hope it looks good when painted and done.
 Focusing on the radio patch panel...... I'm going back to a song from the 70's. " No one knows what goes on behind old paint" Yeah, I changed the words a bit.  I've looked at the dash for a couple years now, over time I realized someone altered the dash for a different radio. It looked ok with the paint covering what was lurking underneath. Looking from the backside I could see a plate tack welded to the dash. I figured the plate was just a reinforcement. Ha, they cut open the dash, then welded a plate on the backside. Then used body filler to fill the gap.  Here's the new plate, I'm so glad to find this available.  Fitted and welded.  I just got the new radio today and went right to the shop to check the fit. There isn't much room for the radio to fit and I was concerned I'd have to alter the new panel holes to fit the new radio. I'm happy to say, it all fit perfect. Check one more item of the "to do" list.  [/QUO [/QUOI noticed you used a marker to label the holes, unless you go to bare metal the marker can come thru the new paint. It may take a while but it will. |
|
|

|
|
|
#138 | |
|
Registered User
Join Date: Aug 2012
Location: Salem Mo
Posts: 657
|
Re: 1957 Chevy truck re-rebuild
Quote:
 Moving onto the next dash modification. I wanted one more switch outlet so I figured the space between the headlight switch and the choke cable would be a good place. I had an extra switch hump left over from the radio patch panel, so I figured I would use it here. 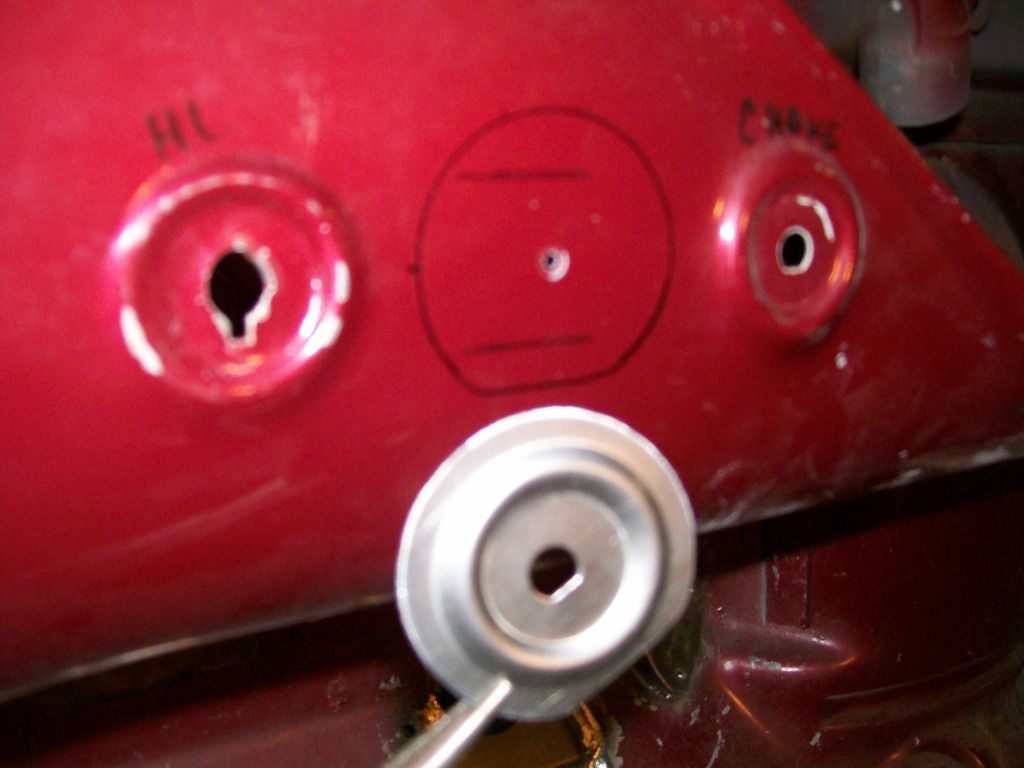 Once again put the 1/8" drill bit to use. 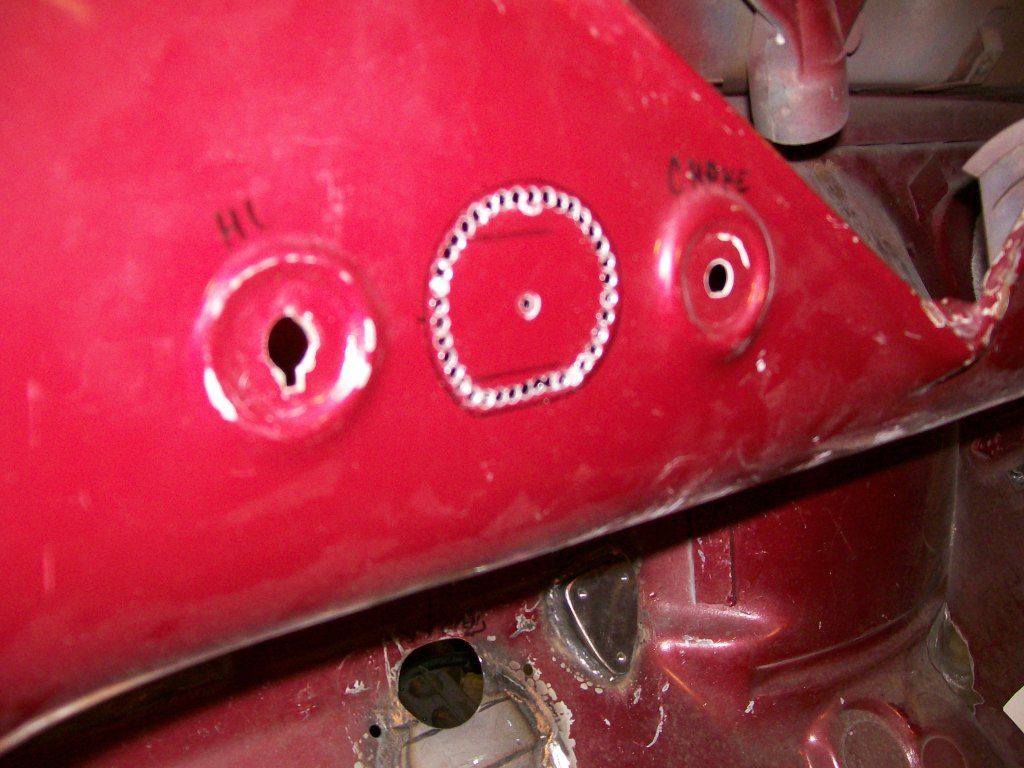 After the drilling, I used the larger rotary brr to clean the edges and fit the hole to the switch mount. 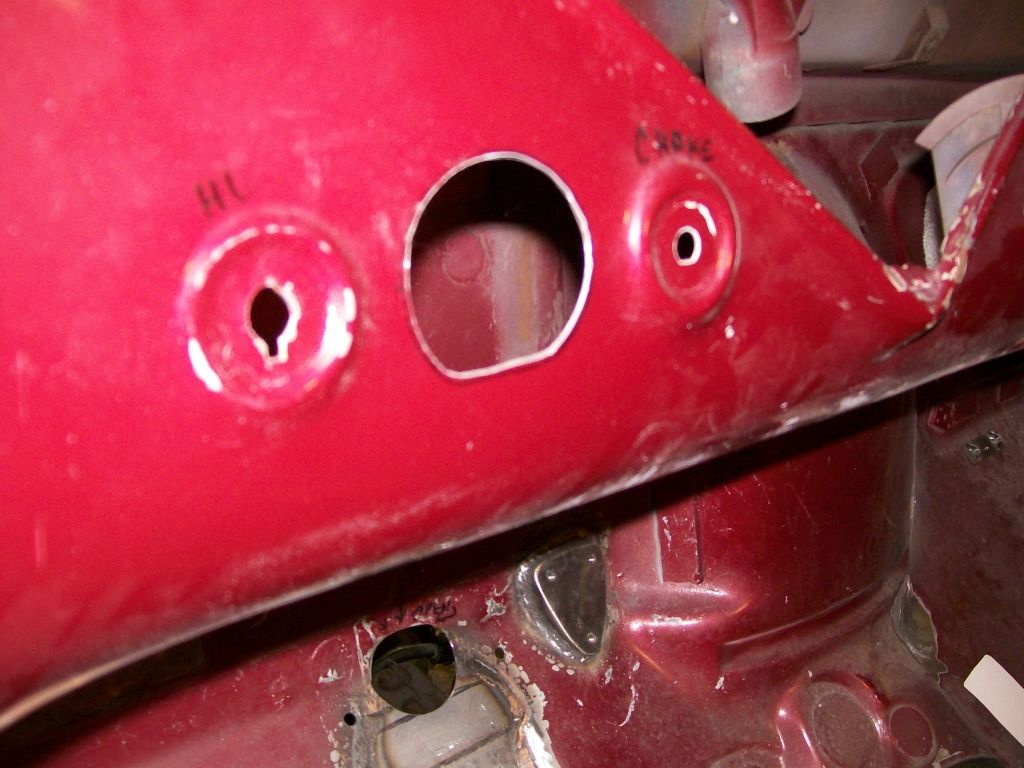 Done with the welding. Still a little clean up to do, but this gets me where I need to be til I'm ready to do the finish work on the rest of the dash. 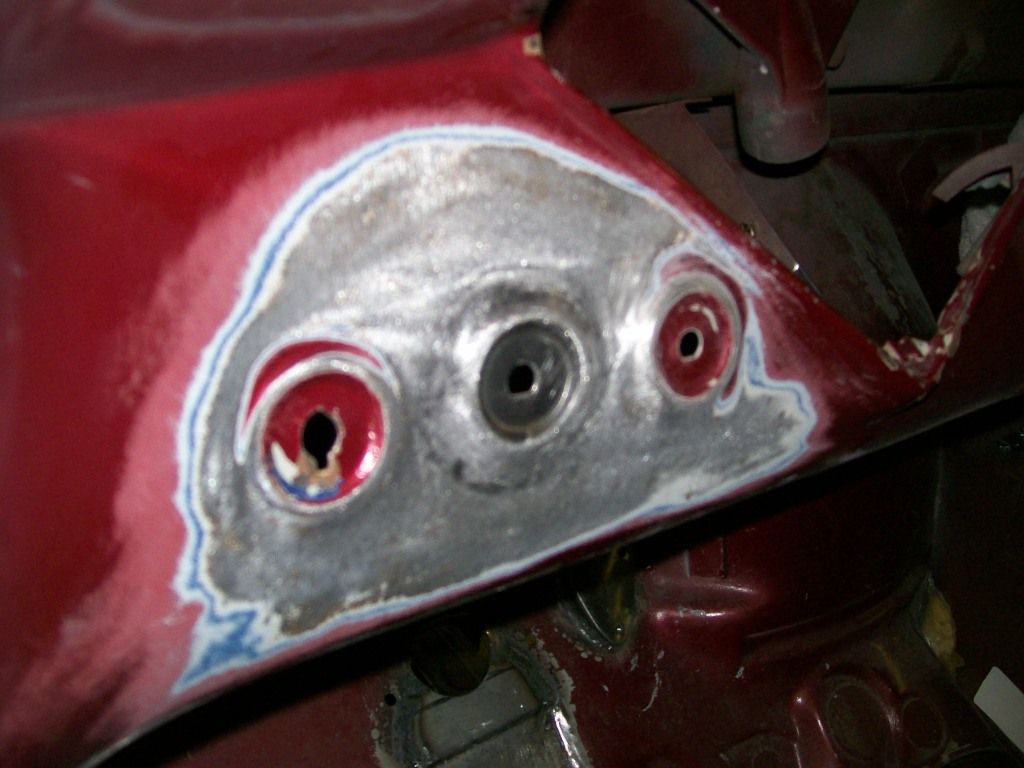
|
|
|
|

|
|
|
#139 |
|
Registered User
Join Date: Aug 2007
Location: Corona, California
Posts: 7,998
|
Re: 1957 Chevy truck re-rebuild
Nice work.
Kim |
|
|

|
|
|
#140 |
|
Registered User
Join Date: Jan 2012
Location: Motown
Posts: 7,680
|
Re: 1957 Chevy truck re-rebuild
looking good stepside jim
__________________
cool, an ogre smiley  Ogre's 58 Truk build Ogre's 58 Truk buildhow to put your truck year and build thread into your signature shop air compressor timer |
|
|

|
|
|
#141 |
|
Registered User
Join Date: Aug 2012
Location: Salem Mo
Posts: 657
|
Re: 1957 Chevy truck re-rebuild
I've pretty well worked myself into a corner, meaning this cab has to come off the frame.
Although the floor is in pretty good shape, I still want to sandblast the top and the bottom. I have a few small patches to put in and I want clean metal. I work alone, and although I have people stop by, I don't want to wait for a time when someone is here to help lift the cab. I look forward to the sandblasting also. I just get tired of using sandpaper around all the edges. Sandblasting just gets it done in no time, and super clean. The best lifting item I have is the cherry picker. I made a bracket, got some wood, did some cutting and fitting, and now removing the cab is a breeze. 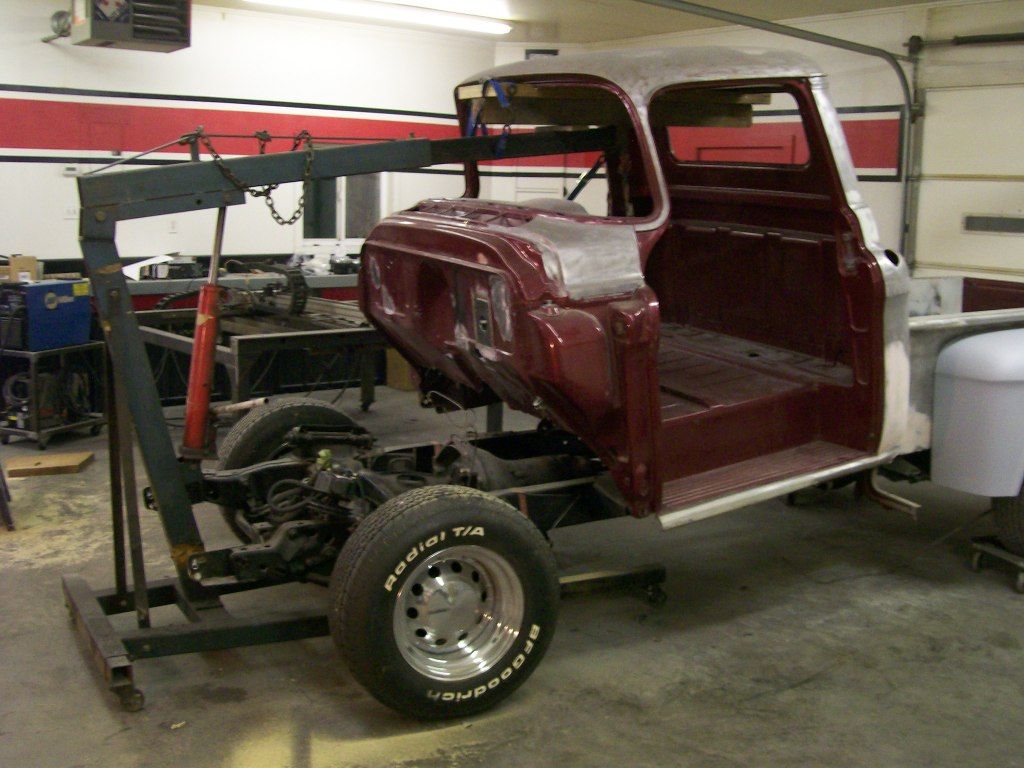 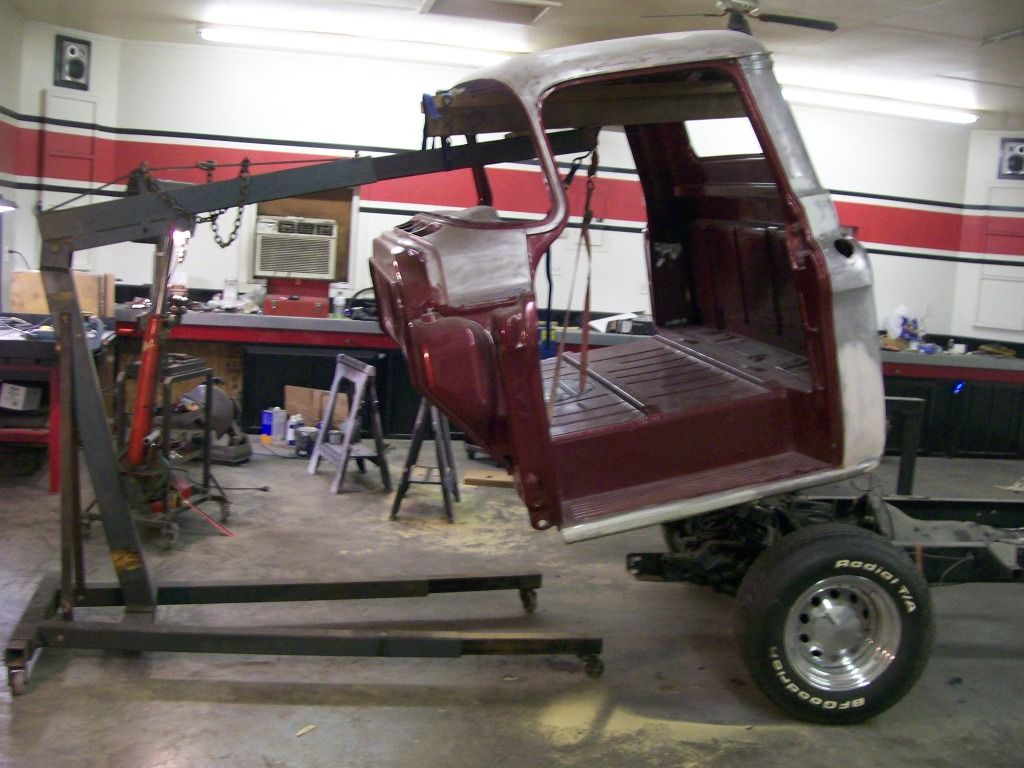 Next I have to get it outside, that'll be next. 
|
|
|

|
|
|
#142 |
|
Registered User
Join Date: Aug 2007
Location: Corona, California
Posts: 7,998
|
Re: 1957 Chevy truck re-rebuild
I use my engine hoist to lift mine also. I go in through one of the doors though.
Kim |
|
|

|
|
|
#143 |
|
Registered User
Join Date: May 2000
Location: Flin Flon, Manitoba, Canada
Posts: 8,853
|
Re: 1957 Chevy truck re-rebuild
great idea for those of us that work alone the majority of the time. Now if only it would lift or tilt enough to slide the cab over the stock steering column.
__________________
My name's Tim and I'm a truckaholic My 56 Chevy shop truck build http://67-72chevytrucks.com/vboard/s...d.php?t=562795 |
|
|

|
|
|
#144 |
|
Registered User
Join Date: Apr 2011
Location: .
Posts: 3,104
|
Re: 1957 Chevy truck re-rebuild
got my attention.
subscribed. |
|
|

|
|
|
#145 |
|
Registered User
Join Date: Aug 2012
Location: Salem Mo
Posts: 657
|
Re: 1957 Chevy truck re-rebuild
Hi Kim, I started going through the door, then I decided to go through the front. Either way, it worked very smooth.
dubie, hmmm, I never got the original steering column, I'm not sure how it would work. On the other hand, it is the "mother of all invention". I mean, it's amazing what we'll come up with to keep moving forward when we don't want to rely on help from others. I just got an offer from a guy who wants to be there on paint day, ha, that's a day I really perfer to be alone. Especially on a two tone finish, I need total concentration.  Hi Bomp, I have to get more pics uploaded. I'm helping some others rebuild an engine and a transmission, and now I've come down with a terrible cold. I hate this down time, grrrrr. |
|
|

|
|
|
#146 |
|
Registered User
Join Date: Jan 2012
Location: Motown
Posts: 7,680
|
Re: 1957 Chevy truck re-rebuild
nice work on getting the cab off, as my signature says:
if necessity is the mother of invention, poverty is the mother of necessity - plato  nice shop too. a lot more than a basic 2 car garage. what are using for sand blasting?
__________________
cool, an ogre smiley  Ogre's 58 Truk build Ogre's 58 Truk buildhow to put your truck year and build thread into your signature shop air compressor timer |
|
|

|
|
|
#147 |
|
Registered User
Join Date: May 2000
Location: Flin Flon, Manitoba, Canada
Posts: 8,853
|
Re: 1957 Chevy truck re-rebuild
You got that right. When I took 4 days off work to strip my 56 parts truck by myself, there were a few times when back yard engineering came into play if I wanted to continue my progress. At one point I had my engine crane in the drive way with the inline 6 and transmission strung up in the air as high as it would go while I hooked onto the chassis with my Dakota and started driving away with it to pull the power train. I would have pushed it but the chassis had 2 seized wheels on it
__________________
My name's Tim and I'm a truckaholic My 56 Chevy shop truck build http://67-72chevytrucks.com/vboard/s...d.php?t=562795 |
|
|

|
|
|
#148 |
|
Registered User
Join Date: Aug 2012
Location: Salem Mo
Posts: 657
|
Re: 1957 Chevy truck re-rebuild
_Ogre, sorry so long for a reply. With all the blasting media out there, I've only got availability to sand right now. I've been using it for over 30 years now so I'm familiar with the characteristics of using sand.
dubie, sounds like you and I have the same "gotta do what I gotta do" attitude. I can't count the times I get myself into a teetering situation trying to balance something with my heart pounding. Shoooey, rubbing the sweat of my forehead, that was close.  Here's my situation.... This is my first picture without using Photobucket. They changed the site and I can't get to the upload to work. Hoefully this will work, if it does, I can get back to posting again. |
|
|

|
|
|
#149 |
|
Registered User
Join Date: Aug 2012
Location: Salem Mo
Posts: 657
|
Re: 1957 Chevy truck re-rebuild
I'll reply to my own post.
 Not as big of a picture, but it worked pretty good. Good job Jim. lol Ogre, yes, I am fortunate with my workshop. It's 30' by 40'. I have a couple of out buildings so I have a strong policy that nothing sits or stays in the workshop if it isn't related to the current project. If it isn't part of the project, it goes to another building. Last edited by Stepside Jim; 02-16-2013 at 10:36 PM. |
|
|

|
|
|
#150 |
|
Registered User
Join Date: Aug 2012
Location: Salem Mo
Posts: 657
|
Re: 1957 Chevy truck re-rebuild
Now that the cab is off the frame it's time to get it outside
I aquired this yard wagon a couple years ago, now I'm gonna put it to use. Although the whole thing looks alittle top heavy, it works well. I need the atv for taking the cab outside, in the shop, it makes moving the cab easier. Time for sandblasting..... |
|
|

|
 |
| Bookmarks |
|
|