
|
|
|
 03-14-2020, 09:20 PM
|
#1 | |
|
Registered User
Join Date: Oct 2017
Location: Calgary, Alberta
Posts: 208
|
Re: 66 GMC Long to Short LS Swap
Quote:
Thanks Stranger, I post as much detail as I can in hopes that it will help others. Once I get the truck on the road and get to tuning I will likely upgrade the injectors but that is a ways down the road. |
|

|

|
|
03-14-2020, 10:10 PM
|
#2 |
|
Registered User
Join Date: Oct 2017
Location: Calgary, Alberta
Posts: 208
|
Re: 66 GMC Long to Short LS Swap
Did the small bit of rust repair needed on the core support.
  [url=https://flic.kr/p/2iEj2v2] [url=https://flic.kr/p/2iEj2v2] [IMG] [IMG] IMG_E6475[/IMG][/img] IMG_E6475[/IMG][/img]  Sprayed the core support, grill surround and passenger side fender and the inside of both doors with epoxy. Started bolting things together, its beginning to look like a truck!     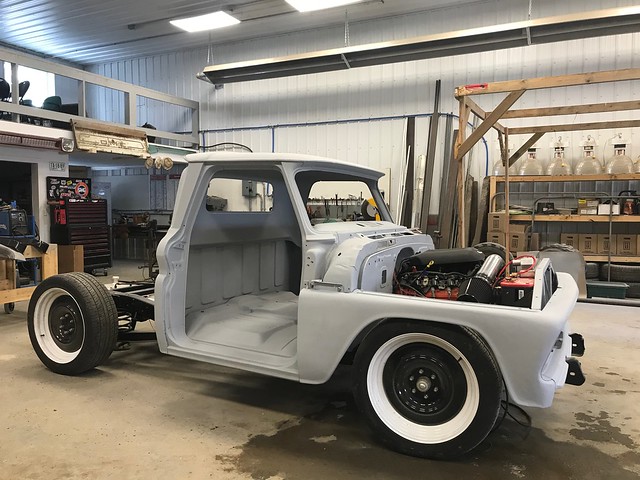
|
|
|
|
|
03-21-2020, 07:29 PM
|
#3 |
|
Registered User
Join Date: Feb 2012
Location: Grand Rapids, Michigan, otherwise known as Beer City U.S.A.
Posts: 1,081
|
Re: 66 GMC Long to Short LS Swap
Wow! That is some Super-Nice work!!!
Great Job!
__________________
My Build: http://67-72chevytrucks.com/vboard/s...d.php?t=512904 |
|
|
|
|
03-23-2020, 09:07 PM
|
#4 |
|
Registered User
Join Date: Oct 2017
Location: Calgary, Alberta
Posts: 208
|
Re: 66 GMC Long to Short LS Swap
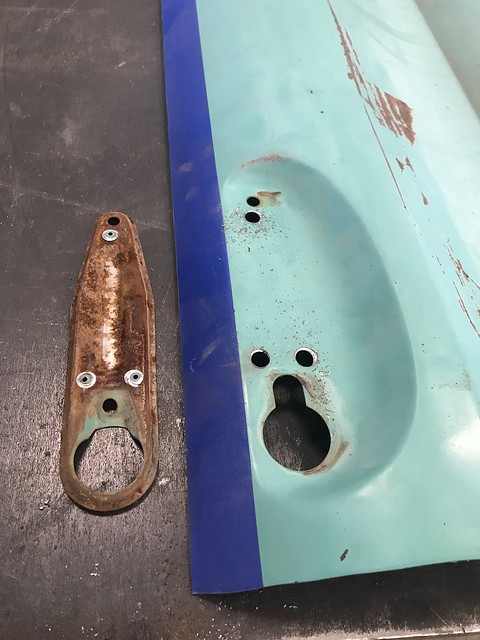
After a bunch of knocking around and a relief cut I got my door skin to fit. Drilled the spot welds out and removed the door handle backing plate from the old skin. Blasted it, primer and welded onto the new skin. Put a layer of Kilmat on the inside and got it all fit up. Tacked it up and then switched to Tig to try and minimize the amount of heat I was putting into the door skin. It will still need a bit of filler to smooth it out but I am happy with how it turned out.
        Moved on to the door bottom. Cut the old bottom off and started fitting up the patch panel. It fits as good as all the other ones. Lots of hammering and relief cuts so far. It's tough to fit up because I can"t reach to use the panel clamps.    
|
|
|
|
|
03-24-2020, 10:16 AM
|
#5 |
|
Registered User
Join Date: Apr 2001
Location: DALLAS,TX
Posts: 21,994
|
Re: 66 GMC Long to Short LS Swap
Clean work. Every time I check the updates I just think "wow".
__________________
67SWB-B.B.RetroRod 64SWB-Recycle 89CCDually-Driver/Tow Truck 99CCSWB Driver All Fleetsides @rattlecankustoms in IG Building a small, high rpm engine with the perfect bore, stroke and rod ratio is very impressive. It's like a highly skilled Morrocan sword fighter with a Damascus Steel Scimitar..... Cubic inches is like Indiana Jones with a cheap pistol. |
|
|
|
|
03-24-2020, 02:33 PM
|
#6 |
|
Registered User
Join Date: Jan 2015
Location: Arnold, MO
Posts: 12
|
Re: 66 GMC Long to Short LS Swap
Very nice work! I've enjoyed reading through your build posts.
__________________
++++++++++++++++++++ 1966 Chevy C10 SWB - 250-L6/3-speed OD 2002 Chevy 1500 Ext 4x4 1997 Chevy S10 Blazer 4x4 (son's) |
|
|
|
|
03-24-2020, 10:29 PM
|
#7 |
|
Registered User
Join Date: Oct 2017
Location: Calgary, Alberta
Posts: 208
|
Re: 66 GMC Long to Short LS Swap
Thanks guys, with the cab finally done it actually feels like I am making progress now.
|
|
|
|
|
04-23-2020, 09:15 PM
|
#8 |
|
Registered User
Join Date: Aug 2009
Location: Lacombe, Alberta
Posts: 335
|
Re: 66 GMC Long to Short LS Swap
You've had a month off now... time for updates!
|
|
|
|
|
04-23-2020, 11:11 PM
|
#9 |
|
Registered User
Join Date: Oct 2017
Location: Calgary, Alberta
Posts: 208
|
Re: 66 GMC Long to Short LS Swap
The last month has been filled with set backs and frustration. I finished welding up the passenger door bottom, got it body worked and in primer.
    I couldn't be happier with how the door turned out...............until I went to hang it on the truck. The inner door bottom is hitting the rocker. I measured pretty carefully but I didn't check the fit before I welded it all up. The outer door bottom is curled in at the corners and doesn't line up very well either. This was disappointing, and the thought of having to cut it up again sucks. Oh well, this is how you learn. Now the part that really sucks. One of the body lines on the door skin does not line up, its out by 3/8". No idea what I am going to do about this. I took the door off and stuck it away where I didn't have to look at it.   I picked up a hood that looked to be in really good shape, much better than the one that came with the truck. I'm getting tired of rust repair so I thought I would save myself some work and get a better one. It had a couple different colours of paint on it. The DIY sandblast place I usually go to is now closed due to Covid so I took the hood, grill and cowls to a shop to get blasted. The hood was full of rust and filler, actually worse than the one I had. Now I am committed to fixing this one because I paid a good chunk of change to get it blasted. I haven't been in the shop for a few days now, no motivation to deal with these issues. |
|
|
|
|
04-24-2020, 09:42 AM
|
#10 |
|
Registered User
Join Date: Mar 2015
Location: Washington State
Posts: 1,644
|
Re: 66 GMC Long to Short LS Swap
Damn fine job so far!!
I have the same issue with the cab and windshield rust. Thanks for posting how you fixed yours. |
|
|
|
|
04-24-2020, 12:00 PM
|
#11 |
|
But Found Her 25yrs Later!
Join Date: Oct 2010
Location: Oregon City, Oregon
Posts: 10,526
|
Re: 66 GMC Long to Short LS Swap
Nice work
__________________
I lost my 65 - Found it 25 years later: http://67-72chevytrucks.com/vboard/s...d.php?t=426650 66 C20 Service Truck: http://67-72chevytrucks.com/vboard/s...d.php?t=428035 |
|
|
|
|
04-25-2020, 09:46 PM
|
#12 |
|
Registered User
Join Date: Oct 2017
Location: Calgary, Alberta
Posts: 208
|
Re: 66 GMC Long to Short LS Swap
Hood looks great sitting on the truck, too bad its swiss cheese.
    At this point it is easier to fix the original hood than repair the second one. I'll use the second one for patch panels. Got started removing the braces. Also never knew that the GMC hood was different than the Chevy.   
|
|
|
|
|
04-26-2020, 08:56 PM
|
#13 |
|
But Found Her 25yrs Later!
Join Date: Oct 2010
Location: Oregon City, Oregon
Posts: 10,526
|
Re: 66 GMC Long to Short LS Swap
Original hood will be good.

__________________
I lost my 65 - Found it 25 years later: http://67-72chevytrucks.com/vboard/s...d.php?t=426650 66 C20 Service Truck: http://67-72chevytrucks.com/vboard/s...d.php?t=428035 |
|
|
|
|
04-29-2020, 07:53 PM
|
#14 |
|
Registered User
Join Date: Sep 2008
Location: Newport, North Carolina
Posts: 632
|
Re: 66 GMC Long to Short LS Swap
Duncan K, I can speak with a small amount of experience and can relate to the panel fitment issues you are running into. I have used some aftermarket parts on my truck and while it’s been nice to not have to deal with rust issues...I have more than made up that time in making them fit as they should. I made small goals for each panel and try to fix one little issue at a time. You already know this, I’m sure. Just wanted to try and give some motivation. Taking these kinds of gut punches really can be discouraging...just keep moving��
|
|
|
|
|
08-22-2020, 11:11 PM
|
#15 |
|
Registered User
Join Date: Oct 2017
Location: Calgary, Alberta
Posts: 208
|
Re: 66 GMC Long to Short LS Swap
Haven't done much on the truck in the last 4 months. Really frustrated with the doors and hood so I decided to try and wrap up all of the mechanical stuff. I'd like to have the truck moving under its own power before the snow comes.
Finished the lines running out to the trans cooler built into the rad. Machined a bracket out of aluminum to hold them to the block.  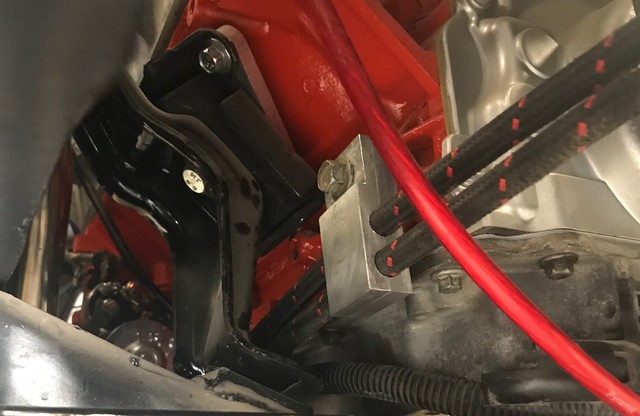 Made bracket to mount the brake booster/master cylinder. I ditched the CPP partitioning valve and replaced it with an adjustable one from Wilwood. Plumbed the rest of the brake lines. I used mild steel tig filler wire to mock them up and the copied them with the brake line.      Moved on to the cooling system. Made a couple brackets to hold the bottom of the rad. The factory outlet for the lower rad hose pointed the wrong way so I switched it out for a Mr. Gasket outlet that swivels to any direction you need. This made finding a lower hose much easier. I mocked up the bend of hose I would need with tig filler wire again and took that to my auto parts store. I compared it to the hoses on their wall until I found one that would work. Ended up cutting the middle section out of a Gates 20380, fits perfect.   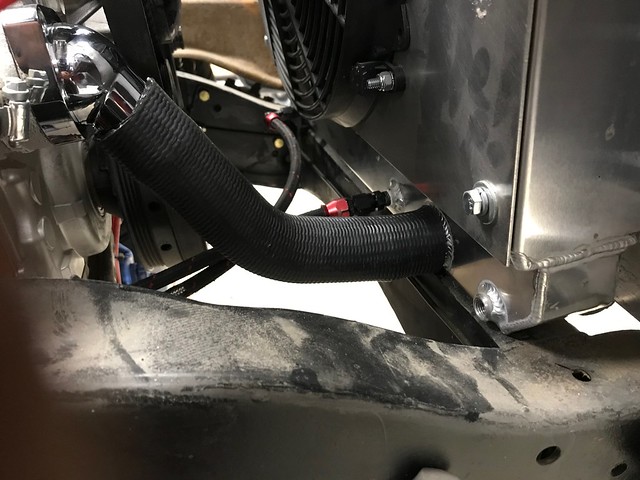 I picked up a new steering column so the truck is now column shift. Also got a Lokar linkage kit.  
|
|
|
|
|
09-27-2020, 11:32 AM
|
#16 |
|
Registered User
Join Date: Oct 2017
Location: Calgary, Alberta
Posts: 208
|
Re: 66 GMC Long to Short LS Swap
Couldn't find an upper rad hose to work so I modified the outlet on the rad. Now just a short straight piece of hose connects the two.
   I didn't like the extreme angle of the rear shocks, and I needed more space to run the exhaust out the back. I relocated the rear shocks outboard of the frame. I recycled the upper mounts and made lower mounts off the back of the trailing arms. Shocks sit vertical, and should work better now. This opens up more space for the exhaust to run through as well  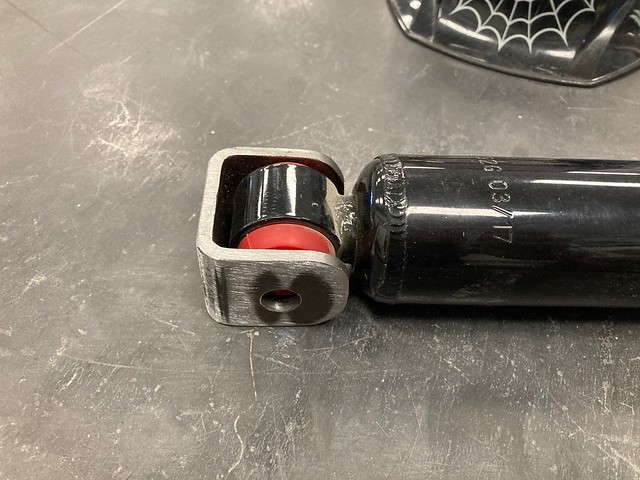 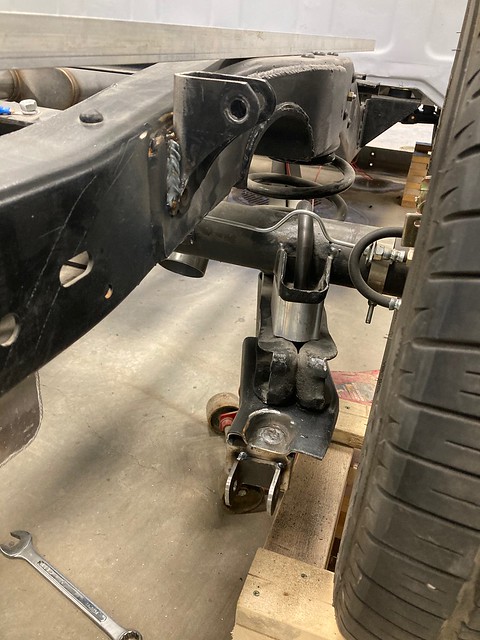  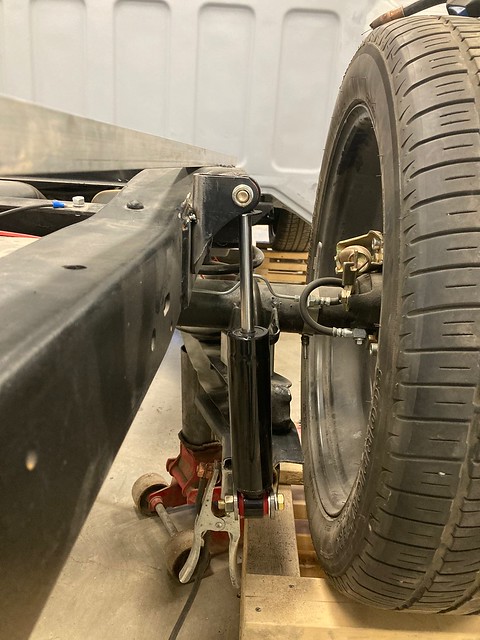 Changed my plan for the exhaust, was going to go over the rear axle but decided now to go under. I moved the mufflers back and finished welding everything that was previously just tacked up. My stainless welds have improved a lot after getting a Furick Fupa 12 cup [   Mounted the new steering column only to find that it was binding and would only move about 1/8 of a turn. Took it apart and found the plastic ball that the tilt steering swivels on was broken. A big chunk of it was hanging out causing it to bind. I just love getting "brand new" parts that come broken. I managed to get the broken junk out and it turns freely now. I bought it from a seller off Ebay, hopefully they will warranty it.   Was really cool to sit in the truck holding the steering wheel, even if it was sitting on a milk crate! Really pushing to drive it before the snow comes 
|
|
|
|
|
09-30-2020, 10:29 PM
|
#17 |
|
Registered User
Join Date: Oct 2017
Location: Calgary, Alberta
Posts: 208
|
Re: 66 GMC Long to Short LS Swap
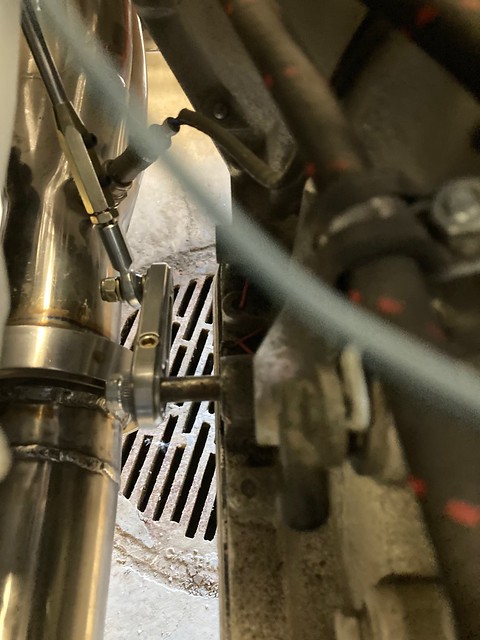
Installed the Lokar shift linkage kit. Had to add a little 90 degree bracket to the lever coming off the column. Looks like I will have to make some changes to the exhaust. The shift lever attached to the shaft on the trans is going to run right into the v band coming off the header.
  I picked up a bracket to mount the drive by wire gas pedal from Animal Speed Shop. Pretty impressed with it, bolts right up using factory bolt locations. Puts the pedal in a decent location. I may trim the bracket a bit to put the pedal a little further back.  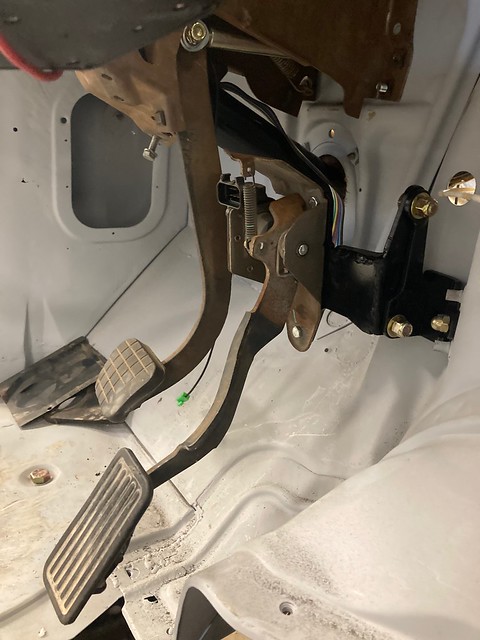
|
|
|
|
|
10-18-2020, 09:09 PM
|
#18 |
|
Registered User
Join Date: Oct 2017
Location: Calgary, Alberta
Posts: 208
|
Re: 66 GMC Long to Short LS Swap
Finally finished the exhaust system, to the rear axle anyway. I didn't like that it was rigid all the way from the headers back so I added some flex couplers. Also welded some stainless tabs to mount it to the frame with rubber isolators.
   Got a steering shaft built. I machined some double d shaft out of some round bar. I used a coupler to go from DD to round, welded both ends up and drilled for a roll pin just to be safe. 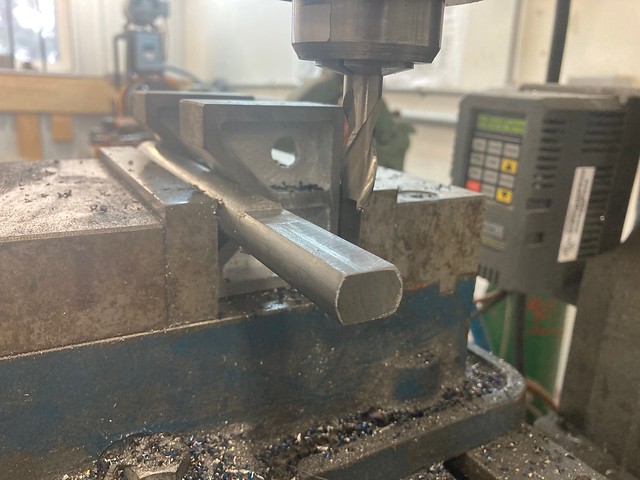  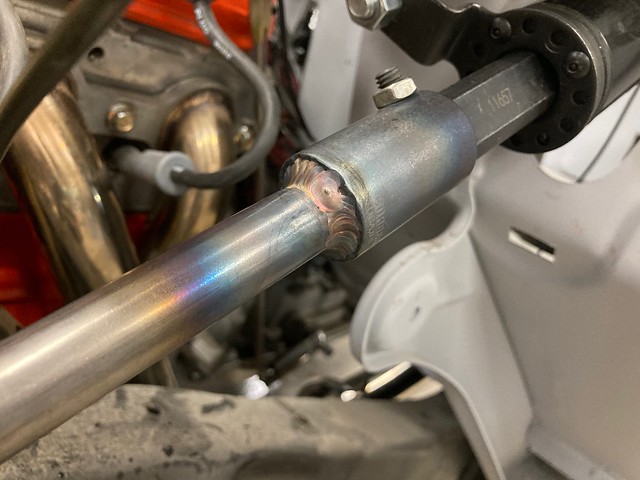 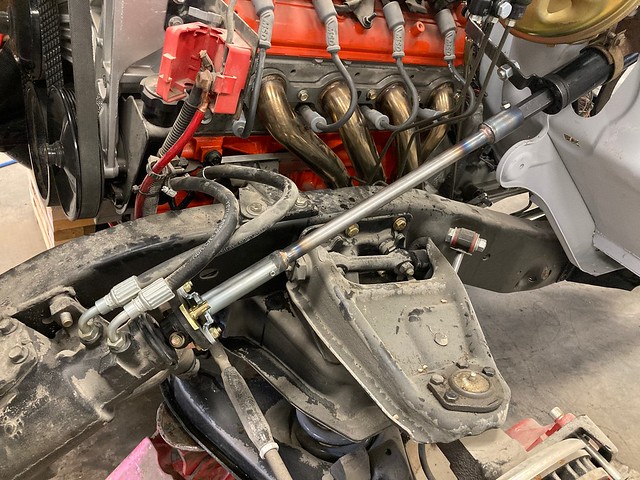 Last thing I needed to tackle before I could drive it was the brakes. I bled the master and went to bleed the lines. Leaks everywhere!! spent the better part of 2 days tightening, redoing flares and lines, vacuum bleeding. What a disaster! In the end I managed to get the brakes working but still don't have a very firm pedal. Its enough to stop the truck on a test drive though. Unfortunately I didn't manage to beat the snow but I was able to take it for a cruise up and down the driveway a couple times. It was a chilly test drive with no doors or windshield and I was sitting on milk crate, but I got to finally get behind the wheel after 3 years. Having it drivable will give me the motivation to get back on the metal work this winter. Still need to finish rust repair on the hood, inner fenders, doors and box. |
|
|
|
|
11-15-2020, 11:20 PM
|
#19 |
|
Registered User
Join Date: Oct 2017
Location: Calgary, Alberta
Posts: 208
|
Re: 66 GMC Long to Short LS Swap
Back on the rust repair and body work again. I removed the braces from the hood. I had 5 or 6 rusty holes to cut out and replace in the hood and braces. I cut up the other hood that I had blasted to use for patch panels.
      747_20c7677a97_z.jpg[/img] 747_20c7677a97_z.jpg[/img]  Got the hood and braces blasted along with the inner fenders. Did a bit of hammer and dolly work on the hood. Learned a cool new technique to shrink a dented area with a torch and a wet rag. Shot the bottom of the hood and the braces with epoxy primer.    Started working on one of the inner fenders 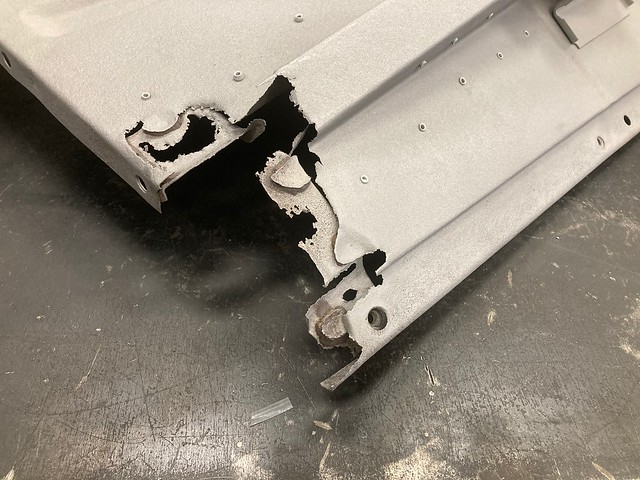   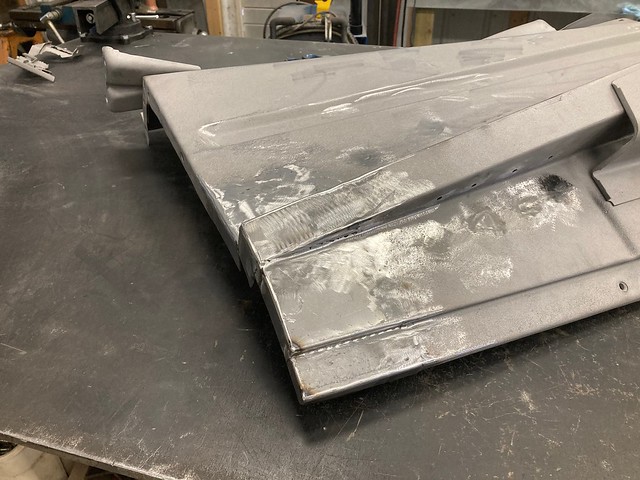  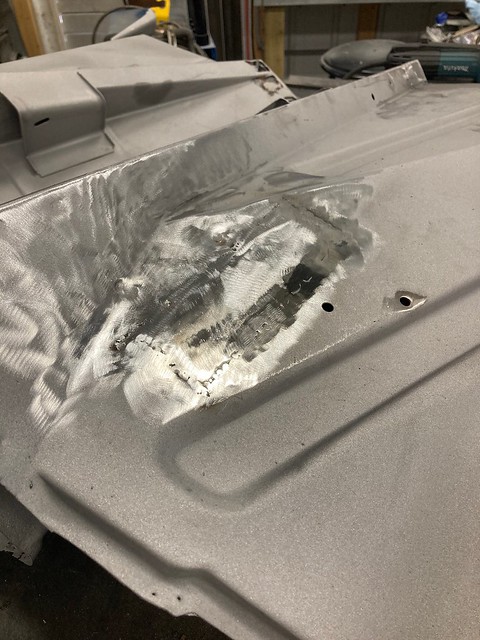
|
|
|
|
|
11-17-2020, 11:01 AM
|
#20 |
|
Registered User
Join Date: Mar 2015
Location: Washington State
Posts: 1,644
|
Re: 66 GMC Long to Short LS Swap
Gotta love Rust repair I feel like all I have done for the last 3 months is Rust Repair.... I am almost sick of it. lol
Yours is coming along and looks great! Good Job. |
|
|
|
|
11-17-2020, 11:16 AM
|
#21 | |
|
Registered User
Join Date: Apr 2001
Location: DALLAS,TX
Posts: 21,994
|
Re: 66 GMC Long to Short LS Swap
Quote:
__________________
67SWB-B.B.RetroRod 64SWB-Recycle 89CCDually-Driver/Tow Truck 99CCSWB Driver All Fleetsides @rattlecankustoms in IG Building a small, high rpm engine with the perfect bore, stroke and rod ratio is very impressive. It's like a highly skilled Morrocan sword fighter with a Damascus Steel Scimitar..... Cubic inches is like Indiana Jones with a cheap pistol. |
|
|
|
|
|
11-17-2020, 11:57 AM
|
#22 | |
|
Registered User
Join Date: Oct 2017
Location: Calgary, Alberta
Posts: 208
|
Re: 66 GMC Long to Short LS Swap
Quote:
|
|
|
|
|
|
11-18-2020, 11:59 AM
|
#23 | |
|
Registered User
Join Date: Mar 2015
Location: Washington State
Posts: 1,644
|
Re: 66 GMC Long to Short LS Swap
Quote:
|
|
|
|
|
|
11-27-2020, 07:53 PM
|
#24 |
|
Registered User
Join Date: Oct 2017
Location: Calgary, Alberta
Posts: 208
|
Re: 66 GMC Long to Short LS Swap
Well I was all set to weld the hood braces back in when I realized that you can see the back side of the front brace through the openings in the hood. I decided to shoot some colour on the back of the brace and underside of the hood before welding the brace back in.
 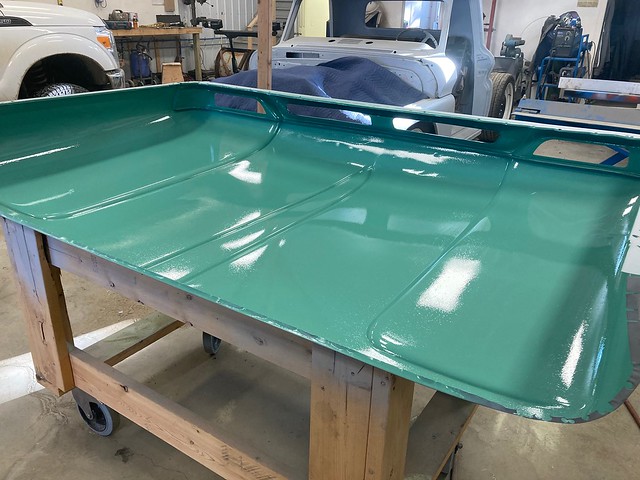 Welded the braces back in, ground everything flat and did some rough body work before shooting epoxy primer.      I am really happy with how the colour turned out. I cut a piece off my old door skin and took it to the body shop supply place to get scanned. I thought it might take a few tries to get the colour just right but they nailed it first try! It will be quite a while before the rest of the truck sees colour so at least I can see it under the hood. |
|
|
|
|
11-27-2020, 09:16 PM
|
#25 |
|
Registered User
Join Date: Feb 2012
Location: Beautiful BC, Canada, eh?!
Posts: 2,235
|
Re: 66 GMC Long to Short LS Swap
Oooof. I don't think I want to do that.
Is this going to be hard removing the inner structure, and welding it all back in again? I'm a little frightened.
__________________
1961 Apache: "Grabber Orange" Shortboxed, pancake, step-notch, air-ride, boosted-LS 1977 Silverado: Shortboxed & dropped, potato-potato V8 Pontiac Firefly (Chevy Sprint): The ultimate engine swap: 5.7L in a 1.0L bag Lotus Super 7 Replica: Scratch-built street-legal rollerskate |
|
|
|
 |
| Bookmarks |
|
|


 Hybrid Mode
