
|
|
|
 04-30-2012, 10:37 PM
|
#1 |
|
Registered User
Join Date: Nov 2010
Location: Fayetteville NC
Posts: 752
|
Re: K1's build thread
I didn't get hardly anything done over the course of last week since I had to work late most nights this week and have been fighting a cold or my allergies...I can't tell which yet. Oh well there's always this week I suppose. Same goal as last week. Get the door back on by next Monday so I can fit up the rockers and finally put the welder away!!! If there is anything I have learned from all of this, it is to find a more rust free truck to work on for my next project.
Today I sealed the inside of the cab corner and welded shut the floor over top of it and sealed the welds up too. If I actually took my time welding it up you wouldn't have been able to tell I cut the floor at all, but patience is a virtue which I currently lack, so there's some warpage in the metal. Doesn't really matter much since it'll be covered with carpet anyways. Since I had the flap disc out I decided to dress the floorpan seams. Didn't do a half bad job on the floor if I say so myself. Tuesday: Cut, fit, and weld up the B pillar. Dress the welds and seal the seams. Wednesday: Cut, fit, and weld up the Front cab support. Dress welds and seal seams. Thursday: Cut, fit, and weld up a floor pan patch for the drivers side toe board. Dress welds and seal seams Friday: Cut, fit and weld up the kick panel and A pillar. Dress welds and seal seams. Saturday and Sunday: Finish floor pan and trans hump patches (all have to be handmade), and cut, fit, and weld in cab corner (tentative...may reorder the part as mine doesn't look quite right) Monday: Remount door and clean/sweep out garage I really want the truck driveable by the end of the Month.
__________________
1966 C10 Long step build on a budget http://67-72chevytrucks.com/vboard/s...d.php?t=445201 no garage, no shop, limited storage space and tools....no problem. |

|

|
|
05-02-2012, 09:43 PM
|
#2 |
|
Registered User
Join Date: Nov 2010
Location: Fayetteville NC
Posts: 752
|
Re: K1's build thread
CRAAAAAP!!! The front cab support I have is for the WRONG side. I still fit it up but I didn't weld it in yet. I'm undecided if I want to make it work or order the correct piece and go from there.
__________________
1966 C10 Long step build on a budget http://67-72chevytrucks.com/vboard/s...d.php?t=445201 no garage, no shop, limited storage space and tools....no problem. |
|
|
|
|
05-07-2012, 10:54 PM
|
#3 |
|
Registered User
Join Date: Nov 2010
Location: Fayetteville NC
Posts: 752
|
Re: K1's build thread
Well after a couple of days of mulling it It over I ended up deciding to make the support I got fit. Sadly the door isn't back on, however the b pillar is now fully welded in, the front support is tacked in place with the holes drilled out, and the kick panel is just about ready to be welded in too. Tomorrow I will finish welding in both the cab support and the kick panel. Wednesday I will fit up the a pillar, and hopefully have it welded in before Friday. Even with all of the delays the drivers side is coming together faster than the passenger side.
Posted via Mobile Device
__________________
1966 C10 Long step build on a budget http://67-72chevytrucks.com/vboard/s...d.php?t=445201 no garage, no shop, limited storage space and tools....no problem. |
|
|
|
|
05-28-2012, 05:03 PM
|
#4 |
|
Registered User
Join Date: Nov 2010
Location: Fayetteville NC
Posts: 752
|
Re: K1's build thread
Had a 4 day, but only got to work on the truck for probably 14hrs over the course of 2 non-consecutive days. Here's some pics...sorry for the crappy lighting, it's the best I can do and what I work with in the garage LOL.
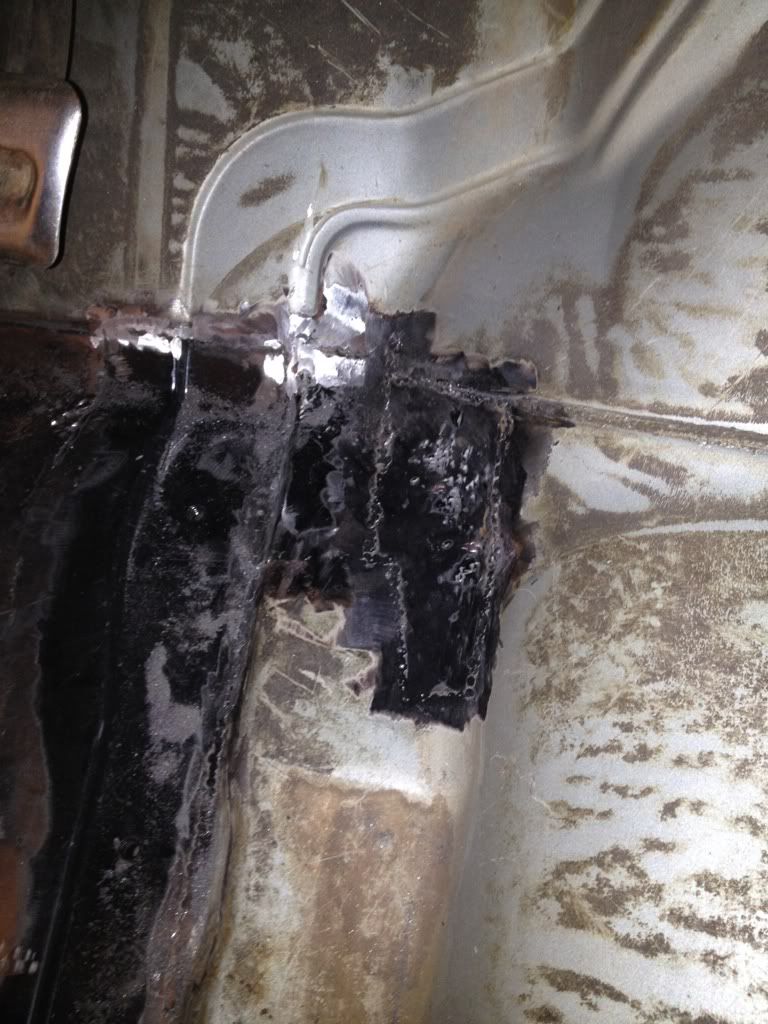
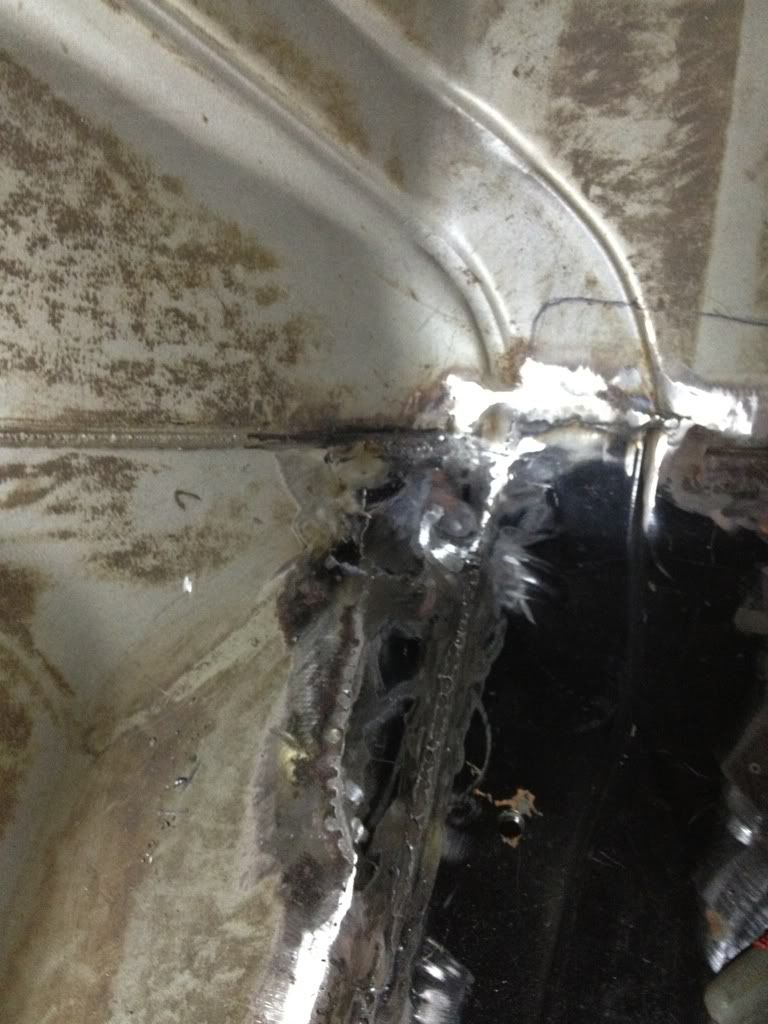
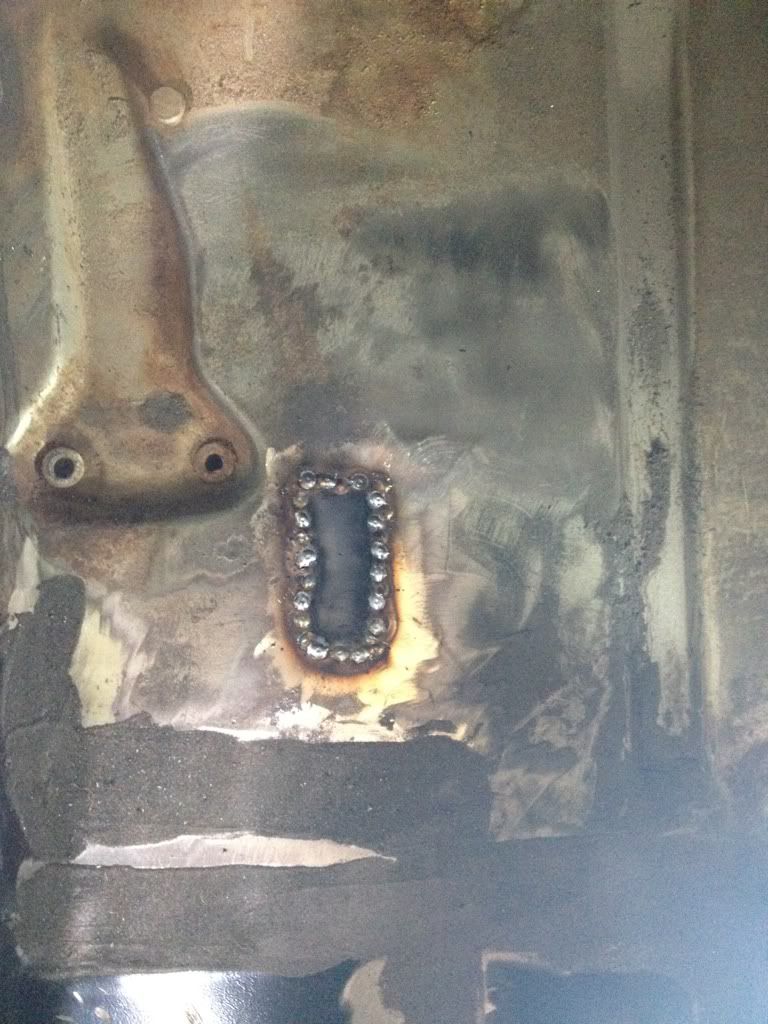
Pic1: I CAN NOW MOUNT A GAS PEDAL YEY!!! Still have to patch by the trans tunnel, that's gonna be fun. Ended up making that patch out of the passenger side floorpan patch panel. Had to beat on it some to make it fit but it works well enough. 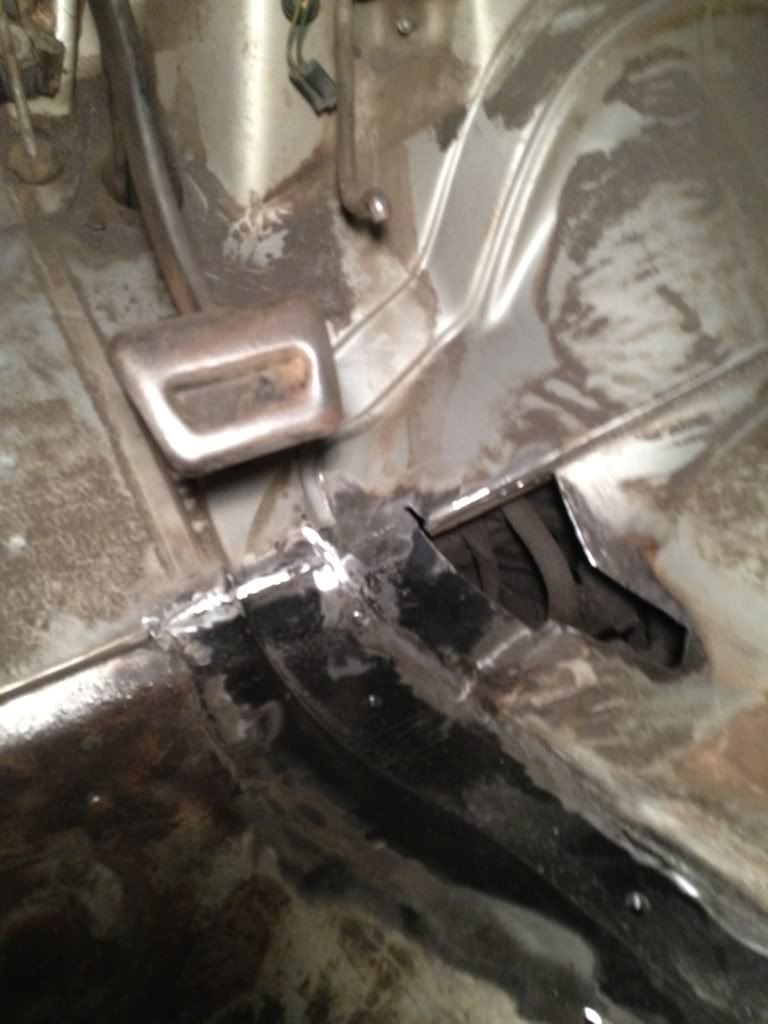 Pic2: outer part of the floorpan is solid...finally. And I also got the kick panel welded in as well as the additional part further up I had to fix too. See next pic 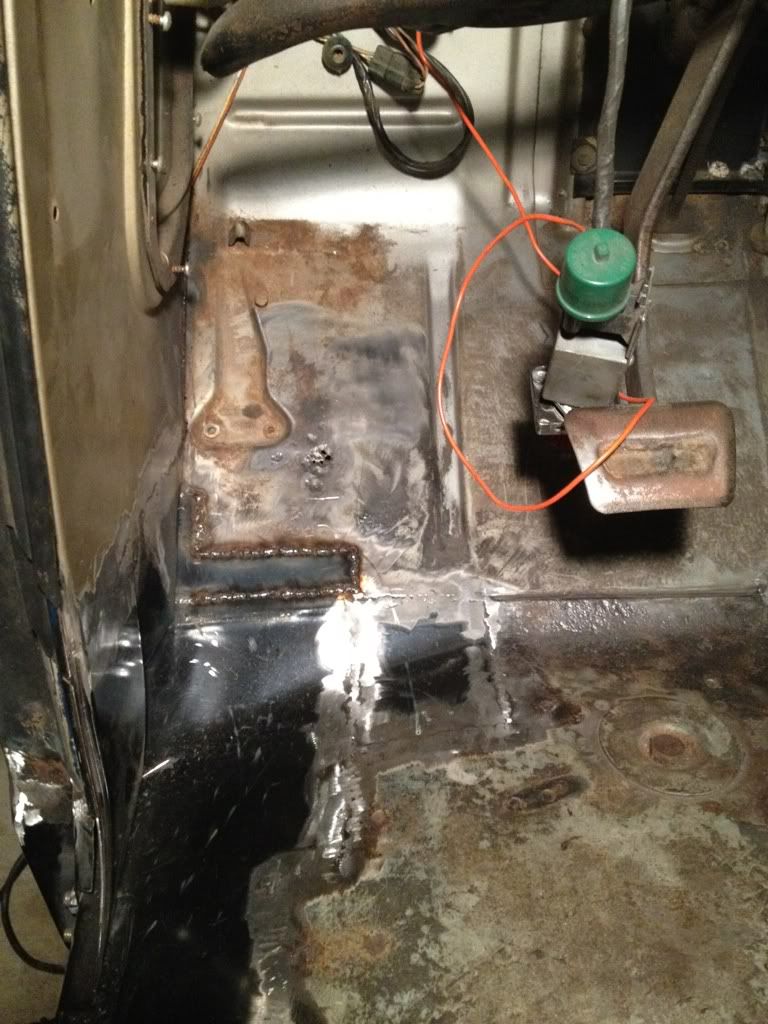 Pic3: Backside of the kick panel, and you can see the extra piece I had to make/fit/weld in. The hardest part was spot welding it back together actually. The original welds had been broken for some time, and the toe board had deformed significantly. 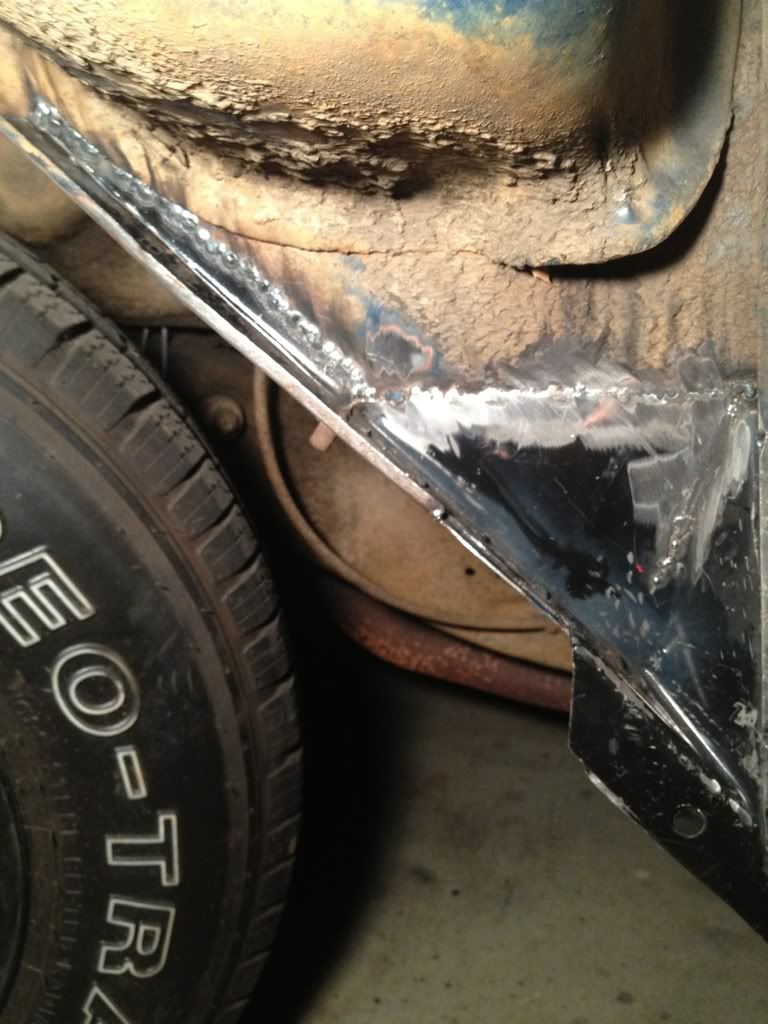 Pic4: A pillar welded in. This part is proving to be a royal PITA. The lower fender mount holes don't line up at all, so I've got to drill them and hope that I can get it to fit correctly once I mount the fender up. Oh well I'll make it work 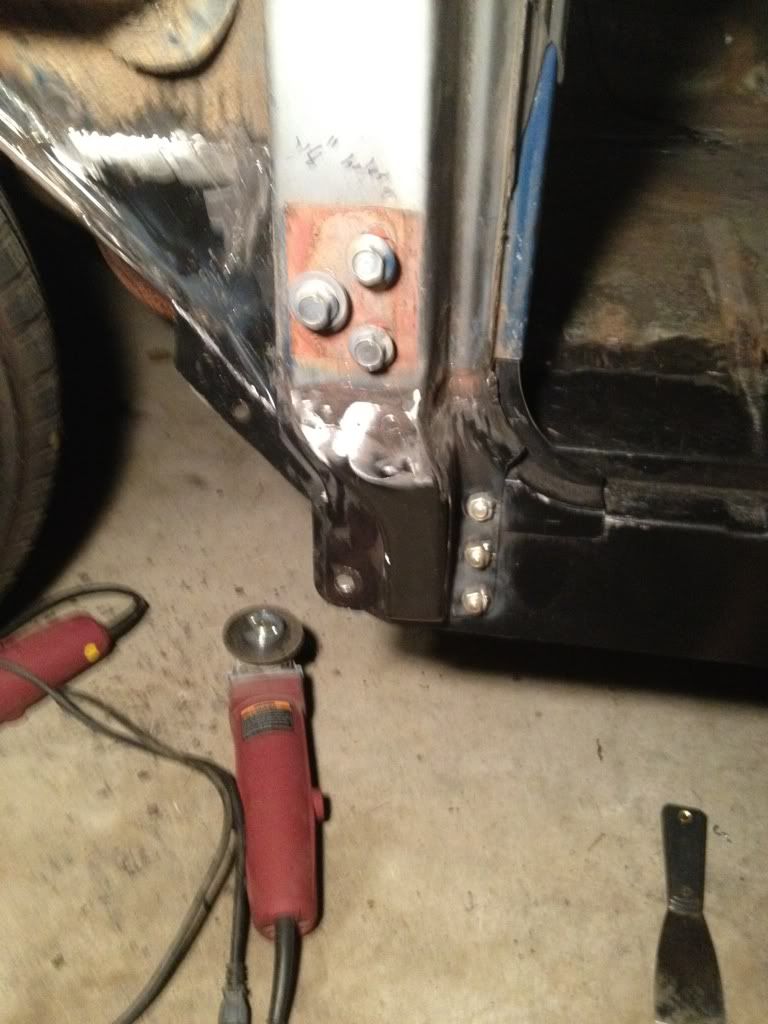 So that's it for now. Just got to put in 1 sliver patch and the trans tunnel patch on the drivers side. One the passenger side I need 1 toeboard patch and the trans tunnel patch too. Hopefully I will have that all done by next weekend. I've got 2 races I've been training for in 2 weeks so I doubt I'll be getting much work. All I've got left then is the drivers cab corner, both outer rockers, and my doors. Doors will be the very last thing I do and when I have some time to really take my time on them. That's one thing I don't want to mess up.
__________________
1966 C10 Long step build on a budget http://67-72chevytrucks.com/vboard/s...d.php?t=445201 no garage, no shop, limited storage space and tools....no problem. |
|
|
|
|
05-29-2012, 10:44 AM
|
#5 |
|
Registered User
Join Date: Sep 2011
Location: Tacoma, WA
Posts: 2,425
|
Re: K1's build thread
Looking real good there man!
I know I was soooooo glad when all my floor rust repairs were done. As I was crawling thru my cab yesterday I reminded myself how happy I was with how it all turned out. Kinda nice to be able to put your weight on a section of floor that didnt used to be there.... What races are you getting ready for?
__________________
Michael McMurphy My 66 Stepside My 64 Tow Truck My 66 Tempest Table Of Contents Added to Page1 |
|
|
|
|
05-29-2012, 12:37 PM
|
#6 |
|
Registered User
Join Date: Nov 2010
Location: Fayetteville NC
Posts: 752
|
Re: K1's build thread
The first one is called the ninja challenge and is a 3mi obstacle course. The 2nd one is muck ruckus Carolina's for multiple sclorosis which is a 5mi mud run/obstacle course
Posted via Mobile Device
__________________
1966 C10 Long step build on a budget http://67-72chevytrucks.com/vboard/s...d.php?t=445201 no garage, no shop, limited storage space and tools....no problem. |
|
|
|
|
05-29-2012, 12:43 PM
|
#7 |
|
Registered User
Join Date: Nov 2011
Location: fayetteville nc
Posts: 10,338
|
Re: K1's build thread
Work looking good mike.
__________________
1963 Short bed step side SBW 427 big block and borg warner T-16 HD 3 speed manual http://67-72chevytrucks.com/vboard/s...d.php?t=519869 1963 Short bed fleetside BBW 348 1st gen big block w/Powerglide http://67-72chevytrucks.com/vboard/s...d.php?t=619024 1964 Short bed trailer |
|
|
|
|
05-30-2012, 10:48 PM
|
#8 |
|
Registered User
Join Date: Nov 2010
Location: Fayetteville NC
Posts: 752
|
Re: K1's build thread
Got the cab corner fitted and tacked in. Go
Posted via Mobile Device
__________________
1966 C10 Long step build on a budget http://67-72chevytrucks.com/vboard/s...d.php?t=445201 no garage, no shop, limited storage space and tools....no problem. |
|
|
|
|
05-31-2012, 10:04 AM
|
#9 |
|
Registered User
Join Date: Nov 2010
Location: Fayetteville NC
Posts: 752
|
Re: K1's build thread
Stupid phone didn't post the rest of that message. I'm going to finish welding in the cab corner and try to do some of the floor pan patches tonight. I will probably go through and seal the welds tonight too
Posted via Mobile Device
__________________
1966 C10 Long step build on a budget http://67-72chevytrucks.com/vboard/s...d.php?t=445201 no garage, no shop, limited storage space and tools....no problem. |
|
|
|
|
05-31-2012, 02:36 PM
|
#10 |
|
Registered User
Join Date: Nov 2011
Location: fayetteville nc
Posts: 10,338
|
Re: K1's build thread
You need to hurry up so you can do mine....haha
__________________
1963 Short bed step side SBW 427 big block and borg warner T-16 HD 3 speed manual http://67-72chevytrucks.com/vboard/s...d.php?t=519869 1963 Short bed fleetside BBW 348 1st gen big block w/Powerglide http://67-72chevytrucks.com/vboard/s...d.php?t=619024 1964 Short bed trailer |
|
|
|
|
05-31-2012, 08:40 PM
|
#11 |
|
Registered User
Join Date: Nov 2010
Location: Fayetteville NC
Posts: 752
|
Re: K1's build thread
cab corner is 90% in. Only got a little bit of time in with the truck. Still have to weld the b pillar side back to the b pillar, and the part on the back part of the cab is completely mis-stamped so I have to figure out how to beat it into submission and make it look ok...
__________________
1966 C10 Long step build on a budget http://67-72chevytrucks.com/vboard/s...d.php?t=445201 no garage, no shop, limited storage space and tools....no problem. |
|
|
|
|
06-15-2012, 06:04 PM
|
#12 |
|
Registered User
Join Date: Nov 2010
Location: Fayetteville NC
Posts: 752
|
Re: K1's build thread
Progress of the day....
  The holes by the trans tunnel are now patched. If you look in one of my previous posts you can see what the driver side one looked like before. The drivers side is kinda ugly just from the fact I had to keep beating it with a hammer so it isn't perfectly smooth. Its good enough for government work lol. I took the truck for a spin around the block. Man I forgot how fun it is to drive...though not so much fun sitting on a bucket with my neck craned over because my head almost hit the roof...but still fun. Engine fired right up on the 2nd crank (carb was dry) and purred like a kitten. I have 2 or 3 more small holes to patch, thankfully they are all on flat surfaces so no more hand made patch panels needed. Still have to install the outer rockers, hopefully that will be on Monday since I have the day off. Posted via Mobile Device
__________________
1966 C10 Long step build on a budget http://67-72chevytrucks.com/vboard/s...d.php?t=445201 no garage, no shop, limited storage space and tools....no problem. |
|
|
|
|
06-15-2012, 06:41 PM
|
#13 |
|
Registered User
Join Date: Sep 2011
Location: Tacoma, WA
Posts: 2,425
|
Re: K1's build thread
Right on, good progress man !
__________________
Michael McMurphy My 66 Stepside My 64 Tow Truck My 66 Tempest Table Of Contents Added to Page1 |
|
|
|
|
06-18-2012, 04:18 PM
|
#14 |
|
Registered User
Join Date: Nov 2010
Location: Fayetteville NC
Posts: 752
|
Re: K1's build thread
The final floorpan patch
 Drivers rocker welded in...what a ***** this was. More on that after the pic 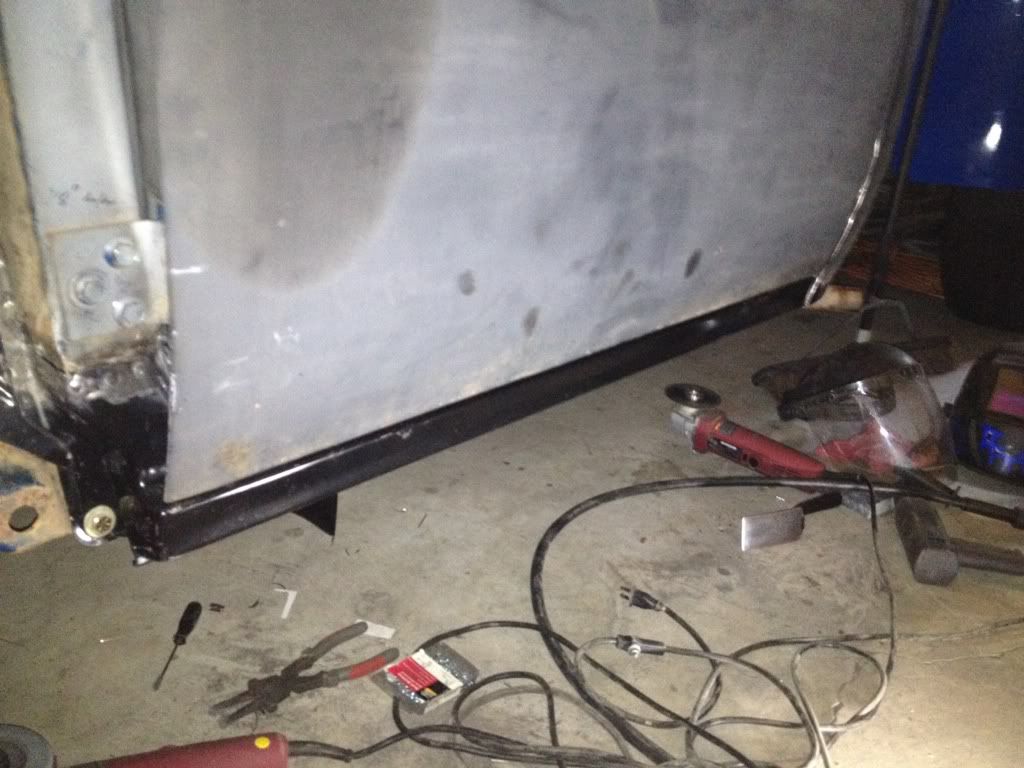 So yeah...those repo rockers suck donkey balls. They're close but holy hell did I have to make a few relief cuts just to get it to fit, and even then I still had to bend and beat it into the correct position to get it to look right. Even still it doesn't look perfect, but it's good enough for now. All I have left to do before I can put away the welder... Fill in some pin holes in the hood Passenger side rocker Drivers door bottom and skin repair/reskin Passenger skin repair/reskin The end is close!!!....but not close enough. Back to the garage I go.
__________________
1966 C10 Long step build on a budget http://67-72chevytrucks.com/vboard/s...d.php?t=445201 no garage, no shop, limited storage space and tools....no problem. |
|
|
|
|
06-18-2012, 07:01 PM
|
#15 |
|
Registered User
Join Date: Nov 2010
Location: Fayetteville NC
Posts: 752
|
Re: K1's build thread
Pass side rocker is now mocked up and more or less fit up. I need to go buy another Phillips head driver for my drill....I managed to break mine which is why I couldn't get the rocker welded in tonight. Tomorrow after work I should be able to get it welded in, and I can start sealing up my seams. Then comes the fun of a little bit of bondo and painting the cab and floor. Hopefully by the end of the week the truck will no longer have any rattle can flat black on it with the exception of the doors. I don't know when I will get around to doing those though. Hopefully in the next couple of weeks
I also am expecting my control ATM shaft kits from NAPA to be in tomorrow. I will be waiting till I am done with the body work before I tackle that though. And I will likely be taking the truck to the base auto shop to do them there since I don't have a table vice. Posted via Mobile Device
__________________
1966 C10 Long step build on a budget http://67-72chevytrucks.com/vboard/s...d.php?t=445201 no garage, no shop, limited storage space and tools....no problem. |
|
|
|
|
06-19-2012, 08:25 PM
|
#16 |
|
Registered User
Join Date: Nov 2010
Location: Fayetteville NC
Posts: 752
|
Re: K1's build thread
Picked up the control ATM shafts, a small can of filler, and the weatherstrip adhesive from NAPA today. Also swung by Lowes and got the 1 5/8" and 1 3/8" sockets, a 1/2" to 3/4" drive adapter, and a 3 pack of driver bits for my drill. No work on the truck tonight, gotta do some organizing of stuff since I am losing the garage in a week and a half.
My priorities for the week are to 1. Get pass side rocker welded in 2. Get welds sealed 3. Prime and paint all bare/exposed metal, and undercoat cab floor 4. Install weatherstripping 5. Put seat back in the truck Posted via Mobile Device
__________________
1966 C10 Long step build on a budget http://67-72chevytrucks.com/vboard/s...d.php?t=445201 no garage, no shop, limited storage space and tools....no problem. |
|
|
|
|
06-20-2012, 11:33 AM
|
#17 |
|
Registered User
Join Date: Nov 2010
Location: Fayetteville NC
Posts: 752
|
Re: K1's build thread
Got the Passenger side rocker welded in this morning before work. Going to path a few holes from the PO ghetto buckets he drilled through the floor. Shouldn't be a hard patch to make, and I might as well do it now while I have the seat out and a garage to work in. Figure I can get that done tonight and seal up my welds so tomorrow I can start stripping the paint off the floor for primer.
Posted via Mobile Device
__________________
1966 C10 Long step build on a budget http://67-72chevytrucks.com/vboard/s...d.php?t=445201 no garage, no shop, limited storage space and tools....no problem. Last edited by k1rodeoboater; 06-20-2012 at 12:00 PM. |
|
|
|
|
06-20-2012, 01:13 PM
|
#18 |
|
Registered User
Join Date: Nov 2011
Location: fayetteville nc
Posts: 10,338
|
Re: K1's build thread
Dont put the welder away. Now that you got the metal work done you can start on mine...haha
__________________
1963 Short bed step side SBW 427 big block and borg warner T-16 HD 3 speed manual http://67-72chevytrucks.com/vboard/s...d.php?t=519869 1963 Short bed fleetside BBW 348 1st gen big block w/Powerglide http://67-72chevytrucks.com/vboard/s...d.php?t=619024 1964 Short bed trailer |
|
|
|
|
06-21-2012, 06:32 AM
|
#19 |
|
Registered User
Join Date: Nov 2010
Location: Fayetteville NC
Posts: 752
|
Re: K1's build thread
Managed to get something in my eye I couldn't flush out last night. At the ER now...this might set my progress back some
Posted via Mobile Device
__________________
1966 C10 Long step build on a budget http://67-72chevytrucks.com/vboard/s...d.php?t=445201 no garage, no shop, limited storage space and tools....no problem. |
|
|
|
|
06-21-2012, 03:43 PM
|
#20 |
|
VA72C10
 Join Date: Mar 2008
Location: Midlothian, VA
Posts: 25,269
|
Re: K1's build thread
hope you get it fixed up soon...had a buddy get some shavings in his eye...thankfully no permanent issues and was back to normal in a couple days...the eye is amazing how it can heal quickly...
__________________
Looking for a 67-72 swb or blazer project in or around VA. 
|
|
|
|
|
06-26-2012, 11:08 AM
|
#21 |
|
Registered User
Join Date: Nov 2010
Location: Fayetteville NC
Posts: 752
|
Re: K1's build thread
Well it turns out the ER missed a piece of metal...went to the optometrist for a follow up because I was still having some irritation, and he removed another piece as well as the rust that was forming in my eye. I'm all better now.
My folks were in town this weekend so I didn't do all that much on the truck. I told me dad to bring some work clothes wi him and we spent all day Sunday doing father and son time while doing some work on the truck. Not quite like the last time he was down, but we did a few things since I gotta move out of e garage/house at the end of the week. We stripped the weatherstripping off the door frames as well as the paint, and I also stripped the dash as best I could. by the end of the day we had masked off the windows and sprayed primer as well as sealing all the weld seams inside the cab and on the rockers. I need to do the undersides yet, but I want to wait for my eye to fully heal up before risking getting dirt and crap in them again. We also put the guts back into the door shells even though I will likely be removing them again as I didn't want them breaking in transit. Thursday/Friday I will be moving back into a storage unit to finish the last bit of the truck up there. The apartment that my girlfriend is renting will not have any garages availible by the time she moves in, and I still have to paint the area where the weatherstripping goes, and install it. So rather than rush it I am just gonna bit the bullet for a month and bust ass to get the truck finished as quick as possible. I have another 4 day weekend coming up so I should be able to knock out the doors if I don't dilly dally with my time. Really all I have left bodywork, aside from paint, is to repair the doors and install the new weatherstripping. I think I am gonna drive. Truck around for a while with the interior not finished up just to see if there are any leaks I need to fix first before I paint and carpet it. Don't want to ruin that stuff if there are any leaks. Posted via Mobile Device
__________________
1966 C10 Long step build on a budget http://67-72chevytrucks.com/vboard/s...d.php?t=445201 no garage, no shop, limited storage space and tools....no problem. |
|
|
|
|
06-26-2012, 04:21 PM
|
#22 |
|
Registered User
Join Date: Sep 2011
Location: Tacoma, WA
Posts: 2,425
|
Re: K1's build thread
I use full face shields these days.
Have had the scratched corena and the retinal flash burns from welding in the past. Dont want them again! Hope you heal up quick and your long weekend plans work out for you!!
__________________
Michael McMurphy My 66 Stepside My 64 Tow Truck My 66 Tempest Table Of Contents Added to Page1 |
|
|
|
|
08-13-2012, 10:34 AM
|
#23 |
|
Registered User
Join Date: Apr 2011
Location: Edmond, Ks
Posts: 595
|
Re: K1's build thread
1. Subscribed! Great progress.
2. Take cell phone pics when you forget the camera. They're sufficient for web  3. Glad your eye is OK. That's one thing I don't mess with. Goggles or bust for me, even though I hate finding them, cleaning them, wearing them, and sweating on them. They still beat being called Squinty or Ol One Eye (which might get really embarrassing) lol.
__________________
Step by steps: Remove primer to reveal original paint Rebuild a carburetor See My Build - Cecilia!  Some people are like slinkys. Not worth much but funny as heck when pushed down stairs. |
|
|
|
|
08-20-2012, 09:13 AM
|
#24 |
|
Registered User
Join Date: Nov 2010
Location: Fayetteville NC
Posts: 752
|
Re: K1's build thread
progress has been slow to non-existent. I had to get the clutch in my DD replaced...only took them over a week...and now I'm stuck waiting on some parts to come in for my suspension. Hopefully I'll have a vehicle again in a few days aside from my motorcycle which I'm slowly getting re-acquainted with.
That said there has been SOME progress made. My drivers door has been repaired and I'll be finishing up the patches on it today. I'll upload a few pics later if I remember to take them LOL. I had to patch the lower front portion of the inner door (BTW that patch piece sucked donkey balls. Had to pie cut, and rebend it to match up even close.) and also do the outer lower door skin. While I do have the full repo door skins I decided to give patching it a shot rather than doing a full re-skin. We'll see how it comes out, worst case I'll be redoing it again/later. so far so good though, and I learned a new trick to bending a 90 degree angle in metal without a brake. Score the line you want to bend on with a scratch awl and straight edge. Take your grinder and score it with the cutoff wheel, then using an adjustable wrench you can slowly bend it up right at the "cut/score" line. This will give you a much cleaner 90 degree bend than just trying to do it without scoring it. I had to do this to make my door skin patch piece out of some scrap I had left over from a floorpan piece. here's a teaser pic 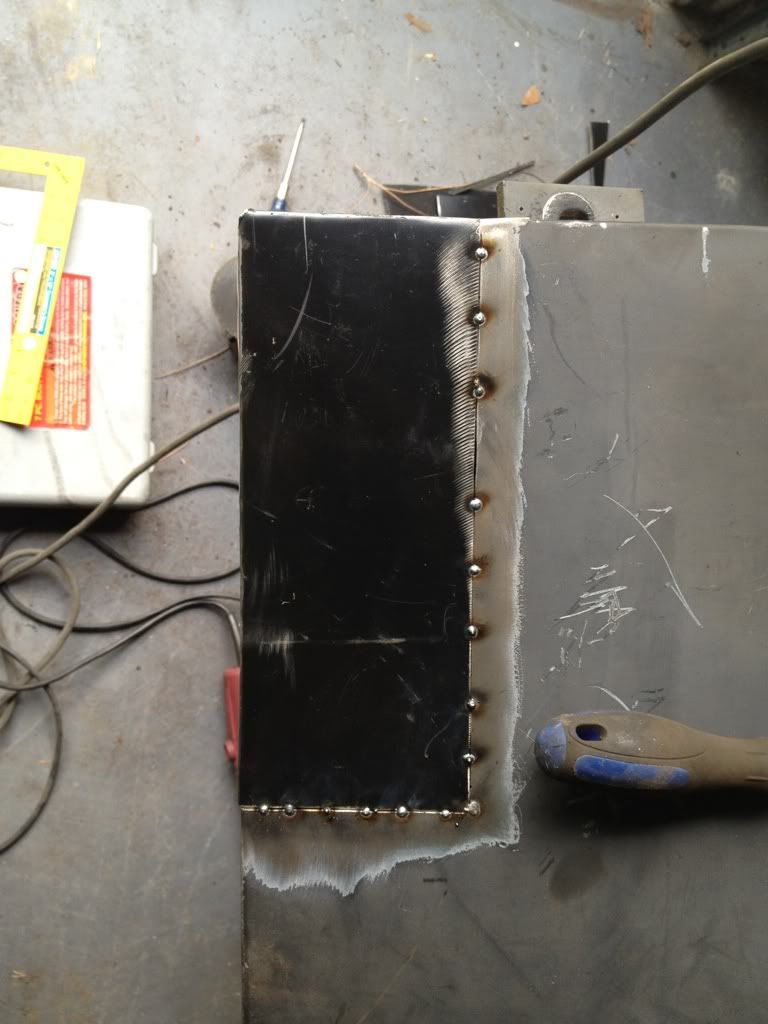 not bad for a home made patch out of scrap if I say so myself... My goal for today... 1.) Get the door skin welded back on, edges folded, spot welded back into place, and grinded down. 2.) Maybe replace the control arm bushings on the upper drivers side a arm, or swap the control arm out for one with good bushings as a temp fix. 3.) paint the pinch weld around the cab to get my door seals glued on in the next few days. I gotta really budget my time well because I now know I will be moving to CA in about a month and a half, and the truck won't be coming with me.
__________________
1966 C10 Long step build on a budget http://67-72chevytrucks.com/vboard/s...d.php?t=445201 no garage, no shop, limited storage space and tools....no problem. |
|
|
|
|
08-20-2012, 06:40 PM
|
#25 |
|
Registered User
Join Date: Nov 2010
Location: Fayetteville NC
Posts: 752
|
Re: K1's build thread
today's progress update...
lower door skin patch was a pseudo success...more on this later. I also filled in the mirror holes that the PO drilled into the skin, and also patched a dent from the door impacting the cowl. Stripped the interior portion of the door completely and sprayed on 2 coats of primer. Today wasn't the best day for painting, it was raining this morning, and I kept getting crap stuck in the primer. Ended up sanding out most of the stuff in the 1st coat, but on the 2nd coat more got in there. I'll sand it again before painting it to hopefully remove the rest. onto the pics... here's the lower patch welded in. This patch piece is garbage, it's not even remotely close. You can sort of see how I had to modify it. Hopefully it won't have clearance issues with the rocker when I go to rehang the door.  and in primer 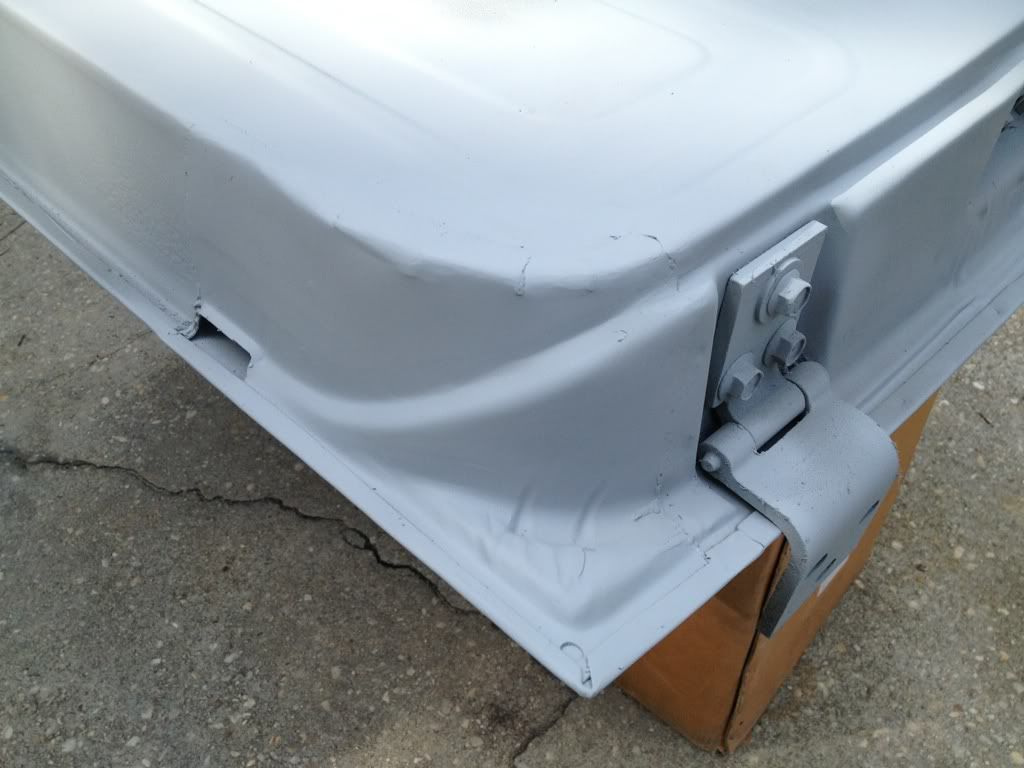 Door skin all patched up and mirror holes filled in 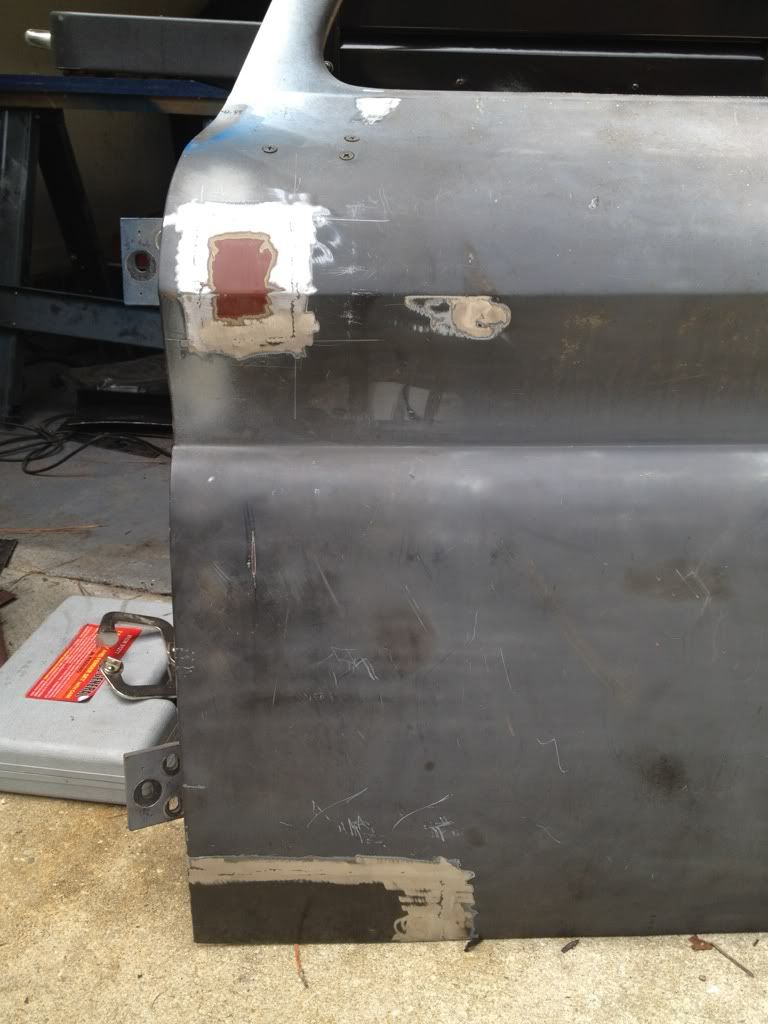 closeup before picture. The red box shows the dent and mirror holes  closeup of my patch job and holes filled in 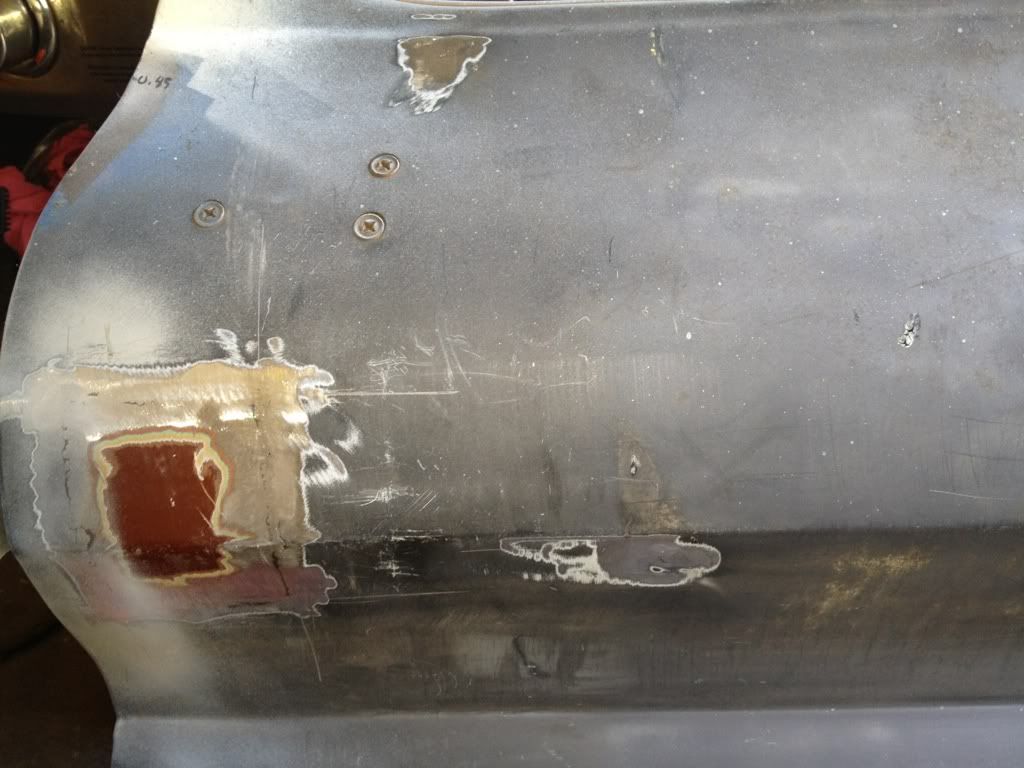 Looks good enough to me... 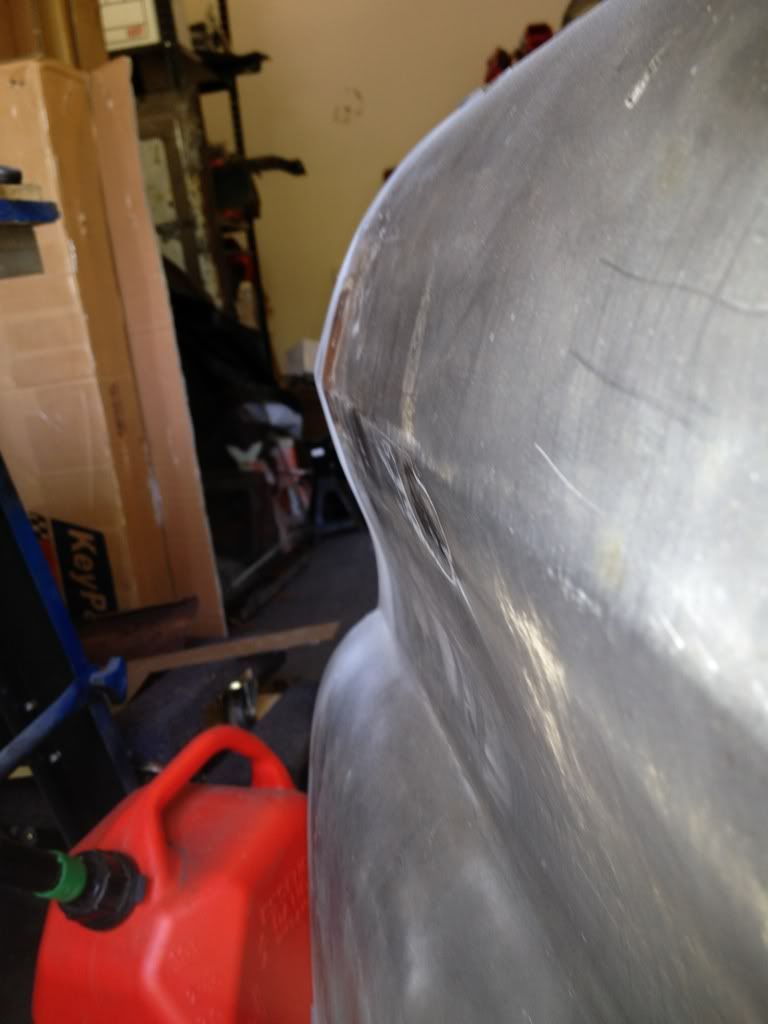 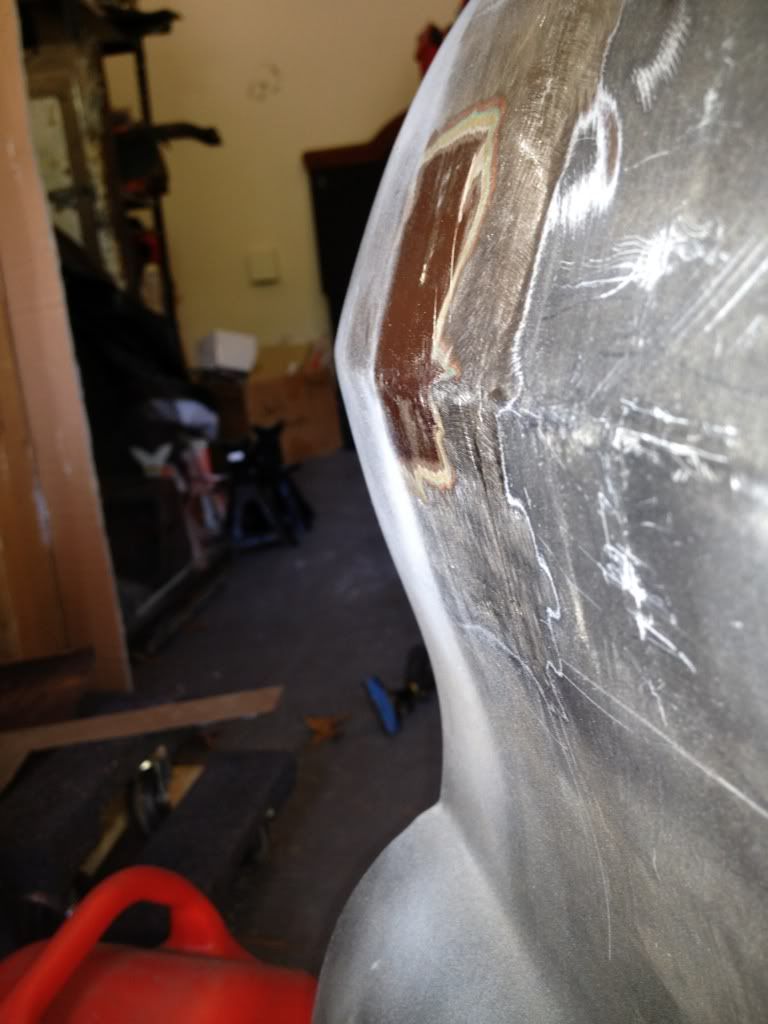 Inner door in primer  And lastly some side/profile shots of the lower skin patch I made. You can see where it's not contoured the same. If I really wanted to mess with it more I could probably weld a few nails to the skin and pull it, but the enemy of good is better, and I'm on a time crunch so I'm leaving it for now. I will either reskin the whole door in the future, find a new door, or reskin the lower portion.  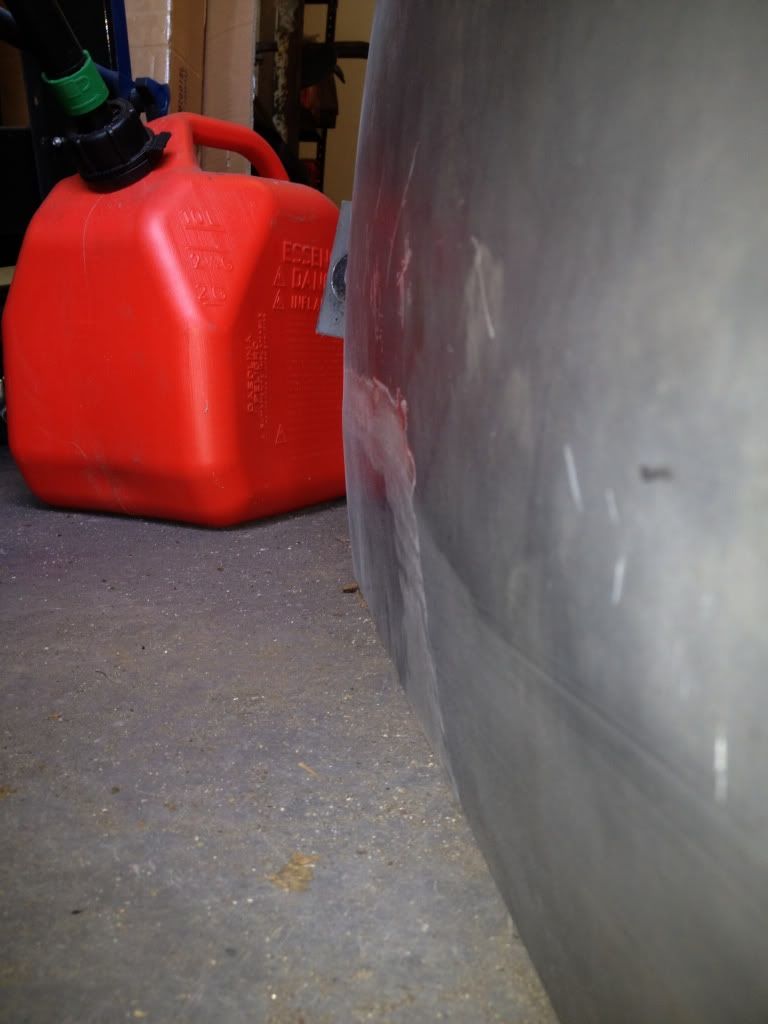 Not bad for how little in the way of tools, experience, and no training except learning on the fly if I say so myself. My welds are getting better and better, and I'm getting better at fitting patches up too. still not quite yet to the point of bondoless repairs, but I have a feeling I'd need more than a year of tinkering to get there. <ETA> forgot to add that I gutted the weatherstripping and felts from the doors...that was harder than I had thought it would be. I ended up messing up the metal a little bit, but I think I can fix the bends I put into it with a set of pliers, they're not off that much and will probably work as is but it'll bother me if I don't at least try to get it closer. This will be after paint though.
__________________
1966 C10 Long step build on a budget http://67-72chevytrucks.com/vboard/s...d.php?t=445201 no garage, no shop, limited storage space and tools....no problem. |
|
|
|
 |
| Bookmarks |
|
|


 Hybrid Mode
