
|
|
|
 03-24-2012, 04:07 AM
|
#1 |
|
Registered User
Join Date: Jul 2011
Location: Des Moines, Iowa
Posts: 3,016
|
Re: Project "My Happy Mess"
Way too many pictures update!
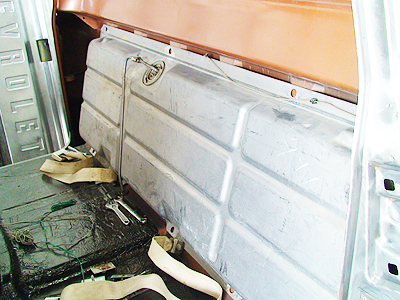
 Brought the pass. door back out today and finished cleaning it up. For those of you secretly asking yourselves "where's that bad ass tailgate at that litew8 scored a while back?" - you'll be overwhelmed (and possibly disappointed) with the footage taken today  Shots of the door finished up -     Okay, lets cut to the chase. Remember the nice OEM $100 tailgate I found back in August of 2011 (THANK YOU TODD of Madrid, IA!) - that was stored in a barn since the early 70's - after being taken off for a camper installation? It's finally getting some attention!                       And then the  news. Found this - news. Found this - Okay, now some GREAT news! Look what I scored on fleabay!SUPER nice OEM AM radio for $35 bucks + FM converter included! No pitting, clean! I've got custom deluxe knobs in route too.   And over the course of the week, I bought an OEM spare tire holder too, (thanks DSALRAM!) that I'll mount on the inside of the bed - behind driver. It'll blast/clean up to NOS quality nicely.   Last, but not least - picture puzzle. Name that year! 
__________________
project: "my happy mess" Last edited by litew8; 03-24-2012 at 04:24 AM. |

|

|
|
03-26-2012, 01:24 AM
|
#2 |
|
Registered User
Join Date: Jul 2011
Location: Des Moines, Iowa
Posts: 3,016
|
Re: Project "My Happy Mess"
More pics!Sorry all, I know I'm showcasing my tailgate too heavy, but the more I clean it, the more I like what I see! Desperately needed, and foundfor 100 bucks, you'd be happy too  You know you've got authentic quality when you can see original seam sealer, in tact - on the tailgate's bottom end no less!  Cleaned up some more. It's damn hard to shoot clean, shiny, tough, quality 1969 U.S.A. steel and have it show good to the camera! These pictures don't do it justice I tell ya!       Pit Boss picture puzzles. Name these locations.     Not sure what this is, but I'm going to post them in the Vintage picture thread - unless someone tells me it isn't vintage  
__________________
project: "my happy mess" Last edited by litew8; 03-26-2012 at 01:32 AM. |
|
|
|
|
03-26-2012, 03:23 PM
|
#3 |
|
Registered User
Join Date: Jul 2011
Location: Des Moines, Iowa
Posts: 3,016
|
Re: Project "My Happy Mess"
Couple more hours on the tailgate today.
The Fixer suggests we paint the letters by hand like they did back in the day. We'd hit it first with the primary color (white), then paint the letters - I think, we haven't discussed it much at all. 
__________________
project: "my happy mess" Last edited by litew8; 03-26-2012 at 03:28 PM. |
|
|
|
|
03-27-2012, 04:03 PM
|
#4 |
|
Registered User
Join Date: Jul 2011
Location: Des Moines, Iowa
Posts: 3,016
|
Re: Project "My Happy Mess"
Removed the current radio - nice clean original paint, all in tact!
Hooked up the radio I got and FM converter - both work good. May not install them both any time soon, we'll see.  Worked on the tailgate a little more also -   Question: The Fixer wanted me to ask everyone, should he conceal the spot welds on the tailgate, or should he leave them like factory. He says they will show through (the indentation) over time, after being painted.  He isn't spending time on my truck, but is getting ready for April showers - 
__________________
project: "my happy mess" |
|
|
|
|
03-28-2012, 03:53 PM
|
#5 |
|
Registered User
Join Date: Jul 2011
Location: Des Moines, Iowa
Posts: 3,016
|
Re: Project "My Happy Mess"
Did a little more work today, nothing serious or very productive.
I plan to work overtime cleaning truck metal these next few days and my goal is to have all metal cleaned up and ready for the next phase.    Found another stamping on the tailgate. In the picture, the numbers are right-side up, but on the tailgate - they are stamped up-side down on the lower back, passenger side.  Started cleaning the cowl, and blasted the spare tire holder.   The Fixer's last truck project stopped by today, so I took some pics to show everyone the quality work to be expected when it comes time to paint my truck. Those that know will notice this Chevy truck isn't all Chevy. It's got some F**d parts, the bed box is one of them. This was a quick restore The Fixer did for a Veteran. He wasn't looking to have it redone for show quality - but you should have seen this truck before! The engine was also built by The Fixer, and dropped in. We support our troops, past and present!          
__________________
project: "my happy mess" |
|
|
|
|
03-29-2012, 01:37 AM
|
#6 |
|
Registered User
Join Date: Jul 2011
Location: Des Moines, Iowa
Posts: 3,016
|
Re: Project "My Happy Mess"
Thanks Jim
For whatever reason, the original bed wasn't usable sothey went with what they could get. The owner didn't care so long as he had his 46 (I think) to drive. If I remember right, it was a barn find for him. It was in really bad shape when The Fixer brought it in. He fab'd up the stainless for the inner bed. We have some cell phone pics, not sure they'll clean up and are blurry. I'll try and see if I can clean them up some and post later. Found another picture of my truck just before tear-down of the front clip, but right after having removed the bed (late June 2011). Man! We've come a long way! Notice the fender pinstripe  And a couple - who can guess this? pictures  
__________________
project: "my happy mess" |
|
|
|
|
03-31-2012, 12:43 AM
|
#7 |
|
Registered User
Join Date: Jul 2011
Location: Des Moines, Iowa
Posts: 3,016
|
Re: Project "My Happy Mess"
Here are the before pictures - 46 Chevy truck. Can you spot the mock up engine?
 Back to work. Cleaning of the cowl vent panel a little more, the other day - Funny how things are in plain sight but never noticed. More grease pen markings & metal stamping from the factory/assembly line. 1971 U.S.A. On the underside of the cowl vent panel:  On the inside, driver's fender:  Number stamp, inside, driver's fender. Two different styled 3's? Cool.  Went to clean up the insides of the fenders. Not looking to take down to bare metal entirely since the factory paint is a good base/primer in of itself. We'll shoot directly over it for added protection. There also seems to already be a black primer/protection beneath the remaining paint. The stuff doesn't remove easily. They'll get primed and coated with something later on.  Inside of the OEM replacement fender I got, back when. The lower trim holes were welded up, and here you can see the upper trim holes also welded up - very nicely done! Not a disappointment to see PO work here!Someone did it right, and we'll use the welds as markers for re-drilling the holes for the upper/lower trim. I cleaned up around them good, therest I just scuffed or better depending on the amount of visible surface rust, and how easily I could access. I wanted to keep as much original coating as possible, where allowed.  Other areas of the replacement fender needing attention -   Finished -         Going over them with the da, or larger - tomorrow to finish them up. Maybe hit the hood while I'm at it. .
__________________
project: "my happy mess" Last edited by litew8; 03-31-2012 at 12:53 AM. |
|
|
|
|
03-31-2012, 10:14 AM
|
#8 |
|
Registered User
Join Date: Feb 2011
Location: Crowley TX
Posts: 979
|
Re: Project "My Happy Mess"
hey litew8, looking good

|
|
|
|
|
04-06-2012, 02:47 AM
|
#9 |
|
Registered User
Join Date: Jul 2011
Location: Des Moines, Iowa
Posts: 3,016
|
Re: Project "My Happy Mess"
Couple more hours of work today.
Went and got the other tailgate parts I had stashed away and cleaned them.   Then I jumped back over and gave the hood more attention. One edge I hadn't gotten to the other day, and double checked the rest.    Notice in the picture above ^ , how the hood looks kind of bad on the underside? I decided to break out the degrease-r and clean it up some. To my surprise, the black is shinny BLACK and the white pinstripe didn't wipe off. The Fixer thinks it's POR15, or something similar, to have held up so well. Maybe they repainted the underside 20+ years ago before they applied the pinstripe? Not sure, but they did a good job. I went ahead and cleaned the whole underside a couple of times to fully remove any grease/dirt. The white is clean/bright and the black is clean/dark. I'm strongly considering just leaving it as is - except maybe taking some lacquer thinner to the two lower corner ones, and removing the circular shape - leaving the winged parts only. This will save us labor and paint. I'm not really concerned, nor do I really care - what the underside of the hood looks like, as long as it is in decent shape. The firewall and the inside of the cab are not getting repainted either. The inside of the cab may get repainted in a year or two. No hurry. I'll photoslop and post the removal of some of the pinstripe later.      Pictures for the Pit Boss. Craftsmanship by The Fixer. Idea by me. Simple but a very nice improvement.    
__________________
project: "my happy mess" |
|
|
|
|
04-06-2012, 03:55 PM
|
#10 |
|
Registered User
Join Date: Jul 2011
Location: Des Moines, Iowa
Posts: 3,016
|
Re: Project "My Happy Mess"
More...
Edited the hood pic, removed the two circular parts on each end near the front of the hood. Before: Edited:  Started working on the kick panels today. A previous owner thought it be cool to put 4 screws into the passenger's kick panel. 3 circles on the pic below, but there's really 4 holes. 2 next to each other in the middle circle. The only guess I could come up with was that there might have been a small garbage can installed here. Otherwise, the screws/holes have no known purpose - unless I forgot what they were for We decided to fill the holes on the cheap without doing actual body work. The Fixer's craftsmanship - cheap and dirty, put over-sized screws into the holes then cut off the heads and grind smooth - done. A nice little surprise for the next owner -       Both panels - paint scuffed and cleaned beforehand. Both sides were shot, ready for paint (soon) -  A little more work to the hood -  
__________________
project: "my happy mess" Last edited by litew8; 04-06-2012 at 04:05 PM. |
|
|
|
|
04-08-2012, 02:35 PM
|
#11 |
|
Registered User
Join Date: Jul 2011
Location: Des Moines, Iowa
Posts: 3,016
|
Re: Project "My Happy Mess"
Removed and revised the pic. I think I'll just leave the custom pinstripe
alone. The hood hardly gets opened anyway, and someone took the time to paint these on by hand. They did a clean job, I'd guess they were going for a country western theme. Here's a re-revised pic just for fun.  More original shots -   Misc. - Name this area.    
__________________
project: "my happy mess" |
|
|
|
|
04-13-2012, 03:39 AM
|
#12 |
|
Registered User
Join Date: Jul 2011
Location: Des Moines, Iowa
Posts: 3,016
|
Re: Project "My Happy Mess"
 You've been forewarned. The next few posts may display disconcerting graphics, and not so favorable comments towards the body shop that worked on my truck. I'll post the pictures for all to see, and later I will post a full page article, with pictures in the review section of the site. This stuff is disturbing. Never again. The Fixer's high quality workmanship is able to correct it all with little effort - he's that good. So all is not lost. But it's worth sharing with others who may be deciding on getting work done to their trucks, to think twice before.
__________________
project: "my happy mess" Last edited by litew8; 04-13-2012 at 04:04 AM. |
|
|
|
|
04-15-2012, 11:07 PM
|
#13 |
|
Registered User
Join Date: Jul 2011
Location: Des Moines, Iowa
Posts: 3,016
|
Re: Project "My Happy Mess"
Earlier we removed the gas tank to repair the dents that shop made.
   Nice original paint underneath -   Found some NOS rear wheel tubs. Thanks to ART'S CLASSIC TRUCK PARTS, INDIANOLA, IA! He can be found on Craigslist Des Moines. It's where I got my replacement pass. door too. I was fortunate to find these. I had ordered aftermarket ones a few weeks ago - only to find out the lip on the backside was missing on one, and both tubs had creases on the ends. Not cool. I didn't want to mess with trying to order another pair of aftermarket and hope they were good - since only one or two manufactures actually stamp these, odd are everyone has creases.    Started sanding on the cab, paint removes easily -    Cleaned up the cowl area more -  Cleaned up the fresh air pump. There was a little surface rust formed -  When I first got the pump, the pressure gauge wouldn't register. I figured it was due to the over-sized K&N inlet filter the PO had put on. I replaced it with the original filter made for the pump, and now I'm registering 10psi, normal. It can be reduced down if needed.  Cleaned up the cowl panel a little more today. We are aiming for Monday to prime, and Tuesday to paint some. We'll see how it goes. Thanks for looking!
__________________
project: "my happy mess" Last edited by litew8; 04-15-2012 at 11:17 PM. |
|
|
|
|
04-18-2012, 01:13 AM
|
#14 |
|
Registered User
Join Date: Jul 2011
Location: Des Moines, Iowa
Posts: 3,016
|
Re: Project "My Happy Mess"
Anxious to get the whole truck finished
I'm growing tired of working on it. That sounds bad, but for real - in 2 1/2 months, it'll be one year. Damn winter months! Who knows, maybe by the time Independence Day rolls around I'll be able to hit some shows Who's all going
__________________
project: "my happy mess" |
|
|
|
|
04-21-2012, 01:26 AM
|
#15 |
|
Registered User
Join Date: Jul 2011
Location: Des Moines, Iowa
Posts: 3,016
|
Prime Time
Thanks! For the most part, these pics aren't too exciting.
Just my cab turning different colors , but for the beinginerthey may prove useful as for how the process works in a general manner. Took clear protective film off the mask. The shop also has a large exhaust fan running while spraying.  This pic from earlier wasn't "sealer" -  It was actually the self etch primer -  Mixing self etch primer and Dupont VariPrime(R) 616S Converter according to instructions. 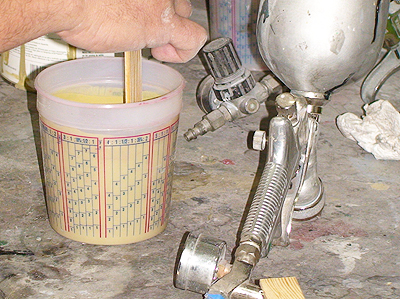  Two thin coats sprayed dry, not wet. Let stand and cure for 10 - 15 minutes (I think). Then spray second coat. 1st     2nd       Next up, 3 coats of Dupont 2K Urethane Surfacer primer-filler.  1st    2nd      3rd   
__________________
project: "my happy mess" Last edited by litew8; 04-21-2012 at 01:41 AM. |
|
|
|
|
04-23-2012, 03:56 PM
|
#16 |
|
Registered User
Join Date: Jul 2011
Location: Des Moines, Iowa
Posts: 3,016
|
Re: Project "My Happy Mess"
Thanks!
We didn't get anything accomplished today, but I took a couple pics! Before we start wet sanding, we want to apply seam sealerto all areas. We're not too comfortable wanting to wet sand and having water run into areas that it shouldn't, even if we let it air out after. So the search began for seam sealer. The Fixer actually has a couple of unused boxes full of Fusor -  ... but they are 15 years old! From 1997.We tested a tube and it actually set up good after a while, except the surface of the beads were still tacky to the touch. We're not willing to take a chance and apply it - so I went and bought some good 3M self-leveling seam sealer, and some heavy bodied seam sealer.   We'll get it applied tomorrow and then think about sanding/painting. This week for sure we'll get something painted! ---------- I'll explain a picture from earlier a little more. The good ole` days when we ruled the streets of the South Side! Not his picture, but one similar. w/his built 351 Cleavland. Man this car was hella fun to drive! 2nd gear scratches EASY!  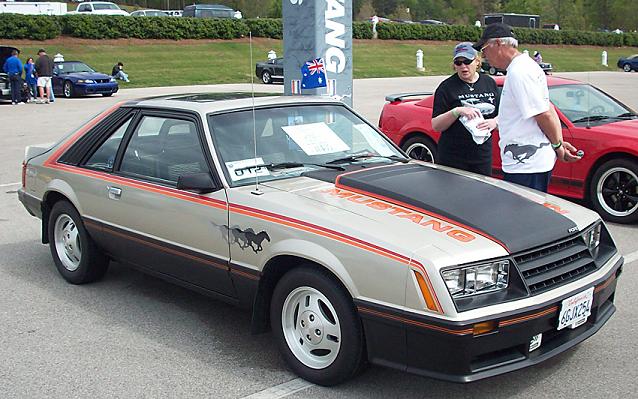 And this picture, the Pit Boss's engineering cira 1985!   Almost forgot, remember this shot from earlier? Look closely in the outlined circle. You can see what looks like a dent. I checked it out today and got a close up look. It's another number stamp!  #32 I think 
__________________
project: "my happy mess" Last edited by litew8; 04-23-2012 at 04:04 PM. |
|
|
|
|
04-29-2012, 12:35 PM
|
#17 |
|
Registered User
Join Date: Jul 2011
Location: Des Moines, Iowa
Posts: 3,016
|
Seam Sealing
Been taking a little break from the computer/internet.
Here's a small update showing seam sealing of the door jambs, etc... excluding the drip rails. We still need to give them attention. Pictures below showing the "Heavy Build" 3M seam sealer. Before and after. We put tape on/around anything we don't want to smear with seam sealer, then remove the tape before the seam sealer sets up - which isn't too much longer after being applied.        The Fixer's gun. 3M Seam Sealer cartridges fit it good. 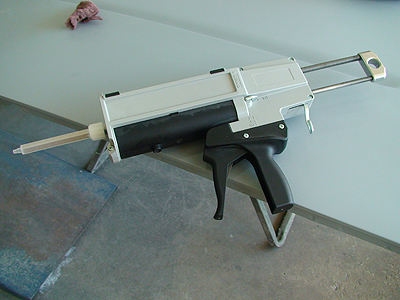 Glove used to smooth/smear seam sealer. Used grease/wax remover also to dip finger in while smoothing - helped keep the sealer from sticking/ drying on glove.  End results -   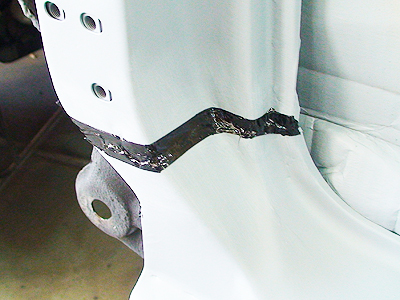   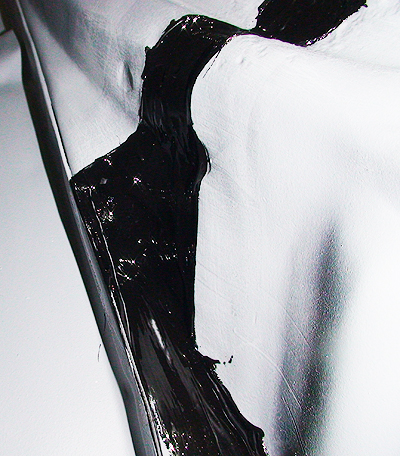   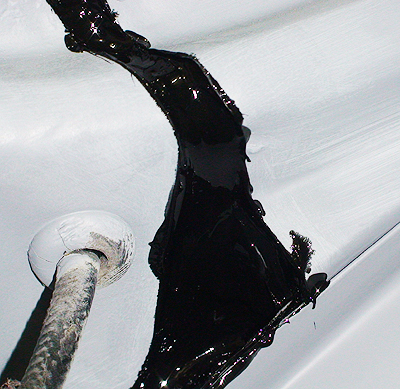    We'll prime/sealer over the 3M seam sealer, then paint. Should turn out good. We'll get the drip rails done soon. More pictures later. Who knows what this is?  Picture puzzle for the Pit Boss -
__________________
project: "my happy mess" |
|
|
|
|
04-30-2012, 04:02 PM
|
#18 |
|
Registered User
Join Date: Jul 2011
Location: Des Moines, Iowa
Posts: 3,016
|
Bad polar bear hygiene
One of The Fixer's side projects.
See what happens when you don't floss? This is a high school mascot from the early 70's The Fixer is going to reconstruct the bear's teeth and tounge. This is the rival's team mascot, but we're nice to help out.     
__________________
project: "my happy mess" |
|
|
|
|
05-02-2012, 02:54 AM
|
#19 |
|
Registered User
Join Date: Jul 2011
Location: Des Moines, Iowa
Posts: 3,016
|
Re: Project "My Happy Mess"
Thanks! Yeah, it's a PITA. The reason being - the vertical drip rail behind the doors. Not enough room there and my finger isn't tiny. The vertical drip rail actually gets narrower the further down you go,
I had some nasty seams to deal with, and now they're covered.The black - it's hard to tell but it is smooth and sealed nice. Before:   After: 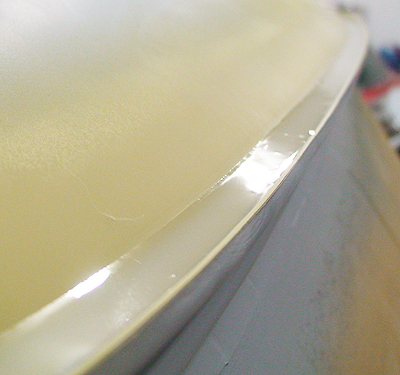 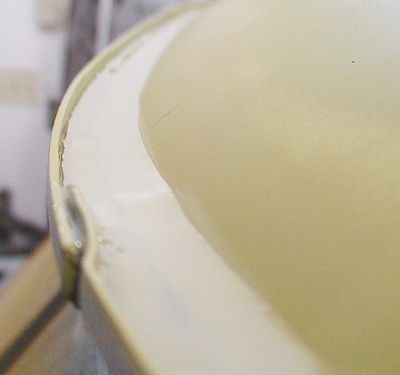  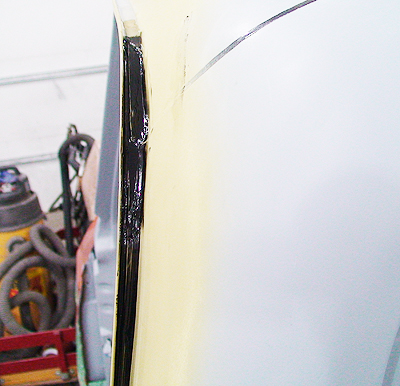 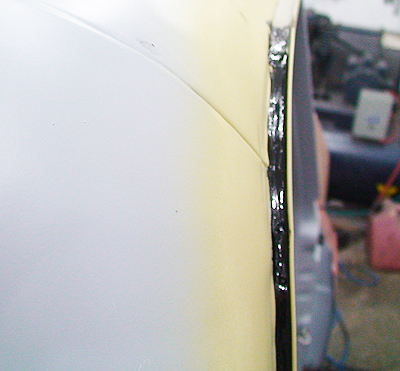 Self-leveling sealer - Due to the angle towards the cab on the inside of the rail, we had to fill it up about 1/2 way for the stuff to level out nice and ensure the seam got sealed properly.
__________________
project: "my happy mess" |
|
|
|
|
05-02-2012, 05:39 AM
|
#20 |
|
Registered User
Join Date: Mar 2010
Location: Forest Hill, MD
Posts: 171
|
Re: Project "My Happy Mess"
Looks great! Very nice job on those drip rails.
__________________
72Kay20 Bel Air, MD 1972 Hugger Orange K20 LWB 350, 4wd, 4spd Sm465, Dana 44, HO52 Other Toys 69 Cortez Silver Z28 86 White Buick T Type |
|
|
|
|
05-04-2012, 01:15 AM
|
#21 |
|
Registered User
Join Date: Jul 2011
Location: Des Moines, Iowa
Posts: 3,016
|
Re: Project "My Happy Mess"
Here's a few more pics of the self-leveling 3M seam sealer.
Passenger side and front shots from the other day -   
__________________
project: "my happy mess" |
|
|
|
|
05-20-2012, 03:30 PM
|
#22 |
|
Registered User
Join Date: Jul 2011
Location: Des Moines, Iowa
Posts: 3,016
|
Re: Project "My Happy Mess"
Told you we'd get some paint sprayed,
it's ZeroRust again. Scuffed, cleaned and sprayed the insides of the doors the best I could. Made sure to hit the bottom good too. Header panel getting some attention also. I'm having second thoughts about spraying the Raptor liner. I keep thinking of shinny bronze paint in the bed and how it'd go with the wood. What do ya'll think?  
__________________
project: "my happy mess" |
|
|
|
|
05-25-2012, 07:02 PM
|
#23 |
|
Registered User
Join Date: Jul 2011
Location: Des Moines, Iowa
Posts: 3,016
|
Re: Project "My Happy Mess"
These are for you bundeber. Not sure how they'll display on different
monitors, they were sort of dark on mine. Black bed liner with red logo. Mine will take a considerable effort due to me needing to alter colors, not sure if I can pull it off but I'll try later. [edit: Deleted. I can see on another monitor the logos are set too high.] I'll get some better ones up in a few.
__________________
project: "my happy mess" Last edited by litew8; 05-25-2012 at 07:21 PM. |
|
|
|
|
05-28-2012, 02:22 AM
|
#24 |
|
Registered User
Join Date: Jul 2011
Location: Des Moines, Iowa
Posts: 3,016
|
Re: Project "My Happy Mess"

|
|
|
|
|
05-28-2012, 08:17 PM
|
#25 |
|
Registered User
Join Date: Jul 2011
Location: Des Moines, Iowa
Posts: 3,016
|
Last one

__________________
project: "my happy mess" |
|
|
|
 |
| Bookmarks |
|
|


 Hybrid Mode
