
|
|
|
 10-15-2008, 12:49 AM
|
#1 |
|
Senior Member
Join Date: Aug 2002
Location: Valley Center KS
Posts: 3,525
|
Re: Ackattack's Pro touring restoration thread
Quick update:
I got the exhaust all tacked back together. Unfortunatly it I couldn't get it to fit through the cross member, so now it hangs below, so that will be my low point. I'll still have a few inches when aired out, so it shouldn't be a problem. I'll have to finish welding it up tomorrow night. I also got my shaved fiberglass cowl. Looks nice, though it doesn't seem to fit the best. might have to enlarge some holes....but I didn't spend a lot of time messing with it. Basically just set it on fiddled with it for 2 min, and moved on. |

|

|
|
10-15-2008, 01:32 AM
|
#2 |
|
Senior Member
 Join Date: Aug 2006
Location: Atascadero, CA
Posts: 1,152
|
Re: Ackattack's Pro touring restoration thread
DAMN!!! Your getting so much done!! Looking good!! Keep up the great work
 Josh
__________________
(Project truck) 1970 C10 under complete transformation My current build thread http://67-72chevytrucks.com/vboard/s...d.php?t=212871 Other project: C5 corvette swap into 70 c10 http://67-72chevytrucks.com/vboard/s...=1#post2413517 On Hold |
|
|
|
|
10-15-2008, 01:50 PM
|
#3 |
|
Registered User
Join Date: Jan 2008
Location: Lacombe, Alberta
Posts: 353
|
Re: Ackattack's Pro touring restoration thread
Did you get the intake off of an ebay store, do you mind posting name of seller. I had another one picked out, but it did not come with a blue filter and hoses.
Looking good.. |
|
|
|
|
10-15-2008, 01:59 PM
|
#4 | |
|
Senior Member
Join Date: Aug 2002
Location: Valley Center KS
Posts: 3,525
|
Re: Ackattack's Pro touring restoration thread
Quote:
http://stores.ebay.com/insys-usa |
|
|
|
|
|
10-15-2008, 09:08 PM
|
#5 |
|
Senior Member
Join Date: Jul 2005
Location: Winters Ca. 95694
Posts: 4,843
|
Re: Ackattack's Pro touring restoration thread
Looking good! What does the rest of the cold air kit look like? Does it pull the air through the rad. support or down through the inner fender? I have a 5.3L for my Blazer and if I don't Turbo it I will be doing a C.A.I. as well.
Kevin LFD Inc. |
|
|
|
|
10-18-2008, 01:07 AM
|
#6 |
|
Senior Member
Join Date: Aug 2002
Location: Valley Center KS
Posts: 3,525
|
Re: Ackattack's Pro touring restoration thread
Tonight I was finally able to get the fuel system up and working correctly. Man, aluminum line sure does flare a lot easier than stainless steel (go figure). So after I replaced my hard line and fittings, I tested it out, and no leaks!
So then I put the bed on, so now it looks like a truck! 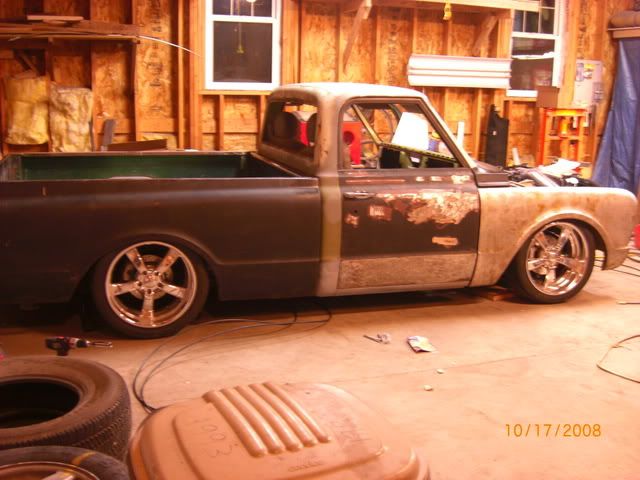 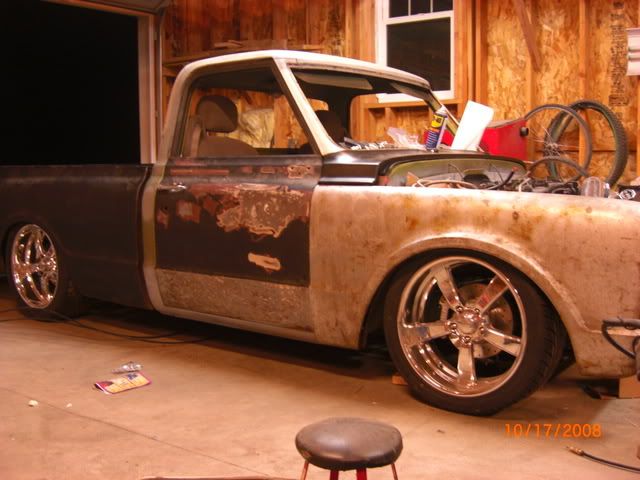 I also got the holes drilled in the firewall for the HVAC: 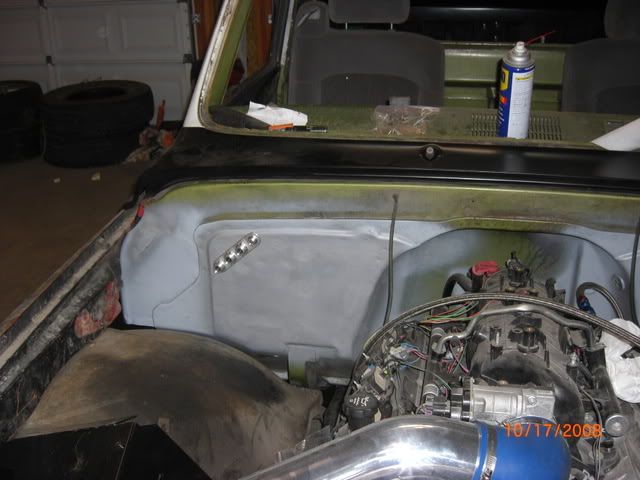 I'm planning on running the lines kinds between the outer fender and the inner fender to kinda hide them. I thought of running them into the kick panel vent like someone else did (great idea) but decided not too (lots of effort and possibly more problems down the road, but definatly a cleaner look) The other night I worked on installing the front sway bar. I worked on mounting it directly to the frame, but after getting it installed, I didn't like the way it worked. It would slide back and hit the bags when fully deflated and when fully inflated it pulled one of the bushings out of the retainer/clamp thing. So I ordered the short stands from ECE. Speaking of ordering stuff, I ordered a bunch of little stuff that I need. I'm hoping I got all of the stuff that I'll need before paint. I also got some other things that were on my list. I also got the A/C condenser mounted, and then the tranny cooler. Of course when I went to start making the lines for the tranny cooler (using -6 SS braided hoses) I realized I didn't have enough fittings. So it will go on my list for the next time I make a Summit order (I just got a bunch of the plumbing stuff for the fuel lines....but of course not the right fittings). I may see if the local napa sells them. So my list of things to do before paint is getting pretty short. The two big things I have yet to do is finish installing the one piece windows (test fitting them at least) and leave the small triangle installed, so it gets painted body color, and figure out the gas filler. Now that I have the bed on, that will be the next priority. Oh yes, I have a high hump tranny cover coming I'll have to install. Got it from a board member! |
|
|
|
|
10-18-2008, 10:49 AM
|
#7 |
|
Senior Member
Join Date: Aug 2005
Location: tulsa OK
Posts: 3,070
|
Re: Ackattack's Pro touring restoration thread
lookin good
|
|
|
|
|
10-18-2008, 12:18 PM
|
#8 |
|
PROJECT 7DEUCE
 Join Date: Dec 2002
Location: GRANTS PASS OR
Posts: 21,591
|
Re: Ackattack's Pro touring restoration thread
Looking good keep up the killer work.
__________________
GO BIG GREEN GO DUCKSMEMBER #6377 72 k-5 daily driver 6'' lift 35'' 350-350-205 slowly getting rust free. Project "7DEUCE" check out my build http://67-72chevytrucks.com/vboard/s...d.php?t=267665 Tim Powell..R.I.P EastSideLowlife..... R.I.P.. |
|
|
|
|
10-18-2008, 12:27 PM
|
#9 |
|
Senior Member
Join Date: Jul 2005
Location: Winters Ca. 95694
Posts: 4,843
|
Re: Ackattack's Pro touring restoration thread
Sounds good! Do you really need the entire high hump trany cover or could you smooth it down a bit? I have a high hump for my 2WD Blazer but plan on tweaking it a bit plus with the DM it moves the motor forward and up 2".
Kevin LFD Inc. |
|
|
|
|
10-19-2008, 11:54 PM
|
#10 | |
|
Senior Member
Join Date: Aug 2002
Location: Valley Center KS
Posts: 3,525
|
Re: Ackattack's Pro touring restoration thread
Quote:
|
|
|
|
|
|
10-19-2008, 02:45 PM
|
#11 |
|
Eat My Rust
Join Date: Jan 2007
Location: Cypress, Texas
Posts: 3,362
|
Re: Ackattack's Pro touring restoration thread
The truck looks absolutly awesome man! Love that stance and the wheel/tire combo is perfect
|
|
|
|
|
10-19-2008, 02:52 PM
|
#12 |
|
Senior Member
Join Date: Aug 2006
Location: Atascadero, CA
Posts: 1,152
|
Re: Ackattack's Pro touring restoration thread
Looks SWEET!!! I like the wheels too!!!!
Josh
__________________
(Project truck) 1970 C10 under complete transformation My current build thread http://67-72chevytrucks.com/vboard/s...d.php?t=212871 Other project: C5 corvette swap into 70 c10 http://67-72chevytrucks.com/vboard/s...=1#post2413517 On Hold |
|
|
|
|
10-19-2008, 10:40 PM
|
#13 |
|
Senior Member
Join Date: Jul 2005
Location: Winters Ca. 95694
Posts: 4,843
|
Re: Ackattack's Pro touring restoration thread
I am sure it is back in here some place but what are the wheel and tire spec's.
Kevin LFD Inc. |
|
|
|
|
10-19-2008, 11:40 PM
|
#14 | |
|
Senior Member
Join Date: Aug 2002
Location: Valley Center KS
Posts: 3,525
|
Re: Ackattack's Pro touring restoration thread
Quote:
Rear: 315/35/20 on 20x10 with 5.75" BS Front: 255/40/20 on 20x8.5 with 4.25 BS Obviously the front tires tuck, but the inner fender is hitting on them when fully aired out. I'm not going to be able to drive with it fully dumped, nor had I planned to. I haven't tried turning the tires yet 
|
|
|
|
|
|
10-19-2008, 11:51 PM
|
#15 |
|
Senior Member
Join Date: Aug 2002
Location: Valley Center KS
Posts: 3,525
|
Re: Ackattack's Pro touring restoration thread
Today's progress:
I finished up the initial install on the Brother's one piece windows. Kinda a PITA. I thought the instructions left a lot to be desired. I'll have to finish the install once everything is painted. I did find that I have some rust to repair under one of the door hinges too. The other day I mounted up the fender, door, and cowl and everything didn't fit real well. So I moved the cab a little (it's not bolted down yet...) and set the door where it lines up nicely, then I installed the fender and cowl. I had to do a little "adjustment" to get the lower corner of the front fender to fit good. I didn't really like the way the gap around the door was with the drip rail missing, so I took a little advice from Frizzle Fry and filled in some of the gap with some 3/16 rod. Seemed to really help fill the gap. 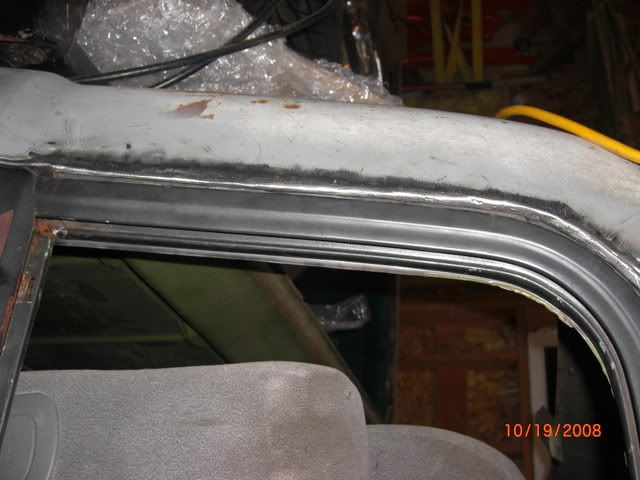 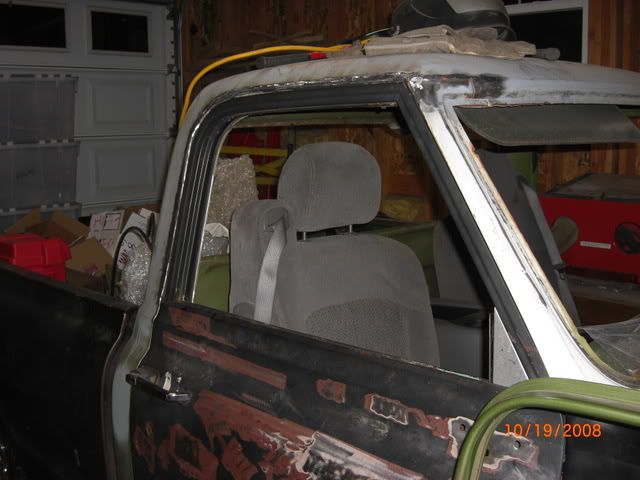 I also got my other fender and grill down from my storage area. And went ahead and threw on the grill just for kicks. 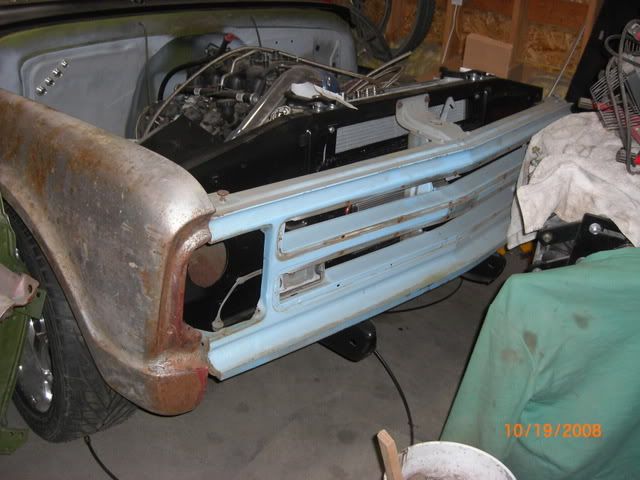 I now see what piece I'm going to have to get at the salvage yard to get rid of the blinkers (they'll be in the headlights) Finally, I spent some time cleaning up the garage. The 900 square foot 3 car garage had so much stuff spread out in it that I couldn't get any other cars in there.....now I can get 3 in there. Here is a pick of the parts I have to go back on the truck....using it for storage: 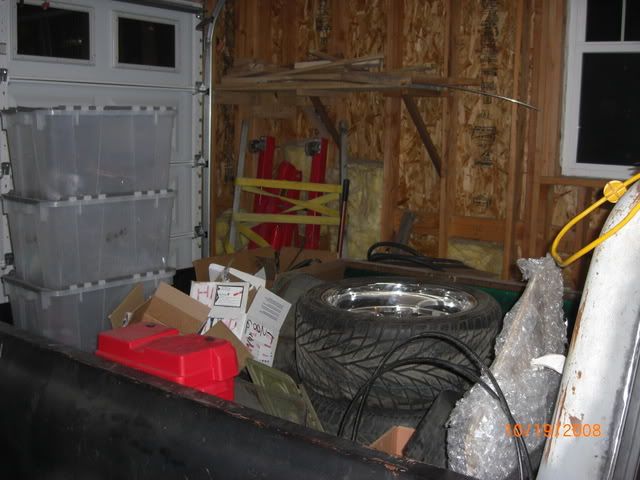
|
|
|
|
|
02-19-2009, 04:31 PM
|
#16 | |
|
Registered User
Join Date: Jun 2008
Location: Jackson, Ca.
Posts: 674
|
Re: Ackattack's Pro touring restoration thread
Quote:
Thanks!!
__________________
Cable -K5 Blazer 2wd: 6.0 LQ4, 7875 Turbo, Tick Stage II Turbo Cam, Built 4L80e, RevMax Billet 3600, 9.5" 14 Bolt -Chevy 3+3 Crew Cab Dually: Cummins 12v P-Pump Swap, Compound Turbos, A2W Intercooler, NV4500HD, 4wd conversion, Radius Arms, Coilovers, Crossover Steering, etc Build Thread: http://67-72chevytrucks.com/vboard/s...d.php?t=803608 Last edited by Ford Assassin; 02-19-2009 at 04:32 PM. |
|
|
|
|
|
02-23-2009, 12:33 AM
|
#17 | |
|
Senior Member
Join Date: Aug 2002
Location: Valley Center KS
Posts: 3,525
|
Re: Ackattack's Pro touring restoration thread
Quote:
|
|
|
|
|
|
10-20-2008, 12:17 AM
|
#18 |
|
Registered User
Join Date: Aug 2005
Location: Hillsboro Oregon
Posts: 6,449
|
Re: Ackattack's Pro touring restoration thread
Lookin good man. Good call on the carpet.
|
|
|
|
|
10-20-2008, 11:45 PM
|
#19 |
|
Senior Member
Join Date: Aug 2002
Location: Valley Center KS
Posts: 3,525
|
Re: Ackattack's Pro touring restoration thread
So tonight I got the driver's side filler piece in. Nothing too exciting.
Then I started on cleaning up around the back window frame. I knew there was one spot I was going to have to fix. Well when I took the wire wheel to it I found that there are a lot more places that i'm going to have to fix. Hopefully it won't be too hard. I'll bend up a longer strip of sheetmetal, then as I cut out the rust, I'll just be able to cut out the right size of filler piece. Hopefully i can bust that out tomorrow night. |
|
|
|
|
10-21-2008, 11:34 AM
|
#20 |
|
Registered User
Join Date: Feb 2001
Location: Wetumpka, Al, U.S.
Posts: 8,891
|
Re: Ackattack's Pro touring restoration thread
Sweet looking project. I just went through the entire thread. You may want to look where the lower felts go for the one piece window and do a little filling in there before paint. Mike Nutt said he wishes he would have. Thanks for documenting the project.
__________________
Kevin Special Thanks to All who have helped on the TRUCK! My Pass Time Show http://s129.photobucket.com/albums/p...Chapter1-0.mp4 So Far my best Times are: Motor only: 6.44 1/8 @ 104.13 10.39 1/4 @ 125.83 Nitrous Times: 5.785 1/8 @ 118.65 with a 1.336 60ft 9.168 1/4 @ 142.58 with a 250 shot dead out of the hole! |
|
|
|
|
10-21-2008, 12:17 PM
|
#21 | |
|
Senior Member
Join Date: Aug 2002
Location: Valley Center KS
Posts: 3,525
|
Re: Ackattack's Pro touring restoration thread
Quote:
|
|
|
|
|
|
10-21-2008, 08:39 PM
|
#22 |
|
Registered User
Join Date: Jun 2007
Location: DFW (Forney)
Posts: 1,529
|
Re: Ackattack's Pro touring restoration thread
Very cool truck. I like everything you are doing to it.
I'd also like to say thanks for posting a "how to" on widening your rear wheel tubs. I did mine almost identical to how you did yours. Being able to come back and look at this thread helped out. Again , nice work ,and nice truck.
__________________
'58 SWB Fleetside...Front & Rear Porterbuilt Dropmember, 6.0 LS /4L60E. Accuair E-level, 20 Billet Specialties (Vintecs) '63 Buick Riviera ... AccuAir E-level, 20" Billet Specialties (Vintecs) http://67-72chevytrucks.com/vboard/s...=528853&page=5 |
|
|
|
|
10-22-2008, 11:52 PM
|
#23 |
|
Registered User
Join Date: Jun 2008
Location: Gonzales, La
Posts: 11
|
Re: Ackattack's Pro touring restoration thread
Nice work, where did you get the tublar engine frame mounts?
|
|
|
|
|
10-27-2008, 12:47 AM
|
#24 | |
|
Senior Member
Join Date: Aug 2002
Location: Valley Center KS
Posts: 3,525
|
Re: Ackattack's Pro touring restoration thread
Quote:
I managed to get the rust around the rear window cut out and replaced with new metal, welded, and cleaned up. Turned out pretty good. I didn't get any pictures though. Earlier last week I got my van tilt column's neutral safety switch relocated. I went to check how it fit's and installs and I realized that I'm missing the support that goes on the firewall. I must have sold it with the non tilt steering columns that I sold. Oops! So tomorrow I'll run by the salvage yard and hopefully get one of those brackets (this place has ~5 67-72s, so hopefully I'll be able to find one bracket. While I'm there, I'm also going to try to get a 67-68 upper grill insert to put in my lower grill, since my turn signals are in the head lights. I'm also going to make some phone calls and talk to some shops about painting my truck. I have one shop in mind. I had this shop repair my corvette's front bumper (wife backed into it). So they did a good job on that, and was willing to take on a restoration paint job (several of the other body shops I went to don't even do restoration paint work.) I also went by another shop that also came recommended a week or two ago. Talking to them, they said there average paint job is $14k!!! I don't think I want to pay that much for paint, since I'm going to drive this thing! So we'll see what I find out this week. Before I choose a shop, I'm going to get some references from people who they've done restoration paint jobs for....see how it turned out, if it was on time and on budget. |
|
|
|
|
|
10-29-2008, 12:40 AM
|
#25 | |
|
Senior Member
Join Date: Aug 2002
Location: Valley Center KS
Posts: 3,525
|
Re: Ackattack's Pro touring restoration thread
Quote:
I also got some references from the guy I had fix my corvette, so I have to call them. The only thing I have left to do before the cab is ready to come back off to start on the firewall is install the high hump tranny cover....unless whoever I have do the paint/body work has other suggestions. |
|
|
|
|
 |
| Bookmarks |
|
|


 Hybrid Mode
